32676
Post by: Meph
Wehey! A quicky introduction perhaps: After lurking here for many years on the site I decided to post my recent project.
After getting the bug again last year, after painting a large scale Space Marine from Forgeworld (it's posted over at coolminiornot) I started eyeballing my old mini's again. A friend of mine got bitten by the same bug again and he started polishing his old Space Wolves army again also so we hatched the fiendish plot to get an army together again within a year or so (busy lives...) so we could do a 2vs2 battle against some other players sometime.
As over the past 10 years, the amount of cool mini's increased dramatically I felt like it was time to start more-or-less anew and a big month ago the project kicked into high-gear and we started buying and assembling mini's again. 
The project: To resurrect my Blood Angels army, paint up some new mini's and in a few months time, challenge a mate to a battle. That'll be the first in over 6 years or so ^^.
So here goes, the biggy of the army, a Land Raider Crusader to ferry the Captain, Reclusiarch and Sanguinary priest (all in termy armour), plus their body guard of a 5-man close combat Terminator Squad.
It's lightly converted with the Forgeworld BA doors and some Dremel'ed and remodeled battle damage. i also used some extra resin and etched brass details here and there.
Funny thing how regular thin masking tape is exàctly the same with as Land Raider tracks. ^^
It took quite a few hours to assemble properly actually. The plan is to use the weathering skills learned with my big Marine on this vehicle so no rush, patience is the key.
First steps after assembly, a black undercoat and a base coat of roughly 50/50 Mechadendrite Red and blood red, mixed with some Vallejo airbrush thinner and a little bit of Klear to give some strength to the paint. That GW paint gun is a lovely tool to apply base coats. No tricky mechanics to clean afterwards...


3197
Post by: MagickalMemories
Good start. I'm liking the assembly. The etched brass looks good. I can't wait to see some highlights.
My only question... Granted I don't know the specifics for this Land raider variant off the top of my head, but you're talking about putting 8 Terminators in this vehicle. That is the equivalent of 16 models, for transport purposes. Does this vehicle have a 16-man capacity? I was thinking it was 12.
Eric
22055
Post by: fraggrenade
Good start, and you are using some sort of foam to mask off the tracks, what is it exactly?
MagickalMemories Wrote
My only question... Granted I don't know the specifics for this Land raider variant off the top of my head, but you're talking about putting 8 Terminators in this vehicle. That is the equivalent of 16 models, for transport purposes. Does this vehicle have a 16-man capacity? I was thinking it was 12.
It has a 16 model capacity.
32364
Post by: krusnikk
MagickalMemories
crusaders can carry up to 15 marines or 8 termies just had to check that myself
3197
Post by: MagickalMemories
Thanks for the info, guys.
@fraggrenade
It's Masking Tape:
Funny thing how regular thin masking tape is exàctly the same with as Land Raider tracks. ^^
Eric
17808
Post by: oadie
I love the impacts on the sides. They appear to have a raised lip around them, though. Did you carve/grind out the depression then do additional sculpting or do you have a secret method you'd be willing to share?
32676
Post by: Meph
Cheers, guys!
I plan do do some light shading and highlighting tomorrow with the airbrush and some normal highlighting afterwards perhaps.
And indeed it's meant to carry 8 Terminators. I'm thinking to maybe paint some panels black or gold to convey a more 'veteran' status but I'm not sure.
@fraggrenade: It's no foam, just some ordinary DIY masking tape. Apparently the width fits perfectly for the tracks. ^^
*edit*@oadie: The impacts were pretty quick & dirty. I just ground out some depressions with a Dremel, but not all the way through, then filled up the depressions with some green stuff and egalized them with the hull. Then I let the putty dry for about 15-30 minutes, made a round depression with the back end of a pencil and gently carved the sharper edges with a modelling knife. 

26142
Post by: HamHamLunchbox
nice start.
i just made an lr redeemer and as you said,patience is the key.
pic for you if your intrested:
well,two pics.
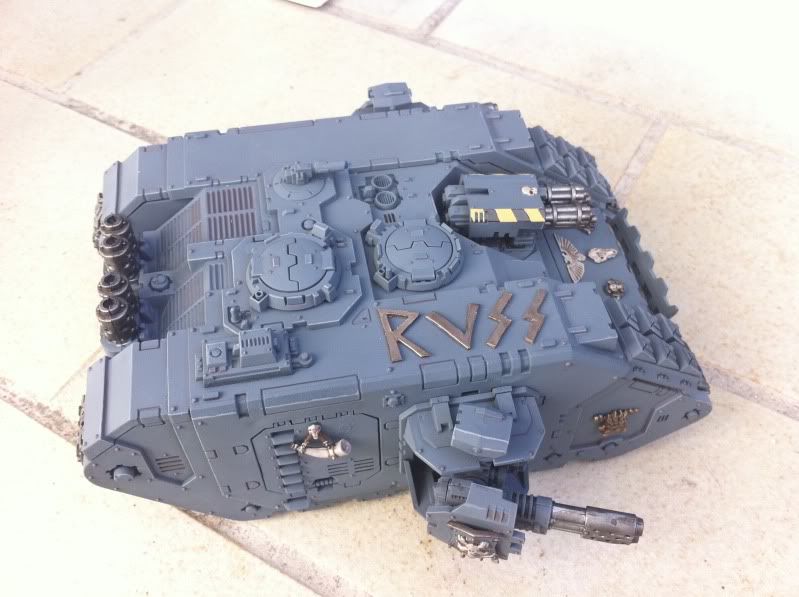
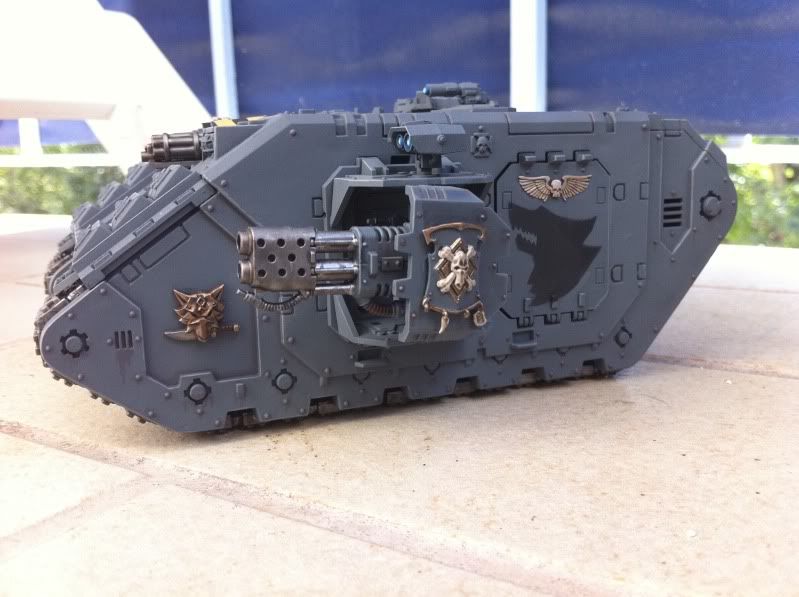
magnetized the sidesponsons so i can use it as an crusader as well.
maybe you wanna try this as well(if not too late by now^^
26142
Post by: HamHamLunchbox
you should really drill out all the weapons.
could be a let down on the finished piece maybe ^^
Meph wrote:Thanks for the pics, mate. That's a very lovely shade of grey, love it.
thanks^^
its adeptus battlegrey sprayed over a black undercoat(emphasis on black,as it looks terrible on white)
32676
Post by: Meph
Yeah, indeed. Sadly i was in lack of a decent pin vice but that has been remedied. I've drilled out all the weapons of the army, only those hurricane bolters still need to be done but luckily they're detachable. ^^
Some progress on the army project.All the miniatures were put together over the past few weeks and have all been undercoated and basecoated. I stuck together a 10- man tac. squad, 10-man dev. squad, 5 Sanguinary Guard, 5 honour guard and 10 death company and a Razorback.
The Razorback received the most attention, vehicles are so much fun to work on. ^^
I basecoated with a mix of Mechadenrite Red and Blood red, together with some thinner and Klear. Then I airbrushed some gentle shading and highlights, followed by a drybrushing with the foundation paint orange. To soften up the dusty drybrushing, as well as add some colour depth I airbrushed on a layer or three of a roughly 35% Baal red wash, 15% Red Ink and 50% Klear.
I'll probably give the edges a gentle drybrushing again to bring out the edges a bit more.
I wanted something to break up the large red surfaces a bit, other than giving the odd plate a different colour. The extra brass and resin detailing will give variation in any case, as well as the weathering still to follow, but I felt it need a little 'extra'. As red wunz go fasta but he's already red there was only one thing I could do. Almost on instinct I spent the better part of an hour meticulously applying masking tape and voilà, racing stripes. 
It came out looking surprisingly well I must say and just needs some tiny touch-ups. The stripes somehow do seem to suit the look of the Razorback. ^^


And I thought I'd post a few pics of the honour guards, all of them received some minor conversions.


And some of the Sanguinary guard. The colour appears a lot lighter on the camera, in reality it's more of a dark bronze. I'm going to go for a dark look with a lot of the detailing also metallic, I want to give them a statuesque look. I'm not I'll even put on the wings though as I feel they're a bit to thick, large and clumsy for jump troops. I think I'll paint the wings dark anyway so I can see when they look like before I make the final decision.


22536
Post by: wargamingpitnick
Army is starting to look great, i'm am looking forward to more post.
32676
Post by: Meph
Cheers, mate! I though about posting a group shot of the rest too but at this stage they'll only be a big red blob with a smaller black blob next to it. Once I've got them shaded and some of the detailing in place I'll post some shots of them as well.
33575
Post by: Bossasaurus
Looking forward to more WIP pics.
33836
Post by: COMMANDER SUNTZU
Looks great. Am thinking of something similar for my space wolf army. How did you do the bullet holes?
32676
Post by: Meph
Cheers!
Well, the bullet holes were actually pretty straightforward and fast. I drilled out the holes with a Dremel, but not all the way through. Then I filled out the holes with green stuff and evened them with the hull again.
Next step is to let them dry for, say, a half hour and then I pressed a hole with a suitably shaped back-end of a pencil. This followed by a gentle treatment with a sharp modelling knife, creating some sharp lines and gently lifting some bits up to create the look of metal bent outwards.
Oh, and you may have noticed I applied some Dremel damage to the dozer blade and the lower edges of the hull as well.
36310
Post by: General somethingorother
Lookin good, how did you you get the effect on the sanguinary guard, it's a really nice colour... Actually it's all looking painted to a really high standard, how long did you say you hadn't been painting/playing for?
36240
Post by: Khorne Flakes
THAT WAS EPICNESS IN BLOOD ANGELS LANDRAIDER FORM 1989793847923879759469347689576957647987348576512571 OUT OF 10!!!!!!!!!!!!
PLEASE DON'T BLOCK QUOTE A WHOLE BATCH OF LARGE PHOTOS. IF YOU HAVE A SPECIFIC COMMENT ABOUT A SPECIFIC PHOTO, THAT CAN BE OKAY, BUT COPYING A WHOLE POST'S WORTH OF PHOTOS CLOGS UP THE THREAD. -The Mgmt.
and i thought you didnt have anything awesomer as the LR you made
32676
Post by: Meph
Cheers guys!
Well, the metallic on the Sanguinary guard was actually deceptively simple.
The base coat you see in the previous post is a home-brewn mix of the Vallejo tin colour and some golden metallics. I then applied layer of two, three of ink. First a smokey ink (can't remember if that's GW or Vallejo) thinned with Klear and a bit of water. then I did one layer of thinned sepia ink (the one from GW) with a little bit of brown mixed in, thinned with klear & water.
I've noticed it's never good to thin inks with acrylic paint thinners as they tend to matte down the colour and make the transparency a bit more opaque.
After the ink was dry I just gradually drybrushed the whole lot with a rather large brush and basically went through all the standard shades of the GW golds, ending with a very gentle drybrush with mythril silver. The key here was a very, very dry brush.
Well, and before I started work on the giant FW Space Marine it was easily a year or 6 before I touched anything and even now I paint only one afternoon per week, damn, progress on this army is slow... Basically because I don't have a 'dirty' desk anymore that I can leave as-is and out of sight. So setting up and cleaning before and after each paint session is a real hassle...
*EDIT*Typo's schmypo's...
36310
Post by: General somethingorother
ah, I thought i recognized your pic, really good work on the FW marine btw
31375
Post by: stompydakka
Beautiful works all!
32676
Post by: Meph
Cheers guys!
Sigh, I really should finish that big guys as well...
Time, time! My kingdom for more time!
32676
Post by: Meph
Some progress at last. I got tempted and bought a Terminator squad and some FW shoulder pads.
In the interest of my economy I decided to magnetize the heavy weapons guy so I can just switch arms and missile launcher. And I must say, it was very easy do do actually...
Also, some progress on the Land Raider. I decided to give a light spray with some thinned dark brown oil paint over a coat of varnish to give it a nice weathering/inking but the mix seemed to have been a bit too thin. Just after spraying it it looked real neat around all the rivets and in all the recesses and just, but after drying out there's almost nothing visible. I'll add further oil paint weathering by hand I think.


32676
Post by: Meph
Someone on another forum was interested in a mini-magnetizing tutorial so I thought to post it here as well.
For the arms it's very simple, just find a drill bit that's the right size for the magnet. I first made a small notch using the tip of a modeling knife where I want to start drilling, then I drilled a small pilot hole using a pin vice and a medium-sized 'tiny' drill' (a bit bigger than the one on the pic), and then the full size hole using a hand drill. I found the best way to handle that clunky hand drill is to put it on your lap, bracing it against one thigh and then slowly drill with your right hand while holding the mini against the drill with your left. Since you're drilling very slowly, this goes ok and is quite accurate. More accurate I feel than clamping the mini in a vice and holding the whole weight of the drill on the mini.
For the cyclone it's a similar process. I drilled quite a deep hole in that torso so I could fit two magnets in there for some more magneto-power. and then covered he hole with some green stuff to make it flush again. mind you, this is a very thin layer, you can see the magnet's edge just where the groove of that little top armour plate is. And then, as you can see from the pics, the magnets I used fit neatly inside the missile launcher itself. that was the handy bit about the plastic cyclone. I assembled the cyclone after the torso magnets were in place and left off the front section. Then you just put the magnet in, right-side up, and put it on top of the termy to dry-fit. Take it out, a drop of superglue in the cyclone's middle section, put the magnet back it and put the missile launcher on the termy as usual. The magnet will position itself neatly while the glue's still wet., with the minimum adjustment needed. And when that's dry, glue the front back on. the cool thing is that those little magnets are strong enough to hold the cyclone on even with +-3mm between them, and the little plastic mounts of the terminator body and cyclone hold it neatly in place. It's not the strongest of bonds though although you can pick up the model by the cyclone, but I wouldn't flick it very hard...
Oh and on a general note, I found that the handiest way to put the magnets in the holes is, for the first magnet; a drop of glue in the hole and then just stick the whole little stack of magnets in the hole and then you can just slide off the stack while leaving one magnet in, that way the magnet sits nicely level and flush. Pushing in one by finger tends to be less level.
And when that's dried I just put on a single magnet on the already glued one so it's centered and right-side up, put a bit of glue in the hole of the second part and push the part onto the magnet, squeezing it in. And then slide off the part. Worked like a charm.

32676
Post by: Meph
Ah, the joys of thinned oil paints...


17349
Post by: SilverMK2
Extremely nice work.
3933
Post by: Kingsley
While all the technical elements of this seem quite good, I don't really like the overall "feel" of these models. To be honest, they seems quite "busy," and not in a good way. The Razorback is probably the worst in this regard-- it has lots of weird little things that I don't think are necessary, such as the radar dish on top of the guns. I'm also not a huge fan of your battle damage/weathering technique.
19650
Post by: shingouki
thats it im gonna bite the bullet and get a land raider,you have really inspired me with your work.
32676
Post by: Meph
Cheers guys! Rofl@ the legendary thread pic!
@Fetterkey: Well, I kitted them out quite a bit as I intend to use them to transfer the elite models. And they're not quite finished yet. There are lots of details that still need attention, like some small skulls, the bullet impacts etc etc. The intention is to have them quite dirty and battle-worn. i didn't want them to be too clean & polished. Any suggestions for alternative weathering techniques are always welcome.
The first tactical squad almost is complete. I'd say it's at roughly 90% finished. I just need to apply some more decals but I'll have to make & print those first. I thought to cook up some righteous mumbo-jumbo for the on the larger pigments and I need some black blood drops for the right shoulder pad as I decided to make them from the 5th company. I'll freehand some stuff on the smaller purity seals and such. And they need some basing done as well.
For the rest I think they turned out quite nicely. I didn't want to go too elaborate on them, both in terms of colours and painting technique. The idea is to have them at a decent table-top quality. The size of the pictures does tend to show the drybrushing a bit harsher than it actually is.
Oh, and I think I'll use some black oil paint to outline the details and panels.

32676
Post by: Meph
I made some progress on the sarge of the Dev squad, I went with a grey/khaki robe. I wanted to avoid the standard cream coloured ones. Whaddayathink?
I think it came out ok but somehow I'm contemplating to give it some washes and glazes to give more depth.


32676
Post by: Meph
And in the mean time, I thought it was time to get ahead (badum-tsh!) and start painting the devastator heads. Right now they're looking a bit spacewolfish but I intend to give them quite a few glazes/washed with thinned blues & blacks to give them a good full dark blue tint. I want them really dark so the blue doesn't clash too hard with the red. (I still want to slap the guys who came up with the blue helmets in the first place)
The guy with the masking tape collar is the unlucky fellow who got his head glued into place before I realised it had to be a Devastator. The tape will make my life a lot easier when applying the glazes and inks.
And as a last pic, meet the crew for the Land speeder Squadron that's in the pipeline. One Land Speeder is the first plastic type, sitting in a red base coat since a decade, and then I've got two of the latest kits; one already full magnetized for all weapon options and undercoated, and one is almost assembled but still needs to be magnetized.
 Automatically Appended Next Post: Automatically Appended Next Post: I did some more work on the helmets this afternoon. I drybrushed the helmets with some pure Skull White and then I gave the devastators three washes/glazes with blue ink, with a little bit of black and thinned by some water, about 2:1. The yellow ones received a white drybrush as well and then two washes with sepia ink, with a little bit of devlan mud, and water.
The camera does show the drybrush in a rather harsh fashion, but then it's also some ridiculously close close-ups of a tiny bit. The effect does look a lot softer on the model and the blue appears much deeper as well. When the lighting conditions are a bit better I'll take some more pics. It's a bit too sunny atm for good model photgraphy.

32676
Post by: Meph
All the details have been basecoated, ready for inking. Maybe tomorrow or so. I'm continuing the 'minimal' palette as with the Tac. Squad. Just some metallics and a few detail colours. After the inking's done, I'll gently drybrush the black as well as the details. Then I just have to apply the decals, paint in the tiny details, such as lenzes. And finally I'll outline the details with thinned black oil paint. The end is in sight! (for this squad). C&c welcome as always, 
32268
Post by: smeugal fan
Nice raider mine is also blood angels but i made my own scheme.
32676
Post by: Meph
Cool, feel free to share a pic  I'm always eager to see other Blood Angels.
26790
Post by: Gitsplitta
Love the way those dev's are coming along Meph. Nice work.
45291
Post by: Shooms
high quality work. Your assembly line style of production with the corks and such is a great idea.
32676
Post by: Meph
Cheers guys! Yeah, the corks are very handy. For the next Dev Squad I'm going even one step further and paint the backpacks separately as well.
While it may seem a hassle to set them up, it makes it so much easier during the actual painting process. Less miniature juggling and brush-twirling to get in the little black details and highlights. It's such a stress- and time saver.
Everyone hates that tiny black line or spot that went astray and defiles a finished, basecoated, drybrushed, inked, and glazed colour...
And a good excuse to drink more wine of course.
32676
Post by: Meph
Hmmm, I'm wondering what colour to paint the lenzes on the Dev helmets... Red, green, or yellow. Personally I'm leaning towards a light green perhaps. What do you guys think?
Automatically Appended Next Post: Bazingah!

And here for some zoomtastic orgasmatronic extravanganza.

38652
Post by: dullblade35
Sweet Raider I gotta invest in a spray gun  Btw Btw check out my BT crusader on:
http://www.dakkadakka.com/dakkaforum/posts/list/357296.page
Keep the BA going they look really epic Love the heads
32676
Post by: Meph
Cheers mate.
Cool, that's a nice tank you've got there as well. The cross looks great on the LR. Lovely, lovely
38652
Post by: dullblade35
Thanks How you going to base your men?
32676
Post by: Meph
LOL, haven't really cooked up a concrete plan for that. Last time I've based a mini was so long ago that just sticking on sand and painting it green was still considered to be hot.
So I've got some sand... and I did make an effort and bought a basing kit with some resin bits and pieces. I think I'll keep it simple; some sand, some resin, a tuff of static grass.
I'm not sure about the colours for it though. I don't want to go too bright, but not too bland either... Any suggestiosn or examples are more than welcome.
38652
Post by: dullblade35
I'v gone dusty desert with my BT with a scrap look i'll post some pics or start a blog
12340
Post by: Jonny_Lunchboz
Very nice, very smooth colours. do you use an airbrush much?
34795
Post by: thorgir
The tac and dev srgts are just amazing.
and the yellow is definitely the right colour for the dev eyes
10842
Post by: djphranq
This is some great work! I need to get me a drill like that.
32676
Post by: Meph
Thanks fellas!
@Jonny_Lunchboz: on the vehicles I use the GW spray gun for basecoating. (if treated correctly, a great tool, no matter what anyone says). I've used an airbrush for some subtle shading on the vehicles, and sometimes I use it when using oil paints or weathering powders. I can definitely tell you I'm never basecoating a mini with a brush again....
@djphranq: Aye, that hand drill is one handy tool.
26790
Post by: Gitsplitta
Beautiful work! Yet again!
22192
Post by: whalemusic360
Really cool style on these guys, very gritty, in a good way.
The giant mold line on the kneeling devastator is a killer, but as it appears to be a fluke, I'll let you slide.
32676
Post by: Meph
Yeah, there are a few mold lines here and there. They got overlooked in the cross-eyed haze of cutting, cleaning, and assembling some 40 marines and a few vehicles :S
It's a big no-no on a presentation piece to be sure, but these are just meant to be a table-top army. Of course I want to give them a good look but I'm not too fussy for about the odd line or missed spot here and there. It's already taken me little over a year to get this much painted up...
And then a mate of mine went and made it worse... (The same guy who's Space Wolves is in this post as well) He got me a Stormraven for my birthday with the explicit request to convert it as he's well aware of my disdain for the awefully unbalanced look of the standard GW model. I seriously detest that ugly turret on top, that out-of-place intake behind it, and the ridiculous front-heaviness of the front vs back end.
That being said, I do like the look of the main cockpit, the front thrusters and the engine/wing assembly. I've been looking at as much self-made and converted Stormravens as possible ever since the rules appeared in the BA Codex. And actually quite recently I've found the best conversion I've seen so far.
It's the one from 1hadhq (he made two actually). After asking about it, he was kind enough to provide me with two links to his beauties.
Painted: http://www.dakkadakka.com/gallery/images-6838-16466_Stormraven%20-%20Slightly%20Altered..html
Unpainted: http://www.dakkadakka.com/gallery/images-6838-15713_Storm%20Raven.html
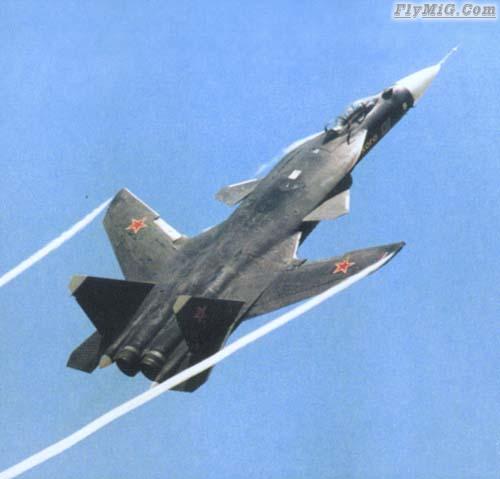
I absolutely love his engine/wing setup, the way he elongated the main compartment, and the canards in front. I'm not going to copy his design 100%, but I'm going to use a similar layout. I ordered some extra bits of off Ebay and once they arrive, the project begins. My plan is to have higher tail rudders (Sukhoi Su-35s ftw!) and I'll elongate the rear hull section using a pair of double side pieces I ordered to cut up. I'll also add some Defiler legs as Dreadnought grapple.
I'm also thinking about the placement of the turret. I intend to use a FW Razorback turret for it but I'm not too happy with the placement on top, with the Stormraven being a gunship and all. During construction I'll see if I can pull it off to locate the very top hull section (inc. cockpit) somewhat more forward so it sticks out above the front loading ramp. If I then can place the FW turret upside down under the 'beak' of the forward cockpit, and it doesn't unbalance the look too much, I think I'll go for it. It will give it a nice attack chopper look I hope. Whaddayathink?
22192
Post by: whalemusic360
Have you seen the Chapterhouse kits for them? They look quite nice (should have mine soon, I'll get pics up when I do)
32676
Post by: Meph
Oh, didn't know they did Stormraven kits as well now. I'll have a looksee immediately
22192
Post by: whalemusic360
Don't think they are on the site yet, but can be seen here:
http://www.dakkadakka.com/dakkaforum/posts/list/510/347567.page
and ordered by emailing Nick.
32676
Post by: Meph
Wow... That's actually almost the exact look I had envisioned for the elongated hull... :O
The site mentions the kit in their news page but it's not in the shop yet.
Aaaand, mail sent. ^^
39693
Post by: -Cypher-
Sub'd. You're doing a great job Meph, and I can't wait to see what's next. Keep up the great work!
22192
Post by: whalemusic360
If they are sold out let me know, I can send one of mine until they become available again. I ordered 4 kits but only have need of 2 in the here and now.
32676
Post by: Meph
Cheers, Cypher!
whalemusic360, wow, that's mighty, mighty generous of you :-O
I'll definitely wait for the Chapterhouse reply and see how it goes.
32676
Post by: Meph
Yarr, just got a reply back from Chapterhouse, presales have ended since a few weeks and it'll be a while before it ends up in the stores as they first are going to catch up with the back orders... :(
22192
Post by: whalemusic360
If you get to the point where you want to work on the bird, lemme know. I got mine yesterday. I have to look up what they cost, but whatever it was, that plus shipping and its yours.
32676
Post by: Meph
Well, seeing all my other ebay-ordered bits arrived today, I'm getting antsy to start the conversion to be honest
So, flabbergasted by the offer, I humbly accept your offer while digging my toe in the dirt... ^^
32268
Post by: smeugal fan
Nice work on the land raider btw
32676
Post by: Meph
Cheers, Smeugal! And he's not even finished!
Alrighty, a start on the Death Company. I didn't want to go for the classic black-highlighted-with-blue-or-grey colour. I started out with a black under coat and the drybrushed them with Mechadendrite Red + black and Mech. Red + orange. Followed by two airbrushed on glazes of Black Ink, with a little bit of red, thinned to a 50/50 mix with water. I also stirred in a tiny, tiny droplet of detergent to break the surface tension.
I then airbrushed on a layer of Vallejo Red Shade, thinned with water, and the bloody thing dried out leaving bright pink lines in the creases of the models. So I then sprayed on another layer of the black/red wash to fix that.
While usually spraying models like this holding them in my hand wearing a surgeon's glove, in my haste, I sprayed some of the models while still standing in the cardboard box I use for undercoating. The cardboard box decided to shed some white fuzz from an old undercoating with white, and now some models have little white specs on their lower legs...
Besides there trials and tribulations I'm quite happy with the effect of the drybrushing and washes. I think it will contrast nicely with all the metallic detailing I'm planning for them.

32676
Post by: Meph
Some experimenting with a red metallic. The mix was just a bit too thick by the end so some cleanups will be needed here and there.
Whaddayathink?

34285
Post by: Matrim
The metallic red really brings out the muted red highlights on the armour.
I think it needs to be toned down though, maybe a few glazes of black wash would lower the tone abit, whilst keeping it 'red'.
Good work!
26790
Post by: Gitsplitta
I like that meph... it works.
32676
Post by: Meph
Cheers guys!
I'll definitely have to experiment with it a bit before continuing it on the other 5 mini's. The pictures make it look redder than it actually is. Under standard lighting conditions it's leaning towards a somewhat purple shine. However, it's only slight.
What I'm thinking to do is to lightly highlight it with some mithril silver or chainmail and then give it some glazes of red ink or thinned paint, maybe thinned with some metallic medium.
I'm quite hopeful that I should be able to get to the shade I want. of course, any idea's or tips are more than welcome
32676
Post by: Meph
Alrighty, I did some testing on a piece of paper, including some highlighting with a purer red, but I think that the solution I came up with is the best compromise between speed and desired look. I highlighted with Vallejo's Bright Bronze mixed with some GW Mithril Silver, drybrushing the rough bits and normal highlighting the smooth bits. I then airbrushed blood red heavily thinned with water, and after that a layer of black ink mixed with a little bit of red shade, also thinned with water.
It's not entire the effect that I first envisioned but I'm ,liking it nonetheless. The deep red copper tint looks more muted than a pure red, and the reddish hue on the black armour gives it a look of dark, dried blood. Which is appropriate for, well, 'Blood' Angels. And I'm also quite confident that once the other detail colours are on that it will tie the unit in decently with the look of the rest of the army. The brass/bronze, some green, the parchments, some metal detailing. There's even one Marine that has a loincloth that I will do in that khaki colour.
What say you?

17349
Post by: SilverMK2
A very interesting colour set you have there - will be interested in seeing how it looks when finished
22192
Post by: whalemusic360
As of Friday your SR kit is otw!
26790
Post by: Gitsplitta
I still like it. Get some contrasting colors in there to set things off and you'll really have something.
32676
Post by: Meph
Thanks guys!
Yeah, I'm actually very eager to get the other colours on there. I'm hoping that the added bronze will give the needed balance to the palette. Yesterday I slowly started the 'normal' metallic details, such as the teeth of the chainswords, and it's already adding much needed contrast.
@Whalemusic: You da man! Again, thank you very much for the offer I couldn't refuse (without any need for equestrian decapitation). I think I already have come up with a name for that Stormraven, or its pilot: "Canticum Cetus" (google translate is your friend). ^_^
32676
Post by: Meph
Wehey! Guess what arrived in the post today?
Everything arrived intact and I must say that the quality of this Chapterhouse cast is of good quality. They even have adequate interior detailing.
The details and lines are crisp, little to no warping, just a slight bend in the larger parts but they're actually as good as straight. The only bits that will require some serious attention are the two side panels. They have quite a large resin 'bar' on the top edge that's 2-3mm thick and 10cm long. That's going to require careful but persistent sanding.
 Automatically Appended Next Post:
This kit really will save me a lot of time and headaches. It's easily over a decade and a half since I handled some plasticard for vehicle conversions and this is just exactly what I had in mind to extend the hull. I'll still need some extra construction material together with the extra parts I ordered off of Ebay to get where I want.
So the master plan is:
-Extend the hull using the kit.
-Integrate two tail booms with the engine housing and cut/relocate upwards the vertical tail to create large vertical rudders, much like a Sukhoi Su-35s (look up pics in Google, most beautiful airplane I've seen).
-add a center boom with no vertical tail, to hold the Dreadnought clamp.
-Ditch the silly top intake
-Position the cockpit section forward well over the front hatch so I can make an attack helicopter-like turret to replace the silly top turret.
Yup, that's right, another project that's crammed into an already full pipeline. Surely Sisyphus's a sissy!
22192
Post by: whalemusic360
That was surprisingly fast, glad it made it there safe. I used a jewelers saw to cut off the strips. No magical customs charges or the like I hope?
32676
Post by: Meph
Nope, no added costs whatsoever, hurrah!
Yeah, I've got a fine, thin-bladed hacksaw but it's old and the blade is not 100% straight... I'll see what works the best with the least risk of damage.
Thanks again mate!
30660
Post by: niallkissick
I'm excited! can't wait to see how this turns out!
39693
Post by: -Cypher-
Do the pictures of the Death Company convey their true colors or are they off at all?
32676
Post by: Meph
Thanks niallkissick, I started preliminary assembly yesterday. I hope to have some progress soon.
@Cypher: Well, the photo's are remarkably close to the true colours, the second pic is probably closest as that has the least of diffused sunlight.
OK, construction question for the Stormraven. I've hot a design snag already.
As mentioned above, I'd like to move the cocpit section quite a bit forward to I create an overhang large enough to put a small turret underneath for the 'main' turret weapons. I can slide the top plate forward enough, no problem, but then I don't have any neat sockets anymore for the wing roots. I'd like to magnetize the wings for ease of transport but If I move the top hull section forward, I'd have to construct a filler plate that's strong enough to hold the magnetized wings. I could also cut of the wing root section off of the top plate but then I don't have enough support for the front section to slide foward for the overhang. Although this might be easier to (re)construct than the wing roots...
I could use some feedback on this conundrum.
Anybody with prior Stormraven conversion experience, don't be shy now!
If the explanation's a bit unclear, I'll gladly post some pics later today
32676
Post by: Meph
After a while of tinkering...
I decided to stick everything together temporarily to see how it actually looks like as I didn't exactly drew any plans or sketches. I'm just winging it basically.
Everything's pretty much in place. I just need to build the 'chin' under the cockpit and figure out what I want to do for chin turret. A razorback turret is a bit too clunky and the original turret is out of the question. I want to make a simple design that holds up using a magnet and have the turret design simple enough so I can magnetize the weapons as well. Any suggestions are always welcome in terms of bits I could use and such.
And the only other thing to do is to close up the sides, install some canards, and close up the 'neck' behind the cockpit.


32676
Post by: Meph
Alrighty, ye who hold their silence, behold and comment!
I'm back from the mad professor shed:
Ze gun turret. First design is meant to have the entire gun assembly swivel up and down on the strut. The whole thing is held together by the gun magnets in combination with the central strut, which also has a little magnet in it. Mechanically it works but the whole thing can't stay perfectly straight. the interaction of the gun magnets with the strut magnet results in the strut wanting to rest just a tiny bit crooked.
The last two pictures is to show what direction I'll go for I think. It's a more solid design which will be better to handle. the up-down motion would be just for the guns then, with the central assembly being rigid. the whole will be mounted to a, well, mount, that will go under the chin and takes care of the left-right rotation. (This would also have been the case with the first design) I'll have to cut up another defiler leg to geth the exact piece I want for the vertical strut, but hey, that's why I bought 'm off of Ebay for.
Whaddayathink?

22192
Post by: whalemusic360
Interesting. I think you might be getting a bit close to having a Space Marine Valkyrie. Certainly is ambitious though.
26790
Post by: Gitsplitta
Pretty cool looking actually...
32676
Post by: Meph
Thanks guys! Here's some progress on the chin turret.
Well, obviously I need to chop down the support struts and maybe make the center strut shorter as well. Right now the turret looks good but it's way too big and I need to place it completely forward in order to have clearance for the front ramp.
'Winging it' bit me in the bum this time...

26790
Post by: Gitsplitta
Very nicely done... wow.
45080
Post by: omgitsduane
How do you do the little spots of weathering all over the tanks? It looks amazing but I don't think its salt weathering is it?
44369
Post by: Ralin Givens
This blog =sexy
nuff said
22192
Post by: whalemusic360
Considering your probably going to have more stuff by the turret (spotlight, sensors, etc), what if you changed the way the doors open, in order to gain more room?
32676
Post by: Meph
Cheers guys!
@omgitsduane: indeed, no salt weathering. I used the 'dry sponging' technique. Take a bit of mousse like you find in the packaging/blisters, dab on some paint and then just treat it much like a drybrush. Rub off as much paint as possible on a piece of newspaper or such, until there's almost no paint coming off it. Then just dab it on appropriate post on the model. You'll get the best effect if you build up, a bit of black, then a bit of metallic colours, some dark brown and such. That way you create a more natural looking effect.
@whalemusic360: Hmmm that will difficult I think. The only way I can see atm if I cut the door horizontally and have the top bit of it rotate outward or inward, much like the cargo door on a military cargo plane. But there still might be clearance issues for marines exiting. I'll take a look at it.
19982
Post by: jetjetex
i love the storm raven! cant wait to see more.
32676
Post by: Meph
Well, here is some more then. ^^
Added some extra thrusters, changed the turret, and tried out the canards. I temporarily set the turret on those two magnets so it sits at the correct height. This gives me a reasonable idea how to build the chin down and around the thrusters.
C&c welcome.


26790
Post by: Gitsplitta
That's gorgeous Meph! WOW!
I'll take one... trade you a Mantis Warrior for it... * big grin*
32676
Post by: Meph
Hehehe, it'd have to be a mighty big warrior. Cheers mate!
Alrighty, a direction has been taken. I've layered the chin up to exactly the height of the round base. Thankfully, three layers of plasticard is exactly the right thickness.
Never mind the rough, stepped edges you see. I gave them a little bit of leeway so I can easily sand them down to a flush angle. The bit behind the turret i'll box up as normal and slope back up to the top of the forward ramp.

22192
Post by: whalemusic360
Looking more complete with each update. You are really taking it further to the Storm Hawk than ever before
32676
Post by: Meph
Tadaaa!
Alrighty, after a long vacation, it's time to pick things up again. i haven't gotten round to painting anything yet but I have been practicing my plasticard-fu.
The chin section is complete and I've figured out how to mount it. The whole assembly neatly slips into place and sits relatively solid during dry-fitting, so when glued it will be a firm joining. Maybe I'll add some extra internal strengthening if needed.
As a whole, I finally have the feeling that I'm getting somewhere. The sides will be easily closed using some plasticard paneling but any suggestings for details or greebles there are welcome. Same goes from the empty back section. On the sides, I'm even thinking about a plasticard wing cutout on the sides but I'm not sure if I can cut that accurately enough.
What say you?


26790
Post by: Gitsplitta
That's thinking about becoming a Thunderhawk....
32676
Post by: Meph
lol yeah, it has grown a bit from the original concept. The accessibility of the front ramp demanded it. :-/
I don't own one, but I'm guessing it's about 2/3 of the length of a Thunderhawk. it's probably a lot slimmer though.
26790
Post by: Gitsplitta
It's got the right feel though Meph. You're doing a fantastic job with it... real pleasure to watch it come to fruition.
40878
Post by: Meade
Thats so cool! nuff said
32676
Post by: Meph
Cheers guys!
31618
Post by: Eggroll
Some great conversion work! I agree, it does look more like a thunderhawk. I've always wondered if it would be feasible somehow to combine 2-3 stormraven kits into a kit-bashed thunderhawk. Would definitely be more economical. Anyway, looking forward to seeing you finish up the mods.
32676
Post by: Meph
Cheers Eggroll!
Alrighty, got the top section sorted out. It's not glued on at the moments as I still need the access for the wing magnets, but it sits almost perfectly flush with the rest of the hull.
The sides have been closed up as well. First I thought to do some more elaborate paneling or a large BA wing cutout, but for the first I felt too lazy and for the second there was not enough room. The area is a bit too low and long for a large icon cutout.
I have some white a transparent decal laserjet paper lying about I intend to use for this. The little top plate is perfect for a decal with the name of the ship, and the large bottom plate seems like a good place to put some artwork. I'm thinking to use some GW art, post-prod something together in Photoshop and print out a full colour decal with some epic imagery. It will allow for much greater detail than a feehand and it will keep the visual style nice and tight.
The end is starting to get in sight for this build, yay.


32676
Post by: Meph
I'm guessing that the build is about 95% complete now. Just some sanding here and there and add some extra detail.
Things done over the week:
-Magnetized the wings
-Some greenstuff gap filling
-Made the 'shoulders' for the canards to sit on. Looks better than expected.
-Added a piece to the main wings to give them the same forward sweep as the canards and tail planes. The macro perspective of the photo's does tend to distort this but all three wing surfaces now have a 10° forward sweep.
At first I thought to close the gap between the wing add-ons and the main wing using greenstuff, but actuallyI I like the look it has now. I figure it will be easier to paint those up as leading edge flaps, with weathering to clearly show that they can move, rather than to use a lot of greenstuff and excessive sanding to perfectly hide the seam. Best to hide in plain sight then I thought. ^^
Any thoughts?


26790
Post by: Gitsplitta
Stunning work. Does the forward sweep do anything aeronautical? (I mean IRL.)
48376
Post by: Capitansolstice
BAdaBa Im lovin it
32676
Post by: Meph
Cheers guys!
Yeah, a forward swept wing (FSW) has loads of advantages. It's a design inspired by most birds. Because of the forward angle on the leading edge, the air tends to flow 'inwards' over the wing, adding more air for lift and maneuverability. And the position of the wing tip reduces what they call wing tip vorteces, when the air 'slips' of the wingtip and starts spiraling over the wing and negating the lift of that wing area. That's why you see those winglets on the tips of commercial airliner wings, they 'cut' those vorteces, giving the wing lift over the entire surface, and this also results in better fuel usage. On military planes they don't use these winglets as they add way too much radar bounce-back.
The reason the FSW design is so rare is because it's so difficult to construct. The wing flexes way more than a conventional wing under incredible loads.
The Russians managed to get a design that could go Mach 2+, the Su-47 Berkut.

26790
Post by: Gitsplitta
Wow, that's pretty cool. Thanks!
48376
Post by: Capitansolstice
cool
22192
Post by: whalemusic360
Amazing work, I should really get cracking on my ravens, though they will pale in comparison.
8884
Post by: viney
Excellent work! I am really digging the Landraiders. The metallic red on the BA is great to!

32676
Post by: Meph
Cheers guys, I'm really glad you're liking it. I've slowly been working on it during the week, like an hour or two every day and then 3-4 hours Saturday and Sunday. So actually I've clocked quite a few hours on just those canards and wing extensions and some greenstuff. Cutting, gluing, sawing, sanding, greenstuffing... The comments make the hour-sum feel less heavy. ^^
Still, it's a quite relaxing thing to do after a hectic day at the office.
48376
Post by: Capitansolstice
Hehe looks good
32676
Post by: Meph
Thanks mate!
Hmmm... dipping or spraying?
To colour the transparent cockpit glasses. I am thinking of using some GW sepia or green ink mixed into Klear to get the hue. But would I spray it on using my airbrush, or would I dip the canopy into the mix and then set somewhere to drain off and dry...?
48376
Post by: Capitansolstice
airbrushing it from afar would make more sense, because then it would stay on. if you dip it the ink will drain off
31618
Post by: Eggroll
Meph wrote:Thanks mate!
Hmmm... dipping or spraying?
To colour the transparent cockpit glasses. I am thinking of using some GW sepia or green ink mixed into Klear to get the hue. But would I spray it on using my airbrush, or would I dip the canopy into the mix and then set somewhere to drain off and dry...?
Heh I had the same idea for my storm raven when I get around to assembling and painting it. I saw some glass paint at my arts and crafts store that I figure will work well. For yours I recommend you use the ink which should work just as well. Make sure it is ink and not the GW wash as the GW wash isn't as transparent and will dry matte which you wouldn't want for your cockpit. Just water down some ink and spray it as you normally would from your airbrush. If it's watered down you can do multiple coats to get the right tint. If you're really nervous, try it on a bit of the clear sprue. Once done, post pics...I haven't done any glass tinting myself yet so I'd like to learn from your mistakes
32676
Post by: Meph
lol, that's some good thinking. I don't mind taking one for the team, lol
Hmmm spraying does seem more controllable. And I think I'll definitely do some tests on clear sprue (or the neighbour's car's headlights?). Since I'll be mixing the brew myself I'll probably want to experiment with the tint and thickness...
32676
Post by: Meph
After having some leftover paint after a DIY job, I decided to use the half-liter thinned Levis wall paint as an undercoat. Yup, water-based paint you would normally use to paint your walls with, thinned with water. ^^
It much clearer to see like this which parts need some more attention for green stuff and sanding. Overall I'm pleased with the smoothness. The file lines you see on the back are actually from the sanding, the actual seam has gone. It just needs a wee bit more green stuff here and there to make the parts fully flush.
Also, there's a first time shot of the Dreadnought clamp, and yes, the door has clearance enough.
Whaddayathink?


17349
Post by: SilverMK2
That. Is. Awesome.
I think it is actually impossible to quantify just how much better that is than the stock model.
26790
Post by: Gitsplitta
Beautiful.
32676
Post by: Meph
Thanks guys, I'm happy it's being well received. the design was a difficult birth. ^^
Woops, I noticed I first linked an old pic, so I updated the first images of the previous post.
34046
Post by: Mr.Malevolent
By the Emperor! That Stormraven is amazing. It literally looks like a mini Thunderhawk. Awesome job.
22192
Post by: whalemusic360
Ballsy move trying an unknown for the basecoat, but looks good! I'm excited to see it get it's paint on.
48376
Post by: Capitansolstice
Wow
47708
Post by: Zebra88
This is like a dream become true........respect....May the Machine spirit bless you....
Zebr@88
32676
Post by: Meph
Aye! The Omnissiah took possession of my soul!
thanks for the kind words guys, it helps me keep my tempo up, even though glaciers move faster...
I realized that I'll need to paint the cockpit first, colour the canopy, glue it on, and then mask it up so the canopy can withstand the staggering amount of paints and washes that thing is going to receive...
For cockpit, I was thinking about something like this.

27706
Post by: grrrfranky
Great work so far on the storm raven. Looking forward to seeing the cockpit interior then
grrr
19650
Post by: shingouki
Bang tidy.
32676
Post by: Meph
Thanks guys!
Yesterday's work. I'm quite chuffed I managed to paint the pilot in one afternoon. It's been a while since I painted just one infantry mini at a time
Whaddayathaink?

47708
Post by: Zebra88
wonderfull
26790
Post by: Gitsplitta
Looks sweet Meph... clean, crisp. Nice job on the eyes too.
32676
Post by: Meph
Cheers fellas!
For the cockpit, I wanted to incorporate some black around the canopy, like the anti-glare section most military planes have. But then I thought of to apply a larger scheme to the craft. It will be mostly red of course, but maybe some black section like these would look nice. including a 40k'ified version of the tail art.


And since I'm waiting for an order of painting materials to arrive by post, I though it was about time to push the Land Raider further to completion. I did the lenzes of the lamps, sensors and Tech Marine's eyes. And I did some work on the large engine grills. All that's left now is some odd and ends like the impact marks, engine detailing etc.

21254
Post by: lipsdapips
Fantastic. Truely fantastic. This is amazing!
LDP
26790
Post by: Gitsplitta
Very nice job on those lenses... really sharp.
38276
Post by: M0rdain
The lenses look beautiful. I like the fact some are green and others are yellow
32676
Post by: Meph
Cheers guys! Yeah, the lenzes took quite some concentration and zoom-o-vision. :S
I decided to go with two colours to imply different sensors, like nigh-vision etc. And it also gives a nice variation.
In the mean time...
Suitable appalling colour, no? In real life the tint is slightly more green, but not much. I think this is a good base for some drybrushing and inking.
And i also did a dipping test on the canopy of the turret, which I'm not going to use. At first I thought the effect was quite good, but up close you can see these little imperfections everywhere.
I'm unsure about the exact cause, it could be some bit of dust that got on during drying, even though i covered it up with a glass.
Or it could be the mix. I mixed some Tamiya clear into Johnson's Klear and dipped it in a small clean metal cup. Maybe the mix curdled ever so slightly or the Tamiya clear simply doesn't mix that well. My gut feeling might be to add a tiny bit of dishwashing detergent to try and break the surface tension of the two fluids. I'd like to hear any other suggestions or tips...


14392
Post by: nerdfest09
AAArgh! landraider lenses! 18 fiddly little circles of hell! you've done a great job on them though! I am loving watching all your work grow over time, especially the storm raven, that model just looks amazing! no other word for it! :-) and the landraider is pretty damn sweet too! i'll be very interested to see where they all finish up!
nerdfest09
26790
Post by: Gitsplitta
Believe-it-or-not... my studio has one wall that's that color... the rest is a lighter shade. I like it... makes me happy.
31618
Post by: Eggroll
Hmmm yeah I can see what you mean about the dip mix. From what I've heard, tamiya paints are not water soluable, they have some special acrylic thinner so mixing their paints with other liquids is always sketchy. I plan on doing mine with gloss varnish and turquoise ink.
26416
Post by: Young_Logan
That is an amazing storm raven, very impressive, although im amazed that the base holds it up, it looks much longer and heavier than the normal one
48376
Post by: Capitansolstice
If you are doing OSL, You should make the glow on the marine
also, maybe you dont want to dip, and use an airbrush instead?
32676
Post by: Meph
nerdfest09 wrote:AAArgh! landraider lenses! 18 fiddly little circles of hell! you've done a great job on them though! I am loving watching all your work grow over time, especially the storm raven, that model just looks amazing! no other word for it! :-) and the landraider is pretty damn sweet too! i'll be very interested to see where they all finish up!
Cheers mate! Yeah, it was a fiddly job fo' so'! I'm actually quite eager to see all the mdoels finished as well, because the longer it takes, the more cool models come out... I've already got a idea taken root in my head to paint up a Contemptor Dreadnought that's just stormed into a melee. ^^
Gitsplitta wrote:Believe-it-or-not... my studio has one wall that's that color... the rest is a lighter shade. I like it... makes me happy.
A bit like an ocean bubble, zennn.
Eggroll wrote:Hmmm yeah I can see what you mean about the dip mix. From what I've heard, tamiya paints are not water soluable, they have some special acrylic thinner so mixing their paints with other liquids is always sketchy. I plan on doing mine with gloss varnish and turquoise ink.
I think I'll try that as well, GW sepia ink & Klear, to stick with the products I know how they handle...
Young_Logan wrote:That is an amazing storm raven, very impressive, although im amazed that the base holds it up, it looks much longer and heavier than the normal one
Cheers mate! Well, the base holds it pretty good actually. On the Chapterhouse hull extension there is a deeper slot to put it so the center of balance stays good.
Capitansolstice wrote:If you are doing OSL, You should make the glow on the marine
also, maybe you dont want to dip, and use an airbrush instead?
lol, OSL, not with my painting tempo... regular paint jobs can already be measured on a geological timescale. ^^
Hmmm, I've thought about it, but seeing how nice and even the dipping coat was I'm not entirely sure it would be easier with an airbrush to build up a nice and even layer without the airflow pushing the paint around too much...
48376
Post by: Capitansolstice
hmmmm I diddnt even think about that, can you tone down the pressure?
37819
Post by: LilLoser
Oh wow, what a cool storm raven. Cool blog too.
LilLoser
32676
Post by: Meph
Hmmm, well the pressure is manageable, you can dial the coimpressor up and down, as well as regulate the airflow somewhat with the dial-action airbbrush but I decided not to risk it. A dipping in klear and GW ink is drying now... ^^
Cheers LilLoser, glad you're liking it.
Cockpit almost done!
Just some quick drybrushing and some very quick detaling. Since almost nothing will be visible in that cockpit I didn't want to spend too much time fiddling with details.
After that I sealed both the pilot and cockpit using a spray can of GW satin varnish. And then I made was with black oil paint and turpentine. I just madly applied it over the lot of it and as you can see the oil paint neatly sucks itself into every bit of texture it can find without tinting the underlying colours too much. I took some before and right-after pics to show what it does. I'll let that dry out for now and see if it needs any correcting after but it looks like it's not going to need much.


32676
Post by: Meph
Voila, cockpit sealed, taped up and seams closed with masking fluid. Fingers crossed, because that's not coming off until it's done...
And I also applied a first of many layers of weathering powders on and around the tracks. It's not bad but it needs a lot refining. Even though it was a mix of 5 different colours (some more than others), it came out predominantly reddish like clay. I feel I need some lighter, more sandy tones to contrast better with the red of the hull I feel.
What do you guys think?
Arch, and I keep overlooking those bullet impacts each and every time, like I'm selectively blind to them... :S

31618
Post by: Eggroll
SR and LR are coming along nicely Meph. Did you already tint the cockpit window or are you planning on doing that last?
32676
Post by: Meph
I gave the canopy one wash, it's lightly tinted yellow now. I didn't want risk making it too dark. I'm already eager to see it in combination with the paint job. ^^
37819
Post by: LilLoser
Oil certainly is gaining in popularity and with good reason too judging by the result. May I ask what brand of oil paints you use?
The storm raven's interior looks amazing. Fantastic work. I like the reddish mud in the tracks; it looks natural.
LilLoser
32676
Post by: Meph
Cheers mate!
Well, I use different brands really. I just bought the colours I needed off of Ebay from random webshops. My experience with oil paints is that most of them are quite to very good. A general rule of thumb to buy them would be is to buy a true arts brand or high quality modeling. It doesn't hurt to go for the medium-high priced stuff as it's not that expensive anyhow and it will last forever. And you want a paint that has a decent medium and high quality pigment, quality does show. mine cost somewhere between 3 - 6€ a piece.
In general, oil paints are just basically an oil based medium and pigment so there's not much that can go wrong with them. Also handy to know is that the colours names are universal as the paint has been around since hundreds and hundreds of years. The oil paint Burnt Umber for example was first used in 1650...
-Top one is from Bob Ross, the afro'd painting pixie. Actually this black is one of the easiest to thin oil paints I've had so far. Dissolves very smoothly with turpentine.
-Middle one is from a 'true' artsy brand. The colour shade is universal, Burnt Umber, absolutely perfect for grease stains and for rust when mixed with weathering powder.
-The bottom one is from MIG and is 'Shadow Brown', I used that over the whole of my vehicles for shading. Made a wash with it and brushed over the whole lot except the silver metallic detailing.
-The lighter is fine produce bought from a nocturnal Pakistani entrepreneur.

36327
Post by: GreyDeathOne
Meph I dont know how I missed your thread but I love your SR conversion is amazing!! Cant wait to see more.
32676
Post by: Meph
Cheers mate, and welcome to the thread. Kick back, relax, have a beer, stay a while.
48376
Post by: Capitansolstice
The cockpit looks so nice with the weathering
32676
Post by: Meph
Cheers mate!
Huah!

48376
Post by: Capitansolstice
Good looking!
48863
Post by: dakkagrot187
:O hobbygasm lol that stormraven is made of win that drowns the stock model in a grots tear
38411
Post by: Ragsta
dakkagrot187 wrote::O hobbygasm lol that stormraven is made of win that drowns the stock model in a grots tear
This pretty much sums up your fine work, Meph.
That Stormraven looks so slick it's almost as if it doesn't belong in the 40K universe anymore - the lines are gorgeous.
I really must dabble with oil paints, you achieve a great effect on your stuff here. For some reason the dreadnought clamp made me chuckle - I have an image of a Dread dangling from that clamp: "Look, I've died once already, can't I just ride inside with you, guys?"
I'm all hobbygasmed out now
32676
Post by: Meph
lol, hobbygasm... Cheers guys! I actually got this Stormraven as a birthday present from a mate who knew full well how much I despise and hate the original stock model. So he gave it to me with the express request to 'turn it into something cool'.
A challenge like that I could not let slip by unanswered so I gave it a shot. ^^
Here she is with some light shading and highlighting and shading done, plus a heavily thinned dark red wash. She's ready for drybrushing, she is.
Oh, and as for WW2 style 'logo'... Those two large side plates just behind the canards will be filled with large full colour decals which I'm going to make and print. I'm just not sure what to put there yet. Any ideas are always welcome, as well as interesting artwork that might inspire me.
Now just imagine a dreadnought hanging on the clamp, dangling his legs while swinging around. ^^


17349
Post by: SilverMK2
Epic indeed
You're not going to have your Giant Terminator strapped to the bottom for Apoc games are you?
26790
Post by: Gitsplitta
Sweet. Man that looks impressive.
48376
Post by: Capitansolstice
Nice work Meph!
31618
Post by: Eggroll
Model looks fantastic based coated. Looks like you missed some areas around the engine intake and undersides though. Get cracking and fix her up and get things painted. I want to see this model finished.
47117
Post by: Farty Wiffmas
 That's BEAUTIFUL! Can't wait to see it finished!
32676
Post by: Meph
Thanks guys!
Gitsplitta wrote:Sweet. Man that looks impressive.
lol, that giant termy is so huge can almost wear that Stormraven like hat!
Eggroll wrote:Model looks fantastic based coated. Looks like you missed some areas around the engine intake and undersides though. Get cracking and fix her up and get things painted. I want to see this model finished.
Hehehe, no missed spots there mate, the engines will get a different colour.
So, urged on by peer pressure. ^^ The infantry is put on hold for the moment as my time is a bit limited. I do expect to bith finish the LR as well as the almost finished infantry in the very near future. My main reason to pause the infantry was the lack of enough decals for the BA symbols. I was planning to do a full A4 sheet of self-composed decals as I've got some printable decal paper lying around but I managed to find a FW BA decal sheet on ebay for a cheep price so now I've got little BA wings a plenty.
So now I'm in no more time pressure to cook up a decal sheet in Photoshop.
Speaking of which, I shall have to commence soon as the decals need to be in place on the Stormraven before the weathering starts... This also creates some incentive as I also need to use the sheet for custom decals; The side panel art, the tail art, perhaps some custom size blood drops and wings, some mumbo-jumbo for scrolls, the Stormraven's name to go on the thin side plates, the pilot's name, maybe some hazard signs etc...
As for the side art; here are some idea's I quickly composed in PS. Some feedback?
 Automatically Appended Next Post: Automatically Appended Next Post: Hmmm....

21254
Post by: lipsdapips
Wow. You did those!? Those are fantastic! I think they should all go in your army somewhere...t...They're all so awesome!
32676
Post by: Meph
Ah, no, I wish i did those... ^^
That's artwork from the web. I would like to draw/paint some custom work myself but I have neither the time or patience to produce something to the quality which I'd like. I have to be a bit economical or it'll never get done.
48376
Post by: Capitansolstice
the third one down from the top!!!!! It would be sweeet
49382
Post by: StringBassKnight
Red for the paint god...
Looking forward to seeing the Stormraven finished.
48863
Post by: dakkagrot187
:O wow
35065
Post by: Calibanite Lion
Awesome Log. That stormraven is quite simply... EPIC! haha. Looking forward to seeing it finished
26416
Post by: Young_Logan
Awesome Storm Raven, i want one now (preferably two but one would be enough) keep up the amazing work. Such a wonderful P&M thread
Looking forward to seeing more
Young_Logan
32676
Post by: Meph
Cheers guys! Thanks for stopping by. Kick back, stay a while and let me pick your brainz.
My personal favs are 1 & 4. But now that I've let the PS mockup sink in, one thought does pop up. I fear that with that large plate being is such a contrasting colour, it kind of 'cuts' up the shape of the hull and emphasizes the hull that's part of the original stock model, no longer creating a unified look but rather clarifying the kitbashing. I feel I should either keep the dominant colour tones of those plates red, or perhaps tie in the plate with the back end of the hull with a black horizontal band or such.
But if I add a horizontal band, it might get a bit too busy in combination with the black tails, recognition stripes on the hull, and the anti-glare section the cockpit.
I need some feedback on this, bounce, bounce!
48863
Post by: dakkagrot187
if it blended in a bit so its not as striking that might solve your problem
36327
Post by: GreyDeathOne
Meph man looking awsome especially onced you primed and based it. It mad it look like a real kit you can buy off the shelf!! The decals look good too and see the artisain look/theme the BA is known for you going for. Cant wait to see how it turns out.
17682
Post by: Tjolle79
Looks great
32676
Post by: Meph
Cheers fellas. With it looking like a kit model is a huge compliment. In fact over the past weeks I had to convince a few mates that indeed it was a conversion. ^^
But in the mean time, on the infantry front...
Halloween update, shock & horror! I decided to get those two squads fully finished now that I've got the decals to put on the right shoulder pads.
Everything went smoothly and perfectly. I gave the little guys a coat of satin varnish, applied some Micro Set on the decal spots, applied the decals, and over the past few days, gave the decals a few coats of Micro Sol. And the decals looked perfectly blended in, utterly transparent, and the edges were almost gone. Seriously, they looked perfect. And today I gave them a coat from the same, almost full, can of satin varnish and look what happened. All tricks but no treat. :(
Look at the first model, that's how they are after the satin coat. The decal completely shows it's surface, and the whole model has a somewhat white misted tint to it. And it's the same frickin' can I used not two days ago without a hitch.
I first tried another coat of satin varnish on one model, no luck. As soon as it dried out the mishap reappeared.
I tested on the second model with the thinned black oil wash I intended to give them, hoping the oil would smooth out the misty effect. it kinda did, but as soon as it dries out completely, the effect seems to come back. Somewhat diminished, but still there.
And the third model I have an unthinned coat of Klear gloss varnish, hoping that that would fix it. As soon as it dried, no luck.
Any help and assistance on how I might be able to fix this would be greatly appreciated as I've got 20 Marines sitting like this... :(

26790
Post by: Gitsplitta
That's really strange Meph... in my experience a varnish, if anything... helps the edges disappear. Are you sure the original decals (and subsequent cotes of Micro Set were completely dry before you applied the varnish? I'm just wondering if the acetic acid in the Micro Set might not have reacted in some way with the varnish.
32676
Post by: Meph
Hmmm perhaps, I did wait for the Micro Sol to dry but I didn't leave them overnight or anything. But the tactical squad, which have had their wings on the left shoulder since long time do seem to be less affected, still a bit frosty though.
I've never had any issue with decals and satin varnish before. The biggest trouble that is that most models have a slightly frosted sheen to them. Something must have gone wrong during the spraying. But strangely enough it's not particularly cold outside, nor not, not wet, not dry. Just regular sunny autumn weather.
Perhaps I didn't shake the can hard enough, or it had an iffy bit in it... Could be a combination of all of the above.
I'm currently trying some stuff out on some mini's. So far I successfully managed to re-blend four decals by first repeatedly and furiously stabiing them with a modeling knife and then applying Micro Sol again, but with firm, firm rubbing (before the product takes effect). The frosted sheen does come back but at least the decals are decent again. I'll then have to brush all models with gloss varnish, so I can apply some pressure when painting the varnish on, that should 'polish' out the frost and bring back my damned colours! Graaaah!
*runs off back to stabbing mini's*
26790
Post by: Gitsplitta
I think that has to do with the ambient humidity. If it's cooler it might be harder to feel the humidity like you can in the summer, but I know high humidity really screws with the varnish finish.
32676
Post by: Meph
Well, there's a first time for everything. Even varnish frosting due to humidity...
But... an afternoon of damage control later I managed to completely reverse the damage!
I almost was at a loss as testing with gloss coats did not resolve the decal problem, only fixated it in place. And extra layers of Micro Sol only temporarily masked the problem. I was at a loss when it hit me, why not try to capture the temporary state?
So I stabbed every decal furiously with a modeling knife to perforate both the the satin coat and the decal itself. I then applied Micro Sol, which made the decal transparent again, and I rubbed as much off with the brush as possible until it was damp but still transparent. Then I quickly applied Vallejo gloss varnish with a brush, and the rest of the model as well. And lo and behold, the decals are back to their pristine state and the gloss varnish also took care of the frosting. Now thàt saved me a lot of time scraping off and re-applying decals.
So then I proceeded as planned and applied a wash of thinned black oil paint to bring out all the details and I must admit they look pretty good. Thanks to DST, there's no daylight left so I took some shots to show the result. They just need a satin coat again, and basing.
During the many drying periods I also gave the Stormraven 4 highlights by drybrushing, a red glaze, a deep red wash, and another drybrushed highlight. The red's finished now, sealed with a coat of Klear, and ready for masking out the to-be black sections. Again, no decent light so I'll post some pics of that tomorrow together with some more pics of the marines.

26790
Post by: Gitsplitta
Cool beans Meph... nice call!
31618
Post by: Eggroll
Good save. I hate working with decals on the shoulder pads...the BA symbols makes things worse given the shape. I'd much prefer to hand paint them these days or just go to the Death Co. molded shoulder pads.
32676
Post by: Meph
Cheers guys! Yeah, those BA decals have been haunting me since a few decades... Luckily for that Micro Sol product, that really is ace...
Also, when first glued down, I tend to make a vertical incision on the decal right between the two wings, up unto the blood drop, and maybe some smaller incisions on the sides of the wings before applying Micro Sol. I just use either a sharp modeling knife for those or a scalpel. and it works great. the little extra cuts allow for overlapping/bending, and after 2-4 coats of Micro Sol they usually relent and obey.
In general the molded shoulder pads do tend to look the best though.
Automatically Appended Next Post:
As promised... Some more pics. The marines are still glossy, and as I couldn't cover the direct light for the SR pics, the tint shown is not 100% accurate. In real life it's much deeper with more subtle gradations here and there from the airbrush shading, consecutive drybrushing, and inking. But it's good enough to show the idea. Don't mind the little dark spots from excessive inks. those will be worked into the weathering.
As always, any request for specific shots, questions, remarks, mad banter, or mind-bending conundrums are welcome.


47117
Post by: Farty Wiffmas
Loving the two devastator squads, really crisp highlights and an awesome paintjob! Also the storm raven on steroids is looking beautiful!
32676
Post by: Meph
Cheers mate! Painting's been a bit slow lately. Work and some other stuff has been keeping me busy, but just to show I've not been doing nuffin'; here's what I've been doing at the moment. I've fallen a bit sick just before a long weekend So I decided to start masking out the Storm Raven slowly as long as the headache allows it.

Next up is the taping of the wings.
27147
Post by: Solar_lion
Awesome work.
Ok . comment on several posts back about the oil paint - got it. Thanks for the helping me understand the technique.
SL
32676
Post by: Meph
Cheer mate, anytime. In case you want to know something specific, don't hesitate to ask.
Luckily I cured the tinfoil masking Greyknightitis before it incubated properly:


37540
Post by: rubirub
Amazing work!
I love the "thunderraven" conversion. or is it a "stormhawk".
26790
Post by: Gitsplitta
Racing stripes on the wings and the black tail fins are a great touch. How do you plan on painting the glass of the cockpit?
32676
Post by: Meph
Cheers guys!
Well, the cockpit is already done, tinted slightly yellow and taped up to withstand the painting and weathering storm. Here it is freshly taped up.

Now that the black is on, all that's left is to paint up all the other detail colours, and apply the decals, and then the weathering fun starts.
I managed to get a design going for the side panels. I think this would suit it. Not 100% convinced myself though, so what to you think?
The top one is for the right panel, the bottom ones are for the left panel.
 Automatically Appended Next Post: Automatically Appended Next Post: And in the mean time, i couldn't help myself, I just couldn't...
(right-click 'm open, they're large res)

48376
Post by: Capitansolstice
awesome~!!!!!
31627
Post by: FantasyBob
This work is amazing! can't wait to be it completed!
32676
Post by: Meph
Thanks guys! Here are some designs for the tail art, just some preliminary designs. I'm a bit unsure what way I want to go with this.


48376
Post by: Capitansolstice
Pin up girl!
27147
Post by: Solar_lion
Very opriginal.. are you planning on transfering the art work to decals or insanely trying to paint it. You keep giving me new ideas.
Question.. the troops in the above picture.. are they all painted using your " oil weathering " technique?
Thou I say pin up girl is always a positive, It's not really saying " Angels of DEATH"
SL
26790
Post by: Gitsplitta
Tell that to the B-29 crews in WWII. However, I don't see the acknowledgment of the sexuality of women to be a very space marine thing. A stripped down bolter on satin sheets maybe...
27147
Post by: Solar_lion
Gitsplitta wrote:Tell that to the B-29 crews in WWII. However, I don't see the acknowledgment of the sexuality of women to be a very space marine thing. A stripped down bolter on satin sheets maybe...
There is a good book out there of aircraft nose art thou I can't remember the name. Somewhat explains the reasoning crews choose what to put on their planes. Still On some chapters I can imagine more sexual pinup art on say the SW or WS, and the stripped down bolter for the BT or UM.
I think Meph got the BA right. BA being a bit vain and in reverence for their Primarch. ahhhhh pain .. SANg... as a fat head!!!
TGIF.
Look forward to seeing more Meph.
23475
Post by: DeadGaurd
Absolutly awesome model dude, you've done a perfect job. I think the tail looks best with the one with the aquila. But the whole model is just amazing
32676
Post by: Meph
Well, the plan is to print the decals onto white decal paper and use those. I'll also make some custom decals to go on transparent decal paper.
A pinup ey... A variation on this one fo' so'!

26790
Post by: Gitsplitta
Nailed it.... even got the right colors and a sneer.
36327
Post by: GreyDeathOne
Meph that is SICK SICK SICK!! And I mean that in a good way ! The tail art and nose art adds alot of character to that model. Keep up the great work and can't wait to see it done.
32676
Post by: Meph
Cheers for the feedback guys, it's much appreciated.
Alrighty, I haven't been painting much. Weather conditions have been too bad for outside airbrushing so I finished some odds and ends.
I finished up the Land Raider and the marines, all they need is a coat of satin varnish and they're done.
I wanted to put some small rubble on the bases but after endless and fruitless searching I decided to flock it. It looks pretty good but I feel if perhaps I shouldn't give it some thinned brown ink or something...
I took some indoor pics just for fun. ^^ Oh, the Razorback is is also almost done, just some heat distortion on the las cannons and painting up the lenzes.
Enjoy!


26790
Post by: Gitsplitta
That's seriously good weathering on those tracks... how did you get the earth effect just on the inner part of the tracks?
21254
Post by: lipsdapips
Stunning! Good job!
12028
Post by: Sarpedon_702
All of this is just fantastic. Love the Homebrew Stormraven!
31618
Post by: Eggroll
Looking good Meph. I like the two black "racing" strips down the middle of the razorback.
32676
Post by: Meph
Cheers guys, thanks for the comments. It's greatly appreciated!
@Gitspilitta: Righty the track weathering. I first brushed/dabbed on the weathering powder with a dry brush. Then I gently applied turpentine to fixate it. Just dab it here and there and make sure the turpentine 'pulls' itself to every nook & cranny where you have powder. And then came the magic trick, scrape off some graphite from a soft pencil, rub some on your finger tip and gently rub the tracks. And voilà, a nice metal shine on the exposed bits and dirt in the recesses.
In my case I did have to do it twice as weather conditions completely messed up my first fixation with a spray can of satin varnish. The whole thing was ruinied with all the weathering powders turning white and frosty. So on with new powders, again turpentine. And then I fixated using a coat of Klear (gloss varnish applied with airbrush, ie: no propellant from a can involved. And I forgot about the metallic so after that I applied the second coat of powder. But it worked fine still after one coat of clear. So to fully seal it, it needs a few layers.
I also still need to matte everything down with some airbrush-applied satin varnish.
26790
Post by: Gitsplitta
Thanks Meph... I'll have to try that.
32676
Post by: Meph
Oh, one thing I forgot to mention... The turpentine needs time to set, dry, easily a full day, best two to be sure... and be careful with handling it until it's dry and sealed. Because the powder does come loose with the slightest pressure.
14392
Post by: nerdfest09
Great looking force meph! I love the 3rd edition? black rims on the troops! and the wings on the backpack of your characters is a nice touch! strangely i haven't seen anyone else do that with them! ;-)
and really, i don't need to say how great the tanks all look with the weathering do I!
Nerdfest09
36327
Post by: GreyDeathOne
Meph I love the battle worn look on your army . I'm a big fan of weathering myself and the new clean look not so much Keep up the great work and hope to see more on your SR soon!!
30785
Post by: Styrofoam04
Thats Incredible stuff, How did you do custom decals? and why doesn't my weathering look that good?
32676
Post by: Meph
Cheers guys! I'm glad you're liking it.
@Styrofoam04: Cheers mate. I had a quick browse through your thread and your weathering looks pretty good. I'm especially liking the flaked paint of the interior of that Rhino, good stuff.
Right now it seems like you've just got chipped paint and rust, and both are looking good. You can always apply a wash with oil paint and then add the chips & rust. You can also add grease, soot, and dirt.
The grease is easily done with Burnt Umber oil paint, the soot with black weathering powder, and the dirt with a mix of brown.
I just basically applied several 'layers' of weathering like this. I think the key is just not to rush it, as oil paints and weathering & turpentine take a at least one, but best a few days to fully dry out.
I guess you could boil down my entire process as following:
-Undercoat
-Basecoat
-Wash
-3 Drybrush highlights
-Glaze
-Wash
-Some highlight accenting with drybrush, if needed.
-Varnish with satin or gloss in case you're going to mask, not needed otherwise
-Apply masking and paint up all secondary colours (usually same as previous steps, but on smaller scale)
-Paint up all details
-Varnish with satin or gloss
-Apply decals
-Varnish with satin
-Apply paint chipping
-Varnish with gloss
-Apply oil wash
-Varnish with satin or gloss
-Apply grease (oils paints)
-Varnish with gloss
-Apply acrylic washes such as heat discolouration, to darken the recesses of vents if needed, and such
-Apply black weathering powders for soot
-Varnish with satin or gloss
-Apply mud & dirt weathering
-Apply some graphite straight from the pencil and rubbed on scrapings on metallic edges here and there.
-Varnish with Satin or matte, 2-3 layers
Done!
So as you can see, lots of steps actually, but none of them are particularly hard or difficult. The only key ingredient is patience and persistence with each step. It's really worth waiting a bit longer when drybrushing so the paint is really tacky and keep rubbing the brush until almost nothing comes of before applying, with weathering, it's just a matter of slowly working your way around the model while looking for logical area's for chips, grease, dirt etc etc.
That's also why I enjoy drybrushing and inks so much, they let you really have at it like a foaming madman. It's a nice change of pace with the slow work of weathering. There, patience really pays off in results.
46051
Post by: BloodGenisis
Wow...Awsome job puts my BA to shame
30785
Post by: Styrofoam04
Thanks Meph,
I'm still in the testing phase. The interior of my rhino was a test that I love how it turned out, but I left it at that.
I just started with weathering powders, so I'm a little hesitant.
http://www.dakkadakka.com/dakkaforum/posts/list/150/305150.page#2679885
http://www.dakkadakka.com/dakkaforum/posts/list/120/349389.page#3481593
As for oils, I seen alot of videos on it and im intregued but I haven't gone and bought any. Maybe thats my next test.
Hell I might even pull out that rhino and gloss it and try it out. I'm exicited again Thanks!
32676
Post by: Meph
Cool, go for it man. Don't be daunted just because it's oil paint. Back a few pages in this thread there are a few posts about brands, how to use etc etc.
Lots of people are interested, few dare to take the step, all are amazed afterwards on how low-threshold it actually is...
32676
Post by: Meph
I managed to finish up the tac- and dev squad. Found a spray can of satin varnish which did not produce any frosting, and I darkened up the bases.
Oh, and I also managed to completely ruin the weathering powders on on the Razorback and Land Raider yet again... The red hull is now nice and dull, but the varnish completely whitened and frosted the weathering powders... again... raaah! But at least the satin varnish on on there now so I re-applied yet another layer of weathering powders and I'll fixate them with several layers of Klear. With the rest of the model protected by satin, I can easily airbrush on the glossy Klear on just the powdered parts, which might create a nice wet look.
Some pics!
The lighting quality was terrible, especially the marines could have used more front light but I only noticed on my monitor. Ah well, once the weather is better I'll take some decent ones. I also feel they come out better with a black background.


26790
Post by: Gitsplitta
Sweet Meph, nice work.
33919
Post by: Moltar
Agreed! Especially on the Razorback and LR. They look really good.
30785
Post by: Styrofoam04
Does that happen to the weathering powders everytime you varnish them?
So far I haven't varnished mine, too worried it will wreak the powders. but the fixitive wont hold on to them either
31618
Post by: Eggroll
Yup, weathering powders will usually do something weird when varnished. Powders are meant for display pieces and not for play. I know that MIG makes a pigment fixer that is suppose to be somewhat decent at holding the powders in place. Haven't tried it though. Some people use rubbing alcohol as an alternative.
Meph - The tanks look very nice. Really liking the racing strips The OCD in me however wants to say that the doors on the rhino are backwards and the cup should be pointing forward though I'm just nitpicking.
32676
Post by: Meph
Gitsplitta wrote:Sweet Meph, nice work.
Moltar wrote:Agreed! Especially on the Razorback and LR. They look really good.
Cheers guys!
Styrofoam04 wrote:Does that happen to the weathering powders everytime you varnish them?
So far I haven't varnished mine, too worried it will wreak the powders. but the fixitive wont hold on to them either
The weathering powder frosting with the spray can is just the nature of the beast I'm afraid, especially on thick layers of pigment. Some already recommended, and I promptly ordered, some weathering powder sealant from MIG. It's an enamel based fluid, most likely akin to a matte varnish that doesn't react with the pigment. Fingers crossed for that one.
Eggroll wrote:Yup, weathering powders will usually do something weird when varnished. Powders are meant for display pieces and not for play. I know that MIG makes a pigment fixer that is suppose to be somewhat decent at holding the powders in place. Haven't tried it though. Some people use rubbing alcohol as an alternative.
Meph - The tanks look very nice. Really liking the racing strips The OCD in me however wants to say that the doors on the rhino are backwards and the cup should be pointing forward though I'm just nitpicking.
Yeah, I'm hoping the MIG fluid does the trick, and in worst case, I'm pretty sure that a good few layers of Klear would to the tick also, although with a more glossy finish.
lol, the door were a bit of a Do'h! moment indeed after I had glued them in place, but in the end I don't really mind. It gives me an excuse to use the same set of doors on another tank, but then the right way forward. ^^
Oh, and just on a whim, I made a little compilation of the major painting and weathering steps. It's seemed like fun to see the evolution in one view. Those models had a slow progress over more than a year, as I don't paint thàt often. ^^

32676
Post by: Meph
After some more OCD, I did manage to finally seal the weathering powders using that blue-bottled pigment fluid from MIG. Great stuff. Although to add some extra protection I airbrushed on some satin varnish from Vallejo. And now it looks satisfactory, and you can touch it without the powder rubbing off.
I actually wanted to work on the large terminator this weekend but after another failed attempt, I decided to coat it in satin varnish, which is slightly less slick than Klear. But now that has to dry and cure. So I thought I'd take some high-res pics of the marines and vehicles.
The satin spray from GW left the models a bit too matte overall to I brushed on some gloss varnish on the lenses, lights, and gold/copper materials. It did a great deal to bring those parts back to life.
On another note, this has been announced:
Lowlands Painting Competition 2012
I'm thinking to enter the Land Raider and my Stormraven. So I've got a deadline of April 14th to finish that bird. Should be doable...
But until then, some High-Res Goodness!! (All pics are 1920 x somethingsomething)
Marines!
Razorback
Land Raider Part 1
Land Raider Part 2

32676
Post by: Meph
Alrighty, now that that Clone Trooper is finished, on to the next one.
I finally feel like I'm getting somewhere with the custom decals for the Storm Raven. Even though I liked the previous designs they were just re-hashing existing 40K artwork, which didn't really sit right in my mind. So after a small epiphany last night I went to work this morning. I went googling for photos of angel statues, picked a few, and dived into Photoshop. After a small hour, this came out. I think this will more suit the purpose of the decals. The imagery might be less clear and defined but I feel the whole look of it will blend in better with the model so it doesn't attract all the visual attention. And since I'll be able to print on a high resolution, the detail will still be there. And for the sake of feth I'll use the same decal on both sides, but mirrored.
And if you look even really close you'll see even some symbology. On the left you have two angels weeping over a fallen man, and on the right you have the Angels of Death bringing The Light to the fallen, and also a spear to the nuts as punishment for having fallen in the first place. For the Emprah!

And also a new version for the tail art. Less piratey, more Blood Angely.

What say you all? Automatically Appended Next Post: I wanted to try them out, so here are some composites for your critical eye.

26790
Post by: Gitsplitta
I say.... two thumbs up! Looks fantastic Meph. I never thing about putting such illustrations on my vehicles and man... do you point out how wrong I am.
Wow... spectacular!
27147
Post by: Solar_lion
like very much the weathering .Haven't tried my powders.. glad you said something about the varnish.
Your style of storm raven makes it look more " jet like" More racing version!
Like the new details
32676
Post by: Meph
Cheers guys!
Yeah, for powders I'd definitely get the blue label pigment fixer from MIG, it's great stuff and fixes quite decently. For gaming, a few layers of the stuff would be needed. And then maybe give it an extra coat of airbrushed on varnish to be on the safe side.
Anyways, variations! After letting it rest a bit, I'm not that happy with the yellow wings. So I fiddled around a bit. The third and the last have caught my attention... Whaddayathink?

26790
Post by: Gitsplitta
Middle left... good Lord that's cool.
30785
Post by: Styrofoam04
^^^ I agree
27147
Post by: Solar_lion
I agree... what needs to remain is the red blood drop. it you take the middle right and add the red blood drop - that might make it more appealing for me as well
SL
32676
Post by: Meph
Alrighty, some adjustments to the panel art. I do feel it has a more balanced look right now. I'm not too sure if I'm 100% happy with it yet. Comments?

Also, some tail art tried on for size. I must say, the yellow/golden one is growing on me, fast. I'm a huge fan of the 'furnace' look as well, but scaled down, it just loses all dynamic. The white one seems appealing as well, but I'm hesitant to give it a red blood drop, it might look a bit too busy.

And as a final reference, the two side panels I had made before using existing artwork. A part of me keeps thinking: "Ditch the rush DIY job and go with these balanced visuals." Dilemma's, dilemma's...


Alright guys, crank it up a notch and give me another blast from the Spice-Weasel! Automatically Appended Next Post: In the mean time, I've been playing around a bit with other small decal designs. Such as warning signs, something to go on the side doors, name of the pilot, name of the craft, and even a back sticker that'll be tucked away on the back. ^^
As reference, the total width of the widest decal here will be 4cm.

26790
Post by: Gitsplitta
Yeah, you're right... the gold is best.
Why would they paint a portrait of an individual on the side of the vehicle? While they may be visually more appealing... they don't make as much sense to me... if you get my drift.
32676
Post by: Meph
Gitsplitta wrote:Why would they paint a portrait of an individual on the side of the vehicle? While they may be visually more appealing... they don't make as much sense to me... if you get my drift.
lol, exactly my dilemma. Somehow I had a hard time putting it into words, but you nailed it!
It's the choice between recognizable and illustrative artwork vs trying to put the design in the 40th millenium on a craft belonging to demi-god warrior monks. The last choice is waaay more appealing but more difficult to execute without making it into a huge project by itself. In the end it'll be only a 6cm x 2cm decal so want it to be a good compromise between time and effect.
26790
Post by: Gitsplitta
Got it! Hmmmm.... If I have an epiphany... I'll let you know.
32676
Post by: Meph
Oh, now I'm curious. ^^
26790
Post by: Gitsplitta
Well... I haven't HAD the epiphany yet... just sayin' if I do, you'll be the first to know.
7416
Post by: jabbakahut
Just found thread, have so much to go back and look at. Awesome. That modification of the Storm Raven looks similar to the Storm Eagle, I almost thought something was up.
32676
Post by: Meph
Gitsplitta wrote:Well... I haven't HAD the epiphany yet... just sayin' if I do, you'll be the first to know.
lol, I must admit I completely misread that. Must've been my hopeful expectation.
jabbakahut wrote:Just found thread, have so much to go back and look at. Awesome. That modification of the Storm Raven looks similar to the Storm Eagle, I almost thought something was up.
Cheers mate! Yeah, when I stumbled upon that picture of the Stormeagle I did have small ' wtf' moment. It seems that over at Forgeworld they didn't like the original Storm Raven that much either. That Stormeagle is going on my shopping list for sure!
32676
Post by: Meph
It's funny how little secondary colour I feel like adding to the model. I think that all details have been prepped to start with the weathering. Stuff like the grilles on the back, the landing gear and other similar details will get their colour during weathering, no need to over-define them now.
The decal sheet has been prepped and will be printed during the week and then there will be some more substantial progress.
At first I wanted to paint the thrusters and engine intakes metallic, but after an experiment with bronze, I decided to go with that. It contrasts nicely and fits in the rest of the models painted so far.


26790
Post by: Gitsplitta
That is glorious.... there's just no other word for it.
46867
Post by: peebzguy
O_O +1 for amazing craftsmanship!
33919
Post by: Moltar
That looks 100% Badass! That beast will be glorious when the paintjob is complete.
55858
Post by: good eye sniper
That is simply awesome,cant wait to see it finished.
I want three of em!!!
32676
Post by: Meph
Cheers guys! I'm happy my frankenflyer is being so well received. ^_^ I growing its lines so much myself, I wish I could mass-produce it. But sadly I have neither the time, the equipment, nor the skill to cast the custom parts in resin or such. Hmmm on a blue moon perhaps a collaboration with someone? I'll have to ponder on that...
In the mean time, I was going through some boxes and to my big surprise I rediscovered these. Oldskool vehicles ftw! There are some of the first vehicles I ever painted, with Rhino #7 being the absolute first. I guess that puts these vehicles somewhere between 20-23 years ago. It's very funny to see my early attempts at weathering and infatuation with etched brass details and early attempts at conversions. I'm feeling tempted to give at least some of those vehicles and update, and maybe even finish that razorback after twenty years, lol.
So, without further ado, some vehicles from the depth of time. Enjoy!

Oh, and look what gradually evolved on my table over past week while waiting for my mate with the colour laser printer. The honour guard squad for the new army! Right now they just received a wash of thinned oil paints and they're ready for some cleanup and finishing. It's amazing what one can do on a week of being home on doctor's orders.
Comments and crits are welcome as always. And yes, there are some mold lines that were glanced over by laziness and lack of zoom-o-vision. ^^

26790
Post by: Gitsplitta
Love to see those old vehicles Meph... and your painting and modeling of them was pretty darn good for the era! Love the little extra details you snuck here and there. The barbed wire spool especially.
Honor guard looks great.. love the gold and the metal swords (I should remember to do that once in a while.)
32676
Post by: Meph
Cheers mate! Yeah, it was a trip down memory lane. ^^
More Hone Guard! Just some minor cleanups needed here and there, and basing.

22192
Post by: whalemusic360
Particularly like that first guy. Simple yet embellished.
27147
Post by: Solar_lion
Very nice gold! .. Aparently I still need to work on my oil weathering . Thanks for providing me with great examples to compare.
SL
32676
Post by: Meph
Cheers guys!
SL, always glad to be of assistance. If you have any question about oil, don't hesitate ey.
Here's some progress on the Death Company. The photos are not that good as I was losing daylight very fast and the veranda light didn't offer much solace either. I'll take some better ones soon but here they are. The marines just had their oil paint wash but they need some cleaning up. Some red area's I'll go over with a fine cotton stick damp with turpentine and polish it up here and there.
I went with the same limited palette as the rest of the marines and it suits them nicely I feel. Bronze, metal/silver, green for detailing, muted grey-green for the loincloth.

27147
Post by: Solar_lion
Nice . love the darkened look. They have a very cast Iron feel. Heavy and hard hitting.. The greeen works well. never thought about doing the braiding in any color other than red.. nice.. give me new options.. humm
Sl
26790
Post by: Gitsplitta
Beautiful work Meph... really takes skill to get them to look like that without relying on a riot of colors like most of us do.
32676
Post by: Meph
Cheers! Coming from you guys that means a lot.
As someone on another forum was interested how I did the black and the red metallic, here's the how-to.
[RANT] First I mixed up some paint alchemy-style, I don't know the exact ratio's anymore but it's some bronze, some metallics like Boltgun Metal and some silver, some dark red, some Blood Red. I thinned it with red wash and red ink as well as some thinner. I think I also added some Vallejo's metallic medium. It was really just trial and error, slowly mixing little bits together to get the right tone of red metallic and then adjusting again because as soon as you add non-metallic paint you tend to matte it down quickly, which you want to avoid.
I highlighted by taking some of the base mix apart and adding some silver. In this case, you lose the red shade very quickly and it turns pinkish. I balanced that with a wash or two of thinned red ink, highlighting again and re-shading with some very thinned red ink with a little bit of yellow/sepia ink.
At one point, I also applied a glaze which I made by mixing Blood Red with a lot of water. Using thinner to make washes and glazes with add a milky sheen and kill the transparency. Actually, best water to add is demineralized water, as used for ironing (take ye basic unflavoured kind of course). Dead-cheap and the lack of calcium is better for the airbrush as well keeping your home-brewed paint mixes in little pots for later.
I'm sure I'll be able to streamline the mixing and workflow in the future as I intend to expand the DC but it was fun experimenting with it. I found out very early on that if you add too much light gold to lighten the red metallic it tends to go back to a bronze-ish colour very fast, and with just silver you go to the pink side immediately. I really wanted to keep it as red as possible, hence the experimenting.
I used an airbrush to spray on the washes to get a more even coating. And all washes were also heavily thinned with water, easily 1:5.
So this was done after I made the red highlights for the black. I drybrushed black with a little bit of red and maroon brown, then with more red added, the some orange and finally with almost pure 'Ice Yellow', which is a brilliant colour btw for many a colour. Between every consecutive lighter drybrush, I sprayed the model with black ink, mixed with red ink, thinned with water, roughly at 3:1:4.
the reason I did it like that was to blend in the highlights with the black, emphasize the red tint, but try to preserve the 'lightness' of the highlights. Using unthinned inks would darken the colours way too much and obscure the underlying tints. Layering it up like this allows to give tint and depth to a dark colour without negating the added colours too much. the aim was to get a really deep black with a red sheen, and not a dark brownish-red with black shading.
The spray on washes for the metallic red were done over the entire model to this helped to enhance the reddish tint on the black. Although I do think I did sneak in one very light drybrush touch-up on the armours edges between the washes.[/RANT]
I now consider them to be finished. The bases will follow at a later stage, as I'm not fond of the act of basing. Tedious...


And a high res piccie of the lads together.
Tadaaa
The pictures are not that great sadly, as the weather is freaky... sunshine, cloudy, rain, sunshine, hail... Sadly the lack of space prevents me from setting up a decent indoor light box.
54386
Post by: reps0l
Wow, these look great. You should bottle up your red metallic mix, very awesome.
You planning on taking pics with their backpacks/jump packs?
32676
Post by: Meph
Hehe, done! I'm keeping in a airbrush jar and I'm going to keep that mix alive as long as I can. ^_^
Yeah, one I get round to painting backpacks, I'll definitely take some new pics. They'll be low priority though, I think next up I'll paint up the sang. guard or the land speeder squadron.
So here's the pipeline minus the Stormraven.
Probably about a few months to a year's worth. ^^ And there's definitely going to be a Contemptor Dread to be added, and a Stormeagle, maybe a librarian, and a chaplain... so many ideas, so many ideas...
Hmm, now I'm wondering, which unit would you guys pick to paint next?
-The all Heavy Bolter Dev squad
-The Sanguinary guard
-A Land Raider
-A 5 man terminator squad
-A Rhino/Razorback/Baal Predator
-A Land Speeder squadron
Take yer pick. ^^

31320
Post by: Knightley
The Gold base on the guard, please do tell!
32676
Post by: Meph
Actually, pretty easy. I mixed up a bronze made up off of Vallejo's Tinny Tin, Bright Bronze, and GW's Burnished gold to a ratio of roughly 2:1:1 so you get this:
Then just smother it in thinned Vallejo's Smoky Ink. (That ink is usually a bit thick).
And finally I just drybrushed them with every gold variant that GW has, just consecutively progressing through the lighter tones, ending with a light touch of silver. The main key here was to use a very, very dry drybrush so you see the dust flying off of the edges.
And then you end up with this.

tadaa Automatically Appended Next Post: Oh, apparently I did some extra steps as well. Here's a copy-paste from the original post on page 1:
The base coat you see in the previous post is a home-brewn mix of the Vallejo tin colour and some golden metallics. I then applied layer of two, three of ink. First smokey ink thinned with Klear and a bit of water. Then I did one layer of thinned sepia ink (the one from GW) with a little bit of brown mixed in, thinned with klear & water.
After the ink was dry I just gradually drybrushed the whole lot with a rather large brush and basically went through all the standard shades of the GW golds, ending with a very gentle drybrush with mythril silver. The key here was a very, very dry brush.
26790
Post by: Gitsplitta
Do the Sanguinary guard. You've got such a nice start on them already.
54386
Post by: reps0l
Sanguinary Guard.
And damn you with your awesome custom blends!!!
46867
Post by: peebzguy
Gitsplitta wrote:Do the Sanguinary guard. You've got such a nice start on them already.
This. I can see such great potential in that base... let's see it Meph!
26790
Post by: Gitsplitta
Oh Lord peebzguy... your little banner makes me laugh so much!! Well done man! *applause*
27147
Post by: Solar_lion
Sang guard.. blown away on how " rich" that looks as a base.
Awesome.
SL
46867
Post by: peebzguy
Gitsplitta wrote:Oh Lord peebzguy... your little banner makes me laugh so much!! Well done man! *applause*
As much as I would love to call it my own, alas, it is not. However, I fly the banner with pride
32676
Post by: Meph
Hah! 'tis a good banner indeed. Cheers you up, it does.
Sanguinary Guard it is! Although I also finished putting the last speeder together. I can't magnetize the weapons yet as my hand drill broke and the drill bit that's the size of the magnets is way too big for my pin vice. And I'm not going to use the Dremel for a job that requires about 20rpm. ^_^
For the Sang. Guard I think I'll leave them as golden as possible. I'll just paint up the seals & parchment, pipes, armour joints, and some weapon details. I want to keep them as statuesque as possible and if I start colouring all those lovely details it'll turn into a cacophony for sure.
48376
Post by: Capitansolstice
Sang guard
48479
Post by: rikuturso
Great work. Had to read every bit of it. Thank you very much! Very inspiring Stormraven.
39666
Post by: GiraffeX
Those Death Company marines are really nice and dark, it makes the eyes really stand out. Great stuff.
32676
Post by: Meph
Cheers fellas, have a beer, stay a while. ^_^
The Sang. guard post-oil paints and ready for final detailing. I wanted to keep them pretty minimalist and statuesque so maybe I'll just paint up some blood drop gems here and there besides the eyes. What say you?

26790
Post by: Gitsplitta
Beautiful work, love the green and the gold.
54386
Post by: reps0l
Bad ass man. Needs a little more color for some contrast for my taste, but the armor is sick.
39666
Post by: GiraffeX
I'm intrigued about the use of oil paints, please can you shed some more light on why you use them and how you apply them.
Thanks
32676
Post by: Meph
Thanks guys!
Yeah, I'm hoping that one the eyes are painted in together with the occasional gem that it will balance the look. If needed, I can always add some minor detailing here and there.
As for oil paints, I've done a few rants on it before but as dakkadakka doesn't seem to allow for direct linkbacks to specific posts.
The simple workflow:
-Seal your model with varnish
-apply oil paint mixed with turpentine
-correct if needed using a brush or cotton stick damp with turpentine. At this point it can also be removed completely if need be.
-Fixate using varnish
Here's a copy/paste of two of my earlier posts combined:
After that I sealed both the pilot and cockpit using a spray can of GW satin varnish. And then I made was with black oil paint and turpentine. I just madly applied it over the lot of it and as you can see the oil paint neatly sucks itself into every bit of texture it can find without tinting the underlying colours too much. I took some before and right-after pics to show what it does. I'll let that dry out for now and see if it needs any correcting after but it looks like it's not going to need much.
I just bought the colours I needed off of Ebay from random webshops. My experience with oil paints is that most of them are quite to very good. A general rule of thumb to buy them would be is to buy a true arts brand or high quality modeling. It doesn't hurt to go for the medium-high priced stuff as it's not that expensive anyhow and it will last forever. And you want a paint that has a decent oil medium and high quality pigment, quality does show. Mine cost somewhere between 3 - 6€ a piece.
In general, oil paints are just basically an oil based medium and pigment so there's not much that can go wrong with them. Also handy to know is that the colours names are universal as the paint has been around since hundreds and hundreds of years. The oil paint Burnt Umber for example was first used in 1650...
-Top one is from Bob Ross, the afro'd painting pixie. Actually this black is one of the easiest to thin oil paints I've had so far. Dissolves very smoothly with turpentine.
-Middle one is from a 'true' artsy brand. The colour shade is universal, Burnt Umber, absolutely perfect for grease stains and for rust when mixed with weathering powder.
-The bottom one is from MIG and is 'Shadow Brown', I used that over the whole of my vehicles for shading. Made a wash with it and brushed over the whole lot except the silver metallic detailing.
-The lighter is fine produce bought from a nocturnal Pakistani entrepreneur.
44886
Post by: Arm.chair.general
WOW they have to be some of the best Blood Angels I have seen!
39666
Post by: GiraffeX
Thanks for the info on the oil paints, I'll keep an eye out for some and give it a try.
32676
Post by: Meph
Cheers ACG, I'm humbled.
Anytime, Giraffex. I'll be curious to see the results.
In the mean time.
The lighting conditions were pretty crappy but I decided to take some pics anyhow. The weather has been pretty grey since a few days. Voila, lenzes and gems painted in. A of me senses that some extra colour might be nice for visual impact, but the statue look has really grown in me. As ancient chapter relics, these armours can be easily imagined standing sentry, looking very much like ancient status. Could be a great movie scene, barely lit corridor, harsh shadows, lenzes flaring to life.

Oh, and there are a few details that still need to be painted in, a final sealing coat, and some gloss on the lenzes and gems.
26790
Post by: Gitsplitta
Sweet. Get some gloss coat on those eyes and gems and you'll be all set.
26416
Post by: Young_Logan
These guys are looking really good, does your mate have a blog as well or is he just slow? i'd like to see some more of his stuff as well. I love the storm raven, are you planning on making a second one?
Young Logan
32676
Post by: Meph
Gitsplitta wrote:Sweet. Get some gloss coat on those eyes and gems and you'll be all set.
And i also need to paint the glowly bit on the plasma pistol. *cough*And the banner for the bearer*cough* 
Young_Logan wrote:These guys are looking really good, does your mate have a blog as well or is he just slow? i'd like to see some more of his stuff as well. I love the storm raven, are you planning on making a second one?
Young Logan
Cheers mate. Yeah, he's not really active on these forums much but he did manage to finish quite a few models. I'll ask him to take some with him when he passes by. I'll gladly snap some shots.
I actually already had an idea for a second Stormraven while building the first one. I've got an image in my head for another wing layout, something even more aircraft-y. But the Forgeworld announced the Stormeagle, that's very tempting to buy... and convert maybe...
22192
Post by: whalemusic360
I love your ba. Such a perfect weathered look.
42111
Post by: Epherous
Meph wrote:Gitsplitta wrote:Sweet. Get some gloss coat on those eyes and gems and you'll be all set.
And i also need to paint the glowly bit on the plasma pistol. *cough*And the banner for the bearer*cough*
The banner is the reason one of the guys is missing a hand right?
32676
Post by: Meph
whalemusic360 wrote:I love your ba. Such a perfect weathered look.
rofl! I seriously read 'I love your bra'. Made me flinch down at my chest, which is odd as I have no moobs.
Epherous wrote:The banner is the reason one of the guys is missing a hand right?
Aye, you hit the nail on the head.
32676
Post by: Meph
Just to show that I've not been sitting still. The next batch basecoated, three thinned layers. The paint is still wet even and most likely they'll need another coat.
It's the land speeder squadron & magnetized parts, and the all- HB Dev. Squad. The SR is on hold as I still didn't manage to print the decals.

26790
Post by: Gitsplitta
That's a LOT of red there matey... looking forward to the "tidy up".
32676
Post by: Meph
Me too, as there was masking take involved on the speeders. ^_^
32676
Post by: Meph
Anywhoo, progress!
First up the marines and speeders received 4 drybrush highlights. Blood Red, orange with some blood red, Ice Yellow with some orange, and Ice Yellow. I never cleaned out my palette so the very few leftover colours from the previous run were mixed in with the fresh, lighter paint.
Then they received three spray on washes, applied liberally with the GW spraygun.
Two washes red ink, the new GW red glaze and demineralized water to a ratio of roughly 2:2:5
One wash with more of the darker red ink to it was more of a 3:1:5 mix.

Now the red is ready on the models although I might accent some edges a bit more with a very light and dry brush with Vallejo's Ice Yellow.

So from now on I'll focus on the speeders and finish the dev. squad after that. It's a smoother workflow if you can focus on one type of unit. And the Land Speeders have extra, magnetized parts so that's quite a bit to paint anyhow.
As an excuse to clearly distinguish the different units in the Land Speeder squadron, what better way than stripes, right? Also, it's the only way to make an already red vehicle go faster, innit? ^_^

Young_Logan wrote:These guys are looking really good, does your mate have a blog as well or is he just slow? i'd like to see some more of his stuff as well. I love the storm raven, are you planning on making a second one?
Young Logan
Here ya go! He came over this afternoon and we had some good amount of painting done. Here's a pic of one of his old models which he's updating (painted +- 10 years ago I think). He just added in some details and is painting up a Forgeworld dreadnought base for it. This is the pre-oil paint stage, which is drying atm.
I'll see if I can get him to bring some more of his stuff.

26790
Post by: Gitsplitta
You're a brave man to do that striping on that complicated speeder... wow. Well done.
32676
Post by: Meph
lol, yeah, it was rather fiddly.
48376
Post by: Capitansolstice
Pretty stripes!
32676
Post by: Meph
High-Res Picture Time!
The group picture's a bit fuzzier than I thought but you get the general idea. I did take some high-res pics of the individual units as well.
I included some easy-to-unbox oldskool mini's which were painted right before my almost 10-year painting hiatus, so you can see the difference. If I dug up all my old BA mini's I could easily add several thousand points worth of mini's; 4-5 marine squads, around 30 terminators, a dozen vehicles, lots of characters, some weird and odd conversions, etc etc. And that's just my Blood Angels, I've got loads of other ancient stuff as well, as well as a dusty Eldar Alaitoc army.
I'm thinking to either update/finish that Captain, or either remake it using new model parts.
Oh, and I forgot my dreadnoughts, three of them, all old metal ones. I kinda overlooked them as they're spread around on book shelves...
There are currently another Land Raider, and a Rhino/predator/Razorback waiting to start, and I've got my eye set on a Contemptor, a Stormeagle, Librarian, and Assault Squad. In that order of eagerness to buy/paint.
Army
http://postwarvandal.com/Meph/Land_Raiders/BA/IMG_4960.JPG
Units
http://postwarvandal.com/Meph/Land_Raiders/BA/IMG_4963.JPG
http://postwarvandal.com/Meph/Land_Raiders/BA/IMG_4965.JPG
http://postwarvandal.com/Meph/Land_Raiders/BA/IMG_4966.JPG
http://postwarvandal.com/Meph/Land_Raiders/BA/IMG_4968.JPG
http://postwarvandal.com/Meph/Land_Raiders/BA/IMG_4969.JPG
http://postwarvandal.com/Meph/Land_Raiders/BA/IMG_4970.JPG
http://postwarvandal.com/Meph/Land_Raiders/BA/IMG_4971.JPG
http://postwarvandal.com/Meph/Land_Raiders/BA/IMG_4972.JPG
http://postwarvandal.com/Meph/Land_Raiders/BA/IMG_4973.JPG
http://postwarvandal.com/Meph/Land_Raiders/BA/IMG_4976.JPG
http://postwarvandal.com/Meph/Land_Raiders/BA/IMG_4977.JPG
http://postwarvandal.com/Meph/Land_Raiders/BA/IMG_4978.JPG
Enjoy!
33919
Post by: Moltar
Gorgeous! Love the whole army shot.
32676
Post by: Meph
Lol, somehow I completely overlooked the dreads. : rotfl:
I actually have four of them. All metal, once really old, two old and updated at the time I started my FW Marine, and one old but never finished.
Here's three of them (old photos):


39890
Post by: cassar
very impressive Meph very impressive.
32676
Post by: Meph
Cheers mate!
Proof that I haven't been sitting still! The tedious, tedious job of painting the parts black has been done so now I can move on the the slightly less tedious job of painting all the details in and applying the decals.
I've hit a snag though, my airbrush broke so I've been looking around to buy a new one, and an upgrade at that. I figure that after 4 years of suing a cheap one, I can move on to something better with a budget between 100-200 Euro. I've been going nuts with searching. So many brands and types. I'm definitely going for a dual action one, but I'm still on the fence if I should go gravity feed, or bottom feed... Also, what needle diameter.. choices choices! I'm looking for something not too small as I don't intend to go for ultra-fine airbrush work, but rather that can handle some volume and large surfaces as well as work in medium-to-fine detail, as well as being sturdy and easy to use. As it's going to be a respectable buy in terms of cash, I could use any suggestion and experience any of you guys had with the 'better' brands and types of airbrushes. I'm sure I'll be able to pick out something decent by myself but any positive experiences are welcome, such as ease of maintenance, simplicity of mechanics etc etc.

39890
Post by: cassar
bit of a Meph painting Blitz going own this weekend lol
26790
Post by: Gitsplitta
Coming along very nicely Meph.
32676
Post by: Meph
Cheers guys! Here's some more.
Also, some goodies have arrived. I present to you a hunter and its prey. The plan is to have the dreadnought look like he just charged into a failed ambush. one Striking Scorpion impaled on his Assault Cannon bayonette (oh yeah, I'm going there ^^), one SR crunched in his power fist like a rag doll, and one being kicked in the chest so hard he breaks double over the foot.
That project will slowly start as well, but finishing the painting takes priority atm.
The detail painting is going well as well, the gold/bronze is painted in, the Vallejo Aluminium that makes a great silver, a few red metallic blood drops and I drybrushed bolt Gun metal on the other to-be metallic parts. The engines were first drybrushed in my bronze mix and some parts received a secon drybrush with BG metal.
Onwards & upwards!

27147
Post by: Solar_lion
Nice .. they are starting to come together.. the shading on the engines is well done.
SL
57159
Post by: Yellowbeard
Very nice. I second SL's cooment on the engines. Is that just a mix of gold and bronze drybrushed on?
Looking forward to the dreadnought project. Sounds like fun.
32676
Post by: Meph
Cheers guys, I'm rather fond of the engine look as well. ^^
@Yellowbeard: Yup, at the moment it's just one drybrushed coat of the same home-brew I used on the Sang. Guard and other marine's bronze detailing. And just those two inner rims received an extra drybrush of pure Boltgun Metal. Very dry paint and very dry brush though... Automatically Appended Next Post: Well, luckily it wasn't Finecrap, sadly it was Failcast... there was a whole frickin' model missing! Luckily the mold lines are naturally rounded off so it's clearly a miscast and not a dodgy employee with clippers.
I ordered the box from Waylandgames.co. uk , which was waaaaay cheaper than ordering from GW directly and they swiftly asked me to send it back, refund the shipping costs and get me a new box out. Two thumbs up for their service, let's just hope it gets here faster than the 3-4 weeks it took for them to ship out the first box...
And for the rest, no progress, more excuses! Some more goodies arrived, a large scantly clad female (w00h00!) and my new airbrush. I just love the way that gunmetal airbrush looks awesome and would look nicely assorted with my car in case the dash board would have an airbursh mount. ^^
I can't wait to give that brush a blast of air. But first things first, now that I'm back from a short vacation I can get back to painting. The mates and me had our annual 4-day gaming weekend in a house in the middle of nowhere for which i had to prepare and GM a 3-day Shadowrun adventure. We had a blast but the prepping ate all my painting time.

39666
Post by: GiraffeX
The speeders are coming along very nicely Meph.
I'm very excited about your dreadnought project though, cant wait to see that being built/painted.
32676
Post by: Meph
Cheers, mate! I'm actually eager to start on the Contemptor but I'm mustering all my patience to wait for the new box o' squishies to arrive. It'll be hard to poser the fella if he's got nothing to squish.
44232
Post by: DijnsK
gratz on the new airbrush!!
i just got my first one. the cheapy!
mine is gravity fed though, because i only paint small amounts at once its easier for me.
but badger renegade is a good series! im keeping them in mind for a future replacement
how much did it cost you?
|
|


