After waaaaay too much fungus brew, I decided on my biggest project to date! (For those of you that followed my last thread, I guarantee THIS will break your gaming table.)
Here's the base model, an '03 Yamaha XVS1100 classic.
First up, I started tearing it apart. Seats, rear fender, and saddlebags were up first.
I found some electric crap under the seat, I pulled it out and set it aside. (could be important later.)
Next, I ripped the rear fender off.
I then took a break, tearin' gubbins apart is thirsty work. While I got grubs to eat, I had Skrilla (my oldest grot) pull off the front fender.
I then ripped off the front lights and again found more 'lectric doo-dads. (I saved these too. you know, just in case.)
Hmm.. there's a lot of parts. I should label them proppa for later use.
You're doing it! Amazing! First you welded a massive Ork Landa and THAT was a piece of work! Can't wait to tear out my eyeballs over this next project!
You are a madman, and probably one of my favourites. I REALLY cannot wait to see this project finished. If it's even half as good as your other work it will be astounding!
Deunstephe wrote:You're doing it! Amazing! First you welded a massive Ork Landa and THAT was a piece of work! Can't wait to tear out my eyeballs over this next project!
Yup! It should be a doozy.
tarar2d2 wrote:You are a madman, and probably one of my favourites. I REALLY cannot wait to see this project finished. If it's even half as good as your other work it will be astounding!
I hope it's half as good. I'd settle for a 1/3, but I shoot for 100%!
SelvaggioSaky wrote:This is going to be a proper "ride"!
Subbed.
It should be fun to see the reaction of other riders.
averagepainting wrote:Oooo. I've wanted to do this myself but I don't have the know how, money, skill or bike to do so Super exited to see how this turns out
Pffft. Money, time, know how, skill, or a bike shouldn't stop you! All I have is the bike, the rest I'm making up as I go.
Ruglud wrote:American Chopper will have nothing on you... Really looking forward to seeing this 'build'
1:1 scale is always awesome
I dunno, american chopper doesn't make rat-rods. You kinda get a cheat doing it Ork style.
I have an update! This project wont be the fastest, I'm learning new stuff as I go to pull it all off. This episode, I stop tearing apart and start building!
To start the day, I swung by the local Army-Navy surplus store and bought some big-ass ammo cans.
I measured out the cans and figured out my frame needs to be 2.5 inches outside of the frame. Here's a quick mock-up.
The basic idea is to build a frame that will hold the ammo cans, rather then hard mount them. that way I have something I can ride around to tournaments with and bring my army, then build the Dakka guns for going to cons and GamesDay.
First up, I measure out the bag frame, cut some flat stock, and bend it. I'll be using the screw mounts on the existing frame, rather then welding directly to it.
Then I bend it again! isn't metalwork fun!
Here's the two pieces ready for drilling.
Next I drill a pilot hole.
After that I drill out to the size I need.
Once I had the sides done, I screwed them into place and then tacked a piece of pencil rod to hold them into place while I built the back of the frame.
Thats it for today!
I do have a quick question though. I've made this project pretty detailed, but I'm wondering if it's overkill. do y'all want me to keep it like this or just post highlights when major steps are completed? In either case, thanks for looking!
Whoa! Quite a lot of responses. I'm glad y'all like it!
Hive Fleet Lazarus wrote:Holy crap, this will be amazing. I will definitely be following this.
Thanks! I'm shooting for amazing.
BunkerBob wrote:No skippin' on dah gubbins!
It will walk a fine line between oceans of detail and keeping a clean look from a distance. My plan is to try and please motorcycle enthusiasts, while keeping all the detail that gamers will love.
Mo Dakka wrote:whaaat?!?! You are a real life mekboy!! What next, a life size Battle wagon maybe? ooooh , Are you gonna paint it red?
I'll finish this project before deciding what next. Once this is done I'll want to show it off, Hopefully work will allow me to take off to visit every store within 300 miles for tournaments. As for the paint job, even though I align with Badmoons more then any other clan, I plan on making a traditional Evil Sunz bike. (It's just proppa.)
uk_crow wrote:This has the potential to be epic, subbed.
It would be bad if I fell flat on my face. I hope to live up to the task!
Muzzah wrote:This is fricken awsome. Bow down to the master
kitch102 wrote:Sub'd
Updated.
KingmanHighborn wrote:Oh I'm going to follow this religiously.
Gork or Mork?
Dysartes wrote:Plenty of detail, please, pox
Will do! I like more detailed posts anyways, I just didn't know if a bunch of shop pictures would interest anyone. I'll go with more detail, and hopefully y'all will tell me if I'm being too wordy.
Dakkamite wrote:If it was anything else, and I mean anything else, I'd call you a monster for ripping up that beautiful bike.
But this is art. Roight propa art.
I have another very beautiful bike if that helps, I bought this just to rip up. I even let the previous owner know my plans in case he was emotionally invested. He can't wait to see the final results!
CommissarKhaine wrote:Mekboy ftw. I love this idea, can't wait to see how ot will turn out!
Meks are the best Orks.
Tyranidcrusher wrote:Man you're crazy.
Yeah, I agree.
Tibbsy wrote:You, sir, are totally fething awesome
I cannot wait to see how this goes...
Thanks! I have a few surprises in store, so keep reading!
Zwan1One wrote:This is going to be EPIC!!!!
I'll redefine the word "epic" if all goes according to plan. Alternatively, I'll redefine the expression "epic fail."
sparkywtf wrote:You have to show all the glorious, epic detail.
For sure, the clan has spoken!
Mr Nobody wrote:Question: Will there be rockets? Orks always need rockets.
The rear tail lights will be rokkits.
I have an update! First I want to thank everyone for the kind responses. Trust me, this is gonna get crazy. To give an over-all timeframe, I'm hoping to be done by the end of August. June and July will be tricky, as I'm both working 72 hours a week right now, and I get married late june. I will try and keep the thread afloat though, you find time for things like this.
I'll stop jawin'. I cut three sections of flat stock steel for the rear bumper. I then built a quick jig using welding magnets and a ruler.
I then ground the three pieces to insure a good weld joint.
I then welded the pieces together in the jig, then welded it to the case frame.
I then ground off the weld lines with an angle grinder, and cut off the pencil rod with a cut-off wheel.
Next, I cut and shaped another piece of flat stock and bent it to shape for the rear brace. This piece is thicker then the other pieces, so I clamped it in a vice and bent it by hand. AAAARGH!
I finished bending it into shape, and added a few more pieces of pencil rod to shore up the rear fender frame.
For those of you that play Orks, you may notice the rear bumper shape is similar to the warbike with a tusked trophy rack for the front fender. My plan is to recreate that front bumper on the rear of the bike, with the tusks curving to the radius of the rear wheel.
Next up, I had to change gears for a bit. I removed the air filter cap. I really want to sculpt on the bike a lot, but the engine dissipates heat through every surface except the air cover. (They actually recommend flat back and no chrome for serious racing engines!) Being as the the air cover is the exception, I removed it so I could sculpt an Evil Sunz face onto it.
You cant paint over chrome, so I had to remove it. Sandblaster HO!
Once that was prepped, I went back to tearin' bike parts off. My collection of tossed parts is growing!
I pulled the cover on the speedometer to make sure I could replace it with a handlebar mounted one.
No issues, after checking with some other Meks and a book on motorcycle wiring harnesses, I should easily be able to replace it. I replaced the cover so I wouldn't lose pieces, and then pulled off the gas tank.
Next up, Sculpting! Front fender frame! Hardbag mounts! Gas tank blueprints!
For those of you that play Orks, you may notice the rear bumper shape is similar to the warbike with a tusked trophy rack for the front fender. My plan is to recreate that front bumper on the rear of the bike, with the tusks curving to the radius of the rear wheel.
Maybe you could get antlers from a deer and use the points to represent tusks?
This is going to be incredible. I cannot wait to see the final result! I do hope that you don't have any trouble getting it approved to ride on the road.
Is there anything you don't have in your Garage? This is awsome, I love seeing in progress pics, Don't be afraid to post them if you have them. I can't wait to see this beast take shape.
This is beyond epic. I can't wait to see the progression of this project! I hope you are able to do some proper WAAAAAAAAAAAAAAAAAGS while riding that thing!
Ill be following this. I cant wait to see the Big Shootas. Maybe have a button on the Handlebars that makes an LED light in the gun barrels light up and creates a popping sound to use in place of a horn?
Thatguyhsagun wrote: Ill be following this. I cant wait to see the Big Shootas. Maybe have a button on the Handlebars that makes an LED light in the gun barrels light up and creates a popping sound to use in place of a horn?
I think that would depend on how fast he wants to get arrested.
Thatguyhsagun wrote: Ill be following this. I cant wait to see the Big Shootas. Maybe have a button on the Handlebars that makes an LED light in the gun barrels light up and creates a popping sound to use in place of a horn?
I think that would depend on how fast he wants to get arrested.
Well this is one of the coolest ideas ever! I know some guys who race in the demolition derbies all the time. Maybe I should ask them to make one orky too! can't wait to see where you're going with this. Have you sketched out your ideas, or are you just going to stick stuff on until it looks good? The second way would be more ork like, but if you do have a plan, can you post your sketches?
Damn, son...this project is the single most ambitious and impressive in scale project I've seen since that 1:1 Dreadnought costume from a couple years back. I will be watching this project most attentively. Good luck to you, you crazy son of a gun.
Wait, what in the... HOLY GOD-EMPEROR KHORNE NURGLE TZEENTCH SLAANESH KHAINE AND ALL THE GODS THAT EXIST (and of course, not to mention Gork and Mork...)
I am shocked, stunned, and impressed all at the same time. Please do make sure that this is safer than the average Ork contraption.
And all you need is an Ork suit to ride it after this.
Madness, the best kind of madness reserved only for people who make amazing things. I just hope it will be able to move with all the extra metal and orky attachments.
For those of you that play Orks, you may notice the rear bumper shape is similar to the warbike with a tusked trophy rack for the front fender. My plan is to recreate that front bumper on the rear of the bike, with the tusks curving to the radius of the rear wheel.
Maybe you could get antlers from a deer and use the points to represent tusks?
Still looking great, keep it up!
Thanks! I'm looking forward to the time off and gettin' hitched!
I'll be making the trophy's out of foam and clay, mostly from self-preservation. If I happen to wreck, I don't want to be impaled on my own art project.
Kavish wrote:This will be one of the coolest things ever! The cops will likely ask a few questions about the two big guns on the side though!
It's all about context. a motorcycle with guns on tuesday night on the streets is warrant for arrest. but fi it's at Strugis, Gamesday, Daytona beach, or Comicon its all good. (for that matter if it's at Black Rock City, a flamethrower would be proppa.)
Xendarc wrote:This is going to be incredible. I cannot wait to see the final result! I do hope that you don't have any trouble getting it approved to ride on the road.
I plan on keeping the bike DOT approved, if that sets your mind at ease.
jason1977 wrote:first time you ride it and get pulled over be sure to take a picture of the officers face
Again, I dont plan on getting pulled over. The bike will have two modes, awesome and super-awesome.
Muzzah wrote:Is there anything you don't have in your Garage? This is awsome, I love seeing in progress pics, Don't be afraid to post them if you have them. I can't wait to see this beast take shape.
Keep up the good work.
One of the perks of my job is free reign of the shop while I'm not working. The entire build is at a machine shop I run.
CptJake wrote:Are you going to keep it street legal (have all the required lights/turn indicators and such)?
For sure. The bike will have two builds, one thats for bike rallies and cons, and one thats for riding to tournaments. Only the guns will be illegal, but I'm building it to switch as needed.
Zeke 169 wrote:rather than 'tusks' you can do the metal mek teeth, seems to be right up your alley and should be relatively easy to do.
for sure. I'll be using a lot of plastic, actually. I have a 400 pound limit, including me.
good luck with this - definitely love the detailed pics, keep 'em coming - I'll be checking up on this daily (if not more frequently)
absolutely awesome - sub'd!
good luck with the wedding! Hope she knows what she's getting into with the hobby!
She knows. Oh, she knows. and she still wants to marry me!
Squidbot wrote:Marry me.
Nope.
cpyke wrote:Well this is one of the coolest ideas ever! I know some guys who race in the demolition derbies all the time. Maybe I should ask them to make one orky too! can't wait to see where you're going with this. Have you sketched out your ideas, or are you just going to stick stuff on until it looks good? The second way would be more ork like, but if you do have a plan, can you post your sketches?
I'll have sketches once I have an idea what my limits are. I need to learn about all the systems of the bike first.
rigeld2 wrote:http://tailgunnerexhaust.com/
You know you want to...
Wait till you see what I have in mind for exhaust!
The Shadow wrote:Awesome project!
I'll be expecting a life-size Power Klaw to go with it though!
A cosplay costume may be in order. but first, the warbike!
-Shrike- wrote:This is awesome. Please film the reaction when you get pulled over!
Cops get mad when you film them. trust me.
jason1977 wrote:you should ride this into gamesday. right through the front doors......................
I plan on making a Gamesday appearance when it's done.
Evileyes wrote:Marry me?
nope.
morfydd wrote:Nice, Beat me to it was thinking about doing this to a 02 Gold Wing..now I have to think up another crazy project ;o)
I looked at the Goldwing frame, I think it would be much better suited to a Vincent Blackshadow bike, or a Dark Angel Imperium bike.
chuxfm wrote:Can I be your grot rigger please?
Actually, I'm hiring right now. You just need to move to New Orleans, be willing to work a minimum of 60 hours a week, and understand that you may be let go within three weeks time if you don't cut the mustard. I'm on my fourth utility worker in as many months.
4TheG8erGood wrote:I have never seen this much positive excitement in a P&M blog. I can't wait to see how this goes, subbed!
Your telling me! This thread exploded, I only hope I can do it justice!
Before I start the update, some general announcements! First, I love the amount of response this thread has received! I only answered the posts that jumped out at me or had a question, but I really enjoyed reading all of them. I worked extra hard this week because of it, and made a lot of progress.
First, I took off the twin mufflers.
The second bolt was a nightmare, it had fully seized. Thank god for PB. I got it out after a full hour of fighting with it.
with the bolts pulled, I popped off the muffler..
Next, I ordered up the right size exhaust pipe and some rain caps. (here's a picture of the rain caps, a ten foot stick of pipe is boring.)
I really wanted to work on exhaust, but I realized that I needed the hard cases in place in order to bend the pipe proppa. onto making luggage mounts!
I start by cutting some angle iron at 45 degrees.
Soon I have enough pieces, so I grind off the sharp bits.
I then combine the pieces into box beds using magnets. (how do they work?!?!)
I stitch them together using my rudimentary welding skills,
And then use a grinder to hide the flaws.
The outside edge of the ammo cans wont fit, so I grind it down till it does.
Next update soon! And thank you all for the kind words and support! If I missed a question, feel free to ask it again. I had planned on going back to my old habit of responding to every post, but if I did that I'd have no time for the bike! As i said before thanks again for reading this. Trust me, this is gonna get cray-cray.
I'll be making the trophy's out of foam and clay, mostly from self-preservation. If I happen to wreck, I don't want to be impaled on my own art project.
A lot more sensible then my suggestion
Keep it up and keep us excited, you're doing a great job so far!
pretty slick man this is going to be a good project. now i do have a question how you? are you going to Hodge podge the fenders like different pieces of metal with rivets or just weld them together when you get to that stage?
Looks like you're making some progress there, pox - how much more do you think you need to take off the original bike before you start building it back up?
So, I'm really enjoying this, but I want to warn you against one thing... Don't grind away any welding flaws. It ain't "proppa."
In all seriousness... I'm no welder so, if it helps the structural integrity or something then, by all means, grind the welds. If not, then leave most or all of them as-is. A Big Mek wouldn't bother going through all that.
He's going to have to take extra time to make extra big weld lines. Less time since they can be wavy, and generally look like gak instead of "roll o dimes"... but the small weld shown in picture will not suffice for "orky"
skyfi wrote: He's going to have to take extra time to make extra big weld lines. Less time since they can be wavy, and generally look like gak instead of "roll o dimes"... but the small weld shown in picture will not suffice for "orky"
You don't think "small weld" is better than "no weld?"
skyfi wrote: He's going to have to take extra time to make extra big weld lines. Less time since they can be wavy, and generally look like gak instead of "roll o dimes"... but the small weld shown in picture will not suffice for "orky"
You don't think "small weld" is better than "no weld?"
Eric
Aesthetically as an ork bike? I think go big or go home sorta. More or less, big needlessly fat welds, or clean & sleek, and ground down like he has... who knows, make the mek is a finicky git?
So I suppose I would say naw, I don't think a small weld is better than no weld aesthetically. Just looks out of place. Like thumbtacks holding up metal decking on a wall?
alabamaheretic wrote:pretty slick man this is going to be a good project. now i do have a question how you? are you going to Hodge podge the fenders like different pieces of metal with rivets or just weld them together when you get to that stage?
Both. The final level of detail will have both welds and pop rivets, along with a lot of sculpting with two-part epoxy. I'll be using a lot of plastic for the spike detail actually, I again don't want to impale myself should I take a slide.
Dysartes wrote:Looks like you're making some progress there, pox - how much more do you think you need to take off the original bike before you start building it back up?
All that's left to remove is the handlebars. At least I think so.
SelvaggioSaky wrote:I think that welds or not welds, this is going to kill all of us of envy
Lots of welding discussion! The problem is, with a project like this a bad weld to any non-gamer is like a bad glue job to a gamer. I plan on doing a mix of both, as in I wont grind down all the beads. The reasons for grinding down is for a few reasons. either I want to make sure there are no sharp edges, the bead needs to be reduced to make sure the parts fit, or I want it to look as if a single piece of metal was bent into shape. The only place that welding will be critical is insuring the gas tank is sealed, and that nothing will be dangerous.
Update time!
Speaking of removing weld lines, I took a corner angle grinder and cleaned up the boxes to insure the diamond plate fit.
Next I took some diamond plate and cut it down to fit the box frames.
I then make sure the plates fit before I drill and tap the screw holes.
before installing them, I fit the frames with a basecoat of heat resistant paint. (the exhaust will be tacked to the base and curve around it.)
I then check the tap chart and drill the starter holes.
I then countersink the holes into the diamond plate.
Dysartes wrote: pox, for those of us who aren't so familiar with metalworking, what do you mean by "tapping" the holes?
Tapping holes are the process where you put screw grooves into the hole. Typically you would drill the hole out first, and then manually tap it with a tapping tool (which is essentially a glorified twist-screw) to create the screw grooves.
Pretty much what Engiwolf said. When you tap a hole, you are adding threads for a screw. This allows me to bolt to the metal directly, instead of a bolt and nut. It has a lot of uses! (for those of you playing the home game, a die does the exact opposite. it adds thread to metal rod or pipe.)
Update!
Now that I have the bases for the hardbags, I start building the frames.
After that, I cut and drill two pieces of angle iron to bolt directly to the existing frame.
All that's left is to join the bag frames to the bike frame. I clamp it into place to measure the final piece.
I cut two pieces of 4" flat stock to fill the gap.
Followed by tacking them into place, and once I'm happy with the results, I weld it.
The ammo cans won't fit snugly, so I grind off one side of the brace-bar.
After smoothing them down, they fit perfect!
AWWWWW YEAH! Now that the bags are in place I can start working on the exhaust.
Now that this update is over, I'm gonna talk a little about the build and the over-arching plans. If you just want pretty pictures, stop reading!
This is something I've always wanted to do, and my job allows me to finally do it. To start, I just did what I usually do, throw myself head first into it and start muckin' things up. At first the guys at work thought I was being my usual weirdo self, but after the first few hours here and there, I started getting a lot of advice. I work with some pretty awesome people, most of them with decades of welding, fabricating, and motorcycle experience. I think it took a little bit of effort on my part for them to realize that with or with their help, I was going to do this project come hell or high water. (and a few of them watched the Landa project so they new I would carry it to the end.) With their help and just general common sense, I formulated a plan over the last few days.
First, I'm going to try and bring all the mechanical parts of the bike together. for this build that means engine, exhaust, seat placement, handlebars, and gas tank. One of the hardest parts of this is I simply can't draw or sketch what I want, due to too many moving parts. I have to understand how all the systems of the bike work, and how they work together. I have ridden bikes for quite a while, but I had little knowledge about how they worked. I know a lot more now, and I'm learning daily. Once I fully understand whats needed for everything, I'll be able to make cosmetic sketches. Until then, its implementing basic ideas one at a time, then refining.
Once I have all the mechanical parts, the next step is electrical. This involves adding all the parts to the bike to make it street legal, including headlight, front turn signals, rear turn signals, brake light, and gauges. This will be tricky, as a lot of that needs to be built into the cosmetic framework. (for example I have horn-shaped turn signals for the front, so I at least need the placement of the skull faring.) This will be the longest and most tedious step, as I will be wiring it all into the existing electrical harness, not to mention placing sensors on all the applicable motor parts.
Once that is finished, I need to complete all the cosmetic pieces. This is every plastic and metal detail that will bring this sucker to life. I have a lot of wild ideas, that are being fuels by the guys at work. I think this step will be a constant work in progress. As I learn more about electronics, animatronics, fabricating, and motorcycles, I'll probably make tweaks here and there. I'll also need to paint it, which will include the help of yet more people, as I know little about automotive airbrushing.
Lastly, I'll have the "Gamesday" show build, which will include The Dakka guns and extra gubbins I wont normally have on the bike. When I started, the first plans came to what I wanted the bike for. I realized that having something I could ride to various games stores (within 250 miles or so) would be fun for tournament and general game play, but I also wanted to have "full dress" for cons and Gamesday. Hence, building extra parts to drag to the big show events. (not to mention motorcycle gatherings!)
I hope this helps give you an idea of where the project will go. Obviously at work I'm limited to whatever time I can scrounge, so I wont always focus on things in that order, but it will serve as a good roadmap to get me to completion.
Looking at the placment of the ammo boxes, have you thought about bringing the exhaust up over the top of the bracket the are attached to? It would require you to raise the seat and add in a heat shield so you don't melt your rear, but having the pipes up top would be "proppar!"
When looking at the rear brak lights/turn signals I have 2 ideas for you:
1) use a large signal and cut a metal orky glyph to fit over top. That when when the light is activated you would still see it but it would also show the glyph.
2) Since Orks don't need lights, try a flush mount led bar like this: http://www.empirechromeshop.com/c-652-long-led-lights.aspx They are easily hidden and don't show up untill they are lit, you might be able to hid them under the ammo can support
I am wondering about your guns. are you planning on making the ammo cans into the base of the guns for your gamesday version? or will you have guns that sit in that place instead of the boxes?
I'm curious, have you thought as to adding more storage space? I'm trying to imagine you cramming a small suitcase for clothes and stuff and another bag of your gaming models onto that.
Squidbot wrote:Man, this just gets better. Good luck with the wiring, that will be tedious as you said, but so worth it. Can't wait to see the gamesday version.
Not looking forward to the wiring. I will have to learn how, and I have a lot of small electric add-ons in addition to the standard parts.
optimusprime14 wrote:Looking money so far!
Looking at the placment of the ammo boxes, have you thought about bringing the exhaust up over the top of the bracket the are attached to? It would require you to raise the seat and add in a heat shield so you don't melt your rear, but having the pipes up top would be "proppar!"
When looking at the rear brak lights/turn signals I have 2 ideas for you:
1) use a large signal and cut a metal orky glyph to fit over top. That when when the light is activated you would still see it but it would also show the glyph.
2) Since Orks don't need lights, try a flush mount led bar like this: http://www.empirechromeshop.com/c-652-long-led-lights.aspx They are easily hidden and don't show up untill they are lit, you might be able to hid them under the ammo can support
Keep at it! I love a good fabrication build!
I have the pipes in this update, The basic placement at any rate. (still bare bones, I'll be adding all the later detail once I know it's working.) I think you'll like the end results! As for the lights, I've already purchased my light package. I'm turning the rear signals into rokkits, and the front will be built into the horns. I found some cool horn-tip turn signals. If I dont like them I'll use what you posted or something similar, I have them hidden on my other bike. (a Yamaha Road Star bobber.)
keltikhoa wrote:I am wondering about your guns. are you planning on making the ammo cans into the base of the guns for your gamesday version? or will you have guns that sit in that place instead of the boxes?
Not sure yet. I'll see once I build the back fender rig. The guns will be the last thing I do.
Enigwolf wrote:I'm curious, have you thought as to adding more storage space? I'm trying to imagine you cramming a small suitcase for clothes and stuff and another bag of your gaming models onto that.
I will have more storage on the back, but really the bike is designed for day trips. I figure no more then 250 miles, and that would be pushing it. (and I would just need a change of cloths.) For further trips I'll use a bike trailer.
Update!
I finally get to make the tailpipe base! I start with ten feet of exhaust pipe.
I then bend and cut after lots of carful measuring.
Once I got the pipes ready, I have to re-visit that horrible screw-hole that I took an hour to remove the screw. I have new screws, but the hole is mangled. On top of that, I don't have a metric tap set. I have to make one! I take one of the new screws and grind a top-groove into it. You can't tap a fresh screw-hole with it, but you can clean out an existing one.
It takes over an hour to slowly re-tap the hole.
Once I got the bike-pipes on, I buy a few connectors to mount the new pipes. I'll use these to make sure everything works before I weld it.
I want them to hold better, so I replace the cheap screws with hex cap screws. Plus they look cooler.
Perfect!
I mount the new pipes with a little finagling.
The bailing wire is to hold it in place so I can make mounting brackets.
Lastly I add rain caps.
I fire it up, and it is loud as war without the mufflers. rain caps work like a charm.
I'm pretty happy with them, now that I know how they work I can mix it up so they look proppa orky.
Up next is the beginnings of the gas tank and Iron Gob.
As an Ork player and motorcyclist I'm stoked about this build. Cant wait to see it done. May have to build me one and join your Mob.
That being said, remember to check your GVWR so as not to overload an axle, or overload brakes...and keep the balance on weight distribution so as not to destroy your handling. I'm no bike builder but confirming safety is a must. I'd hate to see something so cool go wrong.
Something that occured to me earlier today, pox - are you planning on adding more of a bracket to the outside of the ammo cans? It looks to me like they might be at risk of falling out when cornering at present.
Enigwolf wrote:I'm curious, have you thought as to adding more storage space? I'm trying to imagine you cramming a small suitcase for clothes and stuff and another bag of your gaming models onto that.
I will have more storage on the back, but really the bike is designed for day trips. I figure no more then 250 miles, and that would be pushing it. (and I would just need a change of cloths.) For further trips I'll use a bike trailer.
Then you need to make a suitably orky bike trailer when you're done too!
If you are going to be transporting armies in those ammo boxes, how hot are they going to get right over the exhaust pipes? It would be a shame if plastic/finecast minis turned to goo because of heat issues. Or whatever foam you use to pack them melts. No idea is this is an actual issue, but you don't want this to be the "gotcha" at the end of the project.
Nevelon wrote: If you are going to be transporting armies in those ammo boxes, how hot are they going to get right over the exhaust pipes? It would be a shame if plastic/finecast minis turned to goo because of heat issues. Or whatever foam you use to pack them melts. No idea is this is an actual issue, but you don't want this to be the "gotcha" at the end of the project.
Looks awesome overall!
Some heat resistant spray on the exhaust would help
I used to use this stuff to protect sensitive componets for turbo heat is cars
Brother Paen wrote:As an Ork player and motorcyclist I'm stoked about this build. Cant wait to see it done. May have to build me one and join your Mob.
That being said, remember to check your GVWR so as not to overload an axle, or overload brakes...and keep the balance on weight distribution so as not to destroy your handling. I'm no bike builder but confirming safety is a must. I'd hate to see something so cool go wrong.
Ride safe and Waagghh On! Paen Out.
Trust me, I got safety first. The bike has a stock weight limit of 400 pounds. I'm 260 on a bad day, so that leaves 140 for both add-ons and luggage. Before I paint anything I'll weigh the pieces to check total weight. I'm only using steel for framework, I'll skin it with high impact sheet styrene.
rigeld2 wrote:Brakes can be upgraded easily but definitely watch out how much weight you're adding.
See above. I don't really want to alter the brakes (aside from upgrading the shoes,) so I'll just make sure both the weight and distribution are within suggested parameters.
Dysartes wrote:Something that occured to me earlier today, pox - are you planning on adding more of a bracket to the outside of the ammo cans? It looks to me like they might be at risk of falling out when cornering at present.
Yes, the base frame is just for them to sit. I'll figure out straps to hold them in place proppa.
Nowlan wrote:You get bonus points if the exhaust output at engine idle is sufficient to make the rain caps flap instead of just sitting open.
Combo bonus if you mount the headlights in a skull on the front fork.
The exhaust stack would also make a good boss pole, if not for how hot they'll get.
Boss pole will go on the other side. Headlight will be mounted under the steel cowskull.
jimbolina25 wrote:Just had a thought of running the exhausts through the ammoboxes (and exiting out the back) and diguising them as guns from the engine.
That would make the boxes useless!
Muzzah wrote:This is shaping up nicely. I cant wait to see this bike looking more orky. I trust a checkered paint scheme is in order?
As the guy below you put it, Red. Also, with checkered patterns!
optimusprime14 wrote:
Nevelon wrote: If you are going to be transporting armies in those ammo boxes, how hot are they going to get right over the exhaust pipes? It would be a shame if plastic/finecast minis turned to goo because of heat issues. Or whatever foam you use to pack them melts. No idea is this is an actual issue, but you don't want this to be the "gotcha" at the end of the project.
Looks awesome overall!
Some heat resistant spray on the exhaust would help
I used to use this stuff to protect sensitive componets for turbo heat is cars
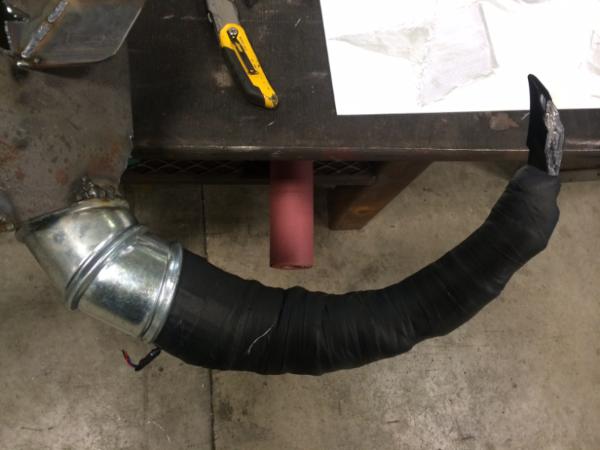
I already purchased 2" black wrap, and I plan on building heat sink tubes to go over the pipes. This will keep people from burning themselves, and make it look more like an Ork Warbike.
Update!
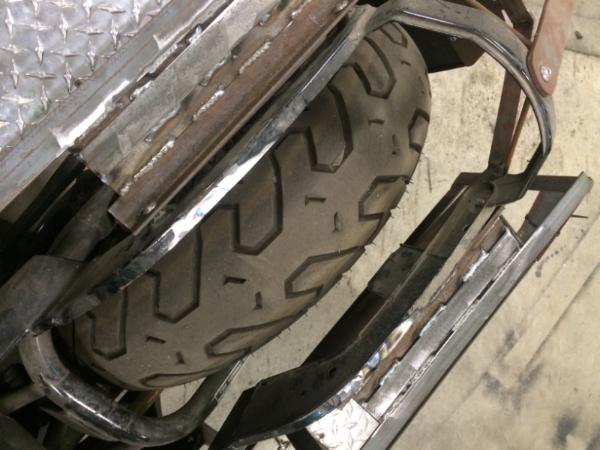
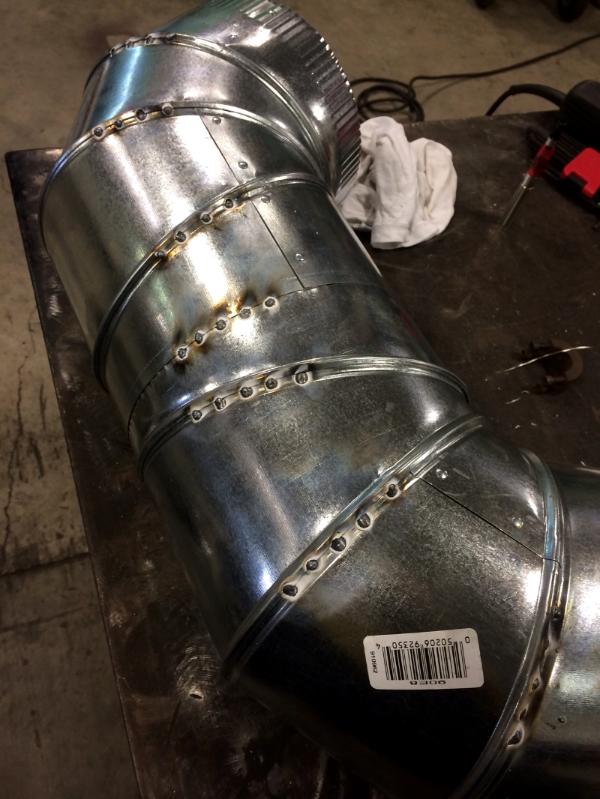
I found the perfect gas tank! a discontinued air compressor. It holds the same amount as the stock tank. (well, .1 gallons less!)
I start by pulling off the compressor.
Next i cut off un-needed bits and grind it smooth.
Smooth and ready to mount.
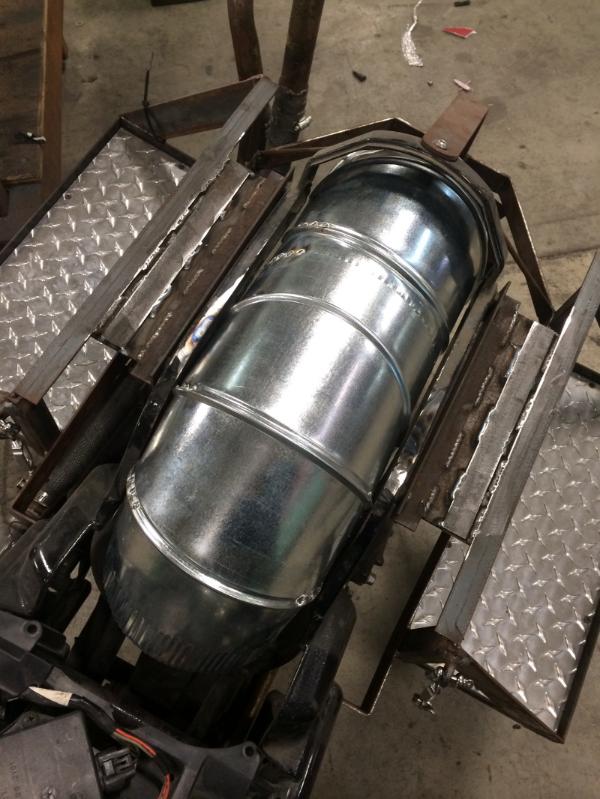
I check the mounting possibilities!
After checking my new drag bars, I realized I needed to mount the tank as close to the frame as possible. Sadly, the air surge box is just too high to make it work! After a few days of research, I figured out how to toss the part. (it will require re-jetting my carburetor, fun!) I order the parts, and went back to hunting.
I found a sweet gas cap from an old bus.
Thats all I have for the tank so far! I should get the new air kit this week, I need to mount it before I determine the final places for the cross-over fuel lines and the petcock. I also need to find a second gas cap for the other side. I have a lead on a warehouse that the owner may let me loot, so I hopefully I'll get the rest of the bits I need!
Wedding went great! good food, good booze, two nights in the French Quarter, and a trip "antiquing," where I found two motorcycle seat options. great week all-in-all.
With the angle of the gas tank, it looks like you are going to have to reposition the valve on the tank to the fuel line if you want to be able to use all the gas in the tank. Ensuring you can pull fuel from (and add fuel to) both of the tanks may be interesting too.
CptJake wrote:With the angle of the gas tank, it looks like you are going to have to reposition the valve on the tank to the fuel line if you want to be able to use all the gas in the tank. Ensuring you can pull fuel from (and add fuel to) both of the tanks may be interesting too.
I realized I wasn't quite clear on how the tanks will work. I'll be plumbing it like a classic cross over tank, none of the current bungs will be used. The petcock will go at the lowest point on te left tank. It will have two gas caps, at the top of each tank. Lastly, there will be a crossover tube at the lowest spot for each tank ensuring I get all the fuel. The petcock will be a basic on/off, so my reserve fuel will be a Jerry can mounted somewhere on the bike for emergencies.
I need to mount it before I can add any of that, and in order to do that I need to mount the seat and finish the max air kit to get rid of te surge box. I'll get a set of pictures to make it all more clear. While I wait for that to all come in, I'll just work on the front fender.
To start with, I got my carburetor jet and filter kit.
Here's a pic of what I'm trying to get rid of.
As you can see, the surge box sits about five inches above the frame. I need to get rid of it to mount the new tank, so I have clearance for the drag bars.
Here's the kit that will fix all my problems. Now I just need to disassemble the carbs and re-jet them.
I read three books, watched some videos, carefully read the instructions, and hoped for the best. I've never done this before.
I was successful in removing the carbs without damaging anything important.
I had originally taken a bunch of pictures of each step and had planned to write up a full description. Over thirty pictures later, I realized that it would be really boring to both read and write out, and this isn't really the forum for it! If you really want to see how it's done, just google re-jetting dual carbs.
Here's the end result!
With a little modification, I was able to get the new tank to sit pretty.
I can now start figuring out how to mount the tank, and then how to plumb it.
In the mean time, I started working on the iron gob. I sat the bike upright, and decided the angle was off and the jaw didn't jut out enough, nor was it level. I fixed it.
I started by splitting the jaw, and reinforcing the joints.
I then cut some angle iron, cut it and fit it, and clamped it into place.
I tacked it into place, then pulled it and finished welding it. It's now ready for sheet styrene.
I still needed to make the mounting brackets. and then when I fired it up to check and adjust the fuel/air mixture, I realized that the coupler I used to mount the pipes was leaking. On top of that, a co-worker pointed out the rain caps were backward! This meant I had cut the pipes wrong, I couldn't turn them around with the current layout. And lastly I need to wrap them.
Falhurk wrote:.....
I dont even...
I just need new pants...
interesting compliment!
OK! as I was telling Dysartes, a whole heap of problems cropped up with the exhausts. I was pondering how to fix it, when something magical happened. I friend of mine asked if I had ever seen the deep back of his warehouse while we were looking at the bike. I said no, and we went to take a look. five hours later, I had many more gubbins for the bike scavanged from mammoth engines and generators.
I found a perfect set of pipes to fix my silly mistake. hell even if I hadn't messed up, I would have mounted these I think.
before I can cut and weld these to the existing pipes, I needed brackets for final placement. I measure, cut, grind, and drill.
Here's the brackets mounted with a few exhaust clamps. way more sturdy then bailing wire, though I'll probably add some later for looks.
now that that's complete, I pull the exhausts and have a friend of mine weld the clamps to the new pipe. I only need to weld one side, making a proppa socket. I had the friend do it because it was zinc plated which can be tricky to weld, and it needed a full seal. I trust his 15 years of experience over my six months!
I then make sure it all works, measure my new pipes, and cut both them and the old ones. they barely just don't fit inside one another, so I grab a pipe expander and make 'em fit.
A little welding and good to go.
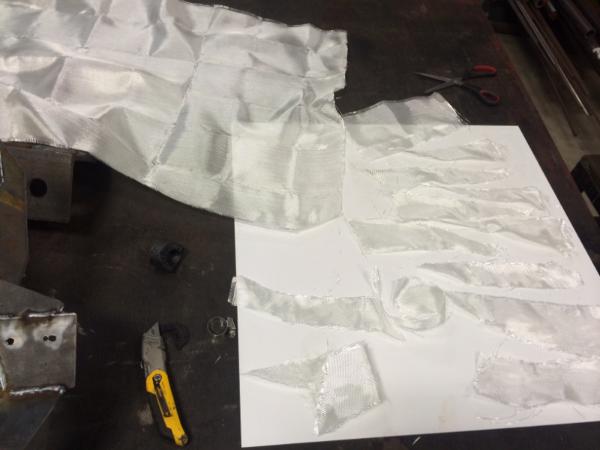
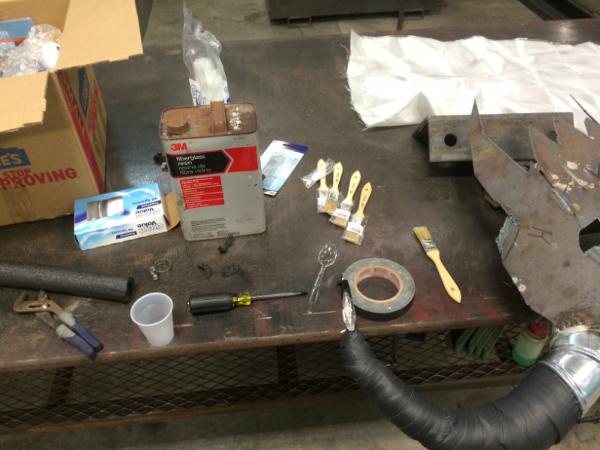
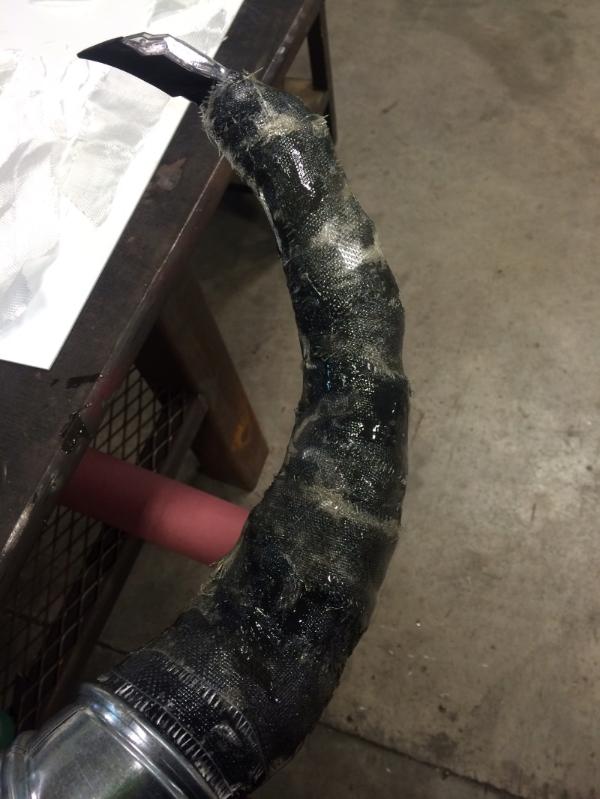
Next up is a fiberglass exhaust wrap. I leave a little pipe exposed for looks.
Lastly I re-assemble everything, and make a funky spacer bracket for the two pipes. Once I have the rear of the bike finished, I'll have one more set of brackets going from the pipes to the bike, both making it look Orky and reinforcing the pipes.
The exhausts are now 80% complete. all I need to do is add detail to the rain caps and mounts, and add a small cage around both pipes where people are most likely to bump into hot pipes.
Thanks for looking! I feel like I passed a huge hurdle with the carburetor finished and working, all that's left with the mechanical side of things is the gas tank. I'm hoping to start that this week along with more progress on the iron gob.
The vert wrap is for people bumping into the pipes, or un-knowing hands touching. (rider included!) I was given the advice to wrap the upper pipes from a co-worker whose friend rode a Screaming Eagle with high pipes, he and others would get singed all the time! I also plan on adding vent cages, both for looks and to keep burns down. As for the steel non-slip over the wraps, they're on there! I added the band ties for looks. (they match the crude exhaust hangers used in the mounting.)
Not really an update, more of a discussion and quasi-poll.
What should I use as a seat?
This John Deere tractor seat
or this saddle?
I was originally combing the back-woods swamp towns of louisiana for a john deer tractor seat, as these look great on rat-bikes. I found one in Ponchatoula, but they also had this saddle at a price I couldn't refuse. I' m leaning more towards the tractor seat, but the saddle matches my army. (heavy Snakebite influence on an Armageddon battle force.)
I would say to go with the saddle, but only if you're going to remove the raised front area (around the horn, etc). I think it might get uncomfortable for you, otherwise.
If you go with that tractor seat... PLEASE, tell me you'd be refinishing it. Your butt would be HURTING after a couple hours on that metal monstrosity.
Definitely whichever is more comfortable. The seat is definitely somewhere where functionality outweighs looks, especially since you're planning on riding it to places hours away. Take care of your ass!
My vote goes for the saddle, definitely! But I'd have to give way to functionality, I suppose. Is there a way you can rig the saddle to it so you can switch the seats out?
Might I suggest tat you add some springs to under the seat before mounting it, that might make for a more comfortable ride.
There is one more thing I thought of... You have some electrical gubbins under the seat. "The tractor seat has some holes in it." If your a serious rider then you will probably ride in the rain a few times (weather change after you start etc.) That being said if ya go with the tractor seat make sure you weather proof the electrical gubbins.
The saddle, definitely. Had I only seen the Deere I would have thought it looked good, but having seen that saddle on the bike I think it looks better by far.
Problem with saddles is they are not made to sit in with your legs as forward as they will be based on where your pegs/controls are. The pommel on that saddle may get in the way/cause some discomfort when riding.
You can get the tractor seat upholstered and cushioned.
WOW...I'm torn really. Although I think I may have to agree with Jake here. As much as I like the concept of the saddle, especially that it matches your army. But I'd think going with the tractor seat as long as you pad/upholster it, would probably be better.
CptJake wrote: Problem with saddles is they are not made to sit in with your legs as forward as they will be based on where your pegs/controls are. The pommel on that saddle may get in the way/cause some discomfort when riding.
How difficult would it be to alter the saddle into a more suitable/comfortable shape?
If it's still a possibility I'd say go for it.
CptJake wrote: Problem with saddles is they are not made to sit in with your legs as forward as they will be based on where your pegs/controls are. The pommel on that saddle may get in the way/cause some discomfort when riding.
You can get the tractor seat upholstered and cushioned.
Jake (who rides bikes and horses)
The reason the tractor seat looks good is because of the holes, etc. Upholstering it would make it look like a normal motorcycle seat imo.
Unless you can get it upholstered with the holes in it.
you very well could by a custom shop i would imagine.
The saddle looks better is my take, as far as functionally, I have no idea. If you can make the saddle work, by modifying it to be more appropriate while retaining its aesthetic (as Xendarc said), that would be the route I would take!
optimusprime14 wrote: I'm goiong to say saddle but with the caveat that you do a butt test on both first. Mount them to a chair and pop a squat for 30-45 mins
You would have to build a frame to hold them at the angle you will be on the bike, and place something where the foot controls/pegs will be. Mounting it on a chair won't cut it.
You could have a custom shop upholster the tractor seat and maintain the holes, I've seen it done. I would also consider a spring suspension for the seat.
Sinful Hero wrote: The tractor seat just seems to fit the bike better- IMHO a saddle would look out of place on an Orky bike.
Agreed.
Agreed too...
can you put some springy spring underneath the tractor seat? Not only for comfort, but I'd say it'll aesthetically add some orkiness to the whole thing.
optimusprime14 wrote: I'm goiong to say saddle but with the caveat that you do a butt test on both first. Mount them to a chair and pop a squat for 30-45 mins
You would have to build a frame to hold them at the angle you will be on the bike, and place something where the foot controls/pegs will be. Mounting it on a chair won't cut it.
You could have a custom shop upholster the tractor seat and maintain the holes, I've seen it done. I would also consider a spring suspension for the seat.
Oh I'm aware of that, it was more just a quick test to see how long you last in either.
As a fellow rider I worry that the tractor seat would just cause some major butt-numbness.
Use "quick change " bolts with "R" clips to secure the seat.
Have a big ass comfy leather one for long rides and the tractor seat for when you need to be too cool for sckool !
pox wrote: am not a good welder. (yet!) My welds are ugly, but functional.
Patience is key. I just learned MIG a few months ago and picked it up pretty quickly. Learned basics of TIG this week.
For MIG you need a steady hand. Having the wire speed set correctly is also very important for running good beads. When I was working on my Claptrap sculpture I found it really helped to be able to rest the edge of the nozzle tip on the weld seam so that the wire extended 1/4 to 1/2 an inch before it touched the seam. Then its just a matter of dragging the nozzle along the seam at a steady rate matching the wire feed speed.
Too fast and its spotty, too slow and you get giant ugly globs to grind down.
Came across this by accident on Facebook , thought you might like it !
I did welding for 6 months after leaving school , it was arc welding for the young lads then , all the experienced welders were on MIG , as mentioned previously wire speed and gas flow are key but your project looks great , don't sweat it and it'll be great !
Denua wrote:Might I suggest tat you add some springs to under the seat before mounting it, that might make for a more comfortable ride.
There is one more thing I thought of... You have some electrical gubbins under the seat. "The tractor seat has some holes in it." If your a serious rider then you will probably ride in the rain a few times (weather change after you start etc.) That being said if ya go with the tractor seat make sure you weather proof the electrical gubbins.
For sure on the springs, I have the blueprints and springs already. As for electrical, I will of course make a cover box.
CptJake wrote:Problem with saddles is they are not made to sit in with your legs as forward as they will be based on where your pegs/controls are. The pommel on that saddle may get in the way/cause some discomfort when riding.
You can get the tractor seat upholstered and cushioned.
Jake (who rides bikes and horses)
True on both points, Especially crackin' me nuts on the pommel during a quick stop.
Sinful Hero wrote: The tractor seat just seems to fit the bike better- IMHO a saddle would look out of place on an Orky bike.
Agreed.
Agreed too...
can you put some springy spring underneath the tractor seat? Not only for comfort, but I'd say it'll aesthetically add some orkiness to the whole thing.
for sure, I can add some gubbins to make it look and ride proppa.
Big H wrote:Use "quick change " bolts with "R" clips to secure the seat.
Have a big ass comfy leather one for long rides and the tractor seat for when you need to be too cool for sckool !
Now your talkin'. it's actually what I'm gonna wind up doing, I wont be able to try them out proppa without a full mount for both as discussed above, and I already own both seat so I may as well mount them both.
Nowlan wrote:
pox wrote: am not a good welder. (yet!) My welds are ugly, but functional.
Patience is key. I just learned MIG a few months ago and picked it up pretty quickly. Learned basics of TIG this week.
For MIG you need a steady hand. Having the wire speed set correctly is also very important for running good beads. When I was working on my Claptrap sculpture I found it really helped to be able to rest the edge of the nozzle tip on the weld seam so that the wire extended 1/4 to 1/2 an inch before it touched the seam. Then its just a matter of dragging the nozzle along the seam at a steady rate matching the wire feed speed.
Too fast and its spotty, too slow and you get giant ugly globs to grind down.
Yeah, the shop has collectively decided to make me get better. I'm practice welding during lunch now.
Big H wrote:Came across this by accident on Facebook , thought you might like it !
I did welding for 6 months after leaving school , it was arc welding for the young lads then , all the experienced welders were on MIG , as mentioned previously wire speed and gas flow are key but your project looks great , don't sweat it and it'll be great !
I'm not worried about my welds at all, I have good penetration and solid builds. they just look crappy, and I'm working on it.
I tallied up the polls, and its 9 for the saddle and 8 for the tractor seat. Too close to call, so as I I said earlier I'll just make full mountings for both and see how ridable they are.
UPDATE TIME!
I got everything for the gas tank ready for welding.
To start, I made a collar-clamp to hold the tank to the bike. once it's fully mounted I'll also have some brass straps holding it in place.
I then figured out what I was gonna use for gubbins and assembled the air crossover, fuel crossover, petcock, gas caps, and air valve.
After measuring everything, I cut all my holes.
I then cut some tubing and base plates for the gas cap bases.
Next up I blast some crude holes into the plates.
I pretty em' up and tap some holes.
yay! it all fits.
Here's everything ready for welding.
Because it's the gas tank, it needs to be welding vary carefully so as to have no holes. The shop foreman is gonna show me how to use the TIG welder, that's going to happen sometime early in the week so I should have a picture of the finished tank soon! after peeking inside the tank, I also realized I'll need to treat the tank so saddly I wont be able to mount it for another week or so. Almost finished with the mechanical part of the build!
I started learning TIG welding this month. It can be tricky to get the hang of.
Tacking and running seams on two pieces with no gap is easy, but when it comes to using filler rod it gets more complicated. Take your time, and practice on scrap first, because it can be pretty easy to burn holes in the metal working with filler. Also, using rod is when you're most likely to zap yourself. Make sure the tip isn't more than 1/4" from the surface when you hit the pedal.
necrovamp wrote:are you going to paint yourself green to complete the interpretation?
I do have plans to build a cosplay outfit, gonna go with a Big Mek, I think. Wont be till the bike is done, AND I will not be able to wear the costume while on the bike!
Nowlan wrote:I started learning TIG welding this month. It can be tricky to get the hang of.
Tacking and running seams on two pieces with no gap is easy, but when it comes to using filler rod it gets more complicated. Take your time, and practice on scrap first, because it can be pretty easy to burn holes in the metal working with filler. Also, using rod is when you're most likely to zap yourself. Make sure the tip isn't more than 1/4" from the surface when you hit the pedal.
For sure, I've been getting lessons at work for the last few weeks when I can find the time. I love TIG way more then MIG, the learning curve is brutal though. I will keep at it though!
Alfndrate wrote:I could have sworn I had already subscribed to this thread..
Well that has been remedied!
YAY! and welcome aboard!
I know I haven't had an update in a while, but the last month was crazy at work. I wrapped two shows back to back, and we rented out more shop space. I spent the last three weeks with only two days off doing nothing but moving heavy gak and reorganizing everything. There is a lull coming though, I should have huge chunks of time to work on the bike in the next week.
UPDATE TIME!
As I said to Nowlan, I've been practicing TIG, but I quickly realized I need WAY more experience in order to properly TIG a sealed tank. I asked my shop foreman to give me a hand, he was happy to help. (He has a Little more experience then me. Like 45 years as a machinist/fabricator.)
Here's the tank ready for a preasure test.
I still need gaskets for the gas caps before I can pressure test it, and I'll need to treat the tank. I got the KREEM in yesterday, so the tank should be done by the end of the week.
While I was prepping the tank, I kept progress on the front fender.
I started with some 16 gauge steel for the base.
I then detailed it out with 22 gauge sheets.
I was worried about the top of the piece, last thing I wanted was a rock to kick up, hit the shield, and make it curl into the tire causing an immediate stop! I reinforced it with some square rod and ground it down so it doesn't rub against the wheel.
I check for fitting one final time, it fits perfectly.
Next up mock up the teeth out of foam-core. after a lot of fiddling, I find the shapes I like.
Next step will be to cut the teeth out of .250 sheet styrene.
I expect good things next week, I'm hoping to have updates AT LEAST every other day. I should get about eight hours a day on it for the next week, compared to my usual 45 minutes a day!
I just stumbled across one random image of this bike in the gallery and tracked down this blog. So glad I did. This is totally amazing. Keep on truckin'. This project needs to be seen through to the end.
Great work going on with the jaw now. The first time I saw the frame, I thought it looked really weedy! Now that I see some detail going onto it, I can see it looks fine. Keep it up!
Sucks about the pinhole leaks on the tank. Hopefully the leak-test at least shows you where holes are? Then its just a matter of grinding 'em down to clean 'em and take the TIG welder and filler rod to it.
I'm a little curious about the durability of the styrene teef as well. I'm just wondering if they'll snap off at speed... you do plan on riding this bike, yes?
I'm a little curious about the durability of the styrene teef as well. I'm just wondering if they'll snap off at speed... you do plan on riding this bike, yes?
The teef are 1/4 inch thick, They should hold up. I plan on testing it to make sure though!
Insane Smile wrote:This is like that grenade thing on 4chan...
I don't know what the grenade thing is, but the reports of my death have been greatly exaggerated!
sadly, I have no pictures due to my phone exploding. My phone dying was just another link in a bad chain of horrible luck. if not for bad luck, I would have no luck at all!
First, It took three weeks to get the gas tank to seal. no matter what I did I had pinhole leaks. after I got that fixed, I had to seal the tank, which was hairy but eventually worked.
next, I accidentally fried most of the electrical system. A co-worker had reconnected the battery to test my new turn signals, and didn't let me know until AFTER i welded on the frame!
Work took a turn for the worse, so I'm working 70 hours a week right now. To top everything else, my main bike crapped out so I spent a bit of coin and a lot of time getting it back to working!
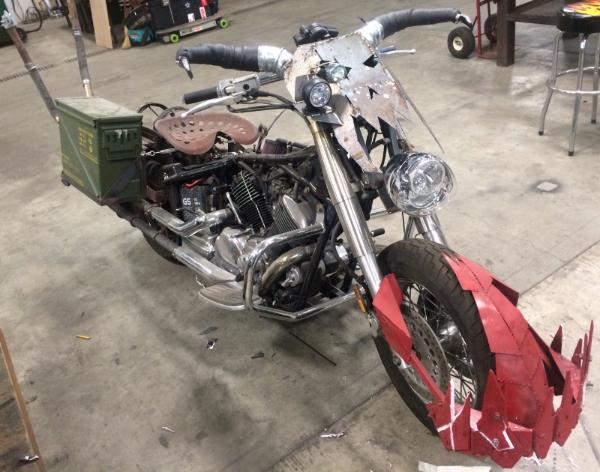
All is not lost though! The project is moving forward, I have grim determination to beat the inquisition and finish the project. I have the headlight mounted, the front bull horns and turn signals placed, I'm working on the sculpt job on the tank at home, I got my custom license plate in, and starting on the rear fender.
Thank y'all for your patience, I'll have pictures very soon. There's no way I'm quitting this project, I plan on having it finished by January first.
Yeah! Happy to see more. And the grenade thing was a guy found grenade in his basement and started messing with it and updated as he went. He said he was going to run it over with his car. Well then his account went inactive and no one heard from him.
Insane Smile wrote: Yeah! Happy to see more. And the grenade thing was a guy found grenade in his basement and started messing with it and updated as he went. He said he was going to run it over with his car. Well then his account went inactive and no one heard from him.
Insane Smile wrote: Yeah! Happy to see more. And the grenade thing was a guy found grenade in his basement and started messing with it and updated as he went. He said he was going to run it over with his car. Well then his account went inactive and no one heard from him.
That explains a lot!
UPDATE TIME!
but first, my usual rambling. One of the things that really stopped me updating was a huge ton of setbacks on the project. Normally, I take these in stride and work on another part, but for about a month any part of the bike I worked on failed. Call me a coward if you like, but it's really hard to just post update after update of my failures. The two biggest areas were the gas tank and the drag bar mounts. I'll go into detail on those parts later, but suffice to say I stopped even taking pictures after the fourth failed drag bar mount, and the fifteenth leak on the tank. I had a huge push over the last few weeks, and I feel I'm back on track, with renewed energy. My work schedule should settle down December 3, so hopefully I will have a lot more time then I currently do.
On to the pretty pictures!
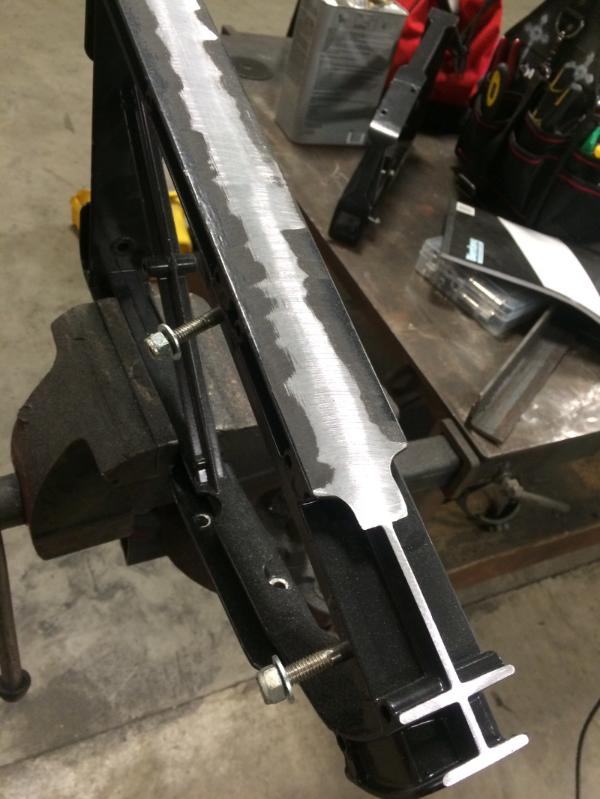
First up, the hated drag bar mounts. Here are the pictures of the final working mount.
The issue was the "scratch and dent" on sale drag bars I bought didn't rise up enough to clear my new gas tank. I didn't want to use the original bars, one of the few consistent details on Ork bikes is straight bars. I made several different mounts, but they either put the bar too high (and the electrical wires and cables didn't reach,) or they were deemed unsafe by the guy who goes over my work. (then I crash and die after they break free of their moorings at 50 miles per hour.)
The final solution was to make a mounting plate that used the original half of the raisers and through-bolted it to the new drag bars. The box in the front is for the steel skull mount.
Next up is the seat. I spent a lot of time trying to mount the saddle, but it proved too difficult to mount without being safe. it straddled the empty space above the swing arm, and if I placed it high enough to mount I couldn't reach the floor!
I was originally gonna have it on springs for looks, but that proved to be to high also. It's hard mounted, and with three turnbuckles is fully adjustable.
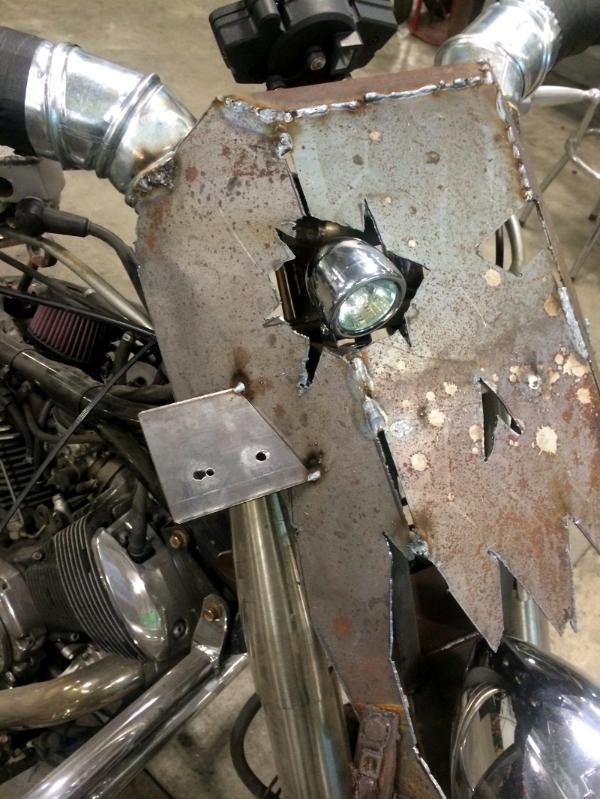
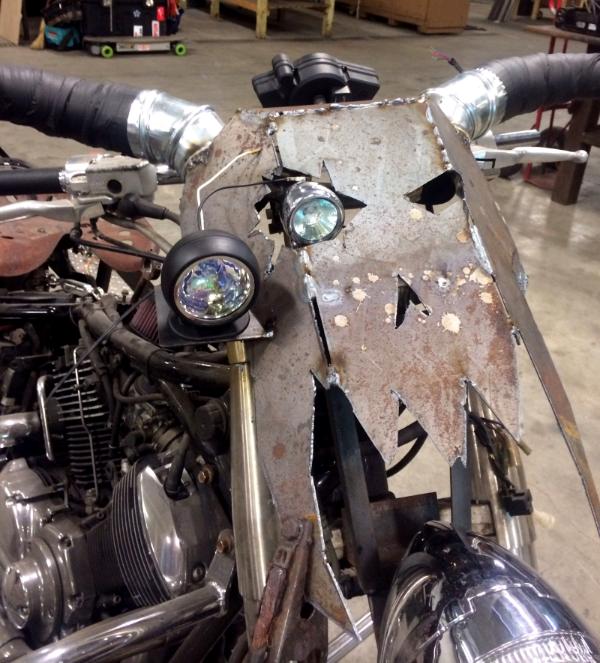
The next step was to mount the new headlight. I needed it on so I could see where to mount the skull.
After that I got the horns for the skull in place. I'm trying to get the bare-bones stuff in place so I can move onto electrical.
Here are the front turn signals at the horn tips.
I then added much wider and thicker highway bars so I can add armored leg plates.
Well, thats the updates so far. Tomorrow I'll get pictures of my new license plate and the gas tank.
If you're still having issues with pinhole leaks in the gas tank, try getting some UV dye (If you're at a car shop they use it for testing AC systems for freon leaks) and mix it in water, then fill the tank with water and slightly pressurize it.
necrovamp wrote:You gonna have one sore ass sitting on that tractor seat!
Looking good though
meh, It's still a swing-arm rear. Many better riders then I have ridden much worse for far longer. ever ridden a rigid frame with no rubber mounting on the engine? I know guys that do that for their iron butt badge of awesome.
AntomanElven wrote:Make the front headlamp more orky
Maybe put a big metal wireframe over it
The final detail of the bike is no-where near what it will become. My next step is to finish all the electrical, I have only made the framework for the cow-skull and headlight so I can make sure it all works. Once thats all done, I'll add the final layers of detail. and a wire frame may be in my future! (or a grot holding on for dear life, spanner in hand fixin' my front wheel.)
Nowlan wrote:If you're still having issues with pinhole leaks in the gas tank, try getting some UV dye (If you're at a car shop they use it for testing AC systems for freon leaks) and mix it in water, then fill the tank with water and slightly pressurize it.
Leak locations will glow under UV light.
good idea! I don't think its needed though. I filled it half with water and pressurized it to ten PSI, then sprayed down the tank with soapy water looking for bubbles. (its how we find propane leaks at work.) I then left it overnight with a gauge on it, still had ten PSI and was dry as a bone. If all that wasn't enough, I used Kreem tank liner, and did a double coat. I'm confident it will not leak.
UPDATE TIME!
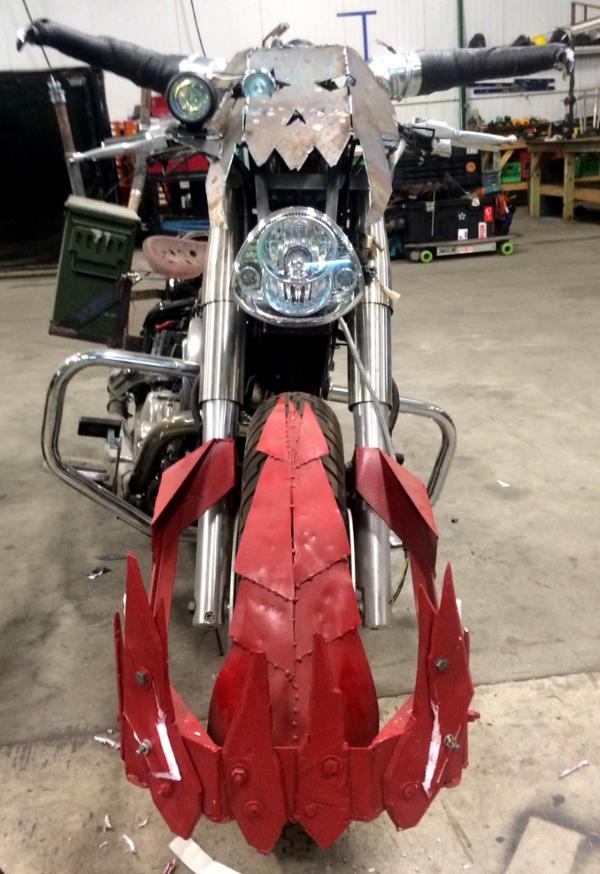
I rough-primed the tank, and started sculpting on it.
Here's the view from the bottom back of the tank, you can see the fuel crossovers and the petcock.
Here's a top view, you can see the air crossovers, vent valve, and of course the gas caps.
Lastly, I started the evil suns logo. this is only the first layer of course.
I'm sculpting the tank at home, so I'm still pushing forward with the main parts at work.
First up I welded some T brackets to hold my rear turn signals/rokkits.
I then mounted them so I can see how much wire I need to run to the relay.
They are sticking out back enough to clearly draw attention to them, while being tucked in enough from the sides that a spill wont snap them off.
Next, I cut a sheet of metal to mount my mudflap, license plate, and brakelight to.
I drilled some holes, hacked up the mudflap, and got it ready to mount.
Hows THAT for a personalized plate?!?
next up is mounting the rest of the electrical gak. I still have to mount the new speedometer, and all the green running lights. I also have to build a switch box and then actually wire everything up.
I also hit upon a great idea to test the sheet plastic! I pulled out one of our hurricane fans at work, and hit the bike with 65 MPH winds. the plastic was flexing just a little, but it was enough for me to decide to add some gussets to reinforce them. I don't want to pull focus from making the bike 100% functional, so as it's a cosmetic fix I'll work on it later.
Thanks for looking! I feel like I'm gaining some momentum, here's hoping the wiring over the next week goes well.
Once thats all done, I'll add the final layers of detail. and a wire frame may be in my future! (or a grot holding on for dear life, spanner in hand fixin' my front wheel.)
Na.... you need to have the grot hanging for dear life from the back of the sissy bar.
I've been following this blog, and AM very happy your back ontack.. I'm so looking forward to this being finished..
That WAARRGH plate is Fark'n "da BOMB"
It is coming together nicely. I'm not surprised the saddle didn't work out. They're just not made to work on something shaped or sized differently than a horse.
I do hope you intend on having someone video your test ride so we can see and hear this beast in action.
I think this blatant rip off of GW IP is ridiculous. You should be sued, thrown in jail and your bike should be confiscated after it's done (and sent to me).
MagickalMemories wrote: I think this blatant rip off of GW IP is ridiculous. You should be sued, thrown in jail and your bike should be confiscated after it's done (and sent to me).
; )
Eric
I just have visions of GW licensing the 40k rights to a motorcycle manufacturer and them making insanely overpriced replicas of Ork and Space Marine bikes.
Now once they figure jetbikes out let me know...
Please they chant even figure out a new sculpt for jet bikes at 28mm...
CptJake wrote:It is coming together nicely. I'm not surprised the saddle didn't work out. They're just not made to work on something shaped or sized differently than a horse.
I do hope you intend on having someone video your test ride so we can see and hear this beast in action.
Jake
Absolutely! It would be a shame not to see it roll out. And yeah, to be honest I was worried about a hard break being taken out on my jibblies due to the unfortunate placement of the saddle horn.
MagickalMemories wrote:I think this blatant rip off of GW IP is ridiculous. You should be sued, thrown in jail and your bike should be confiscated after it's done (and sent to me).
; )
Eric
I agree! (for a small fee, the bike is yours!)
I also giggled at the ensuing comments.
I have a small update. I started the sides of the tank.
First is my right proppa' Evil Sun logo. (sans the sun rays, they're coming!)
on the other side, a "hammered metal" circle, waiting for an Icon. any guesses?!?
As usual, work is being a pain. I'm on seven days, twelve hours a day right now. This leaves little time for Orks, but fear not! December third my schedule calms down.
Really great progress on all the bike , have just seen the personalised plate and I love it . I think my little orks could do with those plates on their battlewagon!
Hope proper work can continue when "dem 'umies" stop working you so hard . Good luck and let the challenge commence .
Project not dead, just lots of more important life stuff getting in the way. Things should ramp up though, barring more crap from work I should have a solid three weeks off in December.
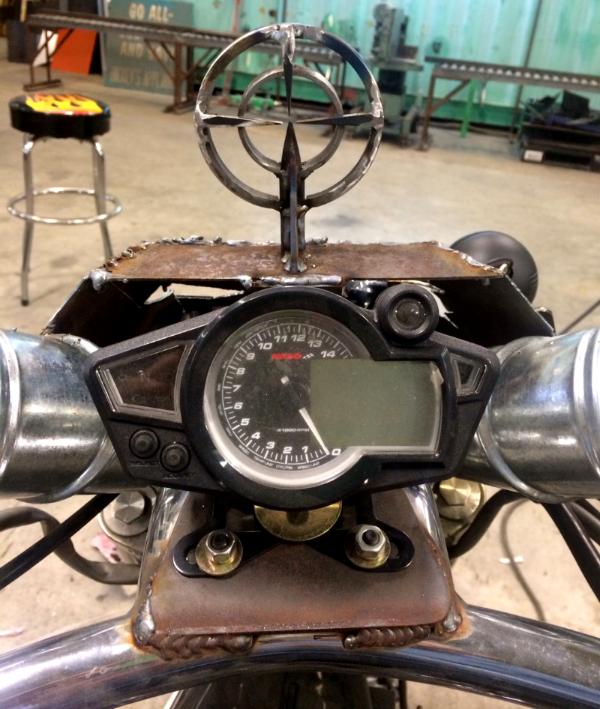
Just a quick update today. I cut and drilled, and welded a mount plate for the new idiot lights and speedometer.
And here it is!
I also welded the rear plate on.
That completes all the mounting needed to start all the wiring and electrical. I will be able to do that as soon as the tank is finished being sculpted and painted.
pox wrote: That completes all the mounting needed to start all the wiring and electrical. I will be able to do that as soon as the tank is finished being sculpted and painted.
I had an idea for you: your turn signals could have gobos that make the light into the words "Dis Way" and "Dat Way" so you can tell the grots behind you which way you're turning. That is if doing such is legal in your area.
DarkSoldier wrote:I had an idea for you: your turn signals could have gobos that make the light into the words "Dis Way" and "Dat Way" so you can tell the grots behind you which way you're turning. That is if doing such is legal in your area.
it would be hard to make it legible without being HUGE turn signals, haha.
KommissarKiln wrote:Speedometer? Orks don't need numbers; they just have these instead: Still, Slow, Fast, Fasta, WAAAGH!!
I may add fake gauges, will keep this in mind.
darkcloak wrote:Drool! This is frakkin' great man! If I saw you riding this down the street I'd grab my choppa and start the lootinz!
It would be fun to ride in a group.
UPDATE TIME!
One of my favorite Ork drawings is of a Madboy, from codex past.
So thats what's going on the other side of the tank.
I start by cleaning up the circle as best I can, lots and lots of sanding.
Next I rough in a sketch,
Add the first layer of clay,
And smooth it out.
While the first layer of the Mad Biker dries, I sketch out the next step in the Evilsunz logo.
Again I add the first layer of clay,
Then smooth it out.
Once all that dries on both Icons I can add the next layers. I really need the tank done, it's getting to where I can't move forward with other parts of the bike without it.
Hey, if you need to take your time, go ahead. I don't want you to rush quality effort; the fact you even began this challenge and are hanging in there still is quite the feat. Kudos.
YA GOT DAT, BOYZ AND GROTZ? GIV 'IM DA RESPEKT DAT 'E DEZURVS!
Ohohoh man! That's a bike that every Big Mek would turn pink in envy for! (or make them blue for the urge to loot it. :p )
And hell, you've been an inspiration for me to keep going with my own metal contraption (which is a Big Gargant, that I personally call the "Bigga Gargant". )!
That would be awesome. I really wanted to make an Ork trukk, I looked around for a good chassis before I was inspired to make the warbike.
Luck.
Luck never changes.
I was supposed to be off for the holidays starting last monday, but alas, I had to make an emergency trip to Puerto Rico. one of the rare times I can't complain about a location I had to travel to for my job! I am back now though, and aside from family stuff all my time will go to the bike.
The tank is finished being sculpted. I was going to add more but decided leaving open areas for my painter to get creative was a better idea, and I have plenty more spaces on the bike to sculpt on.
Here's the final Madboy and Evilsun
The guy I'm getting to help me paint the tank is a bad-ass named Kenny. I bought my other bike simply because he did the paintjob on it, his work covers the most modern techniques in airbrushing and he also does old-school brush pin-striping. I let him know The tank is ready, so I'm waiting on him. Because he's doing all the work pro-bono, It's strictly on his timetable.
On to the fairing! I had a lot of trouble with design on this step. what looked good on a small scale looked flat and cartoony and a full size bike. I quickly realized I needed to make several mock-ups to find what I liked. Here's the first one.
It was a good starting point, but didn't quite work. I looked at a lot of source photos, and was inspired by Black Orc fantasy shields. If I had a three panel skull it would be a lot more dynamic.
I cut the base pieces out first, taking into account the max size the skull could be.
Next I taped it down to the bike.
At this point I had to stop to do life stuff. I should have more time today or tomorrow. I have the whole shop to myself till the 6th, I will try to update every other day. Thanks for looking!
I then fire up the plasma cutter and cut them out of steel
Next I fit the pieces, adjusting the fit as needed, and clamp into place.
Lastly, I burn it into place with some rough stitches
This is only the frame of the skull, I have plenty of detail to add in plastic and clay.
Now that I have the final placement of the skull, I weld some elbow joints on to start fleshing out the base of the horns
After that, I flesh out the rest of the horns with insulation strips, pipe insulation, and gaff tape. I also drill new holes for the turn signal wires.
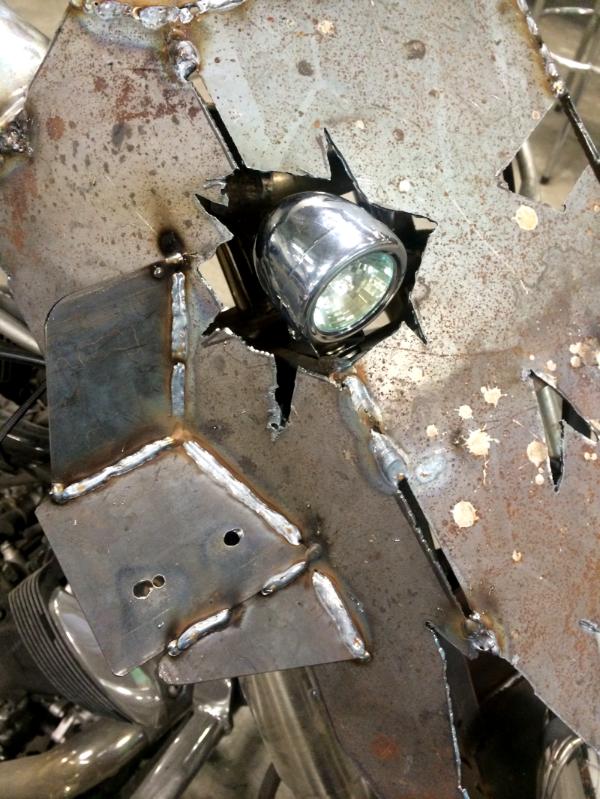
Switching gears, I make the right eye-hole bigger so his light will fit.
I check to make sure my little Baja light has clearance.
Once I have the final position, I make a bracket for the light.
Lastly, I weld the new plate into place, wait for it to cool, and screw on his new eye.
I should have plenty more updates this week. Still heaven't heard back on when we can paint the tank, and I cant start wiring until I have it back so I get to do more fun cosmetic stuff!
Xendarc wrote: Watch out for these badboys when using that plasma cutter!
Looking really good. The light shining through the eyehole is beautiful
After seeing Fabious Bile for the first time, I had me grots modify a mega--nob suit to build with. it has four extra arms, and gives me a good save when the plasma cutter rolls a one.
Gitsplitta wrote:That looks awesome! Are you worried at all about the clay bits breaking up due to road vibration?
The clay I use is less brittle than bondo, so I'm not too worried about it. Only one way to find out though!
Nowlan wrote:
Gitsplitta wrote: That looks awesome! Are you worried at all about the clay bits breaking up due to road vibration?
If he lays 'er down, the mek will have his teef for it.
Man, if I ever lay this junka down, it's gonna leave a bits trail.
MORE UPDATES!
I start by tacking the plate for the lower Baja light.
I hammer the plat till its nice and level for the light.
Once its lined up with the other lights, I add some other plates.
Next I fix the front teeth.
Lookin' good so far!
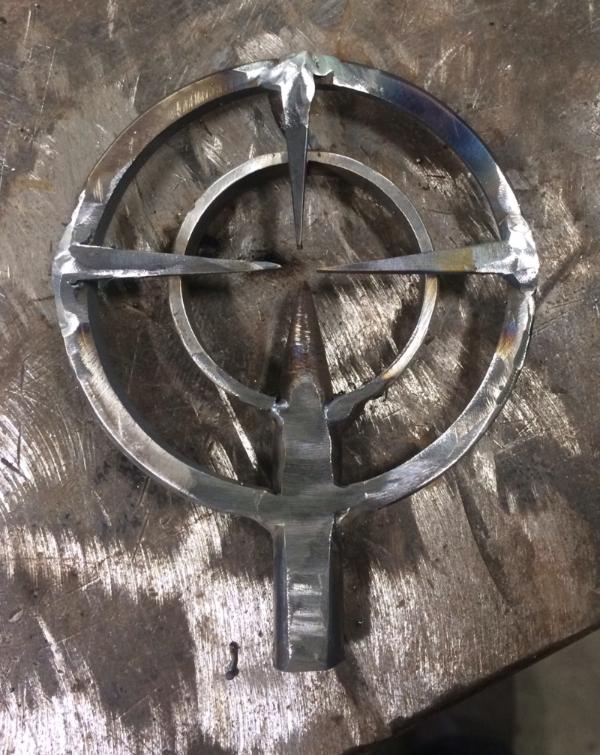
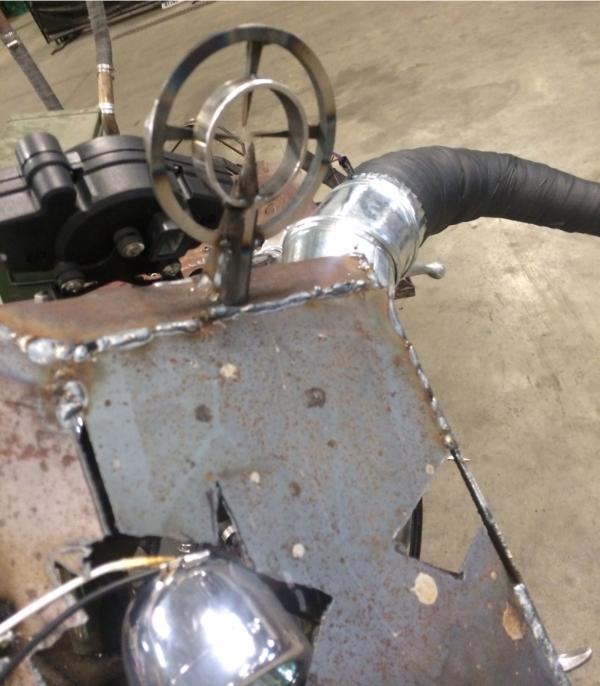
Next I start on the gun sight. I cut some rings and sharpen a bit of rod.
I weld it all together and throw on some spikes.
Lastly, I weld that sucker in place.
Here's the gunner's view!
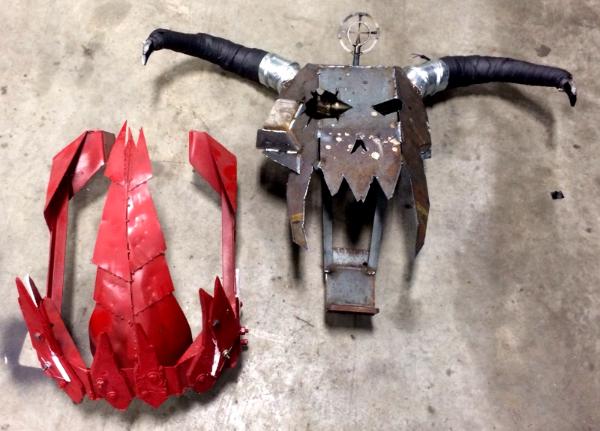
Lastly, I pulled off the jaw and skull. All they have left is clay and plastic work!
I didn`t understand the thread title at first - simply because I couldn`t fathom the madness This is incredibly cool, and that bike is already looking much better than how it started
Thanks for all the comments everyone! not a huge update today, I only had a few hours to work on it.
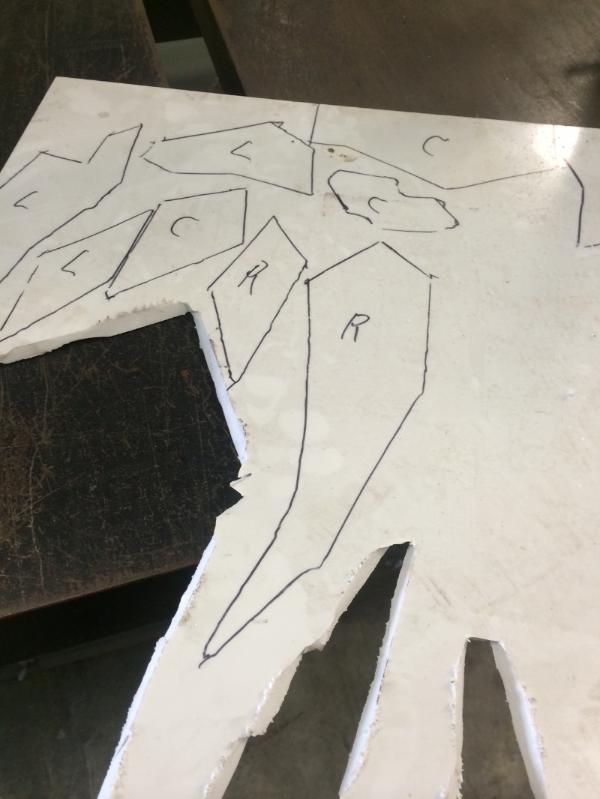
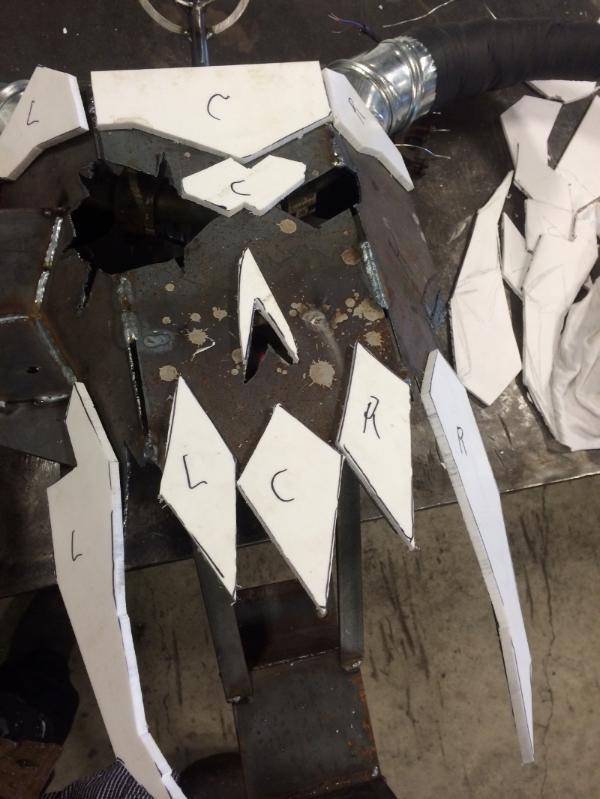
I started by making templates for the additional plastic needed on the skull.
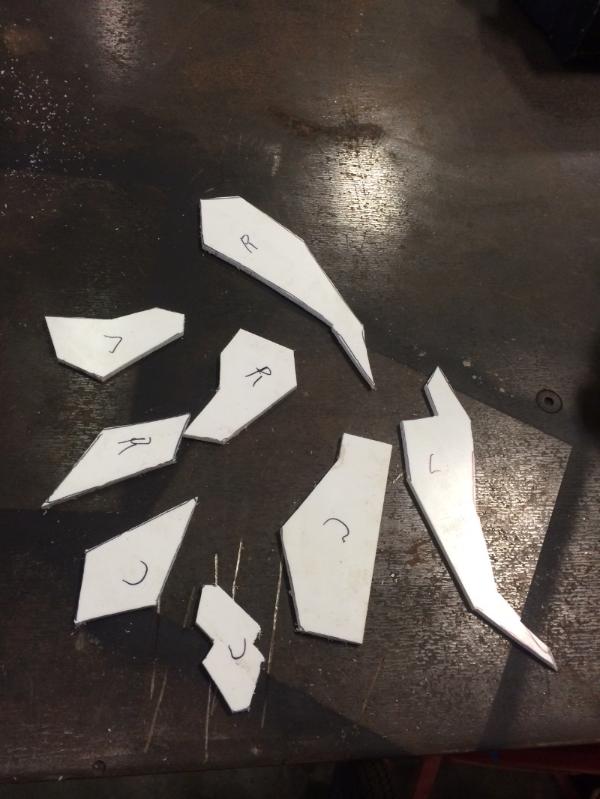
I then traced the templates onto some 1/4" sheet styrene
Next I cut the pieces on a bandsaw set to "slow as molasses." Time consuming, but way less messy then using an angle grinder like last time.
lastly, I check them all to see if they fit. it looks like I'll need to grind some metal before I install.
I also still need to shape and age the plastic, then start drillin' bolt holes. For the horns my boss showed me the proppa way to coat them in fiberglass, so I'll do that the next time I have a good six hours or so freed up to work on it.
After that I lay out all the supplies I'll need to mix the resin. I've never worked with fiberglass before, so I wanted things a bit more organized then usual.
Success! I get the first layer on both horns without setting myself on fire.
While that sets up, I start working on the rear of the bike.
First up I cut off the old bracket that held on the seat.
Next I take some 90% ducting and tack it together.
I make sure it fits before tacking it into place.
Lastly for today, I pulled off some frame pieces from a golf cart and cut them to size.

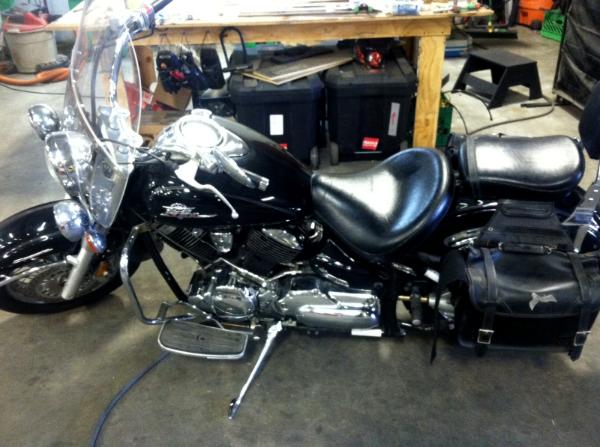

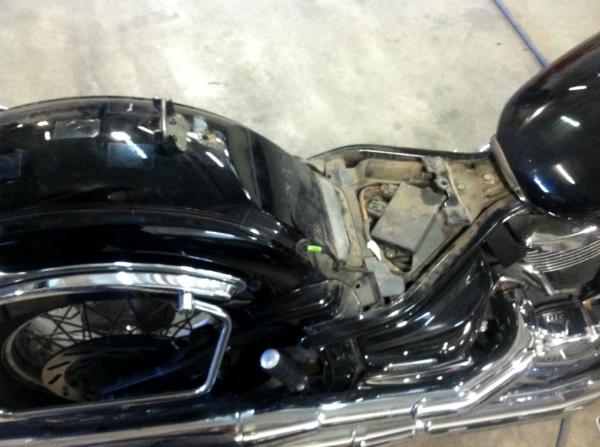
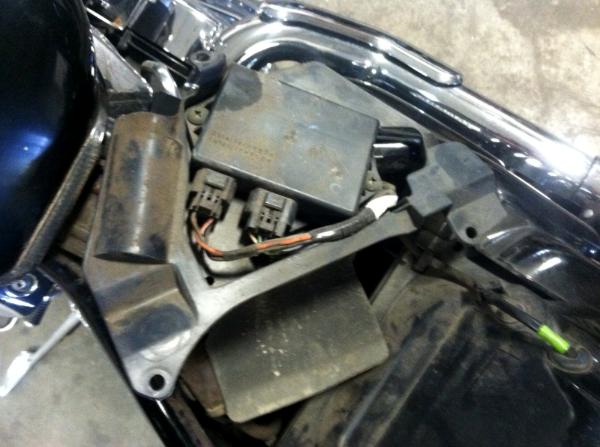

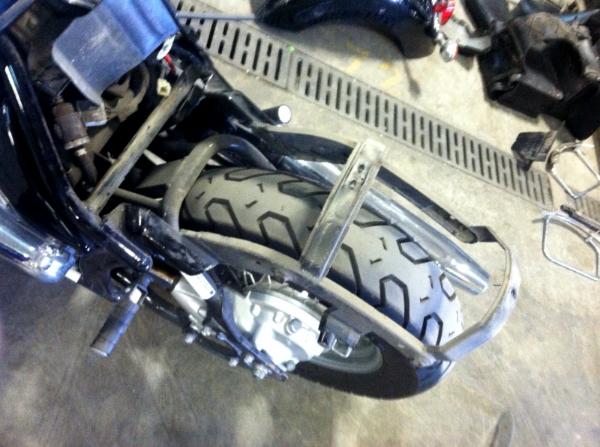
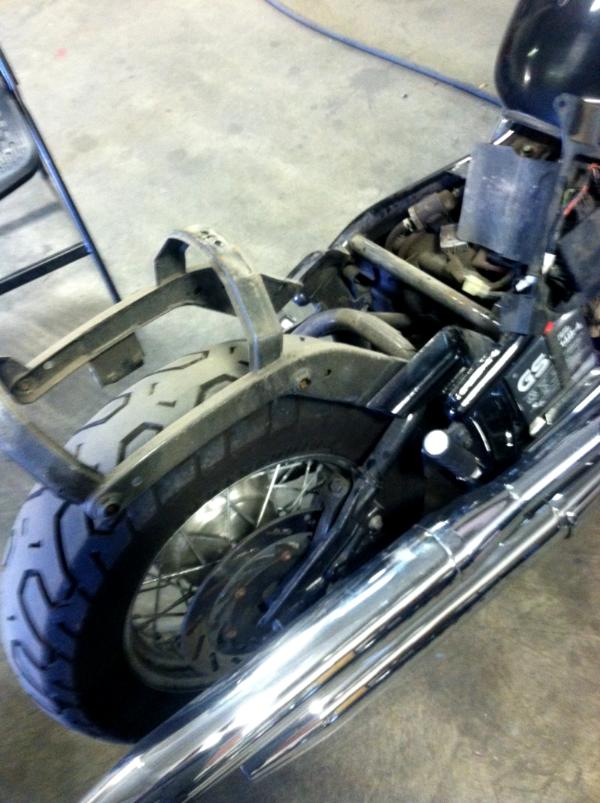
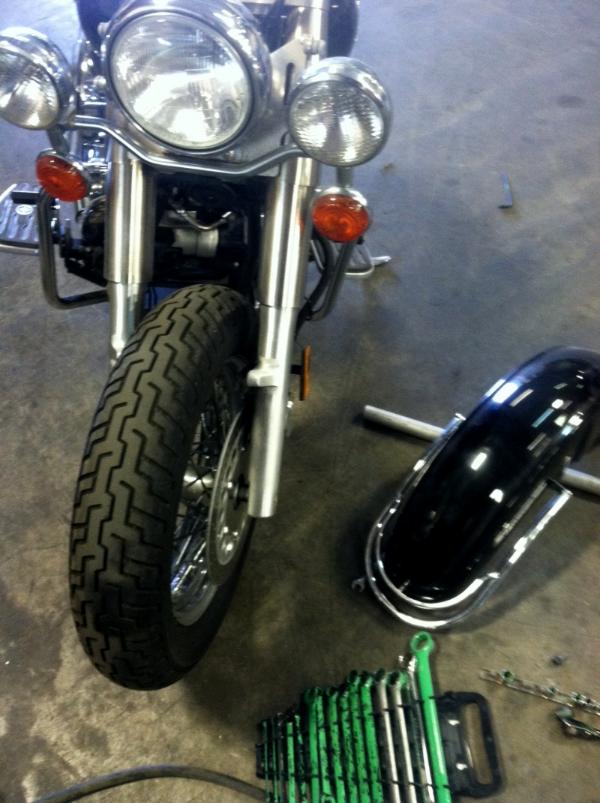
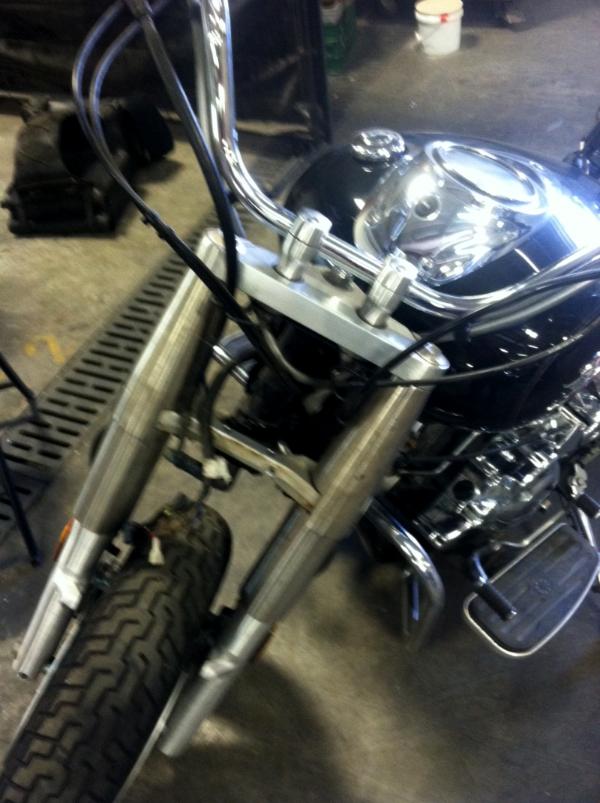
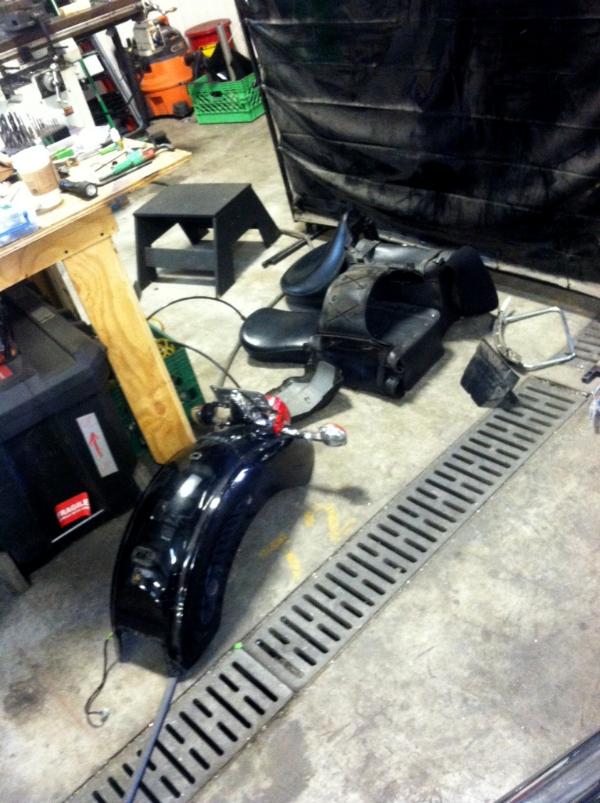


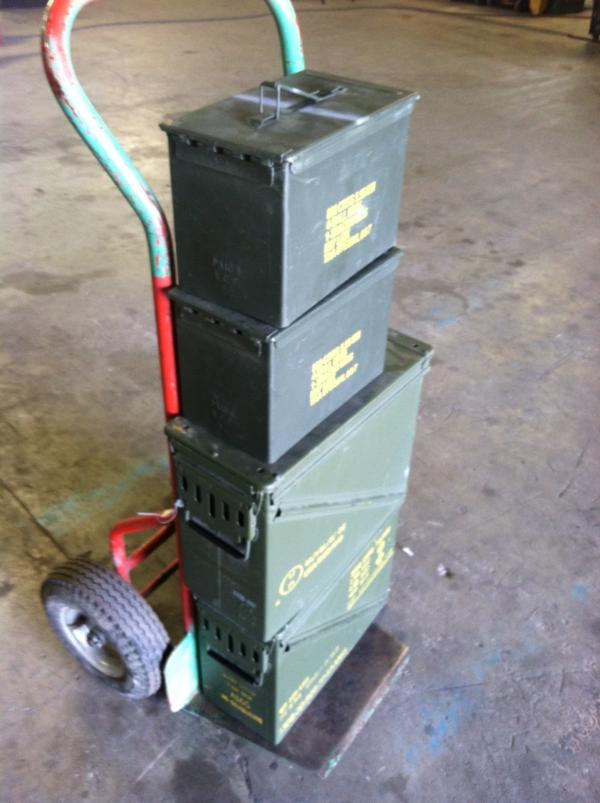
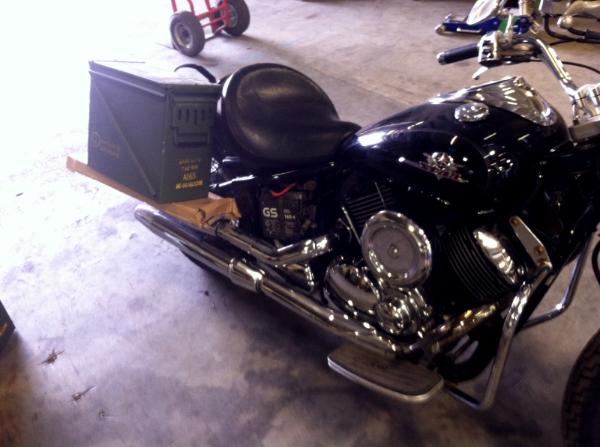
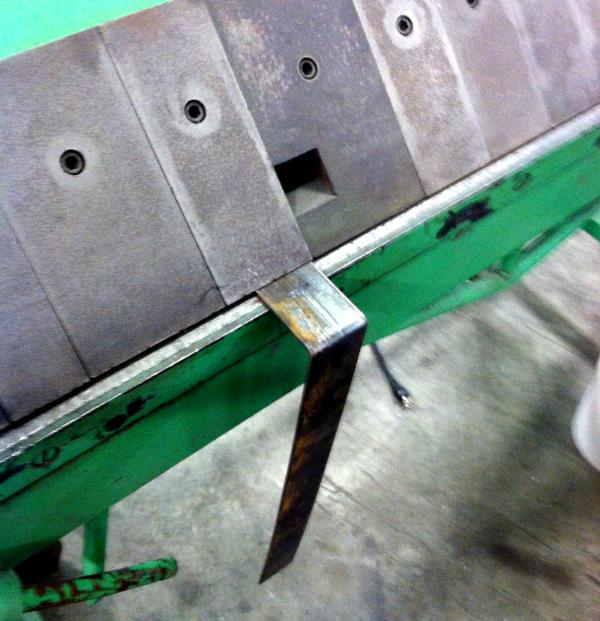
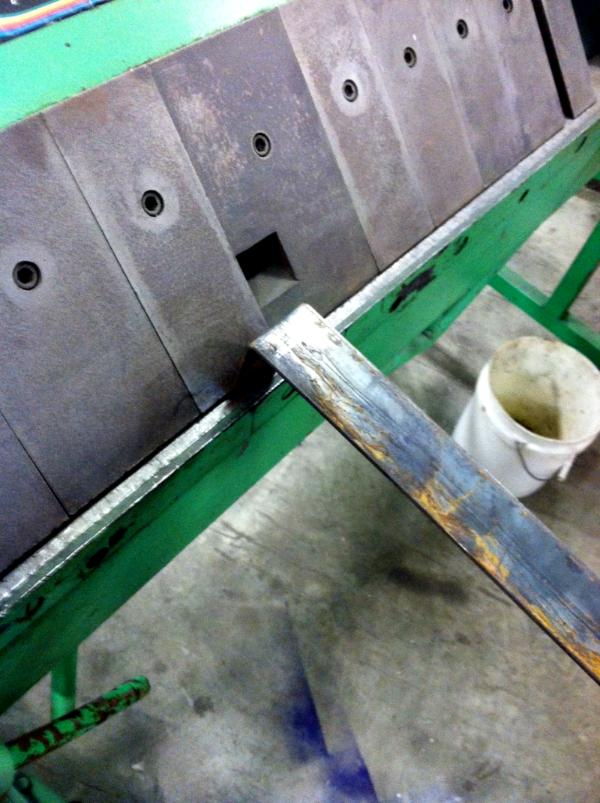
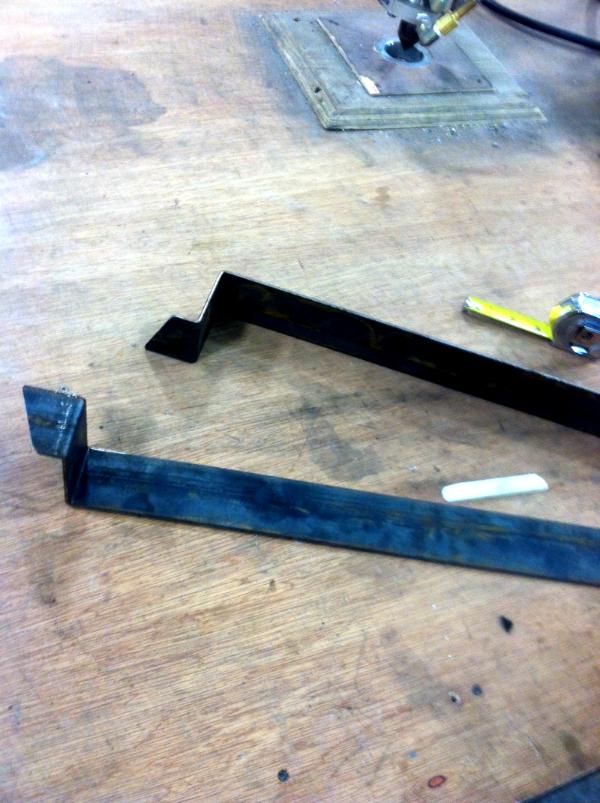
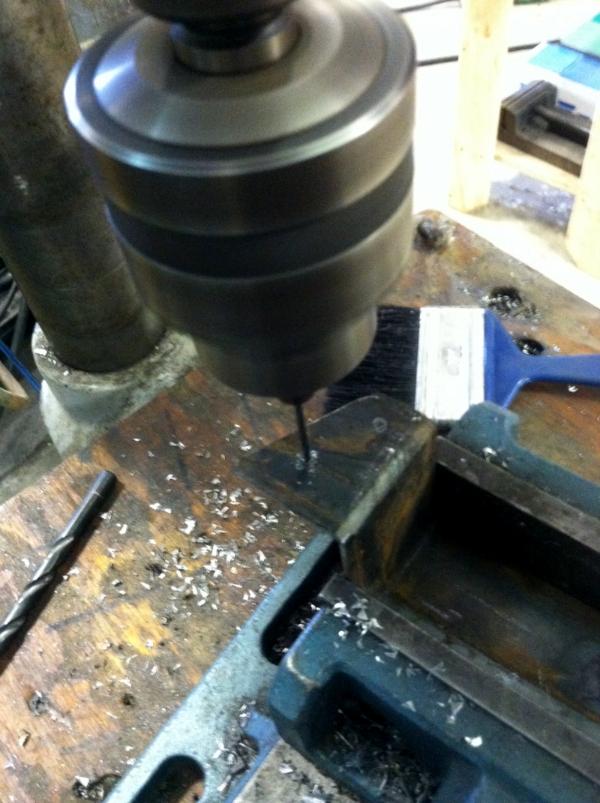
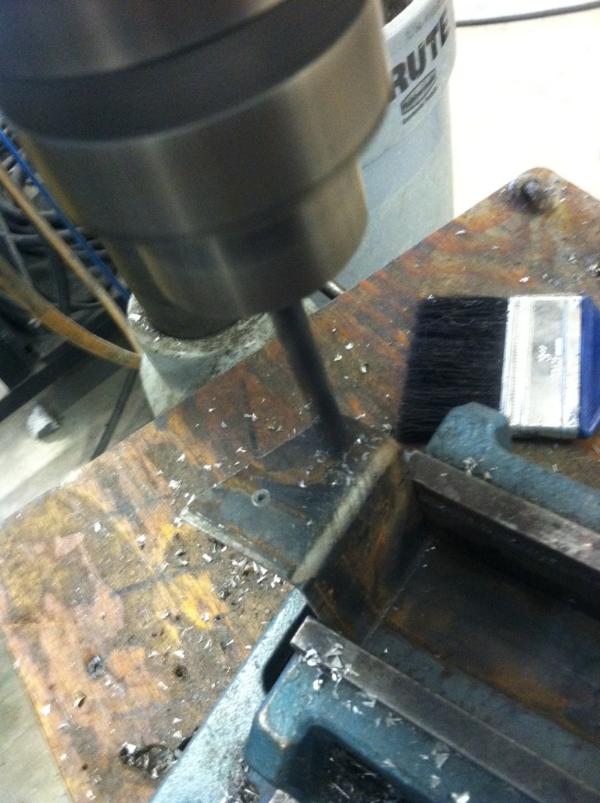
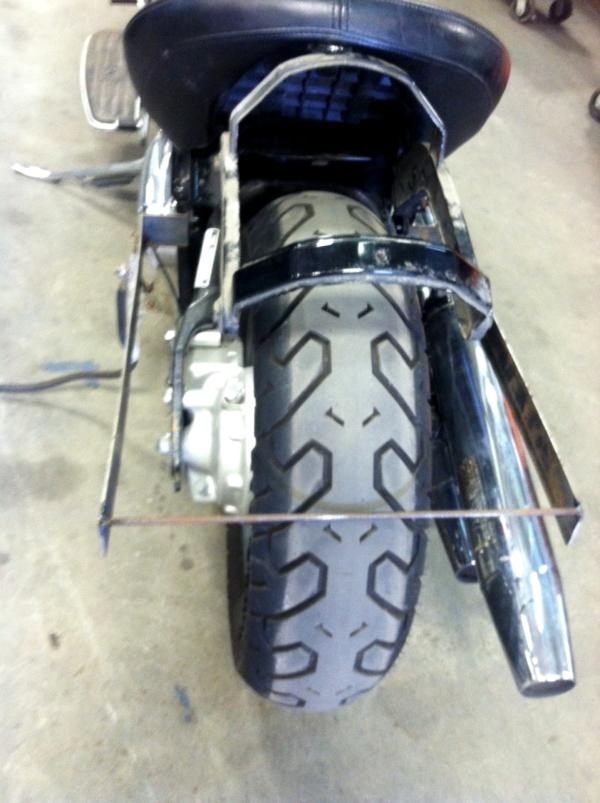
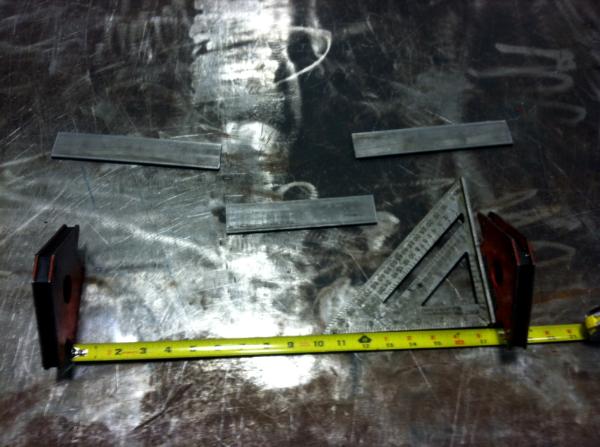
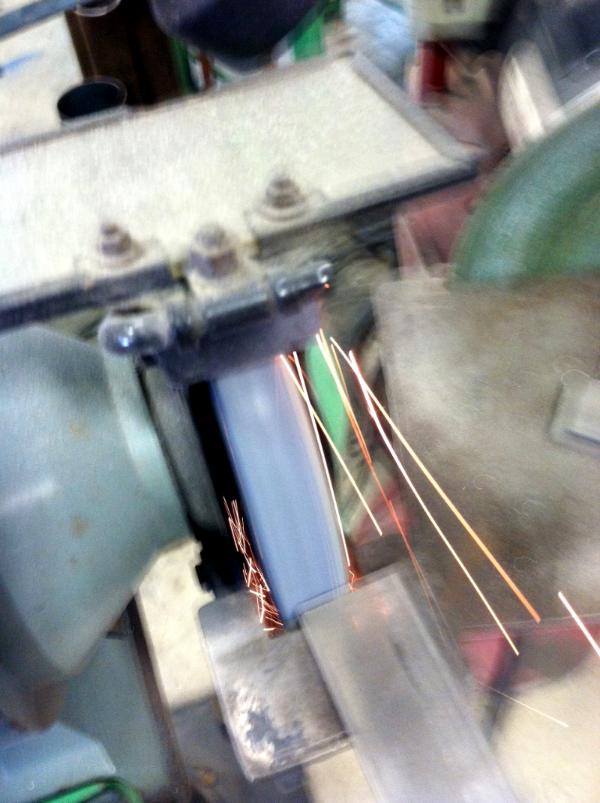
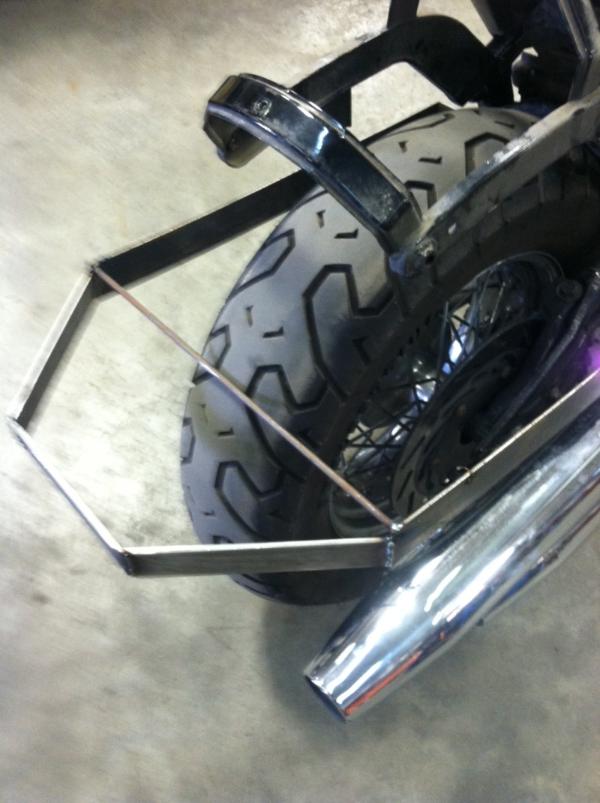
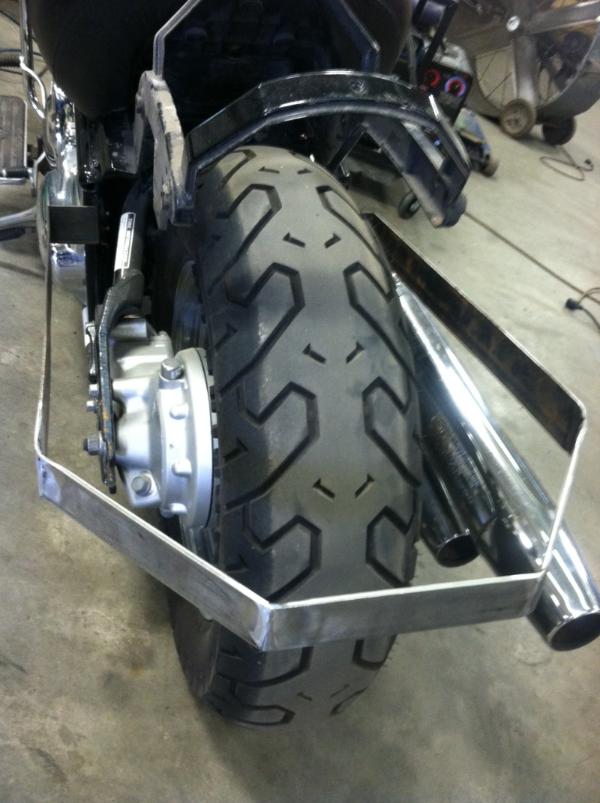
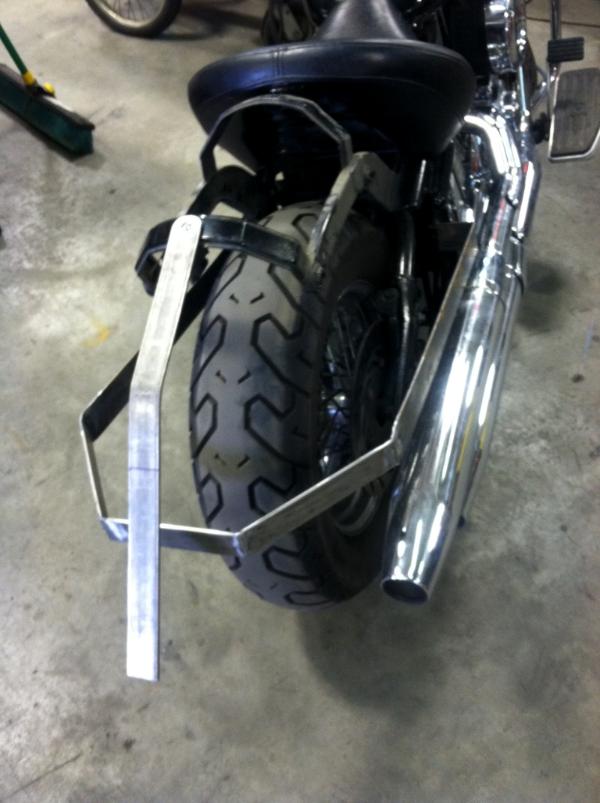
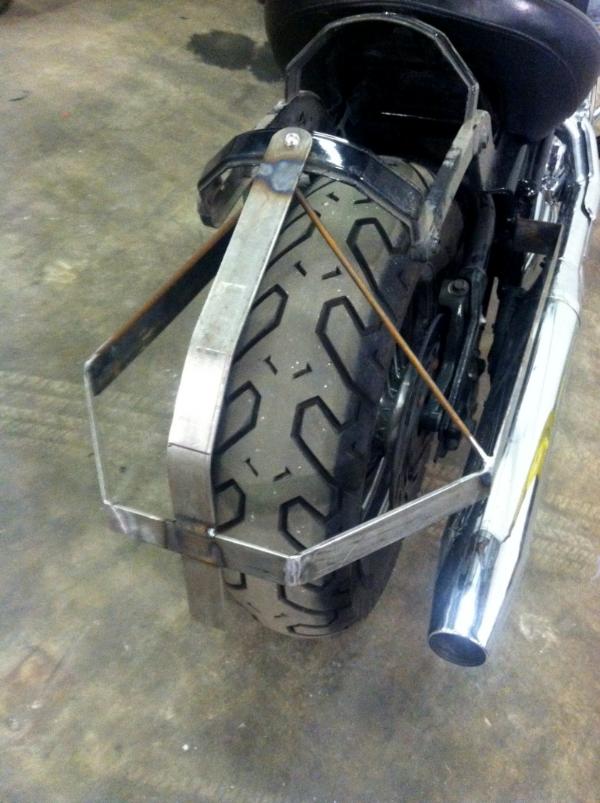
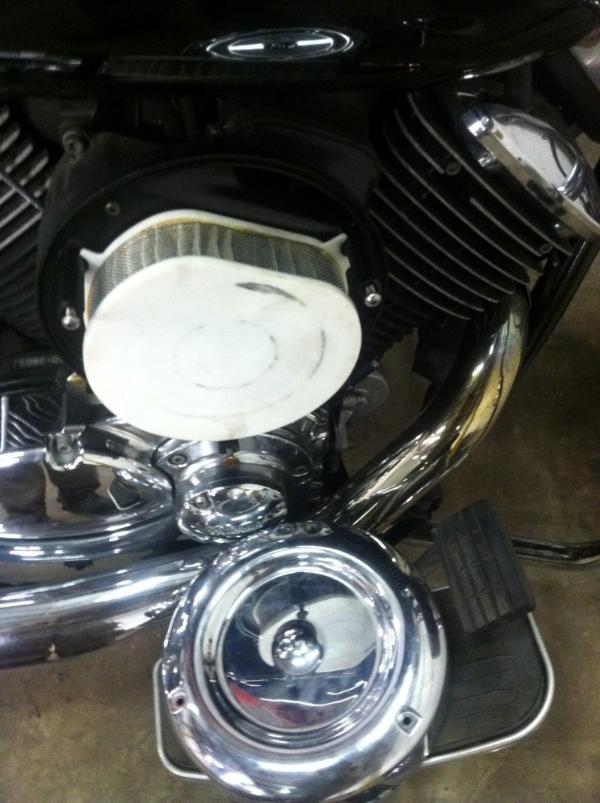
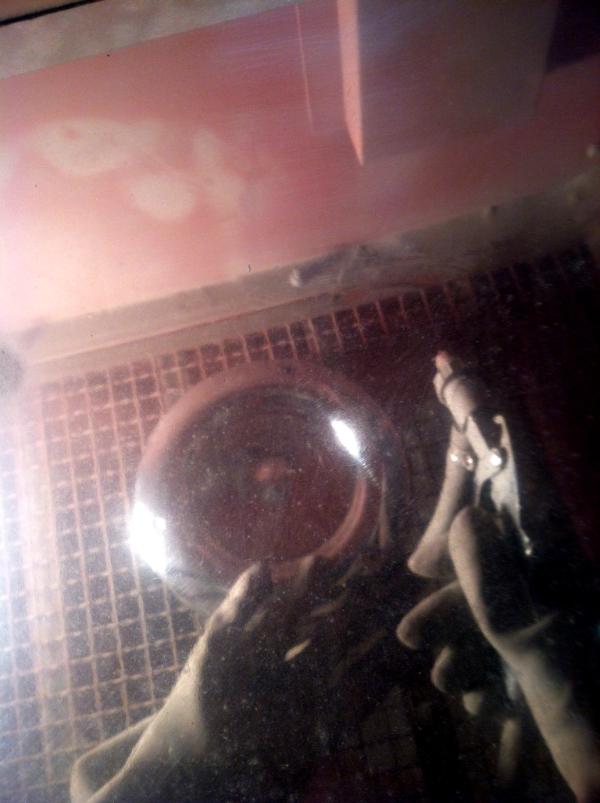
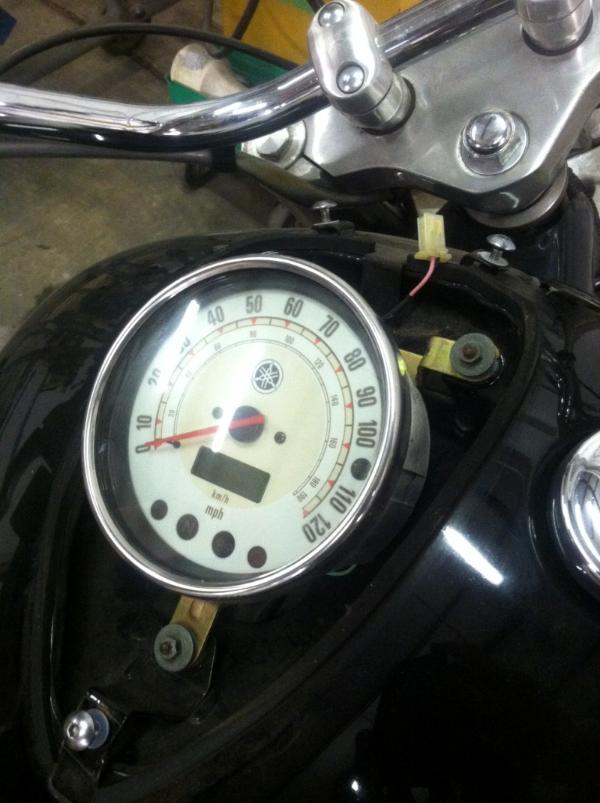
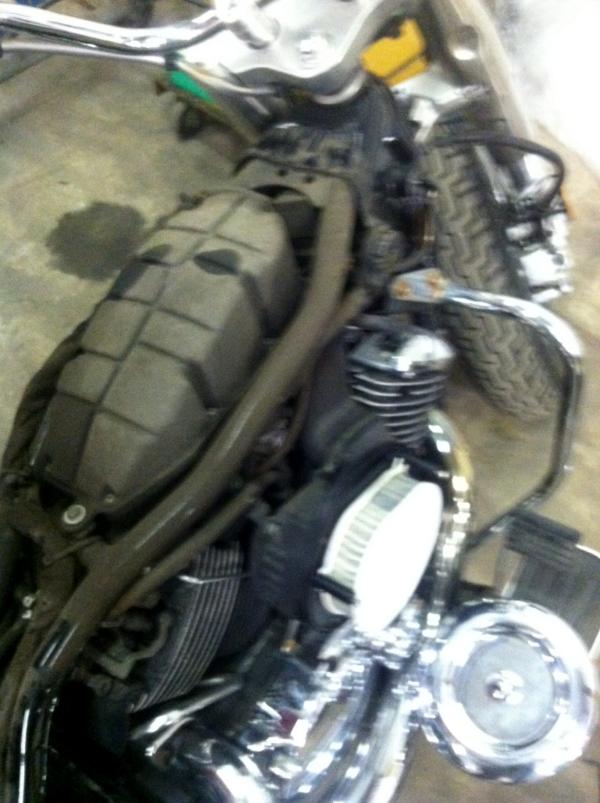


 t. This has made my melon-fething day....


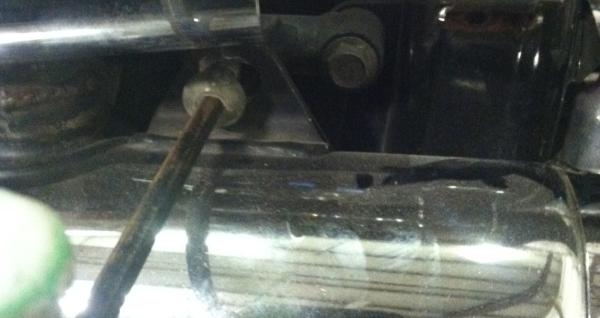
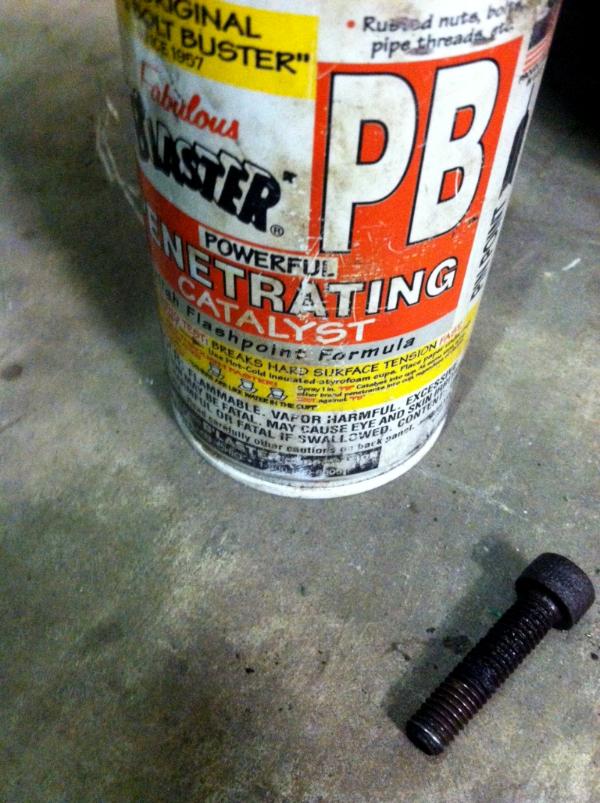
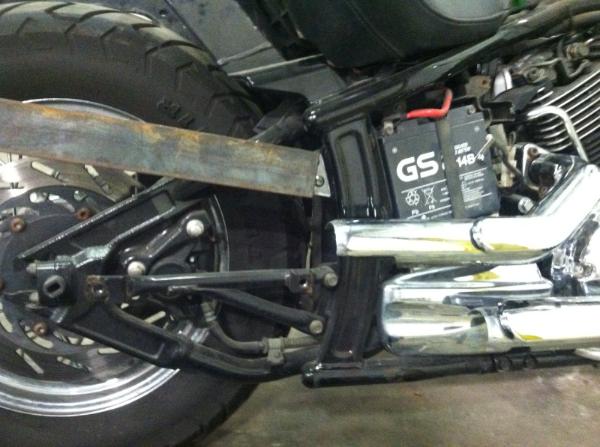
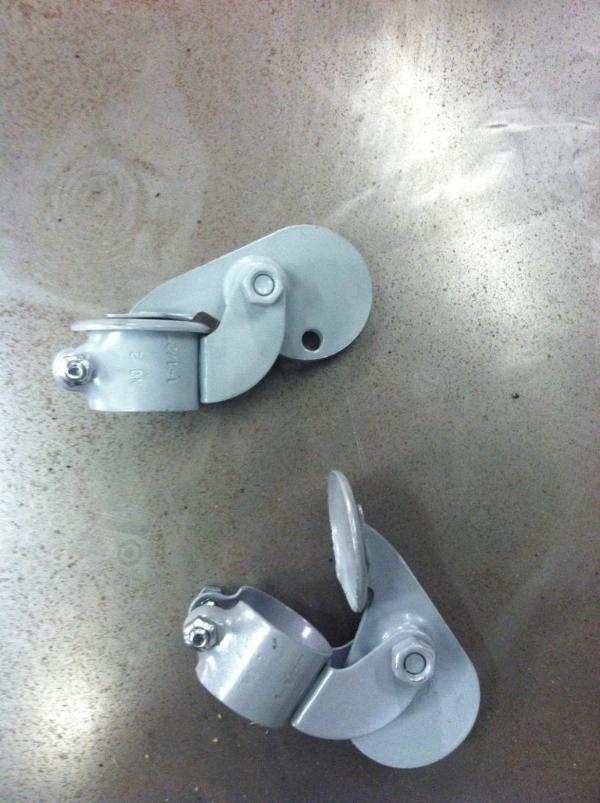
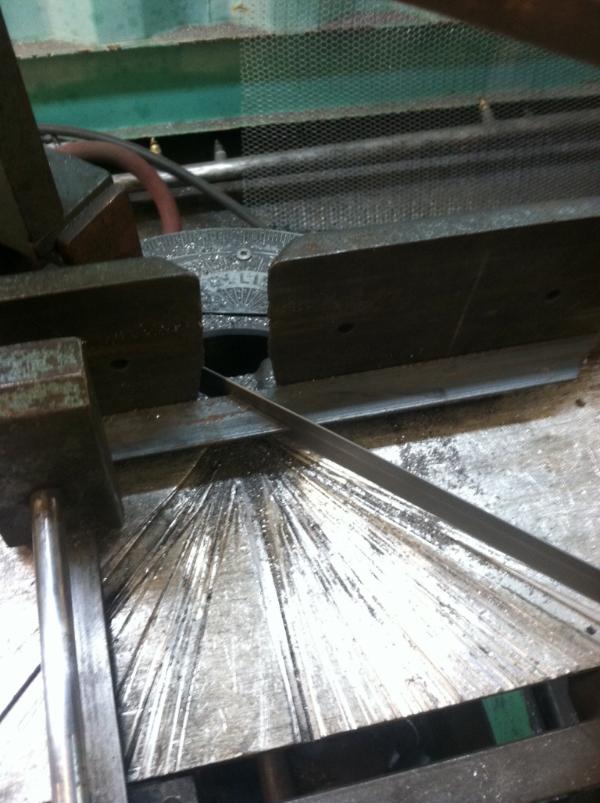
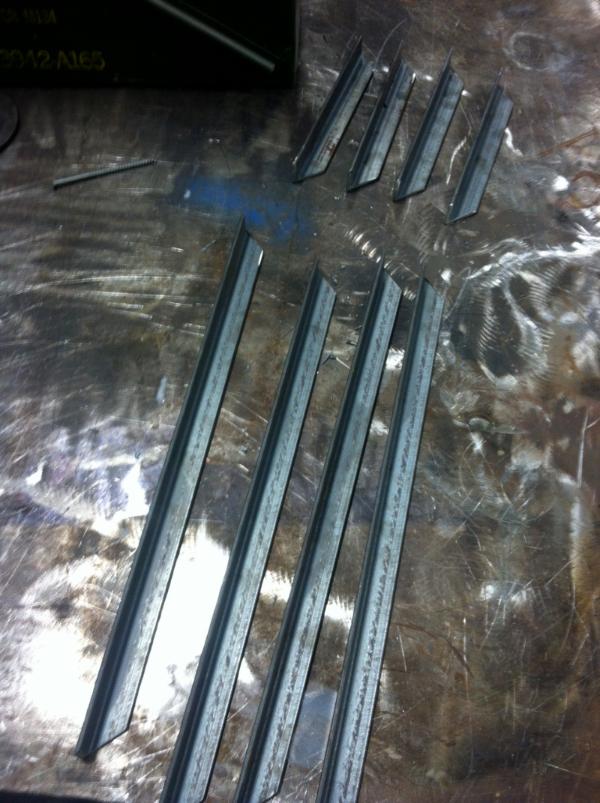
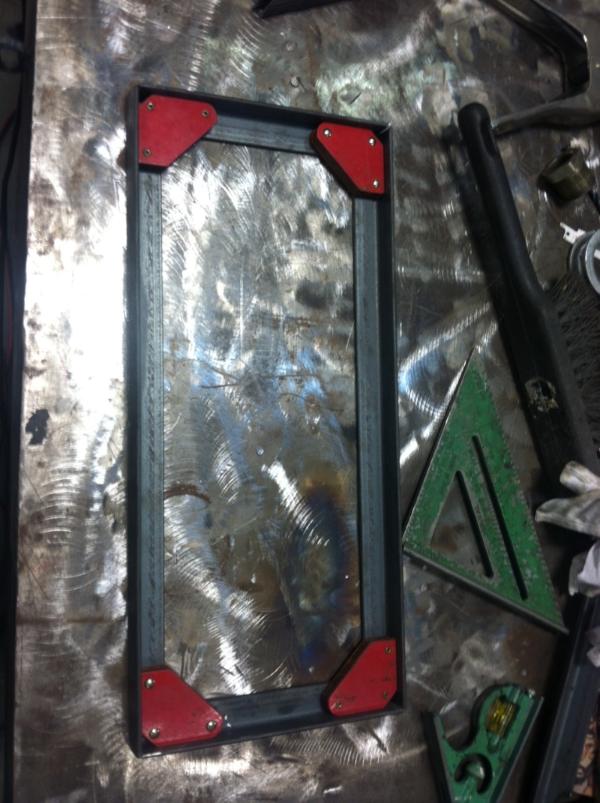
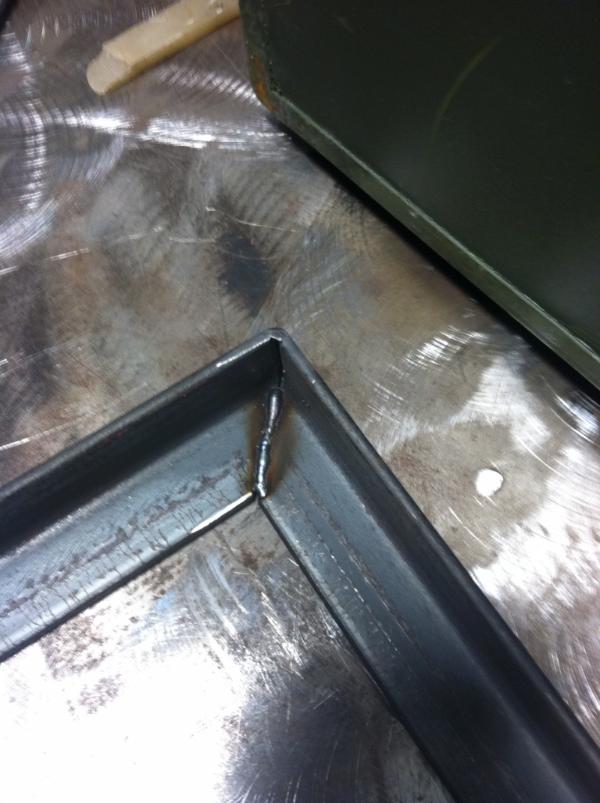
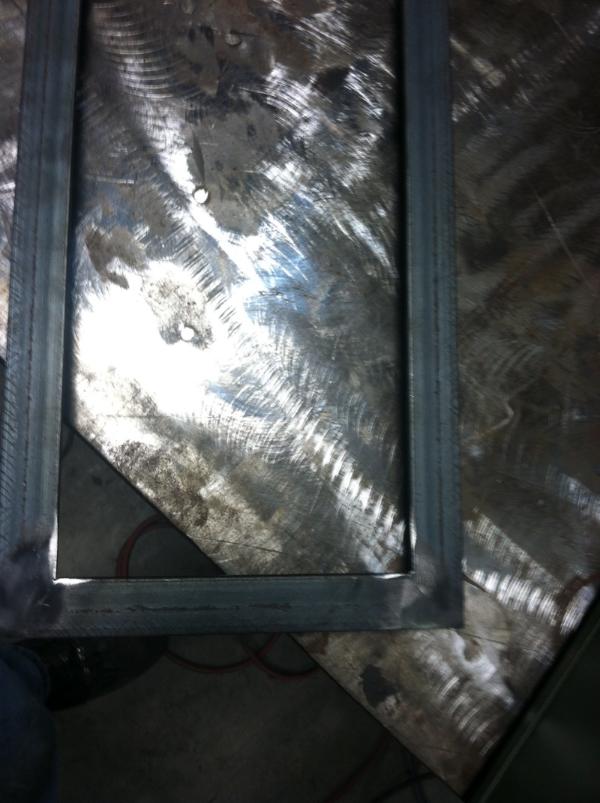
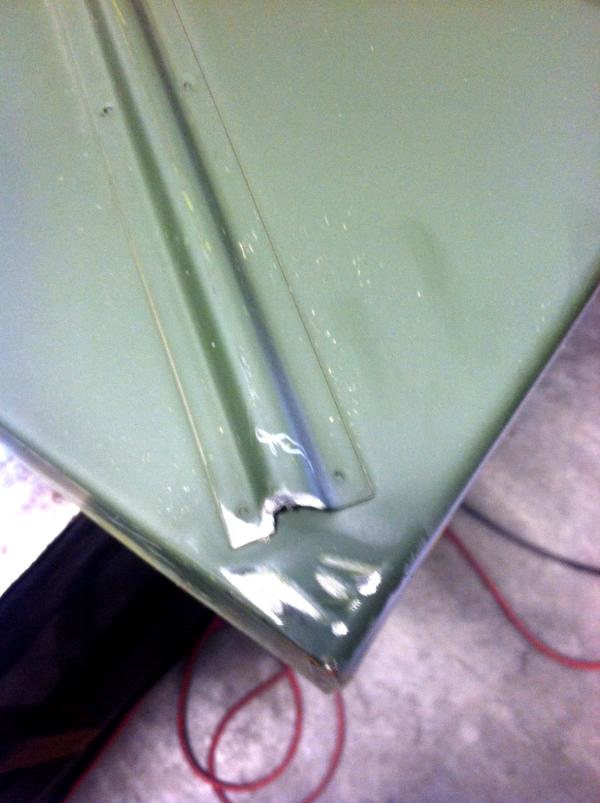

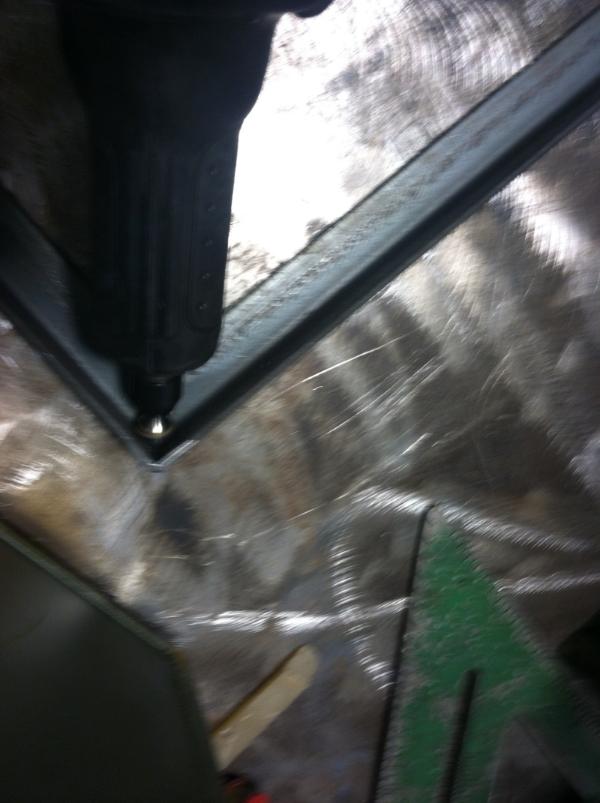
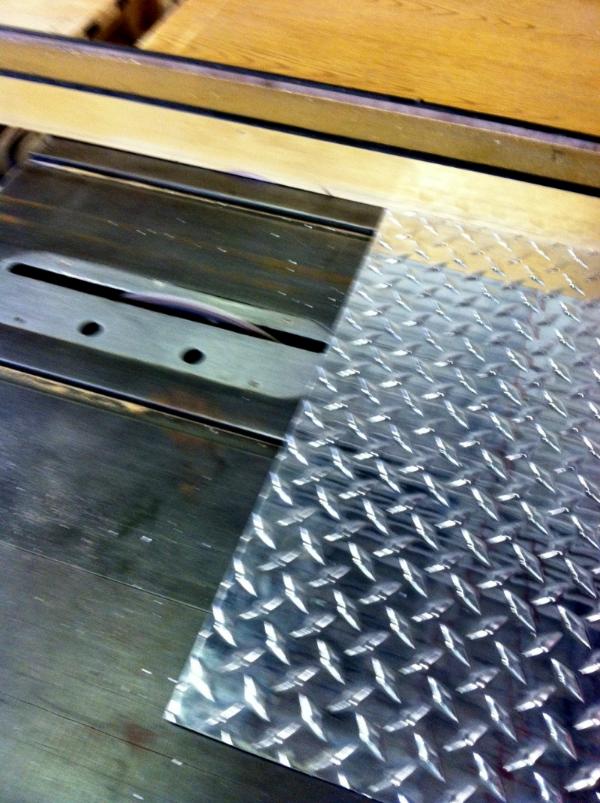
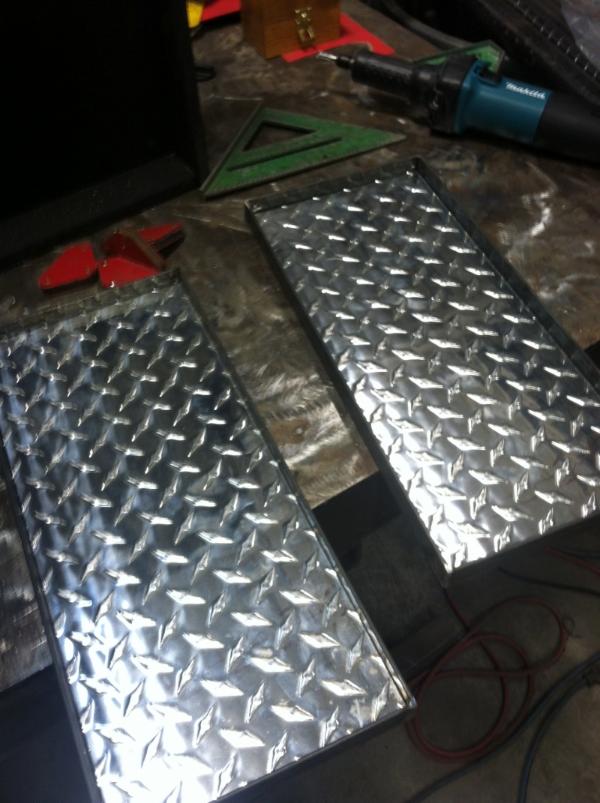
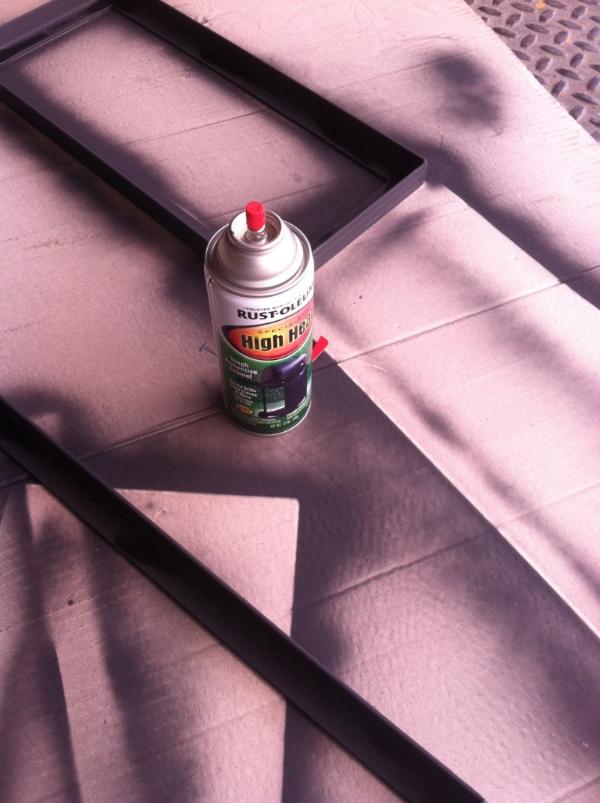
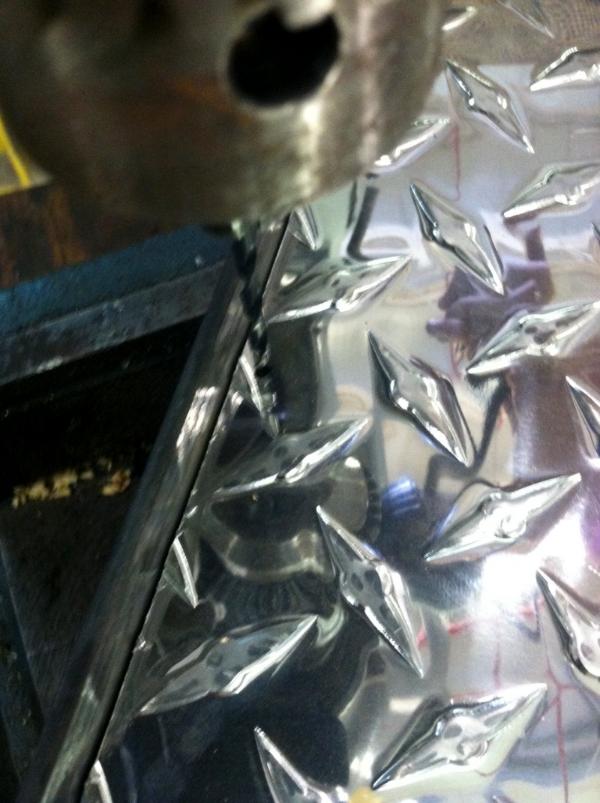
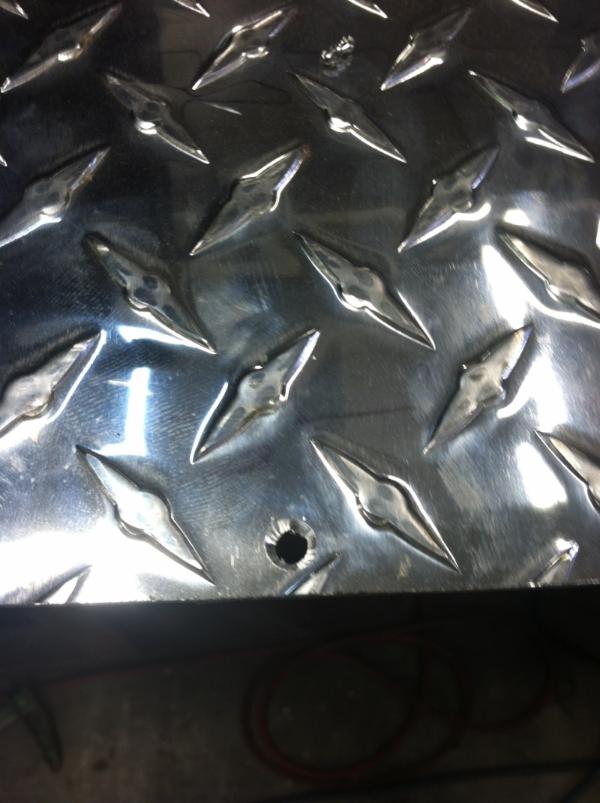
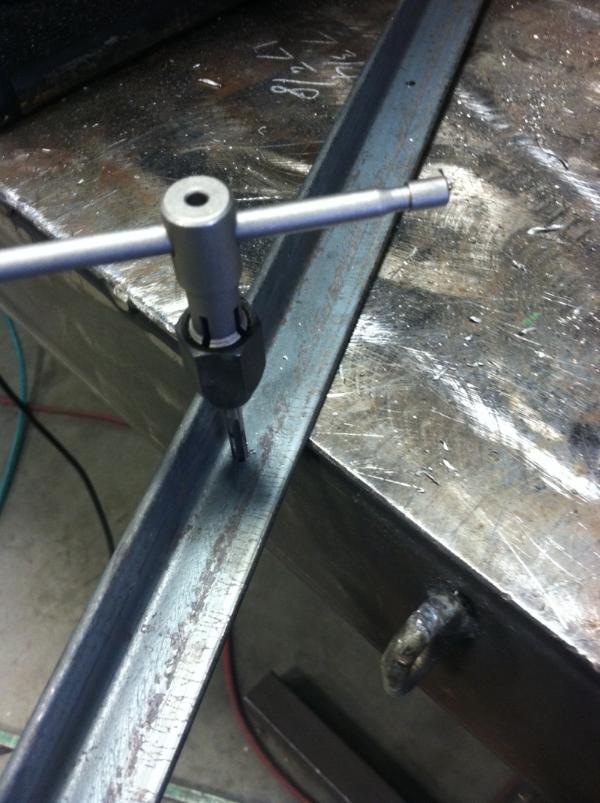
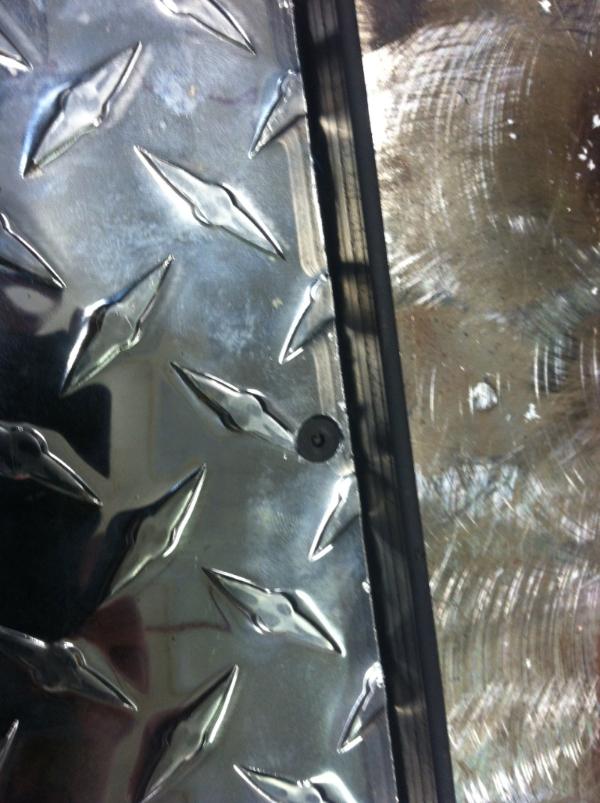
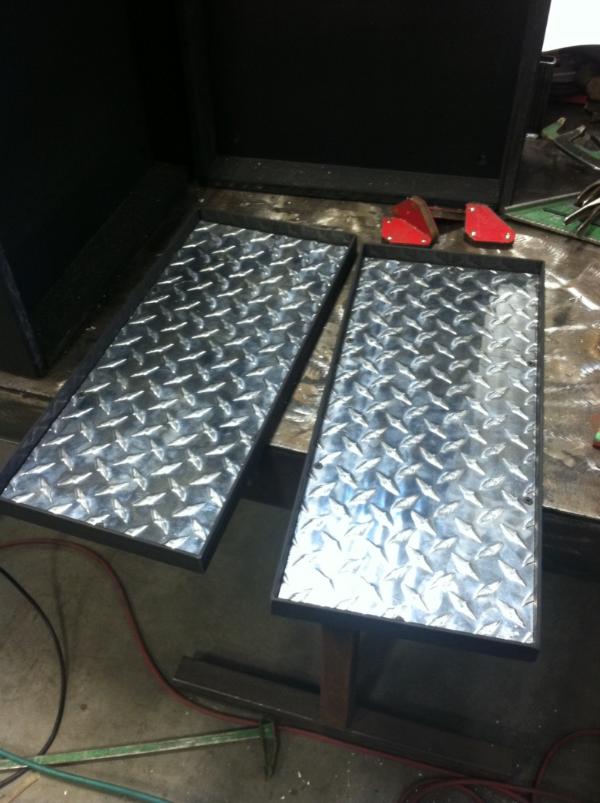
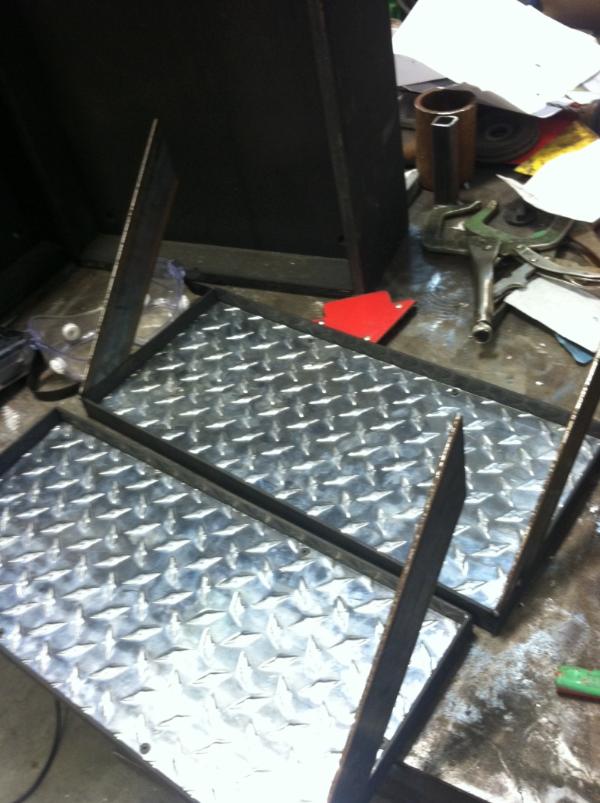
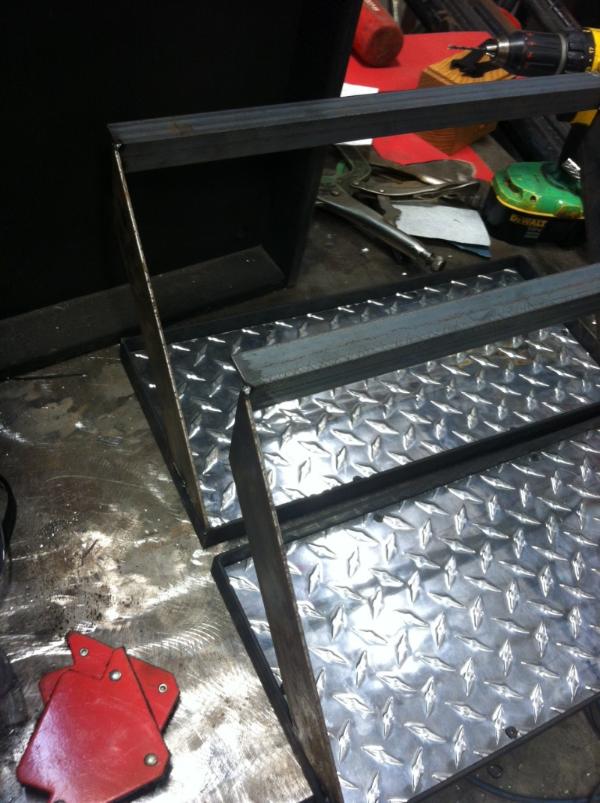
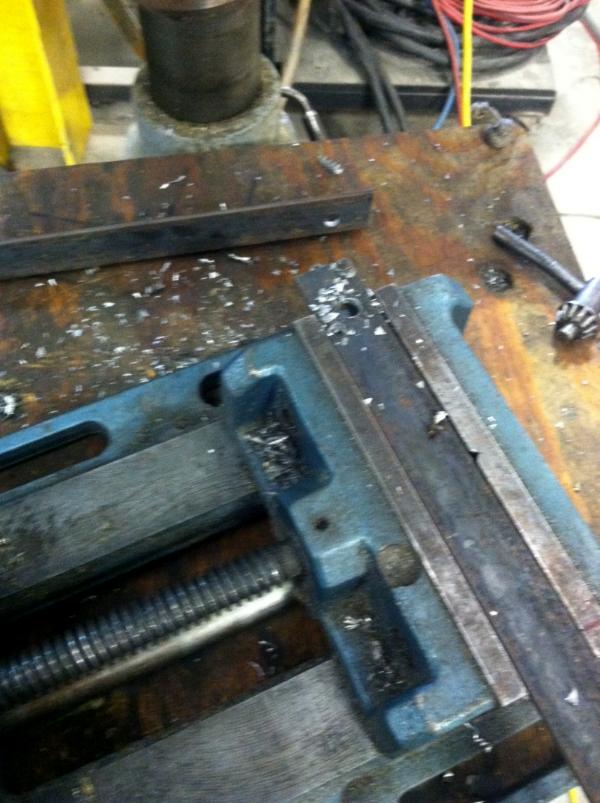
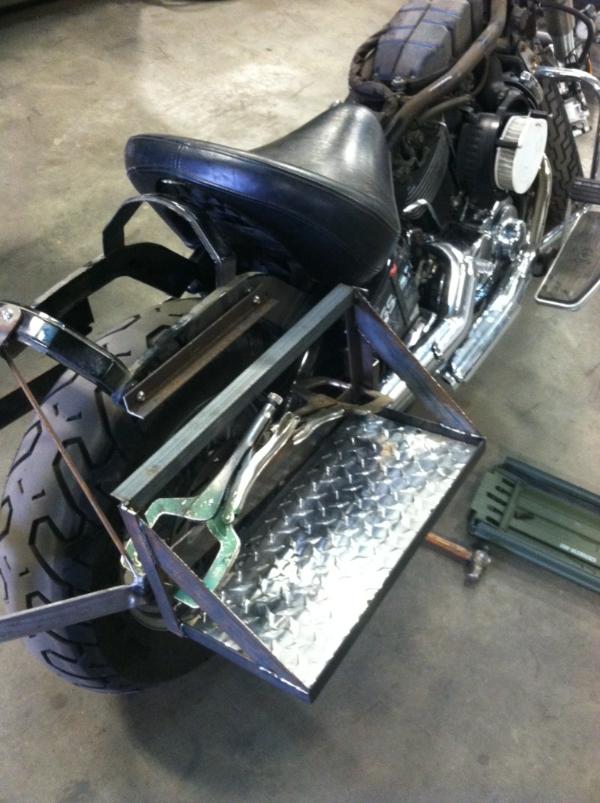
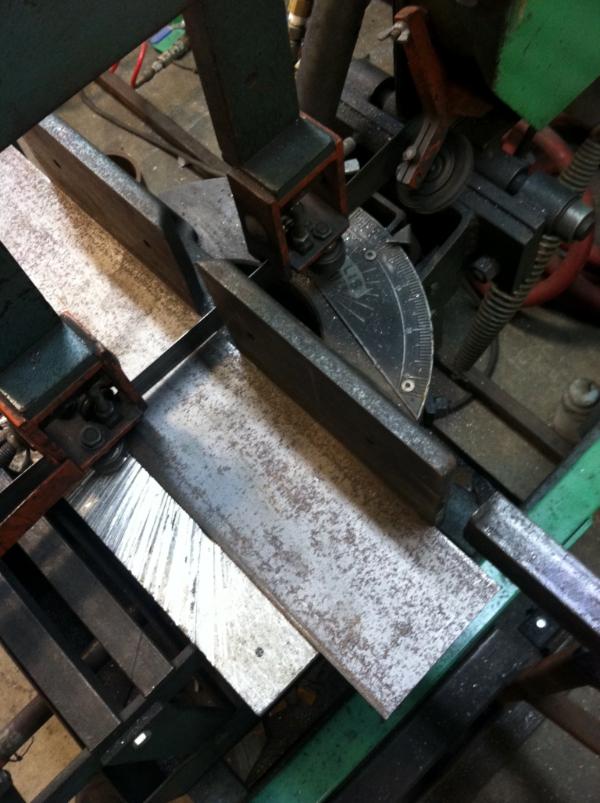
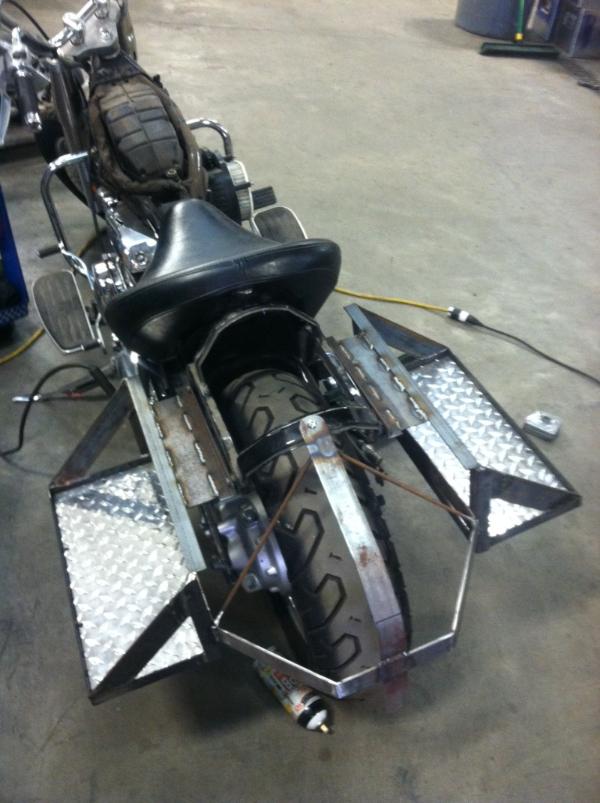
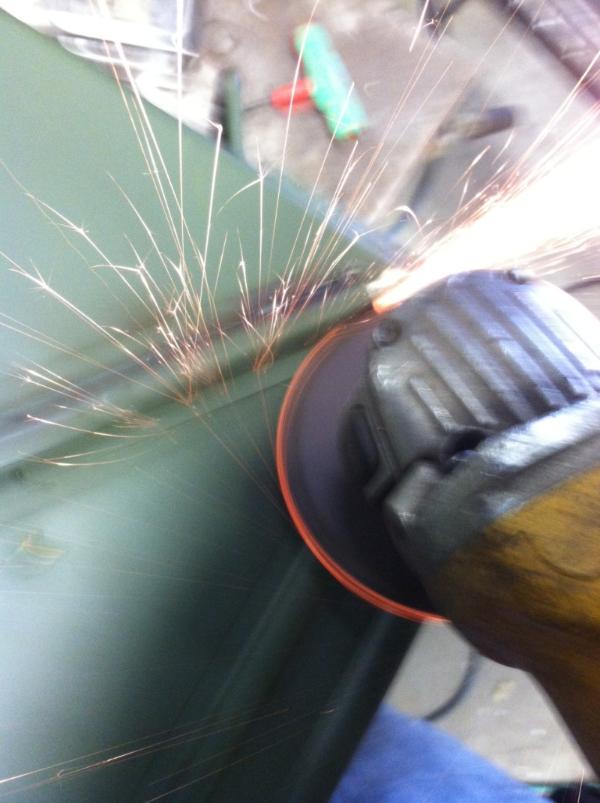
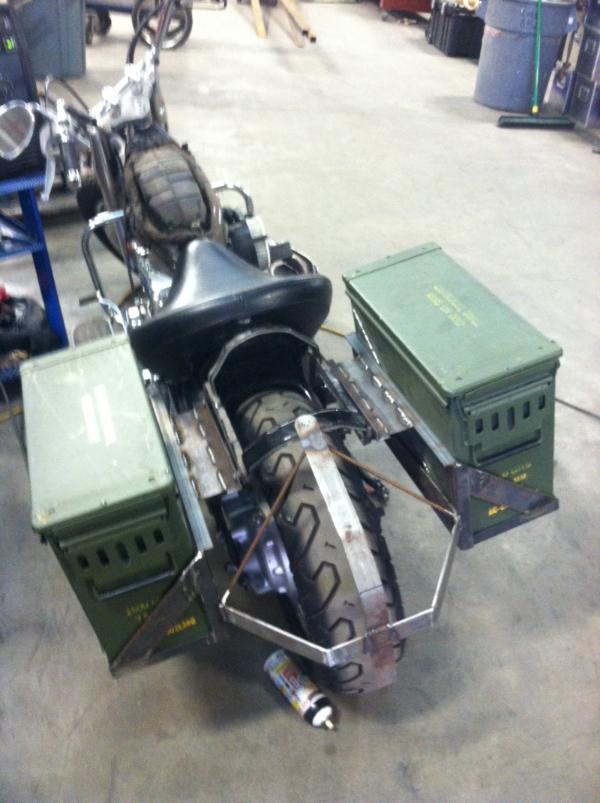
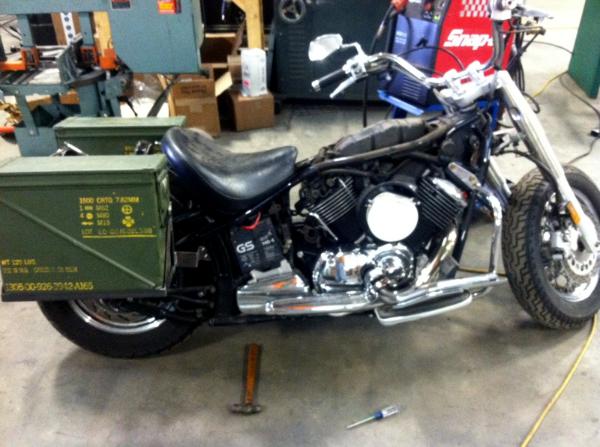
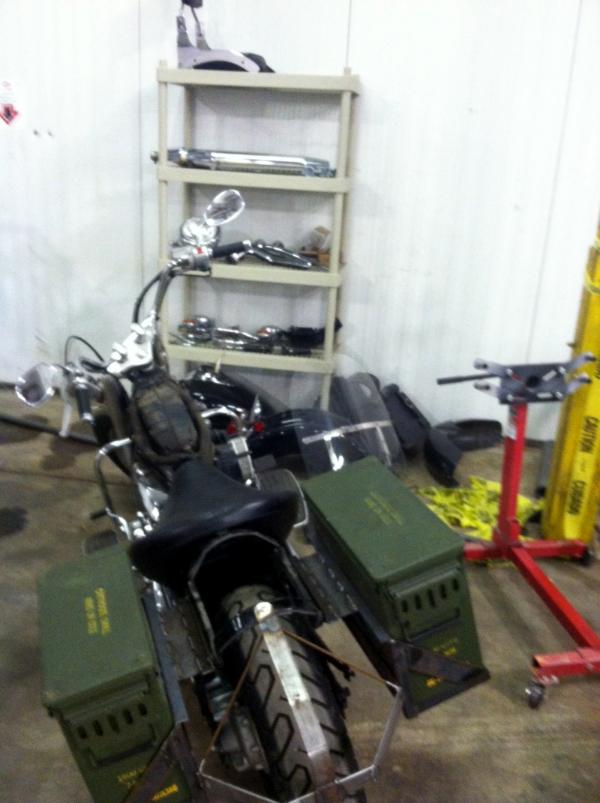
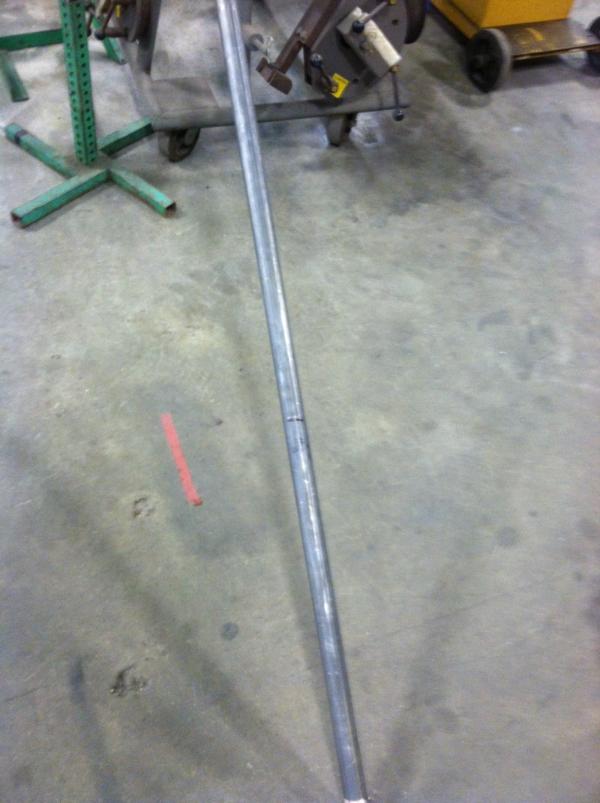
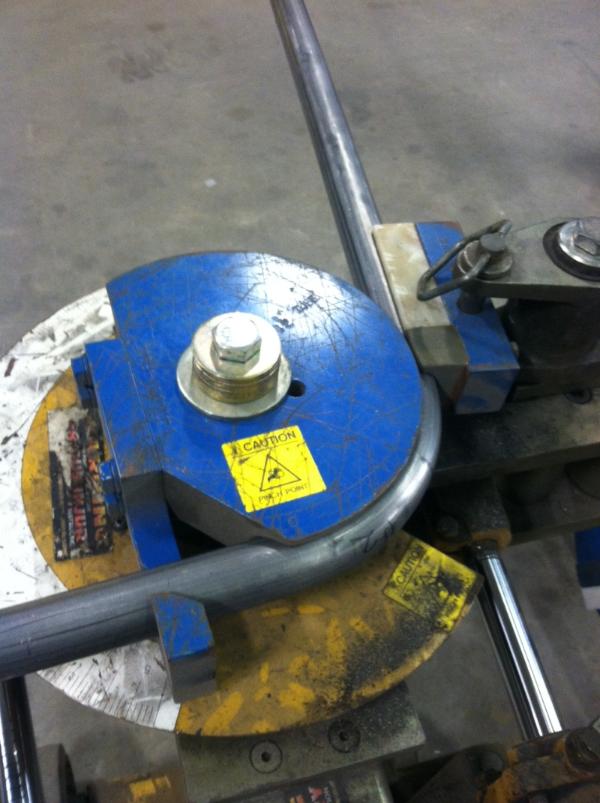
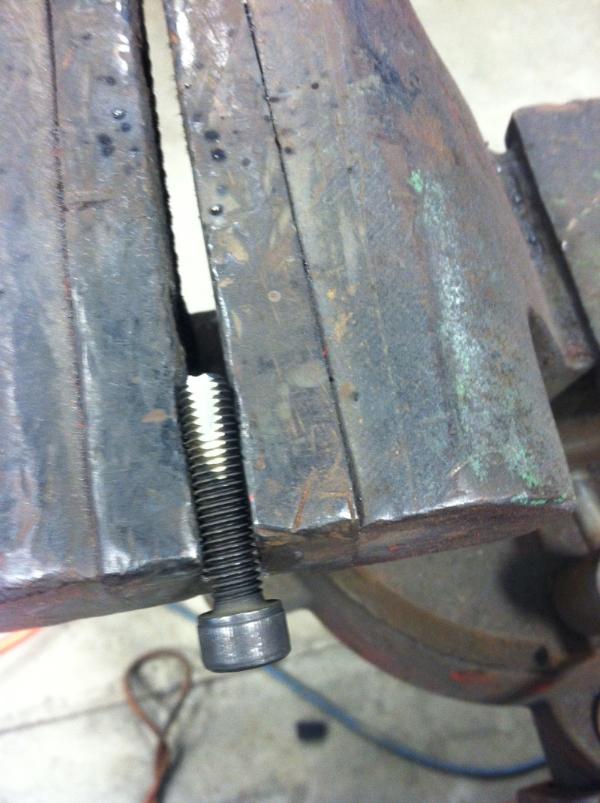
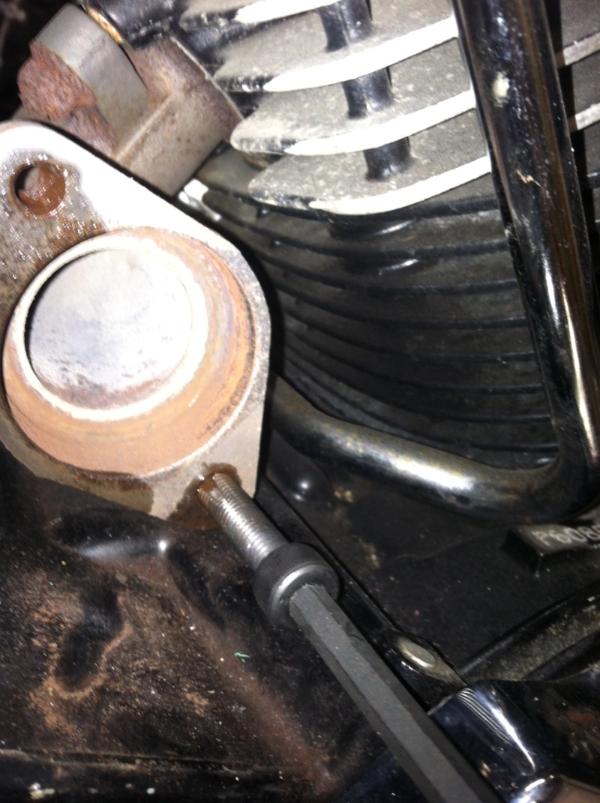
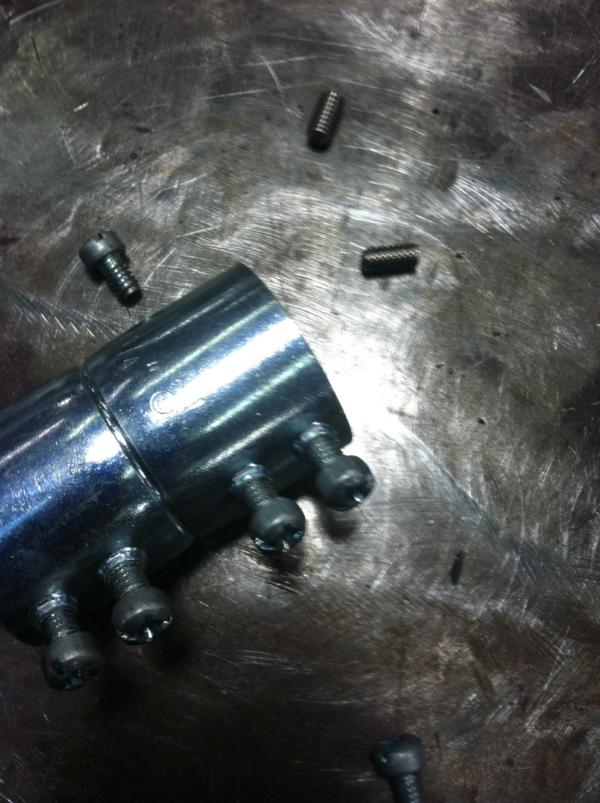
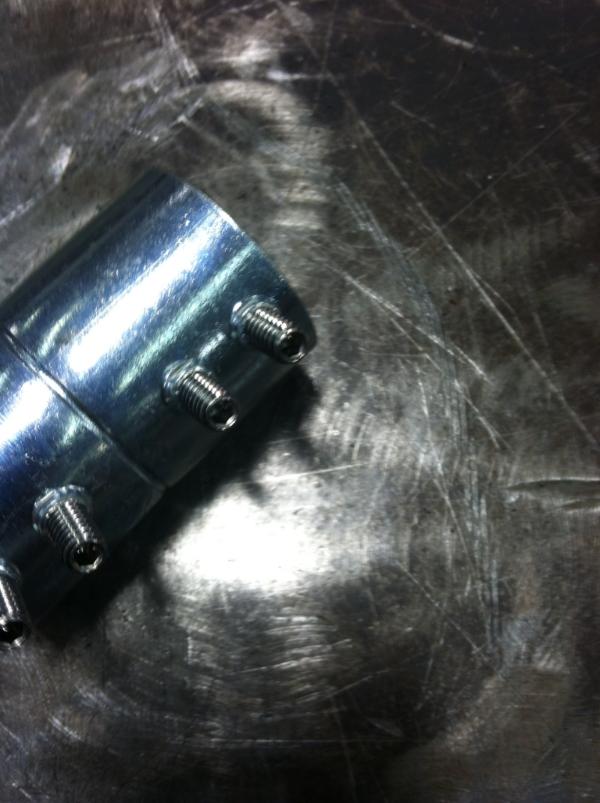
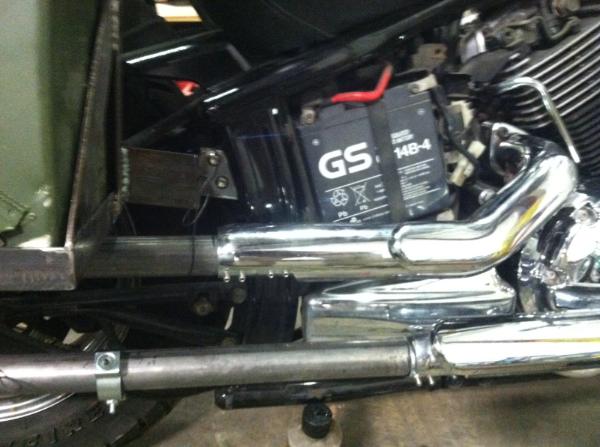
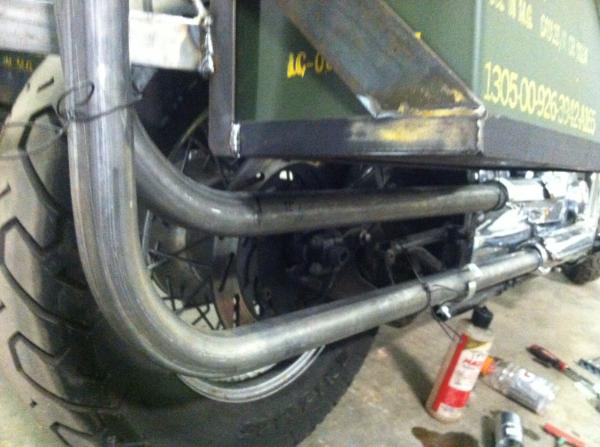
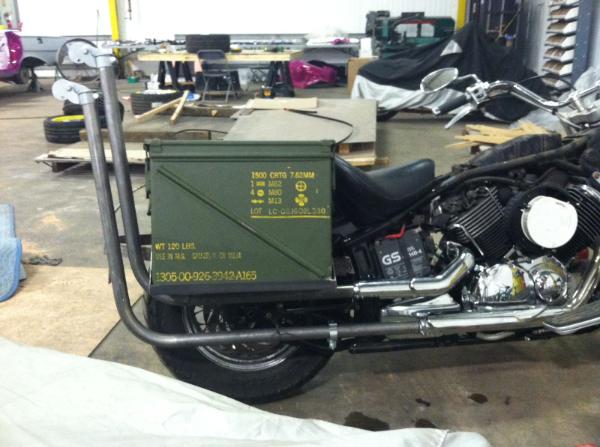
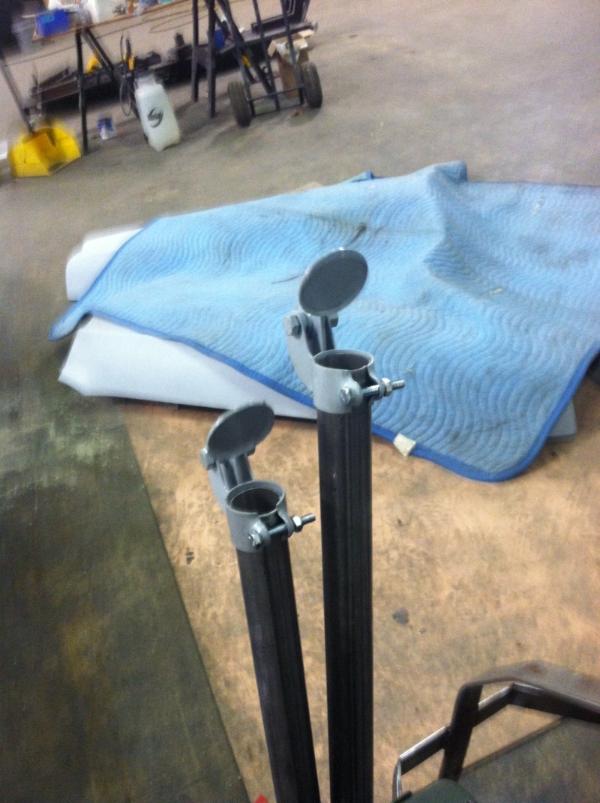

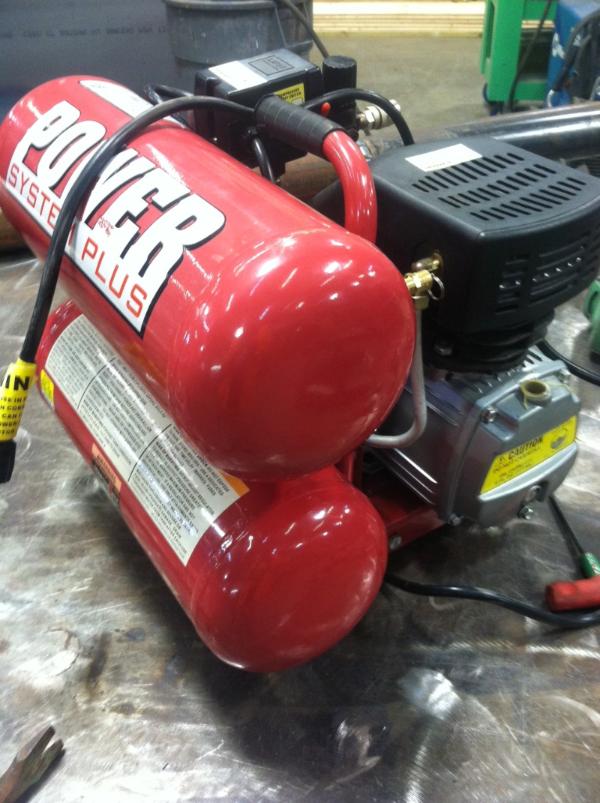
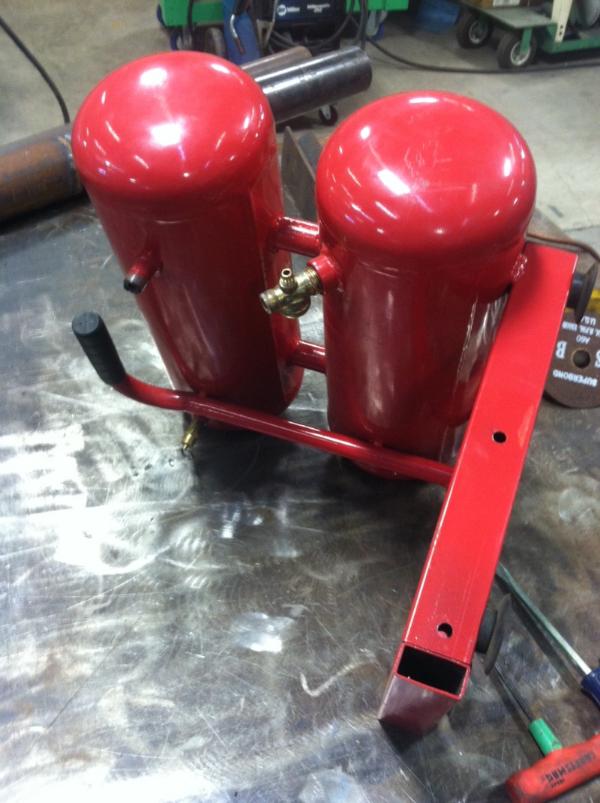

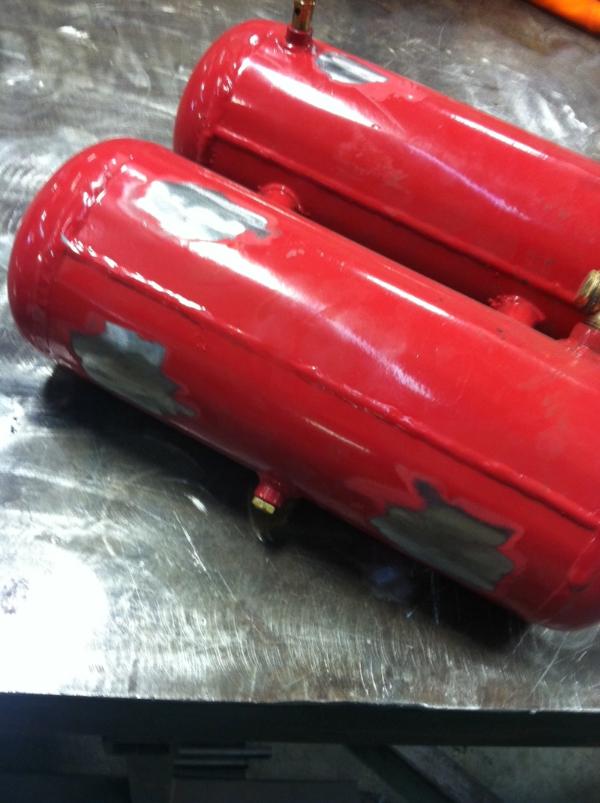
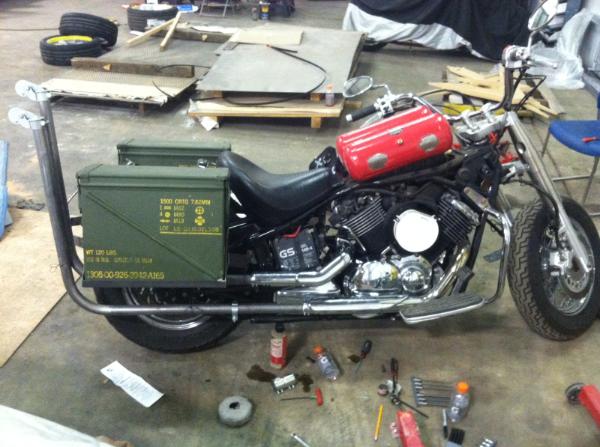
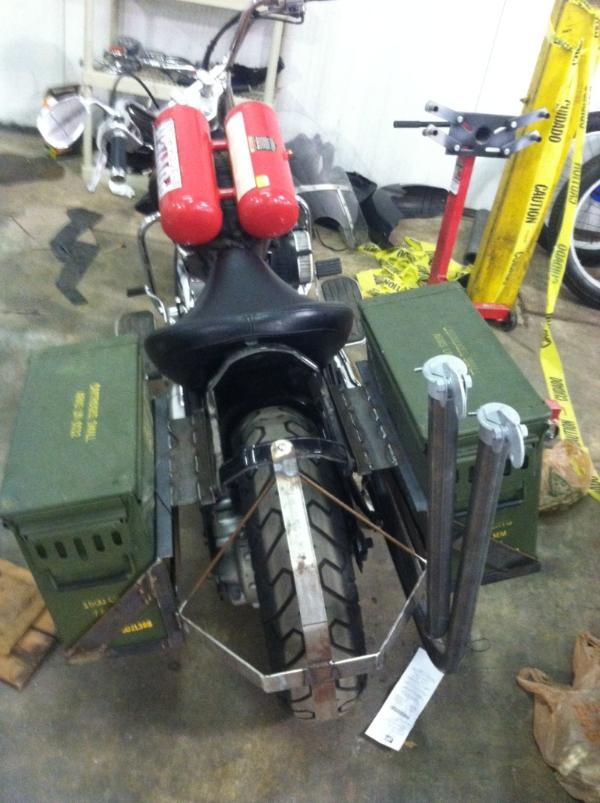
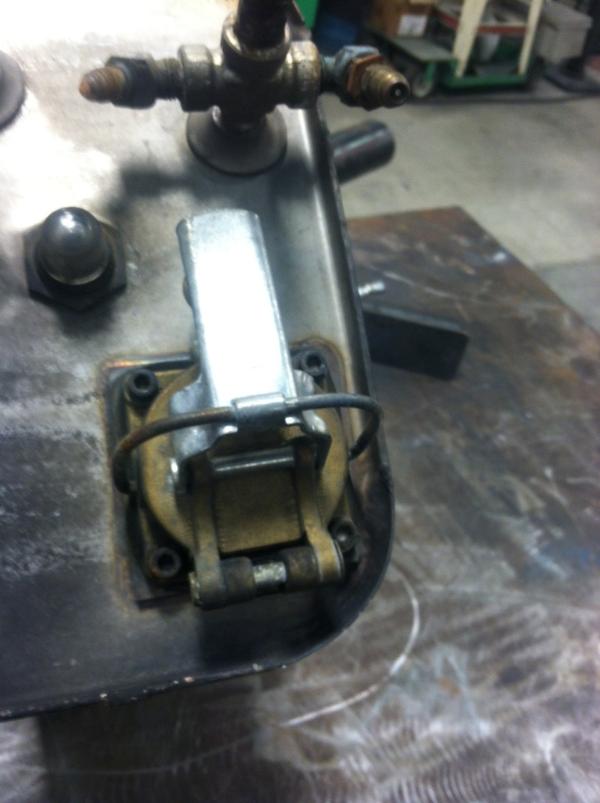
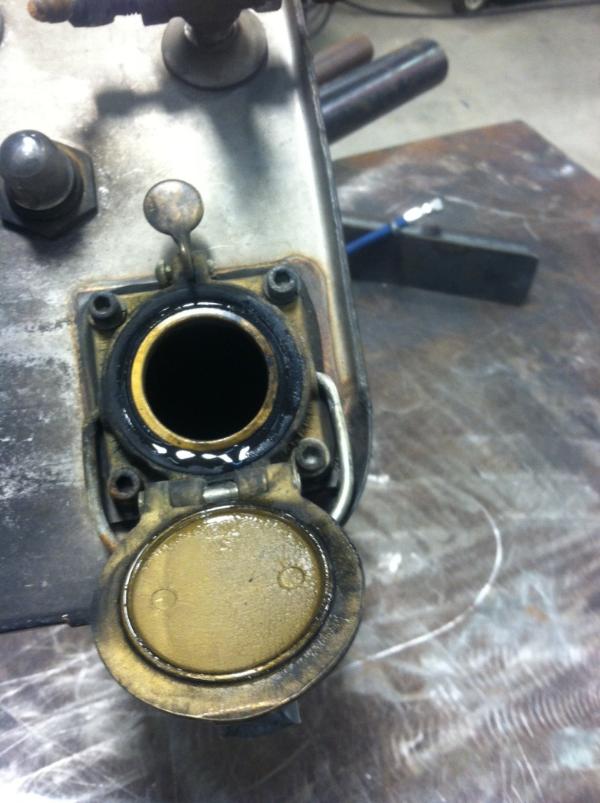
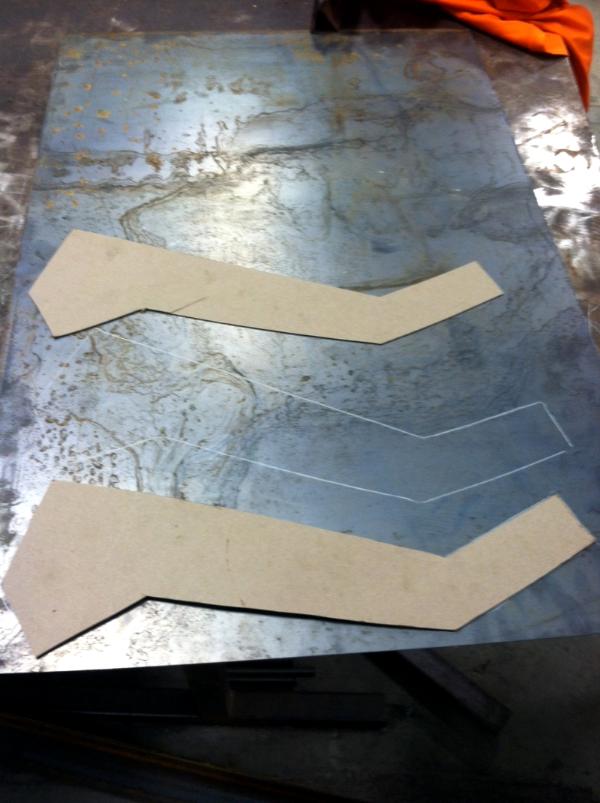
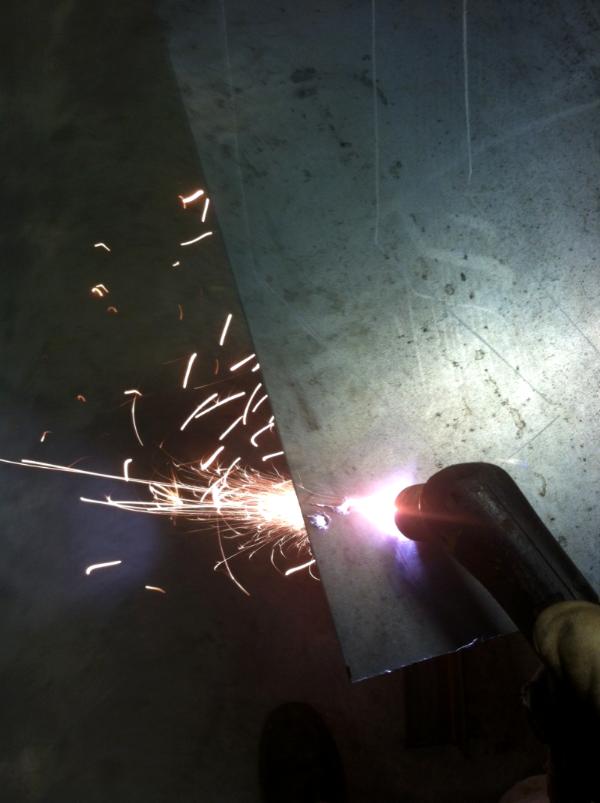
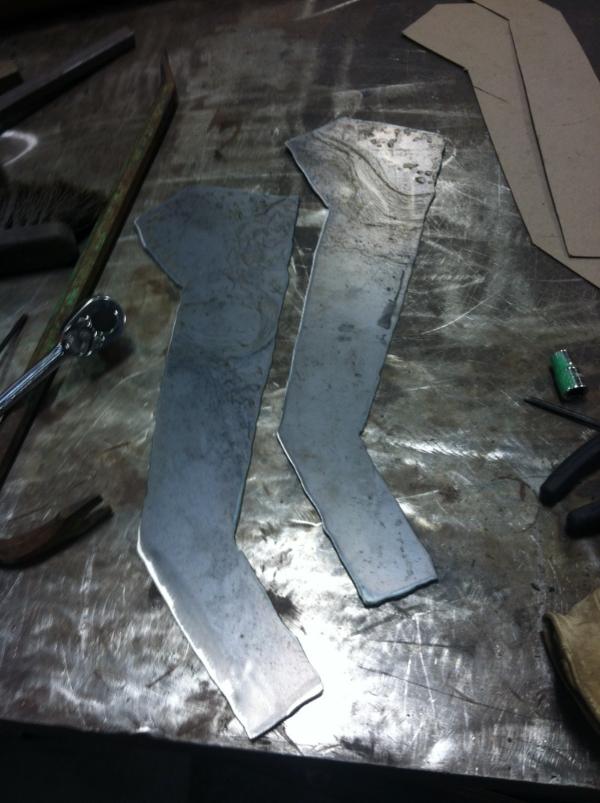
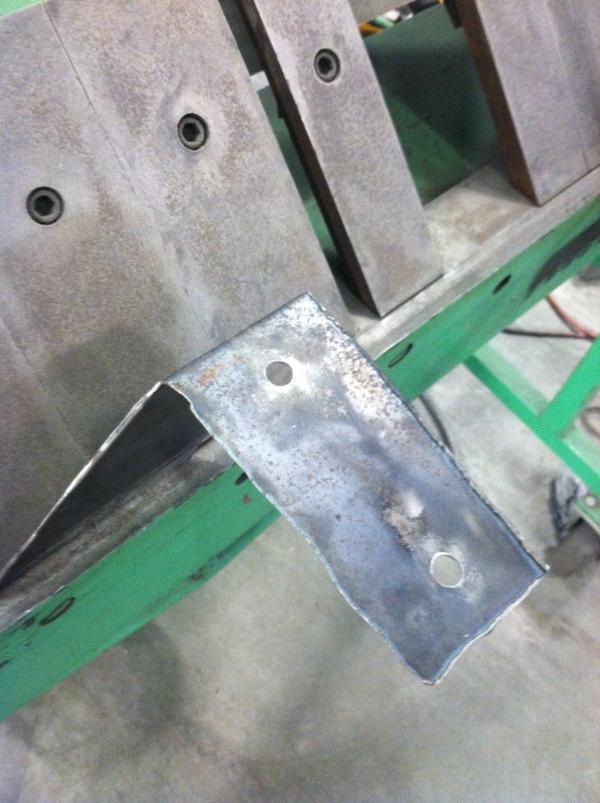

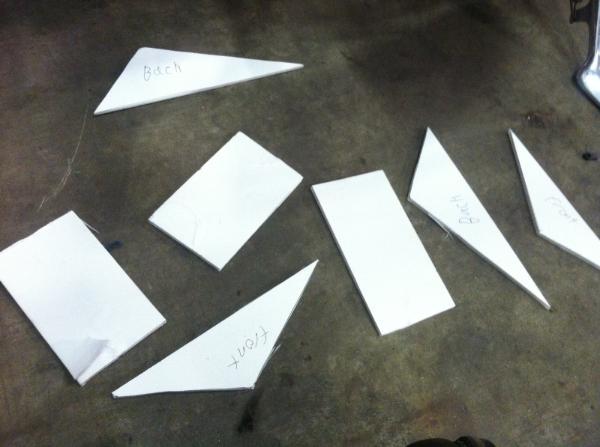
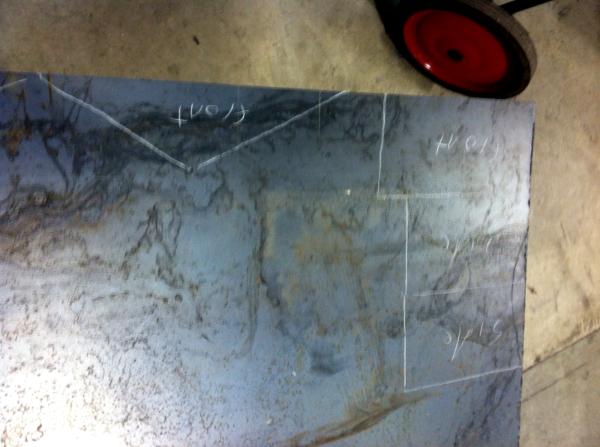
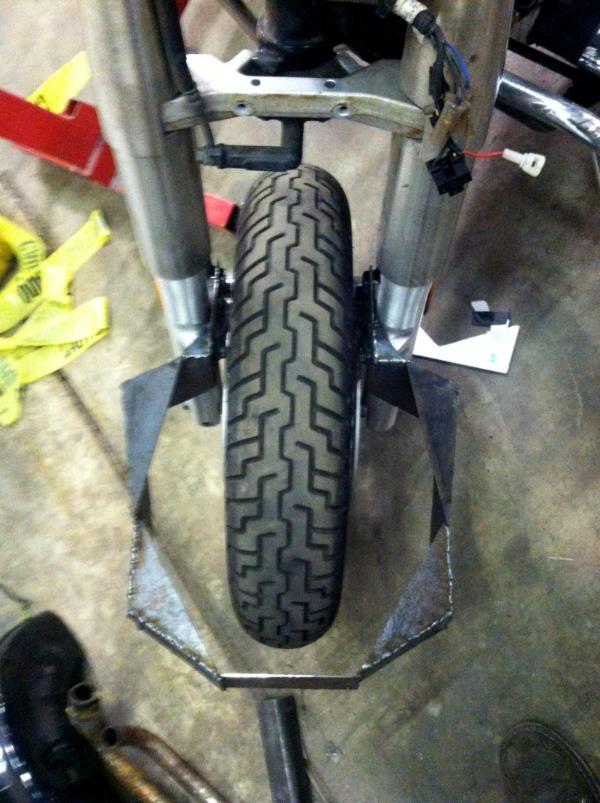
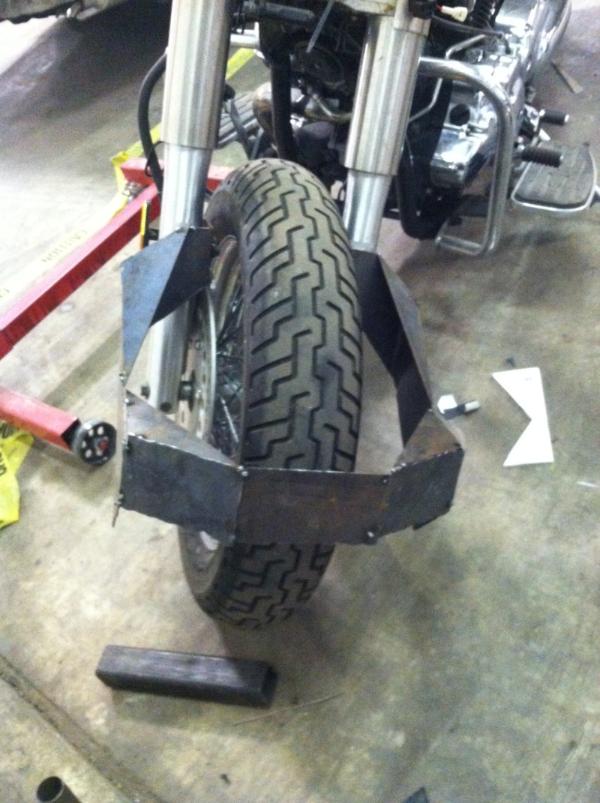
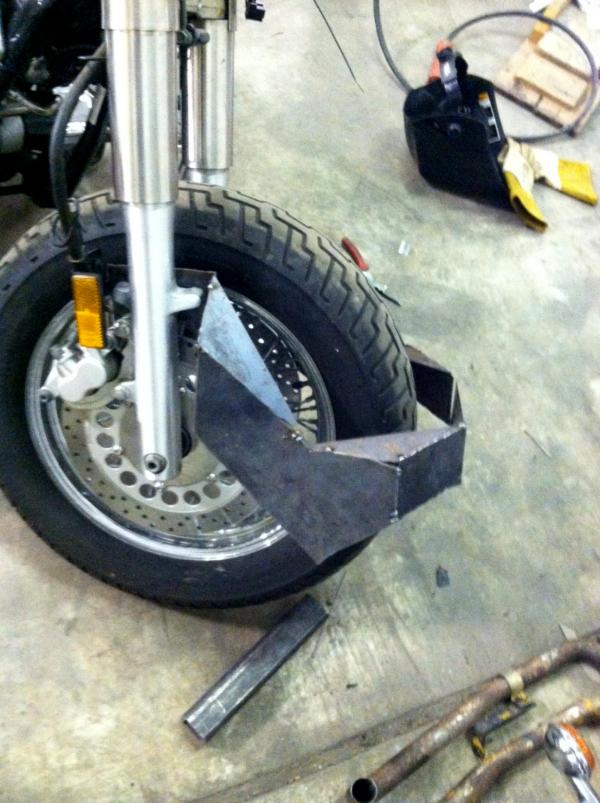
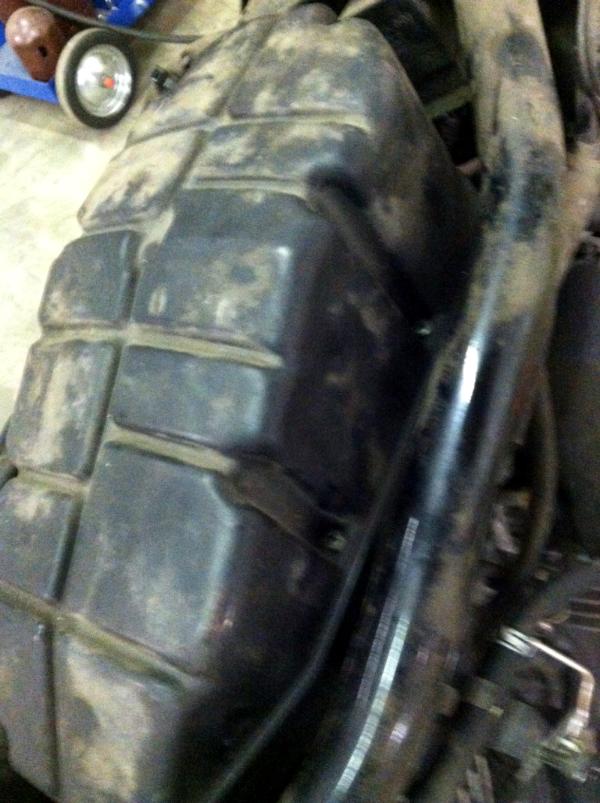
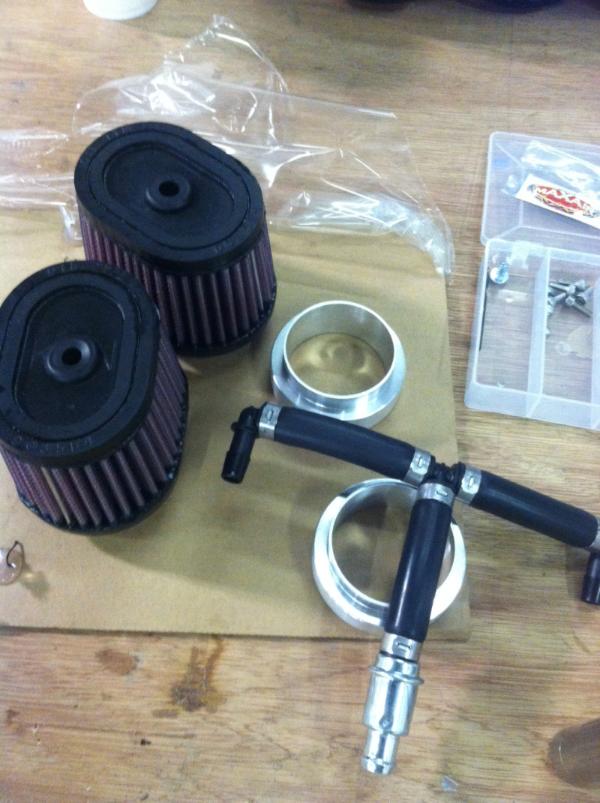
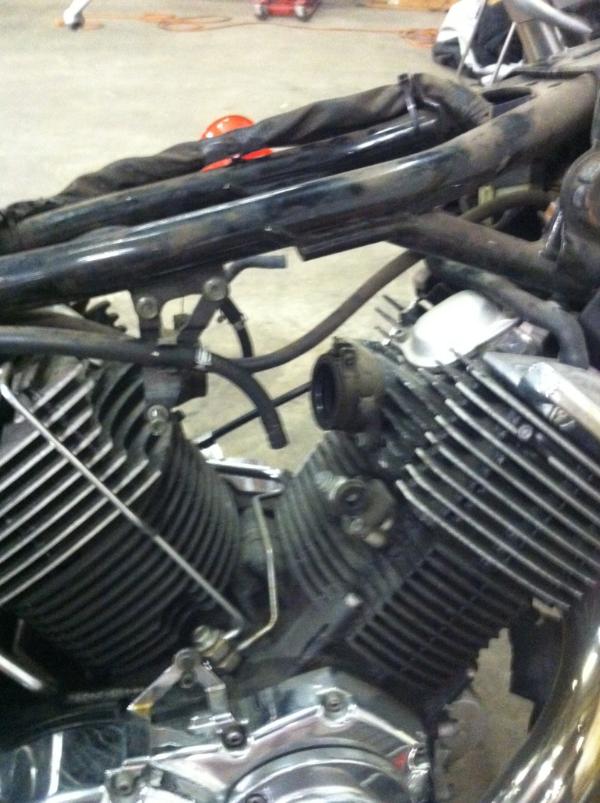
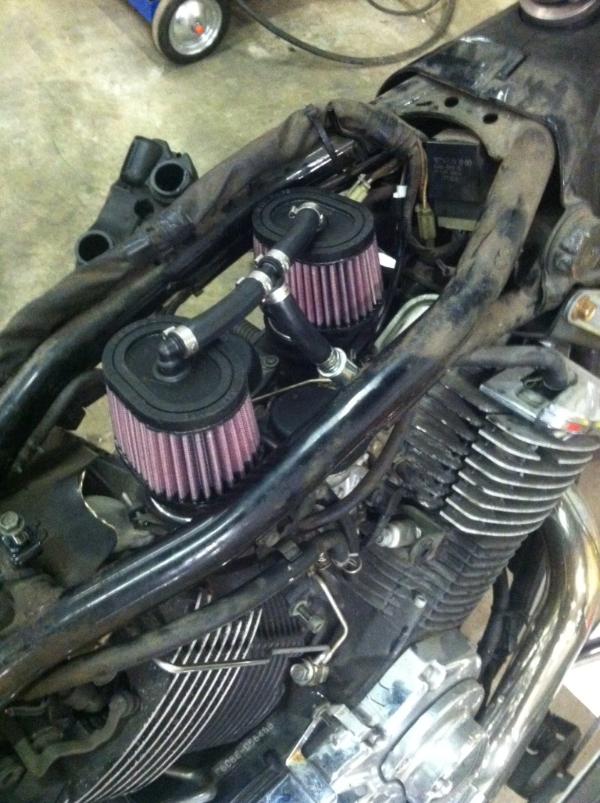


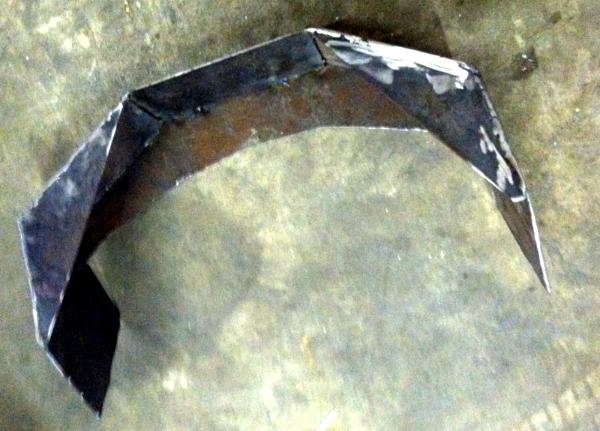
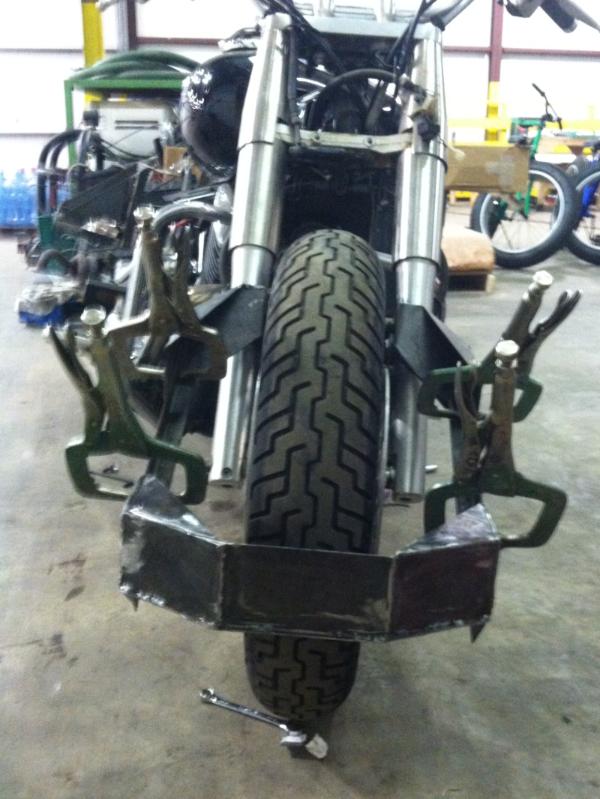
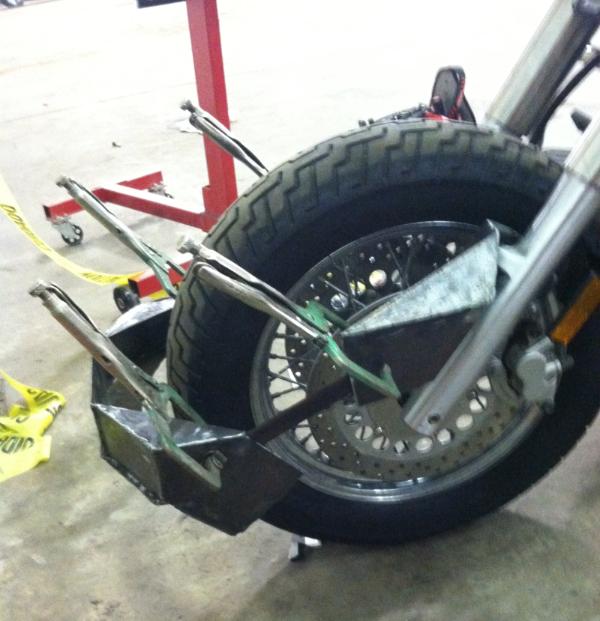
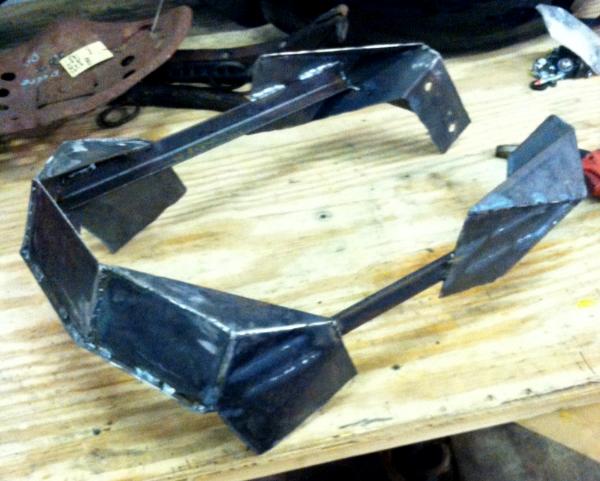
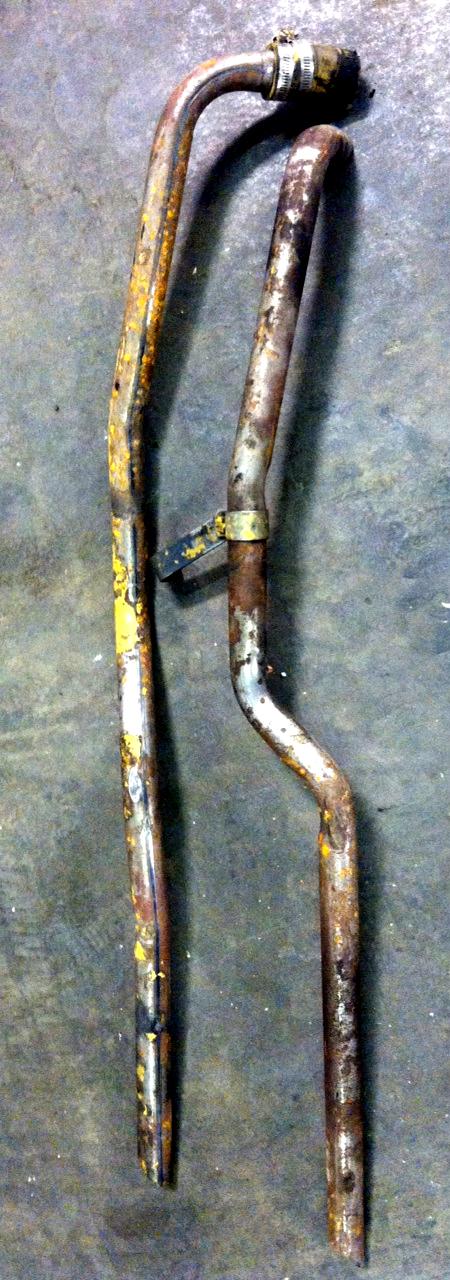
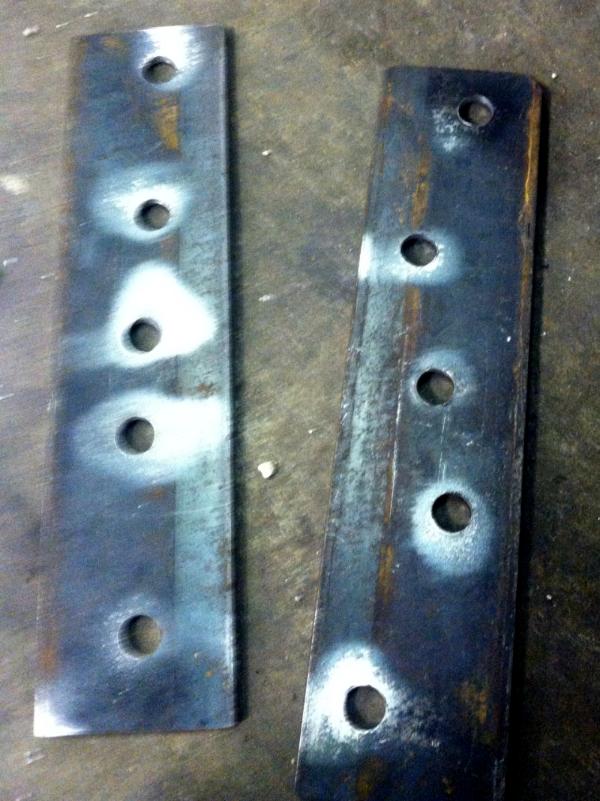
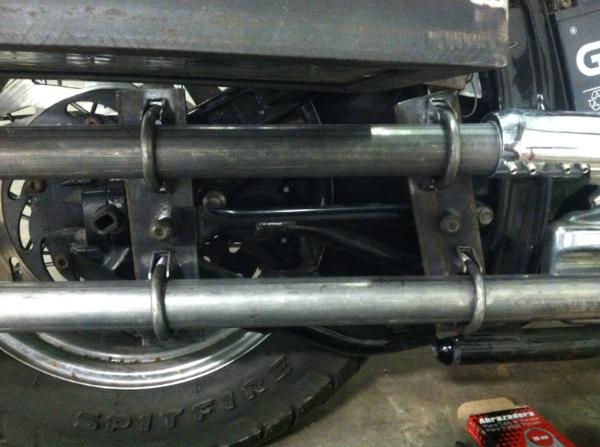
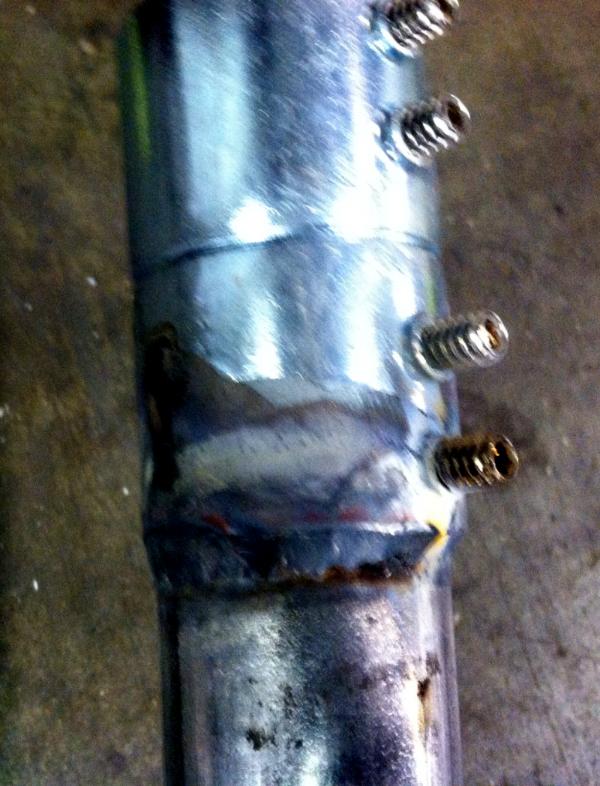
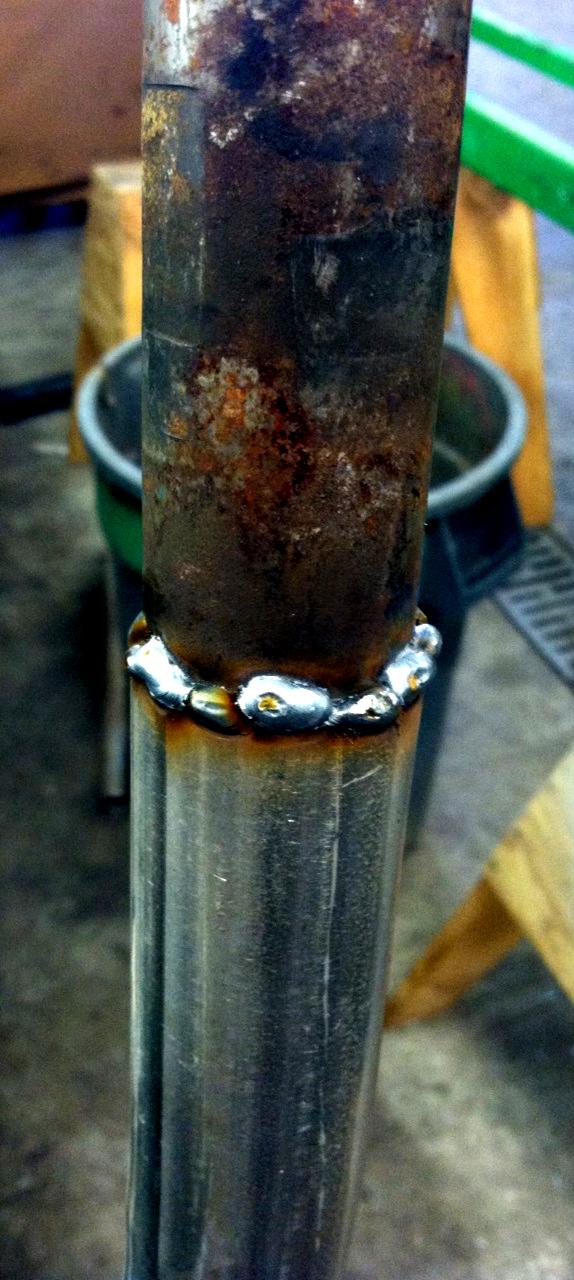
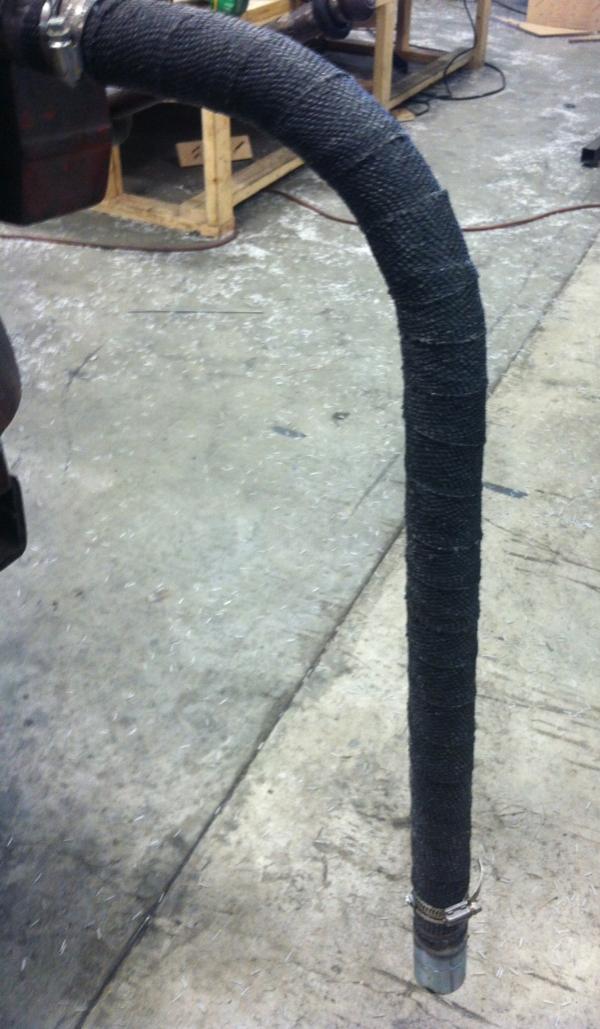
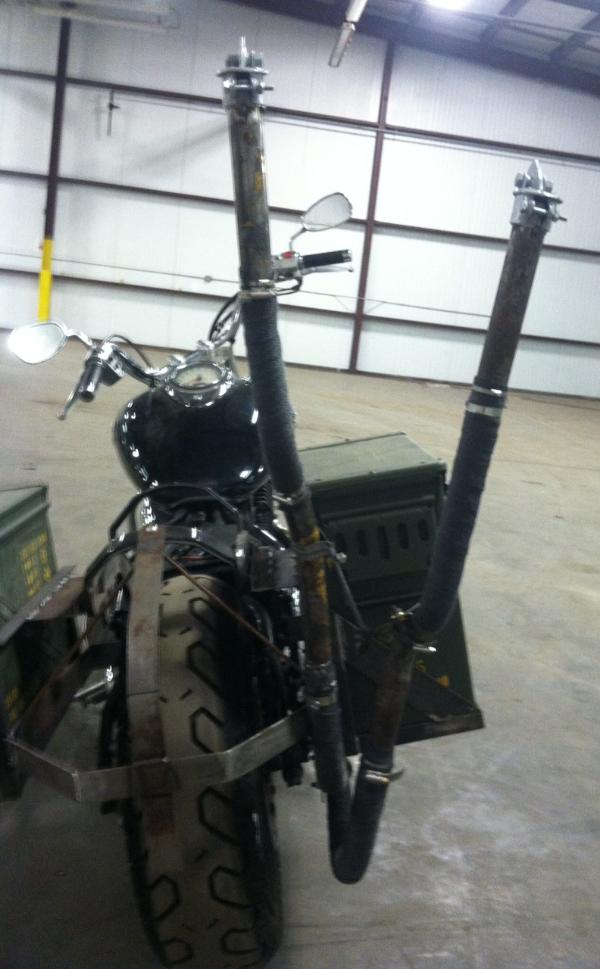
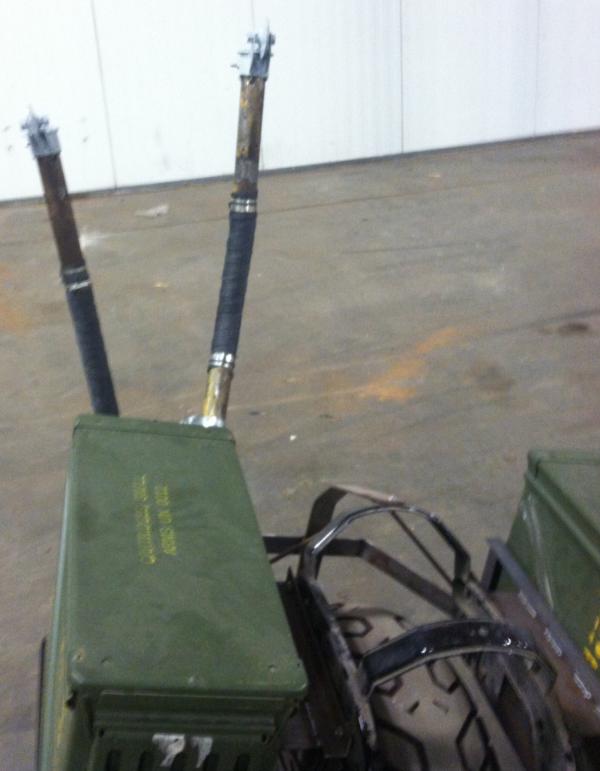
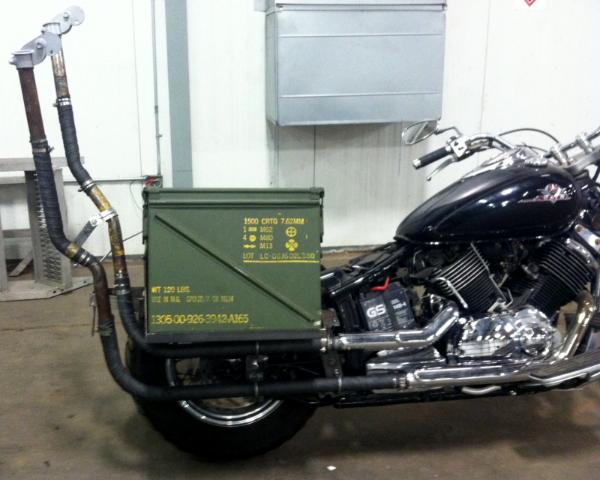
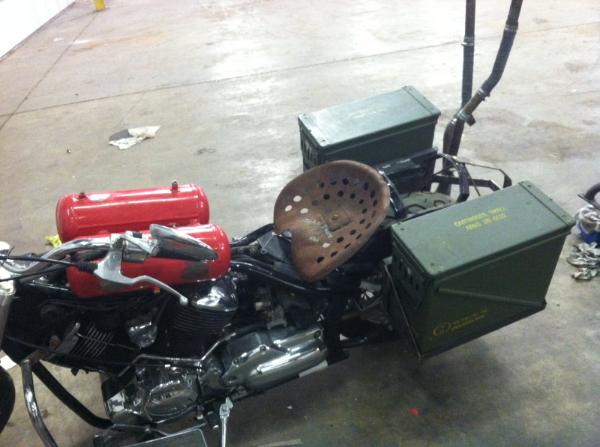

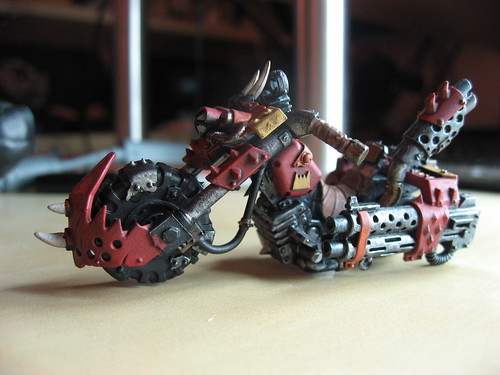
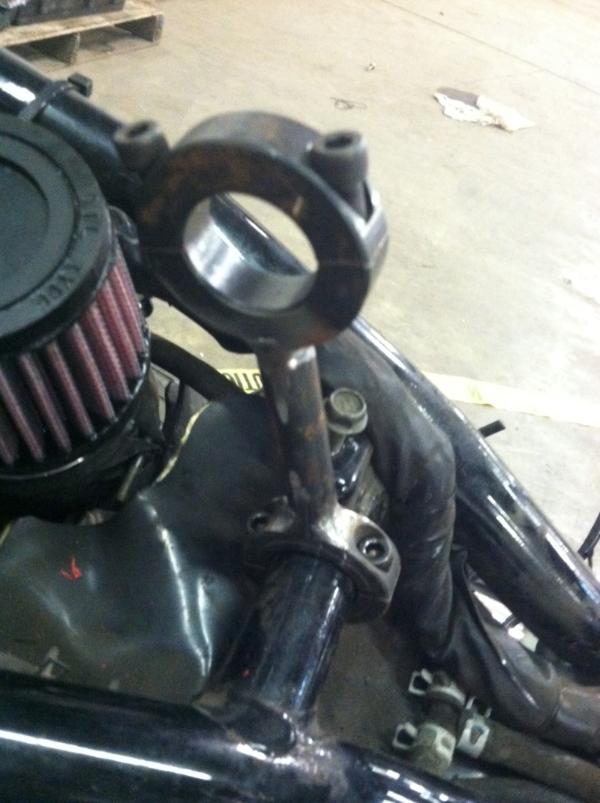
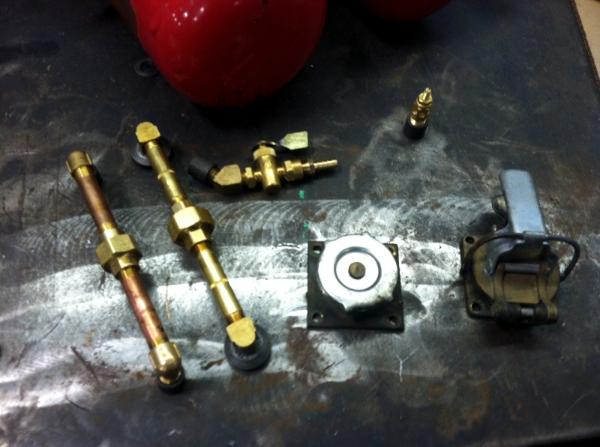
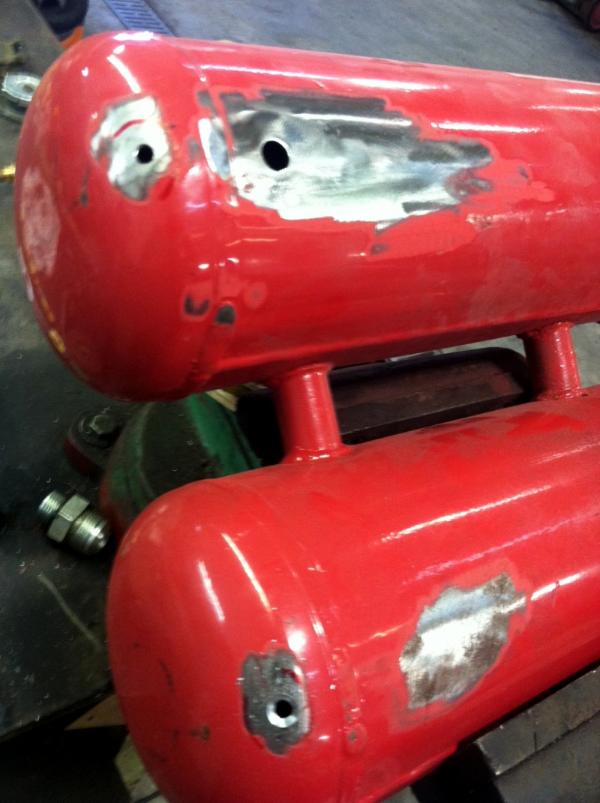
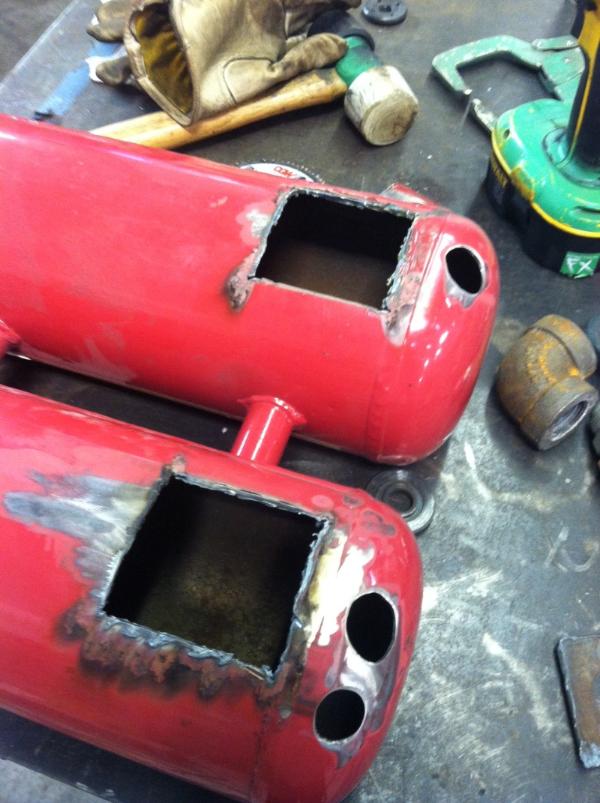

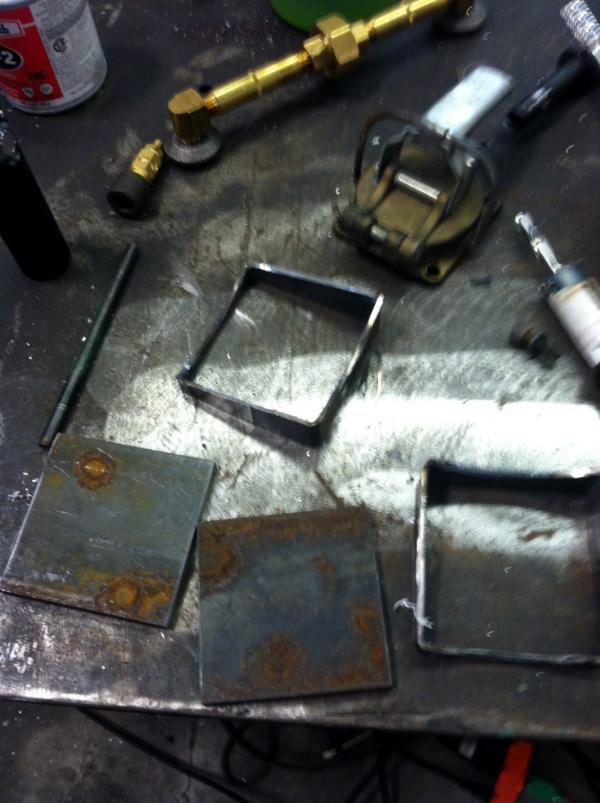
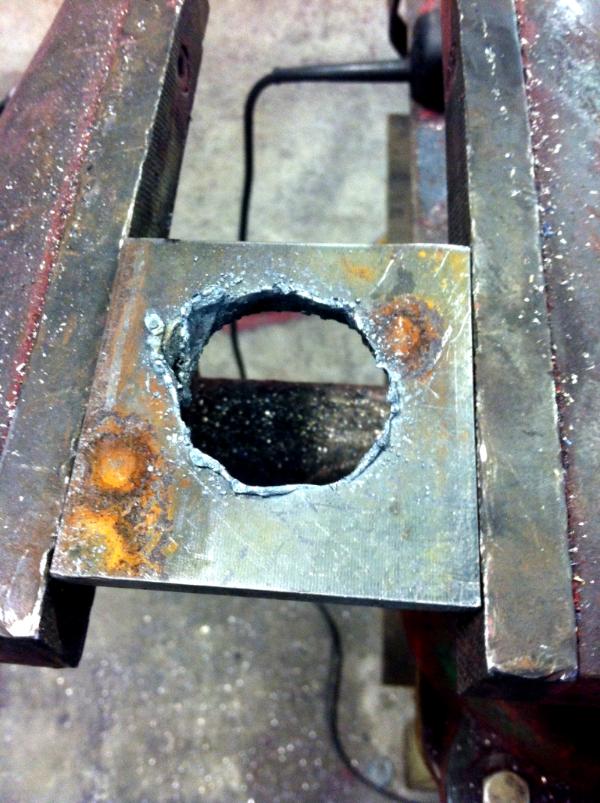
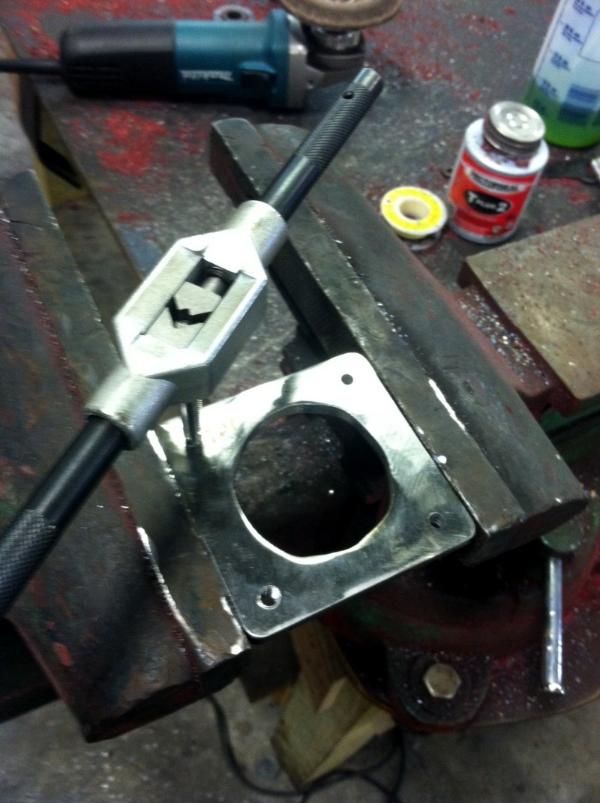
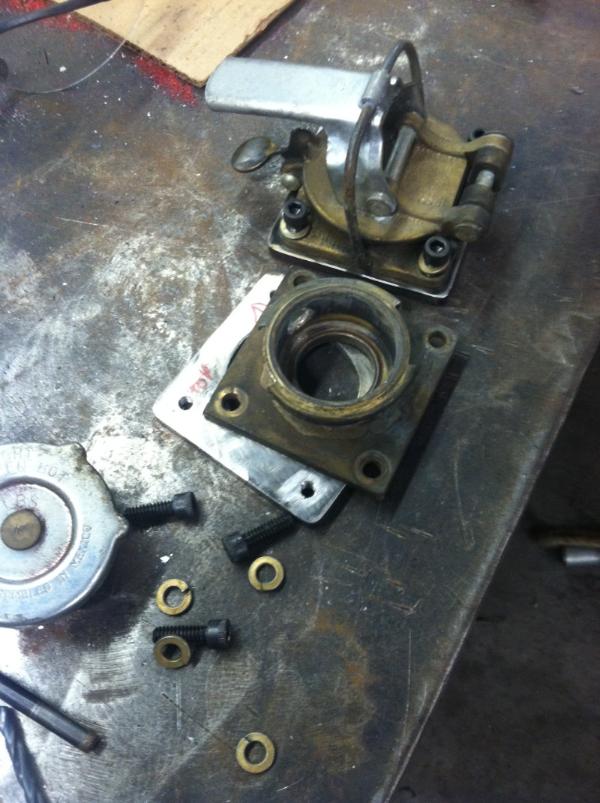
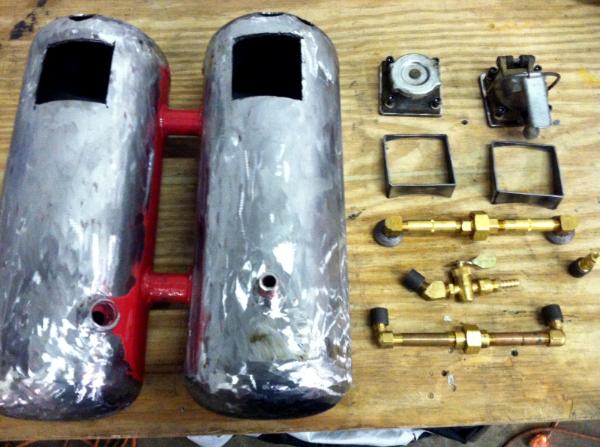
 NOW YOU'S
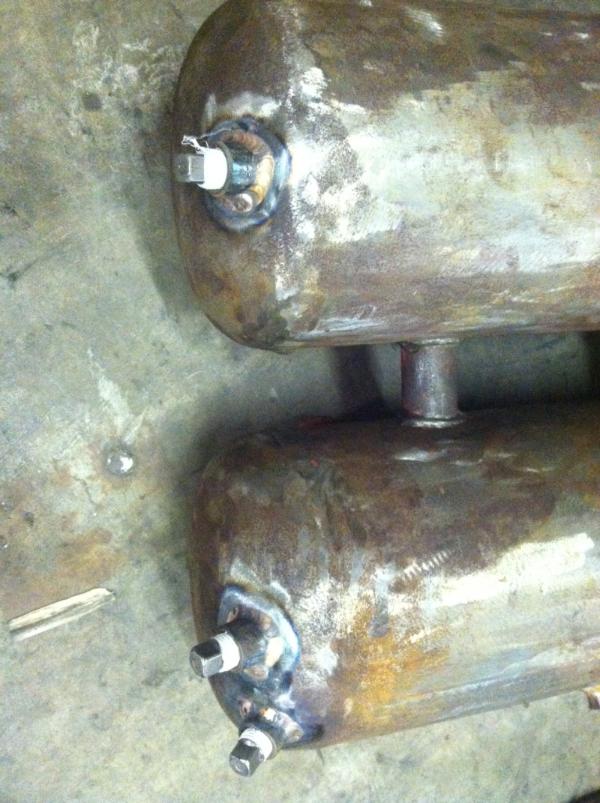
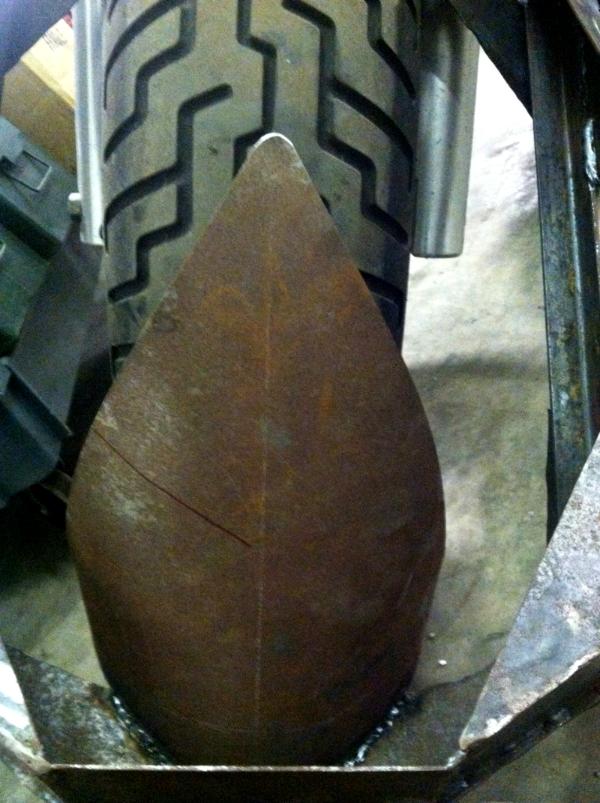
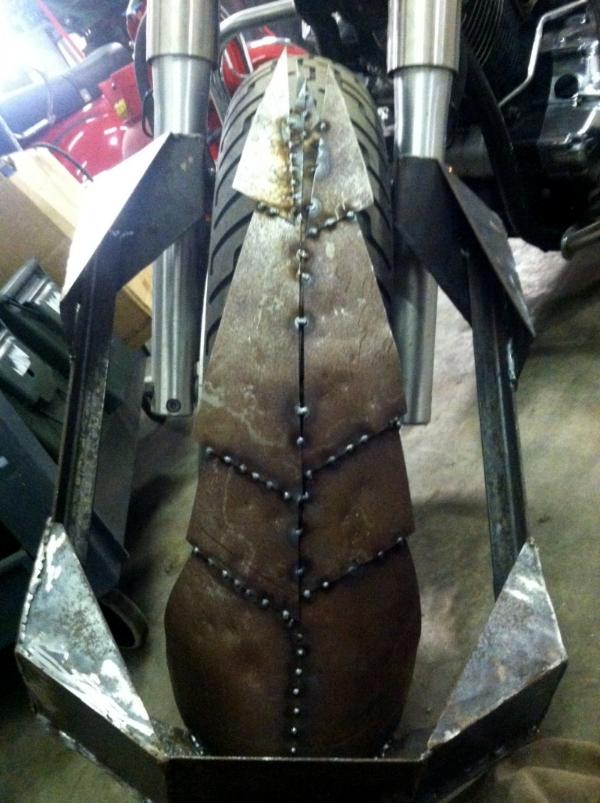
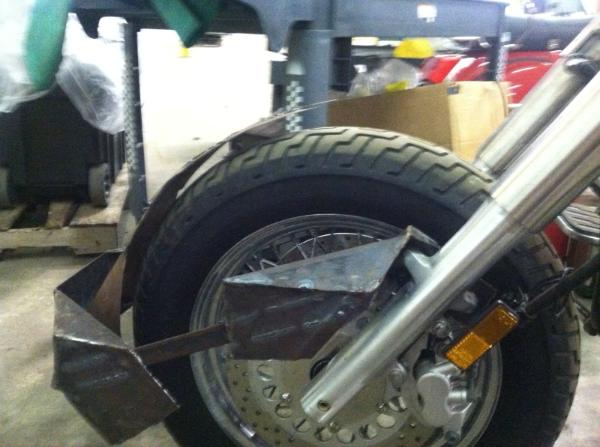
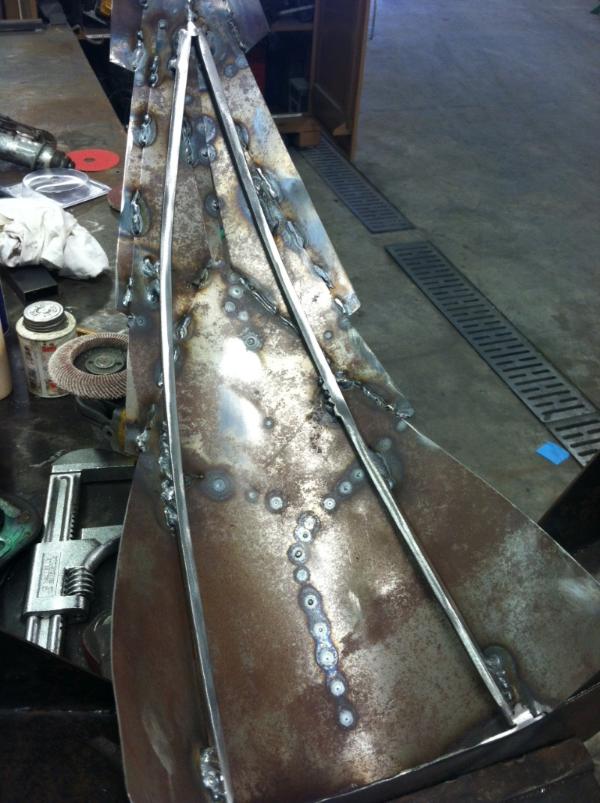
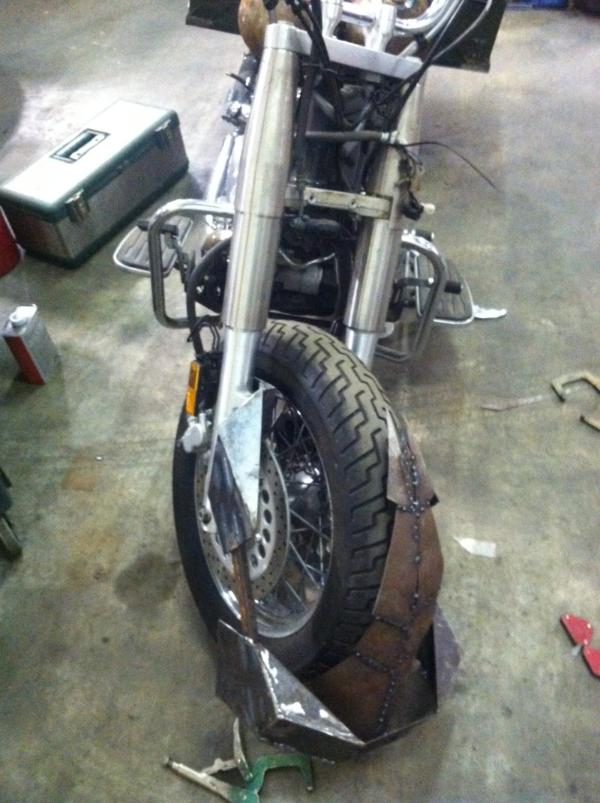
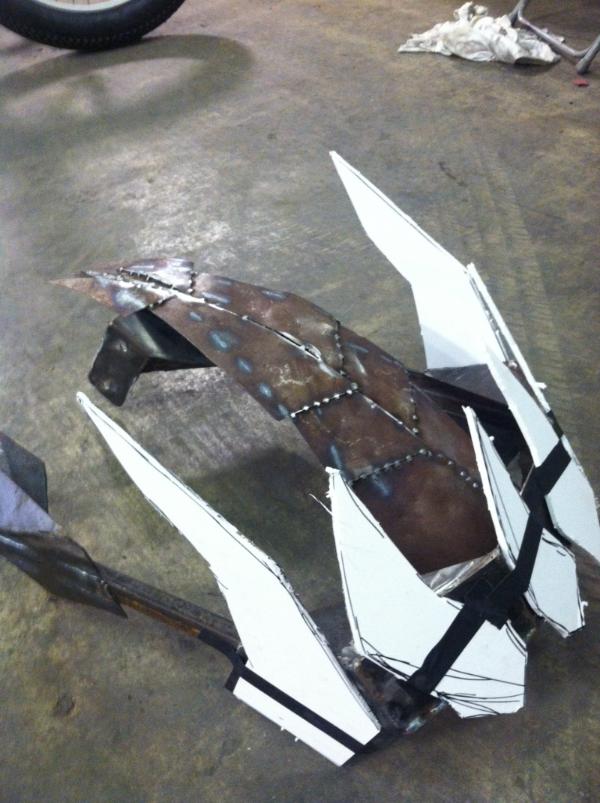
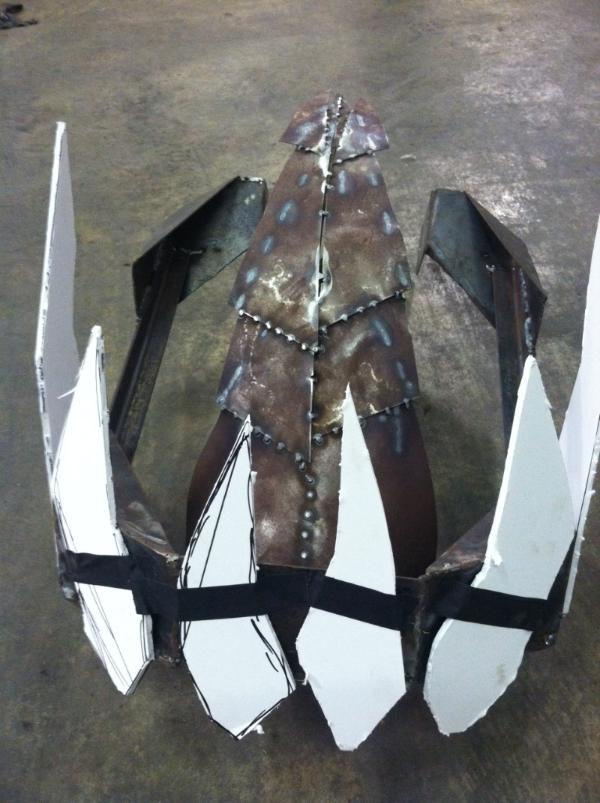
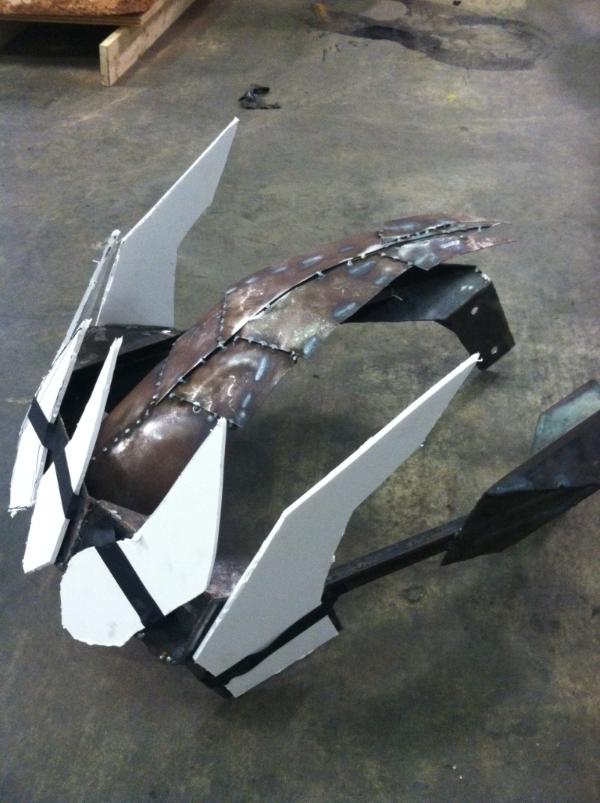
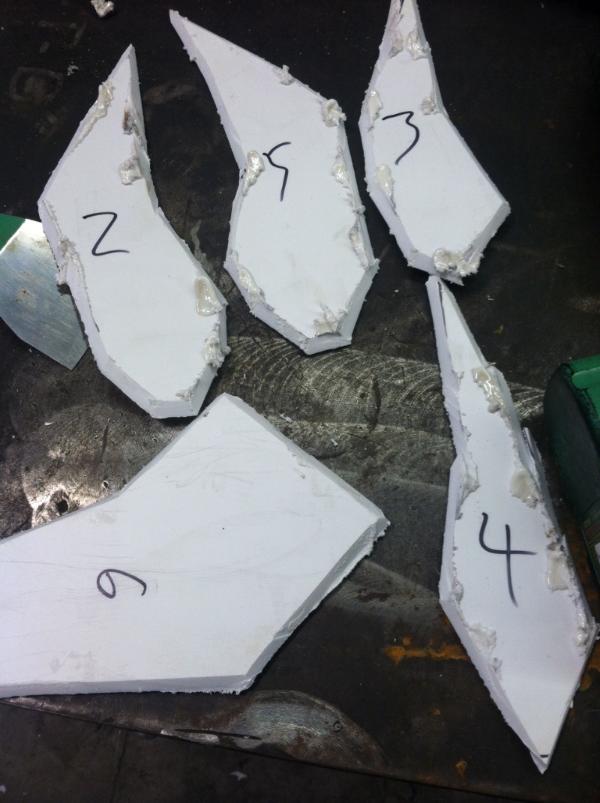
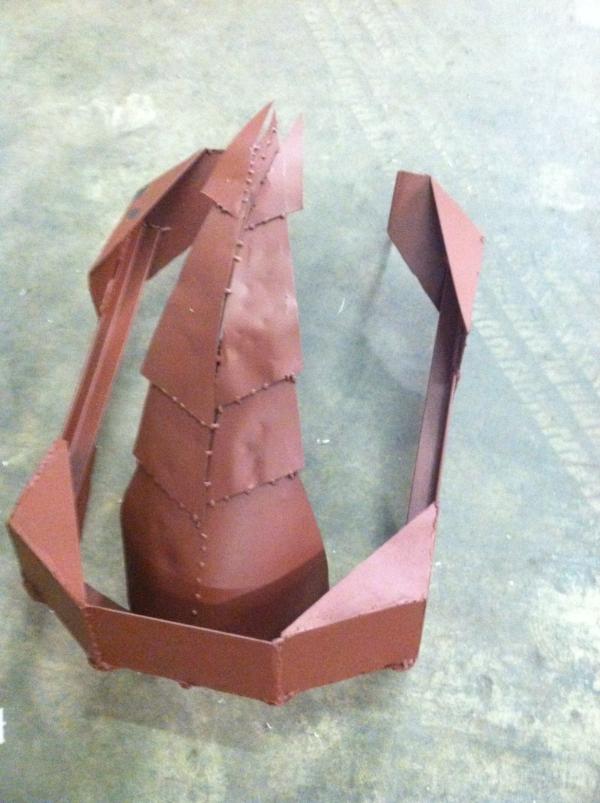
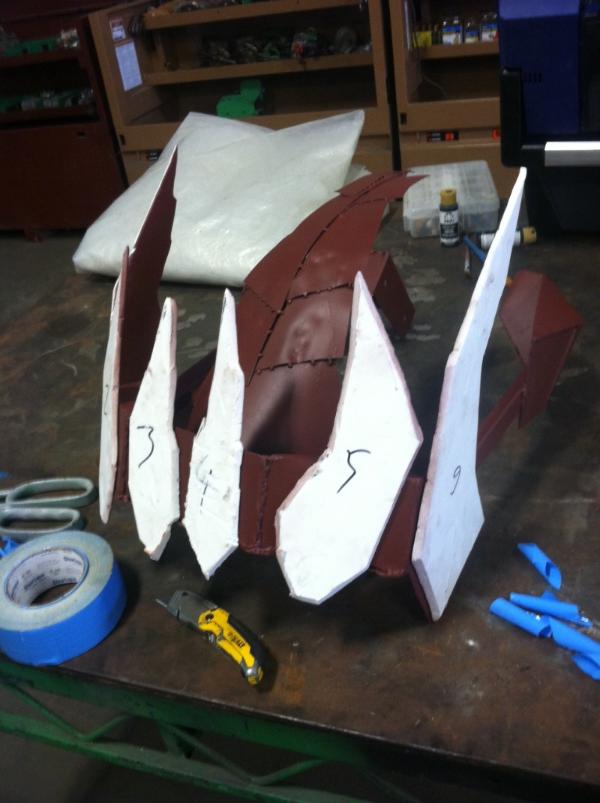


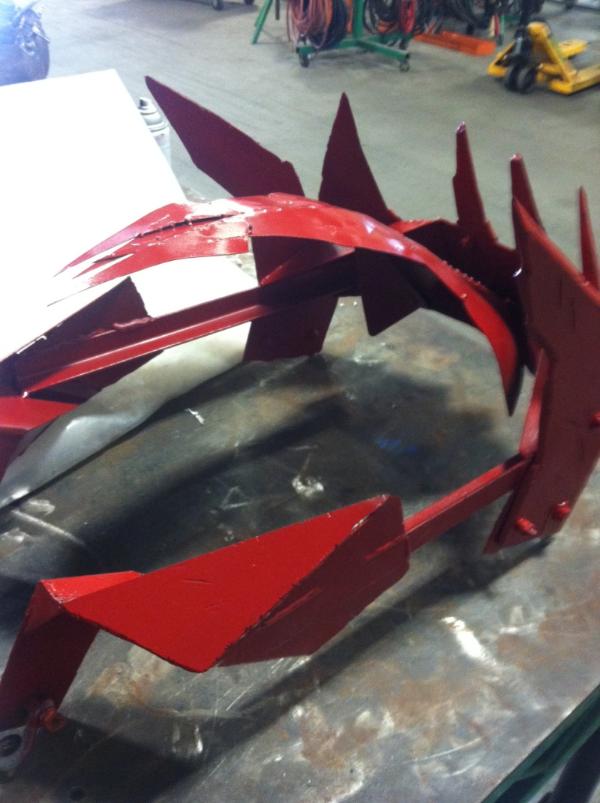
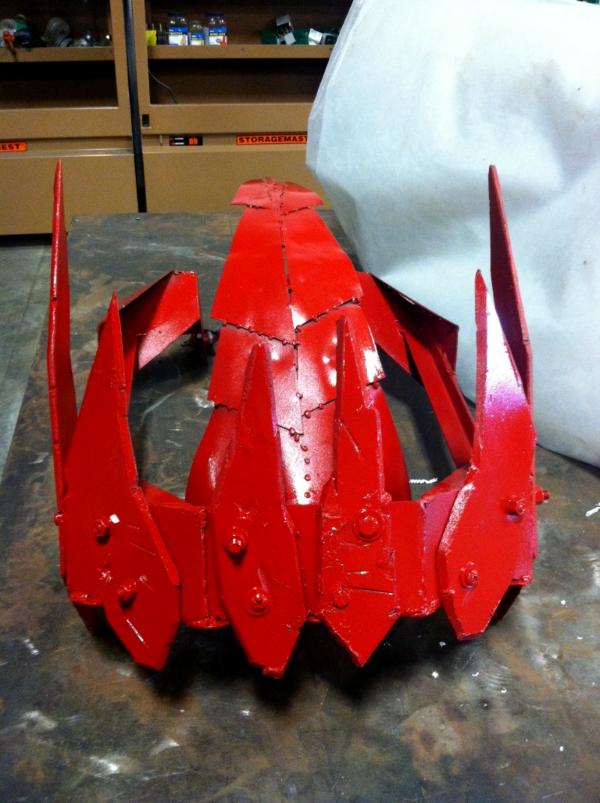


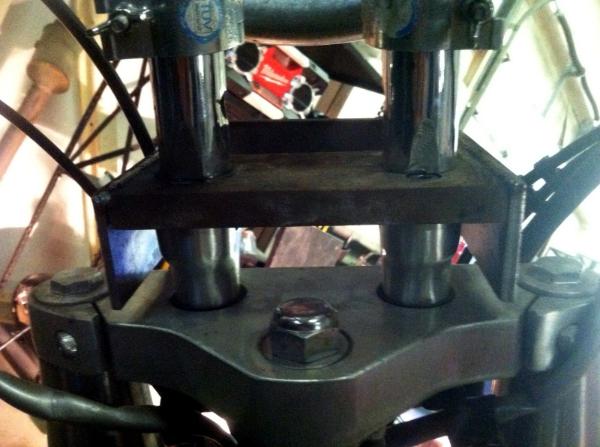
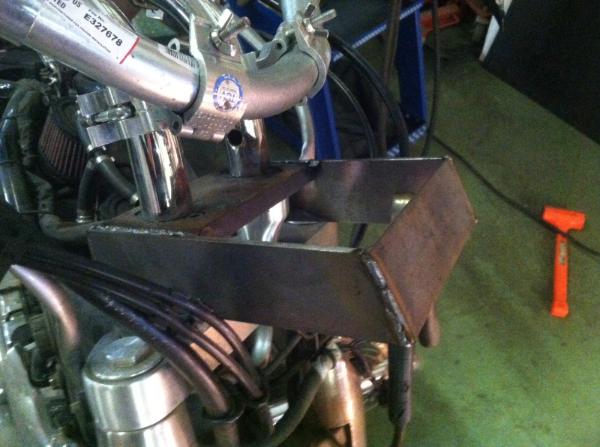
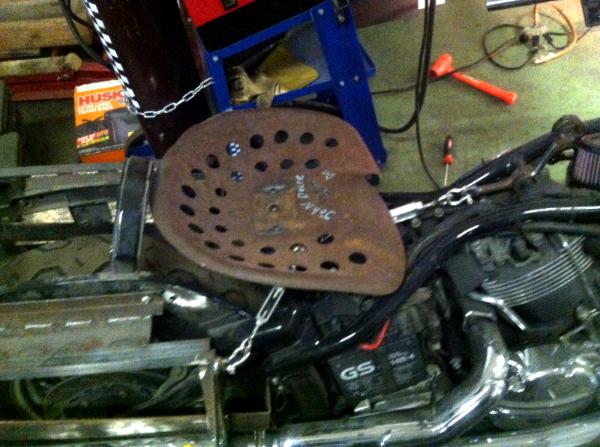
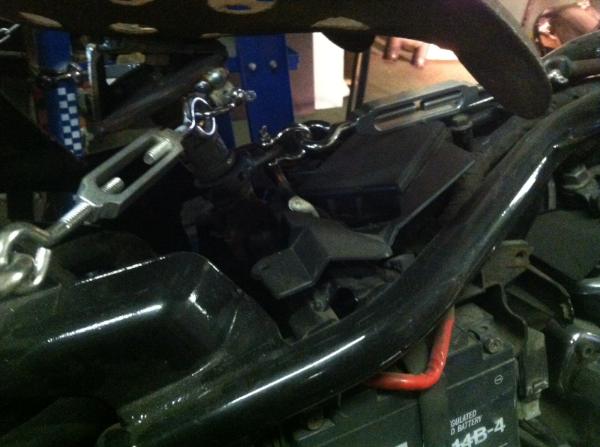
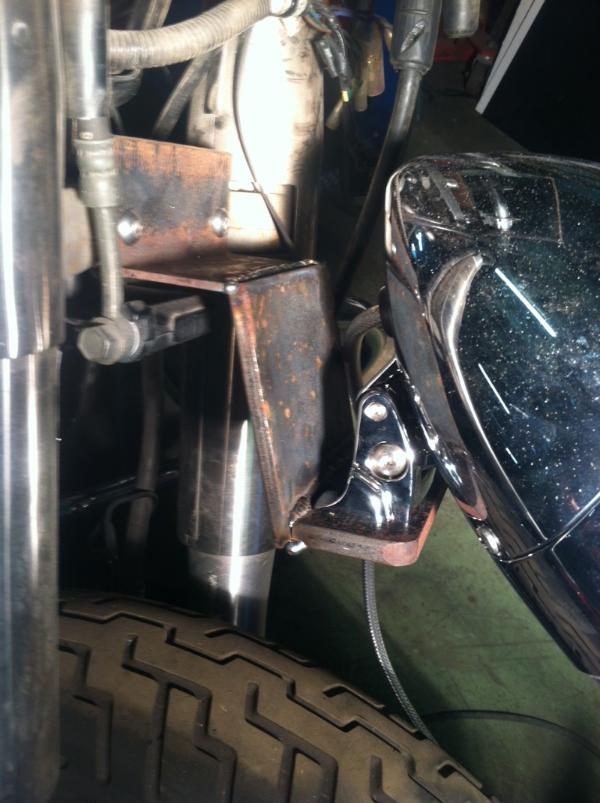
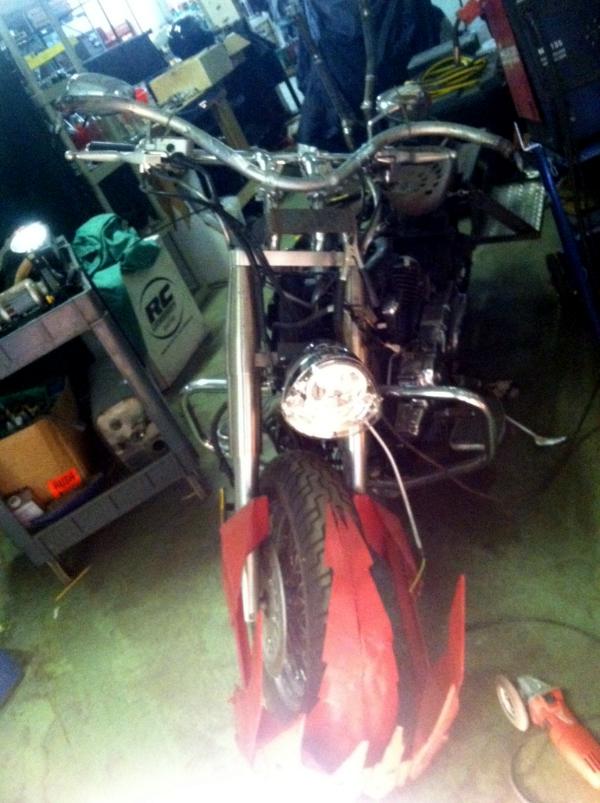
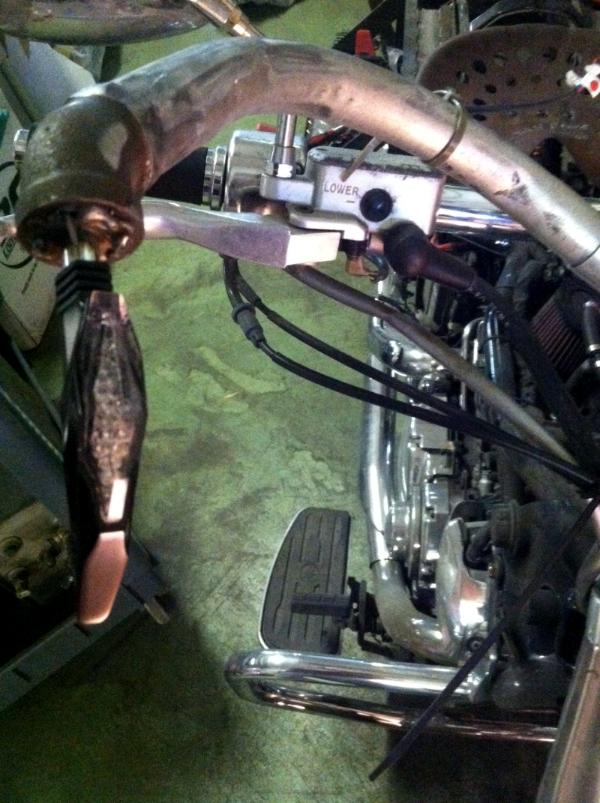
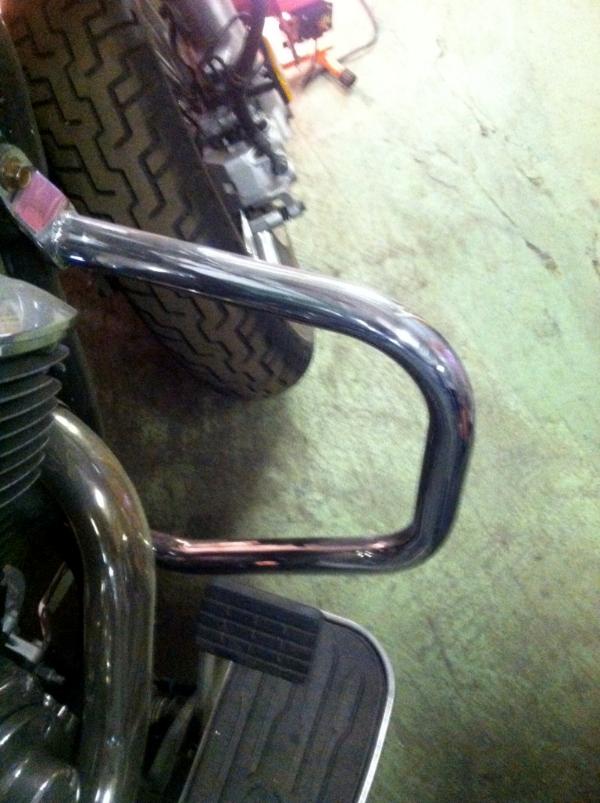
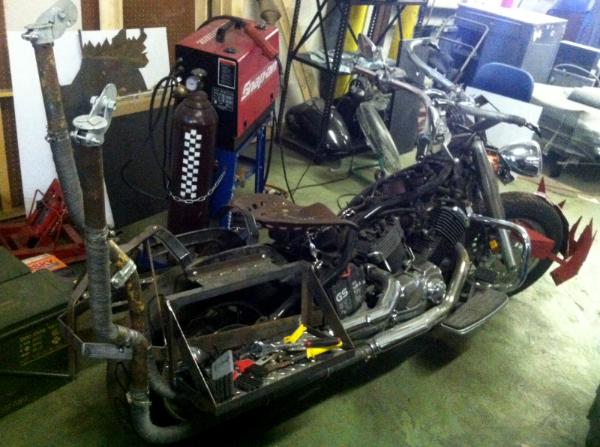
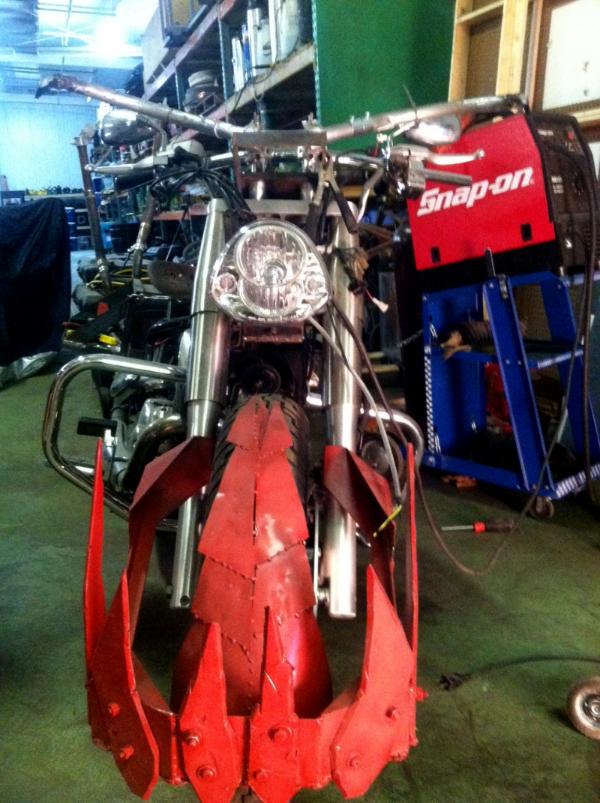
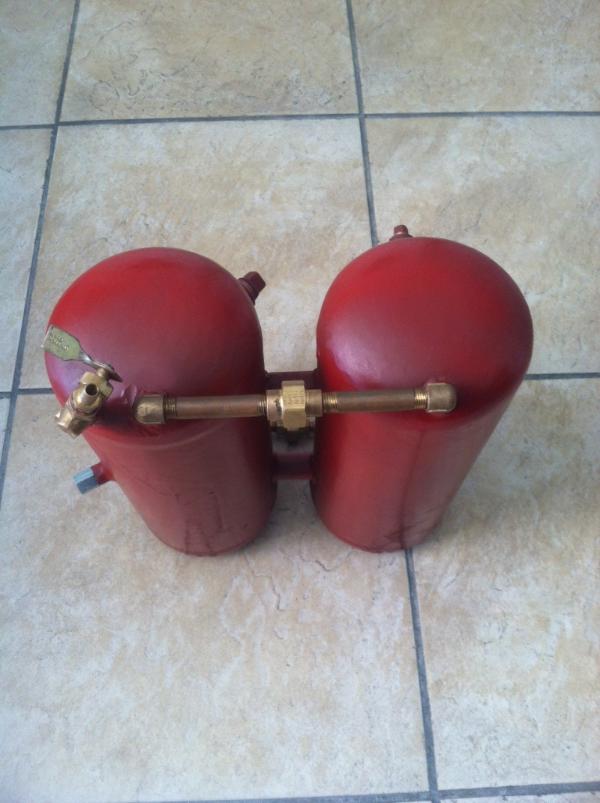
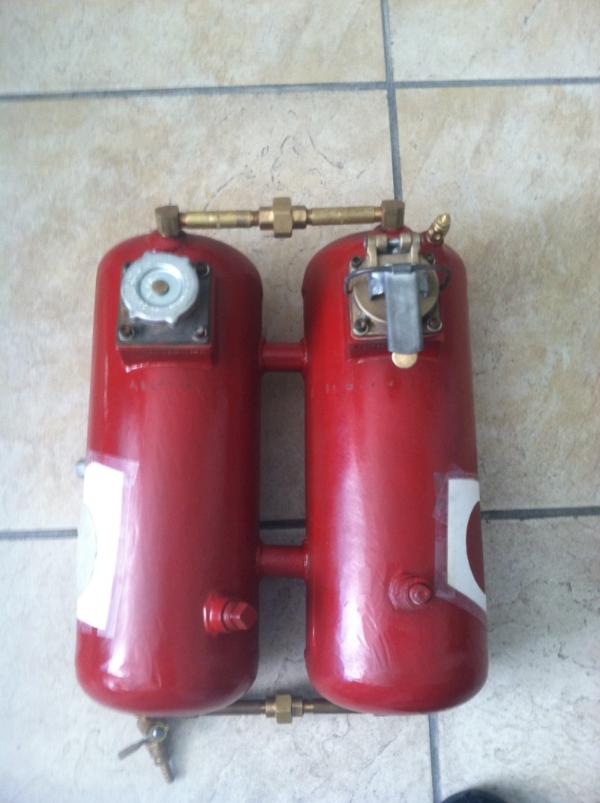
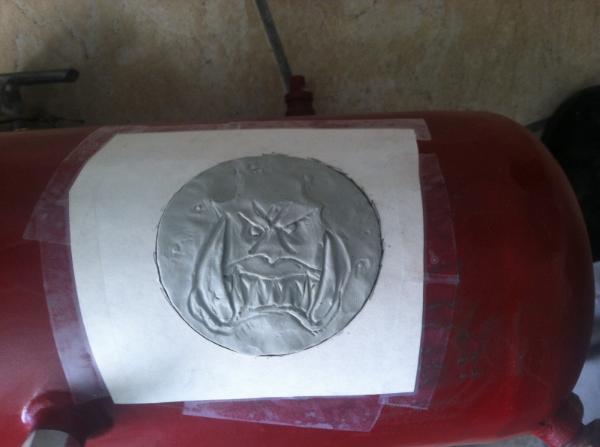
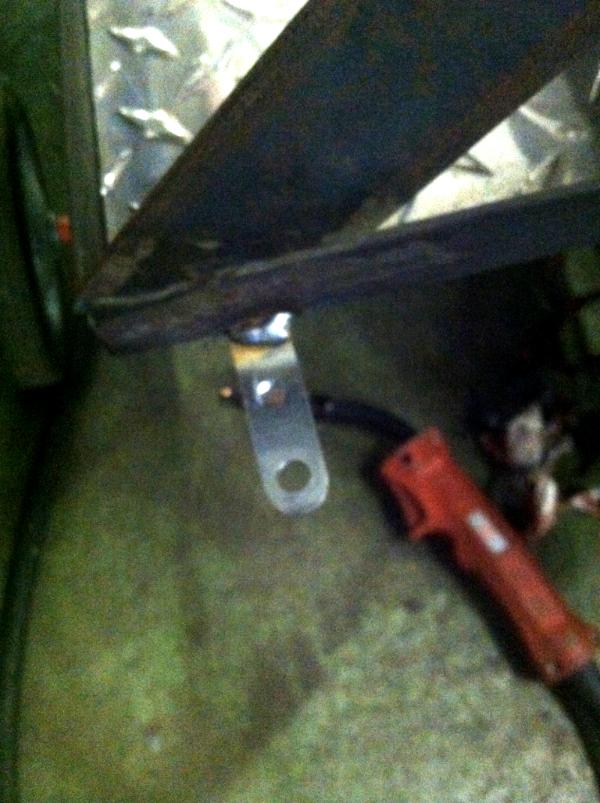
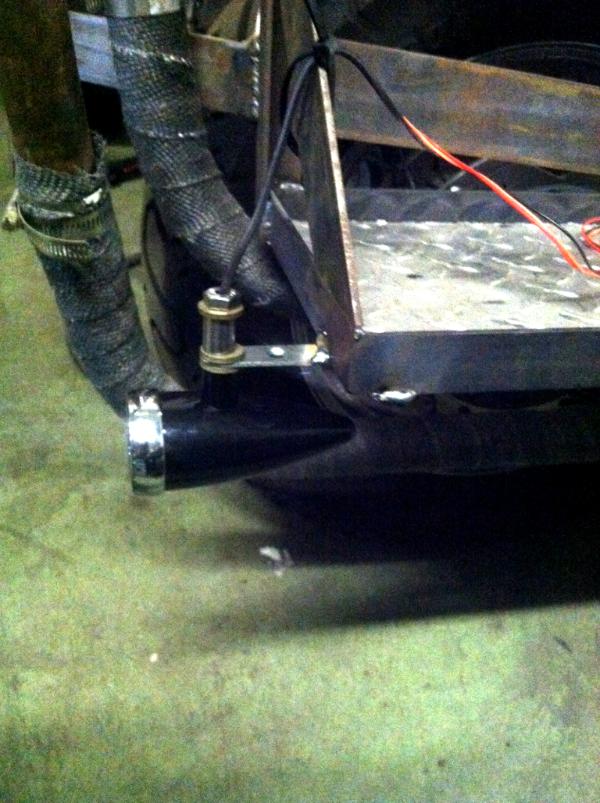
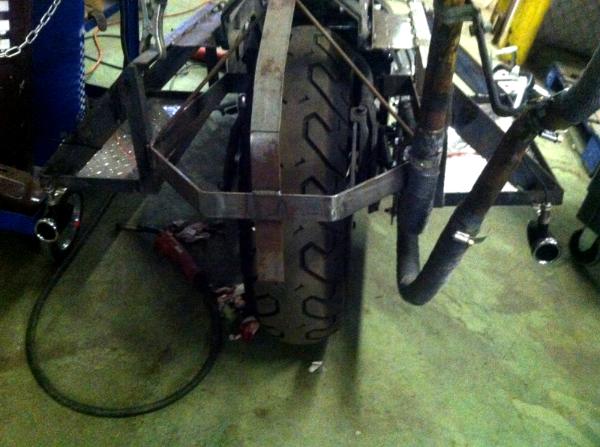
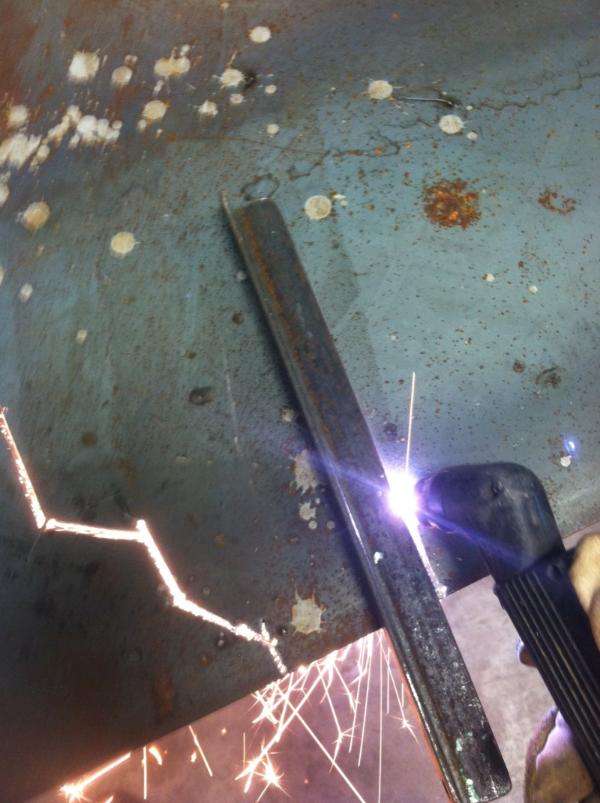
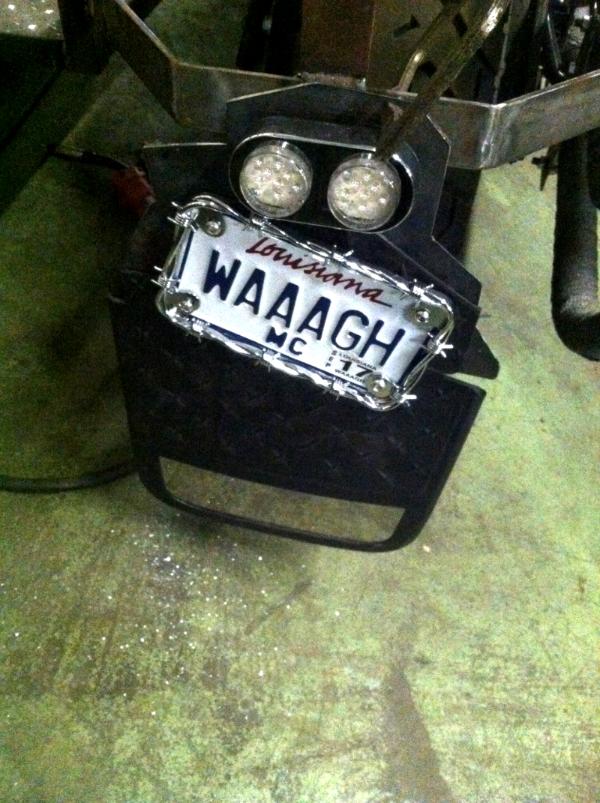
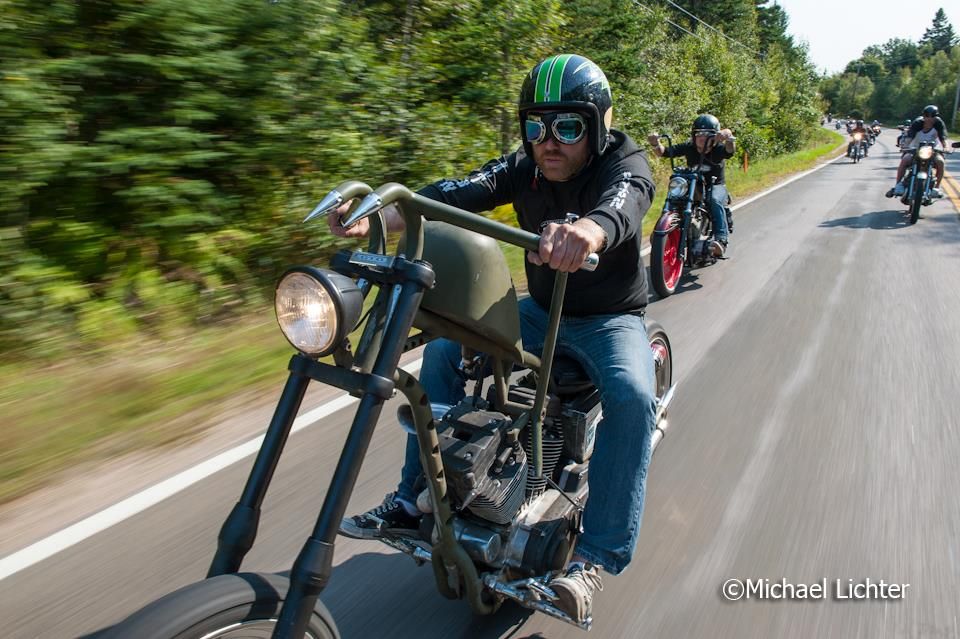

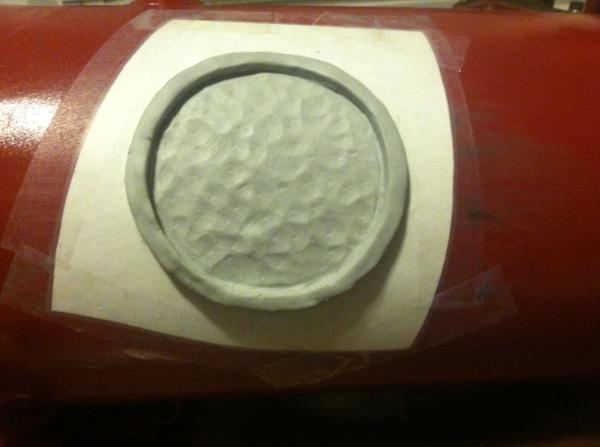
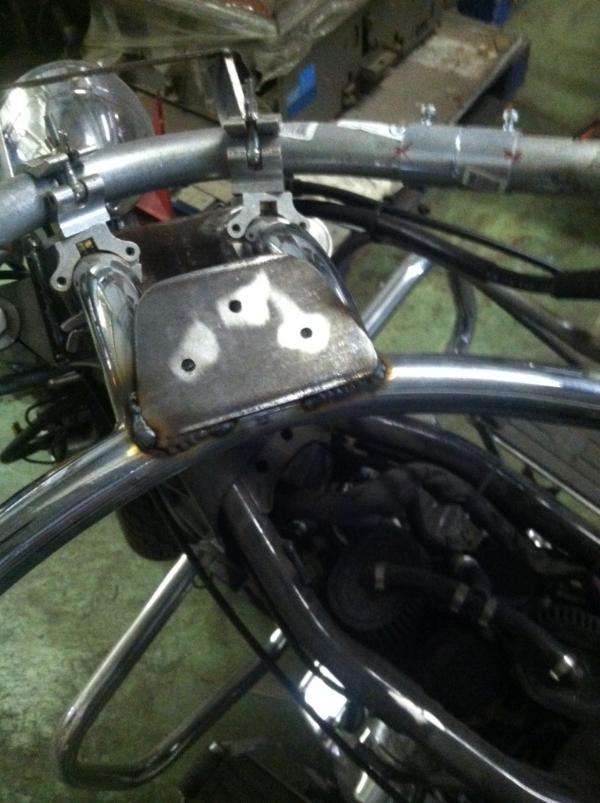

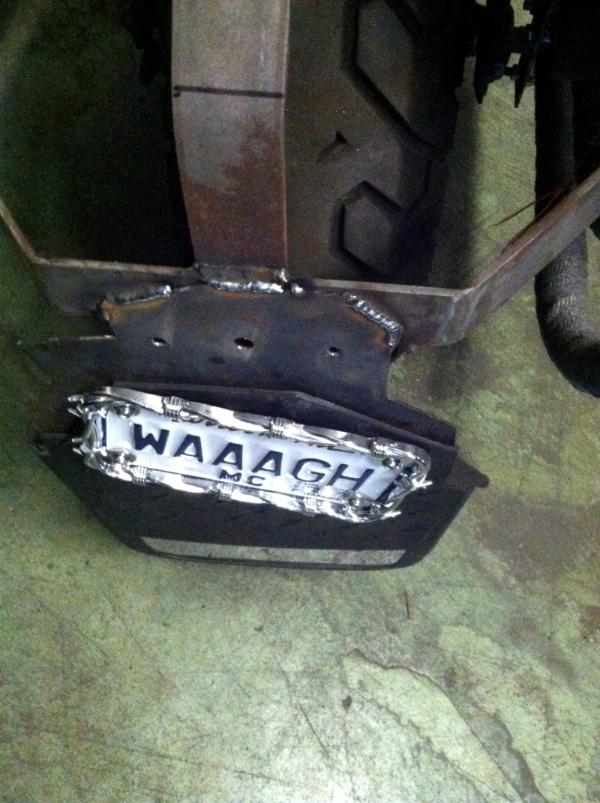
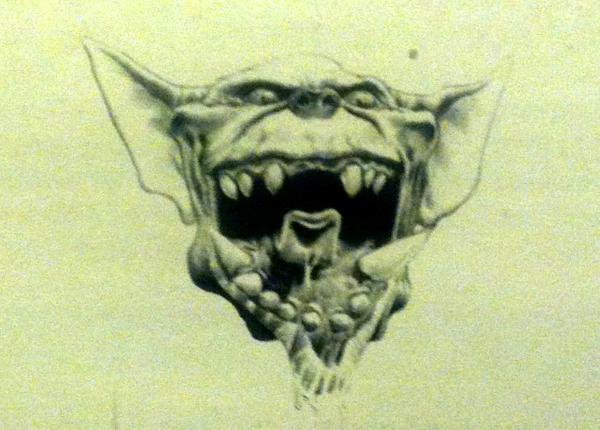
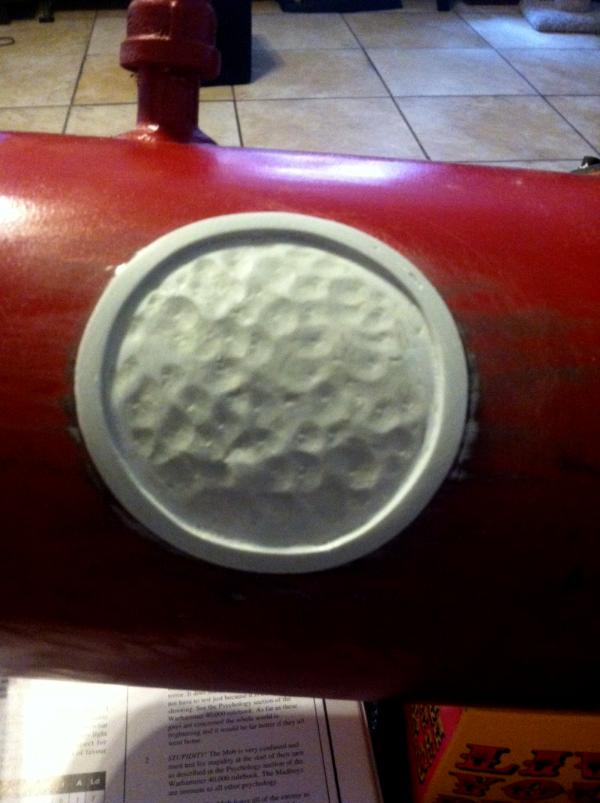
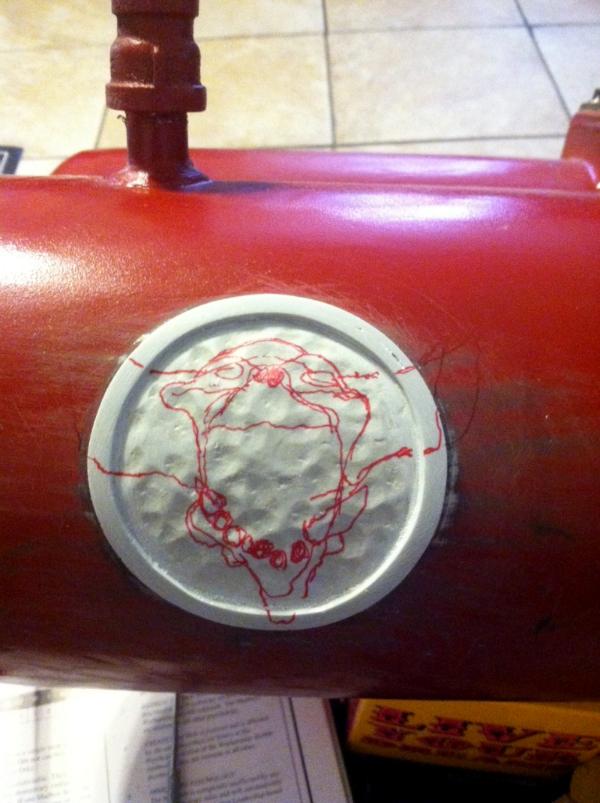
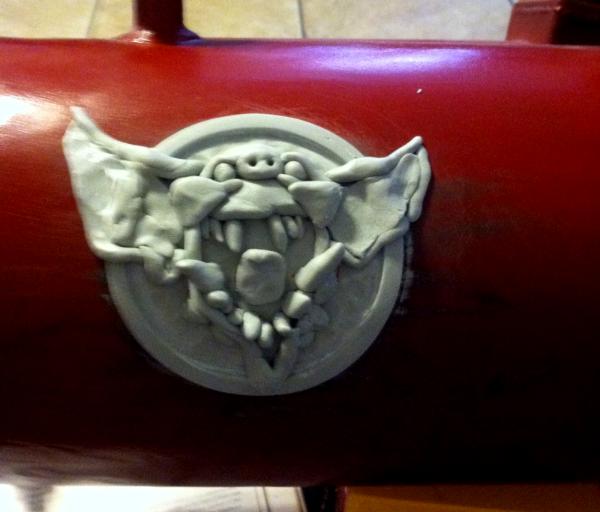
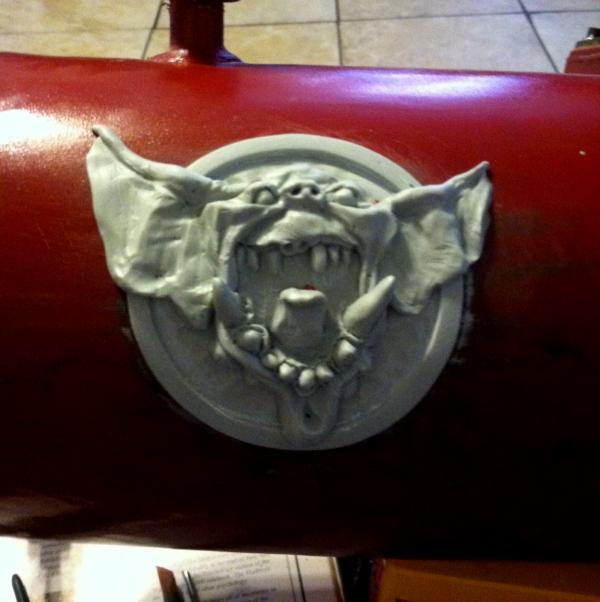
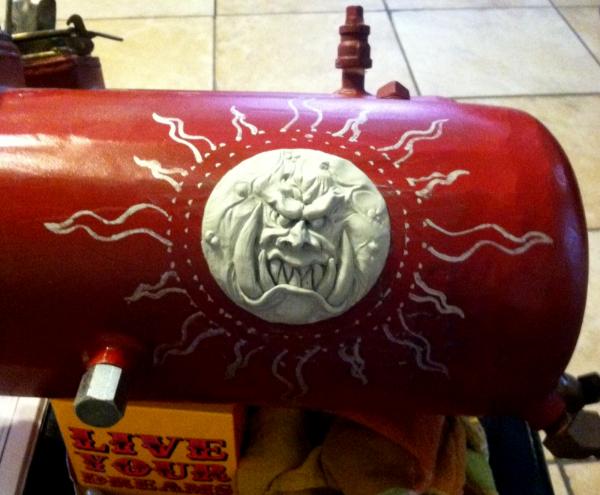
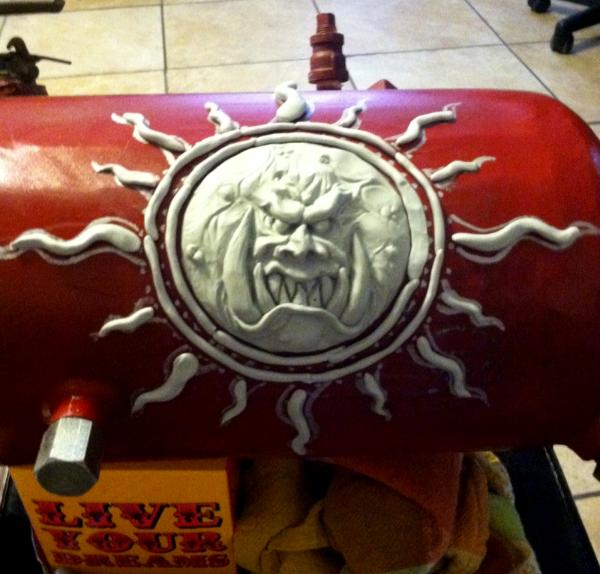
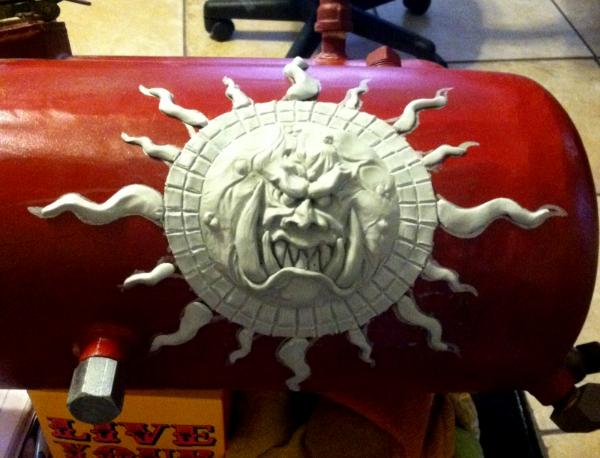

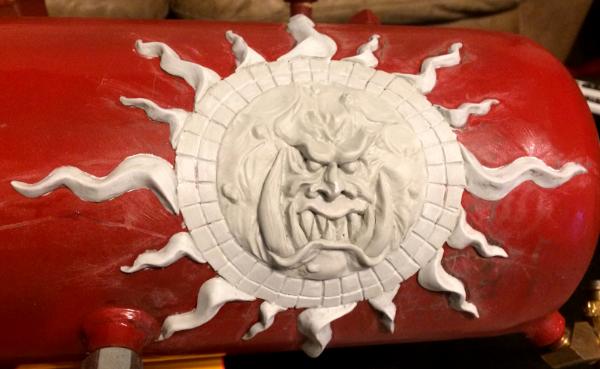


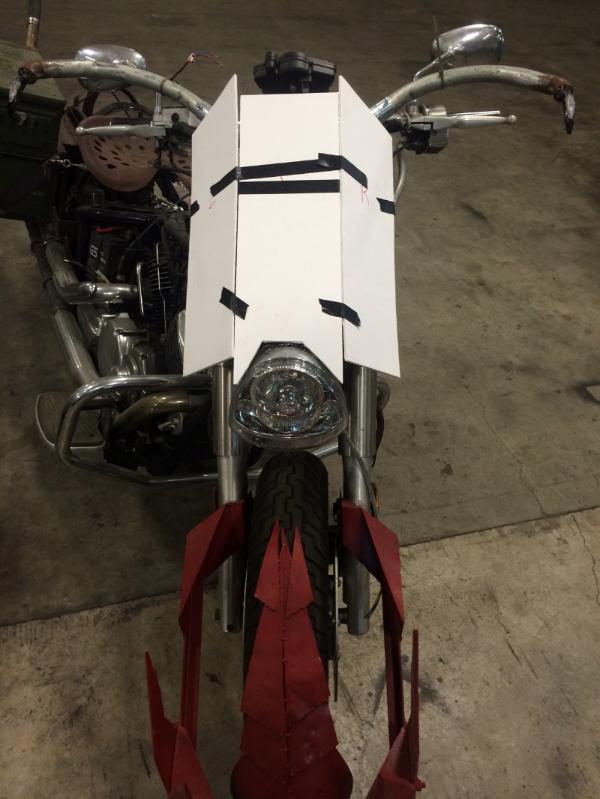

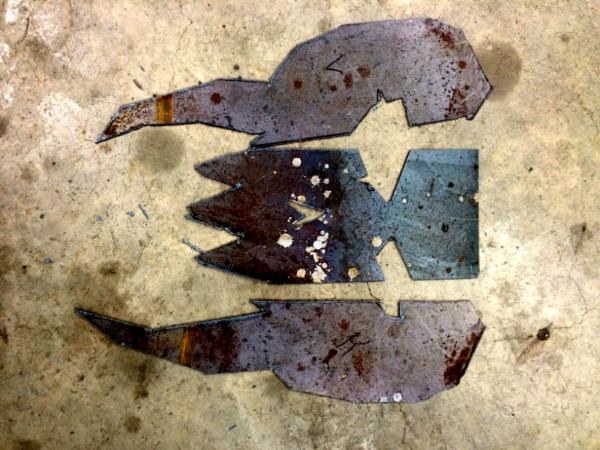
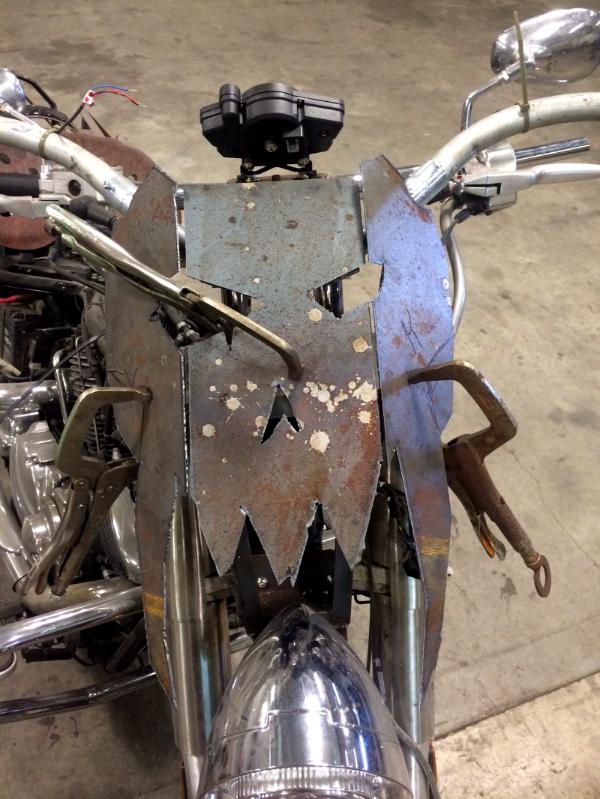
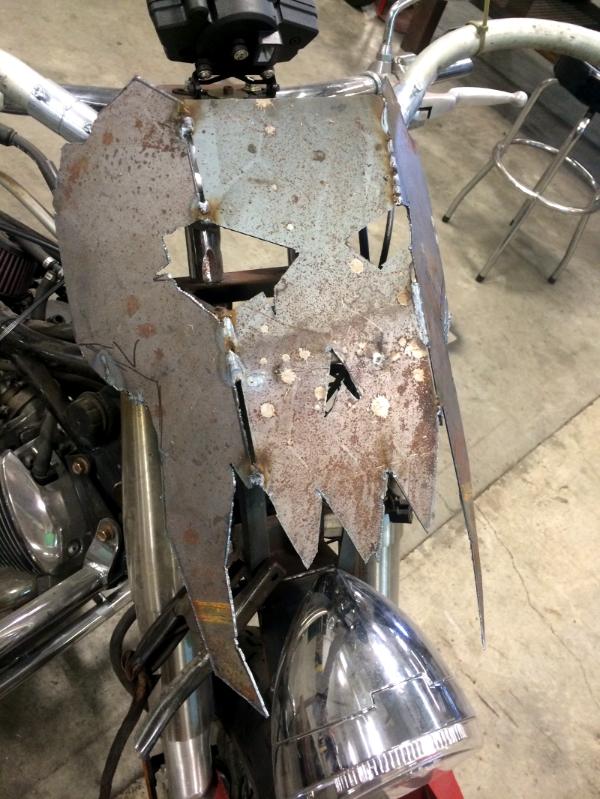
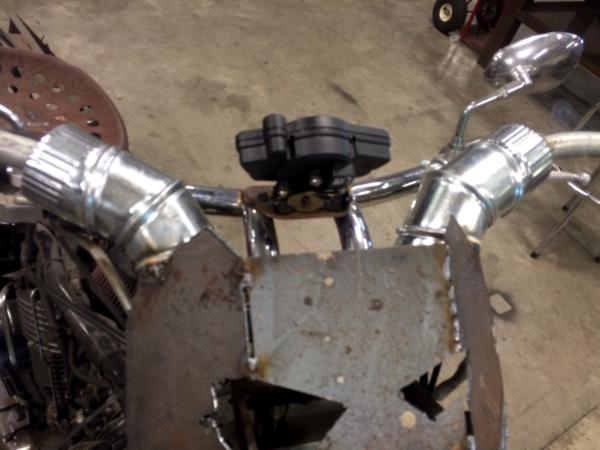
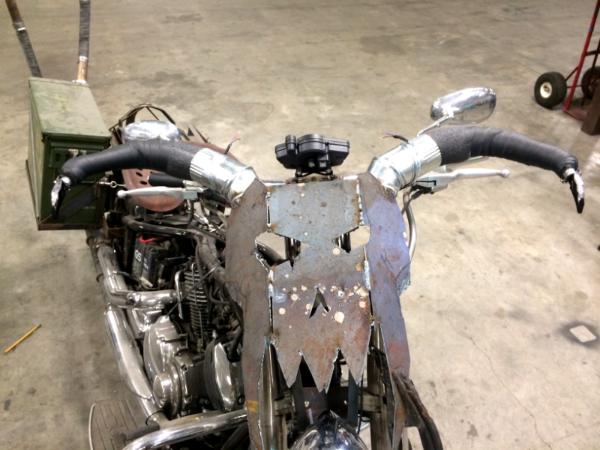
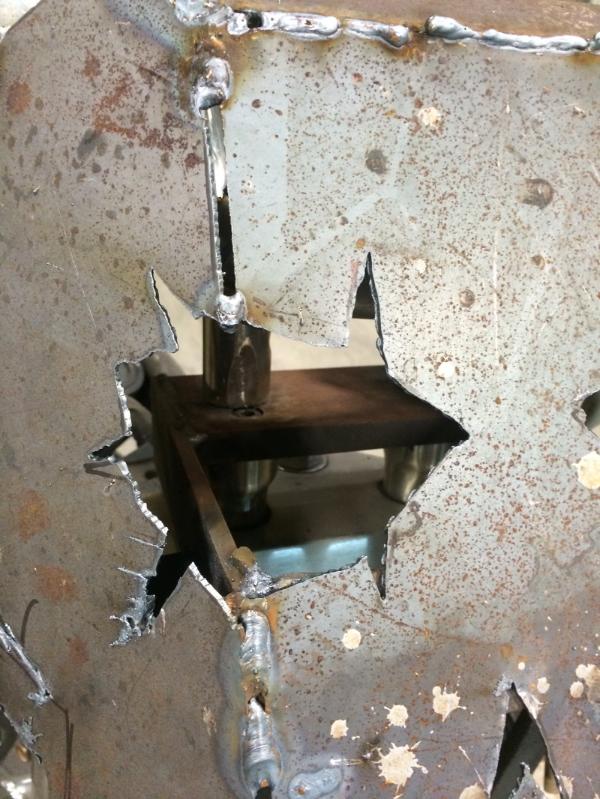
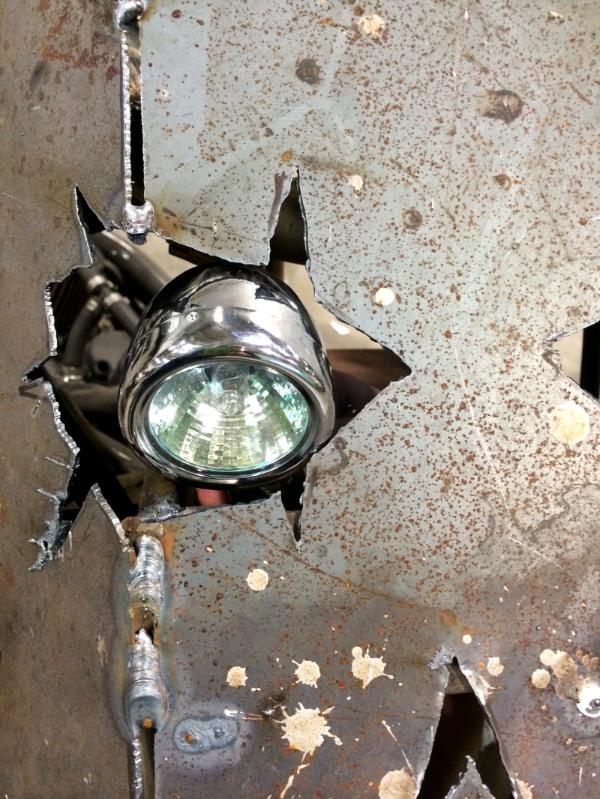
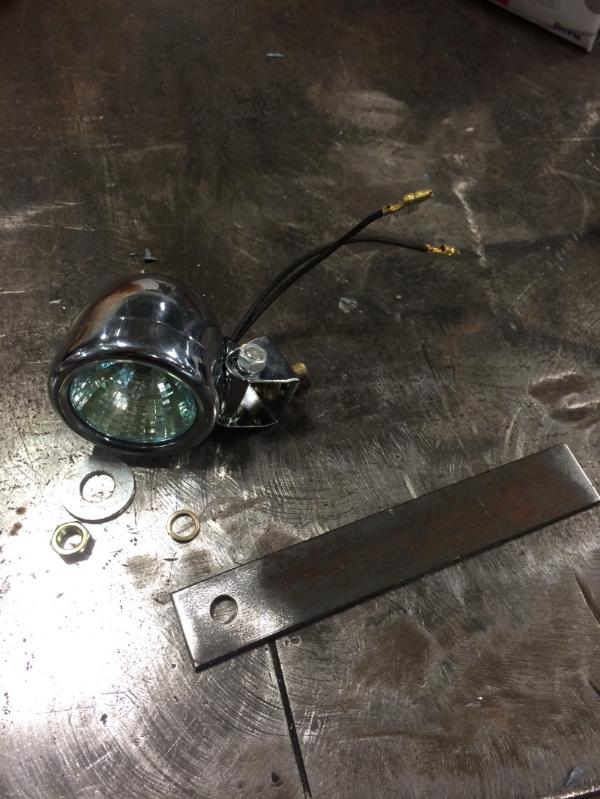
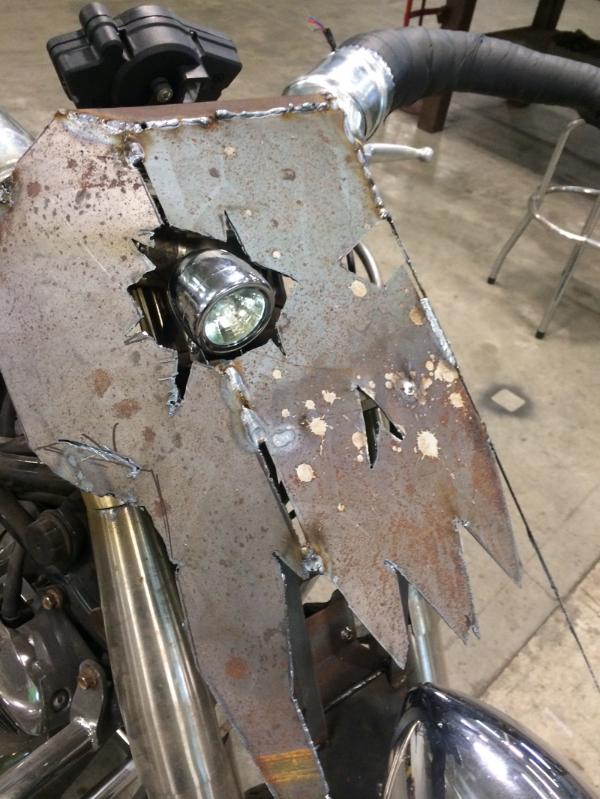
 when using that plasma cutter!