hi, wanted to build a large titan for some time and started to build one last year which due to several reasons i had to put on hold but now starting up again, i'm using lots of games workshop panals, guns, plasticard, plastic rods and anything else that looks like it will look lifelike, my aim is to build a very detailed titan with working led's, so here goes
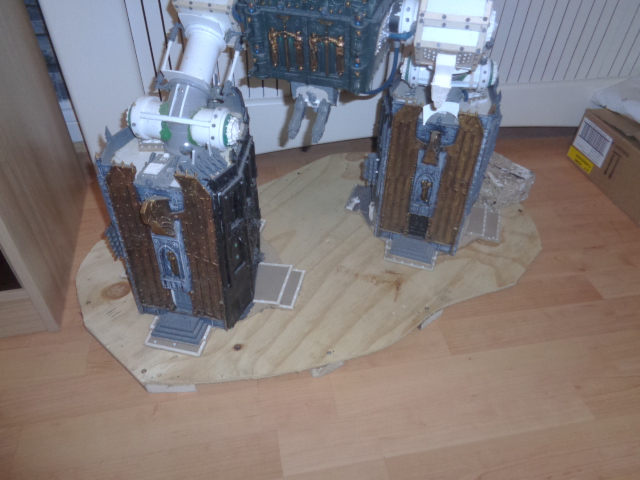
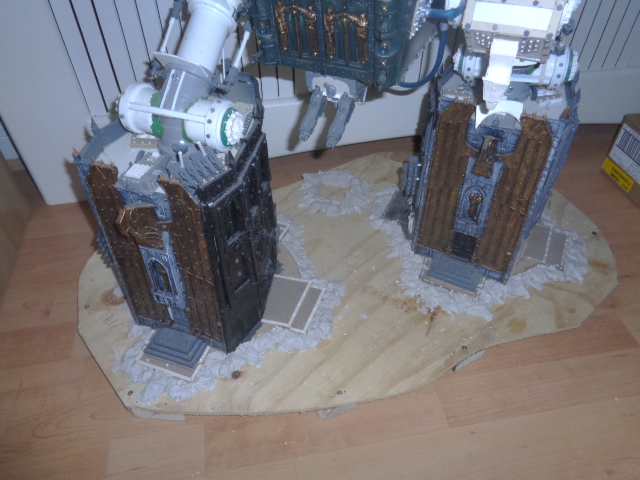
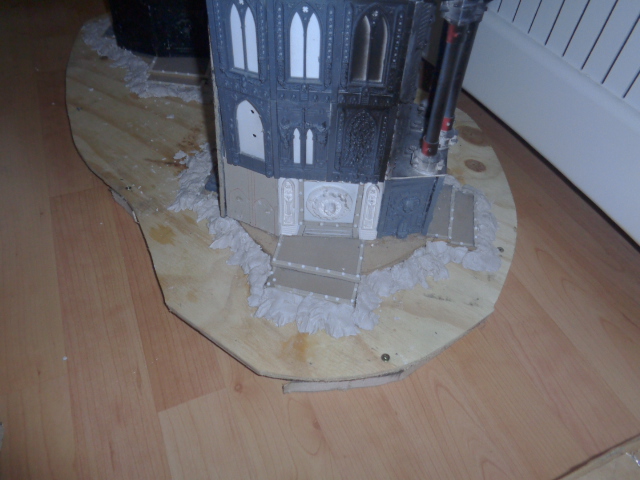
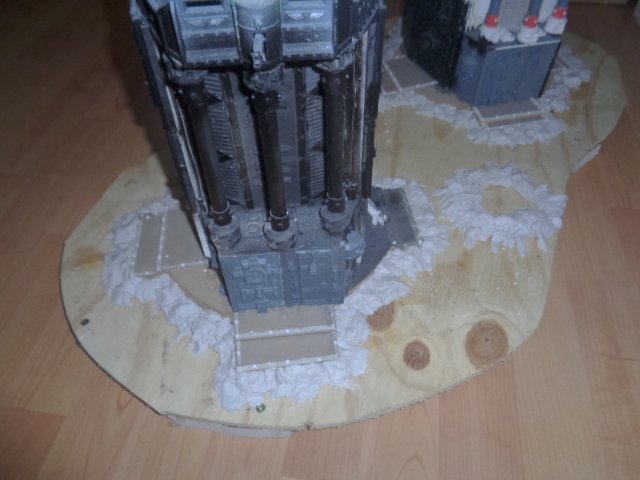
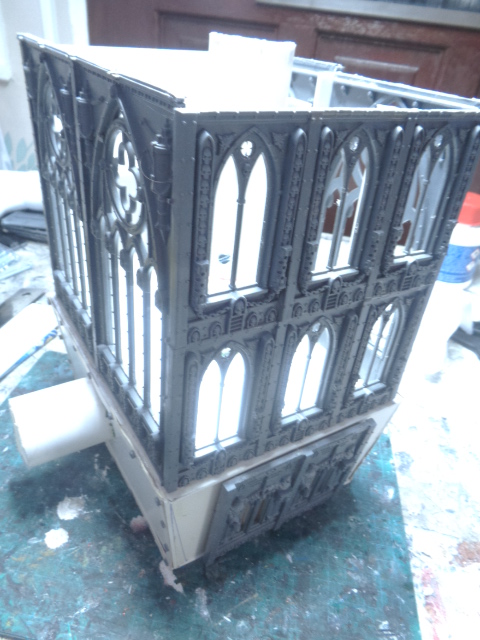
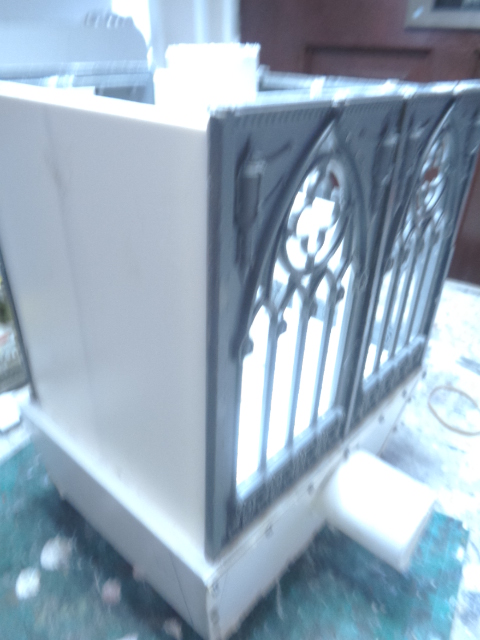
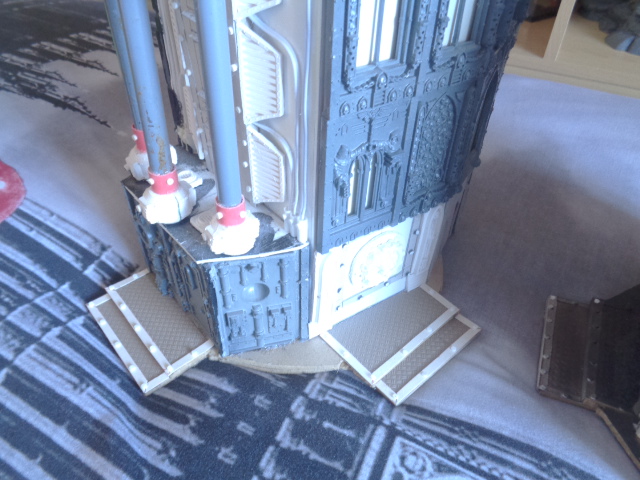
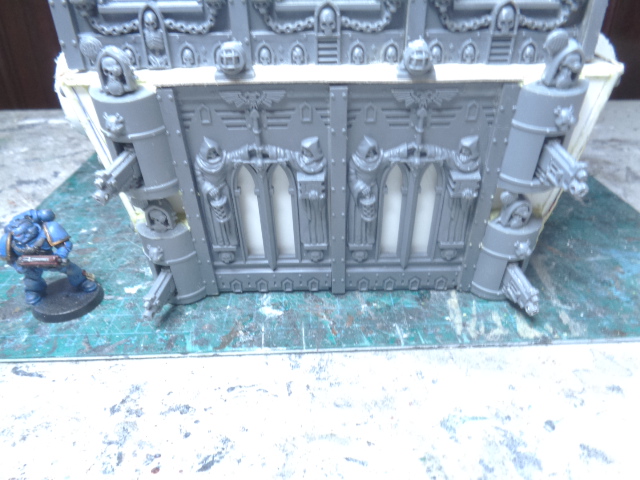
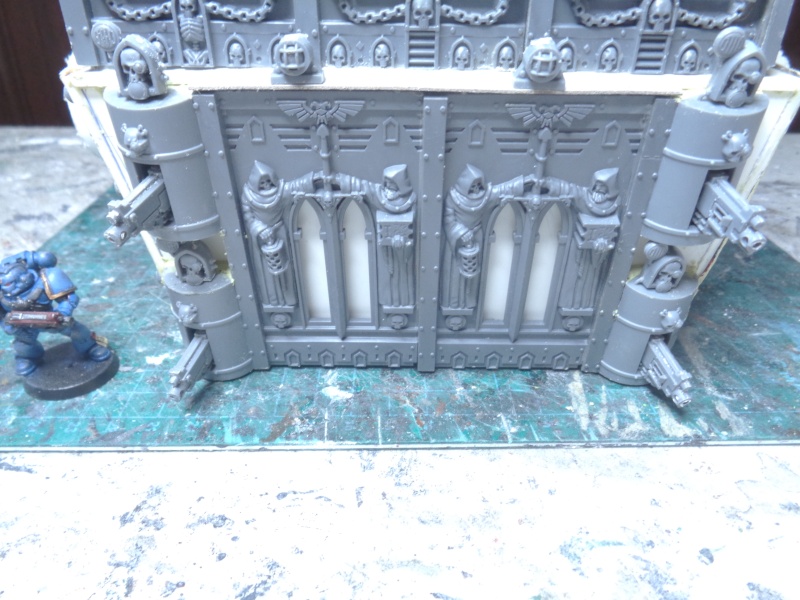
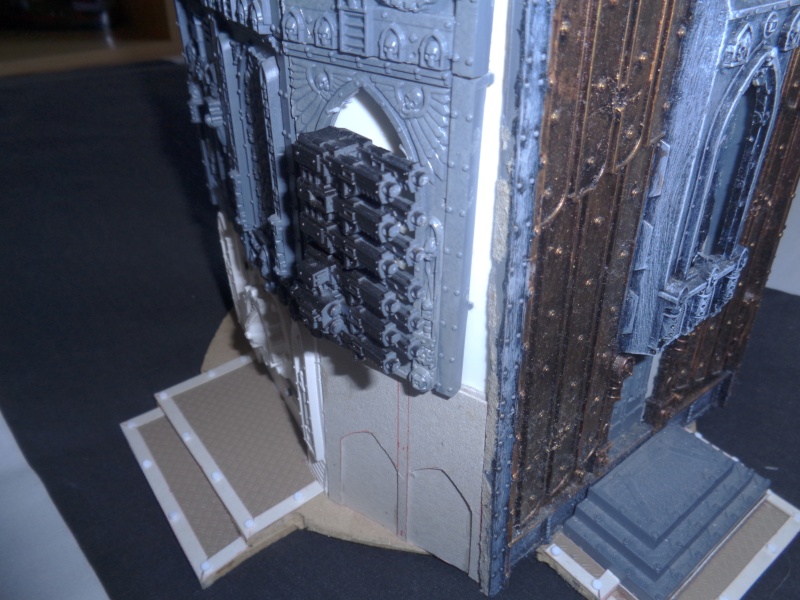
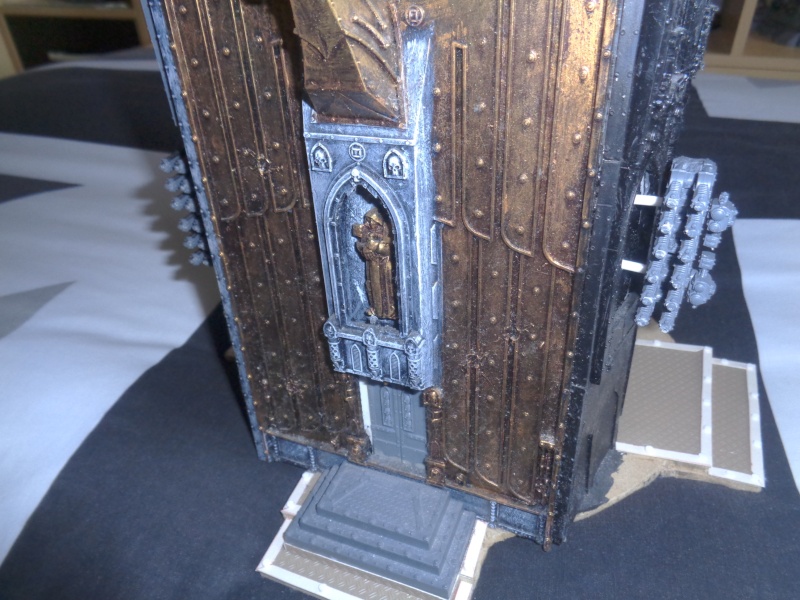
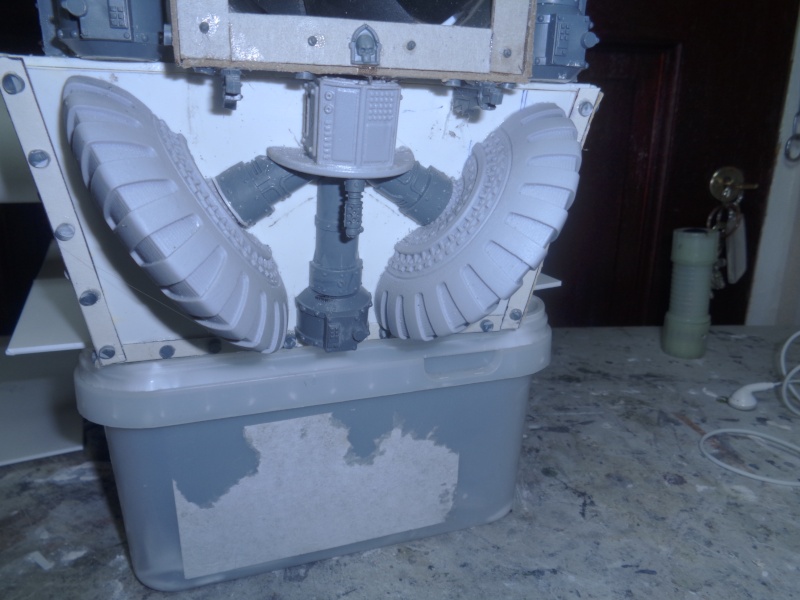
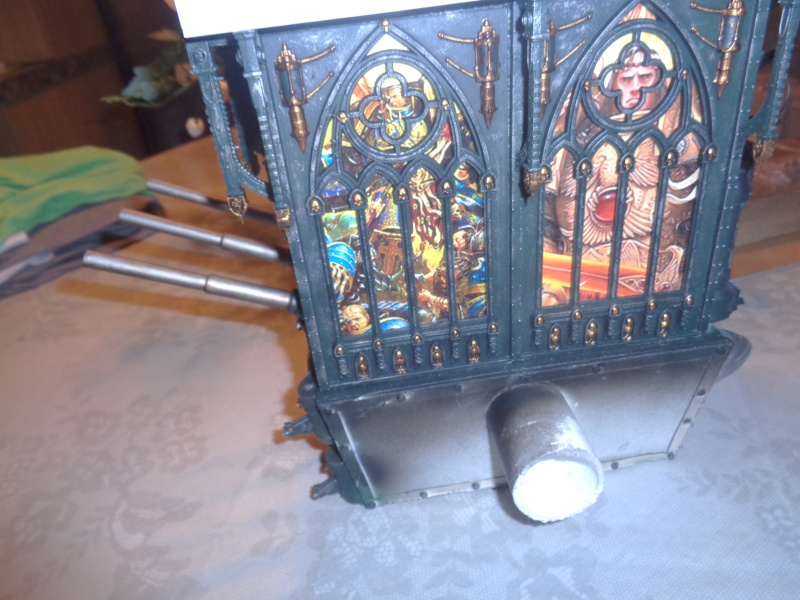
the feet have nearly been done, made from GW aquila fronts, imperial sector windows and lots of scratchbuilt pieces, the base of the feet look thin but this is going on a diorama base so it will look like it has sunk into the ground, most of this wil be built over standard household pvc pipe with nut and bolts through to stop twisting when connected, the bottom main body again from GW windows which will all have stained glass window effects when painted, the rear panel is going to be for detailed engine/generators, so thats where i am upto, more updates as i go along, thanks
First off, this is looking absolutely amazing so far! Seems like the whole monastery look is going to fit right in with the 40k aesthetic. I feel like most attempts at something like this are lacking in detail and ultimately wind up very blocky, but it looks like you are adding detail in all the right places. I am very excited to see how you go about making the engine in particular.
As you mentioned, the feet do open the door for some concern. I feel like they should have a little more vertical bulk and maybe some hydraulics at the connecting points. Just my two cents. Keep it up!
Novasetri wrote: First off, this is looking absolutely amazing so far! Seems like the whole monastery look is going to fit right in with the 40k aesthetic. I feel like most attempts at something like this are lacking in detail and ultimately wind up very blocky, but it looks like you are adding detail in all the right places. I am very excited to see how you go about making the engine in particular.
As you mentioned, the feet do open the door for some concern. I feel like they should have a little more vertical bulk and maybe some hydraulics at the connecting points. Just my two cents. Keep it up!
thanks,, agree with the feet points you bring up, i'm going to add some depth and hydrolics soon
My glob this is an absolute monster of a thing. I love it!!!! I agree the feet need a bit more bulk but otherwise it's moving in totally the right direction. Can't wait to see more. :-)
Dude if you can keep up that amazing level of detail and manage to get this thing finished within a lifetime then I reckon you'll have the coolest emperor class titan ever.
NidLifeCrisis wrote: Dude if you can keep up that amazing level of detail and manage to get this thing finished within a lifetime then I reckon you'll have the coolest emperor class titan ever.
Good luck and keep up the good work!
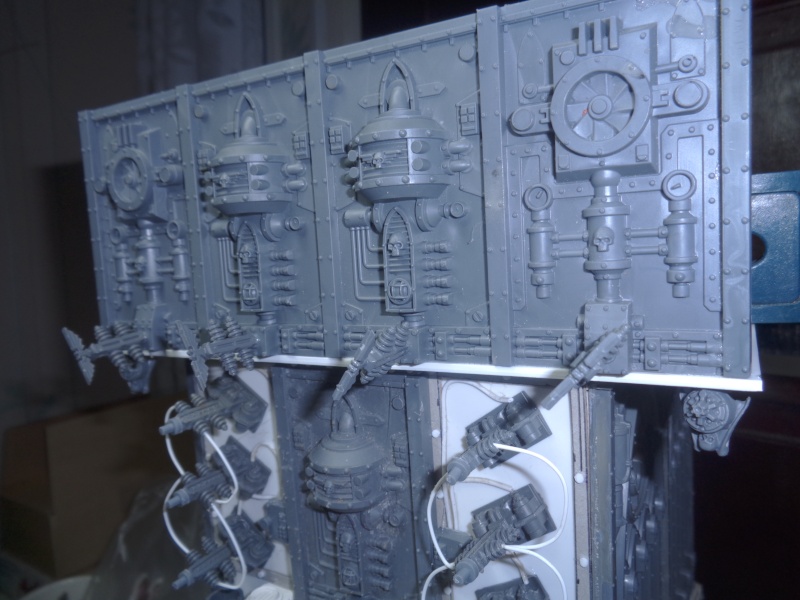
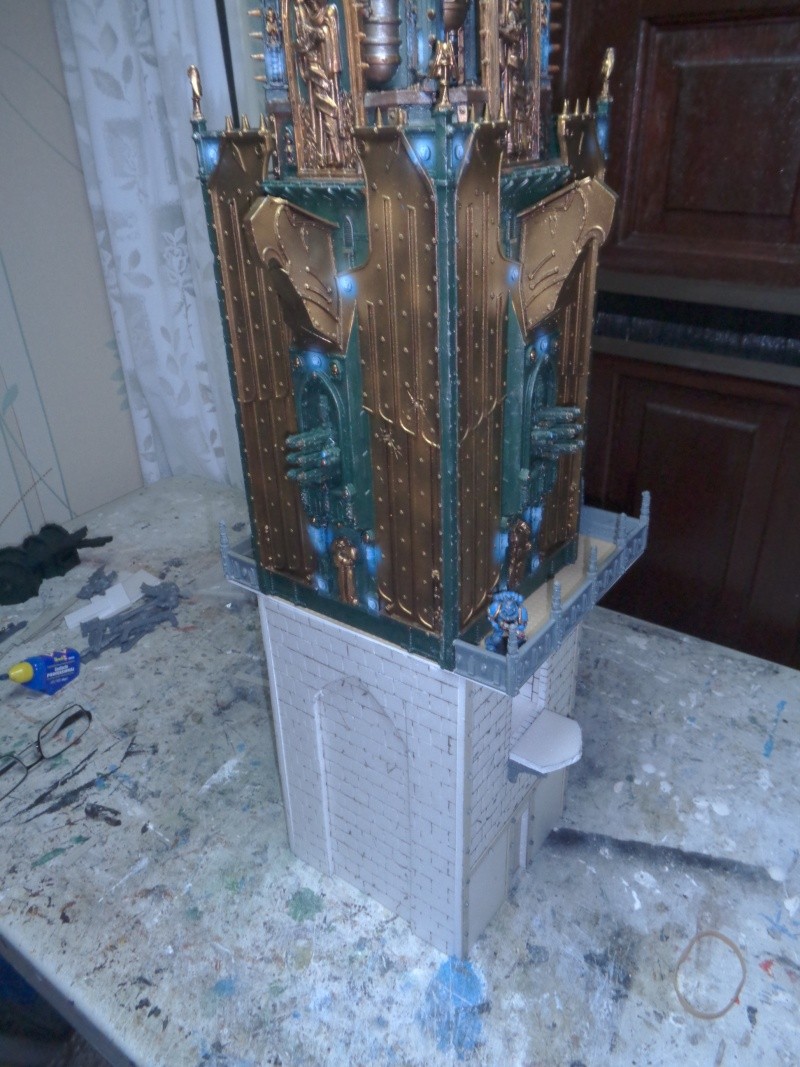
thanks, i really want to give each portion as much detail as possible, a big project like this deserves it i think, i've spent some time getting all the weapons i wanted and have made a start on the fortress top which again will be GW panels
Automatically Appended Next Post:
Elblondino wrote: My glob this is an absolute monster of a thing. I love it!!!! I agree the feet need a bit more bulk but otherwise it's moving in totally the right direction. Can't wait to see more. :-)
thanks
Automatically Appended Next Post:
Elblondino wrote: My glob this is an absolute monster of a thing. I love it!!!! I agree the feet need a bit more bulk but otherwise it's moving in totally the right direction. Can't wait to see more. :-)
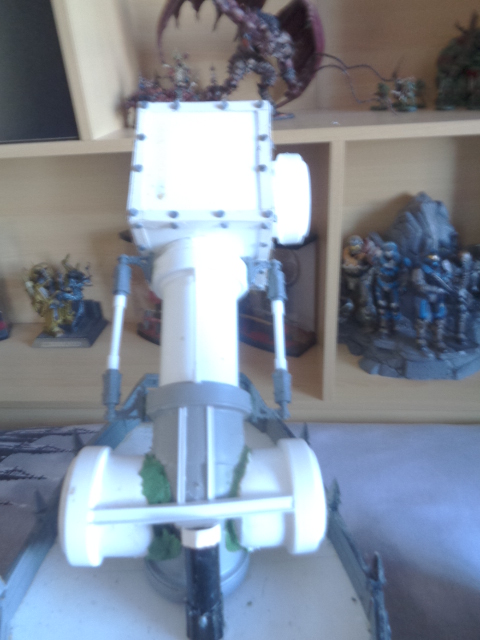
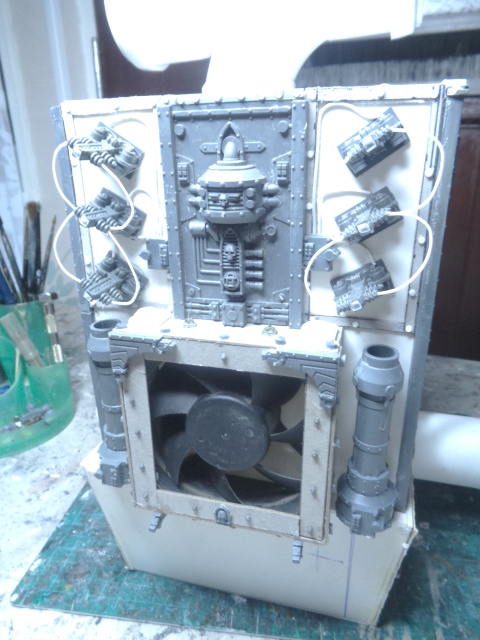
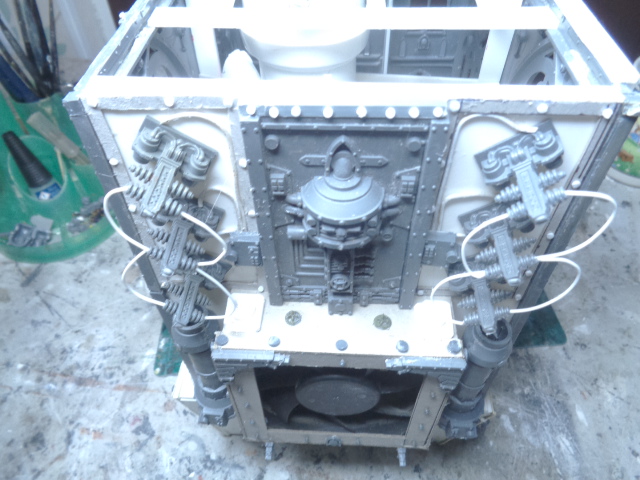
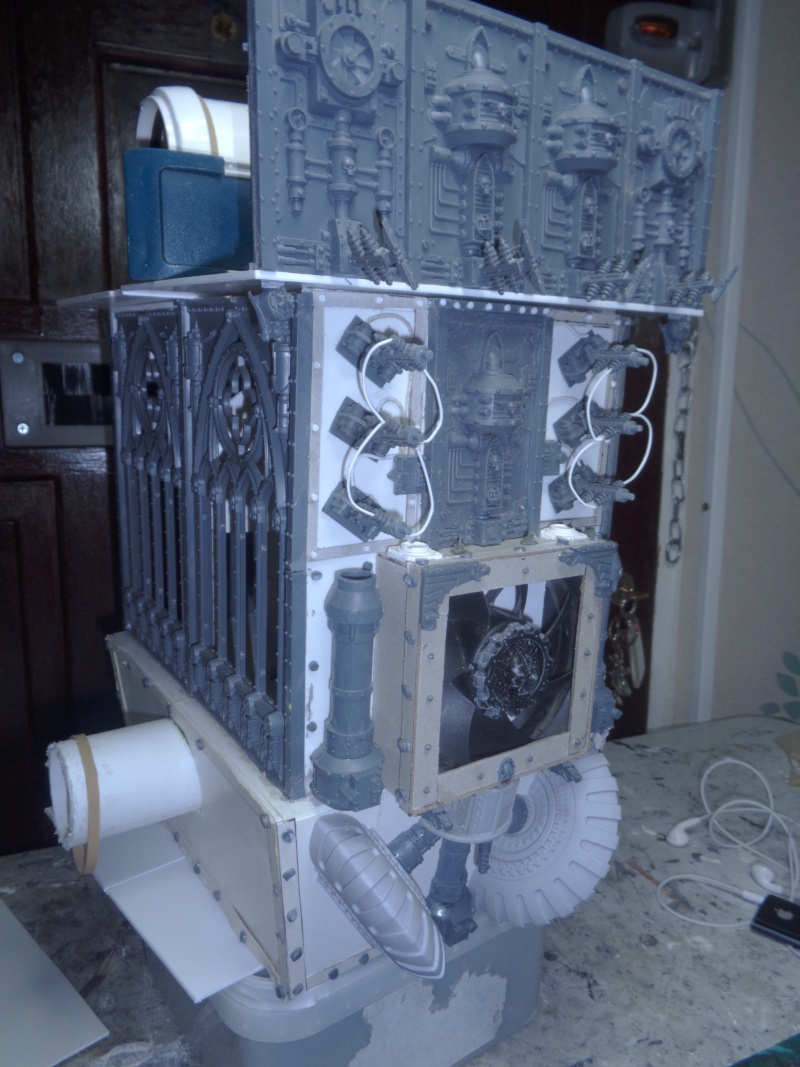
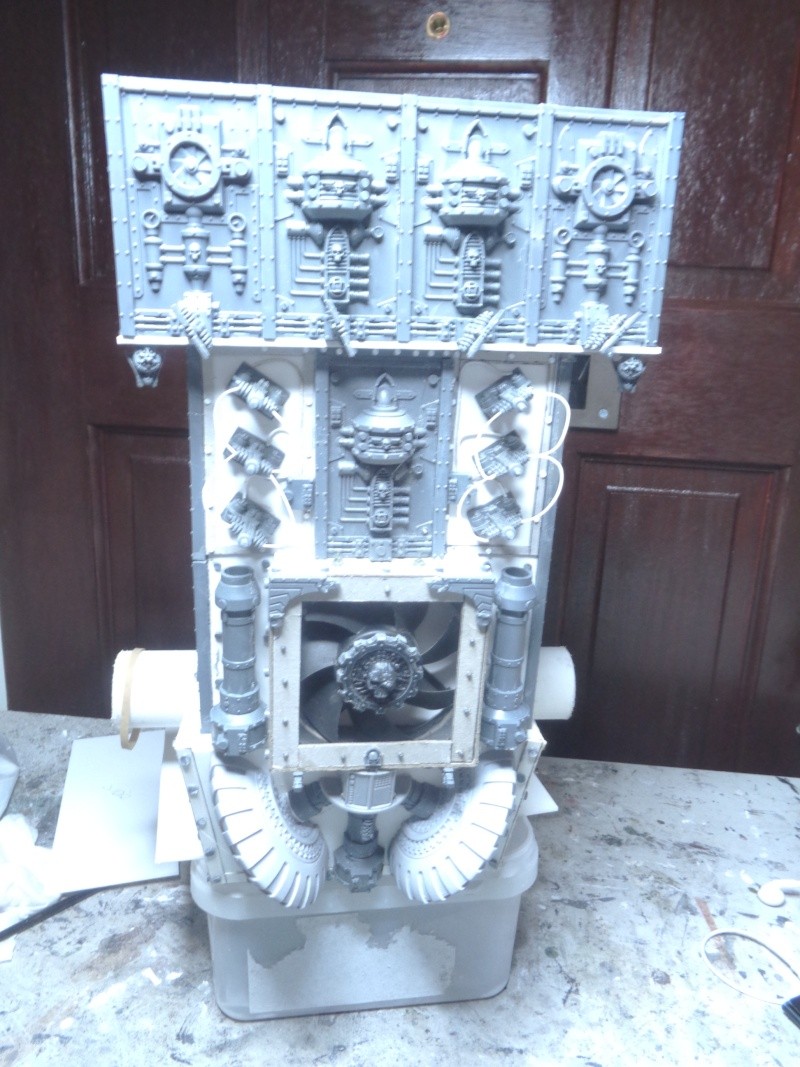
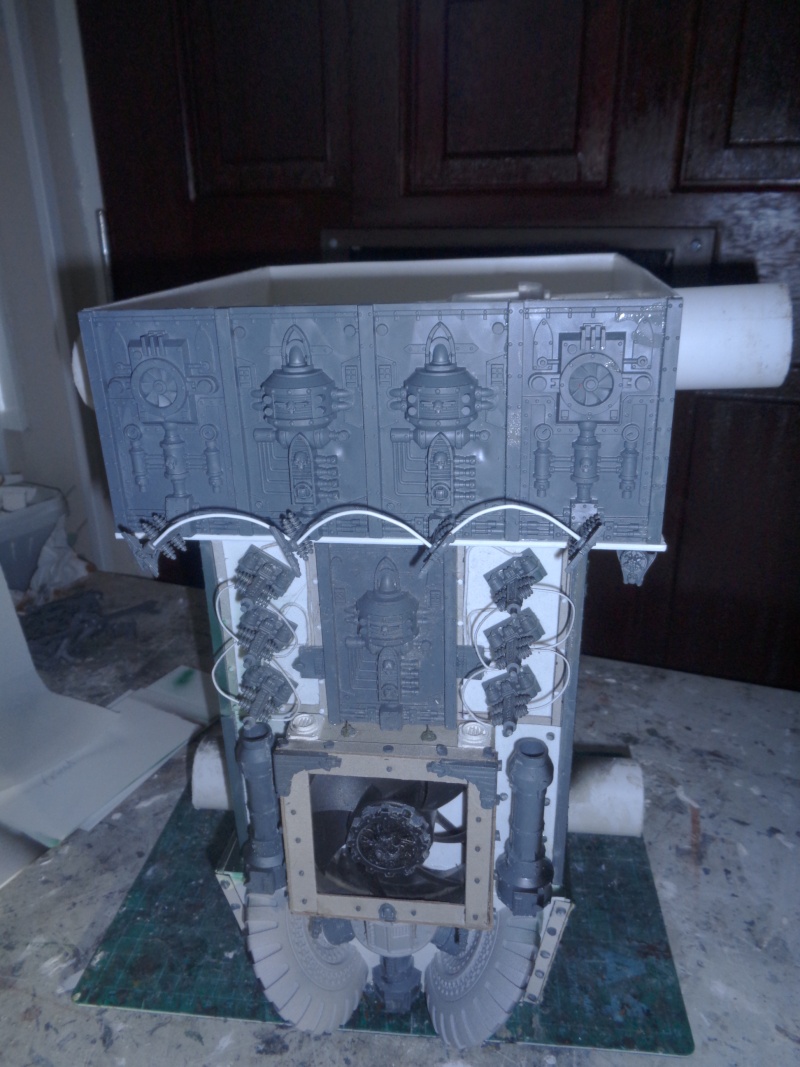
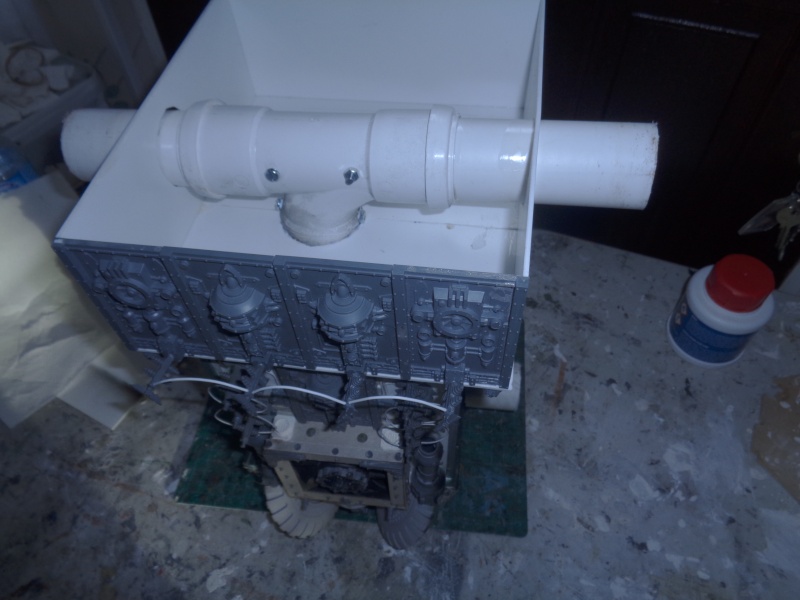
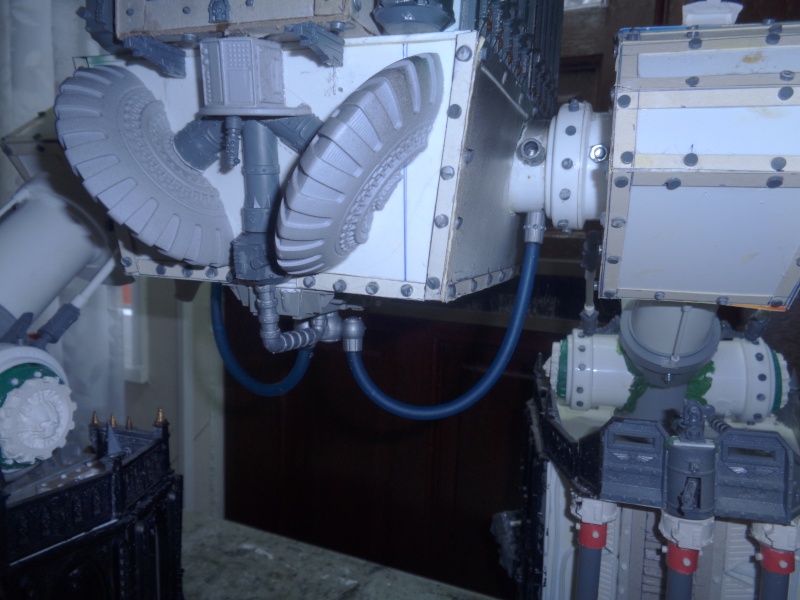
managed some detailing on the engine/power sources, used a old computer fan and cased it, cut down some GW small generators and added plastic rod, the ends i cut off i used as rivets on the fan casing, more GW panels and pipes, handmade rivets and i think starting to look good, under this on plastikard panelling are going to be 2 large generators and more pipes, tubes etc, above will be some more panelling and anything that i can find that looks good, thanks for looking
Raptor007 wrote: Huh, clicked the link expecting some paper towel roll monstrosity.....
You have restored my faith. Keep up the emperor's work.
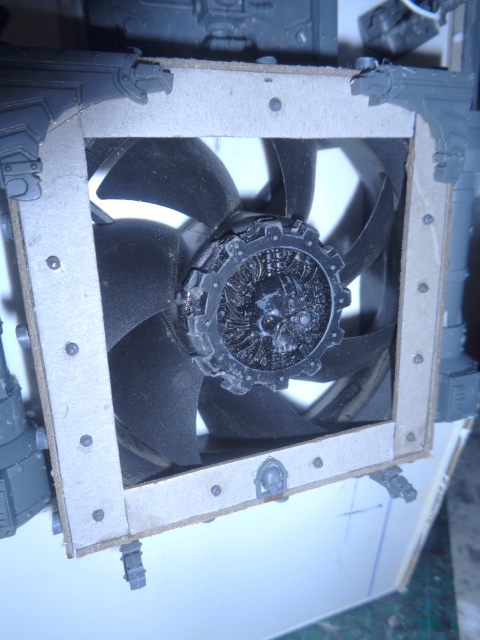
Oh, and add some detail to the central part of the fan. At least some rivets, but a circle of skulls also works.
thanks for the coments, agree with the fan center and found that cutting the symbol from a GW manufactorum panel it fitted perfectly and improves it 100%, albeit a nightmare to cut pictures to follow
thanks, see latest photos of symbol on fan looks great thanks
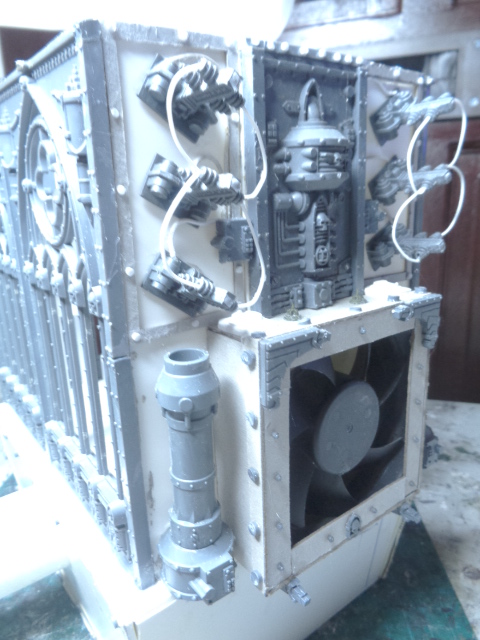
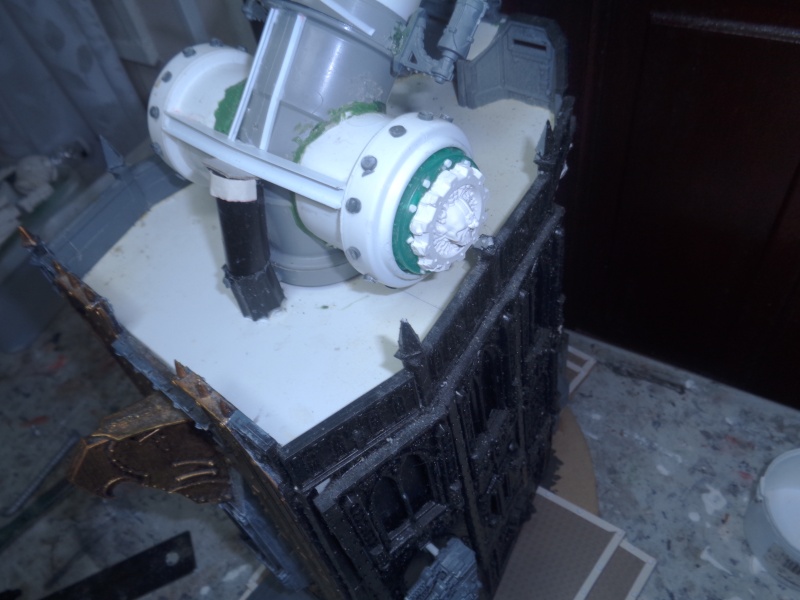
Automatically Appended Next Post: got some feedback about the fan center being plain so cut a mechanicus symbol from manufactorum panel and it fitted perfectly, looks 100% better thanks for advice, also felt the end of the generators wgere i cut them did'nt look good so removed the pivots off bastion turrets i have and add them to the end and now looks more complete, thanks for looking
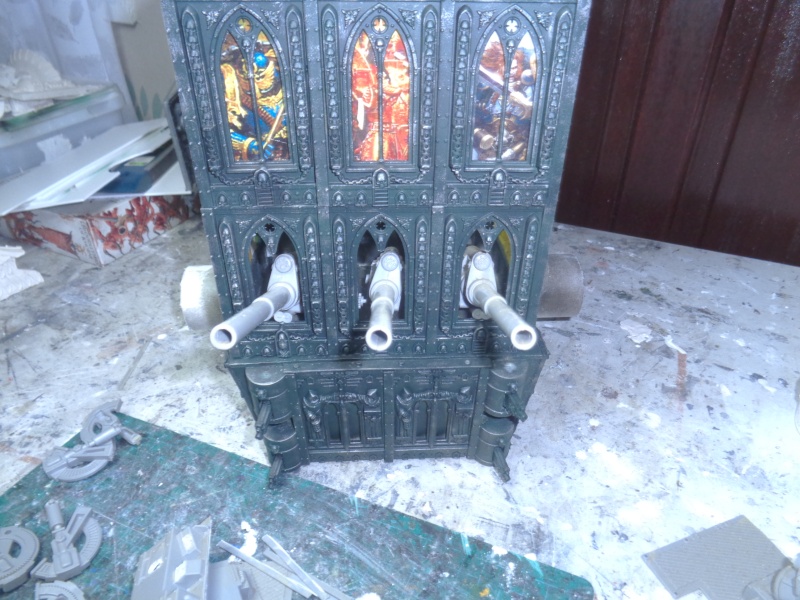
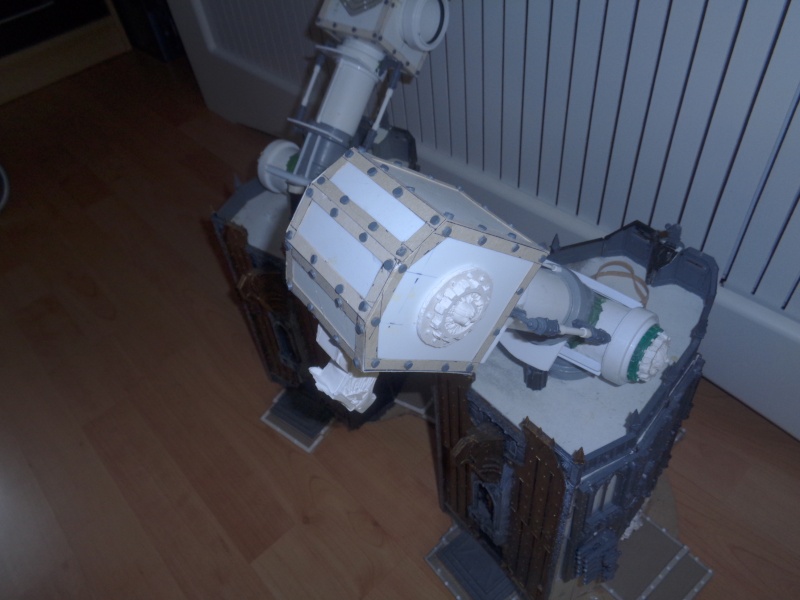
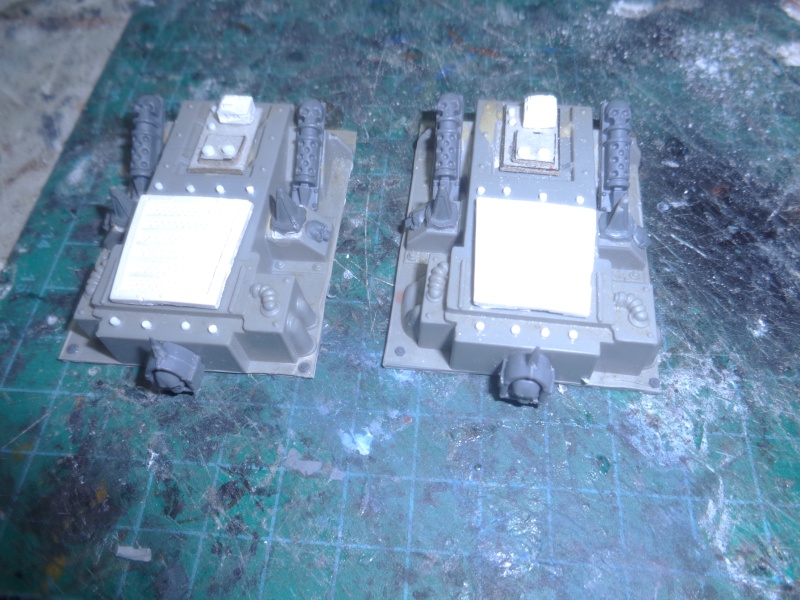
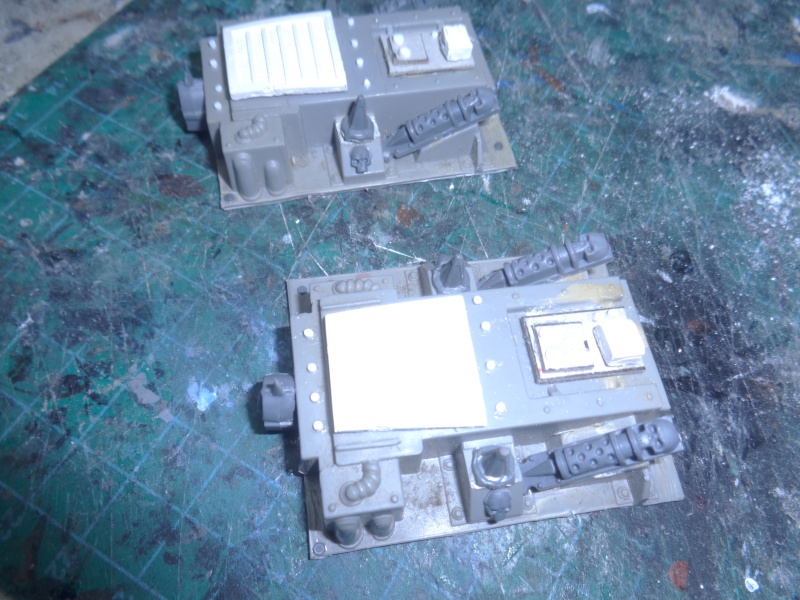
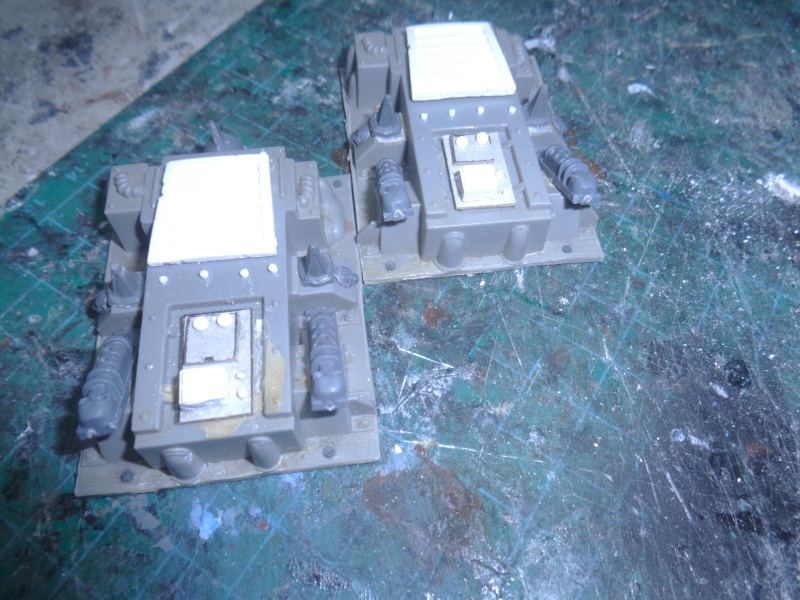
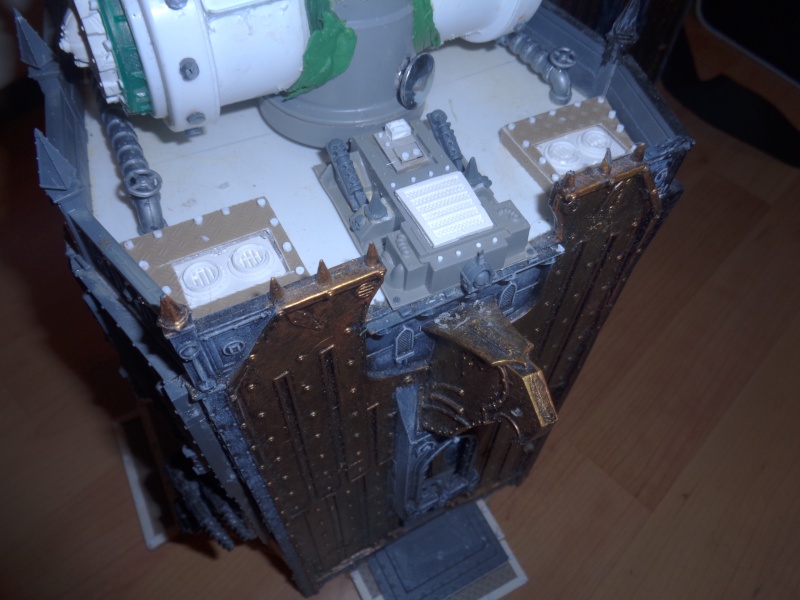
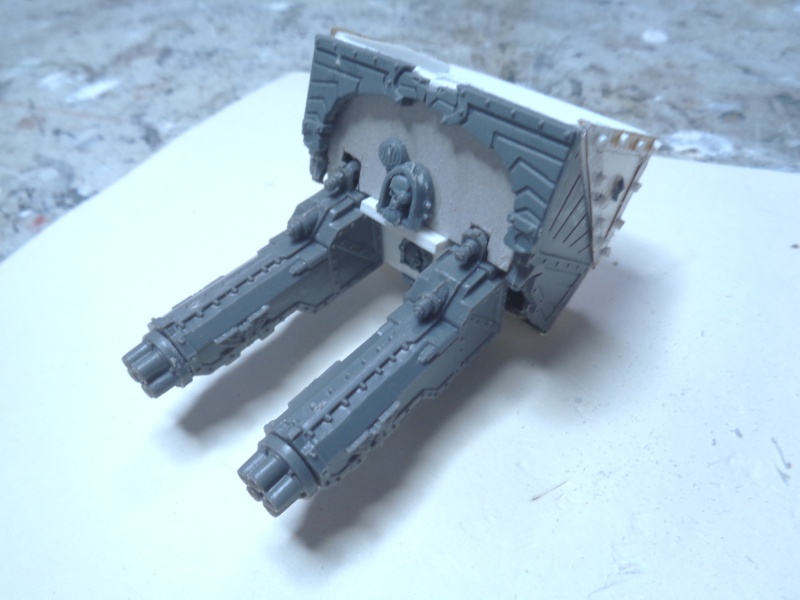
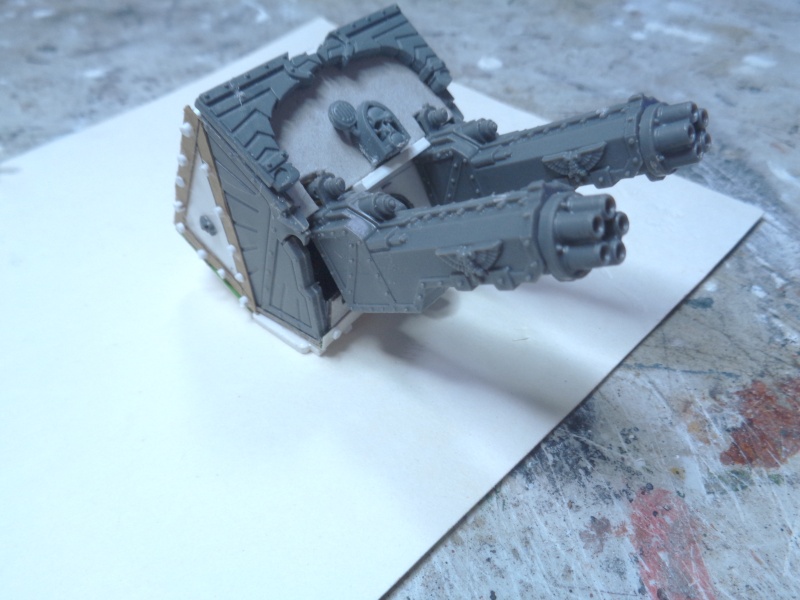
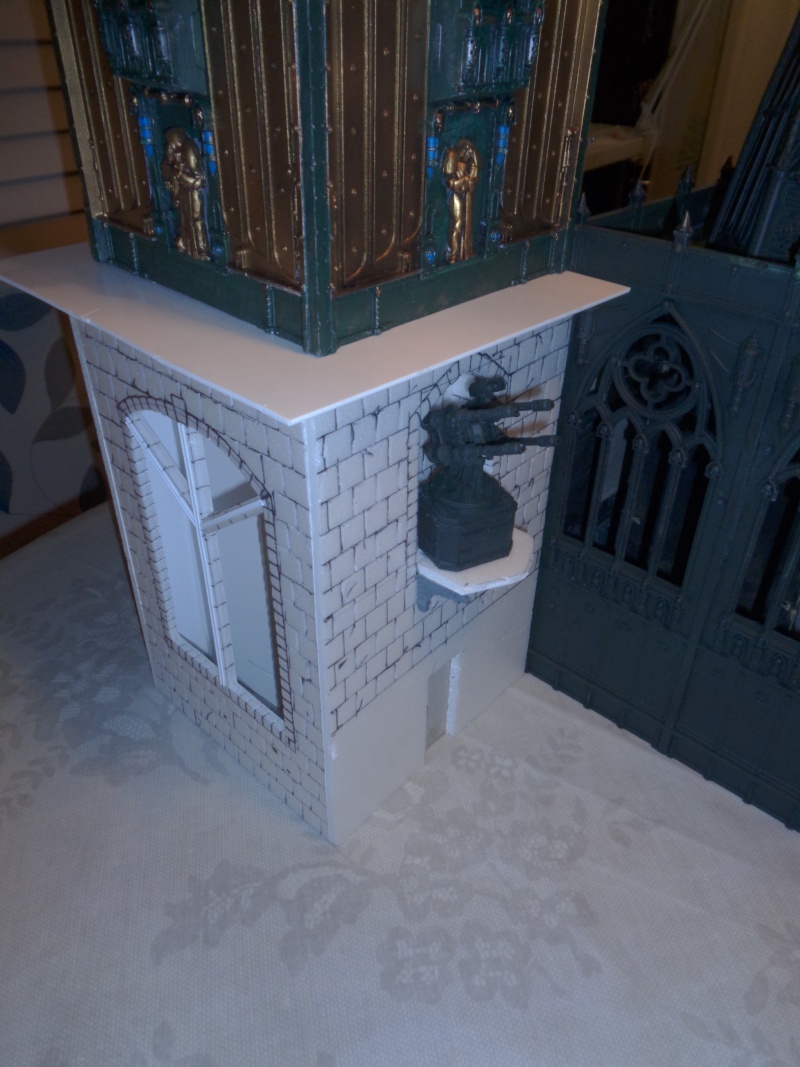
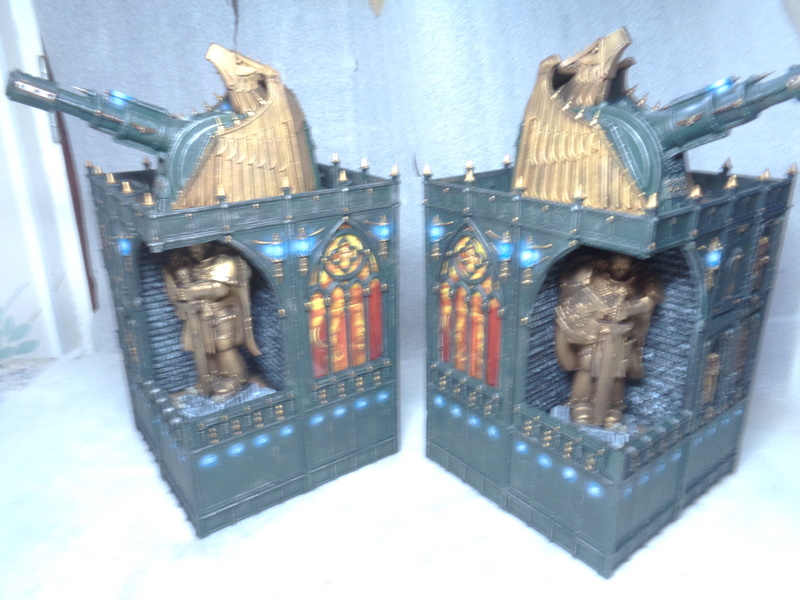
Automatically Appended Next Post: i won some bastion upgrade sprues on ebay so a couple more cannons for the titan, more comms and 4 bastion turrets, looking at the front windows they lent themselves to the turrets so removed the pivot points and fitted to side of windows and filled in with milliput which will be filed down in due course, cut the sights down to fit and the a couple of the light offcuts used on ledge above and added some rivets, think it looks good now, thanks for looking
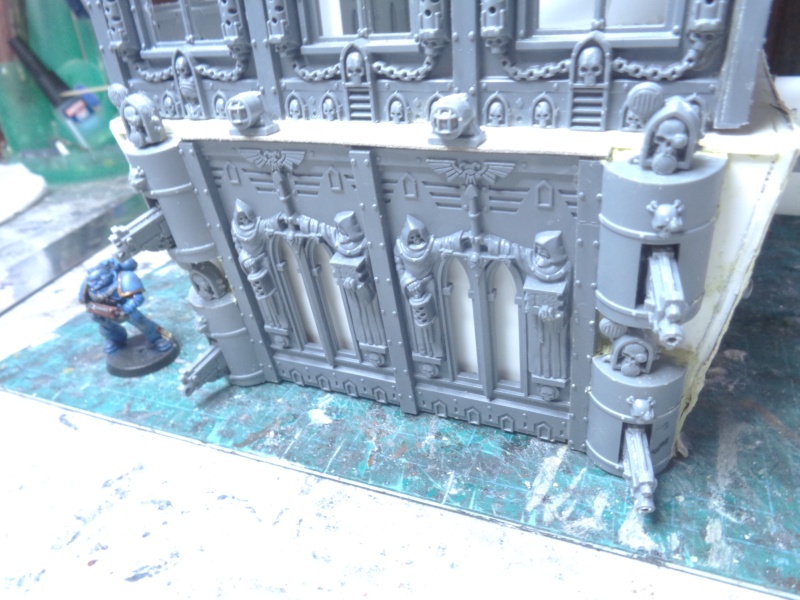
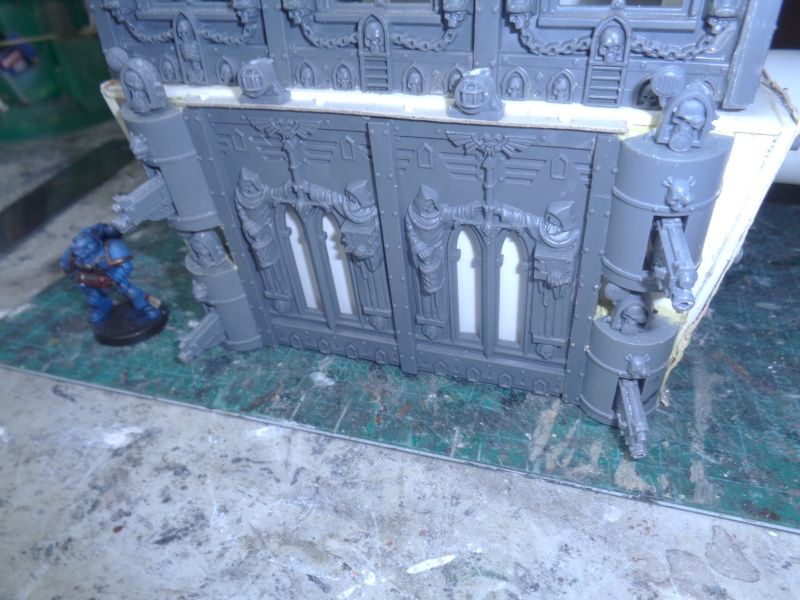
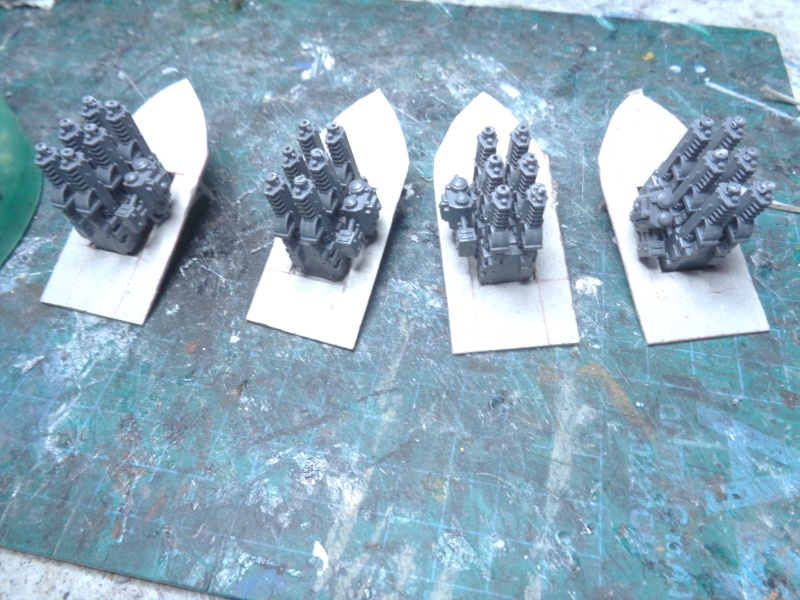
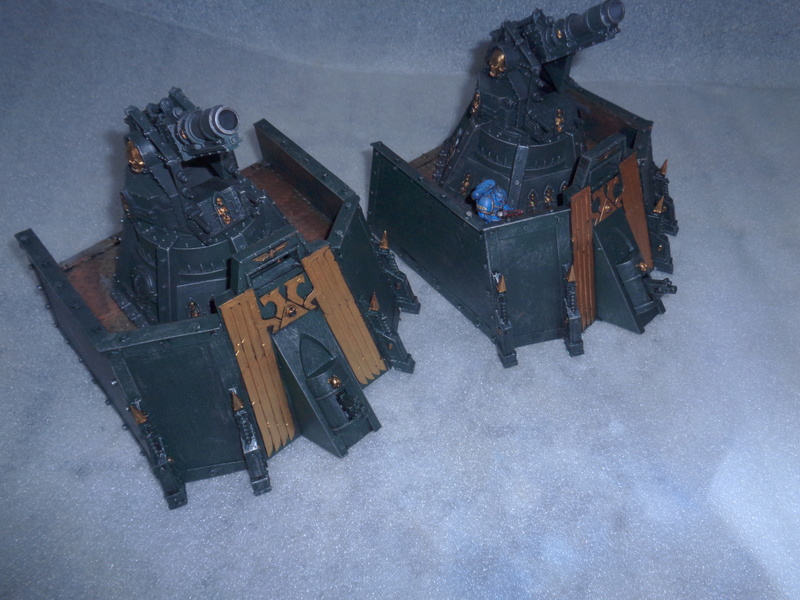
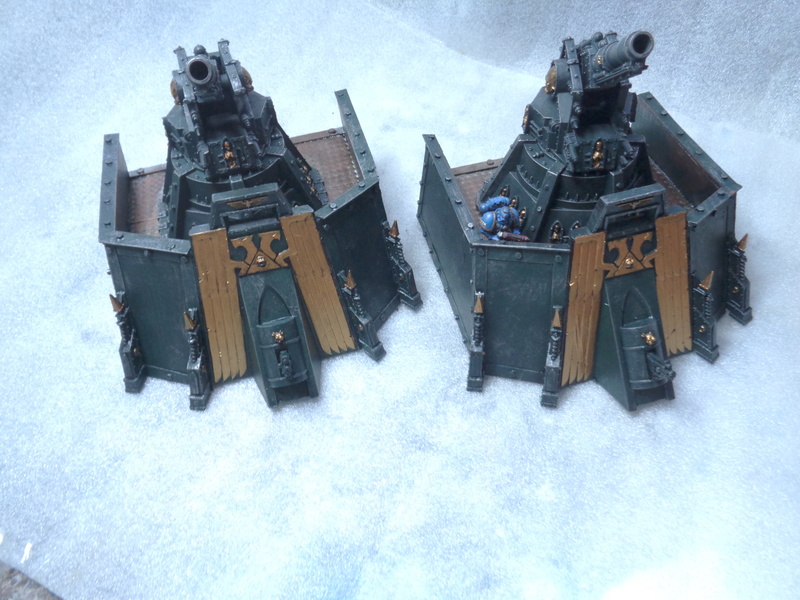
Automatically Appended Next Post: just a quick look at banks of bolters to protect the doors on legs
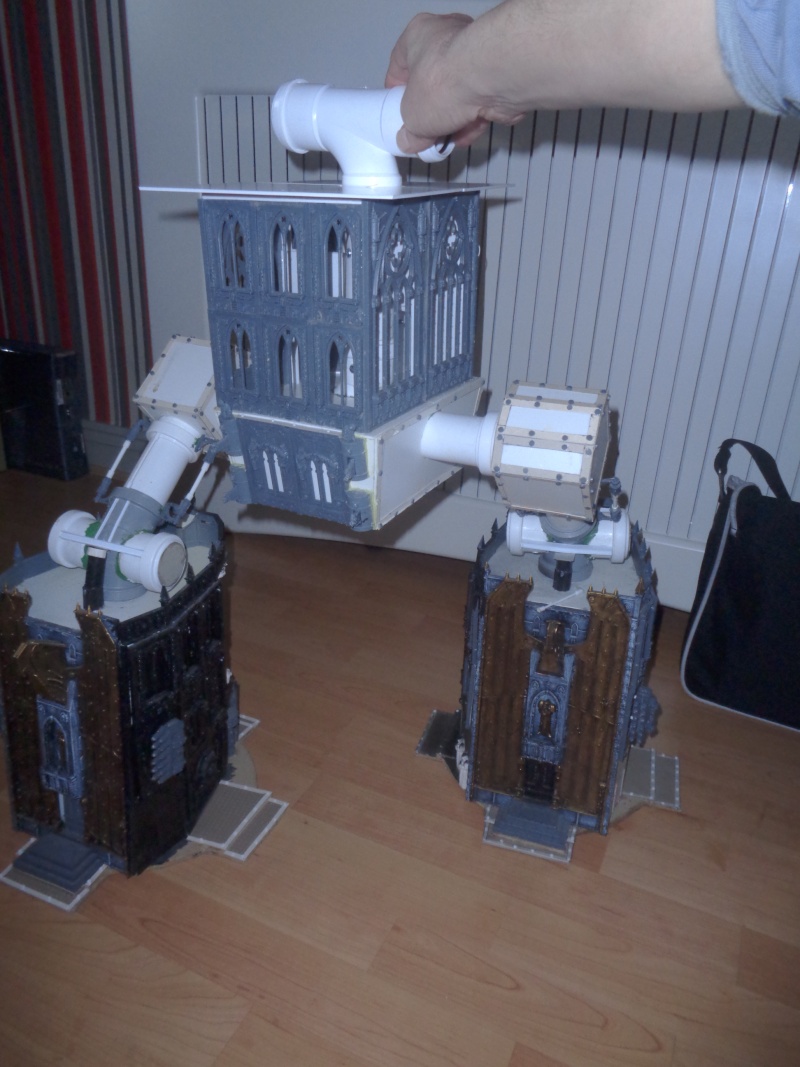
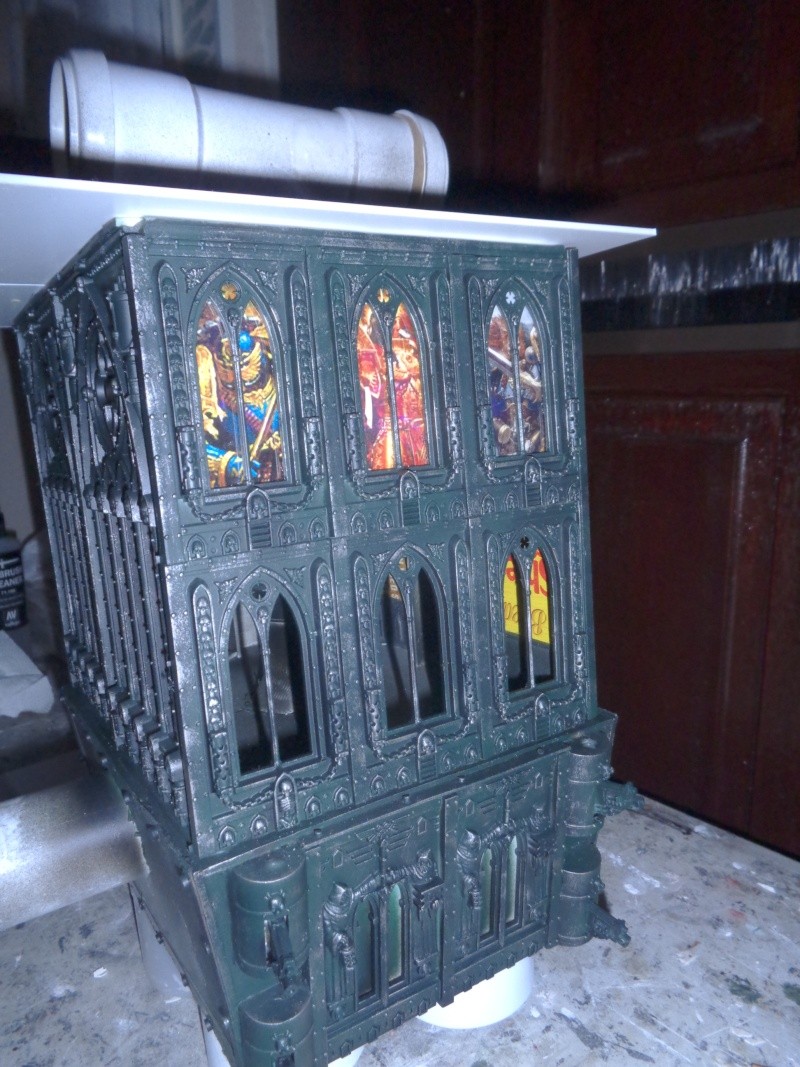
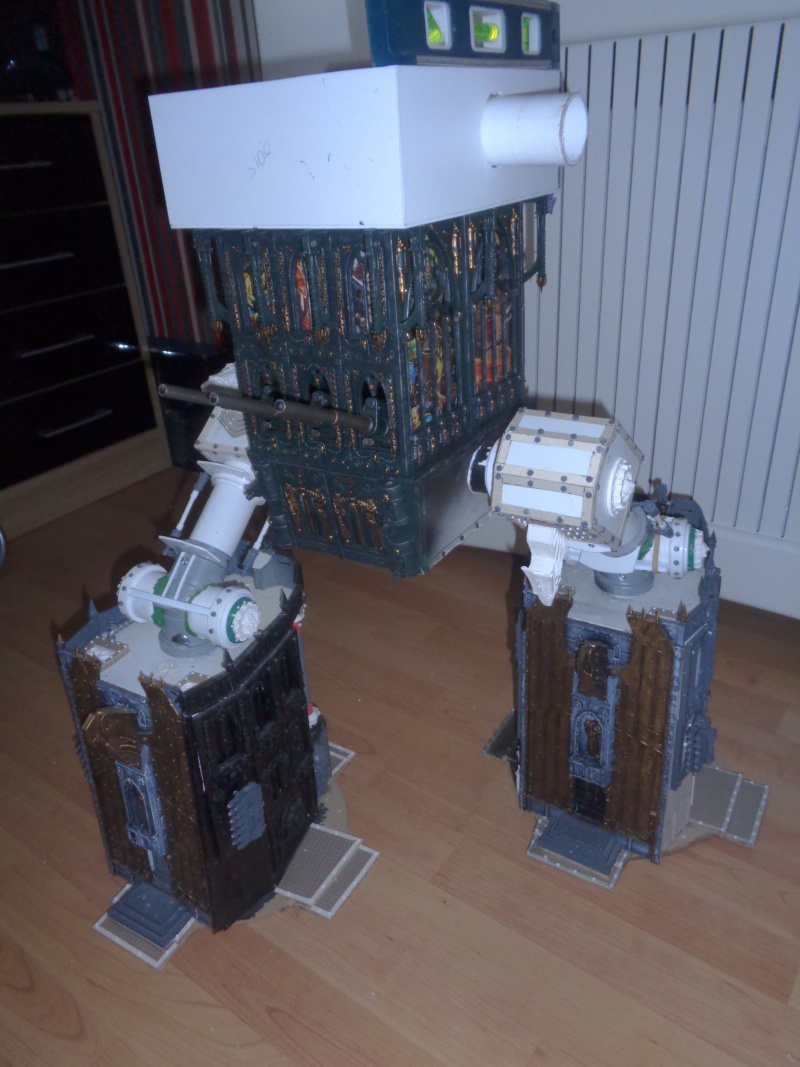
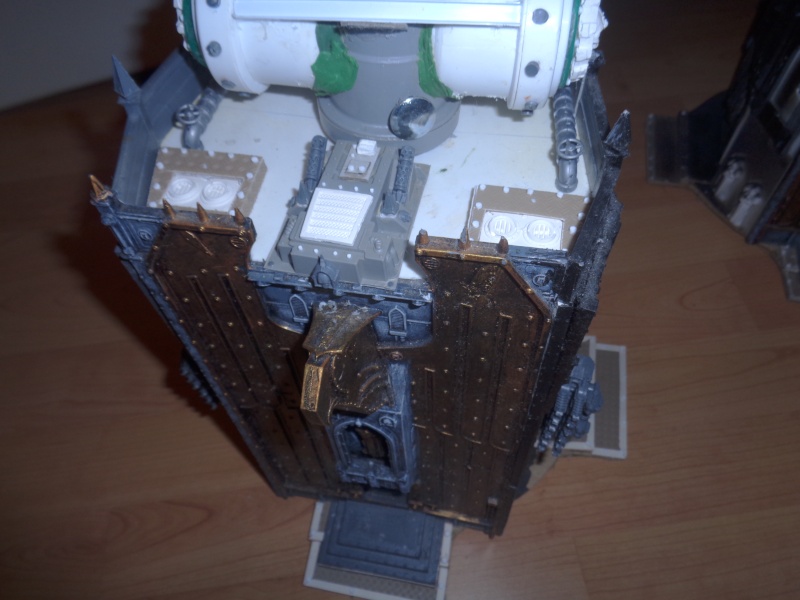
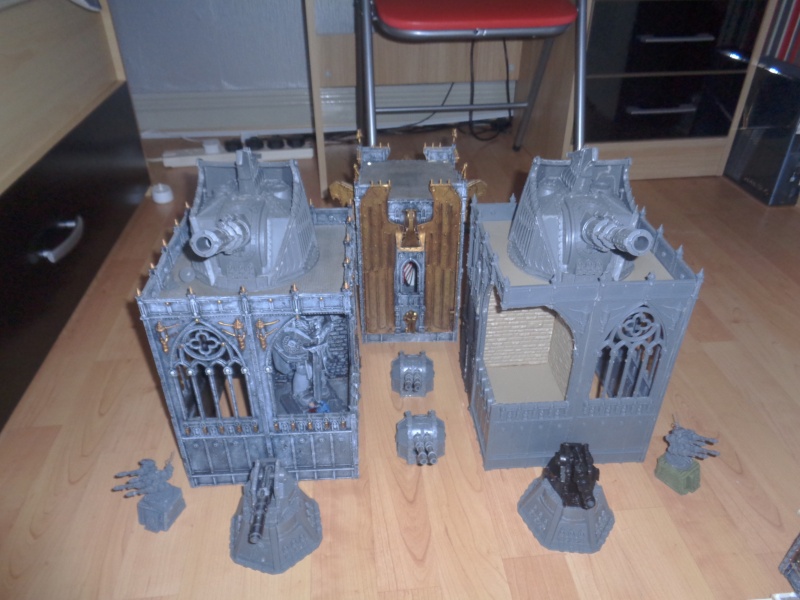
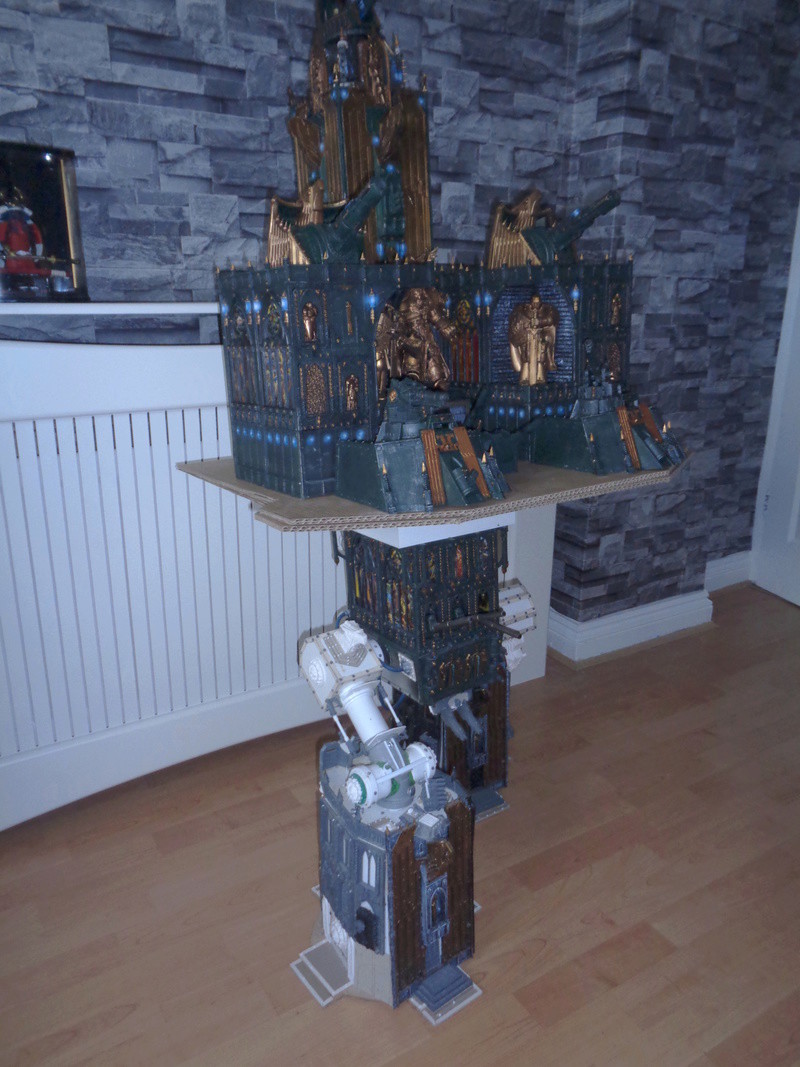
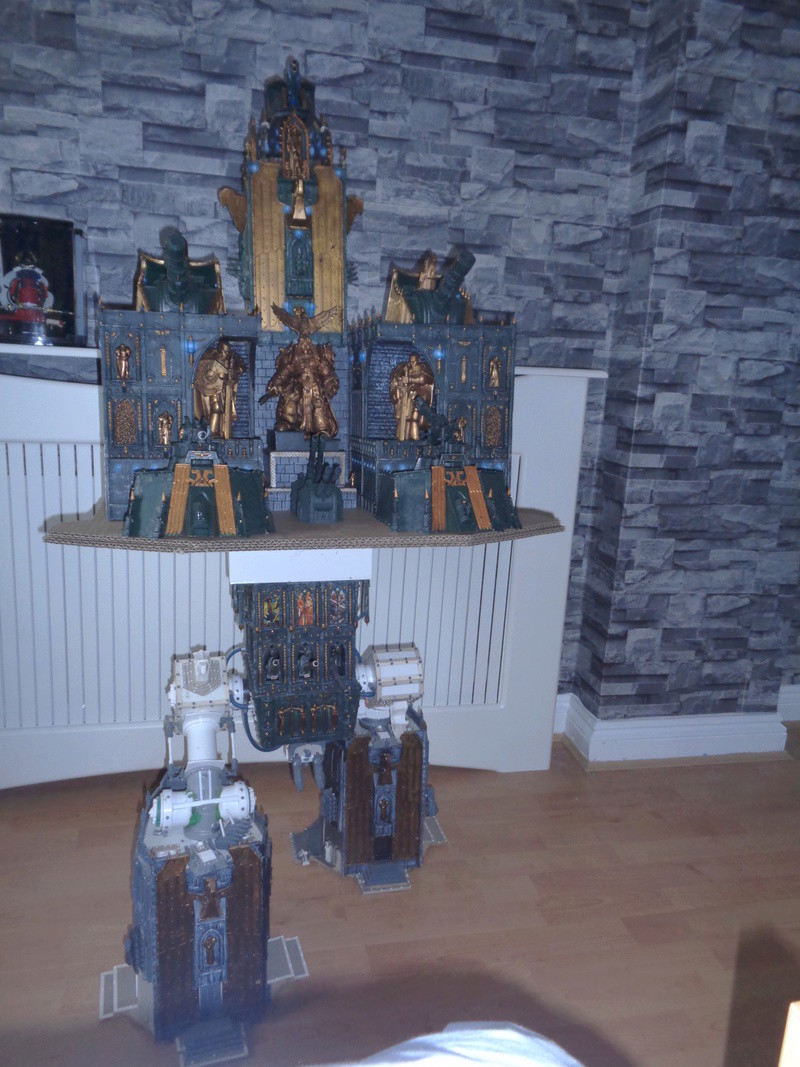
just a quick pic of it dry run together to get scale and height for what i have planned, going to have to paint the middle engine and window section first before putting next level on as wont be able to get stained glass windows in, thanks and comments welcome
Oh, I'm liking this. I'm liking this a lot! Using the GW buildings as your 'building blocks' (heh. heh.heh.) is really effective! Don't forget to paint it in camouflage when you're all done!
It is three cathedrals turned into a biped. I am in love. (And jealous.)
The PC fan is absolutely wonderful. The details you put on it really helped. Please get us a size compare with another titan or knoght when you are finished.
Judging by the higth and weight going with a straight bar for the leg join rather then a diaginal may end up bending it or worse yet snapping the joint.
OgreChubbs wrote: Judging by the higth and weight going with a straight bar for the leg join rather then a diaginal may end up bending it or worse yet snapping the joint.
thanks for the comment, i had thought of this but seen a similar idea on another forum and they had twisting problem but used bolts through pipes to stop this, the pipes are plastic welded aswell so hopefully it will hold up, did'nt seem a problem on dry run where i am at now so fingers crossed
The problem with most titan scratch builds is that, no matter how good they are, they tend to lack the smaller details and intricacies that should cover the damn thing, for example rivets, panels, etc. and therefore tend to look a bit boxy. However this one looks set to capture the look of an actual emperor titan - reminiscent of a transformer who's alternate form is a full sized cathedral.
hippyjr wrote: The problem with most titan scratch builds is that, no matter how good they are, they tend to lack the smaller details and intricacies that should cover the damn thing, for example rivets, panels, etc. and therefore tend to look a bit boxy. However this one looks set to capture the look of an actual emperor titan - reminiscent of a transformer who's alternate form is a full sized cathedral.
Love it! Can't wait for the next pics
thanks for nice comments, i want to get as much detail as possible and really make it stand out, more pictures about to be loaded
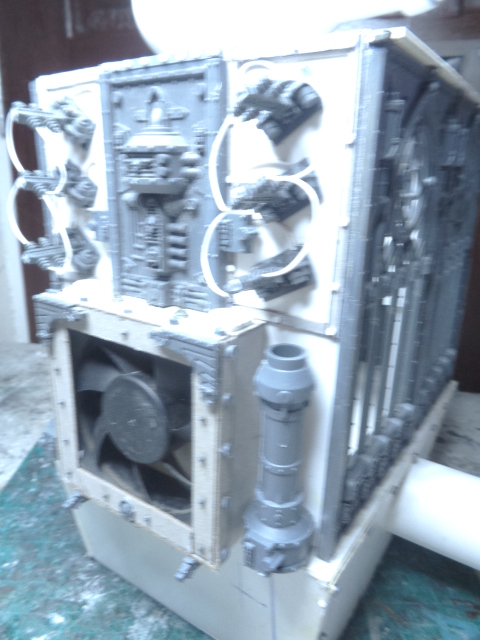
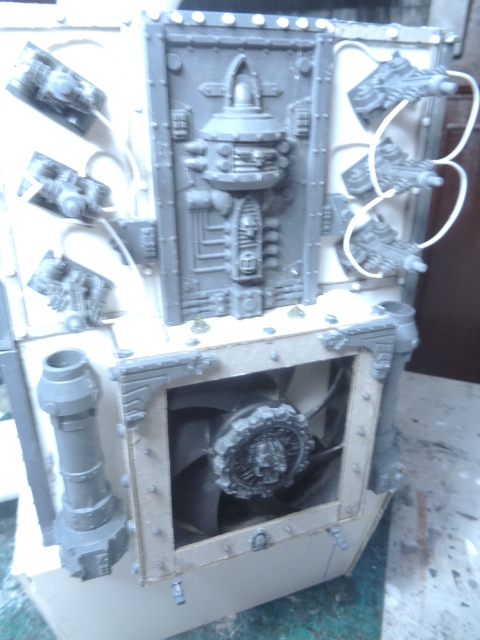
Automatically Appended Next Post: some more work on the engine/generator, added 2 generators to bottom with GW pipes cut to fit, some panelling and rivets around sides, another bank of panals to top and the cut offs from the small GW generators and added to them, some more details to be done yet, thanks for looking and voting
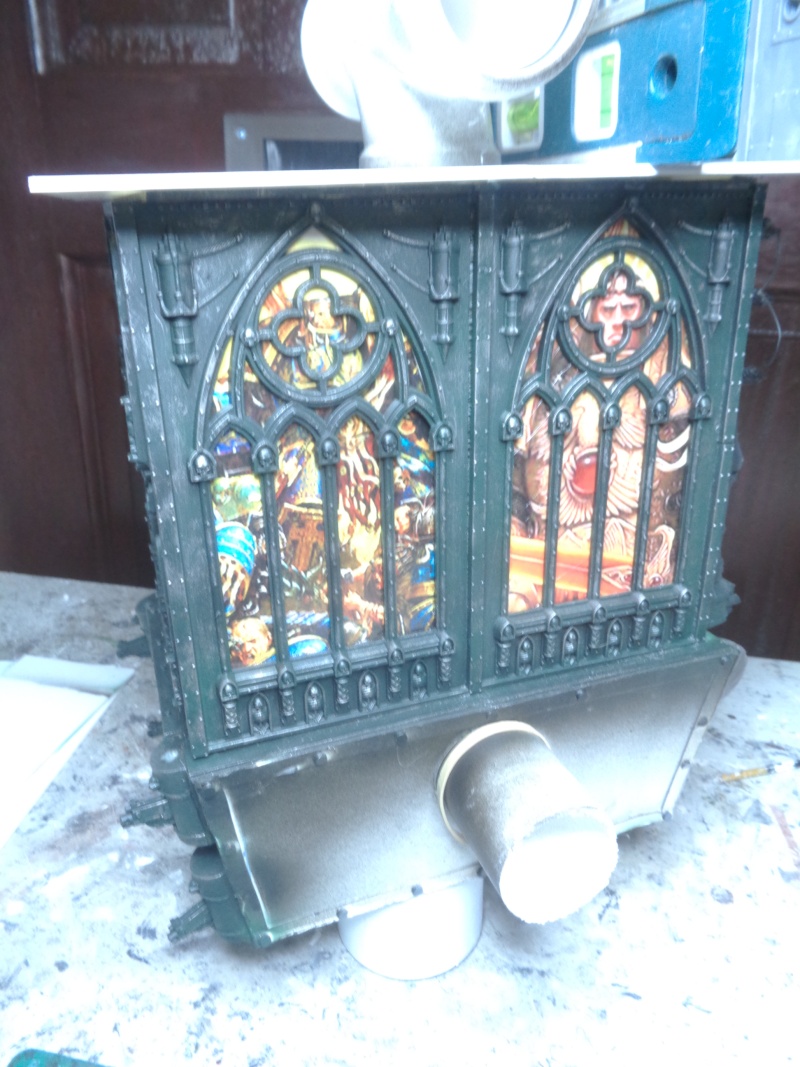
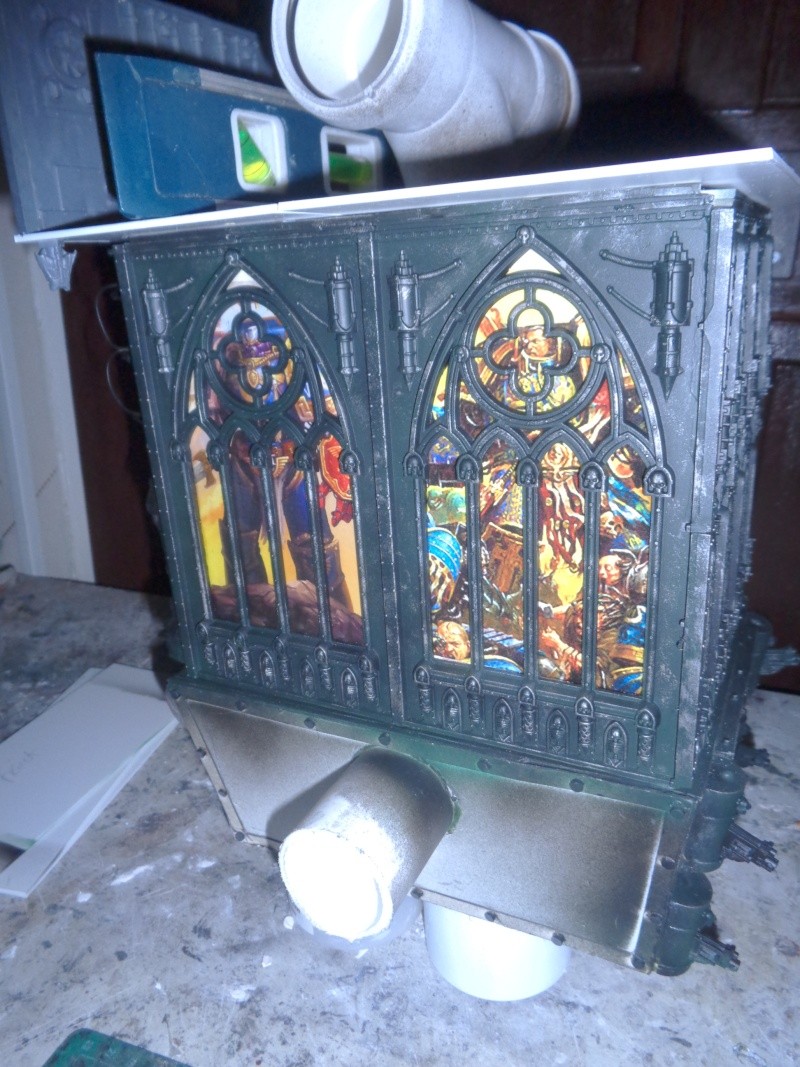
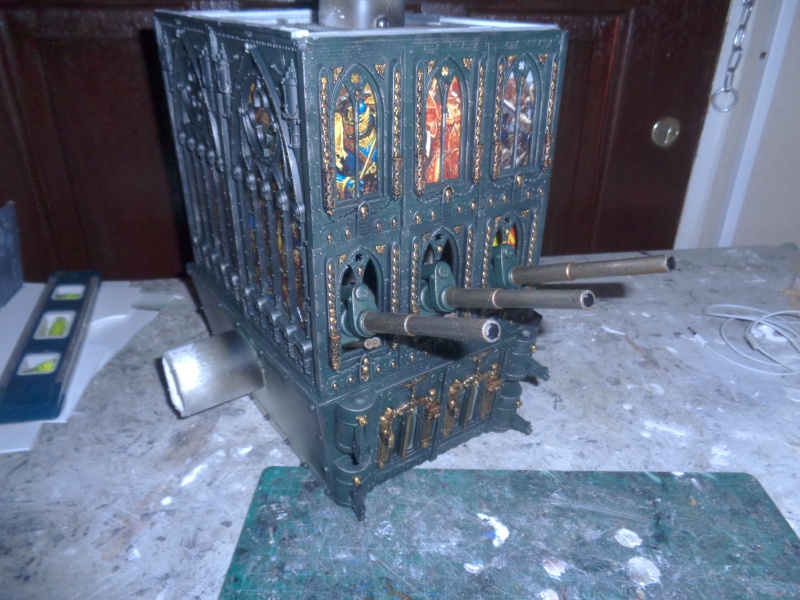
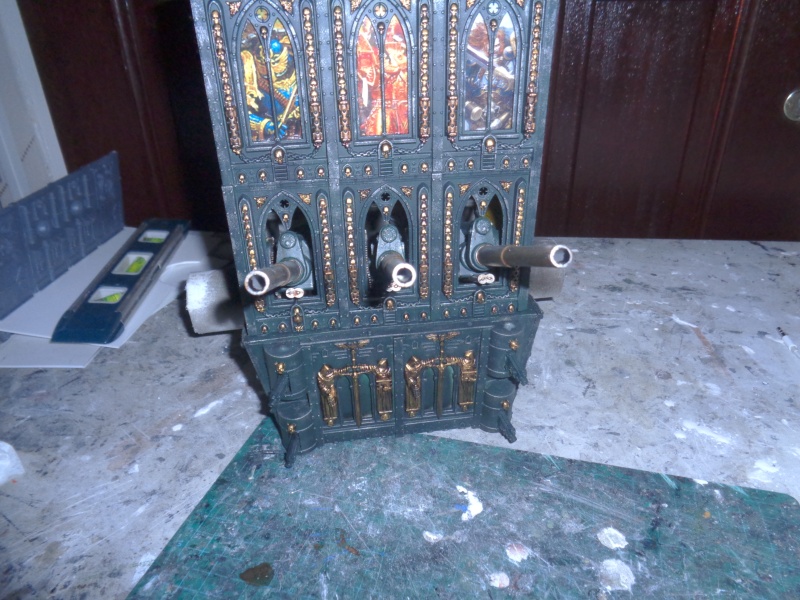
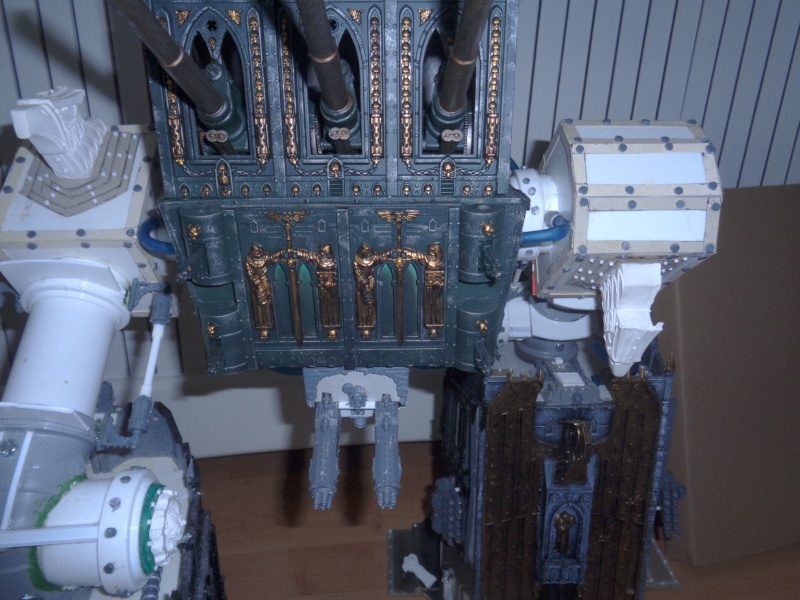
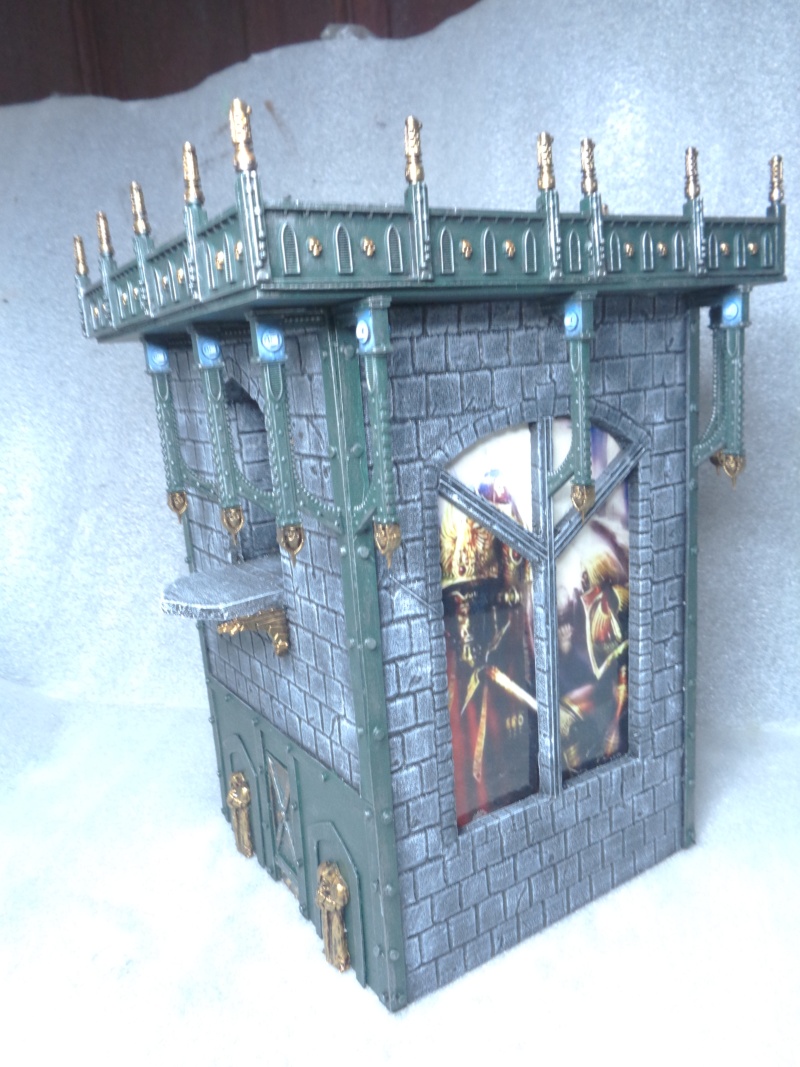
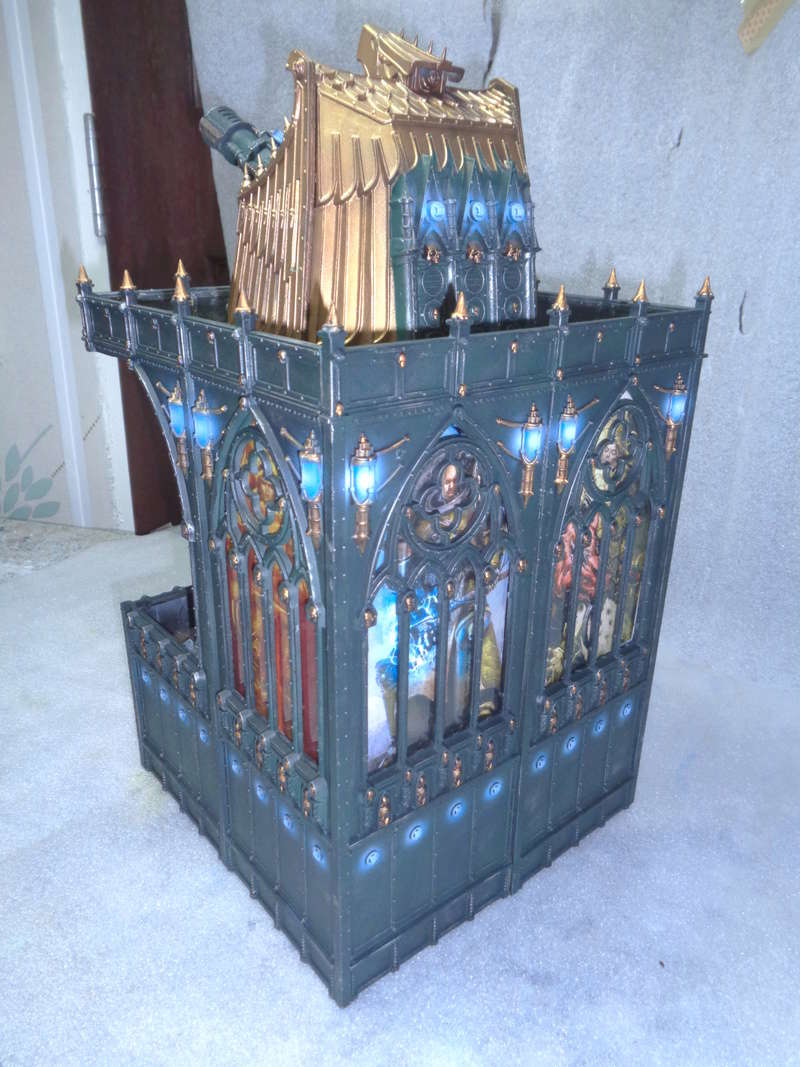
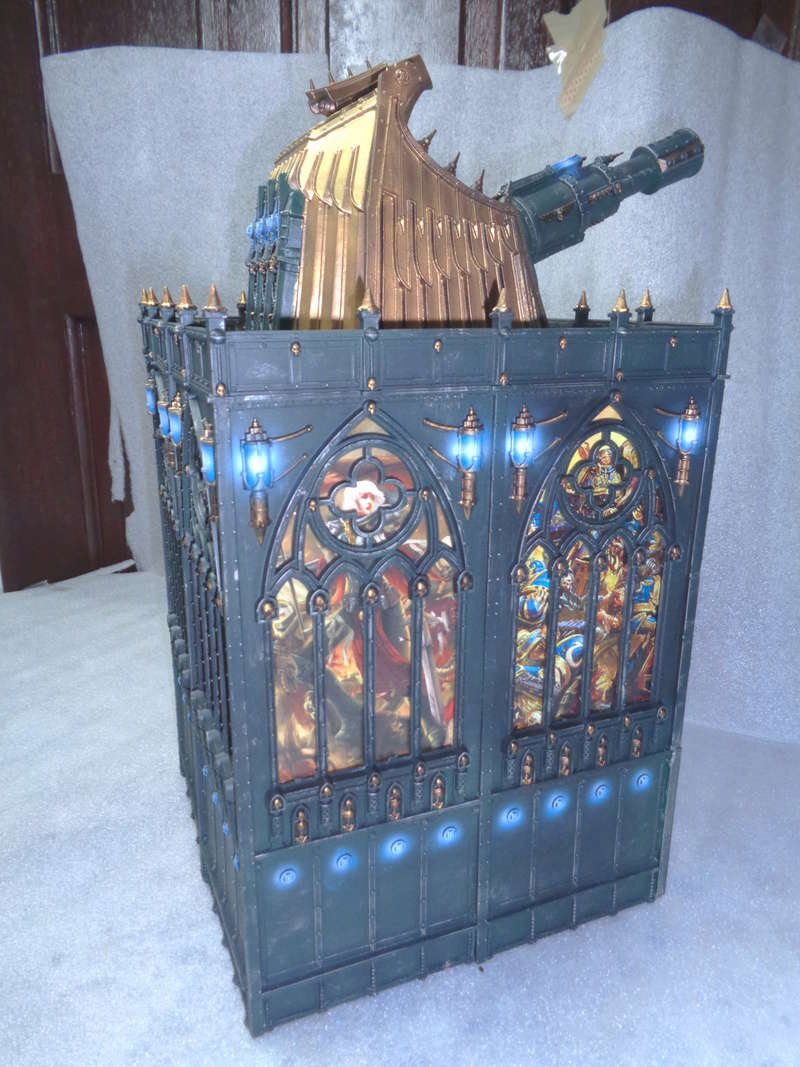
so it was time to fit the stained glass windows, these were on clear plastic but did'nt get the effect even with the leds so put some cream card backing and looks better, pictures make it look brighter than is, had to paint the windows as wont be able to access them which gave me the perfect exscuse to have a go at my new airbrush and compressor my missues bought me for christmas (she just does'nt know she did ) good way of getting used to it as never used one before, laid the base coat on and some chipping, more weathering and gold detail can be done later, the 3 small windows below with no stained glass windows will have basilisk turrets sticking out of them, going for a dark green look, thanks for looking
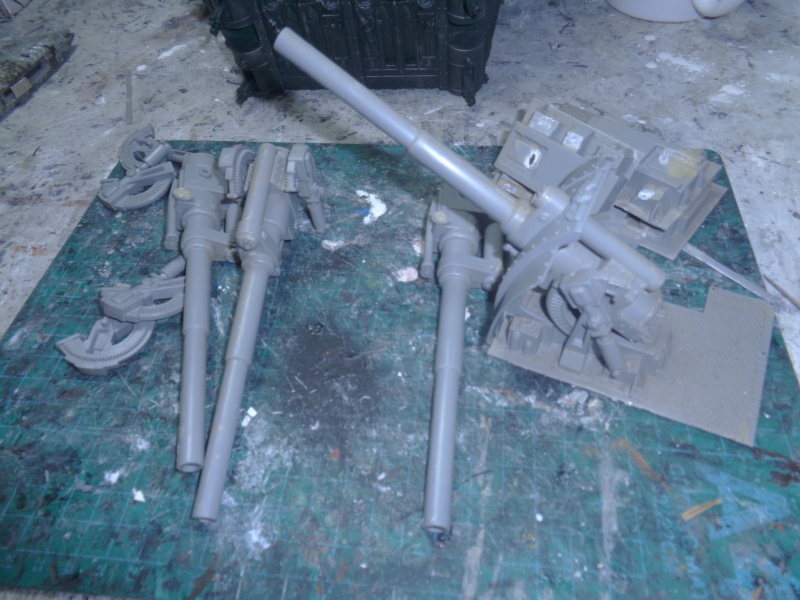
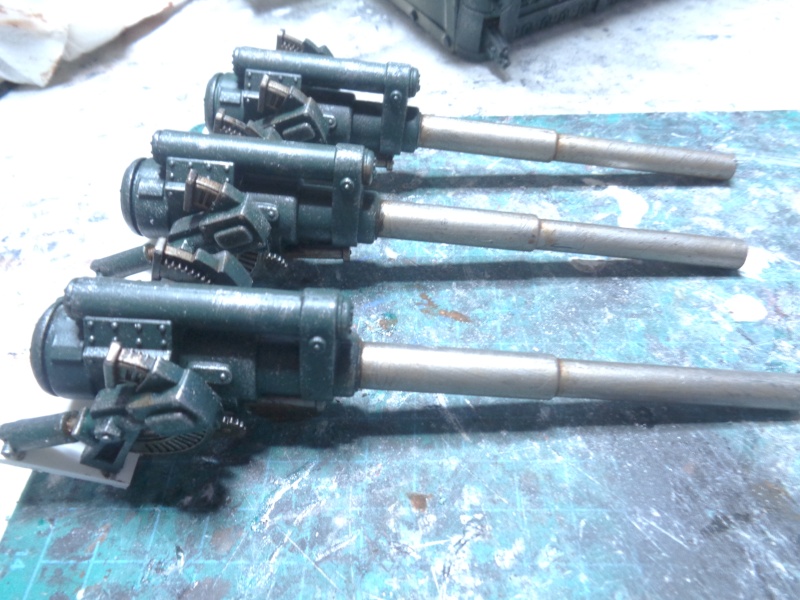
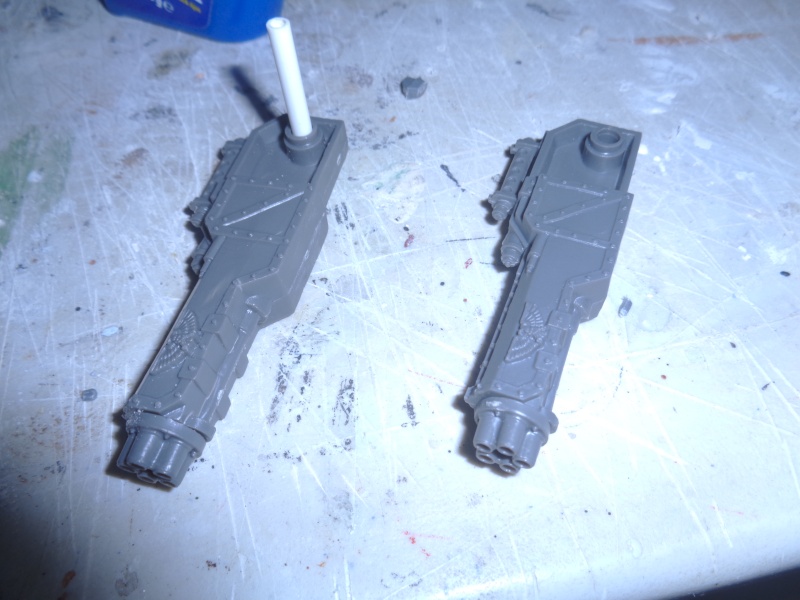
small update, got the beat up earthshakers off ebay today, dismantled and will be cleaned up and painted before fitting inside the building, dry fitted to see if they look ok and fit, the bases i removed will make good circuit panals with some extra work for other parts of the titan, thanks for looking
hi, had a approx dry run with the fortress how i want it and it will be about 50 inches, i'll be using GW panels on the fortress to tie everything together
Automatically Appended Next Post:
mrveng wrote: Wow those basilisk guns look great in those windows, very cool idea. Subbed. Can't wait to see what's next
thanks, once they are done and in place i can carry on witht the next level
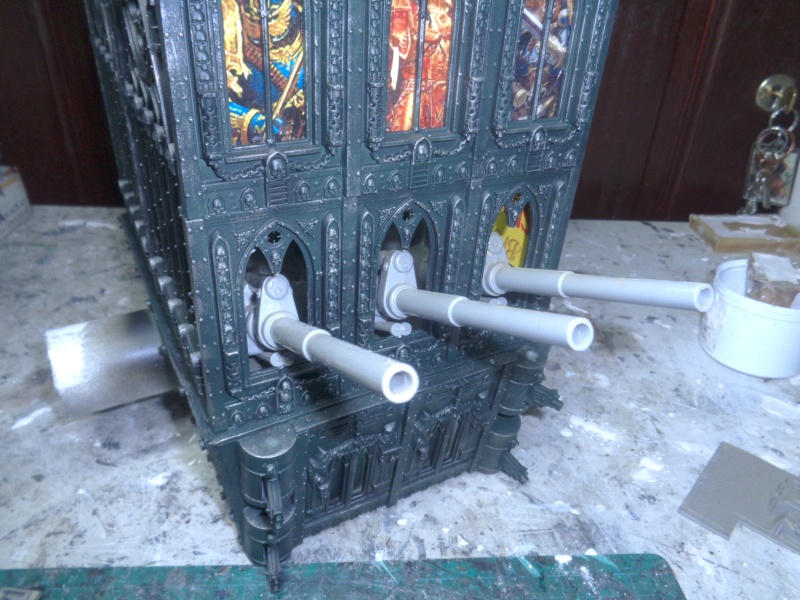
painted up the basilisk guns and placed in building, also started to paint gold details, still got to weather them yet but just easier before putting guns in, thanks for looking
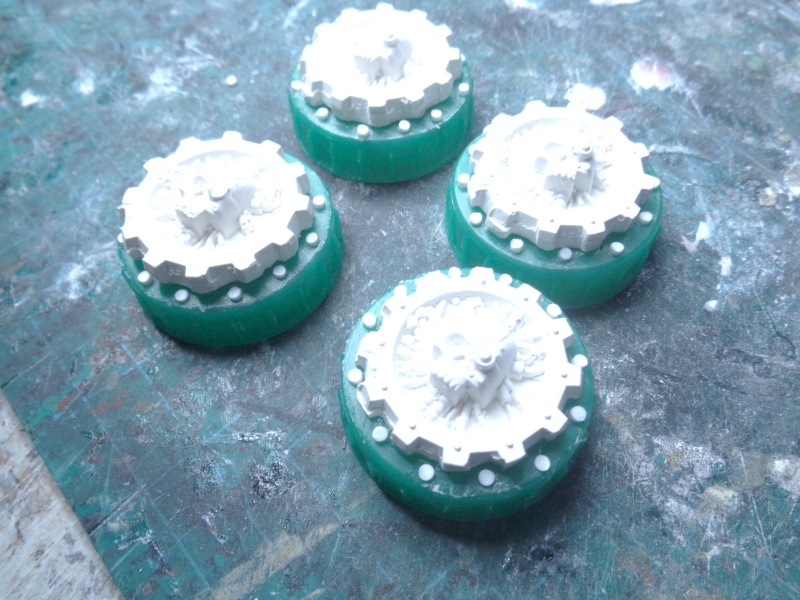
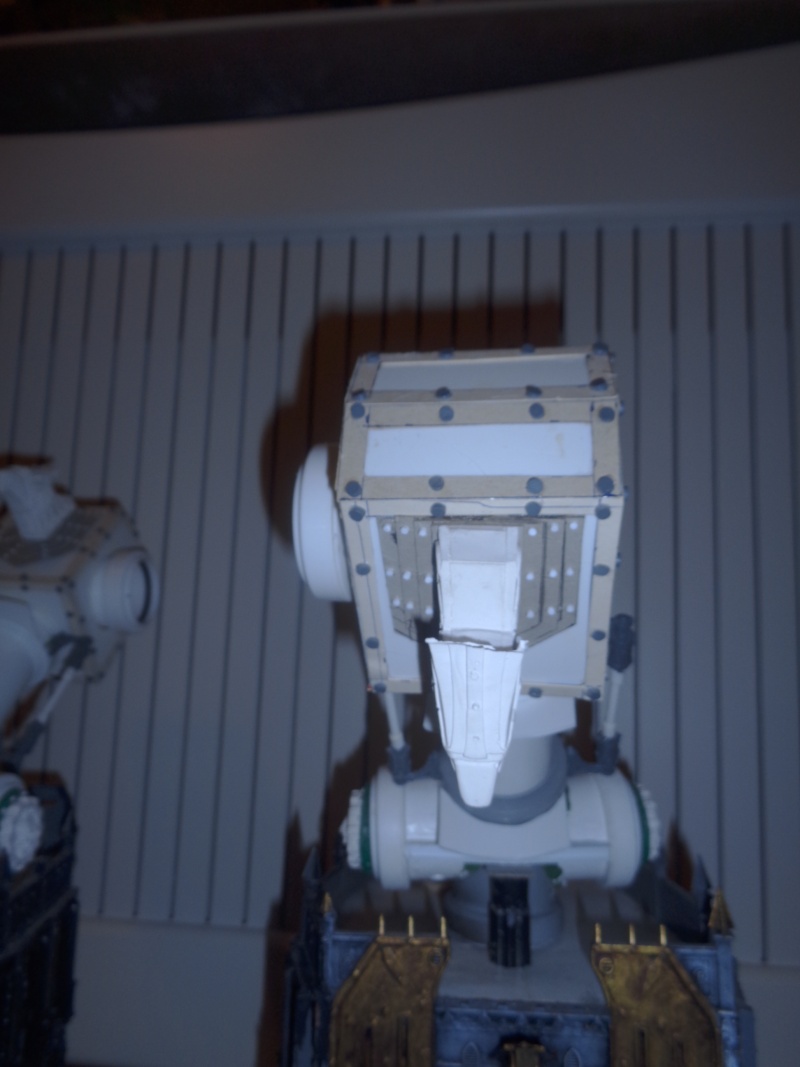
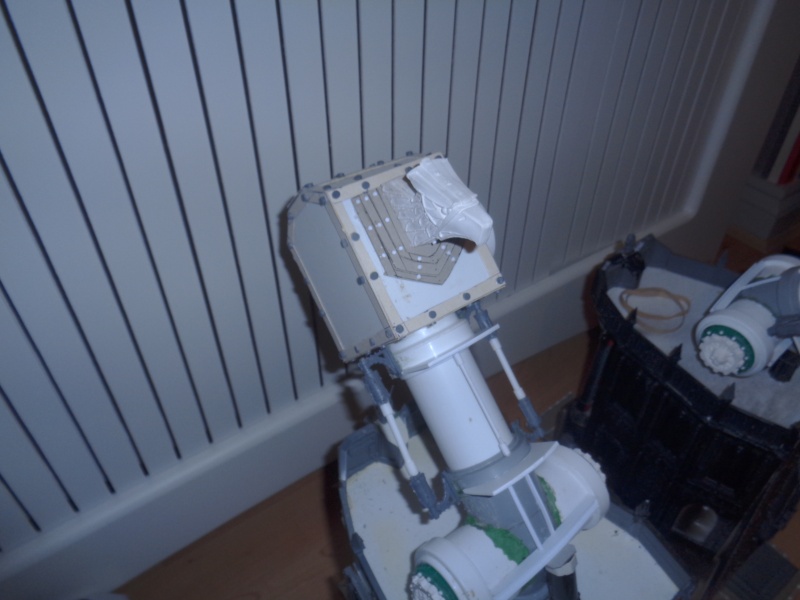
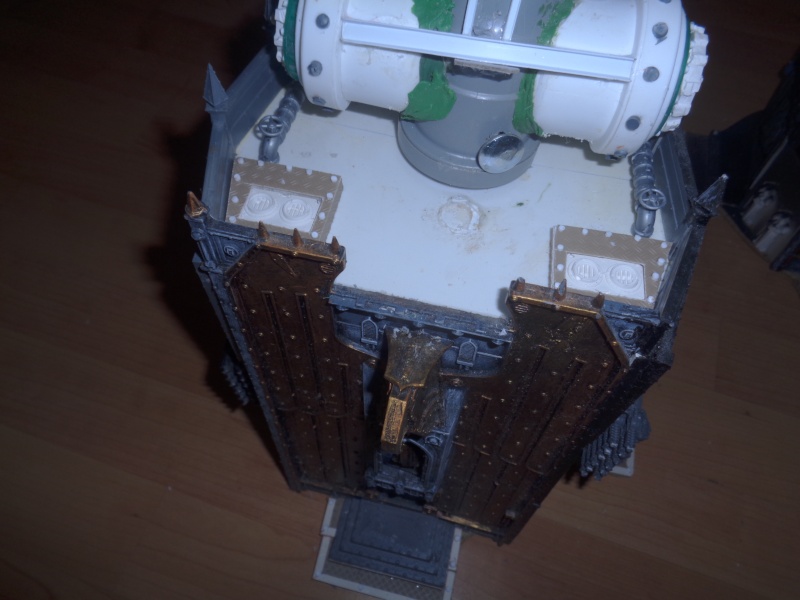
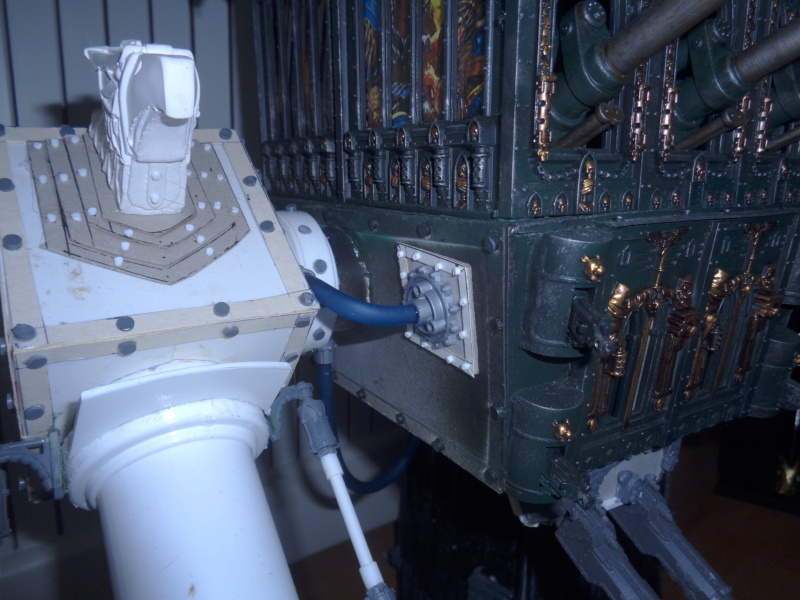
fitted the supprots for gun arma and started to encase, also did'nt like the plain look to the joint ends on legs, so used some milk carton tops, cast some mechanicus symbols and added handmade rivets and like the end result much better, got a lot more tidying up on the leg and will be making some leg greaves, thanks for looking
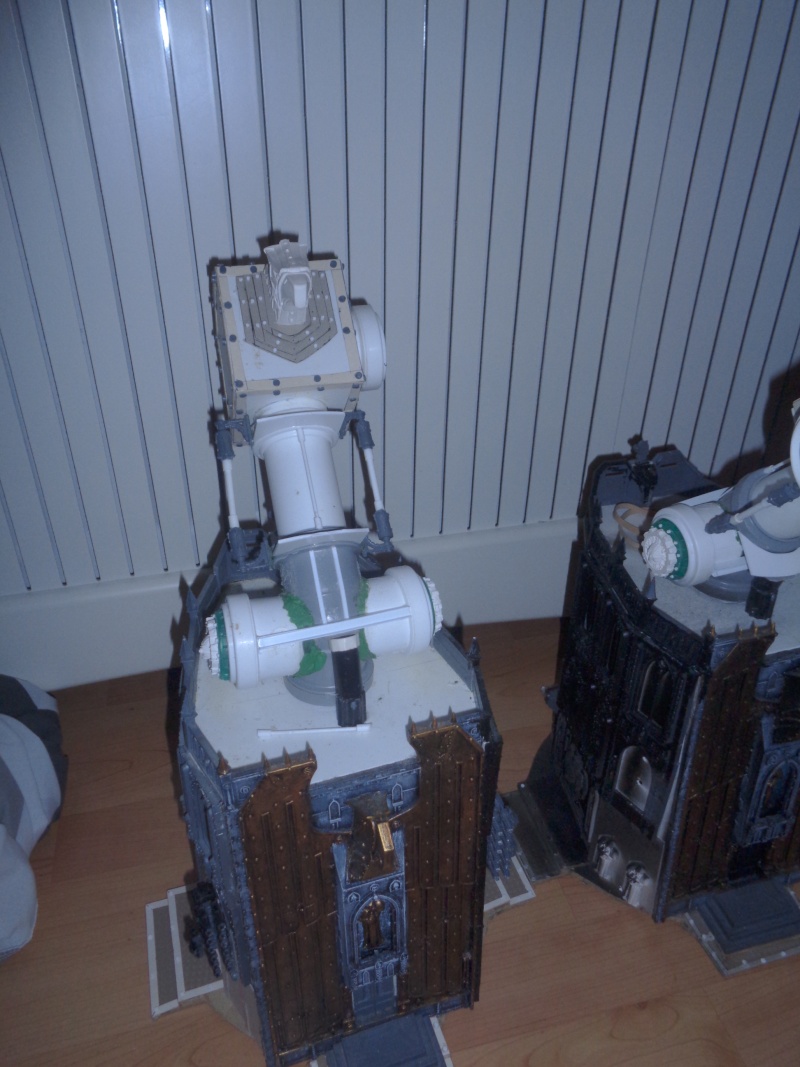
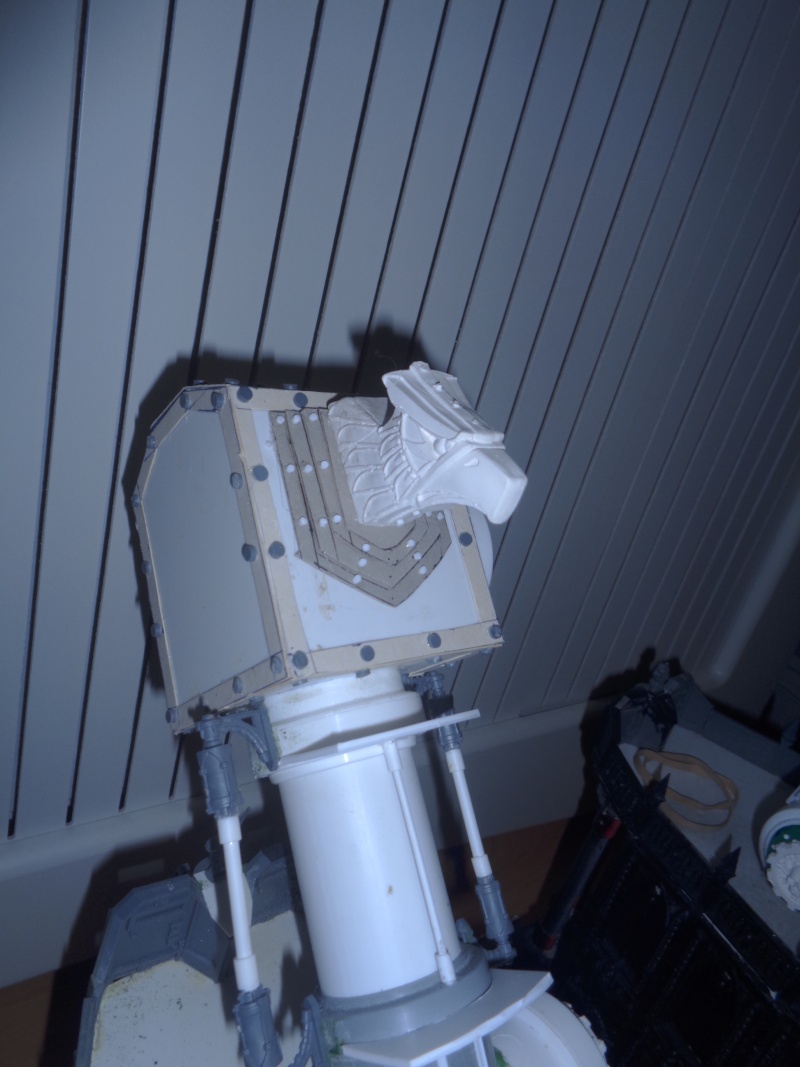
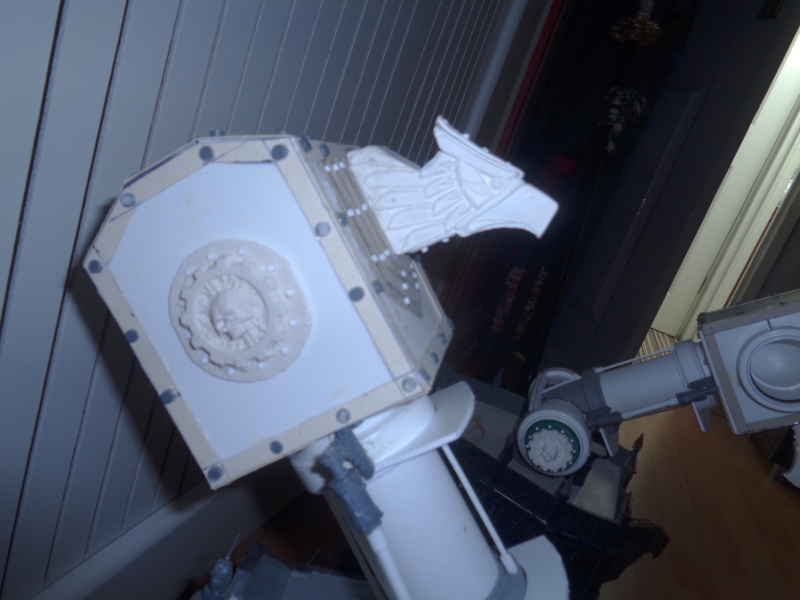
done a little bit on the leg tonight, the top leg joints looked very plain so made some backing plates from card with handmade rivets and a imperial eagle head
hi handmade eagle head then made a cheap cast of it rather than make 2 and i can reuse else where
thanks very much, the fortress will also have stained glass windows aswell
Automatically Appended Next Post:
Claas wrote: Wow, this is going to be amazing. Can't wait to see the finished product. Just curious how long did it take you to design it?
did'nt really sit down and plan it, a lot of it is in my head and made up as i go along, i do have a general idea of how it is going to look, i had seen several on various websites etc, only seen a coupke that where detailed enough for my liking and had always wanted to build one but with lots of detail, i had started building the emperors palace a coupe years back but gave up when i realised how big it was going to be so used all the building parts off that plus picking more on the cheap from ebay and cleaning up, also bought the guns that i am going to usefrom ebay, thanks for comments
Automatically Appended Next Post:
Wulfmar wrote: This is already looking far more Grim-Dark and in the spirit of 40K than the actual titan they released!
just a few bits today, finished the gold details on the main body and added some building struts which will also give some more support for the fortress base, started to put rivets around the knee joints
Been quietly following on from the get go (love the big scratchbuilds people do). Your work is top class and you have a good pace going. Keep up the good work as I want to see a finished Titan.
Out of curiosity are you gunning for it to be in scale to a 40k model?
Archer wrote: Been quietly following on from the get go (love the big scratchbuilds people do). Your work is top class and you have a good pace going. Keep up the good work as I want to see a finished Titan.
Out of curiosity are you gunning for it to be in scale to a 40k model?
thank you, as to scale was hoping too, there are so many differant views on size of titans on the web i'm just building and see where it gets me
Archer wrote: Well it is a spectacular start. Is this going to be the Imperator Class Emperor Titan from Epic or a Warmonger class? Or somewhere neatly in between?
He's asking which class of Emperor Titan, Imperator-class, or Warmonger-class (the difference is size, since the actual design is freeform in this case).
Call it the Aedifex Exitailis, a Bobbuilder-Pattern [Insert type]-class Emperor Titan.
Squidsy22 wrote: He's asking which class of Emperor Titan, Imperator-class, or Warmonger-class (the difference is size, since the actual design is freeform in this case).
Call it the Aedifex Exitailis, a Bobbuilder-Pattern [Insert type]-class Emperor Titan.
thanks for everyones kind words and suggestions, as iwanted to do some detailing under main body i decided to fix legs to it and also to see if it will hold weight of fortress or any other issues, welded and bolted into place, these will be hid in time and all seem ok little bit of warping on mdf on right foot but it is going to be screwed down to a dioram base so not a problem, started some detailing on leg decks with plenty more to come, for those asking, i have added picture of my stompa aginst the titan for scale, thanks for looking
thanks again for all the nice comments, done some more dtailing on leg decks using the beat upbases from the basilisks i got off ebay, little tidy up added some card, rivets, bolt heads, skulls and other bits and bobs, thanks for looking
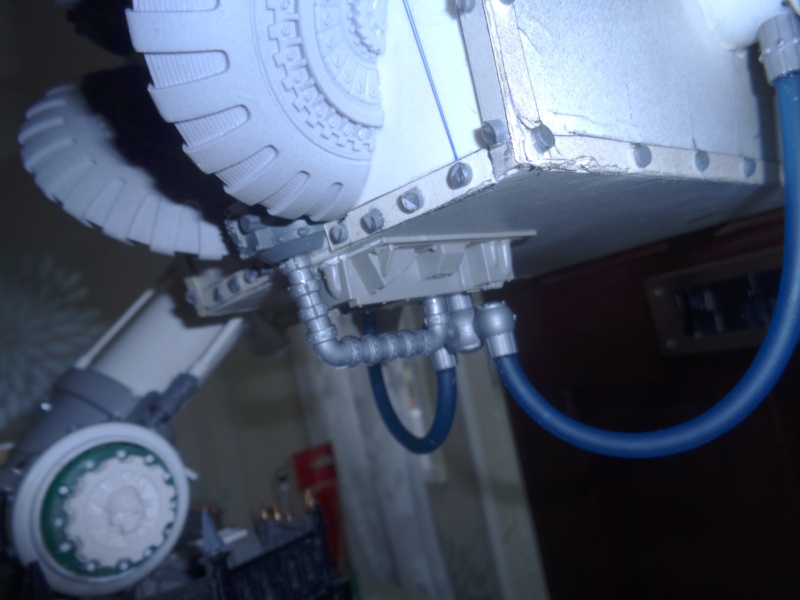
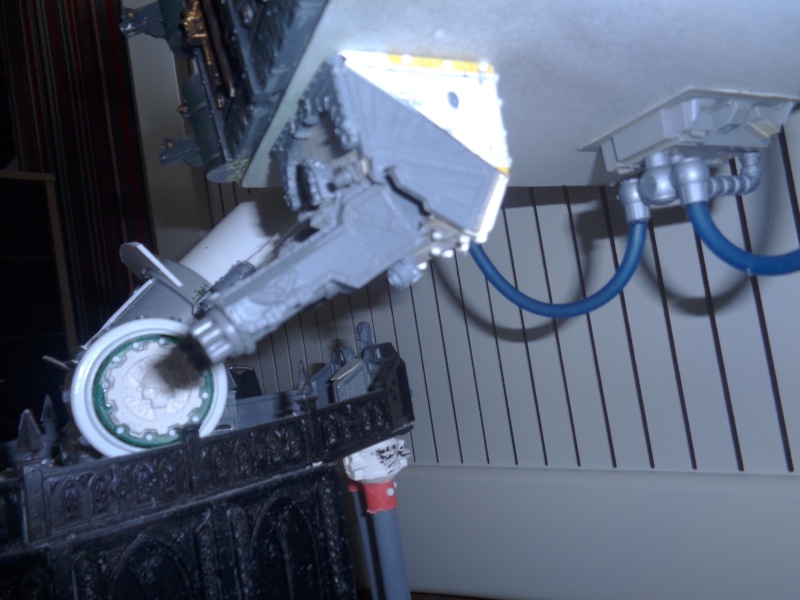
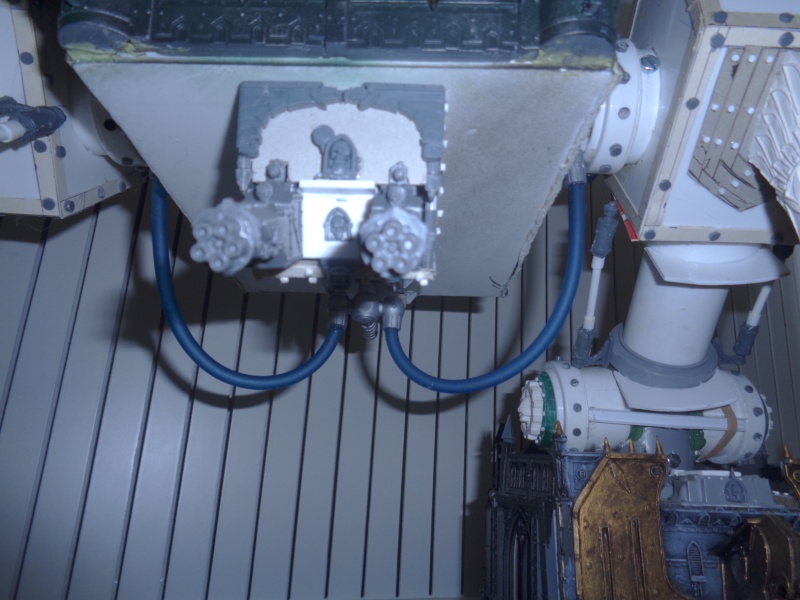
some more done on the engine, used the last base from the basilisks i had and attached pipes to it from engine also started to use flexible pipe to joints, waiting for holder to dry and will cover both nuts with more pipe, thanks for looking
Archer wrote: Really amazing. Love the level of detail you are going to and am very impressed by the speed of your building.
You have a great eye for using odds and ends to make very convincing details.
Are you going to have a detailed interior (like the Princeps in its head)?
thank you, it' amazing what can be used thats why i never throw anything away:0) my aim is to havea fully detailedinterior with lights, servitors, crew and princeps (just got tofinds the parts now) thanks for taking time to comment
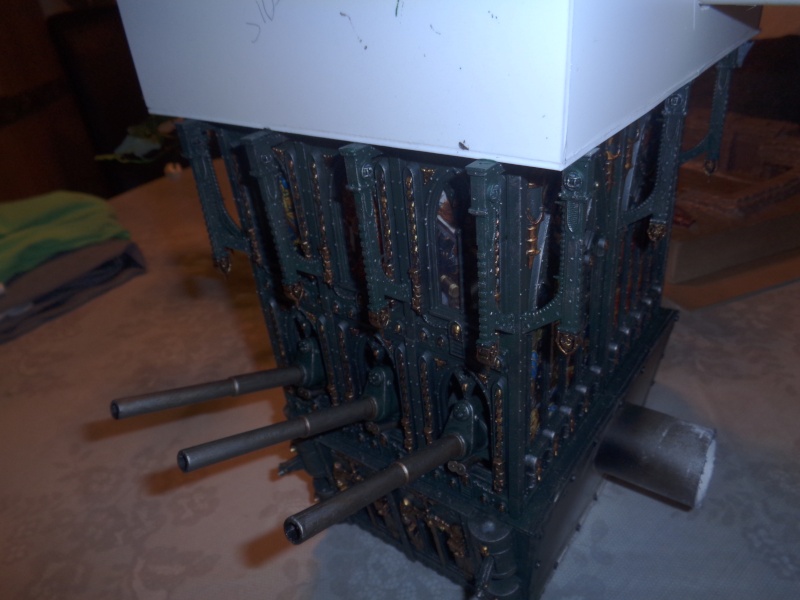
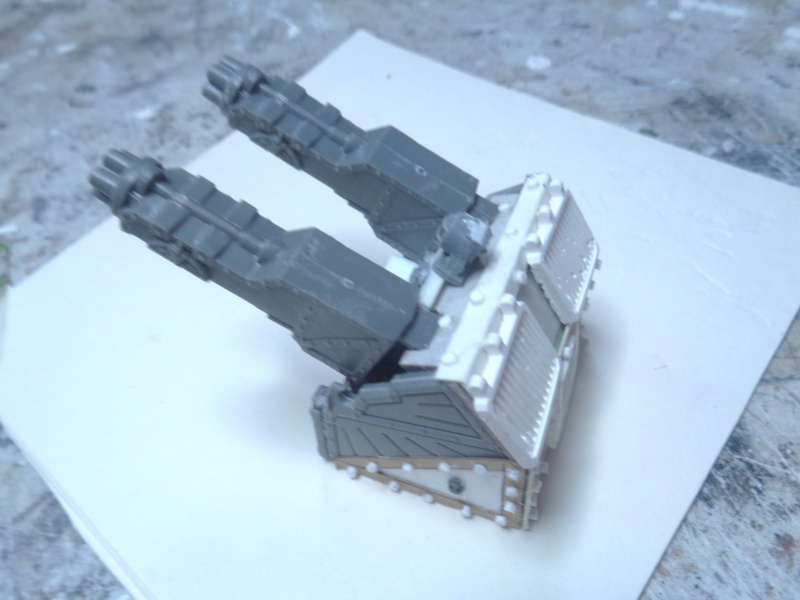
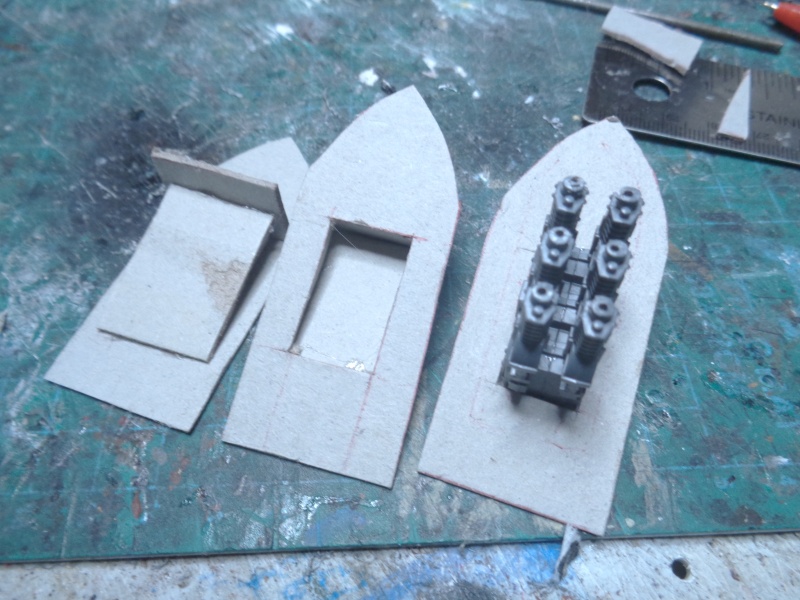
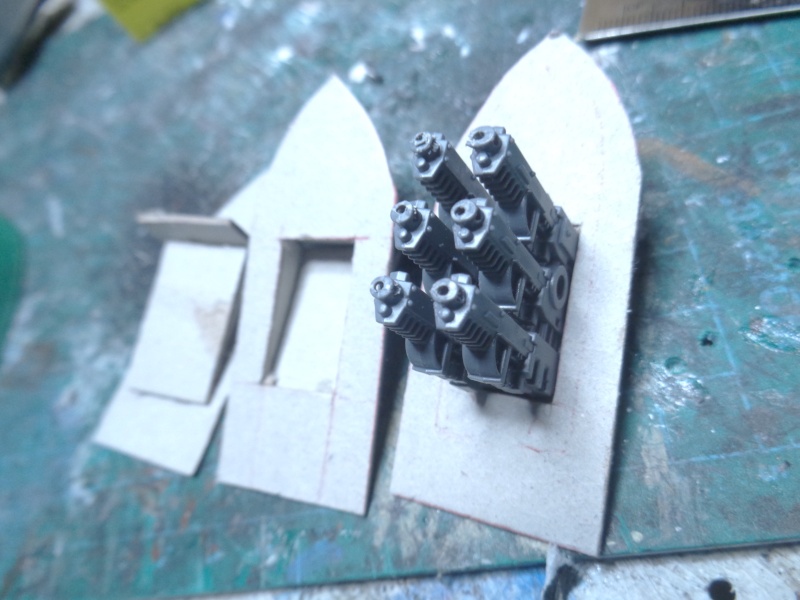
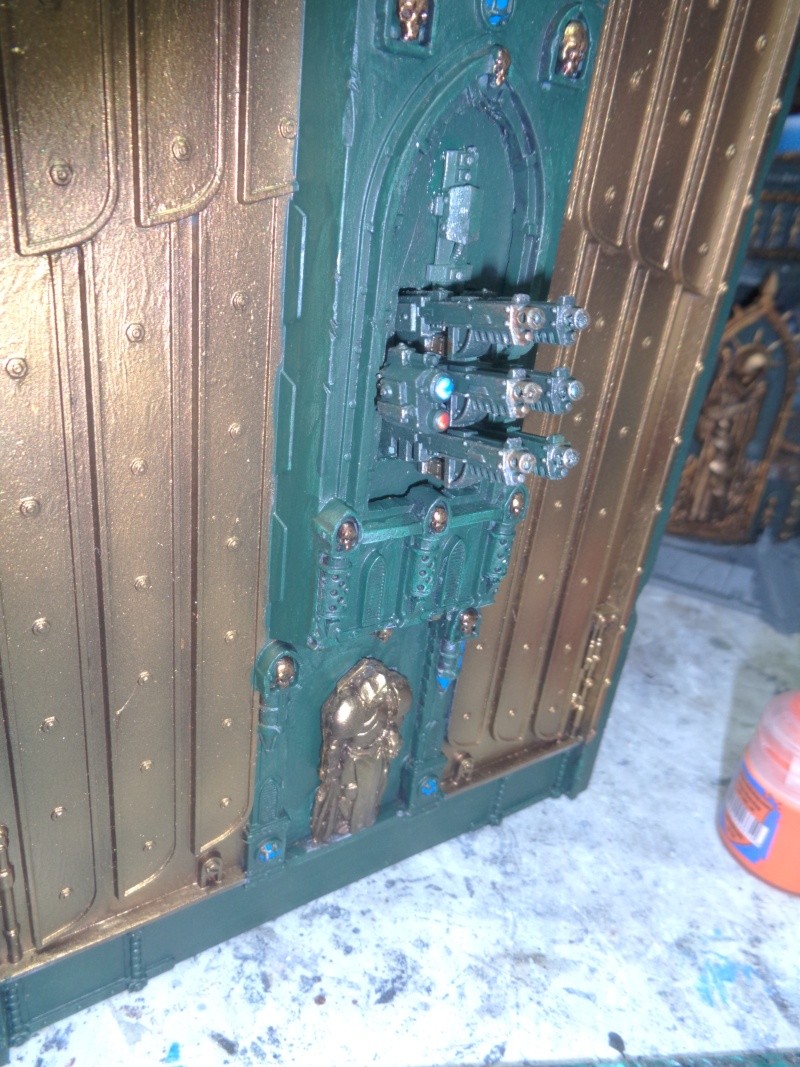
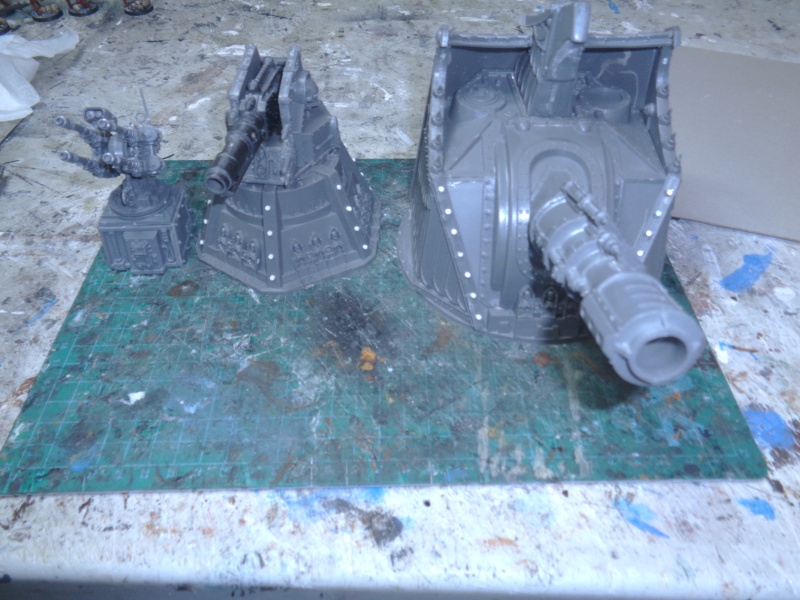
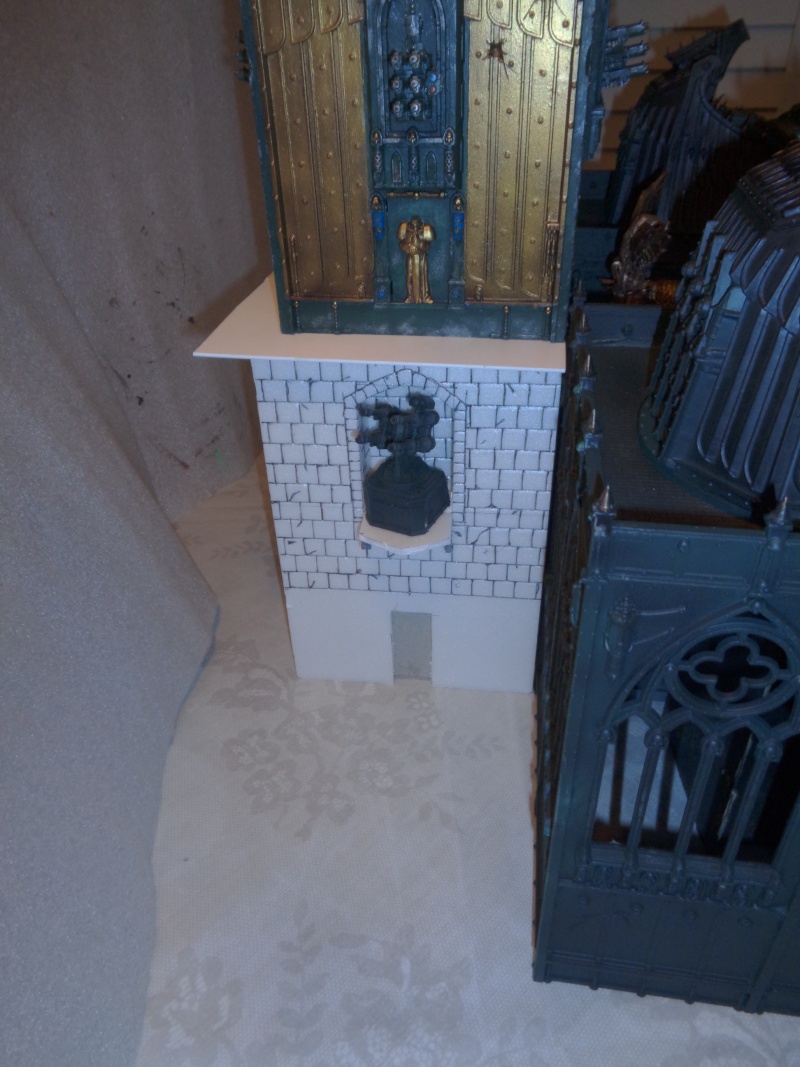
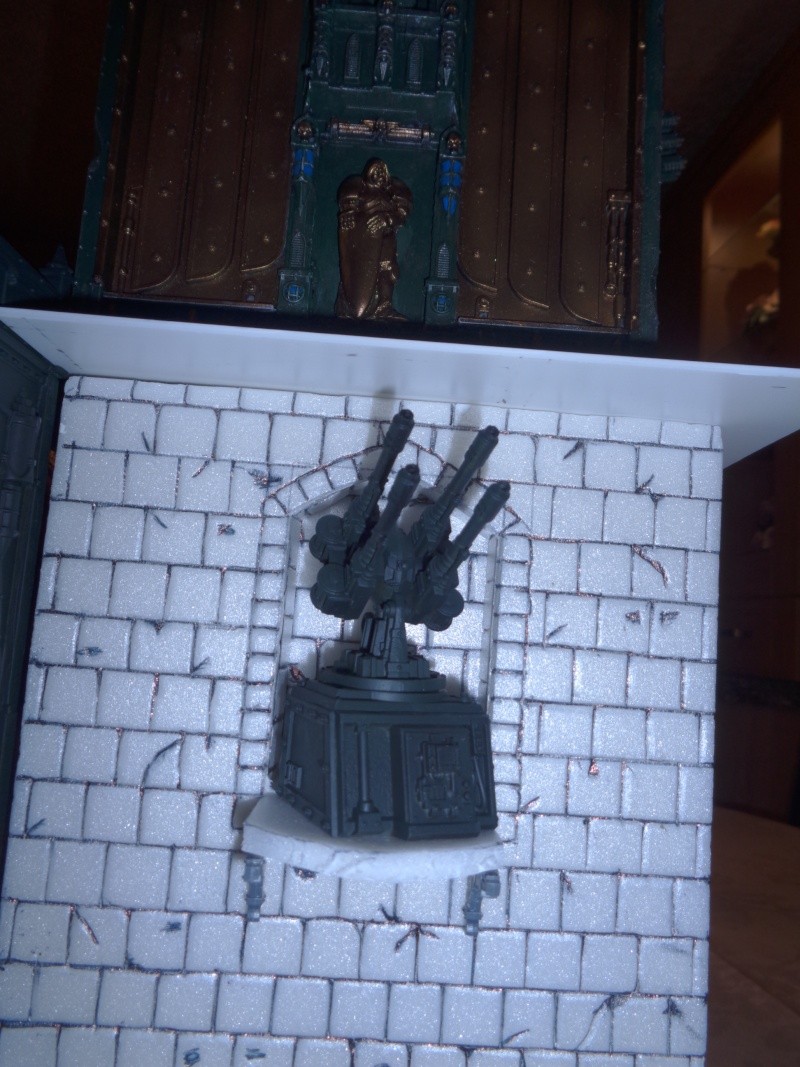
won a wall of martyers vengance battery set cheap on ebay, you get 2 choices of weapons so with the gatling cannons spare i made a under carriage gun using plasticard (more) rivets and cut down imperial building parts and bastion sensor and some skulls just tacked on so ican take off and paint when time comes as will be easier and to see what it looked like up, i'm really pleased with it, thanks for looking and comments welcome as always
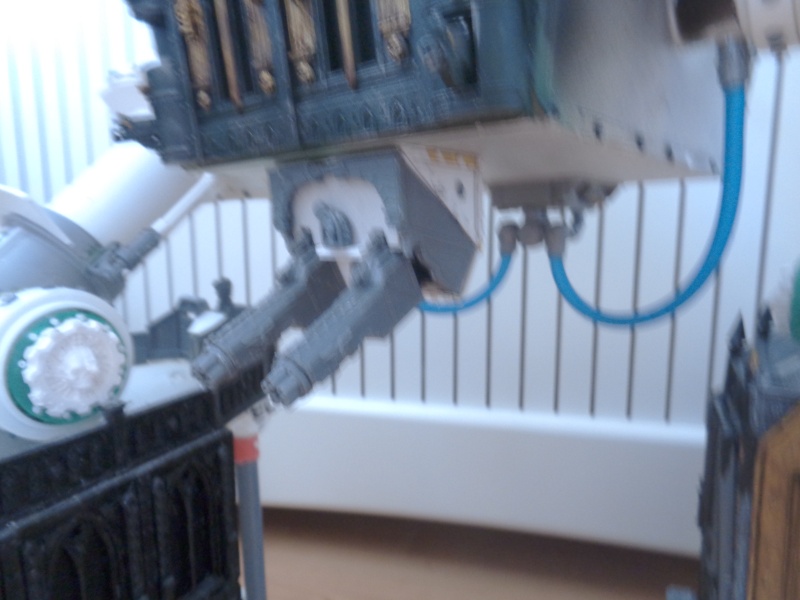
just a small update as not done much, carried on with the pipes andmanaged to hide another 2 bolts, made a housing from plastic chemical plant bits, card, serial box card for border and more rivets from rod
What colour will the finished product be? I thought it was going to be green/gold trim, but I've only just realised that you're not painting as you go (my first clue was the white pipes )
Alaricuk wrote: It just keeps getting better, love the under carriage gun.
thanks
Automatically Appended Next Post:
hippyjr wrote: What colour will the finished product be? I thought it was going to be green/gold trim, but I've only just realised that you're not painting as you go (my first clue was the white pipes )
hi, it is dark green and gold, the body with basiliks in has been painted as i had to put windows in first, will be a lot more weathering etc once complete
Automatically Appended Next Post:
evildrcheese wrote: Good god. This is impressive. You're either a genius or a madman!
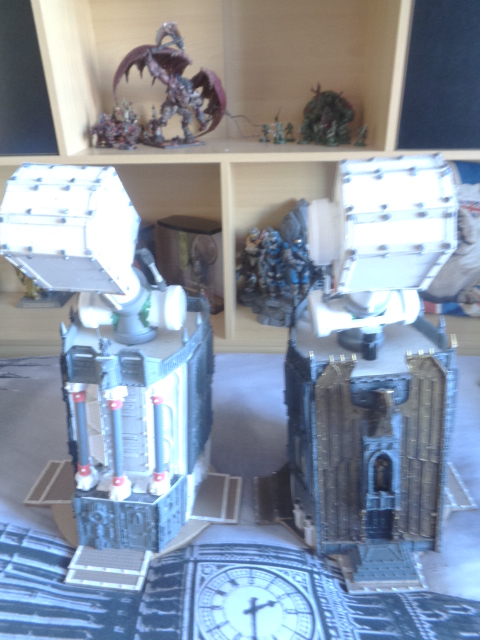
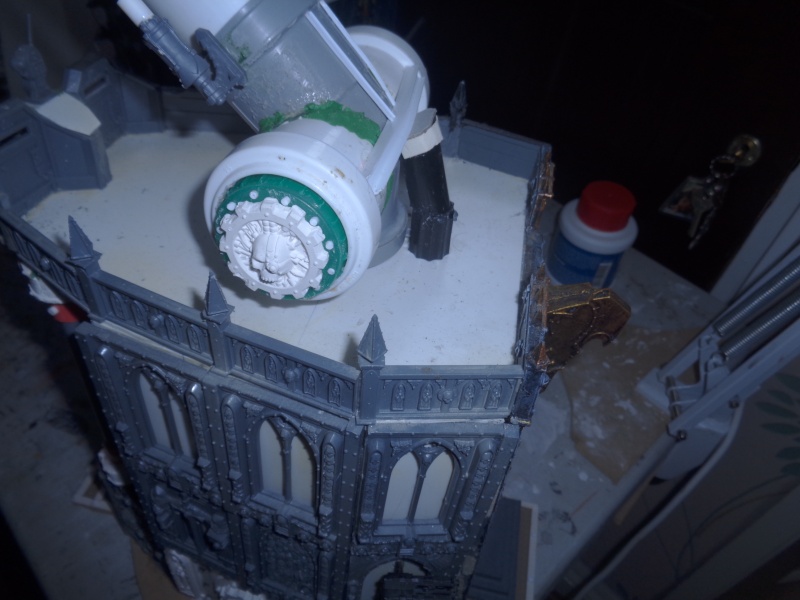
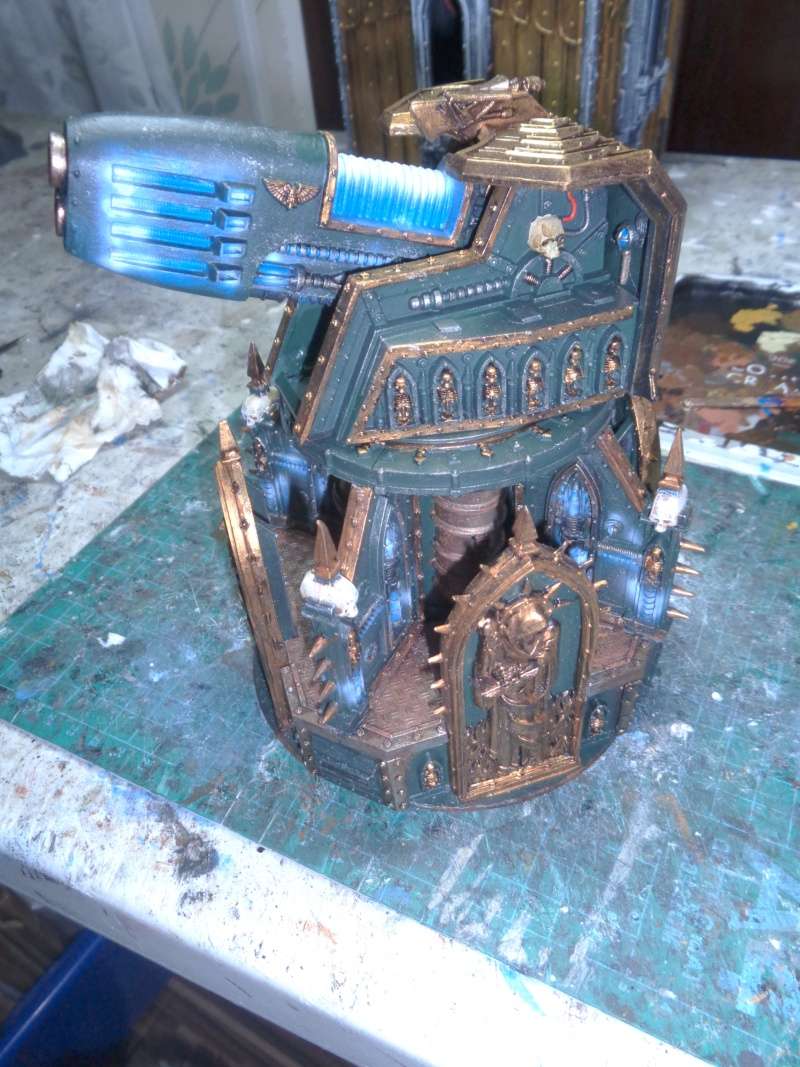
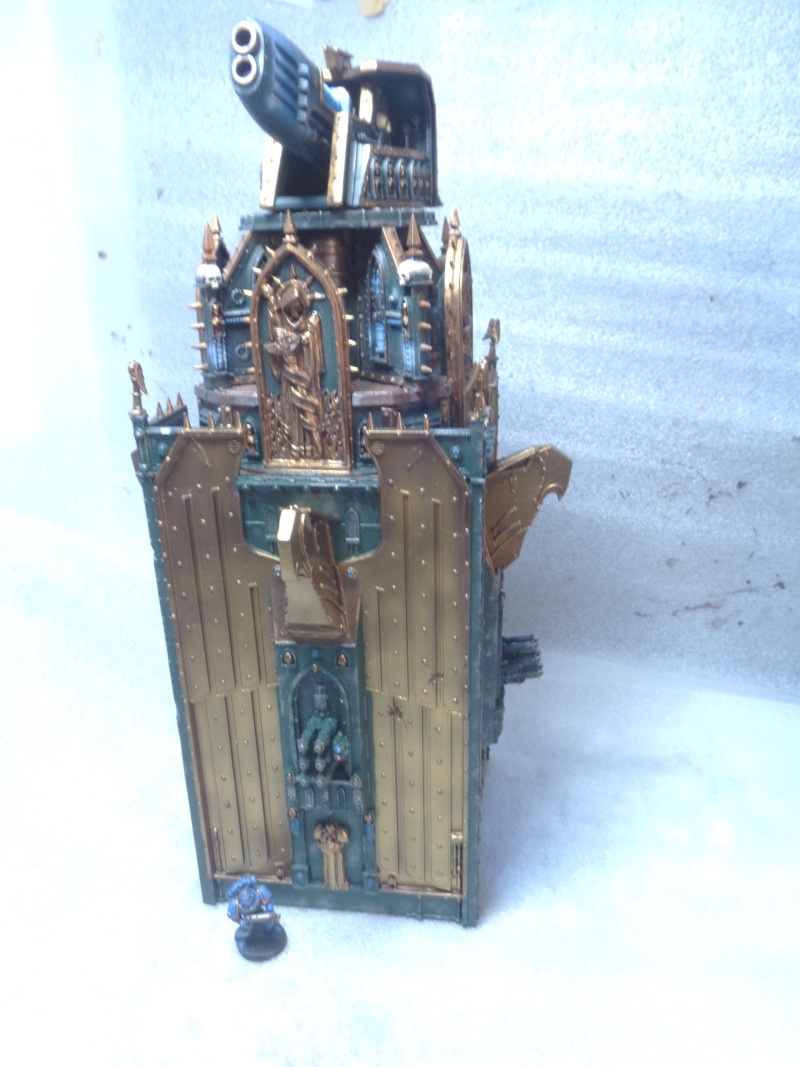
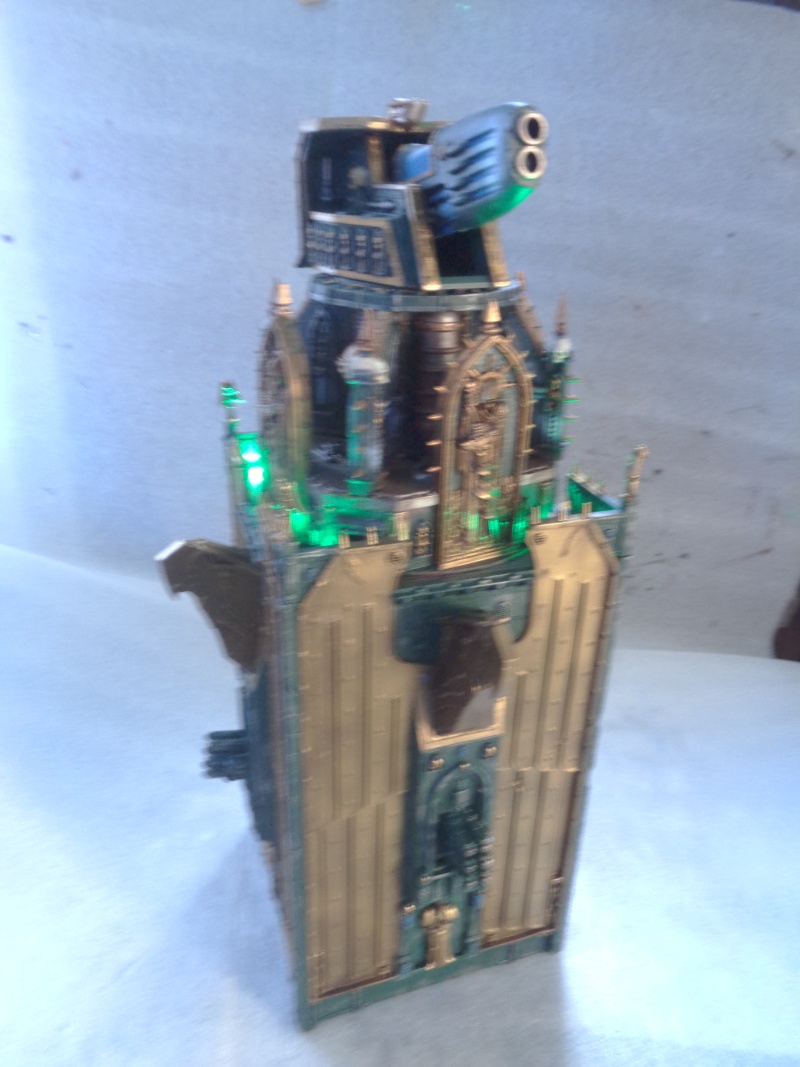
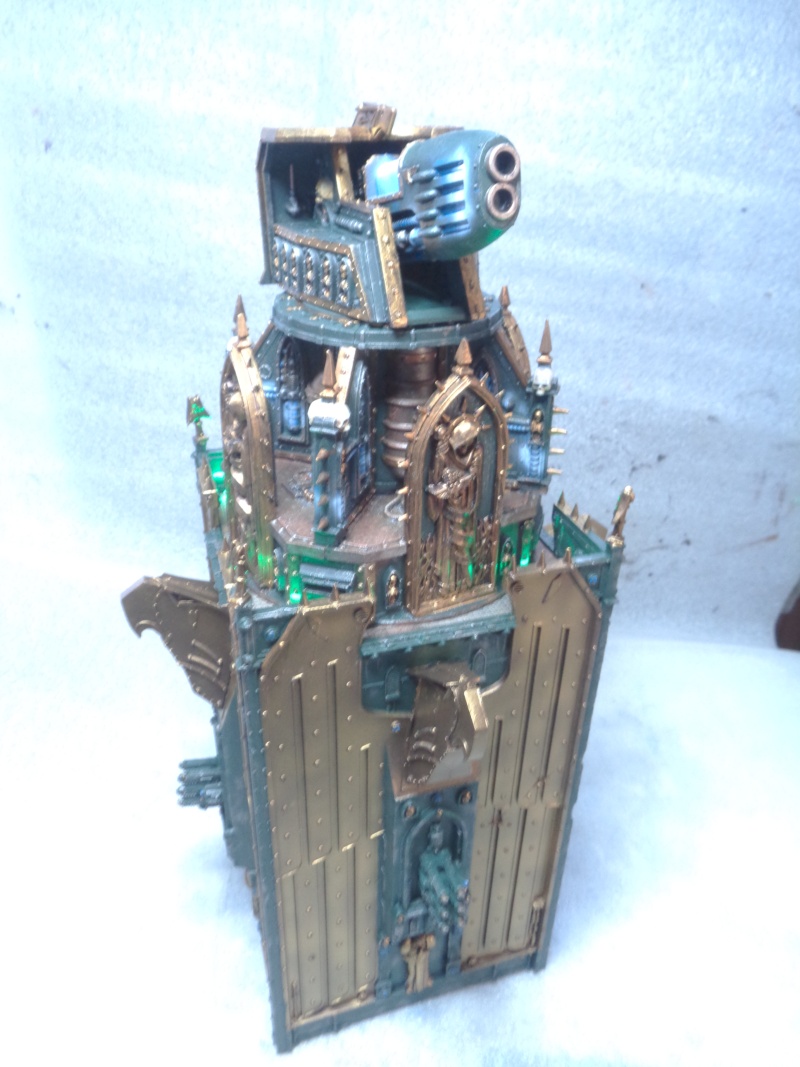
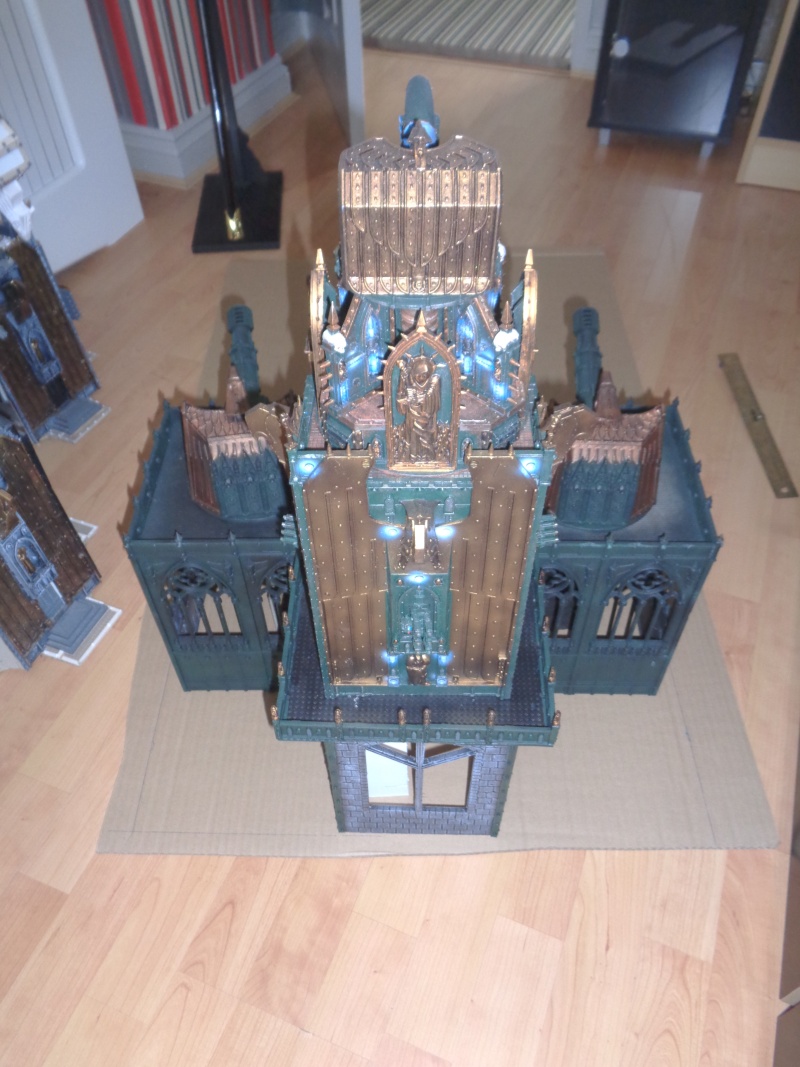
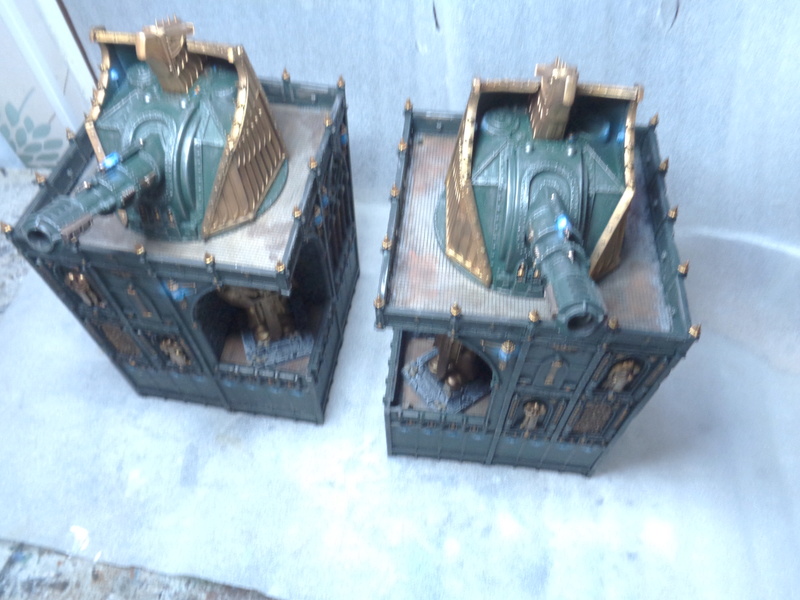
not done much last few days, did try a dry run of buildings and weapons for the fortressand painted the plasma obliterator fr the top of the aquila building that will be the tallest of the fortress,got to make a building for the aquila to sit on and will be between the two large window buildings and will have stepped parts to front for fortress of redemption guns, all we have to be repainted as there in old colours from another project more to come in coming days, thanks for looking
Are you going to use the Titan in a game? That would make for an amazing battle report. Not sure anyone would have enough firepower to take it on. But I would happily throw everything I own against it.
Archer wrote:Are you going to use the Titan in a game? That would make for an amazing battle report. Not sure anyone would have enough firepower to take it on. But I would happily throw everything I own against it.
hi, was really just a modelling project but it would be good laugh to walk into a games workshop with it and ask if anybody wants a game
Automatically Appended Next Post:
hippyjr wrote: Plasma weapon looks great O.O
Yeah the cathedral is the bit I've been waiting for - that and the head/arms/rest of the titan
hoping people dont mind that i am bouncing from one stage to another want to keep my interest up and not concentrate on one thing at the moment, thanks for comments
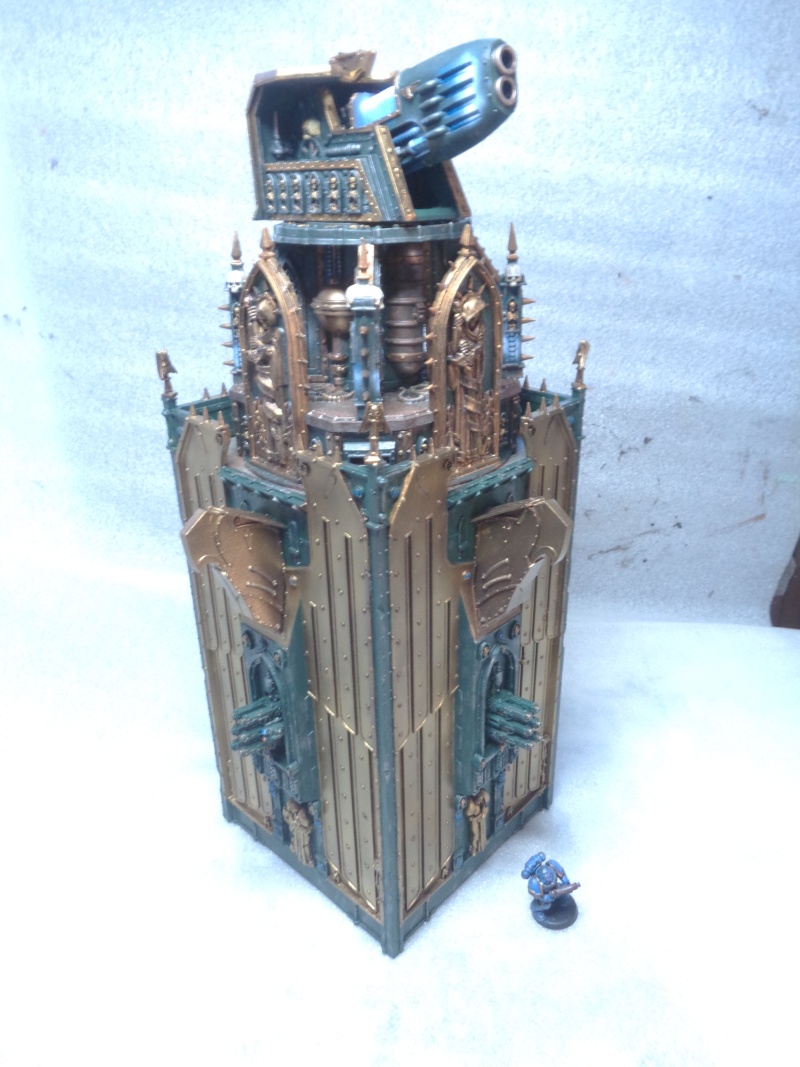
so the plasma tower was a ex project which i took the windows out, so i had 4 hurricane bolters which fitted quite well, made a insert for the window at a angle so bolters had a slight angle to them, in process of repainting the tower
apart from the weathering which i am going to do all at once top plasma tower finished, pictures dont really do it justice to be honest, led lit but may change these to blue but for now i like the glow the green lights give, i'll try and get a better picture, next will be one of the side towers and weapons, thanks for looking and commenting
I have a load of those Plasma Obliterators lying around. I think they look a bit stubby by themselves and I was thinking of putting them on top of those Aquila shrines and making a mega-fortress and you have completely sold it to me that looks frickin sweet, great job!
Tank_Dweller wrote: I have a load of those Plasma Obliterators lying around. I think they look a bit stubby by themselves and I was thinking of putting them on top of those Aquila shrines and making a mega-fortress and you have completely sold it to me that looks frickin sweet, great job!
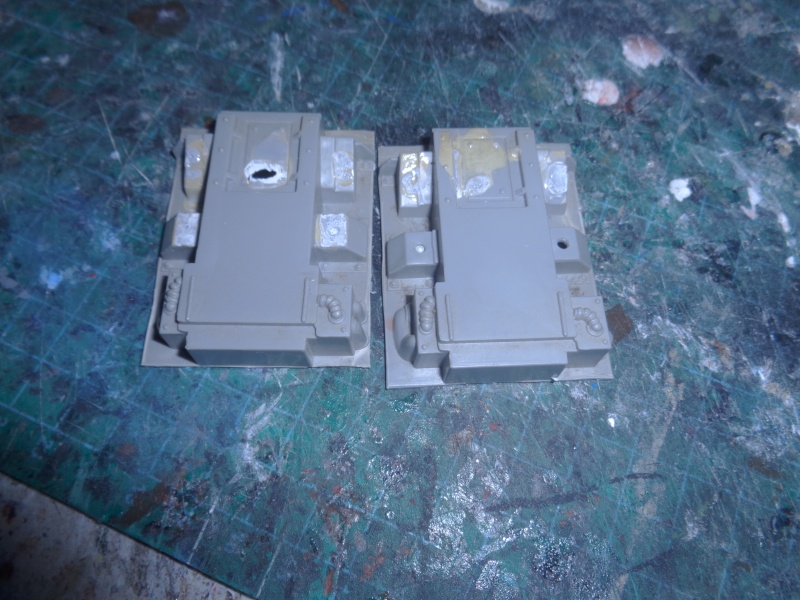
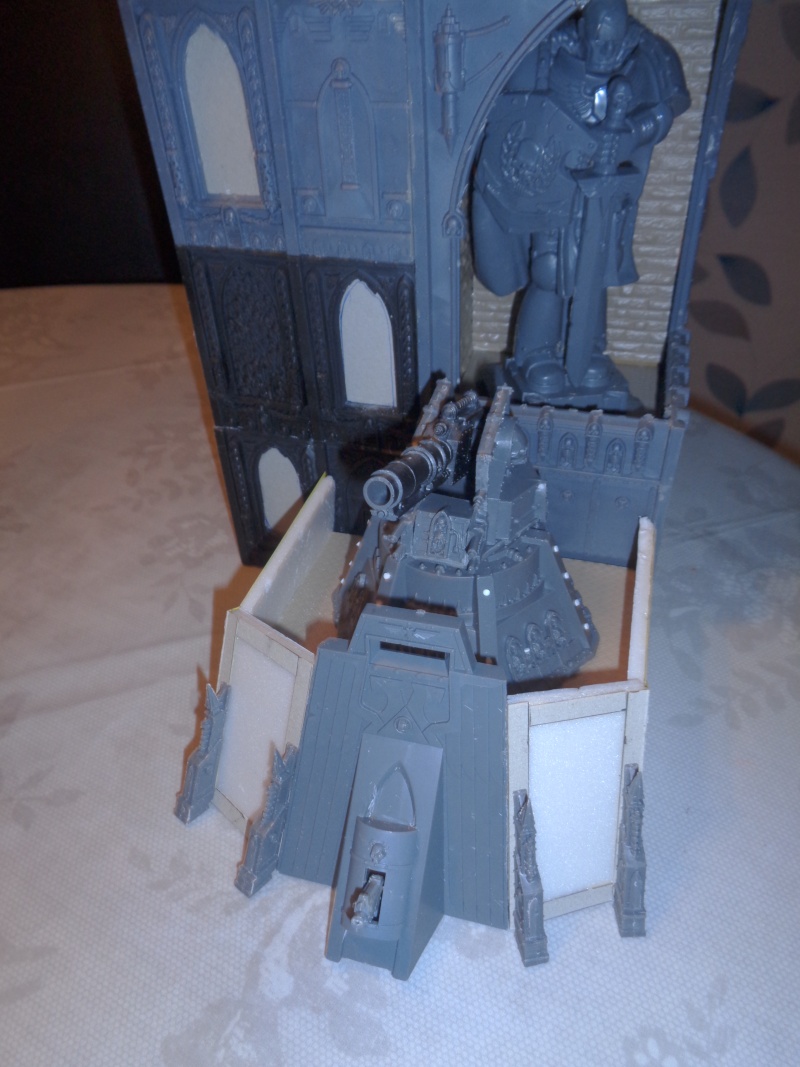
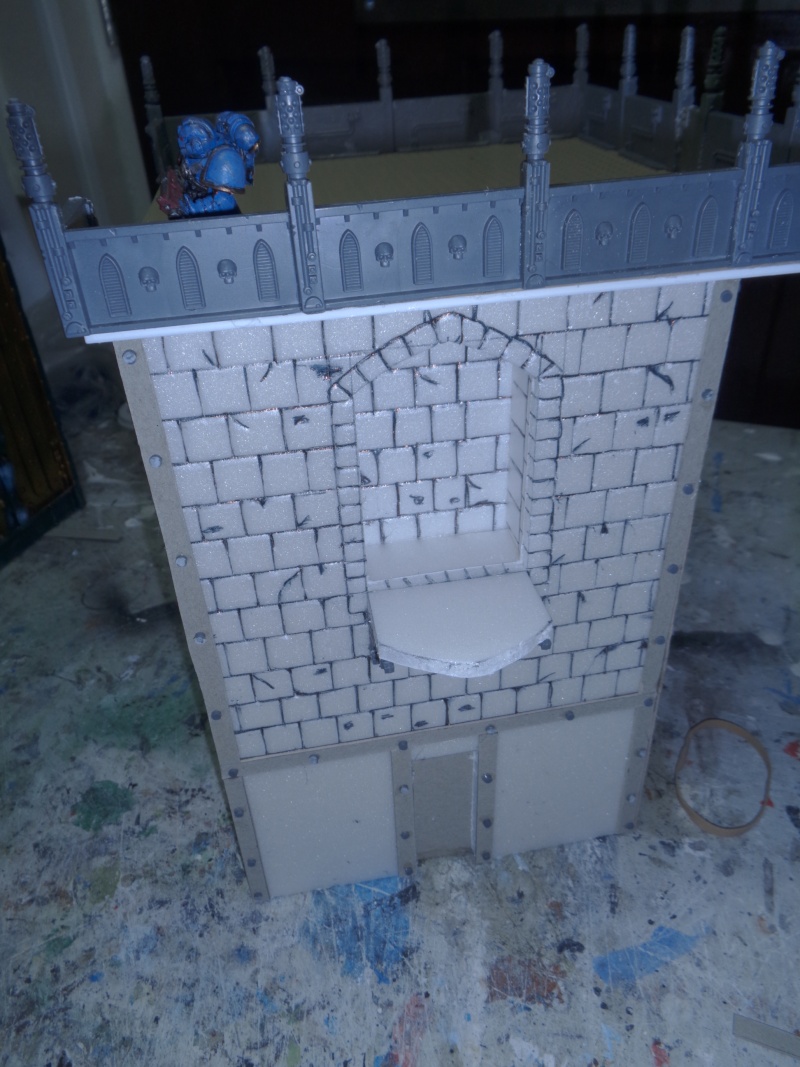
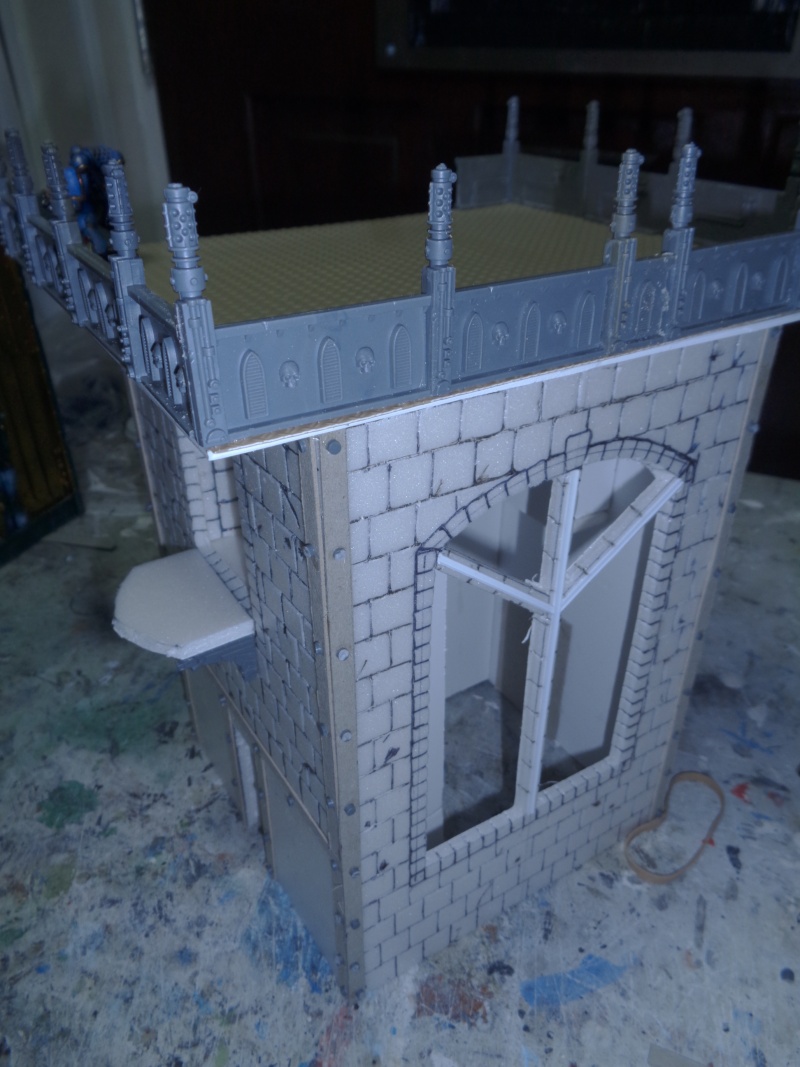
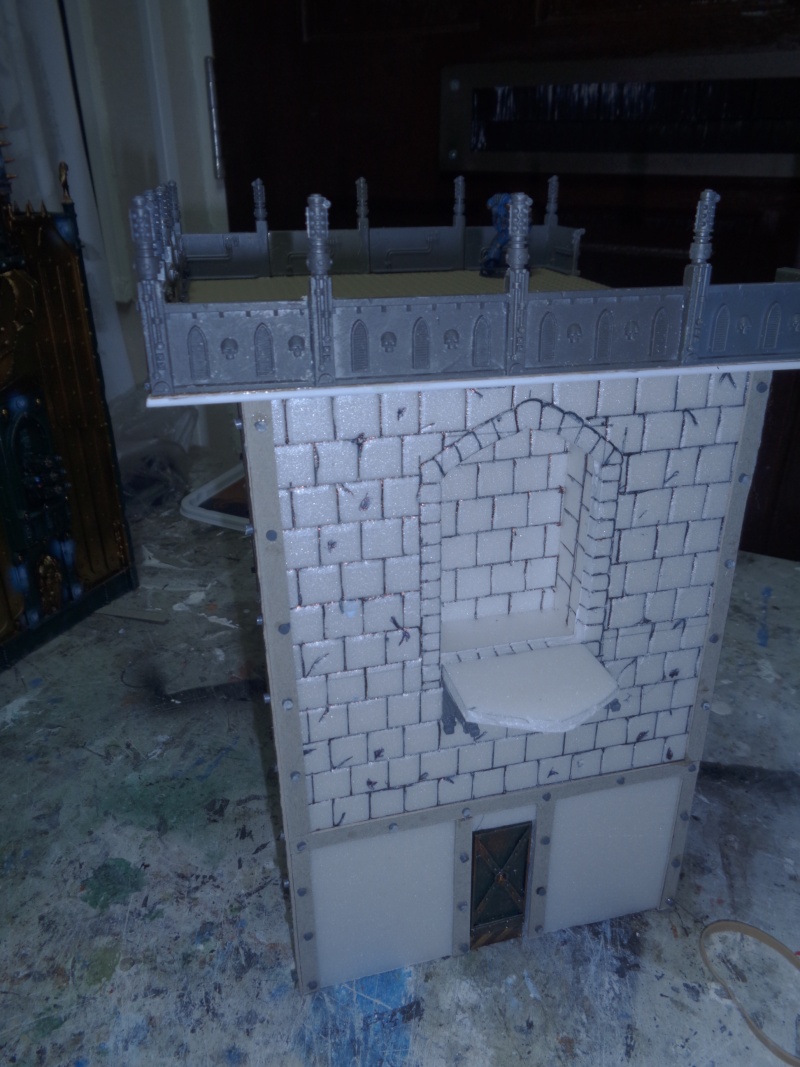
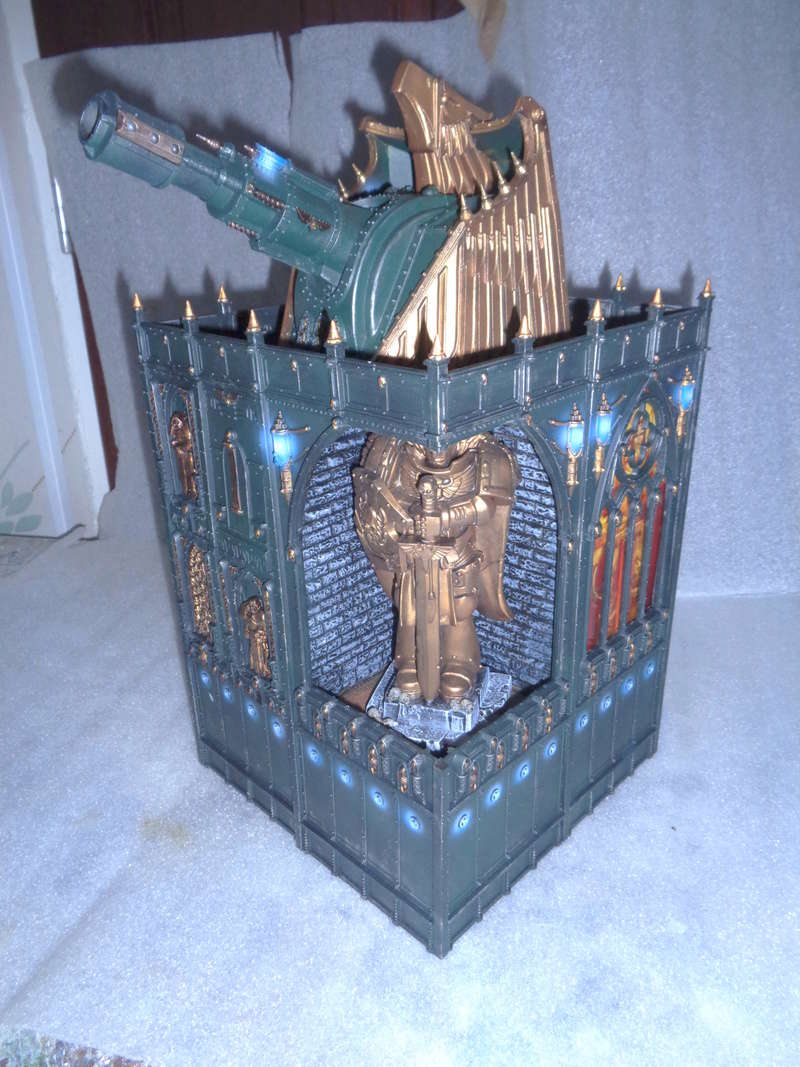
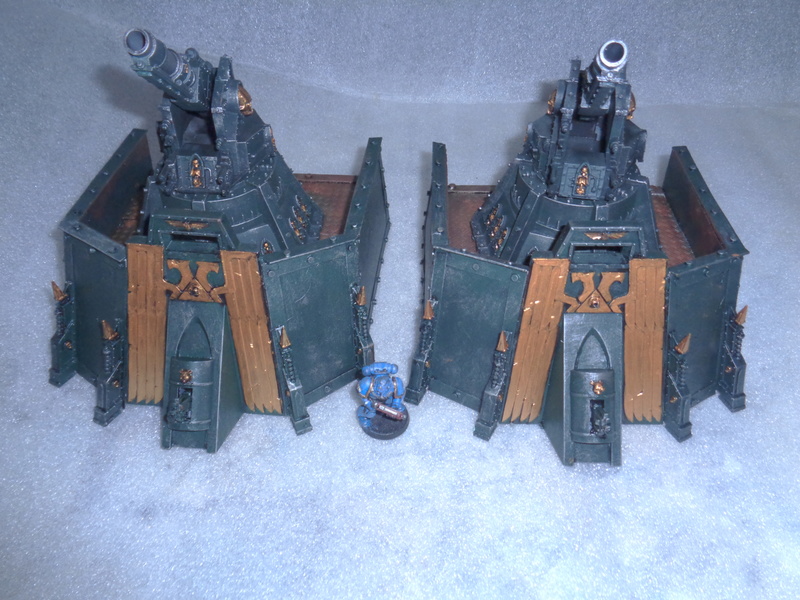
started the 1st tower, adding a bunker for vengance cannon, front is from fortress of redemption, sides foamboard with handmade panelling, the floor is foam and chequer plate plastikard
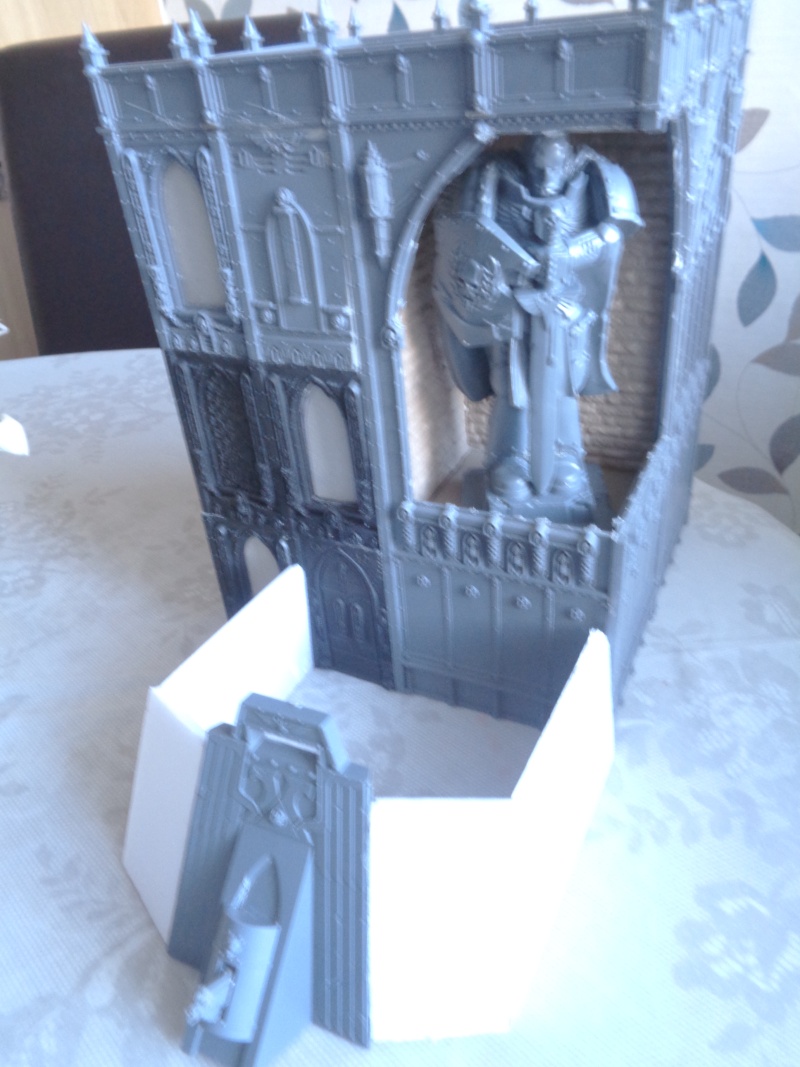
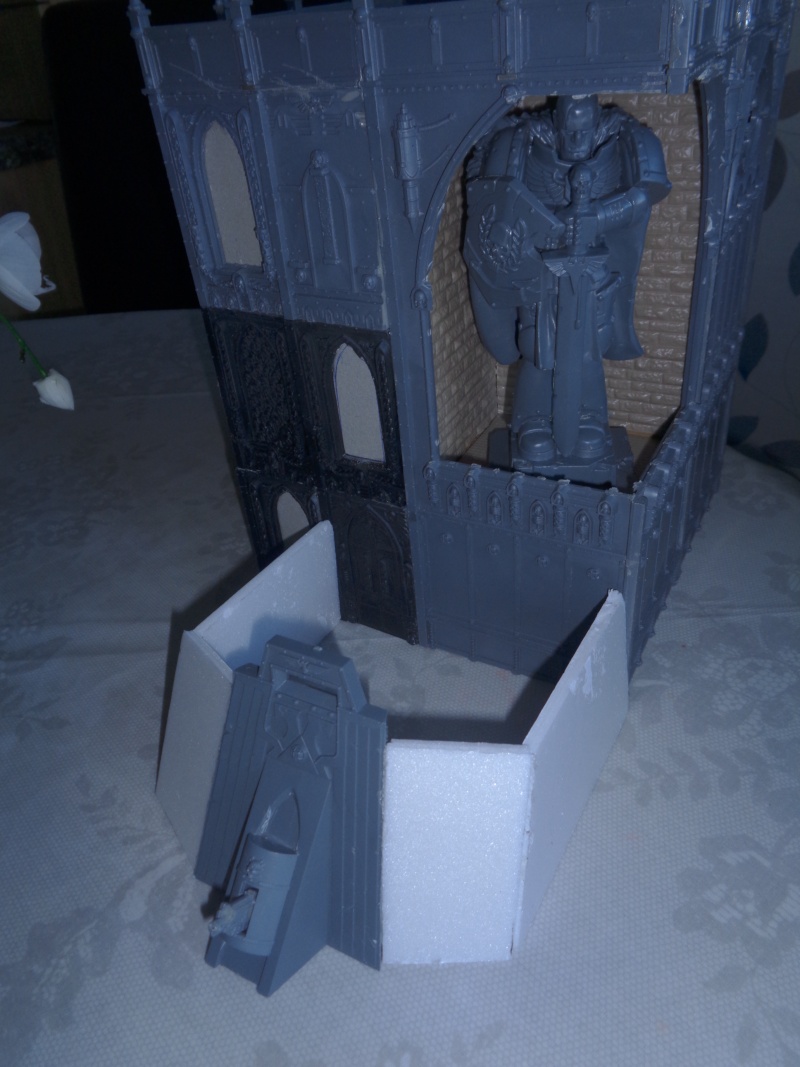
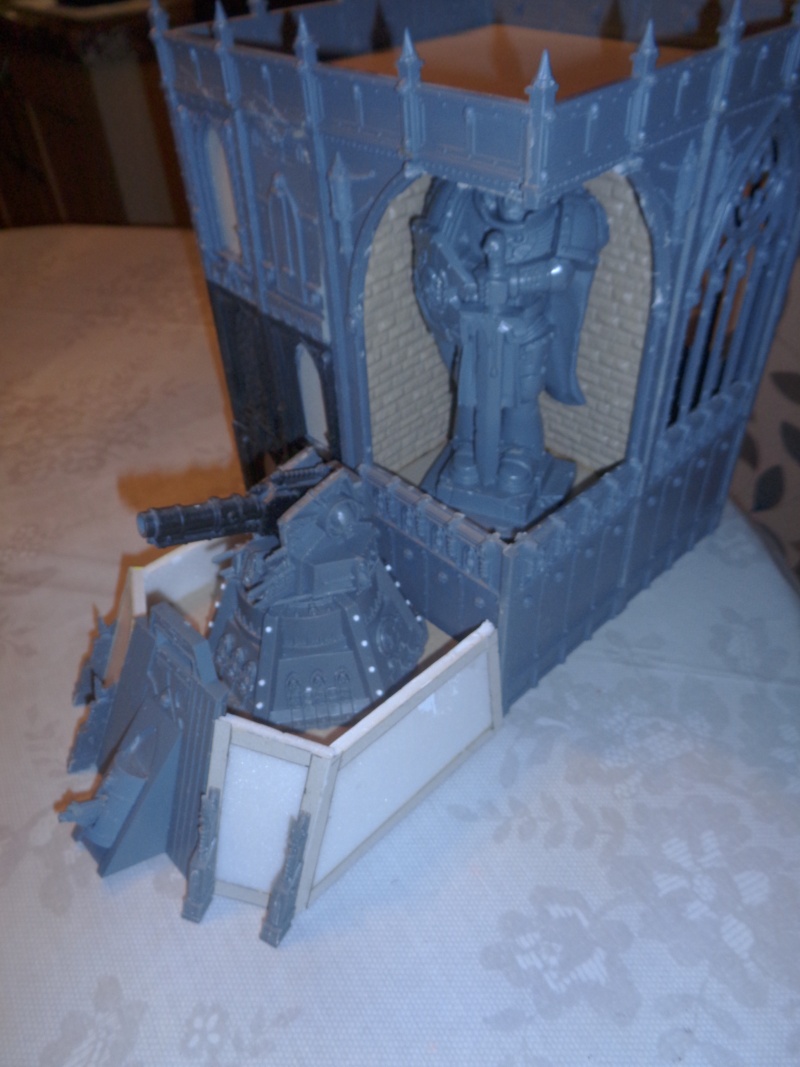
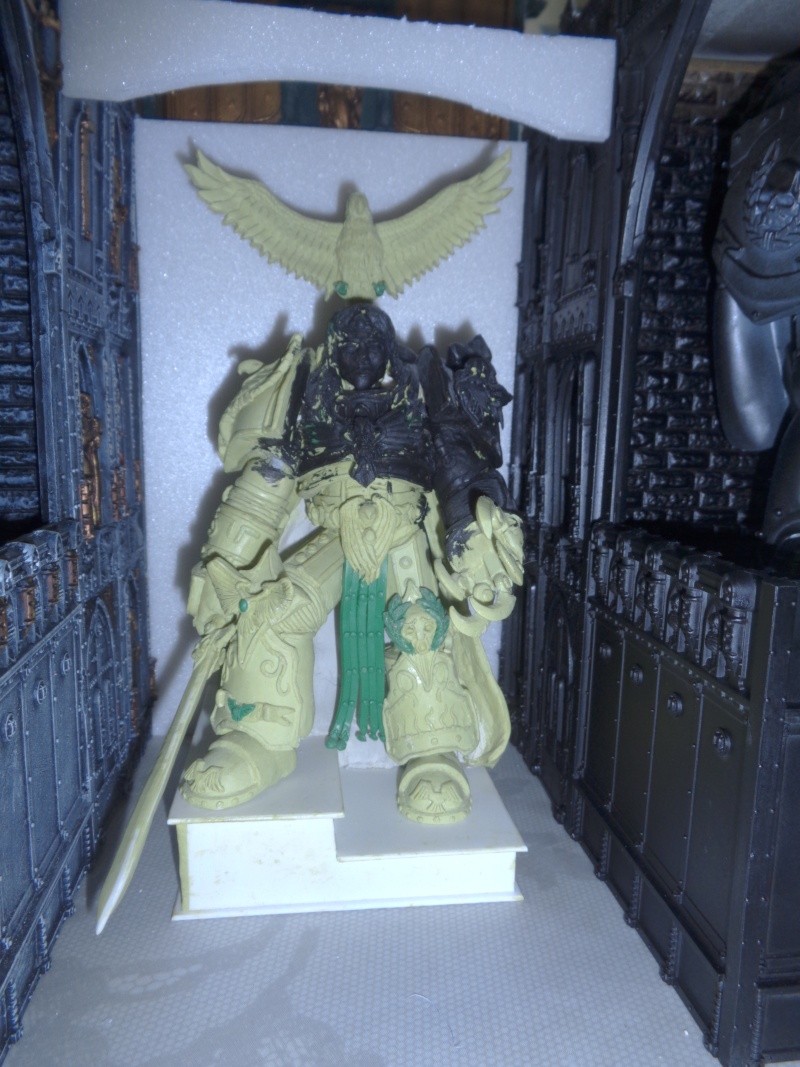
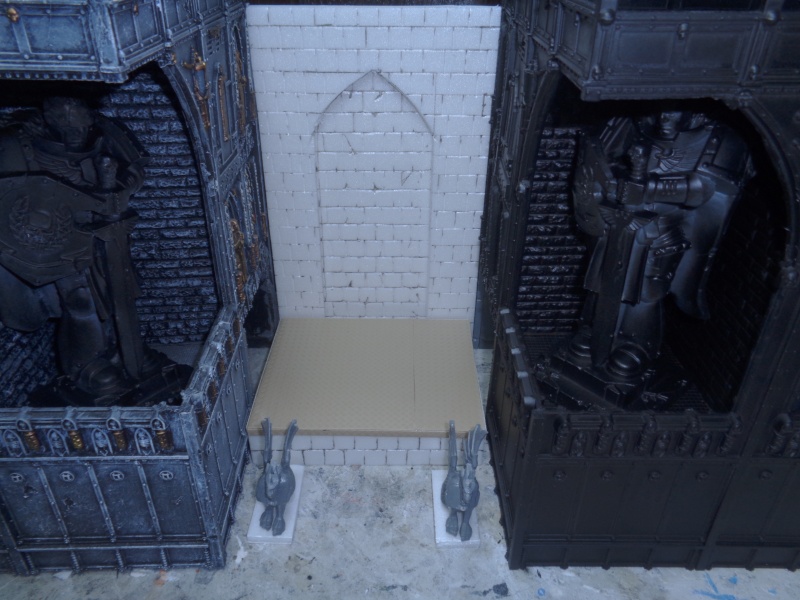
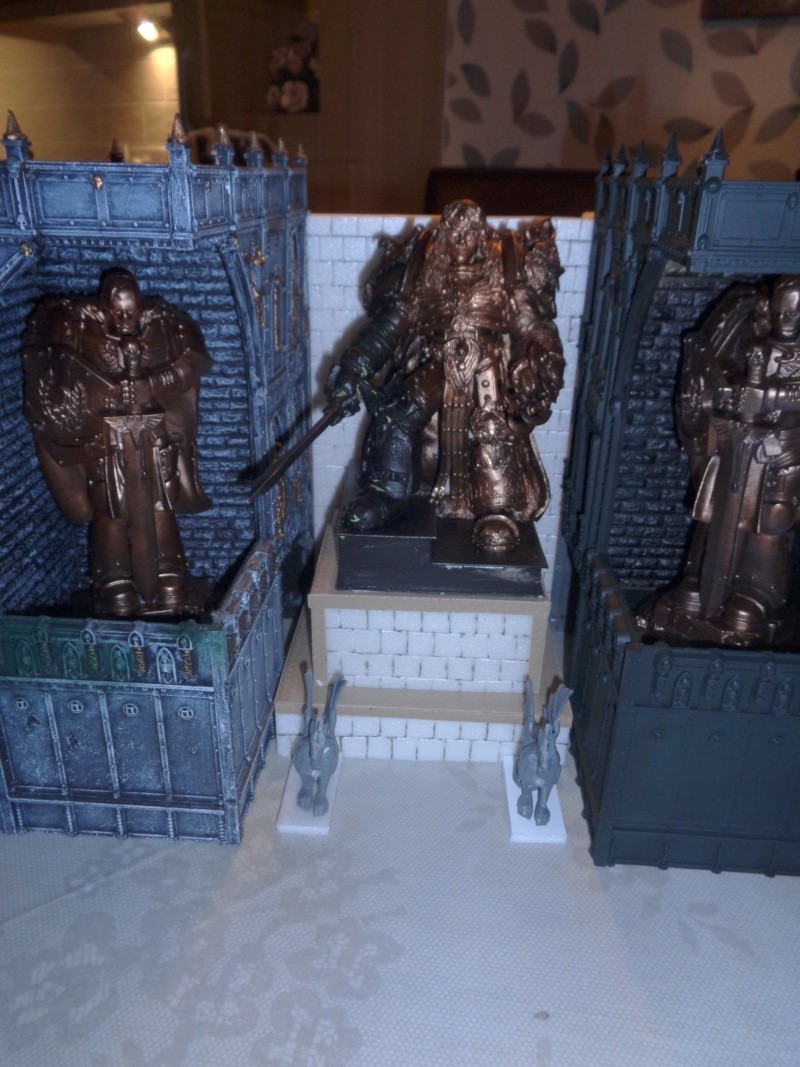
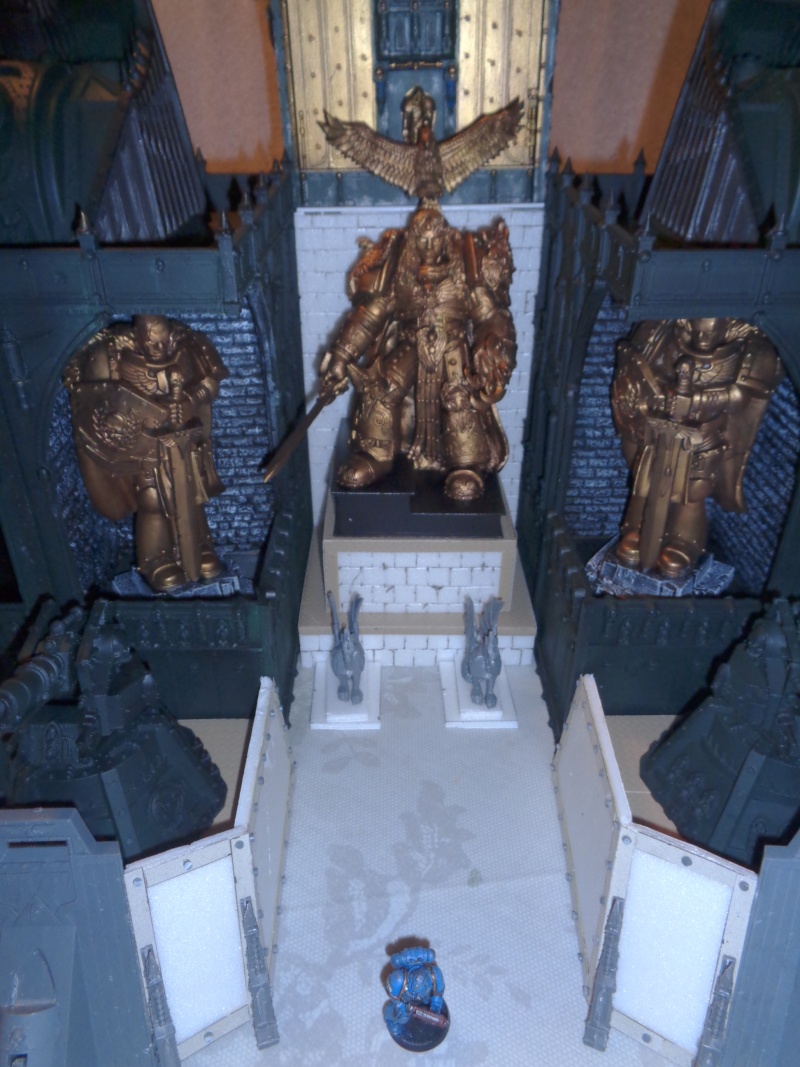
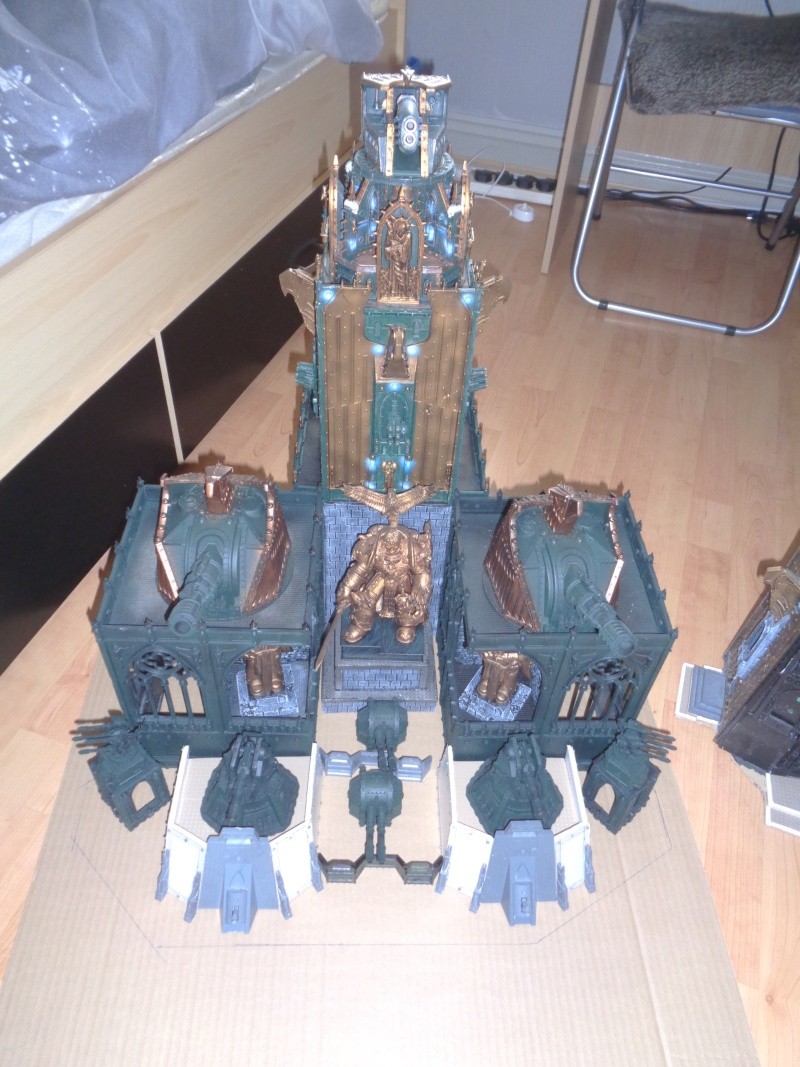
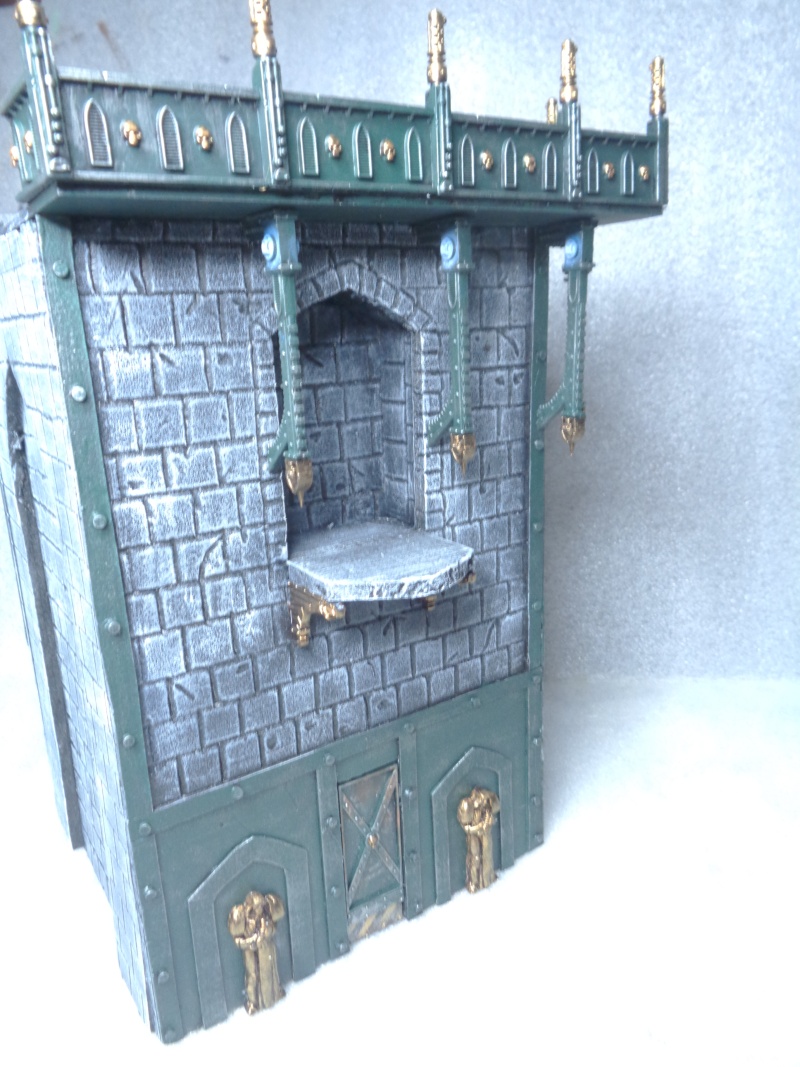
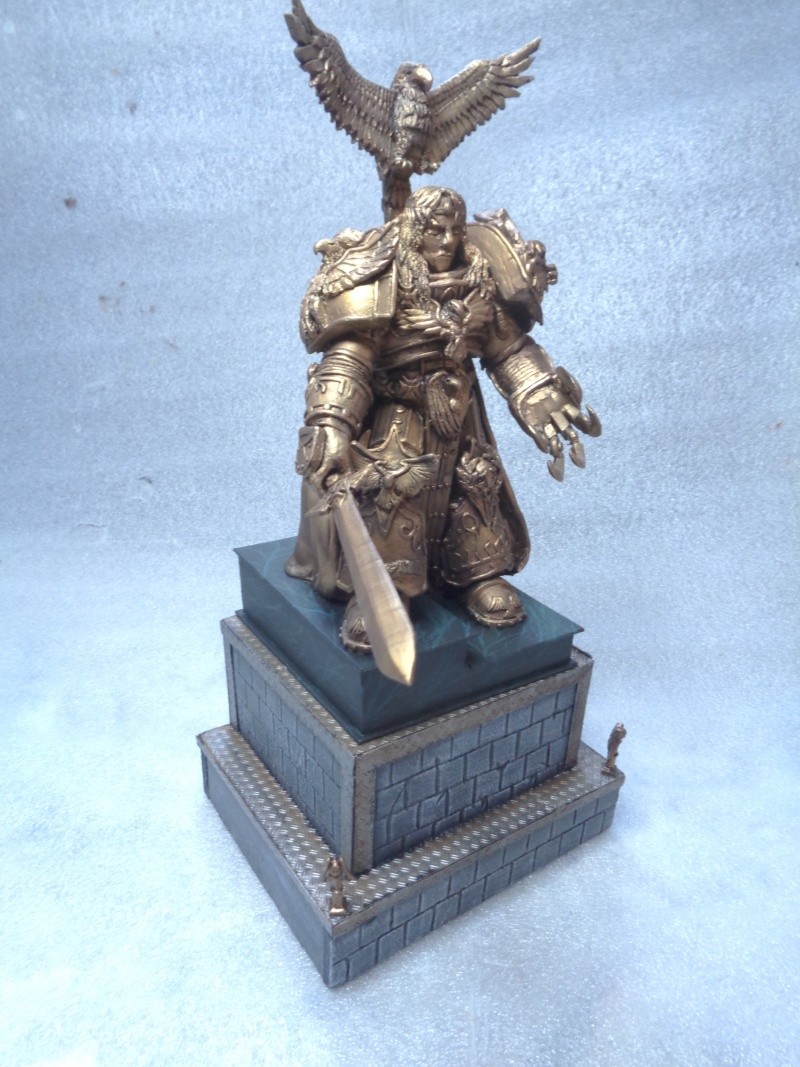
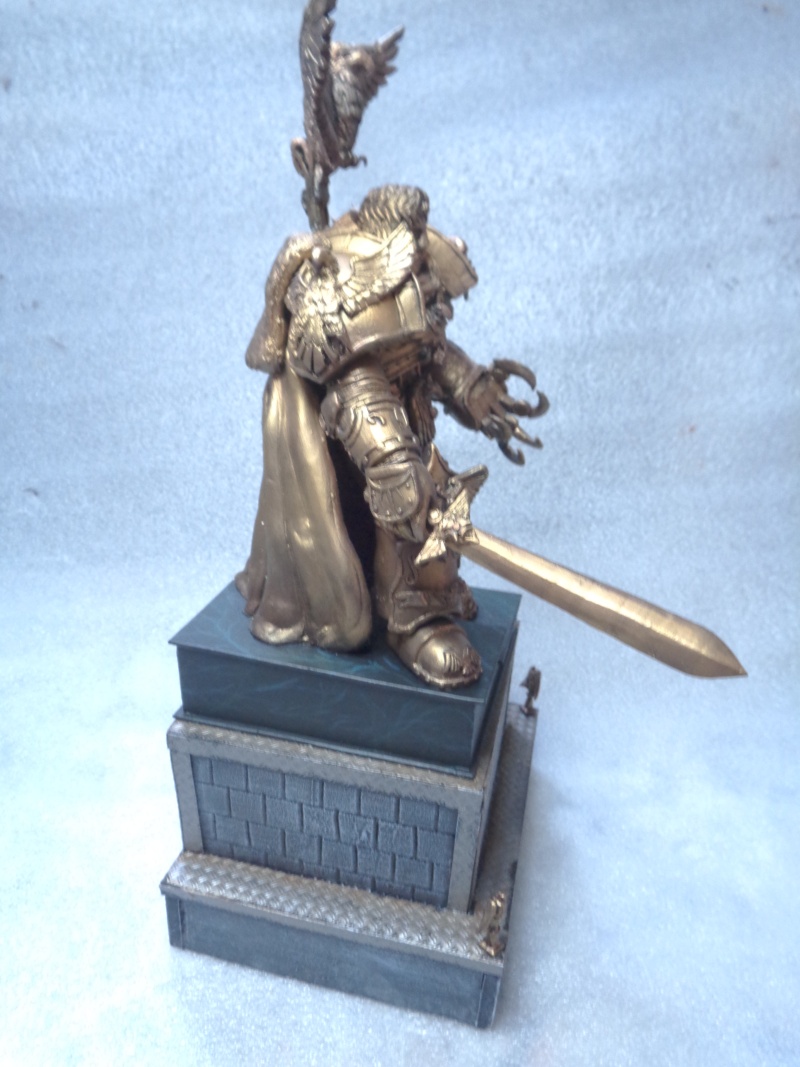
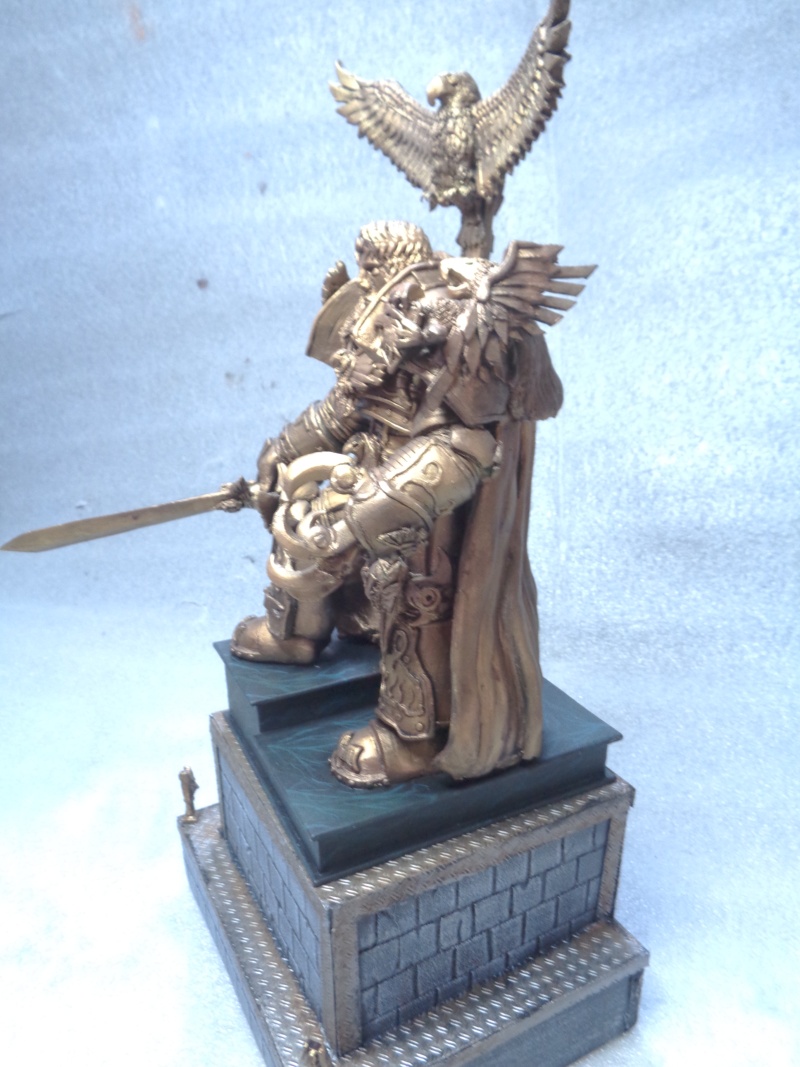
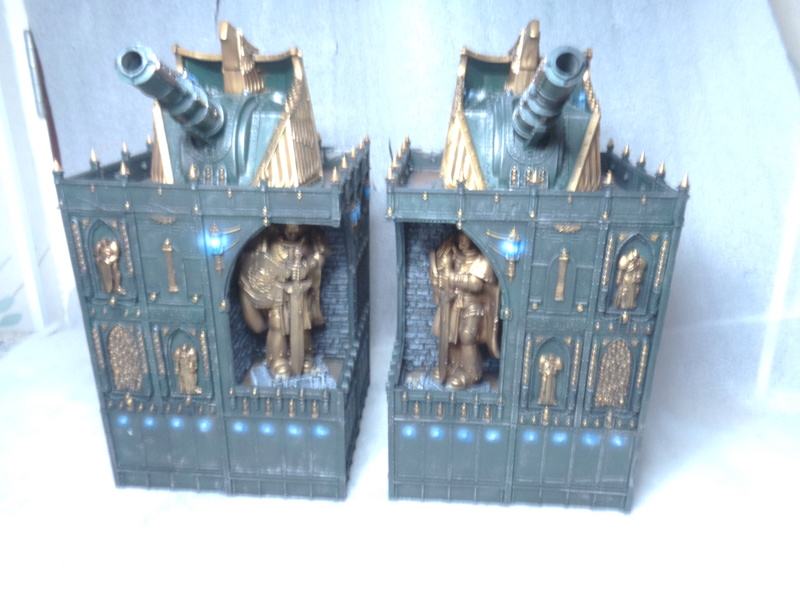
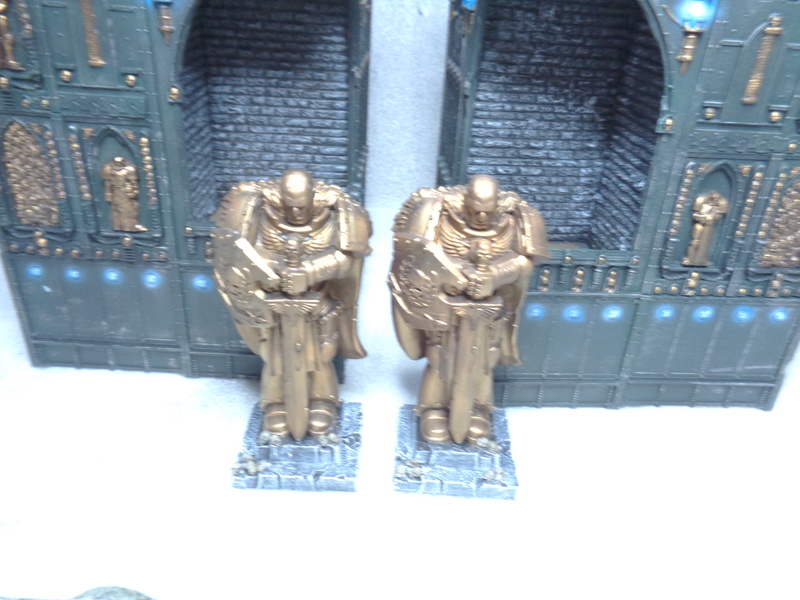
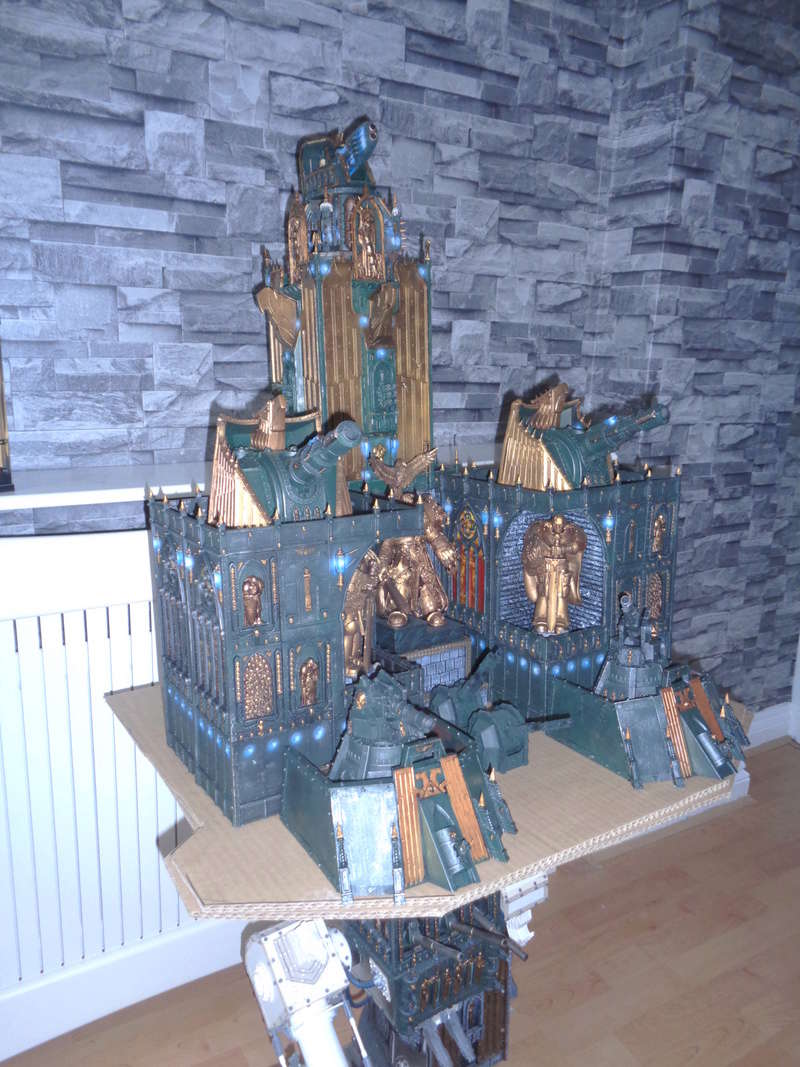
so after a small break i decided to start dry fitting and making the central section between space marine statue towers and i rememebred i had a emperor of manking statue that was going to be a centre peice for another defunct project and thought it would look cool intergrated into the fortress, putting it between the tower with foamboard brick walls and then i can build back for support for aquila tower and each side of this to rear i will be able to fit a landing pad and large communications building, thanks for looking and comments welcome
That is such a great model I feel it should sit proud of that alcove, perhaps even with another level to the base He's on to raise Him up higher and make the Emperor more visible.
The tops of your towers have no roof access. Maybe add an armored roof exit or a floor hatch? I like what you've done with the space marine statuary in their recessed alcoves. That's really quite inventive. Overall your build looks like a massive undertaking. Keep at it; all projects can be finished if we strive to complete them.
Warboss_Waaazag wrote: The tops of your towers have no roof access. Maybe add an armored roof exit or a floor hatch? I like what you've done with the space marine statuary in their recessed alcoves. That's really quite inventive. Overall your build looks like a massive undertaking. Keep at it; all projects can be finished if we strive to complete them.
thanks for comments, hatches ladders etc will be added at later date as will a lot of smaller details that are easier to paint then add and to make sure i'm not knocking them off as i make the main parts
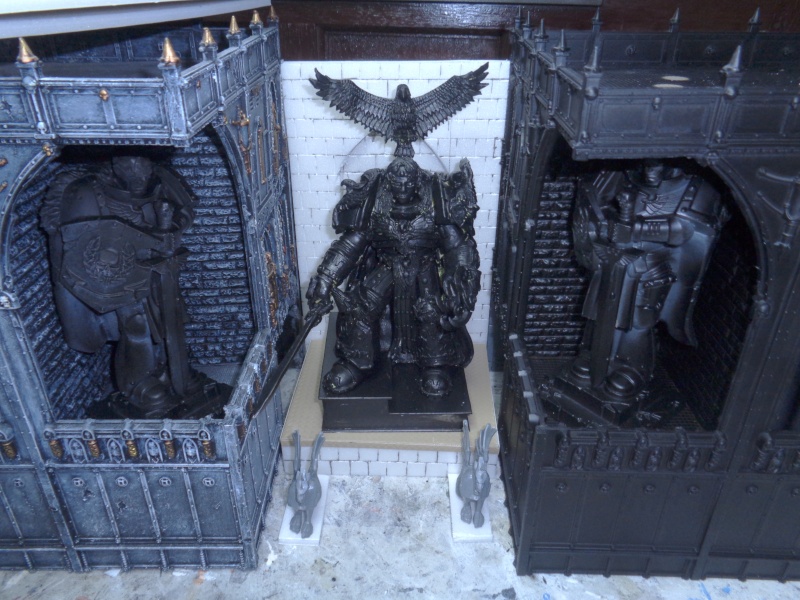
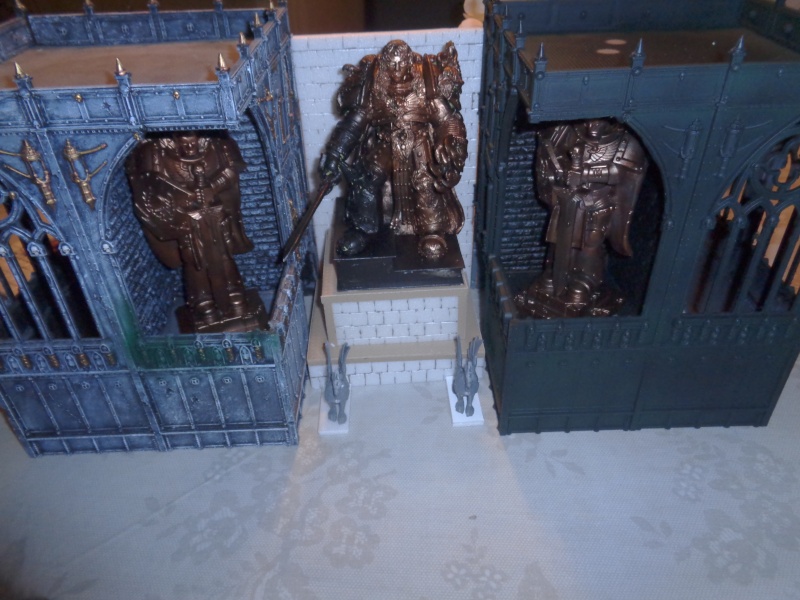
totally agree, made a small plinth for emperor to stand on and alcoved wall to rear which will have a couple banners to each side, some statues to front, still got to make walls to side of towers, thanks for looking
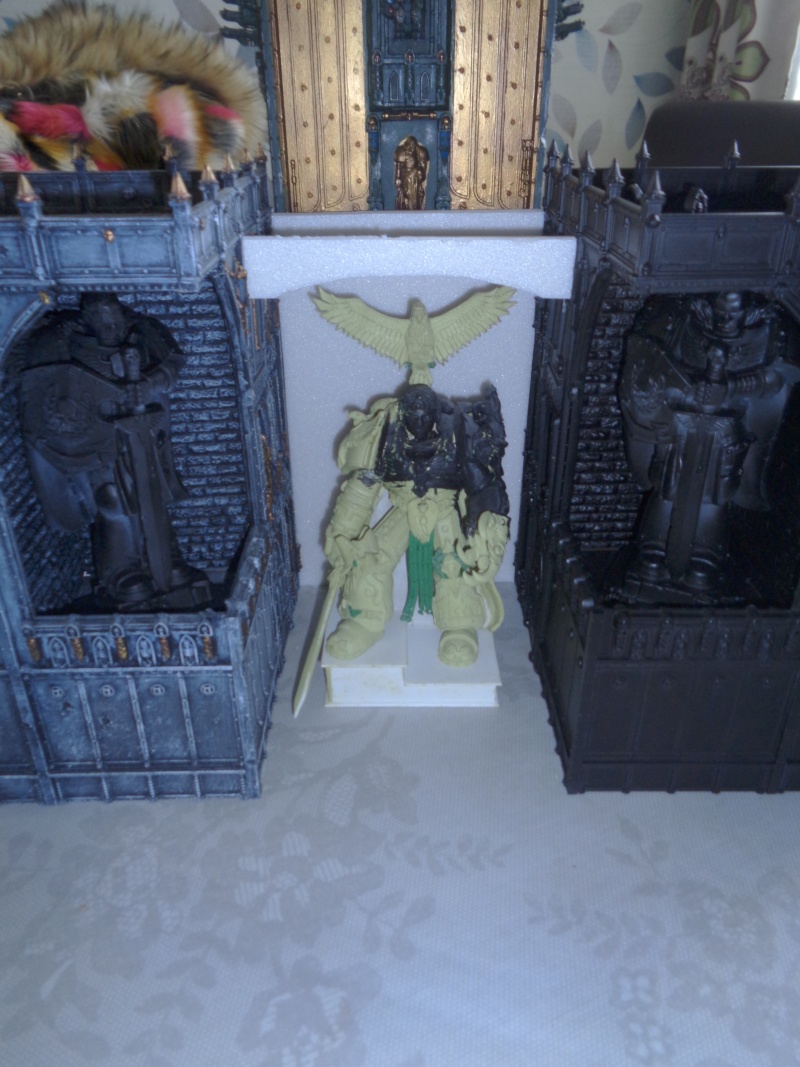
thanks for comments, i raised the emperor up by making another plinth to go on top of the first and i must admit looks better now above space marine statues also made back wall for tower that will hold the aquila tower, with stained glass window, started to paint a few thigs up while i had airbrush out finishing some orks, thanks for looking
Any one of these component parts would make great terrain, or scenario bait. All of them together is a level of awesome I have yet to see in the gaming world on this side of the pond.
Redleg wrote: Any one of these component parts would make great terrain, or scenario bait. All of them together is a level of awesome I have yet to see in the gaming world on this side of the pond.
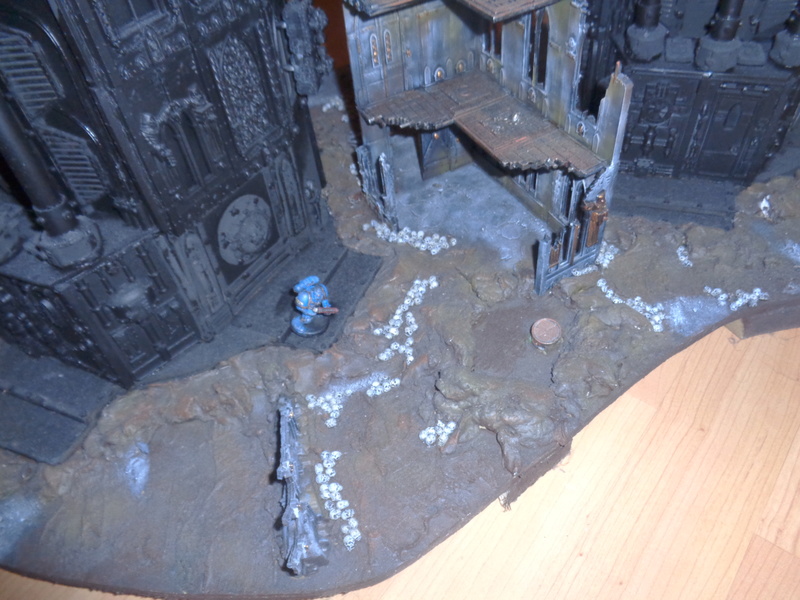
If I may make a small request, it would be useful if you put a random 28mm model next to some of your shots because it is really hard to keep in mind the enormous scale of some of these shots compared to the rest of the game. Thank you and keep building.
If I may make a small request, it would be useful if you put a random 28mm model next to some of your shots because it is really hard to keep in mind the enormous scale of some of these shots compared to the rest of the game. Thank you and keep building.
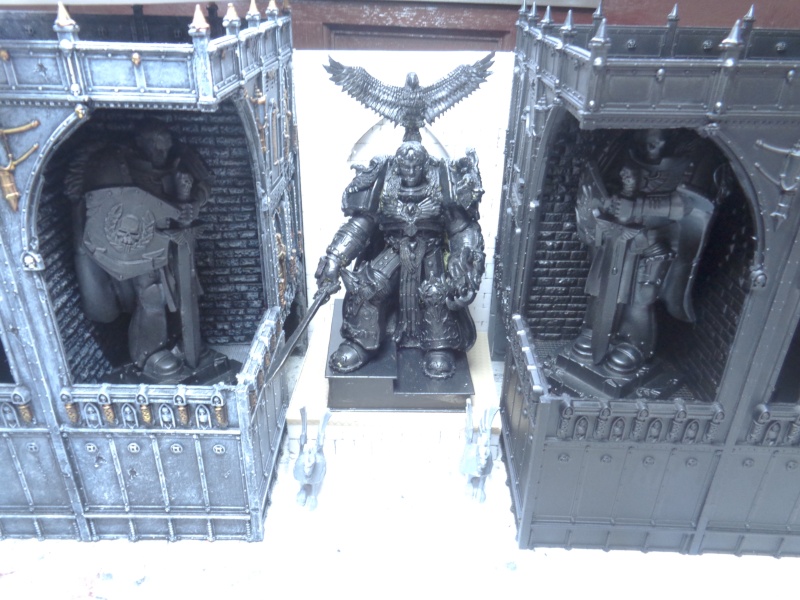
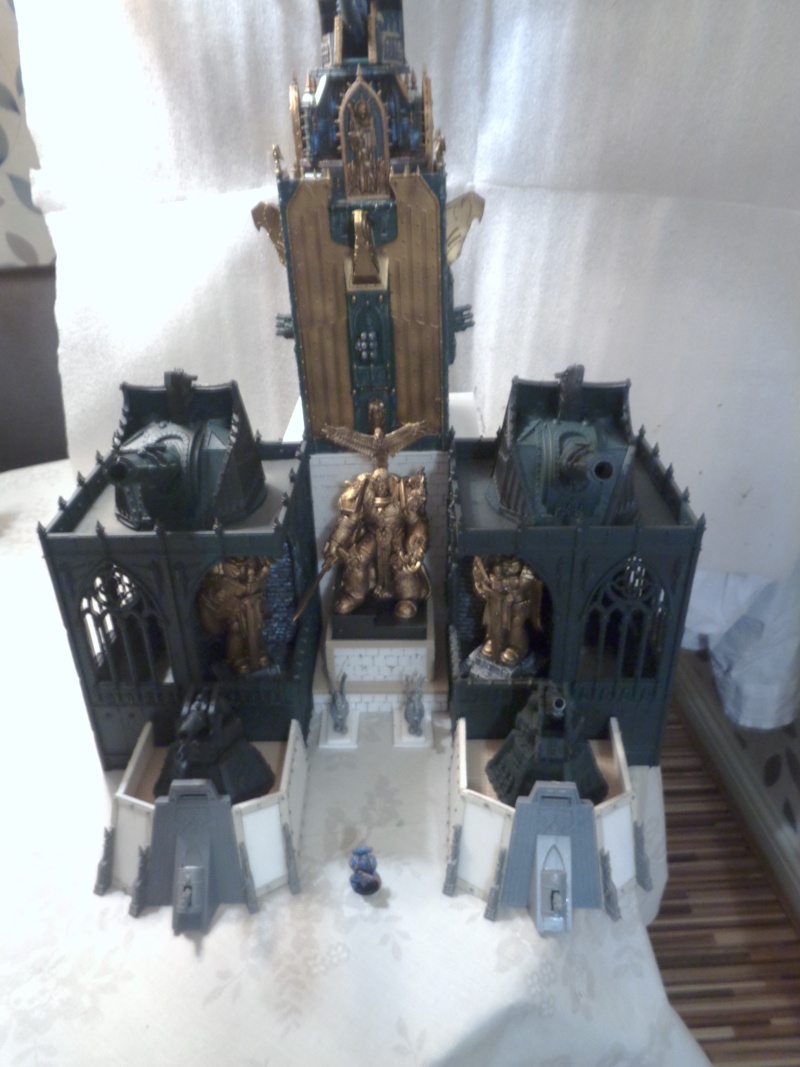
after a small break back onto the beast, made the supporting tower for aquila tower, added a couple alcoves each side for quad guns, couple door going each side still some panelling to do either side, pinted upthe space marine statues and emperor just got to marbe the base and add some icons, started painting base coats to everything, still more weapons to add yet but this is where i'm at, thanks for looking
I really like the quad guns in the alcoves. I think you are really capturing the feel that not only is it an amazing war machine that it also serves as a chapel of sorts and possibly is more symbolic than functional. Amazing progress so far.
This is such an ambitious and amazing project. I am so excited to see this through to the end. Any idea how tall it will stand in real life if fully built? Keep up the great work
Lorax wrote: This is such an ambitious and amazing project. I am so excited to see this through to the end. Any idea how tall it will stand in real life if fully built? Keep up the great work
Archer wrote: I really like the quad guns in the alcoves. I think you are really capturing the feel that not only is it an amazing war machine that it also serves as a chapel of sorts and possibly is more symbolic than functional. Amazing progress so far.
Just read through this entire thread with my jaw on the floor.
This is amazing. And am I the only one that is now even more blown away by the fact that he sculpted that Emperor satue?! Holy crap son do you have a thread on that piece of work as well?
Anyways totally in awe of your ability to make a vision come to life. Keep up the great work.
I haven't checked in on this P&M blog in a while - MUCH to my detriment! This has come SO far in a month! Incredible work! The emperor model is the perfect touch here --and excuse me, you sculpted that thing yourself?! good GRIEF - incredible.
General_K wrote: I haven't checked in on this P&M blog in a while - MUCH to my detriment! This has come SO far in a month! Incredible work! The emperor model is the perfect touch here --and excuse me, you sculpted that thing yourself?! good GRIEF - incredible.
thank you for kind comments
Automatically Appended Next Post:
SickSix wrote: Just read through this entire thread with my jaw on the floor.
This is amazing. And am I the only one that is now even more blown away by the fact that he sculpted that Emperor satue?! Holy crap son do you have a thread on that piece of work as well?
Anyways totally in awe of your ability to make a vision come to life. Keep up the great work.
thanks for kind words
Automatically Appended Next Post:
hk1x1 wrote: This is all looking fantastic so far, and I love what you've done with the Emperor statue, It's great to see it painted up .
thank you
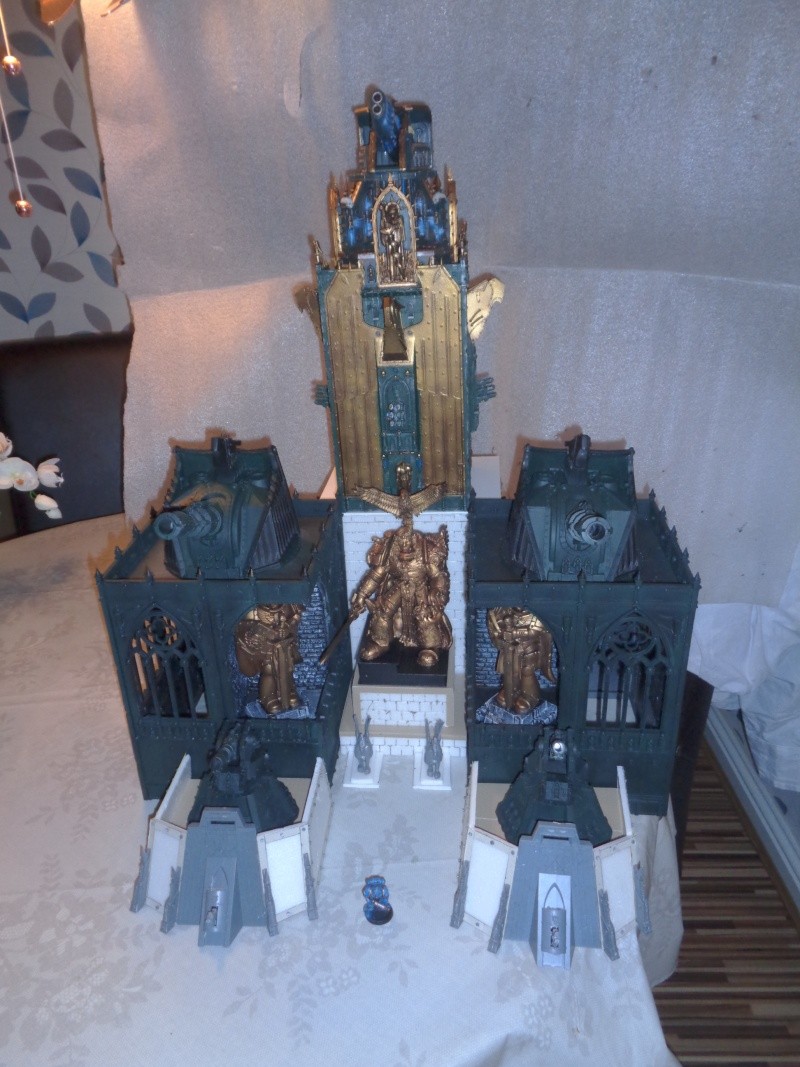
Automatically Appended Next Post: had a couple more hours on the beast tooday, finished the top with plastikard and embossed chequer plate plaastikard, usednew and 2nd hand cleaned up manufactorum panels,edged the building with card and rivets from old sprues (thats starting to get old:0) painted some source lighting witht the airbrush (a godsend on this project) thanks for looking
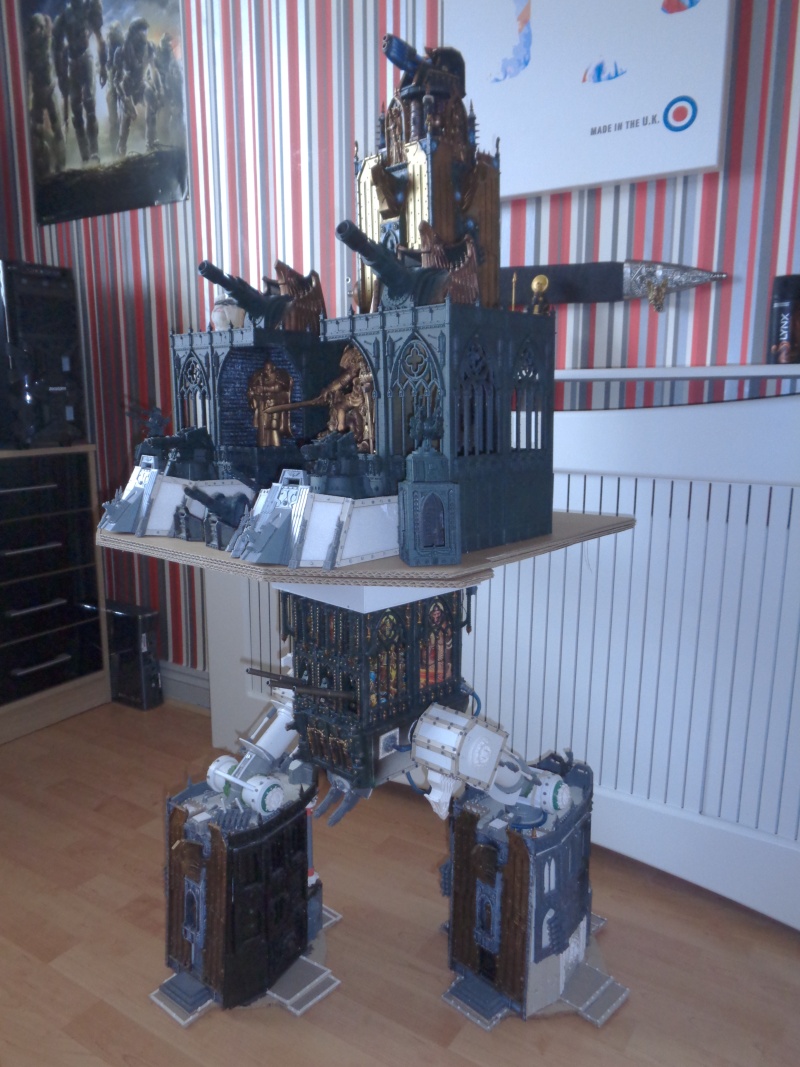
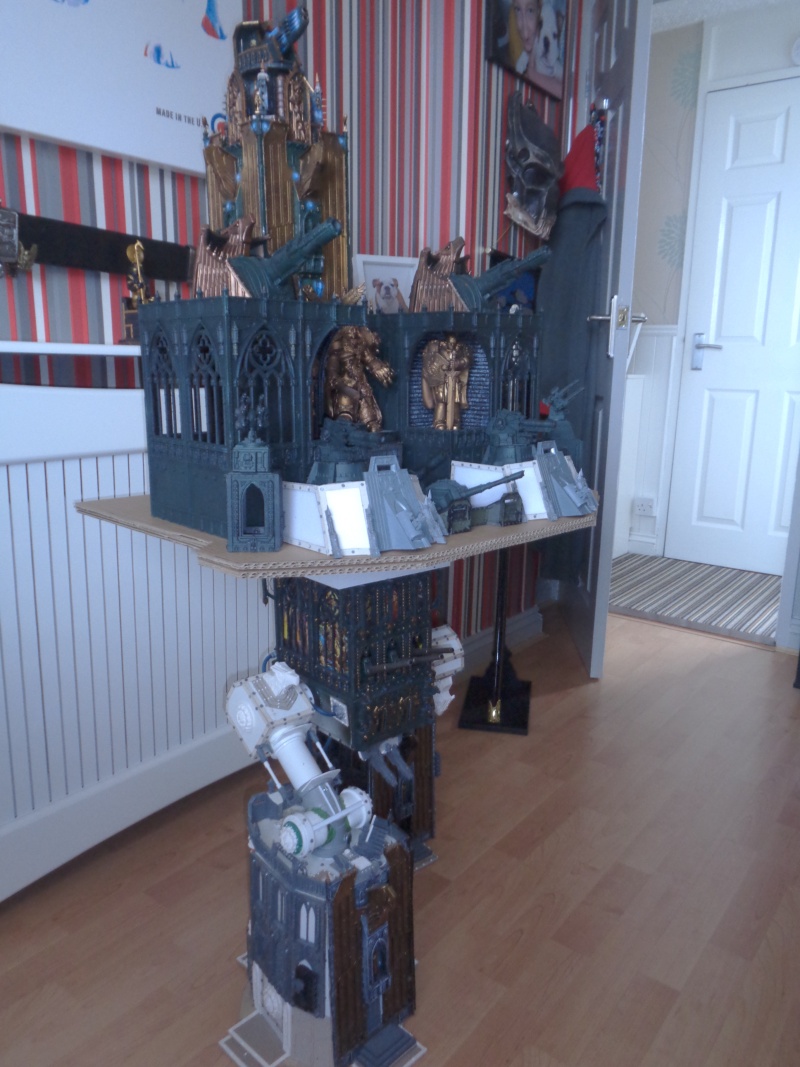
hi all, sorry it's been a while but finally i have been able to get back to the beast, i was going to puit the fortress part on mdf but this maybe too heavy so going to try it on a couple of thick cardboard layers with embossed chequer plate if works, pictures of a little dry run on floor and to get size and shape have started to paint tower behind emperor and will post pictures when complete and has stained glass windows in, to the rear of the fortress will be a massive comms base to one side and a landing pad to other with led lights thanks as always for comments/suggestions
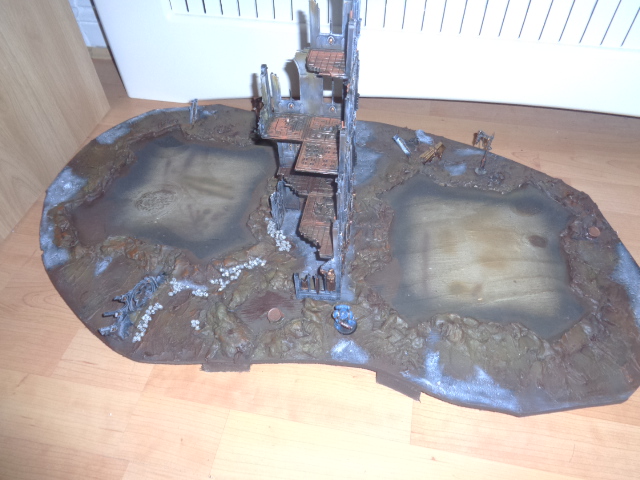
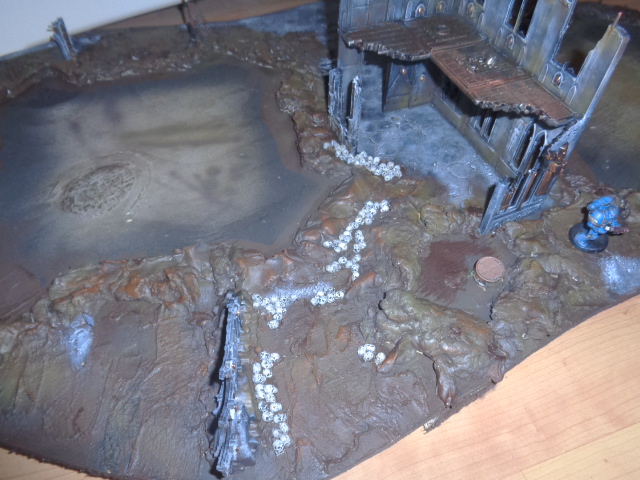
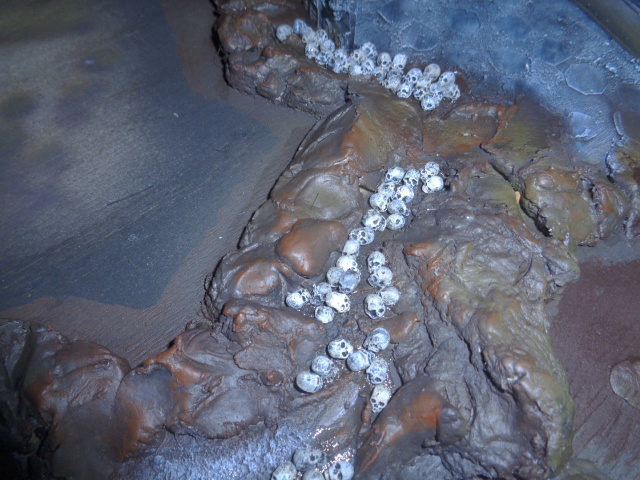
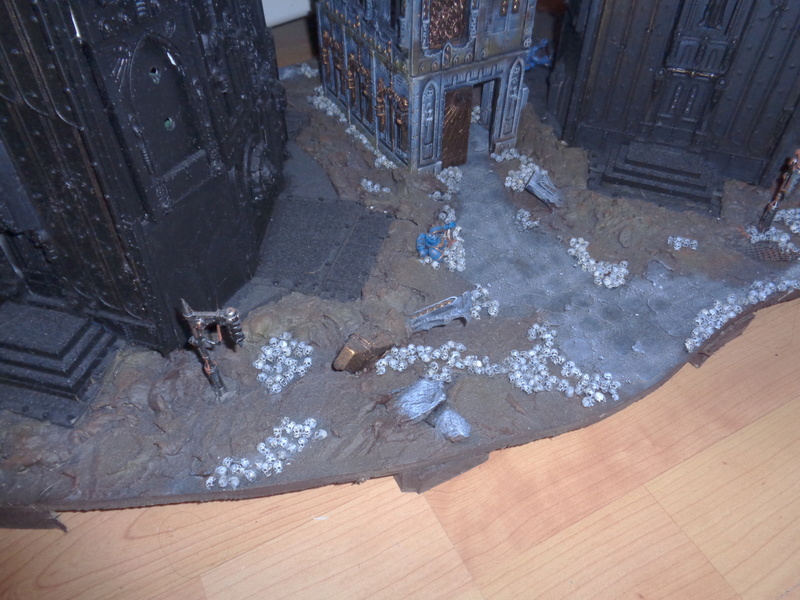
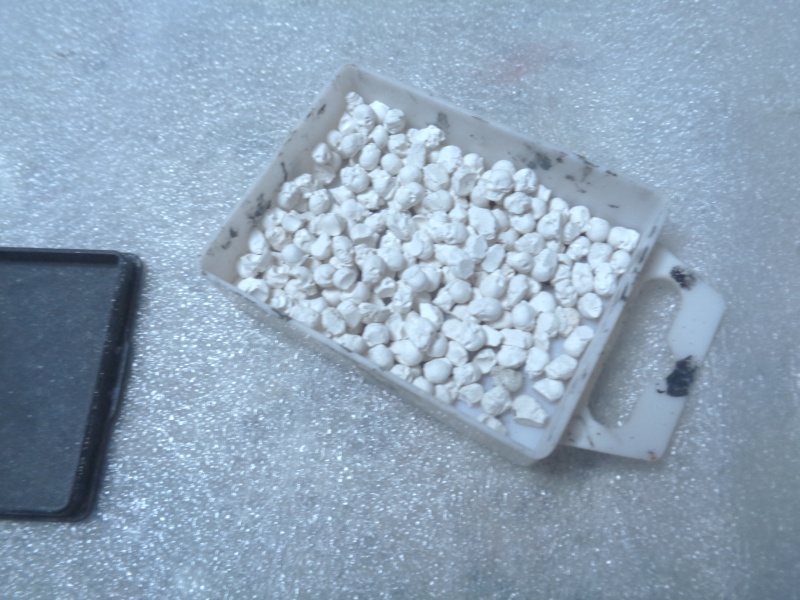
as expected when i placed it on body it bent backwards a touch, my solution to this will lay in the base as my vision this comes from the beginning of the terminator film where the terminator walks through a ruined city with thousands of skulls on the floor, one of the buildings will support under the body at rear which means i will have to make the base before attaching fortress and casting hundreds of skulls i'm also going to have to build the fortress support body up a bit to distribute the weight better and for a decent sized head
Automatically Appended Next Post:
the Signless wrote: This is looking very good. The back of your titan will have more buildings than most of the 40K battlefields that I have played on!
thanks, the buildings were actually from the start of the emperors palace i started but soon realised i did'nt have the room for
so did a little on the plasma cannon support tower, added supports and stained glass window, lot more weathering and rusting to do yet but getting there
also started the skull production going to have to paint these as i go otherwise it could become a nightmare
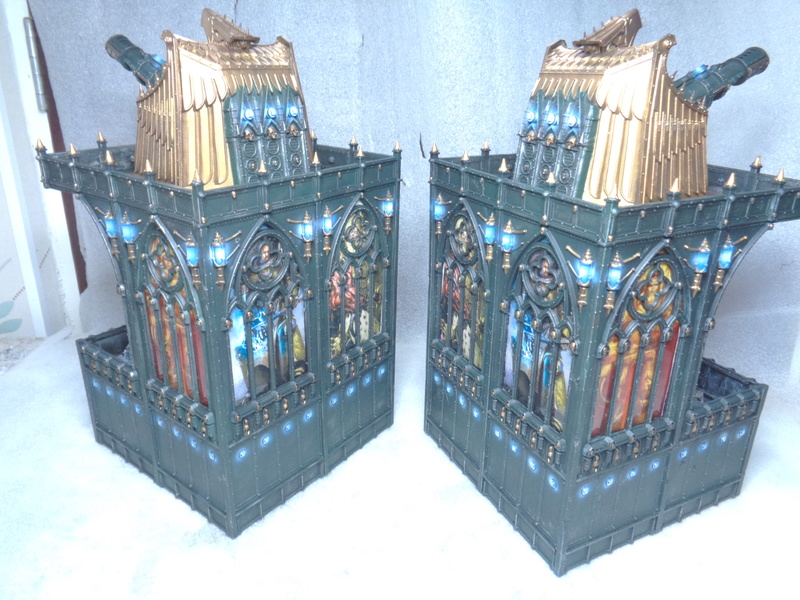
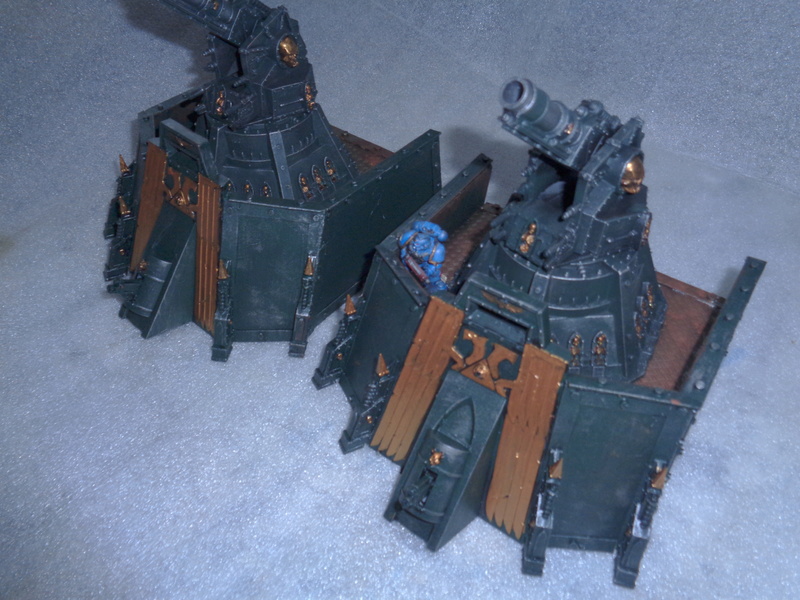
sorry for no updates but had a chance to paint up the two gun towers and added stained glass windows, weathering to be done at a later date as will be doing the whole piece with airbrush, got to add leds at a later date aswell, may make a platform so the guns rotate, thanks for looking and comment
w.servimg.com/view/15469522/627][/url]
Looks awesome. A part of me was hanging out for that garish red that GW had their epic emperor class imperator painted in. But I am liking what you have done. The lights are incredible.
Archer wrote: Looks awesome. A part of me was hanging out for that garish red that GW had their epic emperor class imperator painted in. But I am liking what you have done. The lights are incredible.
thanks archer, my ork army is red so wanted to do something differant
D4V1D0 wrote: Dear sweet Jesus this is awesome. There are so many skills being shown off here and to such a high level!
Once it's finished, will you be putting this on display so your fellow UK (and overseas) gamers can make a pilgrimage to visit?
EDIT: Despite my location saying I'm in Germany, this is just because my work PC is on a German internet system.
thank you for kind comments, going to be a while to finish but would be good for other people to see, althoug it's already getting heavy to move and lift
managed to get the two bunkers and vengance cannons painted up today, more detailing to be done like wiring, space marine reliefs to add at a later stage,
Automatically Appended Next Post: couple of pictures of a dry run with assembly and what it looksl like with latest painting
Archer wrote: Looks good. The waist seems a little thin compared to the upper body in the dry run. Any plans for bulking it out with banners and cabling?
yes there will be more detailing on it and will have to extend it to support top als
One thing I'd love was if you had Space Marines battling various enemies in the style of ancient greek reliefs - just cut them in half and paint them grey!
Matthew wrote: One thing I'd love was if you had Space Marines battling various enemies in the style of ancient greek reliefs - just cut them in half and paint them grey!
this was something i was thinking of doing believe it or not and also hand painted scenes on greaves shoulder pads etc whern i do them, i did give it a go but slipped and cut the head of a space marine but something to try again soon i think, thanks for comment
This is literally the most impressive 40k project I have ever seen undertaken. This thing already looks absolutely phenomenal!! Thank you for posting this work, its a joy to check out and is downright inspirational! I want to do something massive and amazing now.
Rakar wrote: This is literally the most impressive 40k project I have ever seen undertaken. This thing already looks absolutely phenomenal!! Thank you for posting this work, its a joy to check out and is downright inspirational! I want to do something massive and amazing now.
thank you for kind comments, been on the back burner for a while due to one think or another but hope to restart soon
Do you think it will be done in time for Adepticon? Maybe youll face off against the one I plan to build for it. Impressive you used GW kits almost entirely.
hopefully I can get some more done on the beast next few weeks one thing I did do is repurpose a small pallet to make the board for the base, will also have to reattach rivets that have been knocked off
Looking unbelievable based up. Any chance you will attach a few models fighting in and around its feet when finished? I think some Skitarii would be very fitting.
Archer wrote: Looking unbelievable based up. Any chance you will attach a few models fighting in and around its feet when finished? I think some Skitarii would be very fitting.
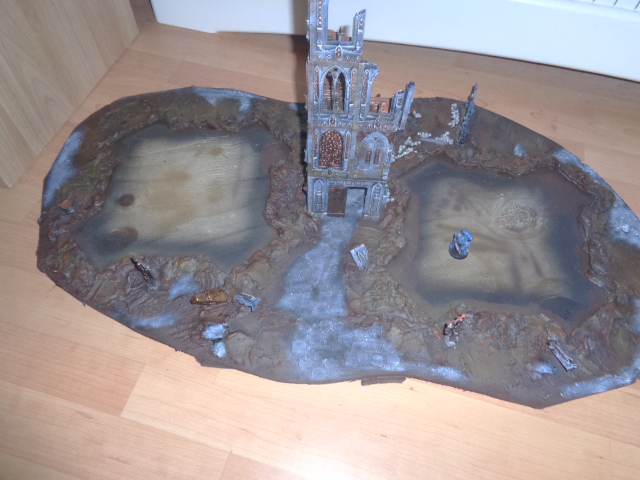
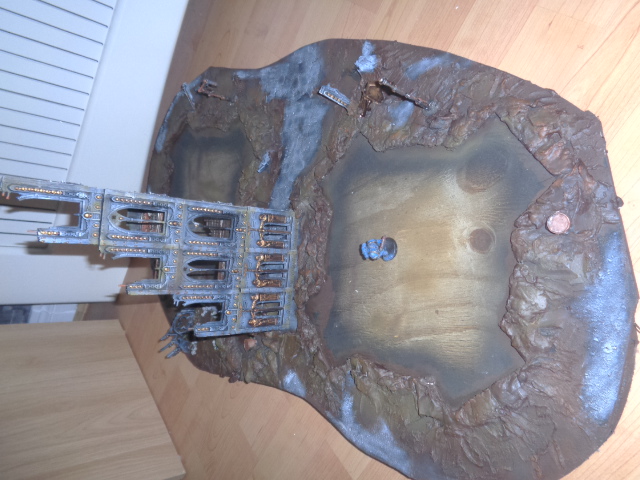
thanks archer, yes got to put a ruined admin building on it which will help support the beast and thinking of making the base as diorama
I admire the effort, deeply - and a lot of the execution. But honestly that pose will undermine the entire thing, especially if the top ends up as good as the. The leg geometry just has no analogue in nature of in the way everyone has seen titans posed and illustrated up until now.
I think you would be well served by bulking out and detailing the feet in a much more robust way, with 'toe' articulation, pistons etc, as well as a much wider toe base (extra inch or two on each toe in each direction), and then re-posing that back leg to be bent in standard plantigrade fashion, with the weight resting on the front toe and the thigh bone vertical or near so.
YMMV, but it seems like that bit of effort would be well worth it towards the final product and legacy of this huge undertaking.
Samsonov wrote: You have to wonder if the Epic Emperor titan actually could have walked. Lift one leg off the ground and you have a severe weight distribution issue.
No idea if this 28mm is any more realistic but it looks stunning anyway.
thank you
Automatically Appended Next Post:
MajorTom11 wrote: I admire the effort, deeply - and a lot of the execution. But honestly that pose will undermine the entire thing, especially if the top ends up as good as the. The leg geometry just has no analogue in nature of in the way everyone has seen titans posed and illustrated up until now.
I think you would be well served by bulking out and detailing the feet in a much more robust way, with 'toe' articulation, pistons etc, as well as a much wider toe base (extra inch or two on each toe in each direction), and then re-posing that back leg to be bent in standard plantigrade fashion, with the weight resting on the front toe and the thigh bone vertical or near so.
YMMV, but it seems like that bit of effort would be well worth it towards the final product and legacy of this huge undertaking.
thanks for your observations, the pose originally was supposed to look like it was walking or a wider stance as I did not like the upright stance and thought It would give a more dynamic look, once the shin guards and rest of details attached to leg it should look better, too late to change anyway without dismantling, was thinking of adding some pistons to feet aswell
Automatically Appended Next Post:
Alpharius wrote: I'd like more/better pictures/angles, BUT, it jibes fairly well with what we 'know' about this class of Titan:
Remember, there are (allegedly) a lot of troops waiting to disembark from those feet!
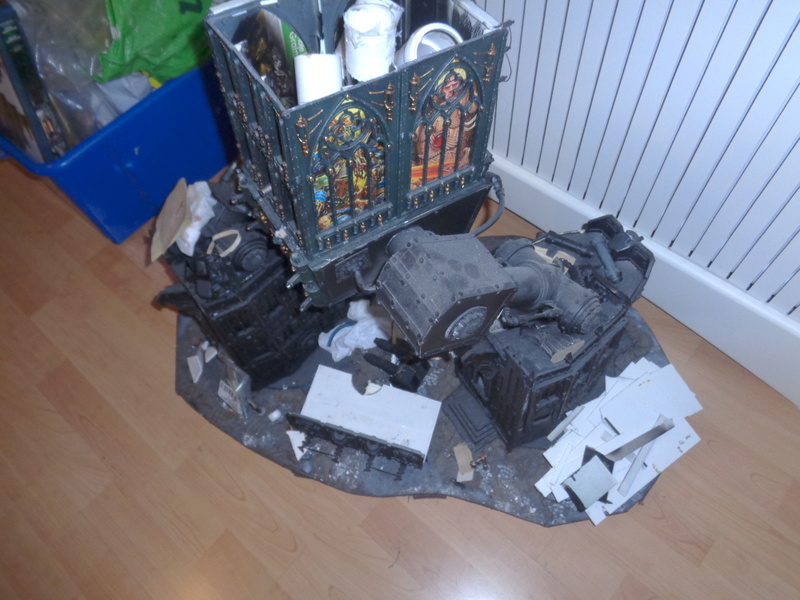
i'm sorry to report that the titan project came to a devastating end as you can see from picture, obliterated by falling shelf above it, don't have the heart to start again so going to reconstitute bits to recoup money I spent on it, picture doesn't show the true effect of damage, windows broke, panels snapped, frame broke, leg hanging off, too much to redo, would like to thank those that subbed and commented on it
Oh boy, that's heart breaking to say the least. I guess this would make some amazing terrain pieces though - fighting round the wreck of a destroyed titan would make for a pretty inspiring battlefield
Good effort man - but please, for the love of smeg; turn what you have done so far into the remains of a titan which has suffered a catastrophic reactor detonation.
It will be a wicked terrain peice and the effort will not have gone to waste - go mad with flickering LEDs lighting up smoke plumes and sound effect units emitting crackling fire sounds and it will still be glorius!! (and probably get more use in games tbh..)
edit: and do water effects running from the hip section to paint like molten metal...
For what it's worth, I really love your attention and dedication to detail. Using the building kit instead of bastions, the eagle heads, the painted windows, Emps on his pedestal, the belly earthshakers, the skulls on the base, the fact that you made a base, even the little undercarriage gun; while reading the thread I kept thinking "this guy gets it".
shortymcnostrill wrote: For what it's worth, I really love your attention and dedication to detail. Using the building kit instead of bastions, the eagle heads, the painted windows, Emps on his pedestal, the belly earthshakers, the skulls on the base, the fact that you made a base, even the little undercarriage gun; while reading the thread I kept thinking "this guy gets it".
Good effort man - but please, for the love of smeg; turn what you have done so far into the remains of a titan which has suffered a catastrophic reactor detonation.
It will be a wicked terrain peice and the effort will not have gone to waste - go mad with flickering LEDs lighting up smoke plumes and sound effect units emitting crackling fire sounds and it will still be glorius!! (and probably get more use in games tbh..)
edit: and do water effects running from the hip section to paint like molten metal...
thanks, was thinking of doing something like that, but, decided to reconstitute bits sell them and make my own version of ferro-giant alphus, will start a blog on it
Automatically Appended Next Post:
Alaricuk wrote: Oh that's terrible news, Had loved watching it develope. :(
This sucks bigtime. I was enjoying seeing this thing come together, and wondering why no updates for a while. So sorry to see the inglorious end of an amazing project.
This sucks bigtime. I was enjoying seeing this thing come together, and wondering why no updates for a while. So sorry to see the inglorious end of an amazing project.


 pictures to follow
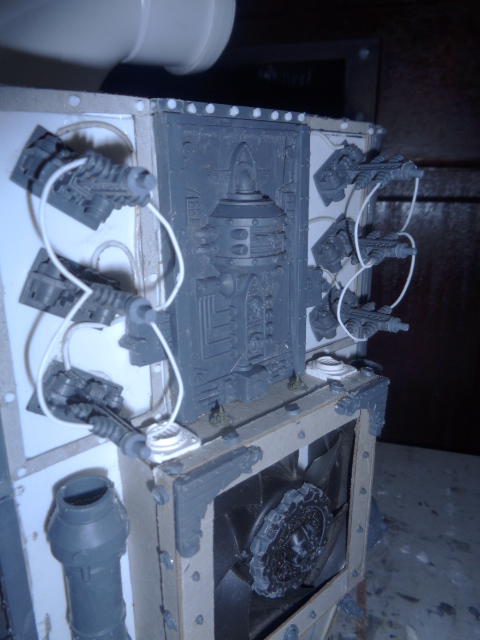


 )
)


 [/url]
 Thank you for posting this work, its a joy to check out and is downright inspirational! I want to do something massive and amazing now.