Switch Theme:

BLACKHAND'S General Casting Tutorial  [RSS] Share on facebook Share on Twitter Submit to Reddit
»
Author Message
Advert


Forum adverts like this one are shown to any user who is not logged in. Join us by filling out a tiny 3 field form and you will get your own, free, dakka user account which gives a good range of benefits to you:
  • No adverts like this in the forums anymore.
  • Times and dates in your local timezone.
  • Full tracking of what you have read so you can skip to your first unread post, easily see what has changed since you last logged in, and easily see what is new at a glance.
  • Email notifications for threads you want to watch closely.
  • Being a part of the oldest wargaming community on the net.
If you are already a member then feel free to login now.


Made in nz
Nurgle Chosen Marine on a Palanquin


Whangarei , New Zealand

In the past I have had several people ask for an explanation of how I make molds and resin cast of my models and Ihave finally folded and decided to post a tutorial ( this is for you mwnciboo!)

Now this is by no means a definitive guide to resin casting, this is just MY method and for the purposes of the tutorial I will only cover open sided casting which basically means that the top of the mold is open and eventually becomes the bottom of the cast peice. This is a much simpler and tidier method than two-sided casting which requires a lot more thought when setting up the mold and is something to tackle when you have had a bit of practice.


Edit : Thanks to Whalemusic’s excellent suggestion here is a list of sites you can find casting products according to country.

In New Zealand I suggest emailing www.Topmark.co.nz and getting their opinion, its where I get the products I use in this tutorial.

American buyers you can get Oomoo 25 1:1 resin from www.theengineerguy.com.
You can also get Smooth Cast 300 resin there as well. Product specs are here at www.smooth-on.com

Dakka DCM JB has also suggested trying "Alumnite" http://www.alumilite.com/index.cfm
He has used it in his great tutorial here http://www.dakkadakka.com/wiki/en/Simple%20Two-Piece%20Mold%20for%20Casting%20with%20Resin

and MicroMark is in the United States. They sell a lot of modelling tools as well as casting materials.

http://www.micromark.com/TEN-TO-ONE-and-HIGH-TEAR-STRENGTH-MOLD-RUBBER-28-FL-OZ,8155.html

Australian buyers (Perth specifically), try Kirkside in Osborne Park for pinkasyl and easycast. www.kirkside.com.au

UK buyers start with Tomps.com, very helpful and knowledgeable, will really help you get what you need. www.tomps.com
Or we have had this site mentioned as www.modelshop.co.uk Worth emailing them for advice as well

For Dakkites in Canada Styrofoam04 suggests giving Sculpture Supplies Canada a go. www.sculpturesupply.com

Gilljoy has also suggested this site http://www.sylmasta.com/acatalog/Casting_Kits.html

If any one else has a suggestion feel free to PM me or post to the blog and I will add it to the list

Edit : Fellow Dakkite Aerethan would also like to add....

I'd also like to plug myself for a mold maker.

If you don't have the resources or skill to make molds or casts, PM me and we can work something out. I can either sell you a mold or sell you casts.

I figure this will save cost for people who just want copies of that one shoulder they designed or head or whatever without the cost of buying entire batches of resin and silicone. I always stock both so I can make a mold any time.


Back to the tutorial!

Since one of the things I get a lot of comments on is my custom Marine shoulderpads I thought I would show how I cast them. These will not be the big 3d lion pads I have used on my Sabre Legion marines but are flatter, more traditional pads that are used more.

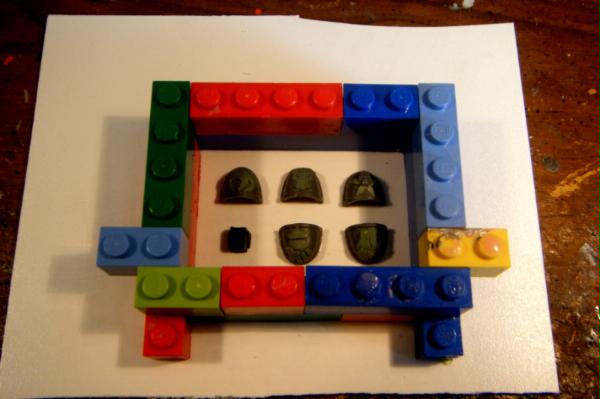
To start with you will want your Master Copies, in this case I used a bunch of plain marine pads and GSd a few chapter symbols on them like so....

Brazen Minotaurs
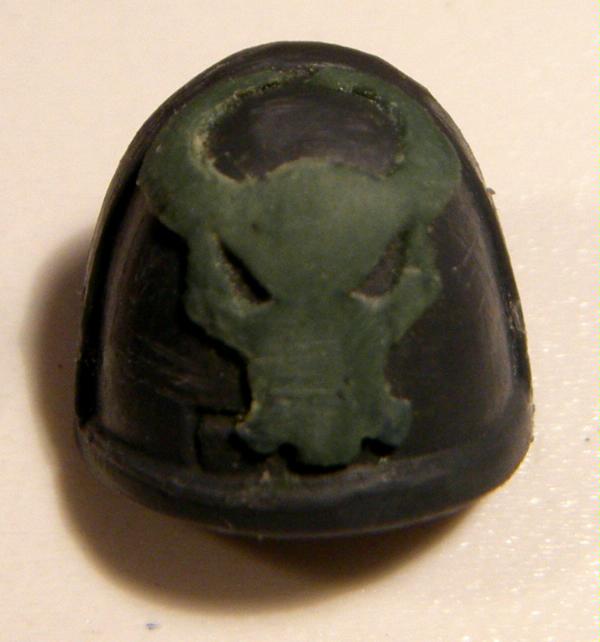


Invaders
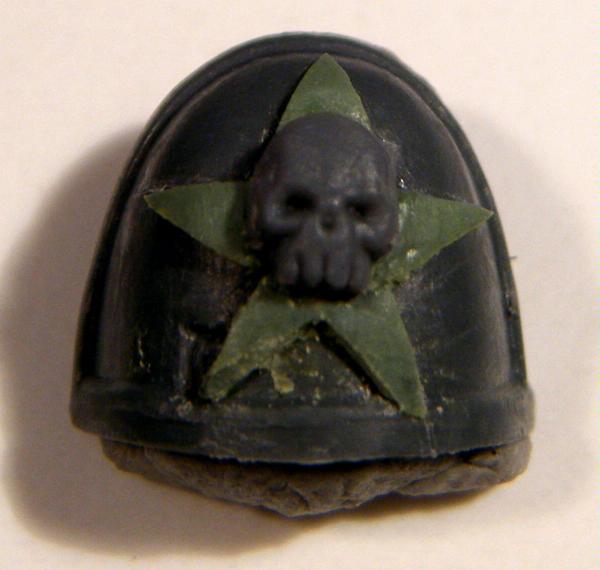


Iron Fists
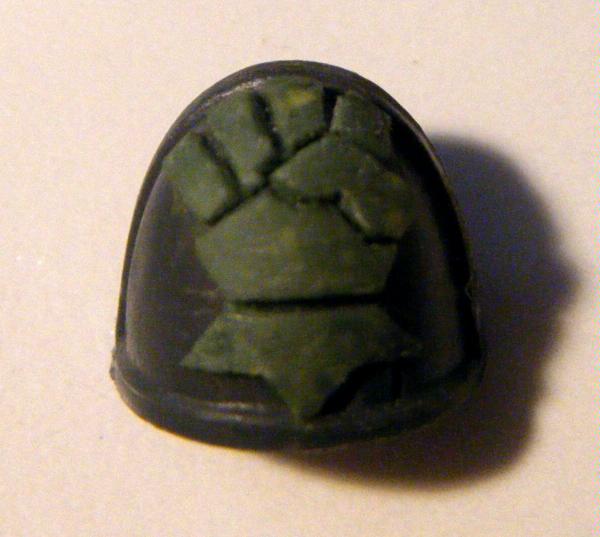


A test for an alternate Sabre Legion Pad
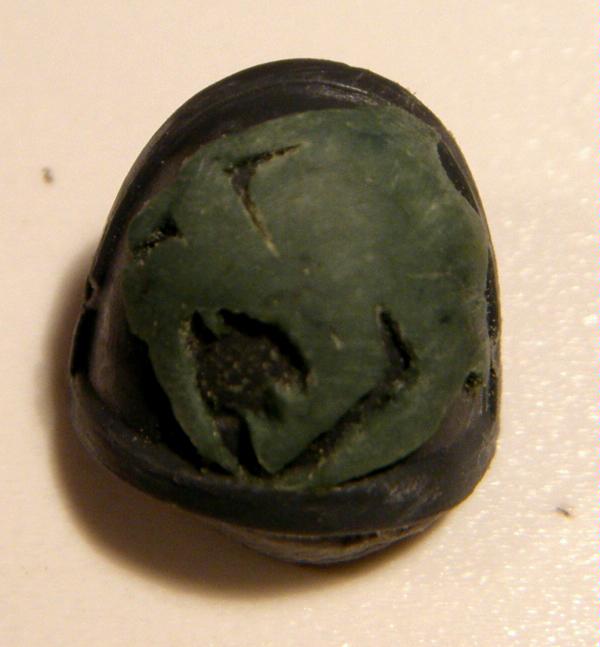


And another test for a pad based on my Avatar pic
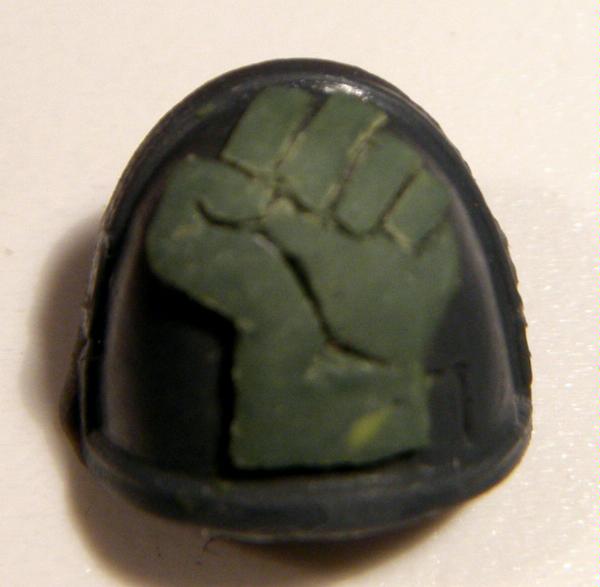


So you have your Master Copies and now you need your casting materials,

For the molds I use a two-part silicone called Pinkasyl I get it from a special effects and modelling shop in NZ but I'm sure its available elsewhere,
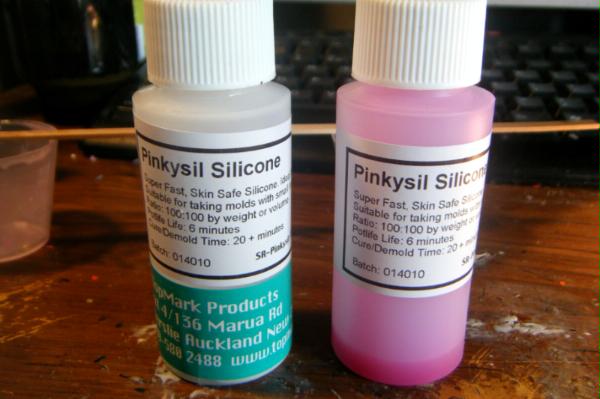


These are not the original bottles so I am not sure what they look like but the name what you need, I use Pinkasyl because of the low temperature when curing ( your master copies won't deform), the incredibly quick curing time ( 15-20 mins, less if you sit it under a lamp and heat it up) and lastly because of it's high flexibility which increase the life time of the mold.

For the resin I use "Easycast" it comes form the same company as the Pinkasyl and was recommended by them as they demold without the use of a release spray or oils. This is really handy when it comes to painting as you will not need to wash the resin casts woot!.
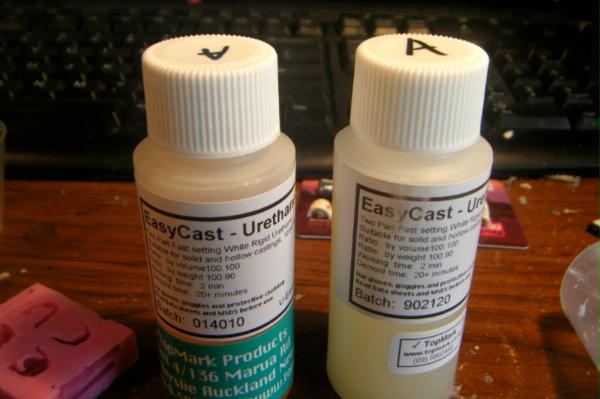


Same as the Pinkasyl, Easycast is a quick curing and simple to use product, they are both 1:1 mixtures which means they use equal parts A and B so they are simple to mix and usually only need one mixing cup. Another fun fact is that once you have mixed and poured the rubber and resin out of the mixing cup and then cured you can just yank out the remnants and the cup is ready use again!

Ok so the most important part of the process is setting up the mold properly. If the master copy moves in the mold box then the wall of the mold can be too thin and may break letting resin spill everwhere and basically ruining your day so to begin with...

Step 1 : the mold base
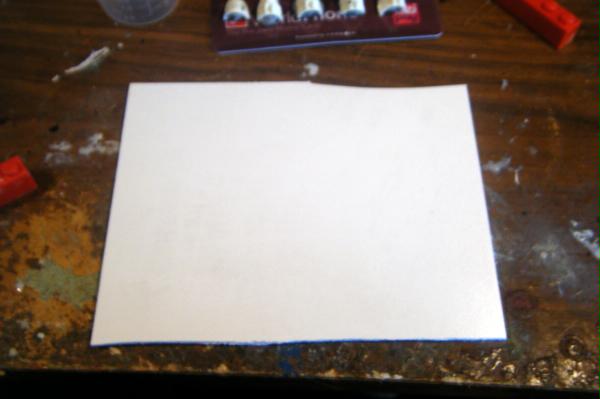


Basically a piece of plasticard big enough to hold the master copy or copies and the mold box material in this case lego

Step 2 : glue master copies to base
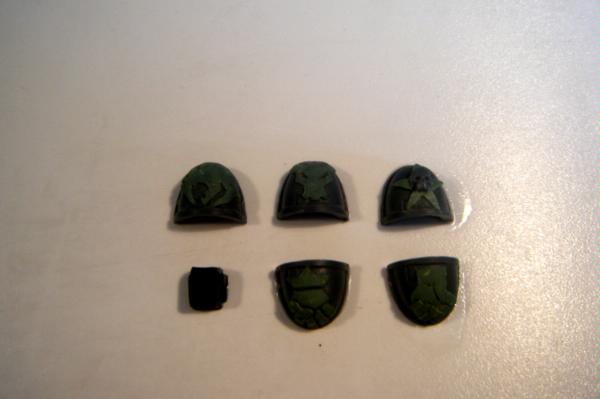


Use a minute amount of superglue to fix the pads to the base, just enough to keep them from shifting when you pour in the silicone mixture but not so much that you cant break them off the base later.

Step 3 : make up a lego box around your master copies and superglue it down
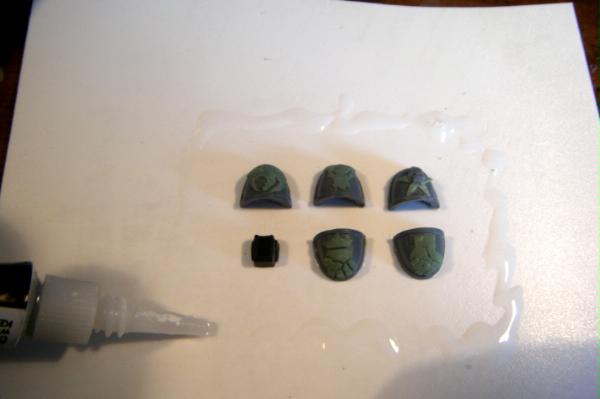


In this case don't be stingy with the glue as it will keep the silicone from leaking out the bottom and again, ruining your day.
Make sure to leave about a 5mm gap around the edge of the mold and between all the pieces in the mold, this will give the walls enough strength that they will flex but not break again extending the life of the mold.

Step 4 : mixing the silicone.
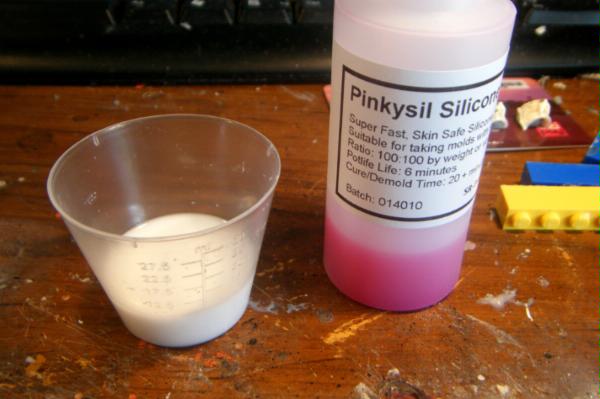


I usually use one mixing cup and pour either part A or part B into the cup up to say the 5ml mark then pour the other part into the same cup up to the 10ml mark.
This saves making a mess in two cups and when you pour from one cup into another there is often wastage and a loss of some of the liquid. The main thing is to make sure you get hold of a decent clear plastic measuring cup with highly visible measure marks medicine cups are the best.

Step 5 : pouring the silicone
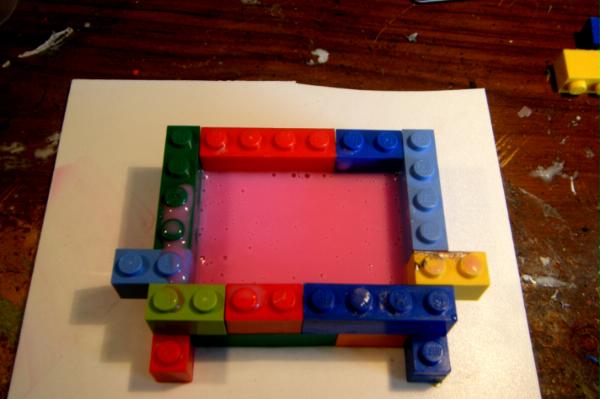


Pretty straightforward, can be messy but use your mixing stick to lay a bit of the mixture over the most detaiedl parts of the master copies so that all the cracks and details get covered properly, then pour in the rest of the rubber making sure to cover them completely you want about 5mm of rubber above the top of the masters in the mold so that there is a solid base to the mold. I also like to stir the rubber slowly with a toothpick to get rid of bubbles which can screw your model up, especially with shoulderpads as the inside of the pad is a notorious bubble trap and having to carve this area out really sucks.

Step 6 : let it cure or be impatient like me!
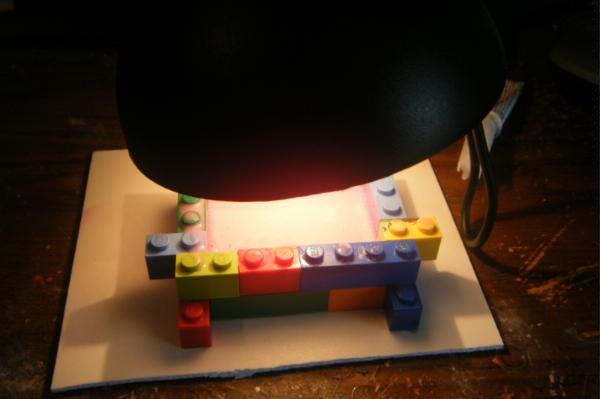


O,k so you can wait 20mins to let it cure or put it under a heat lamp and it will cure in like 10mins or less, I do this because I hate waiting but there is a downside! bubbles that would have usually rise to the top will get stuck in the mold and could potentially ruin it, again stirring slowly with a toothpick should break up the worst of this.

Step 7 : You have your mold!
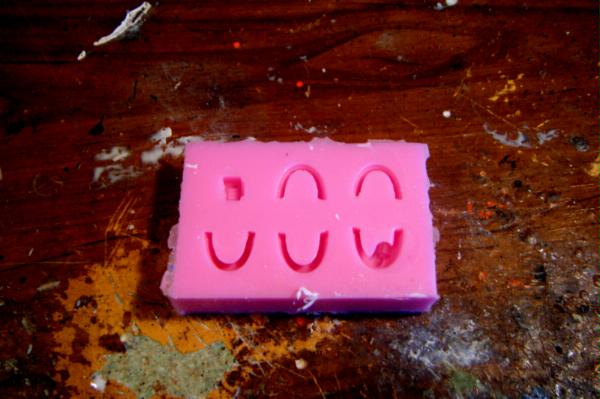


You should end up with something like this, as you can see on the bottom right hand corner there is a large void in under the shoulderpad where a bubble formed, Doh!

Step 8 : mix up some resin

Didn't take a pic as this is exactly the same process as mixing the silicone, at this point I just wish I had a mixing cup with a spout on the lip as pouring the resin into the mold is always messy!.

Step 9 : pouring the resin
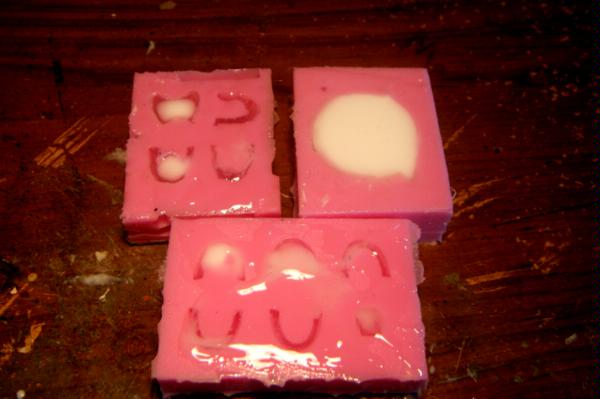


Having poured the resin you will end up with something like the above pic, now fortunately shoulderpads use a minute amount of resin so it would be wise to make a few different molds so that you have them on hand when doing your first pour so that you can use the extra for something productive, in this case I poured the 5 pads, a special ammo clip, a muscle torso , 3 lion pads and a custom base with 5mls of resin, not too bad Again you can use a heat lamps to cure the resin quicker, and demolding before the pieces are completely hard will allow you to carve off flash and bubbles a lot easier.

Step 10 : Demolding and flash removal
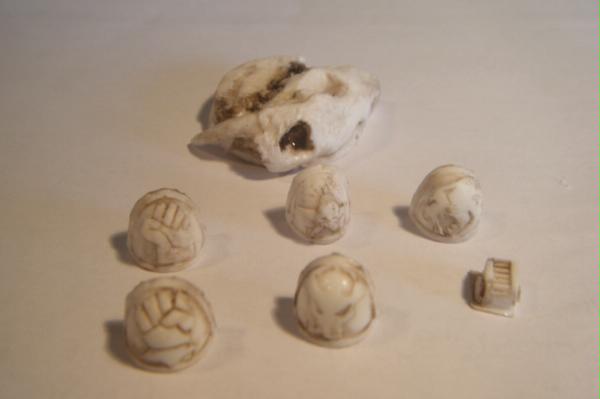


After you pop out the resin casts and cut off the flash you should end up with something like the above, I have washed them in devlan mud to pick out the details in this pic.
Several of these had bubbles along the edges which I will have to fill in with GS but thems the breaks.

So there it is my method for resin casting, hopefully this makes sense to everyone and helps to get your creative juices flowing!

Feel free to post questions I will attempt to answer them in a helpful non-confusing way

Cheers

BLACKHAND


This message was edited 6 times. Last update was at 2011/10/22 22:00:26


 BobtheInquisitor wrote:
I tend to glue metal models with a combination of BSI cyanoacrylate and my tears of frustration.
 
   
Made in us
Legendary Master of the Chapter


Chicago, Illinois

Thank you good sir

From whom are unforgiven we bring the mercy of war. 
   
Made in us
Blood-Drenched Death Company Marine


Indianapolis

Very nice tutorial. You make it look so easy.

   
Made in ca
Decrepit Dakkanaut


There was a project log about some guy whose dad was helping him build and cast a set of six or so Warhound Titans and they used a vaccuum seal to suck the bubbles out of their molds. Not sure how to implement one on the scale you're doing it though.
   
Made in us
Boom! Leman Russ Commander


United States

this looks dope makes me wanna try it!

"Reality is, when you stop believing in it, doesn't go away"
-Philip K. Dick

Constant Lurker, Slowly getting back into modelling! Someday a P&M Blog link will lurk here! 
   
Made in nz
Nurgle Chosen Marine on a Palanquin


Whangarei , New Zealand

@nurglitch - I have heard a fish bowl with a sealed lid and a vacuum cleaner attached to it will act a as a makeshift vacuum chamber but hell when you are working with such tiny amounts a wrecked cast still hasn't cost much

 BobtheInquisitor wrote:
I tend to glue metal models with a combination of BSI cyanoacrylate and my tears of frustration.
 
   
Made in au
Water-Caste Negotiator


Perth, Western Australia

Nice, quick tutorial.

Not to mention it's exactly what I was looking for when I came on Dakka this morning.

Kudos

Check out my Tutorial: http://www.dakkadakka.com/dakkaforum/posts/list/302457.page

Necromunda Tally: Chemos' Seekers
W-1 L-1 D-0 
   
Made in gb
Lieutenant Colonel


BLACKHAND many thanks for putting this up, i know it was a cheeky request but the possibilities are almost endless. You are the Resin Godfather!

Collecting Forge World 30k????? If you prefix any Thread Subject line on 30k or Pre-heresy or Horus Heresy with [30K] we can convince LEGO and the Admin team to create a 30K mini board if we can show there is enough interest! 
   
Made in us
Homicidal Veteran Blood Angel Assault Marine


Dayton OH

Pouring the resin out of the mix cups is easier if you hold your mixing stick against the rim and over the mold. Your resin will flow down the stick and not the side of the cup.

For the Emperor! Kill Maim Burn!... I mean purge the unclean!  
   
Made in au
Water-Caste Negotiator


Perth, Western Australia

I should be attempting this in the next couple of days (have just finished the greens for some squad-specific shoulder pads), so hopefully I can post my results/ problems here.

What level of detail is available with this method? I have numerals embossed into green stuff in some of my shoulder pads, and am planning on recasting the terminator-honours shoulder pad, any clues whether these will turn out ok?

Check out my Tutorial: http://www.dakkadakka.com/dakkaforum/posts/list/302457.page

Necromunda Tally: Chemos' Seekers
W-1 L-1 D-0 
   
Made in nz
Nurgle Chosen Marine on a Palanquin


Whangarei , New Zealand

@mwnciboo -No probs, though I 'm not sure I am the resin godfather...maybe just a resin mobster

@brotherjulien - thanks for the tip, I will give it a go next time I cast some pads!

@captain claw - I have had a lot of luck with fine detail, in the past I have copied the FW daemonhunter rhino back door and front plate both of which have superfine embossed words and with these products I have managed to cast the deathwatch pads with some success, always comes done to popping air bubbles with a toothppick to catch every detail though

This message was edited 1 time. Last update was at 2010/07/25 20:39:36


 BobtheInquisitor wrote:
I tend to glue metal models with a combination of BSI cyanoacrylate and my tears of frustration.
 
   
Made in us
[SWAP SHOP MOD]
Robot Cat


OH-I Wanna get out of here

How many molds do you get from a 500gm pack of pinky?

BTW to everyone else, Ive found it stateside from 500gm to 10kg, just needed a bit of google digging.
   
Made in se
Longtime Dakkanaut


Gothenburg

Thats a very nice ironfist pad (my favorite).

Say, do you by any chance know the shear strenght value on that silicone rubber?
I want to see what you use compared to myself.

Salamanders W-78 D-55 L-22
Pure Grey Knights W-18 D-10 L-5
Orks W-9 D-6 L-14
 
   
Made in au
Water-Caste Negotiator


Perth, Western Australia

@Pyriel-: I'm looking for the same stuff too, and stumbled upon the technical data sheet for both on the net. The links are below.

BTW, this is for a Perth (Western Australia) supplier, close to me thankfully, but it seems like an easily findable product.

@BLACKHAND: Thanks for the tutorial man. As I said I should be trying this soon and I'll post pics of the finished product. Did you bother with a release agent? Going to order online and might as well figure out what else I need. Also, where did you get the measuring cups?

KLAW

Check out my Tutorial: http://www.dakkadakka.com/dakkaforum/posts/list/302457.page

Necromunda Tally: Chemos' Seekers
W-1 L-1 D-0 
   
Made in nz
Nurgle Chosen Marine on a Palanquin


Whangarei , New Zealand

@nirvana69 - Good luck with a full marine cast, If I thought I could pull it off consistantly I would try it but I'm pretty sure I would waste a lot of resin! just remember that by buying silicone and resin you have still paid for the marines.

@whalemusic - Its hard to judge but from the 100gm I get in my kits (50gm part A + 50gm part B) I get enough silicone to make molds for around 20 shoulderpads, if your make molds of objects with a higher volume you may get more out of the bottle , thought the flipside of this is that you have to construct a bigger mold box so maybe the net gain would be minimal.

@pyriel - Thanks I was happy with how the fist came out as well, I'm not sure on the strength though I do find it much stretchier and softer than other products I have used while not snapping or cracking as much.

@captain Klaw - Welcome for the tut, can't wait to see the pics. No i don't use a release agent, the retailer said it wasn't necessary an I havn't needed to use one yet. The measuring cups came in the "starterkit" I buy it in, 100gm of pinkasyl, 100gm of easycast, measuring cups, stirrers, gloves and modelling clay all for $20 + postage!

thanks again for all the questions

 BobtheInquisitor wrote:
I tend to glue metal models with a combination of BSI cyanoacrylate and my tears of frustration.
 
   
Made in au
Water-Caste Negotiator


Perth, Western Australia

sorry forgot to post the links.

http://www.kirkside.com.au/D220/easycast/

http://www.kirkside.com.au/D215/pinkysil/

technical data's on the pages

Check out my Tutorial: http://www.dakkadakka.com/dakkaforum/posts/list/302457.page

Necromunda Tally: Chemos' Seekers
W-1 L-1 D-0 
   
Made in us
Regular Dakkanaut


Joizey

Great tutorial Blackhand. I'll be trying this technique out soon.

I found this review of the product used.
http://worldinminiature.blogspot.com/2009/05/product-review-barnes-pinkysil-molding.html

Too bad I can't locate a local supplier...

This message was edited 1 time. Last update was at 2010/07/26 21:20:28


Made in ca
Veteran Wolf Guard Squad Leader


Ajax, ON. Canada

Nice tut! But it was a bit late for me. After I read ur sabers blog and Sersi's Slaaneshi Themed Daemon Army blog. So I started to google it and found a great place in Toronto called Sculpture Supply Canada. They were very helpful and I bought a starter kit for $45+tax. Going to make my first cast this weekend. Their site also has alot of how to and other information if anyone is interested

This message was edited 1 time. Last update was at 2010/07/28 16:14:43


"The strong are strongest alone", Lufgt Huron, Tyrant of Badab.
The Blood Reaver. Master of the Red Corsairs. Lord of the Maelstrom. Huron Blackheart.

"Life sucks when it gets in the way of Warhammer." - CGBSpender 
   
Made in nz
Nurgle Chosen Marine on a Palanquin


Whangarei , New Zealand

Hey styrofoam04, I have used "smooth on"as well and still have and use the molds I poured with it about 5 years ago, I find the pinkasyl simpler to use but quality wise they are on a par, good luck!

 BobtheInquisitor wrote:
I tend to glue metal models with a combination of BSI cyanoacrylate and my tears of frustration.
 
   
Made in us
Decrepit Dakkanaut


Madison, WI

Nice tutorial, I may have need of this technique in the future...

Anvildude: "Honestly, it's kinda refreshing to see an Ork vehicle that doesn't look like a rainbow threw up on it."

Gitsplitta's Unified Painting Theory
 
   
Made in ca
Veteran Wolf Guard Squad Leader


Ajax, ON. Canada

I'm not sure where to find that here. I like this kit because of the price. I would also like to try the pewter kit as well.

I like the lego idea. I used foam core and a messy hot glue gun. Is the lego water tight? or do you add glue to each level? I've read that some people use a vibration table to get the bubbles up. have you tried this?

"The strong are strongest alone", Lufgt Huron, Tyrant of Badab.
The Blood Reaver. Master of the Red Corsairs. Lord of the Maelstrom. Huron Blackheart.

"Life sucks when it gets in the way of Warhammer." - CGBSpender 
   
Made in nz
Speedy Swiftclaw Biker


Wellington, NZ

I'm in NZ too, where did you get the resin etc from??

"A fortress is built with blood and toil. Only by blood and toil may it be taken." Leman Russ. 
   
Made in us
Deranged Necron Destroyer


Northern Virginia, USA.

How do you remove the shoulderpads from the mould?


malfred wrote:Buy what you like.

Paint what you love.
 
   
Made in nz
Nurgle Chosen Marine on a Palanquin


Whangarei , New Zealand

@gitsplitta - feel free to PM any questions or post em here so everyone can benefit i guess

@styro - Sorry I mistyped I meant that I had used the product in you kit (smooth cast not smooth on) and that it worked well, the only thing was waiting overnight for the rubber to cure but patience is not one of my virtues
As for the lego yep they click togther tight enough the only bit you need to glue is the bottom row to the plasticard you are using as a base, havn't used a vibration table but glueing bits of sprue to extremeties as bubble traps can help to preserve details.

@hobofisherman - Search on Google for "topmark" they are a special fx and modelling supply distributor. ask for the pinkasyl starter kit for $20, they charge like $8 postage due to the nature of the chemicals and I have found that getting a couple of kits at the time spreads out the cost of that postage, you can buy bigger bottles of botht the silicone and the rubber as well of course.

@mew the face - At which point? the originals? I flex the base and crack them off the plasticard (this is how I remove the lego as well) If you line up the originals in the same way then you could theoretically pull the mold the opposite way and it will slide up and sideways, leaving the originals stuck to the plastic if you want. I prefer cracking the pads off the base then removing them from the silicone one at a time. As to how to remove the casts from the silicone then just lever them out with a knife or something similar, the silicone is very flexible so they pop right out.

 BobtheInquisitor wrote:
I tend to glue metal models with a combination of BSI cyanoacrylate and my tears of frustration.
 
   
Made in ca
Mekboy Hammerin' Somethin'


Styrofoam04 wrote:Nice tut! But it was a bit late for me. After I read ur sabers blog and Sersi's Slaaneshi Themed Daemon Army blog. So I started to google it and found a great place in Toronto called Sculpture Supply Canada. They were very helpful and I bought a starter kit for $45+tax. Going to make my first cast this weekend. Their site also has alot of how to and other information if anyone is interested


lol, I've totally got those guys bookmarked, but haven't made the trip downtown to pick any up yet. Lemme know how you like the kit.

   
Made in au
Road-Raging Blood Angel Biker


NSW, Australia

Nice tutorial Blackhand.

Beyond state of being mortal
The Dreadnote wrote:...Ultra mortalitas wins the thread.
Cheif Librarian Vaako wrote:...Terminator:I'm goin' in............. Whoa! man down!
Terminator 2:What happened?
Terminator:I tripped over a piece of string concealed in the bushes.
Emperor:
 
   
Made in gb
Avatar of the Bloody-Handed God


Inside your mind, corrupting the pathways

Pretty cool. I've been thinking of casting up some pretty small scale bits (some scartch built IG backpacks/grav chutes) and it is good to know it is fairly easy to cast such small items.

I've actually got my first mould curing at home right now (for some pannels for an IG single occupant orbital pod [ie drop pod ]), and judging by how sticky the mould was I think I will have trouble with removing it from the moulding clay I used to form the walls and base of my template

Good to see an alternate (and probably better) method

   
Made in ca
Veteran Wolf Guard Squad Leader


Ajax, ON. Canada

I don't mean to hijack your thread. But I poured the OOMOO 30 rubber mix last night! i'm trying my hand on a single-piece mould. I'm not sure if it's too advance, but oh well.

My box wasn't that great, so next time I'll use lego. In this kit you have to use a sealer. A few sprays and then brush with a soft brush into the detail. Either I'm too rough or my brush was not soft enough, because I kept breaking the pieces off my 'sprue'. Then you have to wait 10 min then apply another coat (of course another piece fell off and I had to re-glue). After the second coat you have to wait 20 minutes to dry before you add a coat of release agent(thank Jebus, nothing broke).

I finally get to mix the rubber! But I wasn't sure how much I needed. So I filled my box with water then poured it into a measuring cup 150ml exactly. Thats 75ml each part. Ok now what?! How do i measure each part without putting it in my (cooking) measuring cup? Bingo I remembered that I bought a children's Medical Measuring Syringe for like $2 to mix paint, but never used it. I didn't want this ruined either so i used it to pour exactly 80ml of water into a cup and i drew a line in it and repeated for a second cup. filled the cups up to the lines of part 'A' and 'B'. mixed for 3 min, then poured it into another cup and mixed for another 3 min. Yes! Time to pour. I slowly pour it to the lowest point and let the liquid envelope the model. All thats left to do was watch it cure...for 6 hours.

I cant wait to get home after work and take it apart. Cutting it open will take alot of effort. I'll let you know what happened.

"The strong are strongest alone", Lufgt Huron, Tyrant of Badab.
The Blood Reaver. Master of the Red Corsairs. Lord of the Maelstrom. Huron Blackheart.

"Life sucks when it gets in the way of Warhammer." - CGBSpender 
   
Made in nz
Nurgle Chosen Marine on a Palanquin


Whangarei , New Zealand

Sounds like you have a fair idea of what you are doing Styro,

TBH I have never thought of using water to find out how much rubber I would need it has always been a have a go and see process for me but its a genius move!

One suggestion would be to mark the 75mls on the side of the cup then pour in the other 75mls on the SAME cup. You can then pour in Part A up to the line and pour Part B into part A directly, this way you will not leave a residue of part B behind in a second cup, the amounts will be spot on and when the rubber left in the measuring cup cures you can just pull it out and the cup is clean and ready to use again

When you cut out the original cut in a zig zag motion not a straight line, the two halves will mesh back togther better and will make the mold line up as oipposed to a straight cut which can slip when you pour in the resin.

This is where the lego box is so handy as it makes a uniform shape which you can build back around the mold prior to pouring the resin , the lego bricks hold the two halves togther neatly and saves on using rubber bands to keep it togther during curing.

Good luck!

 BobtheInquisitor wrote:
I tend to glue metal models with a combination of BSI cyanoacrylate and my tears of frustration.
 
   
Made in ca
Veteran Wolf Guard Squad Leader


Ajax, ON. Canada

BLACKHAND wrote:One suggestion would be to mark the 75mls on the side of the cup then pour in the other 75mls on the SAME cup. You can then pour in Part A up to the line and pour Part B into part A directly, this way you will not leave a residue of part B behind in a second cup, the amounts will be spot on and when the rubber left in the measuring cup cures you can just pull it out and the cup is clean and ready to use again

Thank I'll try this next time. In the instructions recommend mixing then pouring into another cup then mixing again. So I poured it back in cup 'B' to mix up that leftover residue

BLACKHAND wrote:When you cut out the original cut in a zig zag motion not a straight line, the two halves will mesh back togther better and will make the mold line up as oipposed to a straight cut which can slip when you pour in the resin.

yes in Sersi's blog he mention that too thanks

BLACKHAND wrote:This is where the lego box is so handy as it makes a uniform shape which you can build back around the mold prior to pouring the resin , the lego bricks hold the two halves togther neatly and saves on using rubber bands to keep it togther during curing.

I really wish i did this. Gonna have to tear up my box and use the rubber bands. Tho I'm worried the rubber bands might cause it to warp

ooo still cant wait to get home

This message was edited 1 time. Last update was at 2010/07/29 21:57:01


"The strong are strongest alone", Lufgt Huron, Tyrant of Badab.
The Blood Reaver. Master of the Red Corsairs. Lord of the Maelstrom. Huron Blackheart.

"Life sucks when it gets in the way of Warhammer." - CGBSpender 
   
 
Forum Index » Painting & Modeling Tutorials
Go to: