| Author |
Message |
 |
|
|
|
|
Advert
|
Forum adverts like this one are shown to any user who is not logged in. Join us by filling out a tiny 3 field form and you will get your own, free, dakka user account which gives a good range of benefits to you:
- No adverts like this in the forums anymore.
- Times and dates in your local timezone.
- Full tracking of what you have read so you can skip to your first unread post, easily see what has changed since you last logged in, and easily see what is new at a glance.
- Email notifications for threads you want to watch closely.
- Being a part of the oldest wargaming community on the net.
If you are already a member then feel free to login now. |
|
 |
2011/05/18 09:18:17
Subject: Tervigon conversion log - another creepy crawler.
|
|

Raging Ravener
|
So I have a tournament that's going to require 2 tervigons, yet sadly I only have the one. So when I set about to build another I got a few requests to document the process.
Here's a spoiler, what the first one looks like:


so this time i wanted to keep the same look, but have the abdomen behind the tervigon as if it was moving rather than laying.
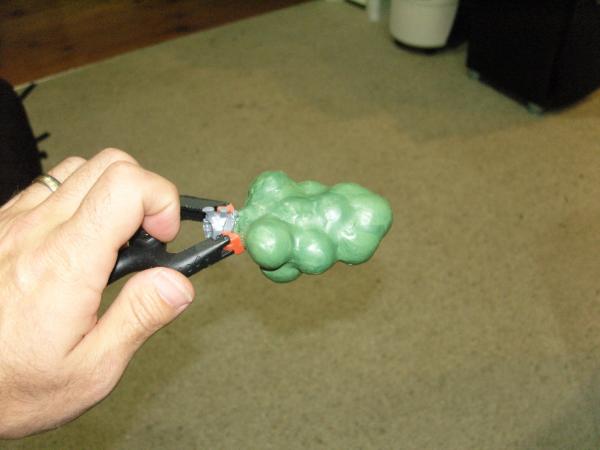
Right, so step one: cut a carnifex in two. For this one I bought one off trademe (kiwi ebay) and it had been glued together rather well, but, no worries. a good saw solves most problems:
I cut out 3 pieces of plasticard (2mm or so) around the same size as the torso
and then laminated them together using tamiya plastic brush on glue and clamps.
I then cut them to shape using my rotozip dremel bit. Not a fine instrument by any means but I didn't have access to a scroll saw... :(
Glue the whole thing together and you've got a well expanded carnifex torso.
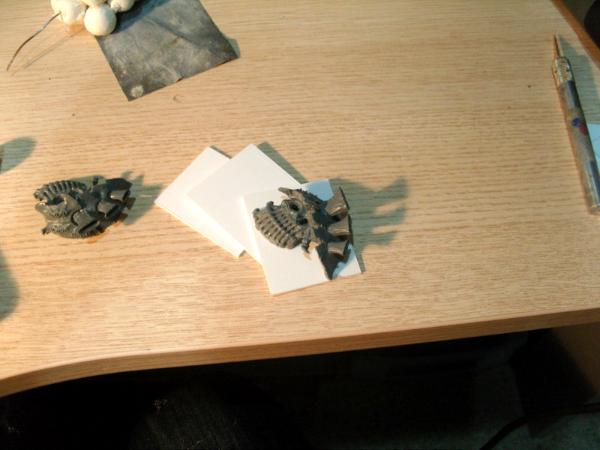
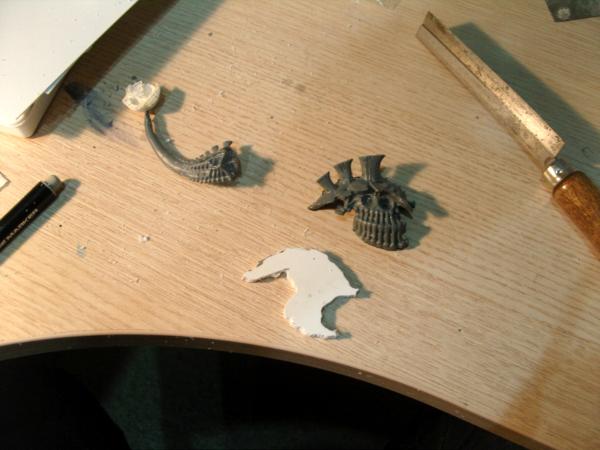
Right, now I need a second row of vents. On the first one, I used the plasticard and filed / carved / futzed about to try and get a reasonable looking simulacrum of the originals. Wasnt all that happy with that so I went another route:
I recently picked up some Oyumaru and since I had the bits from a large tyranid I thought i'd get creative :
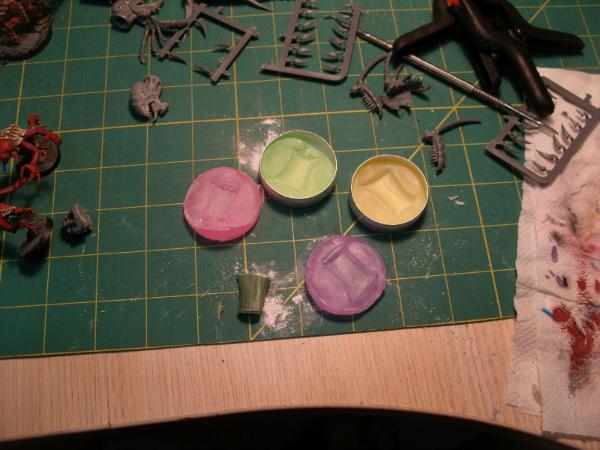
and since i'm cheap i filled some of the space in the moulds with sprue.
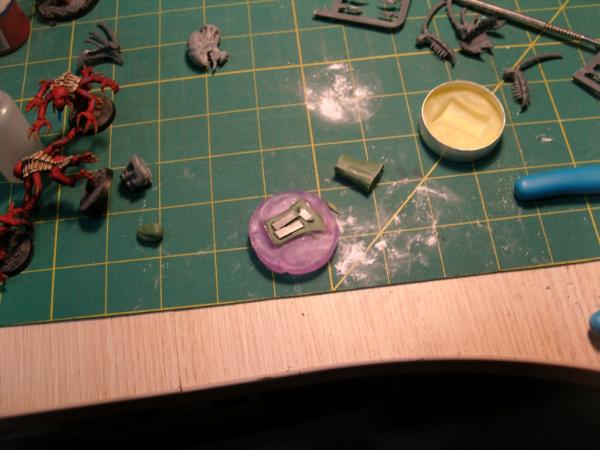
and the results:
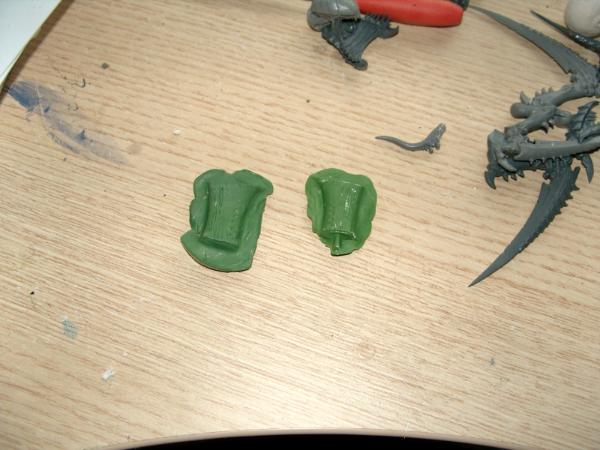
So then it was simply a case of attaching one to the other and greenstuffing the result:
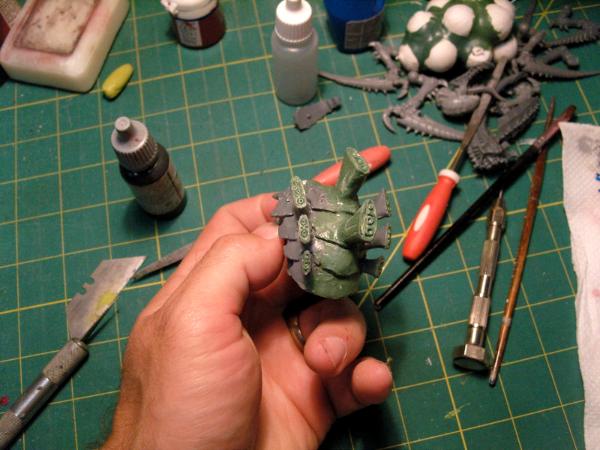
here you can see that I filled the stock vents with greenstuff and had a little play to match the moulded ones. Think i did ok.
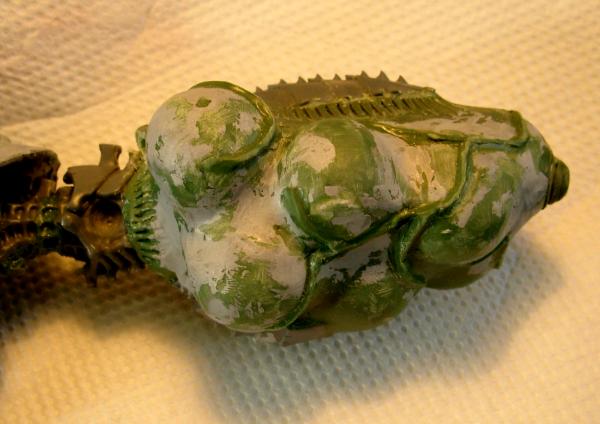
In the mean time, I was working on the tail section. Starting with paper balls I found at Spotlight (kiwi Michaels)
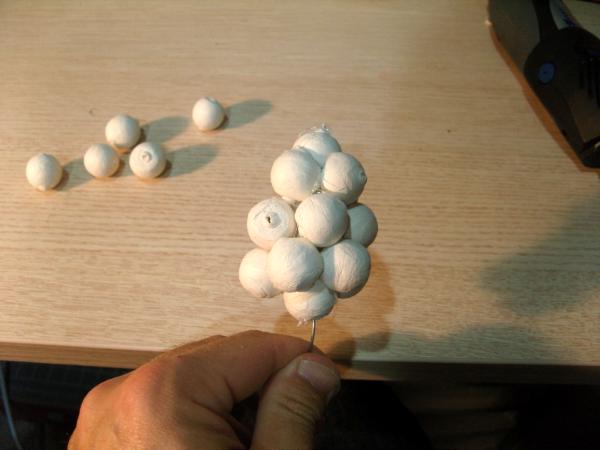
I strung 4 of them on a piece of wire and used a hot glue gun to attach the rest of the balls to get the shape I was looking for (should be about the same shape as the other)
I've since started filling the gaps with greenstuff.
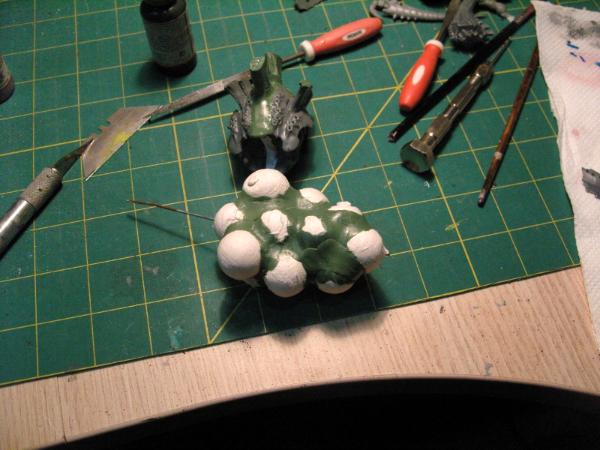
I'll be rolling out some very thin sheets of greenstuff to cover the the rest and smooth the whole thing out.
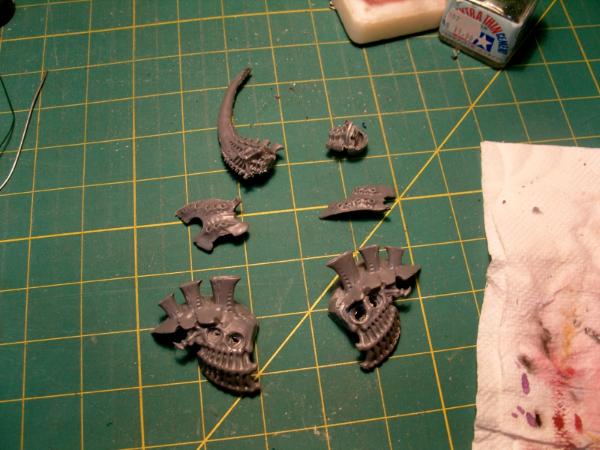
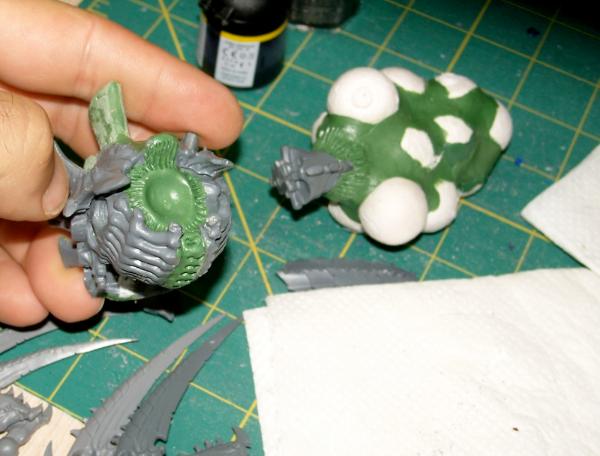
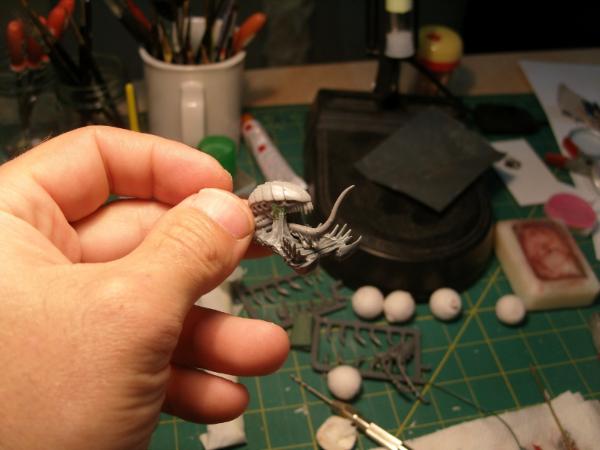
Finally the head bits started getting chopped up:

This will be more or less the same as the other one. The bits are actually glued now waiting for the gaps to be filled.
and that's where I'm up to. I need to have this ready for the 6th of June so expect some quick updates 
Unfortunately this means my Heirophant is on hold until I finish this guy up.
|
|
|
|
 |
|
2011/05/18 12:04:25
Subject: Tervigon conversion log - another creepy crawler.
|
|

Decrepit Dakkanaut
|
Good stuff! Always impressed by the boldness of your efforts.
|
Theophony"... and there's strippers in terminator armor and lovecraftian shenanigans afoot."
Solar_Lion: "Man this sums up your blog nicely."
Anpu-adom: "being Geek is about Love. Some love broadly. Some love deeply. And then there are people like Graven. |
|
|
|
|
2011/05/18 15:44:42
Subject: Tervigon conversion log - another creepy crawler.
|
|

Grovelin' Grot Rigger
|
One of the best tervigons I have seen to date, it's not just another carnifex with some greenstuff lumps on its underside.
Very very nice work!
|
Armies:
 Space Wolves - 2000 pts (3000 pts with very very little proxy) Space Wolves - 2000 pts (3000 pts with very very little proxy)
 Orks - 6000 pts Orks - 6000 pts
 Dark Eldar - 1000 pts Dark Eldar - 1000 pts
Ork Log
Death Fears Me! The central Oregon tournament series!
Click here! |
|
|
|
|
2011/05/18 16:23:51
Subject: Tervigon conversion log - another creepy crawler.
|
|
Drop Trooper with Demo Charge
|
Very cool Man very creepy and oddly realistic too!
|
 "Dahl makes weapons for professional mercs. They're heavy, accurate and effective, assuming you are strong enough to hold one!" - Marcus Kincaid "Dahl makes weapons for professional mercs. They're heavy, accurate and effective, assuming you are strong enough to hold one!" - Marcus Kincaid
82-PVT Maa Squad II Platoon Gamma of the 222nd catachan transferred now 134-Sniper Maa
Hoping for storm trooper training 
 my IG squad beats your squad! my IG squad beats your squad!
 Oh $#!% Oh $#!% |
|
|
|
|
2011/05/18 16:38:07
Subject: Tervigon conversion log - another creepy crawler.
|
|

Chaplain with Hate to Spare
|
Awesome, love what you've created here! looks fantastic and the egg sac is what i imagined when i read the codex, plus your great painting and scheme helps it look even better, i'll definitely be watching this to see how you finish it off!
Nerdfest09
|
 Flesh Eaters 4,500 points Flesh Eaters 4,500 points

" I will constantly have those in my head telling me how lazy and ugly and whorish I am. You sir, are a true friend " - KingCracker
"Nah, I'm just way too lazy to stand up so I keep sitting and paint" - Sigur
"I think the NMM technique with metals is just MNMM. Same sound I make while eating a good pizza" - Whalemusic360 |
|
|
|
|
2011/05/22 08:58:00
Subject: Re:Tervigon conversion log - another creepy crawler.
|
|
Raging Ravener
|
It's update time! I've actually done two nights worth of work on this lovely lady,
First up, finishing up the basics of the torso and getting started on the egg sacks:
A couple of notes: managed to make the neck look reasonably ok. I've also detailed the underside, though I'm not as sure about it yet.
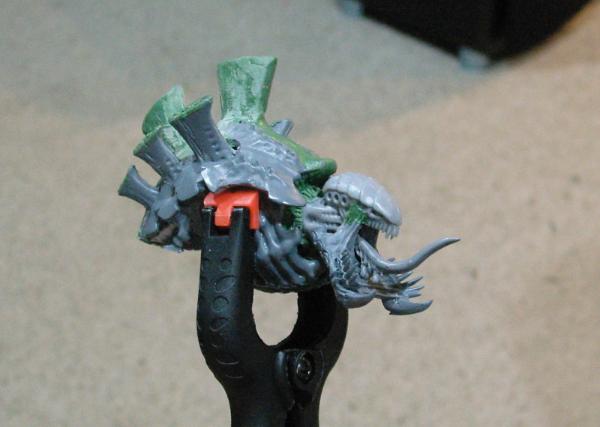
Got the head / face together and applied some greenstuff..
I chose to use the old acid maw tongue on this one instead of the Malwoc on the other Tervigon. I like the look though I wonder how she closes her mouth!
And now some skin! after filling in the gaps between the paper balls (can be seen on the first photo of the post)
I used a rolling pin, some baking paper / parchement paper / Wax paper (depending on where you're from) and got it nice and thin, then applied and with lots of effort and spit (what else do you use to lube up your fingers to greenstuf?  ) it's reasonably smooth as is, though I suspect I'll need to do some more "patching" before I can work on the details.
While I was at it, I had some spare bits from one of my Trygons and thought it would look nice on the underside of the sack.
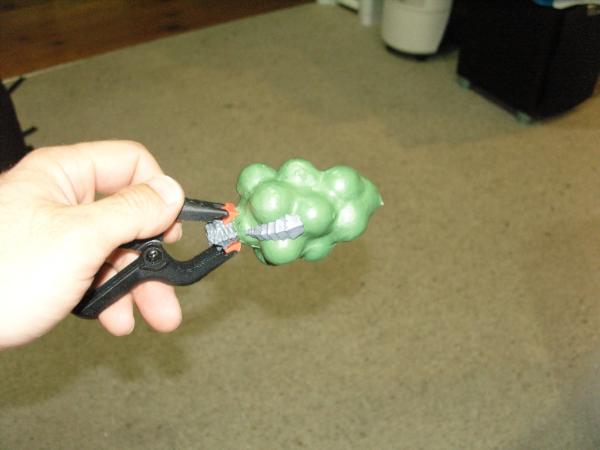
And finally I got the head attached to the torso:
Things are starting to come together
I'm actually no longer worried about my timelines, I'm well in control of this project and hope to have all the conversions done by mid week. Getting it mounted on it's valkrie base may be a bit challenging as it's rather large.
|
|
|
|
|
|
2011/05/23 00:24:53
Subject: Re:Tervigon conversion log - another creepy crawler.
|
|
Raging Ravener
|
So i just found all the spiky bits from the two trygon kits I have lyiing around and I wa sthinking of adding them to the egg sack. good idea or will it be too much? Now's the time to decide before I detail the sac.
|
|
This message was edited 1 time. Last update was at 2011/05/23 00:25:07
|
|
|
|
|
2011/05/23 10:25:54
Subject: Tervigon conversion log - another creepy crawler.
|
|
Decrepit Dakkanaut
|
Lovin' it. As for lubing gs: Vaseline. Those little mini tins that girls use like lipgloss are particularly handy.
|
Theophony"... and there's strippers in terminator armor and lovecraftian shenanigans afoot."
Solar_Lion: "Man this sums up your blog nicely."
Anpu-adom: "being Geek is about Love. Some love broadly. Some love deeply. And then there are people like Graven. |
|
|
|
|
2011/05/30 00:28:36
Subject: Re:Tervigon conversion log - another creepy crawler.
|
|
Raging Ravener
|
update time! I've got 4 days left to finish painting 10 gargoyles and this bad boy so better get a MOVE ON!
Missed one step with the camera, smoothing out the basic egg sac shape and adding the armor padding to the top of it. Not particularly interesting to photograph and i just forgot.
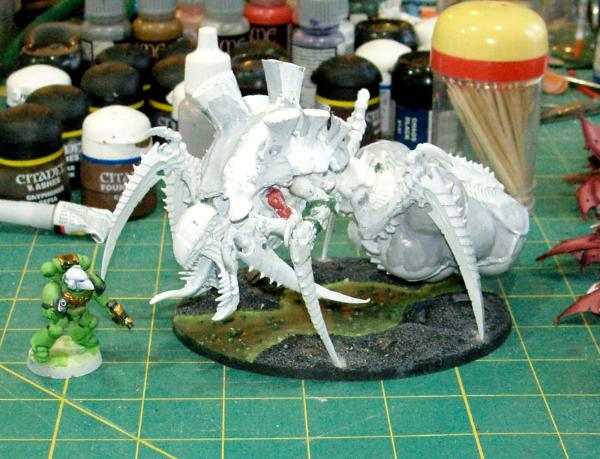
So here's where I am now. I've got the torso and egg sac attached and some basic GS work to make the join look OK. Not super happy with it, but given this was a recycled carnifex to begin with I'll live with it:
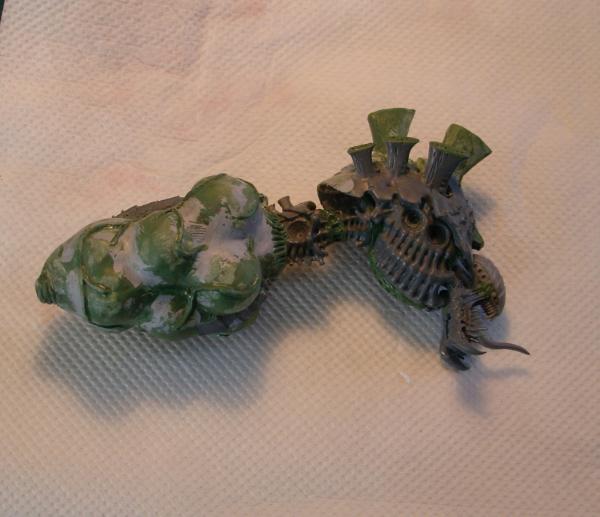
That's where we stand right now. You can see the veins i've sculpted onto the egg sac the armor and the joint between the two. I've been spending a lot of time trying to get the surface as smooth as possible and so far haven't been having a ton of luck. i think I'll use some more tamiya putty once the whole thing is assembled after I prime to get any spots that show up over the white primer
details of the sphincter I've sculpted. Where I had to sand off a few finger prints makes it look a little naff, but I'm pretty sure that once primed it'll look ok.
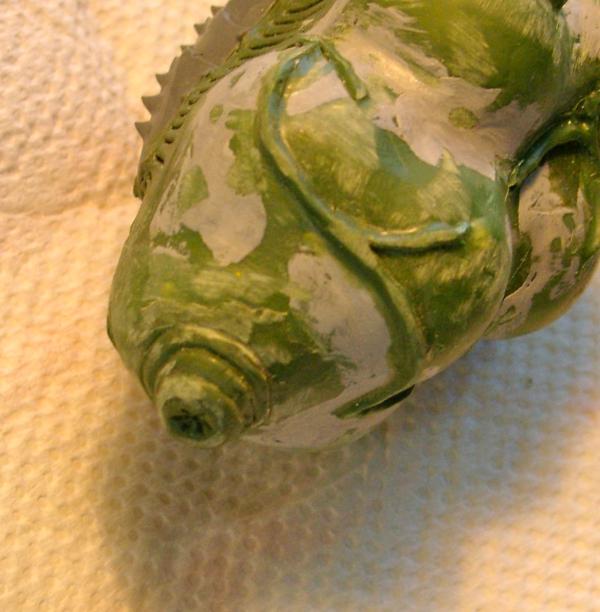
more details on the veins. I really need to get better at smoothing greenstuff, but it'll do for now. We'll see how the armor plate turns out. I tried to texture it a bit, and, after 3 different styles, decided on whats on there. Not sure it'll work but there's always more greenstuff later
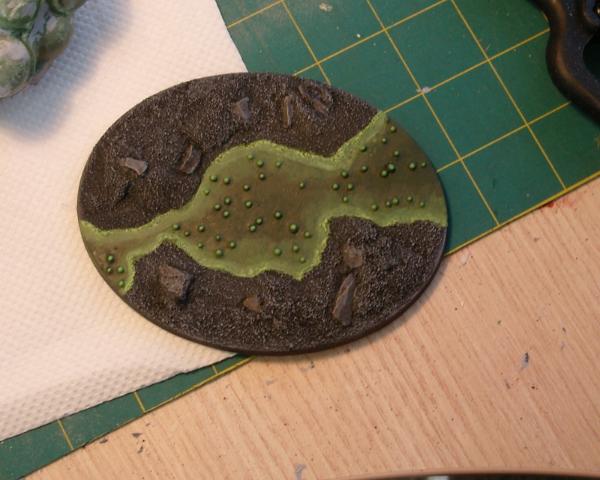
And finally, painted up the base that she'll go on. It's from Iron Halo in their Fens range and it's what i've been using for most of the army.
|
|
|
|
|
|
2011/05/30 01:02:15
Subject: Tervigon conversion log - another creepy crawler.
|
|
Nasty Nob
|
nice nice tervigons 
|
|
|
|
|
|
2011/05/30 07:23:25
Subject: Tervigon conversion log - another creepy crawler.
|
|

Regular Dakkanaut
|
mmmmh, interessing! and a very good job!
|
|
|
|
|
2011/06/06 04:06:45
Subject: Re:Tervigon conversion log - another creepy crawler.
|
|
Raging Ravener
|
Alright folks we're almost there! Sorry for the delay but I was building this for NiCon (Hamilton, NZ Tournament) and had to rush off to the tournie before I could post the pictures.
Got the legs attached and had to do some last minute emergency greenstuffing. Notice that there's holes for the claws to sink into. That way I'm using the claws as the pins that hold it to the base. There's a fair amount of work on the waist to attach the two together. I'm not particularly happy with that bit. May redo it at a later date.

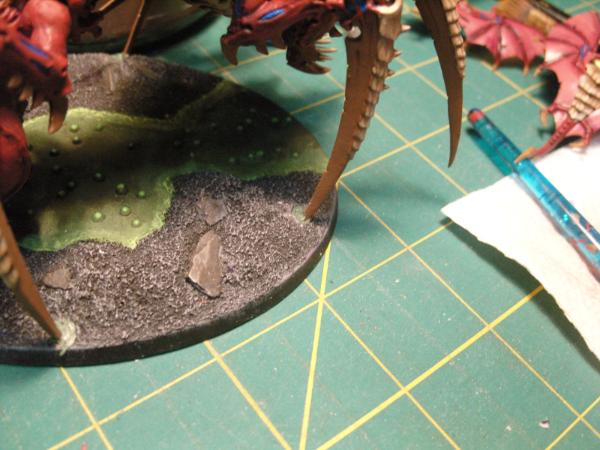
And then of course I had to paint it! To be honest, there' still another couple of hours of highlighting, details and clean up to do but I thought I'd share some photos of the model as it was at its "unveiling" at NiCon
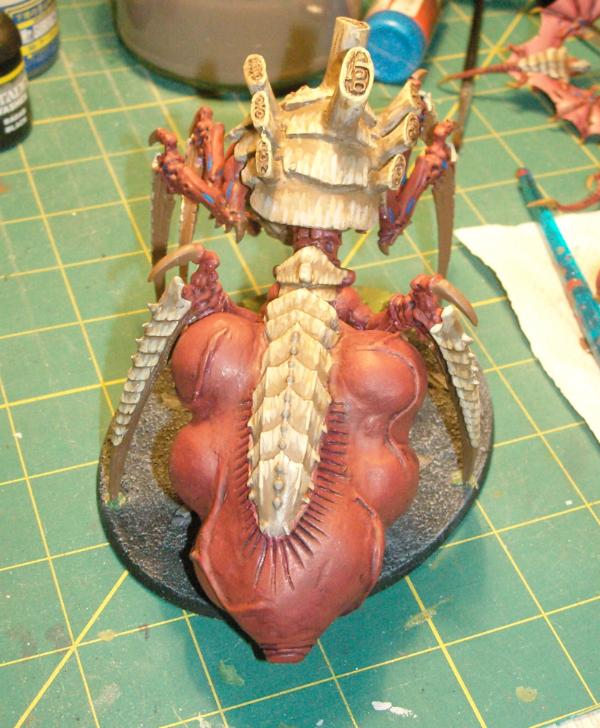
Detail of the egg sack.
Some shots next to it's sister:
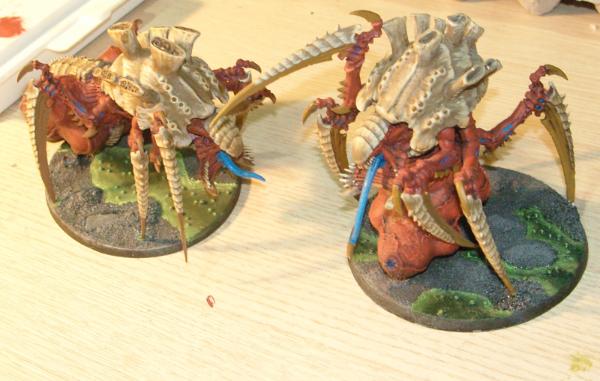
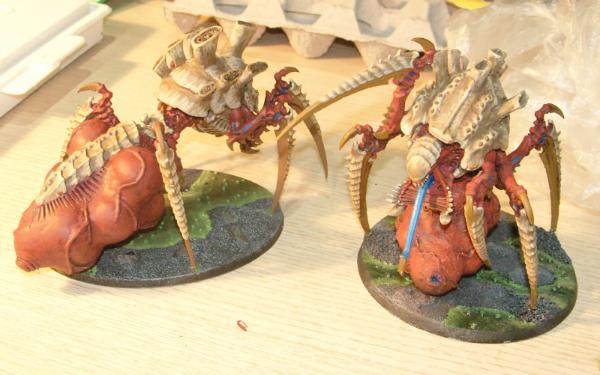
So there you have it.
Left to do:
Highlight the sack and rest of the skin tone
Paint the claws properly
touch up the base, gloss the liquid.
Look for the completed photos in the showcase!
|
|
|
|
|
|
2011/06/06 04:09:58
Subject: Tervigon conversion log - another creepy crawler.
|
|

Blood Angel Chapter Master with Wings
|
Man, that newest Tervi looks amazing, very new and fresh and insectile, while still looking perfectly natural next to other nids.
Great work!
|
|
|
|
|
|
2011/06/06 04:24:26
Subject: Tervigon conversion log - another creepy crawler.
|
|
Raging Ravener
|
thanks! that means a lot to me coming form you. Big fan of your work!
Should get some better photos and possibly a few of the rest of the swarm soon enough. I'll throw it in the showcase forum though.
|
|
|
|
|
|
2011/06/06 04:30:08
Subject: Tervigon conversion log - another creepy crawler.
|
|
Frightening Flamer of Tzeentch
|
You executed the feel of the Tervigon very well. Very inventive with the paper balls to form the birthing "sac". I love seeing everyone's different interpretations on the same idea.
|
|
|
|
|
|
2011/06/06 05:27:33
Subject: Tervigon conversion log - another creepy crawler.
|
|
Dakka Veteran
|
Love it. It's got a real gribbly feel to it. I didn't really appreciate from the first pics how big the first one was!
|
|
|
|
|
|
2011/06/07 03:07:59
Subject: Tervigon conversion log - another creepy crawler.
|
|
Raging Ravener
|
yeah, she's quite big. I figured so long as the circumference of the base was the same on both, it would be fairly safe to have one on a valk base and one on a much oversized (120mm) but either way they are huge.
I think volumetrically they compare well to the trygon and are larger than the tyrant and / or carnifexes.
Nice to get some use out the two carnies I bought in 4th ed but never got to build
|
|
|
|
|
|
2011/06/07 03:27:06
Subject: Tervigon conversion log - another creepy crawler.
|
|
Nurgle Predator Driver with an Infestation
|
Looks lovely.
|
|
|
|
|
|
|


