Forum adverts like this one are shown to any user who is not logged in. Join us by filling out a tiny 3 field form and you will get your own, free, dakka user account which gives a good range of benefits to you:
No adverts like this in the forums anymore.
Times and dates in your local timezone.
Full tracking of what you have read so you can skip to your first unread post, easily see what has changed since you last logged in, and easily see what is new at a glance.
Email notifications for threads you want to watch closely.
Being a part of the oldest wargaming community on the net.
If you are already a member then feel free to login now.
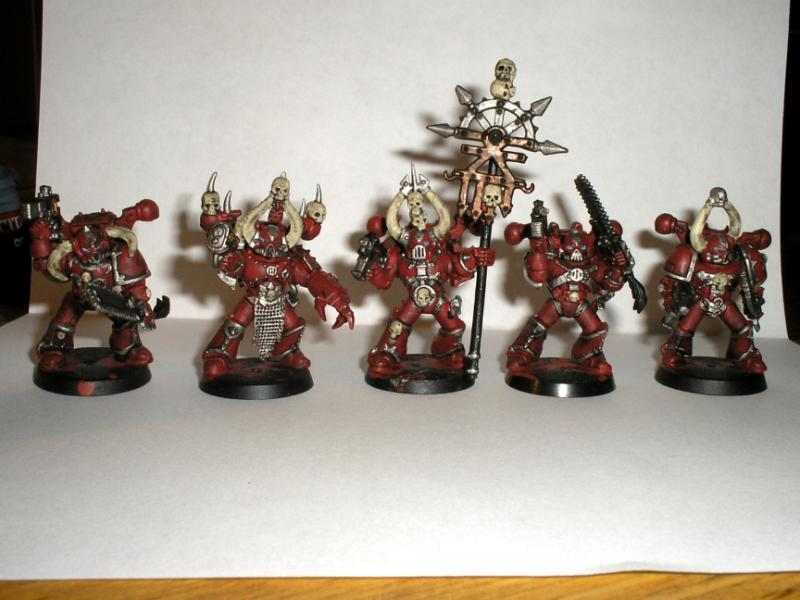
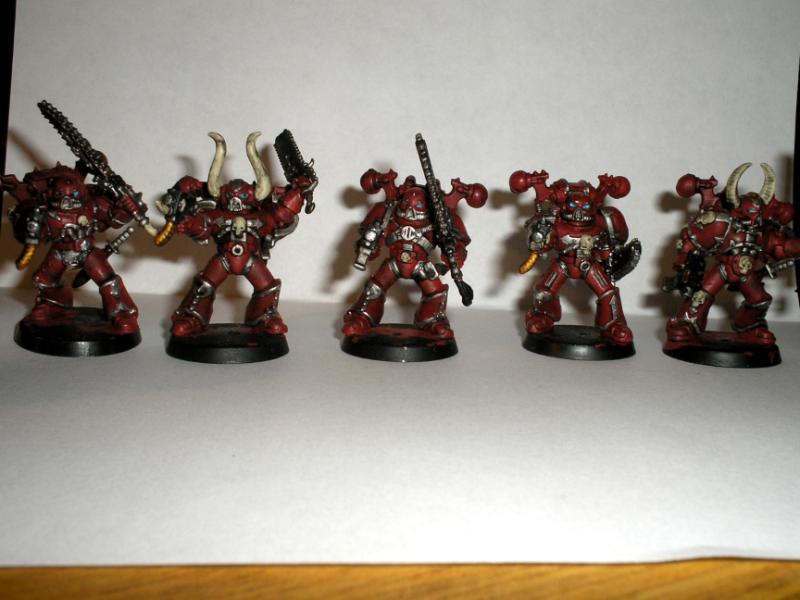
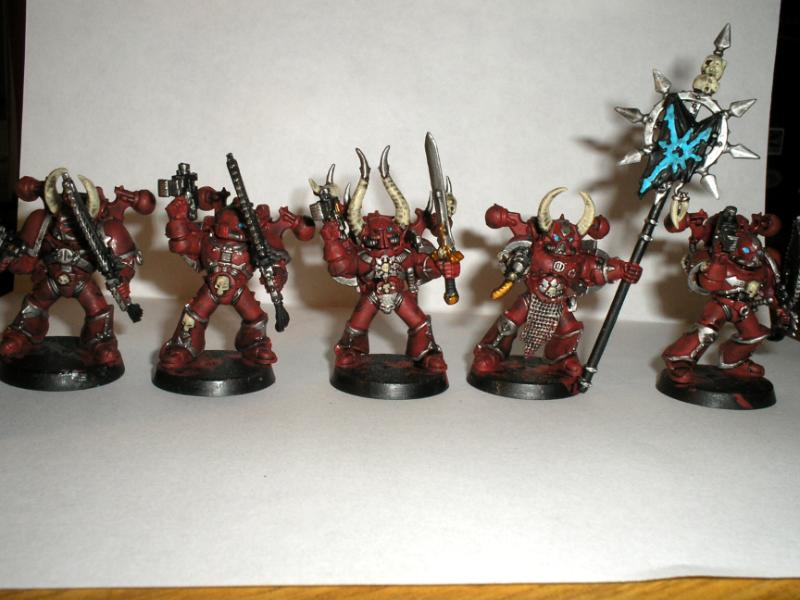
I have arrived at my 2000th post here on Dakka, so I thought I would start a P&M blog to celebrate. I have quite a few armies, mostly bulid and semi-painted and I hope that this blog will spur me on to paint more models and help me improve my painting. I hope that you enjoy seeing my efforts, and I look forward to hearing your compliments and criticisms!
Without further ado, here are a few of my more recently completed models:
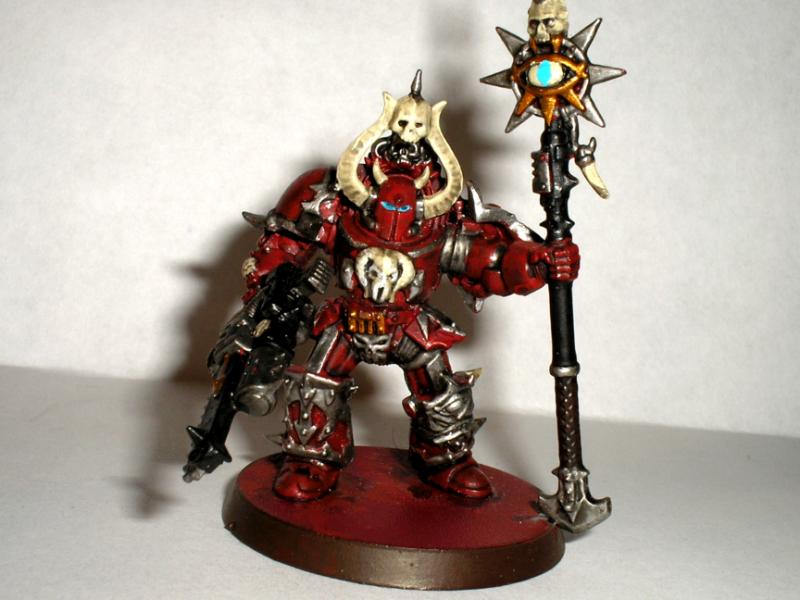
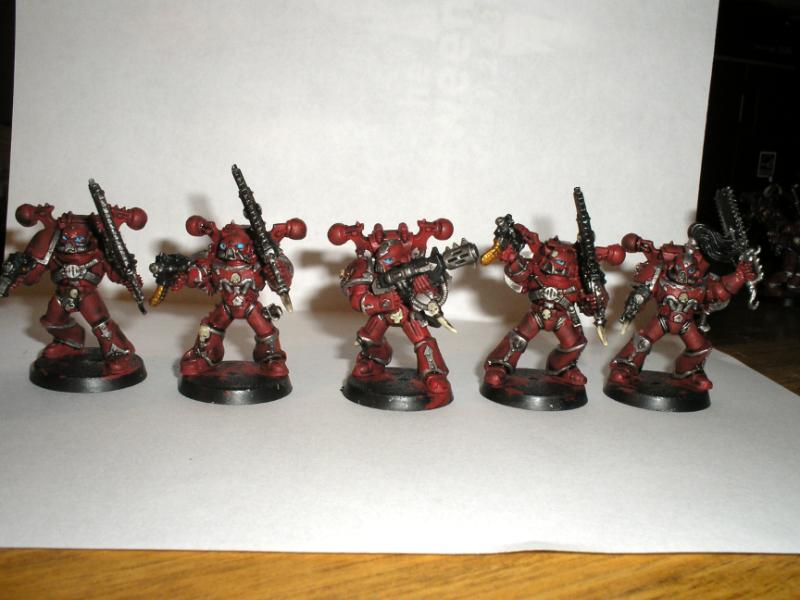
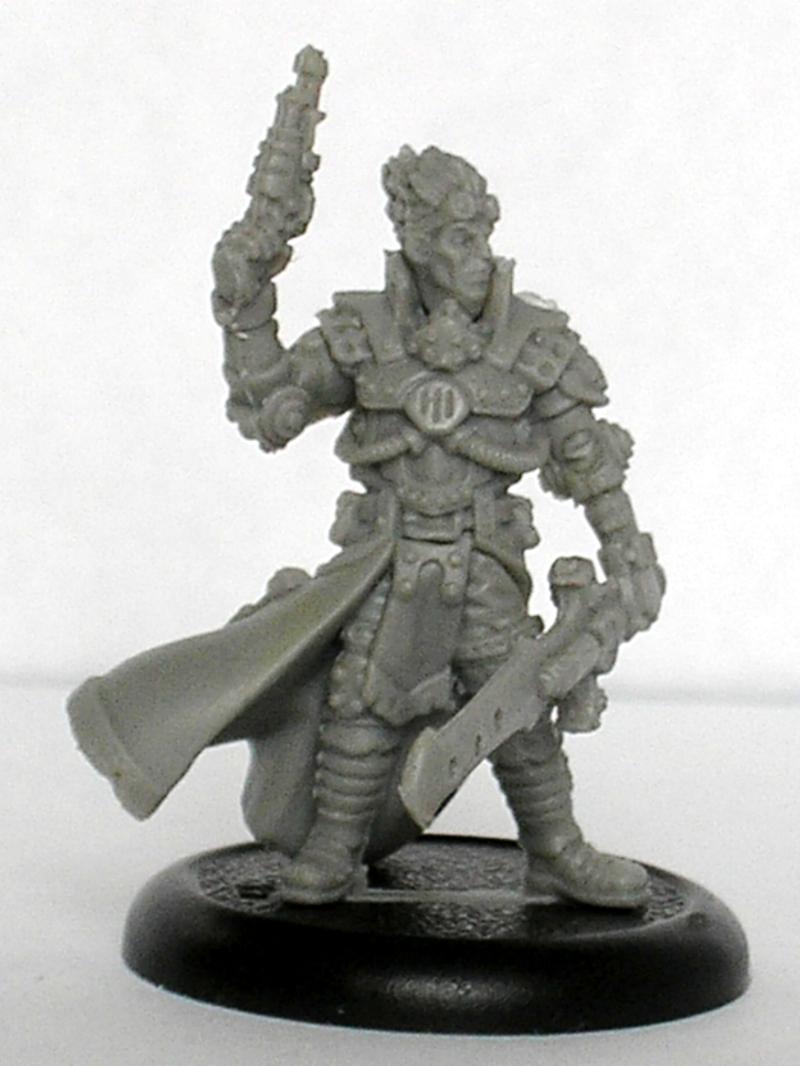
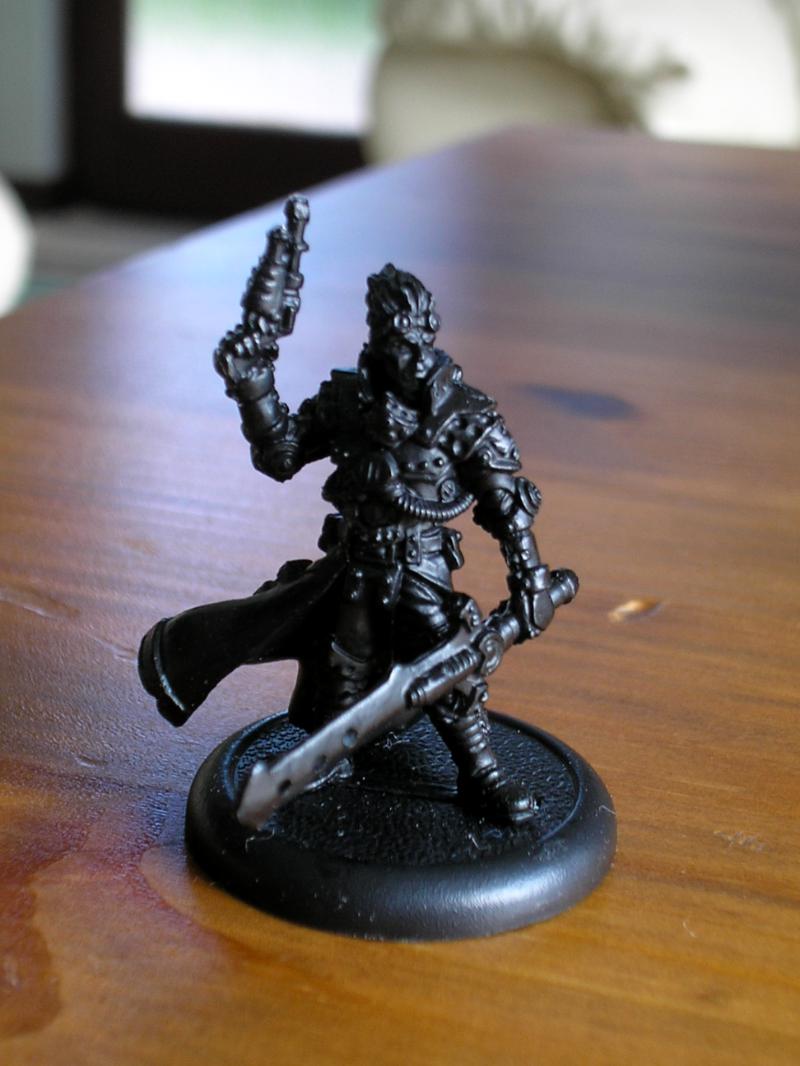
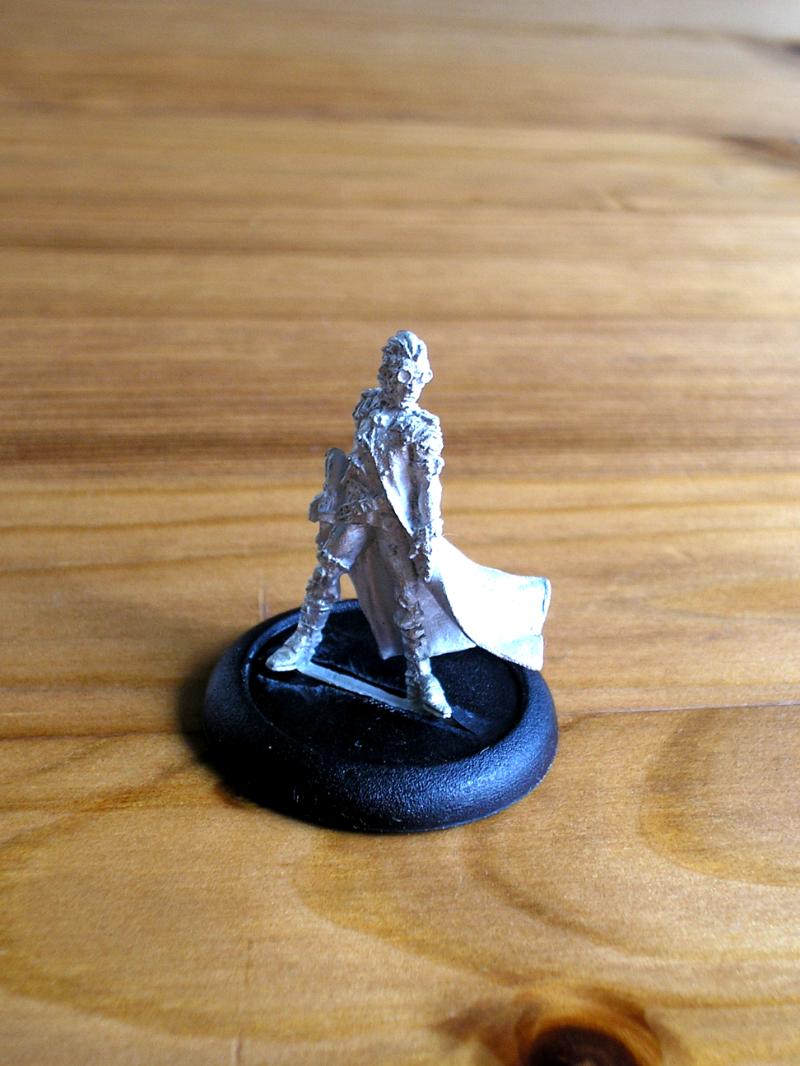
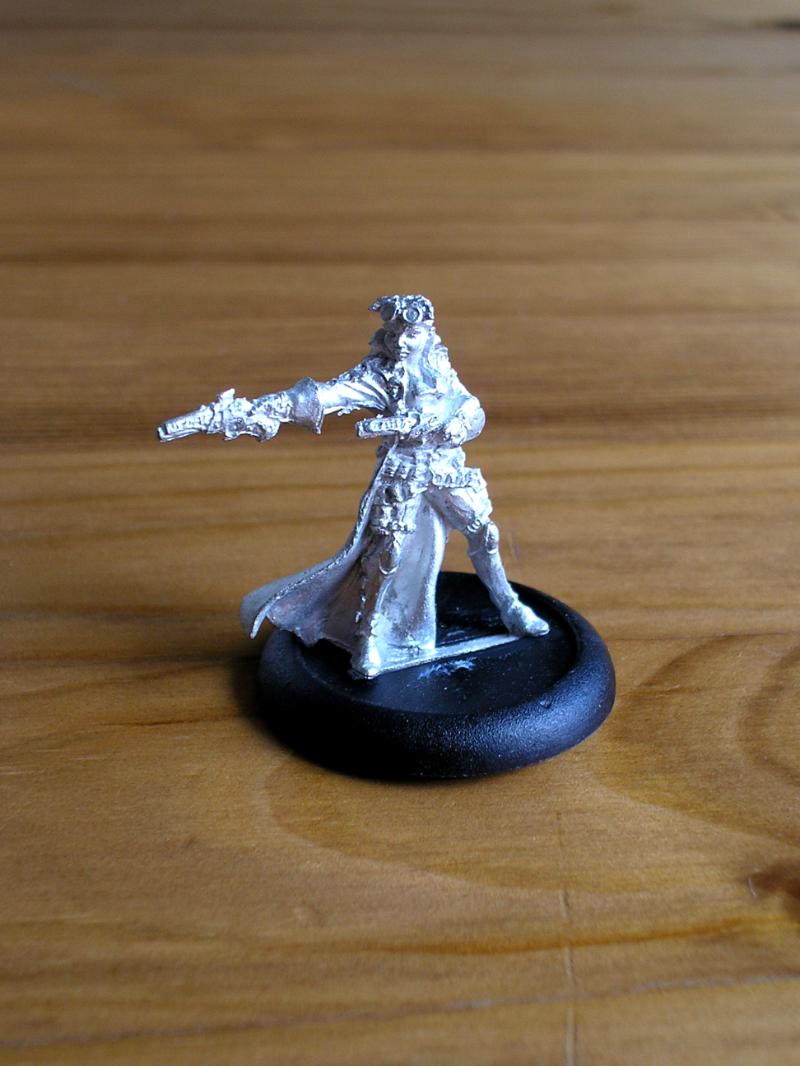
My Word Bearers Sorceror:
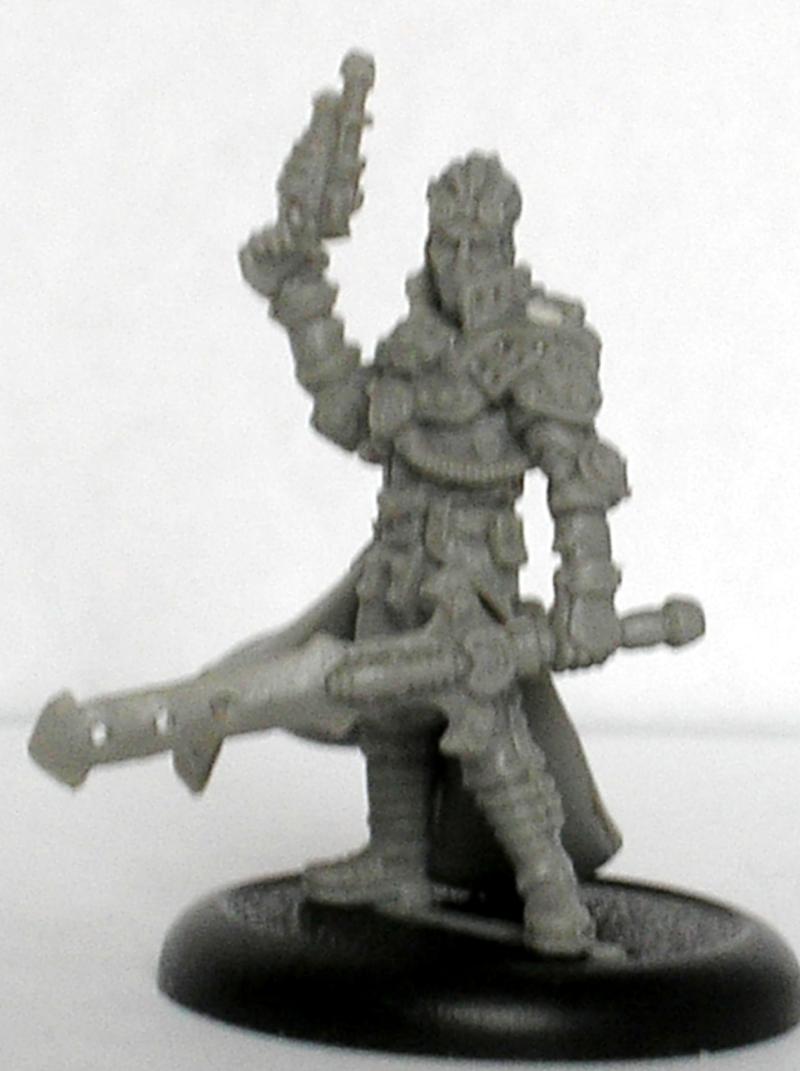
And some of my Word Bearers Marines:
This message was edited 6 times. Last update was at 2012/12/06 18:12:21
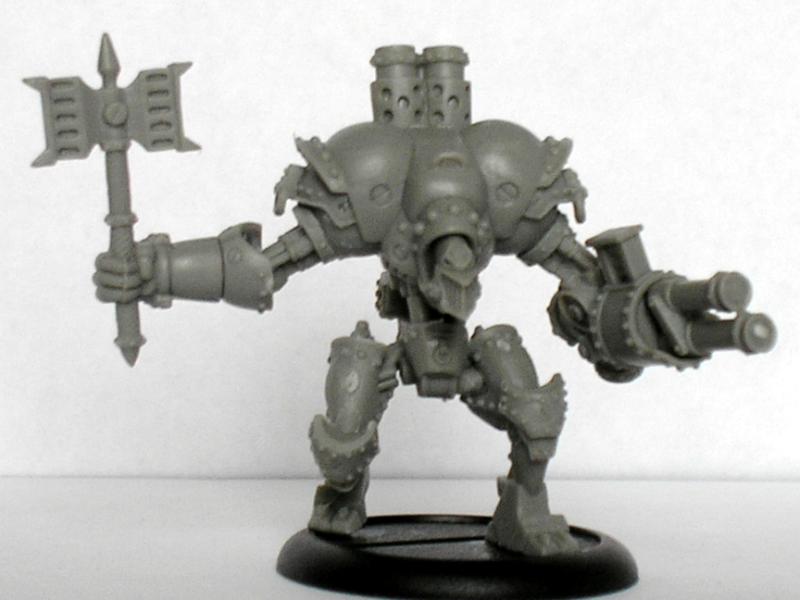
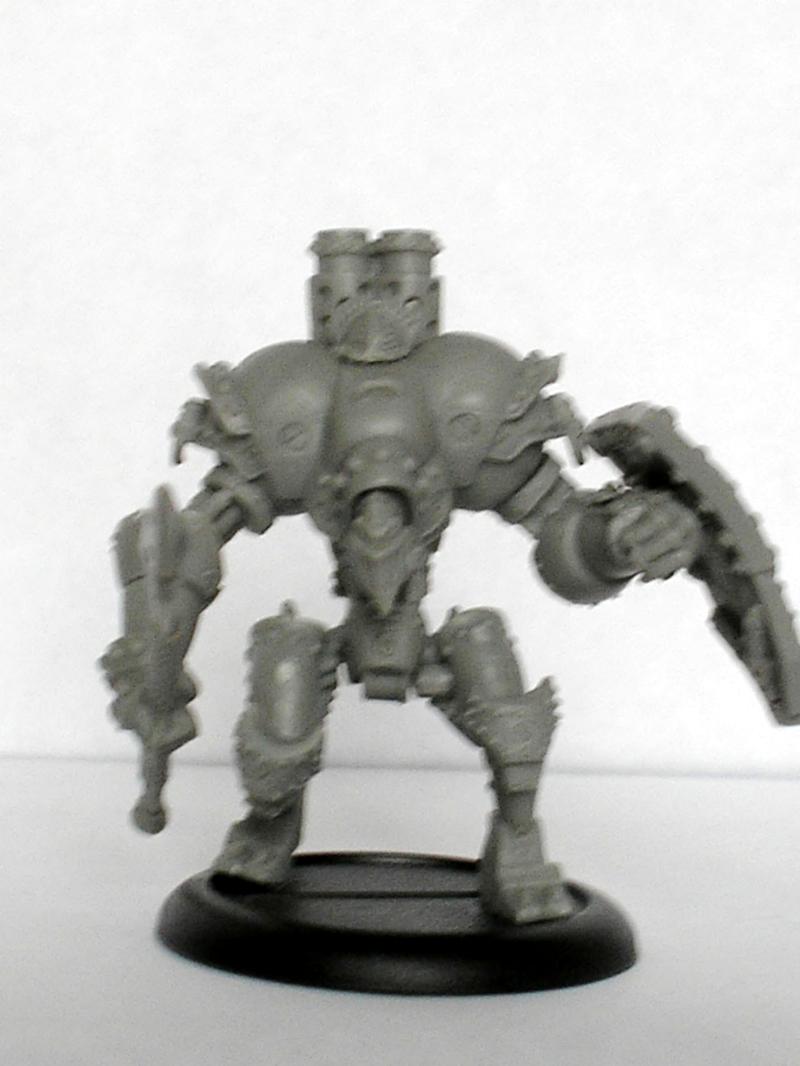
Right, finally got my hands on the Cygnar battlebox I ordered today. Its contents were:
-1 Commander Coleman Stryker (plastic)
-1 Ironclad Heavy Warjack (plastic)
-1 Lancer Light Warjack (plastic)
-1 Charger Light Warjack (plastic)
-1 Set of Quickstart rules
-1 Mini No Quarter Magazine
I should have them built by the end of the day, pictures to follow!
Automatically Appended Next Post: So the kits are built. These were the first Privateer Press models that I have assembled, and I really enjoyed doing so. Overall, there were few mould lines in need of scraping and the kits went together quite easily, not much head scratching was involved. Because PP use a different kind of plastic to GW the models were assembled with superglue, rather than plastic glue. However, despite my inherent clumsiness and a couple of "nearly" moments I managed to avoid sticking my fingers together/to the models!
When assembling the 'jacks I found that it was best to glue the legs, torso, head and any torso attachments together (not the arms at this stage) before attaching the model to its base. Attach the arms last to allow you to pose the model.
Here's a few pics and my thoughts on the individual models:
The Ironclad.
This was the largest model in the kit, and was the first model that I assembled. There were few mould lines that were easily dealt with. There are a couple of small gaps between the pipes that connect the boiler to the hull of the 'jack, but they will be easily fixed with green stuff.
The Charger
The Charger went together fairly easily and most of the parts fitted well. I had some bother attaching the legs of this model, and again there were some small gaps that will need filled with green stuff.
The Lancer
The Lancer again went together quite easily. It probably had the fewest mold lines of any of the models in the battlebox. I had trouble with the legs of this model as well, as the hull is the same as that of the Charger. When attaching the shield arm I found it was easiest to stick the arm brace to the back of the shield, before attaching the shield and arm brace to the forearm. I then stuck this sub assenbly to the upper arm and glued the whole thing onto the shoulder. This model is probably my favourite model in the battlebox.
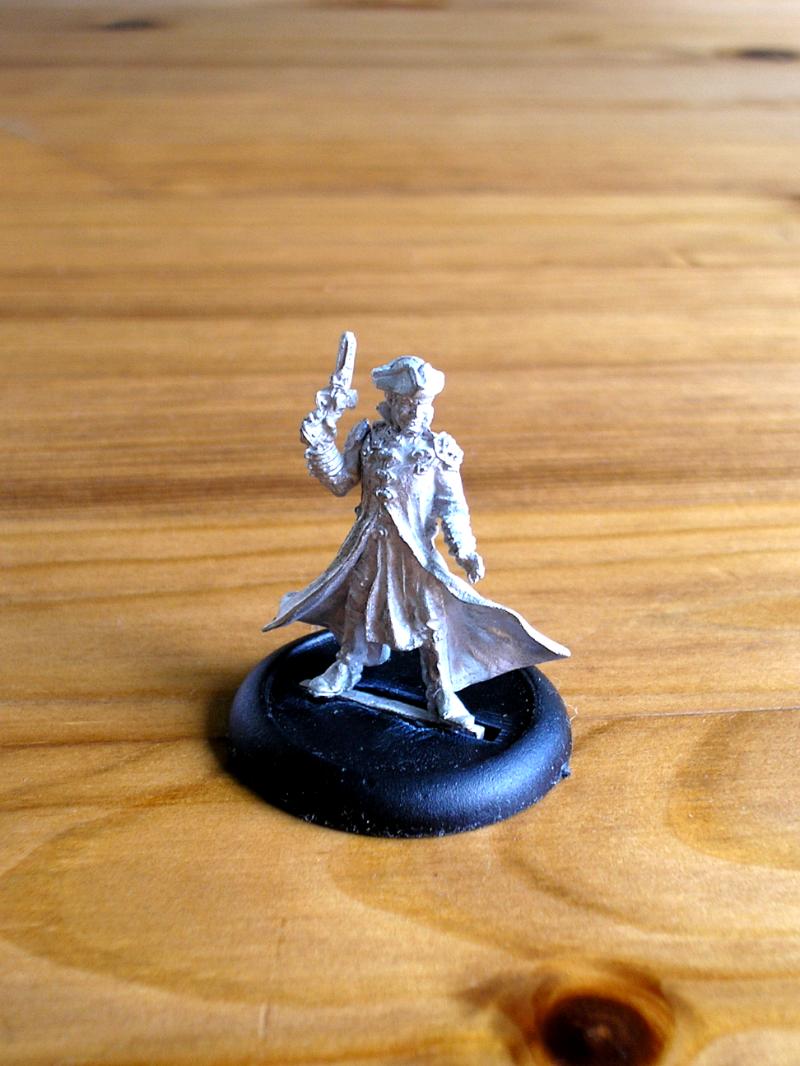
Commander Coleman Stryker
This model definately had more flash and mould lines than any of the other models in the battlebox, but this is probably due to the model having more detail than the warjacks. I had no problems assembling Stryker, but it is probably easier to assemble the whole model before attaching him to the base, to make it easier to attach his sword.
That's all my models for today, hope you enjoyed seeing them!
This message was edited 1 time. Last update was at 2012/05/15 16:14:42
Those CSM are great! I am a particular fan of the eye on the Sorceror's staff, though I am having a hard time seeingas it is rather bright. I'll get around that though, don't worry
Anyway
I'm celebrating 8 years on Dakka Dakka!
I started an Instagram! Follow me at Deadshot Miniatures! DR:90+S++G+++M+B+IPw40k08#-D+++A+++/cwd363R+++T(Ot)DM+ Check out my Deathwatch story, Aftermath in the fiction section!
Credit to Castiel for banner. Thanks Cas!
2012/05/31 18:52:27
Subject: Castiel's P&M Blog. - Assembling the Cygnar Battlebox
Deadshot wrote:Those CSM are great! I am a particular fan of the eye on the Sorceror's staff, though I am having a hard time seeingas it is rather bright. I'll get around that though, don't worry
Anyway
Glad you like them.
The eye is just ice blue on bleached bone, nothing too fancy.
If the badab black has darkened it enough you might also be able to get away with just using the red for highlights. If not I guess mix a tiny bit of a bright orange in then see how it looks. Test highlight colours on either sprue or test models though; gives you an idea about how it will look and some practice for actual highlighting.
Cheers for the advice, I'll try that on my next Word Bearers that I paint.
Also, I should hopefully be able to put up some photos of some of the Cygnar battlebox models painted in the near future as I will have a bit of time to paint soon!
This message was edited 1 time. Last update was at 2012/06/24 15:39:29
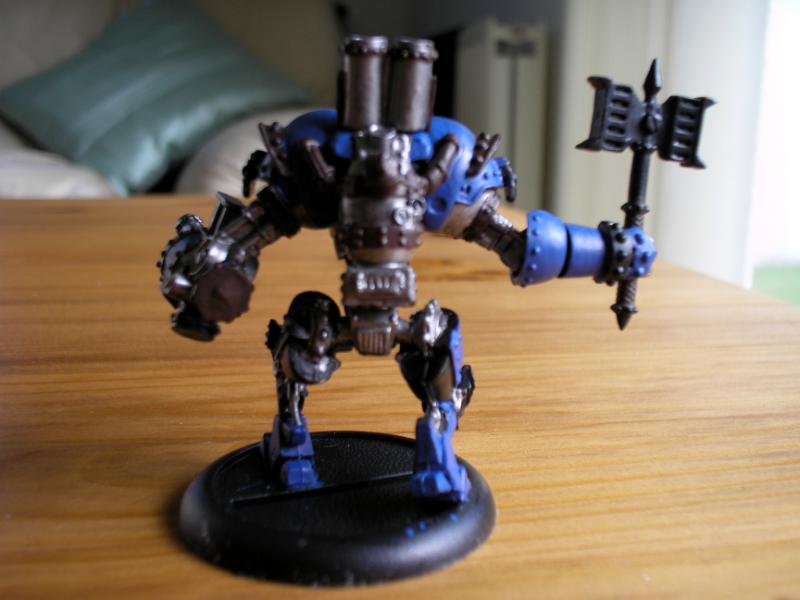
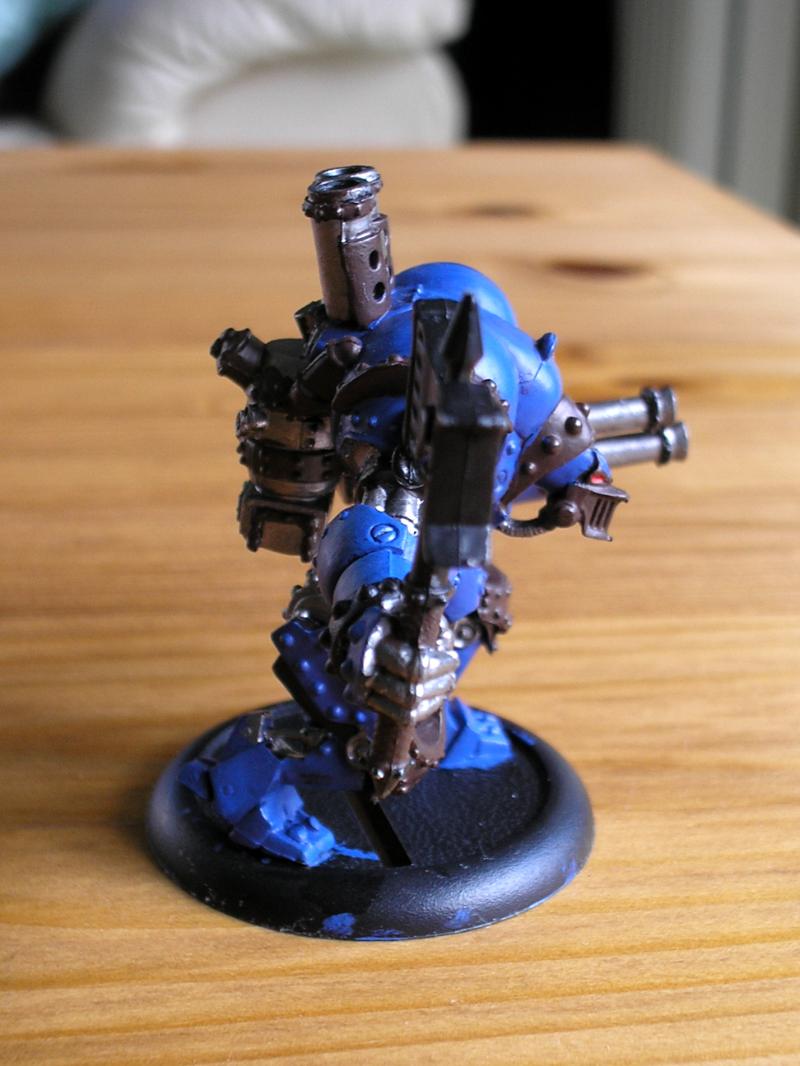
Well, it has been a while since I last updated this thread, but fear not, I haven't been entirely idle! In the break I have basecoated all of the battlebox models and managed to get most of the first layer of colour on the Charger. I have also purchased and assembled the Black 13th Gunmage Strike team to bring my points total up to 15. Most of the Black 13th were one piece models that only had to be glued to the bases, however Captain Lynch had and arm and a hand that needed stuck on. The arm went on easily enough, but the hand was very fiddly and took a couple of attempts to stick down. I got it done in the end though!
So as this is the internet we require pics or it didn't happen! (Pics spoilered due to number)
Charger Pics:
Spoiler:
Lancer Pic:
Spoiler:
Ironclad Pics:
Spoiler:
Stryker Pic:
Spoiler:
And here are the Black 13th:
Spoiler:
Captain Dixon Lynch:
Sergeant Samuel Watts:
Lieutenant Darsey Ryan:
So that's it from me until I next have something to show you. Hope you enjoyed it, and I'm always happy to hear some C&C or answer any questions you may have.
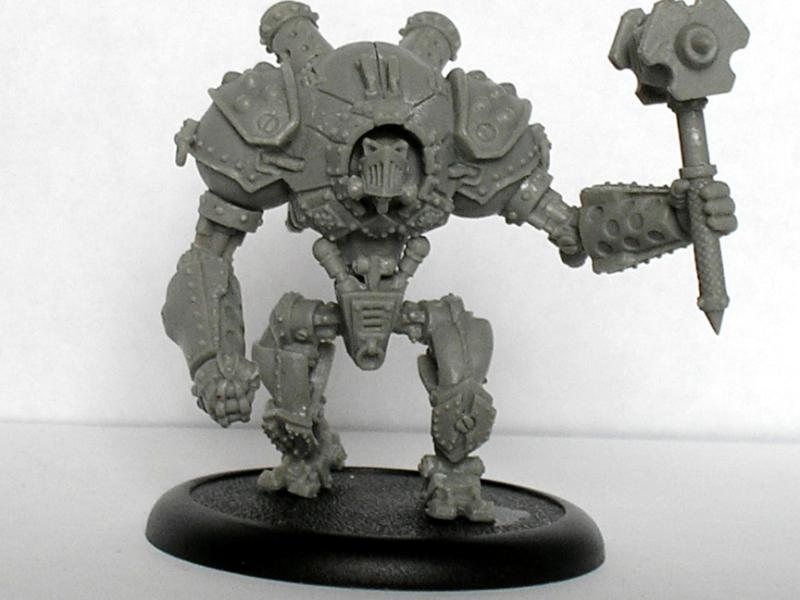
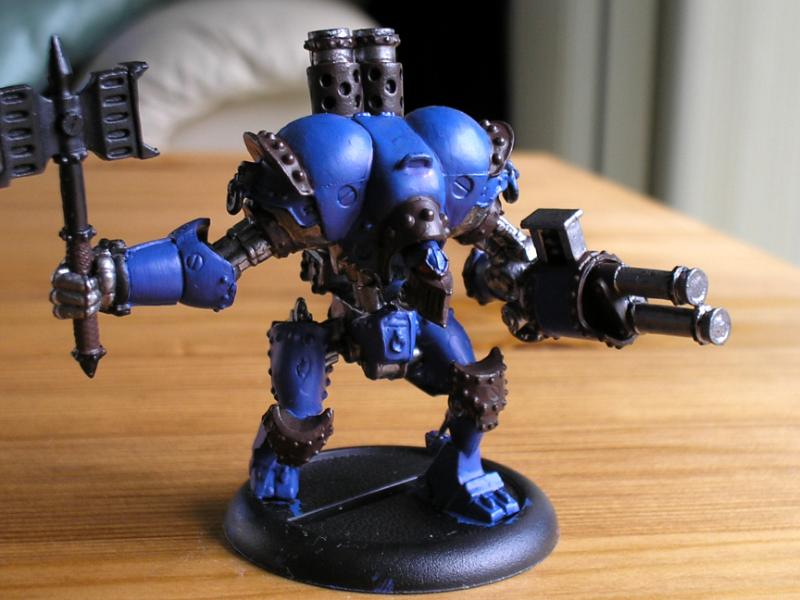
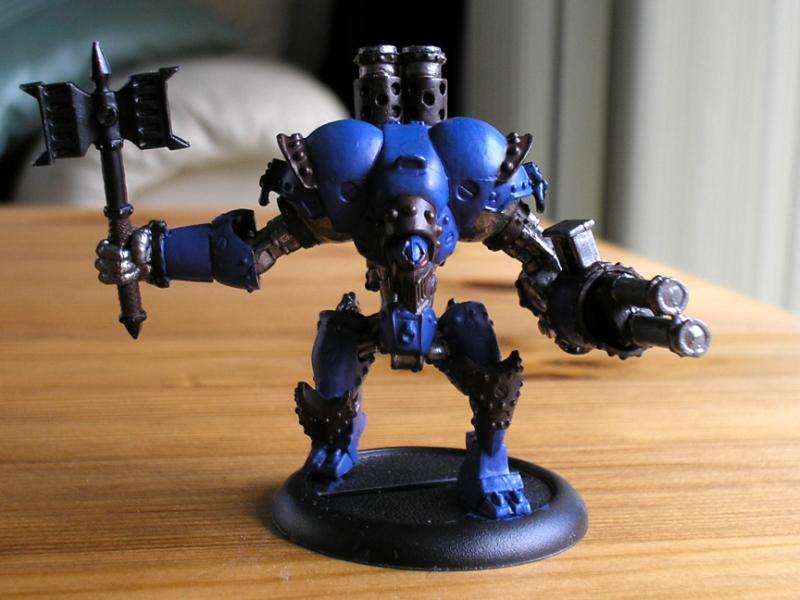
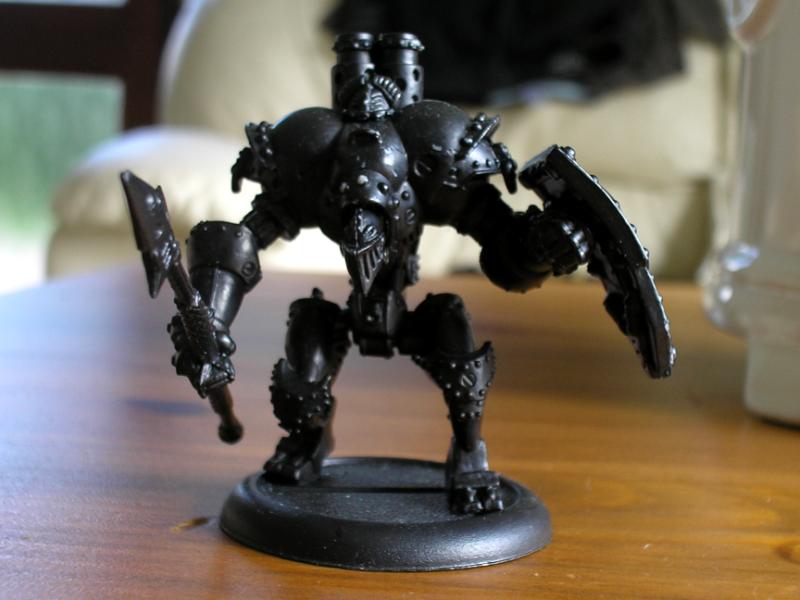
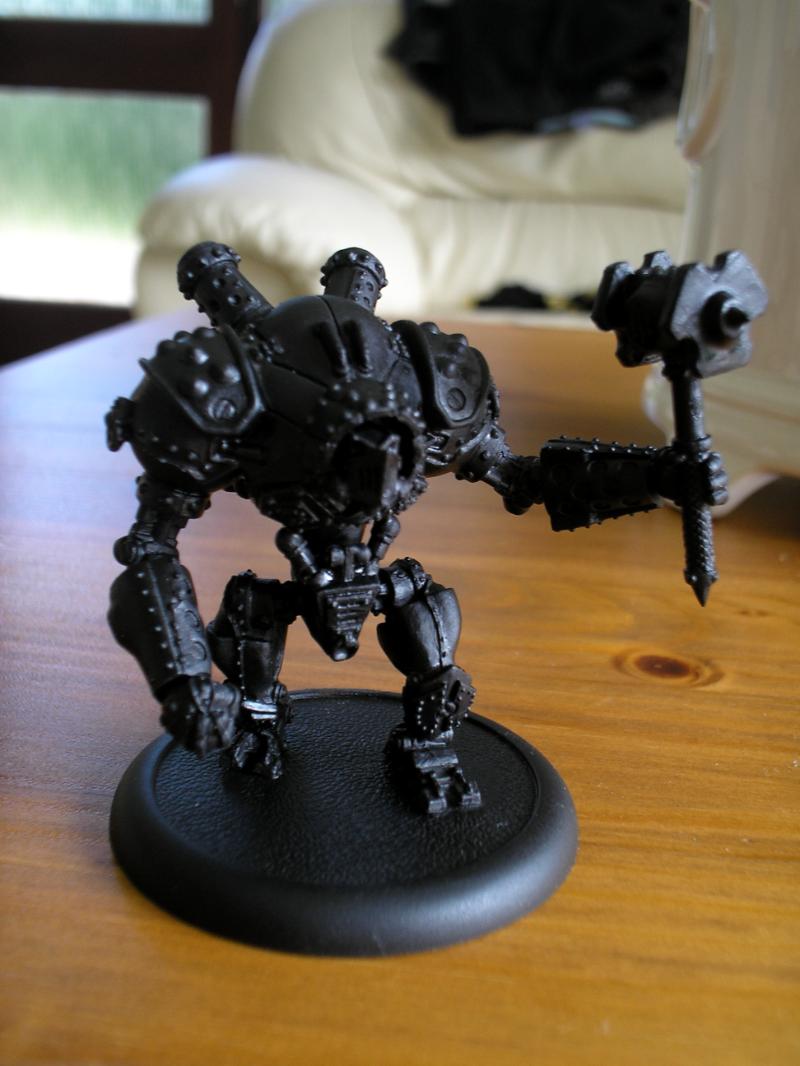
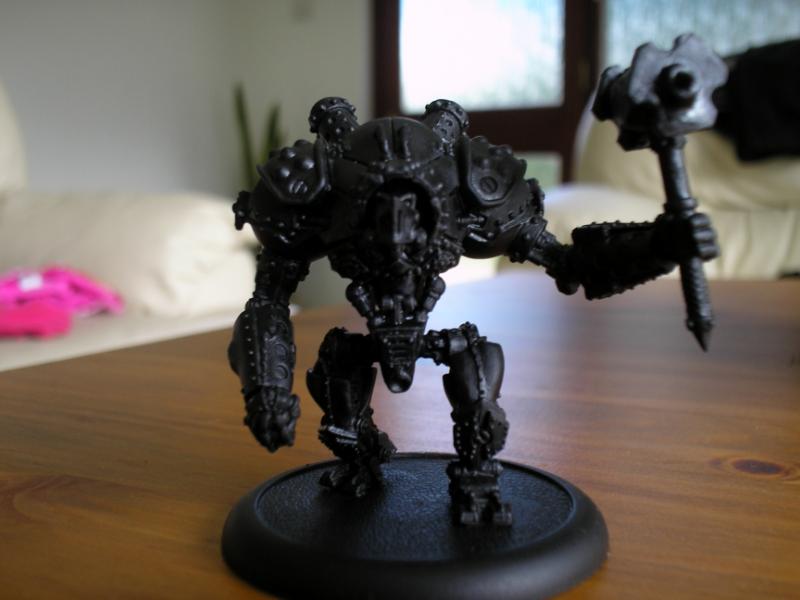
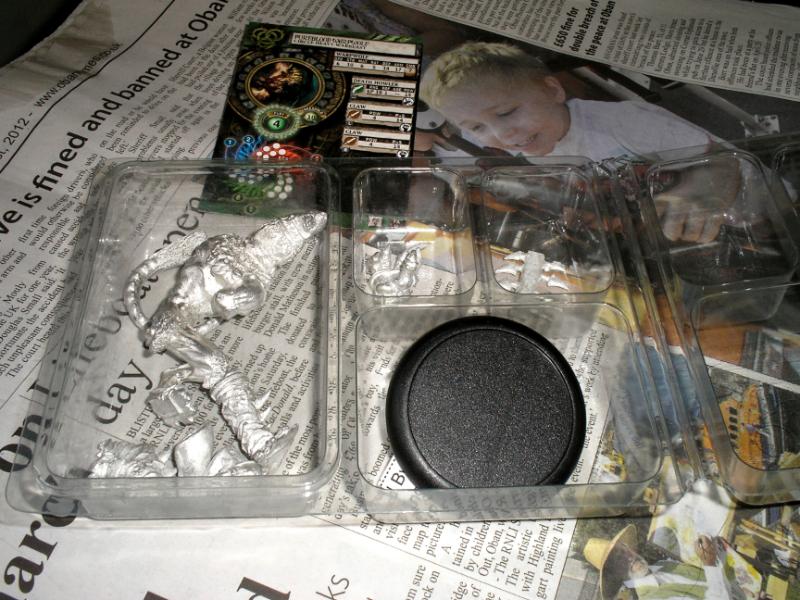
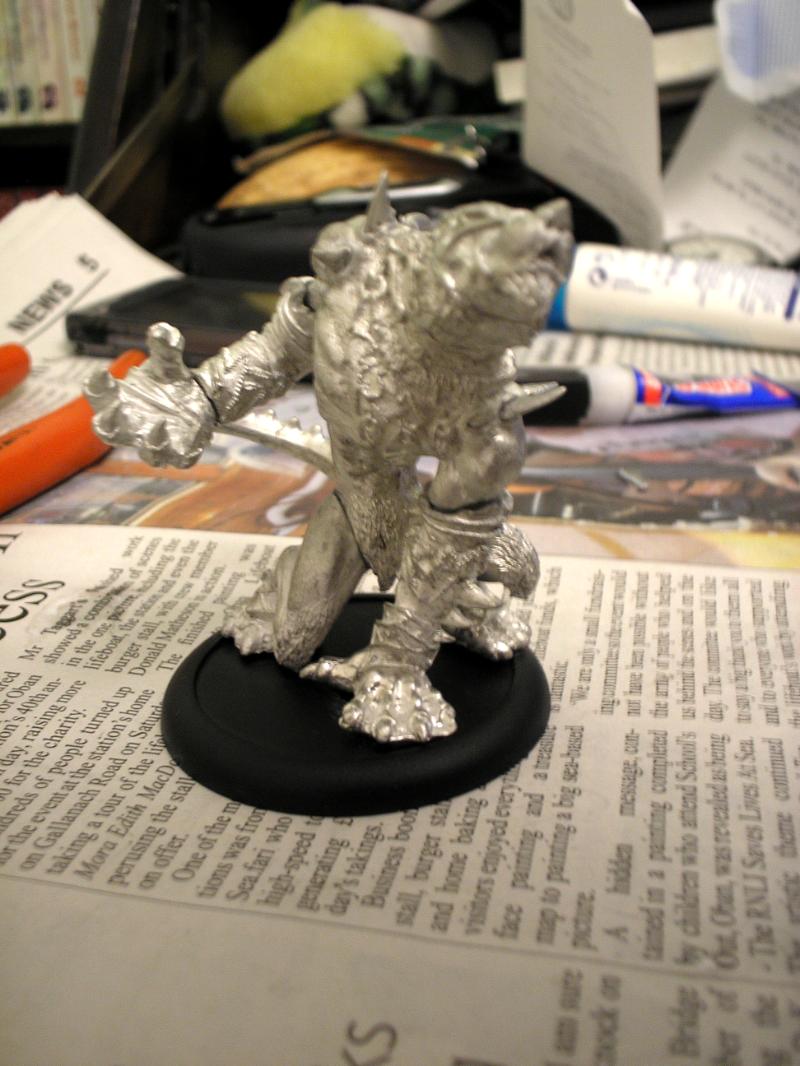
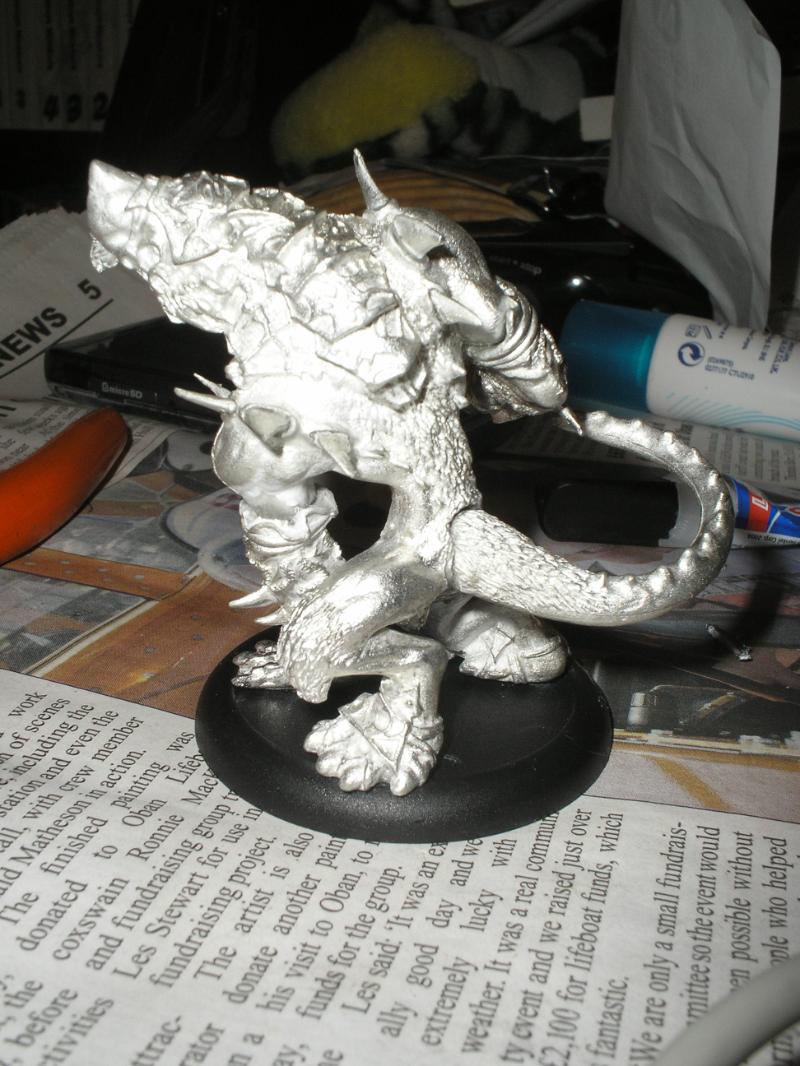
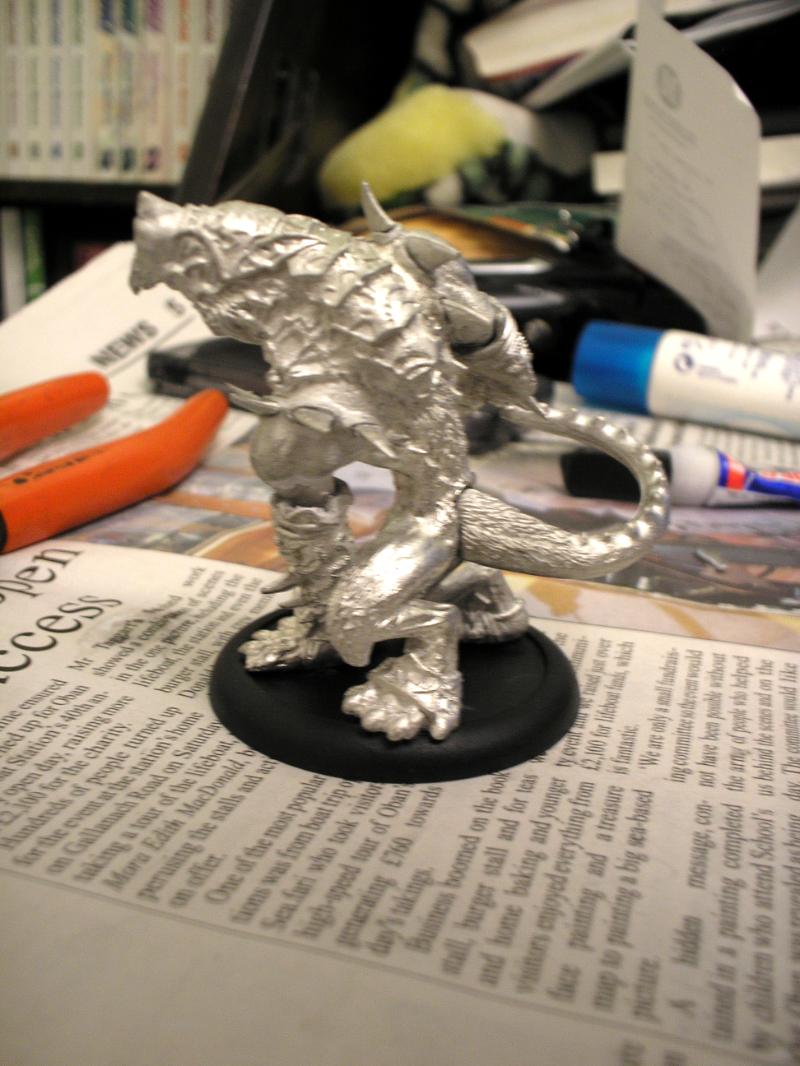
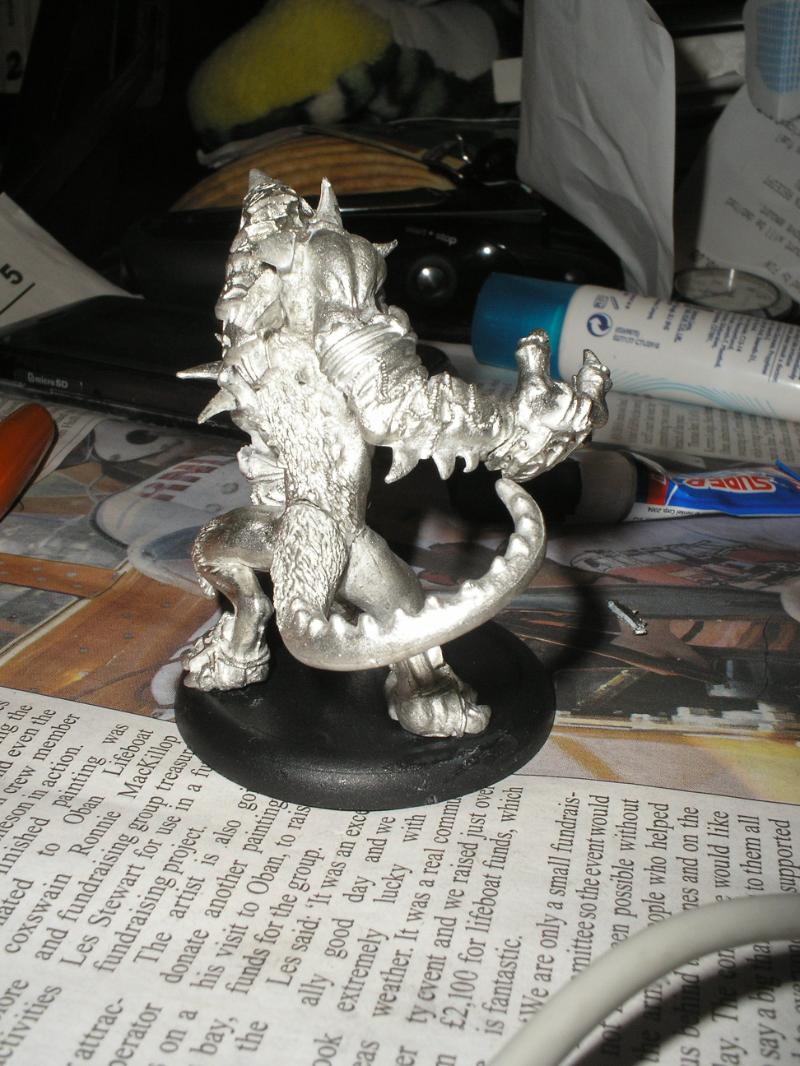
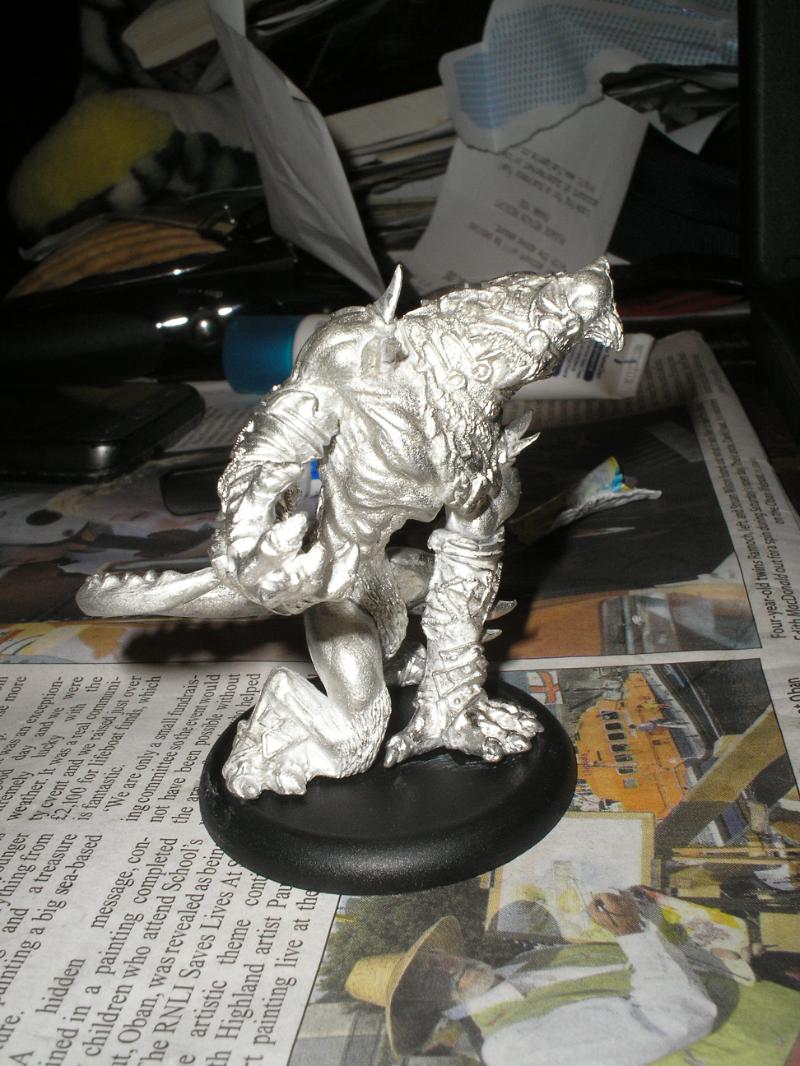
I'm very excited today, because a model I have wanted to get my hands on for a while now has finally arrived! Meet the classic Pureblood Warpwolf from Privateer Press' Circle of Orboros range. I've unboxed it, and will hopefully have it assembled by the end of the day! Here's a few pics:
Now, where's my superglue...
EDIT: Here's how it should look when finished.
This message was edited 1 time. Last update was at 2012/08/20 13:48:50
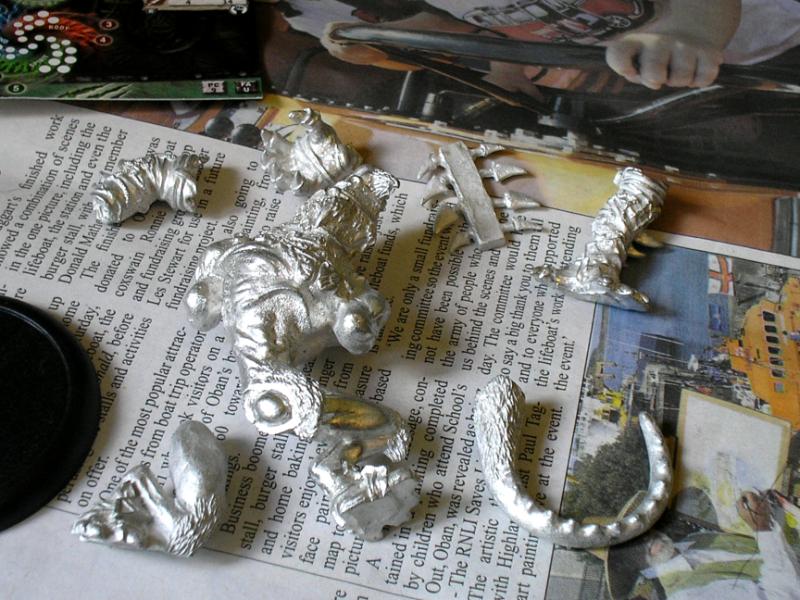
Well, the Pureblood Warpwolf is assembled. The model went together really easily, and there was very little flash. There are a few gaps that I will need to get green stuff for, but that'll have to wait for a couple of weeks until I go back to Edinburgh. I'm really pleased with the model, I think its a fantastic sculpt and I look forwards to painting it! Here are the pics of the assembled model:
That's all until next time folks, C&C are welcome as ever.
Nice paint jobs mate. Makes me wish I could paint better than a 4-year-old
Experience is something you get just after you need it The Narkos Dynasty - 15k Iron Hands - 12k The Shadewatch - 3k Cadmus Outriders - 4k Alpha Legion Raiders - 3k
2012/08/23 15:16:07
Subject: Re:Castiel's P&M Blog. - Some Painting Progress
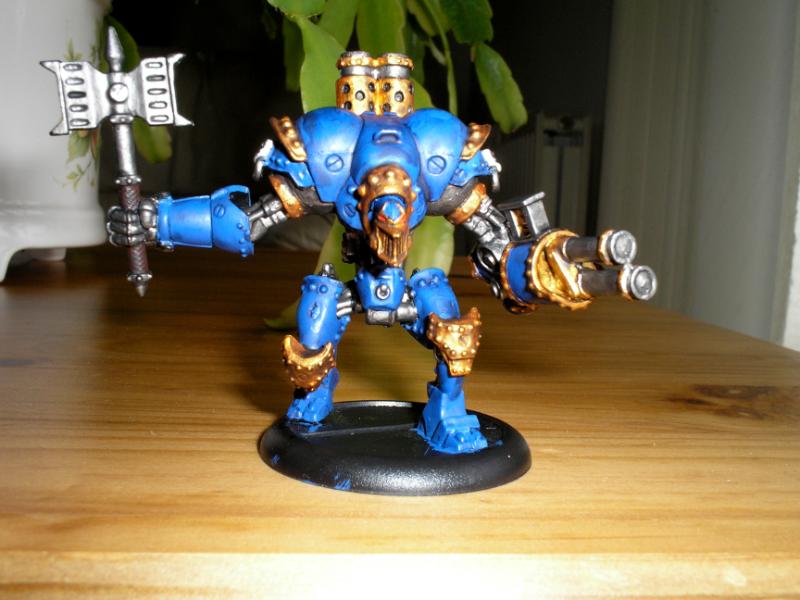
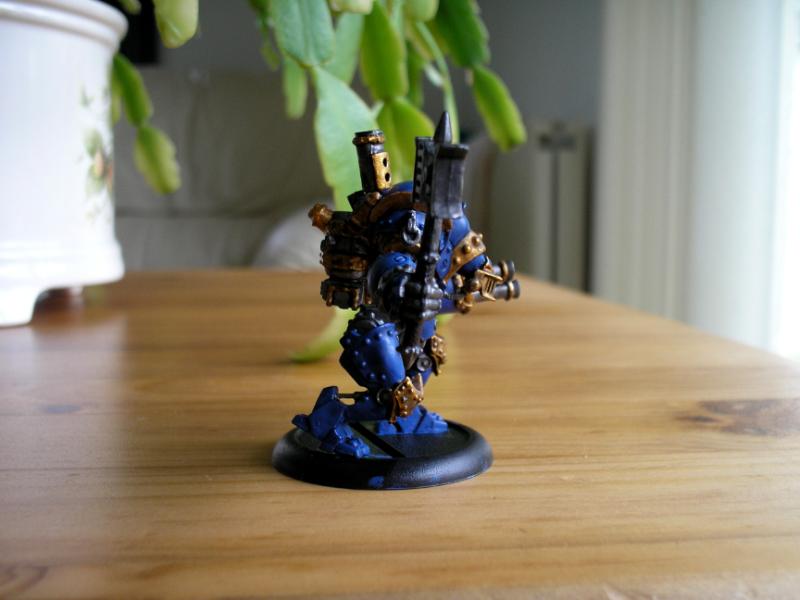
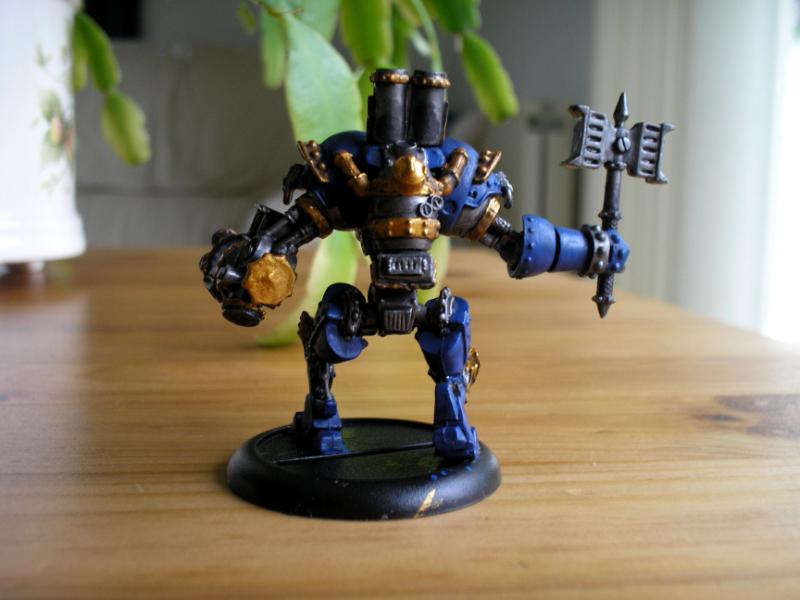
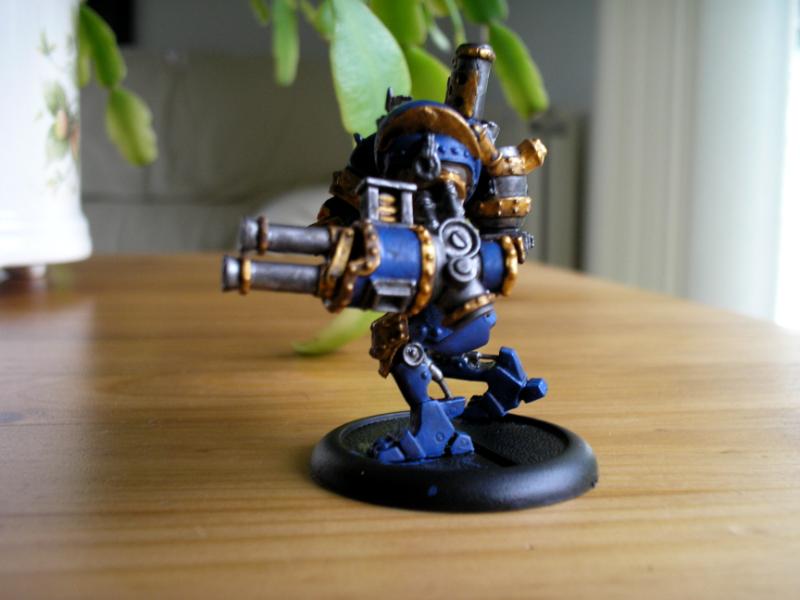
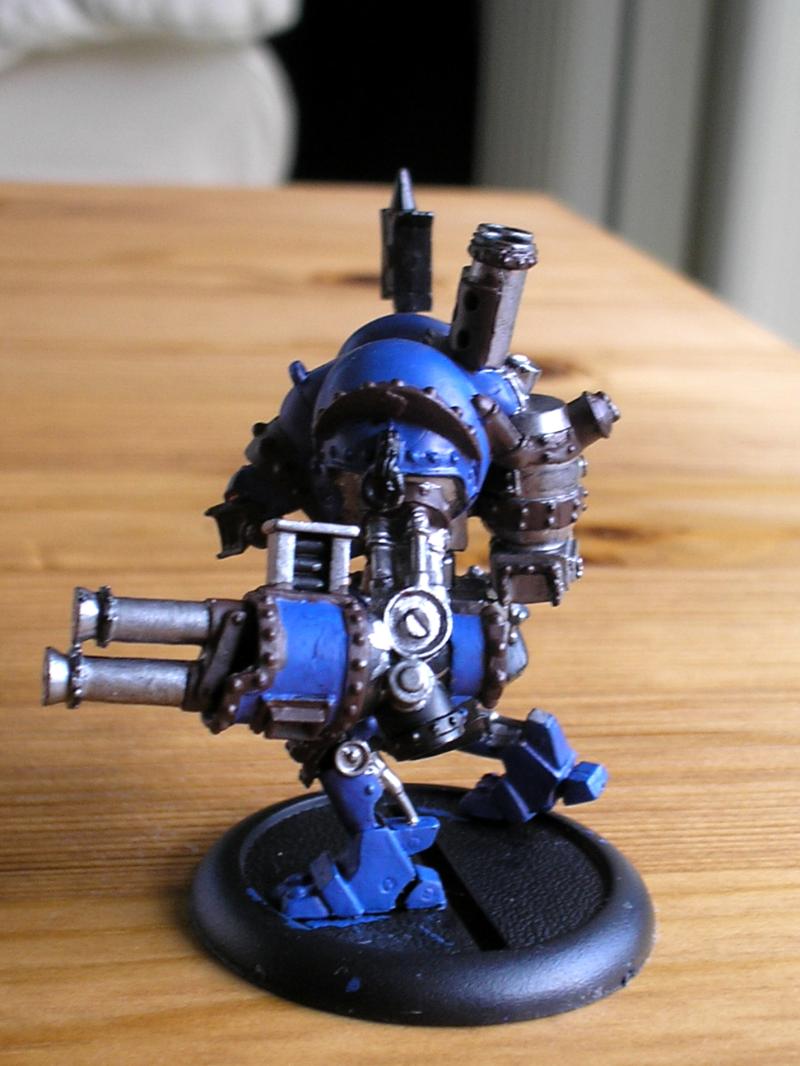
So I had some time to get a bit more painting done today, so I did some more work on the Charger. It now has all the flat colours and shades painted onto it. Here are the pics of how it looks now:
Front:
Right:
Rear:
Left:
So that's it for now, I welcome your comments and criticisms as always, and will hopefully have more for you soon!
It has been a long time since I posted anything here, but today I require your help! I plan to paint the Pureblood Warpwolf I bought I while ago, however, I can't decide on a colour scheme. the Pureblood is usually painted white, but I'm not confident about painting a clean white colour. Therefore I am looking for alternative colour scheme ideas, or a really quick and easy way to get a good crisp white colour.
Pics of the model, and a painted example of the "classic" colour scheme can be found a few posts above.
Thanks in advance!
Cas
This message was edited 1 time. Last update was at 2012/12/06 18:13:41
So inspiration has struck, and I have decided on a paint scheme for the Pureblood. I'm going for black fur and blue armour with silver trim, which I think will look pretty cool. It should be fairly quick to paint, and will give me a chance to improve my highlighting.


 :750 points


 The Narkos Dynasty - 15k
 Iron Hands - 12k
  The Shadewatch - 3k
  Cadmus Outriders - 4k
  Alpha Legion Raiders - 3k