| Author |
Message |
 |
|
|
|
|
Advert
|
Forum adverts like this one are shown to any user who is not logged in. Join us by filling out a tiny 3 field form and you will get your own, free, dakka user account which gives a good range of benefits to you:
- No adverts like this in the forums anymore.
- Times and dates in your local timezone.
- Full tracking of what you have read so you can skip to your first unread post, easily see what has changed since you last logged in, and easily see what is new at a glance.
- Email notifications for threads you want to watch closely.
- Being a part of the oldest wargaming community on the net.
If you are already a member then feel free to login now. |
|
 |
2014/10/16 23:01:40
Subject: [WIP][Commission] - Ancient Temple Fortress on Fenris battle board part 1 of 3
|
|

Speedy Swiftclaw Biker
|
Hi there again.
It has been a while since i've posted anything of notice. But I've been busy as hell designing and building a 3 part battle board pro-style for a client of mine. I tried to document as much as I can along the way to show you guys my progress and the things i've learned.
The wish of the client where quite simple:
" Big... and it must be more than awesome! And also lights.. Yes I want lights. And it has to be modular.. and also I want it to be a display board for my Space wolves army. And it must be cold and snowy but not all snow. And I want to be able to drive my tanks across the board. And I also want water.. Yes water is awesome! ... Oh and while your at it... I want hidden or secret diorama's that tell a story about the place. And I want lights so I can play in a night setting. O and I also want objective points across the board. Oh and not entirely unimportant... it must also be balanced and packed with details! ... oh and... I want lights... " Well you get my point. This was going to be anything but easy to do.
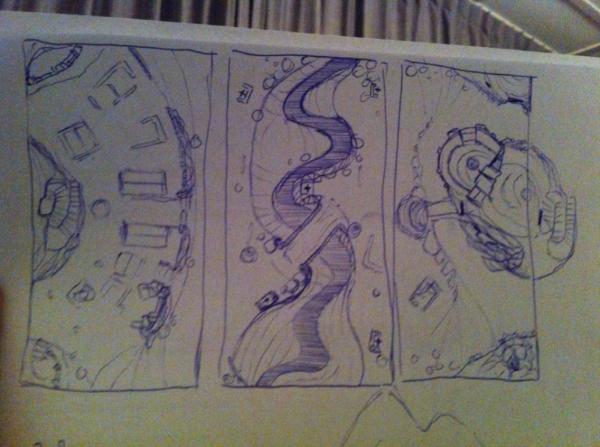
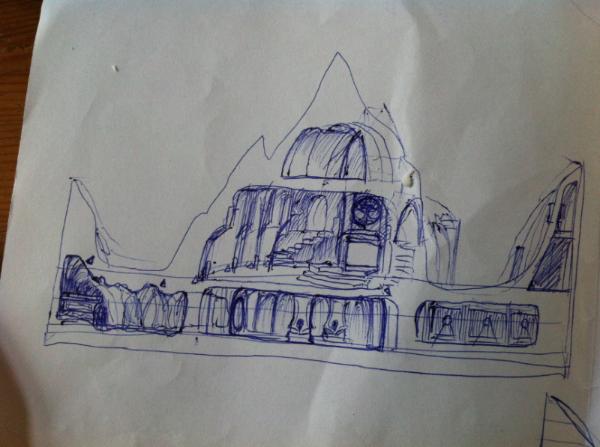
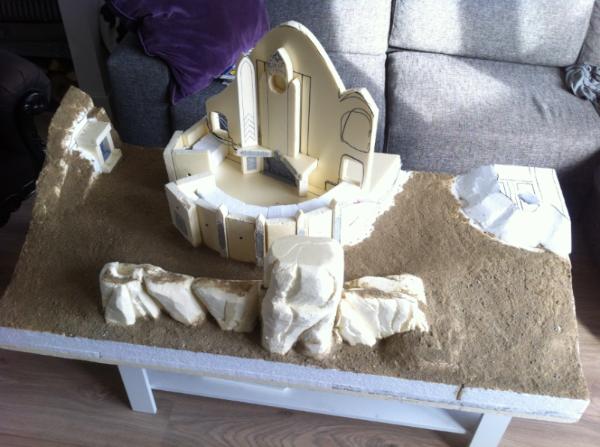
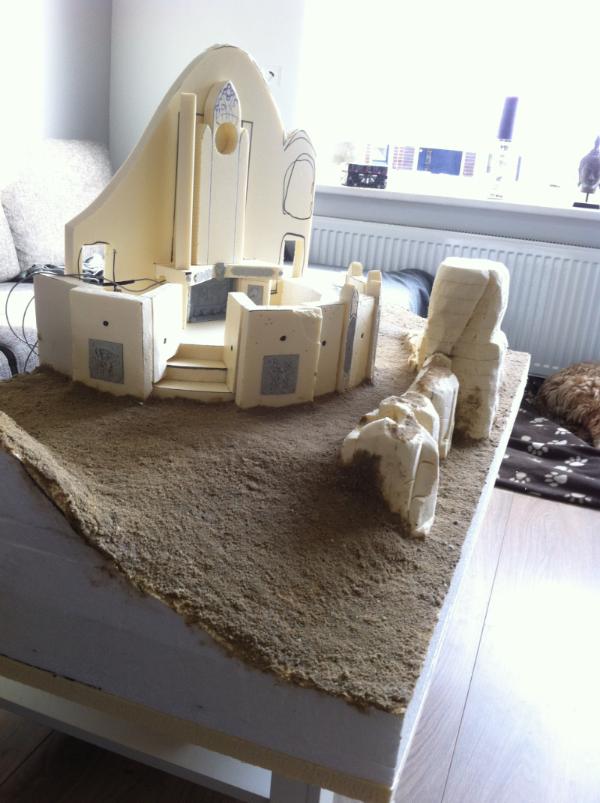
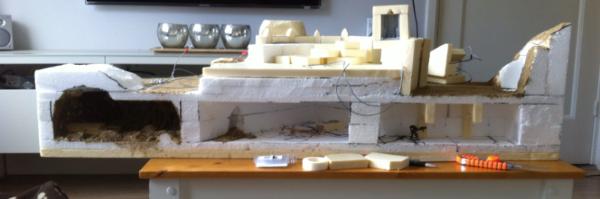
After allot of tinkering and sketching, I came up with a cool Idea for a three part battle board of 125cm by 60cm per part (roughly 4 by 2 foot) that could be laid out in different ways.
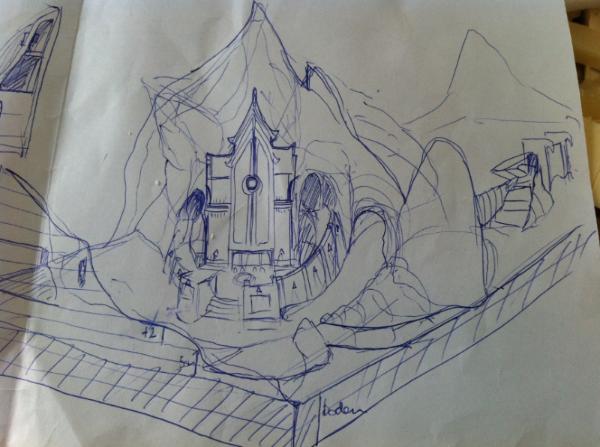
The first board had a mountain embedded ancient temple fortress with courtyard and backside diorama's (including a great hall, subterranean hall, cave tomb and an alt entrance),
the middle board would divide the two sides with a river that has 2 natural crossings and a bridge some coverage and some gun turret support objectives to capture and use agains your enemy,
and the final board would have Mountain slope with a ruined and abandon city laying at its feet so that it could still hide entire squads and provide cover for an advancing force. It also would have backside a big diorama and it will matchup with the backside of the first board, so he could switch the boards around.
A "typical Fenrisean summer temple fortress and abandoned city ruins" would be the general theme.
And last but not least; he couldn't press enough that he wanted lights across the boards so he could also play in a low light setting to simulate night and day fights. (which I've never done before but certainly would look freaking awesome if done right.)
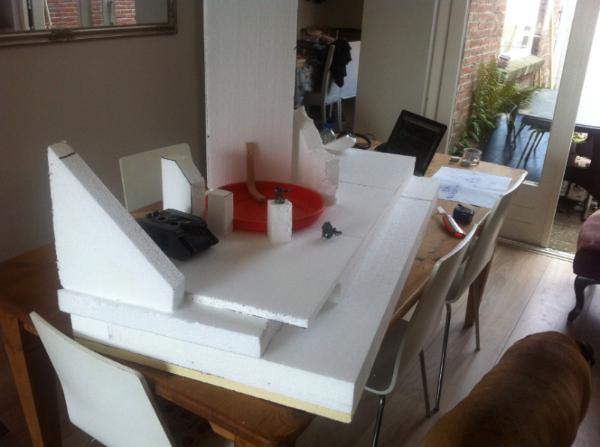
So here are foto's taken with my smartphone of the progress. Feel free to comment or ask questions. Or if you have any tips... 
Enjoy!
|
|
This message was edited 1 time. Last update was at 2014/11/05 21:17:00
|
|
|
 |
|
2014/10/16 23:05:44
Subject: WIP - A typical Fenrisean summer temple fortress and city ruins with a river, bridge and lights
|
|

Hacking Interventor
|
This might just be me being a complete idjut..
But I don't see any photos.. :p
|
I may be an donkey-cave, but at least I'm an equal oppurtunity donkey-cave...
 |
|
|
|
|
2014/10/16 23:12:24
Subject: Re:WIP - A typical Fenrisean summer temple fortress and city ruins with a river, bridge and lights
|
|
Speedy Swiftclaw Biker
|
|
|
This message was edited 1 time. Last update was at 2014/10/16 23:23:48
|
|
|
|
|
2014/10/16 23:35:48
Subject: WIP - A typical Fenrisean summer temple fortress and city ruins with a river, bridge and lights
|
|
Hacking Interventor
|
Okey.. I'm subbing this thread.. 
|
I may be an donkey-cave, but at least I'm an equal oppurtunity donkey-cave...
|
|
|
|
|
2014/10/16 23:37:10
Subject: Re:WIP - A typical Fenrisean summer temple fortress and city ruins with a river, bridge and lights
|
|
Speedy Swiftclaw Biker
|
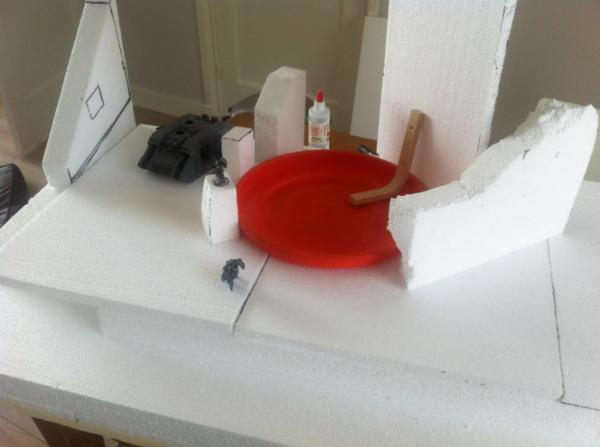
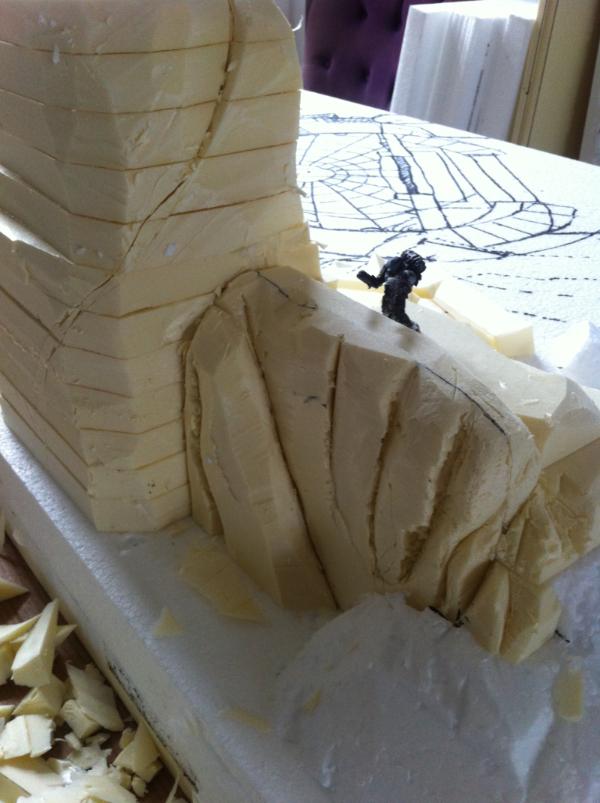
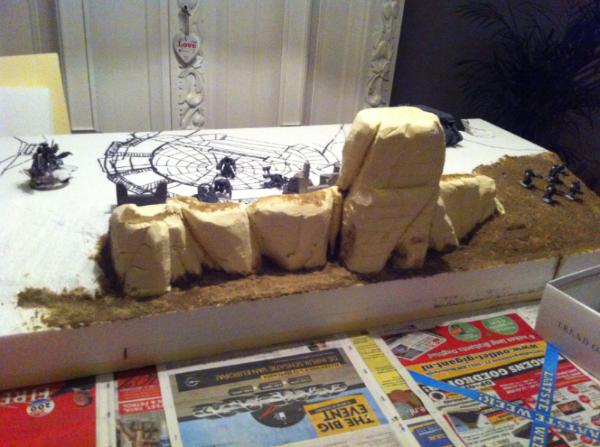
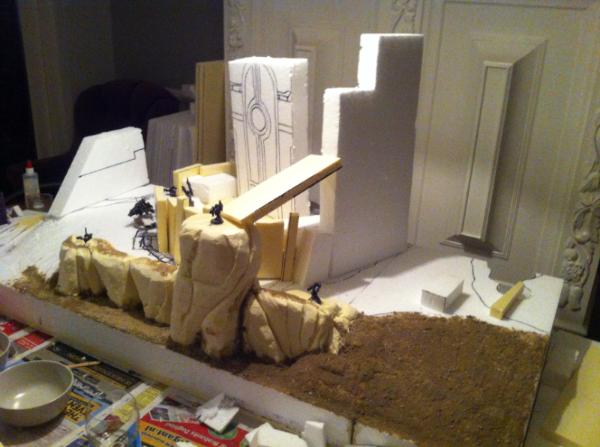
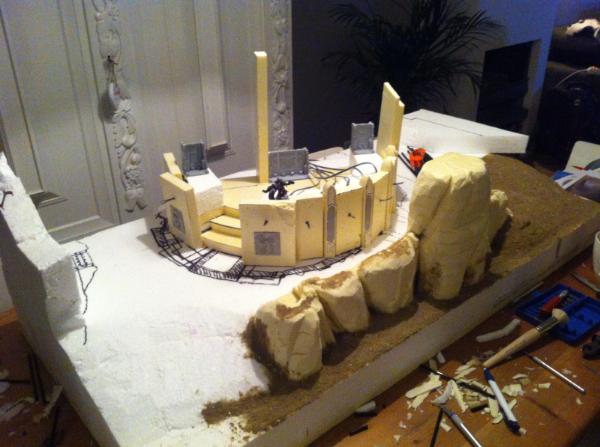
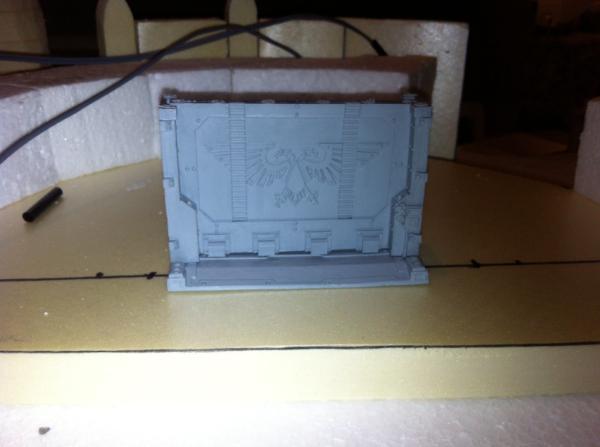
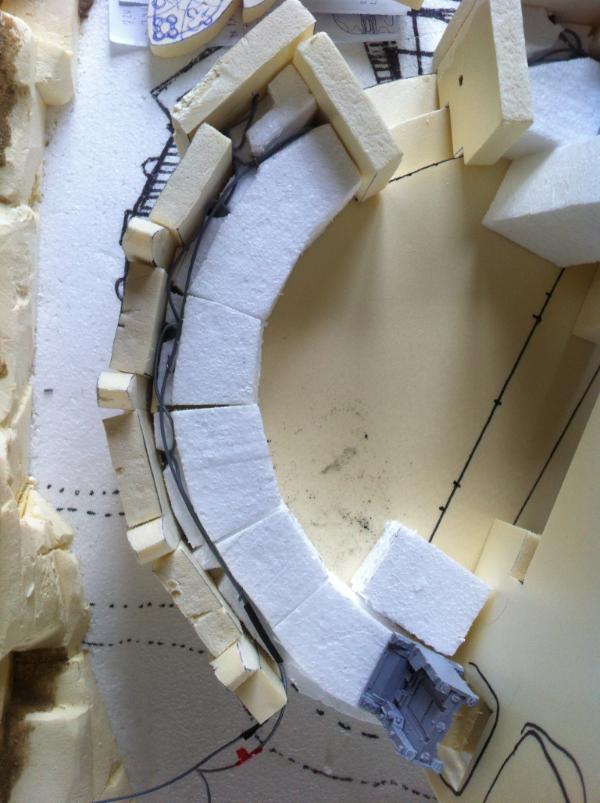
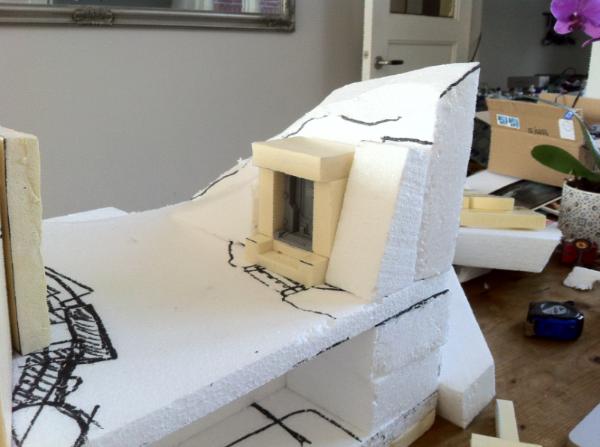
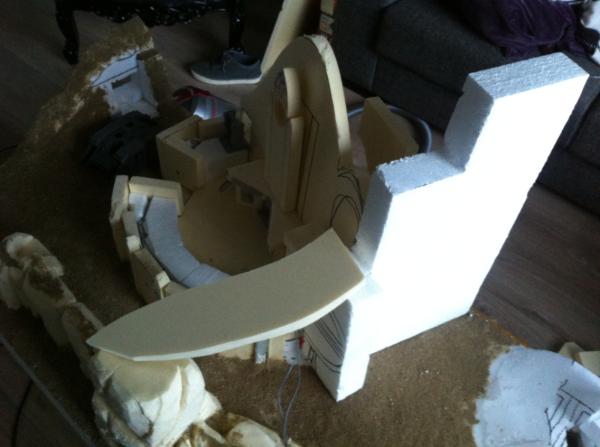
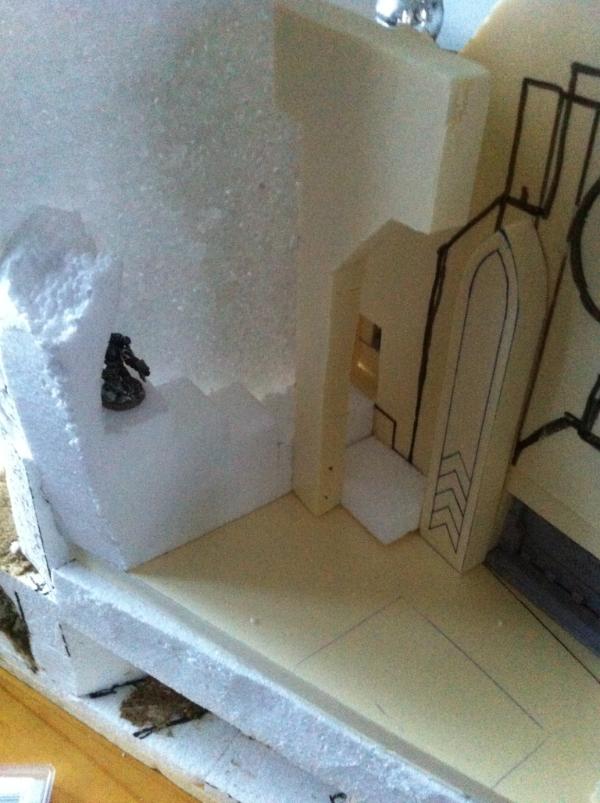
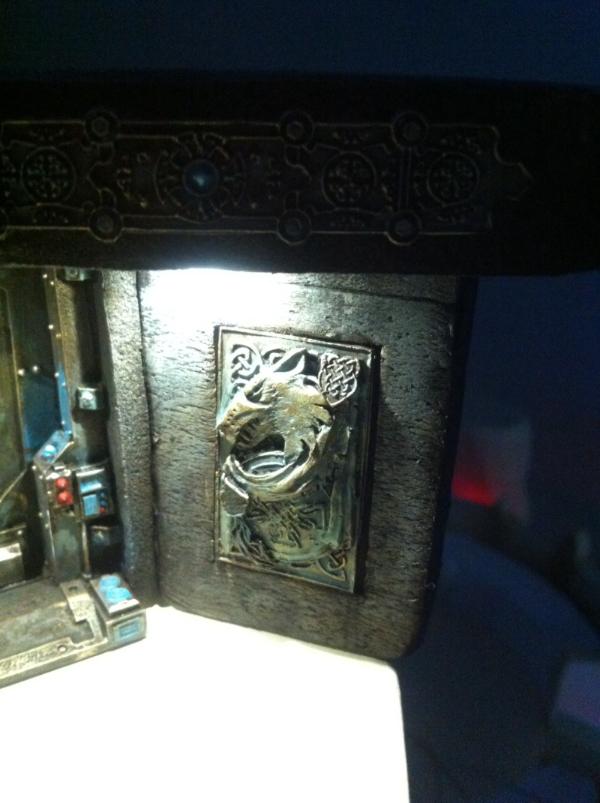
After some work I've on the entrance I wasn't quite pleased. It looked to obvious and didn't really fit into my vision. So after conceding with my client I changed the design.
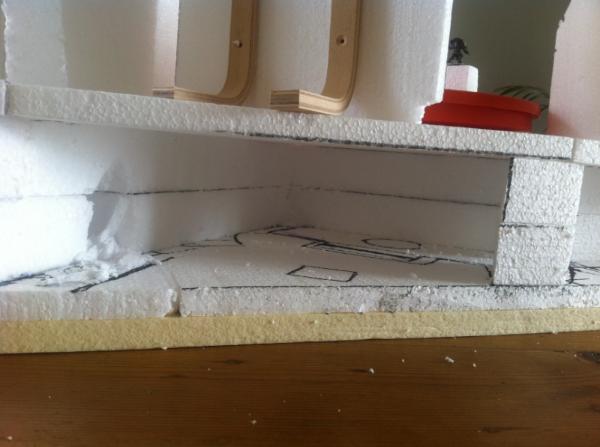
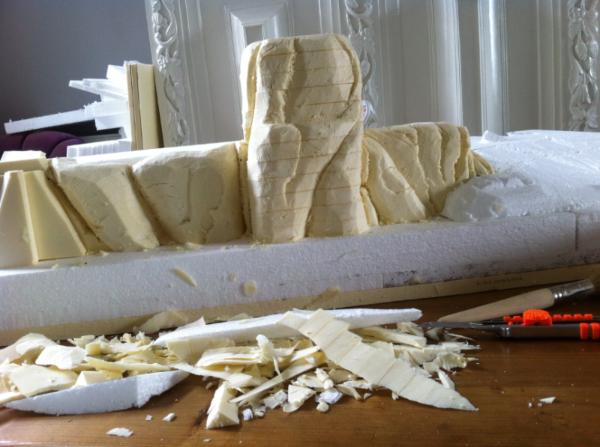
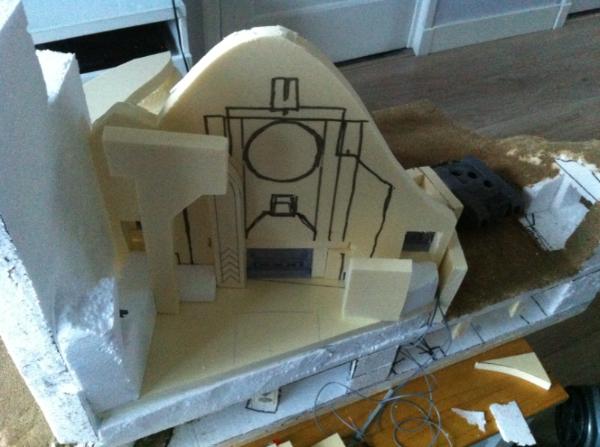
Here are some pictures of the dummy front work to see if the client liked my changes:
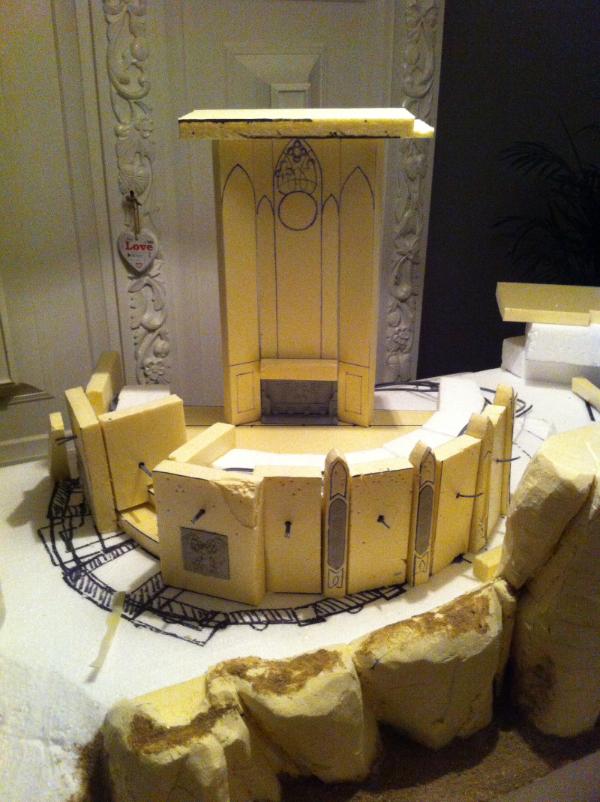
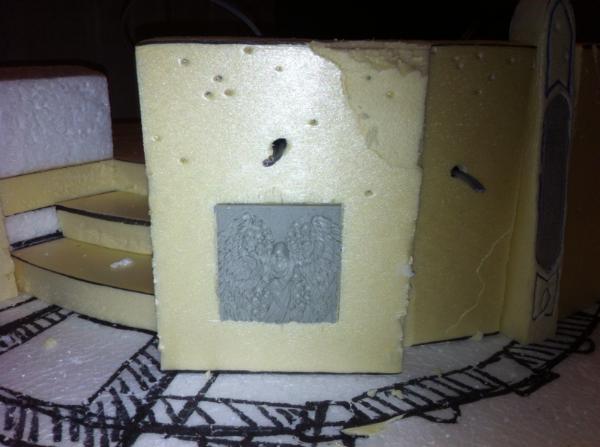
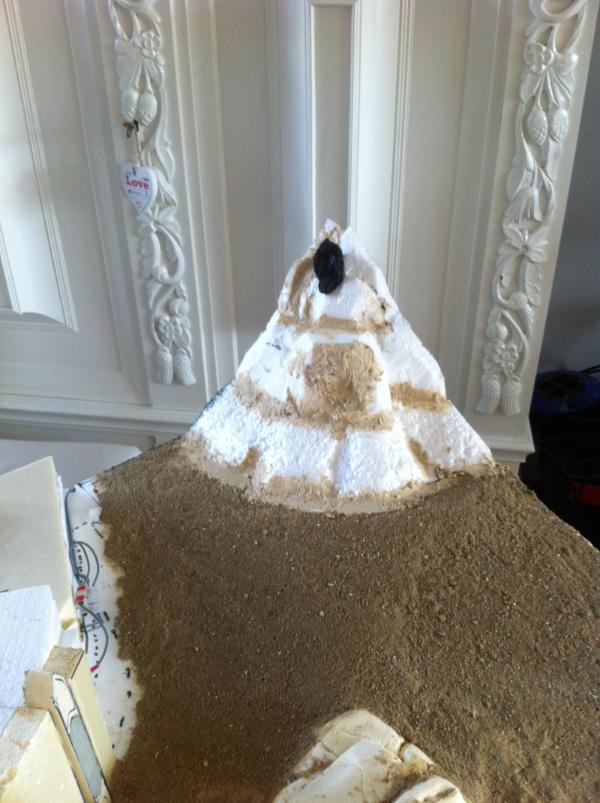
Here is another photo of the gate with a dummy plate to get a feeling for how big the mountain part would be.
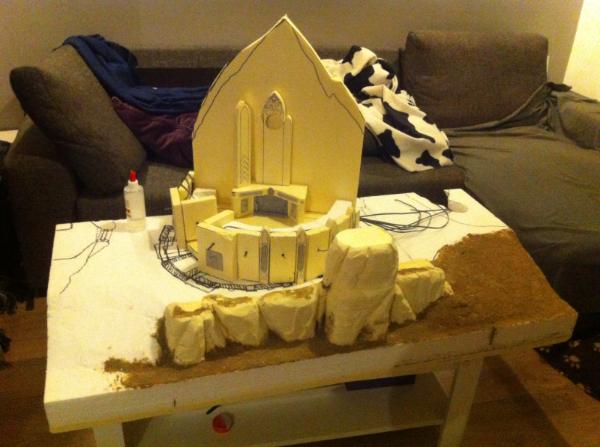
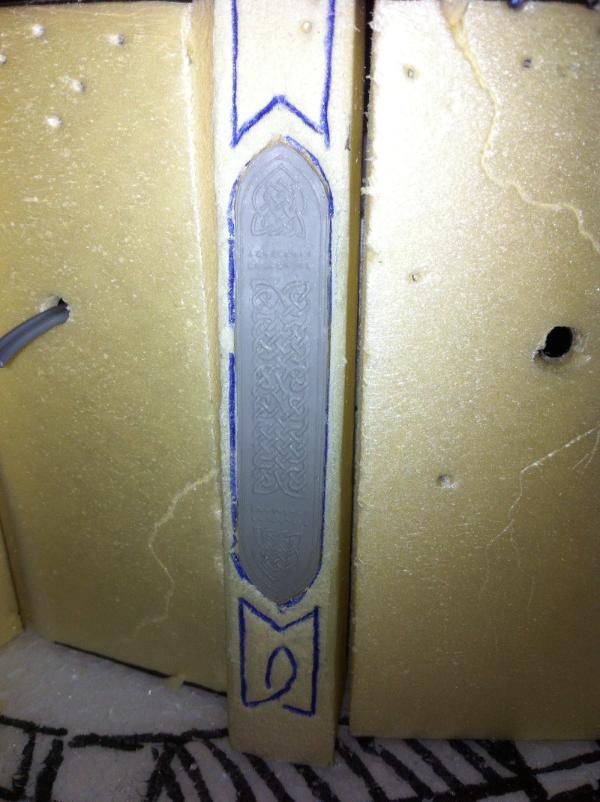
If you look closely you'll see that one of the columns in the more finalized version is missing...
This column:
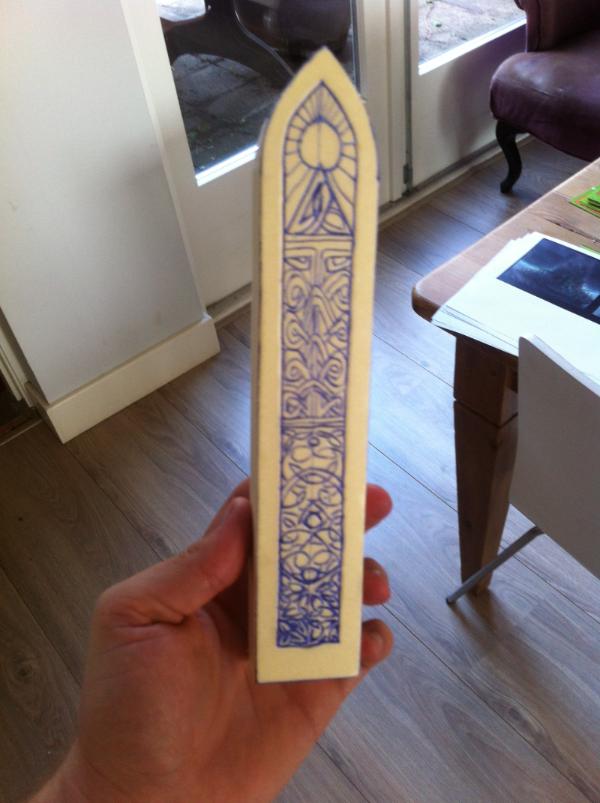
It is because I've ruined it! I was so excited about the line arts on the column I wanted to paint it to see if it would give the wanted effect. So I pulled out my GW black undercoat spray can and rubber gloves and sprayed the thing black...
Little did I know that it would melt / mutilate the High Density foam until there was nothing left of the artwork! I was sadden't but also VERY relieved not to have used that spray onto the rest of my build yet... So PLEASE do not use the GW spray (Or any sprays that uses nitrogen as gas) to spray High Density Foam.
|
|
|
|
|
|
2014/10/17 00:00:03
Subject: WIP - A typical Fenrisean summer temple fortress and city ruins with a river, bridge and lights
|
|
Hacking Interventor
|
It's the solvent in the spraypaint that reacts with the polystyrene foam.. Try making a mix of PVA glue and water.
Coat a piece of foam and try to spray..
|
I may be an donkey-cave, but at least I'm an equal oppurtunity donkey-cave...
|
|
|
|
|
2014/10/17 00:01:31
Subject: Re:WIP - A typical Fenrisean summer temple fortress and city ruins with a river, bridge and lights
|
|
Speedy Swiftclaw Biker
|
|
|
This message was edited 5 times. Last update was at 2014/10/17 01:00:20
|
|
|
|
|
2014/10/17 01:48:19
Subject: WIP - A typical Fenrisean summer temple fortress and city ruins with a river, bridge and lights
|
|

Xenohunter with First Contact
Indianapolis, IN
|
This is simply stunning and inspirational! Great work so far. One question: why all the vegetation in the tomb? It looks cool enough, but wouldn't it be more fitting to be dank and dark with minimal lighting? Almost looks too cheerful lol. Still, better than anything I have done!
|
What is best in life? To crush your enemies, to see them driven before you, and to hear the lamentations of their women. Grrr. |
|
|
|
|
2014/10/17 01:48:51
Subject: WIP - A typical Fenrisean summer temple fortress and city ruins with a river, bridge and lights
|
|
Haemonculi Flesh Apprentice
|
They also sell spray paint specifically for Styrofoam.
|
|
|
|
|
|
2014/10/17 02:47:51
Subject: WIP - A typical Fenrisean summer temple fortress and city ruins with a river, bridge and lights
|
|
Blood Angel Terminator with Lightning Claws
|
Stunning! I can't wait to see more progress!
|
Crush your enemies, see them driven before you and to hear the lamentations of the women.
Twitter @Kelly502Inf |
|
|
|
|
2014/10/17 02:55:30
Subject: WIP - A typical Fenrisean summer temple fortress and city ruins with a river, bridge and lights
|
|
Martial Arts Fiday
|
ooooohh....Me LIKEY!
|
"Holy Sh*&, you've opened my eyes and changed my mind about this topic, thanks Dakka OT!"
-Nobody Ever
Proverbs 18:2
"CHEESE!" is the battlecry of the ill-prepared.
 warboss wrote: warboss wrote:
GW didn't mean to hit your wallet and I know they love you, baby. I'm sure they won't do it again so it's ok to purchase and make up.
Albatross wrote:I think SlaveToDorkness just became my new hero.
EmilCrane wrote:Finecast is the new Matt Ward.
Don't mess with the Blade and Bolter! |
|
|
|
|
2014/10/17 08:00:39
Subject: WIP - A typical Fenrisean summer temple fortress and city ruins with a river, bridge and lights
|
|
Speedy Swiftclaw Biker
|
Realy good question:
as I read about fenris (home planet of te space wolves where this scene would be situated) it is told its a planet of fire and ice. So I pictured that closely underneath the temple rivers of magma would flow (which also would made sence sinds its almost constantly cold and freesing outside. How could anyone survive constant winter right?).
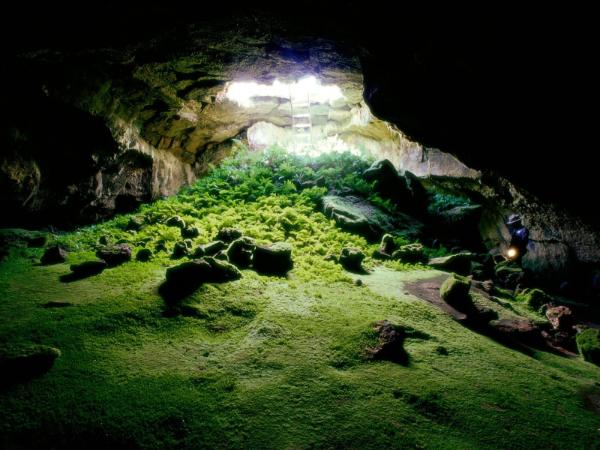
So my plan was to make the Subterranean hall be like a forge with fires from the lava flows from deep underground. So therefore the cave is damp and warm making vegitation to grow like it would in tropical rainforrest but then only with types plants that would be able to grow in those area's. Like varns and mosses.
Here are some refference and inspirational concept art photo's that I used to picture the feeling and use as a guidance to how i'm going to finish the board.
Cave refference:
Great hall and subterranean level inspiration:
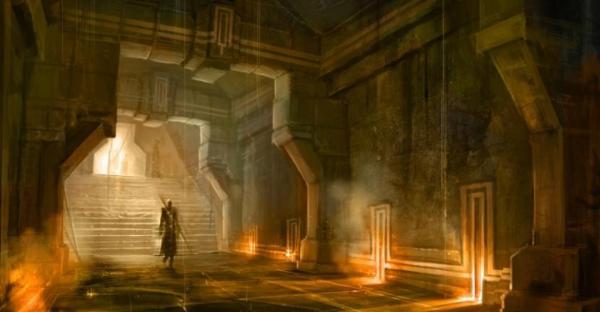
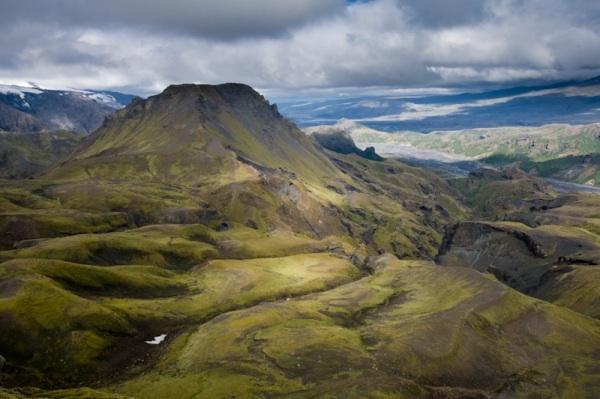
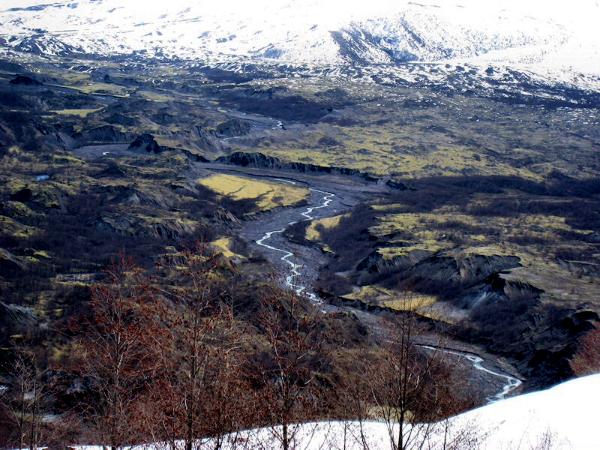
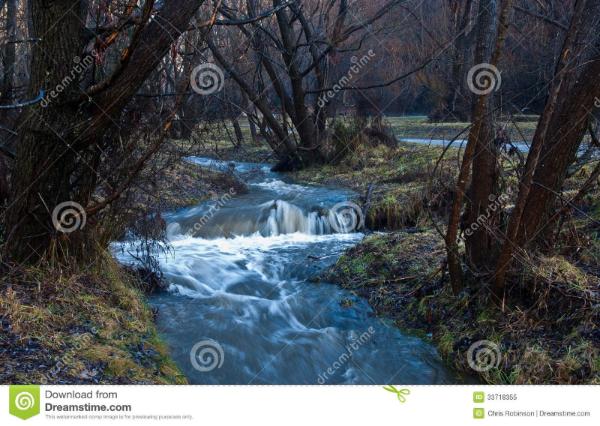
Here are some refference photo's and a concept art photo's that give you an idea on where I want to take the top of the boards to:

|
|
This message was edited 2 times. Last update was at 2014/10/17 08:07:09
|
|
|
|
|
2014/10/17 08:56:17
Subject: WIP - A typical Fenrisean summer temple fortress and city ruins with a river, bridge and lights
|
|

Avatar of the Bloody-Handed God
Inside your mind, corrupting the pathways
|
Very cool build so far. Can't wait to see the development and finished board 
|
|
|
|
|
|
2014/10/20 13:55:34
Subject: Re:WIP - A typical Fenrisean summer temple fortress and city ruins with a river, bridge and lights
|
|
Speedy Swiftclaw Biker
|
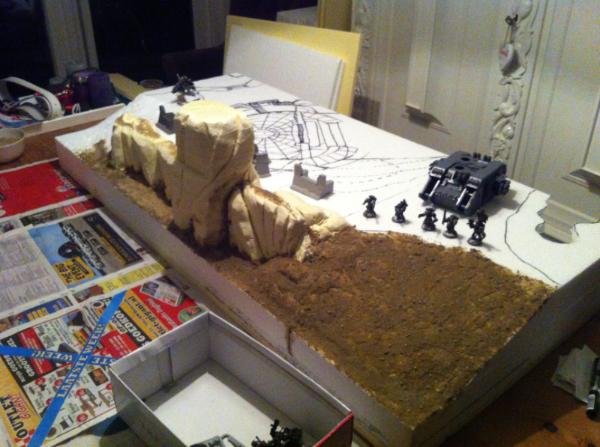
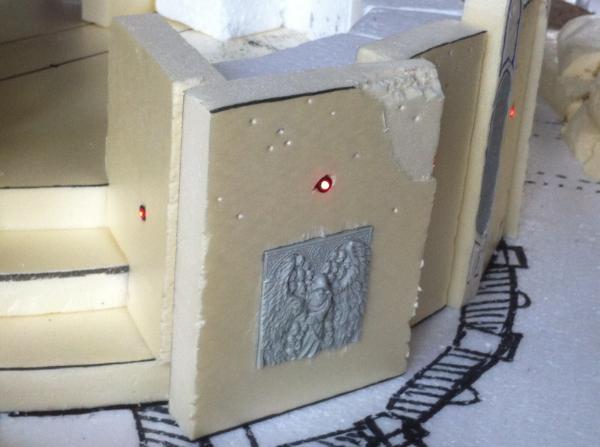
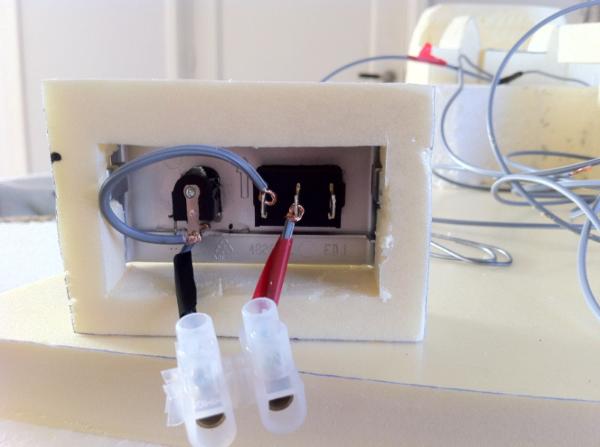
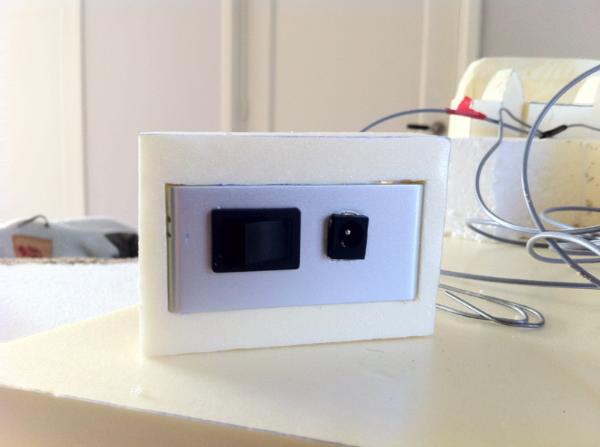
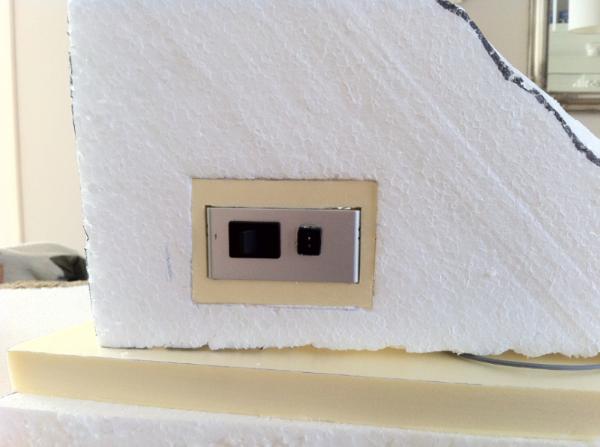
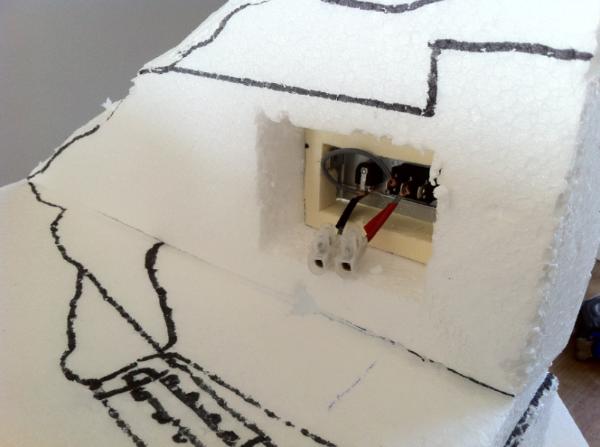
New update:
This weekend I've worked on:
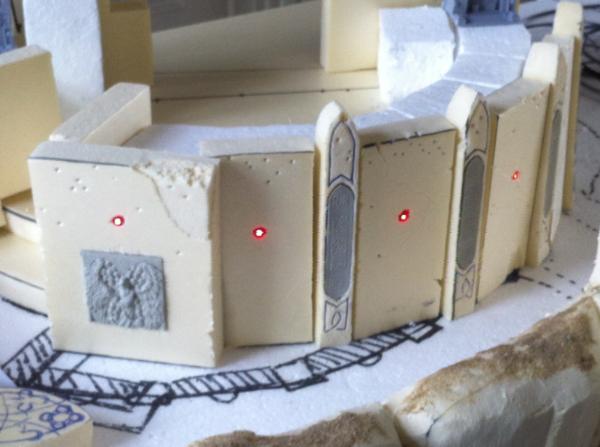
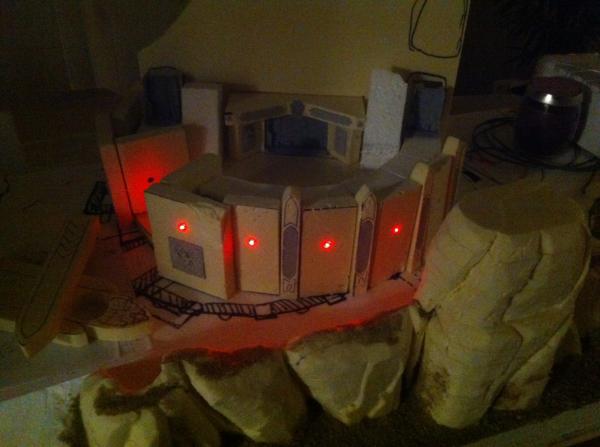
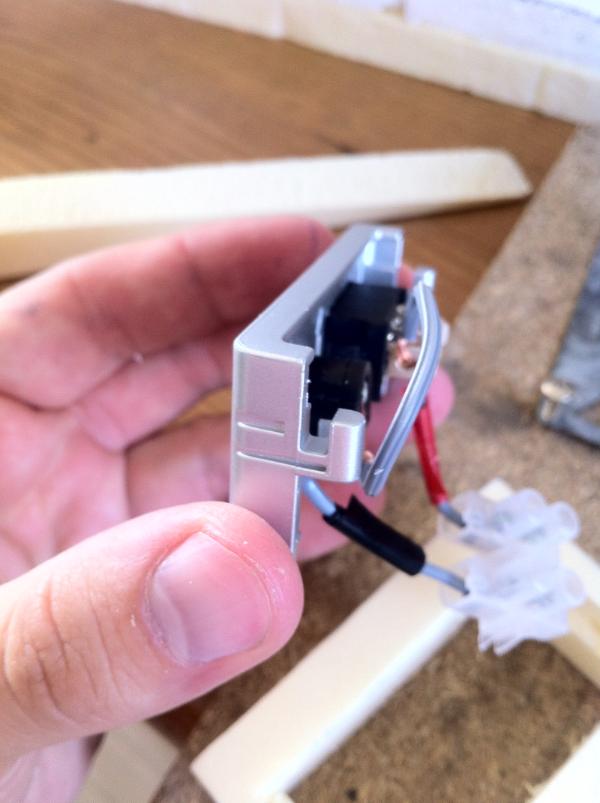
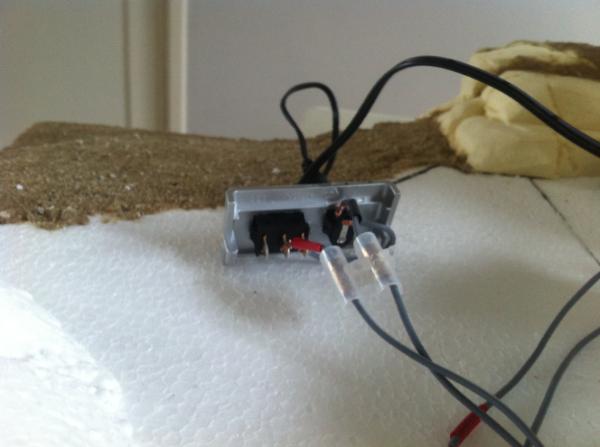
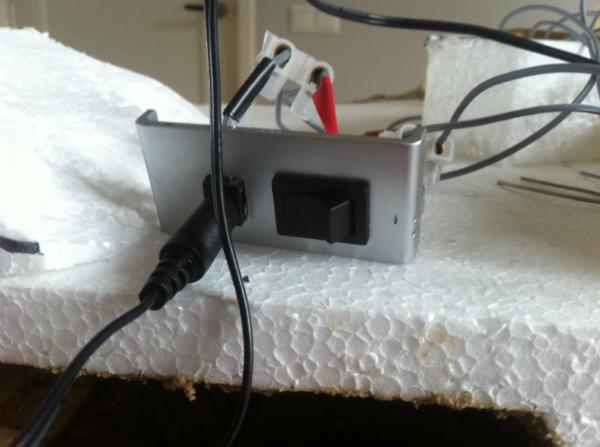
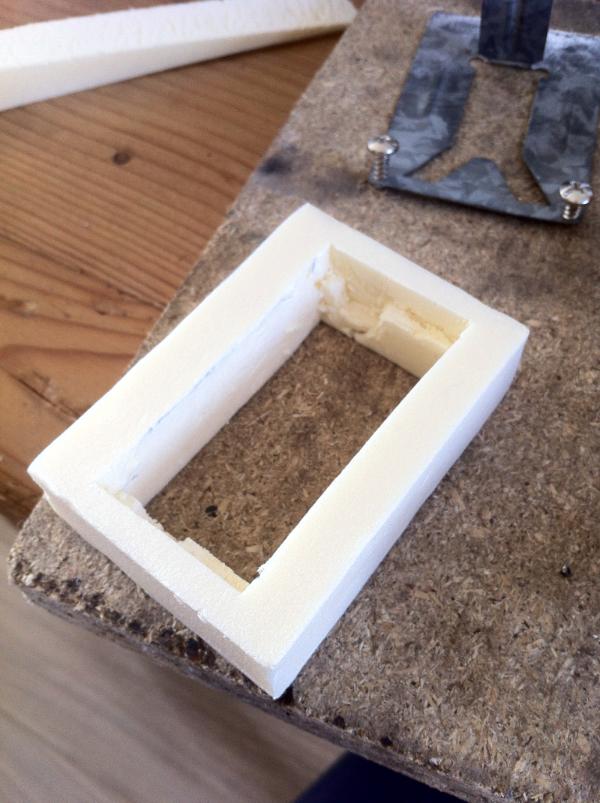
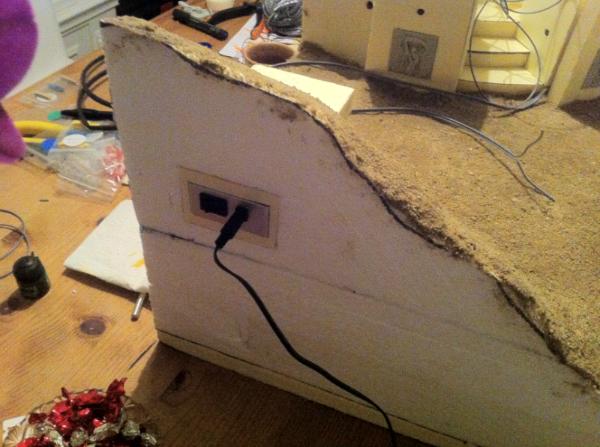
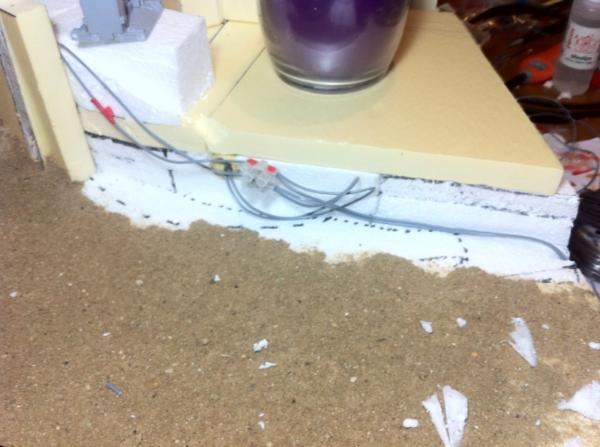
- the wiring and lightning on the Battle board so I have 2 main connection points on either side of the temple mountain with the power switch and adapter plug fixed in place.
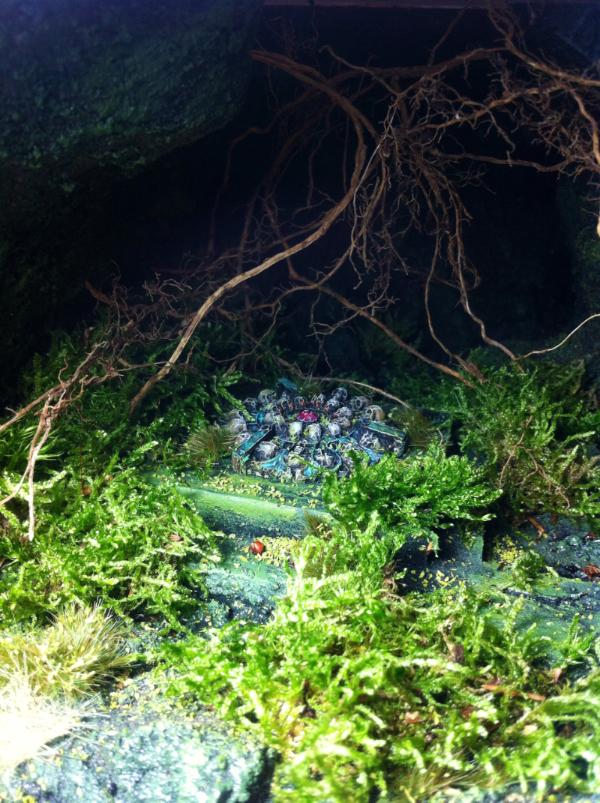
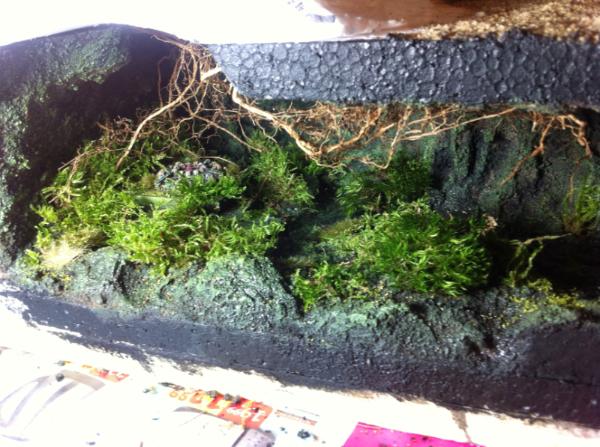
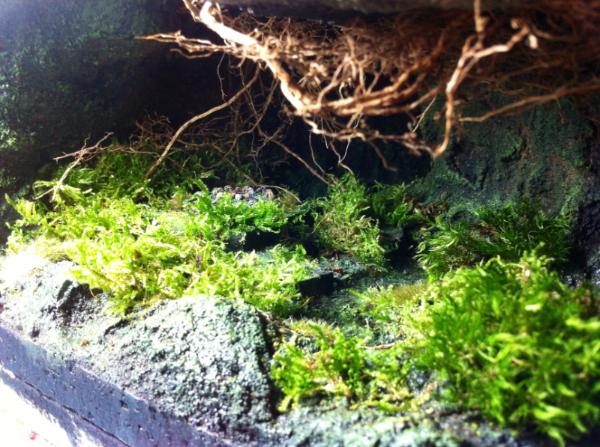
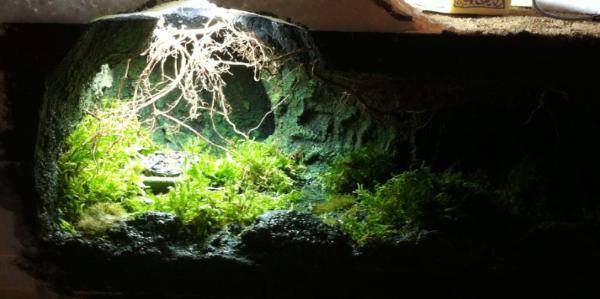
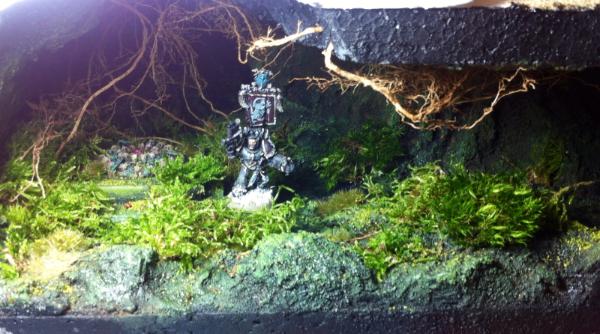
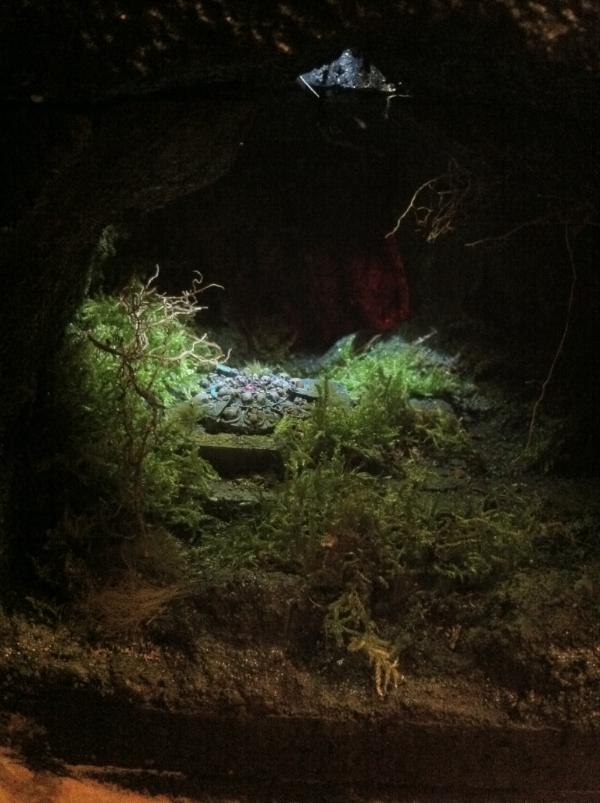
- Added the tomb cave lights so it shows the light fall from the ceiling and the reddish glow from the deeper cave lava. (took in the comments made by you guys on the cave and removed some greens.)
- I've also filled in gaps on the wall sections and mountain sections above the tomb cave.
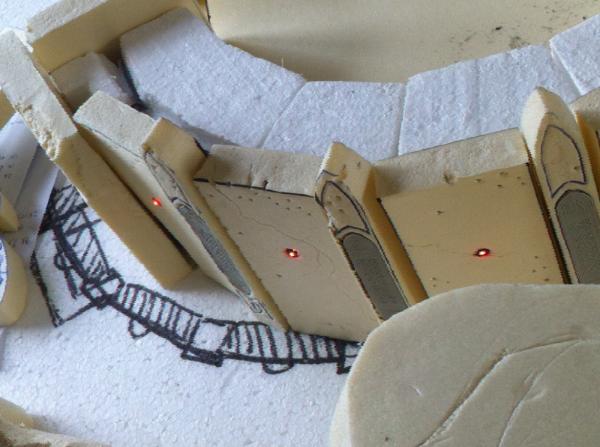
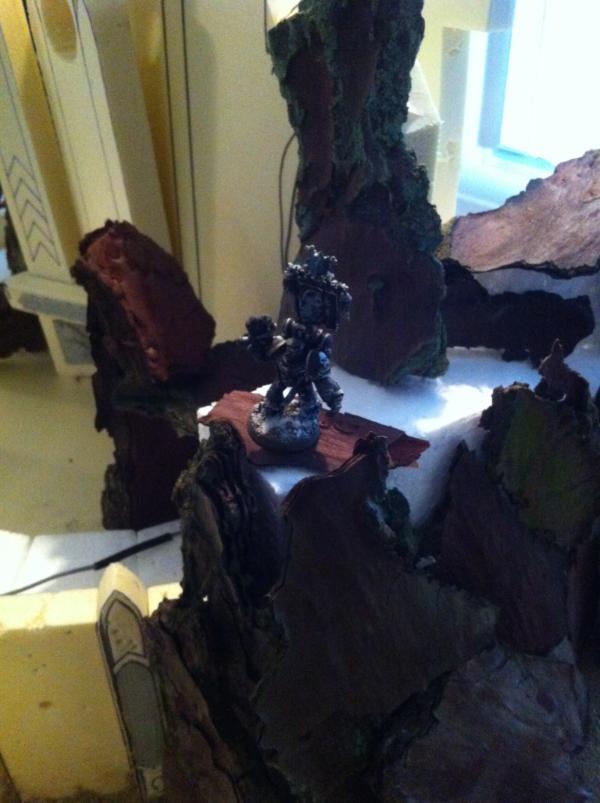
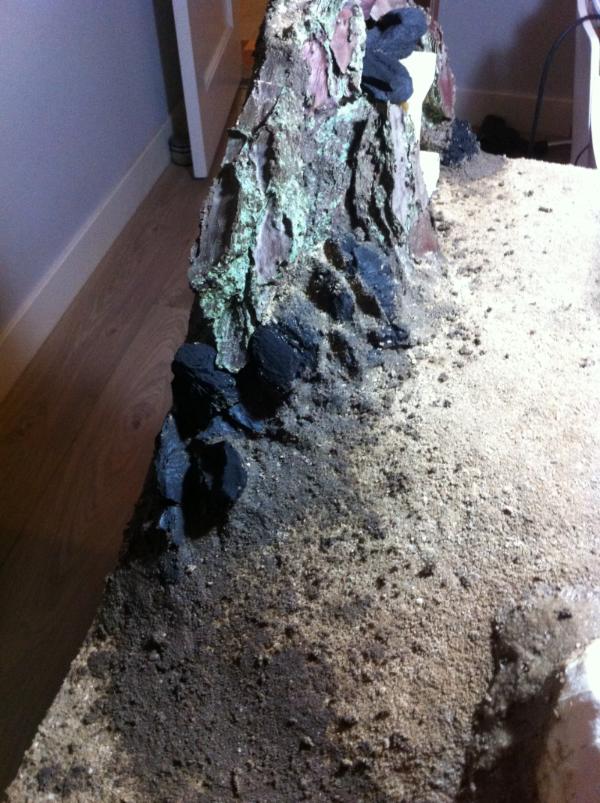
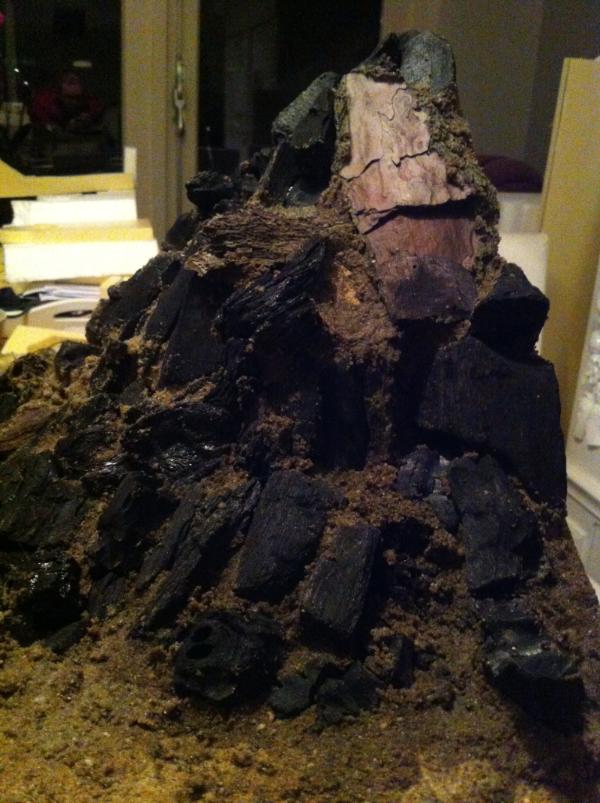
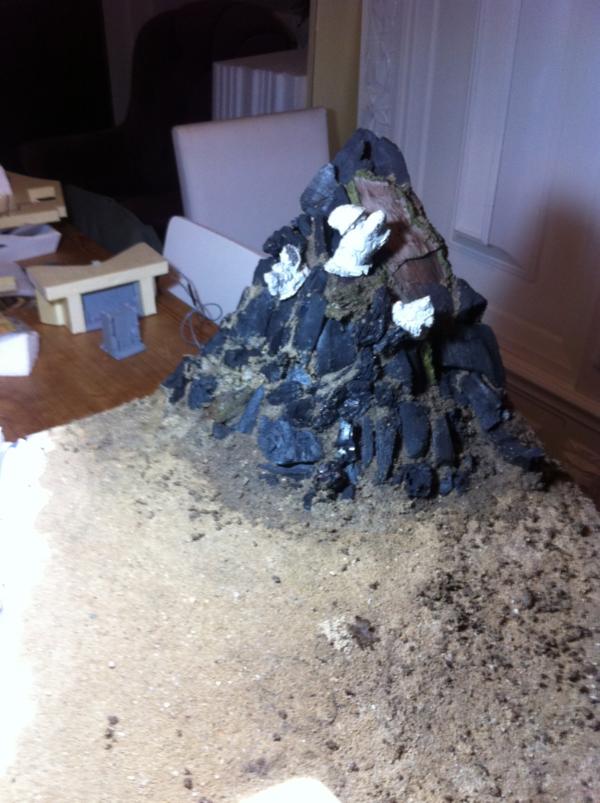
- I've test fitted and hotglued the bark and coals for the rockwork on both the side hills.
- Also sandglued the seems between the rockwork to finish of the two smaller mountain hills on either side of the Temple mount
Enjoy the pictures and as always, comments are more than welcome!
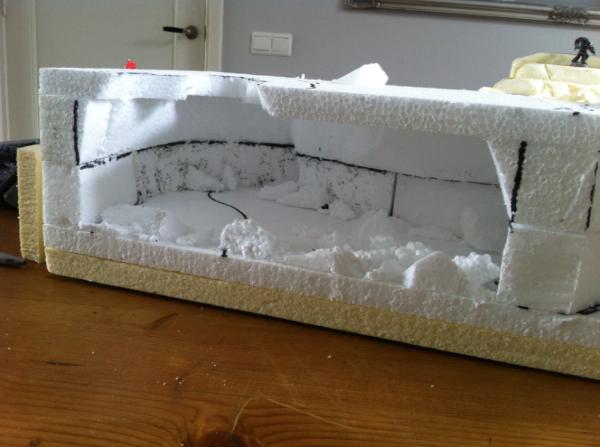
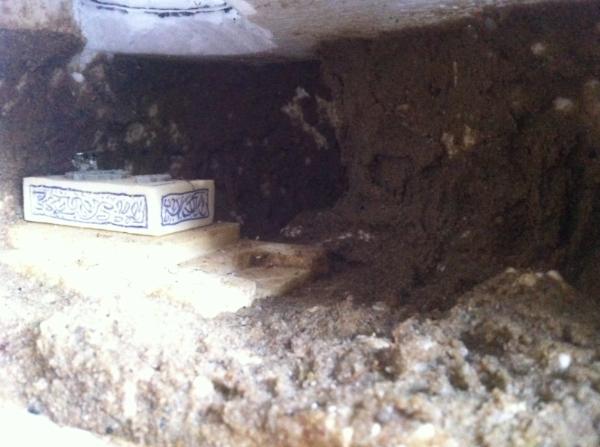
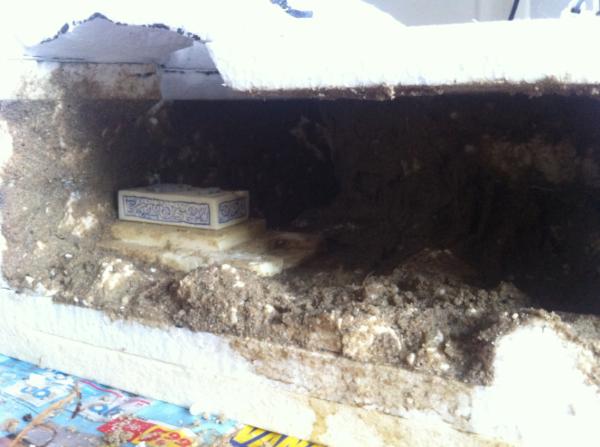
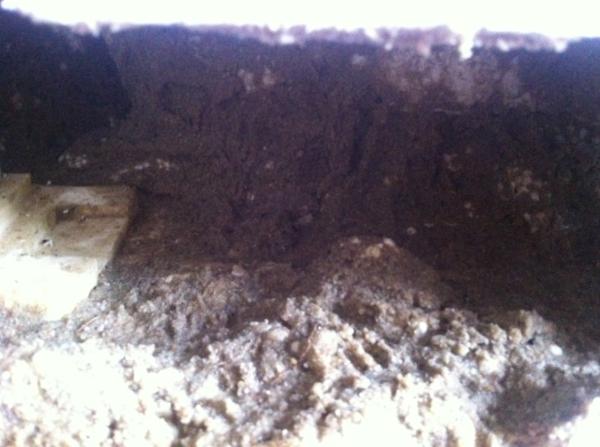
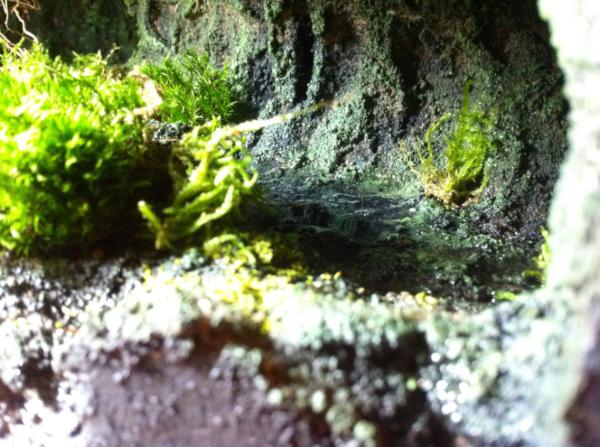
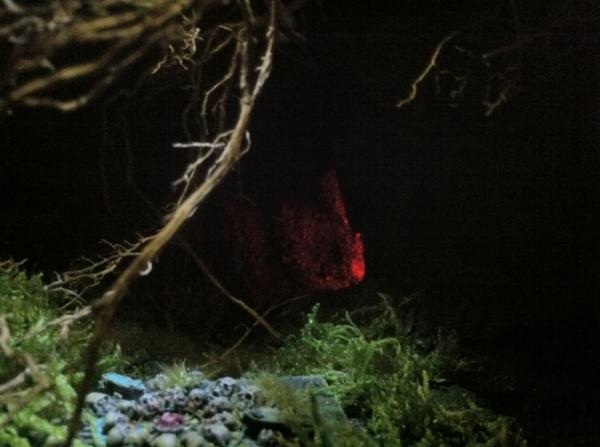
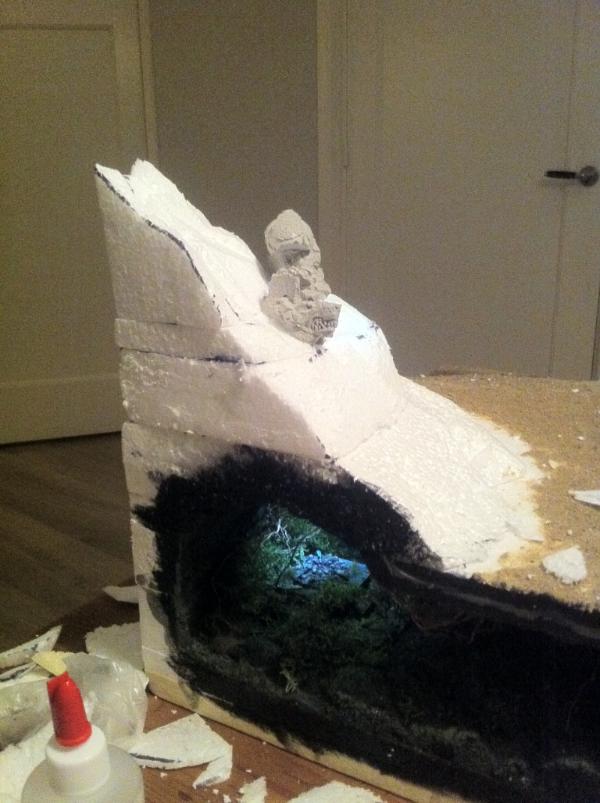
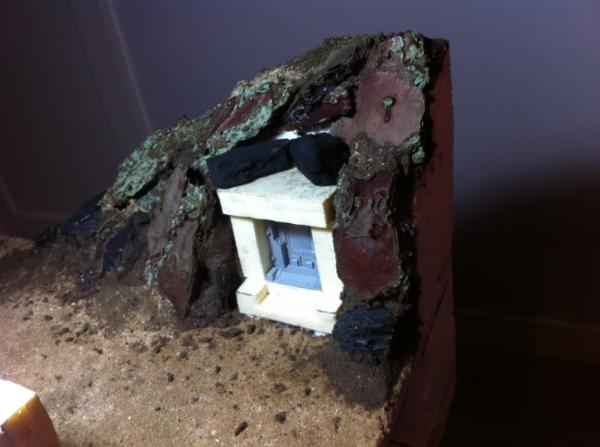
You can't really see it as good on the photo as you can in real life, but the reddish glow in the back side of the cave is much more prominent than it is on the photo.
closeup on the reddish lava glow in the back side of the tomb cave.
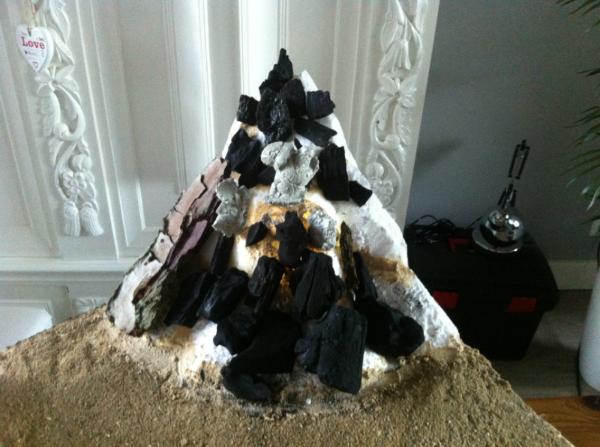
Tomb cave mountain

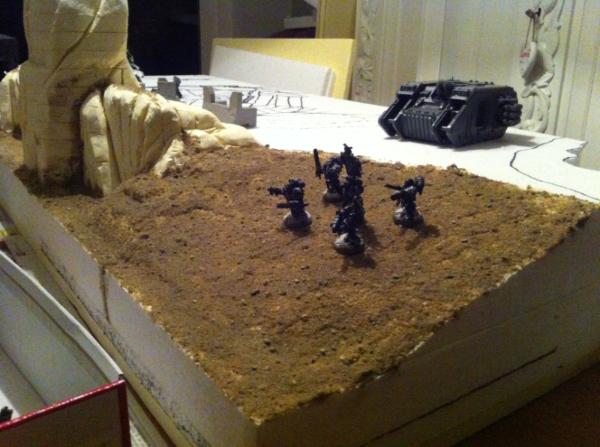
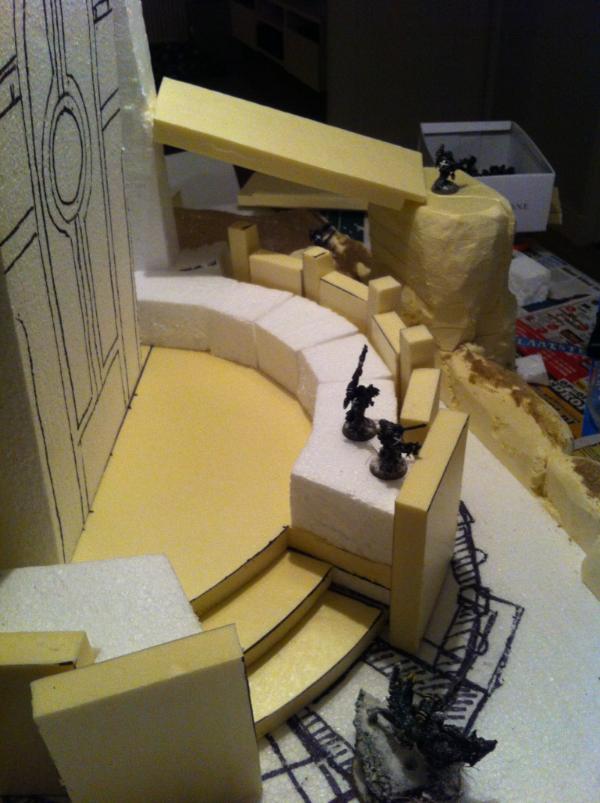
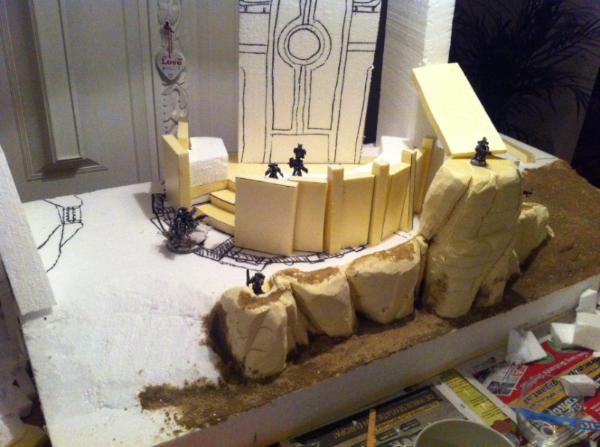
Pre fitted the bark and coal pieces for the rock work
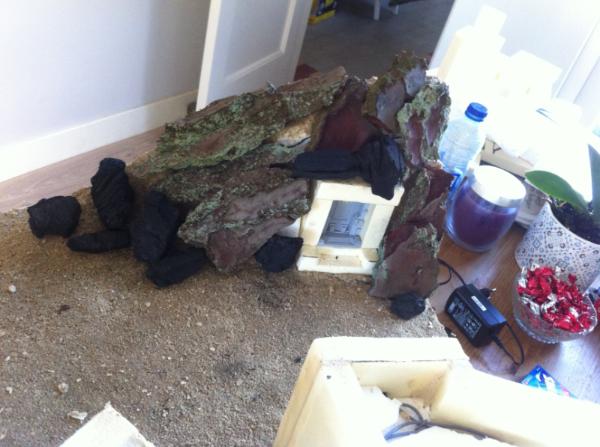
After hot-glueing them to the board

Added some more coals to make the rock work flow more easily into the board and filled up the seems with sand-glue.

Rockwork on tomb cave mountain.
With unpainted ornaments
Well thats all for this update. Next update will contain some more painting (doors and ornaments). I also hope to finish the lighting in the subterranean hall and the pathway to the secondary entrance / escape route. And maybe even get started on finishing up the two other diorama's.
|
|
|
|
|
|
2014/10/20 14:04:06
Subject: WIP - A typical Fenrisean summer temple fortress and city ruins with a river, bridge and lights
|
|
Drakhun
|
wow man, just....wow
|
|
|
|
|
|
2014/10/20 14:50:53
Subject: WIP - A typical Fenrisean summer temple fortress and city ruins with a river, bridge and lights
|
|
Wight Lord with the Sword of Kings
|
This is simply awesome.
|
|
|
|
|
|
2014/10/20 15:16:49
Subject: WIP - A typical Fenrisean summer temple fortress and city ruins with a river, bridge and lights
|
|

Khorne Veteran Marine with Chain-Axe
|
What is the sustainability on using things like bark for building? Won't they rot over time? Also, are you coating the coal with anything to prevent it making a mess in the future?
|
|
|
|
|
2014/10/20 15:22:21
Subject: WIP - A typical Fenrisean summer temple fortress and city ruins with a river, bridge and lights
|
|
Martial Arts Fiday
|
paint over the bark/cola should make it pretty durable.
It looks pretty damn cool so far. Only thing I'm not completely sold on is the ornaments on the hill. They look like ruins that were just dropped there.
|
"Holy Sh*&, you've opened my eyes and changed my mind about this topic, thanks Dakka OT!"
-Nobody Ever
Proverbs 18:2
"CHEESE!" is the battlecry of the ill-prepared.
warboss wrote:
GW didn't mean to hit your wallet and I know they love you, baby. I'm sure they won't do it again so it's ok to purchase and make up.
Albatross wrote:I think SlaveToDorkness just became my new hero.
EmilCrane wrote:Finecast is the new Matt Ward.
Don't mess with the Blade and Bolter! |
|
|
|
|
2014/10/20 16:27:54
Subject: Re:WIP - A typical Fenrisean summer temple fortress and city ruins with a river, bridge and lights
|
|
Speedy Swiftclaw Biker
|
Hey guys thanks for the comments so far.
Yes bark and coal on its own arn't really that strong but with two light coats of watered down pva plus a couple of acrylics coats and a mat varnis coat on top will make it quite durable. Not as strong as pure resin mountain casts but I don't think my client will use the boards for snow-boarding
Coal and bark are the most inexpensive and most realisticly looking miniature rocks you can use.
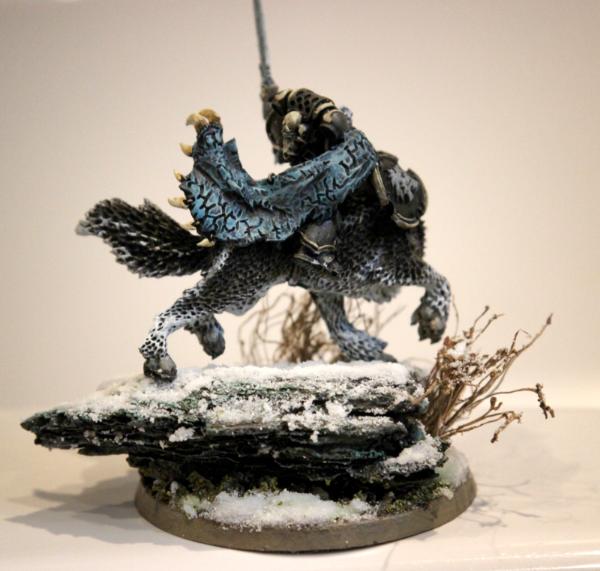
I've used it before:
Coal chunk
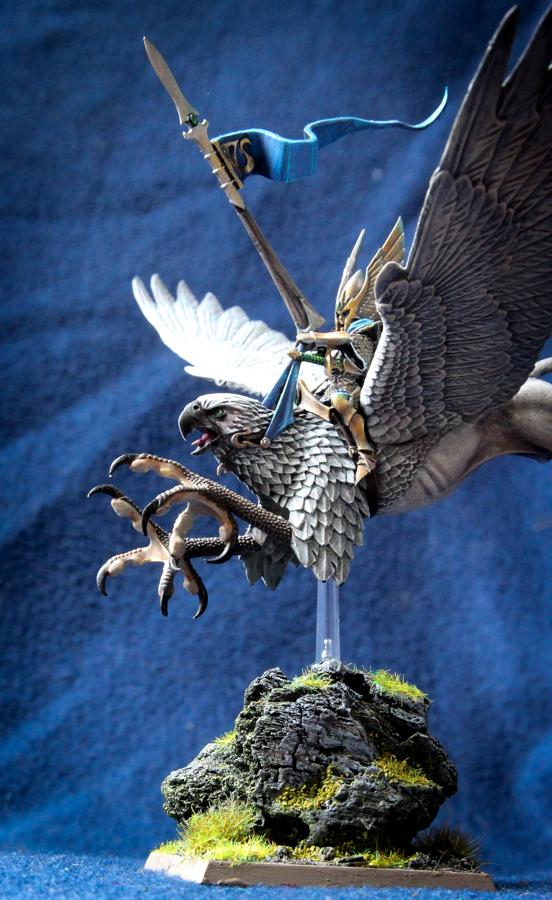
Bark
And about the ornaments..
Yes I'm not entirely sure either but they arn't mixed in to the mountain just jet because I need to paint them seperately. Also the paint will do allot for blending it in and so will the vegitation and snowy frost effects I will add when finishing the board. So it might just work out ok. If not... Gone they will be!
|
|
This message was edited 2 times. Last update was at 2014/10/20 16:30:51
|
|
|
|
|
2014/10/20 20:53:35
Subject: WIP - A typical Fenrisean summer temple fortress and city ruins with a river, bridge and lights
|
|
Pious Palatine
|
Oh my balls. This is amazing! Keep up the great work.
D
|
|
|
|
|
2014/10/22 01:28:30
Subject: WIP - A typical Fenrisean summer temple fortress and city ruins with a river, bridge and lights
|
|
Tail-spinning Tomb Blade Pilot
|
You have my attention.
|
DZC - Scourge
  |
|
|
|
|
2014/10/22 07:02:12
Subject: WIP - A typical Fenrisean summer temple fortress and city ruins with a river, bridge and lights
|
|

Longtime Dakkanaut
|
Excellent artist skills
Engineering not so much, so here's my advice to making your art stronger:
- Drop the white foam altogether, it's just not worth your time. Use only insulation foam, it's tougher and easier to work with, and also often free.
- When making caves, you'll want to have much stronger materials - I would definitely use wood for your tomb cave. Otherwise if somebody just leans lightly on it it'll be destroyed. And leaning on gaming tables happens.
- Basing the whole board on a stronger material is not necessary, but it does a lot to improve longevity, strengthening the sides is even better.
- The LEDs seem to be intact, you can try sanding their bulbs to diffuse light better, it should give a nicer lighting effect.
Your dioramas are awesome, the coal for the rocks looks excellent and you've got the right ideas. I'm not sure the table will be really playable but at least it will be beautiful.
|
|
This message was edited 1 time. Last update was at 2014/10/22 07:02:29
|
|
|
|
|
2014/10/22 08:26:05
Subject: Re:WIP - A typical Fenrisean summer temple fortress and city ruins with a river, bridge and lights
|
|
Speedy Swiftclaw Biker
|
Hi guys,
Thanks Morgoth for your complement, advice and comments, this is why I post here. Let me address all your points one at a time.
The white foam you see in the pictures already is the strong insulation construction foam. And I've given it a coating with a realy hardned 3 layered coating of a homemade sand-glue mixture. It is as hard as rock (comparable with cement but then more flexible and it bonds to the foam realy well). And I exidentilly battle tested it because had it laying on the floor and exidentilly stepped on a corner. The board still looked the same. (Must say there was a solide part of foam underneath and I don't want to try that on the cave part!)
So I will definitly look into creating the backside dioramas with wooden roofs support layers to make sure that the cave collapsing will not happen easily.
I was also thinkering and concidering about putting the boards on a wooden plate with wooden hardboard sides but that would make the board really heavy and almost imposible to handle on your own. The coating I used in the sand-glue mixture is so hard, flexible and durable (and I also think allot lighter than wood and way more cheaper) that I was considering on using that as a coating for the entire board sides instead of the wood construction. And then finishing the sides off with a final layer of black industrial "vilt" (the green toplayer stuff they make pooltables from). So what would you advice me to do?
And really thanks for the tip with the leds I will definitly try that!
And again thanks for your comments and advice. Really appreciate that.
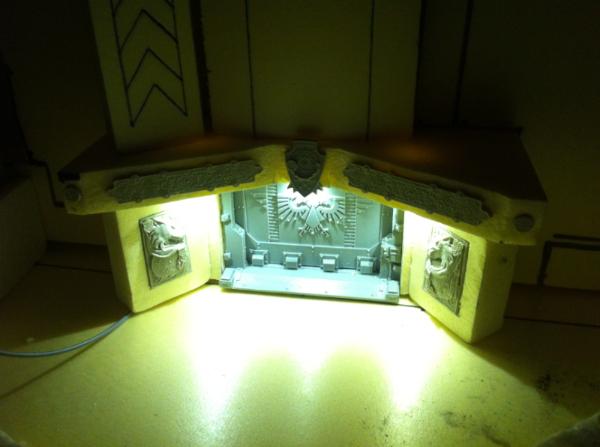
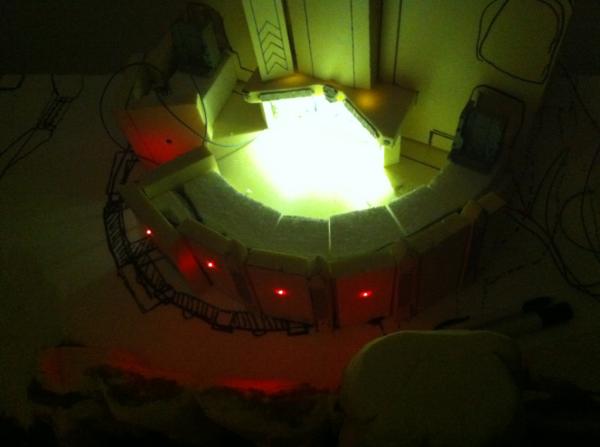
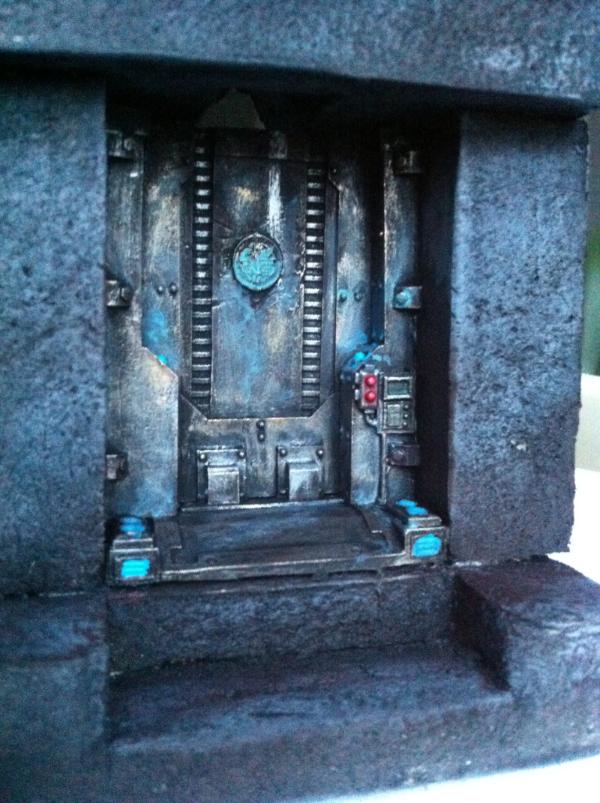
Automatically Appended Next Post: Small Update:
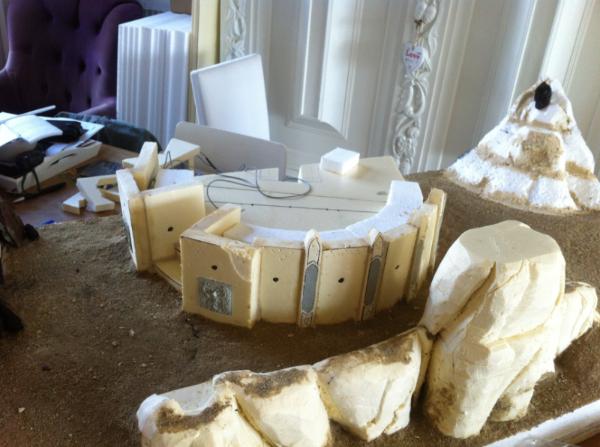
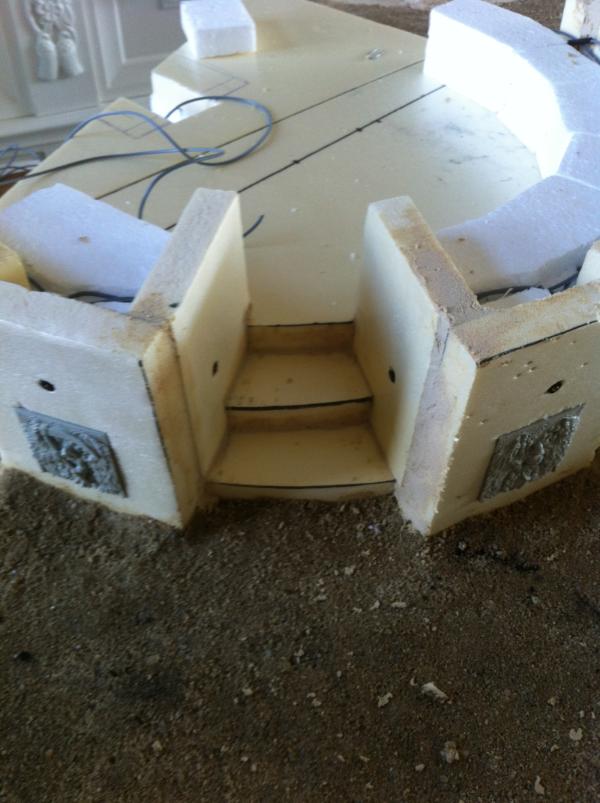
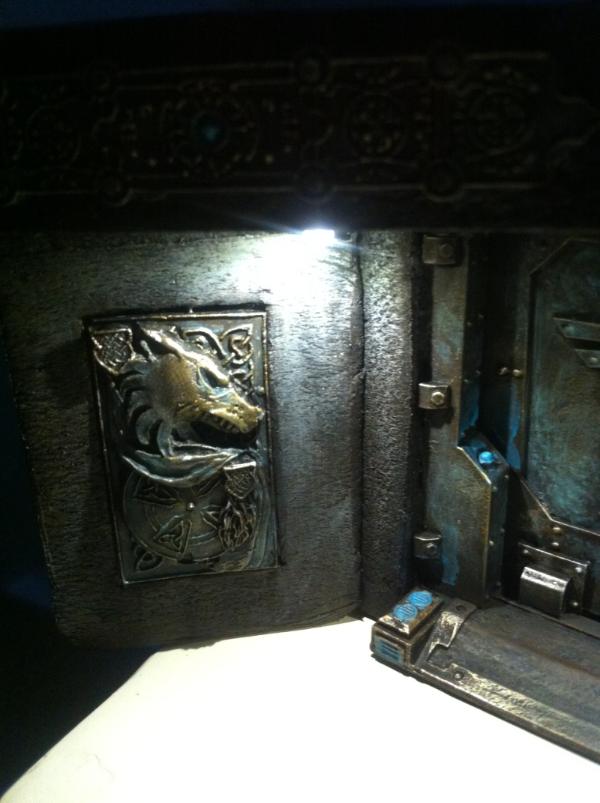
Yesterday evening I've painted the basic colors for the main entrance and the smaller side way entrance. These will form the base for all kinds of weathering additions to make the heavy alien-like metallic doors even more ancient and worn.
Enjoy and as always C&C are welcome!
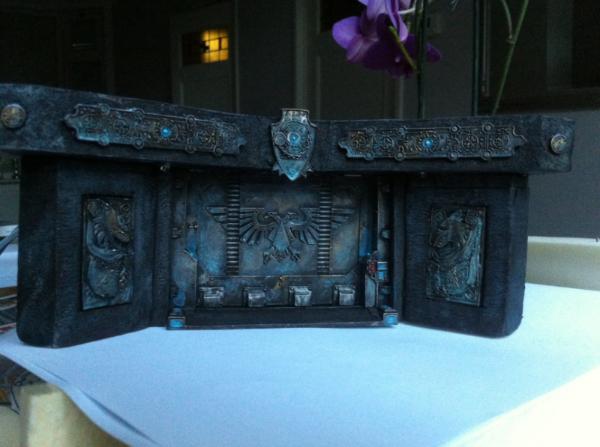
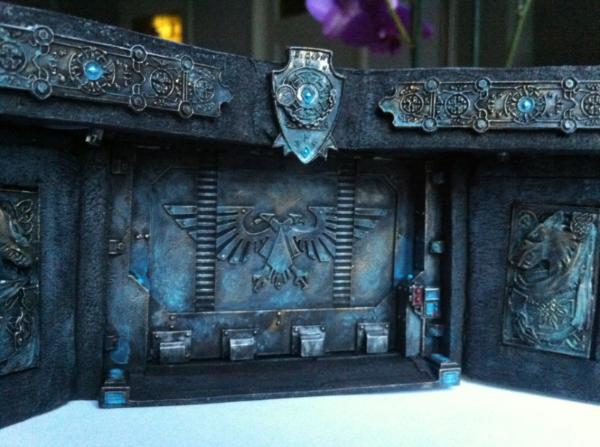
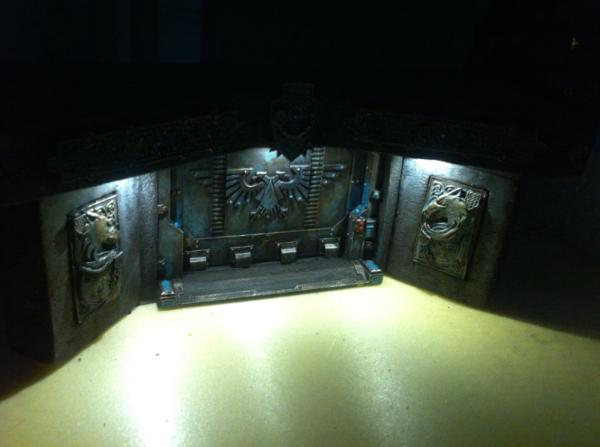
With lights turned on:
|
|
This message was edited 1 time. Last update was at 2014/10/22 08:54:28
|
|
|
|
|
2014/10/22 10:05:47
Subject: WIP - A typical Fenrisean summer temple fortress and city ruins with a river, bridge and lights
|
|
Deadly Dark Eldar Warrior
|
Just plain epic!
Where will this beauty be shipped to? Would love to see it in the flesh sometimes.
One more electrical engineering remark:
Put some 100 Ohm resistors between the LEDs and the supply to stop them from overheating.
And as to the moddeling:
Gruwelijk goed!
|
|
|
|
|
2014/10/22 10:37:11
Subject: Re:WIP - A typical Fenrisean summer temple fortress and city ruins with a river, bridge and lights
|
|
Speedy Swiftclaw Biker
|
Oh thanks Bathroom1!
This board will stay in Tilburg, Netherlands (where I live), client is a friend of mine. So I'm always happy to know I can go take a look at the board If I'm starting to mis it.  I think that could be arranged. I could ask my friend to take the board to our local gaming store where we could have a battle on it?
I've put resistors in, based upon individual series of LED's on a 12v adapter with a 1,5A capacity (which means it could support roughly on the save side 70 LED's with a 20 mili ampere usage).
Different colors mean different Voltages: red 1.8v, orange 2.1v, White, blue and green 3,3v. So I've got that covered as well.
Thanks for mentioning it anyways!
|
|
|
|
|
|
2014/10/22 11:41:17
Subject: Re:WIP - A typical Fenrisean summer temple fortress and city ruins with a river, bridge and lights
|
|
Longtime Dakkanaut
|
 Remco_Tuerlings wrote: Remco_Tuerlings wrote:
Thanks Morgoth for your complement, advice and comments, this is why I post here. Let me address all your points one at a time.
The white foam you see in the pictures already is the strong insulation construction foam. And I've given it a coating with a realy hardned 3 layered coating of a homemade sand-glue mixture. It is as hard as rock (comparable with cement but then more flexible and it bonds to the foam realy well). And I exidentilly battle tested it because had it laying on the floor and exidentilly stepped on a corner. The board still looked the same. (Must say there was a solide part of foam underneath and I don't want to try that on the cave part!)
So I will definitly look into creating the backside dioramas with wooden roofs support layers to make sure that the cave collapsing will not happen easily.
I was also thinkering and concidering about putting the boards on a wooden plate with wooden hardboard sides but that would make the board really heavy and almost imposible to handle on your own. The coating I used in the sand-glue mixture is so hard, flexible and durable (and I also think allot lighter than wood and way more cheaper) that I was considering on using that as a coating for the entire board sides instead of the wood construction. And then finishing the sides off with a final layer of black industrial "vilt" (the green toplayer stuff they make pooltables from). So what would you advice me to do?
My pleasure.
1. I had no idea - it looked so much like the usual white packing foam that loses beads all the time that I thought you had picked it for being cheap or something else.
2. WRT coating, mike from terranscapes told me he uses a product called "foam coat" which makes a hard surface on top of the insulation foam. I don't believe that the sand+PVA mix is any protection, did you use another glue ? Good job with the testing
3. Wood can be light if you don't add too much of it. I use hardboard but I advise checking the quality of the hardboard before (some are more dense and better glued than others) or just using MDF. A layer of hardboard on the bottom and the sides will keep it relatively light. It's really cheap too. If plasticard was affordable I'd tell you to use that, like Mike does, but then I don't think you're looking at the same budgets
4. The "vilt" stuff sounds like an awesome idea, it would take care of most of the micro-gaps while also looking like grass - as long as the colors match that is.
|
|
|
|
|
2014/10/22 12:14:54
Subject: Re:WIP - A typical Fenrisean summer temple fortress and city ruins with a river, bridge and lights
|
|
Speedy Swiftclaw Biker
|
morgoth wrote: Remco_Tuerlings wrote: Thanks Morgoth for your complement, advice and comments, this is why I post here. Let me address all your points one at a time. The white foam you see in the pictures already is the strong insulation construction foam. And I've given it a coating with a realy hardned 3 layered coating of a homemade sand-glue mixture. It is as hard as rock (comparable with cement but then more flexible and it bonds to the foam realy well). And I exidentilly battle tested it because had it laying on the floor and exidentilly stepped on a corner. The board still looked the same. (Must say there was a solide part of foam underneath and I don't want to try that on the cave part!) So I will definitly look into creating the backside dioramas with wooden roofs support layers to make sure that the cave collapsing will not happen easily. I was also thinkering and concidering about putting the boards on a wooden plate with wooden hardboard sides but that would make the board really heavy and almost imposible to handle on your own. The coating I used in the sand-glue mixture is so hard, flexible and durable (and I also think allot lighter than wood and way more cheaper) that I was considering on using that as a coating for the entire board sides instead of the wood construction. And then finishing the sides off with a final layer of black industrial "vilt" (the green toplayer stuff they make pooltables from). So what would you advice me to do?
My pleasure. 1. I had no idea - it looked so much like the usual white packing foam that loses beads all the time that I thought you had picked it for being cheap or something else. 2. WRT coating, mike from terranscapes told me he uses a product called "foam coat" which makes a hard surface on top of the insulation foam. I don't believe that the sand+PVA mix is any protection, did you use another glue ? Good job with the testing 3. Wood can be light if you don't add too much of it. I use hardboard but I advise checking the quality of the hardboard before (some are more dense and better glued than others) or just using MDF. A layer of hardboard on the bottom and the sides will keep it relatively light. It's really cheap too. If plasticard was affordable I'd tell you to use that, like Mike does, but then I don't think you're looking at the same budgets 4. The "vilt" stuff sounds like an awesome idea, it would take care of most of the micro-gaps while also looking like grass - as long as the colors match that is.
1. Haha ok. Well no problem. I spare no cost on building these boards when it comes to quality. And for a pack of 5 white insulating foam plates of 5cm by 100cm by 50cm cost me € 7,95. So It ain't that expensive. The HD foam on the other hand was quite expensive thou... € 37,50 to be precise for 10 plates of 2cm by 60cm by 125cm. 2. Yes I've used a different glue than PVA. And there's also only 1 shop in the Netherlands where I can find it (in Amsterdam near where I work). And its just 2.25 euro per 200ml bottle. It is washable and can be thinned by water. And I've used 4 bottles on the whole sand-coating just yet. Thats 9 Euro's in total. To make the mixture I used to thin the glue down in a big bowl with 1 to 6 ratio and then add mortar sand. And then use gloves to mix the two up until you have a pasty clayish substance. And when you want to apply it to a surface you need to rub it on there with your hands because initially it will not stick directly. But if you have a bit of patience you can manage to smear it on to almost anything. It needs a day or 2 in a room temperature to set entirely but it becomes really hard. 3. Yes I will look in to that. Indeed I want the quality stuff. It's all about balance between weight and durability I think. 4. Yes I wanted to buy the black one for it comes on rolls of 1m width and for 8 euro's per meter. Which will cost me another 45 euro's to do all boards, but I think it will mean the difference between a really good home made board and a pro board. I was also thinking of using cheap acrylic kit (which I have laying around) to smoothen the surface of the sides first before glueing the "vilt" on (after i've added the glue coating off course). And I could indeed use my airbrush to give the black vilt a color if I want to blend in the tops... I'm so excited to read all comments and looking so much forward on the placing a photo series on the finial boards... it really pushes me to keep working hard on the project! Thanks you guys!
|
|
This message was edited 3 times. Last update was at 2014/10/22 12:33:52
|
|
|
|
|
2014/10/23 06:29:26
Subject: Re:WIP - A typical Fenrisean summer temple fortress and city ruins with a river, bridge and lights
|
|
Speedy Swiftclaw Biker
|
|
|
|
|
|
|
2014/10/23 07:46:30
Subject: WIP - A typical Fenrisean summer temple fortress and city ruins with a river, bridge and lights
|
|
Stealthy Grot Snipa
|
I dont know what to say....
other than you make me want to make terrain! and I barely have time to make mini's!
This is indeed all kinds of awesome, some truely fantastic work, I love the style, your painting skills really bring the whole thing to life, they give it such lovely texture and the colours are awesome.
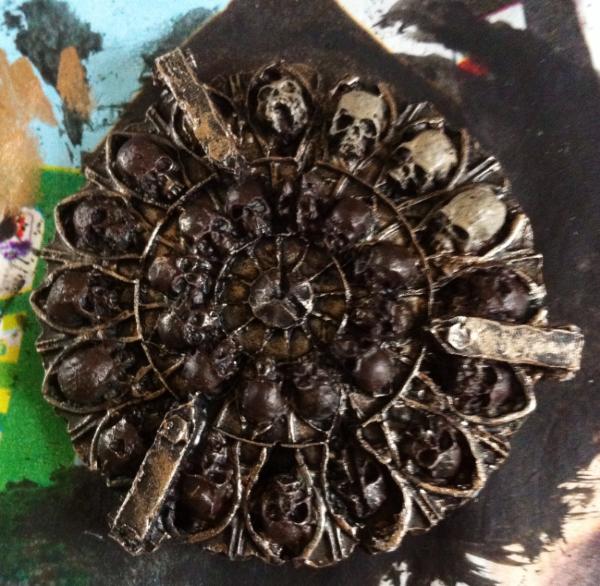
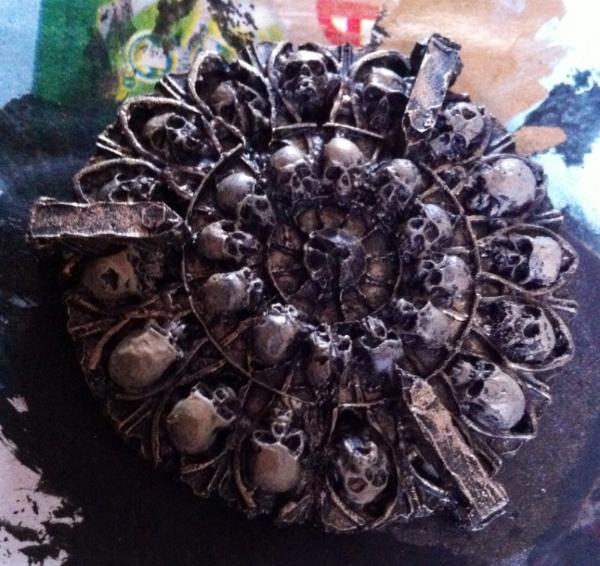
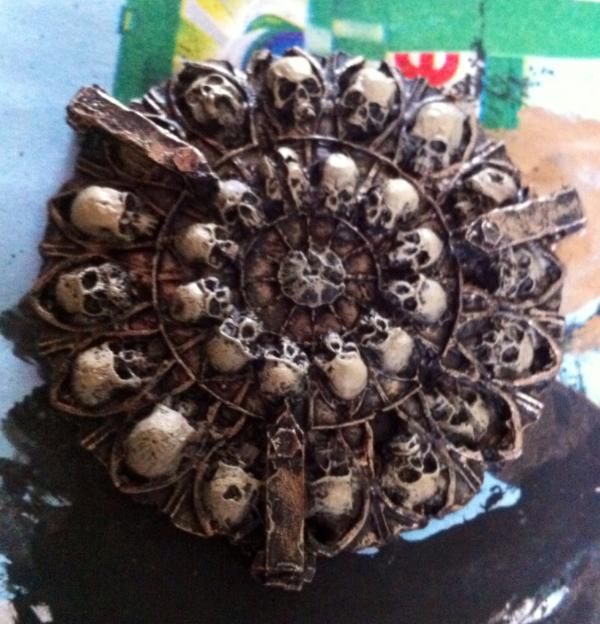
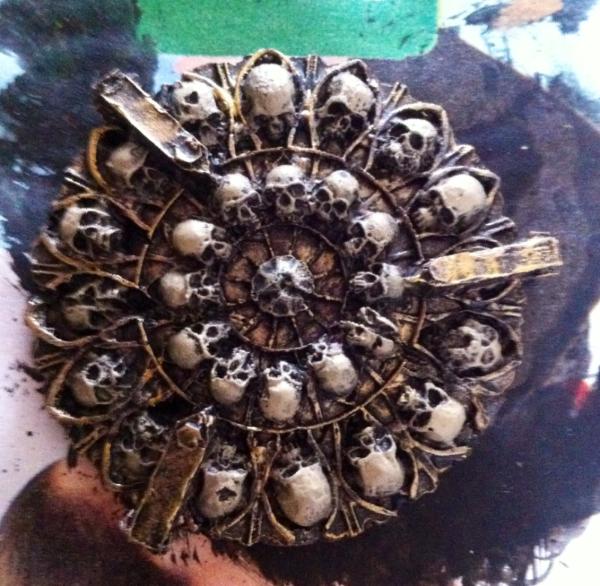
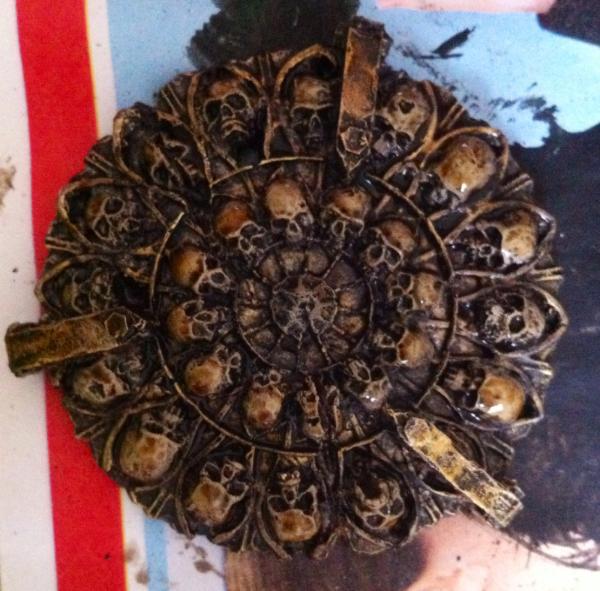
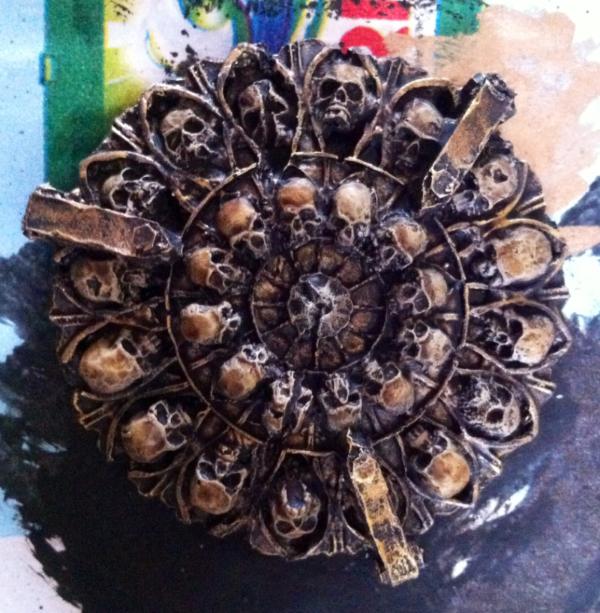
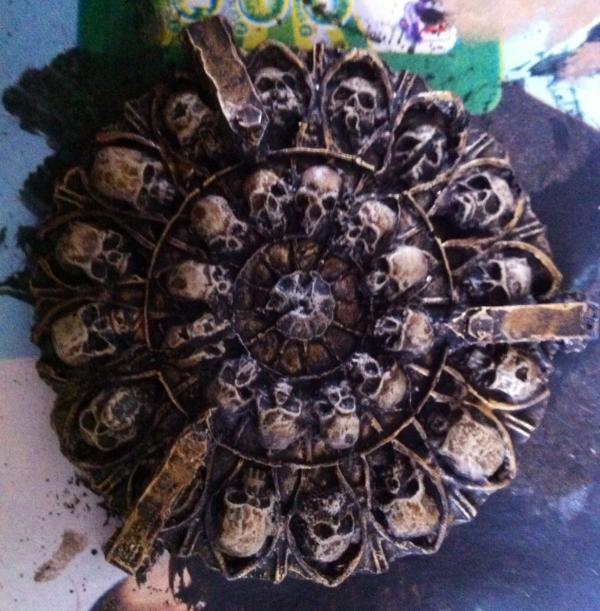
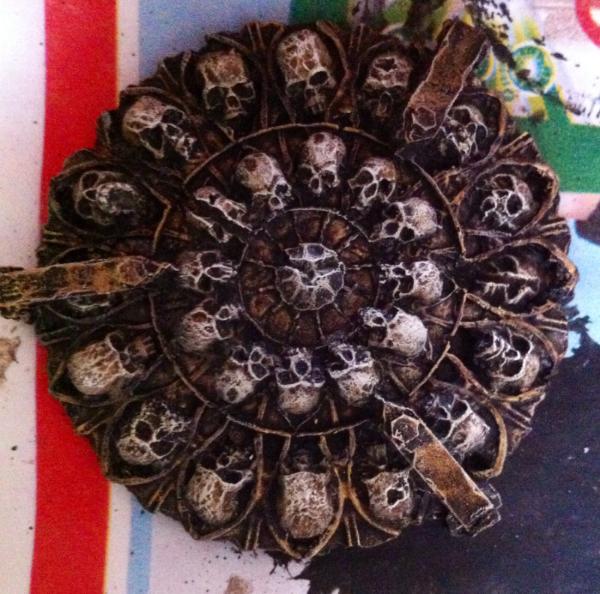
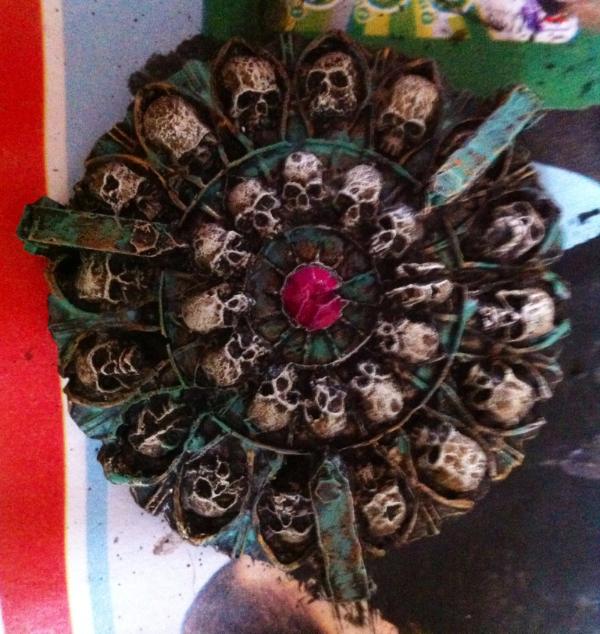
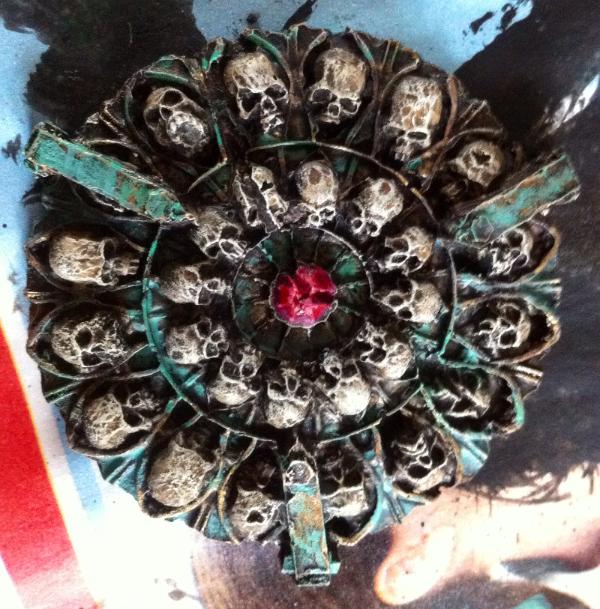
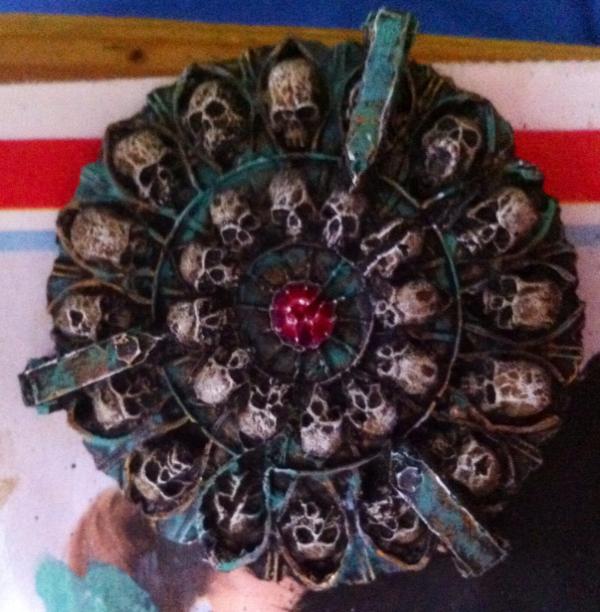
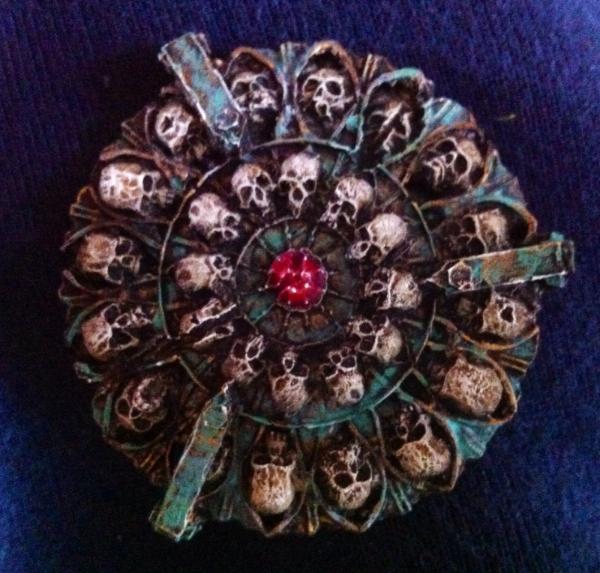
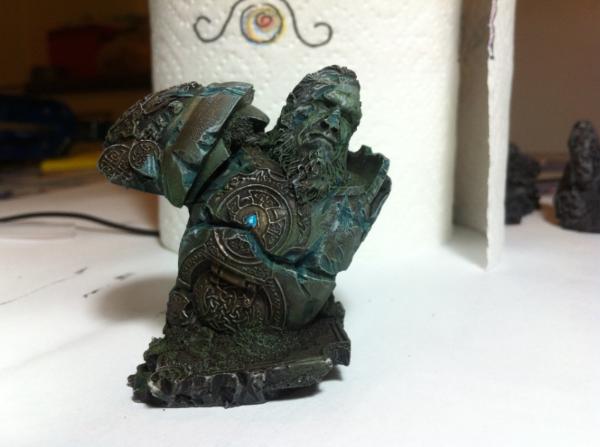
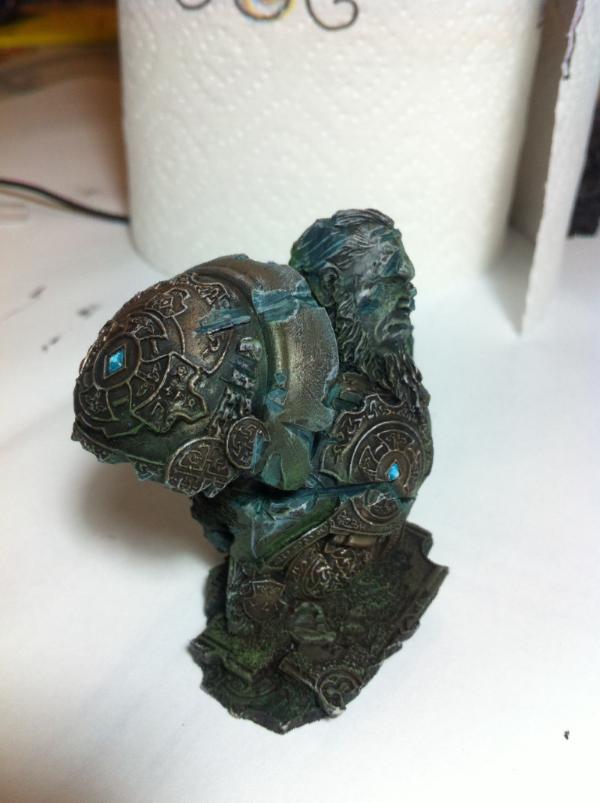
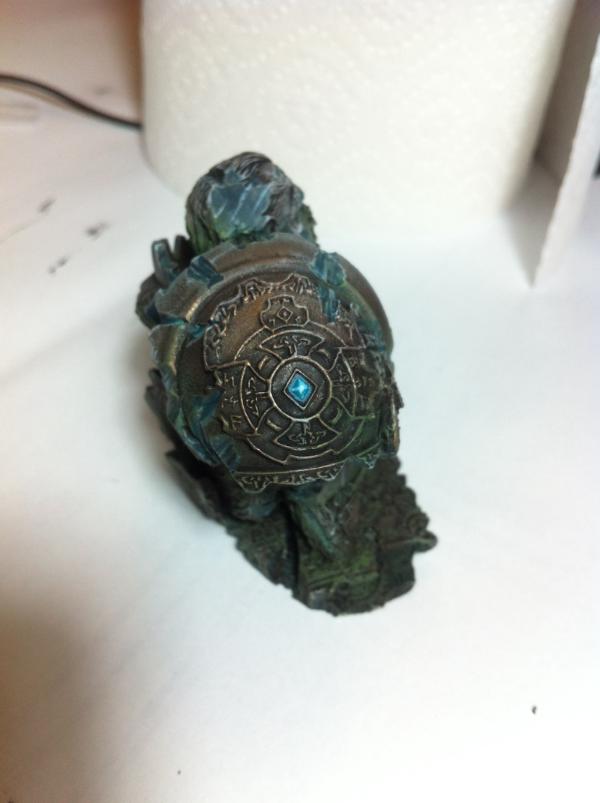
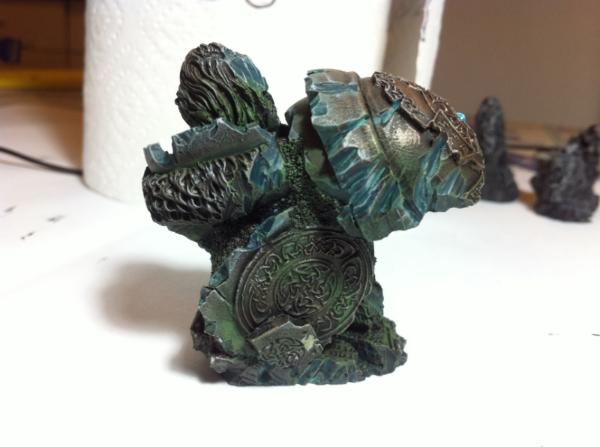
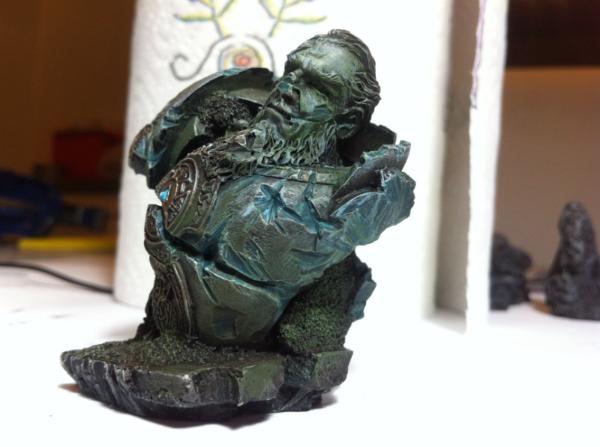
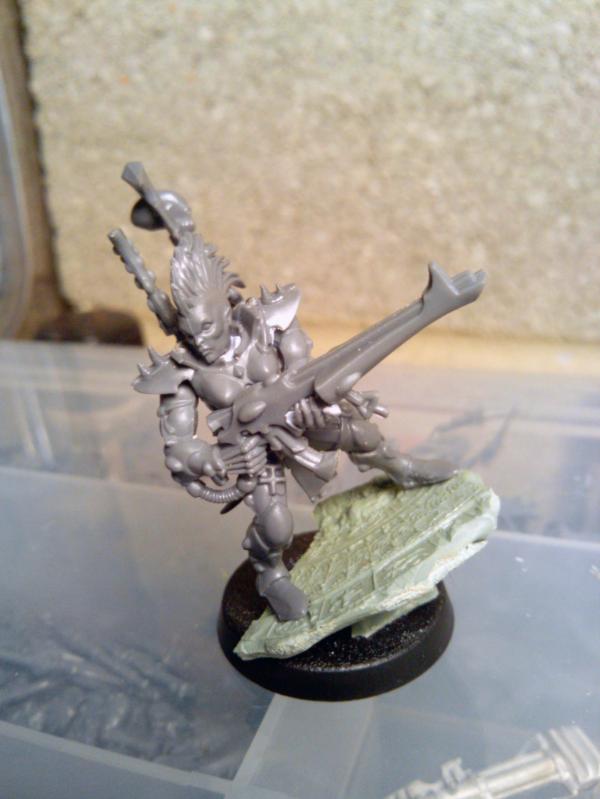
omg... I just realised that your 'basestone' is a mix of foam for the body and then plastic details? and a GS beard! oh wow... I thought that was a bought piece from somewhere like scribor..... impressed to say the least.
Man I wana make some terrain :( Stupid job! Ima just go quit and go home!
Oh yeh! also really enjoyed the frizbie in the initial photos or atleast it looked like a frizbie
Somethings I would consider...
https://www.youtube.com/watch?v=vHmk6kgYA-w
Oyumaru if you've never come across it before, but it rocks my world and im sure you could use it to great effect.
its very useful for making broken rocks, pieces of statues etc... and saves you quite a lot of money if your doing this alot
|
|
This message was edited 1 time. Last update was at 2014/10/23 07:47:12
Favourite Game: When your Warboss on bike wrecks 3 vehicles simply by HoW - especially when his bike is a custom monowheel.
|
|
|
|
|
2014/10/23 09:16:09
Subject: Re:WIP - A typical Fenrisean summer temple fortress and city ruins with a river, bridge and lights
|
|

Veteran Wolf Guard Squad Leader
|
Stunning work, particularly the tomb cave, it's oozing with atmosphere. Thanks for posting this up -it's a real inspiration for my own planned terrain projects.
|
I let the dogs out |
|
|
|
|
|
|