Forum adverts like this one are shown to any user who is not logged in. Join us by filling out a tiny 3 field form and you will get your own, free, dakka user account which gives a good range of benefits to you:
No adverts like this in the forums anymore.
Times and dates in your local timezone.
Full tracking of what you have read so you can skip to your first unread post, easily see what has changed since you last logged in, and easily see what is new at a glance.
Email notifications for threads you want to watch closely.
Being a part of the oldest wargaming community on the net.
If you are already a member then feel free to login now.
2015/01/21 03:44:25
Subject: Sm3gs Blog! - Alpha Legion Added! (Updated June 16)
So am currently in an escalation league of sorts - not your typical type though. The one our GW store is currently running is literally deigned to finish things on your shelf (or start fresh projects if you so desire). Basically every "block" of the escalation there are limits to how many types of units you can paint, you get points for pledging and finishing stuff. After nearly a year of not really being able to get into my painting, this gave me a reason and I find myself finally motivated to get things done!
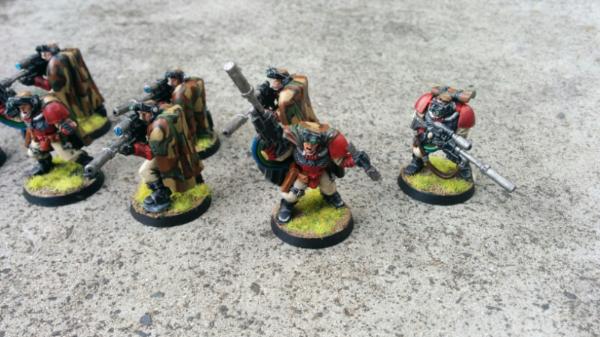
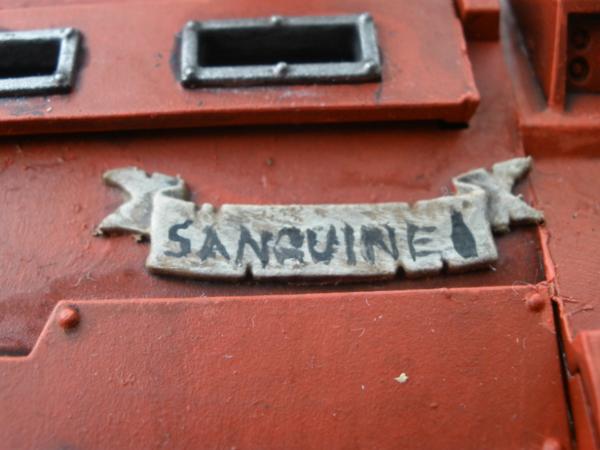
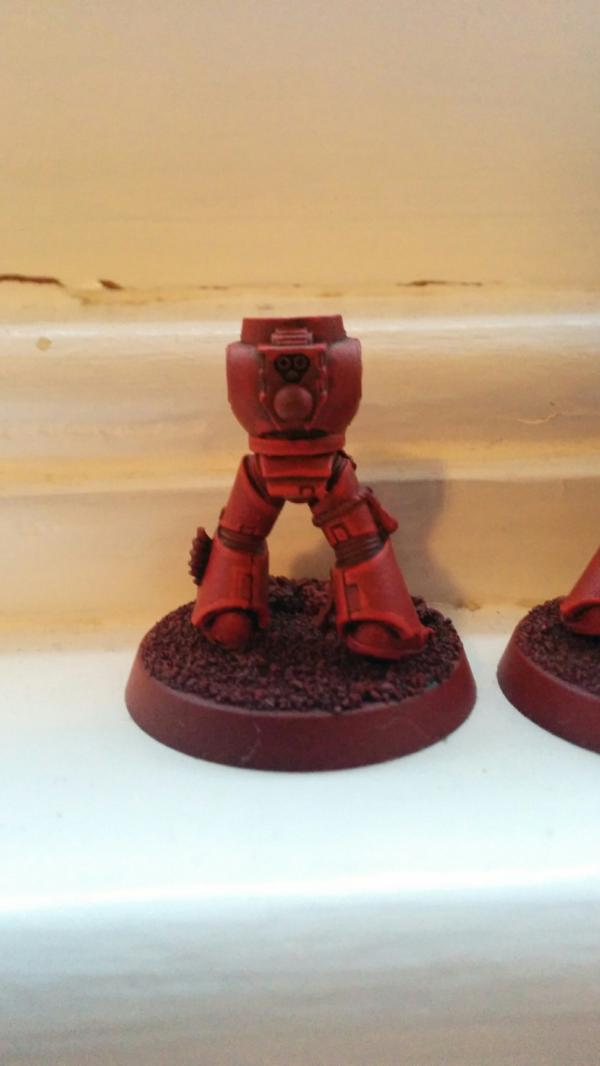
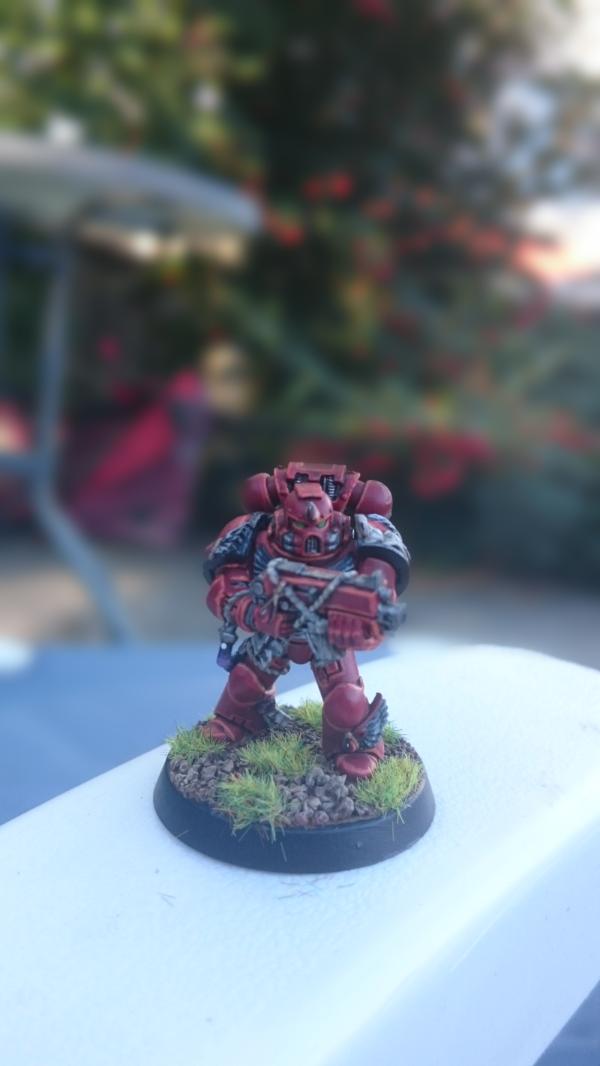
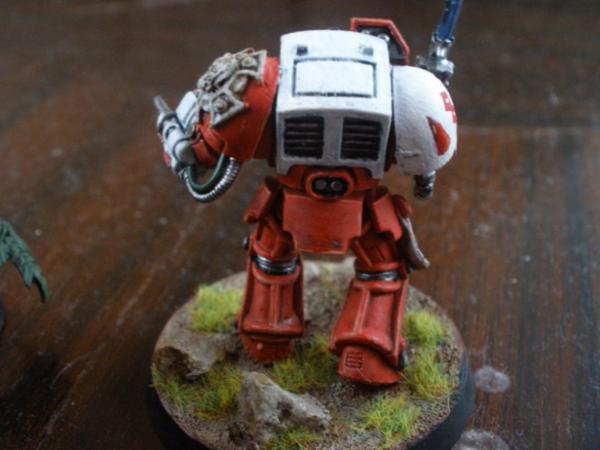
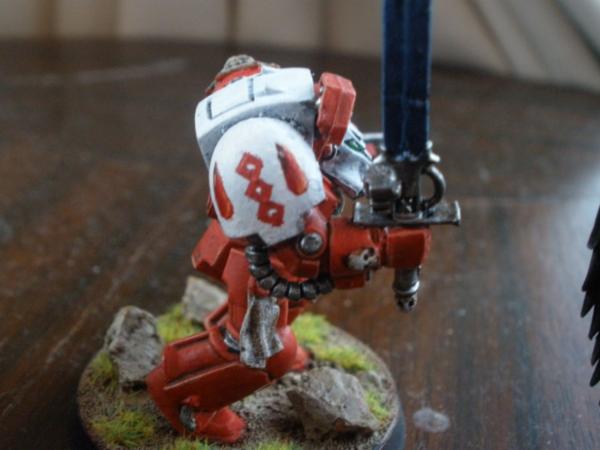
Some of you may have seen my Painting and Modelling thread querying about scout camo on my Blood Angels, those dudes ae all done and dusted so I will start with them! (I have already finished a Rhino for this escalation - might grab some snaps of it tonight or tomorrow and add it).
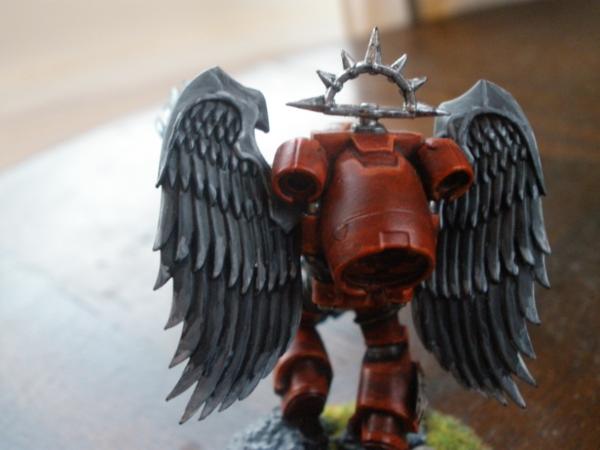
Front View
Back View
Close-ish up number 1
Closeish up number 2 (seems i forgot to drill a barrel, shall fix that).
Firs time painting scouts (I do have about 2k of blood angels already painted, but all power armour).
I think I did not water down my paint enough at times so its looking a bit thicker than I'd like, probably not even close to my best work but gets the job done. Comments and critique more than welcome!
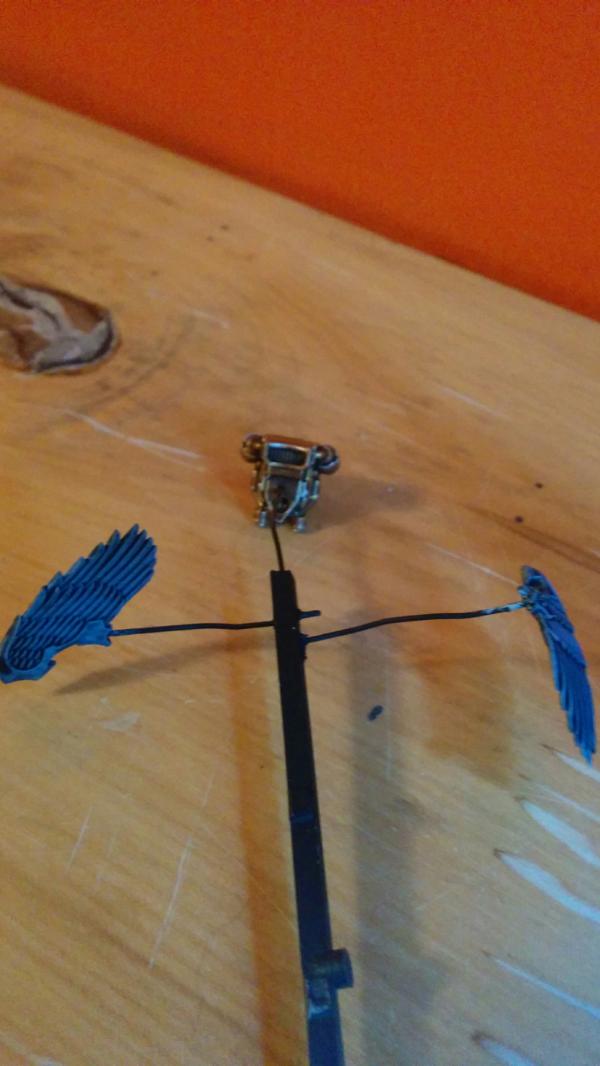
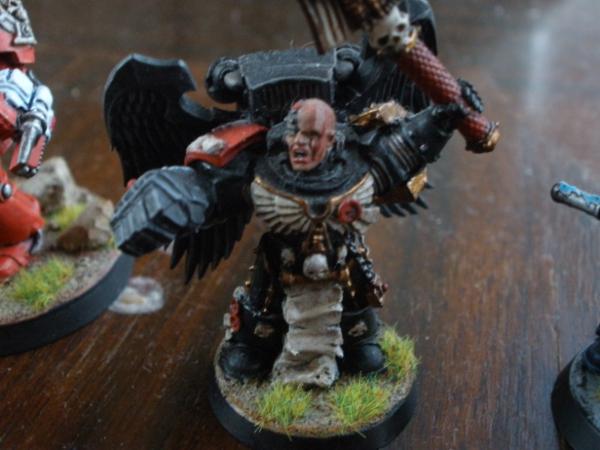
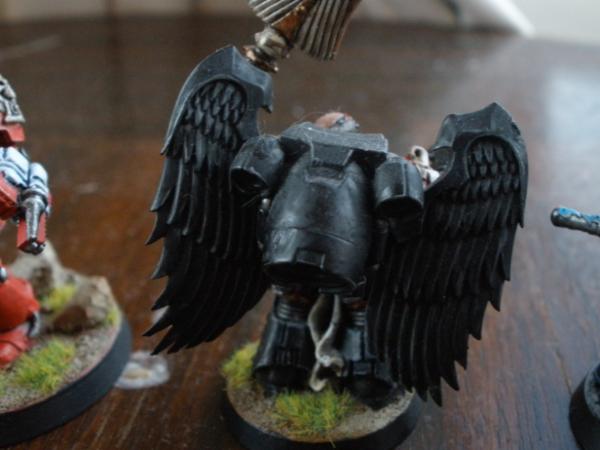
Next on my list is Commander Dante (with wings instead of his jump pack)...
Other things I need to look at doing - getting a better camera (phone doesnt really cut it). ANd finding the best place to upload them, these are just from the Dakka Gallery should I keep uploading them there or can people suggest image hosting sites that would be better for this purpose??
This message was edited 8 times. Last update was at 2016/06/15 23:35:28
Looking good! Nice clean and crisp, I don't see that your paint is too thick, maybe I have old eyes.
What a wonderful idea, the club having people pledge to finish stuff. I used to think that I should try a thing a week like Jonathan Coultan, but I'd be lucky for a thing a month.
I can't speak for the site, but I have hundreds of pics uploaded, so I think it is okay. I think that it does say something about uploading as many as you like when you are uploading.
Nice work, you should upload the 2k power armor finished.
Haha alright, over the weekend I might try and find a good spot to take some snaps of the existing models for you all to look at!!
And yeah this escalation is great (tried a proper one with Orks a few months back and got like 5 grots painted...). .. You get more points in this league if you paint something that hasn't been started (nothing more than undercoated). And you get even more points if you purchase and paint it during the block. Currently I am coming second as the Rhino literally took me one day
Wasn't sure what the go was for the gallery and the WIP shots and what not, I like its zoom in feature though, that is nice!
EDIT: While snapping the existing Blood Angels I might also get some of my Tzeentch Daemons....about 1500 points painted there I think!
This message was edited 1 time. Last update was at 2015/01/21 04:20:21
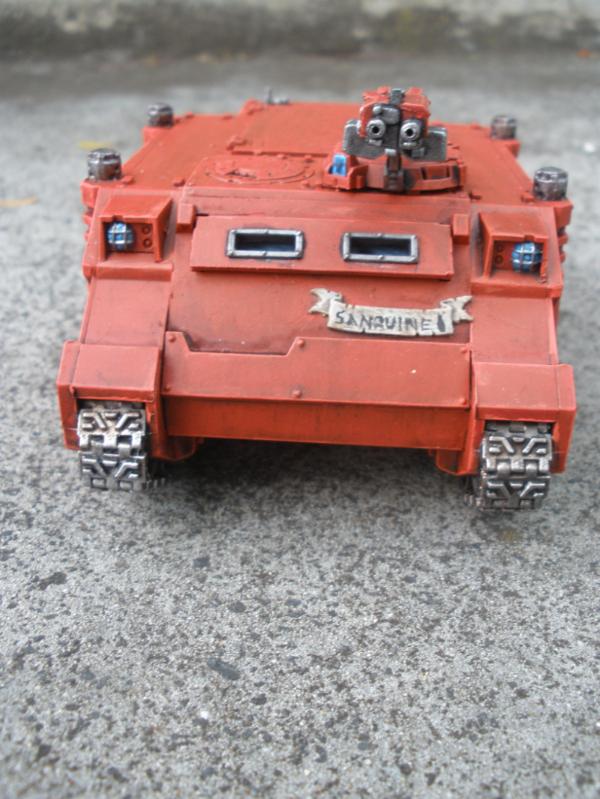
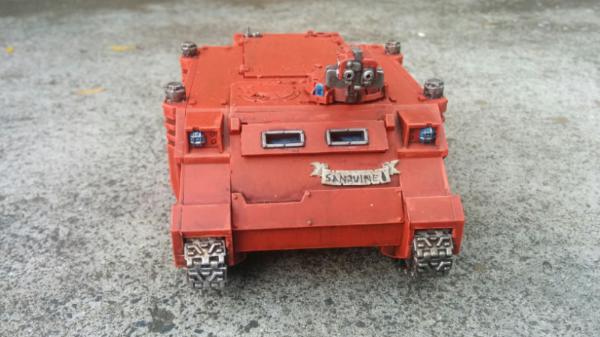
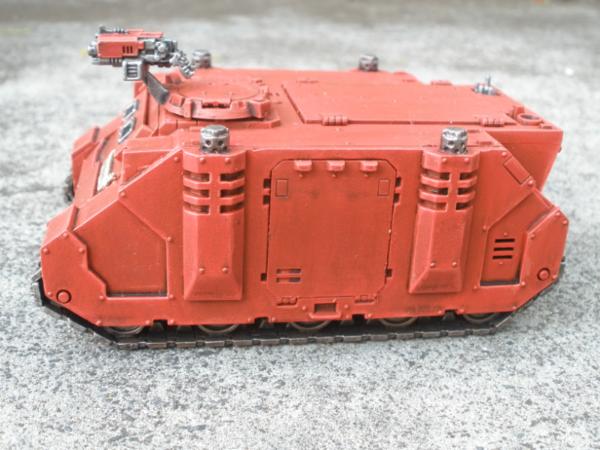
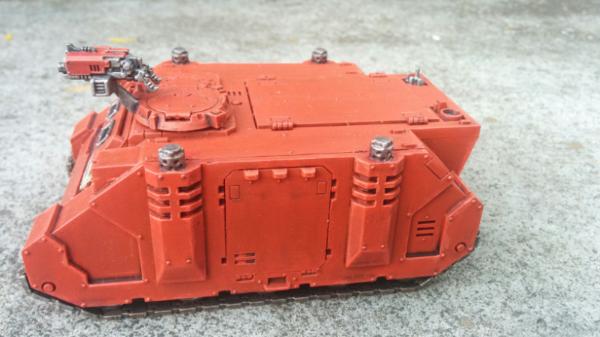
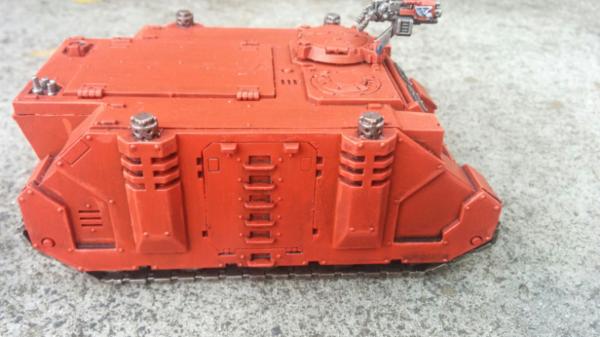
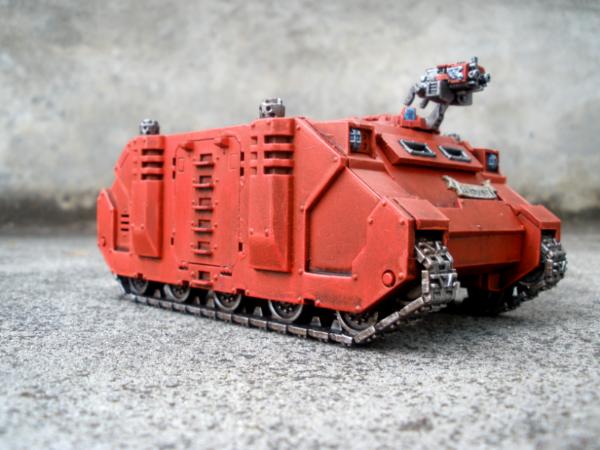
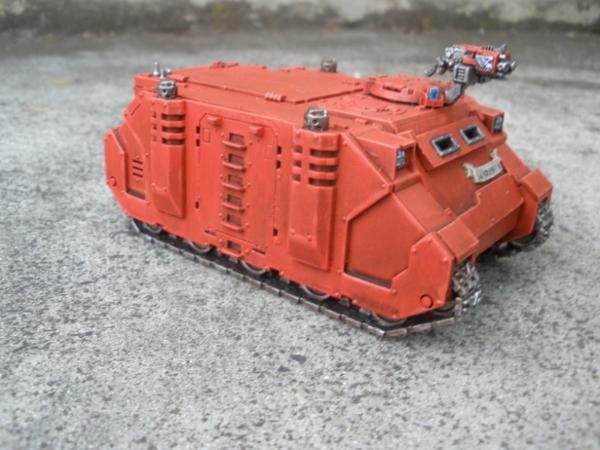
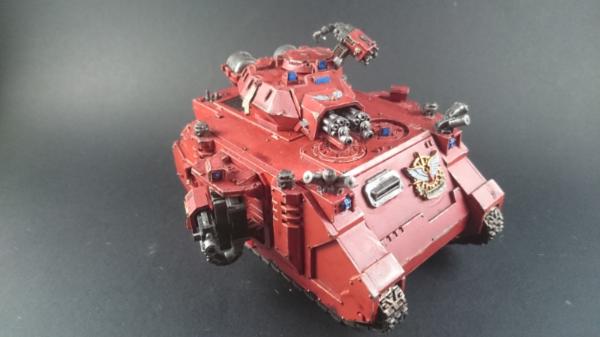
So I dug out my old digital camera this morning and took some snaps of my Rhino. Also took some with my phone so I could compare and get feedback on which one you think does the job better.
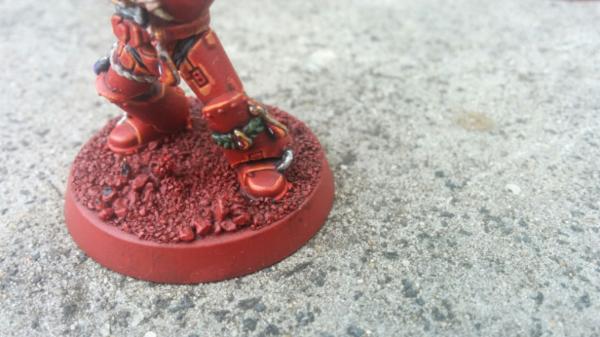
Tried taking some indoors but the lighting was all wrong, so went to the slab of concrete in my yard where I took the scouts photos - seems to be an alright spot.
Front View - taken with the camera
Front View - Taken with the phone
Side View - taken with the camera
Side View - Taken with the phone
Other side - taken with phone (didnt snap with side with the camera).
Testing the macro modeon camera - my freehand abilities arent the greatest...and I didn't judge the space well so had to add in a blood drop to make it not look off centre
Taken with the camera - I used the dakka gallery auto adjustment on this one, I quite like this shot.
Another one with the camera (bit blurry I think)
And another one with the camera, again a bit blurry.
I think my digital camera has potential to take better shots, but it is far less forgiving when I don't have a steady hand!! C&C on model and camera work appreciated!
I have changed it to the Dakka Gallery now, was going to keep my WIP shots elsewhere but I guess not eh!!
I reckon I will add chapter markings eventually, don't know if I will invest in an air brush and use a stencil, or if I will get some HUEG transfers from forgeworld though!
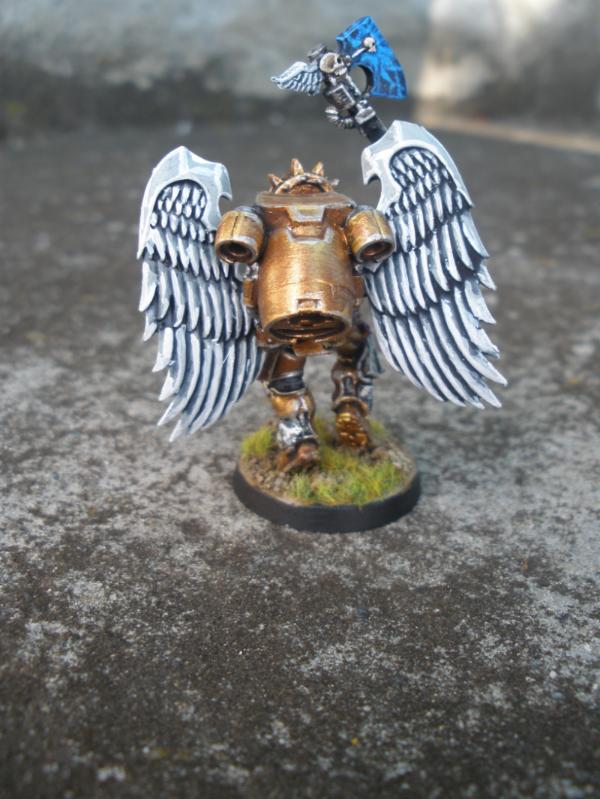
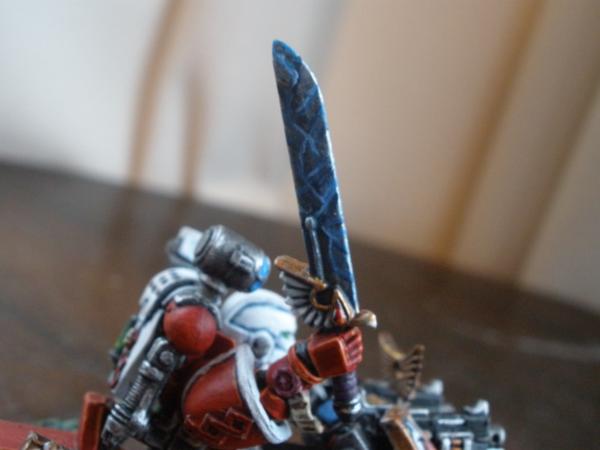
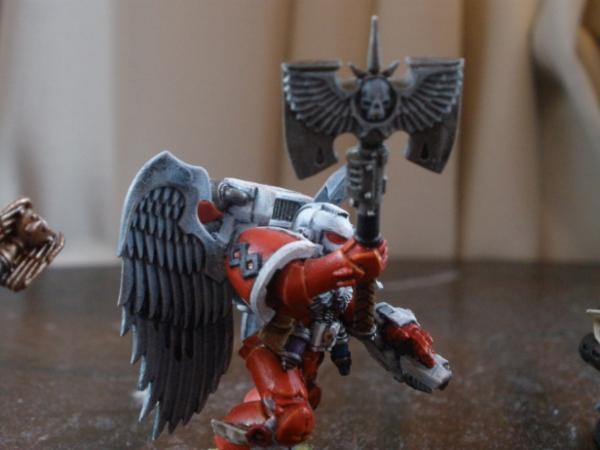
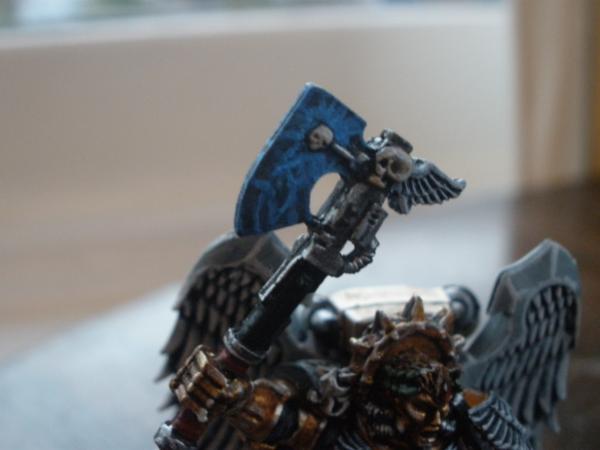
I am not sure how I want to paint the power weapon on Dante either.... I am leaning towards silver, blue wash, then try out some lightening kind of dealio, that seems to look pretty good and contract nicely with all the gold!
This message was edited 1 time. Last update was at 2015/01/22 23:41:40
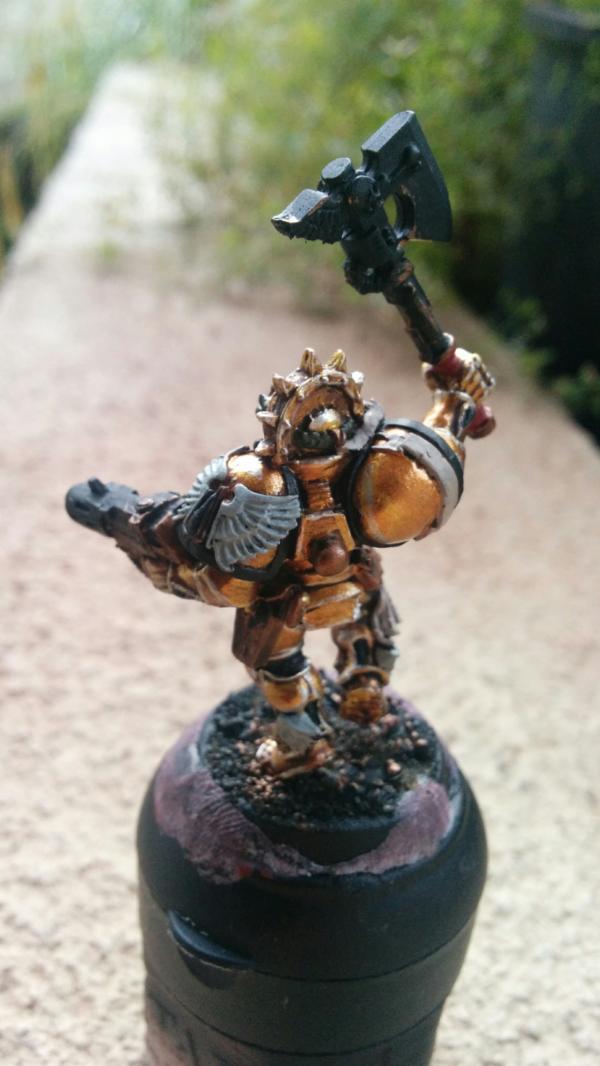
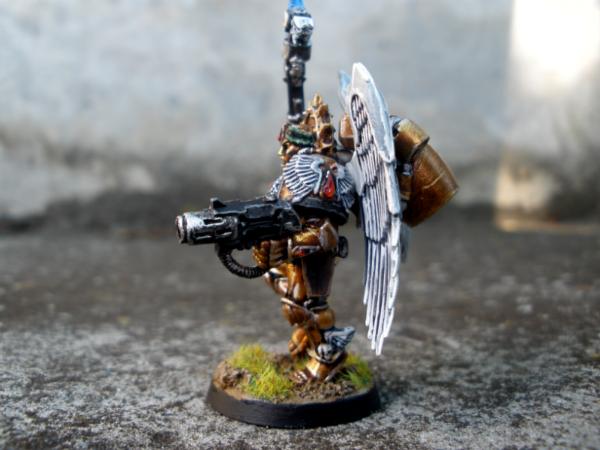
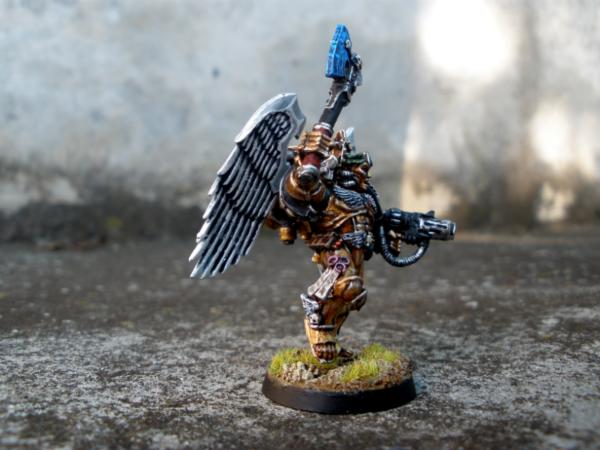
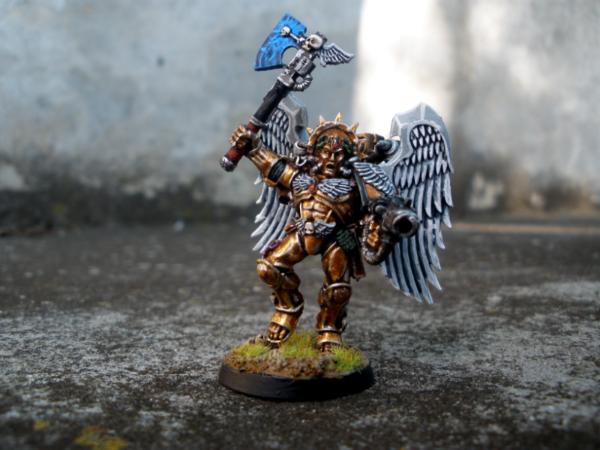
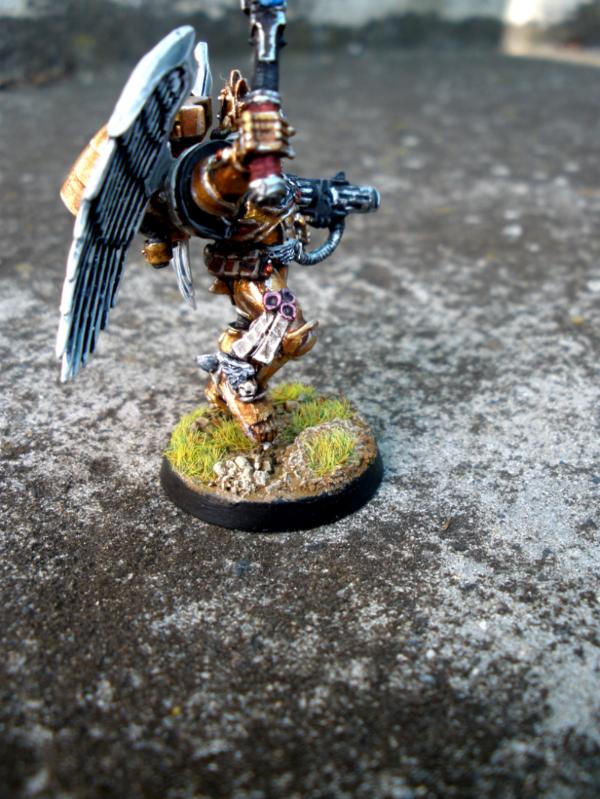
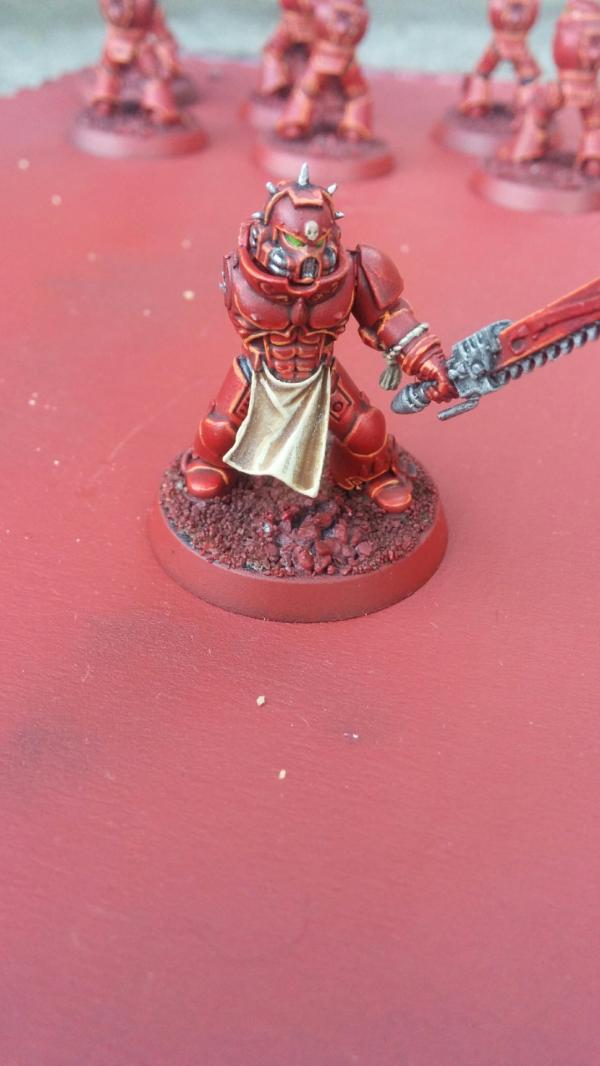
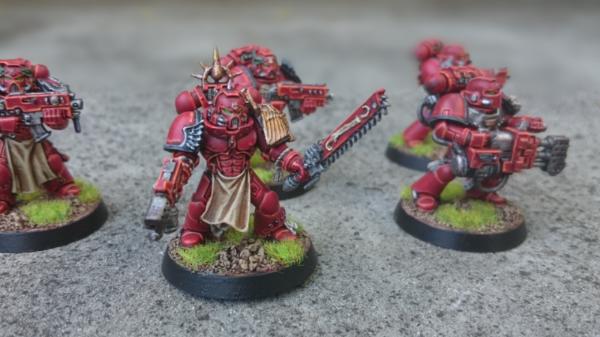
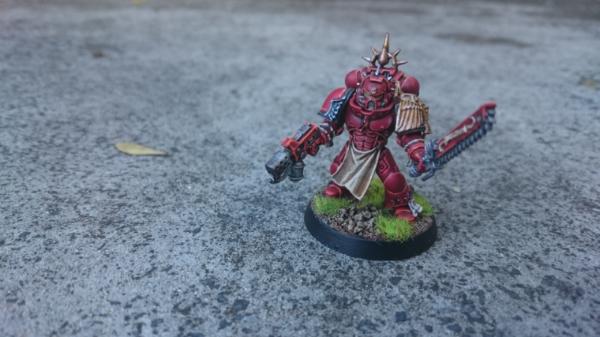
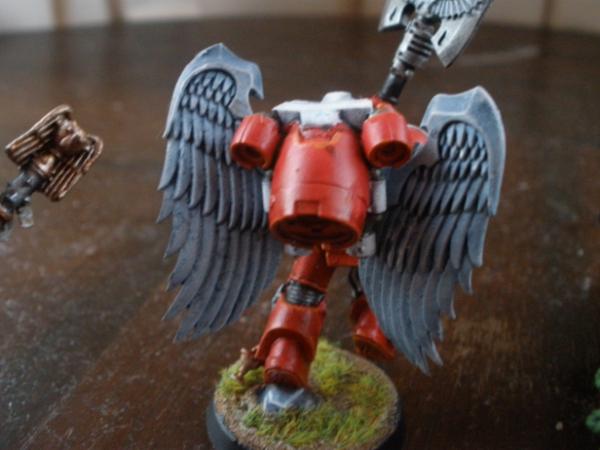
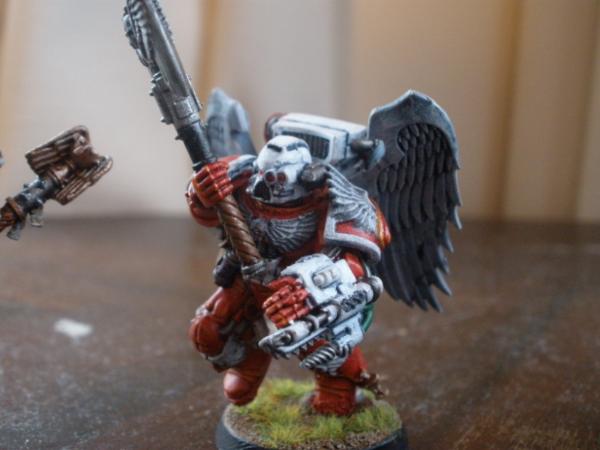
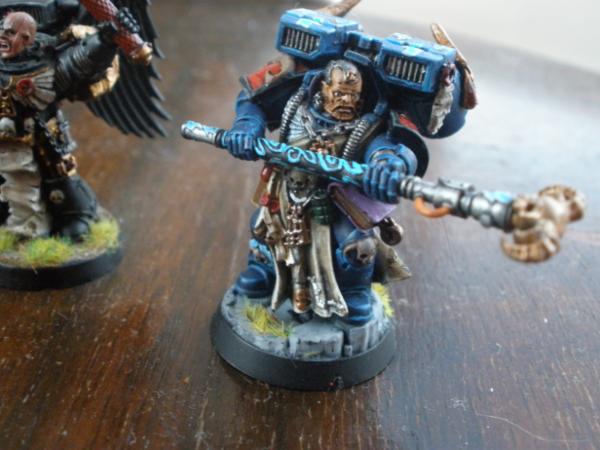
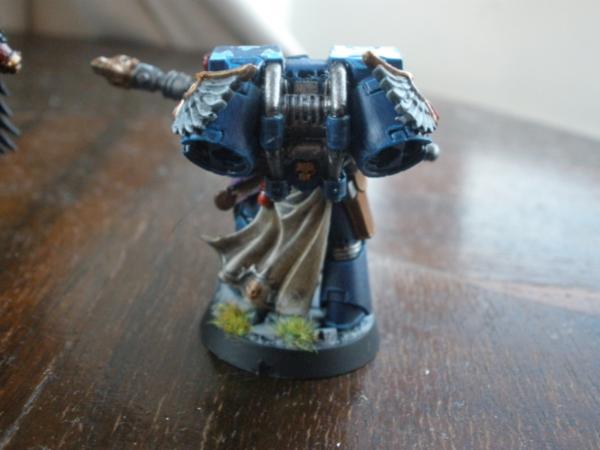
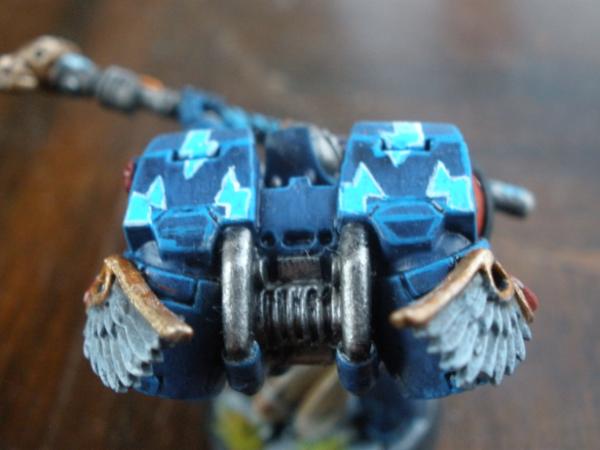
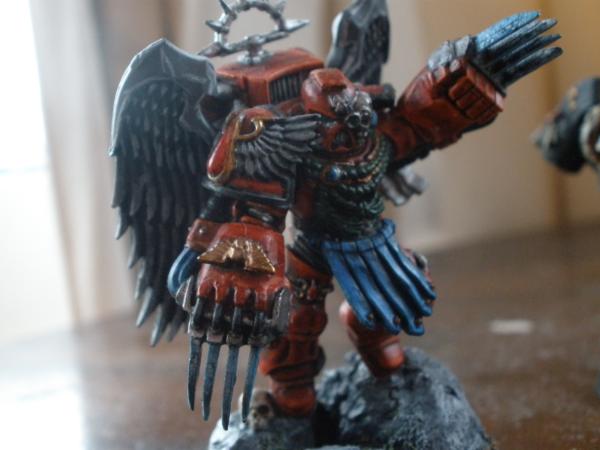
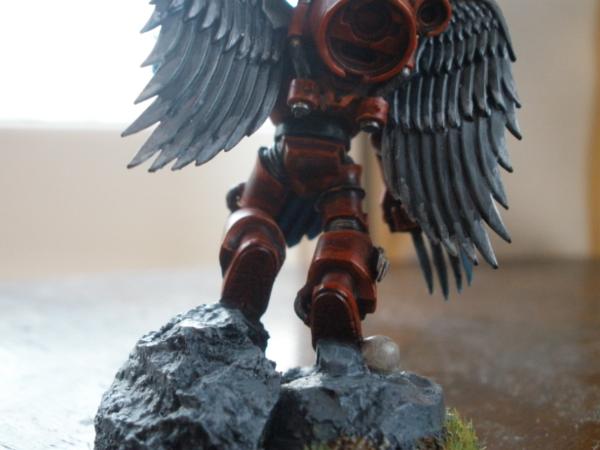
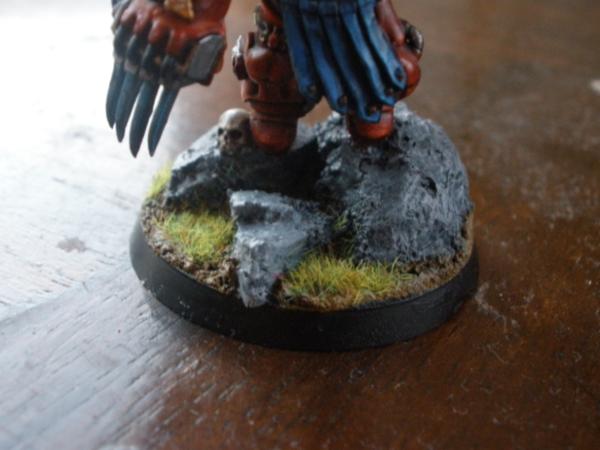
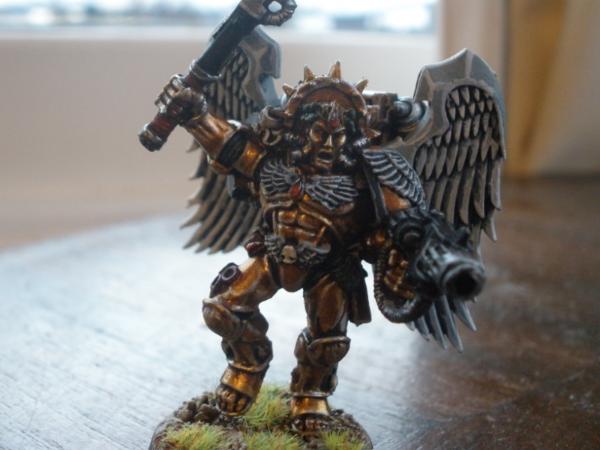
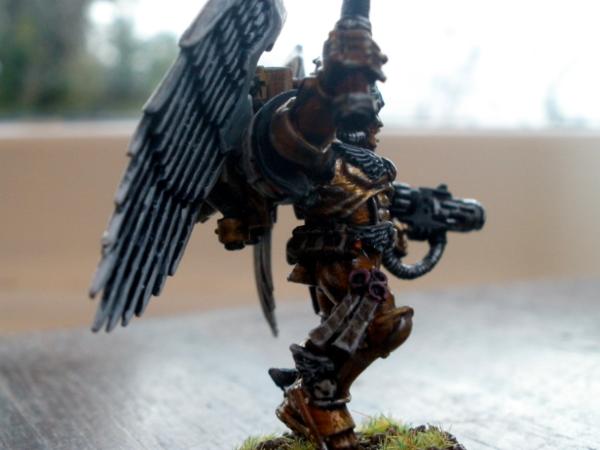
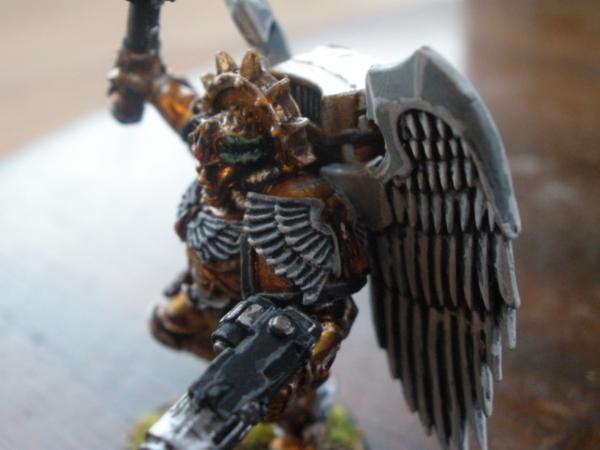
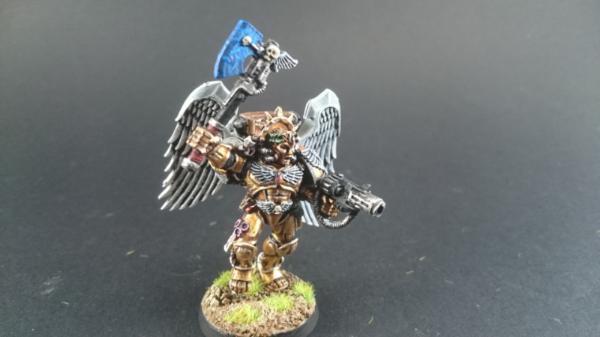
So I have now finished off my Dante, fairly happy with how he turned out, not 100% sold on the axe though.
Happy with the gems I did on him though
I wasn't sure if I went overboard with the armour highlighting either, haven't really painted gold on anything bigger than a SM head before.
C&C always welcomed! Next up for me is a tactical squad, painting it mostly in pieces which I don't normally do (usually I'd just leave the boltguns off) so I will see how all that turns out for a change, I feel like it might just end up making more work for myself.
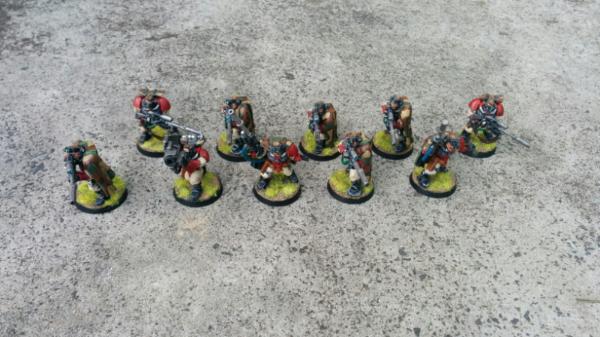
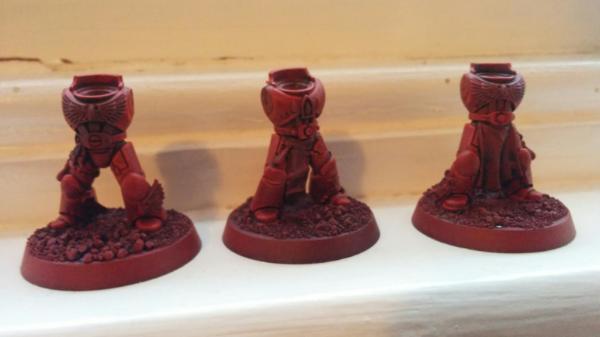
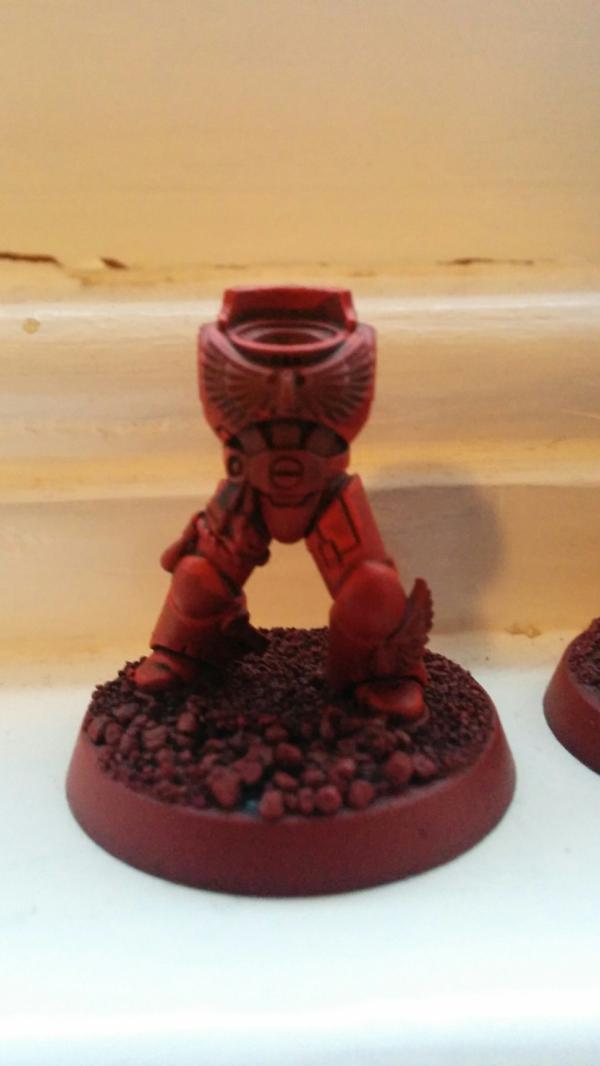
Been a bit slack with the Tactical Squad this week - with Australia Day (then recovery day) at the start of the week it put me behind a bit.
I have managed to get the Bodys/Legs/Arms/Backpacks basecoated and washed and have then re-done the basecoat on the Bodys/Legs to leave a shadow (Spray Mephiston Red > Agrax Wash > Mephiston Red).
I also started doing first stage of highlights on some of the Bodys/Legs last night... I don't mind too much if some of the lines end up thicker on this highlight stage as I do a finer one with orange (roughly following the guide from the Blood Angels painting guide Sons of Sanguinius).
I am hoping to get the Armour (including arms and backpacks finished up by the end of the weekend so then I just have the details left to do I reckon.
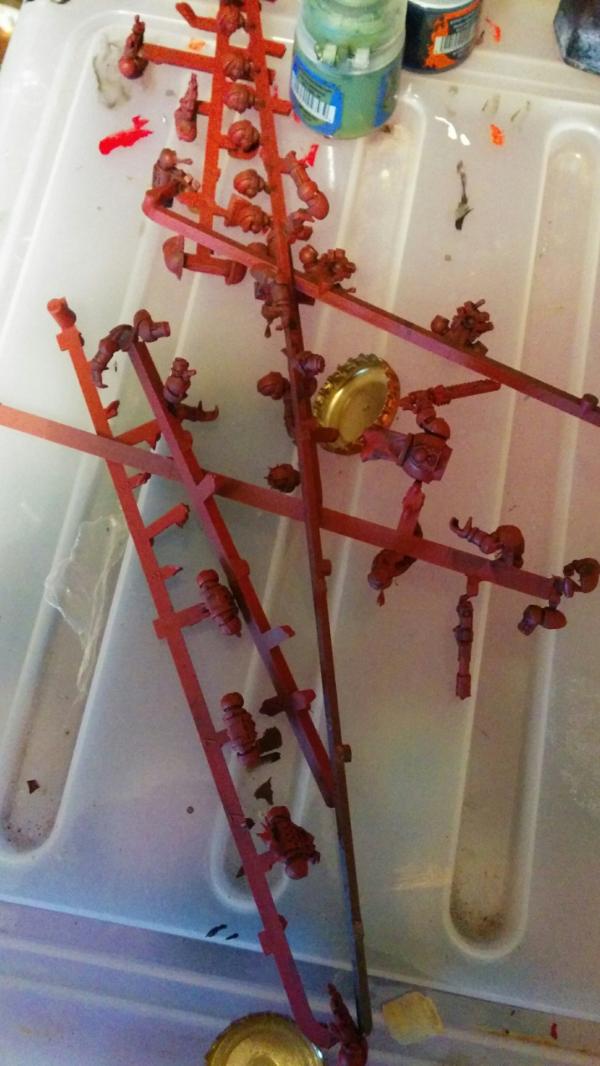
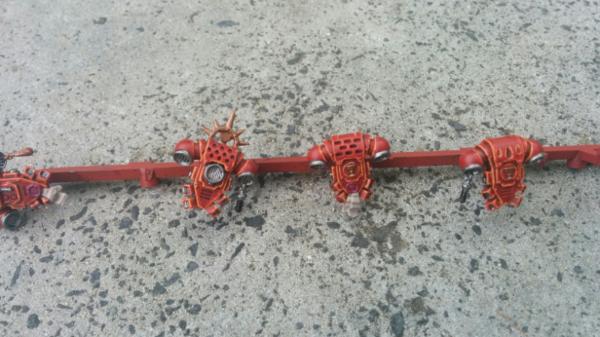
All the sprues!
So given its been raining here a bunch (yaaaay summer) I haven't been able to use my usual photo taking spot outside, this was the best I could come up with in the meantime!
Thanks for the comment Glad you like him, just needs some sort of guard to go with him I think!
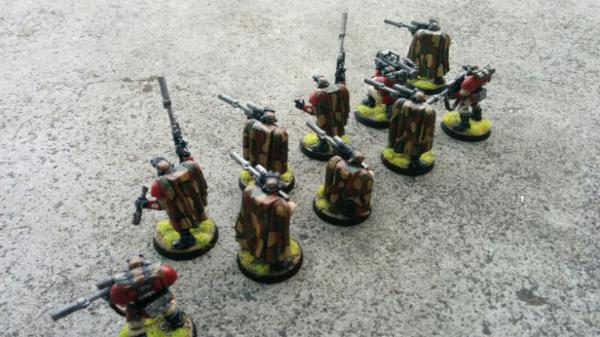
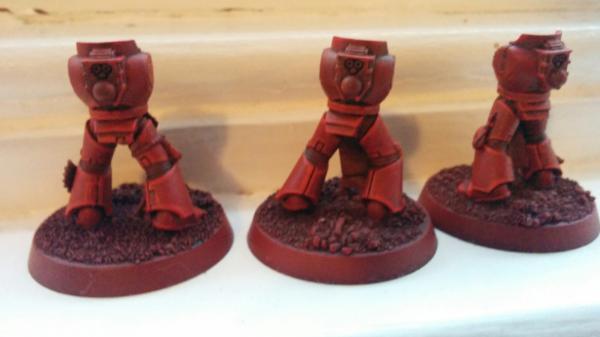
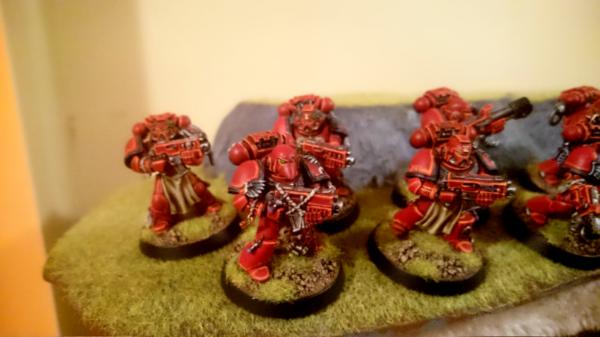
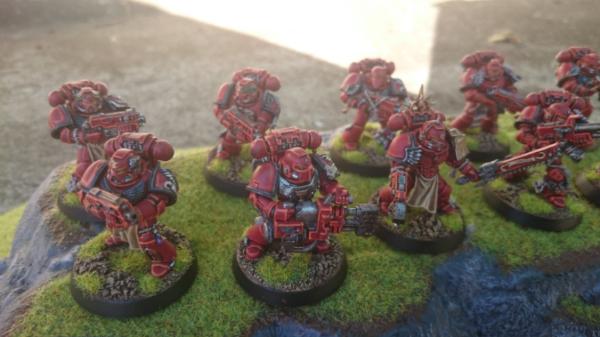
So I had a fair whack at the Tactical Squad over the weekend (although one day was taken up with various social commitments and getting drunk watching the socceroos somehow beat Korea in the AFC). I got the main armour done, and got the heads completely done (for such a small bit they took aaaaaaaaages). Had a bit of a shakey hand while doing the highlighting which was annoying but I think it has still turned out okay, although I am not sure I am a fan of the orange for the edge highlight, makes it look like of like fire.... Might use a flesh colour next time as its not quite so in your face (I think from memory I have generally used a flesh colour on my other models).
Front view of the squad so far
Rear view of the squad so far
I started doing details last night but was feeling sleepy so stopped - but this is what I have done on them as far as that's concerned. I am not sure if I want a black with grey highlight for the chest eagles, or if I want to go lighter like I did on my Dante.
lipsdapips wrote: Nice aesthetic! Very reminiscent of Jawaballs' blood angels with the fiery highlights. Consider me subbed
Ahah cheers!! And yeah you are totally right, I knew i had seen a similar style of highlighting somewhere before (that being said his were painted to an amazing standard).. I think I will fix up a couple of the highlights on the flamer, they seem a bit thick when I get a good close up look!
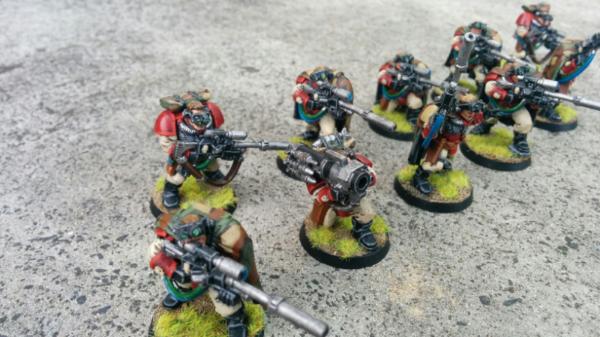
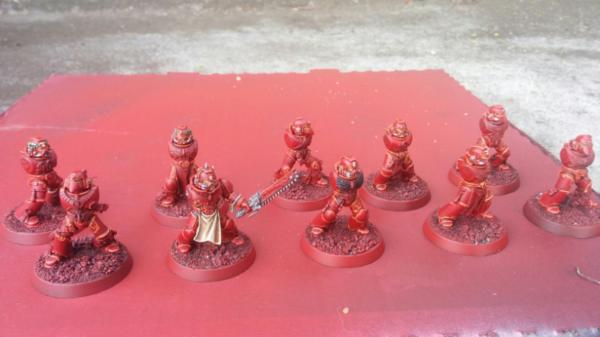
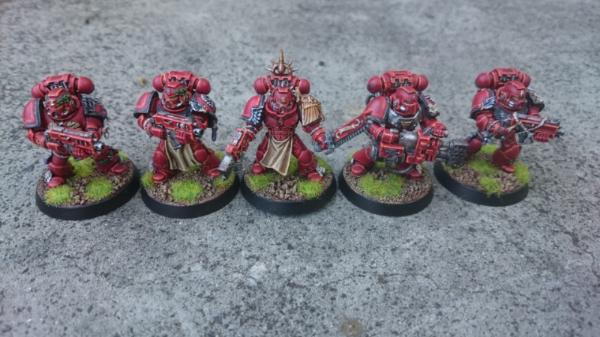
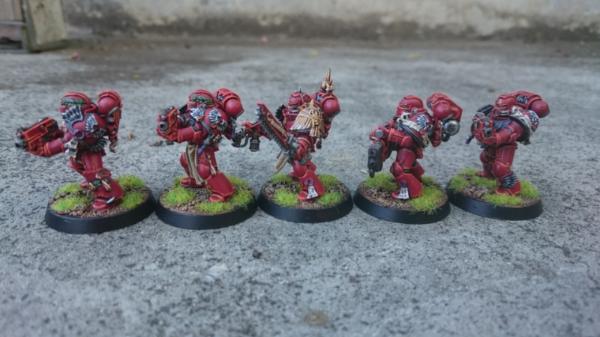
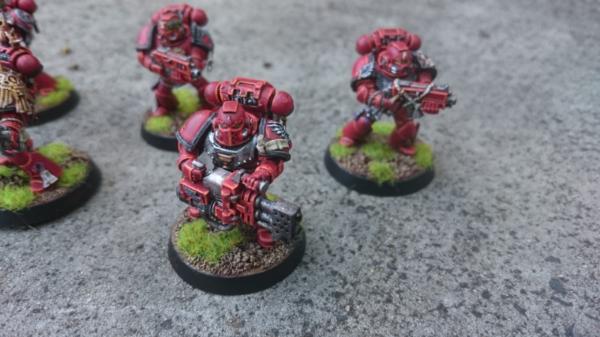
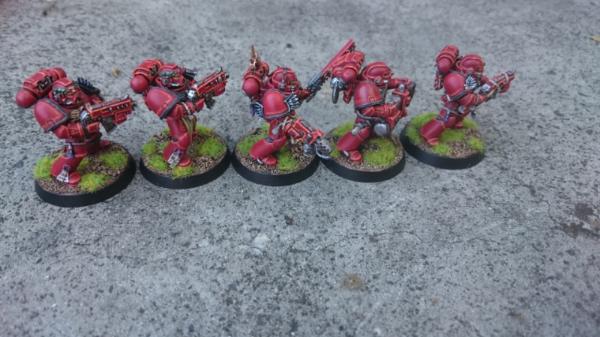
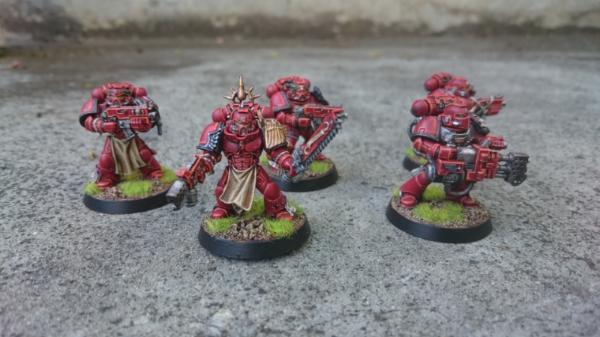
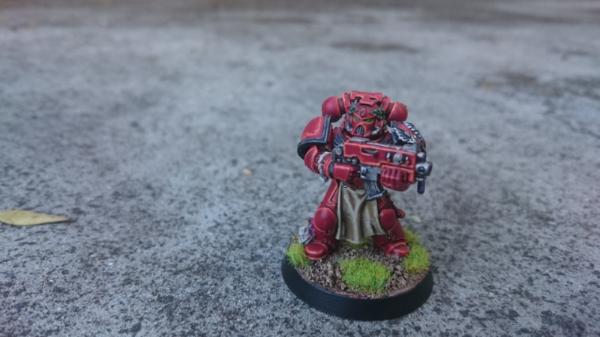
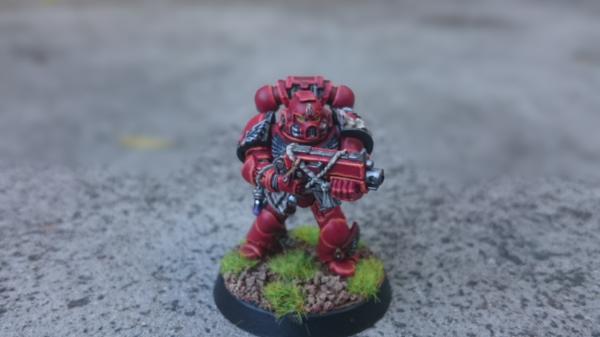
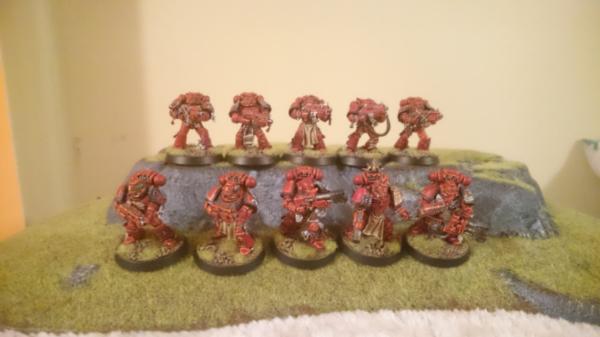
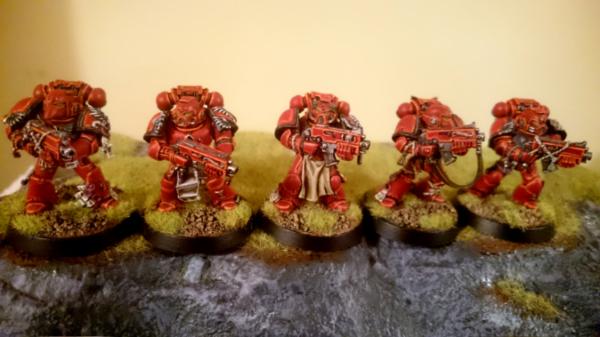
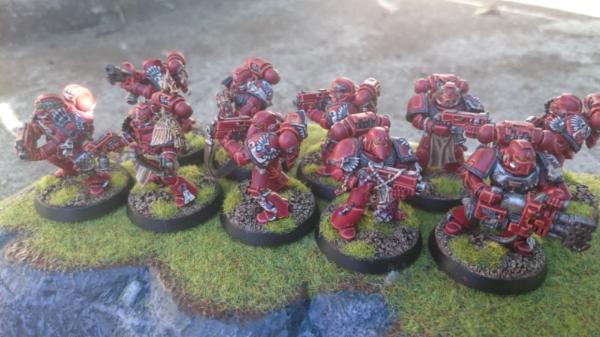
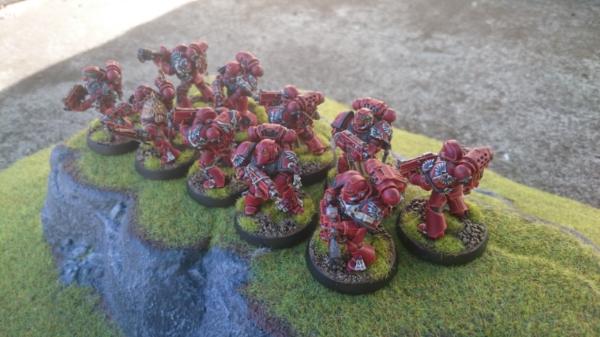
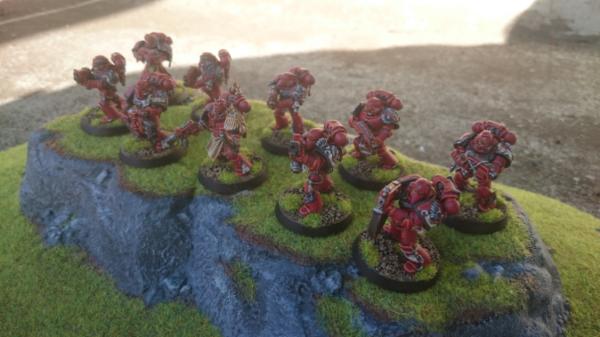
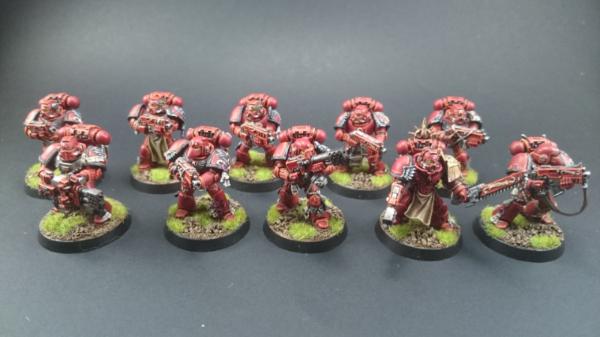
So finally finished the first 5 dudes in my Tactical Squad!
I also picked up a new phone over the weekend (Xperia Z3) which means new camera....Not sure what I think of it TBH, although from what I read I should use manual mode and get it just right instead of auto mode like I did in the following images.
WHole Squad Photos
Spoiler:
Individual Photos
Spoiler:
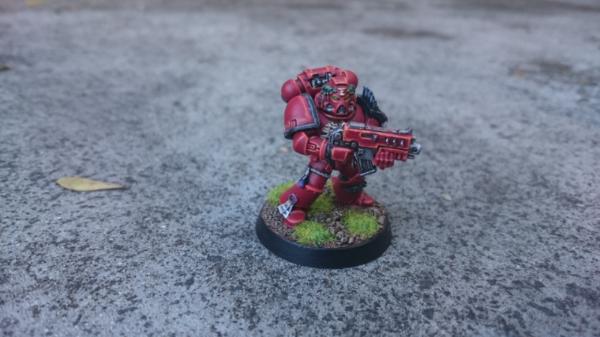
Playing with "background defocus"
Spoiler:
I think the reds are appearing a bit off in these images which is a shame, might finally get round to making a light box and see if that doesnt help things...
5 down 5 to go, hopefully I get the final 5 done a bit quicker
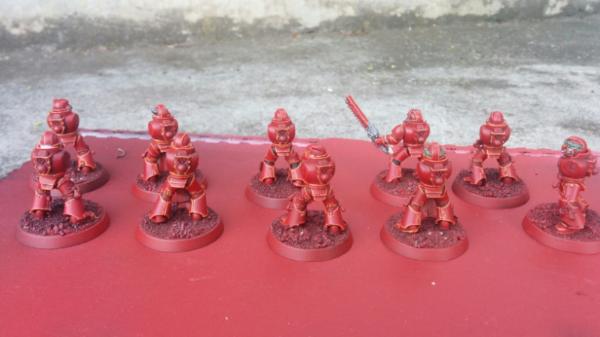
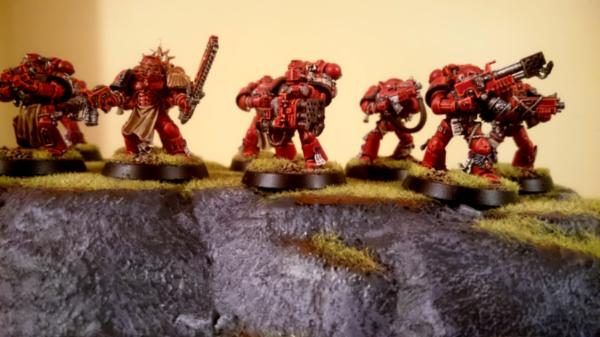
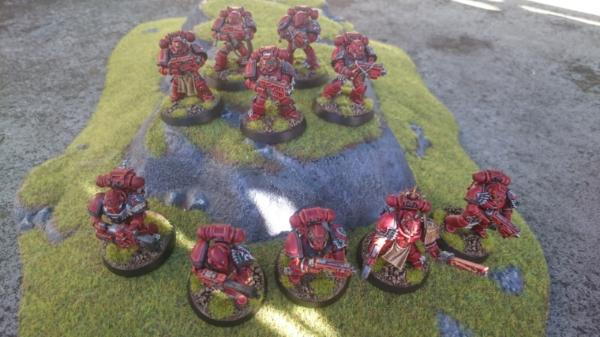
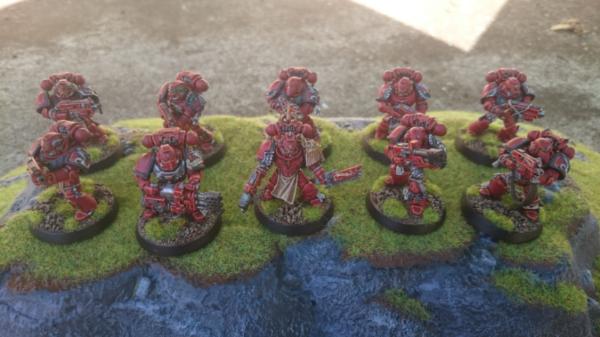
It's been a little while but I finally finished that damn tactical squad.
Unfortunately it was still a bit dark outside when I left for work so the images aren't the best, ive uploaded a couple but will be taking better ones hopefully this evening (I really need to hurry up and make a light box of some sort so I can take good photos of my miniatures inside.
The full squad, top image is using Dakkas auto image adjustment.
So there we go, a little preview of what is to come!!
Next on the to do list:
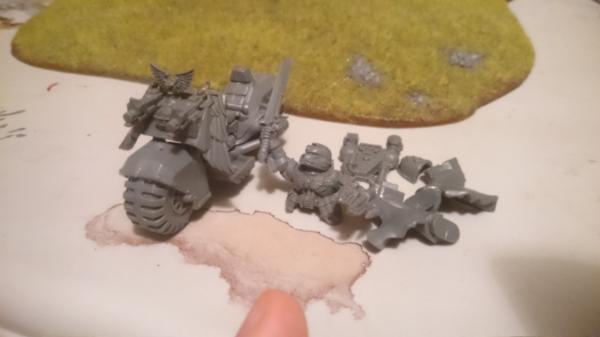
Sanguinary priest on bike.
I still need to make his base and also try and figure out what the hell I am going to use as a blood chalice. Changed his left arm position so that it looks like its holding the handle bars while he i raising up his sword to kill something.
So I took some more photos in better light yesterday evening. However I am still not liking the camera on this Xperia Z3 - just can't get it to take a nice photo of my models. Might have to bust out my Nexus 5 for the photo taking at this rate. I find the photos always come out a bit washed out, I have tried auto mode and a variety of manual settings to no avail. Anyway here are the photos I deemed usable.
Made a collage of the 10 dudes using some random app.
This uses Dakkas auto adjustment.
See what I mean about washed out?
C&C as always is welcomed and appreciated. If anyone has any explanation as to why the photos are appearing this washed out/suggested things to try and fix it that would also be awesome!
Get to start painting my priest tonight, exciting times!
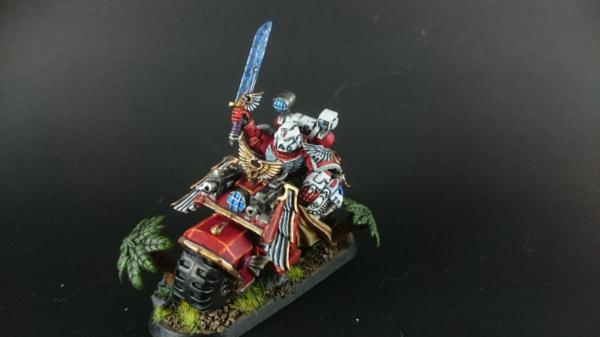
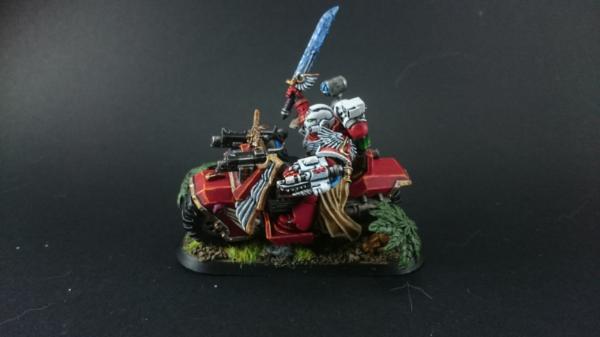
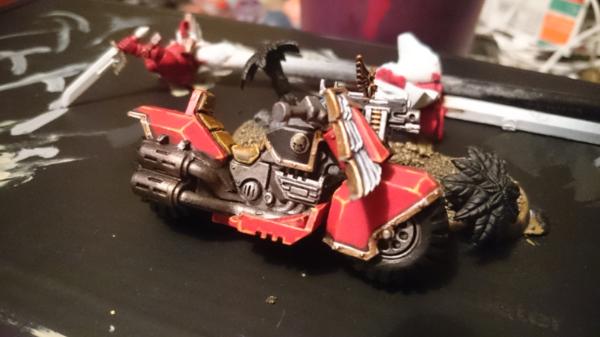
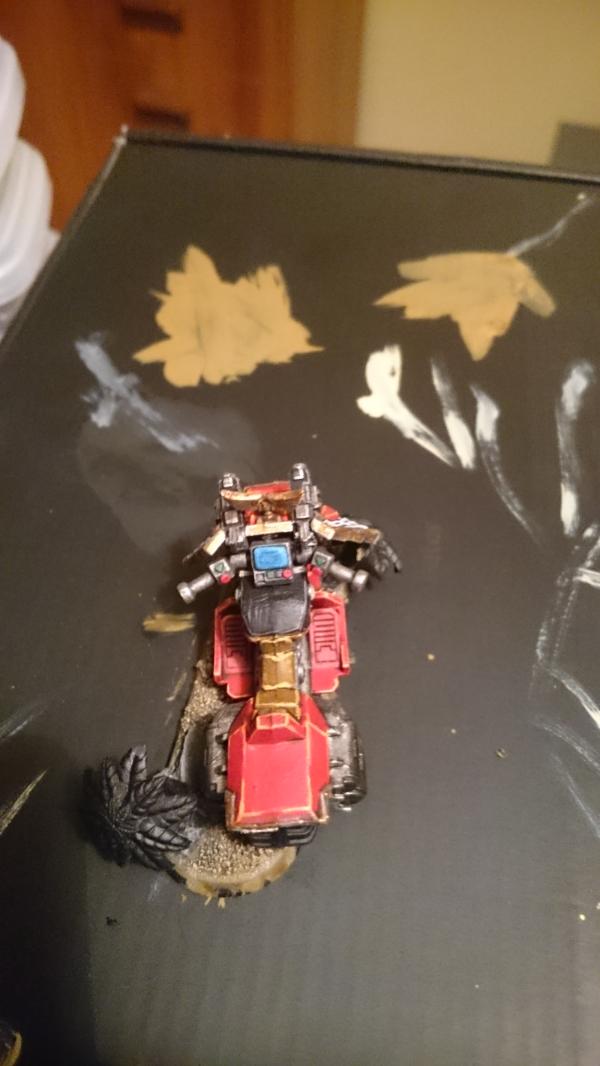
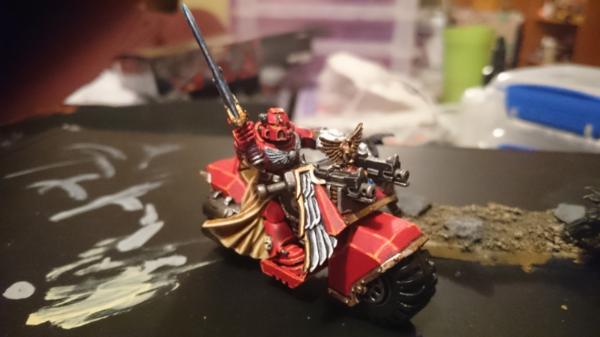
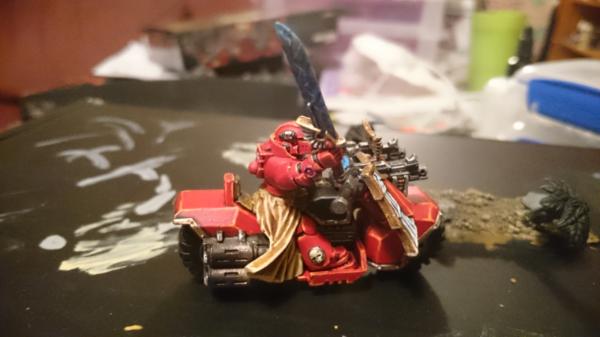
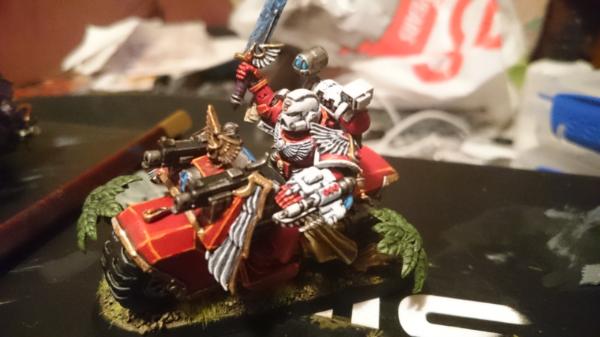
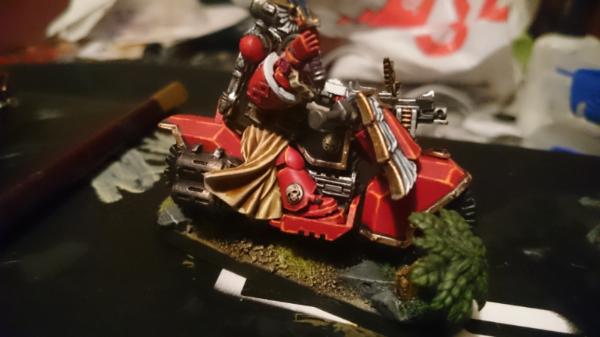
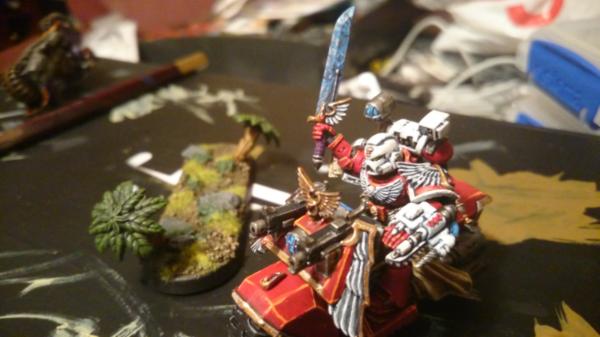
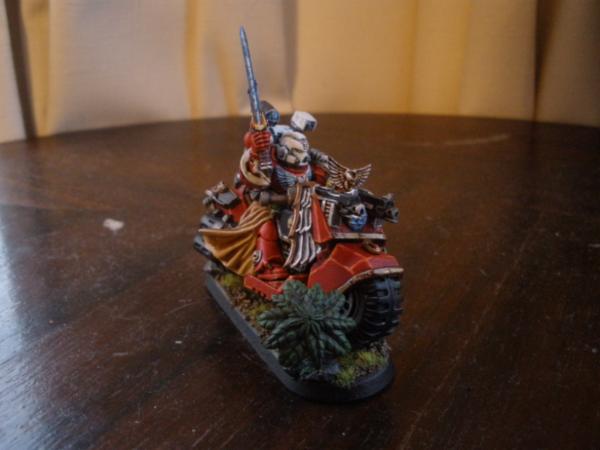
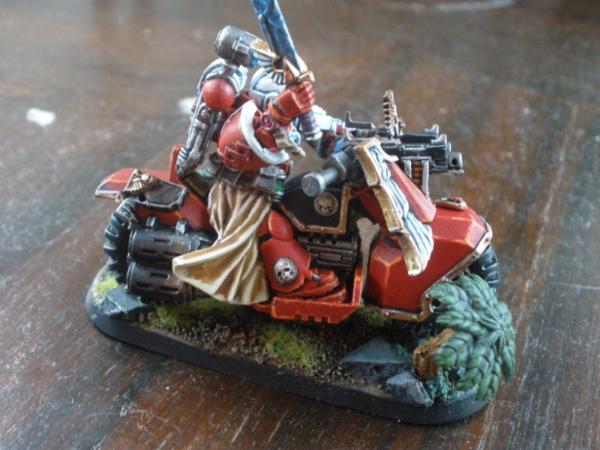
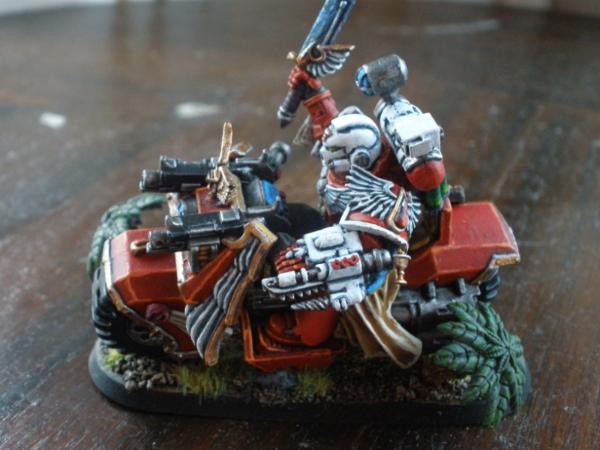
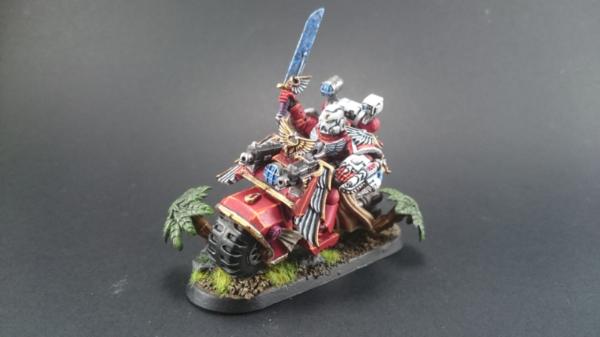
Got some work done on my priest on bike over the weekend (well got some work done on the bike more to the point).
Side View - Priest in background currently just base coated and washed.
Side View
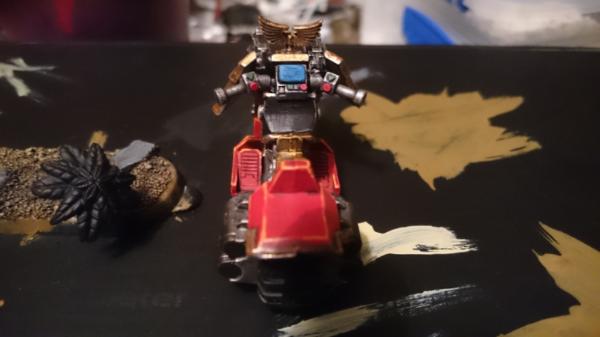
Rear View
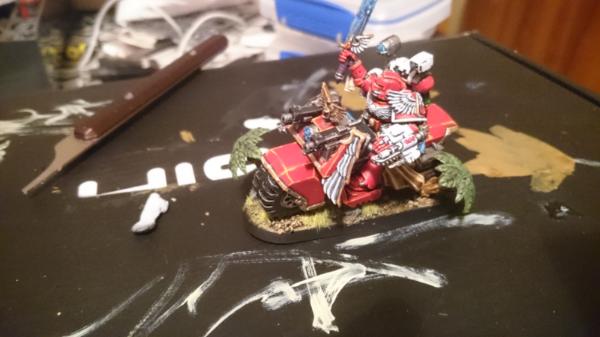
Side View sitting on base
Another Side view sitting on base
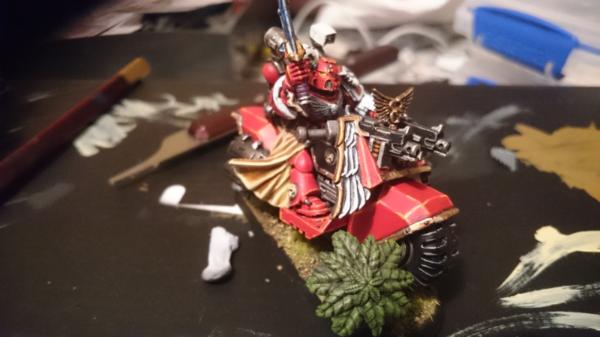
Top Down sitting on base
Front View sitting on base
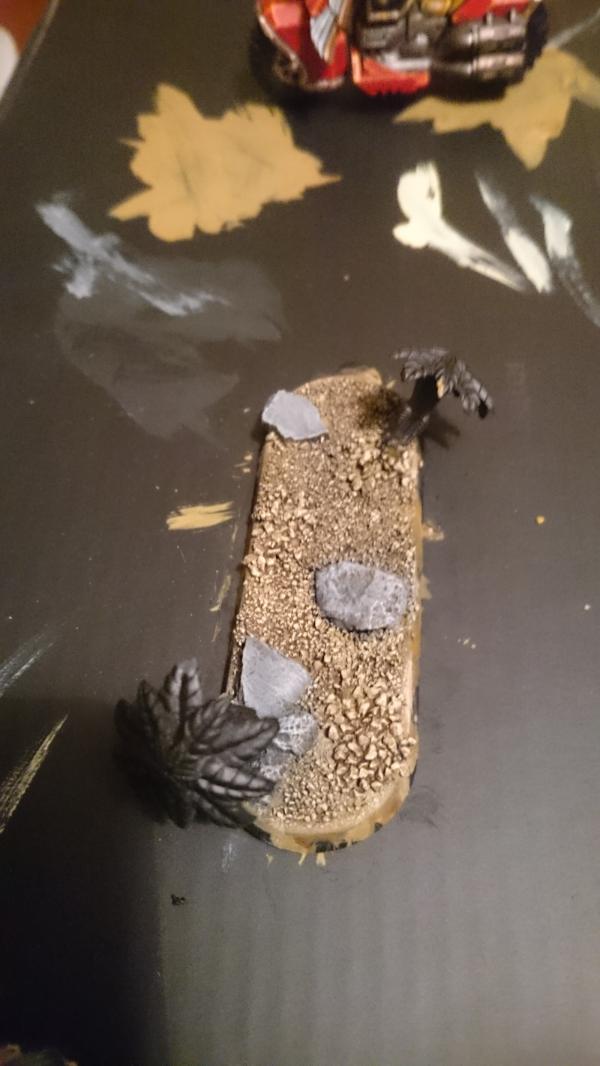
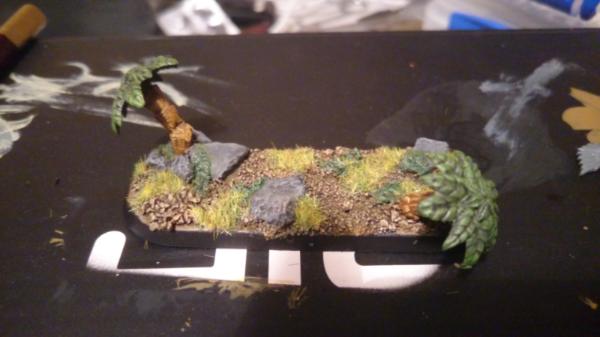
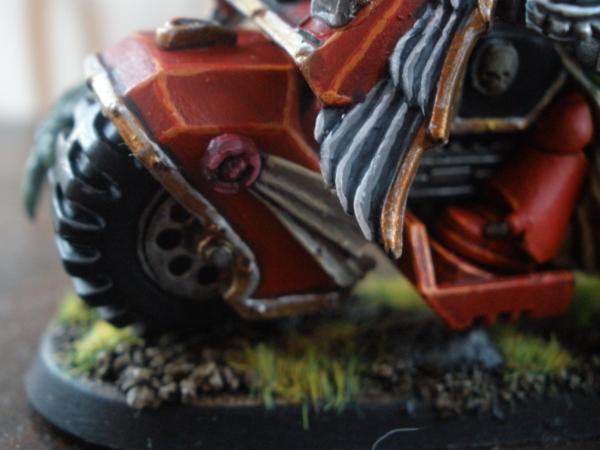
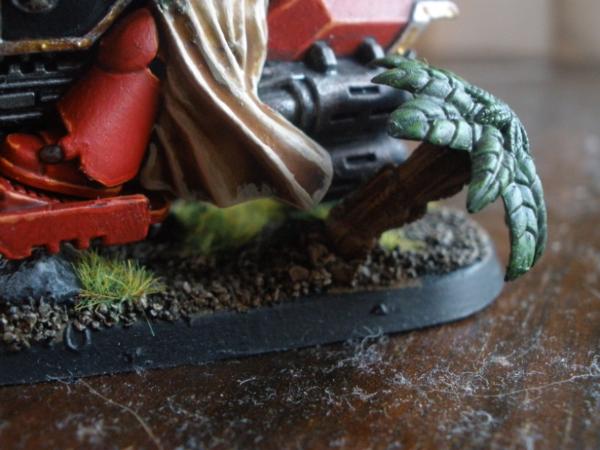
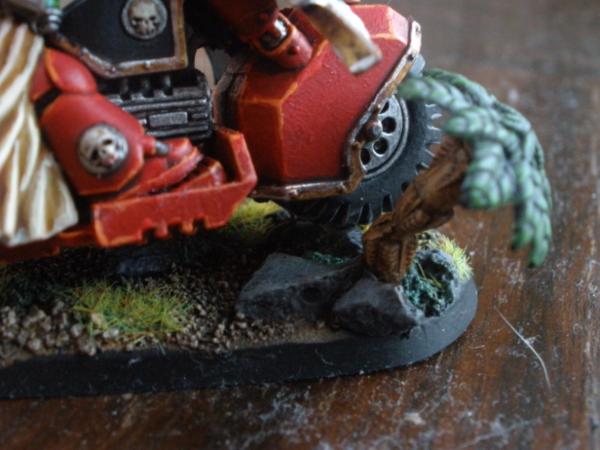
The base so far - have to do the trees still.
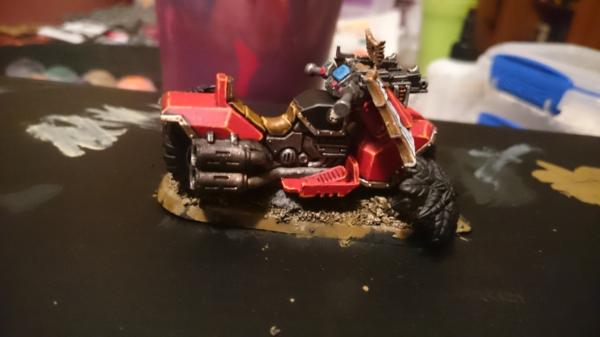
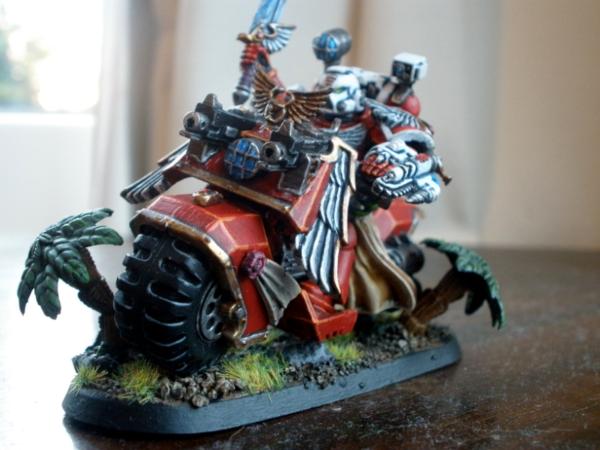
The bike is more or less finished I think, I just have to do the wheels...I don't know if I should highlight the black, or put on some dirt (somewhow, not really sure how)... So in the meantime I will work on the actual rider while I make up my mind (any suggestions guys ??)..
Overall I am happy with how the bike has turned out, was fun to paint too.
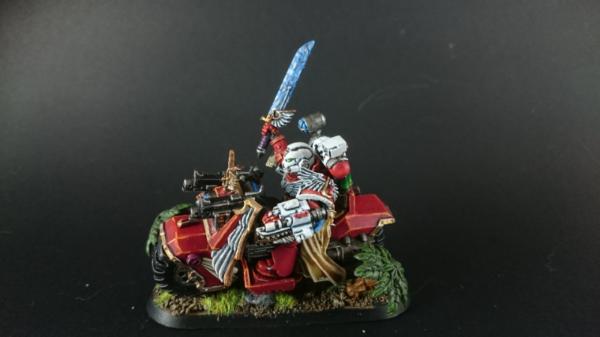
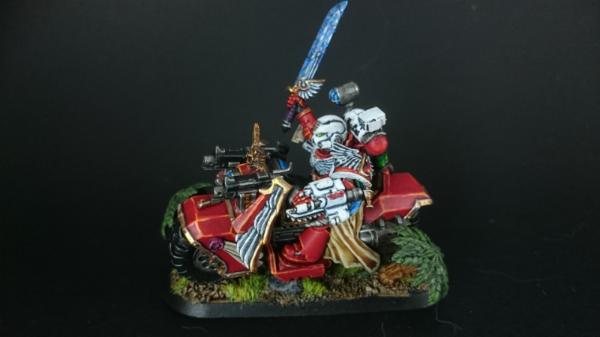
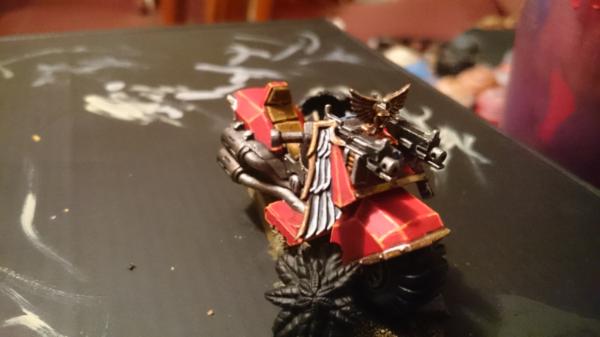
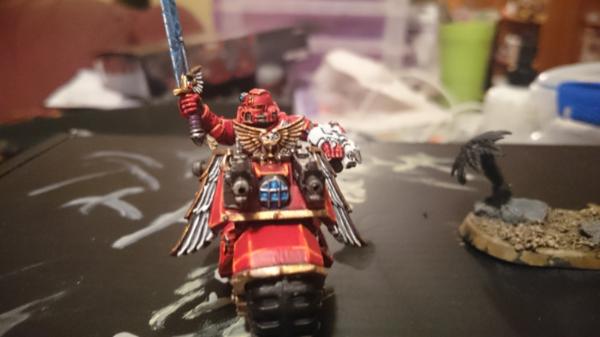
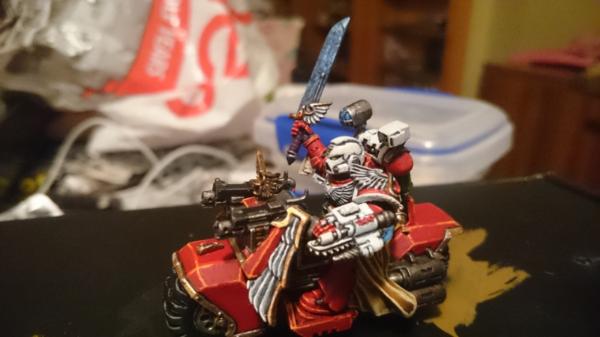
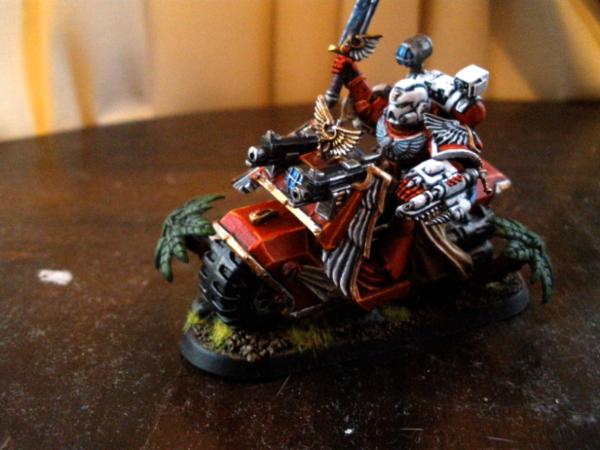
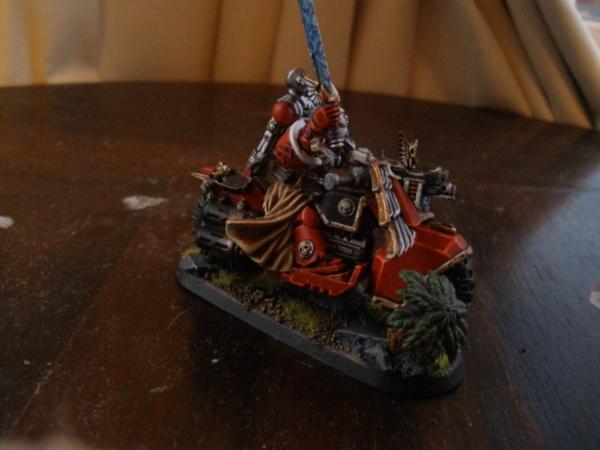
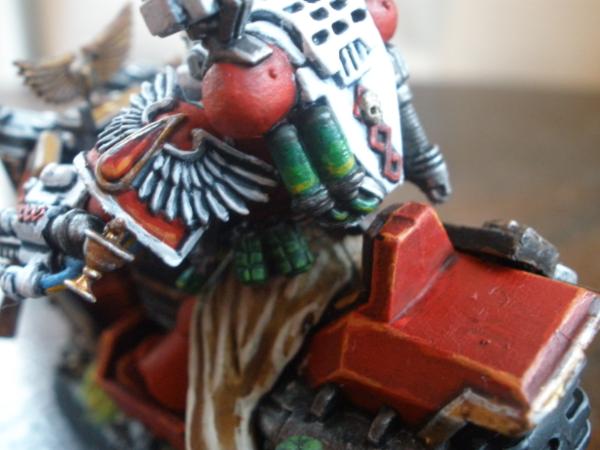
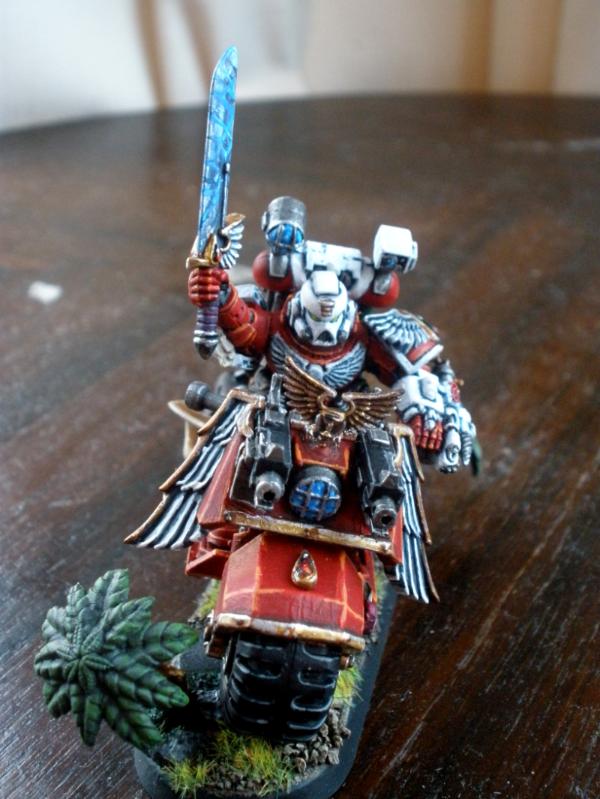
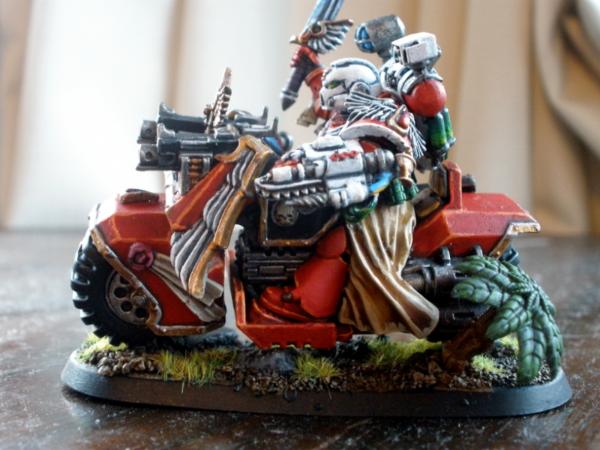
Some more of the priest - he is finished now, here are the final few WIP shots. Will take some better ones of him today (and perhaps some of my other HQs too for funsies).
The base
Before doing the sholder pads or backpack.
Spoiler:
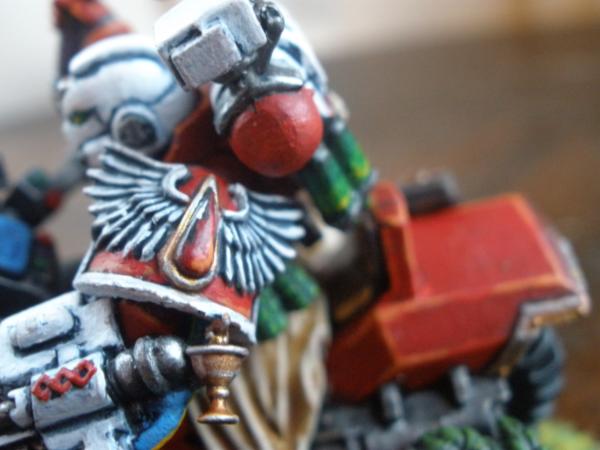
Front-side view: Before doing shoulder pads and backpack.
Front view
Side view
Side View 2
After doing backpack and shoulder pads
Spoiler:
Front-side view
Side view
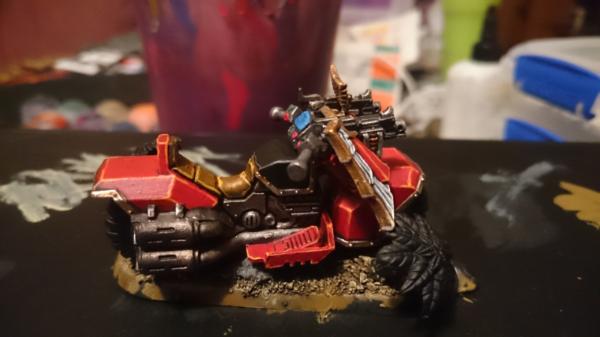
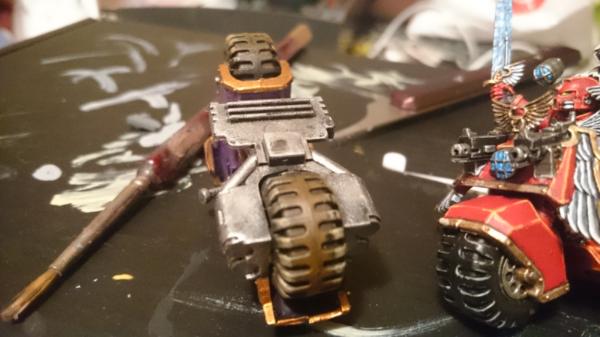
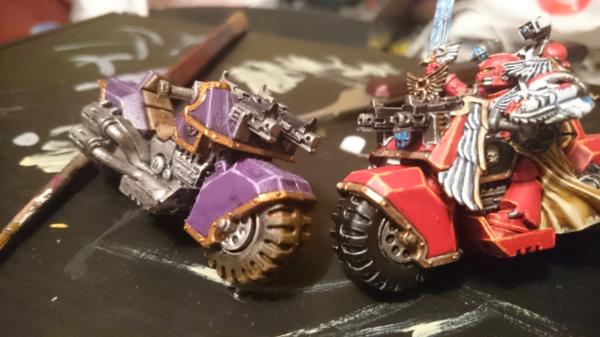
I couldn't decide if I wanted to put dirt on the wheels - i pulled out a bike id painted ages ago to try a couple of different methods
Decided to keep them just black for now (can always go back and do them later).
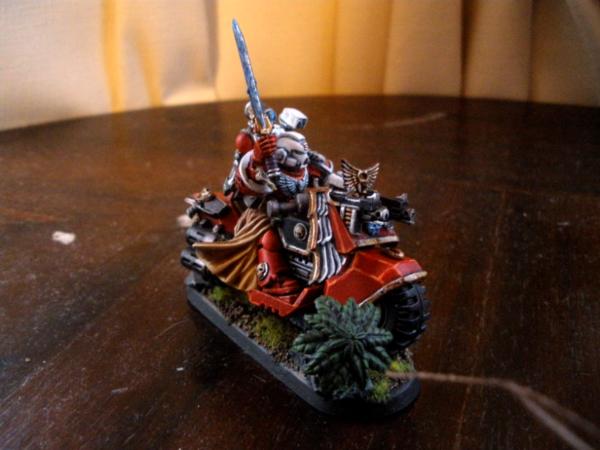
Showed a couple of photos to my mate who said I should make his head white (would fit in with my other 2 painted priests). I kind of had a brain fart moment when painting this guy initially and didnt even think to make his head white until after I ahd finished making it red. Decided to cut the red one off and do a white one.
Finished with white helment
Spoiler:
Since these photos I had added a purity seal and pistol in holster (incase people complain about my paying a point for a second weapon - WYSIWYG!).
Trying to find a good spot to take photos (charging my digital camera too since the phone photos still arent coming out well).
C& C like always is appreciated! Next up to paint is a Fragioso
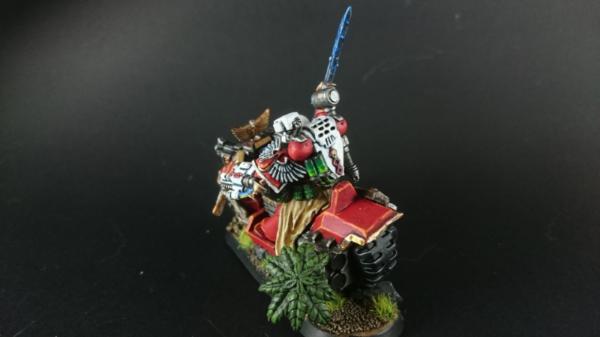
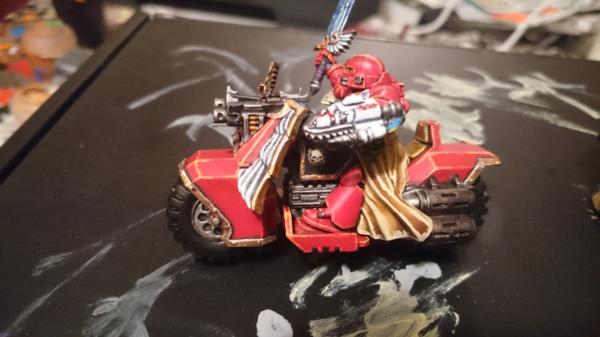
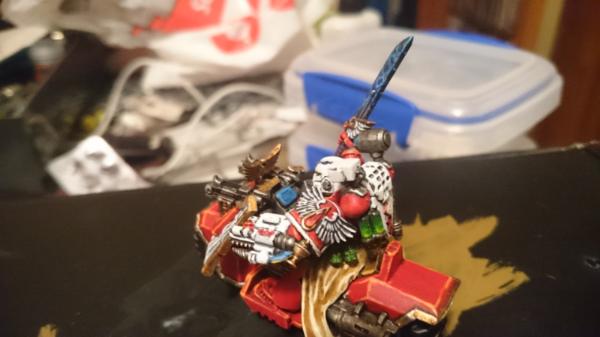
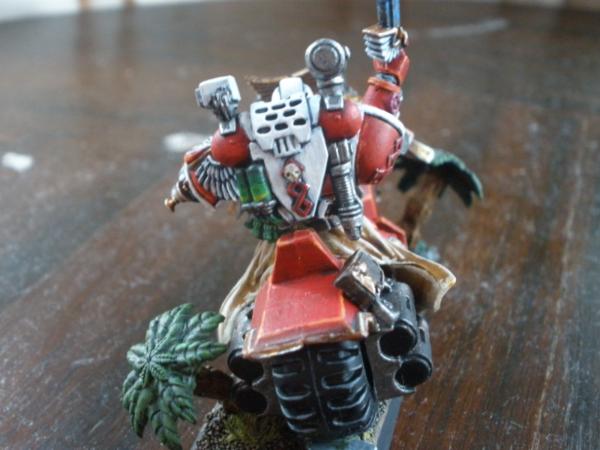
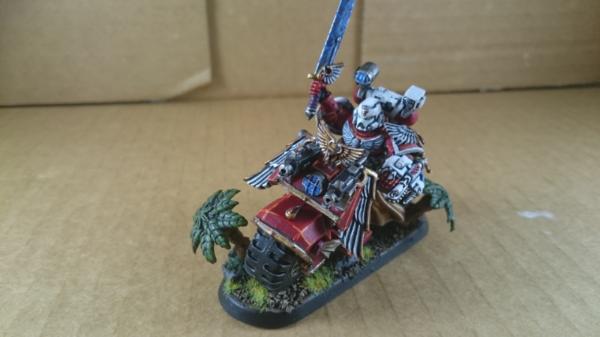
So I got a few better photos of my priest and the rest of my characters.
While they are better I am still not 100% happy with them, really need to look at building a lightbox or something similar in the hope to be able to take a nicer photo of my minis!
Priest On Bike:
Spoiler:
(Used dakkas auto adjust)
(used dakkas auto adjust)
Sword close up (probably my least favourite part of the model)
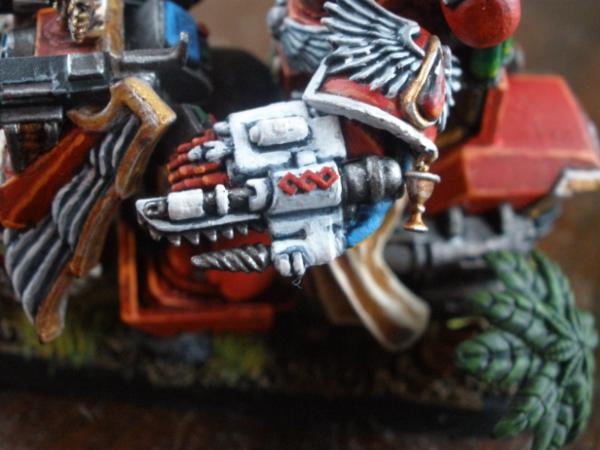
Narthecium close up
Some base detail
Some more base detail
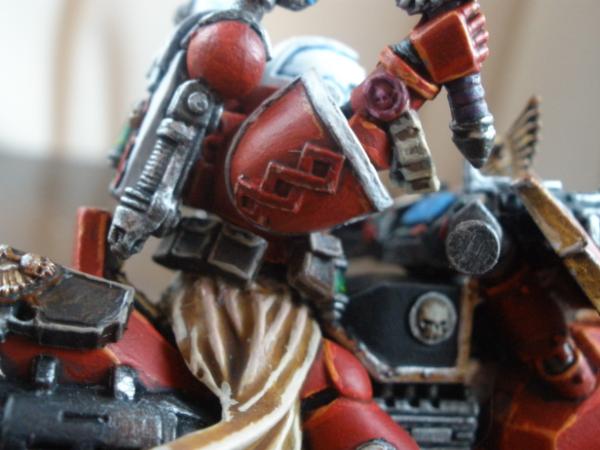
Right shoulder pad - not sure if I should have made the logo black instead of red...
Backpack details (can also see the grenades)
Left shoulder details
Used dakkas auto adjust
Used dakkas auto adjust
Next Up Sanguinary Priest (Jump Pack):
Spoiler:
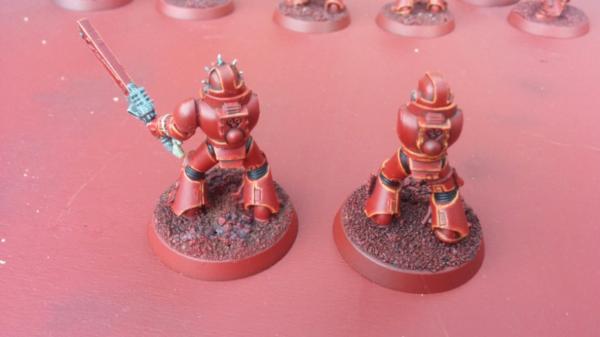
Sanguinary priest In termintor armour (I know I can't use him anymore :( )
Spoiler:
Freehand!
Chaplain With Jump Pack (my old Reclusiarch)
Spoiler:
Came out a bit blurry sadly
Librarian With Jump Pack
Spoiler:
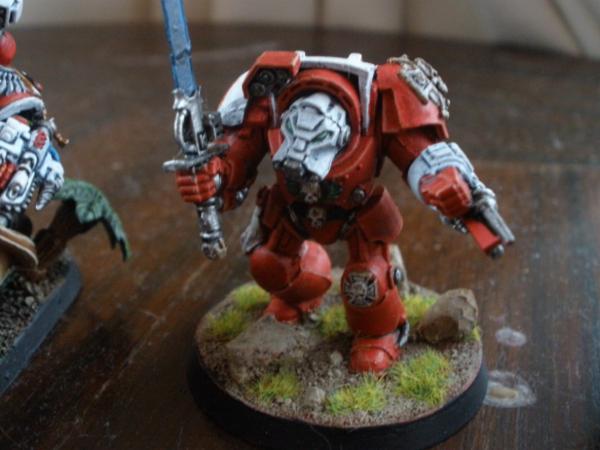
Captain with Jump pack
I entered this one in a painting competition a good 4 or 5 years ago.
Spoiler:
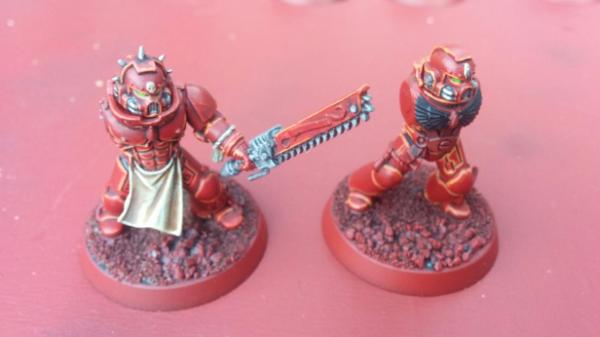
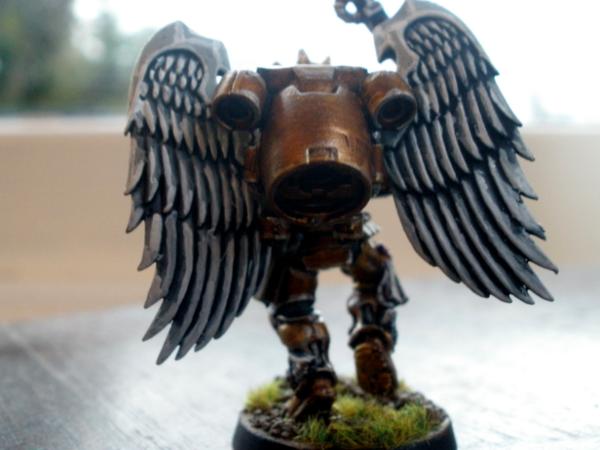
Lemartes (old and metal)
Spoiler:
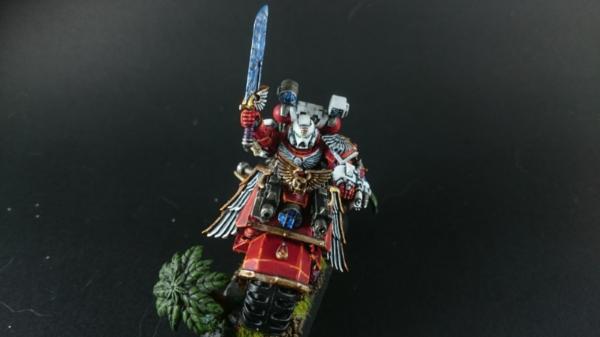
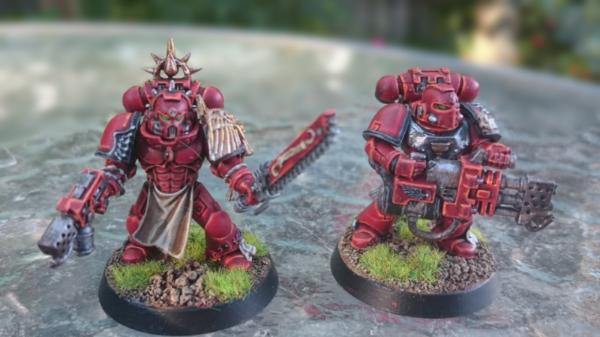
Dante (yes already seen in this thread, couple of new snaps)
Spoiler:
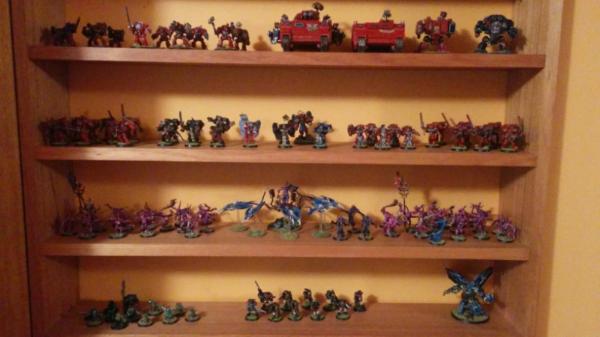
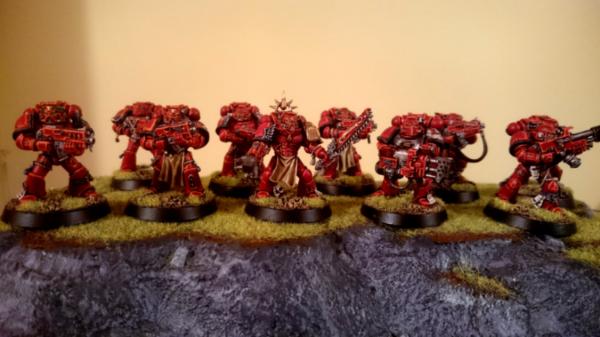
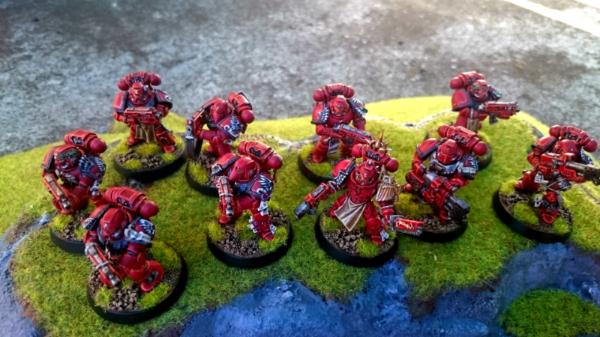
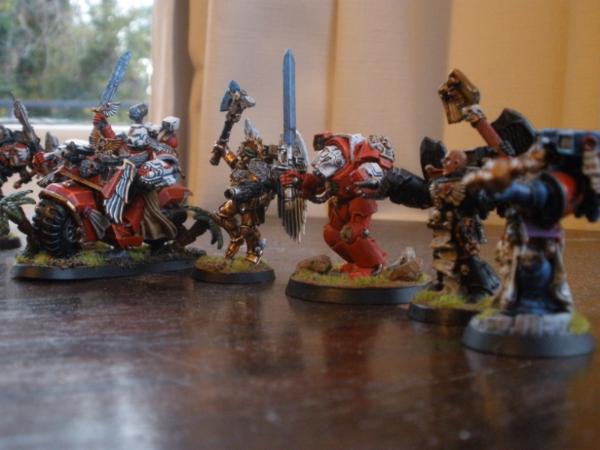
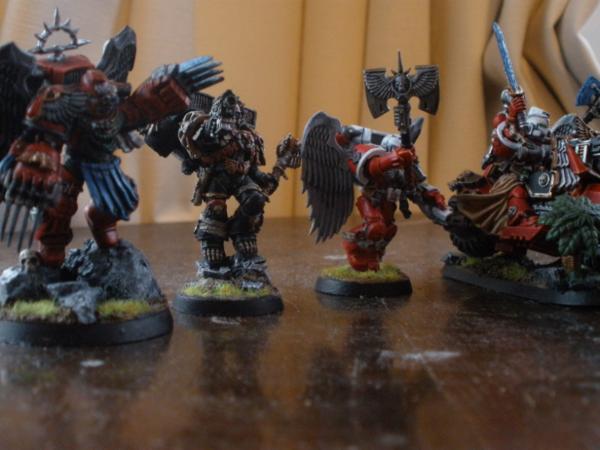
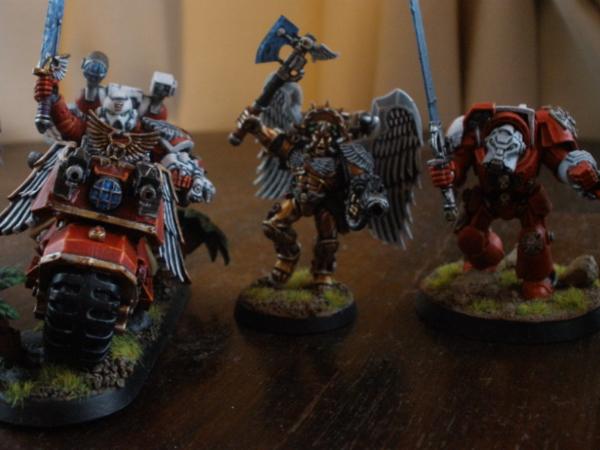
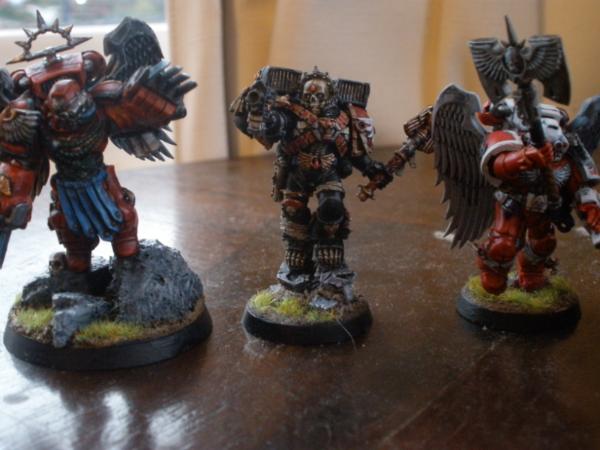
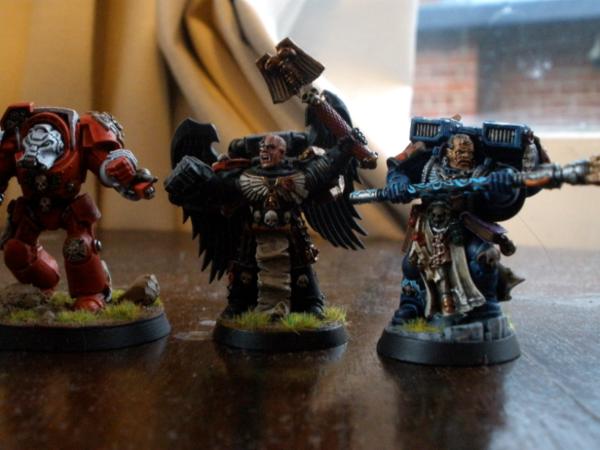
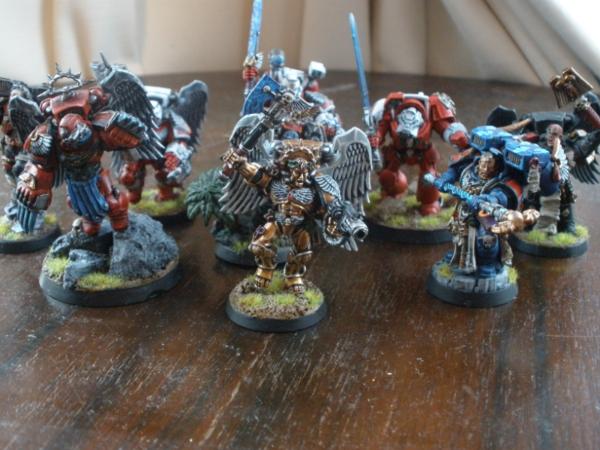
And now some group shots!!
Spoiler:
Bit of a big post, lots of pics, C & C Welcome. Keep in mind with the exception of Dante and the priest on bike these models are all several years old now - I think my painting has progressed somewhat!
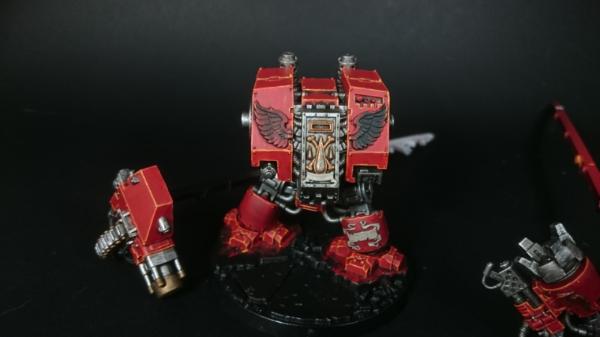
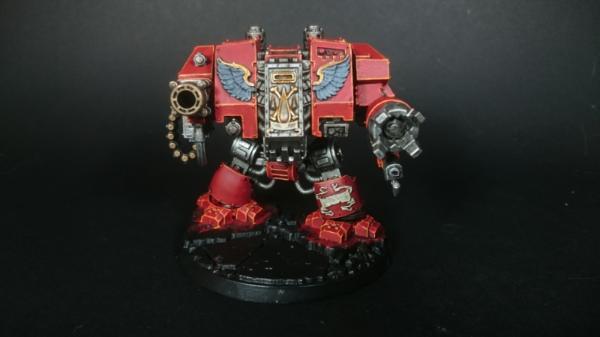
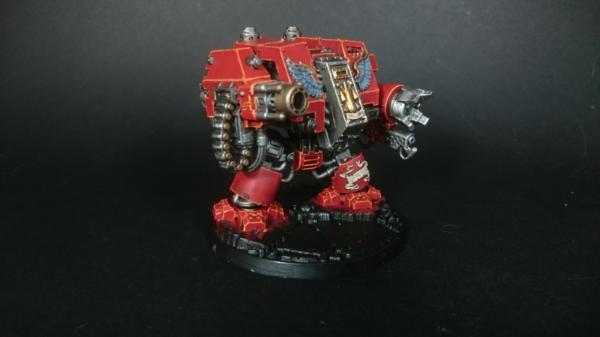
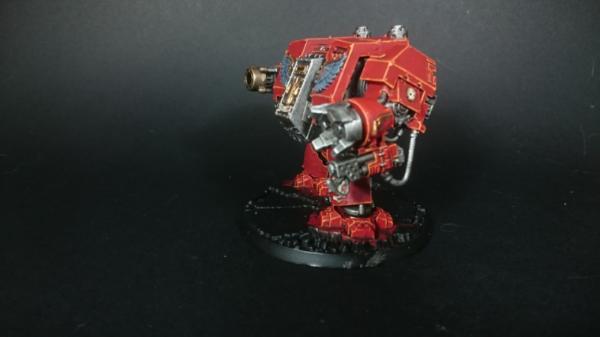
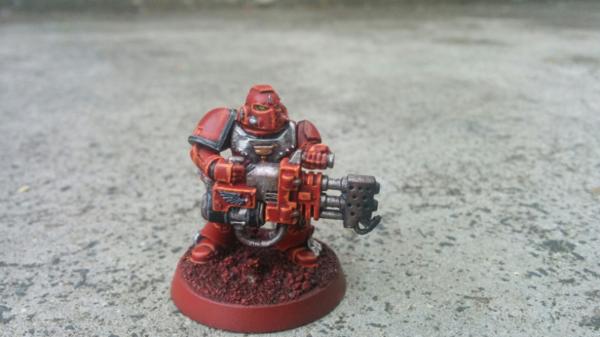
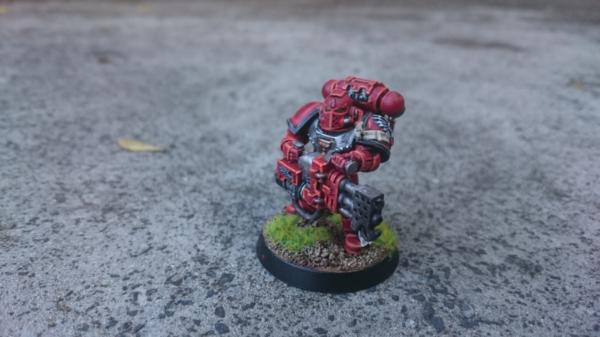
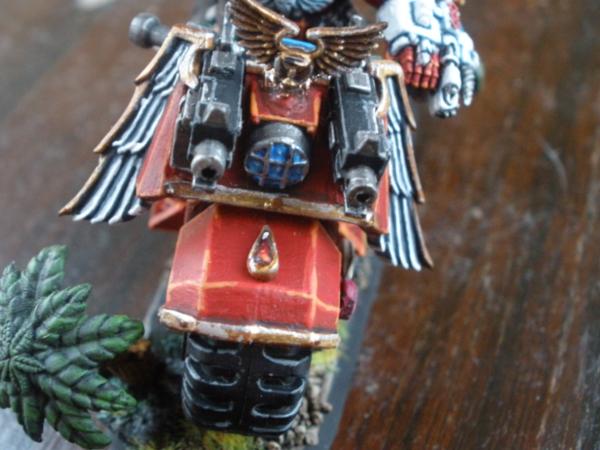
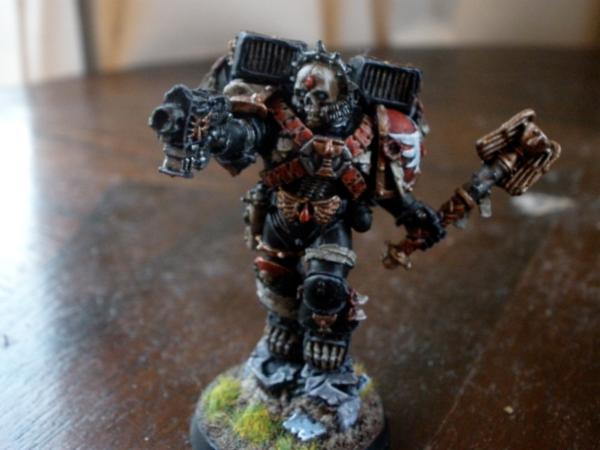
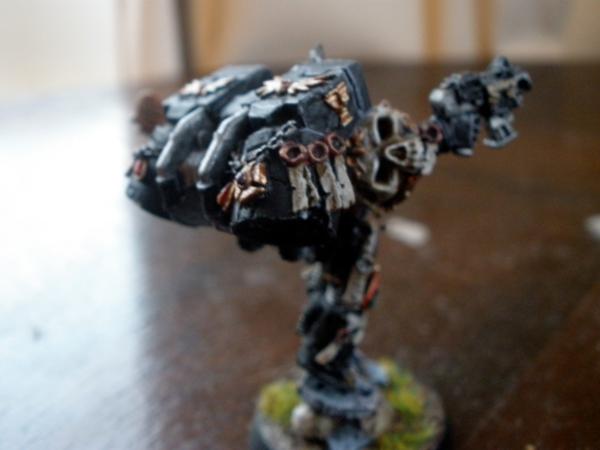
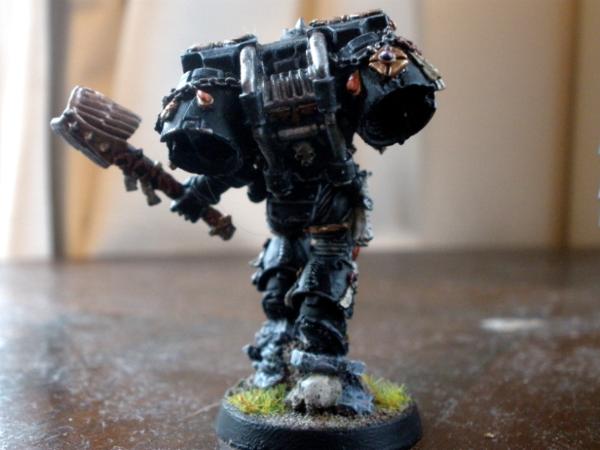
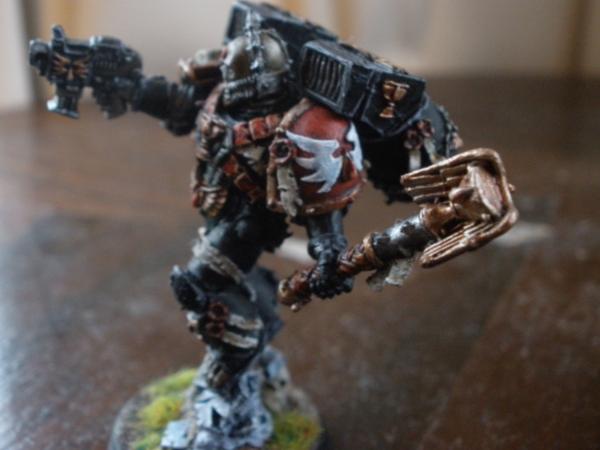
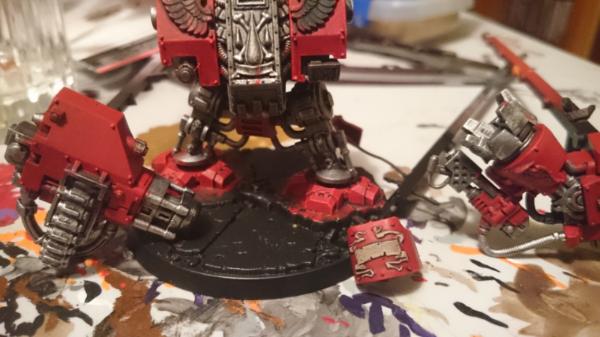
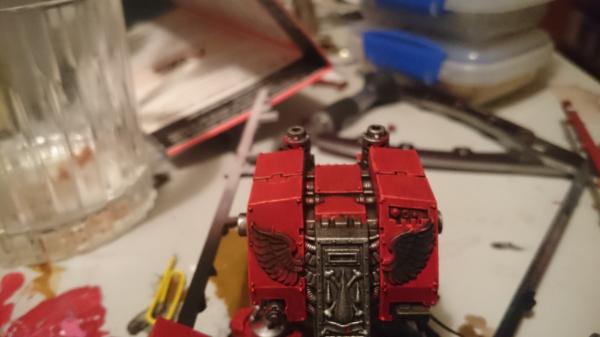
Had a bit of time to work on my Furioso Dreadnought over the past couple of days.
It was a second hand model that I bought off ebay a while ago, while it wasnt painted there were bits glued on that I didn't want glued on (leg plates, melta instead of flamer). Removed the leg plates then put in a pin in place (since the plastic bits broke as I thought they would) which was not an issue. Removing the melta was a PITA and had to do some greenstuffing to fix up some gaps..The bit where the tube/cable attaches to the arm is still a bit munted so might paint up a couple of purity seals or something to try and sneakily obscure that area once its all finished.
Here are some WIP photos.
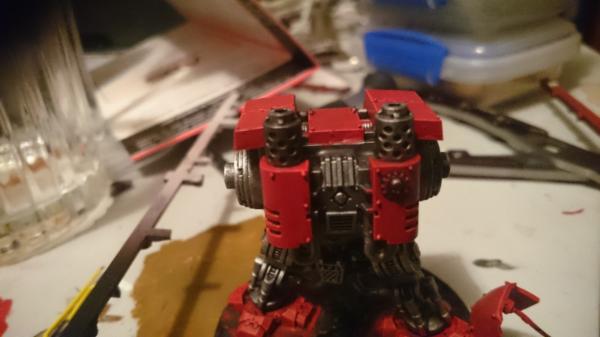
I have done first stage of highlights on everything except the arms - leaving arms to do then orange highlights on everything.
Gotta fix up a fair bit of the silver (im pretty bad at going over the edges when base coating large areas).
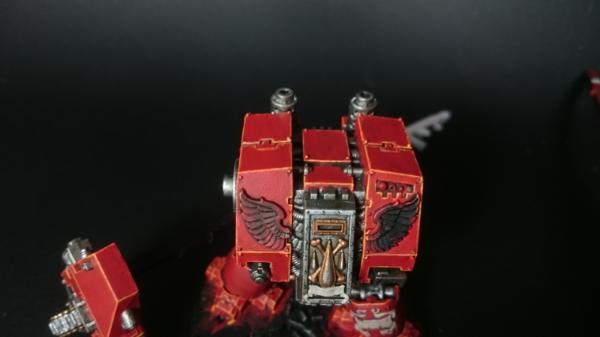
Everything
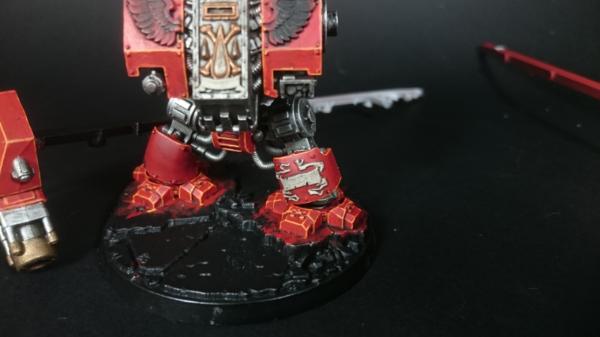
Leg plate
Body
Back
Fist arm
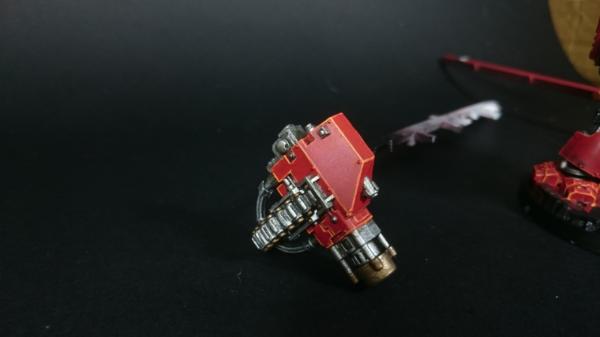
Frag Cannon Arm
Hopefully get the red done in the next day or two, touch up the silver then onto the details! Unfortunately probably can't get much done over the weekend this week though.
Thanks! Hoping the end results ends up looking good (last dreadnought I painted was many many many years ago!).
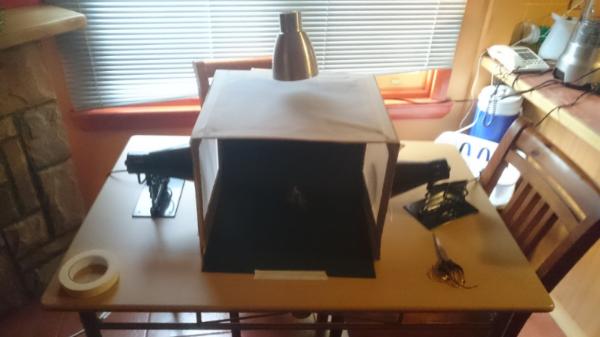
In other news, finally sought out some advice re:Lightbox and should be paying a visit to my lighting shop on the way home from work today to pick up the lights I need, then hopefully I can start uploading better quality images
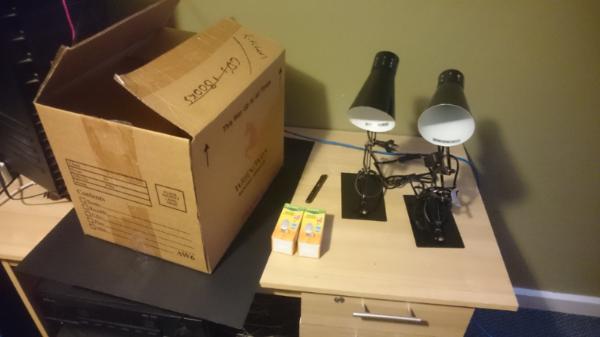
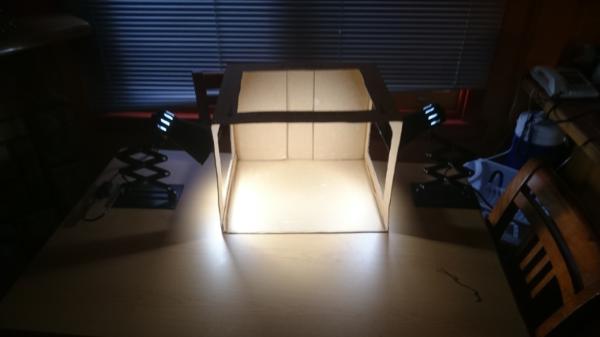
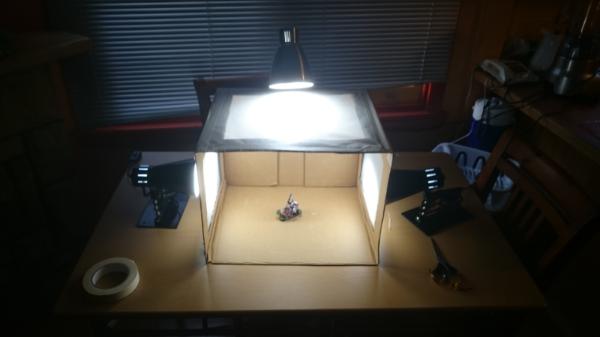
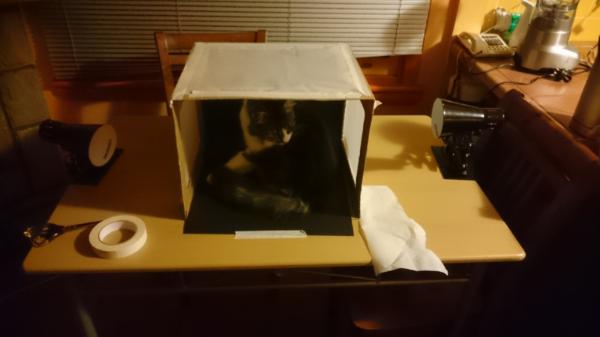
Automatically Appended Next Post: So I bit the bullet and bought the stuff for my light box.
The Supplies!
An old moxing box, couple of daylight LED globes (6000K), couple of cheapo desk lights, my hobby knife, some black card, and eventually some baking paper and masking tape
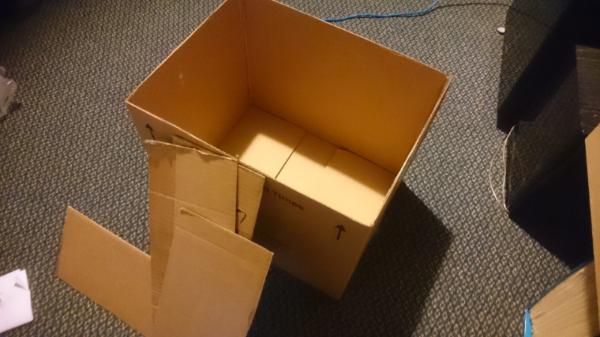
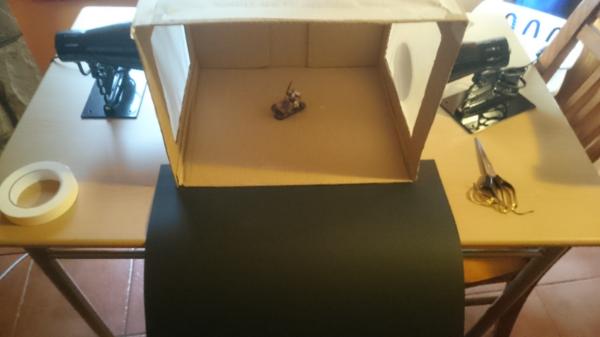
First step was to remove the flaps from the box
Then cut holes in 3 of the sides (I wasnt sure if I made them big enough TBH)
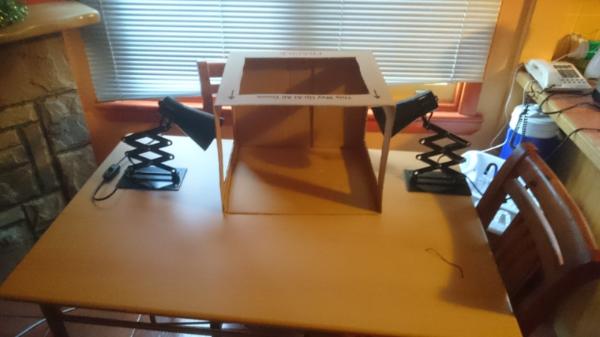
The set up with a couple of lamps
Seems to get an okay spread of light
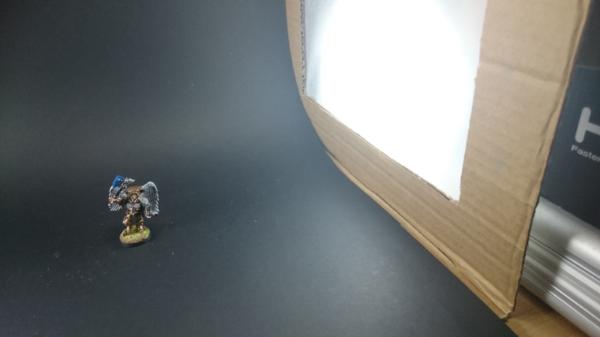
The first test image - came out okay (taken with the phone I have been whinging about, so turned out better than most with that so far)
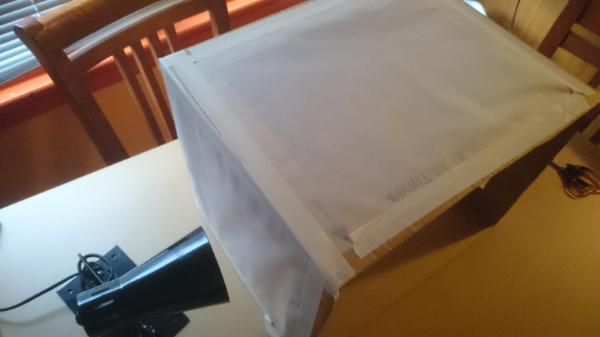
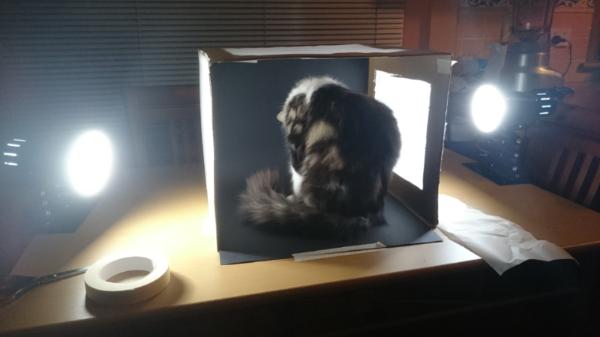
Didnt have any of the material most tutorials recommend so pulled out the baking paper! (attached with masking tape)
The light still comes through!
Not much different (perhaps not so bright anymore??)
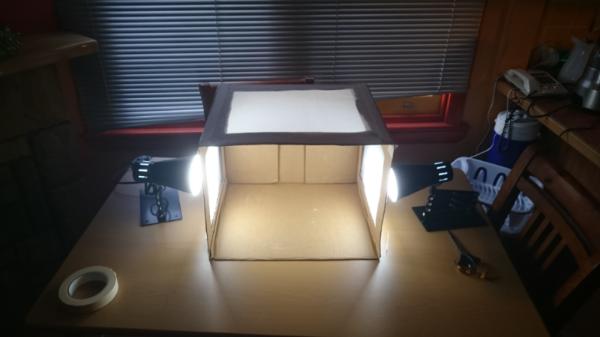
Out comes the third light (my painting lamp)
Bit more even spread of the light
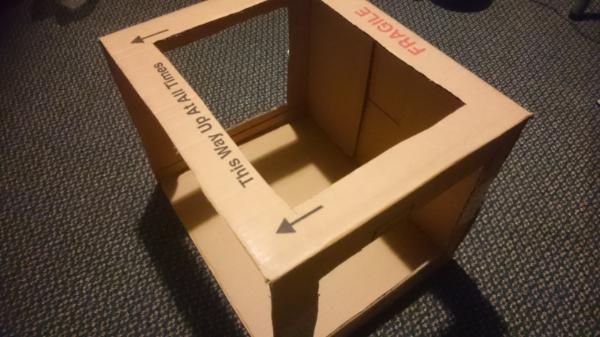
My black cardboard was a touch too big so had to trim it back!
A+ handy work, attached to box and table with masking tape
Thats how high the edges of the box currently sit - anyone that has made these before happen to know if i have made them big enough or not??
Well there you have it folks, my quick and dirty light box.
I have some test images that I am uploading and will post probably in the morning (Aussie time)
This message was edited 1 time. Last update was at 2015/03/19 11:03:24
Hi. Love the fact that you have made your own light box. Your problem is the ISO setting of the phone camera and the f stop. These are usually fixed values on phone cameras and are only changeable on digital SLR. The composition is the key thing, some of your photos that have been auto-dakka'd are very clear with good colours. Also think about direction of light, you need one light source in front of the models otherwise they end up being in shadow.
GW - 670 pts || - 354 pts || - 46 pts || - 106 pts || LoTR - 400 pts (Evil) vs 0 pts (Good) || Space Hulk - 1/35 || Deathwatch Overkill - 0/50
OtherMEdge: Karists - 23 points || Epirians - 0 points Shattered Earth: Awaiting delivery "Awakening" Terrain: Awaiting delivery DWMG2: 4/54
My Miniatures blog || My Terrain blog || My MEdge blog || Paradigm's Painting Challenge League Tables: 2015/16, 2016/17 The Hobby Mission: 25/713 minis complete, 98/406 terrain complete. 46 more minis in 2016 to complete my goal for this year
jreilly89: "In the far future, there are only drive-bys."
TP^DC Deputy Manager wrote: Hi. Love the fact that you have made your own light box. Your problem is the ISO setting of the phone camera and the f stop. These are usually fixed values on phone cameras and are only changeable on digital SLR. The composition is the key thing, some of your photos that have been auto-dakka'd are very clear with good colours. Also think about direction of light, you need one light source in front of the models otherwise they end up being in shadow.
Thanks, seemed like the logical thing to do as it was cheap and would help my situation a lot!
With regards to the settings, I can in manual mode change iso settings, white balance and exposure. I can also mess with these a bit on my digital camera.
I received some advice today that I will try later which is angling the side lamps a bit and bring them closer to the front of the box this will probably create a shadow behind the model (as light will be coming in from the front). Then have the top one positioned to take out the shadow that forms behind the model.
Ill be giving that a go a bit later to see what happens.
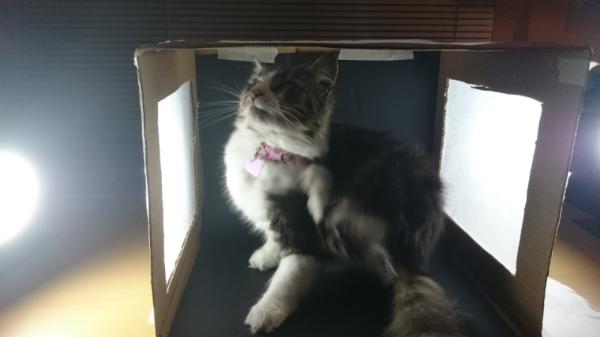
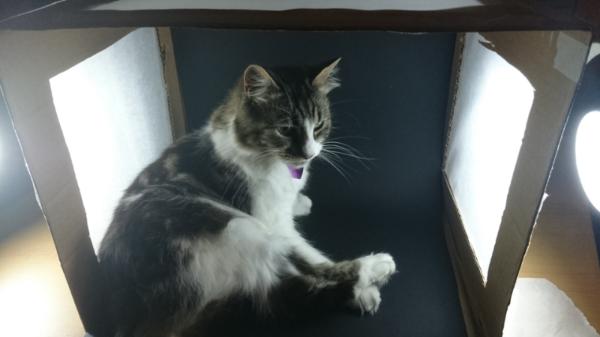
Automatically Appended Next Post: AAAnd I think I have had a bit of success!
Spoiler:
Bit too much shadow
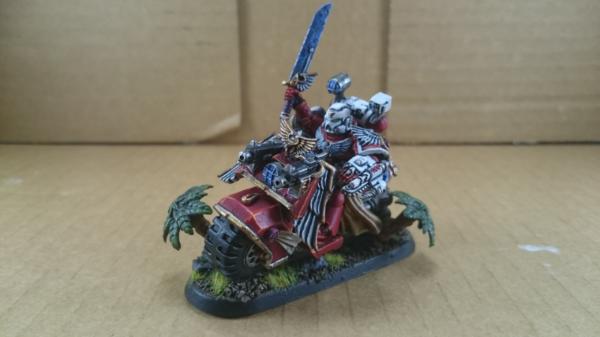
This one I think is getting pretty close to what I want!!
Notice all the damn cat hair?!
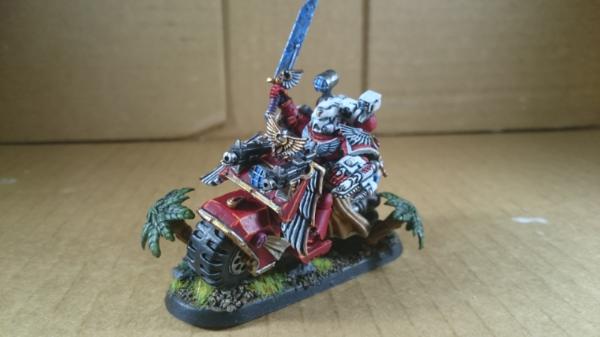
And since you might be getting sick of seeing that priest by now..something completely different!
Spoiler:
These guys I painted maybe 2 years ago now!
This message was edited 2 times. Last update was at 2015/03/20 09:52:46
Choose a 400 ISO, higher will make the photos grainy, this will slow how long the shutter is open for therefore more risk of blur - use a tripod. If you can alter f stop, choose a low number 5.6 is a good all round setting. The lower the number, the greater the light let in and also you will achieve that blurred close-up, in focus backflground effect that looks so cool on models with swords!
I'd have two lamps at front 30 degree angles from centre then top lamp directly above pointing down, should kill your shadow.
GW - 670 pts || - 354 pts || - 46 pts || - 106 pts || LoTR - 400 pts (Evil) vs 0 pts (Good) || Space Hulk - 1/35 || Deathwatch Overkill - 0/50
OtherMEdge: Karists - 23 points || Epirians - 0 points Shattered Earth: Awaiting delivery "Awakening" Terrain: Awaiting delivery DWMG2: 4/54
My Miniatures blog || My Terrain blog || My MEdge blog || Paradigm's Painting Challenge League Tables: 2015/16, 2016/17 The Hobby Mission: 25/713 minis complete, 98/406 terrain complete. 46 more minis in 2016 to complete my goal for this year
jreilly89: "In the far future, there are only drive-bys."
I can't change the f stop I dont think specs tell me: f/2.0 maximum aperture
Those photos were taken at 50 ISO.
For the lamps I had one angled and pointing through the side, another pointing through the front with some baking paper taped over it and one coming from the top . Loving the LED lights, they don't get hot so it doesnt matter if I just tape baking paper right over the lamp
This message was edited 1 time. Last update was at 2015/03/20 22:06:16
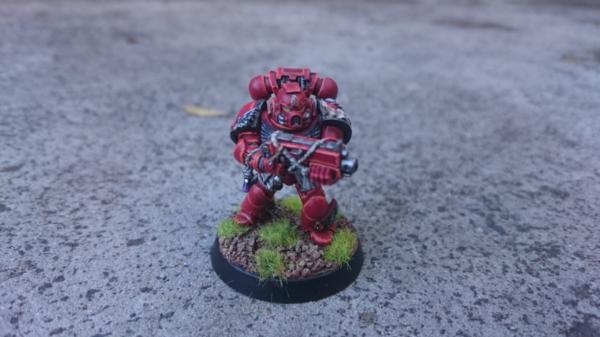
Organge Highlights are done
Touching up the metal is half done (have put on leadbelcher but I want to rewash and probably highlight some bits because they are obvious enough to annoy me)
Haven't started the wings on his torso yet, not sure if I want them gold or black/white....
Base also unstarted - I have ran out of my dark grey basecoat (it dried out)
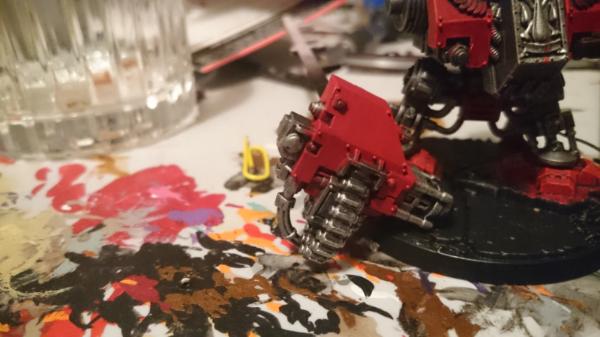
Frag cannon - still need to highlight the brass bits then touch up the metal near the bullets
Need to blacken the end of the flamer here like I did on my tac squad flamers
Home stretch now! Really about 75% of the dreadnought painting is the red and silver it turns out!
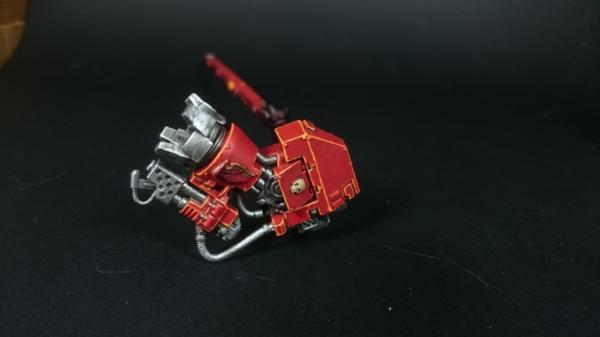
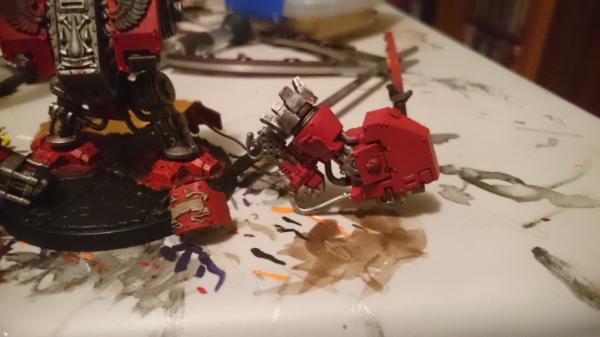
Got things done enough to put the arms on!
Decided to go with white for the chest wing things as it would tie in with the rest of the army a lot better than gold.
Front View
Frag Cannon View
Fist VIew
I hope i can get it all finished tonight!!
Next on the cards is either an attack bike or 5 DC I am yet to decide


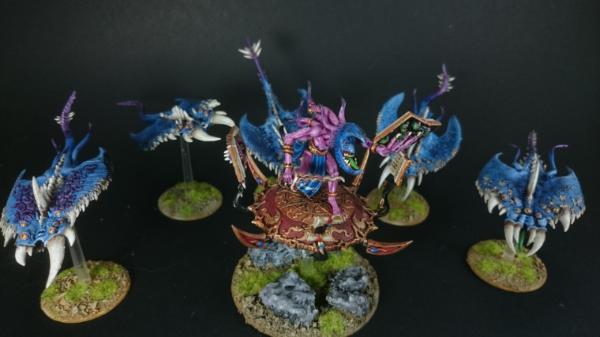
 Dante looks very good!
 Blood Angels
 Grimtoof 'Eadchoppa's Deff Skullz
 Astral Claws and Tyrant's Legion
  Glad you like him, just needs some sort of guard to go with him I think!


 ___________________


 - 670 pts ||
  - 354 pts ||
  - 46 pts ||
  - 106 pts || LoTR - 400 pts (Evil) vs 0 pts (Good) || Space Hulk - 1/35 || Deathwatch Overkill - 0/50