Switch Theme:

Tutorial: Turn a GW Drop Pod into a FW Dreadclaw EASY  [RSS] Share on facebook Share on Twitter Submit to Reddit
»
Author Message
Advert


Forum adverts like this one are shown to any user who is not logged in. Join us by filling out a tiny 3 field form and you will get your own, free, dakka user account which gives a good range of benefits to you:
  • No adverts like this in the forums anymore.
  • Times and dates in your local timezone.
  • Full tracking of what you have read so you can skip to your first unread post, easily see what has changed since you last logged in, and easily see what is new at a glance.
  • Email notifications for threads you want to watch closely.
  • Being a part of the oldest wargaming community on the net.
If you are already a member then feel free to login now.


Made in us
Frothing Warhound of Chaos


Let's talk about converting Dreadclaws for your Chaos or you 30k army using just a single drop pod kit (technically less than the whole kit). I really dig the fact that using units like the Dreadclaw is becoming more widely accepted. Playing with these units shouldn't break a player's budget and it also shouldn't force them to resort to using the dreaded Pepsi Bottle Proxy. I want to revisit this tutorial, brush up the explanations and help distribute it to a whole other generation of players. Let's take a look.
A little history: I first posted a tutorial on this method on DFG a few years ago and since then it has been used by tons of folks on Dakka, B and C, the Lounge and tons of blogs. To this day it is the most visited post on my blog during any given week. Here is an example of some great work Mordian 7th did with the design for his World Eaters:


Mordian's came out great and like many other, he added a little something to the design (I didn't use anything on the bottom of the pod because I just figured nobody would look there).


Over the past couple of years, people have added their own takes on the design and I encourage you to do the same and I also encourage you to share your twists and takes with me because it makes us all a little better to have that information linked in a post like this. Check out the rest of the post for another variation.
Anyway, let's take a look at the build:


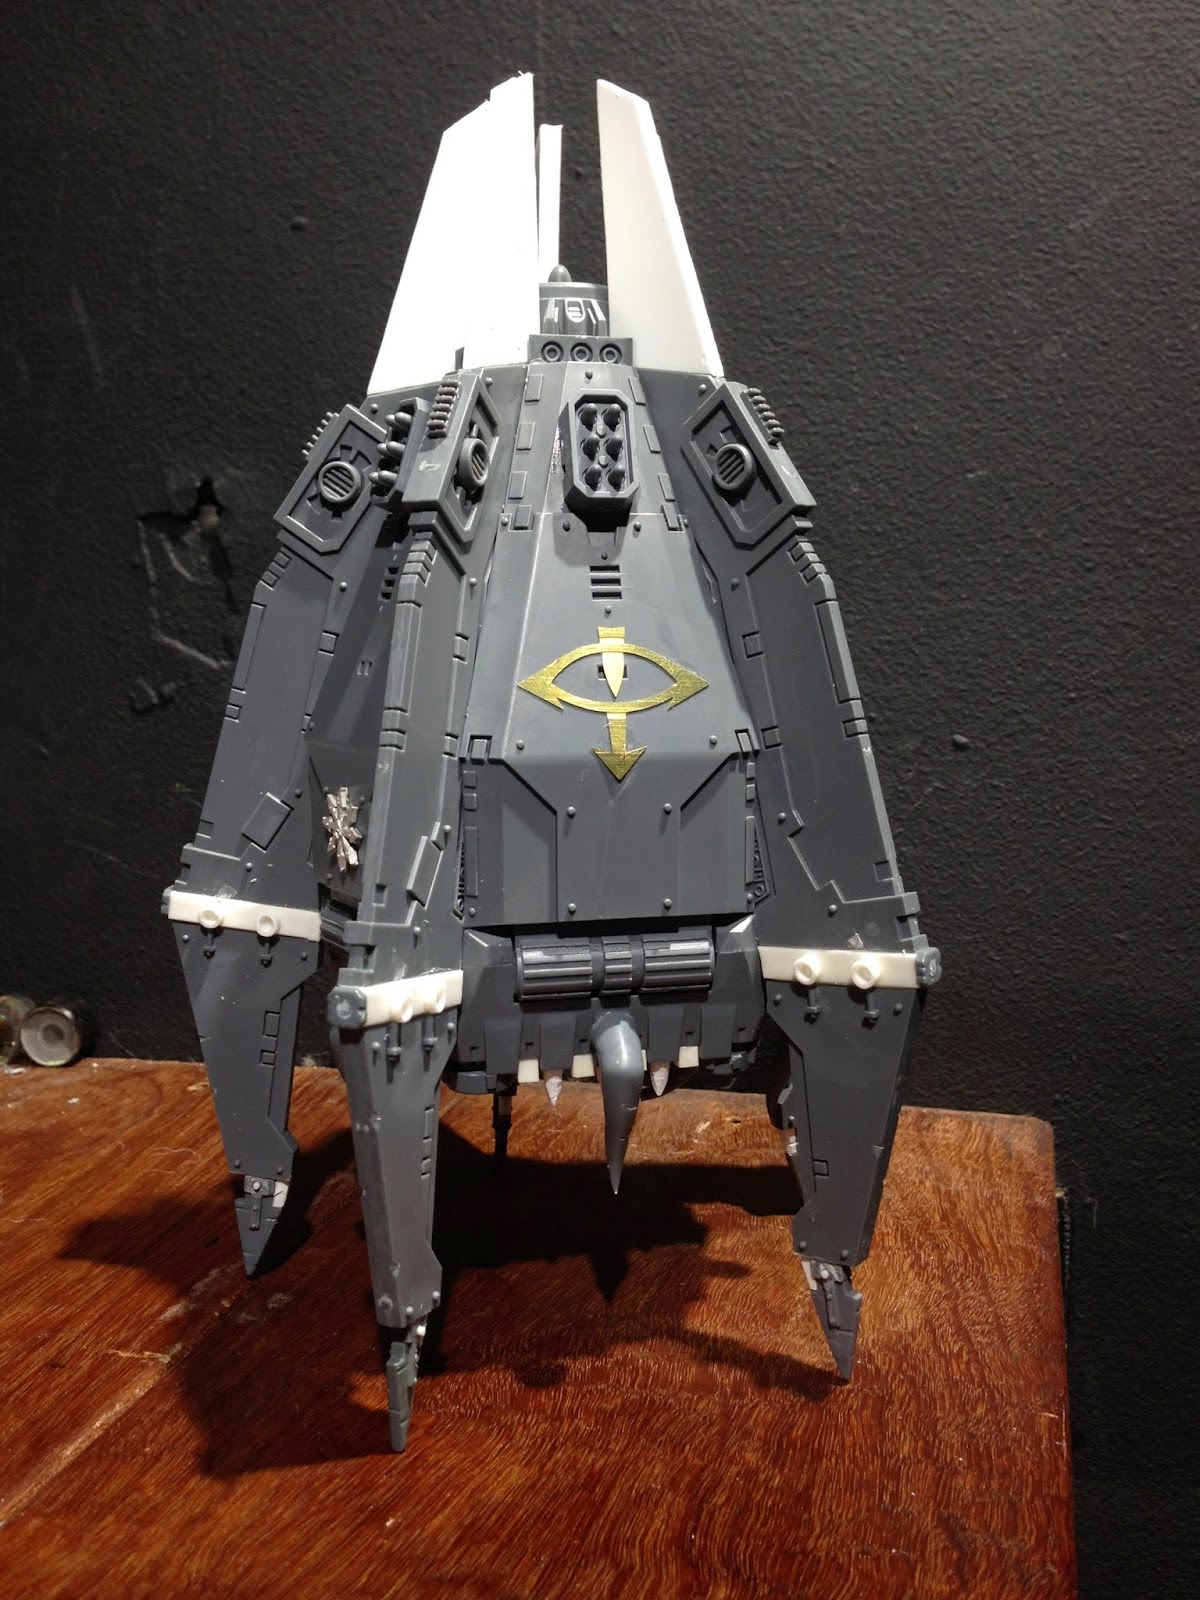
So my original intent was to make this pod for my Iron Warriors (read: Plain) and to also make a pod that anybody could convert, so it is simple. That being said, it is also very easy to customize once built and while it take some work, it is much easier to put together than an actual drop pod.


To begin just buy a drop pod kit, take all the outside doors, fins and engine assembly off the sprues and clean off ALL the mold lines and snags (left over plastic from clipping).

Now take the fins and cut the pointy corners off like on the picture above.


Take a look at the top one (uncut) and compare it to the bottom one (cut). I cut the corner on the inside of the fin (the corner that was cut on the left side as you look at the photo) parallel to the rune-like markings running along the inside of the fin. On the other corner (the small one on the right side as you look at the photo) just near the hose on the bottom part, parallel with the diagonal line below the rune-like marking strip.


Now, because the fins are going on last and the top part here will not be exposed, I shave off this bolt on each side of each fin - just this bolt.


This is what your five fins should look like.


Now assemble the pod's petals with just the outside panels, leaving the inside part on the sprue as you will not need it. (if you fully assemble each petal to include the inside of it, you will have a ton of issues fitting the fins into place).


Now glue it together so you have the normal pod petal for the bottom (you don't need any of the bits for the inside as the dreadclaw will never open). Also assemble the engine completely as you normally would with a drop pod. Then glue the top corner of each door to the top of each square section from the engine housing that matches each door, leaving the actual turbine above the door (or hull as they now form on the dread claw).
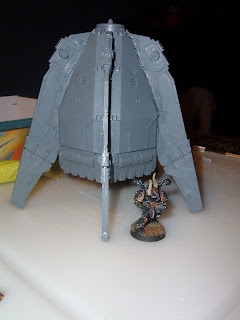


Now take your fins and insert each one into the slots made between each door. They will fit snugly (good thing), the idea is for the corner to catch under the lip made by the turbine bit on the engine housing, the other area you cut should fit snugly into the grove where the fin would normally go on the bottom side. If you left the inside of the door petals off of the model, this step is easy, but if you didn't listen, you may need to do some shaving.


After one good dry fit, glue the fins into place. Your dread claw is basically complete. From here you can just add those little details that make the pod more your own.
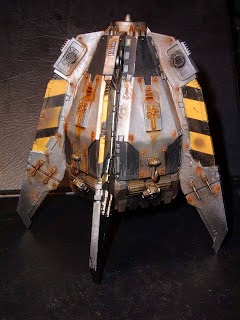


For me that meant adding the retro thrusters. To add those, just take the little fans that you find in the drop pod bits and find a home for them toward the bottom of each petal, where the regular drop pod would have a joint (check the photo above).


To make the pod more aggressive, I also shaved the corners off where the points touch the ground. Those sharp angles made all the difference to me. From there you can add Chaos bits or just freehand paint symbols in later. The choice is yours.


Here is another great take on the conversion from A Host of Word Bearers:


<table align="center" cellpadding="0" cellspacing="0" class="tr-caption-container" style="margin-left: auto; margin-right: auto; text-align: center;"><tbody>
<tr><td style="text-align: center;"></td></tr>
<tr><td class="tr-caption" style="text-align: center;">Damn, I really love this take on the design!</td></tr>
</tbody></table>


He made some great changes to the design and he has a tutorial here covering those changes.


And how could I forget Sheep's pods:
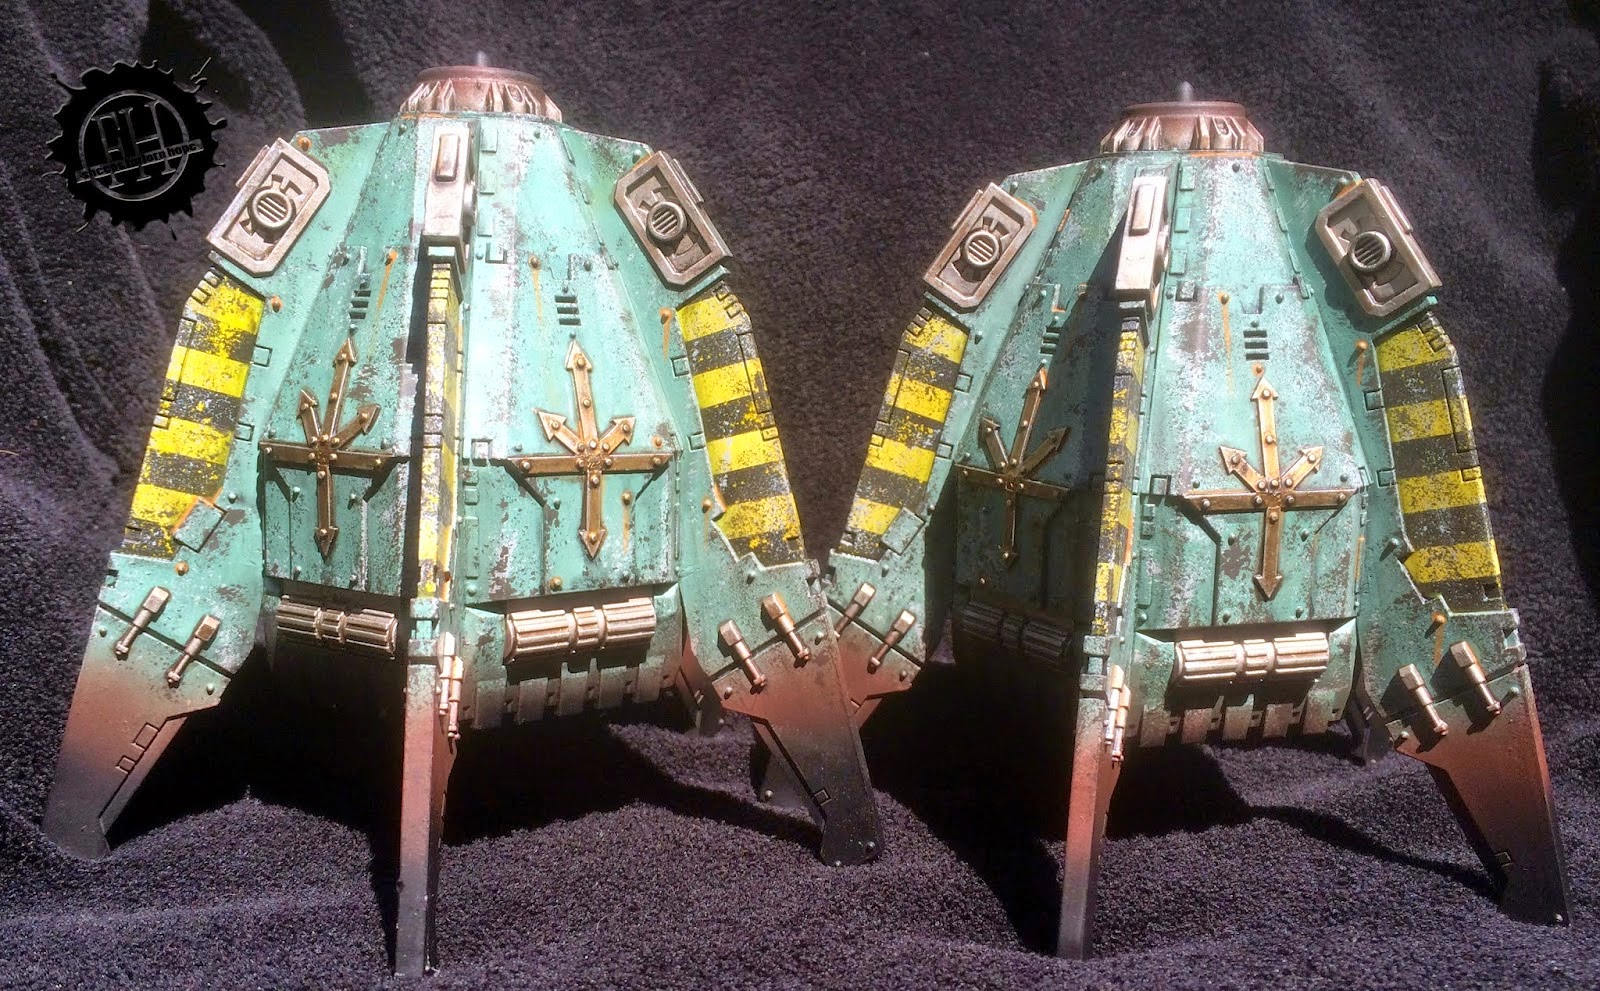


Those Chaos symbols are awesome and make me want to redo my pod!


Now that you have some ideas, get out there and make those Dreadclaws for your Legions, Daemonkin, CSM and whatever other Lost and Damned souls you choose to fling across the Grim Darkness! Make something that looks cool!


If you have some innovative upgrades or twists, please link them in the comments for others to find. We can all find room to improve and a little inspiration can go a long way!


find more of my work and tuts at my blog:

http://darkfuturegaming.blogspot.com/

This message was edited 2 times. Last update was at 2015/04/14 01:29:40


Made in au
[MOD]
Making Stuff


Under the couch

Very cool. Thanks for sharing


Made in us
Omnipotent Necron Overlord


Wow - those look nice. You have any Sicarian tank easy conversions?

If we fail to anticipate the unforeseen or expect the unexpected in a universe of infinite possibilities, we may find ourselves at the mercy of anyone or anything that cannot be programmed, categorized or easily referenced.
- Fox Mulder 
   
Made in us
Blood-Raging Khorne Berserker


Pittsburgh, PA

That is rather ingenious. Nice tutorial, and it looks pretty easy to do, as far as larger conversions go. Having never seen a dreadclaw in person, how close to it is this, size wise?
   
Made in ca
Gnawing Giant Rat


Timmins, Ontario

I was wondering how I was going to modify my standard SM Drop Pod kit into something that my Chaos warband could use. This is a great idea, and surprisingly easy to do....now I have another thing to add to the workbench...

1500pt The Ghost Eyes - A Skaven-flavored CSM/Dark Mechanicum Warband  
   
Made in nz
Warp-Screaming Noise Marine


Auckland, New Zealand

Yes, I'd love to see a comparison of an official Dreadclaw next to a Droppod Conversion.

That said, this looks excellent and I'm pretty sure I'll be making one!
   
Made in gb
Regular Dakkanaut


very nice, i think i could use it as a regular drop pod too


Automatically Appended Next Post:
very nice, i think i could use it as a regular drop pod too

This message was edited 1 time. Last update was at 2015/04/29 10:22:01


http://www.dakkadakka.com/dakkaforum/posts/list/0/491183.page
ork plog

http://www.dakkadakka.com/gallery/644601-Thunder-ork.html?m=2

please vote in my gallery


Forum Index » Painting & Modeling Tutorials
Go to: