I couldn't seem to find any tutorials on how to magnetize every weapon option on the new Knight kits, so I'm going to pay it forward to the Dakka community by writing a tutorial documenting my process as I go through this. Please bear with me as I'm still working on my Knight as of 6/2/15, so parts of this tutorial aren't done. I'll update it as I go forward.
First of all, it's important to recognize that the new Knight kit is the same as the old Knight kit, with an additional sprue attached. Furthermore, if you think about the possible combinations needed to be made, there will be 2 close-combat armatures (the part connecting the weapon to the body chassis) for the Knight Errant and 2 ranged weapon armatures for the Knight Crusader. Also notice that of all the weapons, only the Avenger Gatling Cannon and the Reaper Chainsword are designed to be ambidextrous - meaning they can both be mounted on the left and right arms (Avenger on the right arm for Crusader and Chainsword on right arm for Errant). Therefore, by the end of this tutorial, you should have the following parts:
Heavy stubber secondary weapon sub-assembly
Meltagun secondary weapon sub-assembly
Two "shoulders" with magnets
One elbow armature with attached Avenger Gatling Cannon
One elbow armature with attached Reaper Chainsword
One elbow armature with attached Grabby-Claw Thing (too lazy to look up what it's called.. thunder-something gauntlet)
One elbow armature with a further magnetized option for either battle cannon or melta cannon
Additional Stuff Needed:
Magnets, small
and large ones
A dremel or similar handheld power tool, or a metric crapton of patience, hobby knives, pin drills, and files
Stormspear Rocket Pod vs. Ironstorm Missile Pod
Step 1
Assemble the chassis of the rocket/missile pod, EXCEPT for the front "face" where the missile bits attach. Also, clip a length of vertical sprue.
 Step 2
Clip the vertical length of sprue down to the inner height of the pod, such that it stays vertical when pressed into the pod. Drill a hole in the middle of it and stick a magnet in it. Drill holes in the middle of the rear of the rocket/missile pod face. Stick more magnets in there, making sure that the sprue is attracted to both.
 Step 3
Press the vertical bit of sprue in, till the rear of the sprue on the bottom is in line with the circular hole on the inside, with the magnet facing out. This will mark the depth needed for your rocket/missile pod faces to sit flush against the pod. Glue it down.
 Step 4
Profit.
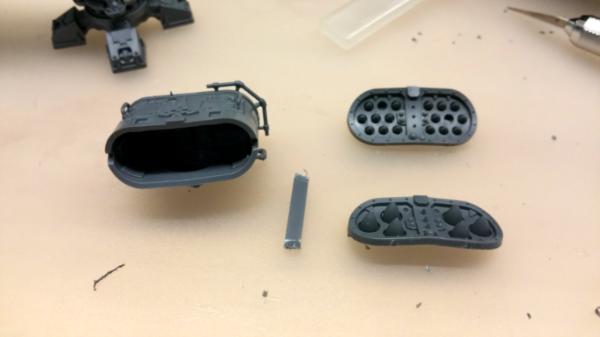
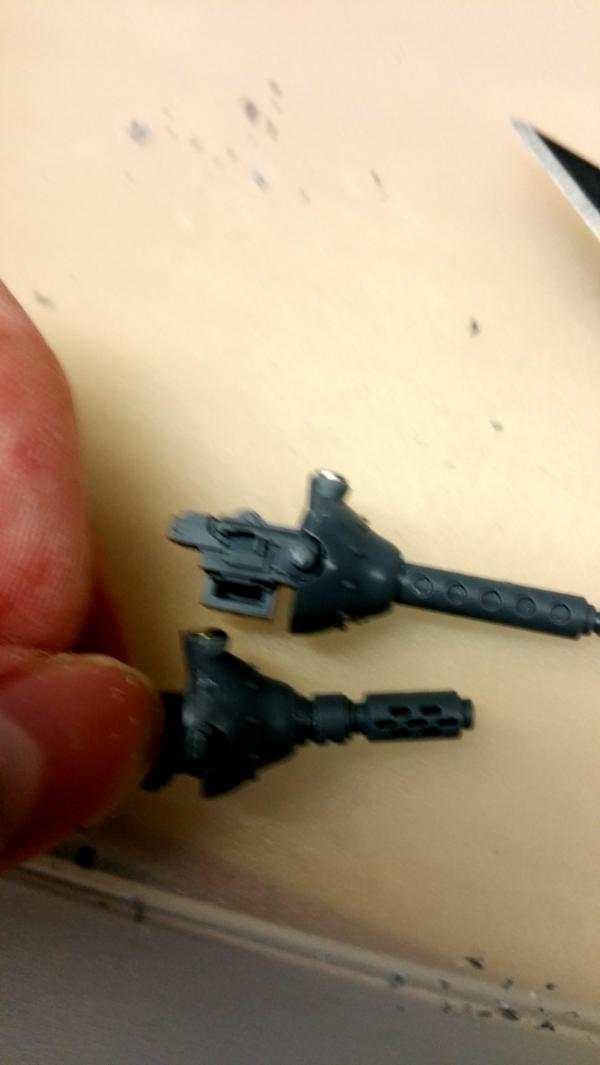
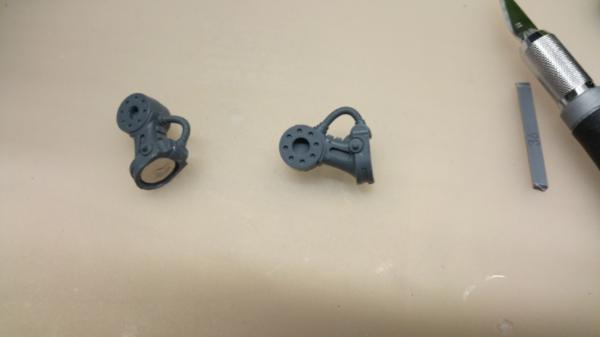
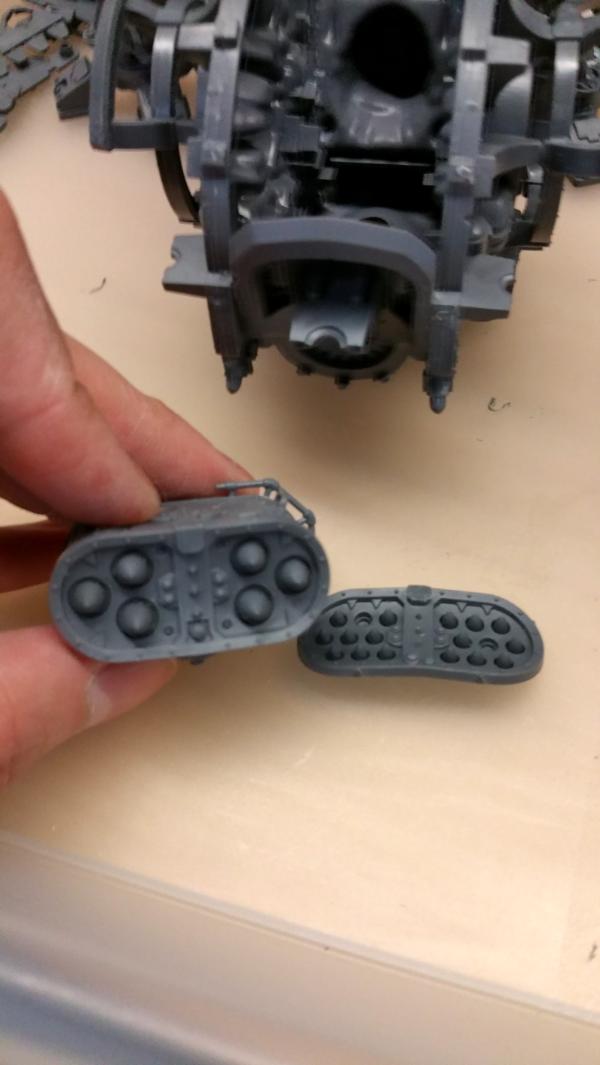 Chassis Secondary Weapon Heavy Stubber vs. Meltagun
Step 1
Chassis Secondary Weapon Heavy Stubber vs. Meltagun
Step 1
Notice that you have enough bits to assemble both gun assemblies. Go ahead and do that. Also attach the other "half" of the circular thing which would normally hold the guns in place to the Knight chassis.
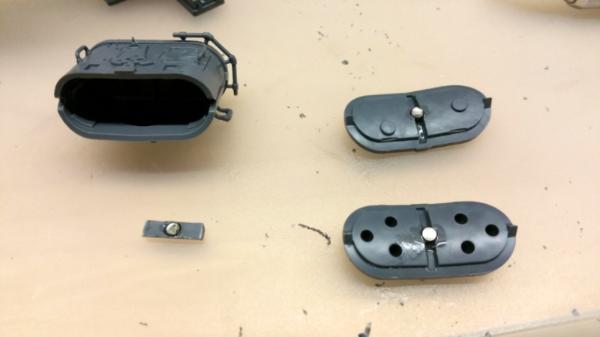
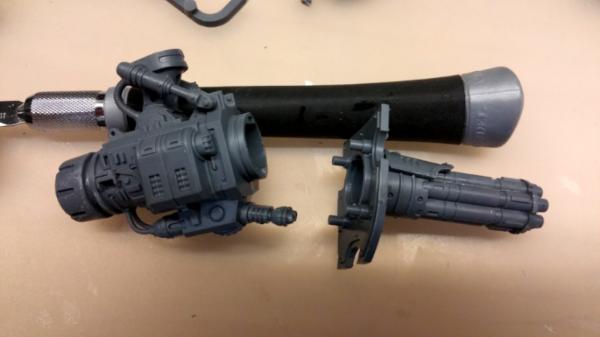
 Step 2
Clip off the nubs on the guns' mounts, then drill a hole and drop a small magnet in each of them. Sorry for the poor image quality.
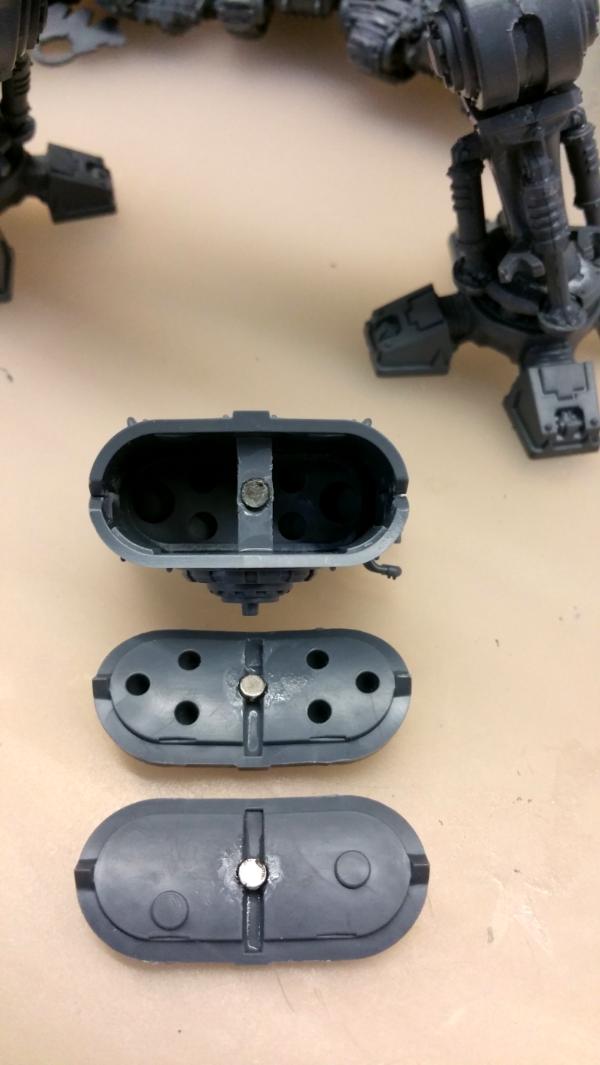
 Step 3
Widen the hole where the gun would usually attach, and then press a small magnet in and glue it there.
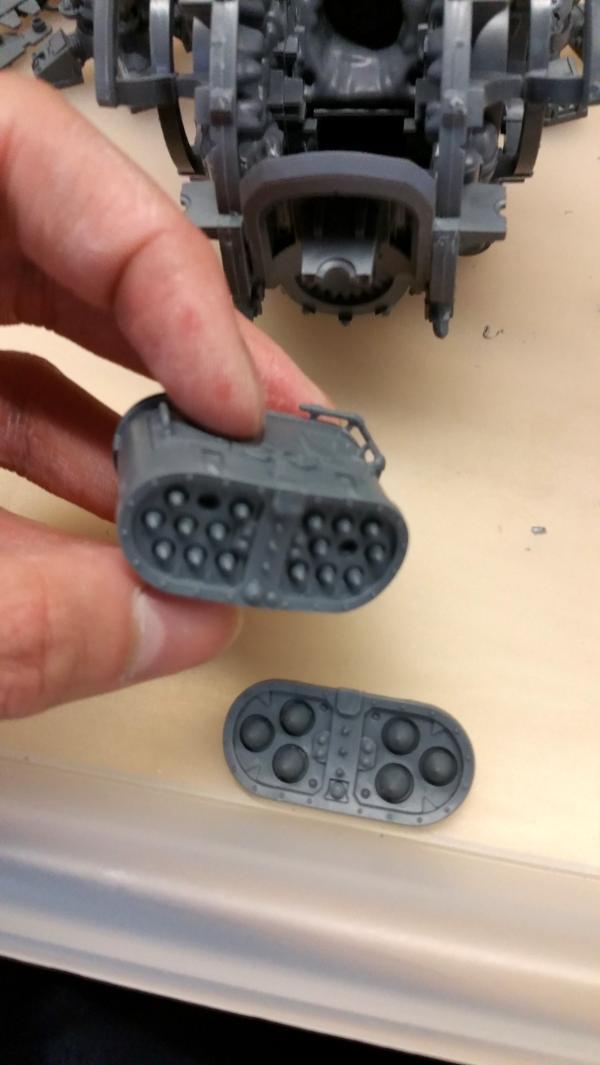
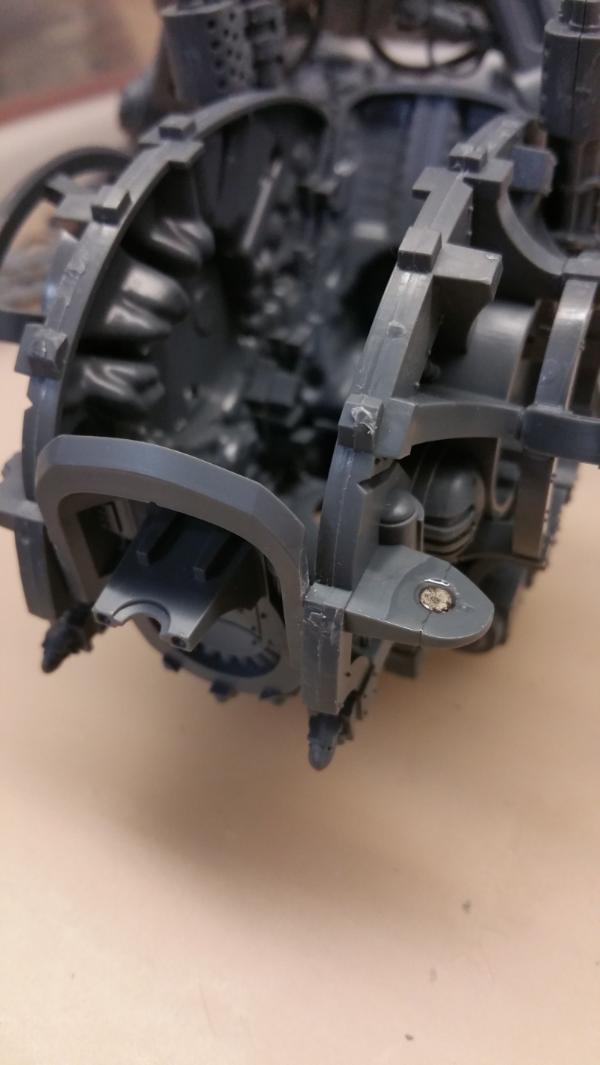 Step 4
Enjoy having both guns swappable. The Knight carapace won't interfere with it.
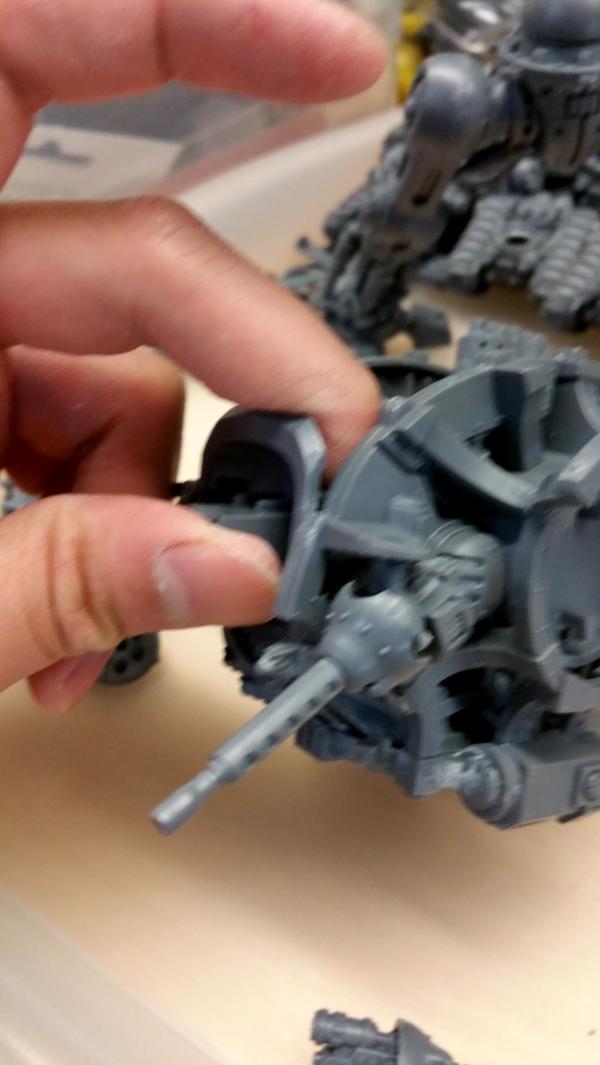
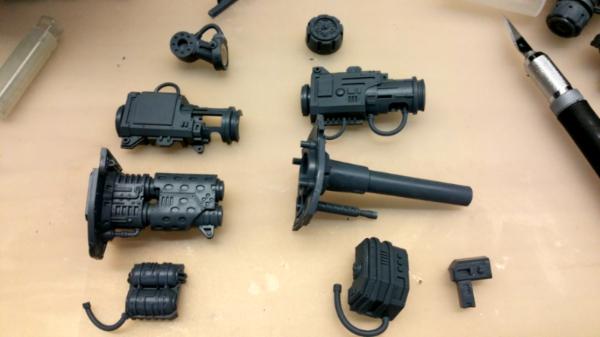
 Everything Else - AKA the gun arms
Step 1
Everything Else - AKA the gun arms
Step 1
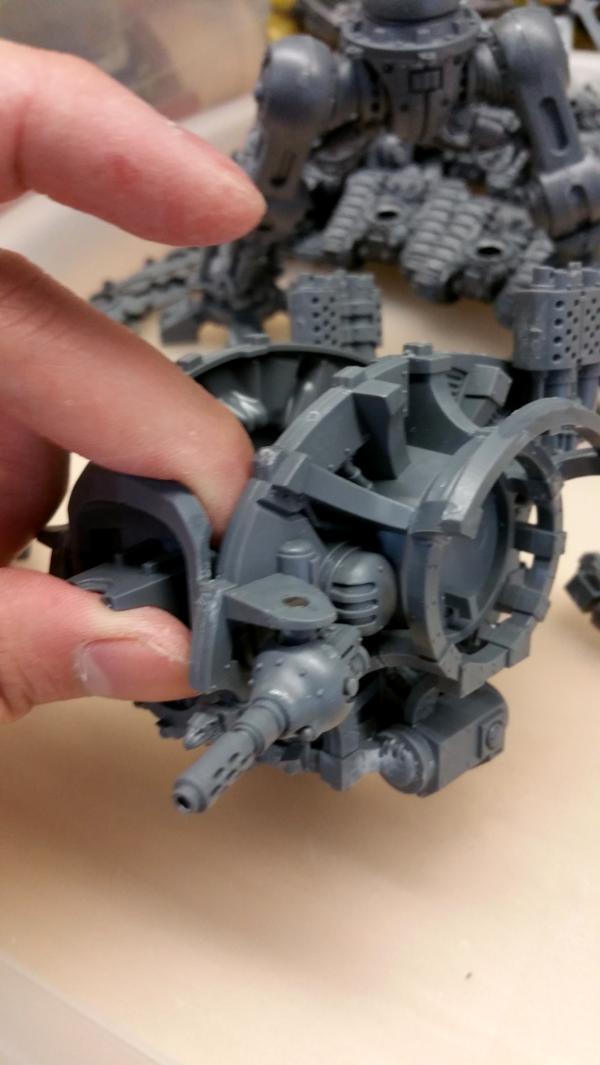
Draw your attention to these two shoulder sub-assemblies. Note of warning, you probably want to do the next few steps first instead of assembling them first like I did (hindsight is 20-20...)
 Step 2
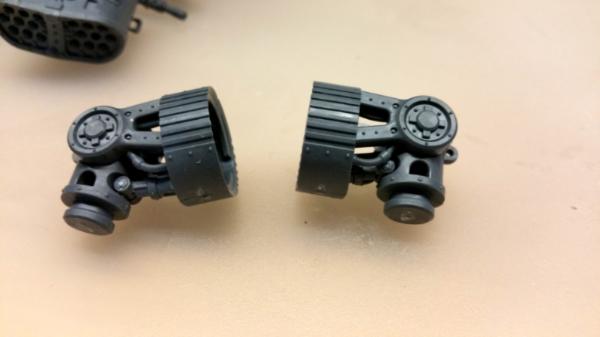
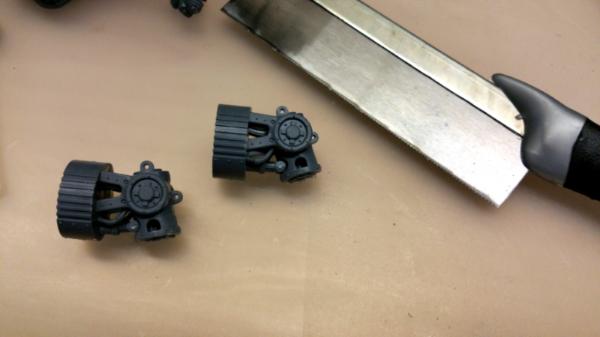
Using a hand saw, a knife, or a similar killing implement, hack off the nubs on the shoulder sub-assembly.
 Step 3
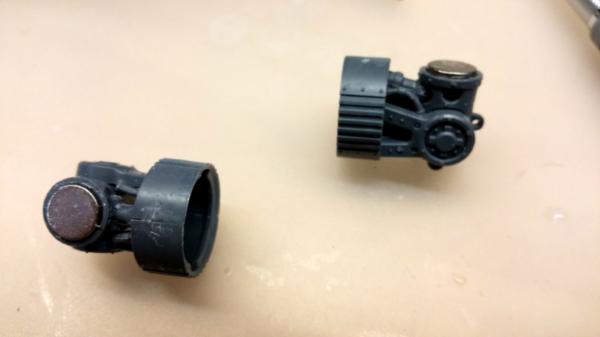
Yup, you guessed it, use your drill/dremel/powertool to make a big enough hole at the spot you hacked off the nub for you to sink a large magnet in and glue it there. Its perfectly fine for your magnet to be protruding a little like mine is, and you probably want to as well, since you can't drill too deep of a hole, and because the original model was designed to have some space between the shoulder sub-assembly and the elbow.
 Step 4
On the elbow sub-assembly (the part which you later connect to the guns), bore out the existing hole and attach a large magnet. It will probably end up being slightly recessed - that's fine.
 Step 5
Take one of the elbow sub-assemblies and build the Avenger Gatling Cannon as per the instructions.
 Step 6
With the second elbow sub-assembly, collect the bits you need for the Battle Cannon and the Melta Cannon. Assemble the sub-assemblies seen in this picture.
Rest to be continued...
Everything Else Part 2 - AKA the close combat weapon arms


 Black Legion/Iron Warriors/Night Lords
  Inquisitorial Friends & Co. (Inq, GK, Elysians, Assassins)
  Elysian Droptroops, soon-to-add Armored Battlegroup
  Adeptus Mechanicus Forge World Lucius


 )
)