Hi,
I’ve had a few kind words said about my painting since i placed a few images in my gallery so I’d like to do a quick rundown of how i achieved the results I’ve achieved. I've only been painting for 1 year now after a break for 20 years. My fine detail work is atrocious so I have a preference for techniques that can be easily attained even if a little more lengthy. An example image is here:
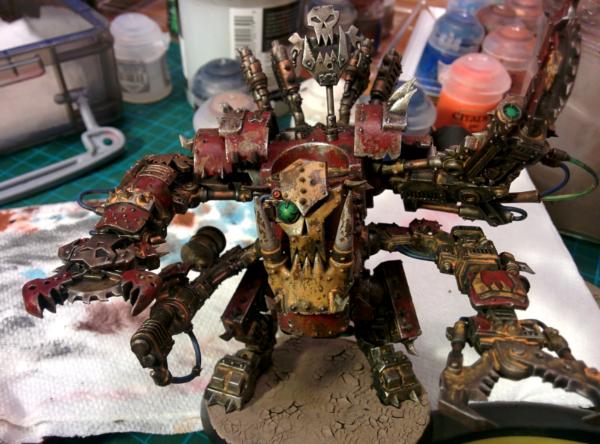
In this picture, the Deffdread is not completely finished (base and banner which I’ve now done) but i currently lack a picture. Most of the techniques and tricks I’ve used I have learnt from these forums and I’ve merely combined a few of them to get results that are agreeable to me.
I also lack a complete photo diary as the pictures i took were on my camera phone and were my text message response to my brother asking what I was up to. I’ll happily answer any queries anyone may have. There also may be quicker easier ways to achieve similar or better results.
I use primarily
GW paints, Windsor and Newton brushes for most the work but i have a few v.cheap synthetic bristle brushes for certain things such as dolloping paint onto the wet pallet, using weathering powders and varnishing.
I start off with a simple chaos black primer (leave it 24 hours to cure) and then the
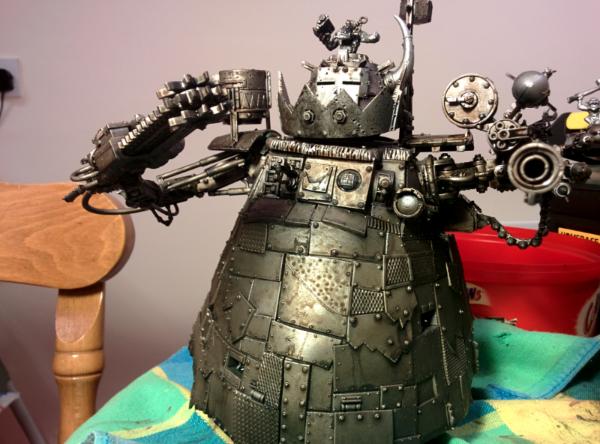
GW leadbelcher spray (about an hour seems fine but longer if you are patient enough). The first time i did this I panicked a little because the model looks like a nightmare silver blob of horribleness, such as you can see in this picture of my stompa.

I then throw on a wash of Nuln oil let it dry then Agrax Earth. I think this is done to mostly to settle my panic but I have considered just picking out some details weathering and calling it job done! It would certainly not look bad at all but not my intended look.
In areas i want painted with ‘paint’... I stipple! I use one of those packs for £2 for 10 brushes you occasionally see in Tesco, Aldi or ‘cheap stuff’ shop that you see on the Kilburn high road. I trim off all but about 5
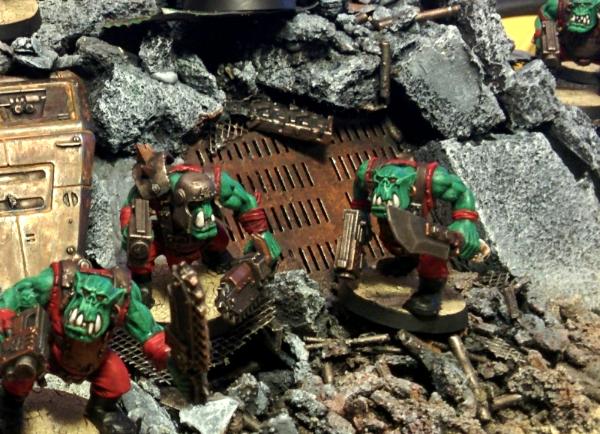
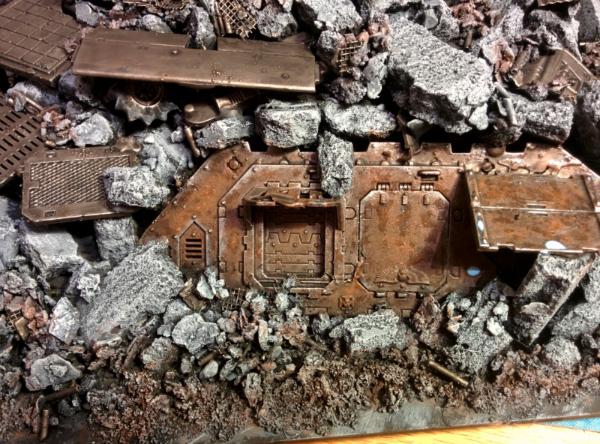
mm of bristles. You will get a feel of what brushes make the best stipple brushes but i guess any will do. I then stipple in reducing amounts, Rhinox hide, Mournfang brown, Scrag brown, then Ryza rust. As well as reducing amounts of stippling, the earlier paints i allow to smudge a little and the latter ones stay as more distinct dots. If you accidently stipple too much, immediately dab your finger on it a couple of times, you’ll take a little of the paint off and also blend it a little into the other colours. I’ve tried using more browns and oranges and also less and i have found no improvement i can see with using more shades. If it looks a little bit rough at this point, don’t worry, it will great later and the most distinct lines, the more obvious it will be under the peeling paint. If it is done well it can look great as it is. I left it like this on the grate in this image (sorry for the low res image) and for this piece of scenery i think it work pretty well.
At this point I then go around all those metal edges with a heavily loaded small dry drybrush of leadbelcher. The ‘metal’ at this point looks nice and dirty but sometimes it stops being identifiable as metal until this dry brush is done. Whilst close up i don’t think this dry brush is required, when at arms reach it makes a real difference. If you like you can even hit it with a lighter silver too, such as runefang or necrons but I’d be wary of over doing it. With this i will tend to dry brush a little heavier on areas that may not receive as much corrosion. It is also after the next stage which i’ll explain in a moment, but it is the only photo I have around this point of the process:
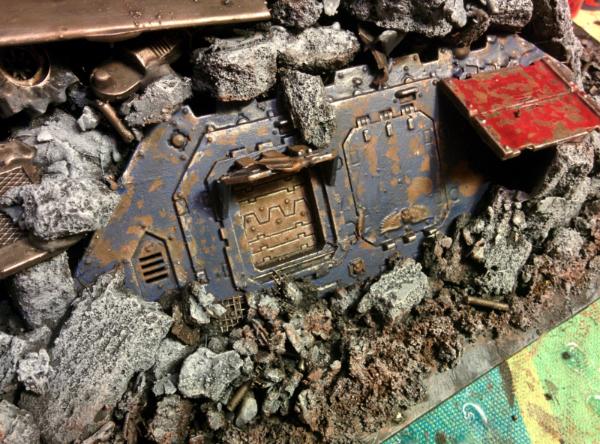
Then i use a masking fluid. I went to the local hobby craft and picked up some Frisk artists' Blue masking fluid (smells like its latex based to me). Again there maybe better stuff out there but i picked it up on a whim one day to experiment with and I’ve been using it consistently ever since. You can use a brush, (one of the cheap synthetics as it will destroy your brush in about 10 mins) or a piece of sponge. I use the rough side to those plastic foam dish scourers you can get 10 of, from Tesco for about £0.80. I apply the latex to areas that i want to be chipped and the paint flaked away. Around the edges of panels is good and on/near bolts. If you splash a blob on the bolts and some on the neighbouring panels it will effectively mask these off so you don’t have to worry quite so much when painting over this area (a nice tip for lazy painters such as myself). Make sure you don’t add it too thin as sometimes, when thinly applied it can make it a real pain to remove later. But you do want fine little flecks to get a really good look so it’s a little bit of a balancing act of applying enough but well placed. I practiced a little on a piece of plasti-card first. The more paint you add, the harder it will be to remove these latex-ed areas later, bare that in mind. After this, it should look like the picture, (same pic but closer up), on it you can see the shiney areas where the latex dried, some areas i put too much and its still drying: I used a brush here and i don’t think the effect is as good as with the sponge which i used for the deffdread. I’ve added the finished
LR here too so you can see the effect of the brush compared to the sponge on the deffdread.
The next step is to paint over it. I’d advise 1-2 thinned coats and a wash but experiment and let me know how far you can go. I always thin the paint a lot, perhaps excessively so, so after the 2 thin coats i can often see colour variations under the paint still, especially where the latex is. With yellow and white i do 3 coats but i do find this slightly harder to remove than when i do red/blue/green with 2 coats. I have tried doing 2 washes before and this seems to make it even harder to remove than an extra layer of paint (perhaps it has a lot more binder in it?). I tend to just always go for a wash of agrax earth shade now. I used to tailor the wash a little better but i prefer the grubby look even if it isn’t always quite as striking (or perhaps again I’m just lazy!). As always ensure it doesn’t pool too much but a few small ‘tide marks’ with this technique is not a bad thing and can sometimes help add to the weathered look. If in doubt, don’t overdo it with the agrax, just ensure you add some depth to the recessed areas.
I’ve not got any pictures of how this looks but I’m sure you’ve all seen red/green/blue/yellow with a bit of an agrax wash on it.
Allow to dry completely but don’t leave to cure too long, as it may make the next part of the process tougher work. I’m usually doing another piece of the model and continue with this as soon as the its dry.
Next take a stiff tooth brush, or one of the stiffer haired cheapo synthetic brushes you bought. I then trim down the bristles on the cheap brush to about 5mm again. With the stiff tooth brush you should be ok as it is, but it you are having troubles perhaps trim it down a little, but try it as it is at first. Then go to work on the paint with it. The bristles should catch on the slightly raised areas of latex and reveal your stippling underneath. Keep going taking care to get rid of the latex from the entire model and ensure none ends up in the recesses. I have a pair of fine forceps for removing these little bits if they get caught somewhere. As you brush you may end up showing up some of the leachbelcher spray on the edges underneath the shades/stippling. I’ve never got down to bare plastic but I have got down to the primer before. This is usually on the edges is anywhere and can be touched up with leadbelcher in the next step. If it’s in the centre of the panels (for whatever reason) then try a little leadbelcher, then use some rhinox hide and using your normal brush, just do a stippling motion a little to make it blend with the rest of the area.
You will notice that this brushing of the surface will leave the surface quite shiney. Its glossier the more you scrubbed at the paint. I guess you are effectively polishing the surface. Don’t worry, this can be matted down again with a coat or two of matt varnish. Again i just picked some up on whim once from my local hobby craft store. Its Windsor and Newton UV protection Matt varnish. I’m not 100% happy with this varnish, it’s a little thick for my liking and not as matt as I’d like but perhaps i need 2 coats, something i won’t do because of its viscosity. It does a good enough job though and leaves a finish that is somewhere between matt and satin. If you don’t need to scrub too hard, then you can probably leave this step out.
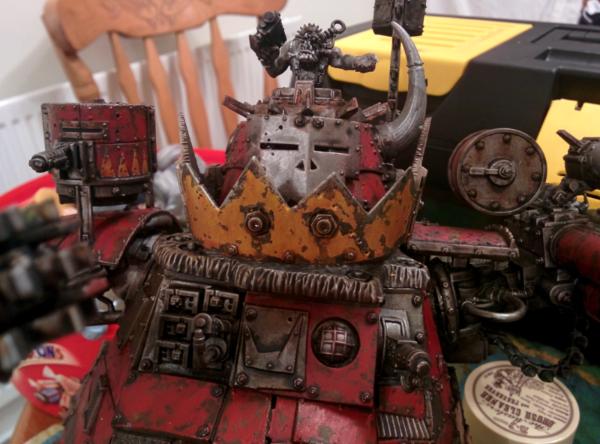
The last part is to go round with lead belcher where the metal may have rubbed, broken off any corrosion and left the silver beneath. For this i more or less edge highlight the ridges. I only ever using the trick of angling the brush at 45 degrees to the fulcrum of the two surfaces to get a very thin, but shiney line. Whilst my hand is sometimes steady enough to just paint the thin lines i often feel this is too much for the silver at this point. This step will really give the arms length appeal, with the beautiful stippled rust beneath chipped paint when the model is looked at closer up. You can also use a little iron breaker or even Runefang steel to just hit a few edges, but don’t go over the top with this. On the image below, i only hit the rim above the escape hatch, the edge of the let claw (our left) and tiny bits on the shoulder plates. Perhaps a tiny bit on his knees as well. Just be sparing with it.. in this case, less is more.
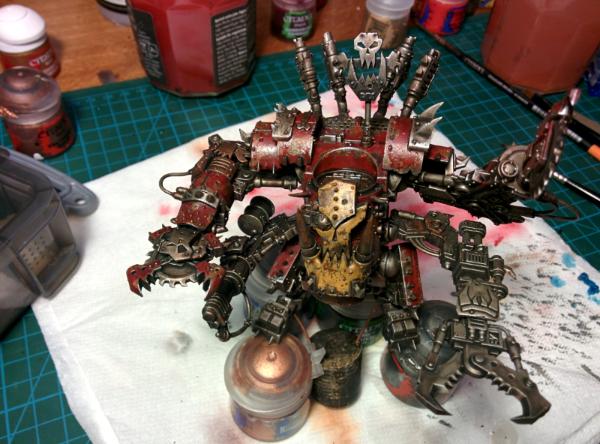
In the picture below, my stompa (not finished in this picture although there is one in my gallery of it finished), you can see the difference some of the steps make. The yellow jaw, I dry brushed the lead belcher and iron breaker on before the + latex and paint, once painted yellow i then washed a little with agrax. The red parts I didn’t do the dry brush and use agrax after I had painted and removed the latex. I bought this stompa for £20 at warhammer world from someone who was selling it cheap. It was terribly badly painted and i just sprayed over the top with primer and lead belcher so i treated it very much as a practice project. It turned out pretty well in the end without huge loss of detail considering it was a just a test subject, I guess I should have stripped the paint first (lazy again!).
All the areas that i left just metal on the deffdread (chaos black spray-lead belcher spray-nuln oil-agrax earthshade) I first hit the recesses with a little typhus corrosion then I edge highlighted with lead belcher, maybe a tiny bit of necron dry brushed, or runefang steel on the right tips of pointy things! (just tiny bit!). I then used a weathering powder mixed with IDA and hit all the areas that needed rusting up. Try and think about where the rust will be, but i must admit sometimes i just try and make the model look baIanced colour wise rather than worry too much as to why would rust build up on a particular area.
I use a synthetic brush (Daler Rowney- £5 for 4 from hobbycraft.. not super cheap like the others.. but cheap) as i imagine that the IDA will strip oils from a sable brush but I’ve never honestly tried it. I should varnish before this as the IDA, if agitated even a tiny bit, will strip away the paints beneath it. I’m a little lazy (again) and I’ve got used to just being careful. If I over do the rust a bit, first i let it dry, then use a brush dampened with IDA to absorb a little dried powder, or a bit of nuln oil or Agrax to dull down the bright orange, usually a combination of these. I tried a couple of the secret weapon rust colours (orange rust and red rust) and I must admit I’m not a big fan of the colours, perhaps i’m not using them right. I use one of those Tamiya weathering kits (the ones that look like a ladies make-up compact). I crumble a bit of the orange rust one into a pot and mix it with the IDA. It’s the exact tone of orange I’m after. If anyone can suggest an alternative cheaper/more convenient one, with a similar tone, please let me know! =)
Most importantly take your time with this bit and enjoy it, it’s by far my favourite part and the model really comes together at this point for me.
(I’ll add a finished picture when i take one)
I won’t write about the other details as I’m still learning how to do the lens etc. Please let me know if i can answer any questions though I’m very happy to discuss things =)
Comments and most importantly constructive criticisms are very welcome.
I hope someone finds this useful,


 1400 points of EW/MW Italians (FoW)
 2200 points of SoB and Inquisition (40K)
 1000 points of orks (40K)
 Just starting out with Ultramarines (30K)
 Four 1000-2500 point forces for WHFB (RIP)
 One orc team (Blood Bowl)

