Following some requests i have written this guide on how to make the Ikea Detolf display cabinet almost 100% dust proof for very little money.
Overall this process took my about 1 hour to do. You need to do this prior to assembly. Doing it whilst the cabinet is constructed will make it very difficult. I did this after purchase so disassembled the cabinet to do it. The cabinet itself is only £40 meaning the whole project can be done for roughly £55. A bit more if you install i lighting kit like i did.
What you need
There’s two different types of foam draught excluder i used. Both are single sided (sticky on one side only) and costs about £5 for a 5m roll.
1) Black foam draught excluder 12mm wide by 8mm thick. You need about 5m of this (this will allow you some extra in case of mistakes).
2) Black foam draught excluder 10mm wide and 3mm thick. You need about 5m of this.
3) 2 magnets 25mm x 8mm x 2mm. I used the strongest i could find (N52 grade). Cost me £4 for 5 off Ebay.
Step 1 – The door
First step is to install the foam on the door. It’s really simple. Using the thinner 3mm foam stick a line of it all around the inside edge of the door trimming appropriately around the catches and handles.
 Step 2 – The sides
On the side glass panels you need to stick the thicker draught excluder. On the right hand side (as you LOOK at the cabinet) you can stick the excluder right up to the edge.
On the left hand panel you need to leave a 6mm gap all the way down the panel then stick the draught excluder from top to bottom. The 6mm gap is where the door will sit when it closes.

 Step 3 – The top and bottom
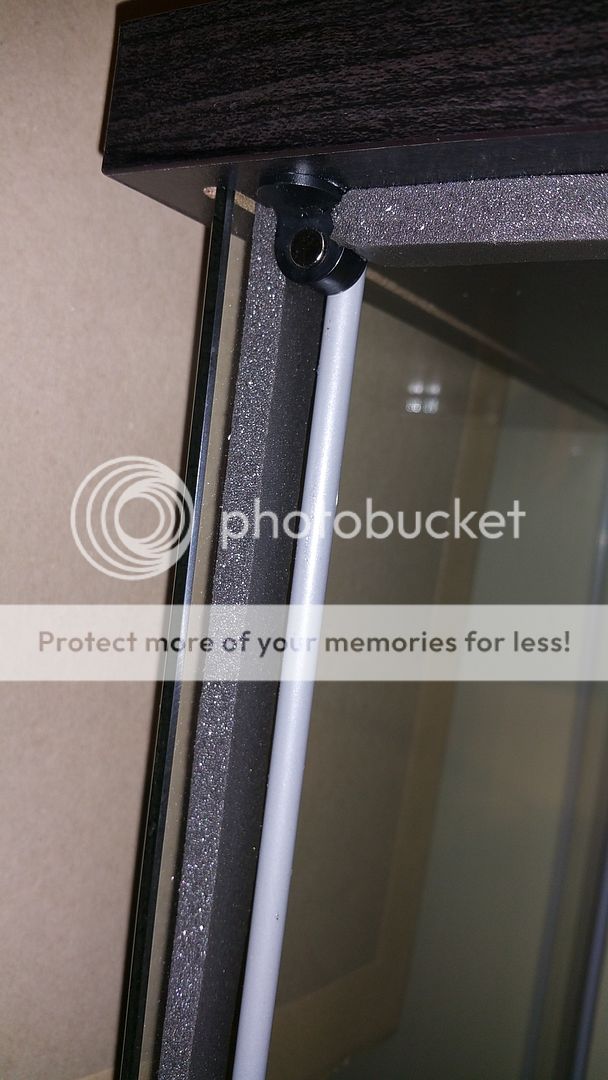
Using the thicker draught excluder stick a line between the magnet bracket and side panels. This will need to be sat back enough to allow the door to sit against the magnets. As a guide i left a 14mm gap between the edge of the top and bottom panels and the draught excluder.

 Step 4 – Strengthen the magnets
As the door is now tight i now use stronger magnets. You just need to slot them into the top and bottom brackets as pictured.
 Step 5 – Adjust the door
You may need to adjust the door slightly to ensure the foam does not pinch and pull away. Just undo the screws and move the door either further in or out to make adjustments.


 Dark Angels/Deathwing - just getting started!
 Space Marines -
 Eldar - Biel Tan 2000pts


