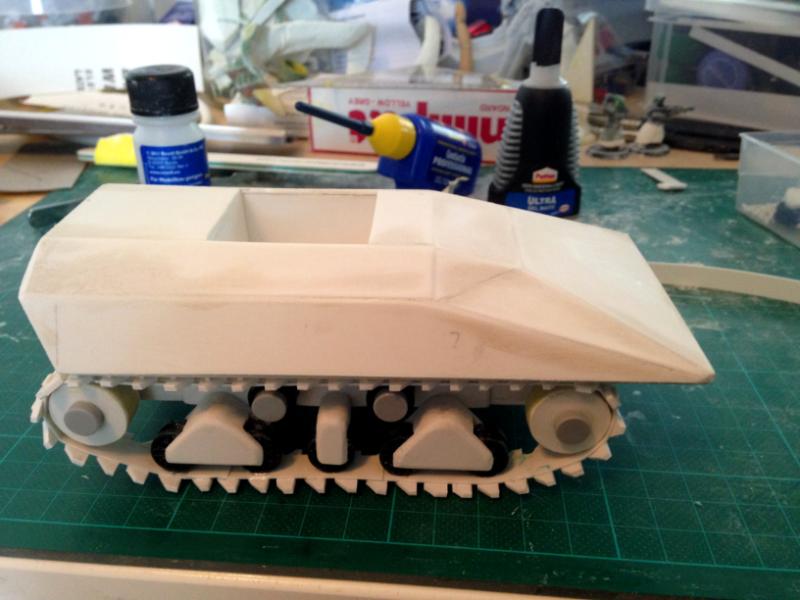
I wanted to build a Infantry Fighting Vehicle for Nuclear Renaissance, but information on making tracks proved to be very limited. Since this method seems to have turned out well enough, I thought I'd share it for anyone else running into a similar problem.
This tutorial will primarily cover the track itself, not the suspension or mounting. The pictures show what I did, but I think everyone will have their own ideas on that front.
The other thing that's missing is the track drive elements. I had some ideas on that front, but I'm happy enough with the end result as is and my concept was probably too complicated.
Needed Materials
0.5mm Plasticard
1mm to 1.5mm Plasticard
Track Mounts (I used Legos and Plasticard)
Glue (I use Revell for the plastic bits)
Track Pieces
These are to taste. I decided on a backing piece of 1.5mm Plasticard, cut 14mm wide and 5mm tall with the bottom corners cut off. The bumps are 1
mm Plasticard 3mm by 1mm. Note that I was not very consistent with these. They're all 14mm wide, but the other measurements were something of a mixed bag.
Backing Strip
0.5mm plasticard 8mm wide, with a length about 10mm longer than what you'll need to go around your track mounts so that you can leave a tab to glue the track together.
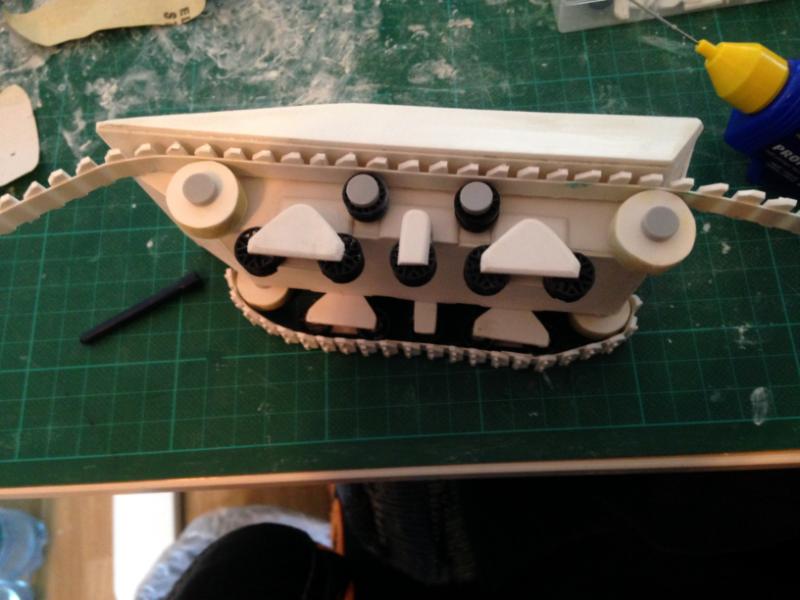
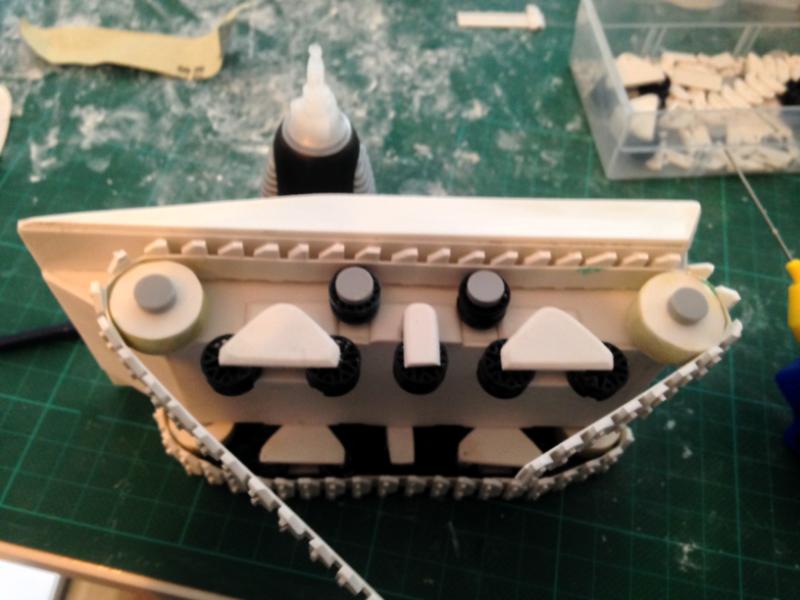
Track Mounts
These are again to taste. I have not found a good way to get consistent circles out of plasticard, so I experimented (If someone does, please let me know). The front and back wheels are 1mm Plasticard edges,spaced with more plasticard and then filled with Milliput to make the wheel surface. The small black wheels I acquired at a lego store and worked very well.
Preparation
Build sufficient track pieces for a whole track beforehand. I used 44 pieces on a 300mm strip, but that will depend on your track pieces and spacing. Cut out the backing strip. Assemble your Track Mounts however you'd like them to be.
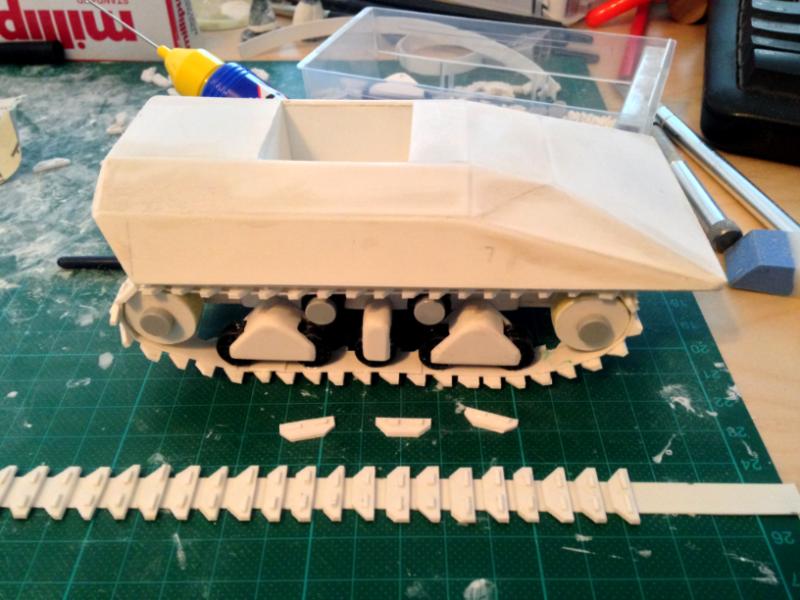 The track that will be going on, as well as individual track pieces
Assembly
The track that will be going on, as well as individual track pieces
Assembly
Make sure you do this in one go. I learned the hard way that leaving your track pieces to glue for too long makes the process exponentially more difficult, since the backing strip gets brittle and breaks off when you bend it. (Leaving on vacation after gluing the tracks did not help)
Mark off 10mm on one end of the backing strip. Glue the first track piece on that line. Leave 1 to 2
mm between the pieces and continue until the backing strip is covered. I used a steel ruler laid out parallel to the strip to get the track pieces on evenly. The track pieces then butt against the ruler, which made the whole thing much easier.
Once the glue is sufficiently set, it's time to get the track on the mounts. Starting on the top edge, where the track is sandwiched between the body and the mounts proved optimal. If your design differs, I would suggest starting on the longest straight you have. Glue the track onto the mounts there.
When the glue has sufficiently dried that the tracks are staying on, you can continue by bending the track around the wheels. Slow and steady bending over the backing of the wheels kept the backing strip from breaking. Glue the track onto the wheel as you go.
Now test fit the final straightway on the bottom of the track. You might have to trim one end to properly fit the pieces together. Glue the end with the tab down first, then glue the other end onto that. Make sure you get the mounting wheels as well.


 ' ~9000pts
 ' ~1500
 " ~3000
 " ~2500