| Author |
Message |
 |
|
|
|
|
Advert
|
Forum adverts like this one are shown to any user who is not logged in. Join us by filling out a tiny 3 field form and you will get your own, free, dakka user account which gives a good range of benefits to you:
- No adverts like this in the forums anymore.
- Times and dates in your local timezone.
- Full tracking of what you have read so you can skip to your first unread post, easily see what has changed since you last logged in, and easily see what is new at a glance.
- Email notifications for threads you want to watch closely.
- Being a part of the oldest wargaming community on the net.
If you are already a member then feel free to login now. |
|
 |
2016/07/21 02:14:50
Subject: LED lighting tutorial
|
|

Drop Trooper with Demo Charge
|
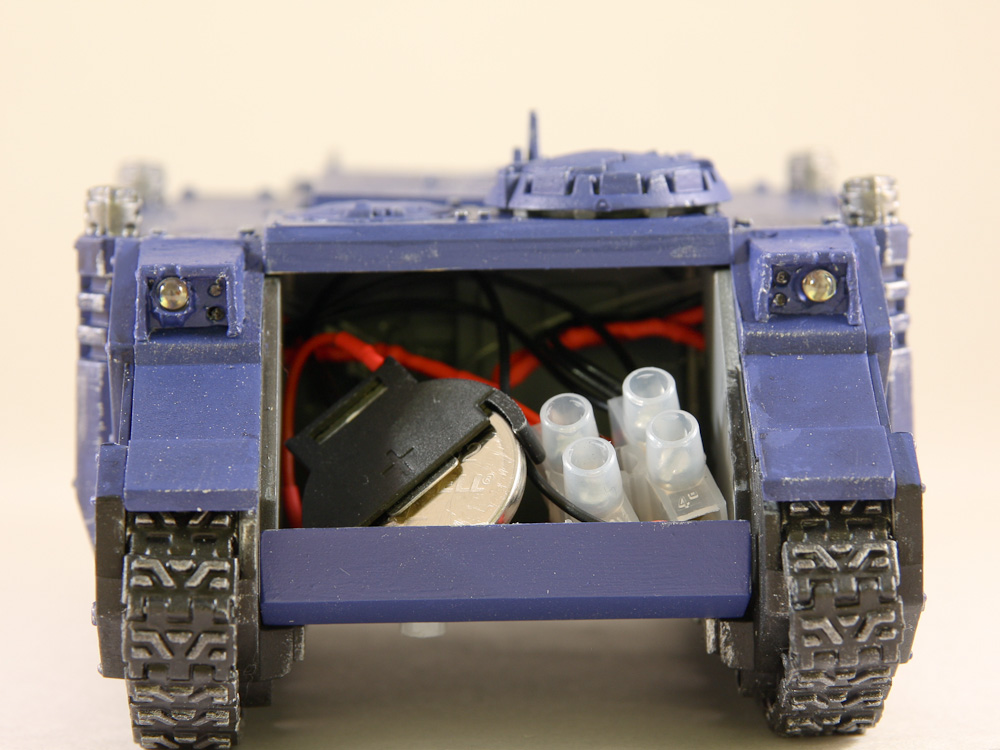
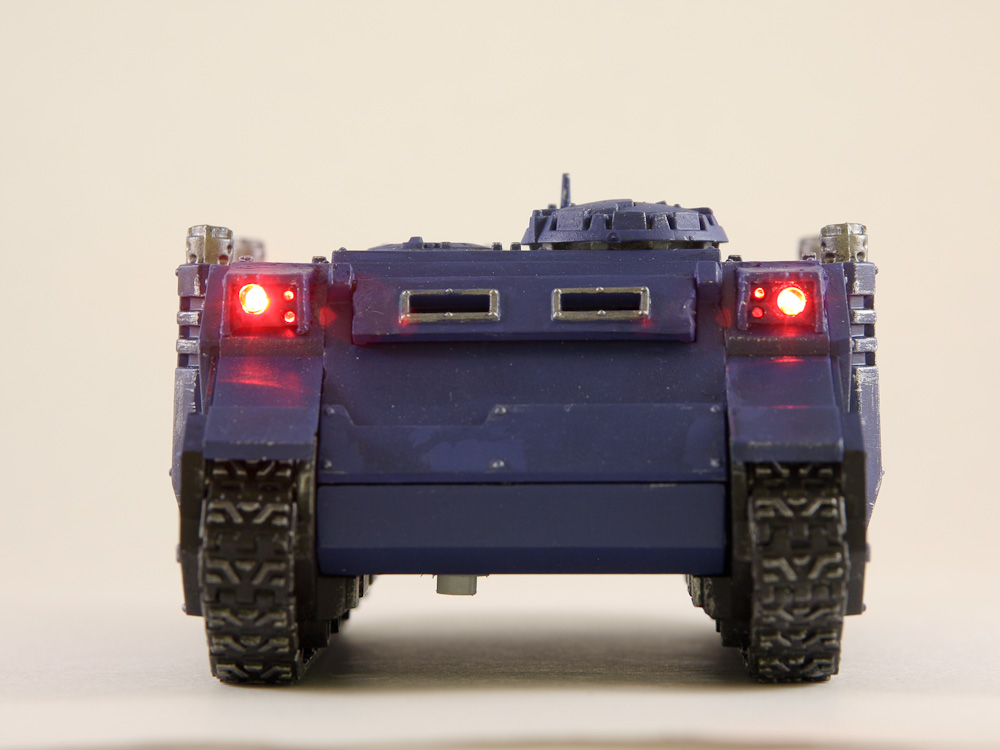
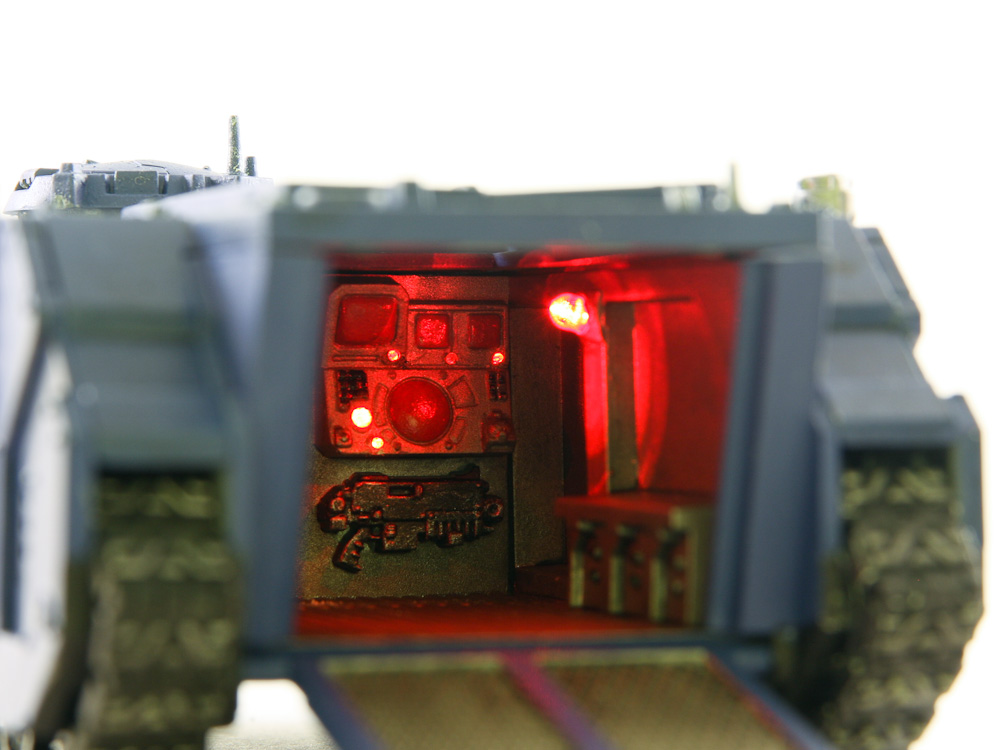
Today I bring you a guide to lighting the interior and exterior of wargaming vehicles written by Jennifer Smith of JS Miniatures. This tutorial covers installing LEDs and fibre optics into a 40k Rhino tank but it is also suitable for other tanks including Predators and Land Raiders.
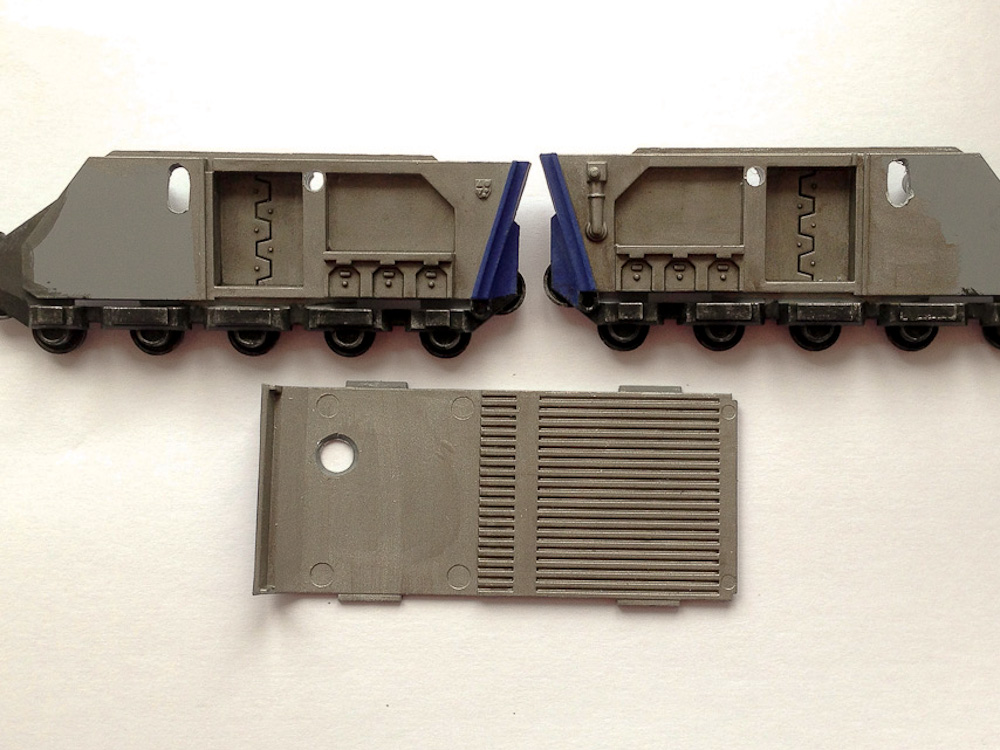
Step 1: Drill the holes in your model. Positions can be changed if desired or used as shown on photo.
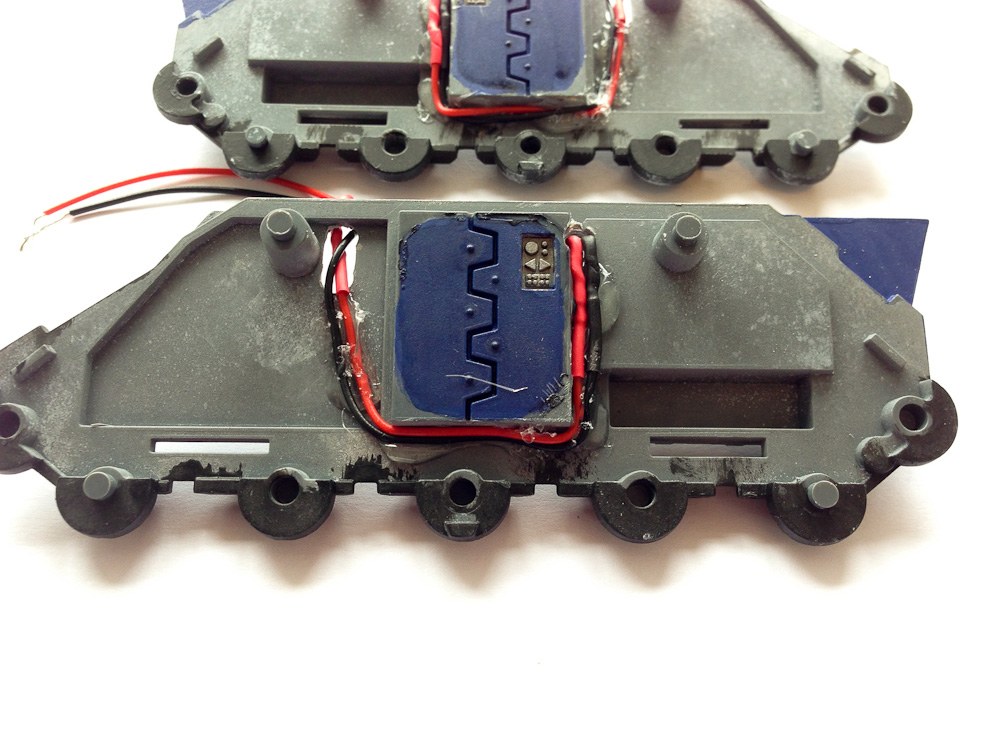
Step 2: Connect the 3mm LED to the wire and check, how it fits inside. Then fix them in this position as it’s shown below using super-glue. This creates neat wiring that won’t be visible once the tank is assembled and won’t impact on the tank fitting together.
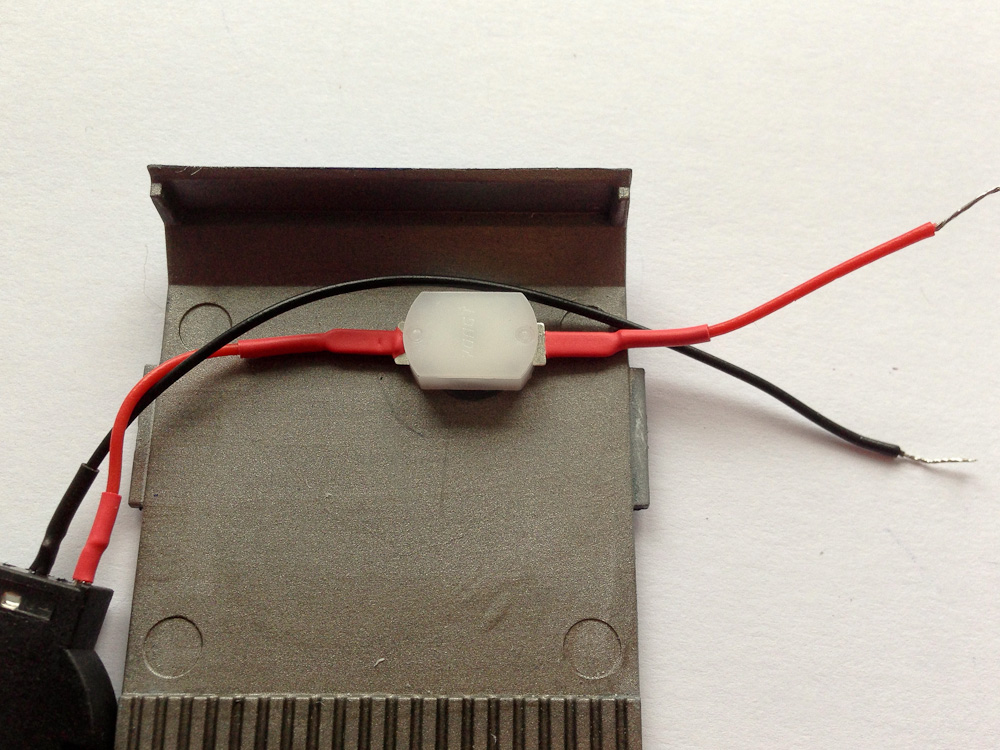
Step 3: Drill the hole in the base for the switch. The picture shows how the fitted switch should look. The button fits through entirely and the larger base snaps into the hole. Check the switch can be pressed properly.
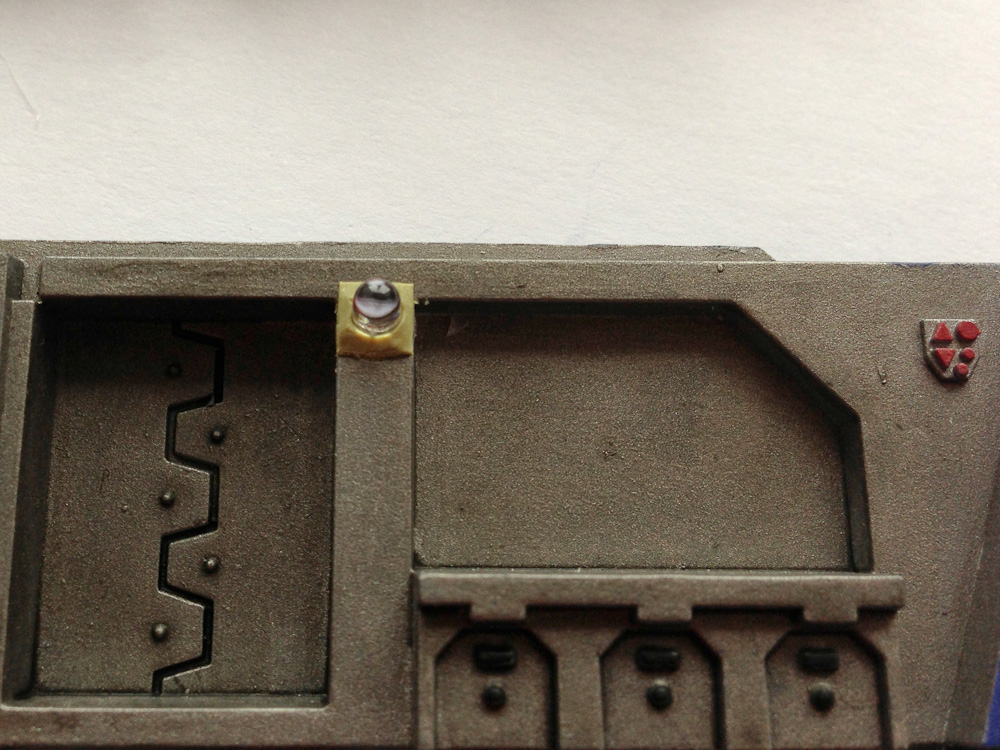
Step 4: To neaten the hole for the interior lighting and make it look like part of the tank. You can use Green Stuff
Step 5: Twist the LED wires together. The battery wires go opposite the LED wires as shown. This can be fiddly but it’s best to twist the wires together as tightly as possible, adjust the screw to roughly the right height, place the wires in the hole and then tighten the screw down to secure. Glue the switch in place once the wires are all connected with hot melt glue.
See more here: http://warzone40k.com/led-lighting-tutorial

|
|
|
|
 |
|
2016/07/21 14:41:36
Subject: Re:LED lighting tutorial
|
|

Fresh-Faced New User
|
Long time lurker, had to register just to comment this. This "tutorial" provides no info on the components used, how to wire the led properly (correct polarity), and guides you to not use a current limiting resistor. With LEDs you should always use a resistor between the battery (or other source) and LED to limit the current, otherwise you'll just end up burning your LEDs. Quick googling, e.g. "LED resistor" will provide you with the information you'll need. Pretty lights though.
|
|
|
|
|
2016/07/22 15:44:17
Subject: Re:LED lighting tutorial
|
|

Focused Dark Angels Land Raider Pilot
The grim darkness of far Fenland
|
Toge wrote:Long time lurker, had to register just to comment this. This "tutorial" provides no info on the components used, how to wire the led properly (correct polarity), and guides you to not use a current limiting resistor. With LEDs you should always use a resistor between the battery (or other source) and LED to limit the current, otherwise you'll just end up burning your LEDs. Quick googling, e.g. "LED resistor" will provide you with the information you'll need. Pretty lights though.
Sorry, but have to agree with this comment. The end result looks good, but there's no real advice here beyond - "drill holes, wire it up. Done!".
I just finished LEDing up my RT Rhino and I had to think about resistance (Ohms Law), voltage and voltage drop, parallel vs serial circuits etc. It's not as easy as this tutorial implies.
|
|
|
|
|
|
2016/07/22 18:36:31
Subject: LED lighting tutorial
|
|

Ultramarine Scout with Sniper Rifle
Bloomington, IN
|
This is not really a tutorial at all.
|
|
|
|
|
2016/07/22 20:12:02
Subject: Re:LED lighting tutorial
|
|
Guardsman with Flashlight
|
 Whittlesey40k wrote: Whittlesey40k wrote:Toge wrote:Long time lurker, had to register just to comment this. This "tutorial" provides no info on the components used, how to wire the led properly (correct polarity), and guides you to not use a current limiting resistor. With LEDs you should always use a resistor between the battery (or other source) and LED to limit the current, otherwise you'll just end up burning your LEDs. Quick googling, e.g. "LED resistor" will provide you with the information you'll need. Pretty lights though.
Sorry, but have to agree with this comment. The end result looks good, but there's no real advice here beyond - "drill holes, wire it up. Done!".
I just finished LEDing up my RT Rhino and I had to think about resistance (Ohms Law), voltage and voltage drop, parallel vs serial circuits etc. It's not as easy as this tutorial implies.
Think you could make a tutorial? This is a pretty cool idea.
|
|
|
|
|
2016/07/22 20:29:44
Subject: Re:LED lighting tutorial
|
|
Focused Dark Angels Land Raider Pilot
The grim darkness of far Fenland
|
ultimateweapon200 wrote: Whittlesey40k wrote:Toge wrote:Long time lurker, had to register just to comment this. This "tutorial" provides no info on the components used, how to wire the led properly (correct polarity), and guides you to not use a current limiting resistor. With LEDs you should always use a resistor between the battery (or other source) and LED to limit the current, otherwise you'll just end up burning your LEDs. Quick googling, e.g. "LED resistor" will provide you with the information you'll need. Pretty lights though.
Sorry, but have to agree with this comment. The end result looks good, but there's no real advice here beyond - "drill holes, wire it up. Done!".
I just finished LEDing up my RT Rhino and I had to think about resistance (Ohms Law), voltage and voltage drop, parallel vs serial circuits etc. It's not as easy as this tutorial implies.
Think you could make a tutorial? This is a pretty cool idea.
Erm, what?
I shuda kept quiet 
I'm no expert, but I'll try to chuck something together over the weekend.
|
|
|
|
|
|
2016/07/23 09:26:56
Subject: Re:LED lighting tutorial
|
|
Focused Dark Angels Land Raider Pilot
The grim darkness of far Fenland
|
Whittlesey40k wrote:ultimateweapon200 wrote: Whittlesey40k wrote:Toge wrote:Long time lurker, had to register just to comment this. This "tutorial" provides no info on the components used, how to wire the led properly (correct polarity), and guides you to not use a current limiting resistor. With LEDs you should always use a resistor between the battery (or other source) and LED to limit the current, otherwise you'll just end up burning your LEDs. Quick googling, e.g. "LED resistor" will provide you with the information you'll need. Pretty lights though.
Sorry, but have to agree with this comment. The end result looks good, but there's no real advice here beyond - "drill holes, wire it up. Done!".
I just finished LEDing up my RT Rhino and I had to think about resistance (Ohms Law), voltage and voltage drop, parallel vs serial circuits etc. It's not as easy as this tutorial implies.
Think you could make a tutorial? This is a pretty cool idea.
Erm, what?
I shuda kept quiet
I'm no expert, but I'll try to chuck something together over the weekend.
Tutorial is up http://www.dakkadakka.com/dakkaforum/posts/list/697347.page. Let me know what you think and if it can be improved!
|
|
|
|
|
|
|
|

 Dark Angels/Deathwing - just getting started!
 Space Marines -
 Eldar - Biel Tan 2000pts