To begin just buy a drop pod kit, take all the outside doors, fins and engine assembly off the
sprues and clean off ALL the mold lines and snags (left over plastic from clipping).
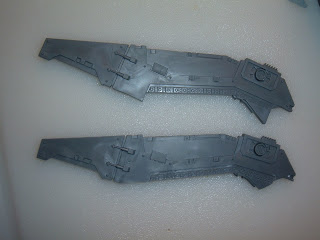
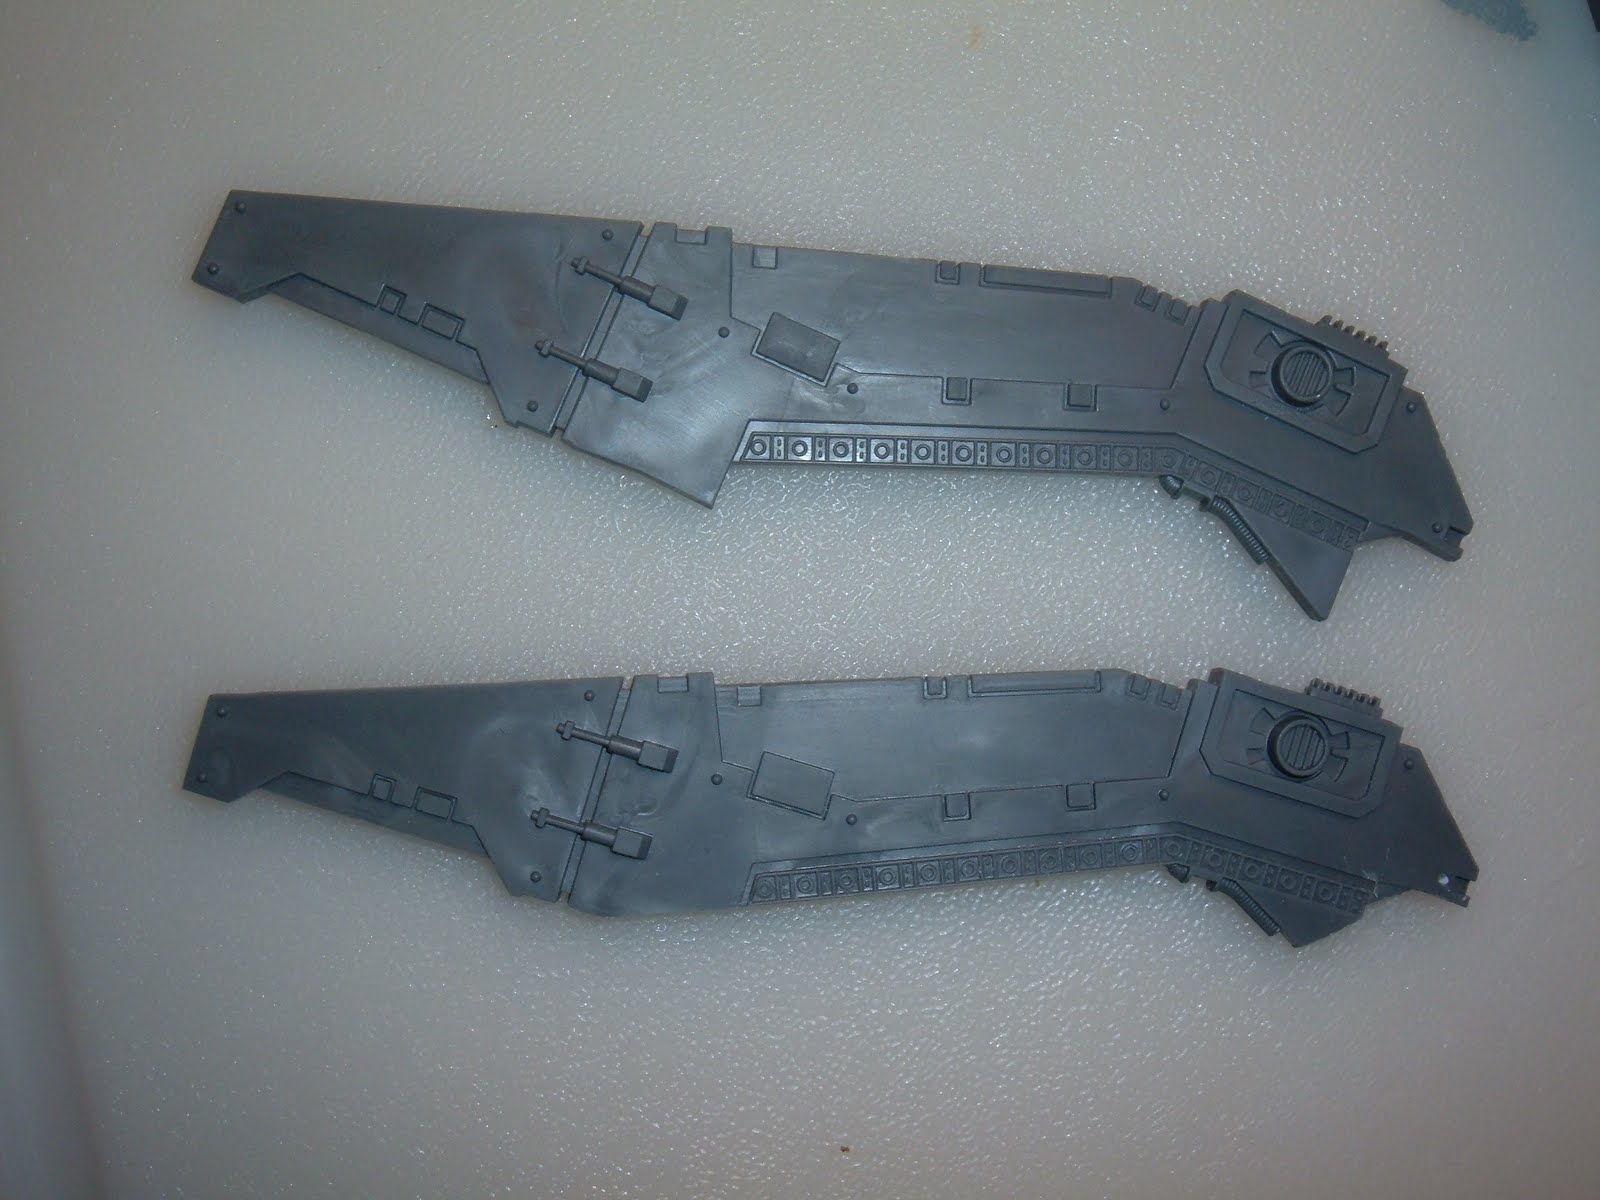
Now take the fins and cut the pointy corners off like on the picture above.
Take a look at the top one (uncut) and compare it to the bottom one (cut). I cut the corner on the inside of the fin (the corner that was cut on the left side as you look at the photo)
parallel to the rune-like markings running along the inside of the fin. On the other corner (the small one on the right side as you look at the photo) just near the hose on the bottom part,
parallel with the diagonal line below the rune-like marking strip.

Now, because the fins are going on last and the top part here will not be exposed, I shave off this bolt on each side of each fin - just this bolt.
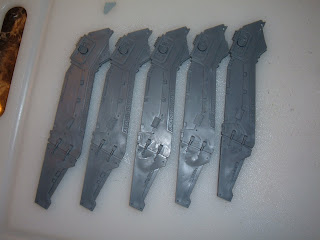
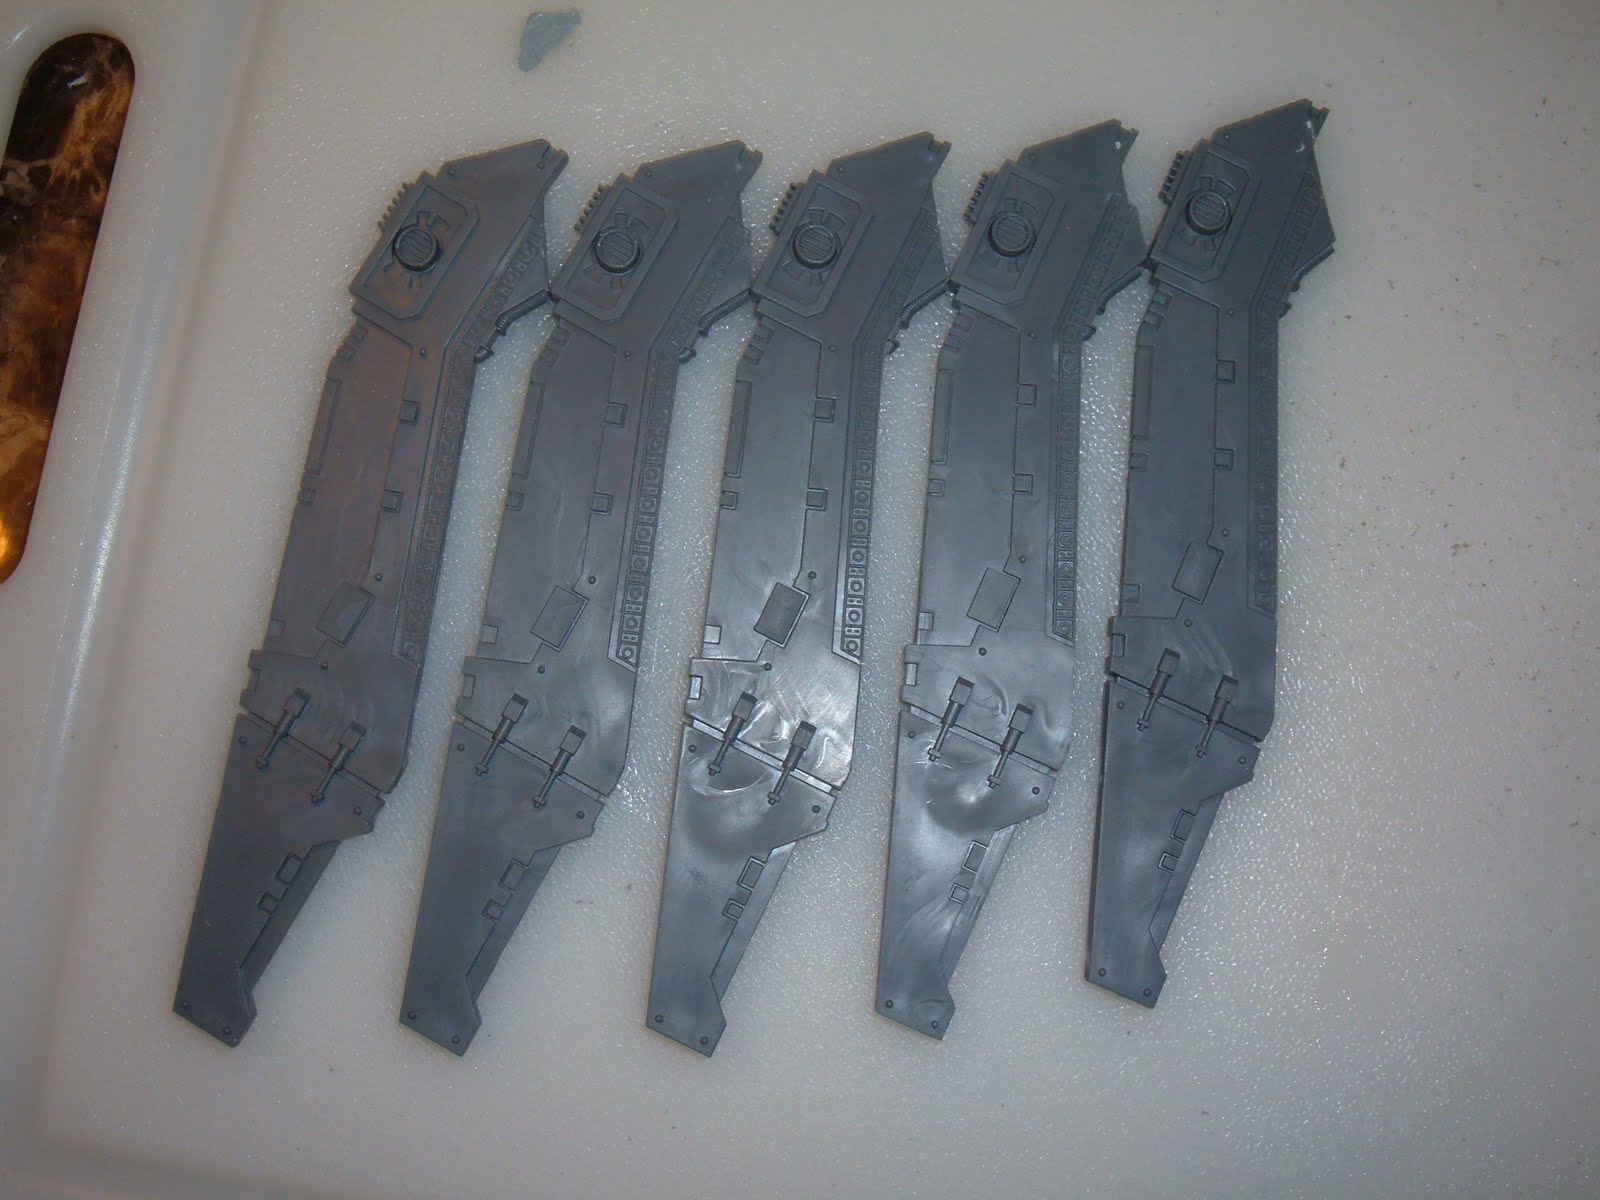
This is what your five fins should look like.

Now assemble the pod's petals with just the outside panels, leaving the inside part on the sprue as you will not need it. (if you fully assemble each petal to include the inside of it, you will have a ton of issues fitting the fins into place).
Now glue it together so you have the normal pod petal for the bottom (you don't need any of the bits for the inside as the
dreadclaw will never open). Also
assemble the engine completely as you normally would with a drop pod. Then glue the top corner of each door to the top of each square section from the engine housing that matches each door, leaving the
actual turbine
above the door (or hull as they now form on the dread claw).
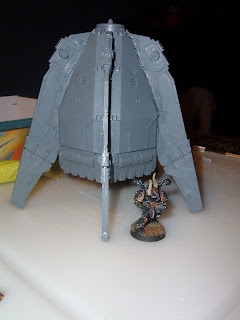
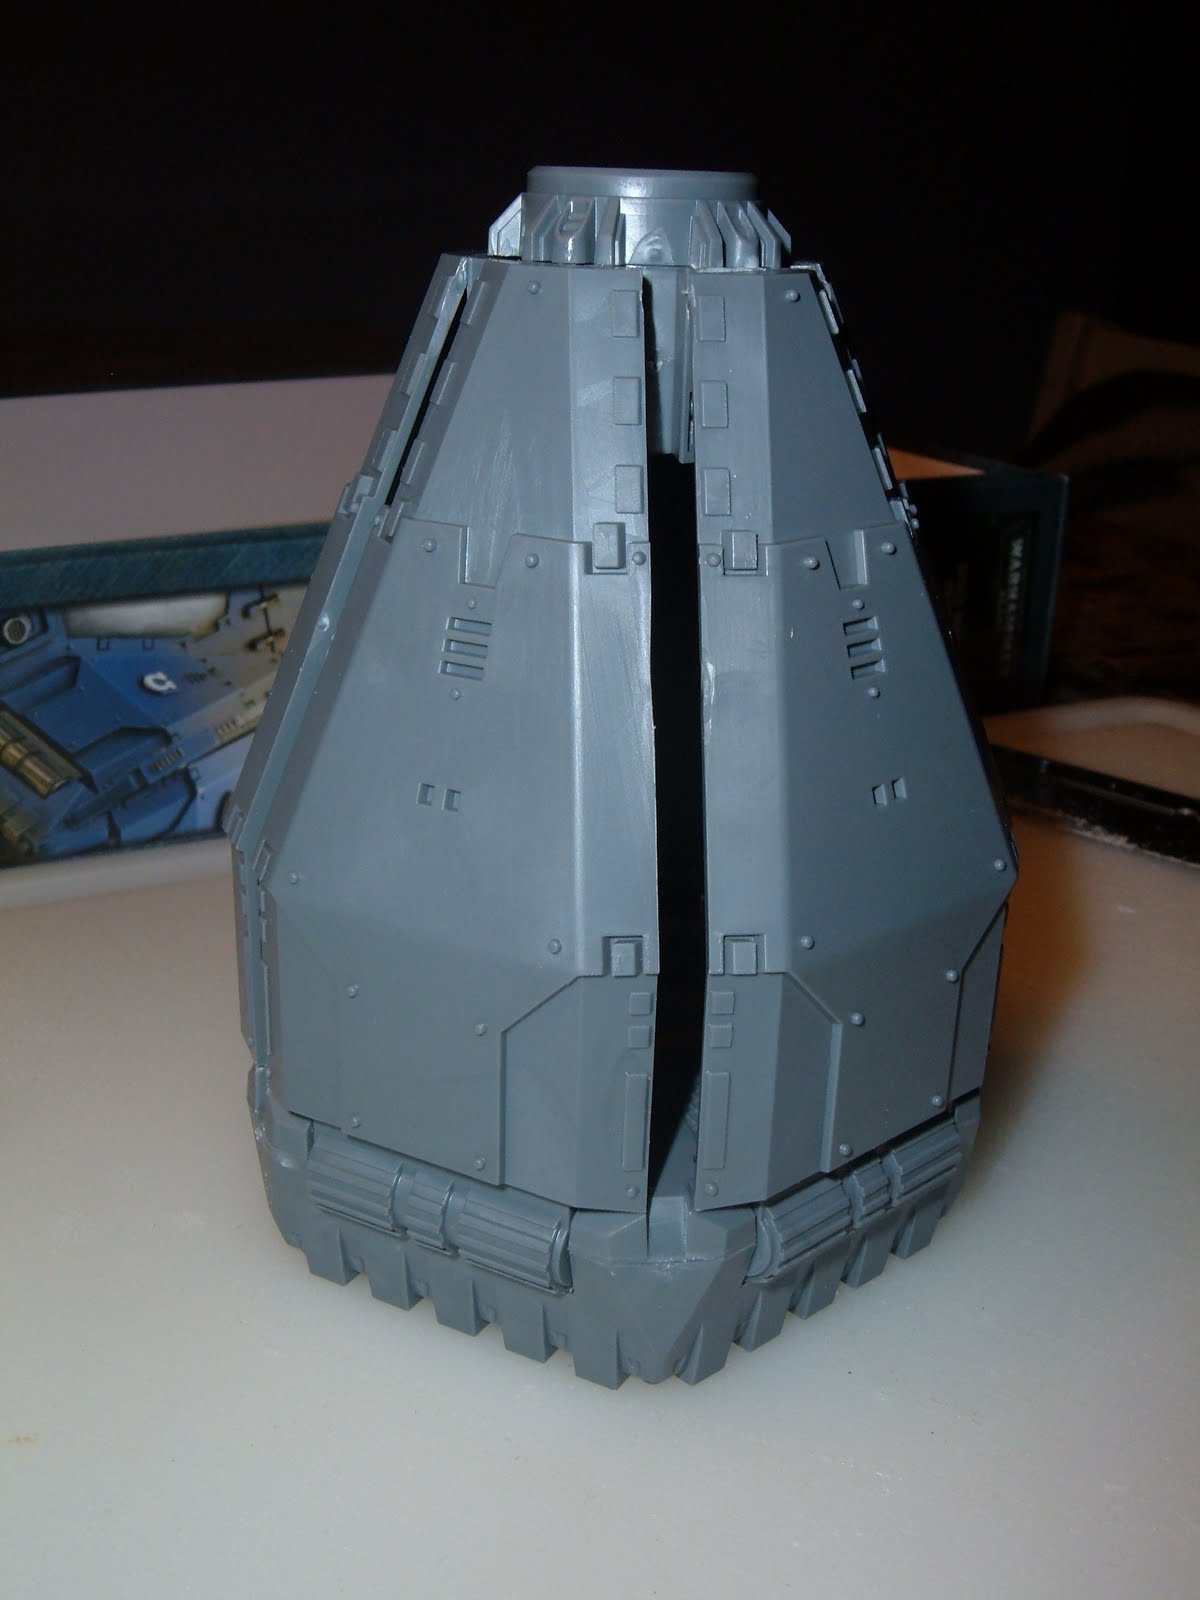
Now take your fins and insert each one into the slots made between each door. They will fit snugly (good thing), the idea is for the corner to catch under the lip made by the turbine bit on the engine housing, the other area you cut should fit snugly into the grove where the fin would normally go on the bottom side. If you left the inside of the door petals off of the model, this step is easy, but if you didn't listen, you may need to do some shaving.
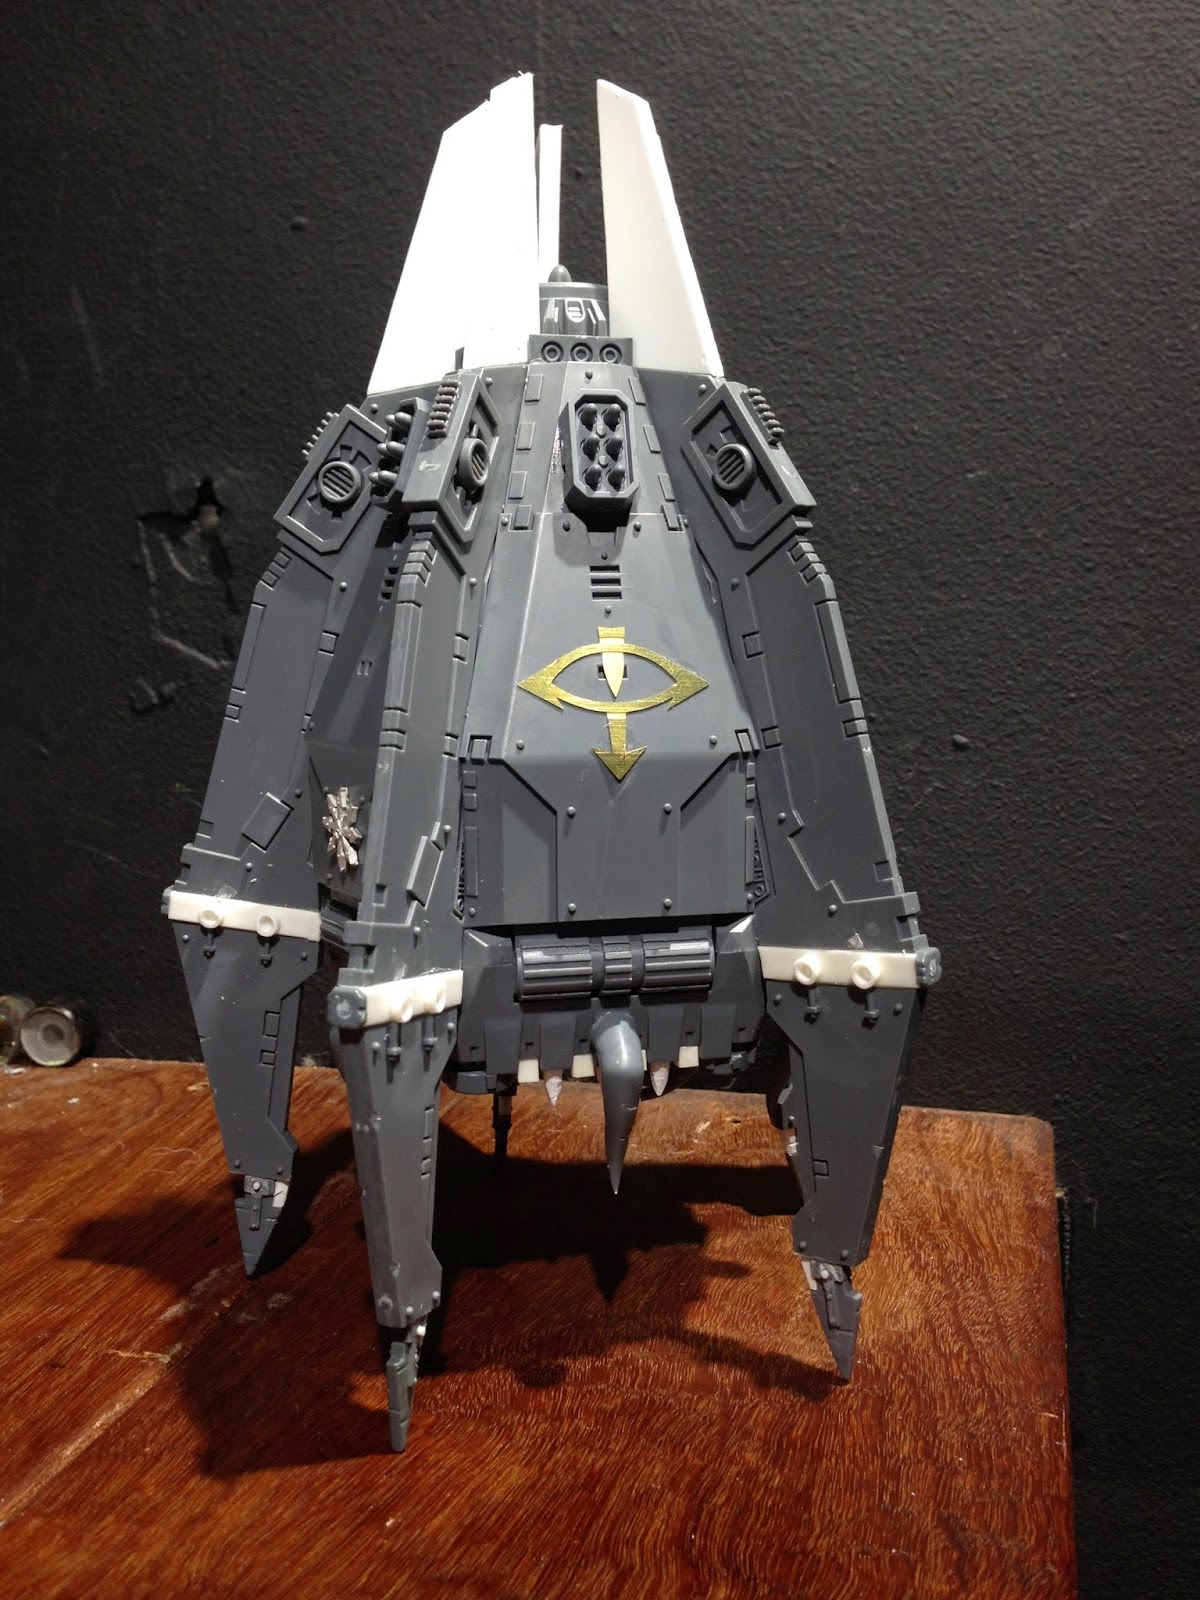
After one good dry fit, glue the fins into place. Your dread claw is basically complete. From here you can just add those little details that make the pod more your own.
For me that meant adding the retro thrusters. To add those, just take the little fans that you find in the drop pod bits and find a home for them toward the bottom of each petal, where the regular drop pod would have a joint (check the photo above).
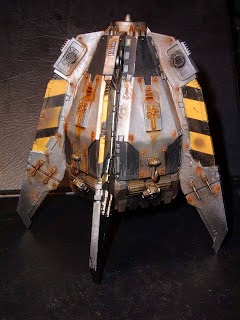
To make the pod more aggressive, I also shaved the corners off where the points touch the ground. Those sharp angles made all the difference to me. From there you can add Chaos bits or just freehand paint symbols in later. The choice is yours.
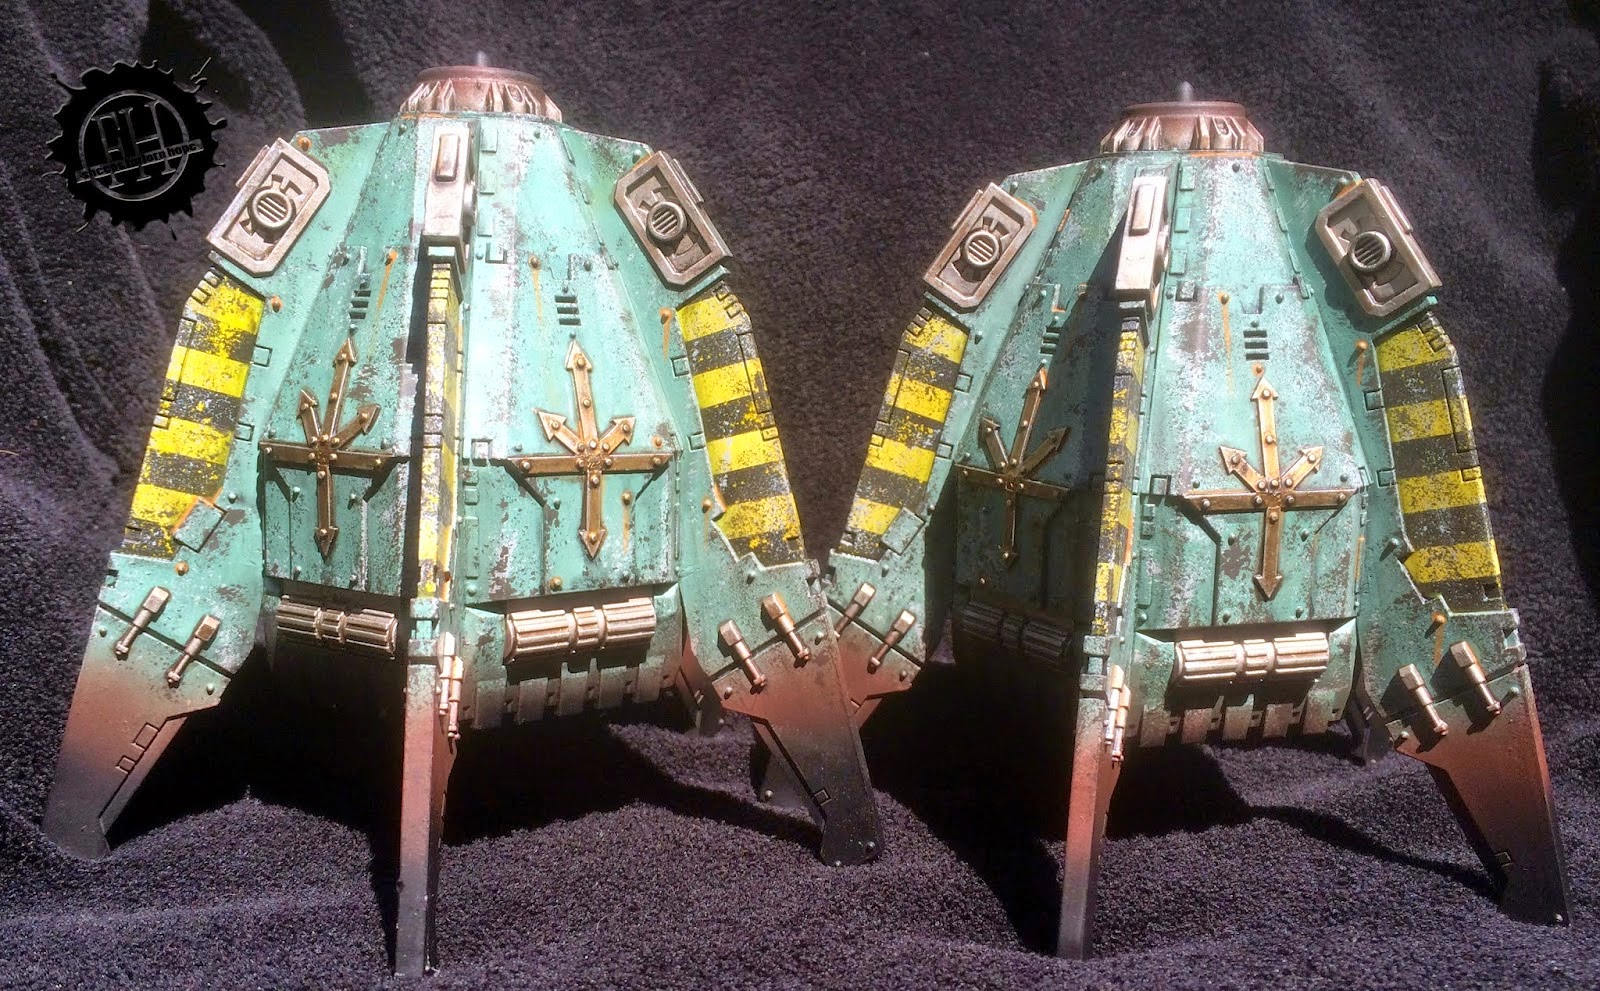
Here is another great take on the conversion from A Host of Word Bearers:
<table align="center" cellpadding="0" cellspacing="0" class="tr-caption-container" style="margin-left: auto; margin-right: auto; text-align: center;"><tbody>
<tr><td style="text-align: center;">
</td></tr>
<tr><td class="tr-caption" style="text-align: center;">Damn, I really love this take on the design!</td></tr>
</tbody></table>
He made some great changes to the design and he has a tutorial
here covering those changes.
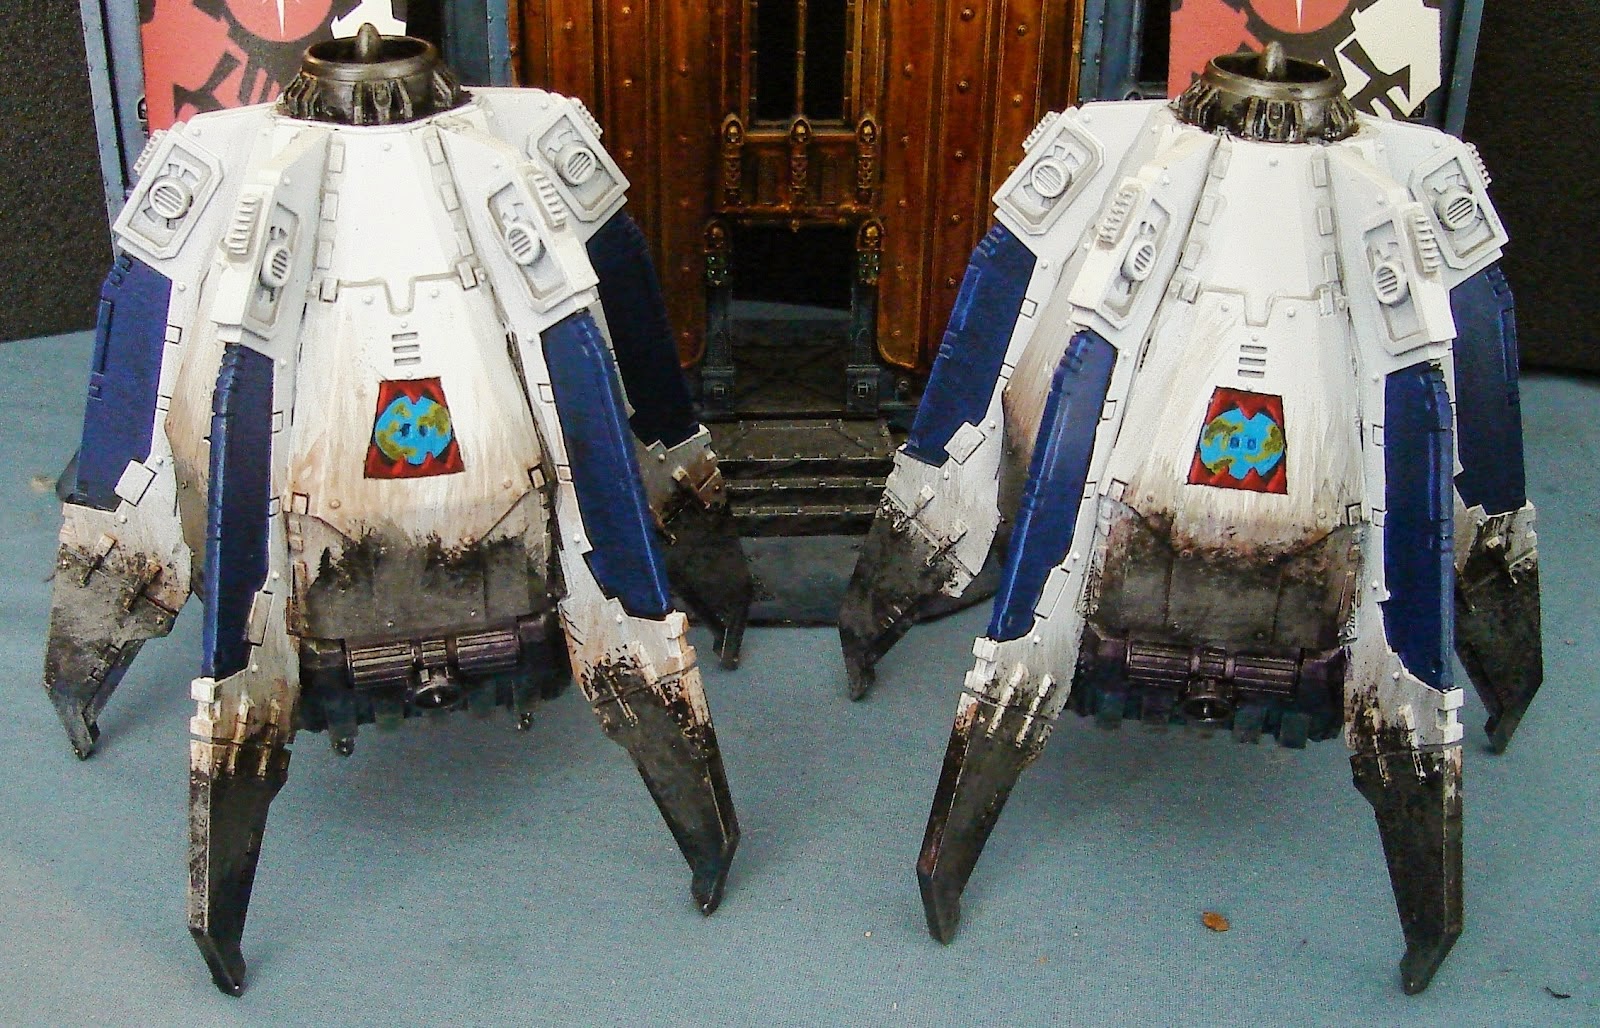
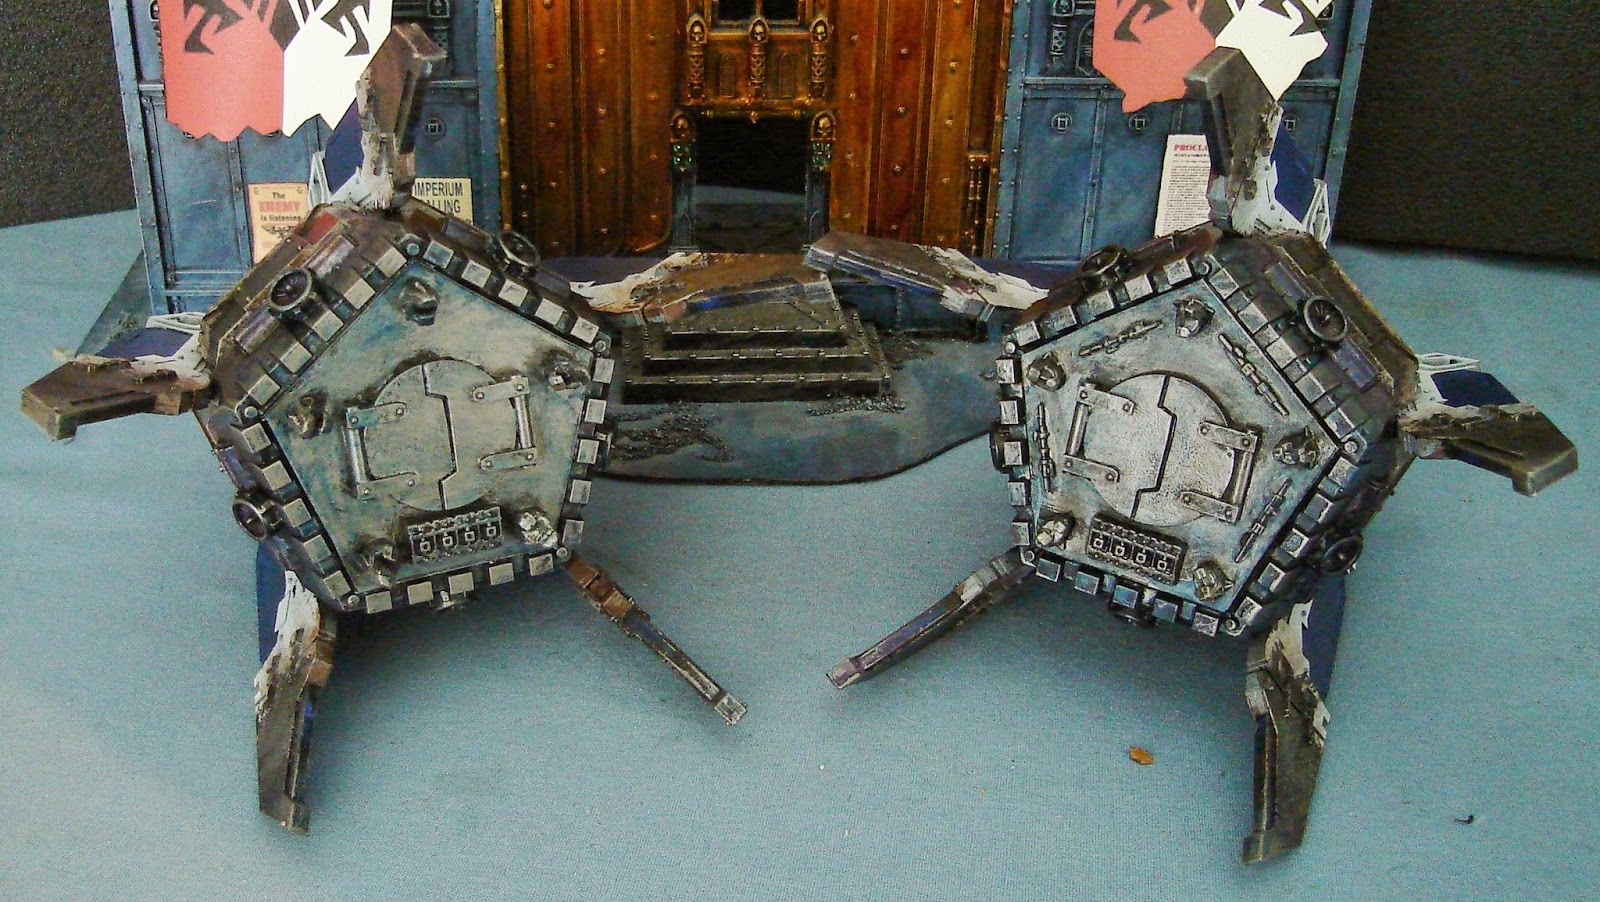
And how could I forget
Sheep's pods:
Those Chaos symbols are awesome and make me want to redo my pod!
Now that you have some ideas, get out there and make those Dreadclaws for your Legions, Daemonkin,
CSM and whatever other Lost and Damned souls you choose to fling across the Grim Darkness! Make something that looks cool!
If you have some innovative upgrades or twists, please link them in the comments for others to find. We can all find room to improve and a little inspiration can go a long way!


 1500pt

