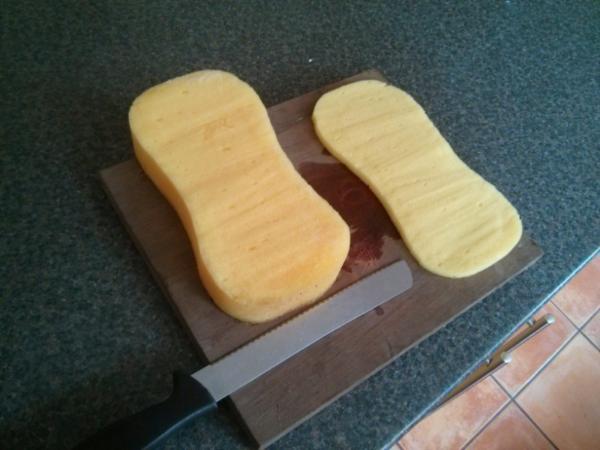
Pluck foam for carry cases is surprisingly expensive, normal sponges are cheap. The problem is it’s very difficult to cut low density foam and you end up making a mess if you just take a knife or scissors to a household sponge. The problem is it deforms under pressure and you end up making jagged cuts and tears.
Here is a simple way to cut normal sponge foam; soak it with water, squeeze out the excess and freeze it. The ice will hold the foam stable and allow you to cut it with normal tools (bread knife, hacksaw, electric carver). This allows you to cut the foam into uniform strips which you can use to line a box and make compartments.
Alternatively you can use a drill with a hole cutter bit (used for cutting holes in wooden planks, included in most bit sets) and cut circular holes in the sponge directly, then glue a floor under the hole using either part of another sponge or the removed foam plug.
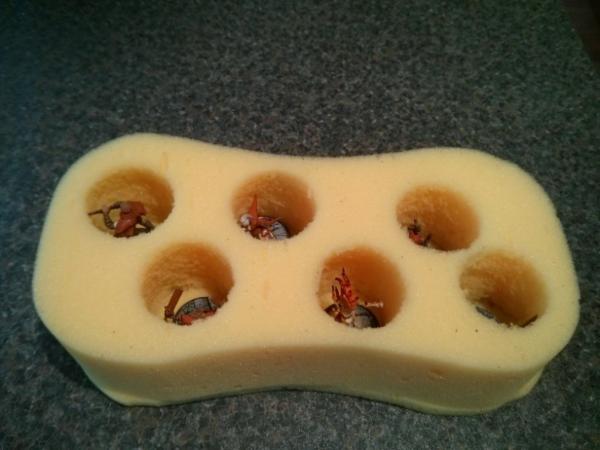
The manual steps can be done quickly, turning multiple 30p car wash sponges into a 6 compartment holders.
Here’s the tools and steps I used:
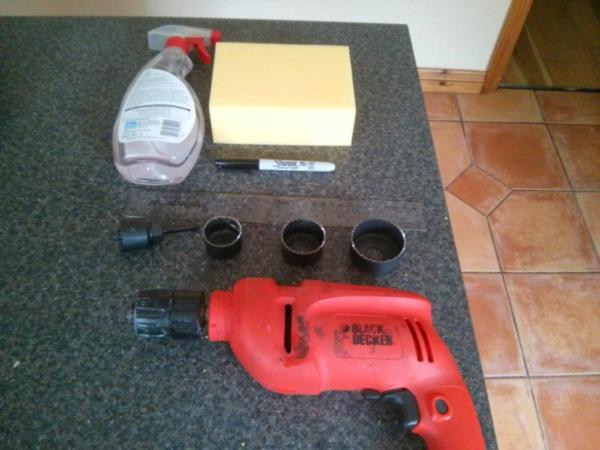
1. Select your hole cutter bit depending on the the size of compartment you want.
2. Measure and mark the holes you will make using a sharpie on the sponge (doesn’t run in water).
3. Soak your sponge in water, squeeze out excess and put in freeze for 30-45 mins. Recommend taking out after 15 mins and spraying with more water then turn over and put back end to ensure it freezes evenly.
4. Fit your hole cutter bit into it’s holder. Fit it so the bit in the middle of the holder (goes into the guide hole) is not protruding, so you cut all the way through the foam.
5. Take the sponge out of the freezer and drill the holes. Begin by pushing the drill bit into the sponge firmly then start the drill and cut slowly but steadily, too fast and you will tear the foam.
6. Defrost and dry the foam, then glue a foam floor using PVA glue. Depending the thickness of your sponge (and what you want to store) you may be able to use part of the removed foam plugs cut with scissors.
Obviously using this approach you can make neater cases with more effort, I wanted to show how using common items you can quickly make a useful case for your miniatures.

