| Author |
Message |
 |
|
|
|
|
Advert
|
Forum adverts like this one are shown to any user who is not logged in. Join us by filling out a tiny 3 field form and you will get your own, free, dakka user account which gives a good range of benefits to you:
- No adverts like this in the forums anymore.
- Times and dates in your local timezone.
- Full tracking of what you have read so you can skip to your first unread post, easily see what has changed since you last logged in, and easily see what is new at a glance.
- Email notifications for threads you want to watch closely.
- Being a part of the oldest wargaming community on the net.
If you are already a member then feel free to login now. |
|
 |
2015/05/31 11:01:07
Subject: New HOW TO tutorial for Abadoned Workshop build from Paint Forge
|
|

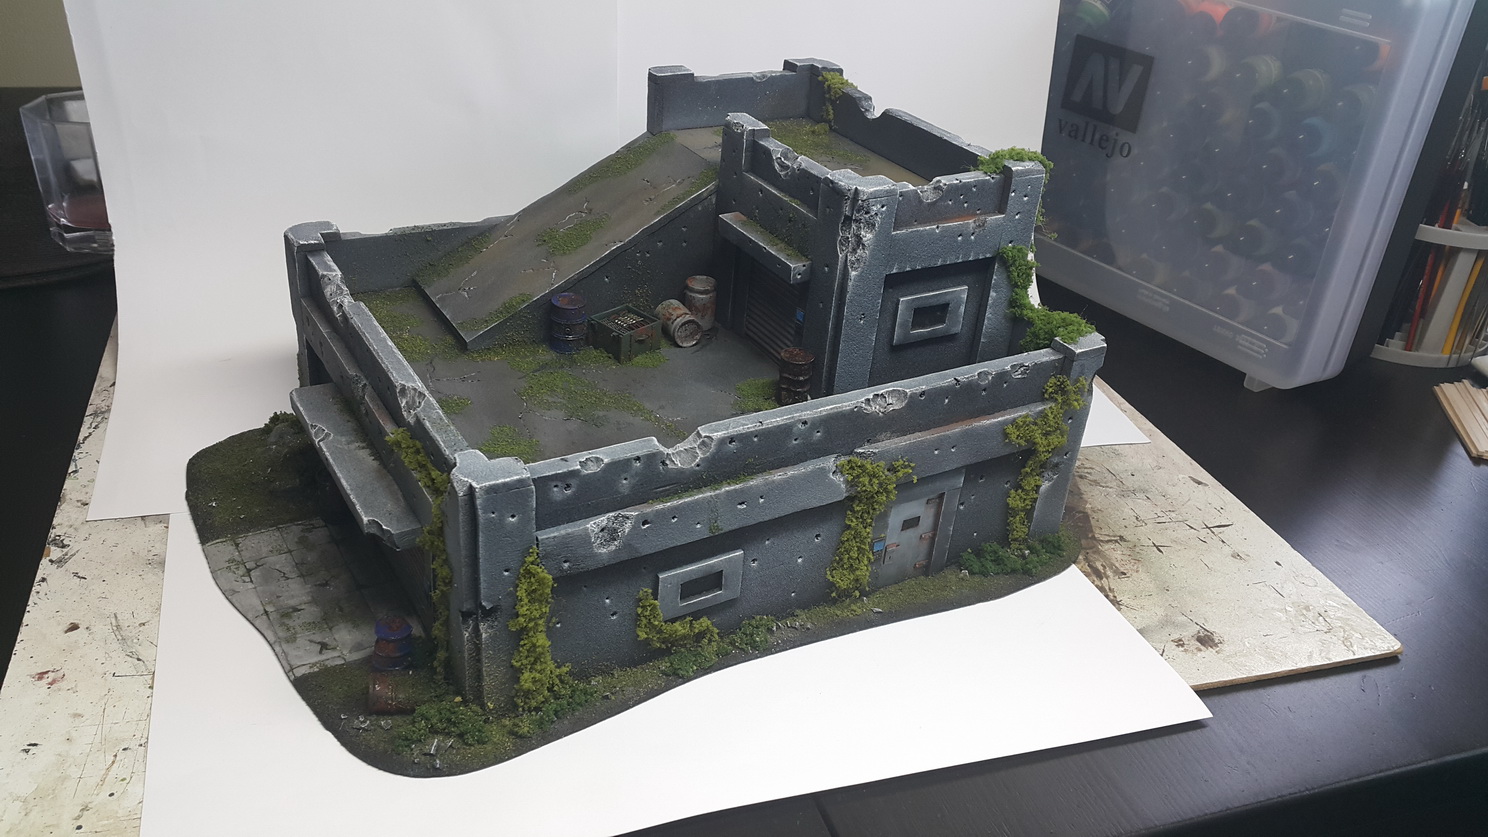
One Canoptek Scarab in a Swarm
|
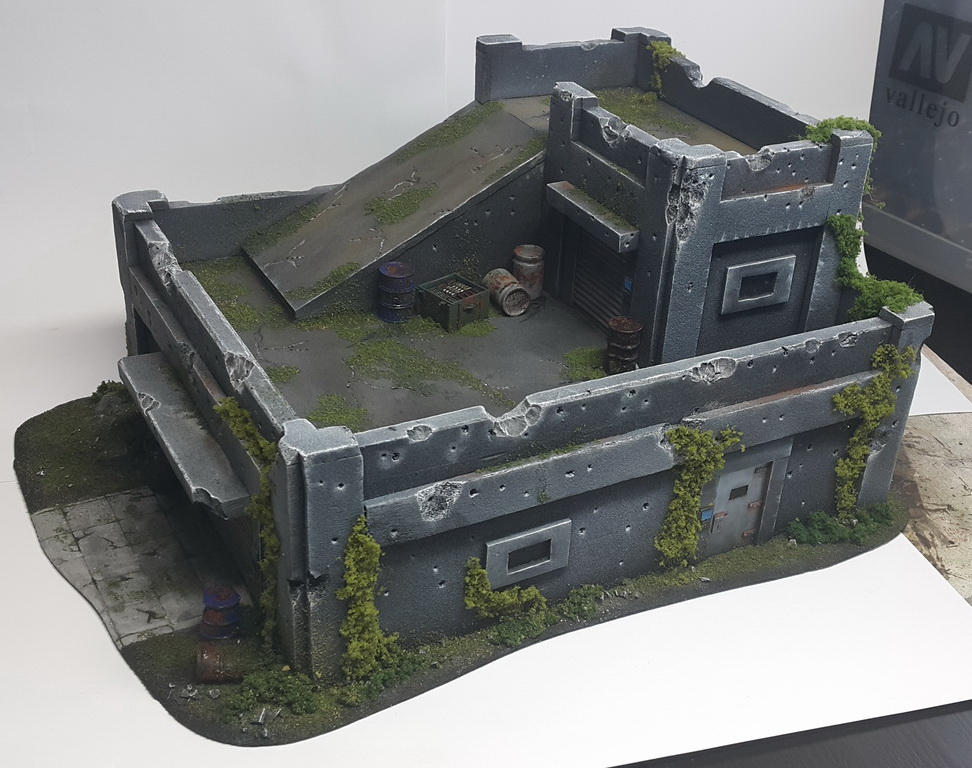
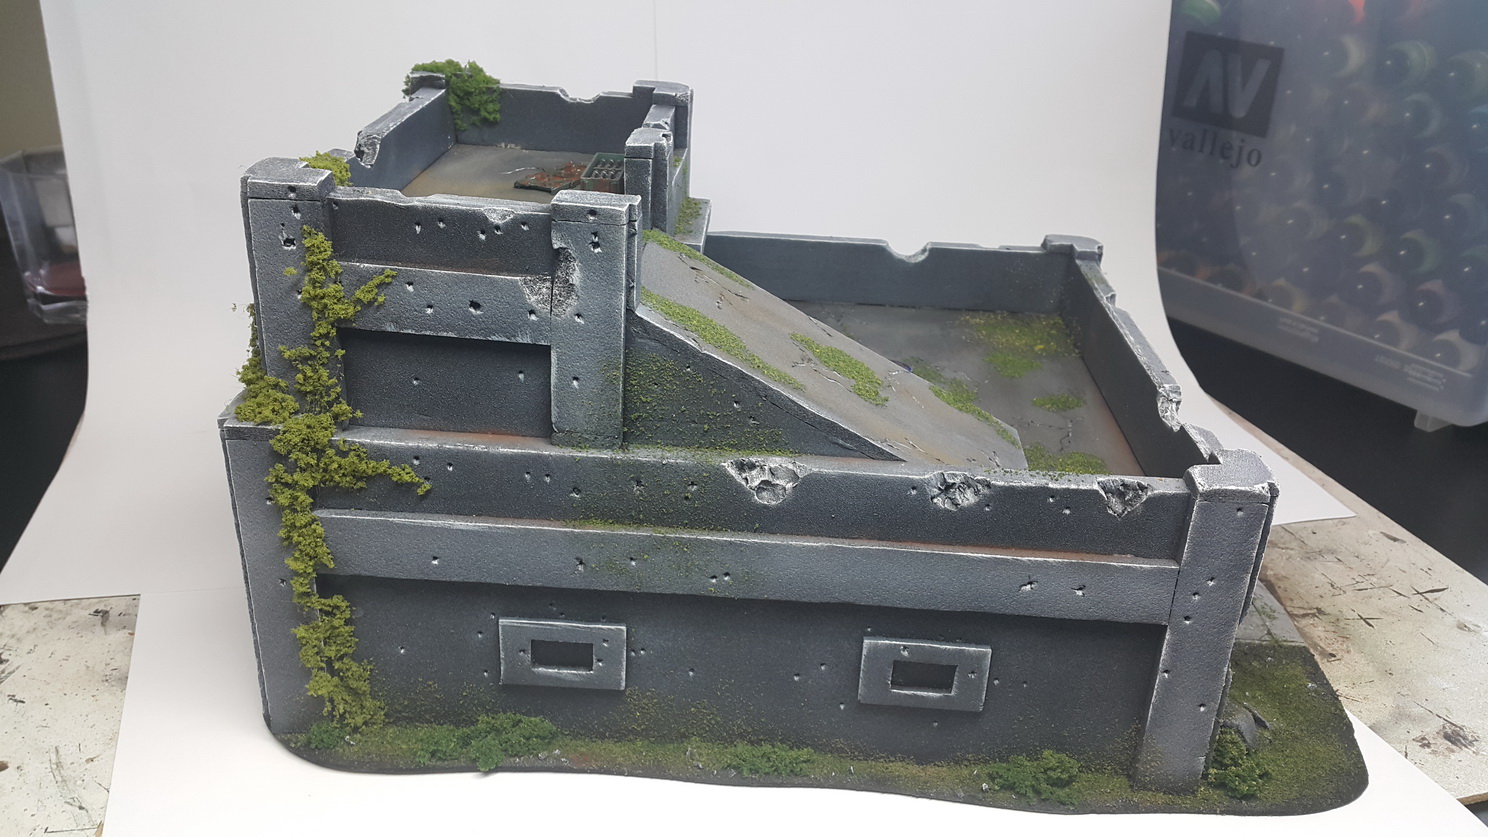
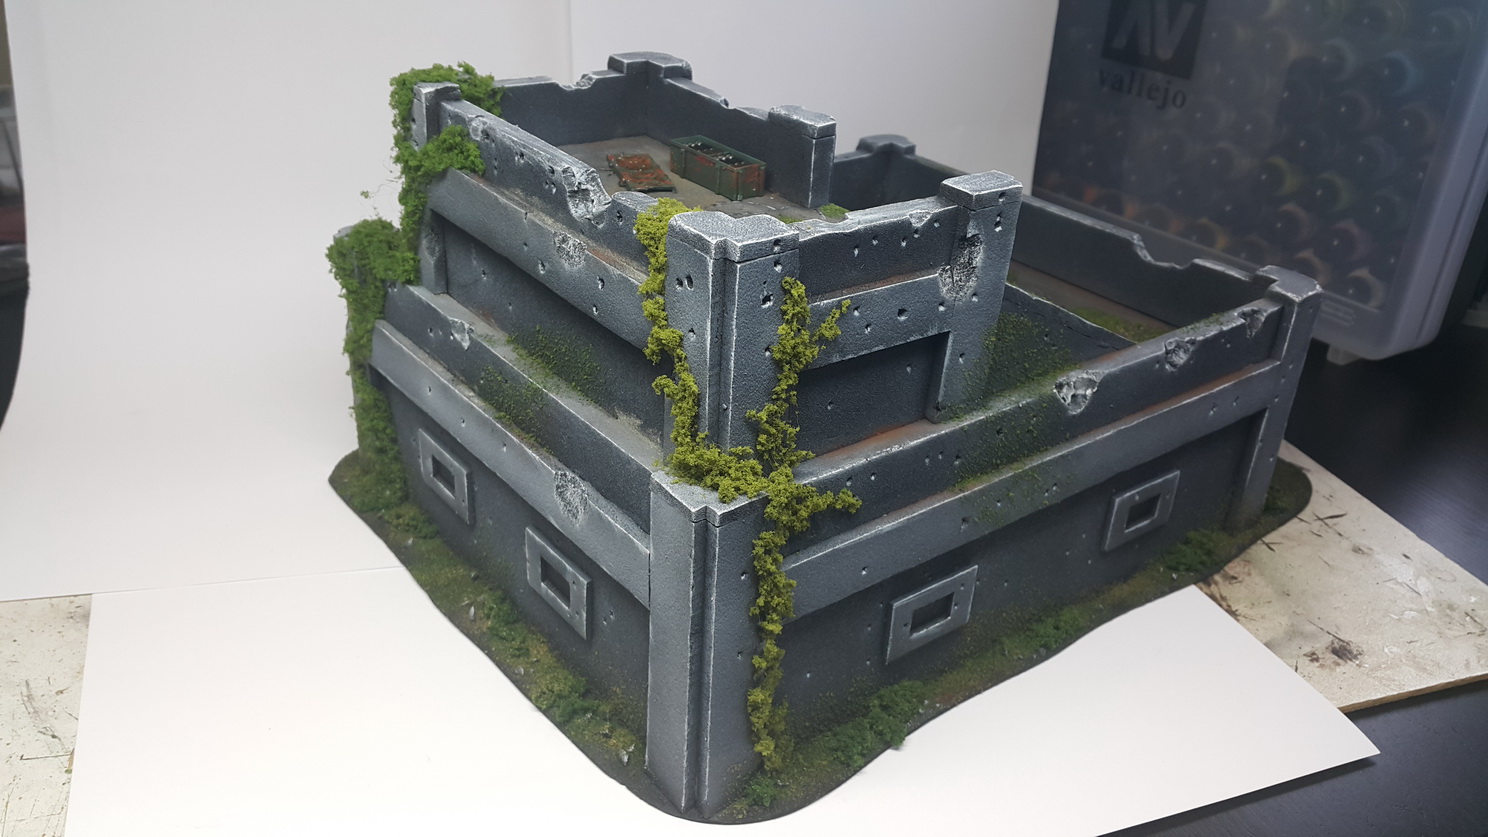
Here's next Step-By-Step of mine so you're able to see how this building was made.
At the end of this SBS I put links to material I used because they're really good, easy to use and sometimes unknown to you.
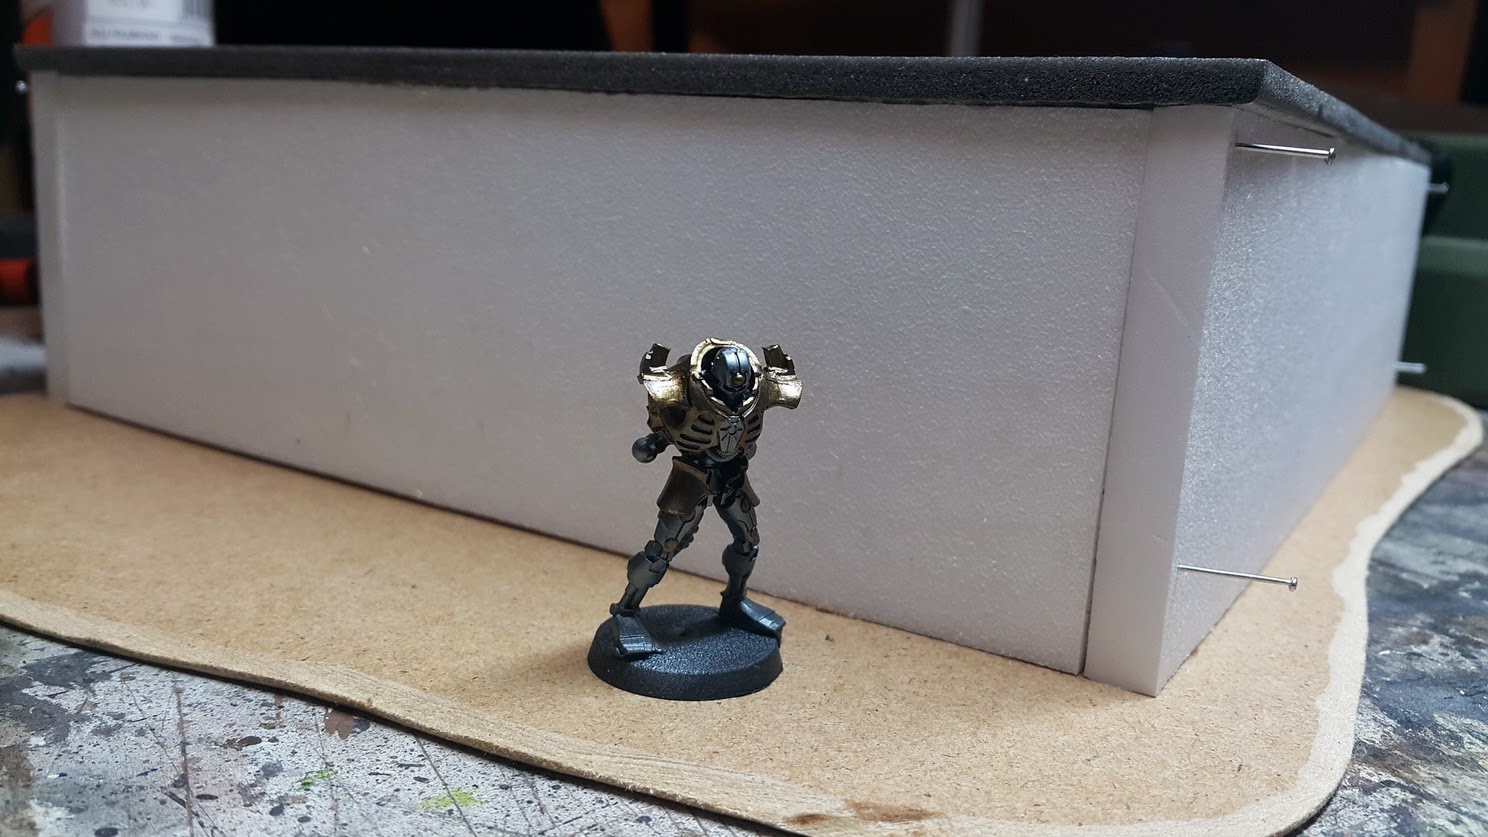
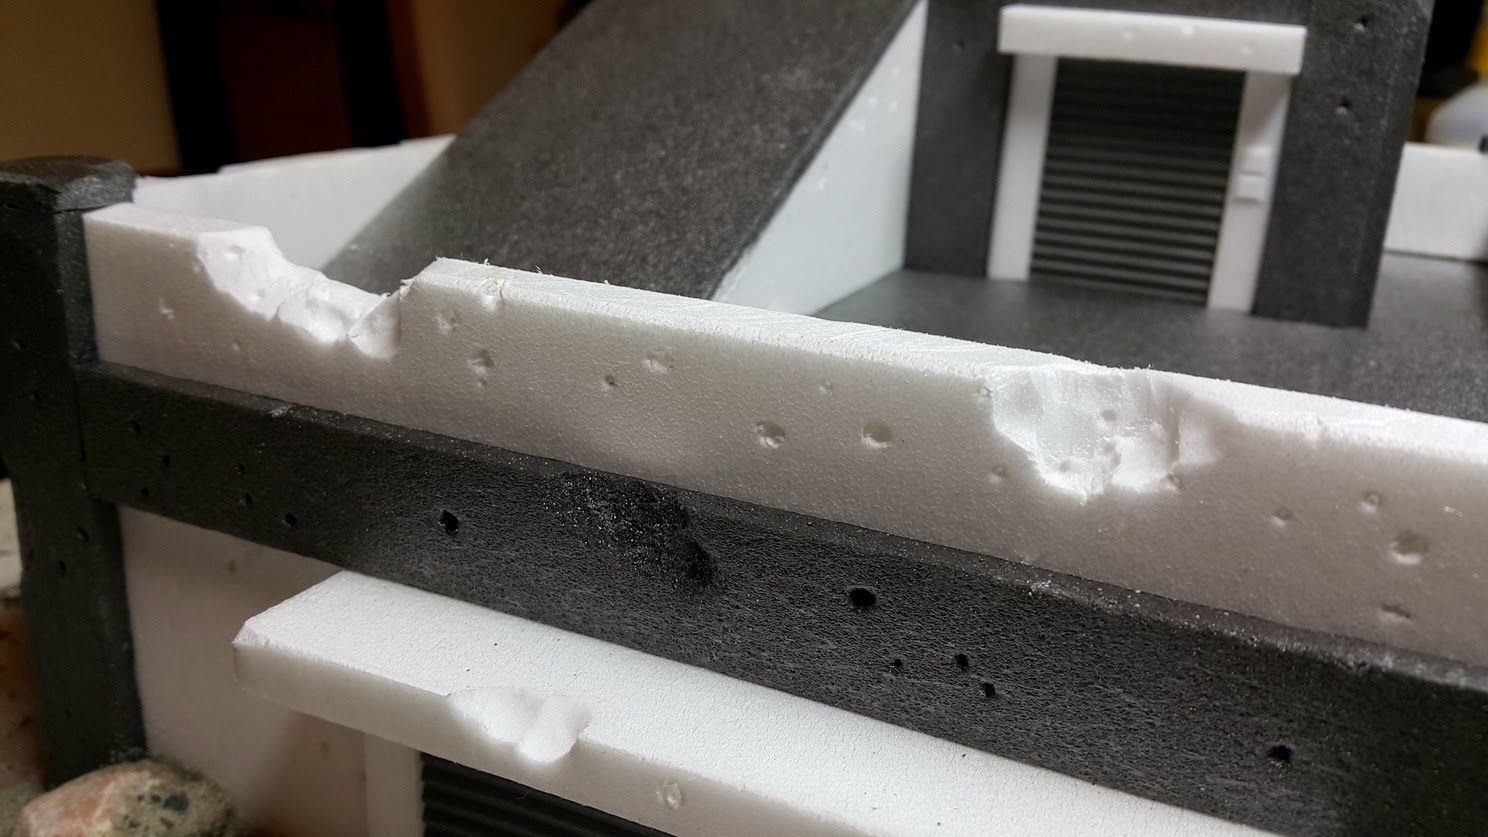
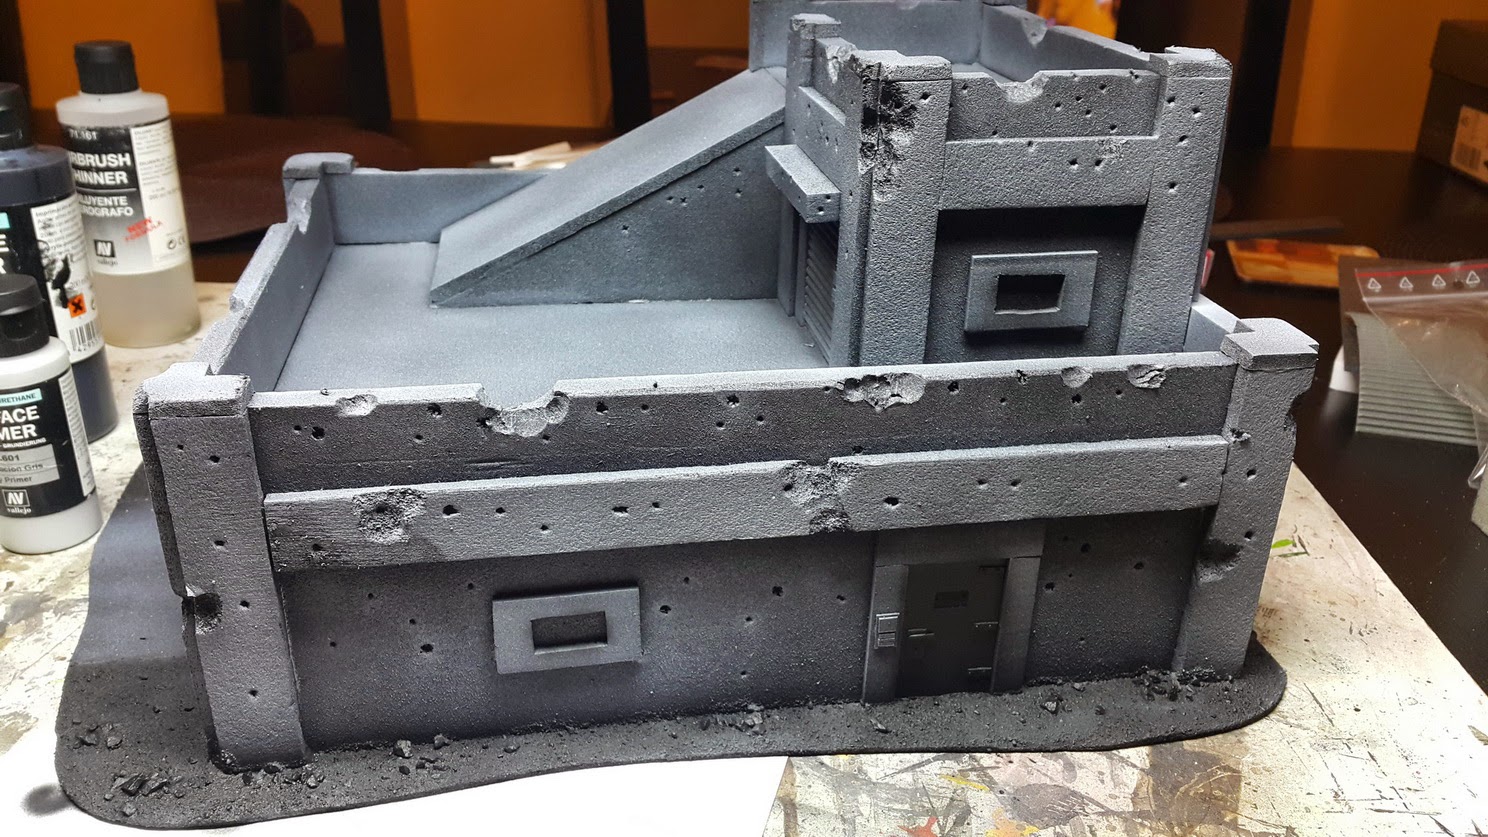
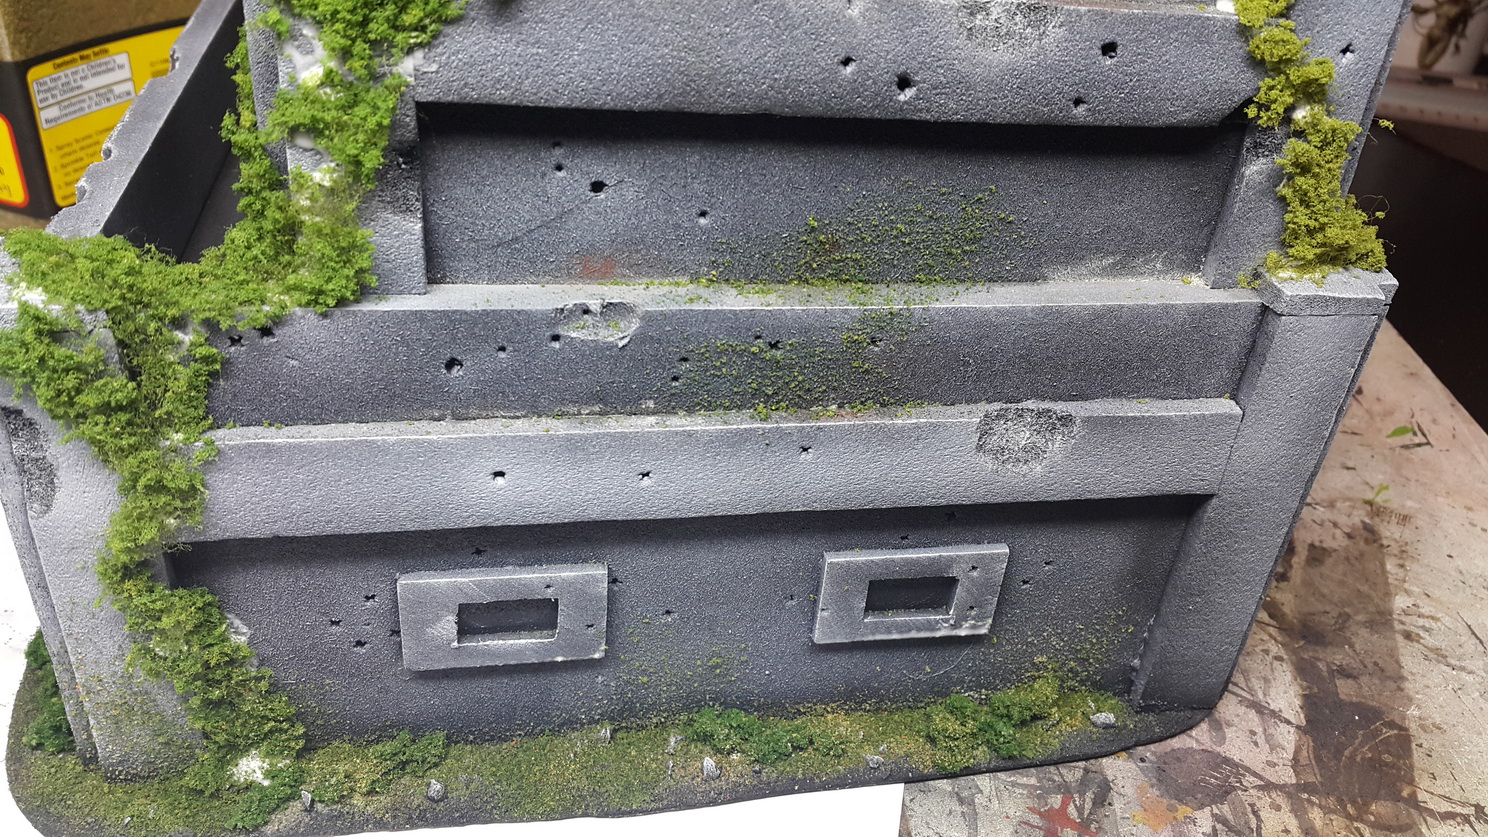
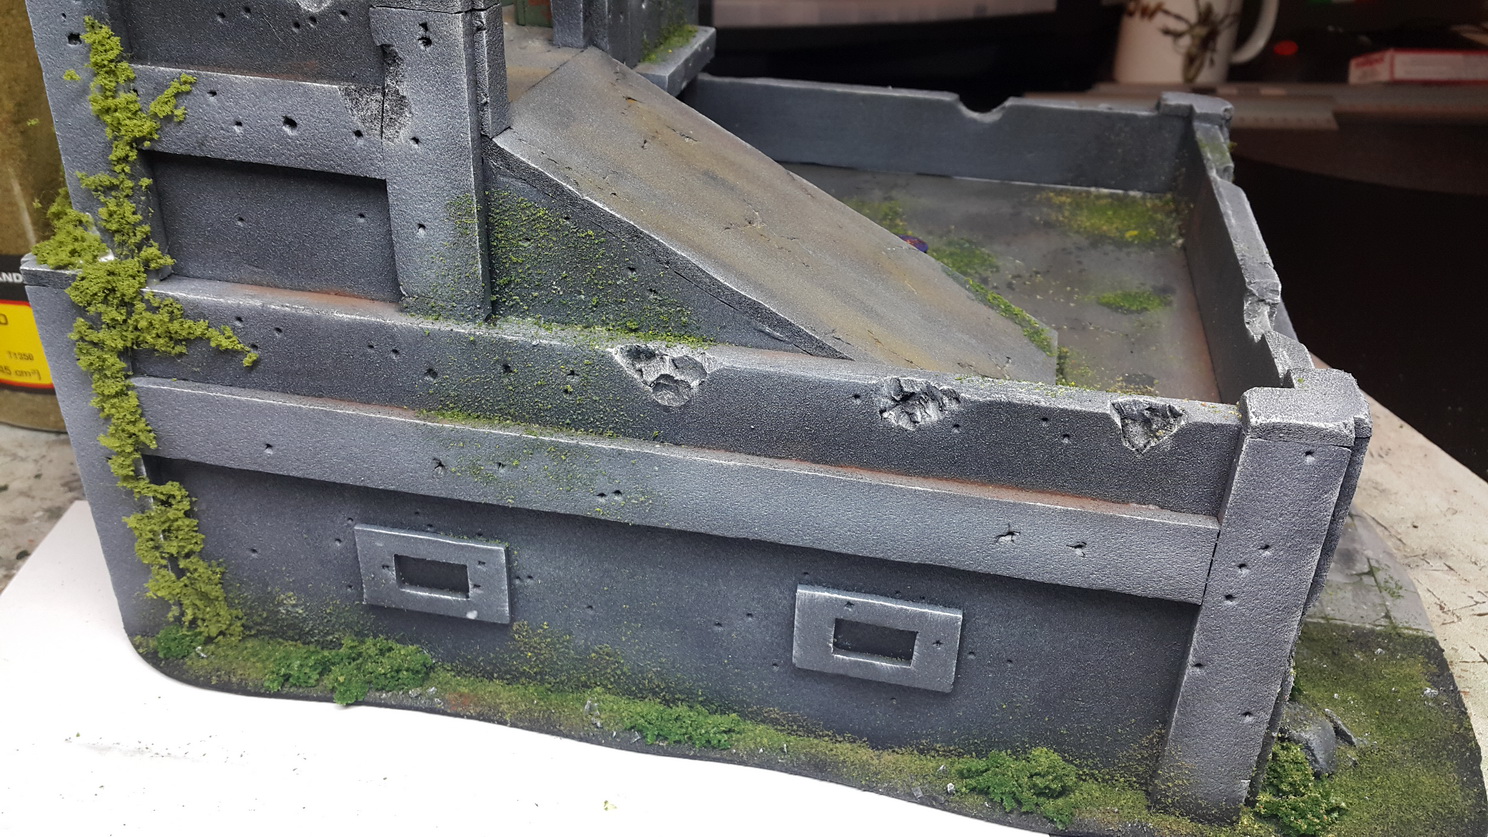
Everything started from MDF board and grind the edges Next I used Styrodur (kind of Syrofoam but with greater density) boards 10mm (white) and made walls from it and Depron boards 5mm (dark grey).
I used needles while glueing - keeping everything in place.
Here I made first wall 30mm height. Later I saw that for Warhammer minis better would be 25mm but it was bit to late for change.
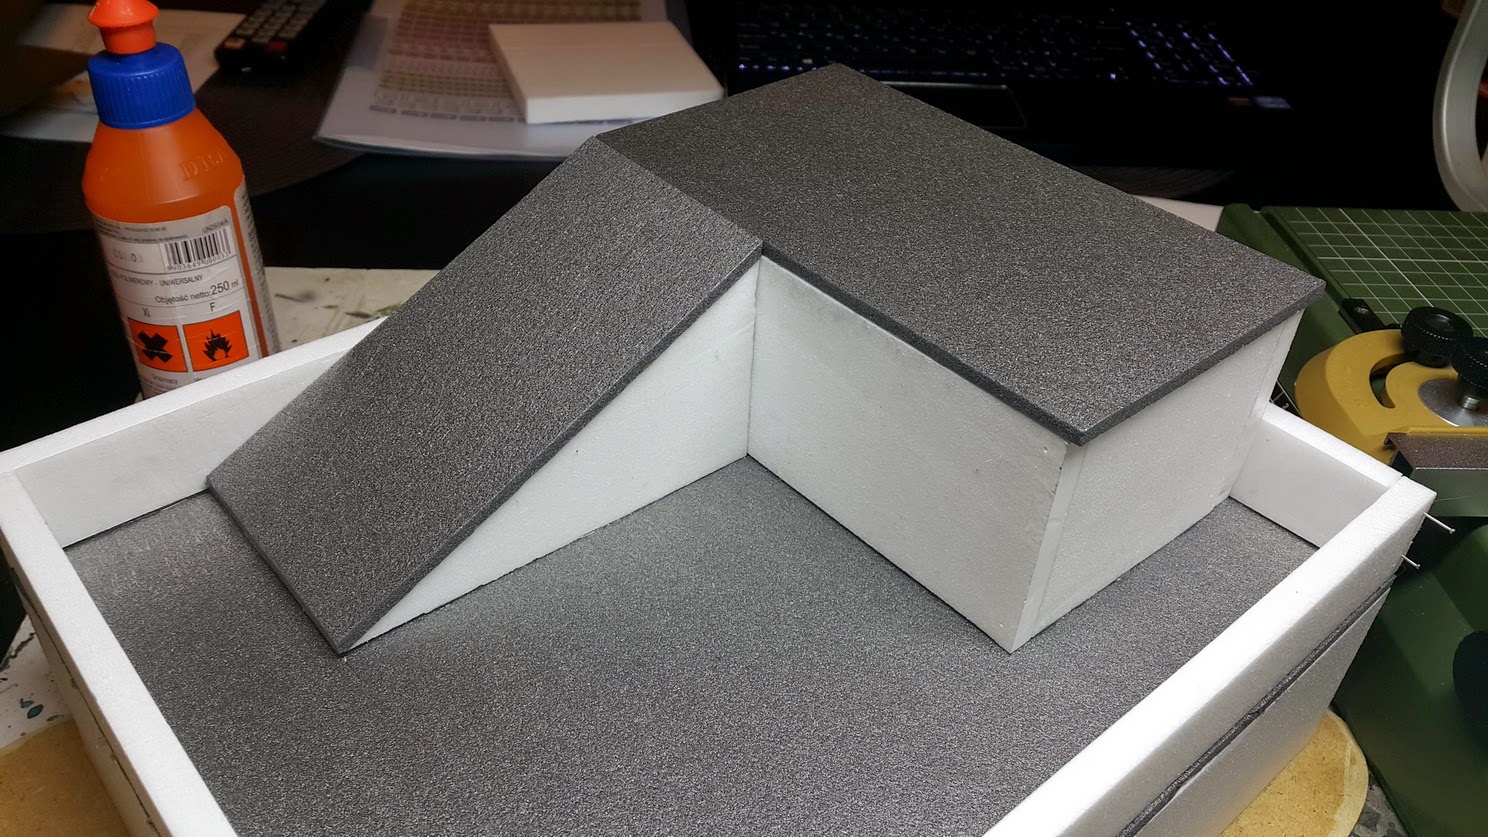
Next floor is coming. As you can see I put additional pillars to support the roof because Depron boards ate not so hard and could damage in future while gaming.
The boards are not lining ideal but after drying the glue I can cut them easily.
Next wall (now is 25mm). Additional with Depron stripes I was making corners and corner front-ends. With this I masked connections of main walls and made additional details.
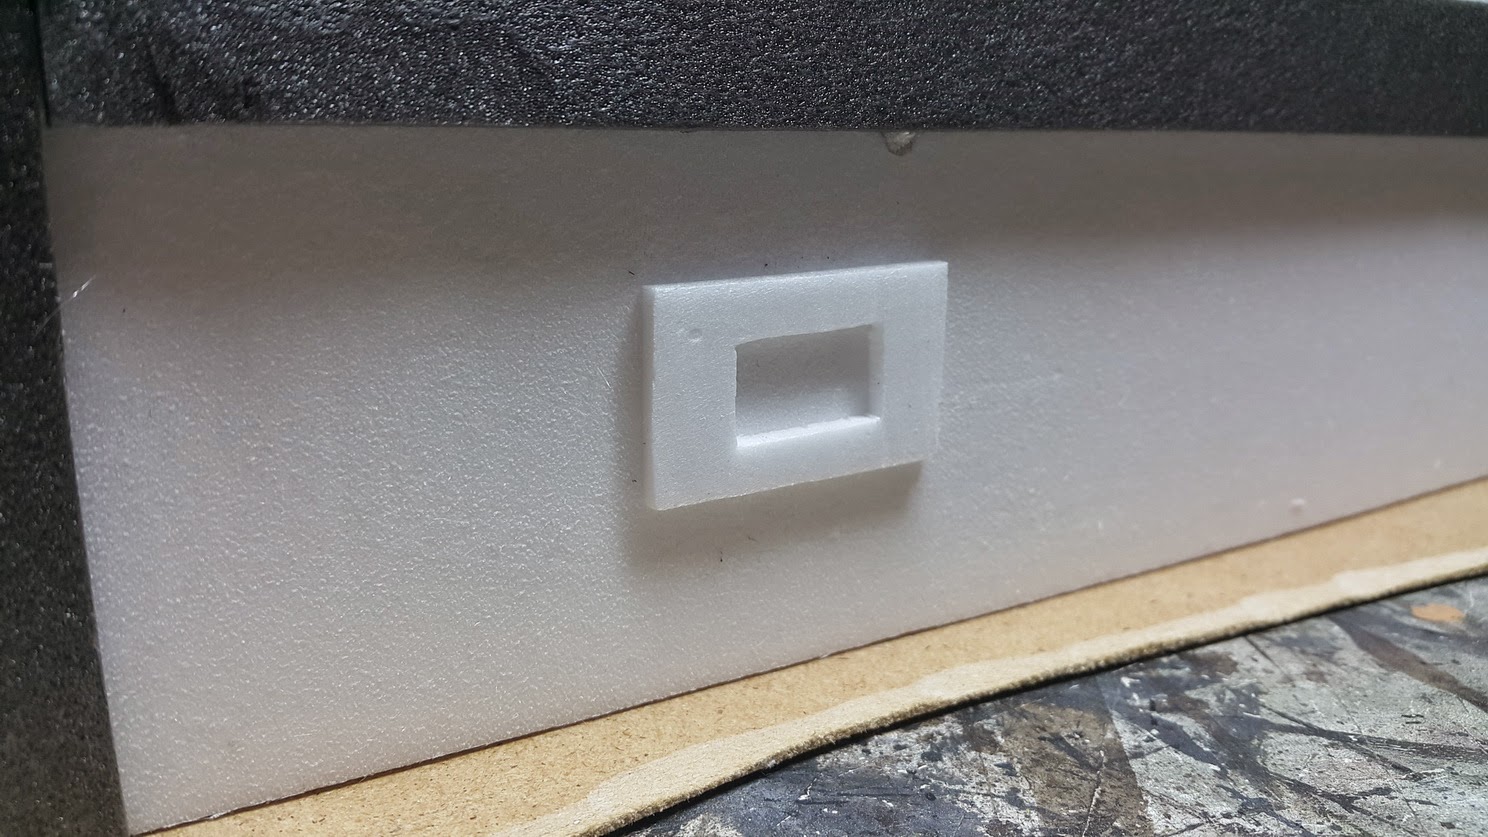
I cut Styrodur on thin stripes and cut small openings to make windows from it.
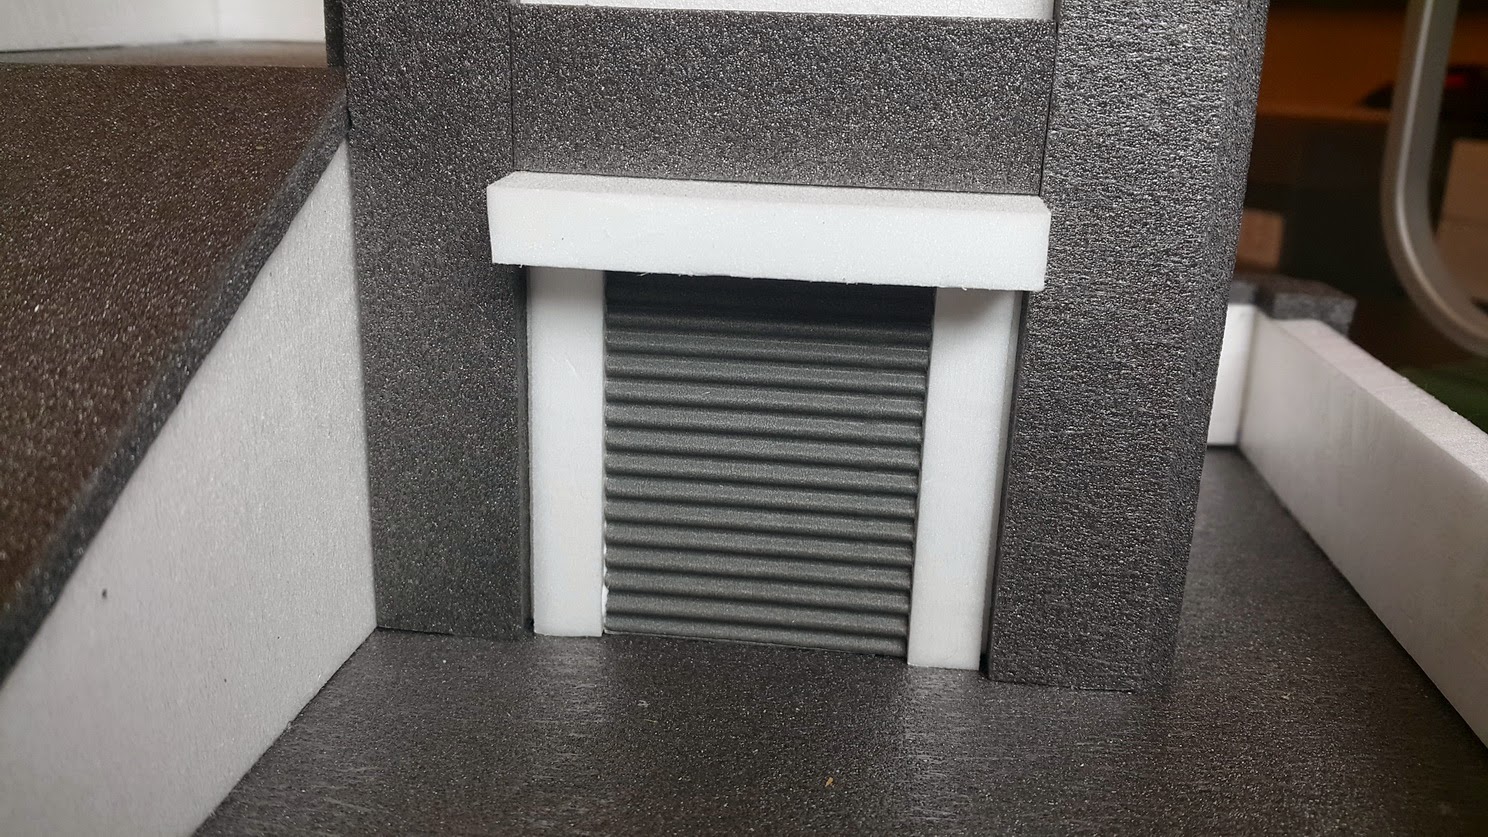
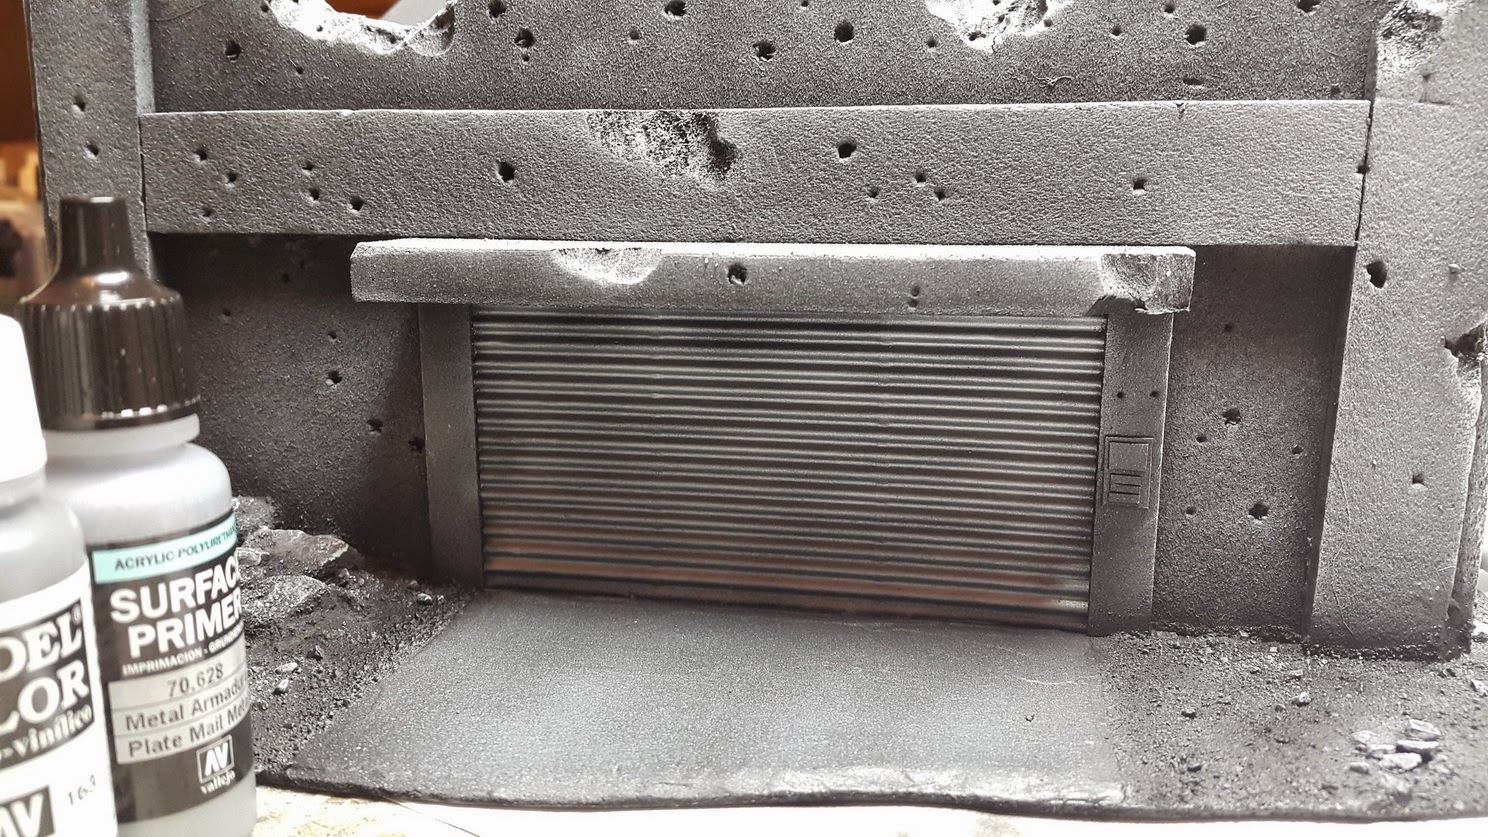
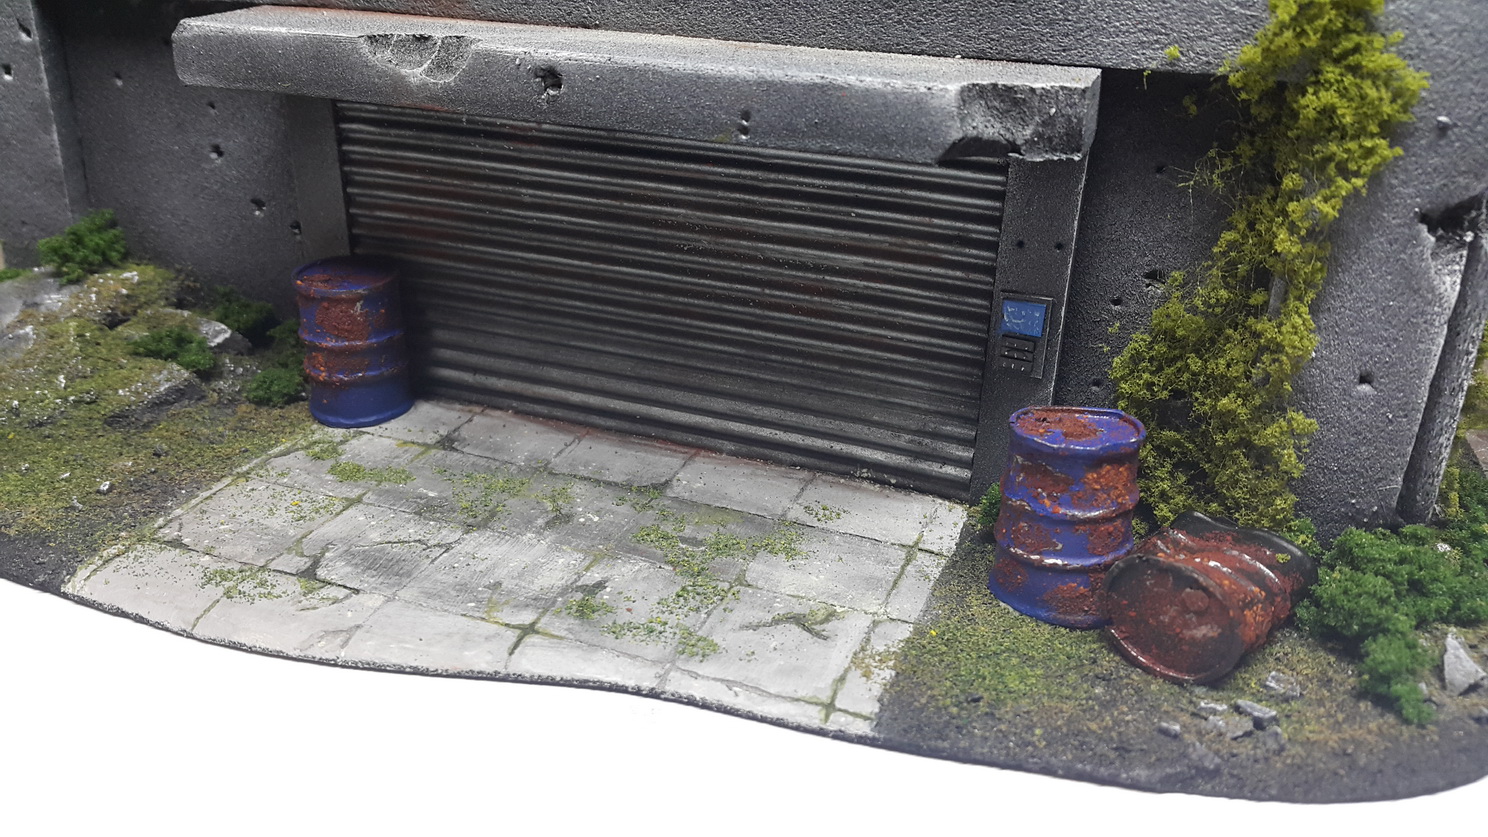
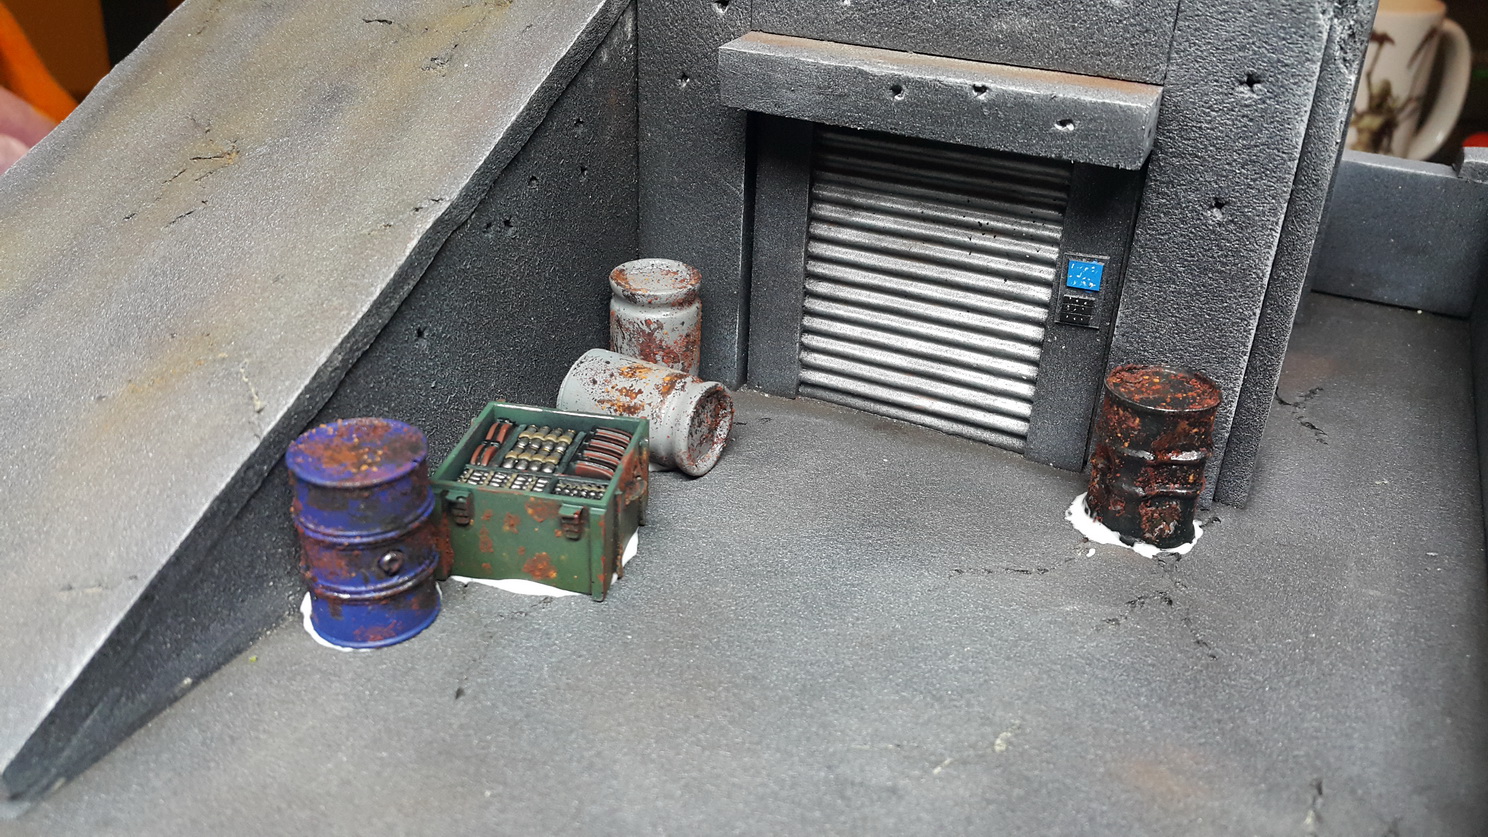
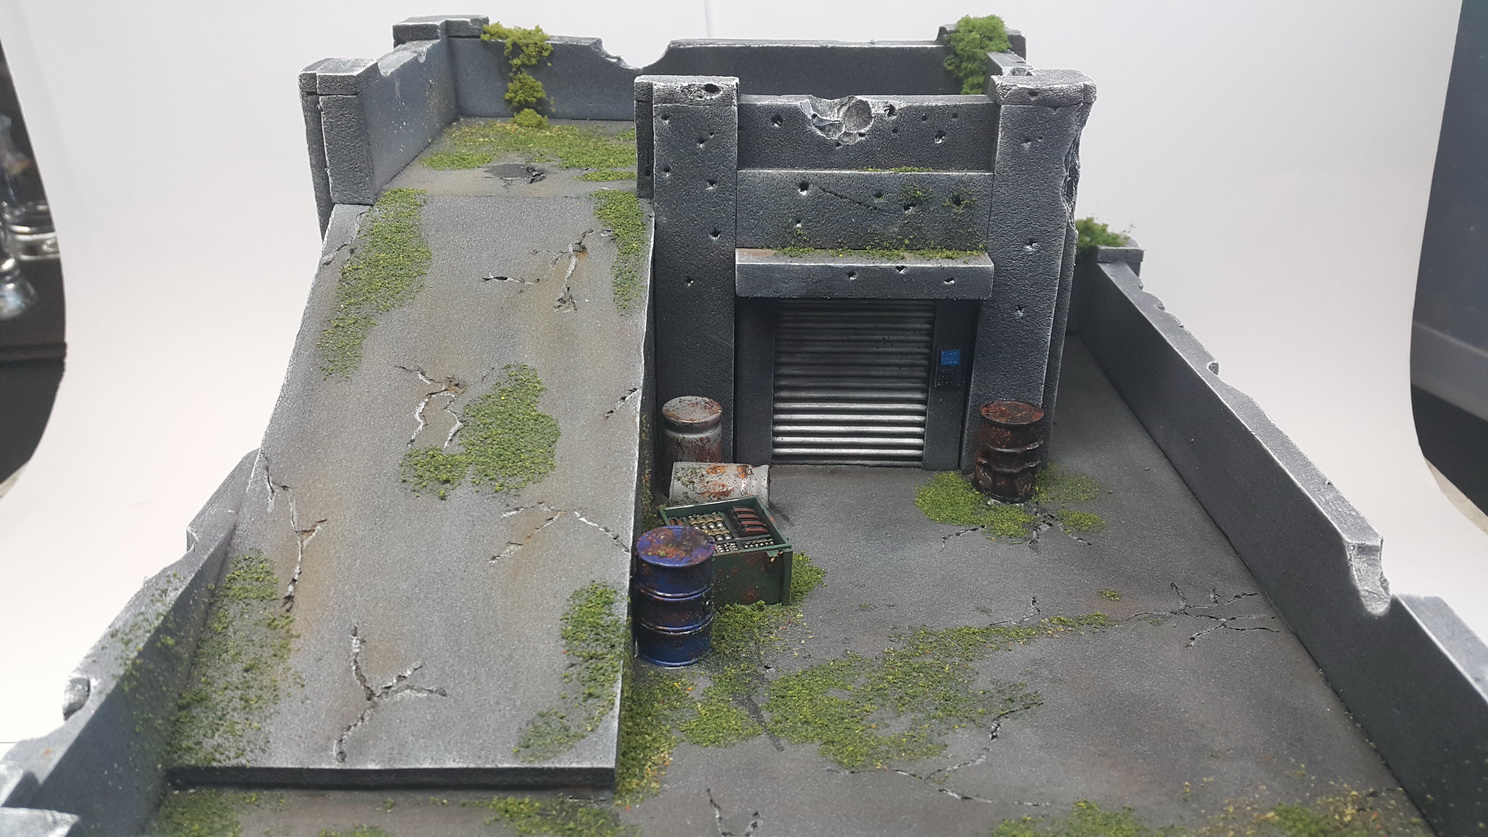
From wavy cardboard I made two gates.
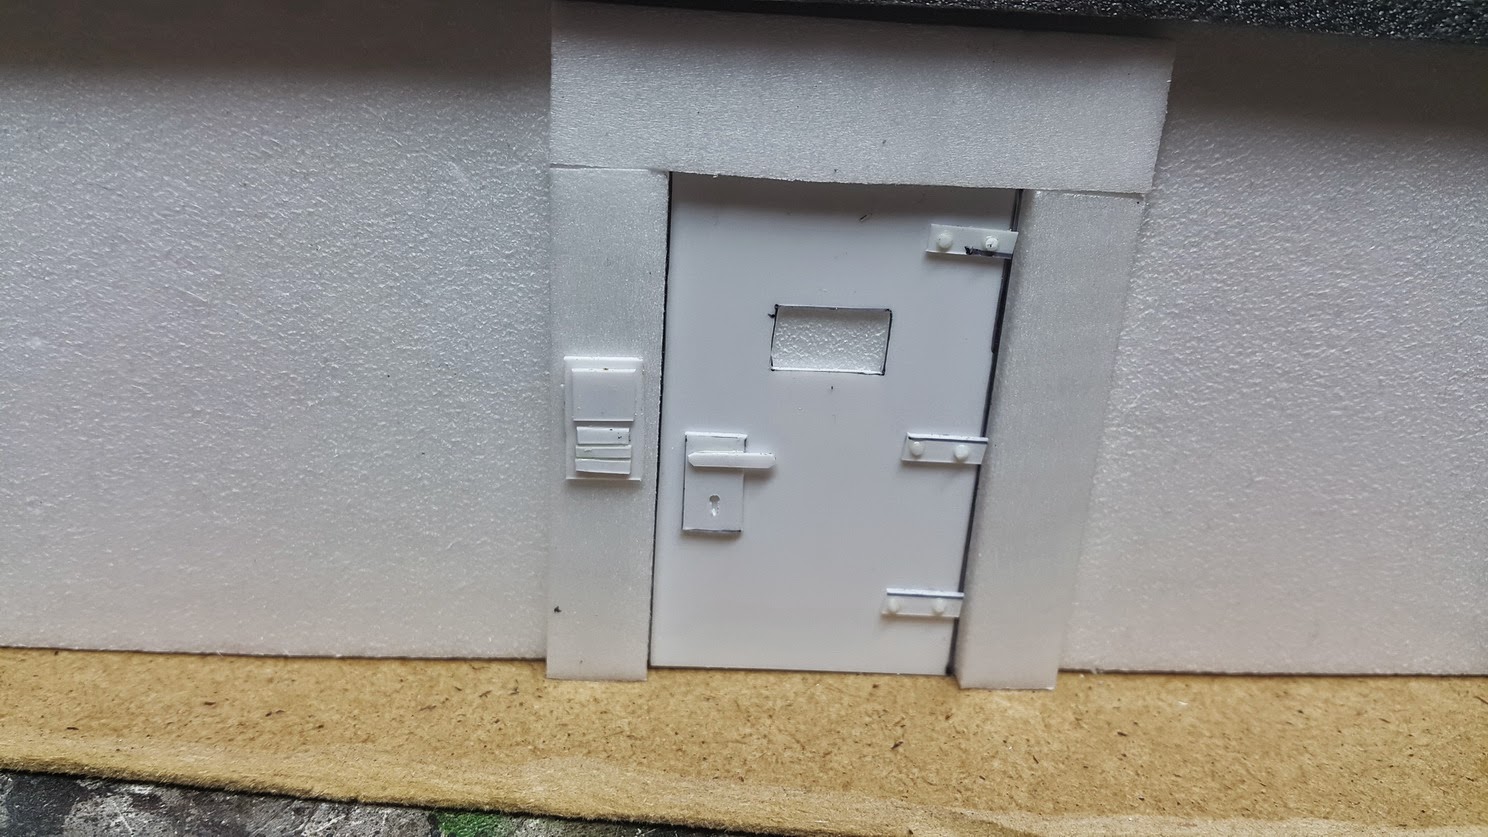
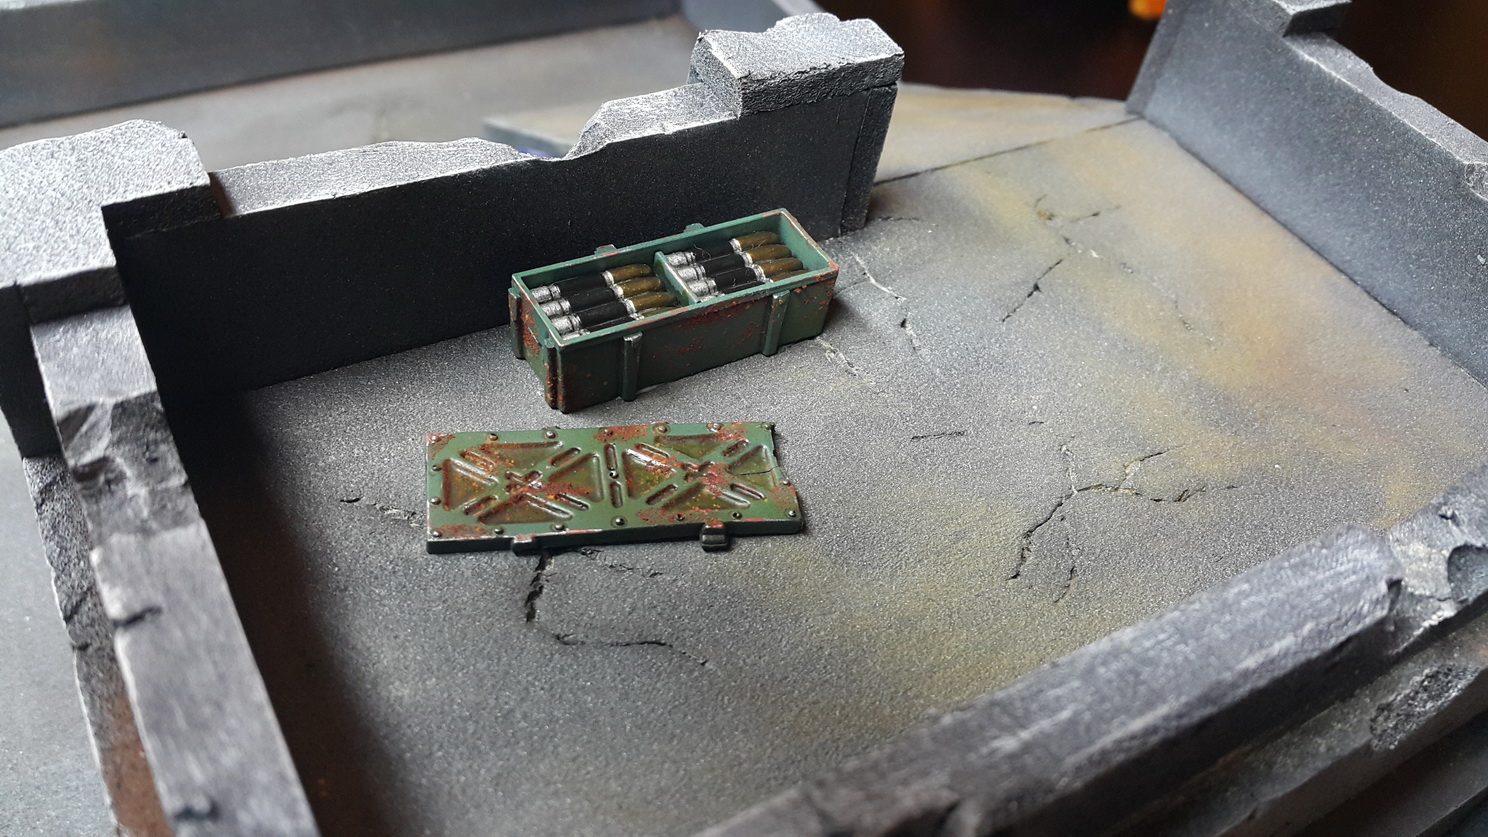
From HIPS board I made doors and door lock, handle, hinges and code locks . Always some more details.
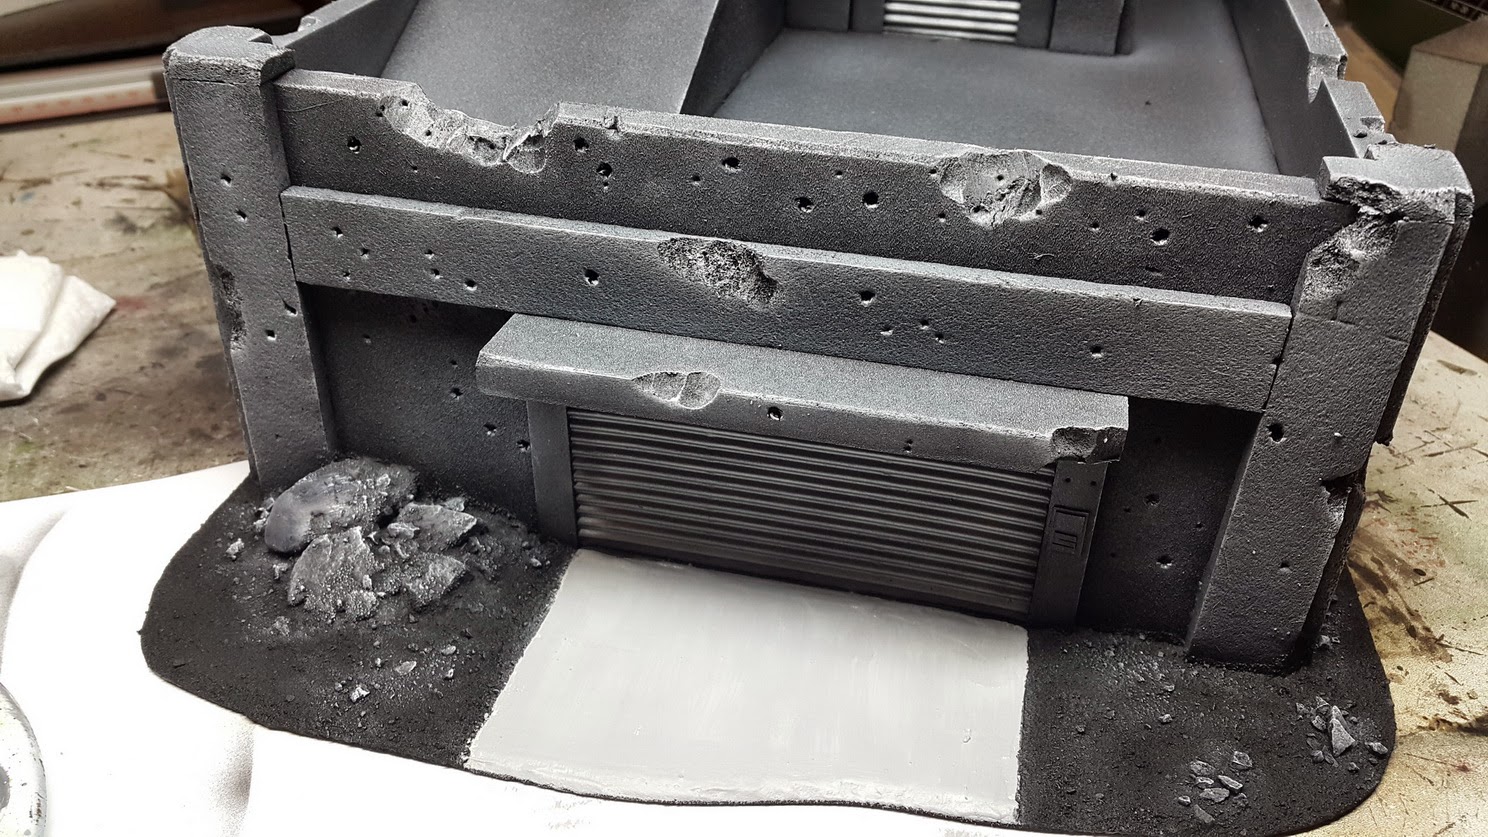
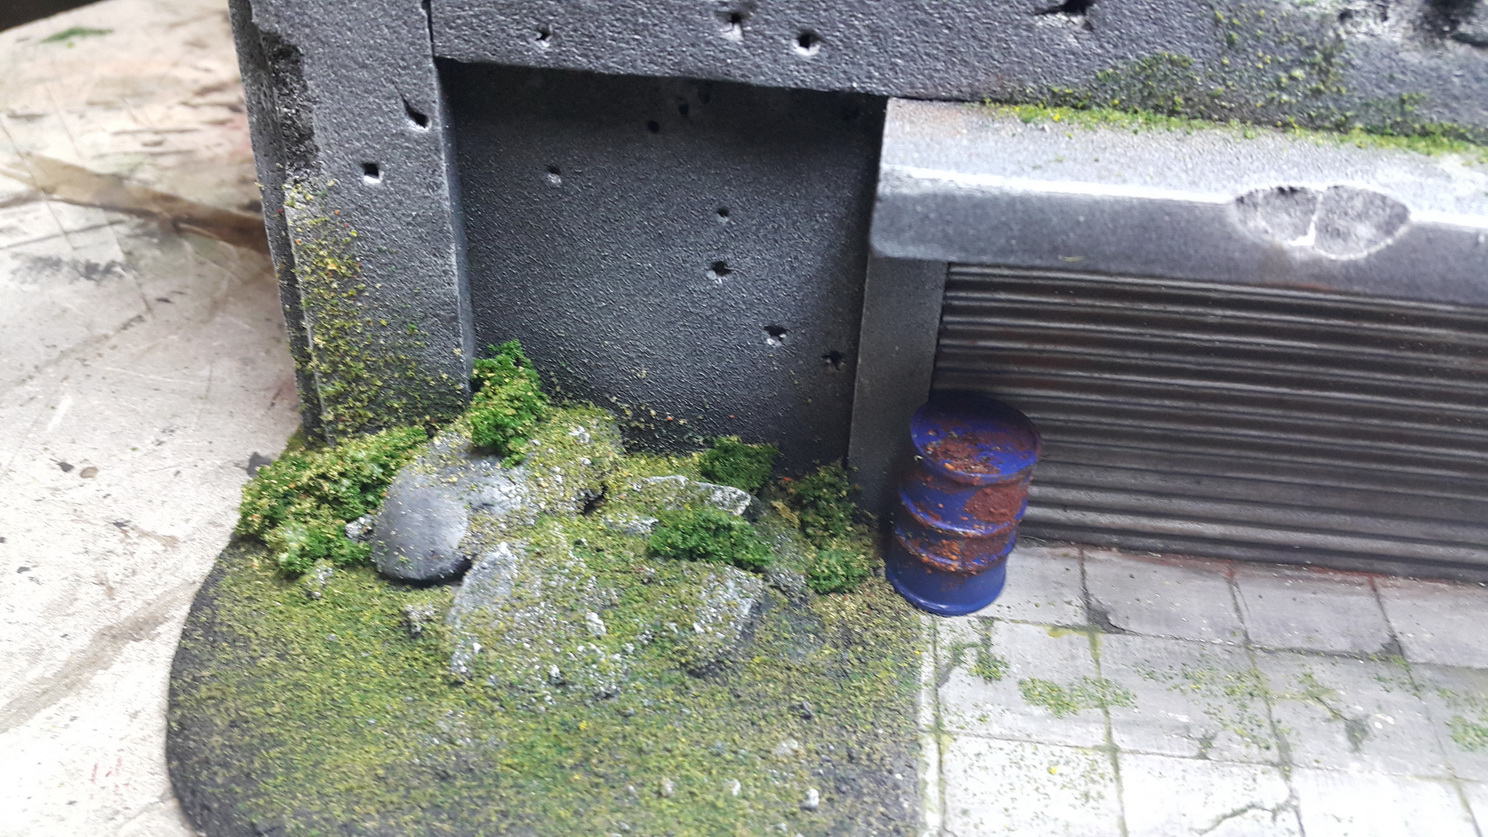
With Milliput putty I put different size some rocks next to gate.
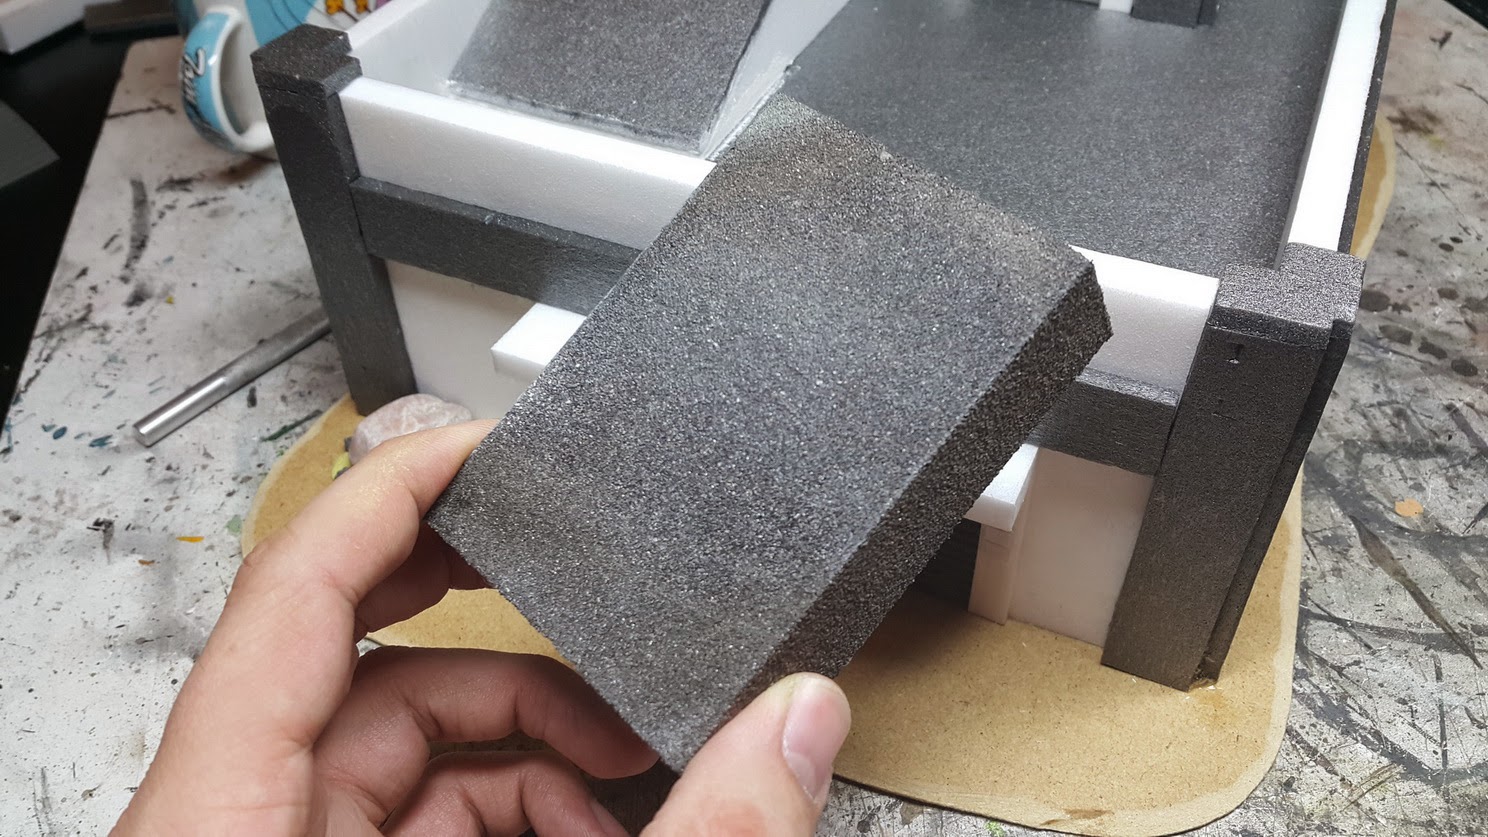
With sanding sponge I gently sand the edges.
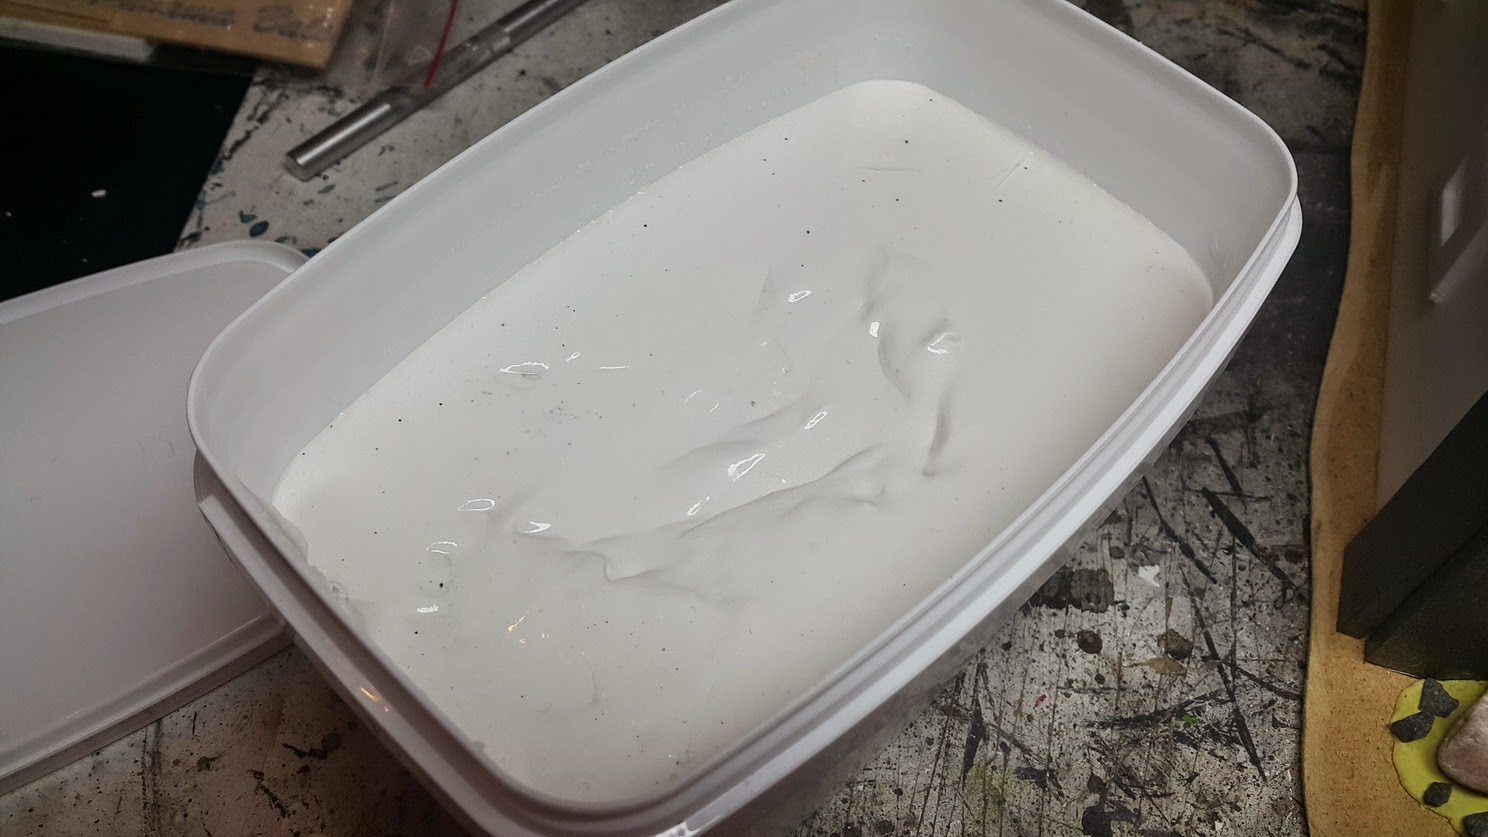
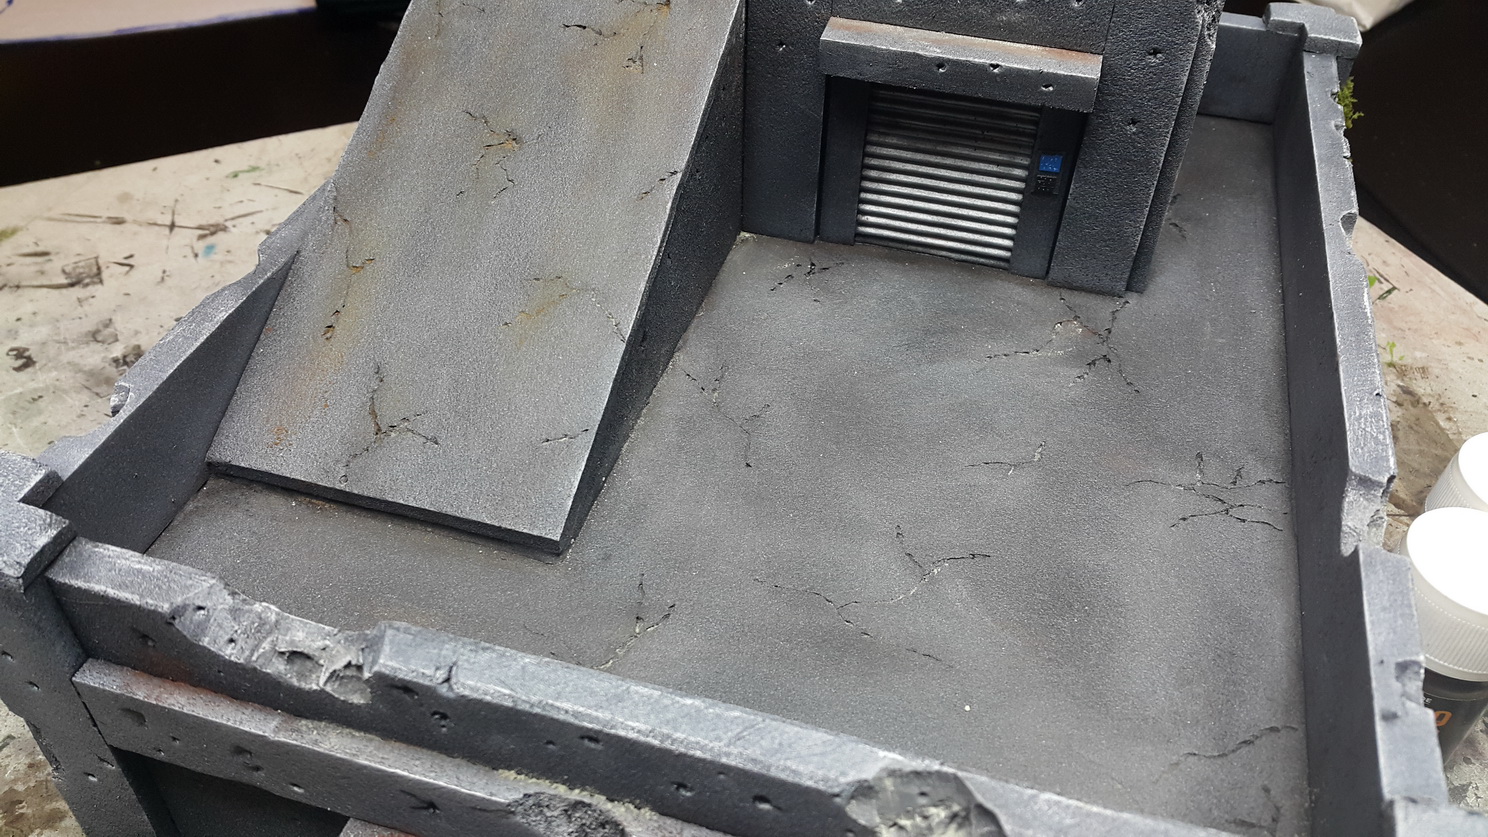
Recently for the first time I used Acrylic putty and have to say that I liked it much so used it to make Concrete entry to the main gate and to fill some gaps at the ramp.
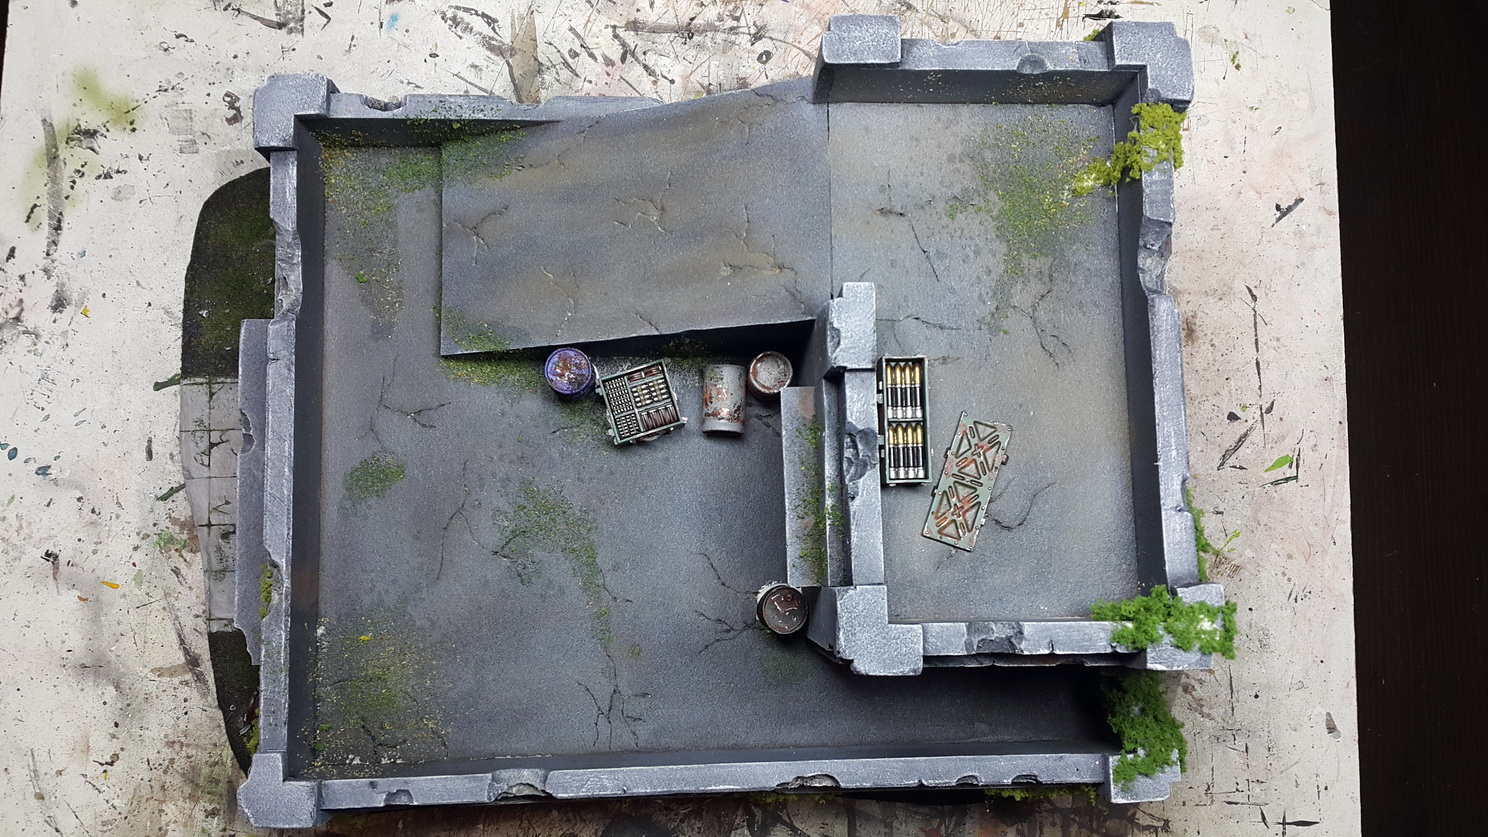
With White Glue I put sand and small gravel on the MDF board
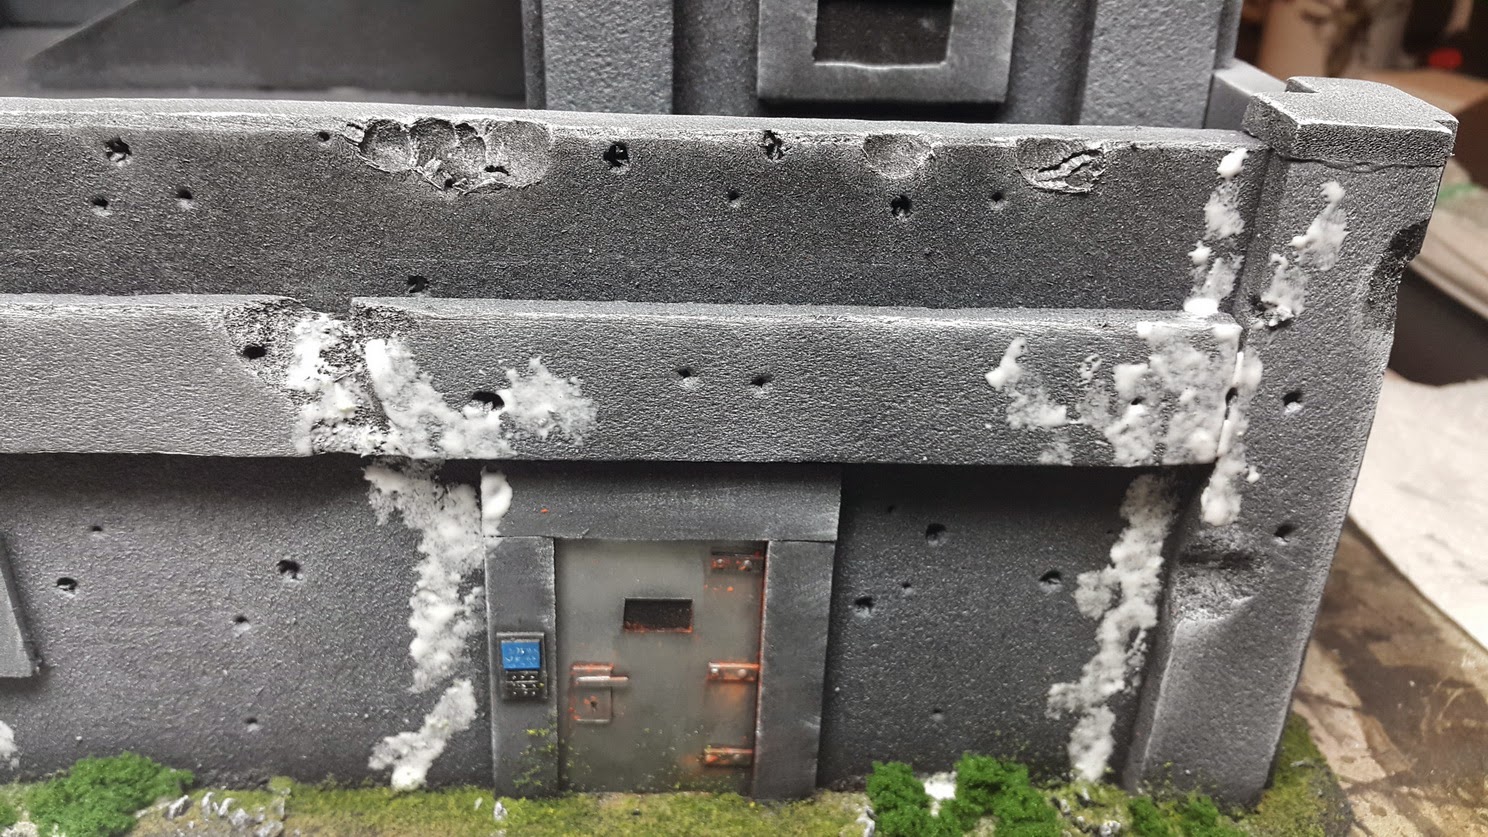
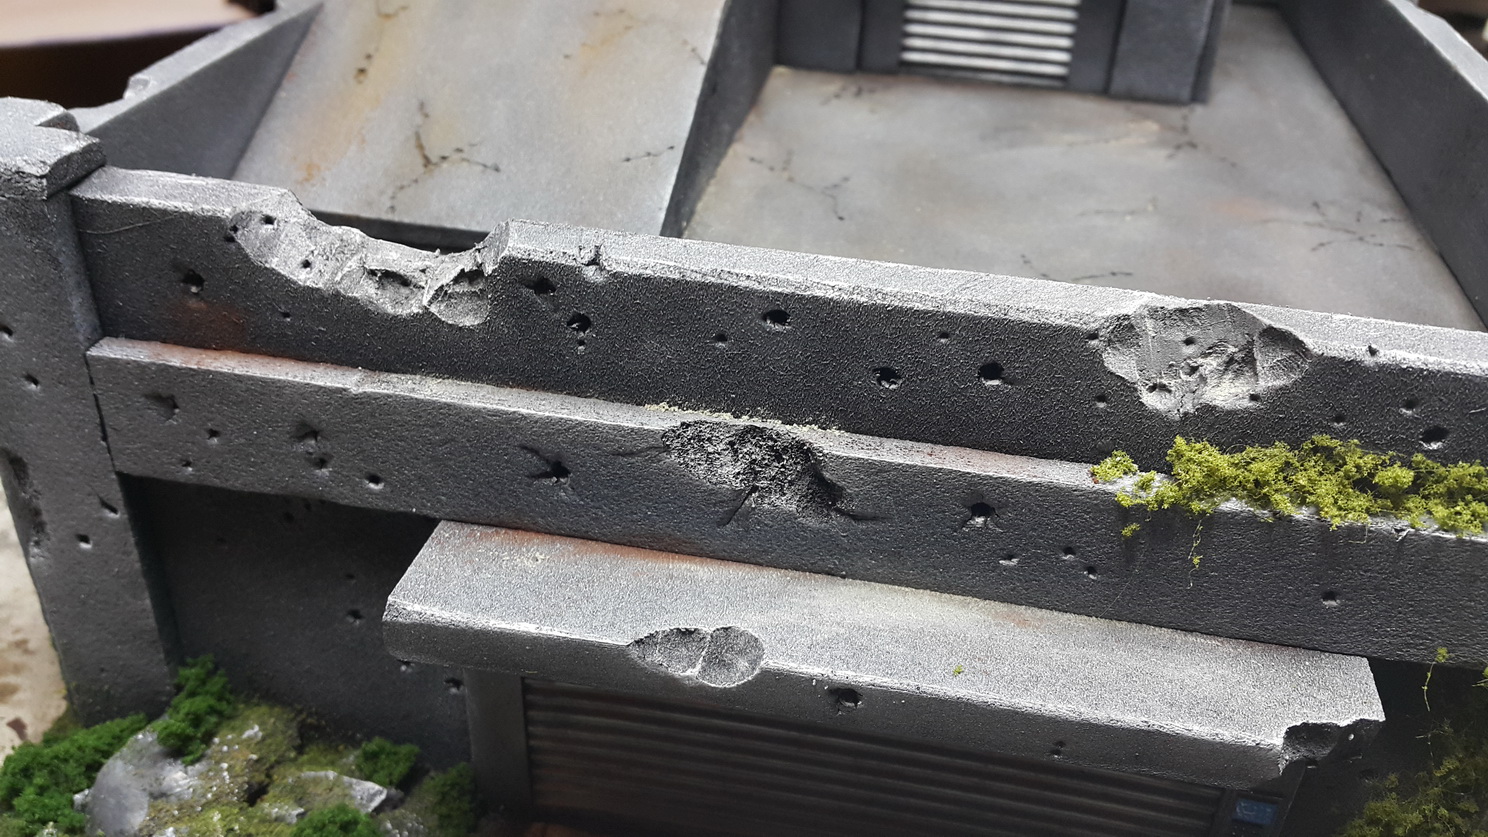
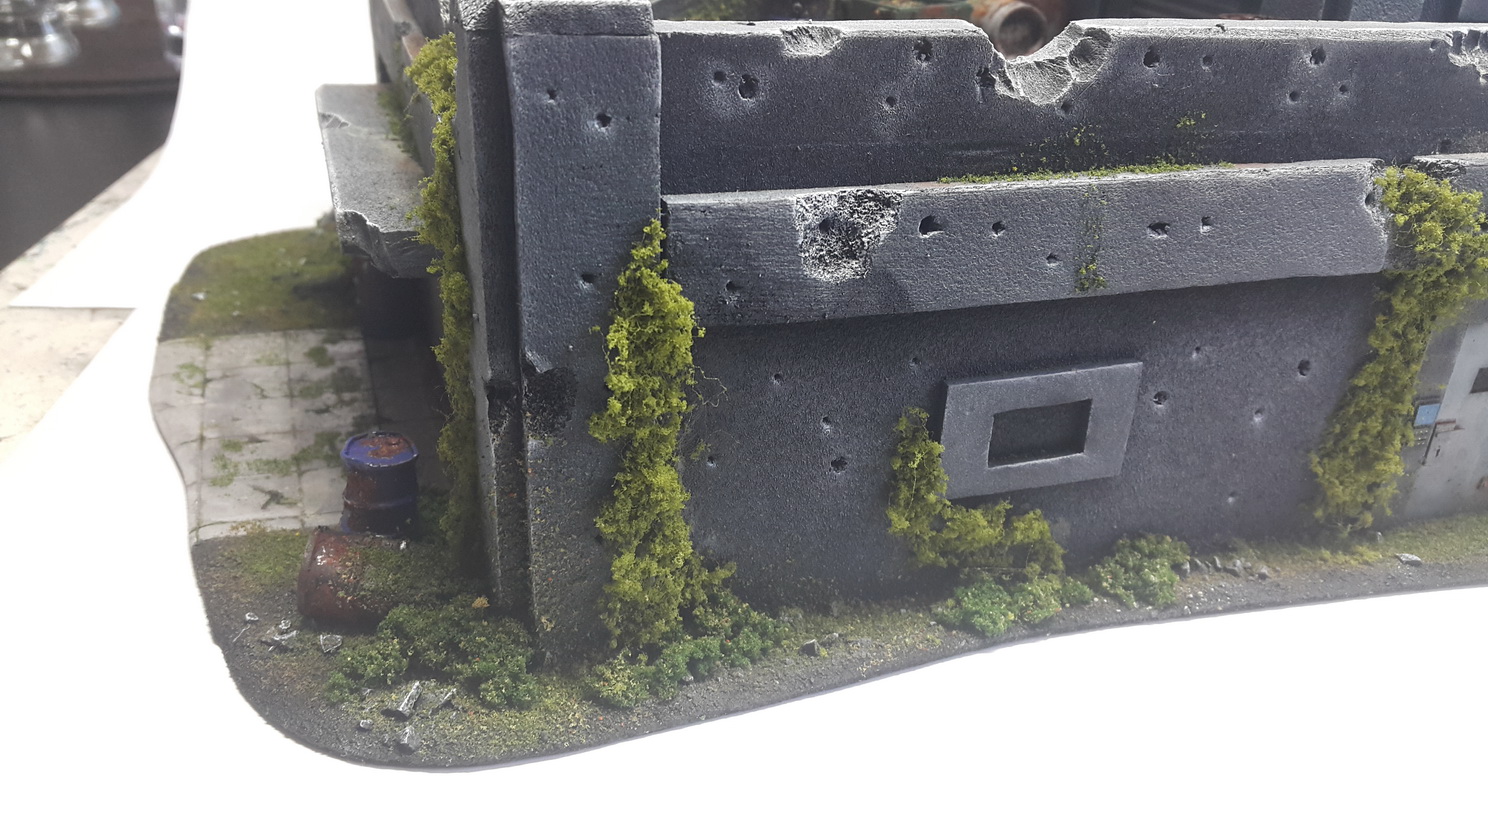
Time for some damages. With small screwdriver and bodkin (can be even pencil) I made holes from firing and ripped out small parts of the walls.
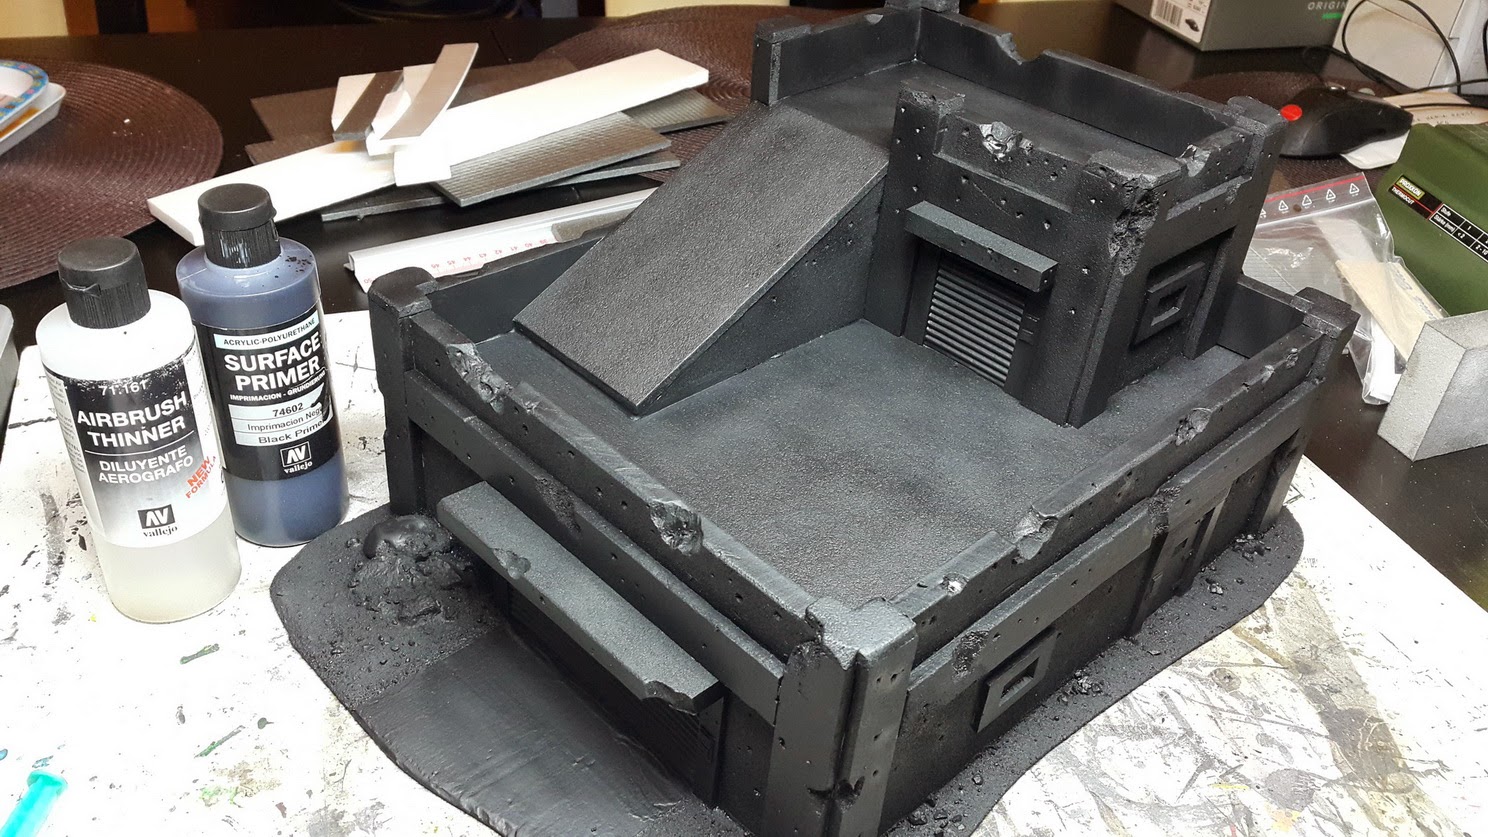
Lets get painting
At the beginning I painted all with cheap akrylik paint but due to the fact that Sturodur on some places is slip and paint didn't cower good so I had to make priming with airbrush with Vallejo Black Primer.
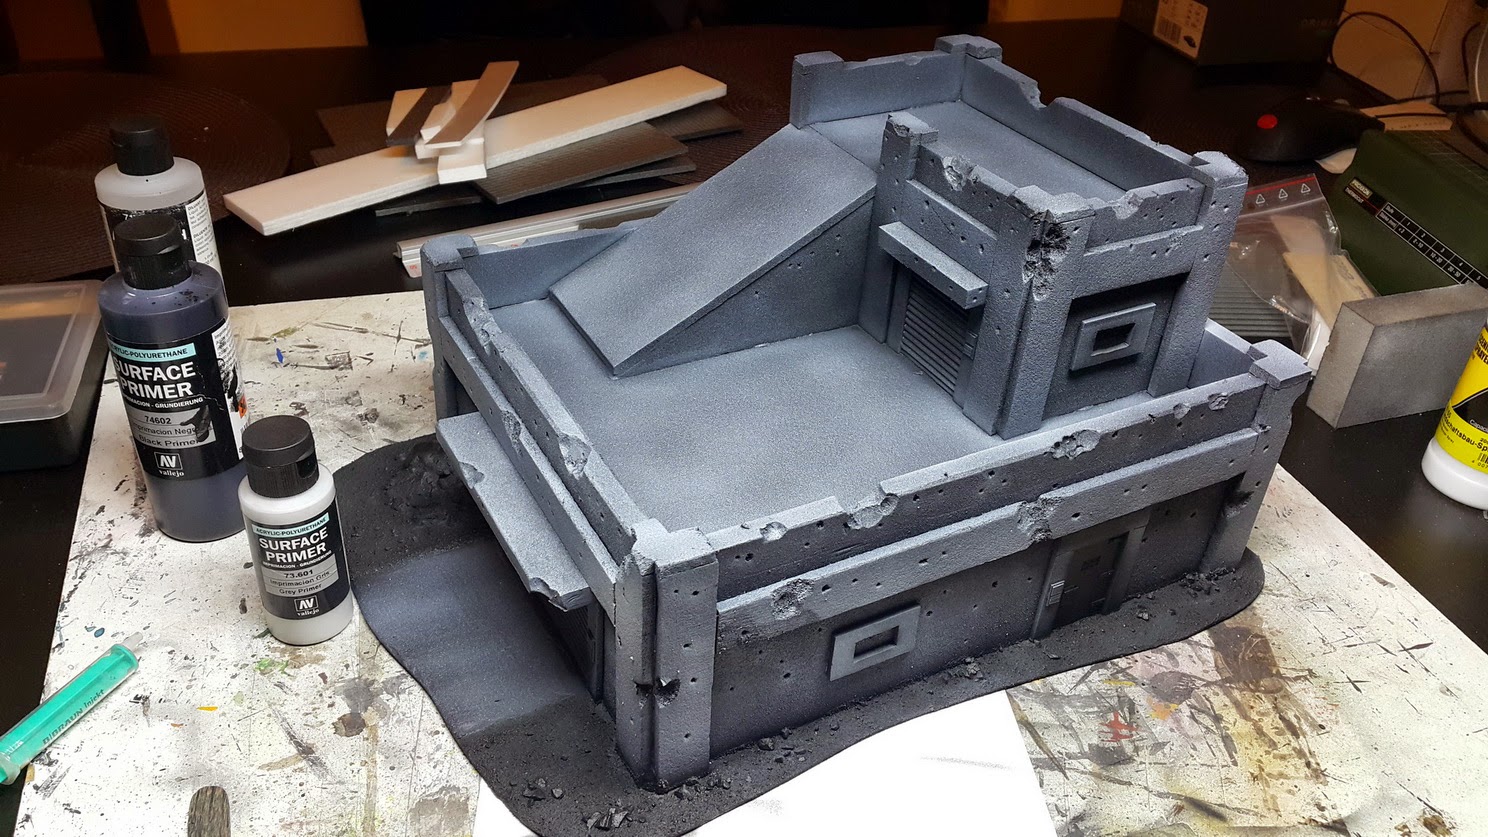
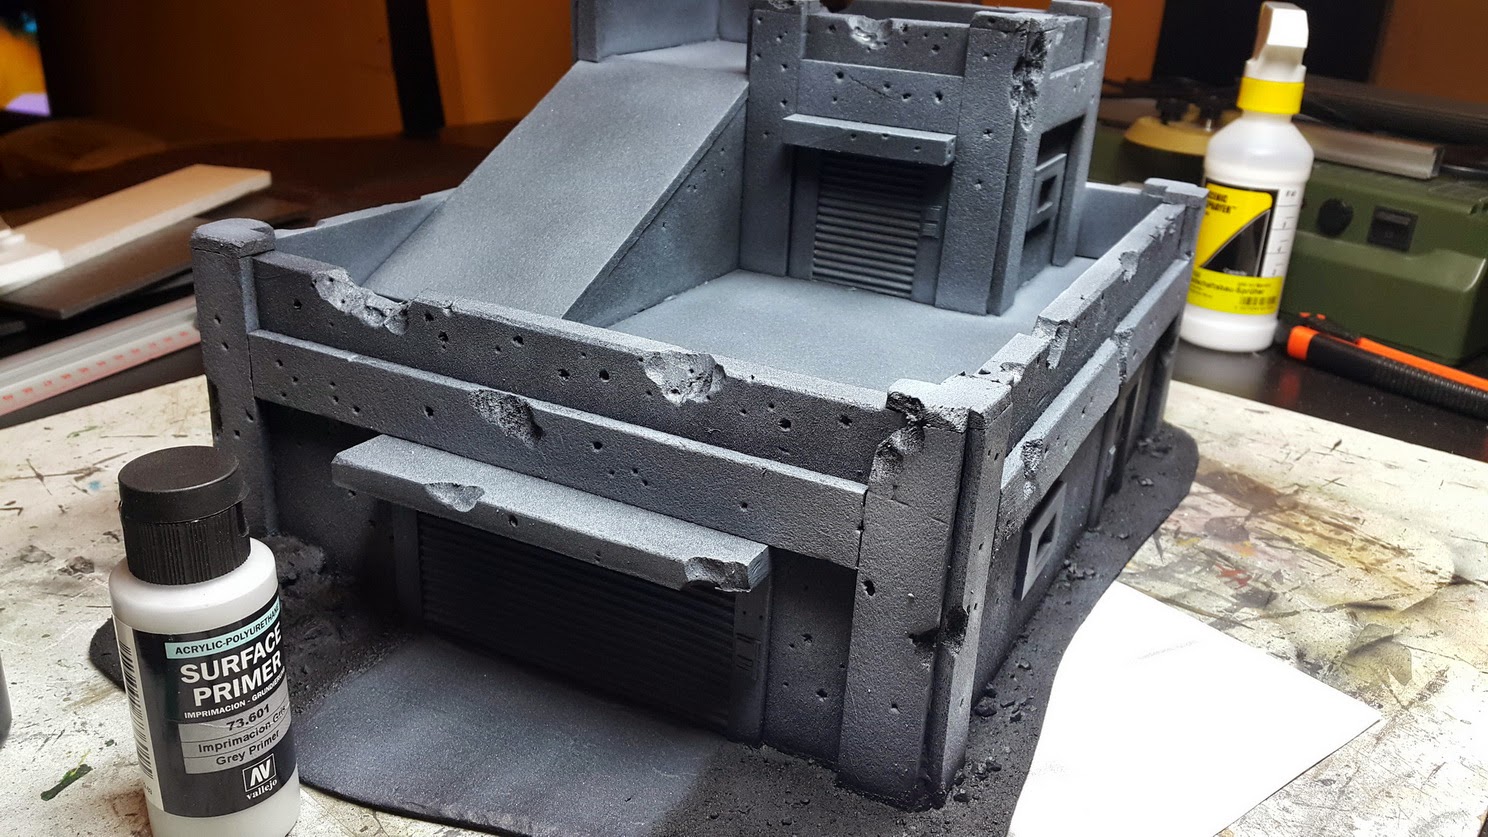
Next with Grey Primer I started slight lightings and shadings.
Brush to the hand - dry-brush with light grey and white on edges and some bigger gravel parts.
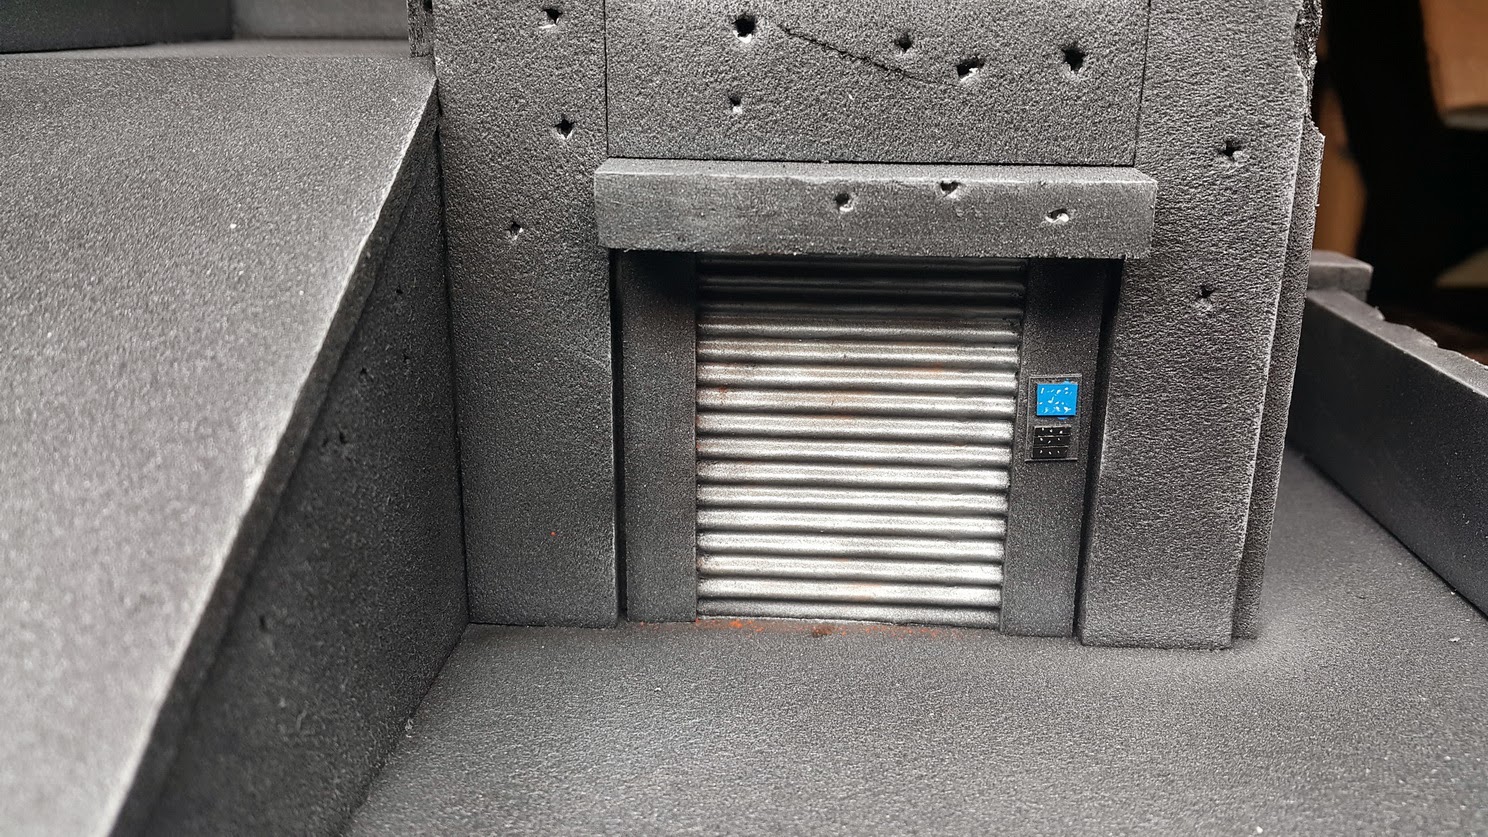
With airbrush I painter also gates and doors with steel.
Concrete slide was painted with Sky Grey.
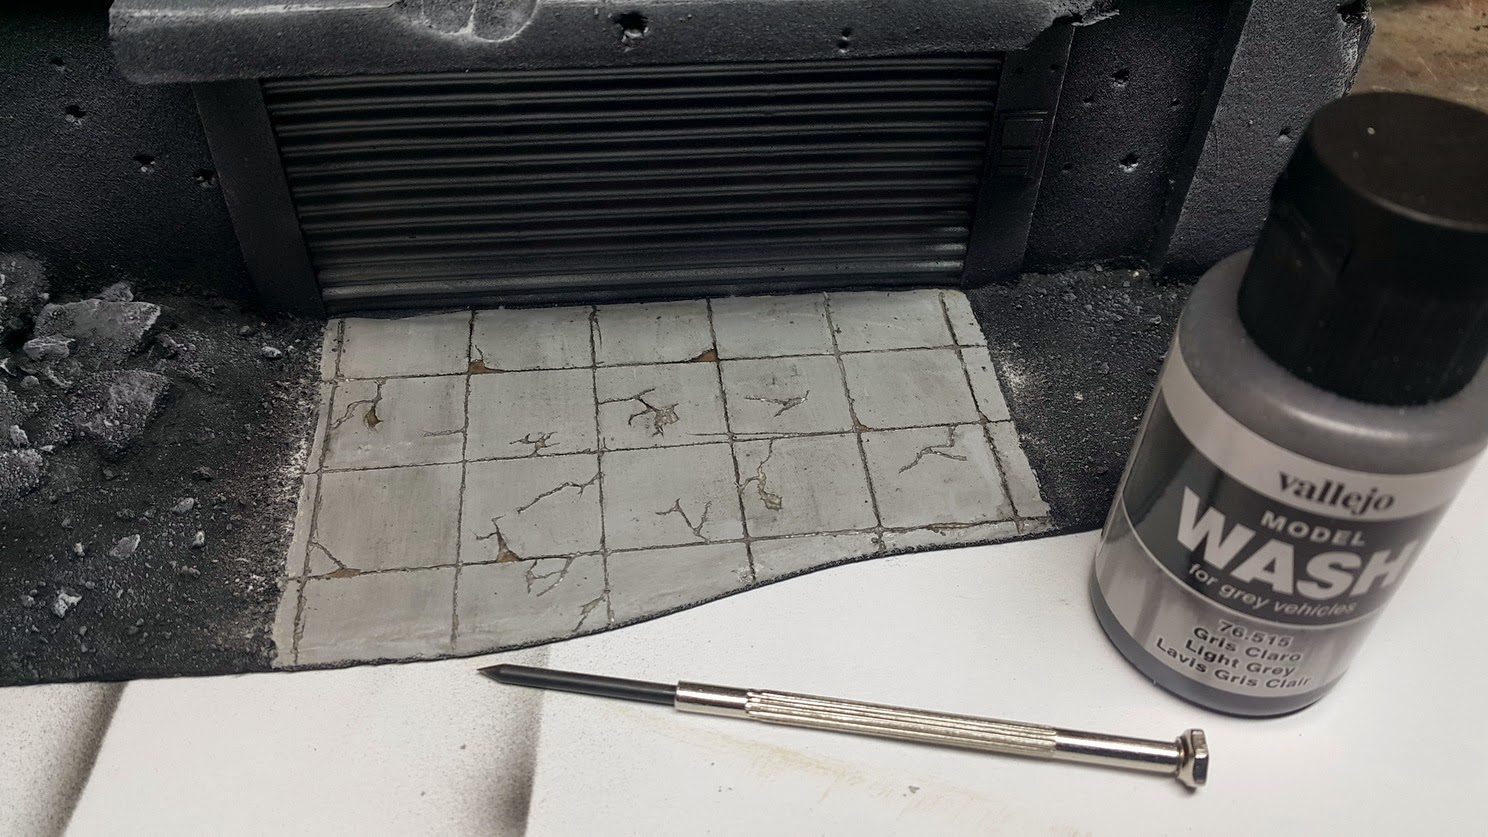
With bodkin I made lines and some damages. Here acrylic putty proved itself to be ideal so it will be ma future way of making concrete.
Light and Dark Grey washes and Oiled Ground put on the lines and cracks.
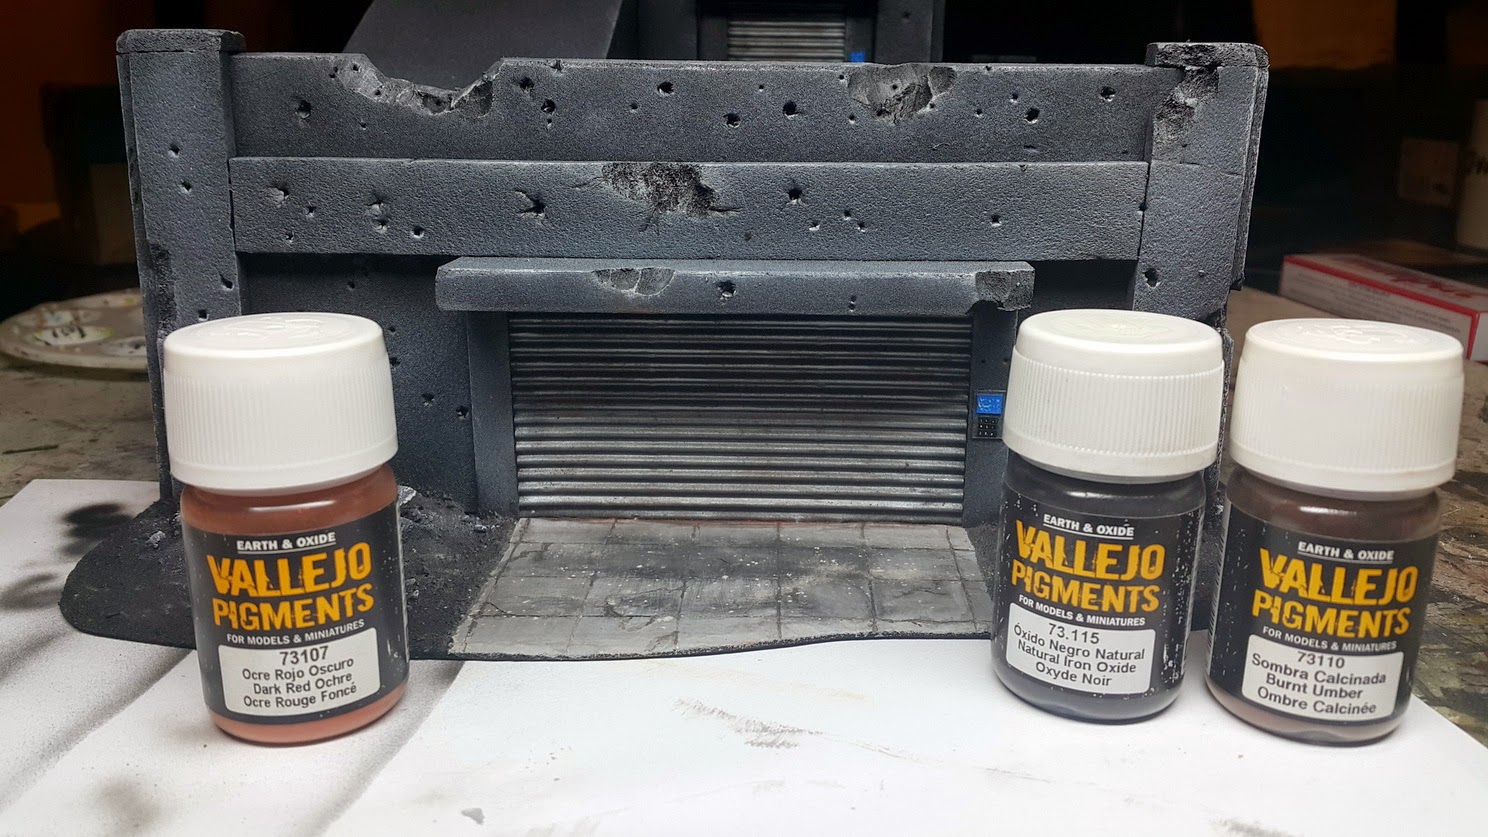
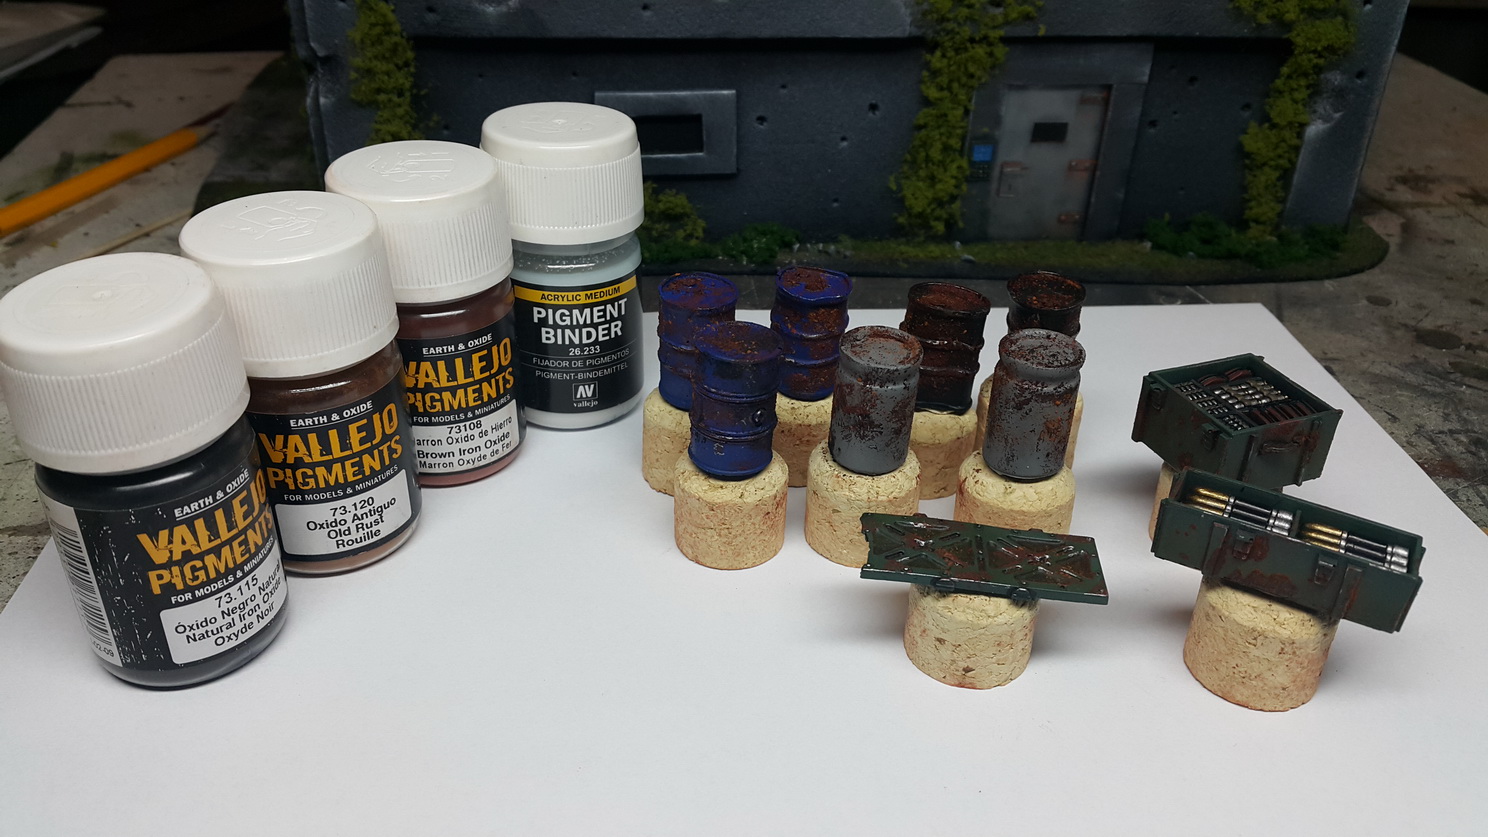
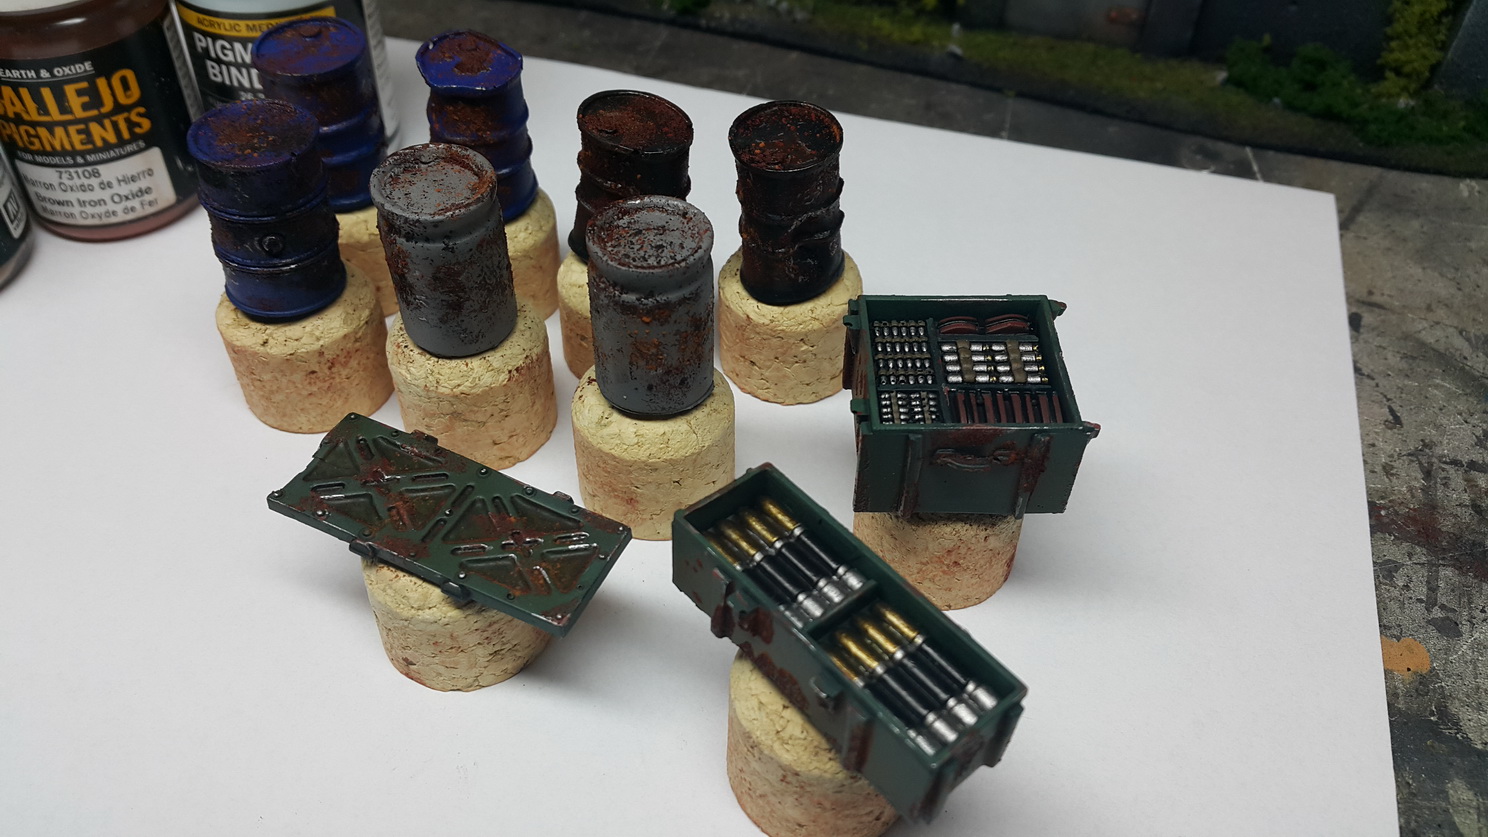
Time for pigments. I used rusty, burned umbra and Iron oxide (here was my mistake because after bushing it started to be glossy so had to mask it in next steps).
Both gates and doors were dry brushed with pigments.
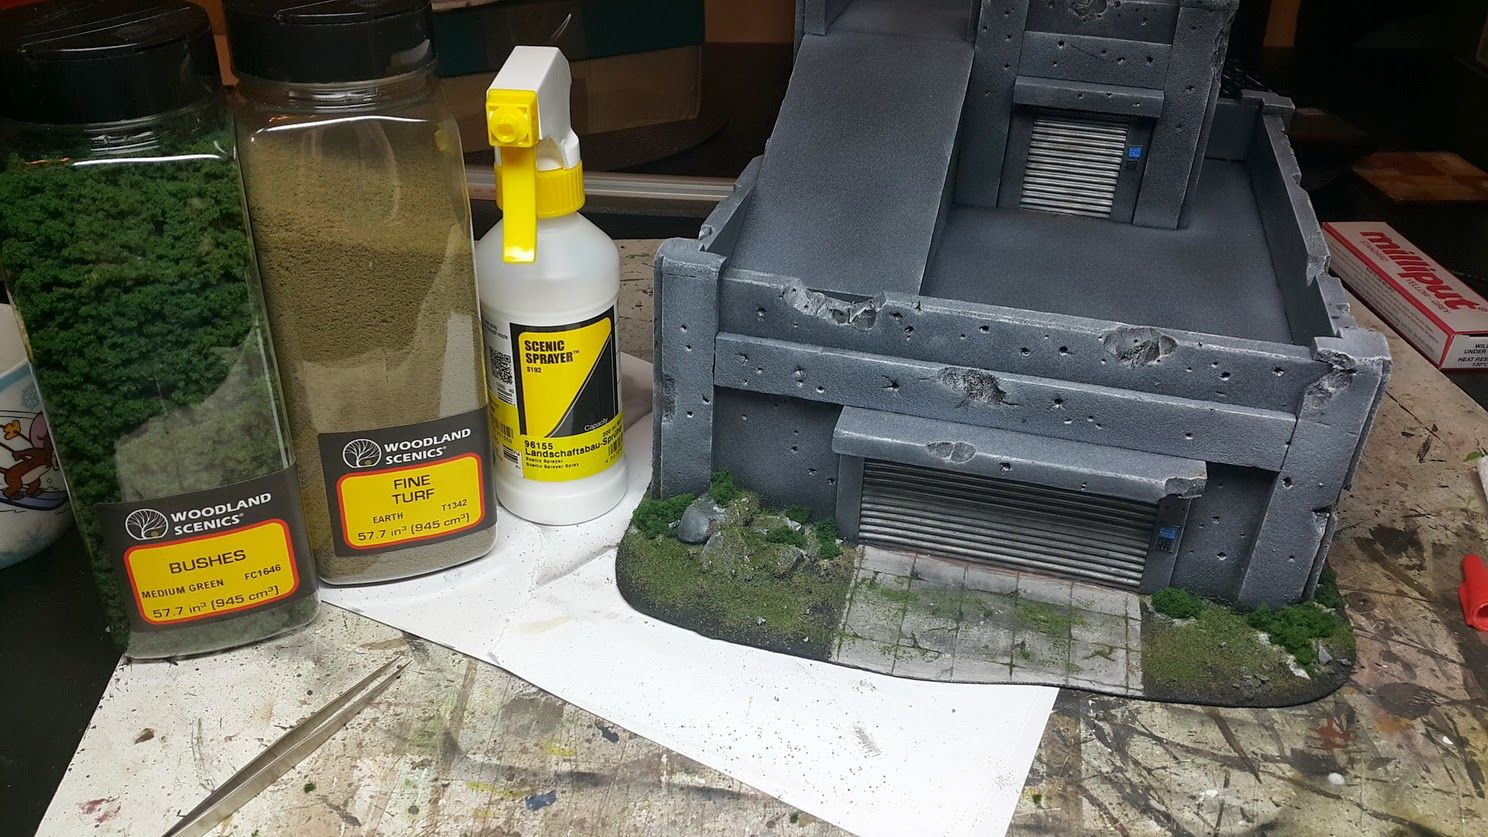
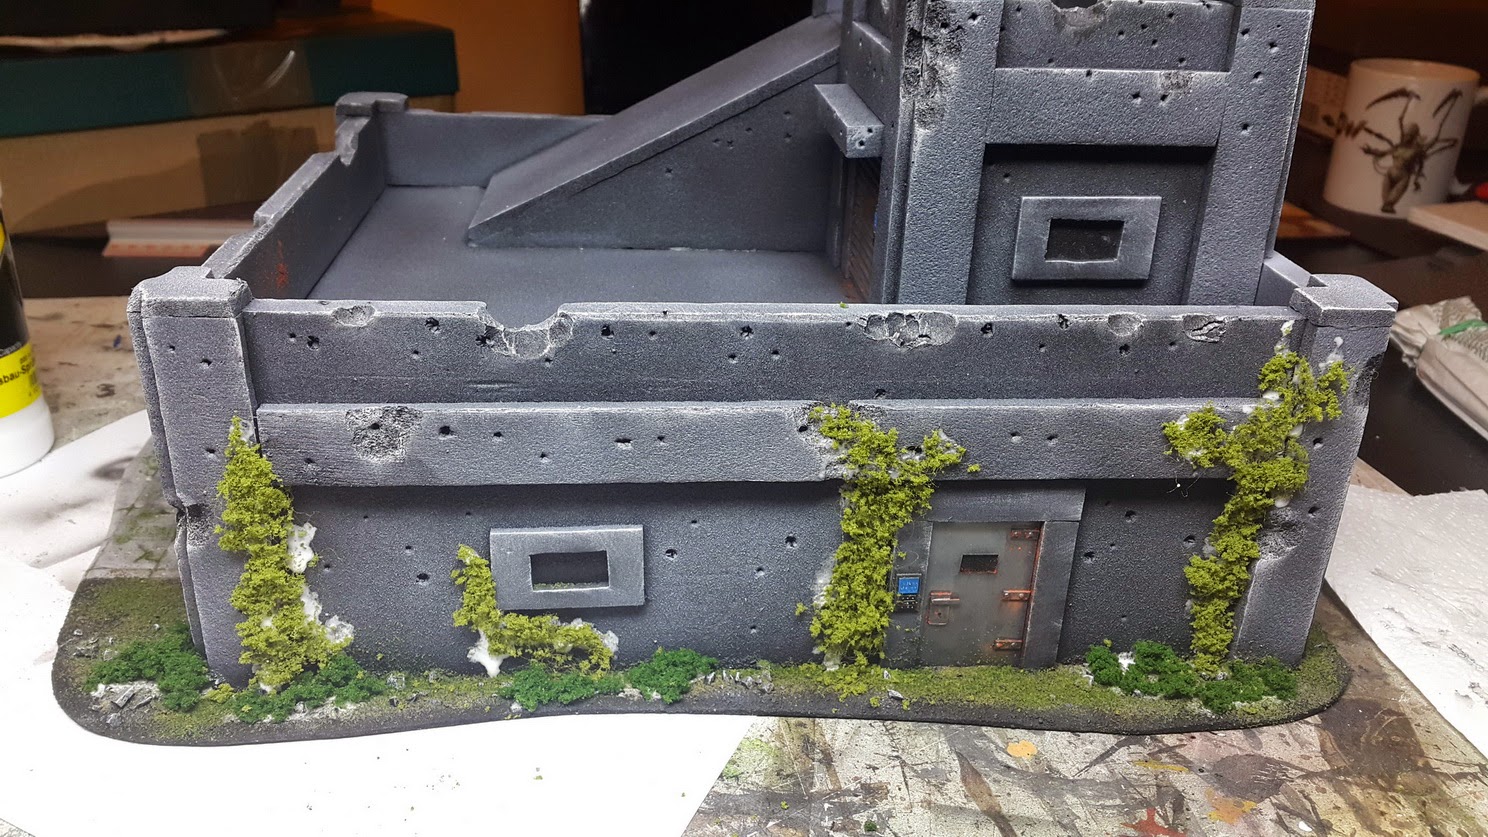
Time for first greens.
Recently I started to use material from Woodland Scenics and I'm very pleased.
Very easy application, lot of materials and great colours.
So lets start.
Scenic Cement (very smooth so ideal to go into gaps and great for application by sprayer). On that go Fine Turf: Earth and Fine Turf: Green Blend .
Next with the White Glue I put Bushes topping.
Time for walls. Again White Glue and Foliage. It's something like fabric and topping - You cut a part and ripped a little with fingers and then just glue to elements.
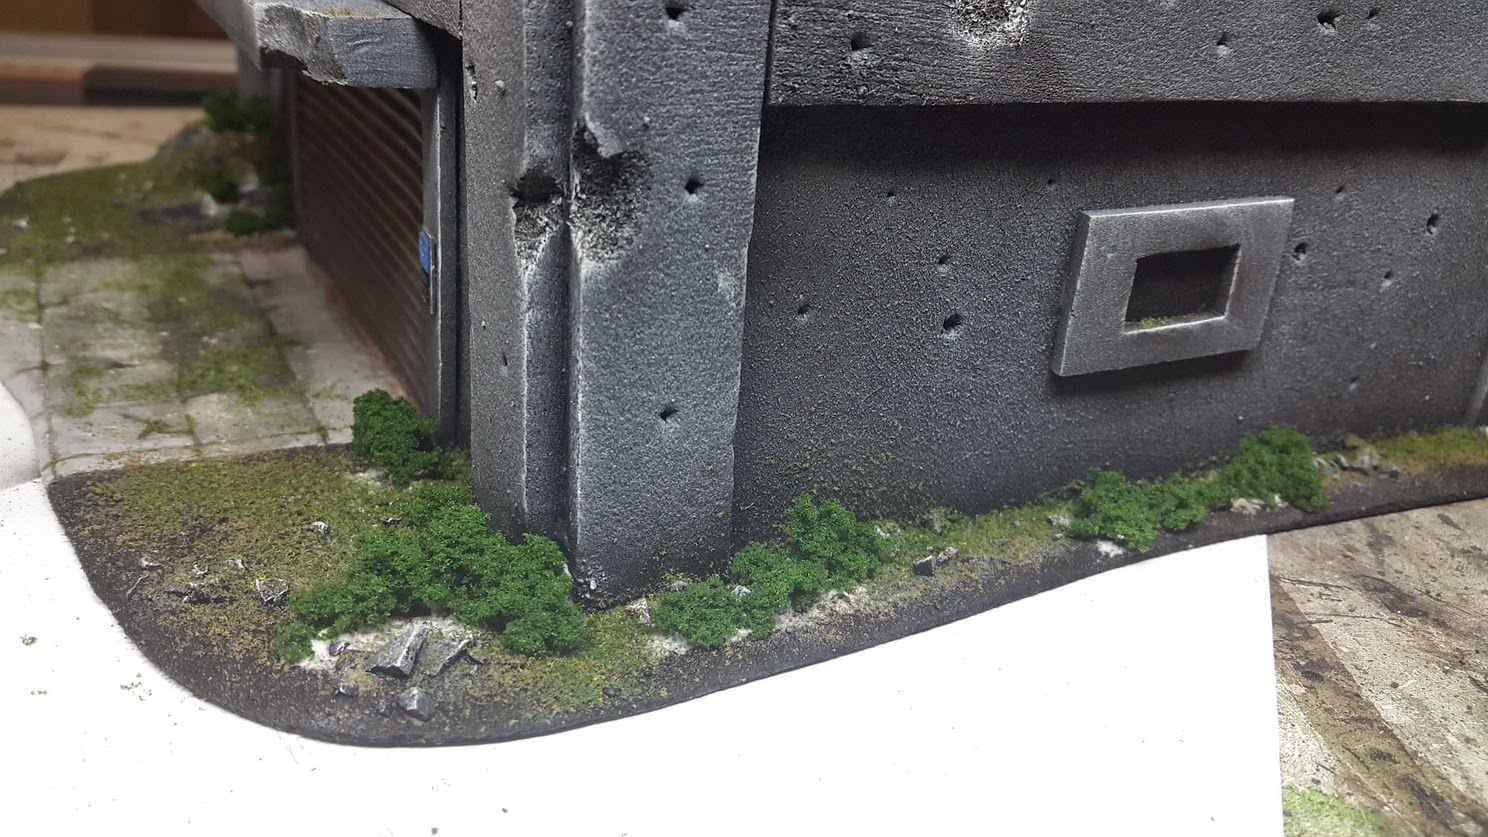
I used dry pigments applied with brush to add some shadings and colours on the upper levels and also on some parts of the walls.
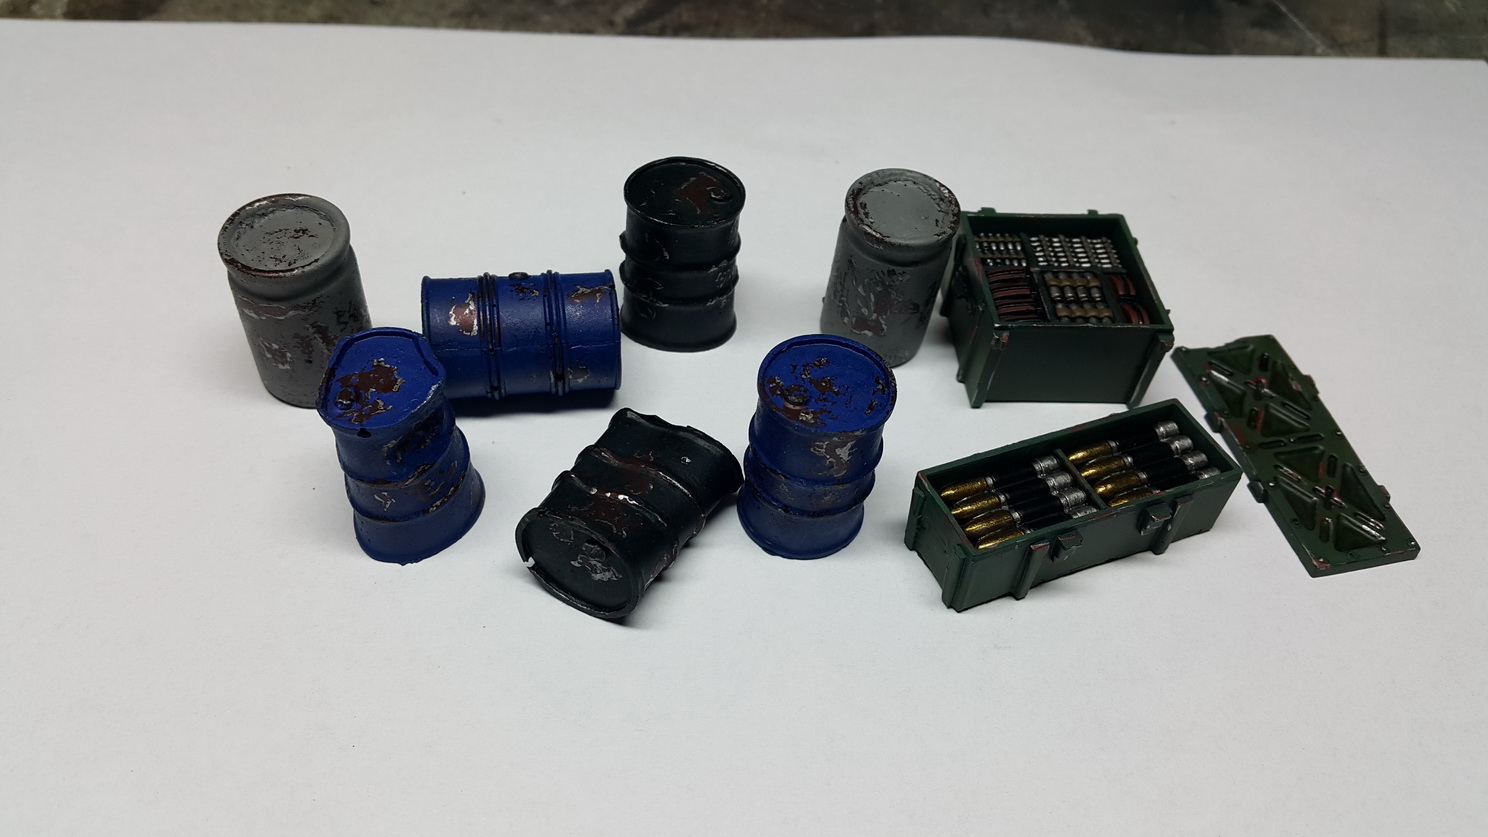
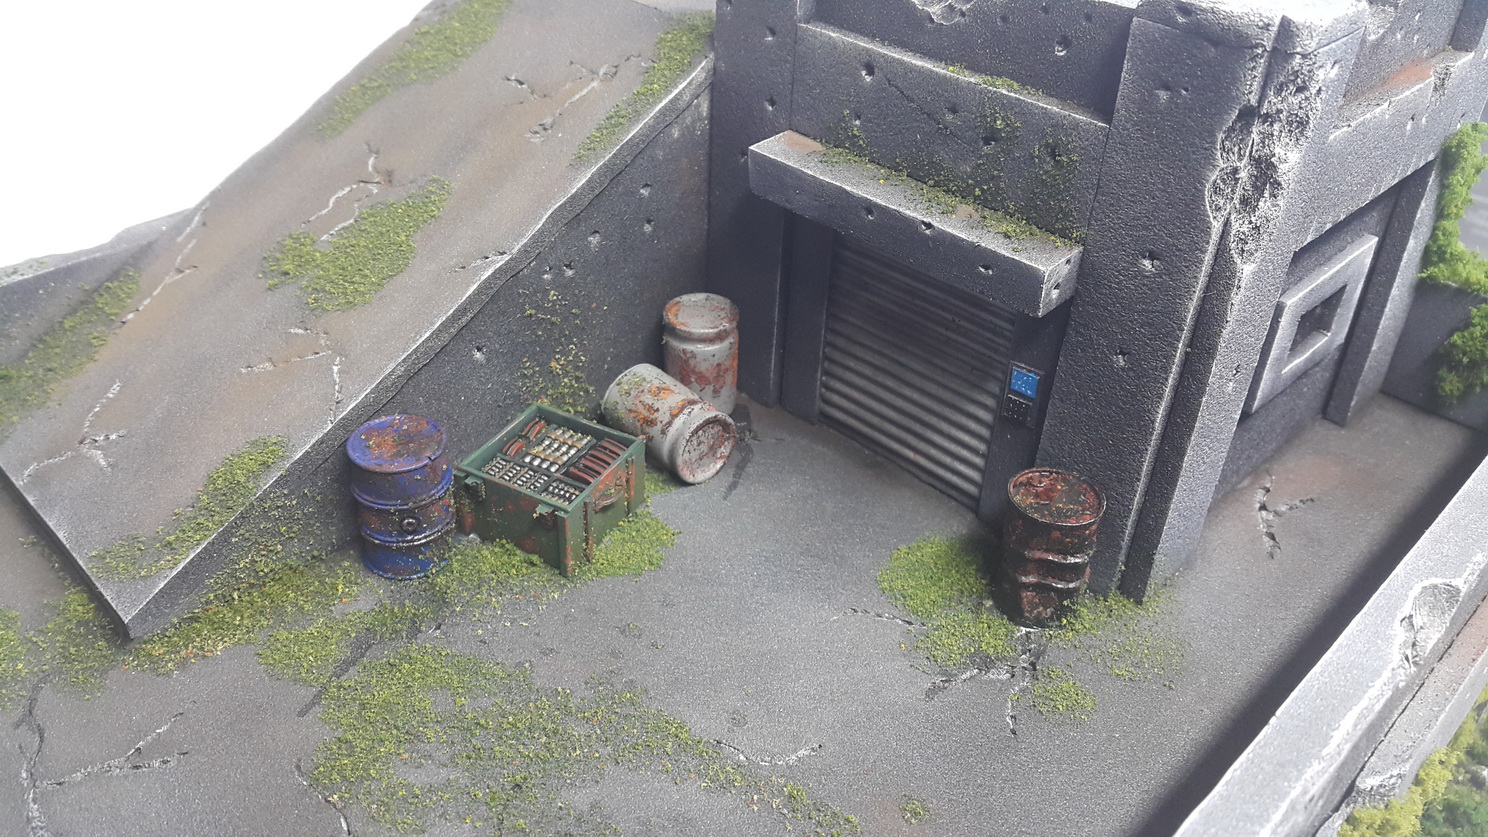
I wanted to make barrels and crates with scratches and rust so used Chipping Medium on previous airbrushed metallic layers and after Chipping Medium was dry completely main colours were put.
The same was done with ammo crates. Additionally I put washes on crates items.
And then toothpick and stiff brush + water to make scratches - effect below.
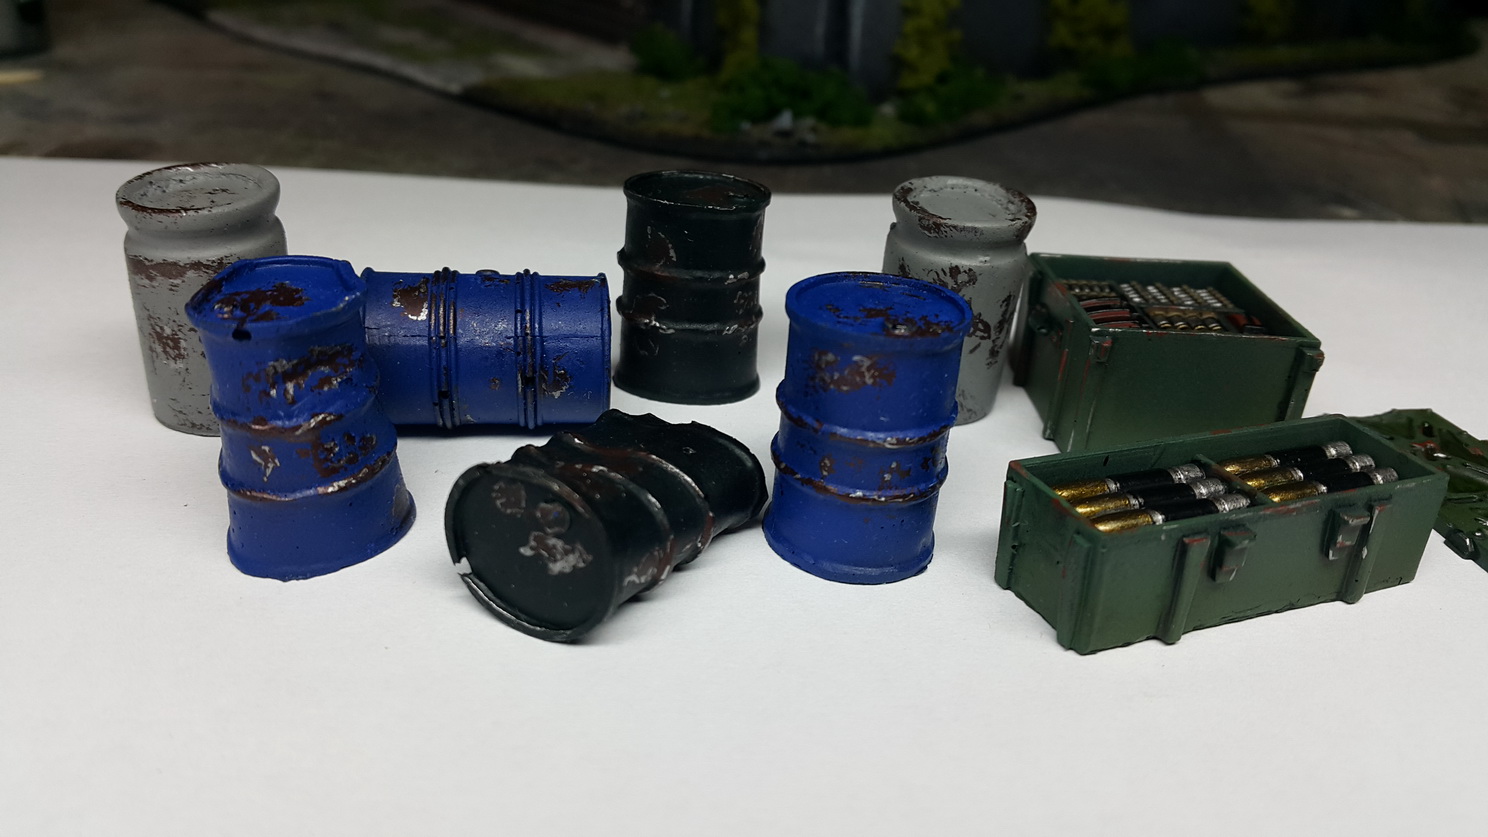
To improve corrosion effect I used pigments and Pigment Binder to make it solid. Here first I put Binder with brush on some spots and then showered whole element and then gently hitting on something take off the exes of pigments
I glued elements with White Glue.
Most of the Greens I sprayed again with Scenic Cement and applied Woodland Turf: Earth Blend and Green Blend. I applied also parts of walls and barrels to make the brushwood and on bushes to blend them better.
As you can see Turf was put also on Concrete elements to make it overgrown and old.
Sadly last pictures are not the best because the building is large (38x28x19 cm) that made problems while taking the pictures  Write do you like it and maybe give some ideas of new dioramas or Hot To tutorials.
Here's also list of some materials used plus links to producers (so you can see how they are making terrains) and to the shop were they're available (because Woodland Scenics is hard to get in my region)
Write do you like it and maybe give some ideas of new dioramas or Hot To tutorials.
Here's also list of some materials used plus links to producers (so you can see how they are making terrains) and to the shop were they're available (because Woodland Scenics is hard to get in my region)
List:
Woodland Scenics:
Foliage - Light Green & Medium Green
Turf: Fine Turf Eartf Blend & Green Blend
Bushes: Medium Green
Scenic Cement
Scenic Sprayer
Vallejo:
Black Primer
Grey Primer
Paints Model Color, Game Color, Game Air, Model Air
Other/ Różne:
Sturodur board
Depron board
MDF board
HIPS Plystyren sheet
White Glue
Acrylic Putty
Barrels and Ammo crates
Cheers
Kender
|
|
|
|
 |
|
2015/06/02 21:07:35
Subject: New HOW TO tutorial for Abadoned Workshop build from Paint Forge
|
|

Quick-fingered Warlord Moderatus
|
I will have to say, the greenery and the barrels, etc. really add to the life of the scenery piece. I've seen a lot of "just building", and they look so artificially lifeless. Great job on this!
|
Click here for my Swap Shop post - I'm buying stuff!
DR:90-S++G++M+B++I+Pw40kPbfg99#+D++A++/eWDR++T(T)DM+
 Black Legion/Iron Warriors/Night Lords Black Legion/Iron Warriors/Night Lords  Inquisitorial Friends & Co. (Inq, GK, Elysians, Assassins) Inquisitorial Friends & Co. (Inq, GK, Elysians, Assassins)  Elysian Droptroops, soon-to-add Armored Battlegroup Elysian Droptroops, soon-to-add Armored Battlegroup  Adeptus Mechanicus Forge World Lucius Adeptus Mechanicus Forge World Lucius
 |
|
|
|
|
2015/06/02 21:26:36
Subject: New HOW TO tutorial for Abadoned Workshop build from Paint Forge
|
|

Sneaky Striking Scorpion
|
Its great. The effort you put into all the details makes the piece shine.
One tip. I think cork dust is better than sand, as it won't scratch models that get knocked over. You can get big bags of cork dust cheap: its used to makes floats for fishing.
|
|
|
|
|
2015/06/04 19:02:08
Subject: New HOW TO tutorial for Abadoned Workshop build from Paint Forge
|
|
One Canoptek Scarab in a Swarm
|
 ColonelFazackerley wrote: ColonelFazackerley wrote:Its great. The effort you put into all the details makes the piece shine.
One tip. I think cork dust is better than sand, as it won't scratch models that get knocked over. You can get big bags of cork dust cheap: its used to makes floats for fishing.
Have to look for this cork dust and try.
For the sand to use at this diorama there is almost no scary to scratch models because all area is also covered with Turf which is elastic and will protect models.
|
|
|
|
|
|
2015/06/08 14:11:33
Subject: New HOW TO tutorial for Abadoned Workshop build from Paint Forge
|
|

Incorporating Wet-Blending
|
Looks great! From a modeling perspective, just remember that those cracks tend to accumulate dirt and vegetation loves to grow in them as opposed to a flat surface. Of course then you are covering up your lovely cracks.....
|
-James
|
|
|
|
|
2015/06/23 23:21:24
Subject: New HOW TO tutorial for Abadoned Workshop build from Paint Forge
|
|
Gargantuan Gargant
|
Great project !
The attention to the little details really make it stand out.
|
|
|
|
|
|
2015/06/26 08:29:52
Subject: New HOW TO tutorial for Abadoned Workshop build from Paint Forge
|
|

Regular Dakkanaut
Czech Republic
|
Fantastic work on this one...
|
|
|
|
|
|
2015/06/26 09:31:23
Subject: New HOW TO tutorial for Abadoned Workshop build from Paint Forge
|
|

Shroomin Brain Boy
|
very good looking work there! and even better to have such an in-depth step by step!!!
|
|
|
|
|
|
|
|