| Author |
Message |
 |
|
|
|
|
Advert
|
Forum adverts like this one are shown to any user who is not logged in. Join us by filling out a tiny 3 field form and you will get your own, free, dakka user account which gives a good range of benefits to you:
- No adverts like this in the forums anymore.
- Times and dates in your local timezone.
- Full tracking of what you have read so you can skip to your first unread post, easily see what has changed since you last logged in, and easily see what is new at a glance.
- Email notifications for threads you want to watch closely.
- Being a part of the oldest wargaming community on the net.
If you are already a member then feel free to login now. |
|
 |
2016/04/05 17:56:40
Subject: Scenery, Tablescape, Zone Mortalis and more - finished
|
|

Lord of the Fleet
|
|
|
This message was edited 38 times. Last update was at 2017/08/01 20:03:26
|
|
|
 |
|
2016/04/05 18:06:50
Subject: Re:Scenery and Tablescape Boards
|
|

Preacher of the Emperor
|
Jealous! I'd need a bigger space and a bigger budget, but this looks like a great table coming together. I'm basing my current army for a ruined cityscape with a board like this in mind, so I'll be watching this one!
|
|
|
|
|
|
2016/04/05 20:53:39
Subject: Scenery and Tablescape Boards
|
|
Lord of the Fleet
|
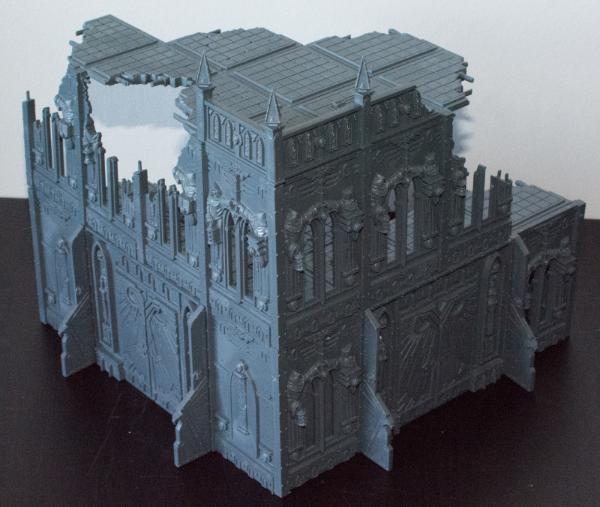
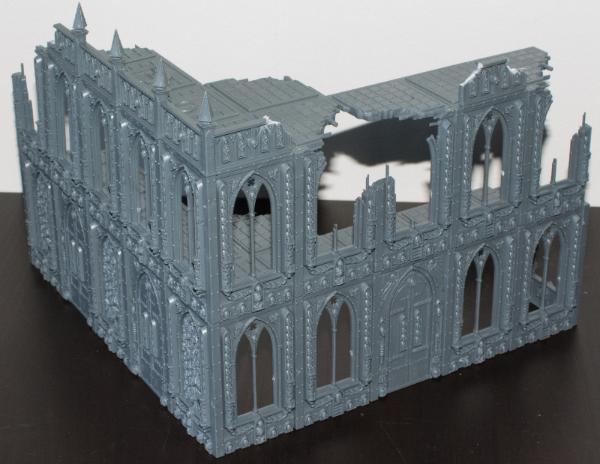
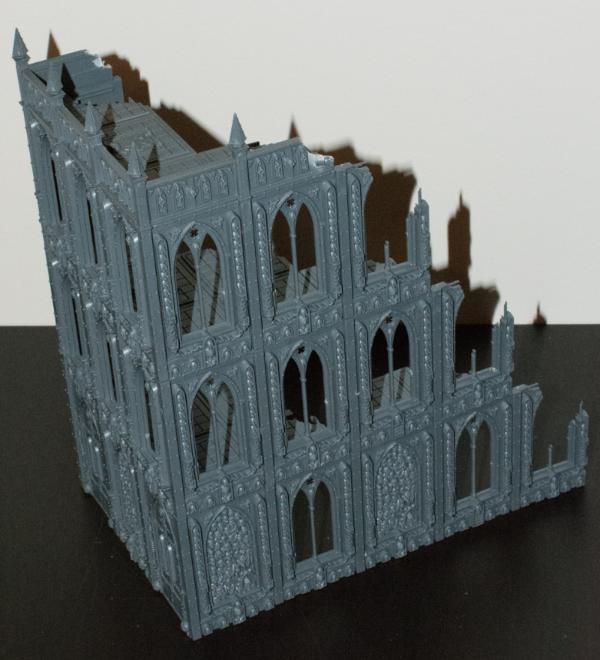
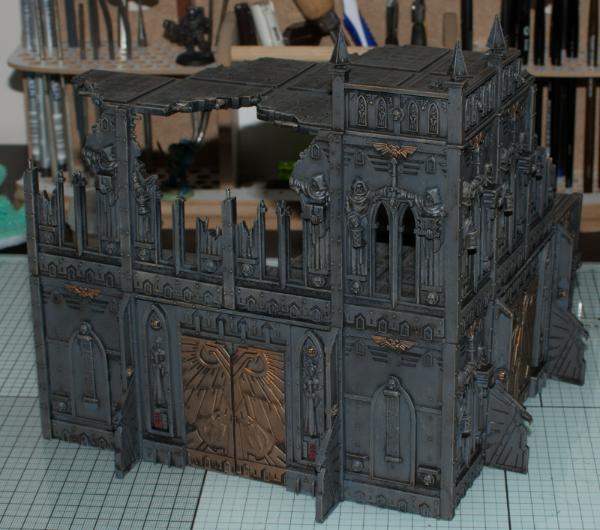
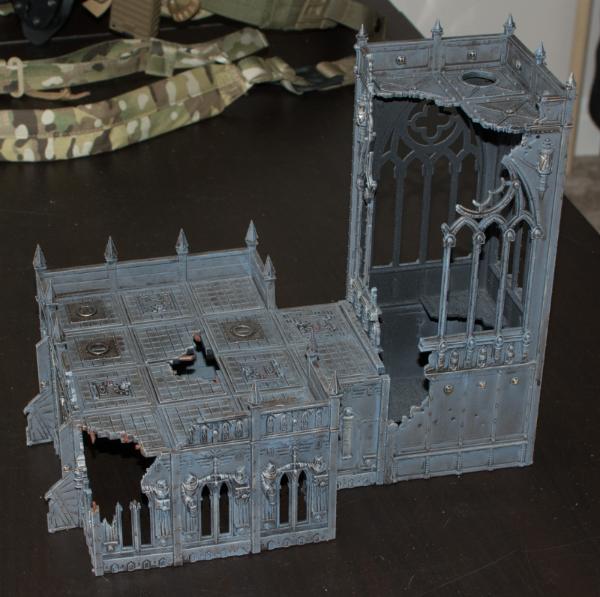
It's going to move pretty fast!
Here's a couple of ruins using the sanctum sprues:
|
|
|
|
|
2016/04/06 19:23:44
Subject: Scenery and Tablescape Boards
|
|
Lord of the Fleet
|
Basilisca:
Sanctum & SotA:
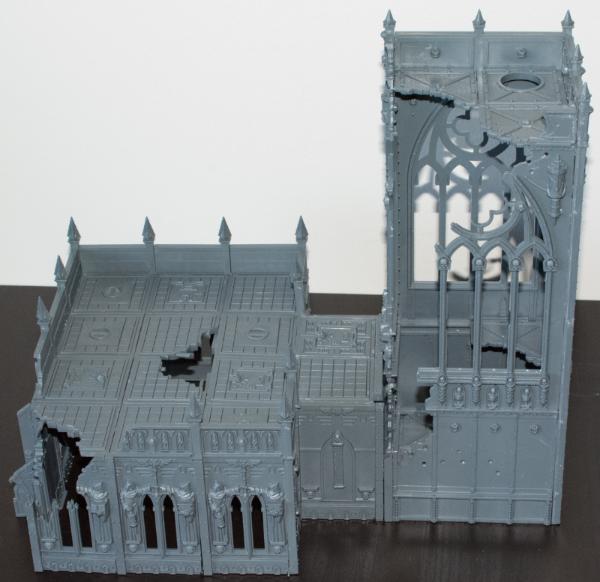
Basilisca & SotA:
|
|
This message was edited 1 time. Last update was at 2016/04/06 19:23:57
|
|
|
|
|
2016/04/08 21:30:18
Subject: Scenery and Tablescape Boards
|
|
Lord of the Fleet
|
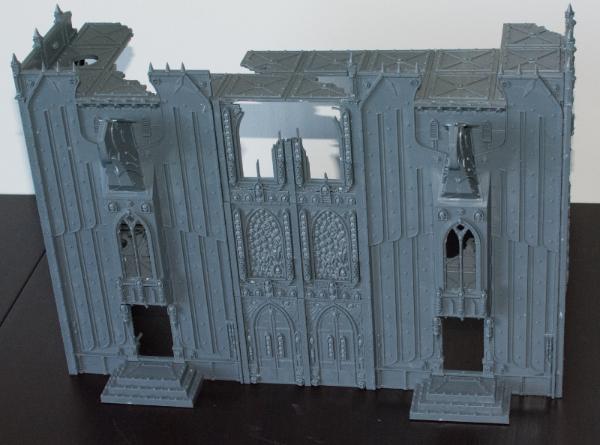
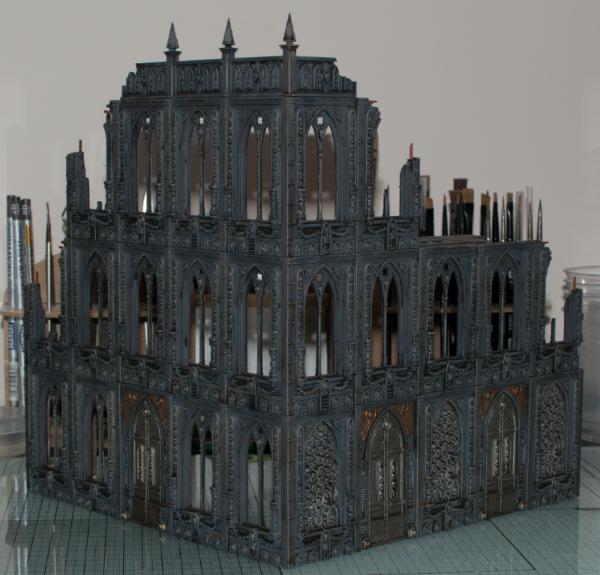
Basilisca:
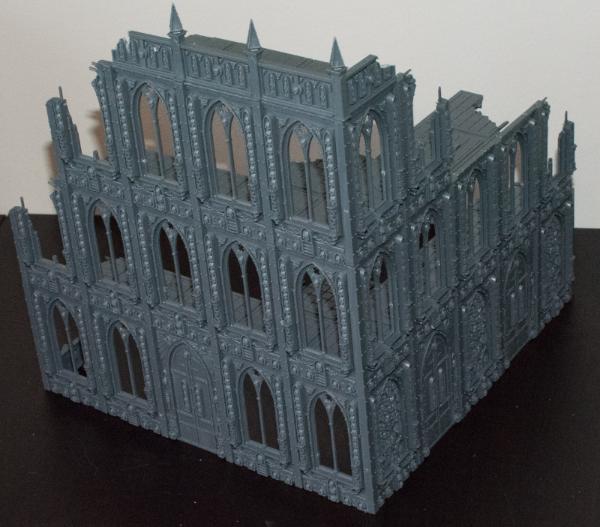
Basilisca, Sanctum & SotA
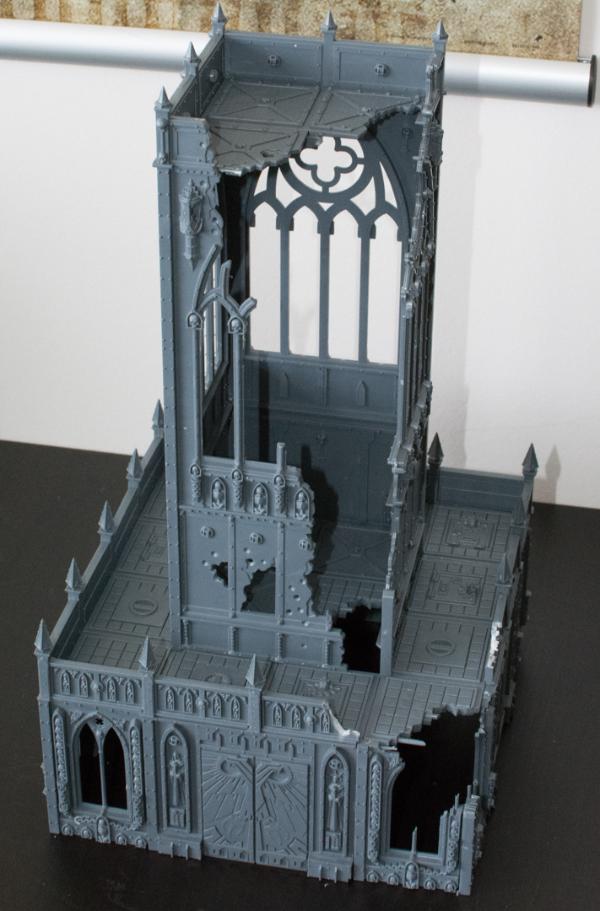
That's all of the ruins assembled. Just the statue to put together and then painting can start.
|
|
|
|
|
2016/04/08 21:40:49
Subject: Scenery and Tablescape Boards
|
|

Pustulating Plague Priest
|
Did you plan out the buildings before assembly? Or just put them together as you went?
I ask because I'm just not sure where to start with mine, I've had them for years, still unassembled.
|
There’s a difference between having a hobby and being a narcissist. |
|
|
|
|
2016/04/08 21:44:33
Subject: Scenery and Tablescape Boards
|
|
Loyal Necron Lychguard
|
Looks great! Myself, I'd board up some of the ground floor windows to block more line of sight, but that's me.
Excited to follow this project!
|
|
|
|
|
|
2016/04/08 21:53:26
Subject: Scenery and Tablescape Boards
|
|
Lord of the Fleet
|
Joyboozer wrote:Did you plan out the buildings before assembly? Or just put them together as you went?
I ask because I'm just not sure where to start with mine, I've had them for years, still unassembled.
This makes five imperial sector boxes that I've built. You've got to have at least a rough plan to make sure you don't run out of floor pieces. Also, do remember that the more intact the building is the more wall pieces it'll use. It's very easy to use up a lot of your walls building a more intact building so decide beforehand how many buildings you want and roughly how large you want them to be. Most of these ruins took around three wall sprues and 1.5-2 floor sprues.
Automatically Appended Next Post:
 Anpu-adom wrote: Anpu-adom wrote:Looks great! Myself, I'd board up some of the ground floor windows to block more line of sight, but that's me.
Excited to follow this project!
Thanks! I generally play that ruins can be shot into/out of but not shot through so it's not as important. A lot of the ground floor walls are the blocked pieces though and every ruin has at least one solid wall on the ground floor.
|
|
This message was edited 3 times. Last update was at 2016/04/12 17:29:12
|
|
|
|
|
2016/04/09 22:30:19
Subject: Scenery and Tablescape Boards
|
|
Lord of the Fleet
|
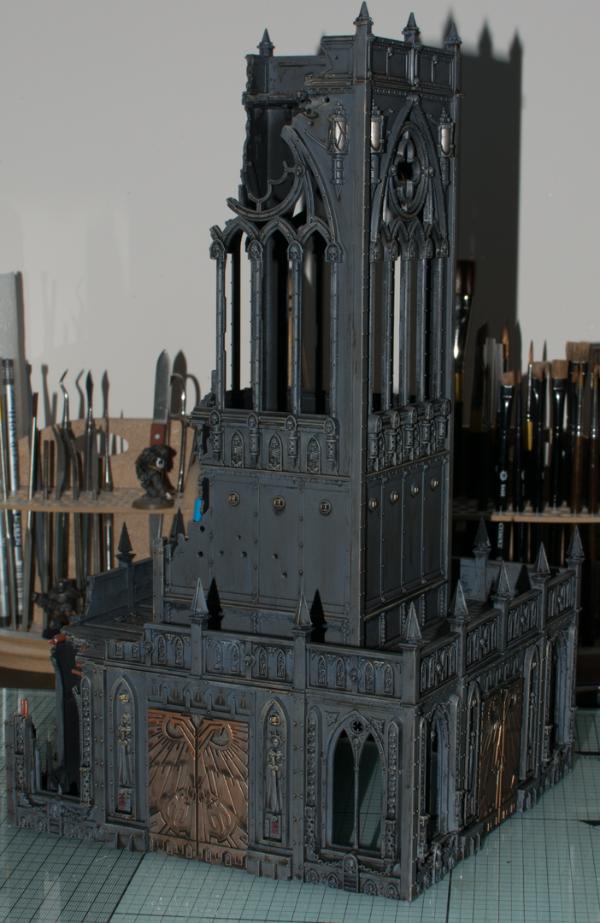
Statue
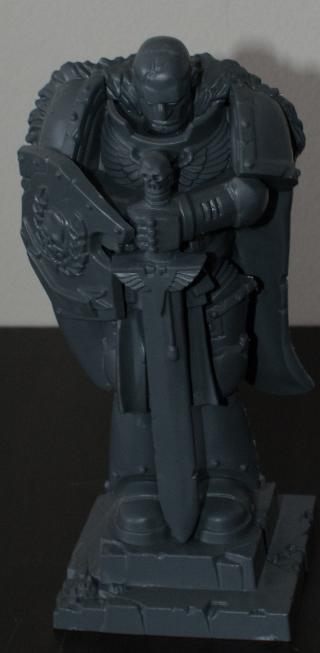
That's all of the assembly done for phase 1, painting to commence shortly.
|
|
|
|
|
2016/04/12 17:26:33
Subject: Scenery and Tablescape Boards
|
|
Lord of the Fleet
|
|
|
This message was edited 2 times. Last update was at 2016/04/12 17:53:07
|
|
|
|
|
2016/04/13 06:15:15
Subject: Scenery and Tablescape Boards
|
|
Ragin' Ork Dreadnought
|
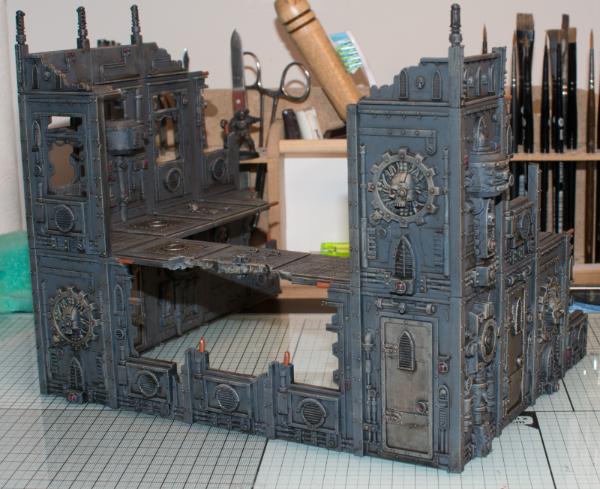
I like the worn look of the interior walls.
|
|
|
|
|
|
2016/04/13 07:07:22
Subject: Scenery and Tablescape Boards
|
|

Sure Shot Scarecrow Sniper
|
Looks great! Is it one colour and a wash for the process?
|
|
|
|
|
|
2016/04/13 08:34:01
Subject: Scenery and Tablescape Boards
|
|
Lord of the Fleet
|
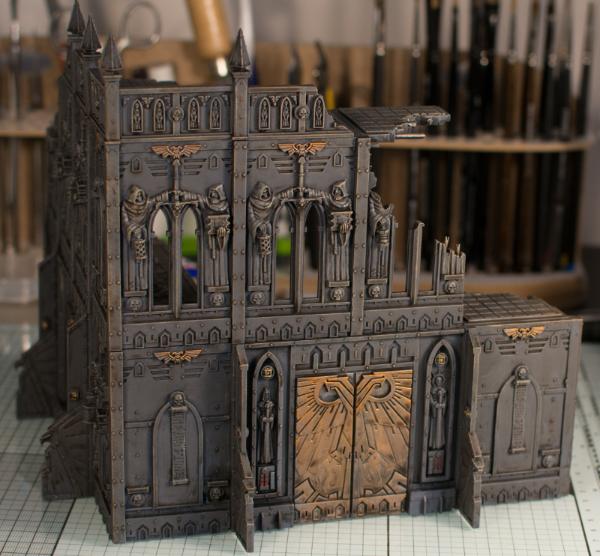
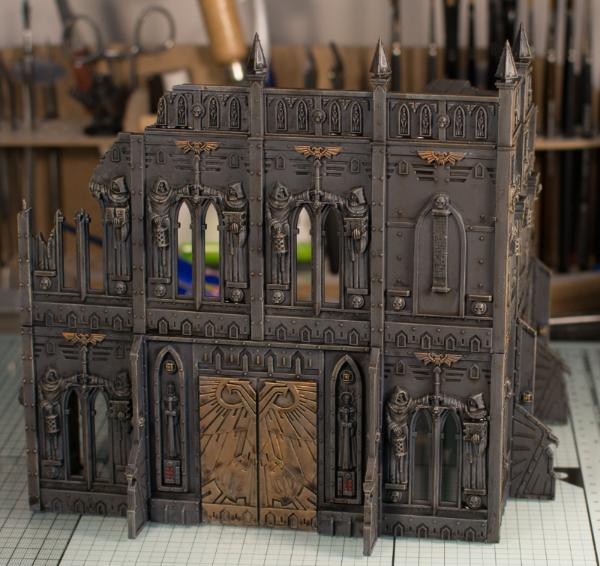
Mechanicum standard grey + drybrush of Kazak stone + details + agrax wash for the exterior.
Zandri dust + sponge of mechanicum grey + details + agrax for the interior.
Quick and easily repeatable.
I was planning on using the army painter quickshadefor the wash (cheap and protective) but I tried it on a test piece and didn't like it all. I'm going need about 5 of the large bottle of agrax...
|
|
This message was edited 1 time. Last update was at 2016/04/13 08:36:09
|
|
|
|
|
2016/04/16 12:44:42
Subject: Re:Scenery and Tablescape Boards
|
|
Preacher of the Emperor
|
Those terrain boards are great, but could you store them in stacks without damaging the paint and texture? I don't have a permanent table right now, but after seeing the blog I keep going back to their website. Are the shipping boxes something could be used to store and transport the tiles?
Looking good!
|
|
|
|
|
|
2016/04/16 16:43:33
Subject: Scenery and Tablescape Boards
|
|
Lord of the Fleet
|
I'm still figuring out how to store the tiles. The boxes hold the tiles on their edges which will make it very easy to damage them when pulling them out.
I need to make some kind of tray that they slot into. Next best thing would be something that I can stack them in with a separator. Looking for a box or tray that's about the right size that I can modify before I go and fabricate something from scratch.
|
|
|
|
|
2016/04/17 20:25:26
Subject: Scenery and Tablescape Boards
|
|
Lord of the Fleet
|
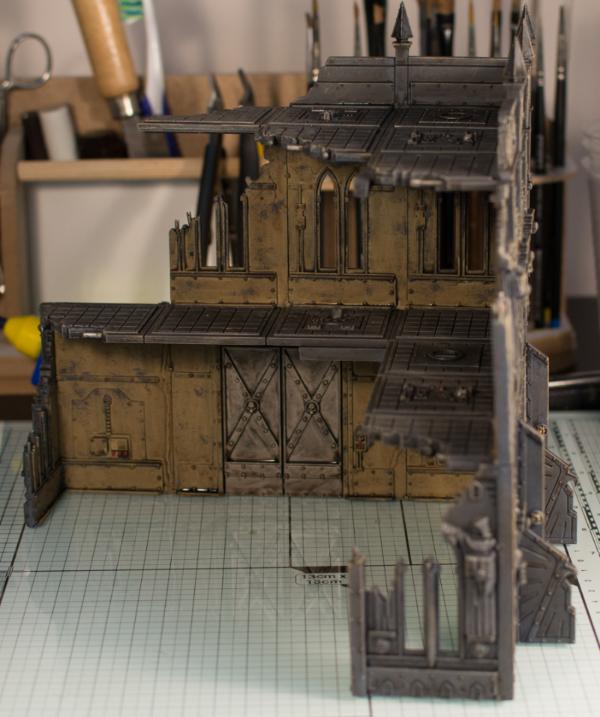
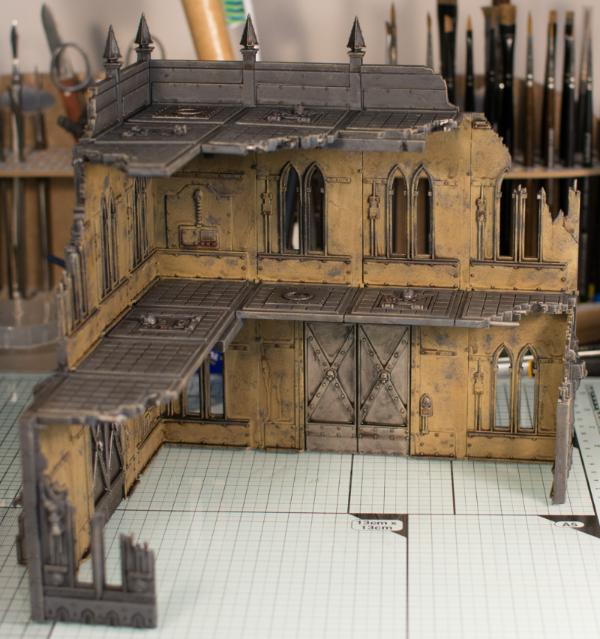
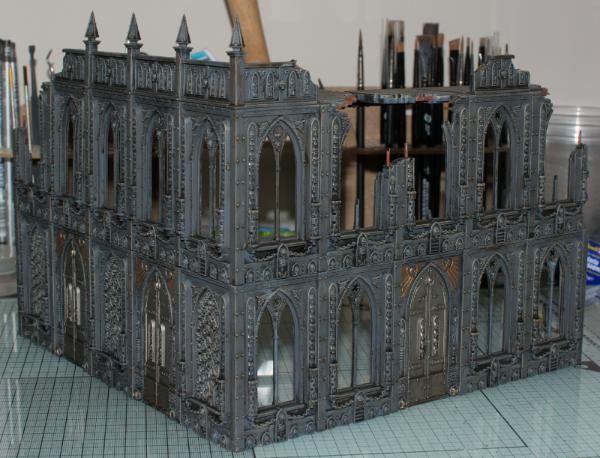
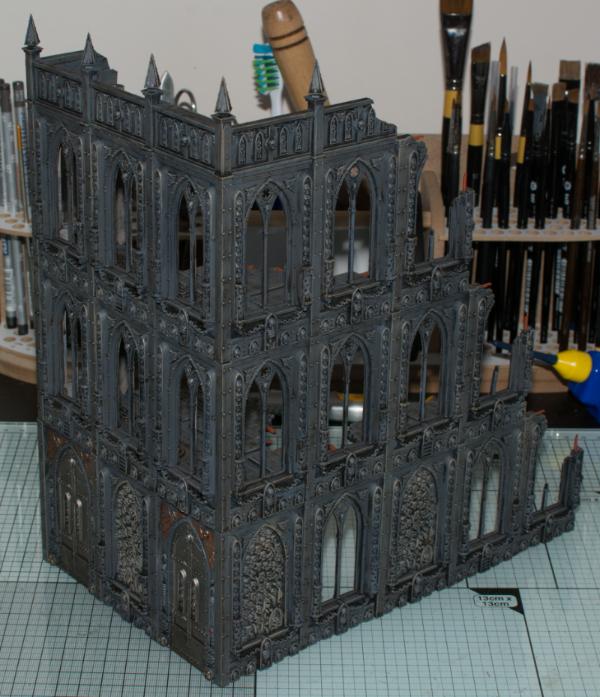
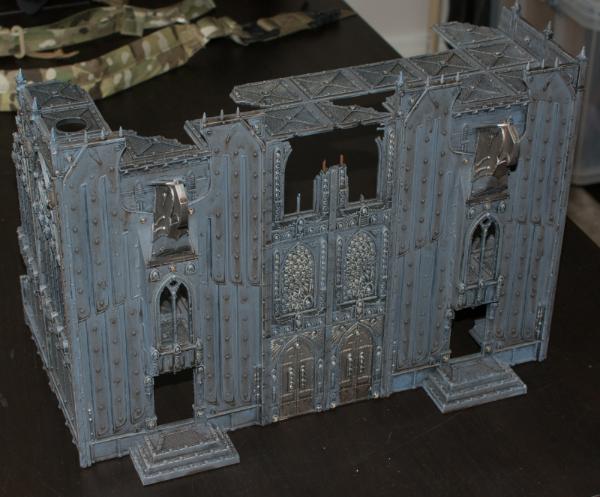
Ruin #2
|
|
|
|
|
2016/04/20 22:05:22
Subject: Scenery and Tablescape Boards
|
|
Lord of the Fleet
|
Ruin 3/10 finished.
|
|
|
|
|
2016/04/23 20:04:50
Subject: Scenery and Tablescape Boards
|
|
Lord of the Fleet
|
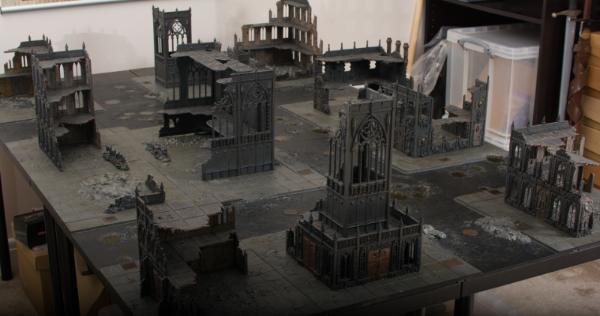
Half of the ruins (all of the 2-story ones) finished.
|
|
|
|
|
2016/04/28 21:20:00
Subject: Scenery and Tablescape Boards
|
|
Lord of the Fleet
|
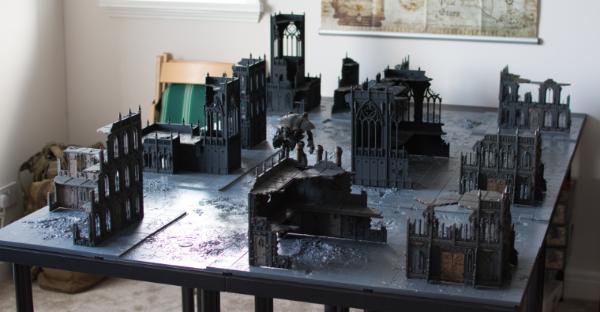
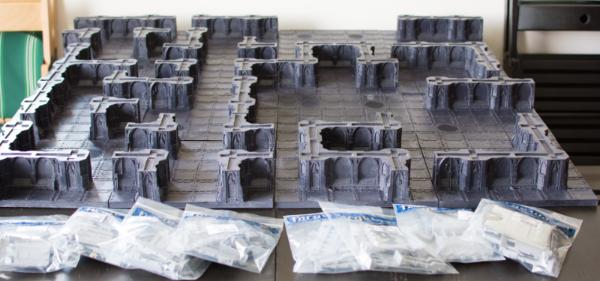
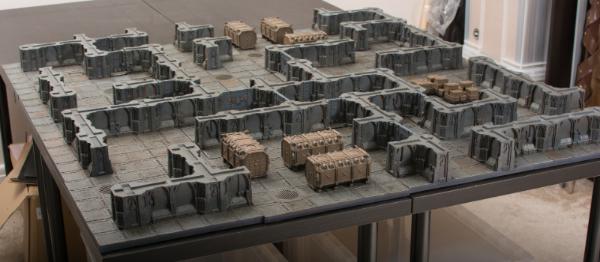
Number 6
I started preparing the baseplates for the ruins (each ruin will have a specific baseplate with magnets) and hit a snag. All of the plates are slightly bowed (high center) preventing the ruins from sitting flat. To fix this I glued a 1mm thick additional magnet to each attachment point. This provides enough clearance to avoid the bowed surface. It also raises the ruins above the bulk of the small bits of debris moulded into the bases so far less needs to be removed.
I also got a whole table of tiles out to see what laying them out is like. They clip together much more easily than the RoB. (the floating buildings in the pic below have 2mm spacers - the 1mm spaces look much better)
|
|
This message was edited 2 times. Last update was at 2016/05/01 12:31:48
|
|
|
|
|
2016/04/29 17:34:49
Subject: Scenery and Tablescape Boards
|
|
Lord of the Fleet
|
All of the buildings and baseplates are magnetised and I've got a suitable supply of primer, spray paint and varnish so as long as the weather holds we should see some progress on the urban tiles tomorrow.
|
|
|
|
|
2016/05/01 09:31:27
Subject: Scenery and Tablescape Boards
|
|
Lord of the Fleet
|
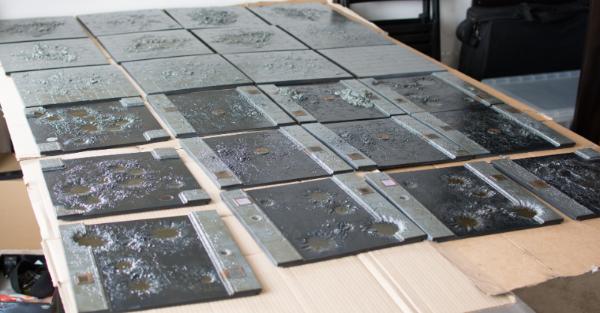
Finished all of the damaged urban tiles yesterday. Just waiting on the Army Painter quickshade drying (it'll probably be tuesday, I deliberately made it pool in the craters) and then matte varnish and some final weathering.
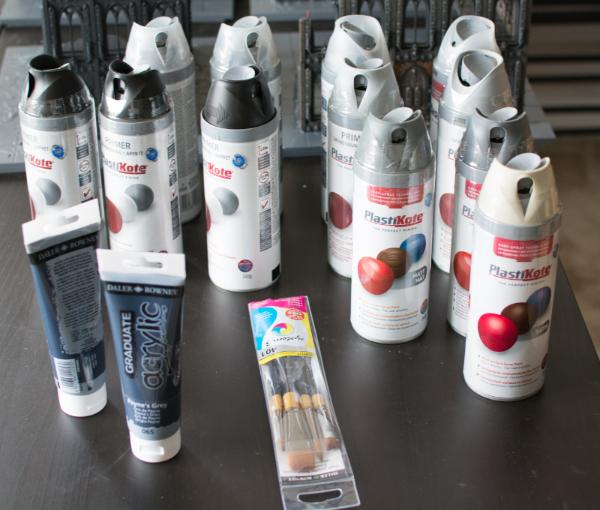
If you're planning your own these were the supplies expended:
~1.5 cans of primer
1 can of grey was adequate to cover all of the paved areas
The tube of acrylic used for the roads would happily cover several sets (two was definitely overkill)
~3/4s of a tin of quickshade
~1.25 cans of sealant
That puts the material cost of painting a set at ~£60 (assuming that you don't need to buy paints for details, drybrushing, rust, etc.).
|
|
This message was edited 3 times. Last update was at 2016/05/02 17:24:05
|
|
|
|
|
2016/05/04 18:36:04
Subject: Scenery and Tablescape Boards
|
|
Lord of the Fleet
|
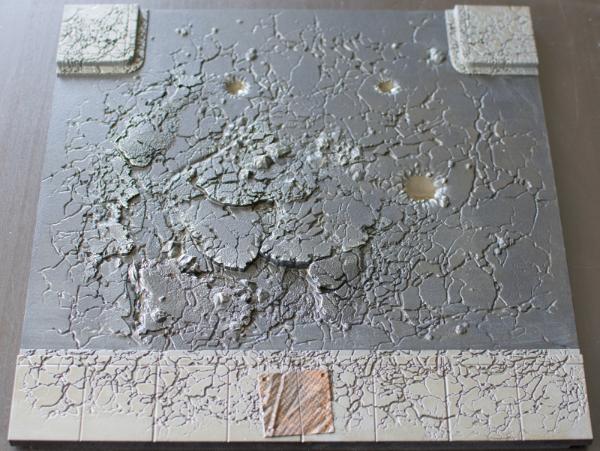
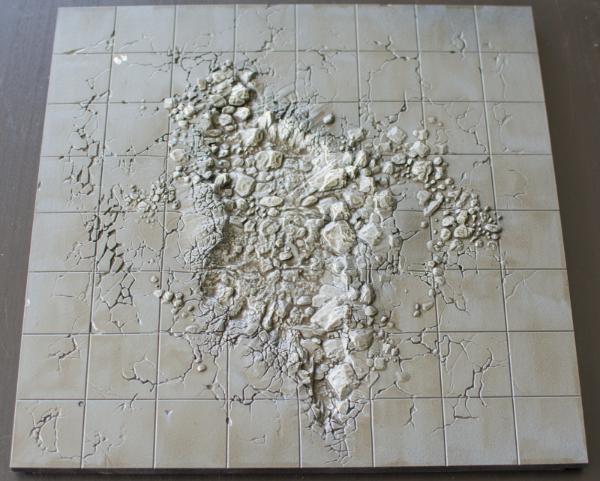
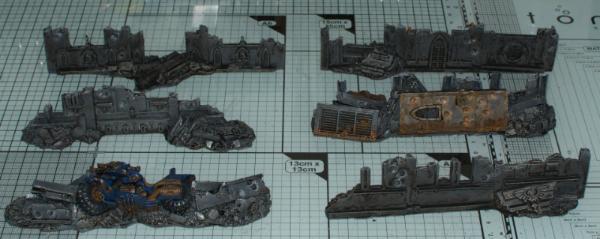
For those that are interested here's what you get in the Tablescapes Damaged Streets 4x6 box.
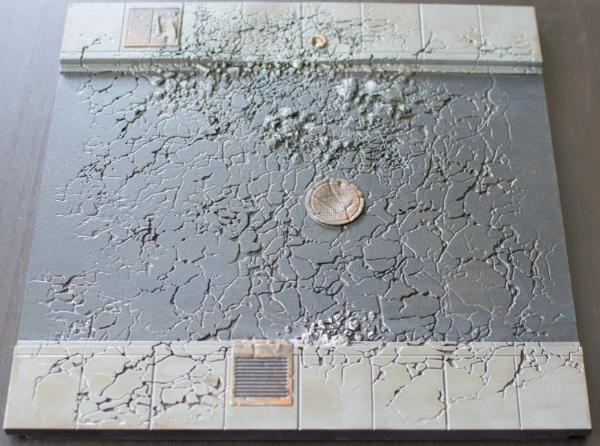
4x straights with manhole cover. I like the intricate cracking around the damaged portion of the sidewalk.
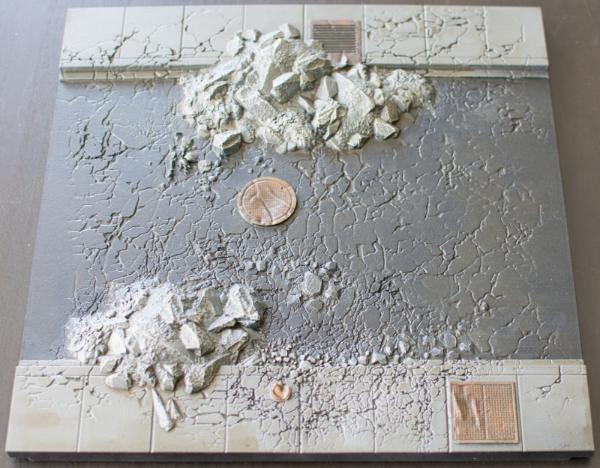
1x straight with rubble. I quite like this one but it's let down by being a 100% copy/paste of the one above.
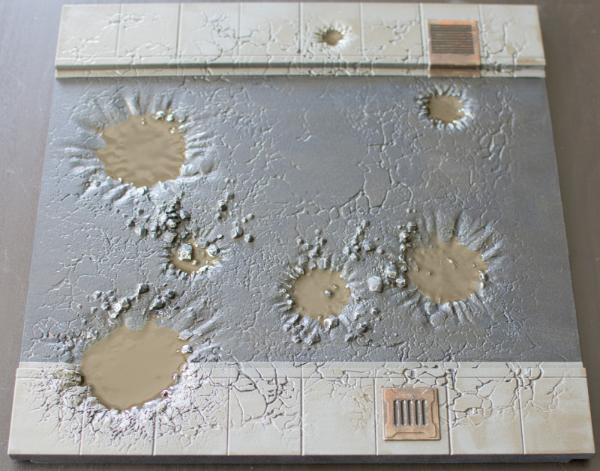
4x straights with... craters? Except the damage doesn't look like explosive damage on asphalt at all (explosive damage on ashphalt generally has a distinct edge and that edge is forced upwards by the compression of the substrates) - it looks like compression damage. So either very small airbursts or an imperial knight has been playing hopscotch.
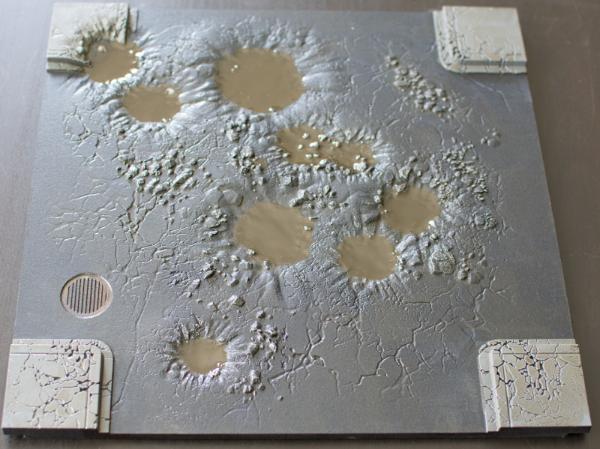
2x crossroads with more hopscotch
1x t-junction with better damage. I would have liked to see more damage like this showing the layers separating. I'd also have liked more t-junctions and less cross roads.
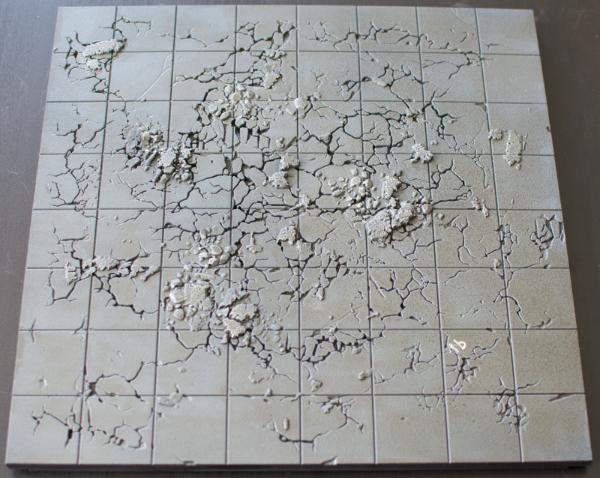
5x baseplate with light rubble
5x damaged baseplate
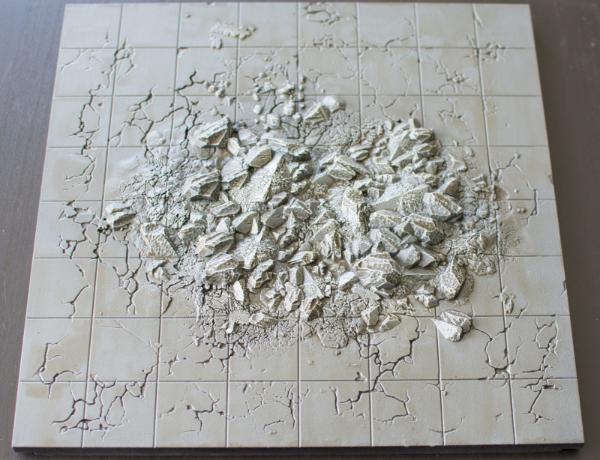
2x baseplate with rubble pile
Also, here's building #7
|
|
This message was edited 1 time. Last update was at 2016/05/04 18:38:39
|
|
|
|
|
2016/05/05 20:09:40
Subject: Scenery, Tablescape, Zone Mortalis and more
|
|
Lord of the Fleet
|
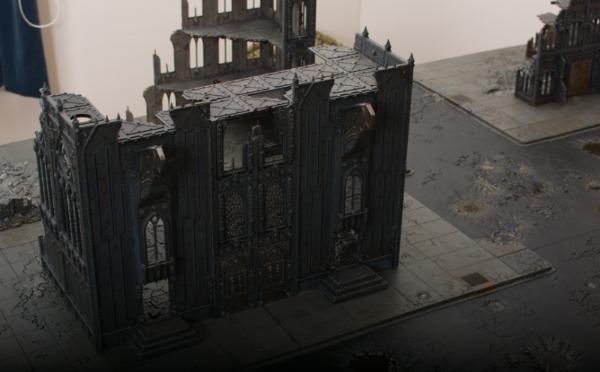
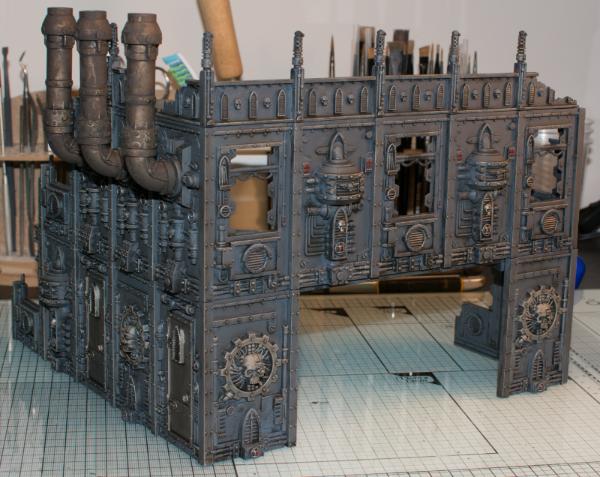
Phase 2 - Zone Mortalis is here
|
|
|
|
|
2016/05/10 20:03:19
Subject: Scenery, Tablescape, Zone Mortalis and more
|
|
Lord of the Fleet
|
Barricades
Ruins 8/10
|
|
|
|
|
2016/10/24 21:27:57
Subject: Scenery, Tablescape, Zone Mortalis and more
|
|
Lord of the Fleet
|
I haven't updated this thread in a while so there's lots of progress to post. I got sidetracked by the ZM tiles which are quite time consuming to paint even for a very simple paint scheme.
The last two ruins:
That's the urban table essentially finished - pics to come tomorrow.
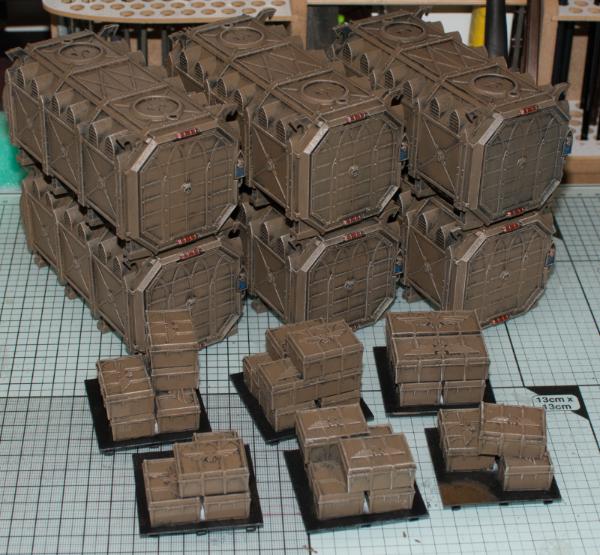
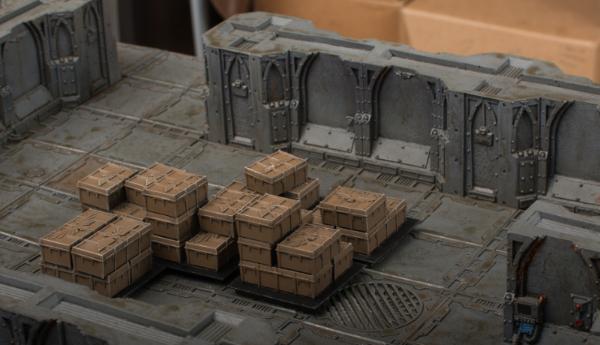
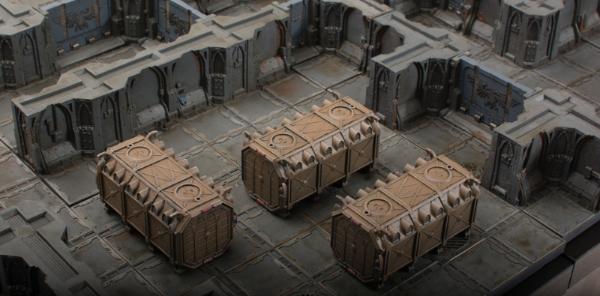
Here are some containers and pallets of crates:
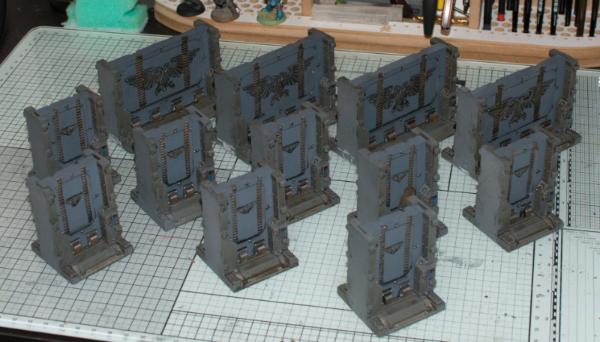
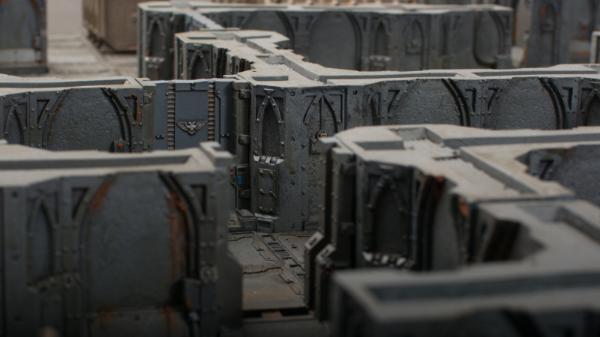
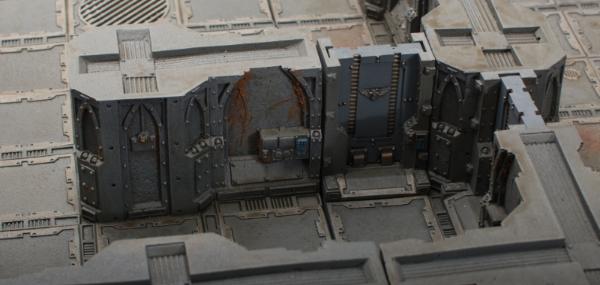
Some Zone Mortalis doors:
 Automatically Appended Next Post:
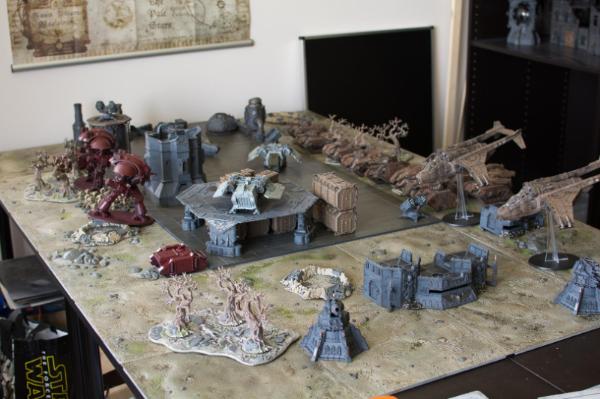
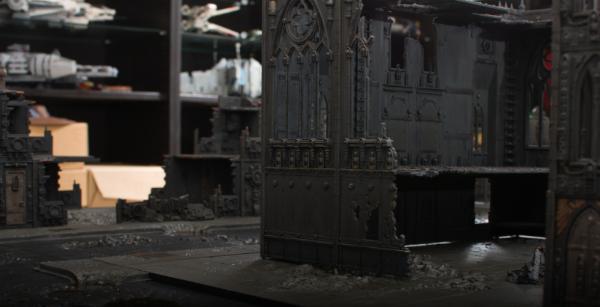
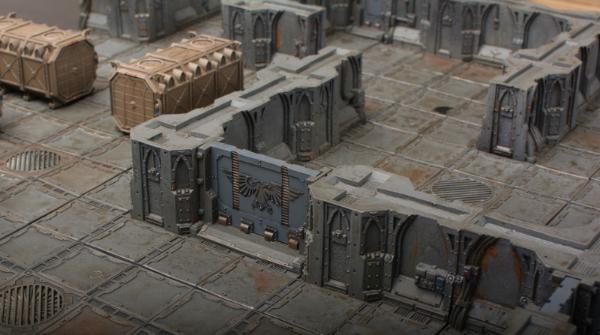
Finished Zone Mortalis table:
Some details:
|
|
This message was edited 2 times. Last update was at 2016/10/24 21:38:23
|
|
|
|
|
2016/10/25 00:50:14
Subject: Scenery, Tablescape, Zone Mortalis and more - lots of progress!
|
|
Loyal Necron Lychguard
|
Wow! What an update!
Looks amazing!
|
|
|
|
|
|
2016/10/25 11:12:47
Subject: Scenery, Tablescape, Zone Mortalis and more - lots of progress!
|
|
Lord of the Fleet
|
|
|
|
|
|
2016/10/25 17:41:30
Subject: Re:Scenery, Tablescape, Zone Mortalis and more - lots of progress!
|
|
Water-Caste Negotiator
|
Those boards looks pretty amazing, really like the color schemes! I also like the diversity of smaller tiles vs the larger one like the RoB board, I currently play on a GW grass mat with a couple of buildings (on your old base plates  ), and some of the GW forests/mountains. How well do these tiles take such flat plates, or would they become really wobbly?
Not that I really have time to build/paint one up myself but these tiles look really good, seriously considering getting a set anyways (you can never have to much spare plastic  ), did you directly import them from the US or did you find a EU retailer? Not looking forward to having to pay import taxes on such an order.
|
 1500, 100% WIP, 100% kick-ass 1500, 100% WIP, 100% kick-ass
 (dkok) 1500, 100% NIB (dkok) 1500, 100% NIB |
|
|
|
|
2016/10/25 20:08:58
Subject: Scenery, Tablescape, Zone Mortalis and more - lots of progress!
|
|
Lord of the Fleet
|
Flat bottomed scenery pieces are a massive problem on the damaged streets and rolling fields board sets.
Painting the damaged streets was really easy, the bulk of the painting was done in a day, and you're right - the modularity of the 12x12 tiles works much better for streets than 24x24.
There are a couple of UK stockists for these (I got mine via a friend that has an account with one of the big distributors).
|
|
|
|
|
2016/10/25 20:20:51
Subject: Re:Scenery, Tablescape, Zone Mortalis and more - lots of progress!
|
|
Malicious Mutant Scum
|
Fantastic looking terrain, Scott-S6! The sheer amount and quality are something to be very proud of. I especially like your ruined buildings. Also, your kitbashing skills, as well as, your forethought of how the buildings will be built are superb. I'm looking forward to seeing more awesomeness from you!
-LostCarcosa 
|
Cultists, Mutants, Traitors, & Dregs of Society - a Lost and the Damned PLOG
Then suddenly I saw it. With only a slight churning to mark its rise to the surface, the thing slid into view above the dark waters. Vast, Polyphemus-like, and loathsome, it darted like a stupendous monster of nightmares to the monolith, about which it flung its gigantic scaly arms, the while it bowed its hideous head and gave vent to certain measured sounds. I think I went mad then.
-from "Dagon" by H.P. Lovecraft |
|
|
|
|
|
|