Hi everyone! Here's a little step by step tutorial on how to add a book and chain to a model, for all your Librarian customisation needs.
Materials/Equipment:
- Plasticard in three thicknesses (approx. 0.015", 0.03", and 0.06" thick - the
Gale Force 9 Variety pack is what I use)
- Greenstuff and/or Milliput (or any other preferred sculpting putty)
- Hobby Knife
- Fine-grain/smooth sandpaper
- Pin (a sewing pin or needle - I prefer a pin because the larger head gives me something easier to hold on to)
First off, making the book! It's made entirely out of pieces of plasticard. If you're not sure what size you want your book to be, use some scrap paper to cut out various sizes and blu-
tac them to the model to test. Once you know what size you want, cut out one piece of the thickest plasticard slightly smaller than that size (or if you don't have the thicker plasticard, glue a couple of bits of thinner plasticard together and trim them down to the desired size). This will be the pages section of the book.
Then cut out two rectangles a couple of millimeters larger from your medium thickness plasticard to be the covers of your book, and one more strip about the same length and wide enough to cover the edges to be the spine. It's better if you cut out the cover and spine pieces slightly larger than you'll need, since you'll be able to trim them down to size/shape once you've glued things together.
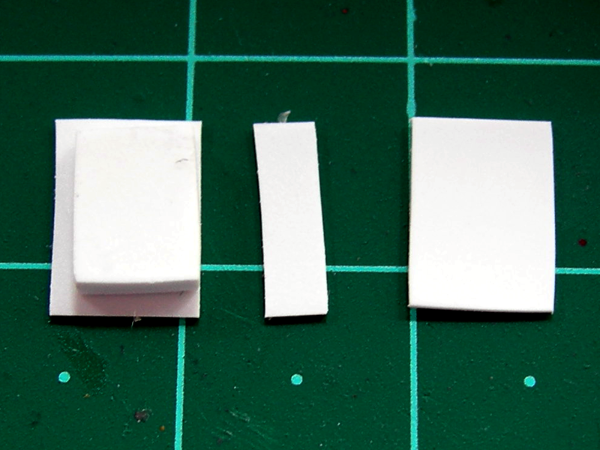
Here's the four main pieces cut out and one cover already glued to the pages section. Note how the pages and cover are lined up along one edge - this will be the spine of the book.
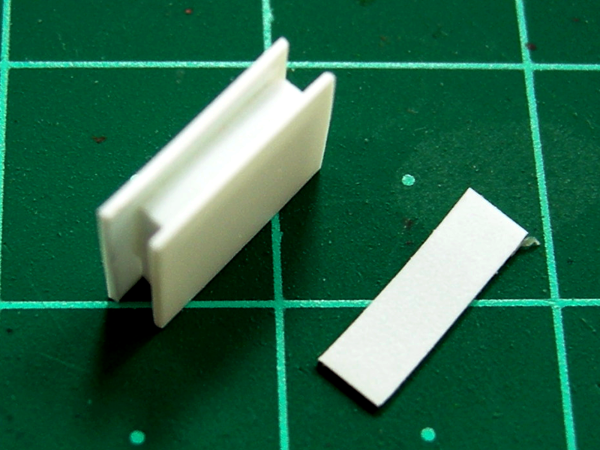
Here's the second cover glued on, with the book standing up on its spine side. Note how the covers aren't exactly level with each other or symmetrical - this is why they're cut slightly larger first, so they can be trimmed down evenly once the glue has dried.

Here's the covers trimmed down and sanded, to show the difference.
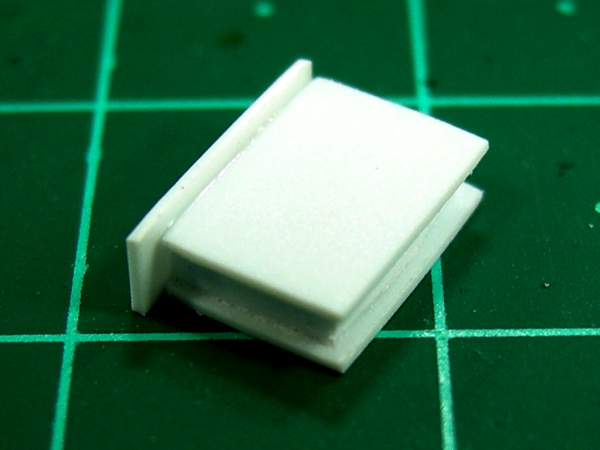
Now the spine's been glued on - again, it doesn't need to be the exact size first. Just wait for the glue to dry, then trim and sand to size.
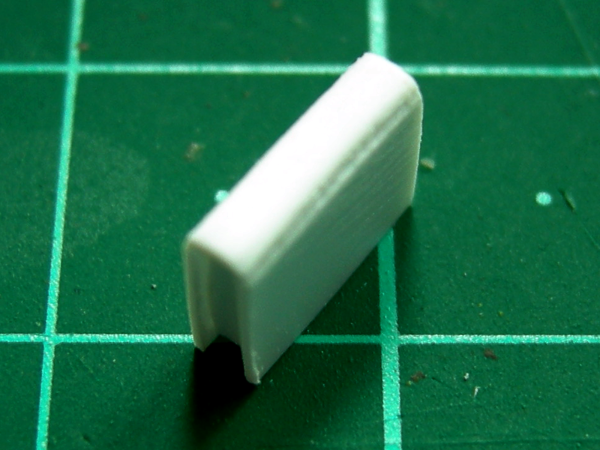
The spine has now been trimmed down and shaped with the knife and some sandpaper. At this point you can also use the knife to score thin lines into the interior section, to give the impression of individual pages. (I forgot to do that with this one because I was doing this pretty quickly, oops!)
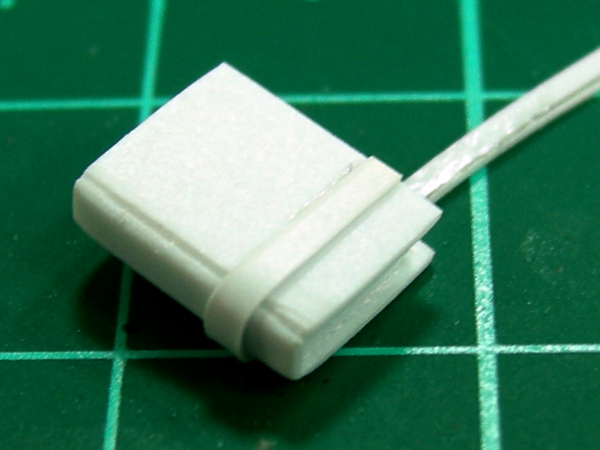
Now for some detailing - cut a long, thin strip of your thinnest plasticard, apply glue to one side, then stick it into place on one side of the book and wrap it around the spine. Let the glue dry, then trim off the excess.
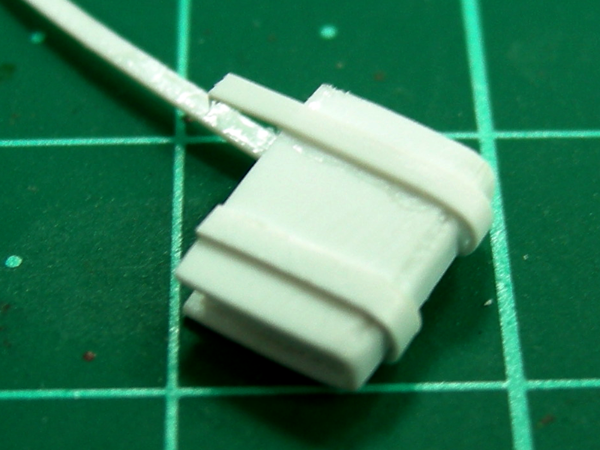
Here's the second binding strap glued on but not yet trimmed down.
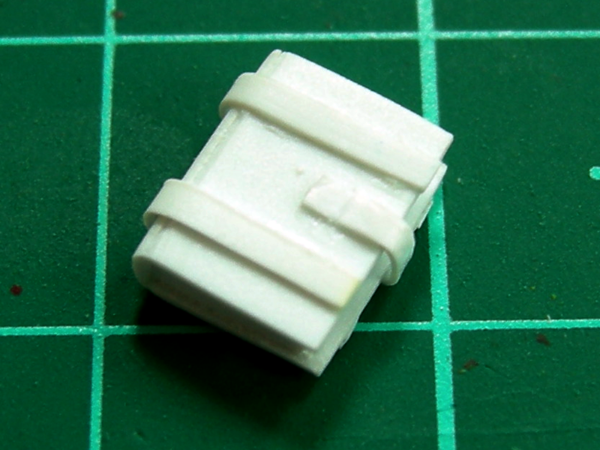
Here's the clasp/lock added. This piece does need to be cut approximately to size first, but since one side will be glued to the model, it doesn't have to be perfect.
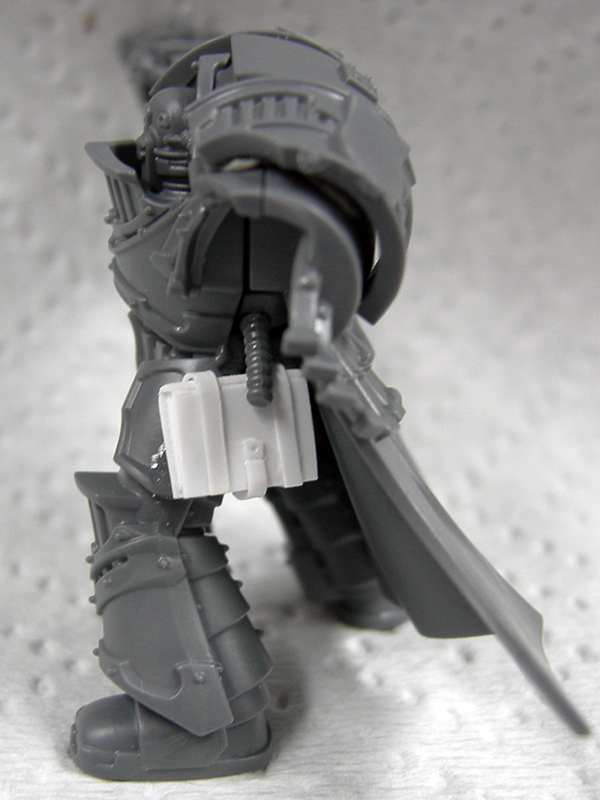
The book's now been attached to the model, and shows the detailing carved into the clasp/lock with a knife tip. The hole of the lock can also be done with something like the tip of a compass, or some other round sharp pointy thing.

Now, time for the chain! I used a 50/50 mix of Greenstuff and Superfine White Milliput here, but straight Greenstuff or other putty should work as well. Whatever you use, make sure it's very thoroughly mixed before you start! After mixing, it also helps to let it sit for a few minutes so it's not quite so sticky before you start working with it.
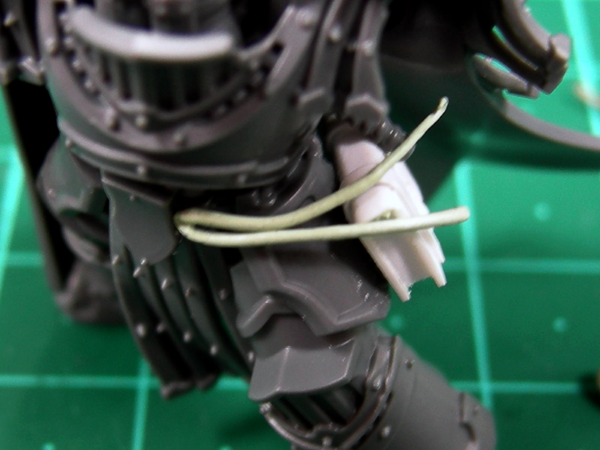
Roll out a long thin rope of millistuff, then use the pin to press the middle of it to where one end of the chain will be attached to the model.

Use the pin to then press the other end of the chain into place and trim off the excess. Then start carefully shaping the links with the pin. Since there's no solid backing beneath the chain, you need to be very careful and gentle, so as to avoid stretching the millistuff out. Alternate between pressing down from the top, then pressing up from the bottom to form each chain link.
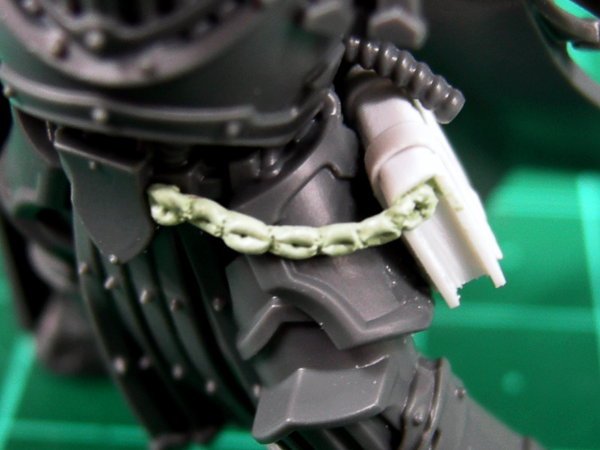
Here's the first part of the chain finished. Make sure you shape the holes in the middle of each link, they'll be needed for the next step. Once you reach this stage, it's a very good idea to let it dry first before continuing! There's nothing worse than accidentally squashing your work and having to pull it all off and start over. Also, once it's dry, you can use a knife/sandpaper to help tidy up any rough areas and refine the shape of the links, if you wish.
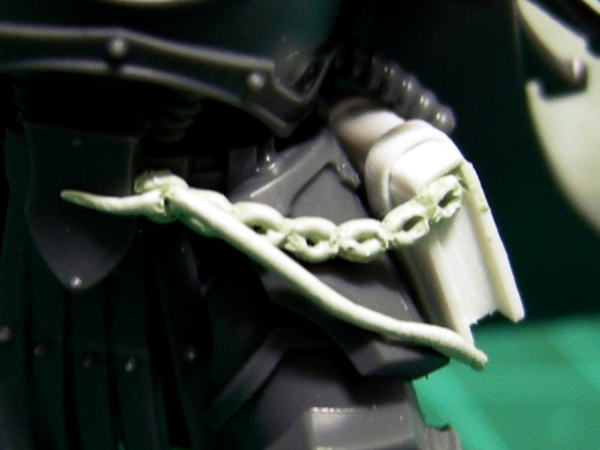
Onto the next step! Roll out another thin tube, then use your pin to press one end into the first hole at one end of the chain.
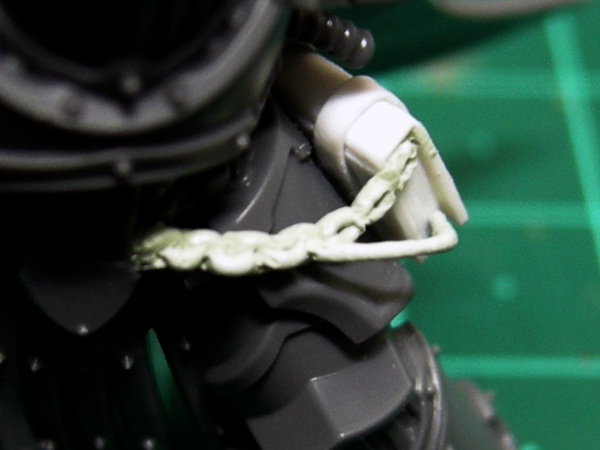
Continue carefully pressing the tube into each link hole, to form the cross-links.
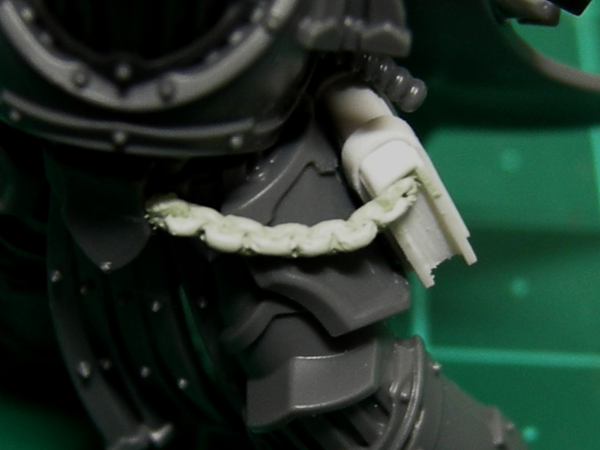
Here's the (mostly) completed chain! I haven't done so yet here, but once it's fully dried you can again use knife/sandpaper to tidy up any rough areas and smooth things out a bit. If you're feeling really finicky you can also add the cross-links to the interior side of the chain, but I didn't bother for this one.

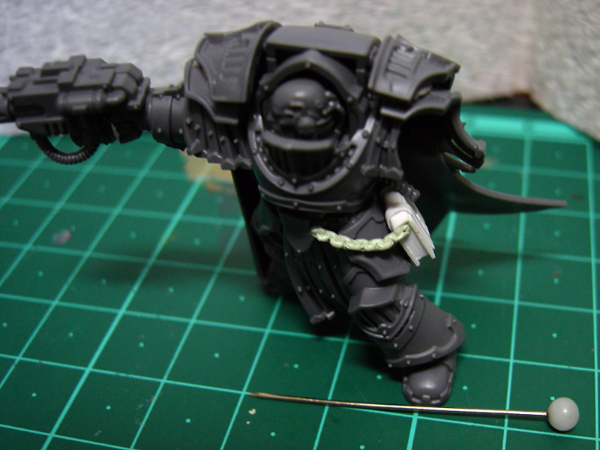
And here's a (mostly) full view of the model! With a cameo from the pin I use for most all my sculpting.

Also, if your model isn't wearing a cloak or something like this one is, you'll need to repeat this process on the other side of the book and attach the chain to the back of the model's belt somewhere.
Anyway, that's how I make books and chains for my customised models! I hope this helps, and if you have any questions or difficulties, please let me know!
