
Stone Walls - A quick How To
Intro
Well, I was surfing through some Black Gobbo one day and noticed a nice little how-to and decided to give 'er a go! Here's the page .
.
Have to say, I'm kind of impressed with the results for such a quick and easy project. I chose to use it on a small simple wall to try out some techniques I might end up using later on for terrain on my table.
Getting Started
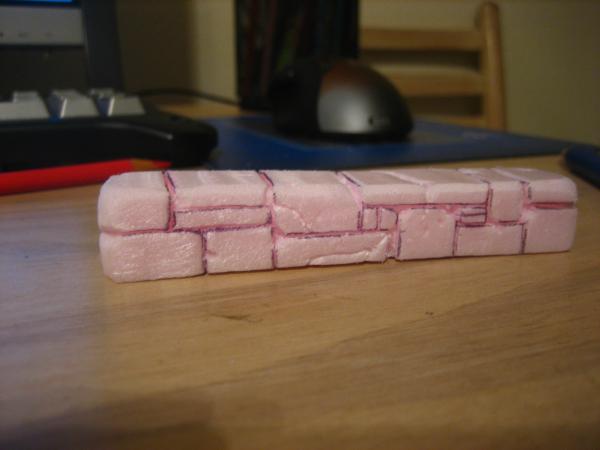
I started off using just a small bit of pink insulation foam that I had laying about. I decided to start with a reliable old sharpie marker to get the lines down. Well, after finishing all the line work, I went to begin cutting into the foam and where there was sharpie, there was no longer nice solid foam, it ate away at the foam just enough so that when you cut directly into the line, you pulled up all the sharpie mark instead of making a neat little cut. So long story short don't use sharpie for this project.
Well, I went back, cut out a new piece (which sucks because the piece I had was really already perfect shape....), and got a ball point pen that did the trick for me. I lined everything out which took longer than it really should have because I'm too into perfecting rocks now all of a sudden x.x...

Cut, Divets, and Sanding
After that I got to cutting in the lines. To start out I just cut a thin shallow line right on top of the drawn lines, then I took a pencil like the tutorial said and pressed it into the cuts. This really doesn't work as easily as you expect it to. You've gotta really get in there with the pencil and go over the same spots multiple times. I ended up pulling the knife back into service in a lot of spots that were being stubborn. I weathered them a bit by trying to sand out some corners, but again, not the greatest of results from this. Sanding is awesome on most materials/projects. But for this one, it just seemed to texture the foam in a way I really wasn't too keen on. So I don't really suggest sanding all that much. I would just stick to the knife on this one. After trying to sand, I cut out some corners, and added some cracks and divets to complete the weathering.
Base Coating Considerations
Remember, Spraypaint Melts Foam, so be sure you don't go nuts with the ol' primer can. I used a bit of dark interior latex paint I've been using on my table project for a 'primer' here. Marines in for scale of course.

Painting
Then I set to painting. It's a Codex Grey base with a Fortress Grey highlight around the edges and cracks, and very lighting drybrushed all over with Fortress as well. I added some weathering around the base of the model then with Bestial Brown, very lightly highlighted with Snakebite Leather. Using a very thinned out wash of Chaos Black, I added 'drainage' from cracks and divits. After it was all said and done, I did a quick drybrush over it all with Bleached Bone.

Additional Details
When the paint was finished and dry, I pulled out the Woodland Scenics Blended Turf I've had sitting around for years. To add this I just painted on some PVA Glue (Elmers FTW!) and dipped it into the container. I found that it took two or three dips until I wasn't seeing wet glue spots anymore.

Conclusion
And it's done! Just wait for the glue to finish drying and hit it with a quick Matt Varnish.
Hope this helps someone out there ^_^. I know I type a lot sometimes, but I'm hoping that you'll all be able to learn from the mistakes I make x.x.....
All in all, a really easy but effective method. It would definitely work wonders on a full building or ruins. I suggest you give it a go ^_^.
Another try
Here's another try with the same method. I ended up skipping the pencil step for this piece and just cut into the foam at angles to get the separation for each stone. I wanted to try and get multiple levels on this one, making it feel less like a big pillar and more like a defunct wall section. It's just as thick as the last piece, if not thicker, but it looks more natural than the last one. I'm happy with the results for the time invested.


This was merely a time killer, again not a finished or completed piece, but it does its job as an easy quick piece of modular terrain.
For more from this user, check out User:grey_death
