Forum adverts like this one are shown to any user who is not logged in. Join us by filling out a tiny 3 field form and you will get your own, free, dakka user account which gives a good range of benefits to you:
No adverts like this in the forums anymore.
Times and dates in your local timezone.
Full tracking of what you have read so you can skip to your first unread post, easily see what has changed since you last logged in, and easily see what is new at a glance.
Email notifications for threads you want to watch closely.
Being a part of the oldest wargaming community on the net.
If you are already a member then feel free to login now.
I have been inspired to try try a bit of scratch building again!
I have not done alot before, just a few Mega nobs and some lobbas but I want to step it up a little!
I want a few battlewagons for my orks and have decided to try building them rather than buying, I must confess I have been inspired by the HUGE battleship made by Ian Wyatt a few years ago. If you have not seen it google it straight away!
I cannot hope to build anything that epic but I hope I can at least make something i can be proud of!
I do not own a battle wagon so am not copying sizes, just proportioning as I see fit.
Concept is a ship with tracks and try to make it fit the theme!
I feel one of the most important visual aspects will be a forward deck gun and I will be building this early to ensure the theme works and also ensure my ability can match my enthusiasim!
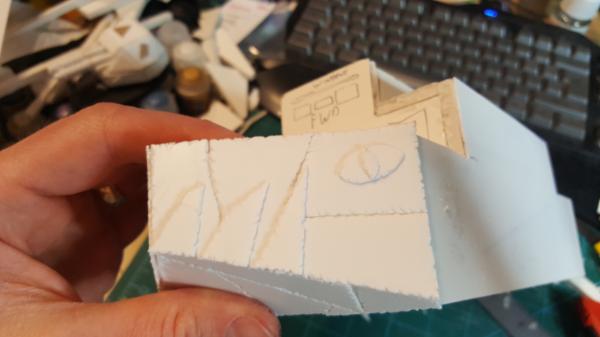
First pics!
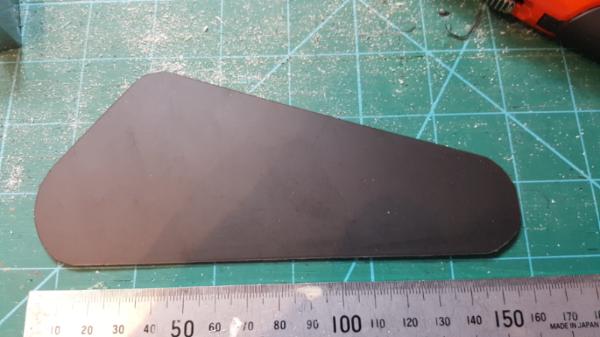
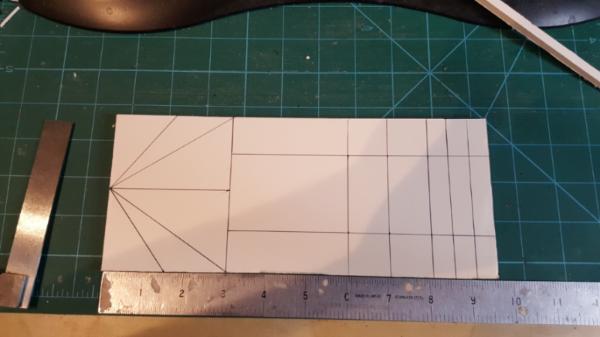
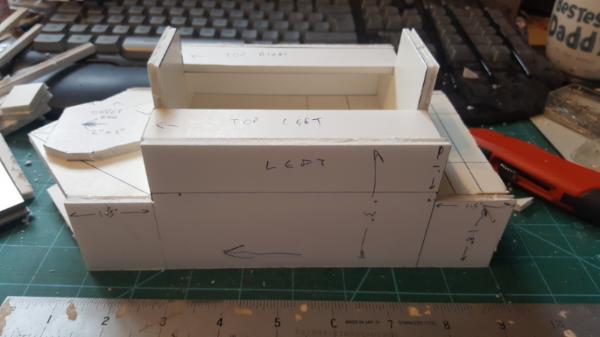
Deck measurements - alot of the lines mean nothing at this point as I was still unsure how big to make this - as it turns out I am not shortening the hull at all and may even extend it slightly.
The multi angles at the front are similar guesses at what will look good.
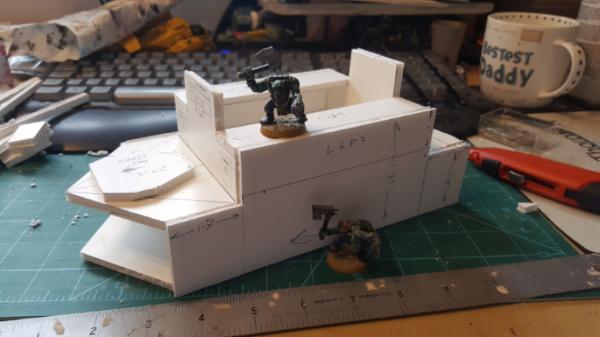
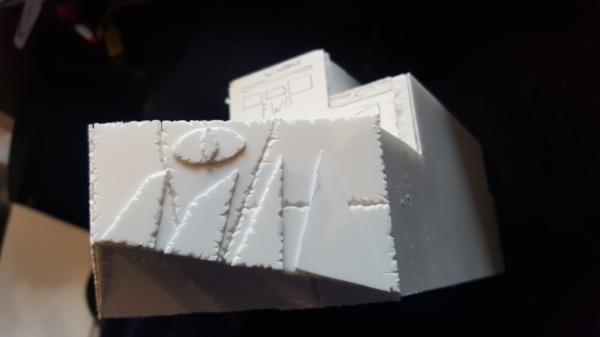
Sides and side walkways added, gives a good idea what I am aiming at.
For scale.
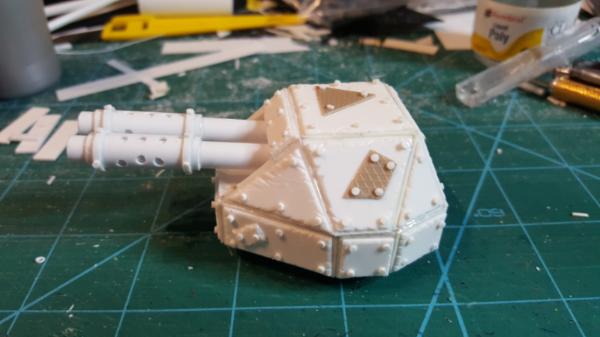
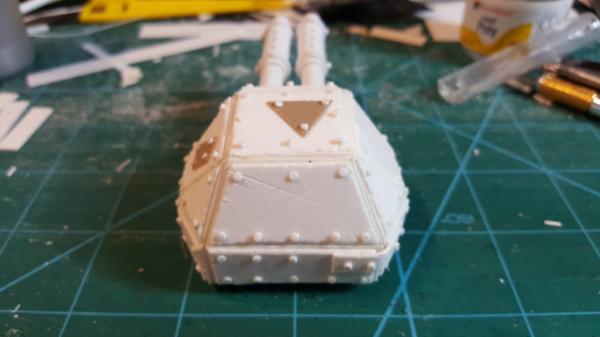
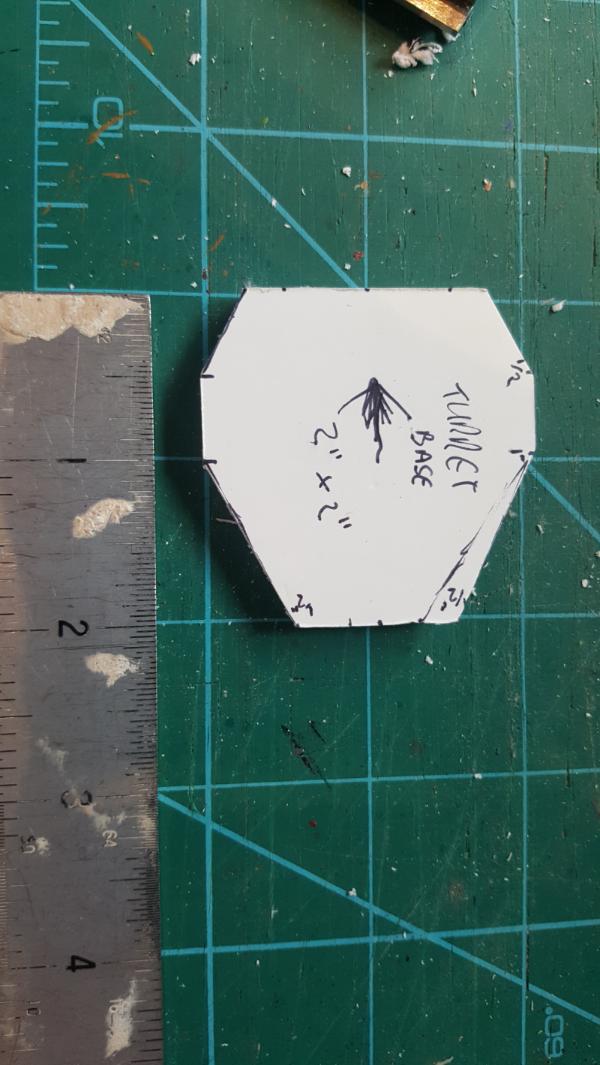
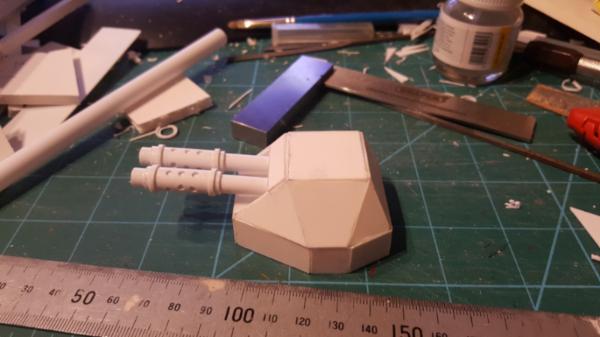
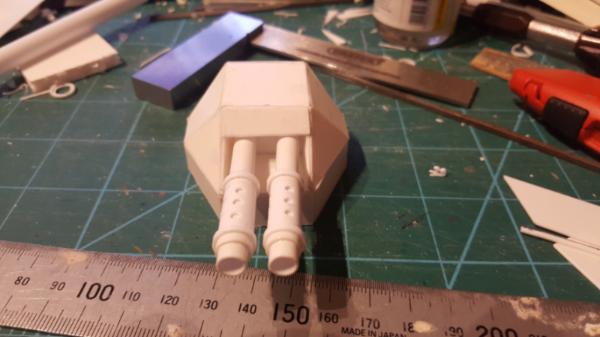
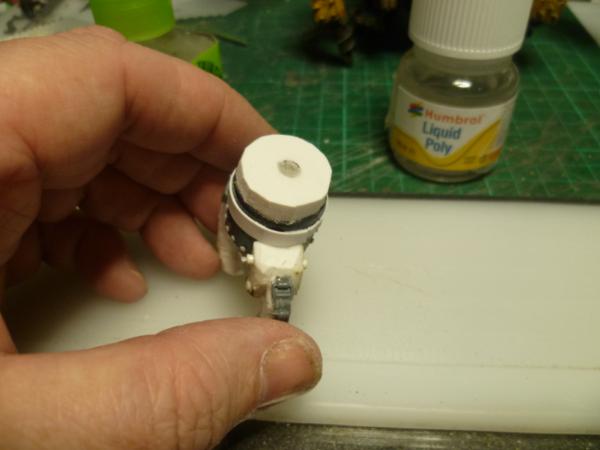
The shape of the forward turret.
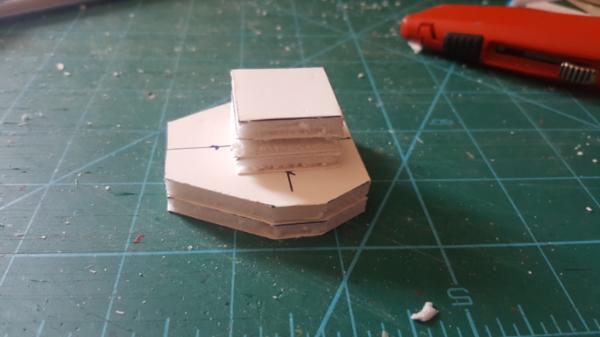
Turret before cladding.
My next step will be to clad the turret in plasticard to give the correct shape and get the barrels in to ensure I can creat the look I am after, wish my luck!
Camkhieri: "And another very cool thing, my phones predictive text actually gave me chicken as an option after typing robot, how cool is that."'
Meercat: "All eyes turned to the horizon and beheld, in lonely and menacing grandeur, the silhouette of a single Grot robot chicken; a portent of evil days to come."
From 'The Plucking of Gindoo Phlem'
if looking at a ship style turret look at the old historical pics, they all often have angled fronts etcc. just little details.
Sgt. Vanden - OOC Hey, that was your doing. I didn't choose to fly in the "Dongerprise'.
"May the odds be ever in your favour"
Hybrid Son Of Oxayotl wrote:
I have no clue how Dakka's moderation work. I expect it involves throwing a lot of d100 and looking at many random tables.
FudgeDumper - It could be that you are just so uncomfortable with the idea of your chapters primarch having his way with a docile tyranid spore cyst, that you must deny they have any feelings at all.
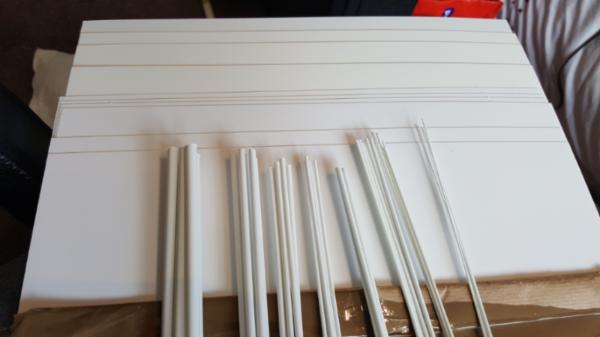
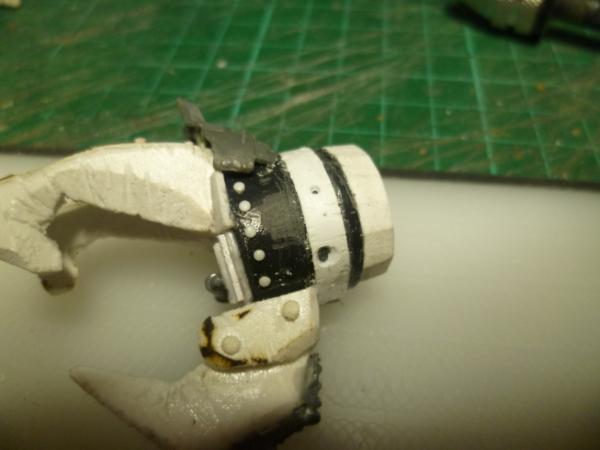
I don't have any rod so can't start making the rivets till I get hold of some, weirdly my local model shop does not stock solid rod! What sizes should I get for rivets? 1mm? 2mm?
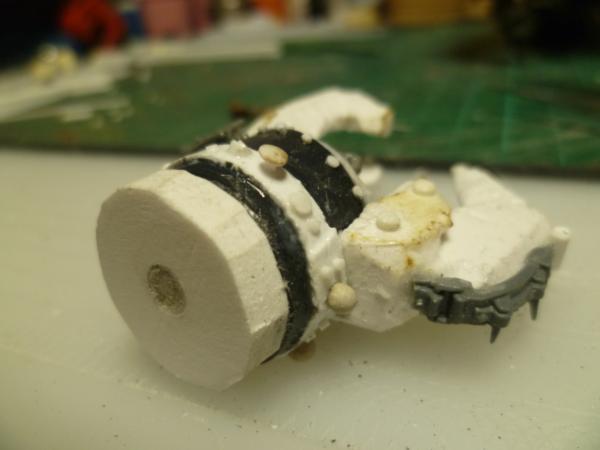
I have never made armour like this before should I have left the gaps between plates or tried to get them closer together? I think it looks really cool without the rivets and REALLY want to paint it already! I will resist though!
Looks great so far! I don't know anything about rivet sizes as I've never done them. Ork rivets do seem to be large(er) than they need to be though haha
This really does have a great Ork vibe to it so far!!
"Sanctified with Dynamite"
Space Marine Dreadnought Project here Astral Claws Terminators here
For the rivets I would suggest 1mm. Another option is buying a 1/16" hole punch (1.5875 mm?), and punching them out of styrene. Or a multi-punch if you want some variety in the size of your rivets.
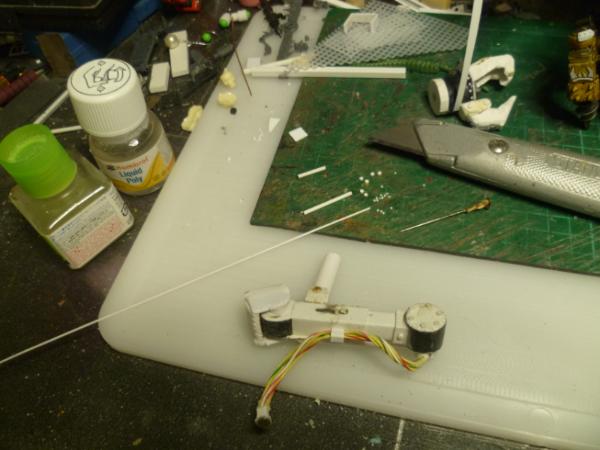
Rivetting stuff....the way I do it anyway
Standard rivetting, Prepare the kit...styrene rod of your choice. Here I have 1mm and 2mm, I cut it with the knife, about a dozen at a time.
The needle is a sewing needle with a silly bit of melted plastic to assist with grip. Use this to place rivets. I tend to put down poly cement, then rivet then come along after with thin Tamiya. This I find seals the rivets well in place.
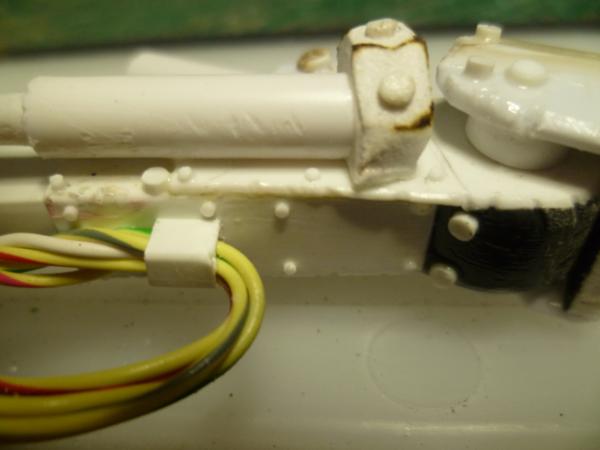
Optional extra here, I flash a blowtorch over the rivets and I get a more domed top ...
Place your rivets in a relatively logical manner, even orks would do this, not very tidally but rivets where needed.
OK so you want to put a band of rivets around something...
Start by getting a thin piece of styrene, glue just the first few mm and allow to dry properly.
Then once dry you have an anchor point to pull the band around tightly. These are orks so my band will overlap. Again I put down a coat of poly cement, give it a second or two then place the part, while holding it in place a run a bead of Tamiya around it, letting it wick in, this sets really fast, so you should only have to hold it for a few seconds. 10 minutes and it is set solid.
Drill some holes, some will remain holes, some will have another form of rivet in, you do not have to drill for every rivet.
The really round rivets are an idea from DrH, the beads from the silicone packs you get in stuff to keep the moisture down, these have to be superglued in, and I drill a small divot for them to go in. Once dry you can sand them down. Here they just add variety.
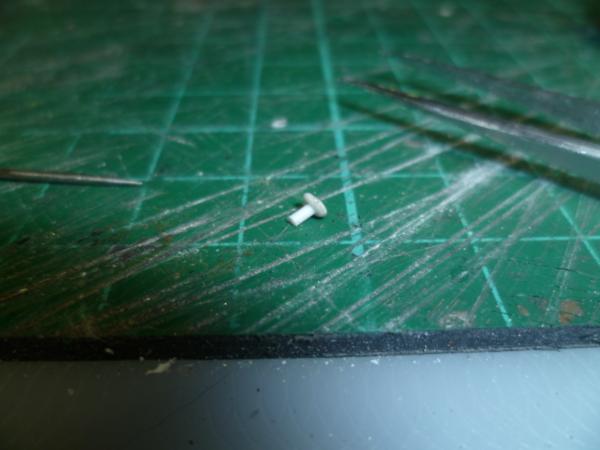
You may notice I have a loose rivet, I like to add these as it really adds to the ramshackle appearance, this is just a 1mm rod with the end heat treated and flattened on the bench. Cut off and a hole drilled for it to be glued in...
And thats that arm just about ready for paint...
And finally, not the last method I use but another option for rivets and banding...GS...
This is good if you have an uneven variable surface, place a bit of GS on and make a strip..
Take a nail punch, various sizes available and
Press in where ever you want a rivet...
Now I hope I have not upset anyone, I hope it is useful to somebody. As I have said this is my way, I find it very therapeutic and zen like settling down to rivet up something. dsteingass is a master here as is Viktor von Domm, Many years ago on Dakka Arakasi used to do some amazing work as well, Check these guys out. There are many others who inspire me, just mention these as my early influence.
Hope that helps a little. I do have several other methods, just ask.
This message was edited 1 time. Last update was at 2017/03/25 00:50:40
Great turtorial! Thanks for the post, should never spoiler someting as useful as that!
Particularly love the pulled rivet, I would never think of that level of detail, so cool!
I am starting to clad the front of the boat, I know what I want up there, hatches etc but could really use some opinions for the upper deck, I think I would field this in game terms as a kannon (turret) and 4 big shootas but I am not ure how to model the big shootas. Have I made it tool long and thin?
If it where me, I would add a bigger toof at the back and move the eye much more forward, maybe make it smaller, but above the smaller teeth. Looks OK though, the "cartoon" factor will be the painting.
As a tip, get a triangular file, blade sharpening ones are good, they are less pointy than the needle files and rougher so work quicker.
Thanks for the info about the file! Will defo look into that as I have quite a few plates to do and a ton of other ideas I want to build!
Do you mean more like this for the teeth?
I am still not sure though I think this way probably looks better. It's going to get iron girder sticking out as spikes and stuff but it looks really flat to me and I am struggling to visualise the finished look.
Not sure what to do with the teeth yet so have decided to prgress the forward deck.
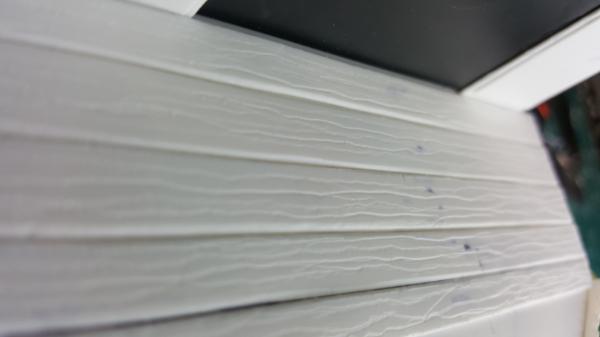
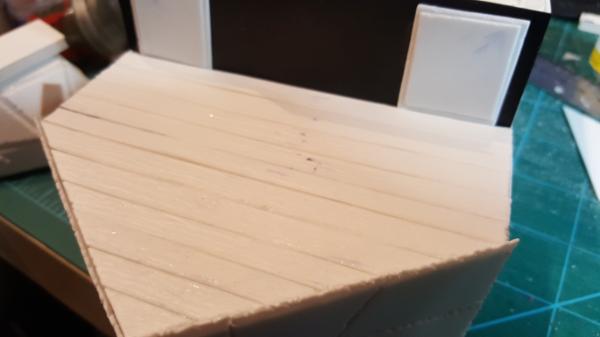
Here is a close up of my attempt at wood effect.
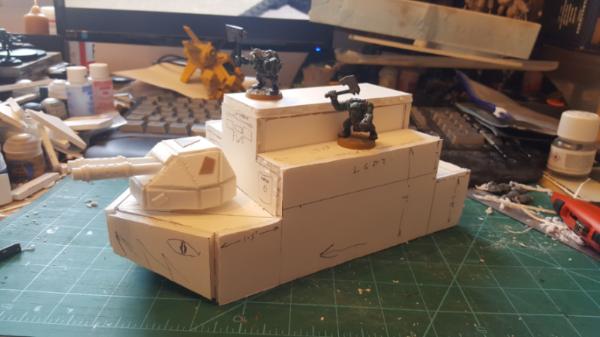
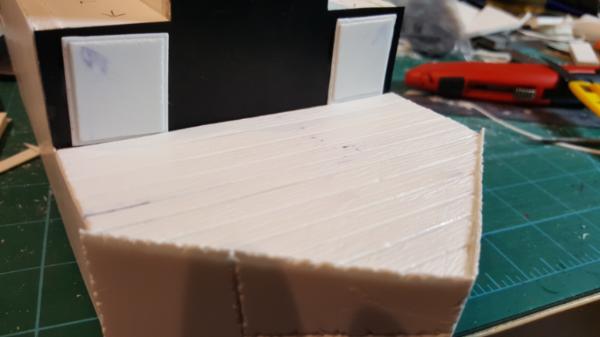
The deck down.
With turret.
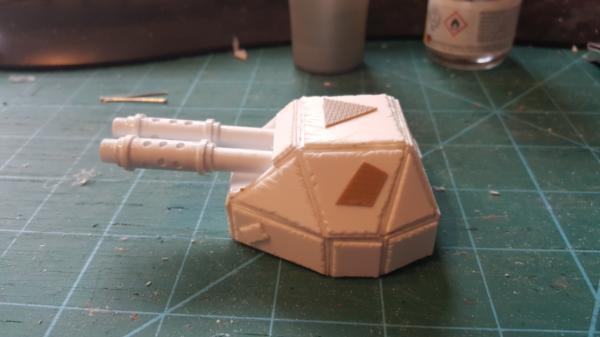
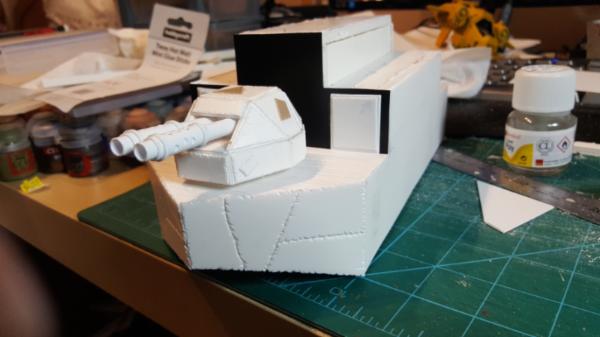
You may have guessed I LOVE my turret so forgive me for sticking it in at each step but I hope it shows the idea progressing!
You may noticed I have started detailing the front wall, the black is just normal 20 thou plasticard I just have some black and white, I am running out of supplies and am waiting for a mail order restock!
The white squares will be hatches but I do not want to add detail until I receive rods and bits I am waiting for incase I make the handles/hinges the wrong size for the riveting.
Camkhieri: "And another very cool thing, my phones predictive text actually gave me chicken as an option after typing robot, how cool is that."'
Meercat: "All eyes turned to the horizon and beheld, in lonely and menacing grandeur, the silhouette of a single Grot robot chicken; a portent of evil days to come."
From 'The Plucking of Gindoo Phlem'
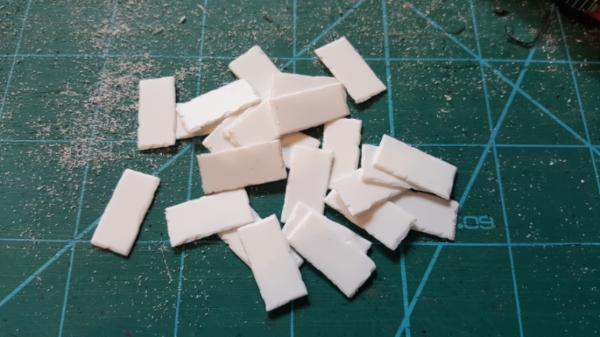
Still waiting on new supplies being delivered so working on a few random bits that I have the correct material for!
Here is the shape the tracks will follow, I have cut out 4 of these.
Here is some track plates, bit tedious making these! Not sure if this will be enough, I plan to enclose the top tracks in a guard so will not need to go all the way round.
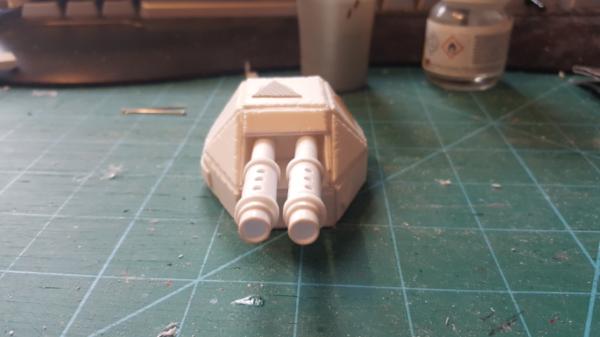
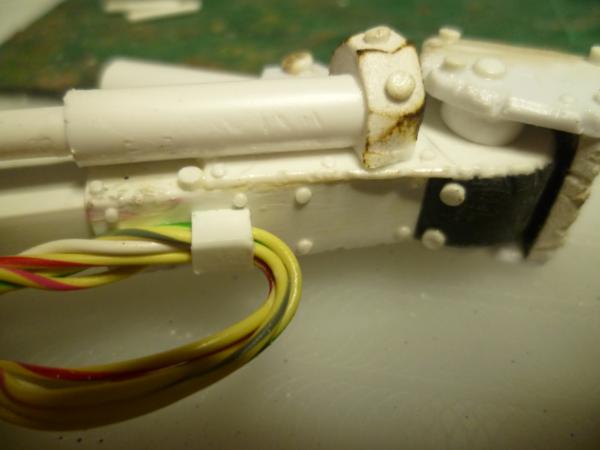
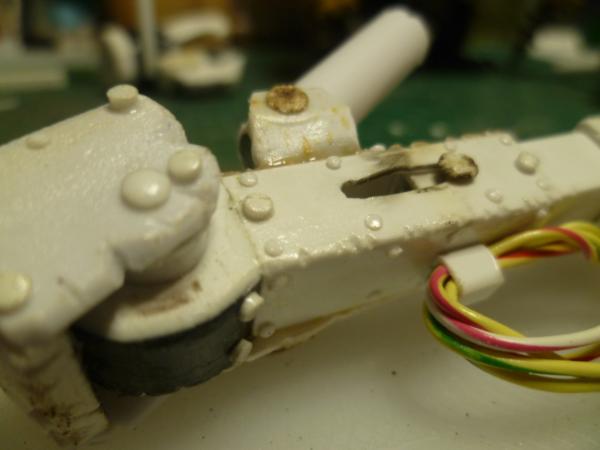
I plan to add a dual anti aircraft gun turret to the top deck (will count as 2 big shootas for gaming).
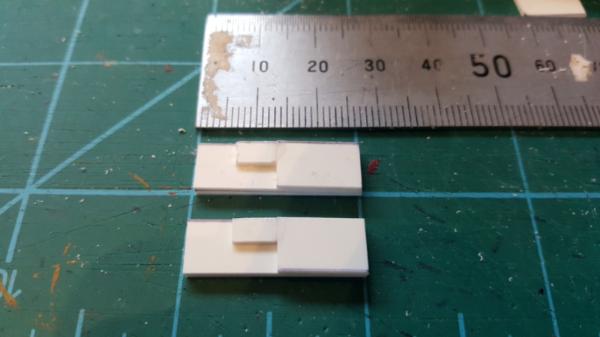
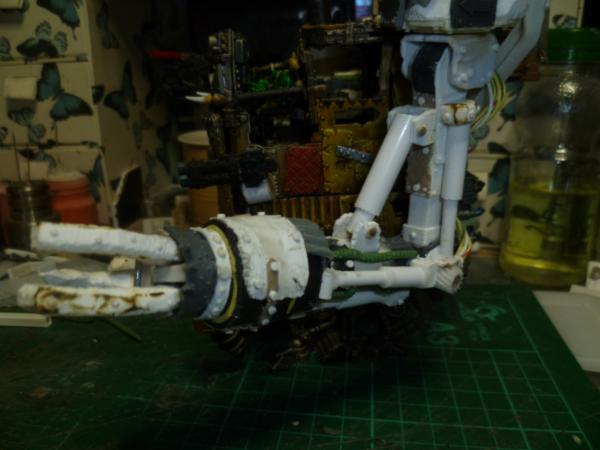
Here is my attempt to follow Ian Wyatt's tutorial on you tube for building guns. These are harder/fidlier than I expected!
I am finding it really hard to keep cuts square on the very small pieces!
Hopefully these will look better when complete!
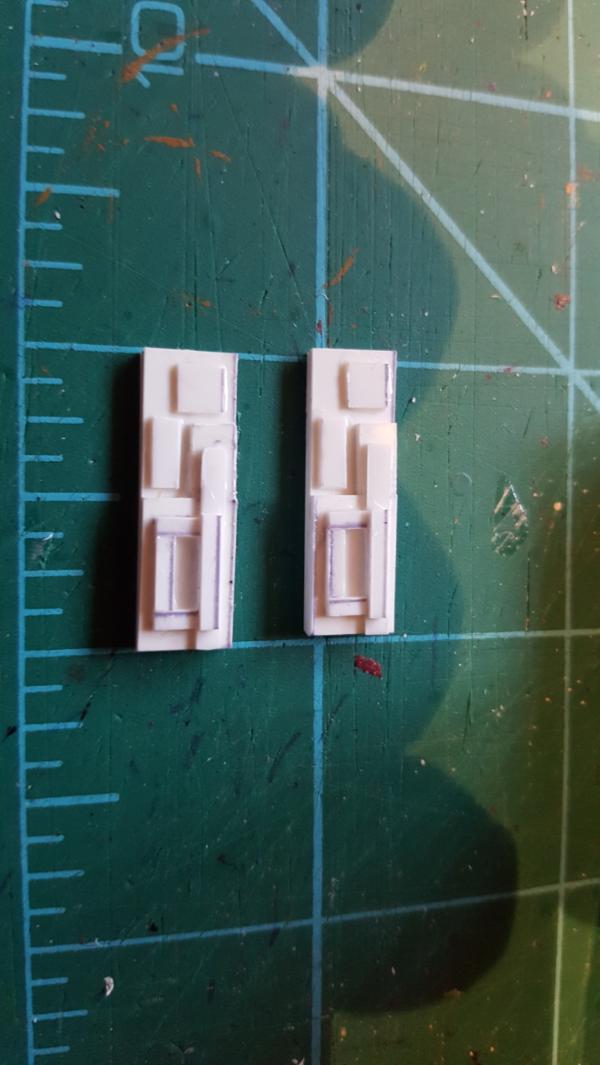
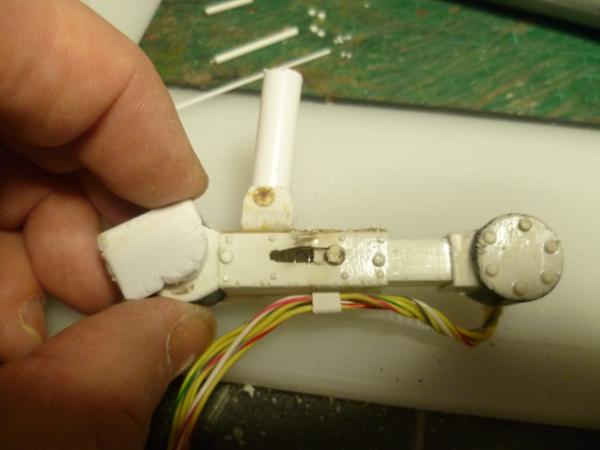
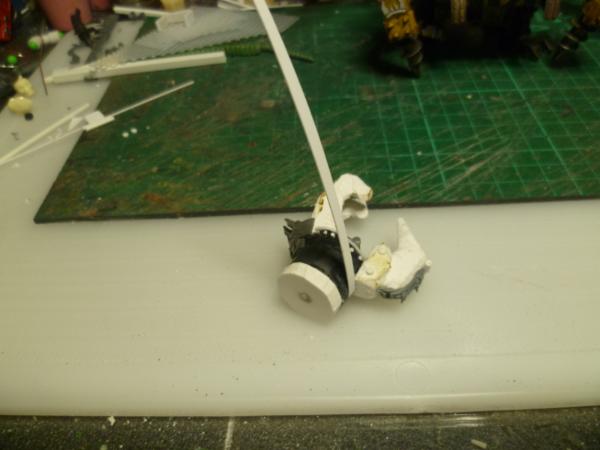
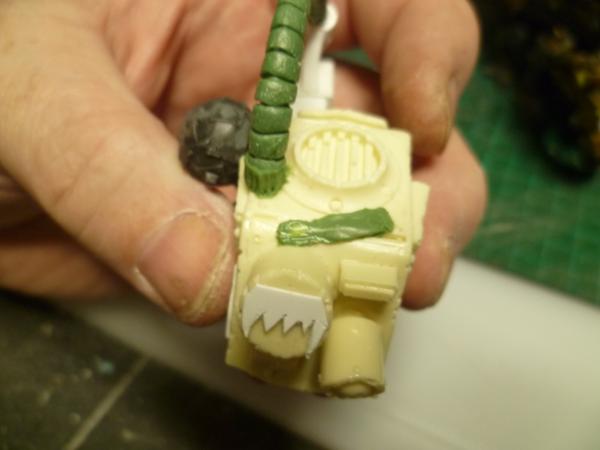
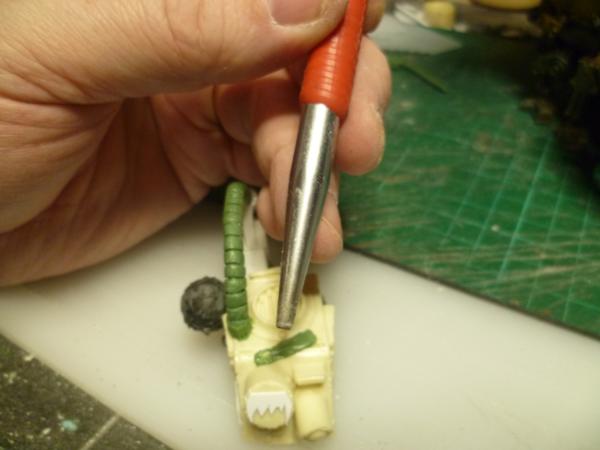
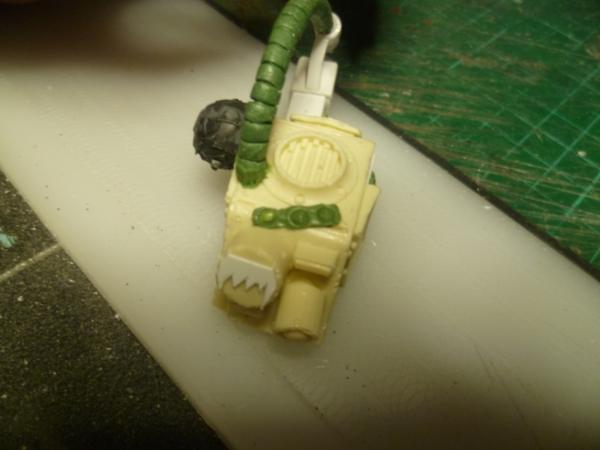
OK, go back to the big shoota picture and see if you can spot what I have done wrong - why will my twin linked big shoota turret not work?
Before you cut the panels up drill some holes in some of the material to get that holy look the orks have.
Can't see any thing wrong with the turret. No hatch, but they could be climbing up inside. No ammo ejection, but that could be inside as well, what do they care if there are red hot casings flying everywhere. You could just add some on the sides. Only other thought would be the elevation, can't hit squat at less than half a mile if it is under 10 ft high, but that again is not an issue, worst case slip a wedge under the back of the gun.
Loving this build so many great ideas, and looking so good.
Looking, good. I have to admit, I'm happy of old IG tracks left over, because making tracks out of plasticard would be be beyond the limits of my patience!
OK, go back to the big shoota picture and see if you can spot what I have done wrong - why will my twin linked big shoota turret not work?
Gun can't elevate? Maybe some dremel-work can fix it?
Camkhieri: "And another very cool thing, my phones predictive text actually gave me chicken as an option after typing robot, how cool is that."'
Meercat: "All eyes turned to the horizon and beheld, in lonely and menacing grandeur, the silhouette of a single Grot robot chicken; a portent of evil days to come."
From 'The Plucking of Gindoo Phlem'
Some people use a metal ruler as a guide for the hobby knife. For thin styrene/plasticard, you could just use scissors. That's what I do for anything under 0.5mm thick. Not that I'll claim that all of my lines are straight, but with a T-square I get pretty close. Also, you could just score it with your hobby knife, and then snap the sheet over the edge of the table.
Also, Orks. If something isn't straight, slap a patch on it. 'portant thing is that it's ded killy. Hur hur hur.
Camkhieri: "And another very cool thing, my phones predictive text actually gave me chicken as an option after typing robot, how cool is that."'
Meercat: "All eyes turned to the horizon and beheld, in lonely and menacing grandeur, the silhouette of a single Grot robot chicken; a portent of evil days to come."
From 'The Plucking of Gindoo Phlem'


 Click below for plenty guardsmen