76303
Post by: Warboss_Waaazag
 Tommygun1918 wrote: Tommygun1918 wrote:Really nice work. How well does the foamcore hold up to game play?
I have started building a few foamcore buildings but never seem to finished them.
Generally I work with polystyrene I buy in bulk from a commercial supplier.
I'm always looking for ideas.
Pretty well, actually. With the layers of details and glue, the material becomes quite durable.
Thanks for the comment, Tommygun!
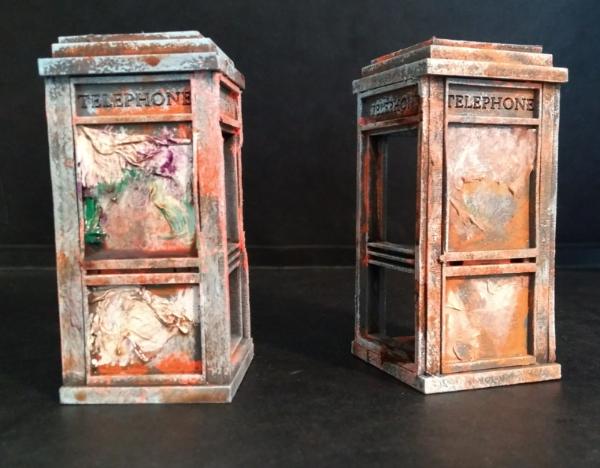
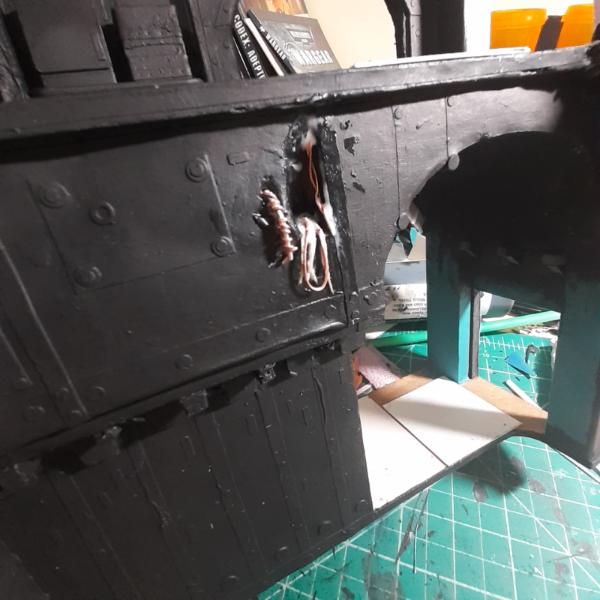
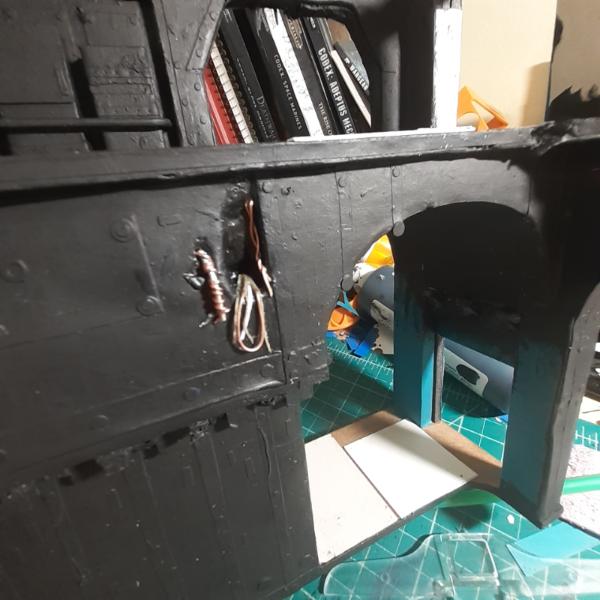
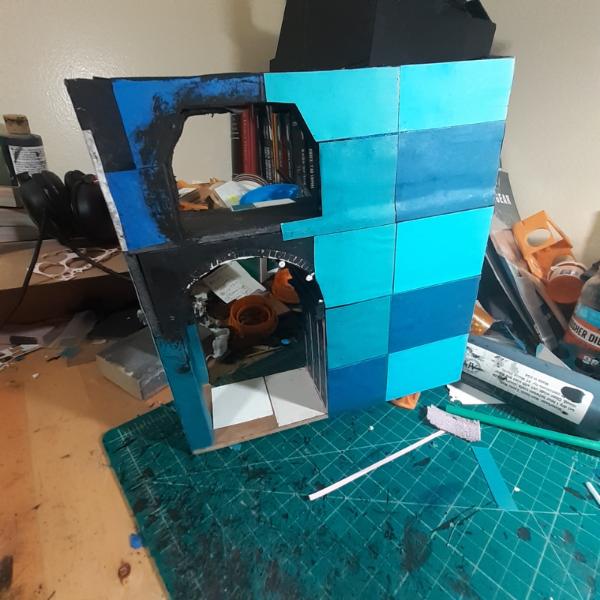
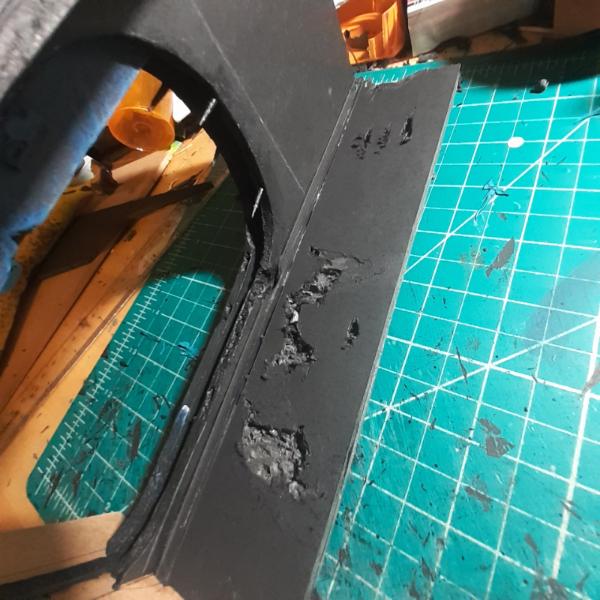
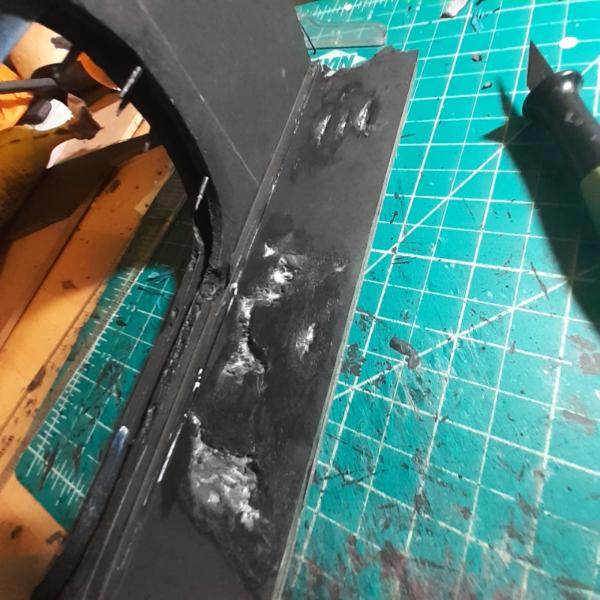
Also, I did some more work on the outer wall of this piece.

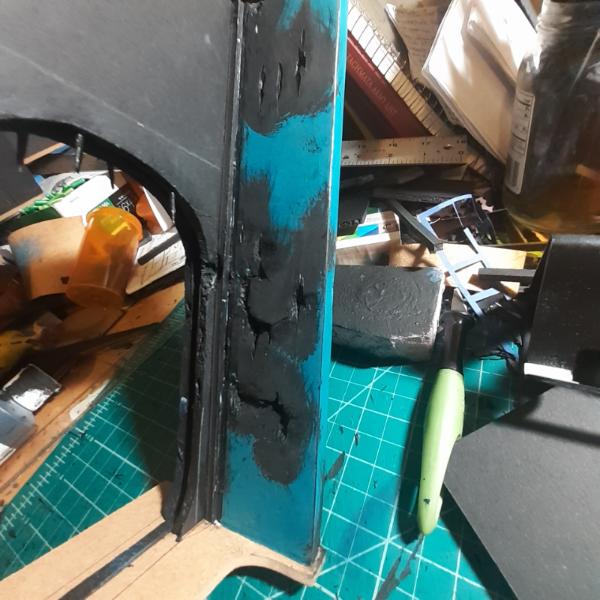
And base coated the interior walls with glue and cheapo Craft paint.
Thanks for looking and have an awesome day!
22619
Post by: inmygravenimage
Ooh I'm excited to see how the wall damage turns out
I tried something similar with tissue paper to create corroded walls.
2326
Post by: shasolenzabi
Very nice ruin ya got there!
76303
Post by: Warboss_Waaazag
 inmygravenimage wrote: inmygravenimage wrote:Ooh I'm excited to see how the wall damage turns out
I tried something similar with tissue paper to create corroded walls.
Oo, that sounds cool! Did you just soak the stuff in watered down PVA and layer it on the walls?
Thanks, shaso!
22619
Post by: inmygravenimage
123017
Post by: Olthannon
Awesome updates Waaazag! The buildings look great.
76303
Post by: Warboss_Waaazag
Nice, graven! I'll have to try that.
Thanks, Olthannon!
More updates soon.
119289
Post by: Not Online!!!
It's always nice seeing some terrain. That damage is interesting.
76303
Post by: Warboss_Waaazag
Thanks for the feedback, Not Online!!!
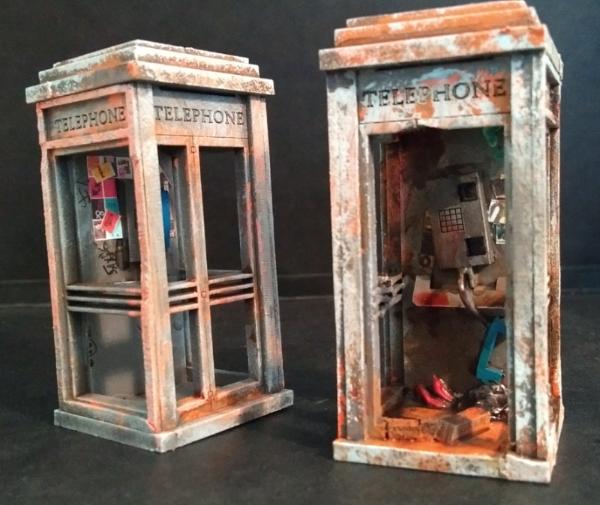
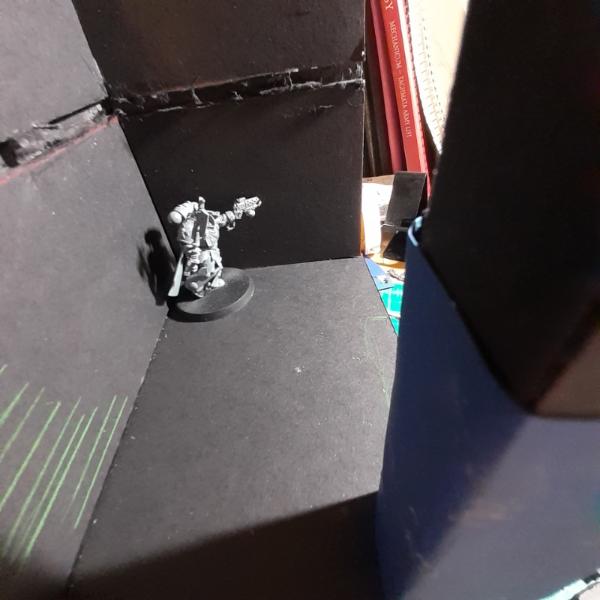
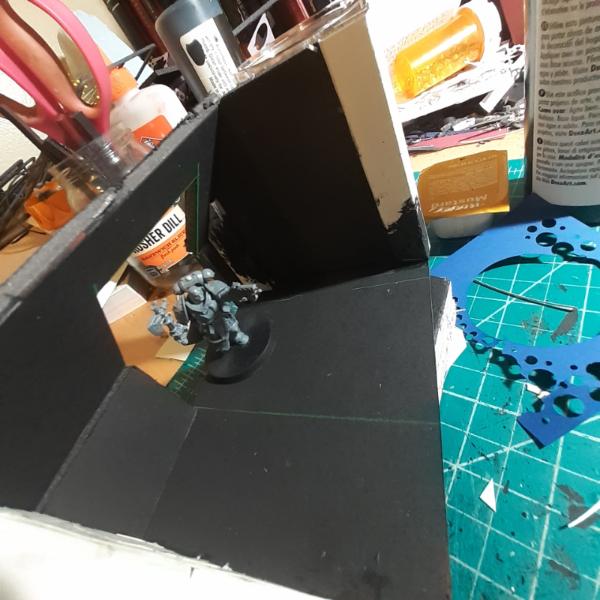
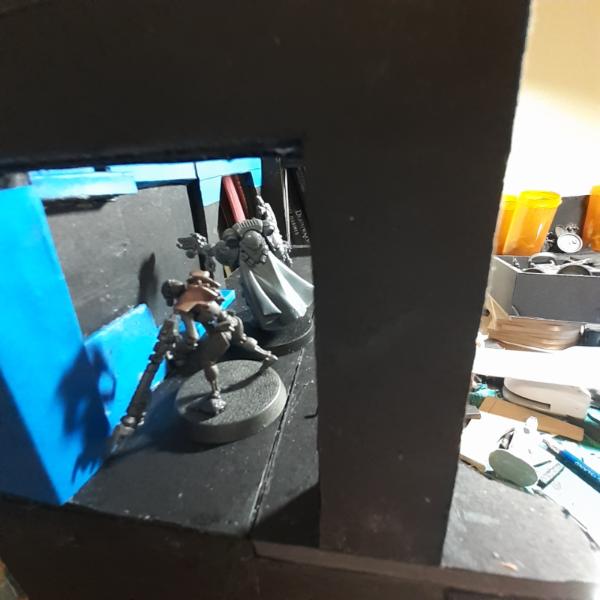
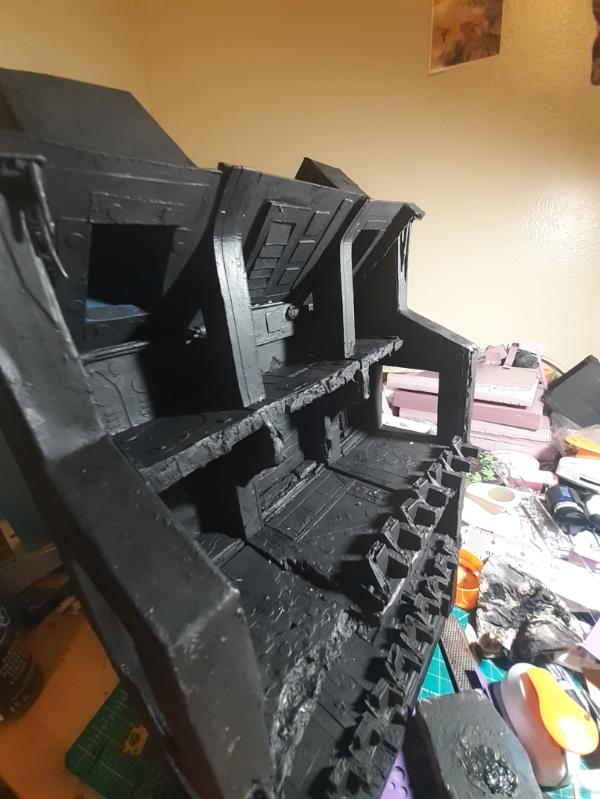
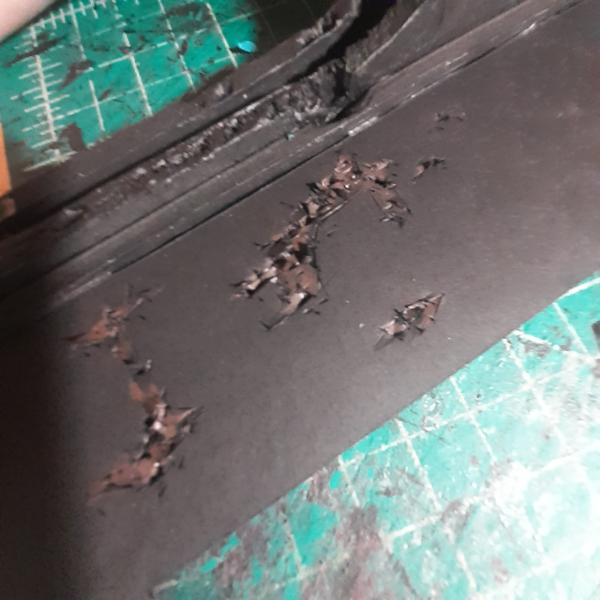
The damage is meant to represent corroded metal. And this is also a project to represent an unlit spacehulk interior. I'm imagining that the space marines are using just their autosenses like thermal and enhanced vision to "see" in the total darkness. So I'm making and painting as if they can barely see it.
119289
Post by: Not Online!!!
 Warboss_Waaazag wrote: Warboss_Waaazag wrote:
Thanks for the feedback, Not Online!!!
The damage is meant to represent corroded metal. And this is also a project to represent an unlit spacehulk interior. I'm imagining that the space marines are using just their autosenses like thermal and enhanced vision to "see" in the total darkness. So I'm making and painting as if they can barely see it.
That is one awesome concept, i might steal some ideas for my own terrain. 
1124
Post by: Captain Brown
More interesting creations Warboss_Waaazag.
Cheers,
CB
76303
Post by: Warboss_Waaazag
Thanks, Captain Brown!
I'm currently struggling with figuring out how to make a working sliding door on the opposite side of the bulkhead. I *think* I know what to do - build up wall thickness with cardstock, leaving a gap large enough to fit the door and then layer over that with just a small amount of raised detail attached to the door sticking out of the outermost layer. It hurts my brain to think about it, but I think I can do it.
2326
Post by: shasolenzabi
Warboss_Waaazag wrote:Thanks, Captain Brown!
I'm currently struggling with figuring out how to make a working sliding door on the opposite side of the bulkhead. I *think* I know what to do - build up wall thickness with cardstock, leaving a gap large enough to fit the door and then layer over that with just a small amount of raised detail attached to the door sticking out of the outermost layer. It hurts my brain to think about it, but I think I can do it.
and the slide guides, I recommend some plastic U like long pieces to fit in.
76303
Post by: Warboss_Waaazag
That's a good idea!
76303
Post by: Warboss_Waaazag
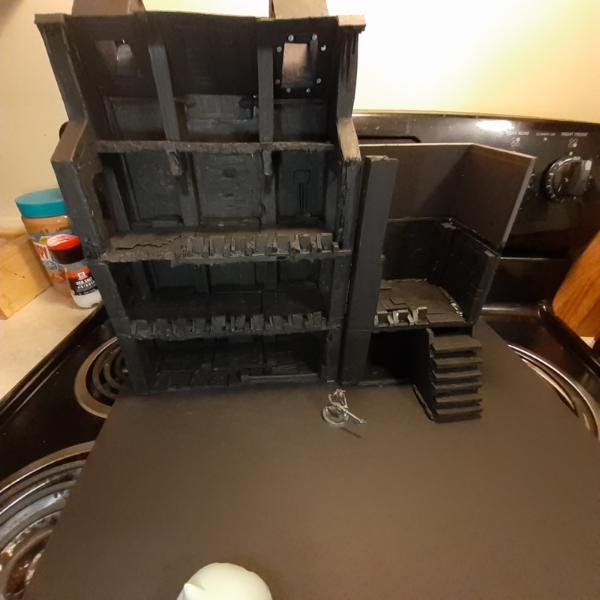
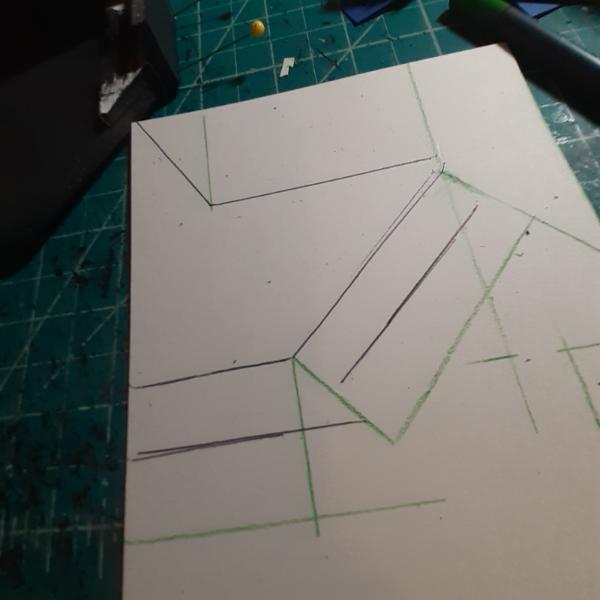
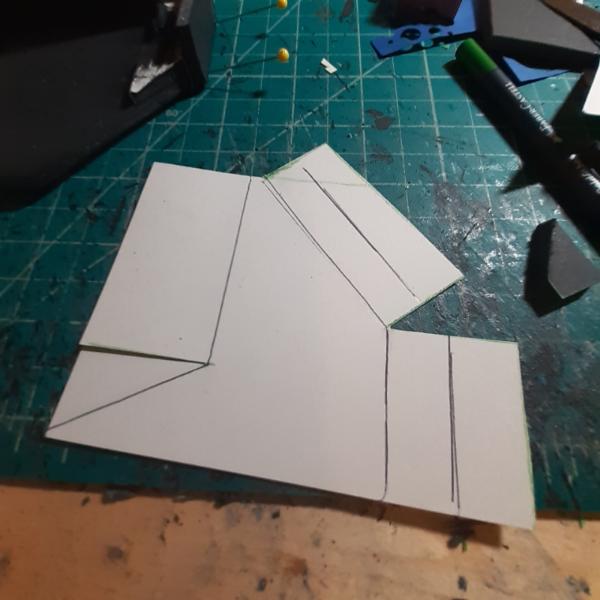
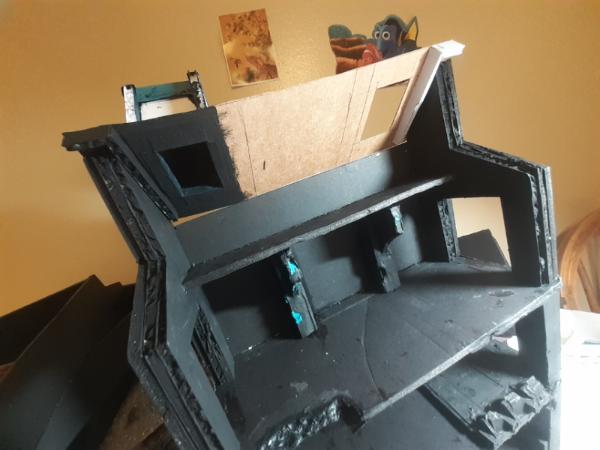
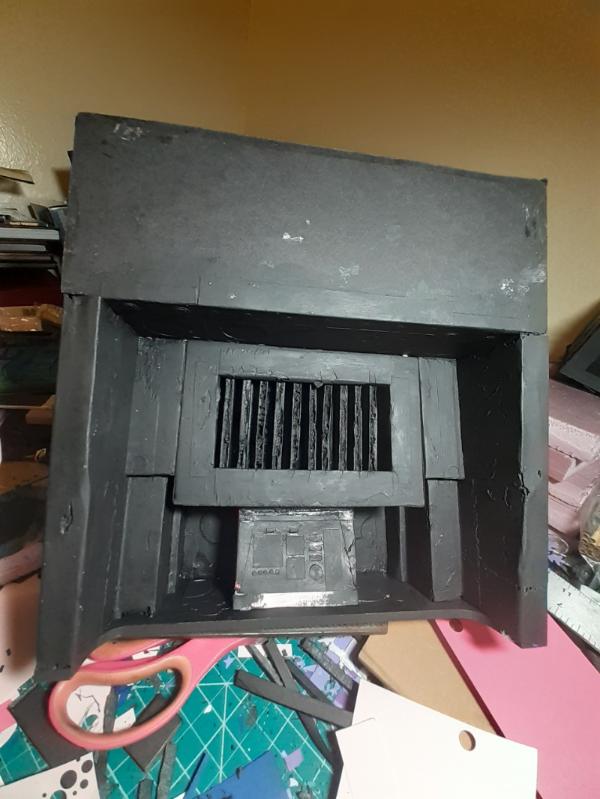
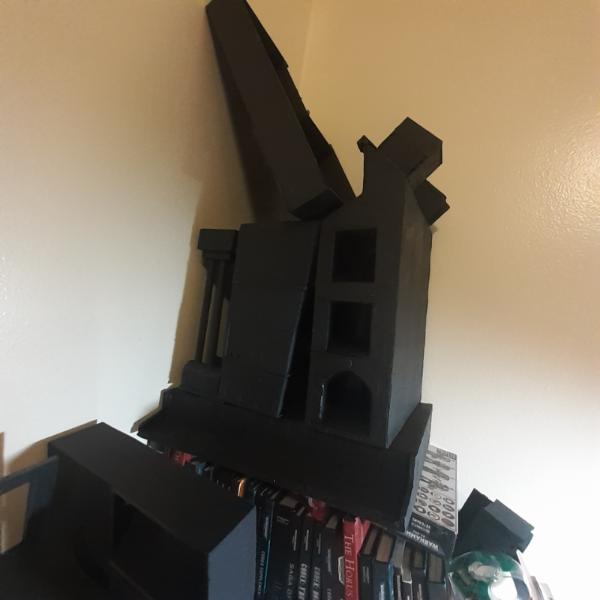
Wow, it's been some time since I posted on this. Never let it be said that I'm skilled at finishing the projects I start. On the plus side I finally got diagnosed for my various mental illnesses and am now on regulating meds that are helping me stay focused in ways I have never been able to achieve before. So, that said, here's the start of my current project.
I wrote an enormous Deathwatch/Spacehulk campaign on one of the other subsections of this very forum and have decided to create modular sets of terrain for each Mission until I feel like I have enough terrain. I first started with the idea that I'd be making terrain for a 48" by 72" table, but then discovered that my friend's gaming table's dimensions are actually 28" by 44". So I'm building with those dimensions in mind.
I started with a piece that was originally meant to face its flat surface to the center of the board with the detailed floors facing outward, to act like corridors in the walls. I was struggling to come up with a way then to create an elevated walkway for the interior. But now that I'm working with less space, I can turn it around so that the piece can be both interior wall/structural support and elevated walkway.
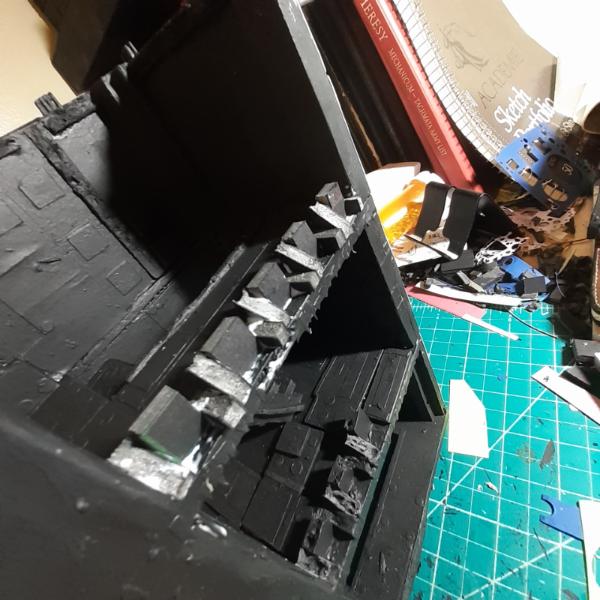
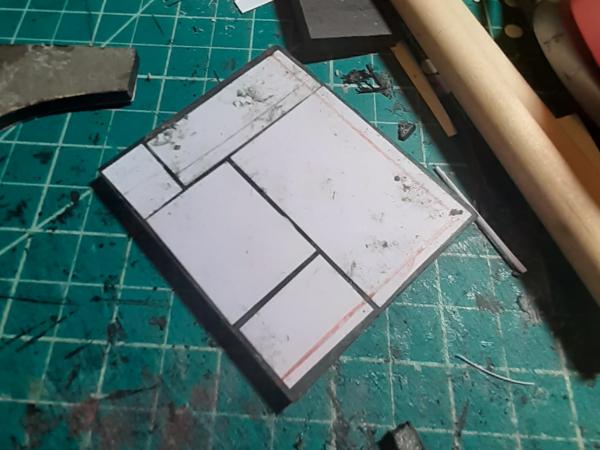
Blah blah blah blah terrain. Anyway, I built the basic framework with a masonite letter (an F with the "f" bits sawn off) and roughly measured and glued together foamboard walls/floor. Once done I started detailing the bottom and finally remembered to start taking in progress photos. Here's the first.
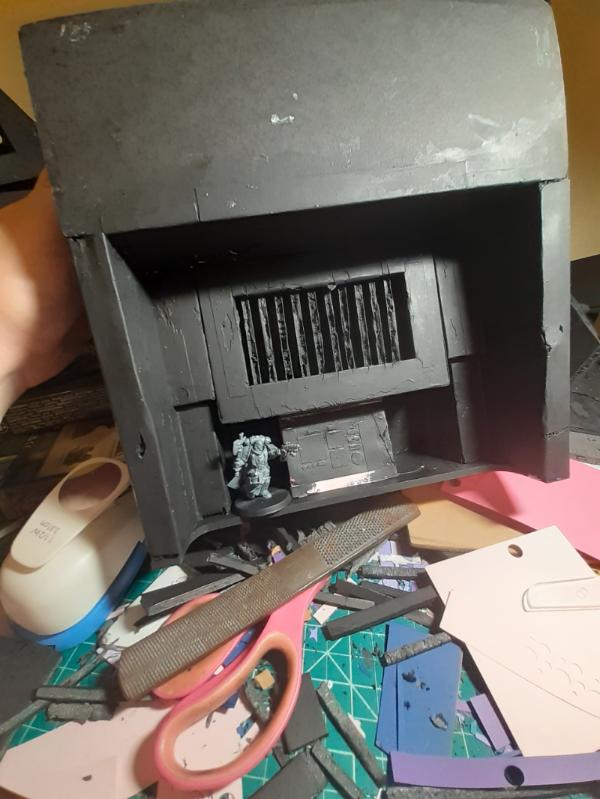
And then went nuts with more details and forgot to take more photos until I remembered to take these.
I've been priming each section as I go because there is a lot of nooks and crannies to get at. I'll post more progress up as I remember to take photos and upload them. Thanks for looking and have an awesome day!
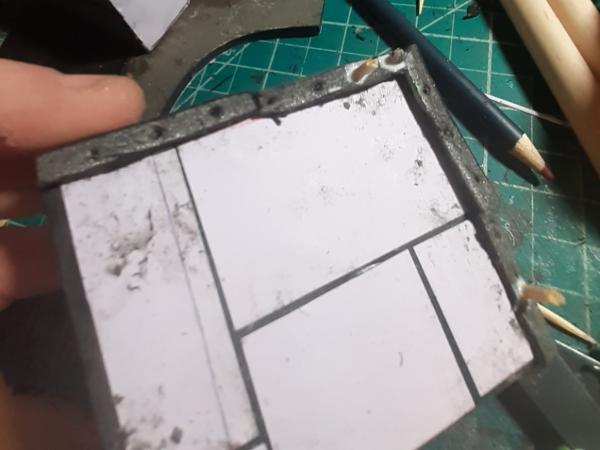
Edited to add: Oh check it out, I did remember to take some progress shouts of the 1st floor.
106010
Post by: Meer_Cat
Great to see you back, WW! Hail, hail, the gang's all here!
Very interesting use of found/non-standard materials to achieve the desired outcome- your terrain pieces never lack for imagination.
I find myself in a similar predicament vis a vis: progress photos; I either forget to take them, or don't want to bore people with intermediate stages and present only finished or near-finished items. In the end, I let folks figure out for themselves how much they want to read or look at and try to take photos at fairly regular intervals or stages of progress. Using the cellphone to take the photos has helped a lot; using a point-and-shoot little camera before was adding an extra step and had to remember to have the little camera out to begin with- the phone is almost always on me.
Great to have your thread to look in on again and get inspiration from! "The destination is nothing, the journey is everything." 
Rock on!
76303
Post by: Warboss_Waaazag
Thanks, Cat! I appreciate the warm return reception. Yeah, I agree that the phone camera is way better than the digital camera I was using. So much easier to work with and saves me so many unnecessary extra steps.
76303
Post by: Warboss_Waaazag
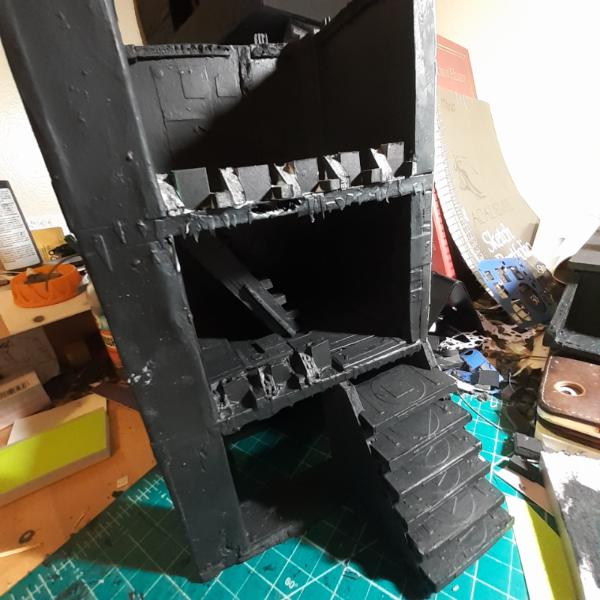
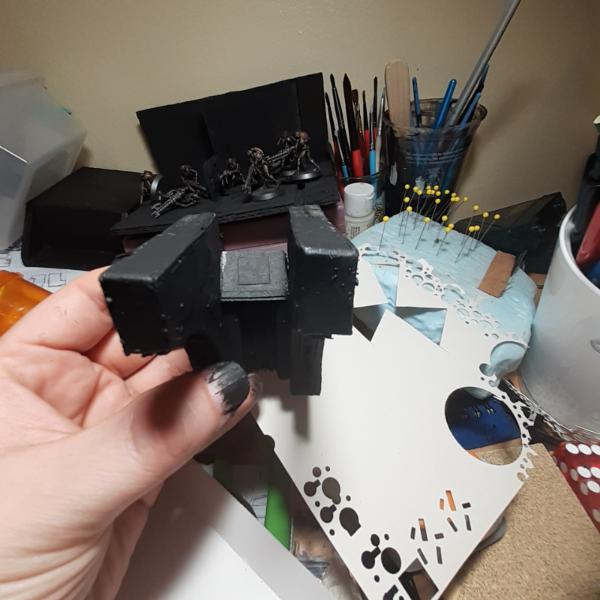
More detailing work on the first level.
76303
Post by: Warboss_Waaazag
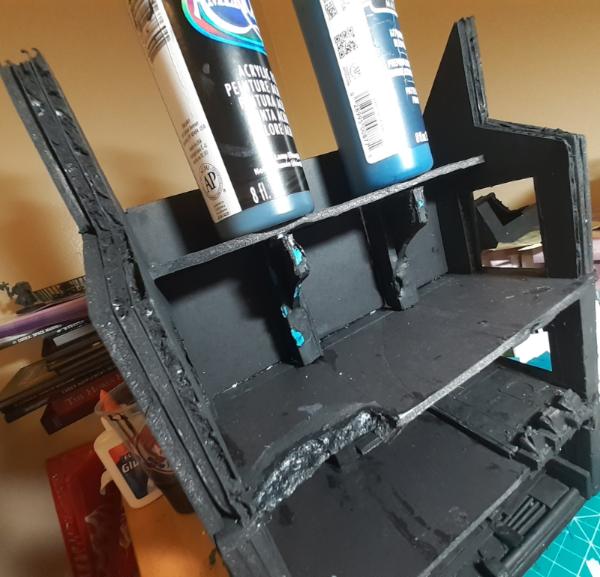
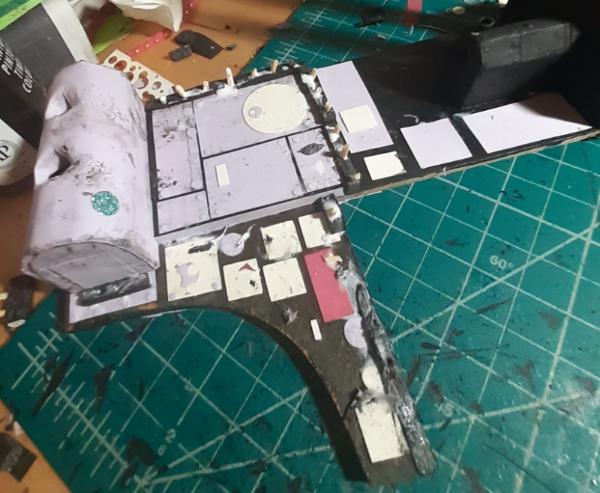
More work done, complete with priming.
3rd floor structural supports test fitted.
Made an air duct out of throw away scraps, including the packaging from my foam core.
And I made some panels for the inside of a ceiling hole.

Thanks for looking. C&C always welcome. Have an awesome day!
106010
Post by: Meer_Cat
Excellent progress and that console you built serves as inspiration for what I want to do on the zeppelin. Rock on!
76303
Post by: Warboss_Waaazag
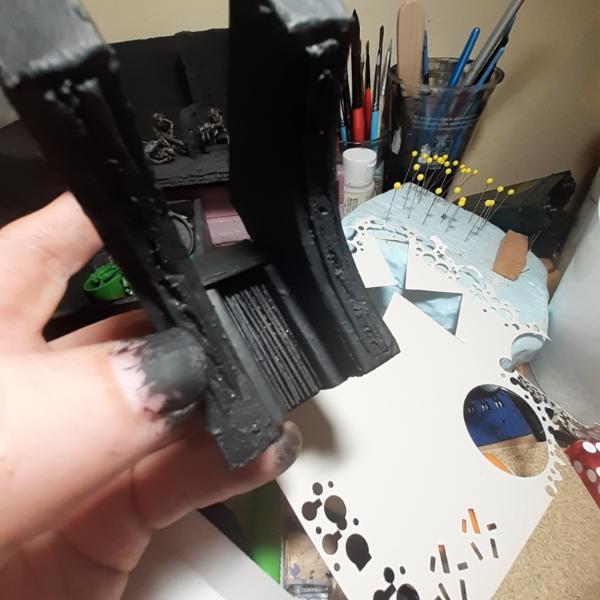
Here I have the third floor structural supports in place with craft paint to weight them down.
And then tunnel views of the 1st floor:
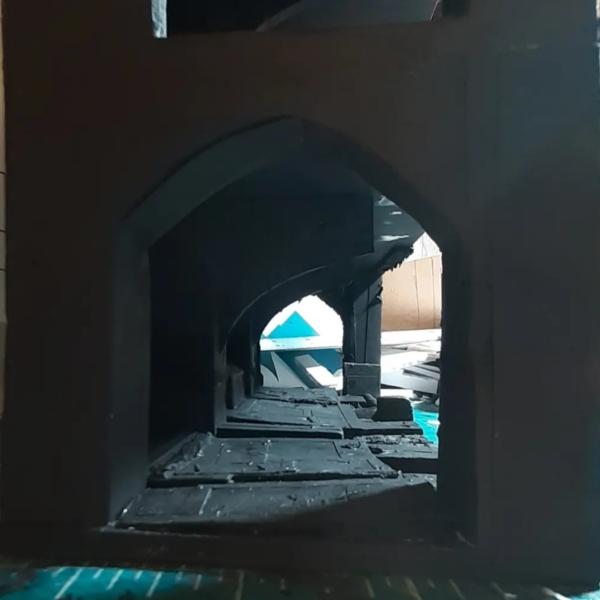
2nd floor:
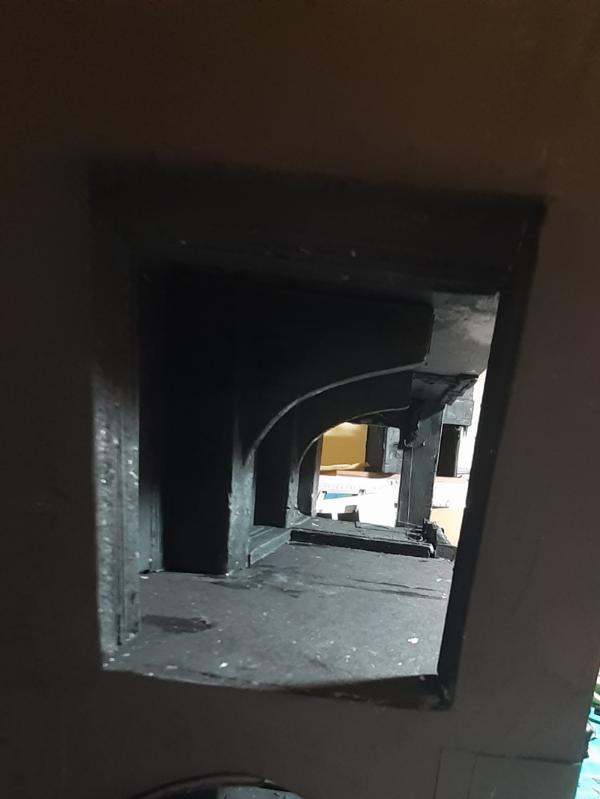
And 3rd:
More work to be done.
106010
Post by: Meer_Cat
All three of those views are going to be excellent stages for when you want to photograph a figure- let alone the fun of gaming them!
98217
Post by: Skinflint Games
Great to see this blog back in action :-)
76303
Post by: Warboss_Waaazag
Yeah, Cat, that's one of my favorite things to do with finished terrain projects. Taking pics of painted models in action on 'em!
Thanks Skinflint! I really appreciate that!
I'll have more pics of my progress up soon. I keep thinking I'm almost done...and then there's still so much left to do. I have to detail the ceiling on the first floor, the floor above that, the ceiling and floor above that, and the "connection" to the ceiling on the top. Then the back of the thing. There's so much. And this is the first of like 35 pieces.
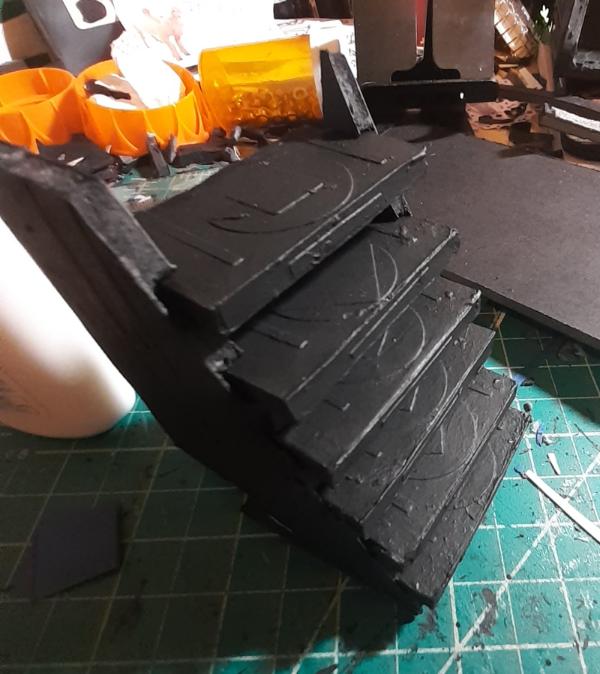
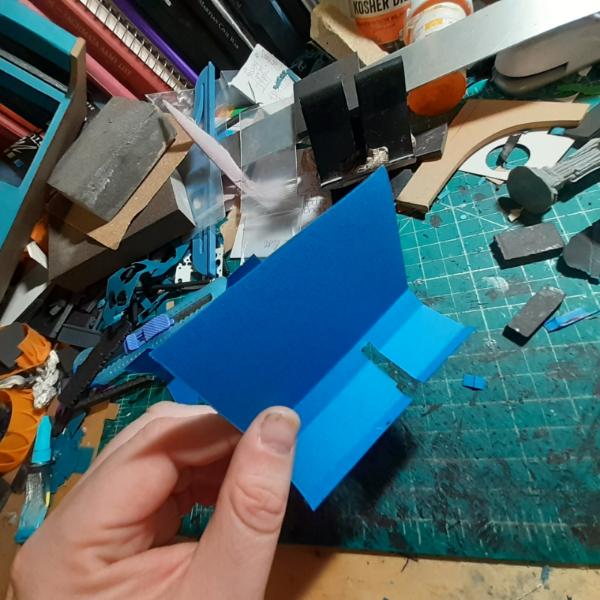
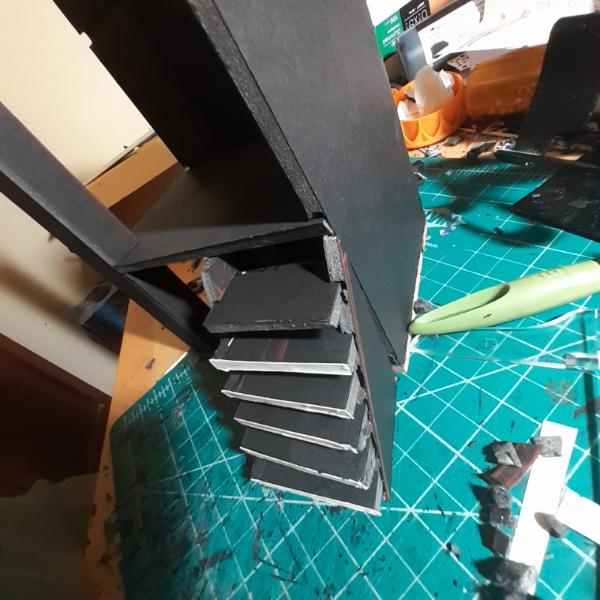
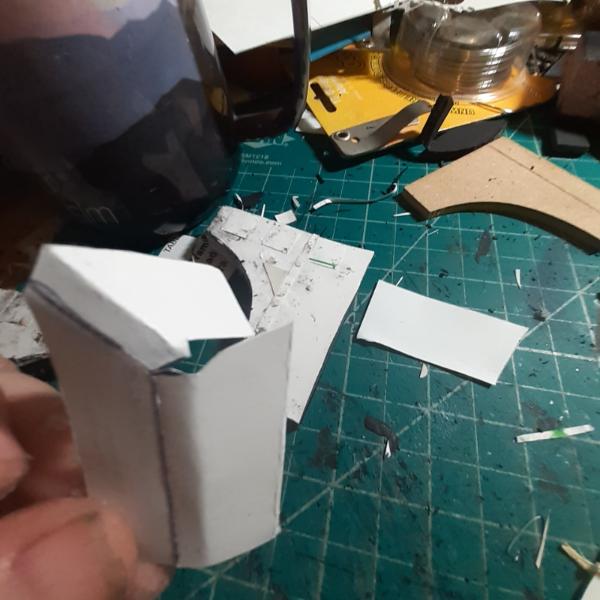
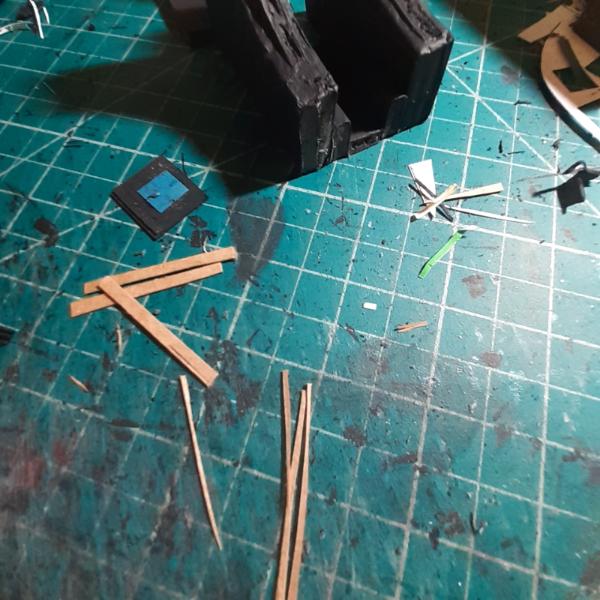
Although, I did start building a pair of balconies. These were originally created to "solve" the open doorways on the 2nd and 3rd floors of the other peice, but I realized that the short one missed the 3rd floor and the tall one blocked the 2nd floor. So now my intent is to use them as separate stand alones.
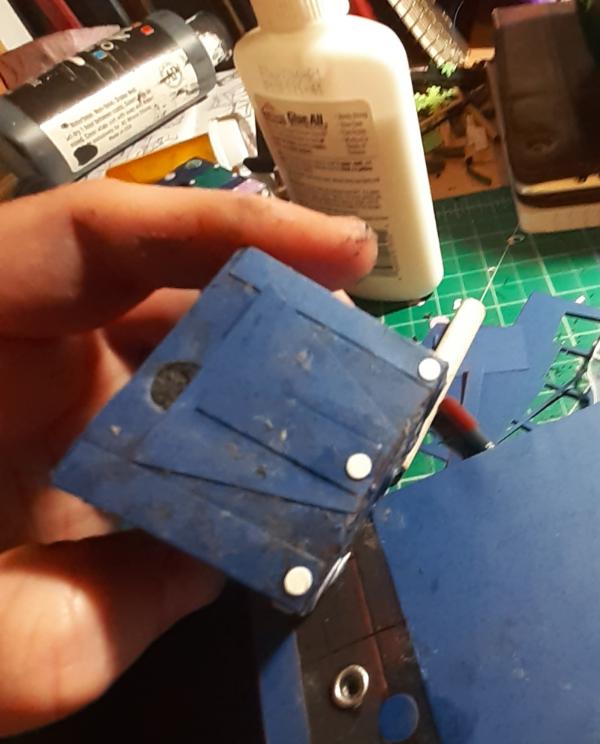
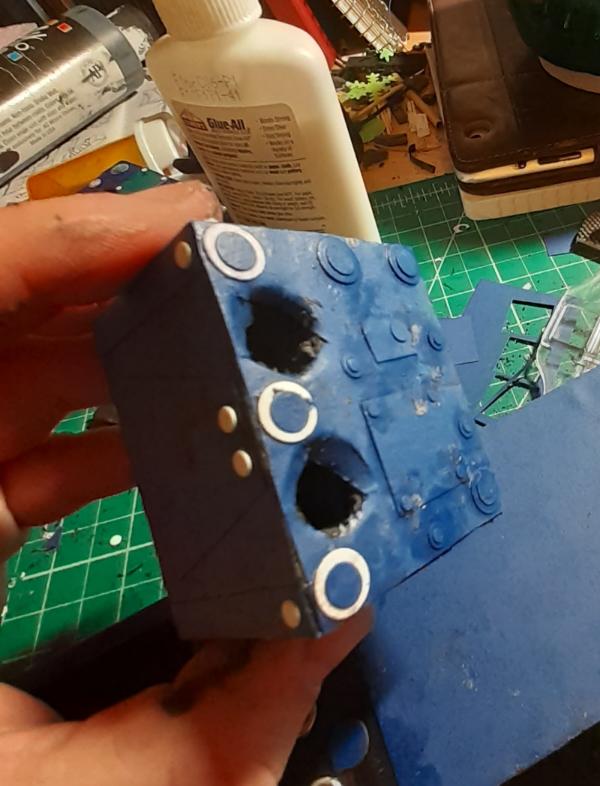
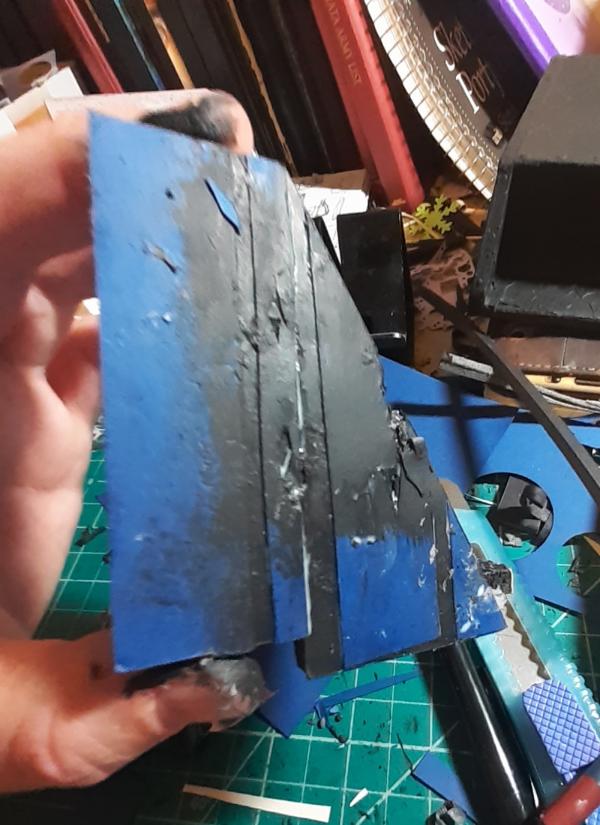
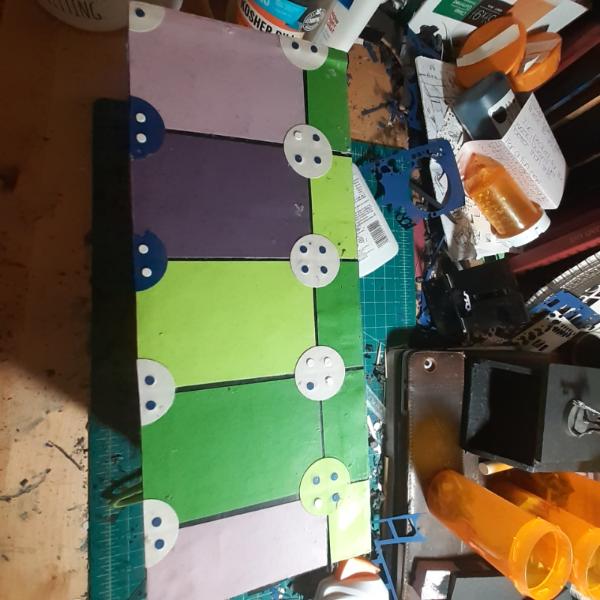
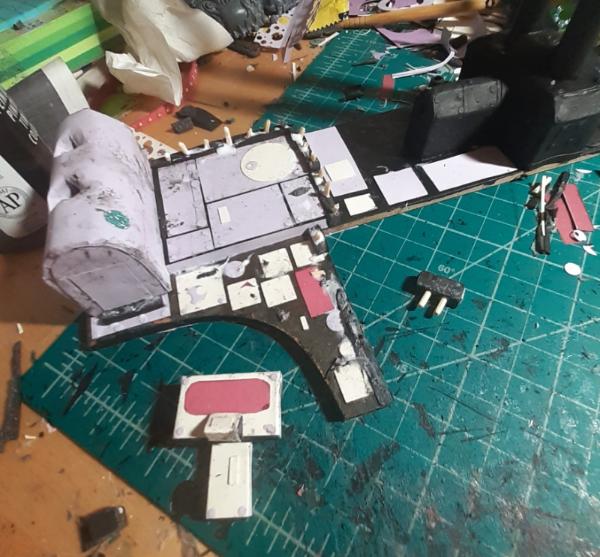
This is the bottom of the short one.
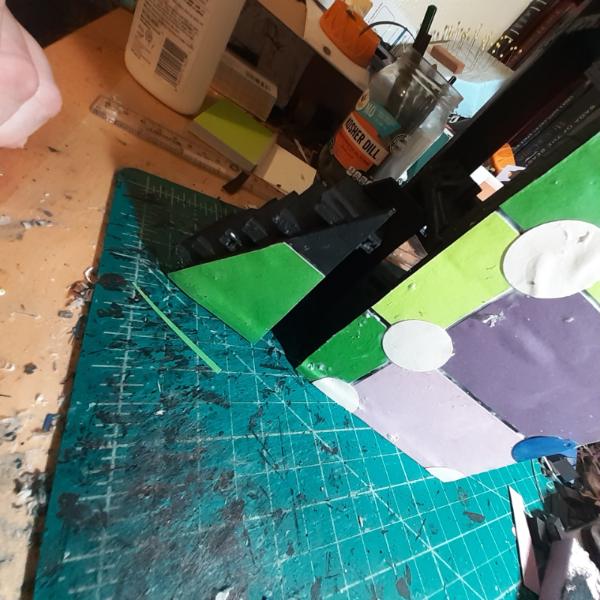
I made their shapes complicated because I thought I was building for a 48" wide table and had made a riser platform. This shape was intended to fit a staircase under it so models could move to the stuff on a lower level and inside the walls. Now that I am working with a 28" wide space, that shape is unnecessary, but I'm not about to waste a project just because it looks weird.
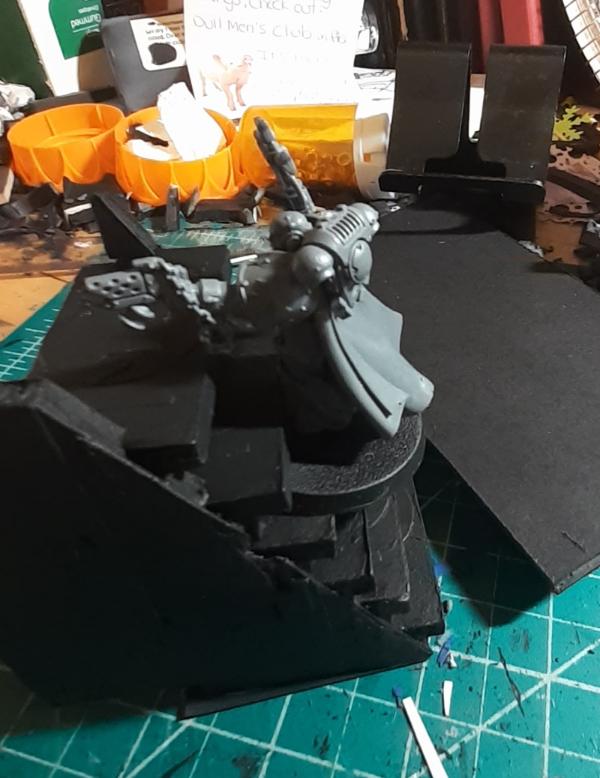
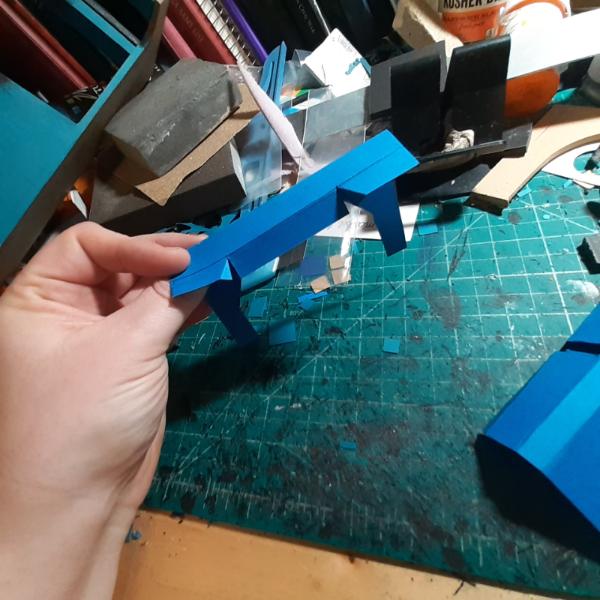
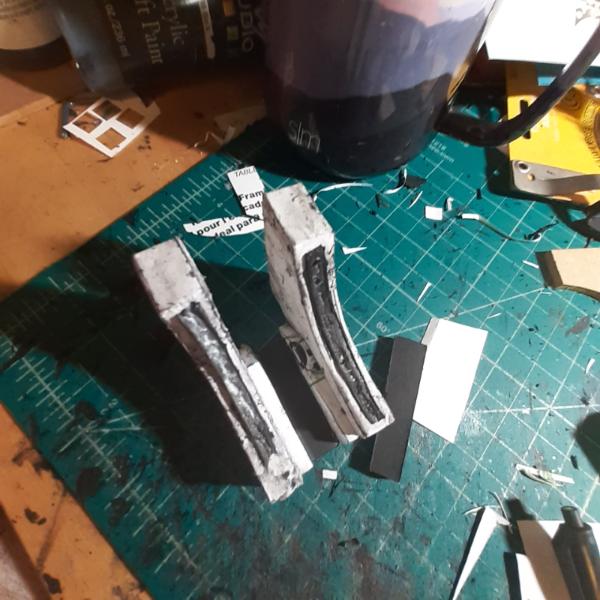
This is the taller peice as I started to detail it.
My materials are primarily paper, toothpicks, and foam cast offs. Here is a shot with the little platform I built to start the stairs and how it would have socketed into the weird 3 legged design.
Anyway, that's it for now. Thanks again for looking and I hope everyone has a fantastic day!
76303
Post by: Warboss_Waaazag
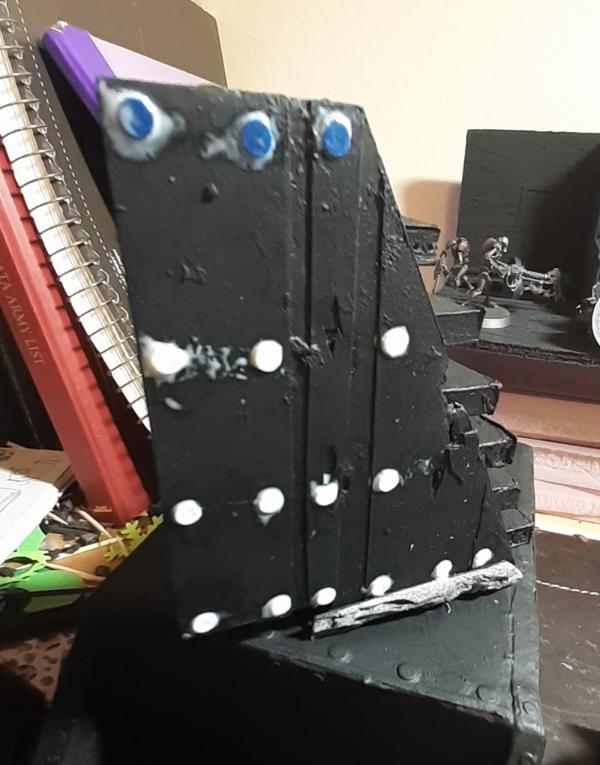
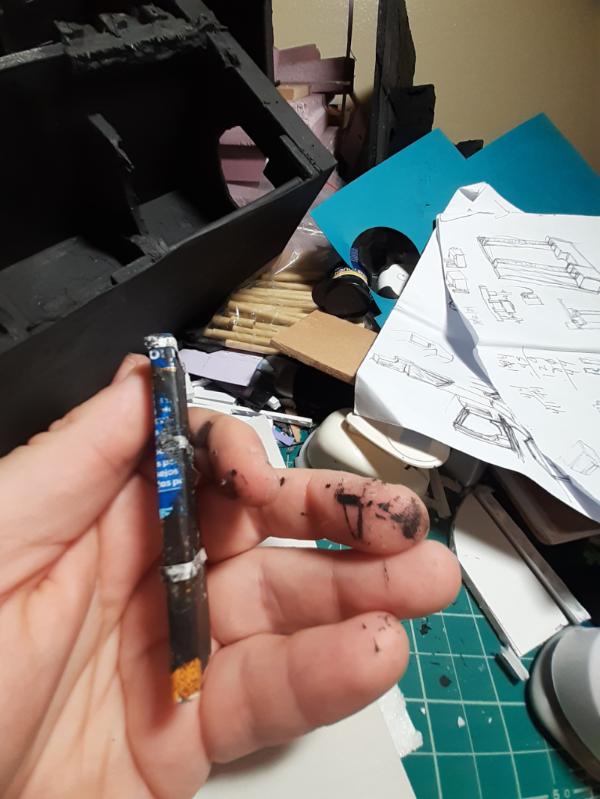
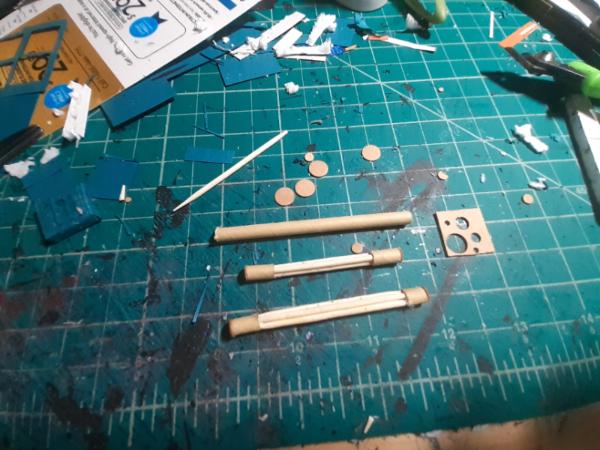
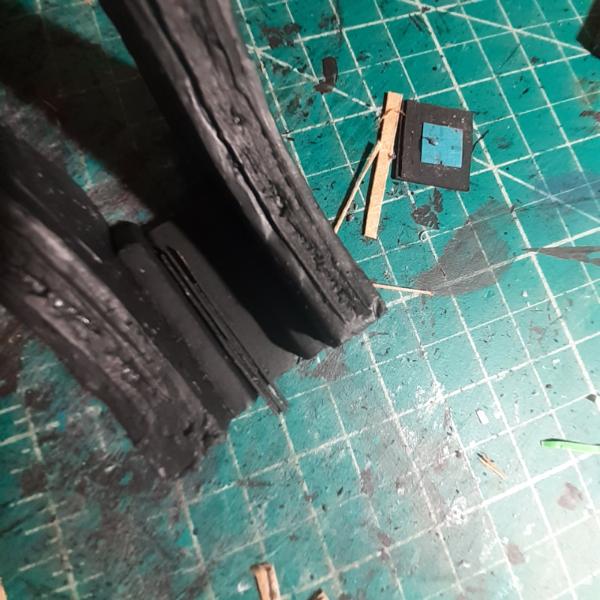
I did a whole bunch of detail on the small balcony. And because I'm not using it for its original purpose, I decided to make it more stable by adding a bunch of exposed pipes for the missing 4th leg. These pipes are rolling paper tubes. I have a bunch of friends who smoke and they save stuff for me.
I also did a ton of detailing on the taller piece, but forgot to take progress shots until it was all primed. And of course I could not leave well enough alone and added even more detail after the priming.
That's it for now. Thanks for looking. C&C always welcome. Everyone have a great day.
133289
Post by: Tommygun1918
I see you're making progress, keep it up.
76303
Post by: Warboss_Waaazag
Thanks, Tommygun1918!
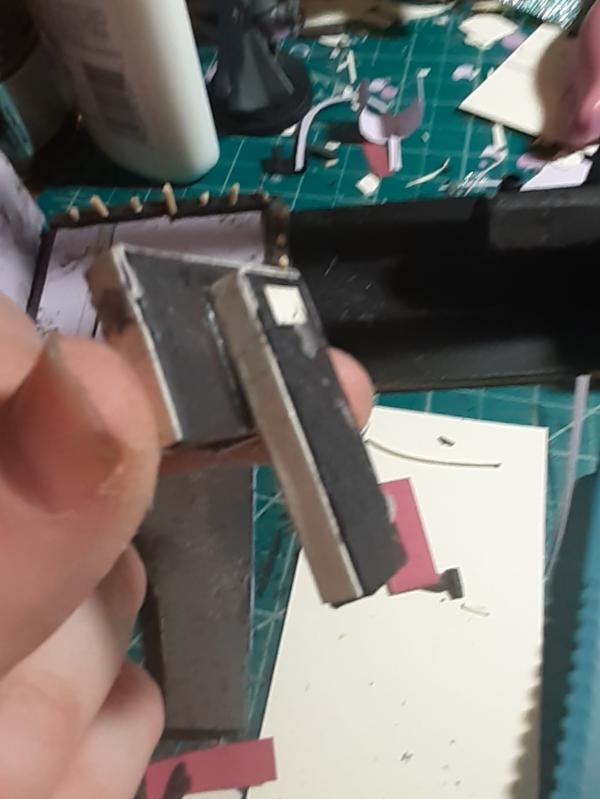
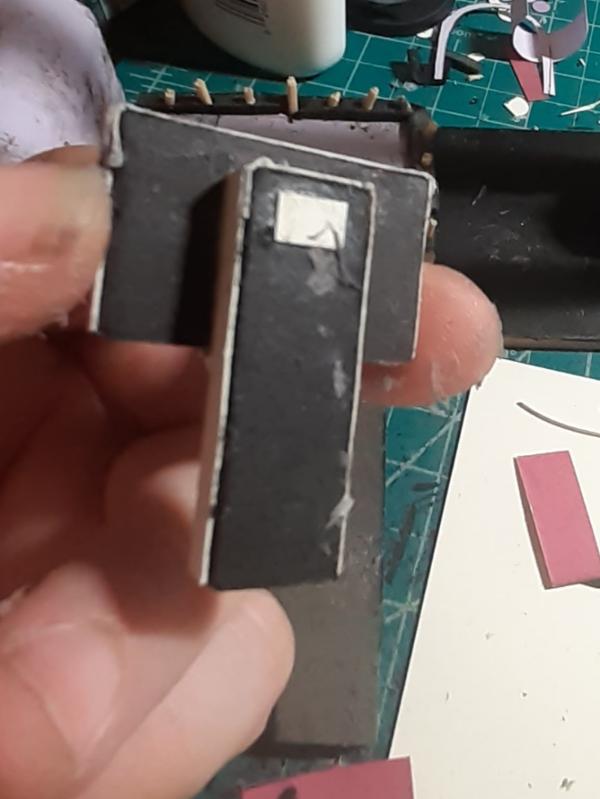
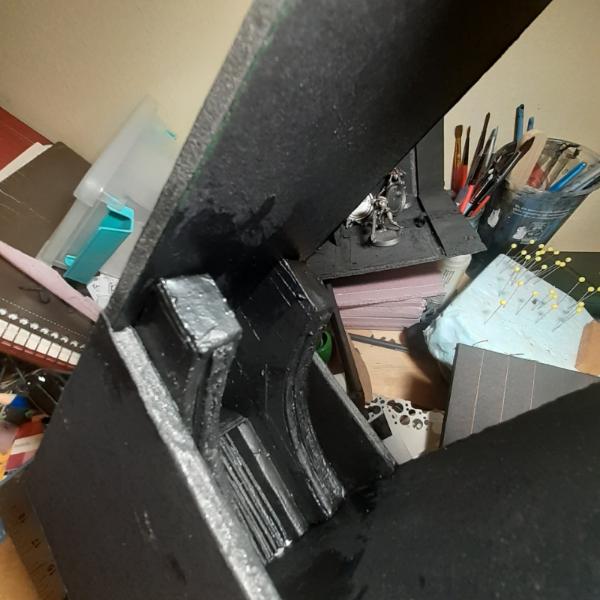
I imagine this doesn't look like much yet, but this is going to be the angled ceiling on the tippy top of this piece. It is in its infancy, but here's the inner wall.

And the outside facing part.

I built a little lip to glue these walls onto, to create depth.
I'll paint these walls and glue them in place. We'll see if, once done, anyone will even notice all the absurd work I've put into this detail. Thanks for looking! More progress will be posted soon.
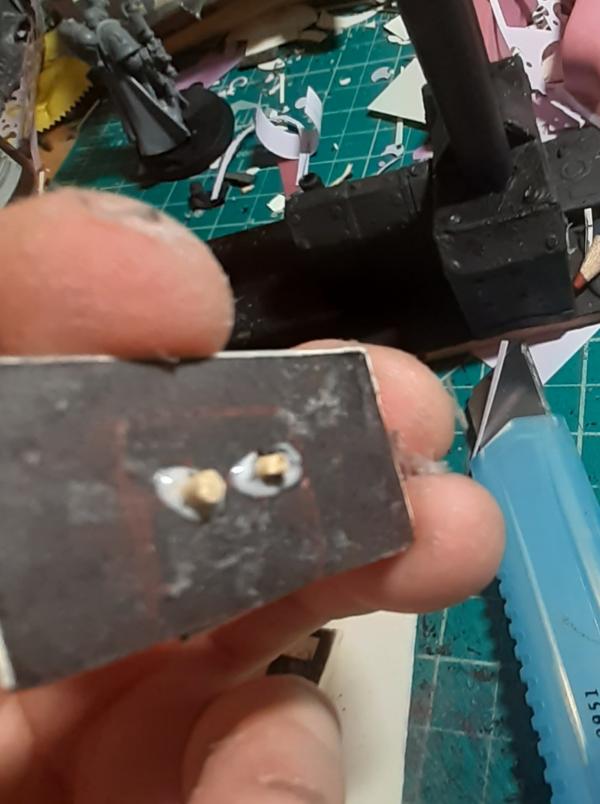
Automatically Appended Next Post: Alright, here is the ceiling hole painted and in place. And yep, I was right, no one is going to notice this insane detail except me.
The top side is a little wonky at the moment, but there's plans to fix that.
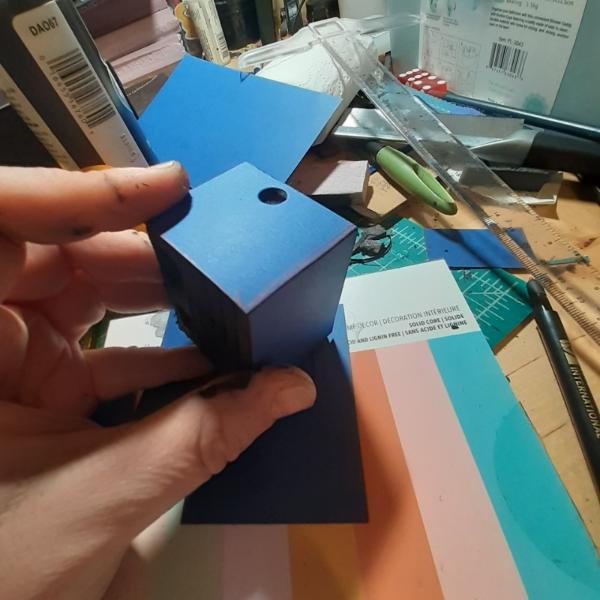
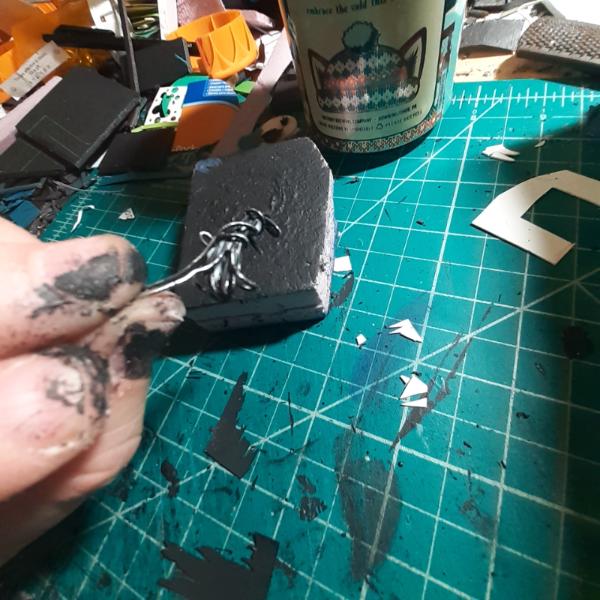
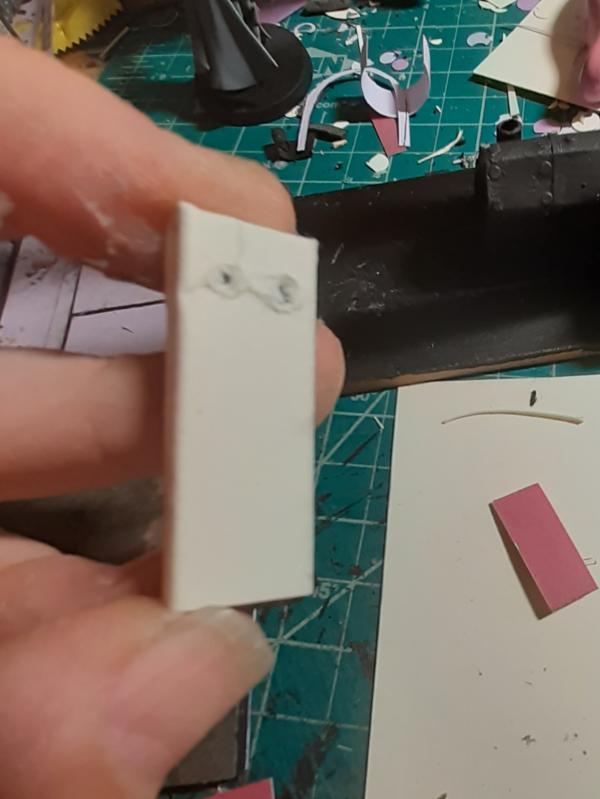
Also pictured is the block from earlier, detailed up.
And a test fit of the ceiling bit. I still have a lot left to do.
Thanks for looking. More progress shots up tomorrow.
84491
Post by: gobert
Looking good Warboss! You’re cramming loads of details in for sure. Sounds like it’s going to be an amazing 3d board to play over when you’re done!
76303
Post by: Warboss_Waaazag
 gobert wrote: gobert wrote:Looking good Warboss! You’re cramming loads of details in for sure. Sounds like it’s going to be an amazing 3d board to play over when you’re done!
Thanks very much, gobert!
"Electrical cabling" made from cardstock, toothpicks, and rolling paper tubes.
And then some glued into place.
I'm feeling pretty good about my progress on this. Thanks for looking. Always looking for critique. Have a fantastic day!
76303
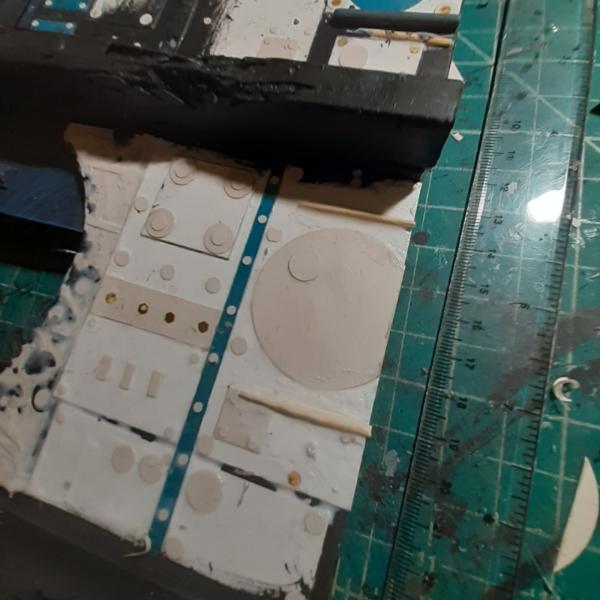
Post by: Warboss_Waaazag
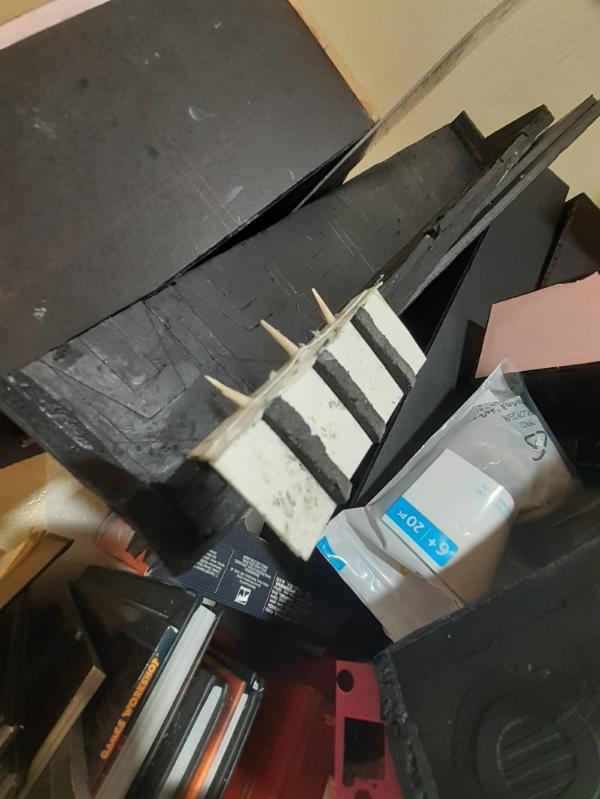
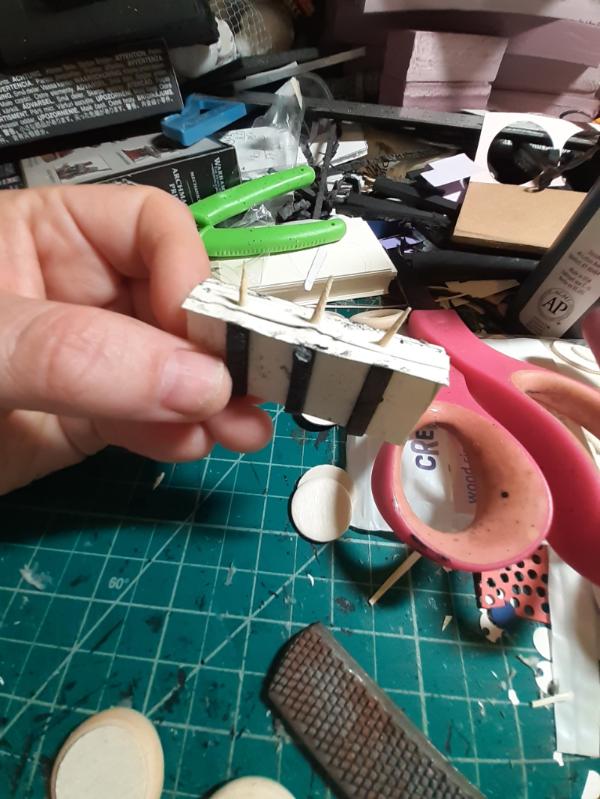
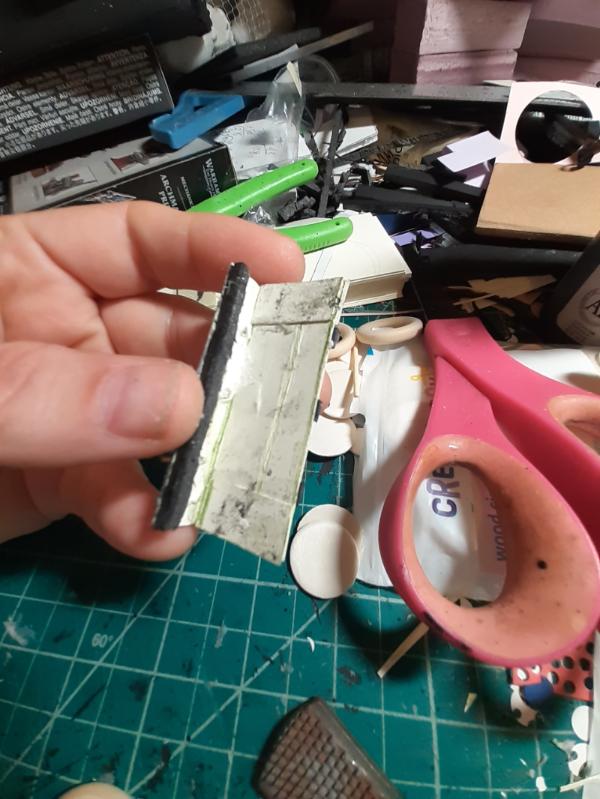
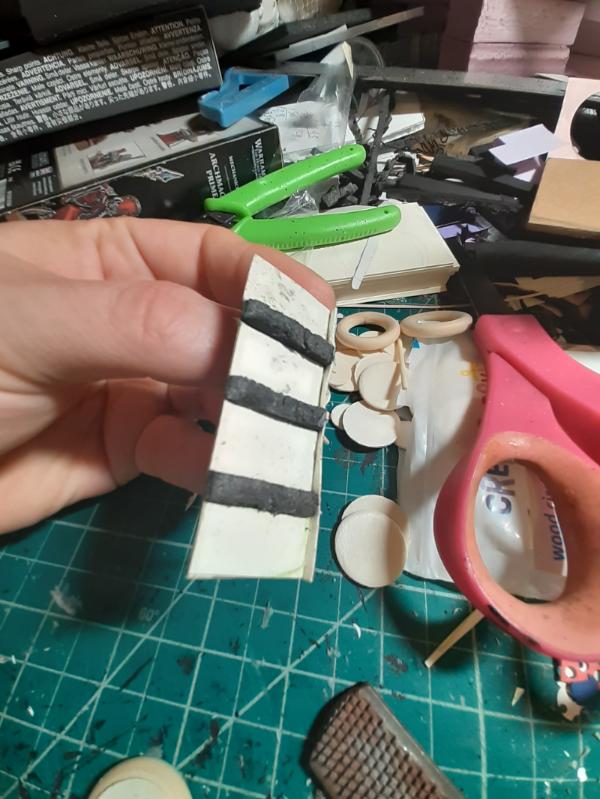
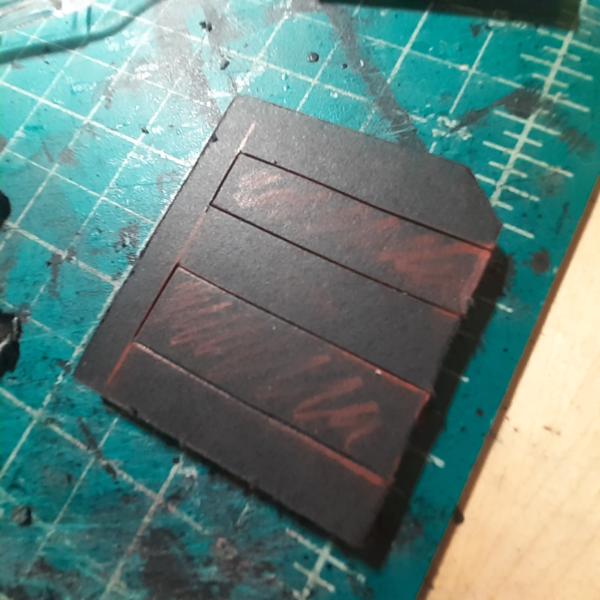
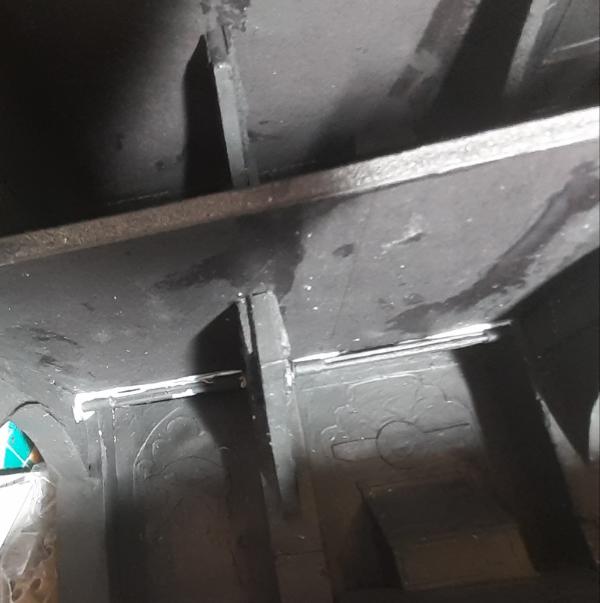
I did a little bit more work yesterday evening. Not a huge amount, but even small progress is real progress. This is the corroded trim along the edge of the 3rd floor's...well, floor.
I also added a band around the pillars on the 1st and 2nd floors & started wrapping the pillars on the top most level. Just small details. I think, for some reason, I am dreading reproducing the "railing" trim that I made a test for at the end of the 2nd level. I don't remember what sizes each peice was and I have to find my replacement blades because all my exactos are getting dull.
Ah, well. More work will get done this evening. Thanks again for looking and have an awesome day!
76303
Post by: Warboss_Waaazag
Okay, finally remembered to take progress photos of stuff before I primed it. The spaces between each pillar, on the back walls, gets decoration and a little floor runner to fill up the space. Here are the WIP shots of each of those three for the third floor.
And some extra detail on the side of one that will peak up just over the floor panel.
And then each runner with its respective wall panel and miscellaneous extra details, if any.
This one is for the left wall:
Here is the back wall and the panel for the center:
And the right wall:
More details will go up as I make them. Thanks for looking and have an awesome day.
106010
Post by: Meer_Cat
You're really cranking through the work!
That's a great idea with the floor runners to add visual interest, detail and texture without having to get really involved- great look within reasonable build times; I
m stealing that. 
76303
Post by: Warboss_Waaazag
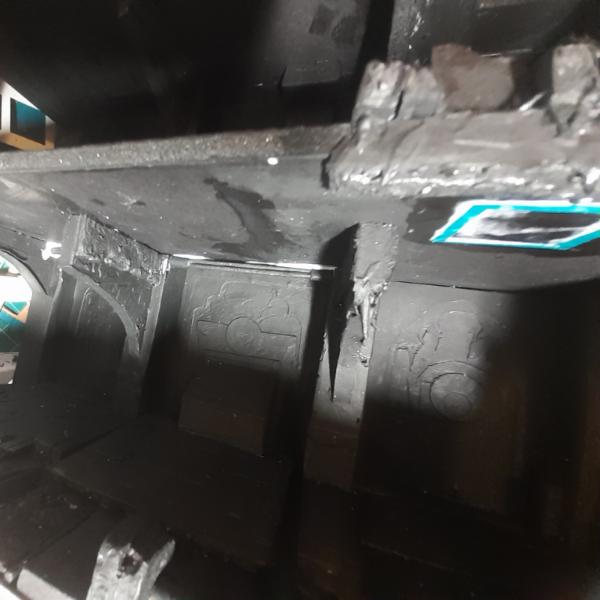
Thanks, Meer_Cat! I'm very happy with my progress also. Speaking of which, here are some shots of the ceiling from the 1st floor, along with the last length of cabling in place.
And then the right wall and floor panels in place:
The middle:
And the left, including detail of the floor. I tried to make it look like the area had been damaged by acid. Do you think it comes across well?
And then the third floor in its entirety, including the decorative railing.
Thanks for looking. C&C is always welcome. Have a great day.
76303
Post by: Warboss_Waaazag
Not a huge amount of work, but I started on the 4th floor.
Thanks for looking. More progress tomorrow.
22619
Post by: inmygravenimage
The evolution of this is staggering. Lovely stuff.
76303
Post by: Warboss_Waaazag
Thank you very much for the high praise, graven! I should have more progress shots up tonight or tomorrow morning. I'm working on the right side of the ceiling and the back wall on this top floor.
76303
Post by: Warboss_Waaazag
I started making details for the left side. A wall panel first:
And then primed with some piping:
And then the floor:

And then a notched structural beam:
That's as far as I got this evening. More work will get done in the next few days, with more updates. I have to wrap the beams on the right side, make railing bits for the 2nd floor, detail the right side ceiling (including a vent shaft), and figure out what I want to do with the center. Then I have to cover the sides and detail the back before I will consider the building part complete and move on to the next piece.
Thanks for looking and have an awesome day!
106010
Post by: Meer_Cat
I say again- that paneling is a terrific effect! The whole project is impressive and intimidating in its scope, but I really like your raised-relief panels and how natural they appear in their positioning; there is really a purpose for them to be where they are. Rock on!
76303
Post by: Warboss_Waaazag
Thanks again, Cat.
I started work on the right hand ceiling vent. This rim gets glued to the exterior of the angled ceiling.
These are rough cut panels that will form the walls of the shaft.
I learned from last time that most of the details I add to these panels will be hidden in the ceiling, but I still put way more than necessary. I just cut a bunch of paper strips of various widths, used some of the other paper debris you can see in the background here, and various scraps to add random shapes to these panels.

This might be difficult to see in this photo, but this is the base details of the other ceiling hole, with an extra nib of foam in the lip because the right side angle doesn't line up as well as the left.
Then I primed and painted the vent interior panels.
And the inner rim of the ceiling hole.
And then this is just a shot of the ceiling details of the third floor. Just a whole bunch of dots.
Any way, that's tonight's progress. More to do tomorrow. Thanks for looking. C&C always welcome. I hope you all have a fantastic day!
84491
Post by: gobert
This is looking superb, really giving me some enthusiasm for building a similar feature to display my Space Hulk stuff on. I’ll probably chest and 3d print something though
76303
Post by: Warboss_Waaazag
gobert wrote:This is looking superb, really giving me some enthusiasm for building a similar feature to display my Space Hulk stuff on. I’ll probably cheat and 3d print something though
Thanks, gobert. And I want to point out that 3D printing is not "cheating". It's just another tool in our creative toolbox. If I had the skill to design things in those programs or had access to a 3D printer, I would be using that, too. There is no wrong way to make great art (except by using generative AI because those steal art already made by other artists without crediting them. There really needs to be better regulation to protect creative people, who pour their heart, soul, dedication, energy, time, and earned skills into making their art, only to have it stolen and appropriated by Tech Bros and real cheaters/plagiarists looking to make money off of someone else's efforts).
Hmm, clearly I have strong feelings about AI art. Although, to be fair, I have really strong feelings about art in general and a deep love and respect for the artists that create it.
TL;DR: 3D printing is a tool, AI art is theft.
Rant out of the way, I wrapped the right pillar finally.
And glued the right ceiling vent panel in place.
This part was way forward and I did not want to undo any of my previous work to fix it, so I added the nib inside this lip as an anchor for these corrosion stalactites.
And then I immediately started adding panel details.
And floor deets:
And here you can see a close up of the decrepit right pillar.
More updates as I get stuff done. Thanks for looking and have an awesome day.
65595
Post by: Camkierhi
Inspirational work. Brilliant use of material. Love this.
76303
Post by: Warboss_Waaazag
Thanks, Cam!
Here are a bunch of 4th floor details WIP.
This will be a wall vent that I wanted angled louvers for. So I glued a short stack of risers to act as support inside the vent.
And then the last ceiling panel in place.
And then a wider shot of the top.
Every step of this build has been preceded by dreading the next big thing I had to solve or duplicate. The complex railing, the structural beams on the 4th floor, the ceiling vents, wrapping every pillar, and on and on. Powering through this build has been such an emotional challenge for me. And of course, I still have to detail the back and exterior sides of it. My work continues forever.
Thank you coming to my build and witnessing it with me. C&C always wanted. I want everyone to have the best possible day.
76303
Post by: Warboss_Waaazag
76303
Post by: Warboss_Waaazag
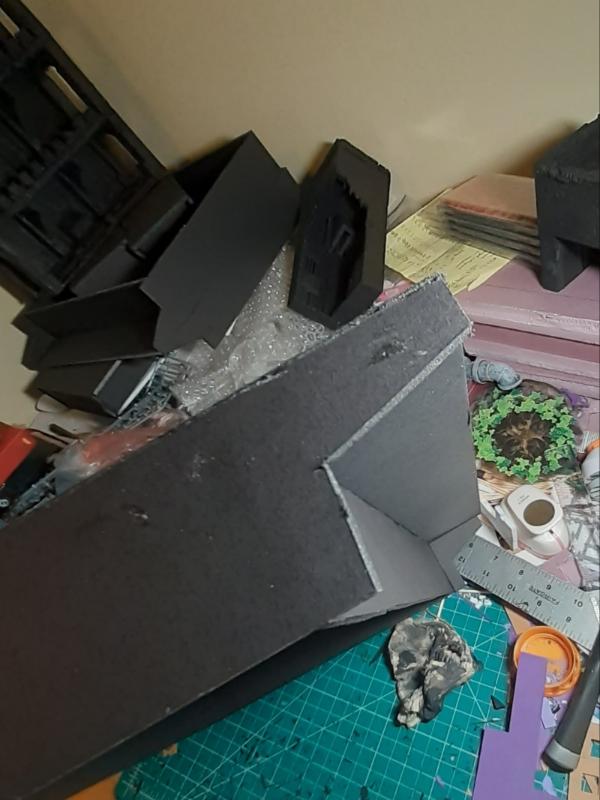
More work done. This piece was meant to give me a 2" depth ino the center of the board layout (there will be 5 other 2" riser platforms). My original idea was to have a board where a big hole in the center presented a flanking option to get to the opposite side of the table. But that idea centered around the idea that the airlock players would be entering from came into a cargo hold of some sort. My new idea places the airlock between gun batteries, with a platform overlooking the loading areas. So now this riser is just a middle piece among many. It also means that I will have to add a bottom sheet to enclose it all. I want it to sit flush with the other terrain it will sit on top of.
 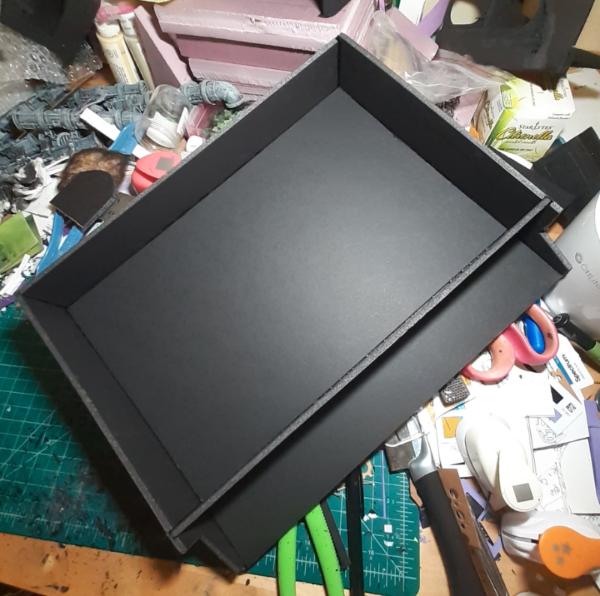 
And I wanted to make the shape interesting, so I added this lip.
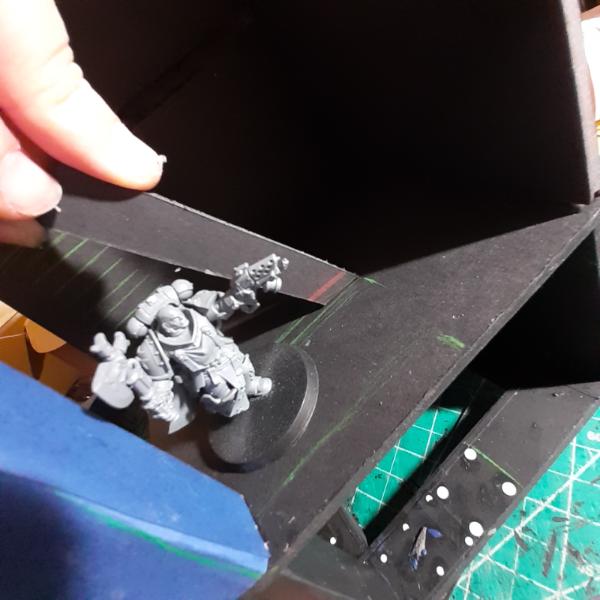
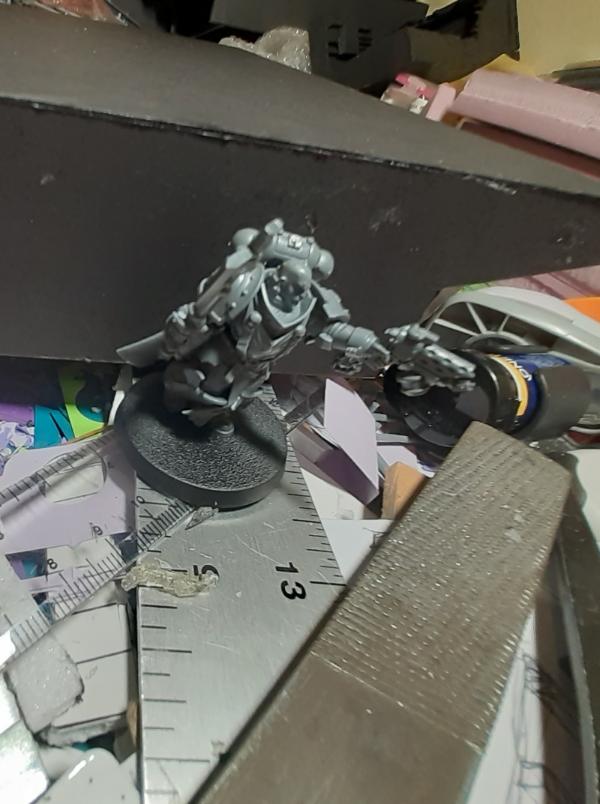
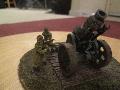
Here is rando BT to showcase scale.
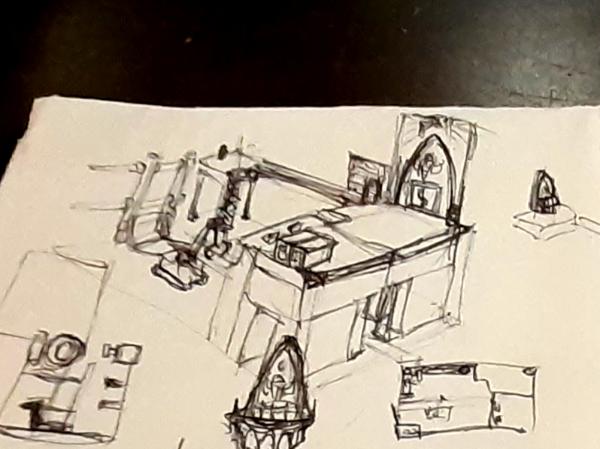
This zoomed in shot is my new board layout idea.
The full size of this riser thing is 14" by 11" by 2". I didn't want to do much cutting, so the top sheet is the exact size of the precut foamcore.
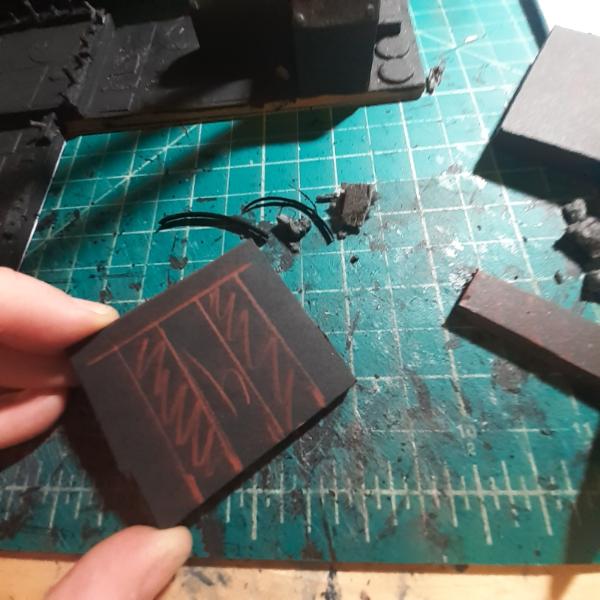
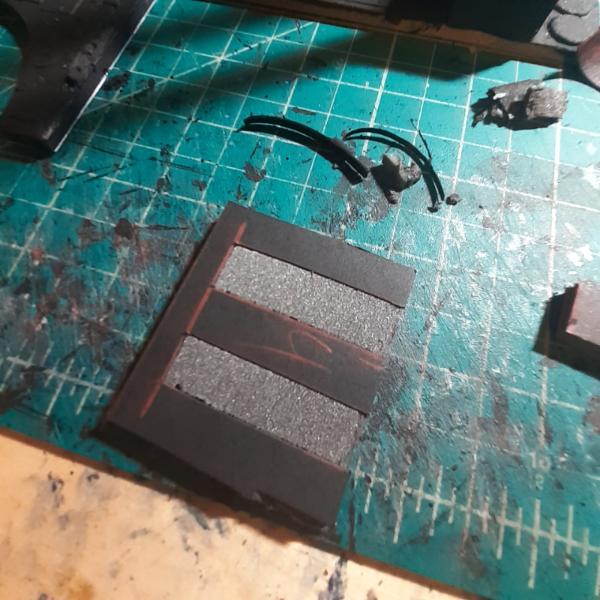
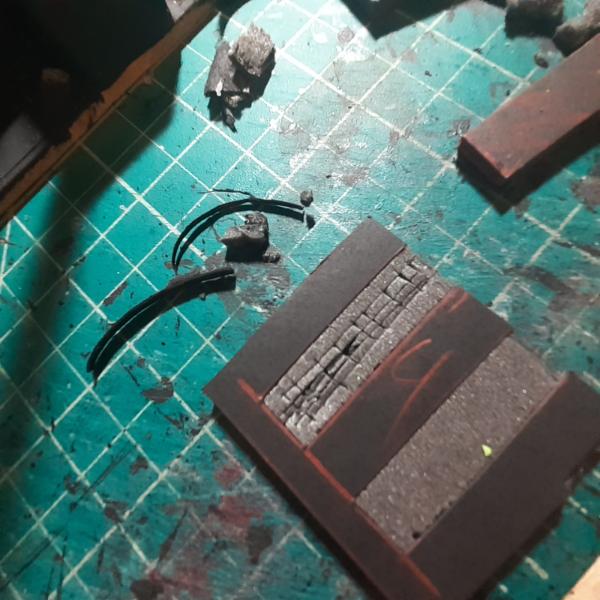
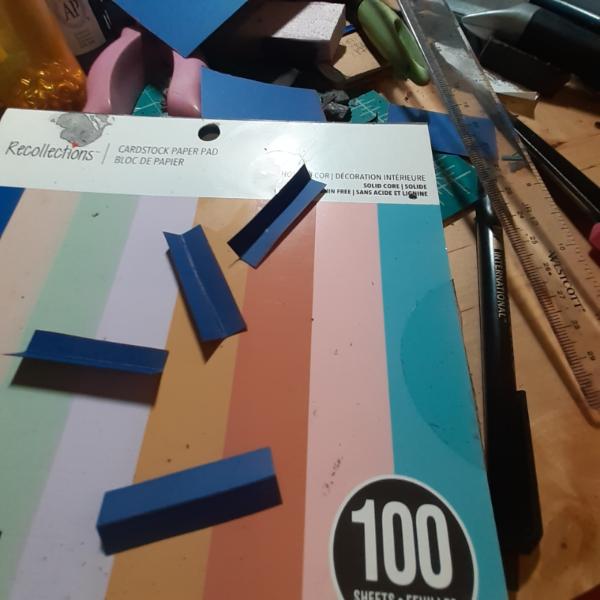
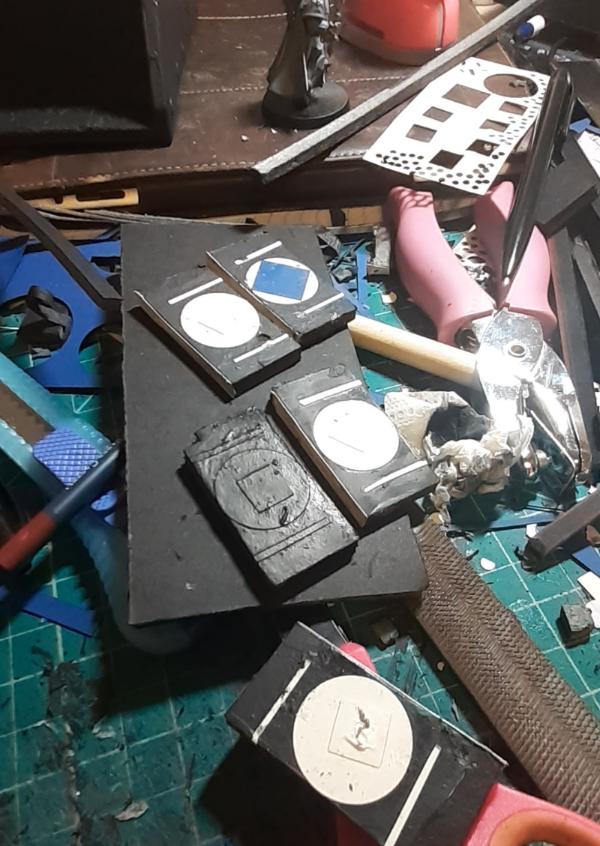
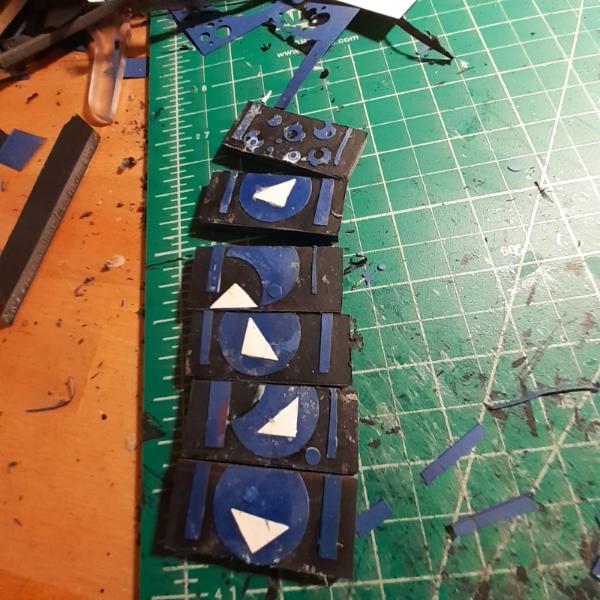
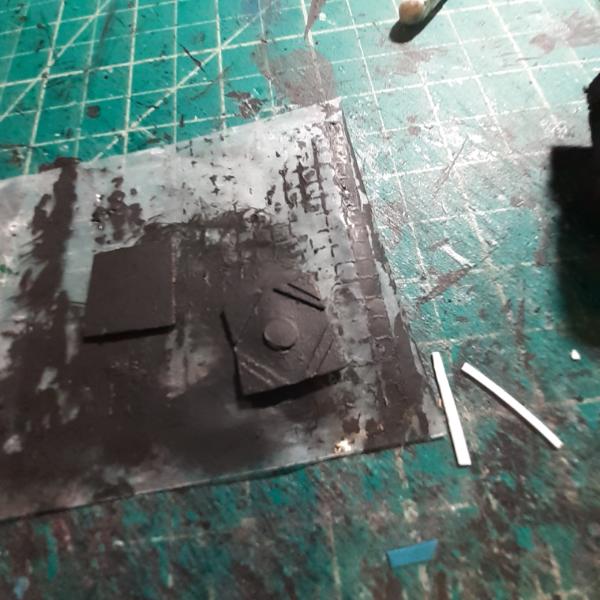
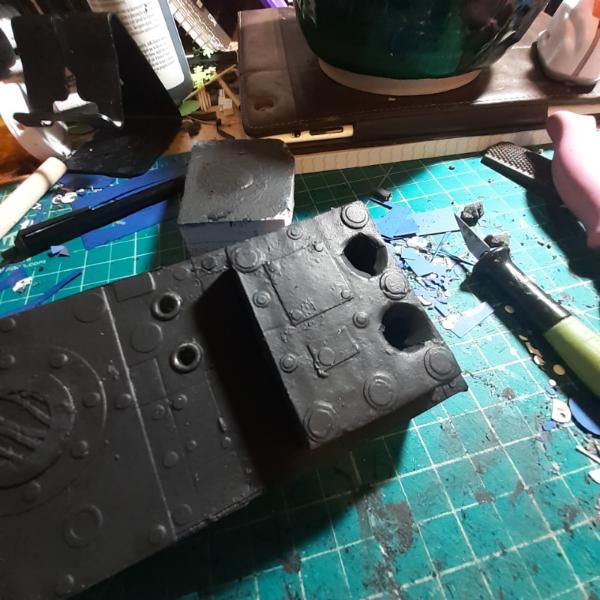
This is barely a beginning, but I don't want to lose momentum. Automatically Appended Next Post: I went a little berserk with making basic shapes to detail.
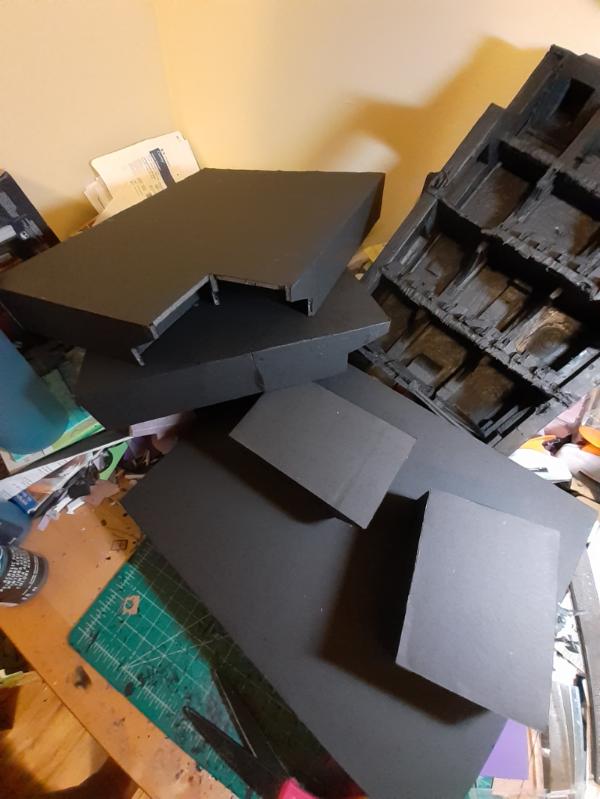
Hopefully I can make a bunch more basic shapes tomorrow, too.
1124
Post by: Captain Brown
Warboss_Waaazag,
OK, I see the detail on the one at the back. When that treatment is applied to the basic shapes it should look epic.
Cheers,
CB
76303
Post by: Warboss_Waaazag
Thanks, Captain Brown.
I wish I had progress shots to show for yesterday or today, but I wound up seeing a good friend on my way out of work last night and spent all my potential hobby time talking to him and catching up. So alas, I did human stuff instead of hyper focusing.
More updates forthcoming.
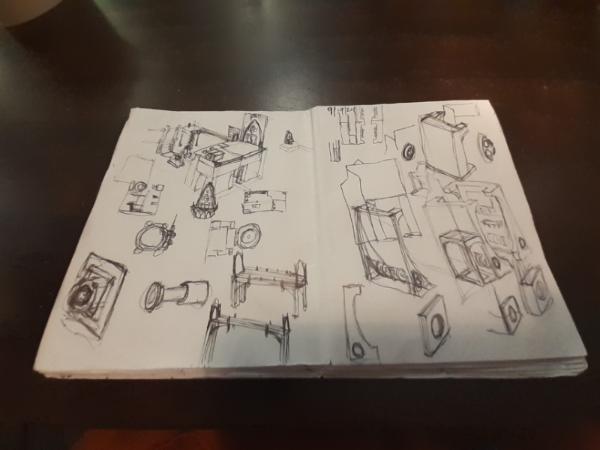
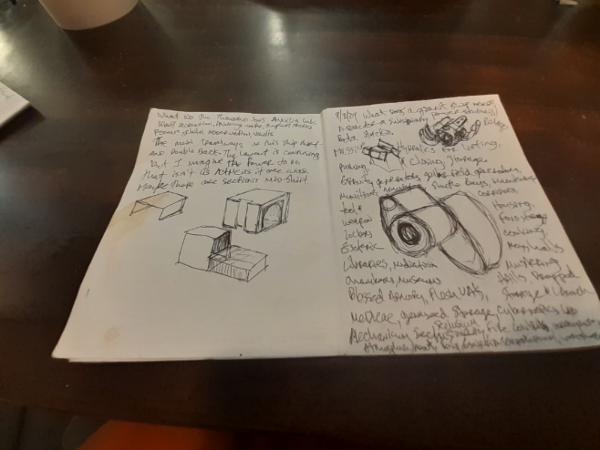
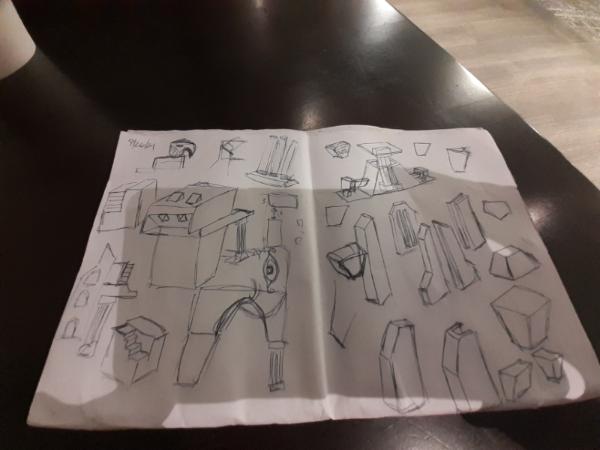
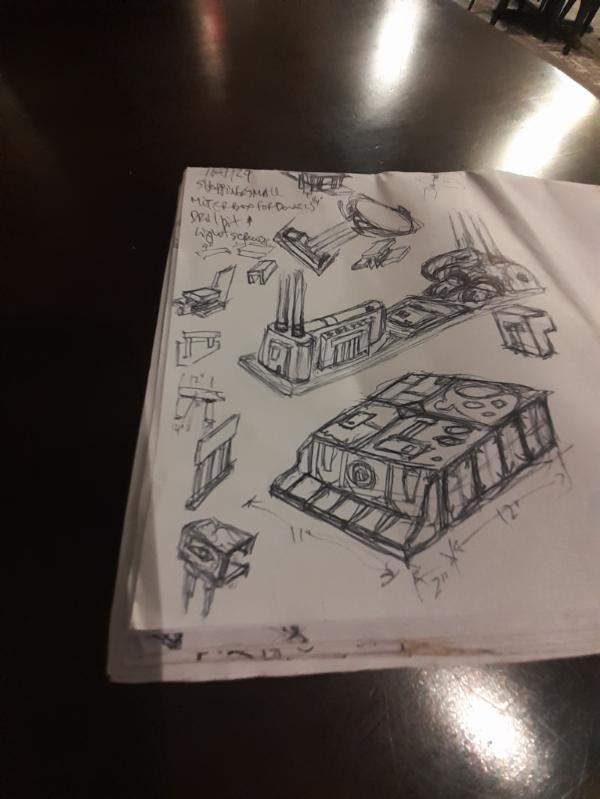
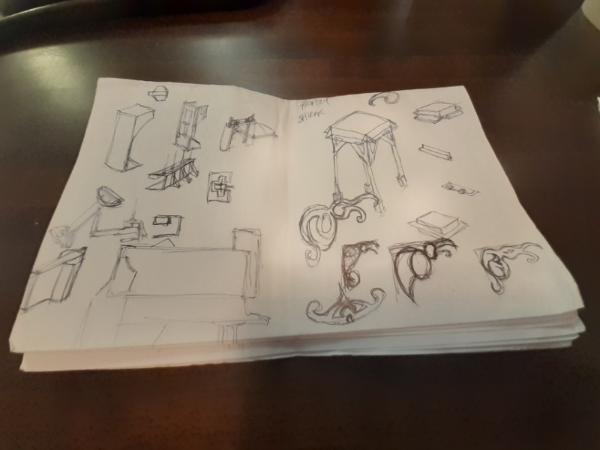
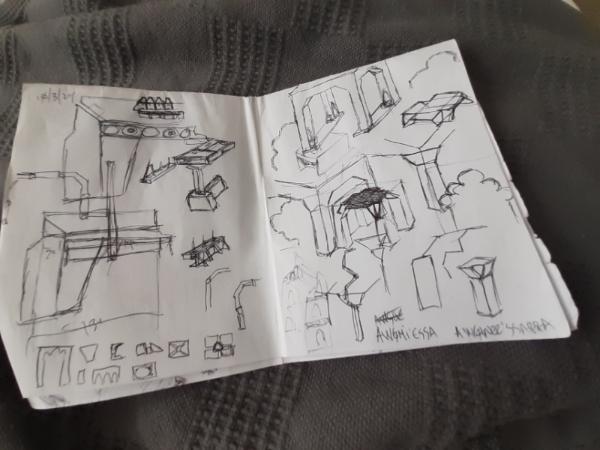
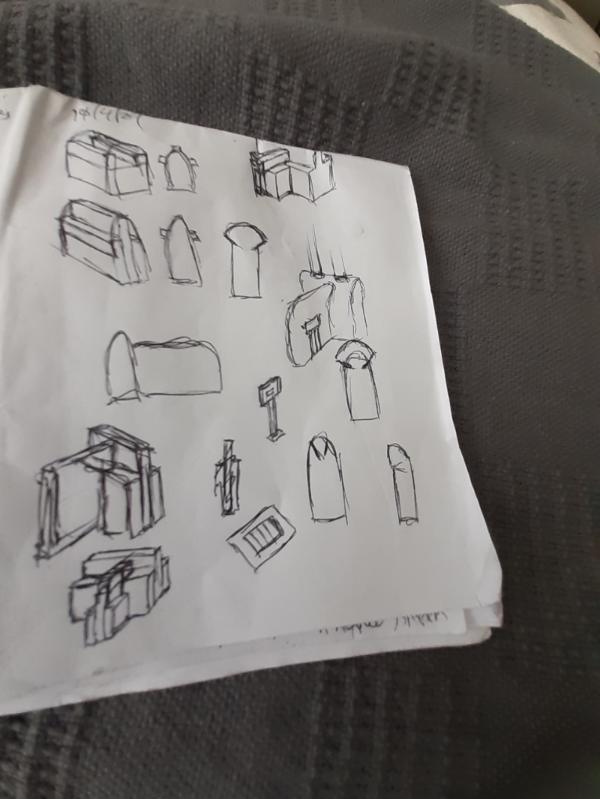
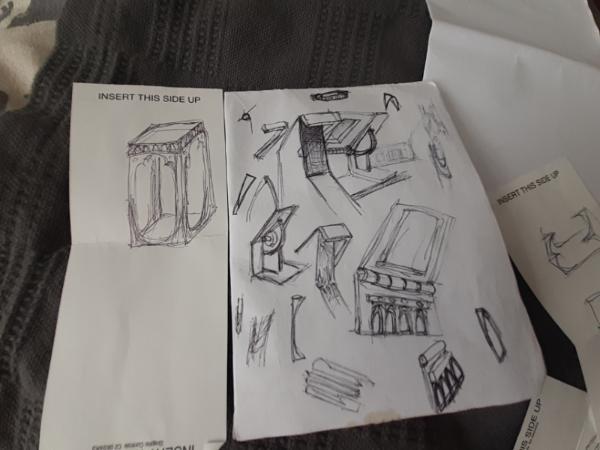
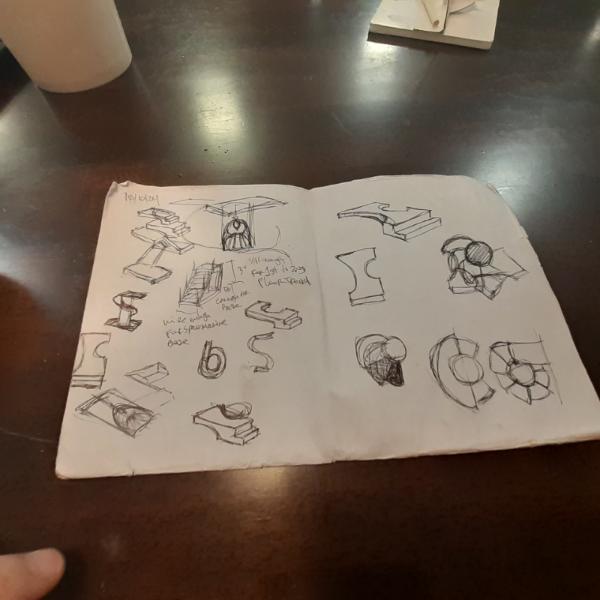
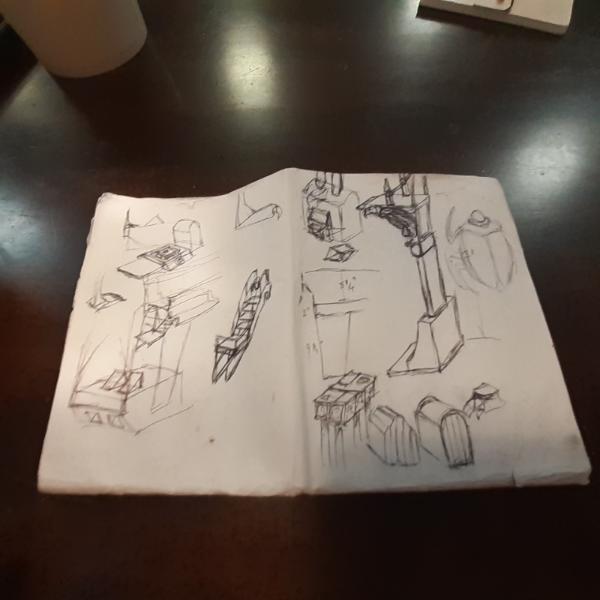
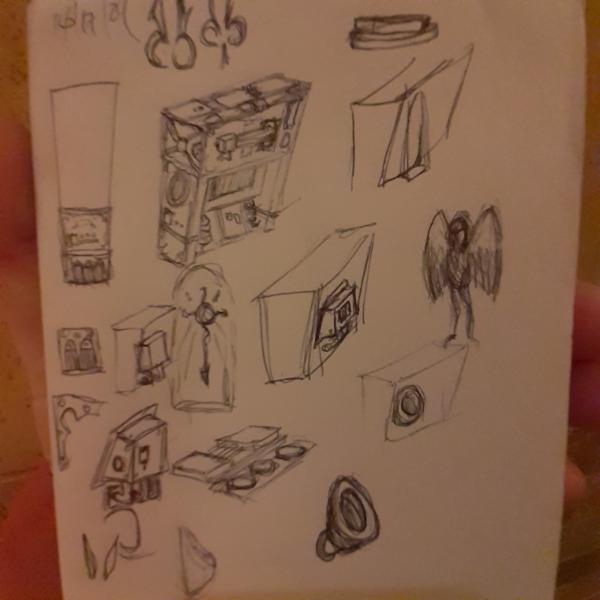
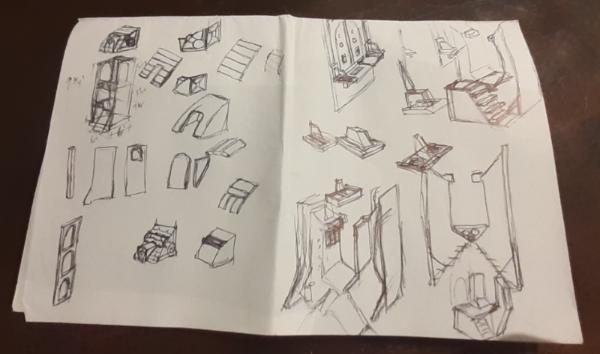
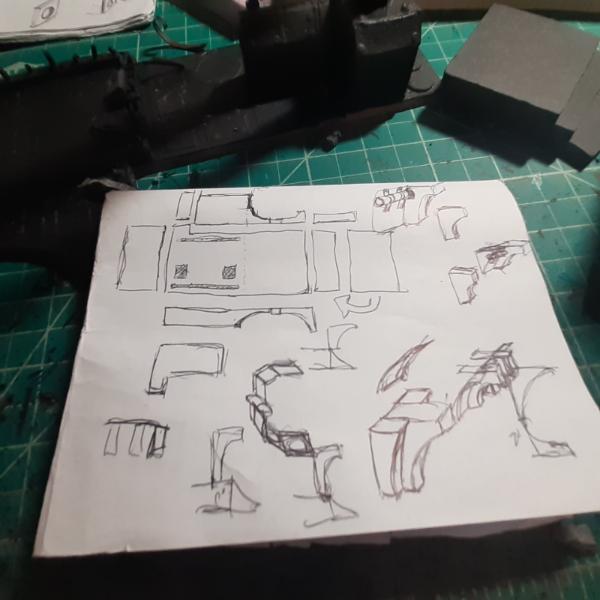
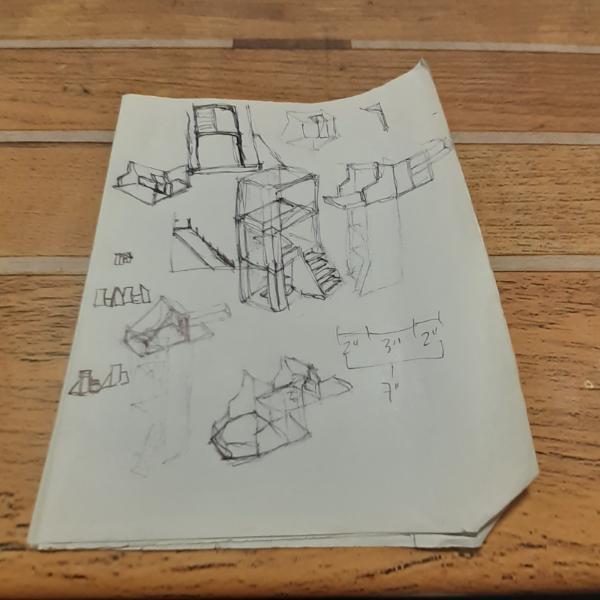
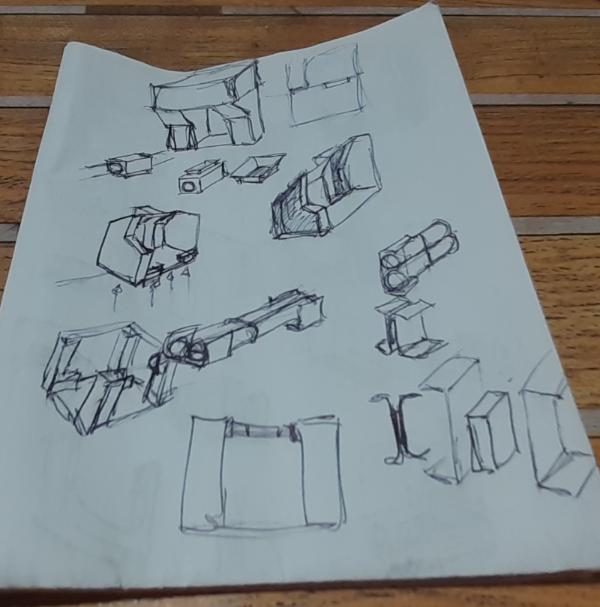
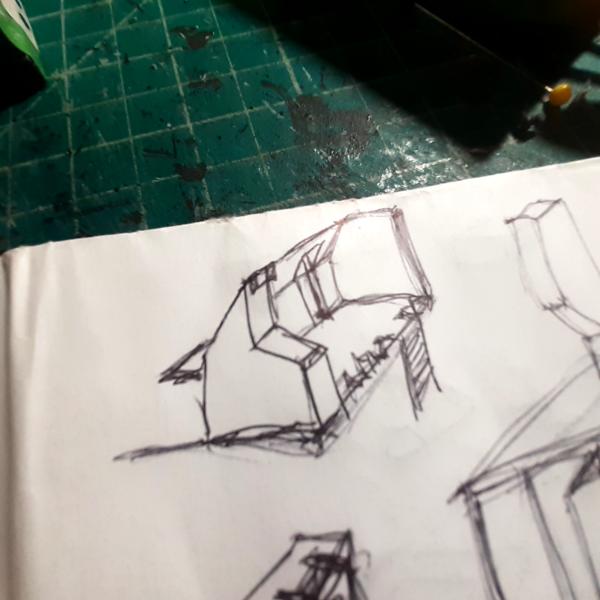
I think what I am currently struggling with is how to make effective staircases that are easily accessible by models, functional, and not gigantic. I want scratch built stairs that don't overpower the terrain and still look good. I might have to switch to a different material other than foamcore, but I also want to try to steer clear of plasticard. Anybody have any suggestions - material wise, construction tips, or links to stuff you've seen or done that works? Automatically Appended Next Post: I worked on more sketches. Just trying to spend my time well. Always trying to work out new designs, new ideas.
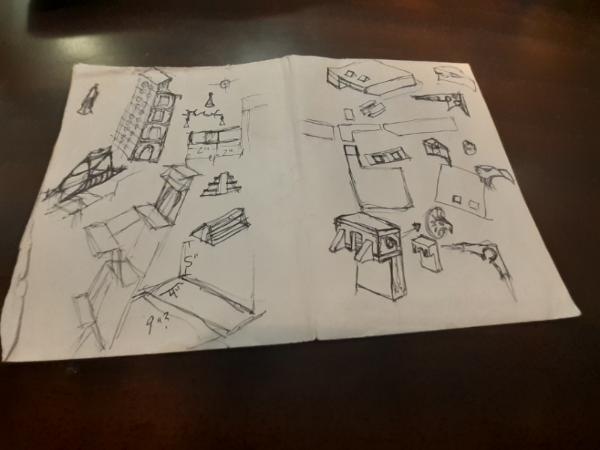  
Don't mind my lunch in the background.
76303
Post by: Warboss_Waaazag
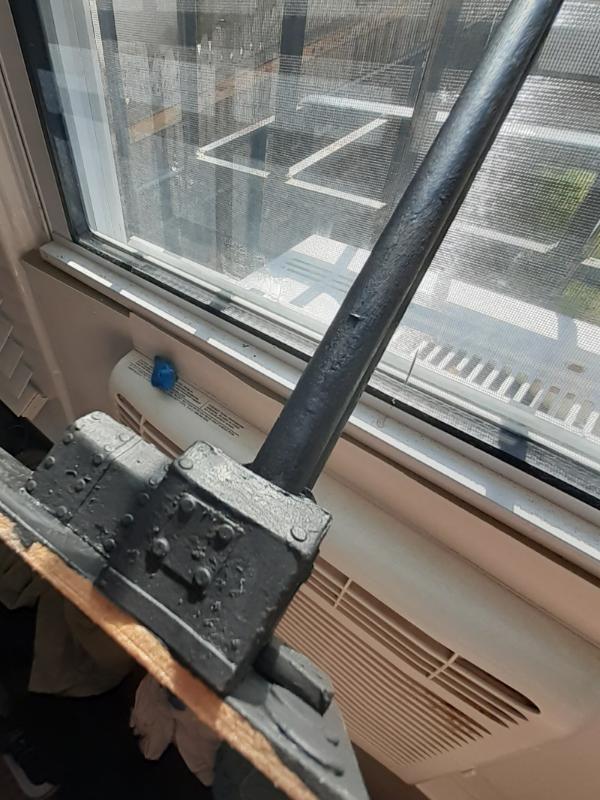
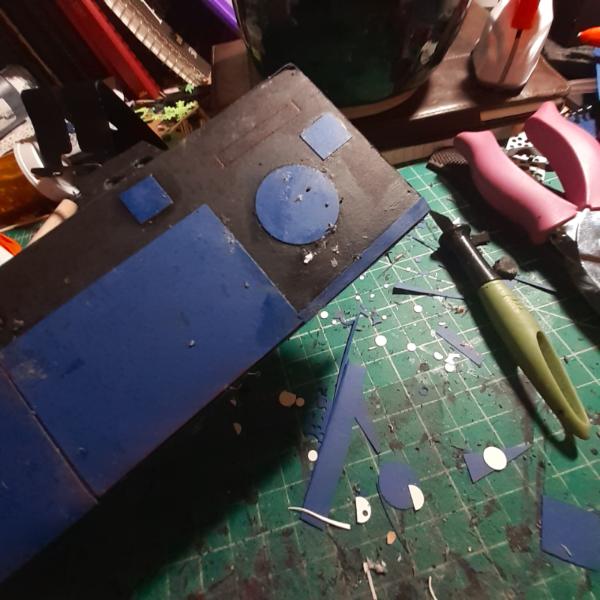
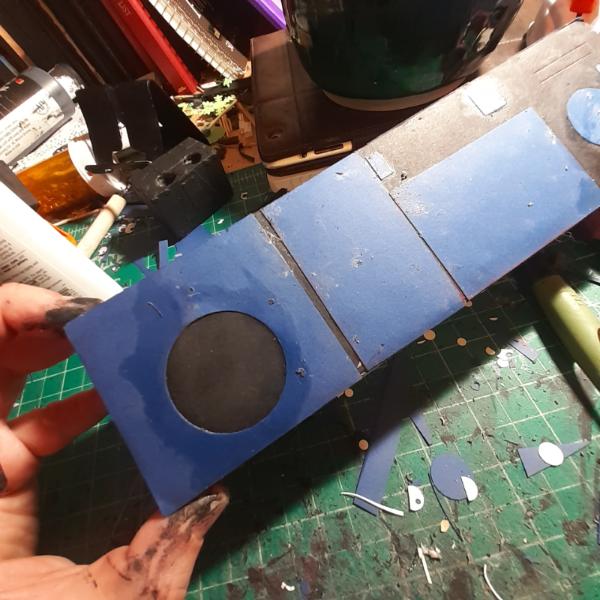
Started work on another piece. I wanted it to lean forward a bit and have some complex shape. Measurements got fiddly.
But I got there.
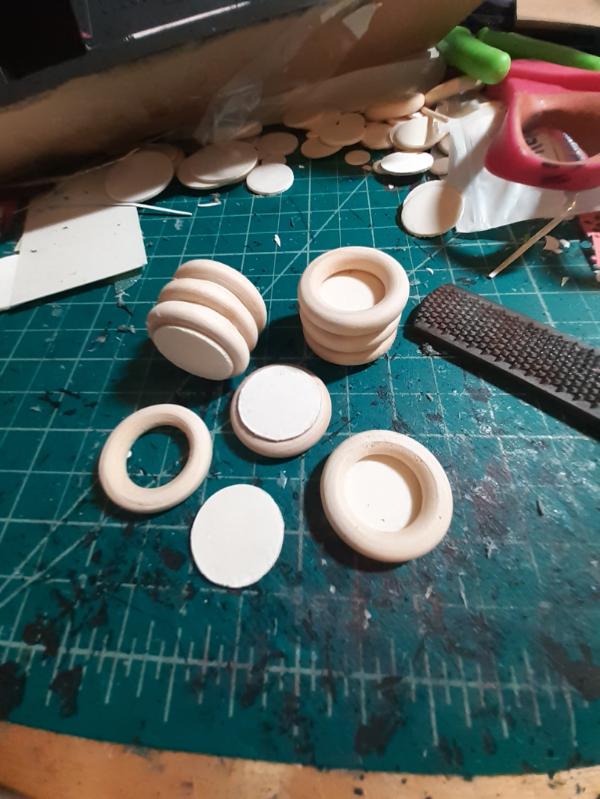
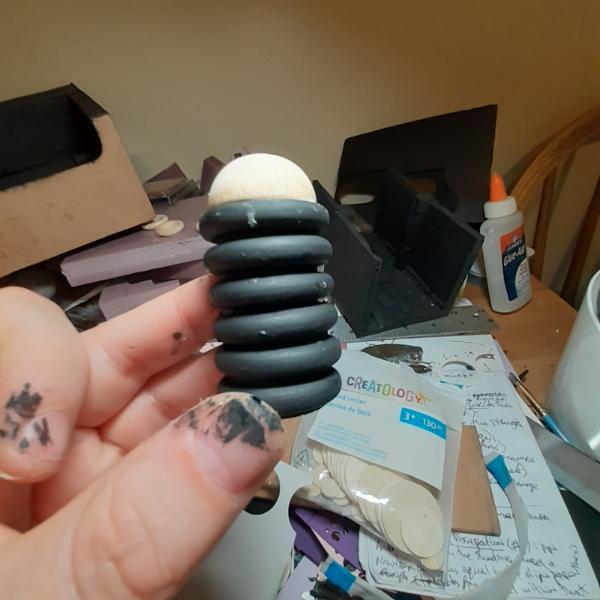
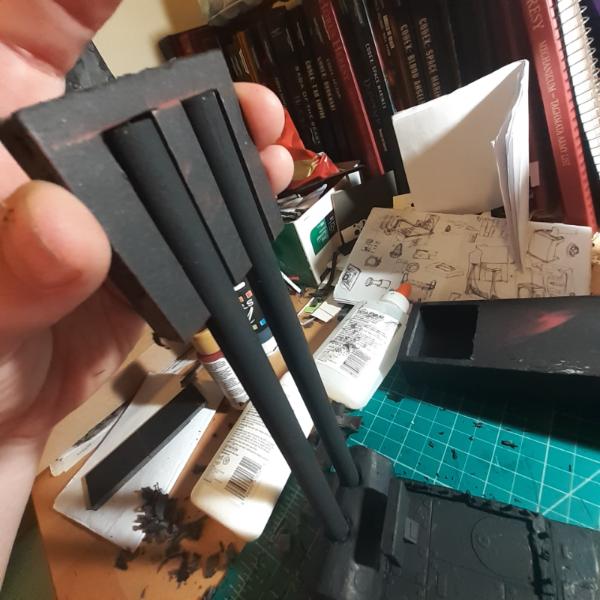
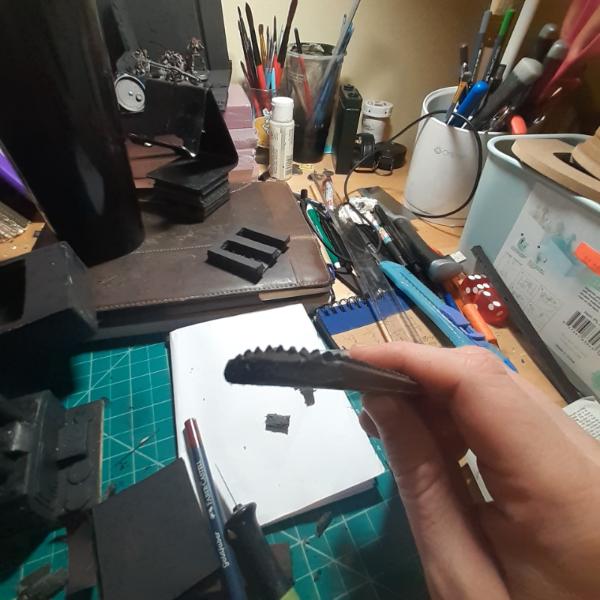
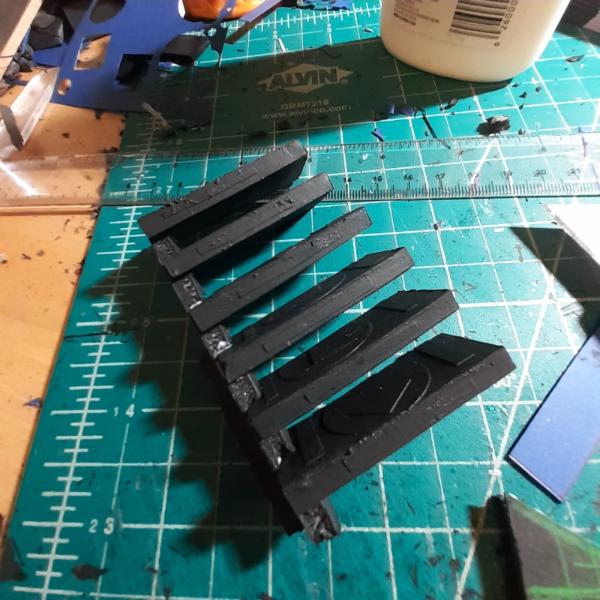
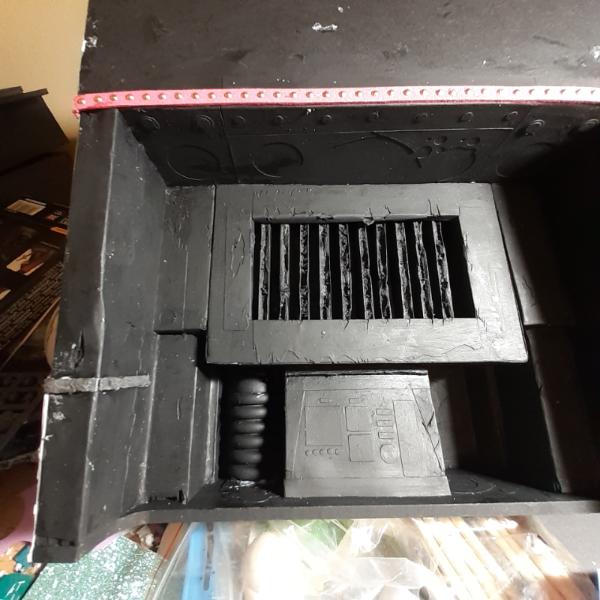
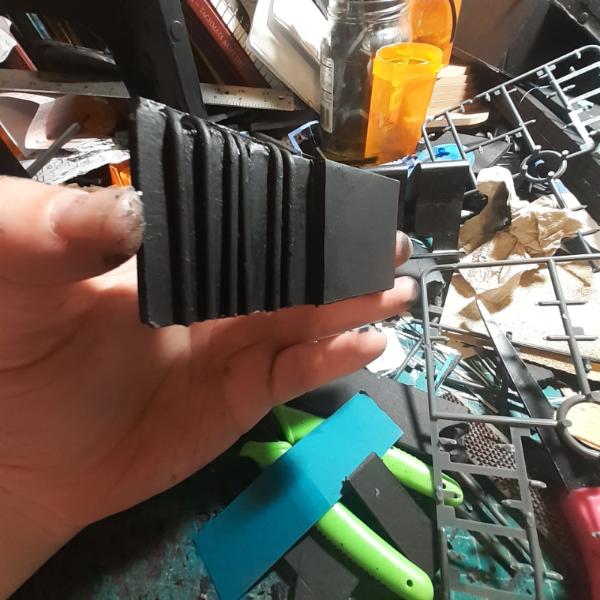
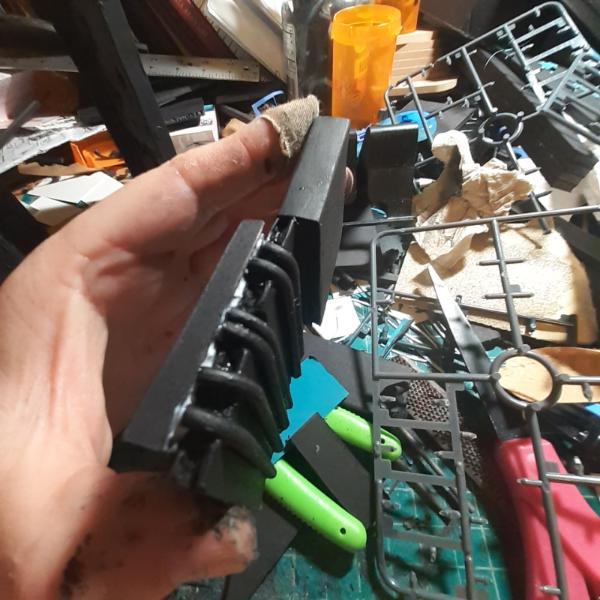
Then I started work on a giant heat sink.
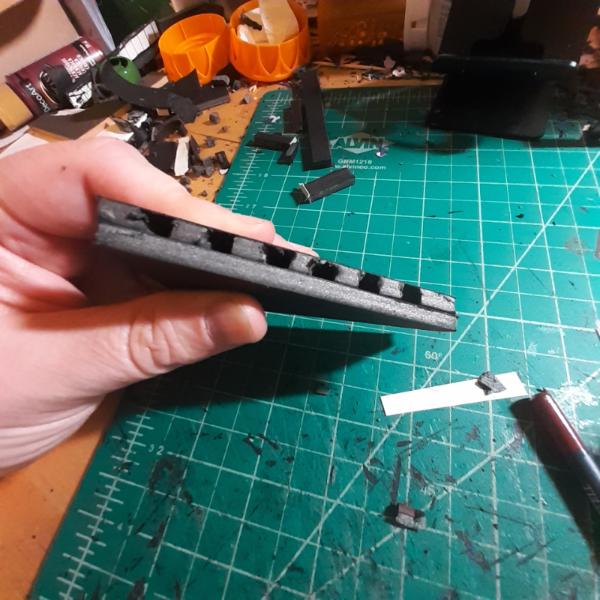
These are the tines
And here I test fit them in their housing.
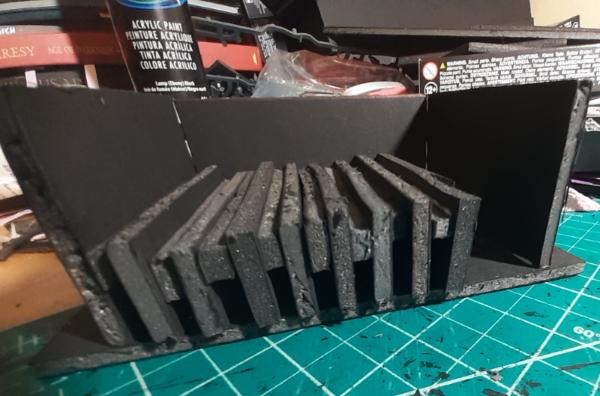
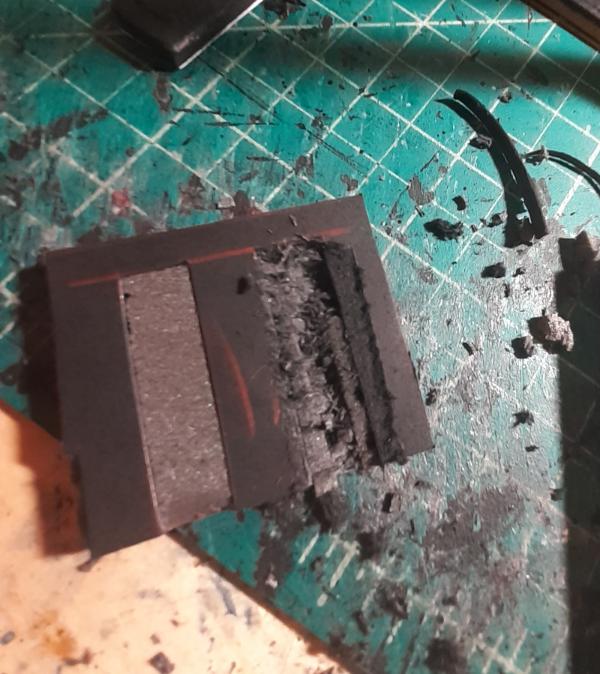
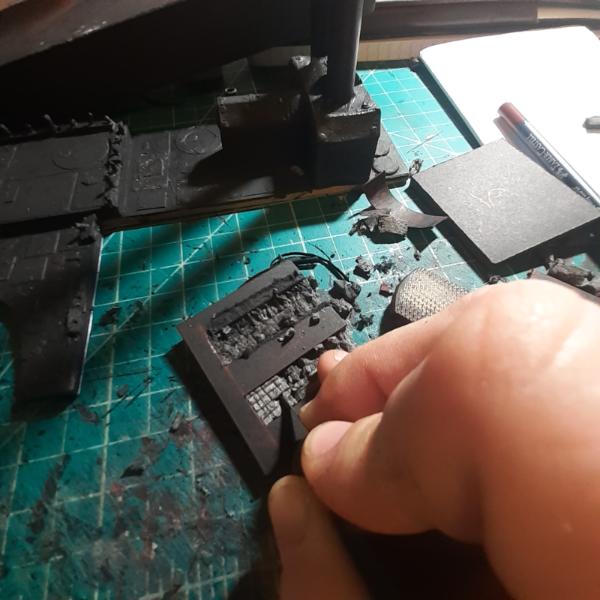
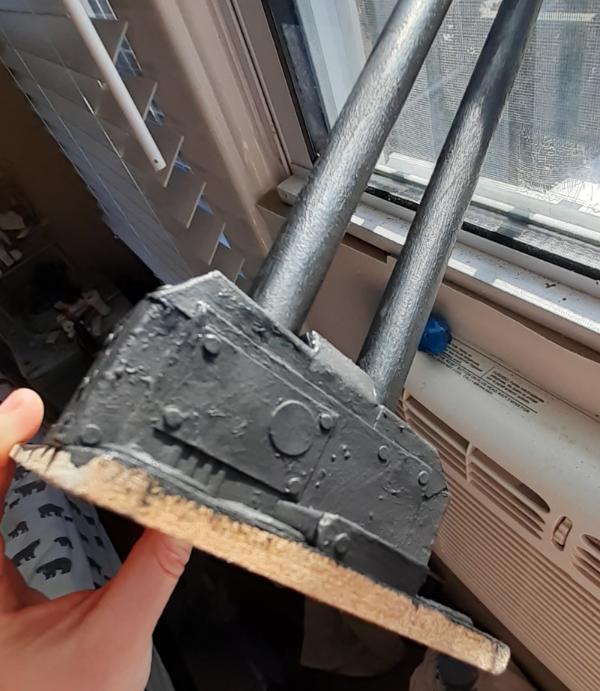
That's it so far. More progress photos as I make it/them. Thanks for looking and have an awesome day! Automatically Appended Next Post: Okay, I detailed the rim of the heat sink vent.
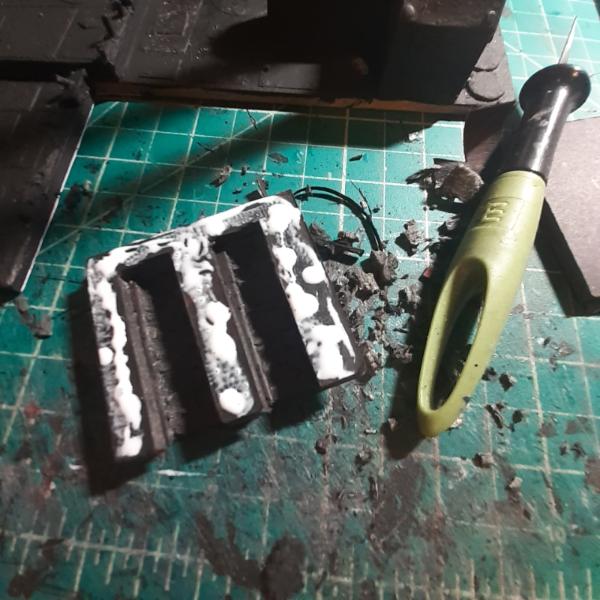
And then I distressed each tine. Applied glue to seal them, didn't wait for the glue to dry before priming them, and then primed and assembled the whole thing.
And then I test fit it into the main body.
I like how this is coming out, but now I am kinda at a loss for what to put underneath this thing. Ah, well, I'll figure it out. More to come.
106010
Post by: Meer_Cat
What a great piece!
Maybe condenser coils underneath? Or a computer work station/control station?
Rock on!
76303
Post by: Warboss_Waaazag
 Meer_Cat wrote: Meer_Cat wrote:What a great piece!
Maybe condenser coils underneath? Or a computer work station/control station?
Rock on!
Funny you should.suggest that!
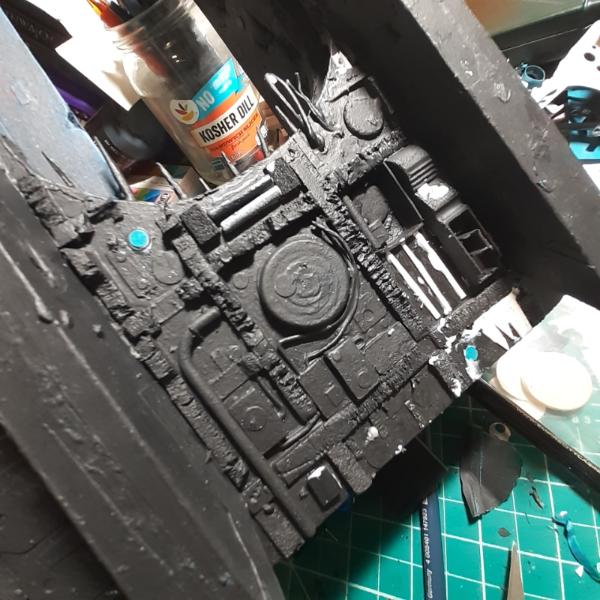
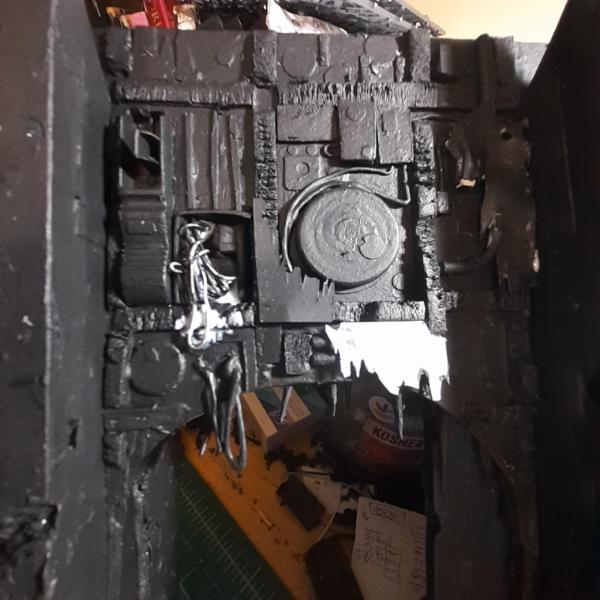
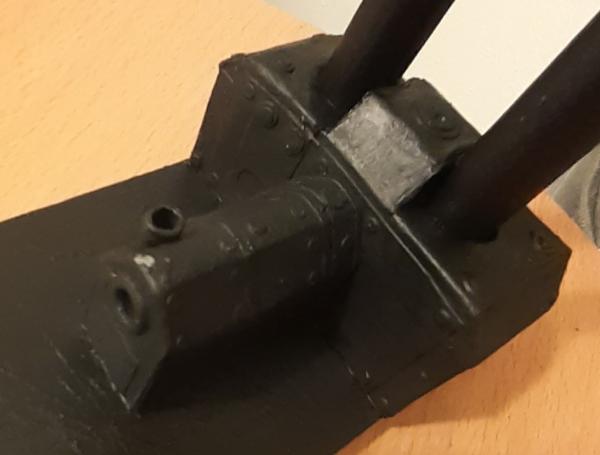
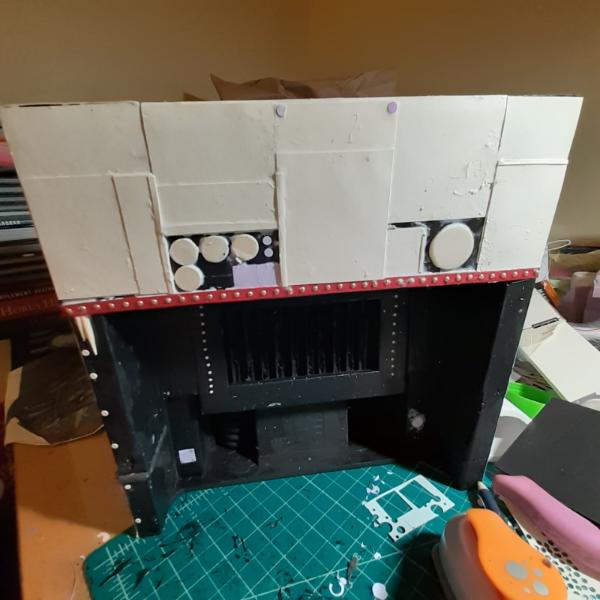
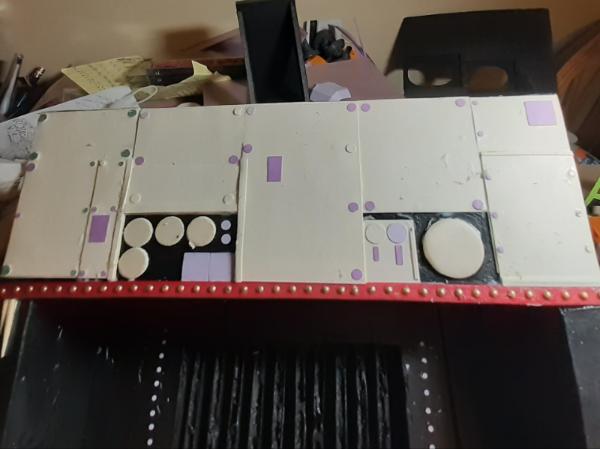
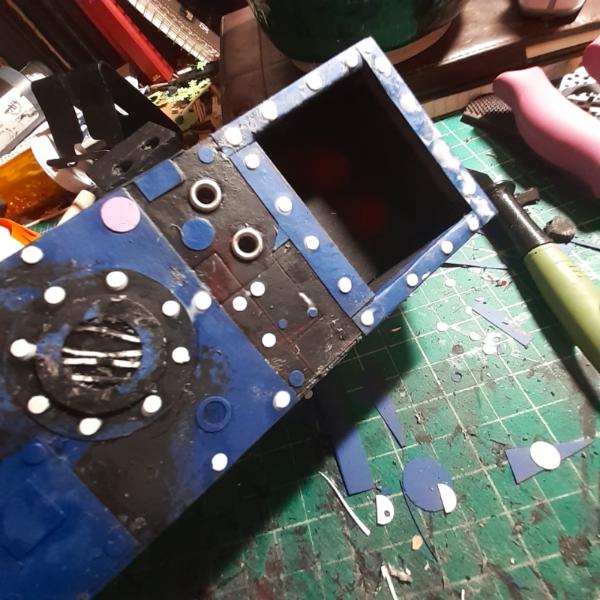
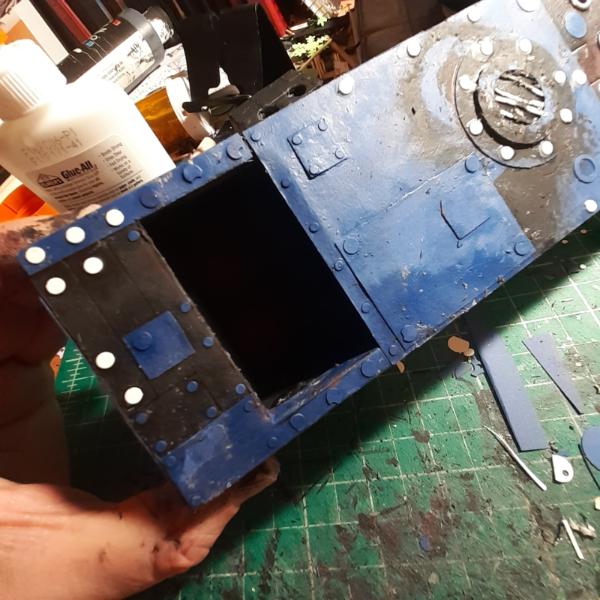
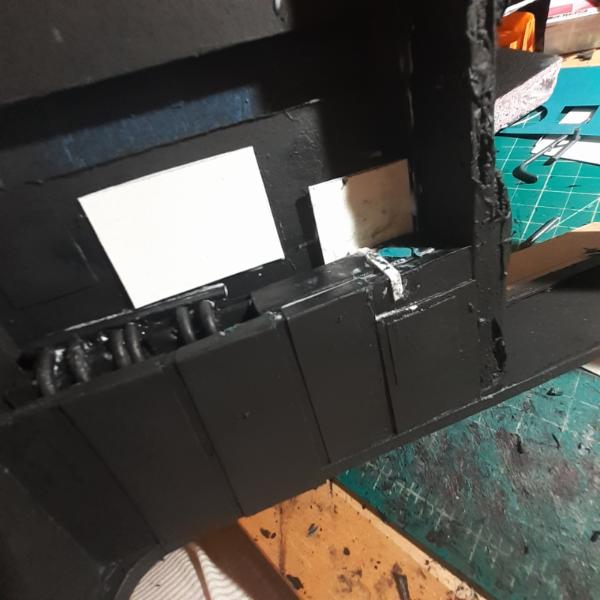
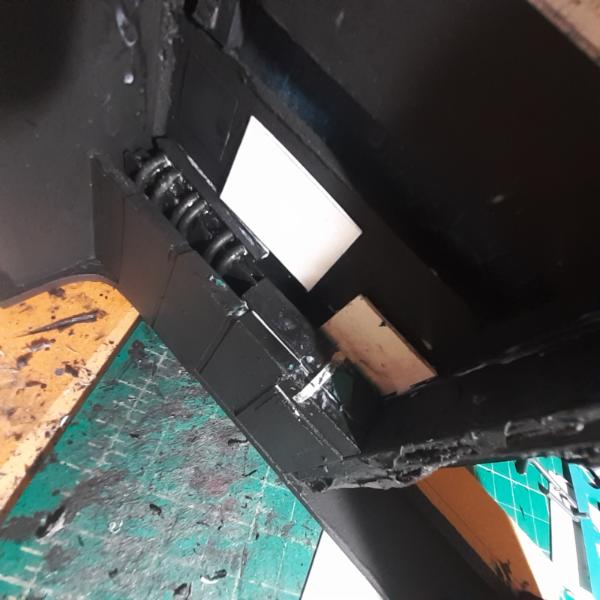
Detailed the sides of this thing.
And added first floor details
And then I made this console.
And then glued everything into place.
With Larry for scale
Thanks for looking, more updates soon.
76303
Post by: Warboss_Waaazag
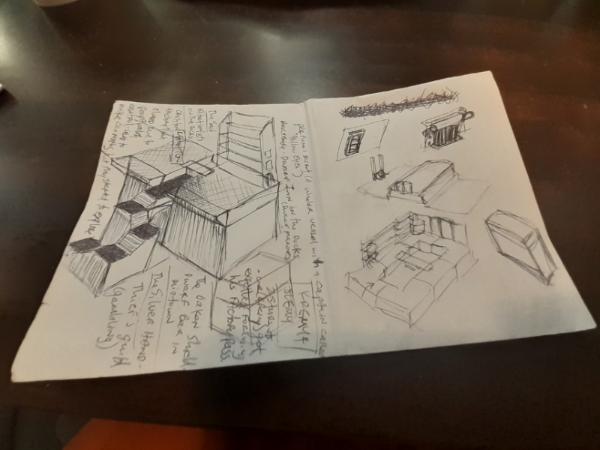
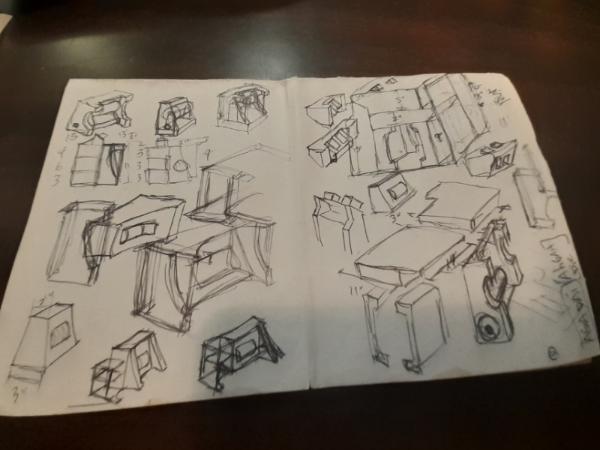
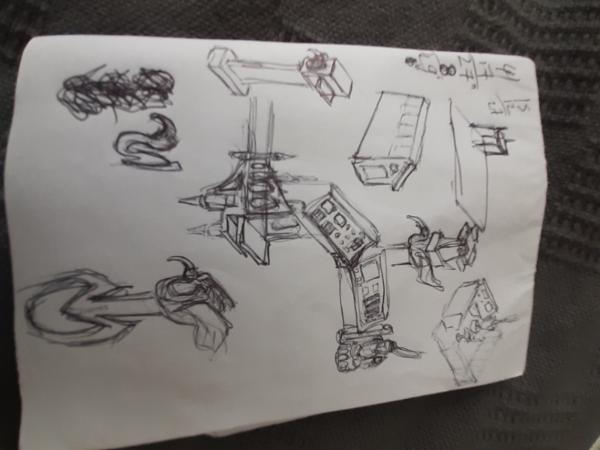
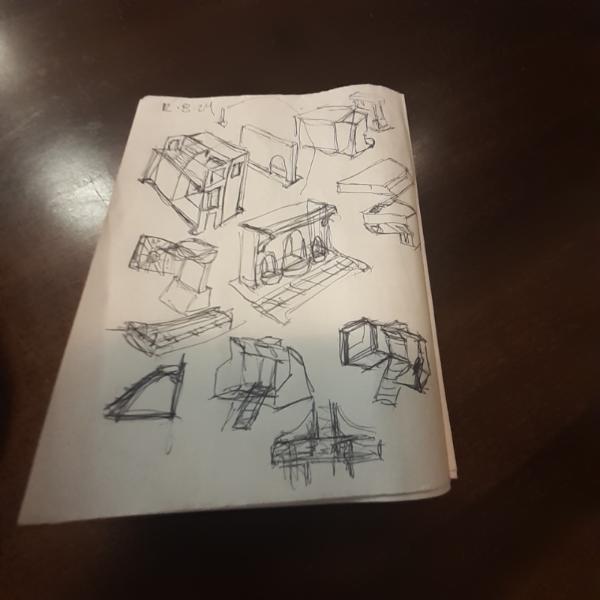
All I've managed to do in the past few days is sketch. I blame my mechanic.
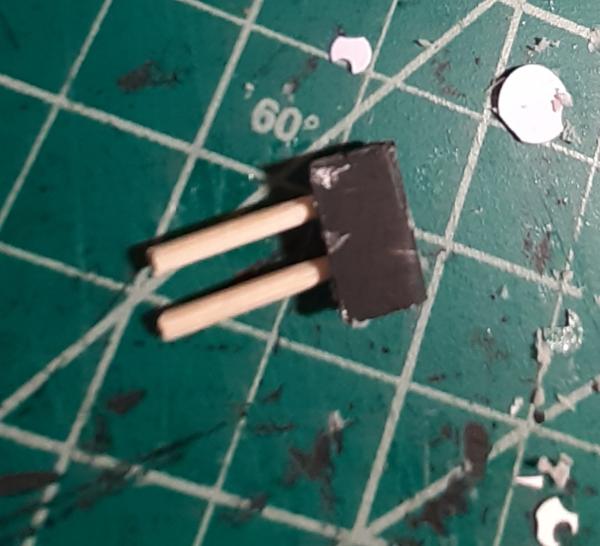
Thanks for looking. Feedback always welcome. Automatically Appended Next Post: I made a super small piece, meant to be scatter. The cap on the bottom? top? Got extra fiddly as the shape is not a perfect rectangle.
But whatever, it fit. Small work done, but at least I am trudging forward.
106010
Post by: Meer_Cat
Righthand pic, upper: that power conduits and control station needs to be made reality. Just sayin'.
76303
Post by: Warboss_Waaazag
Meer_Cat wrote:
Righthand pic, upper: that power conduits and control station needs to be made reality. Just sayin'.
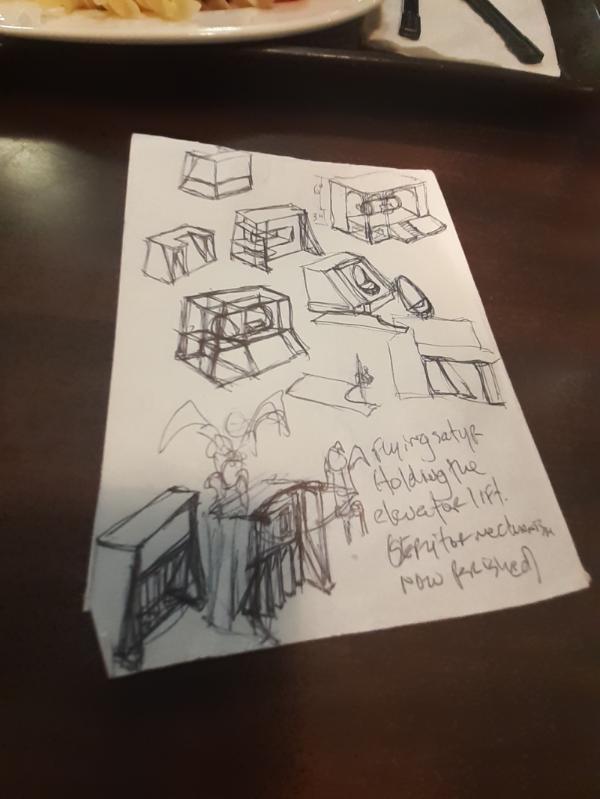
Thanks, yeah. I had a plan to make a pair of pillars on one long base to stand opposite the giant heat sink as a way to hold up the structures above, to add elevation, but I started thinking about using dowels to mimic pipes running from floor to ceiling instead of bulky structural supports. I was rolling ideas around for how to make them look more interesting than "pipes go up and down". Hopefully I can do the bird-ish part justice.
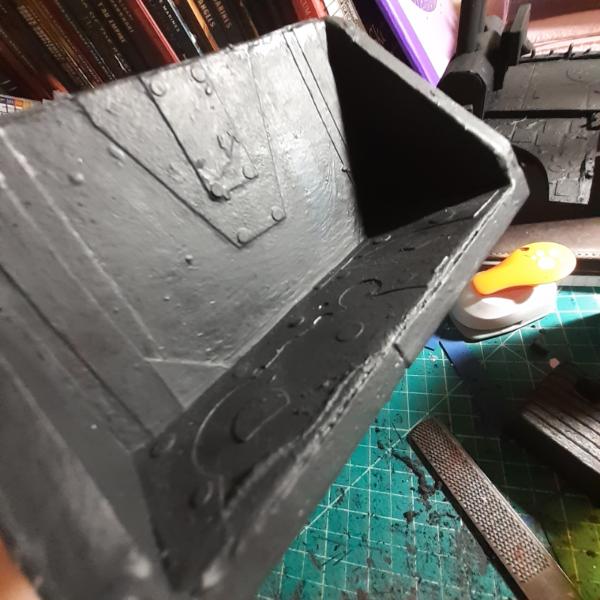
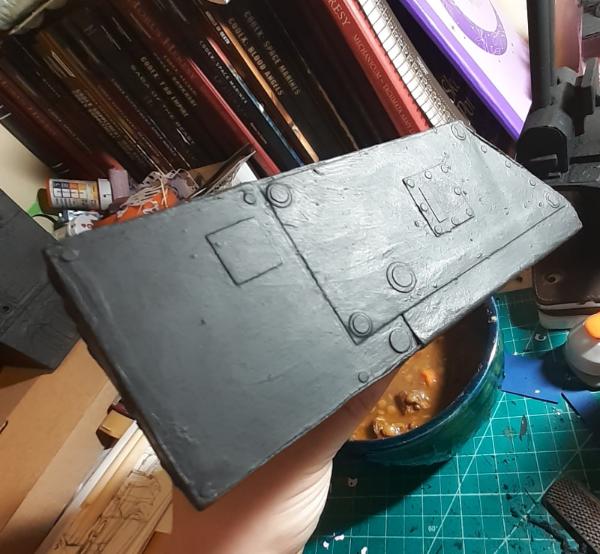
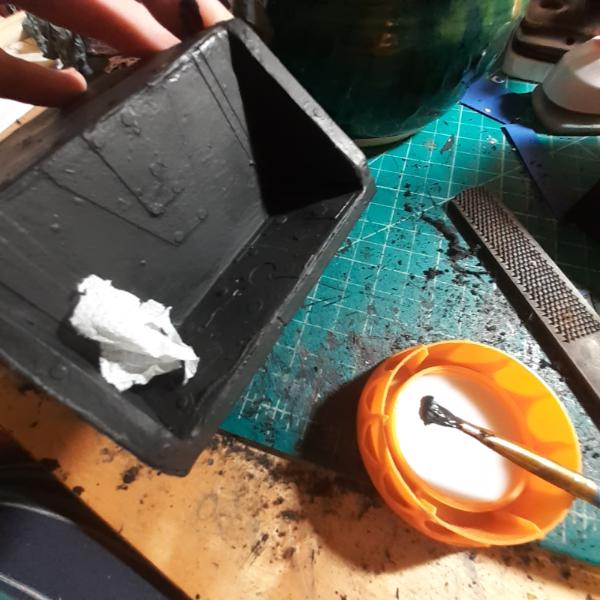
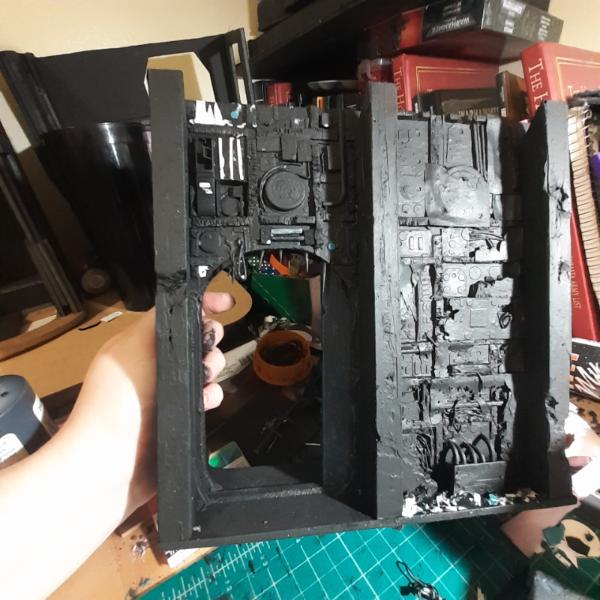
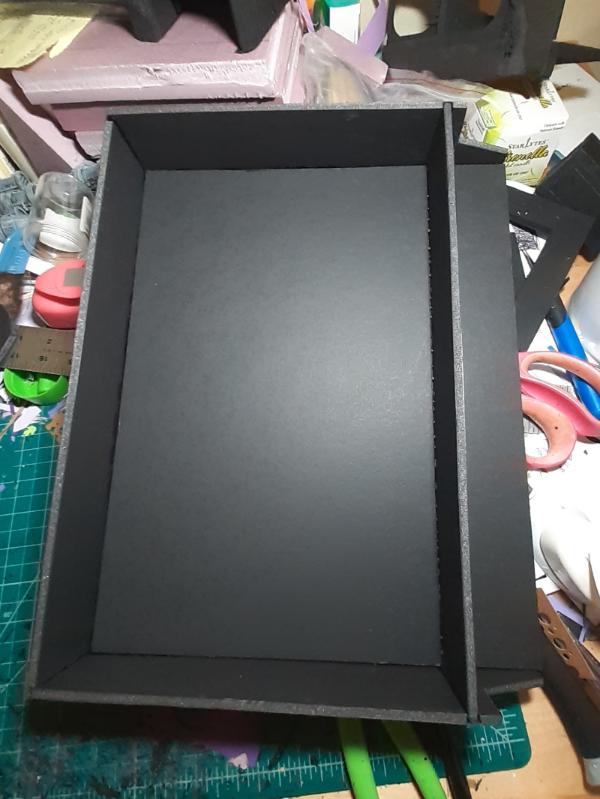
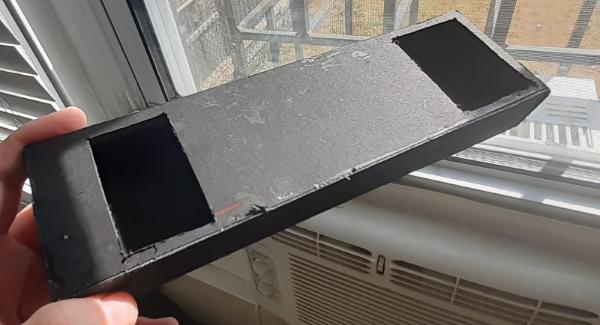
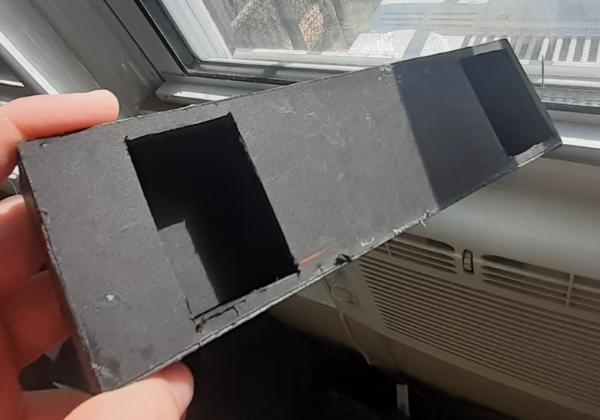
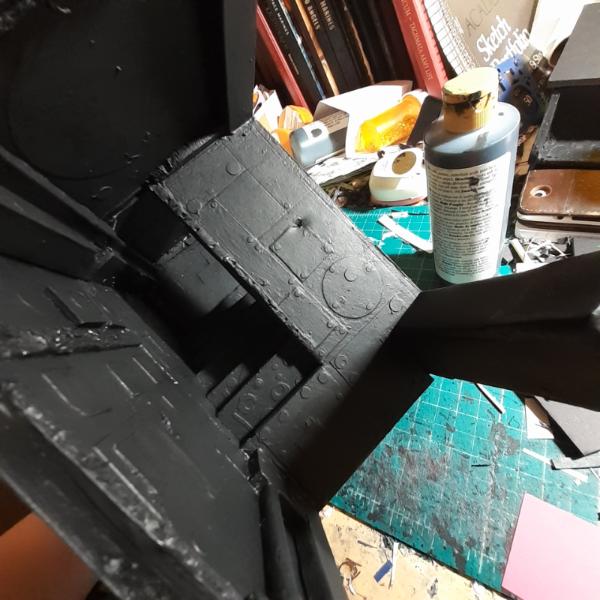
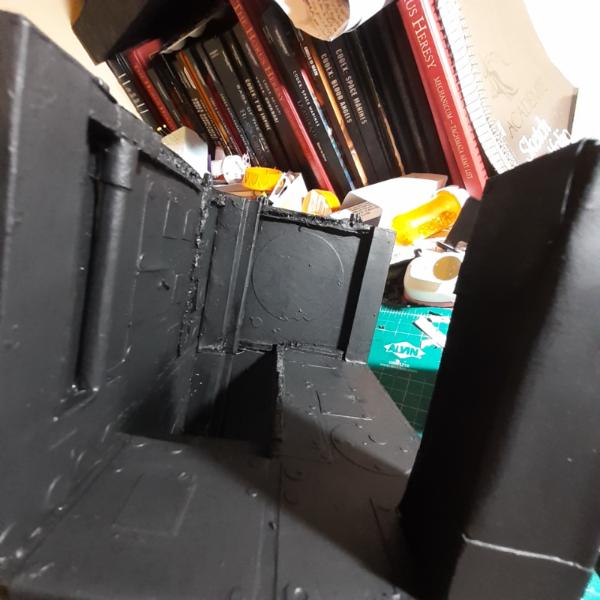
In other news, I started detailing the big, broad box that was originally going to be a riser to add a pit to the center of the board (with an overhang) and is now becoming a middle level walkway that i could potentially use up side down with that original intent.
This was a thing I needed to do because it was relatively simple. I fret about doing justice to the more sculpturally involved details and I don't want to discourage myself into inaction. So I did this instead:
It's obviously not finished yet, but what do you think of it so far?
Automatically Appended Next Post:
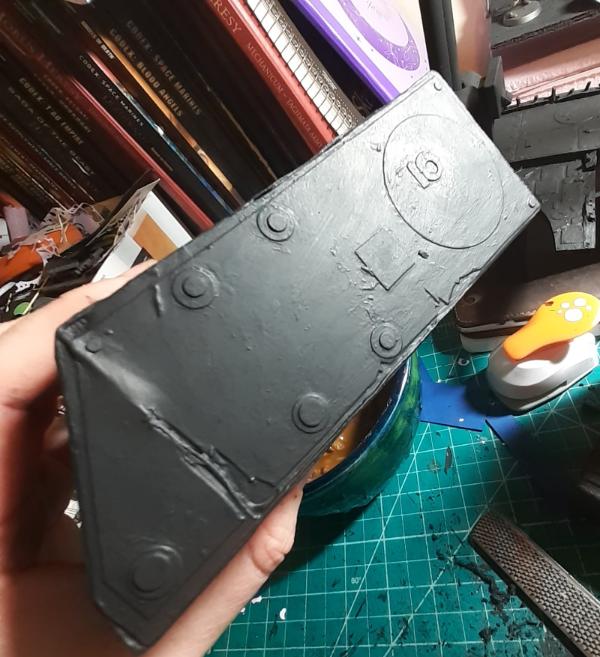
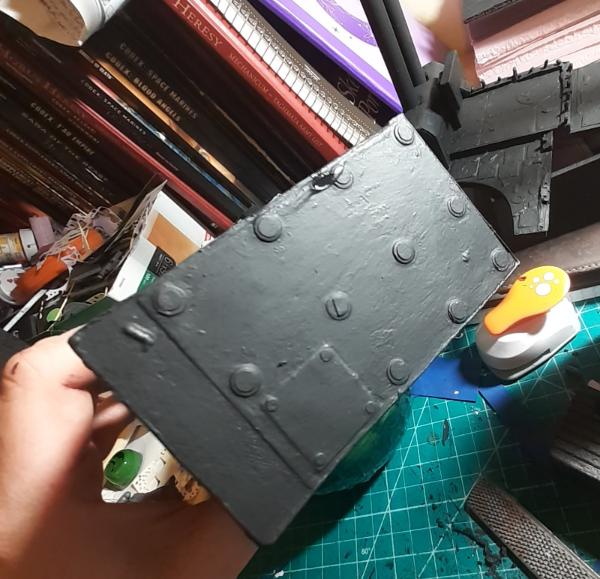
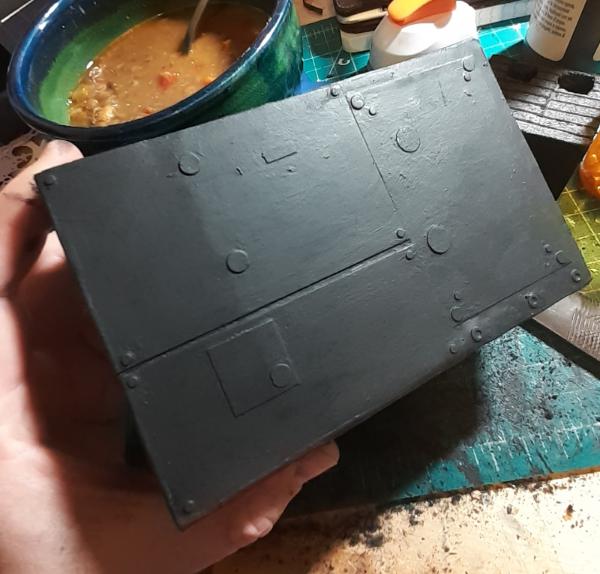
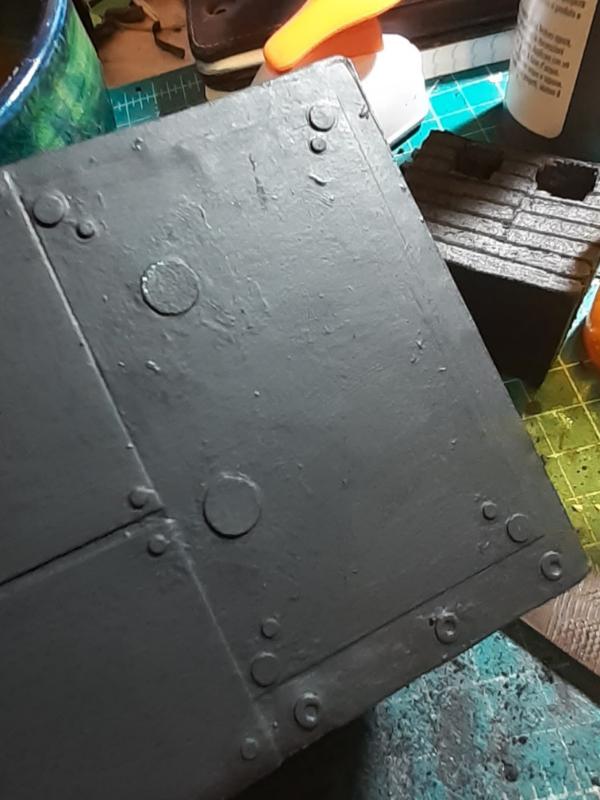
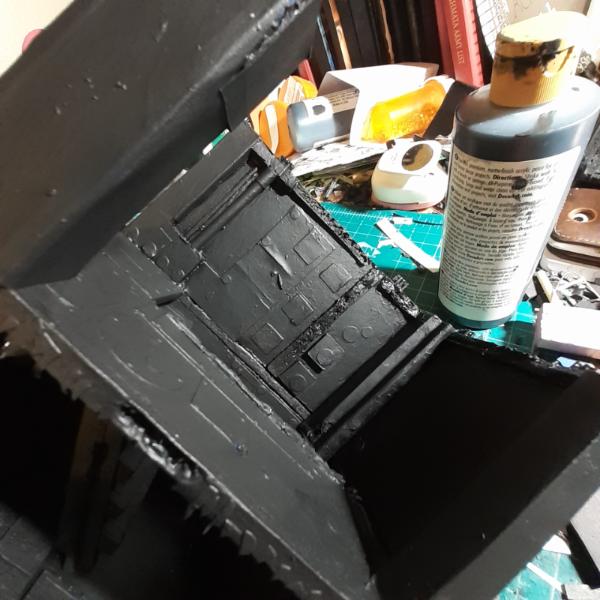
I finished off the walkway and added deck plating made of sheets of various paper materials.
And then I primed it all.
Just moving along. I was too exhausted to do any more work, but glad I was able to do some.
76303
Post by: Warboss_Waaazag
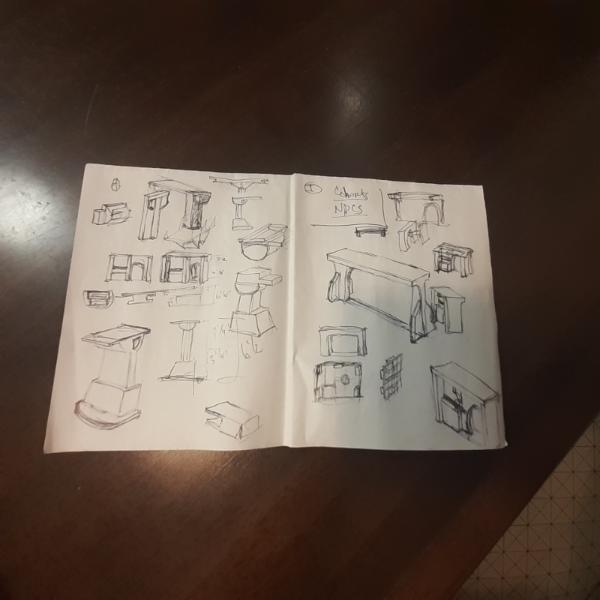
Oodles of doodles today. Full time jobs are not as fun as the hobby.
I'm coming up with scatter terrain detail ideas. What I like to call "Municipal Doodads".
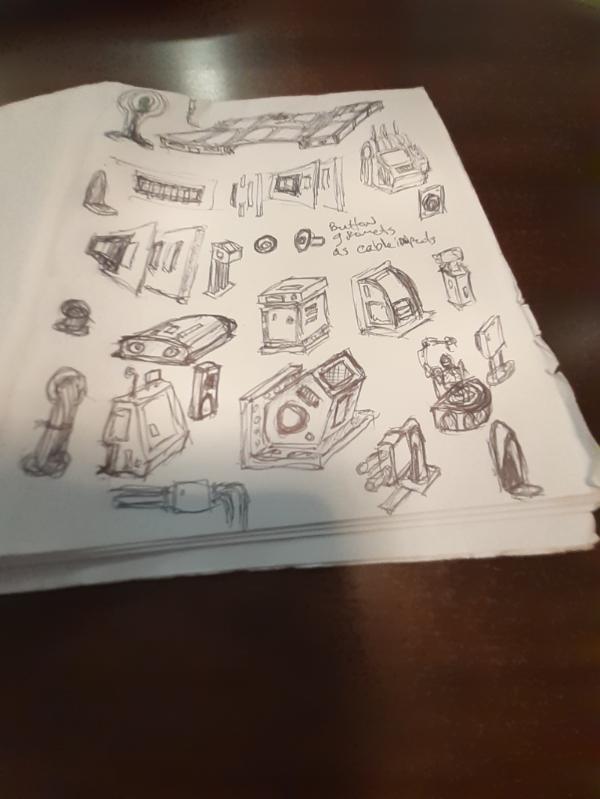
Thoughts? Any that jump out at you or that you think work particularly well? These are meant to be placed against a wall or in the middle of a big room to change up the big set pieces without having to make dozens of near-identical terrain.
Thanks for looking. Have a great day! Automatically Appended Next Post: Here, I did more
76303
Post by: Warboss_Waaazag
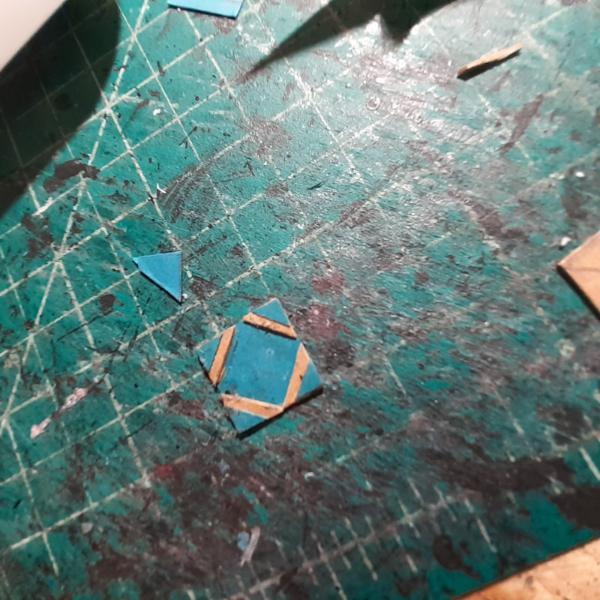
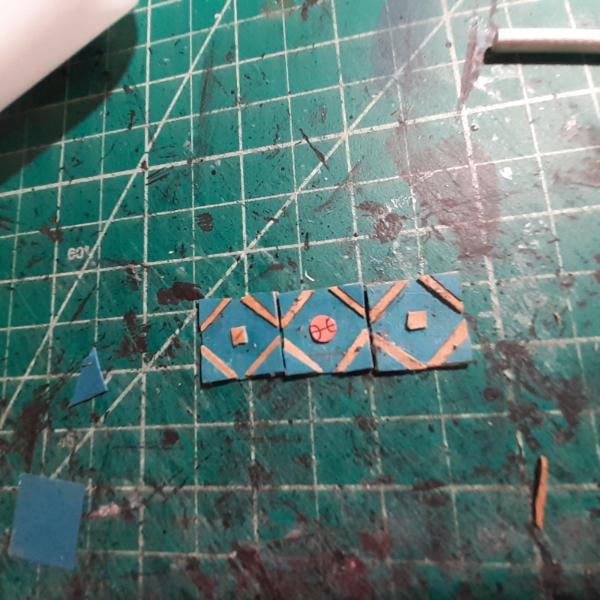
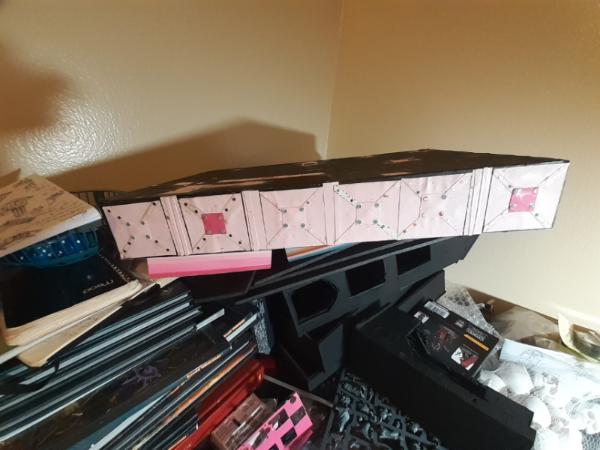
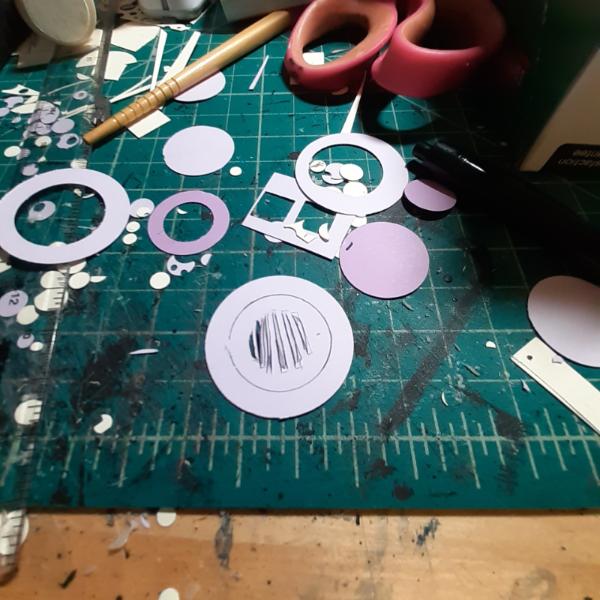
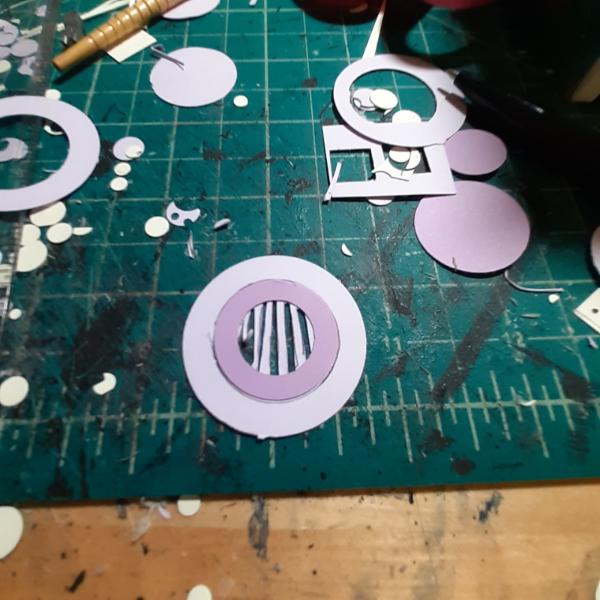
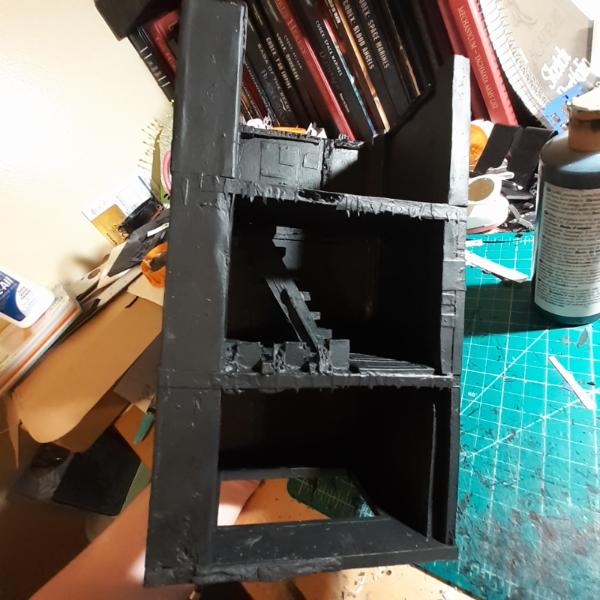
I started to work on the side panels of the big, flat riser peice.
Then I cut out a small trim by hand and then one with the hole puncher. I liked the hole puncher better because it was way easier to make clean lines

Here they all are in place.
I wound up cutting them in half and then taking large hole punchers to them. Then I added these 2 "vents" and a bunch of teeny tiny rivets.
Then I added a second layer of details to the smaller large flat side.
I'm particularly proud of this "cabling".
Please comment on my progress. Even a "nice job, I like it" type comment is encouraging and appreciated. Thanks for looking and I hope you have an awesome day.
1124
Post by: Captain Brown
Warboss_Waaazag
That was an ingenious way to make those vents.
Cheers,
CB
76303
Post by: Warboss_Waaazag
Thanks, Captain Brown! I really appreciate your feedback!
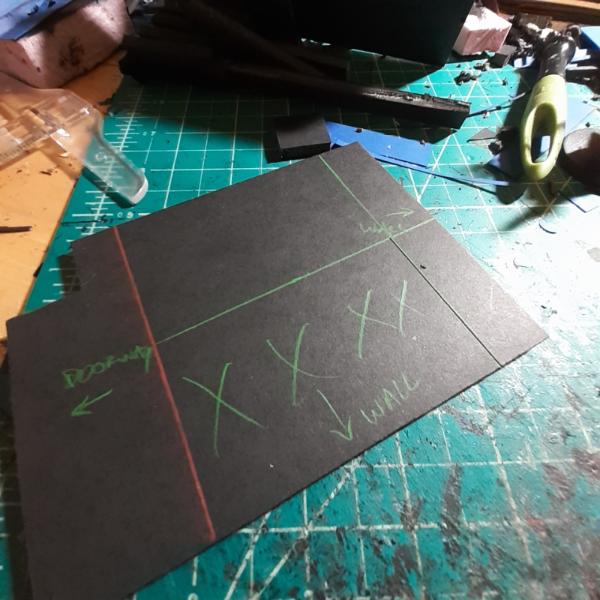
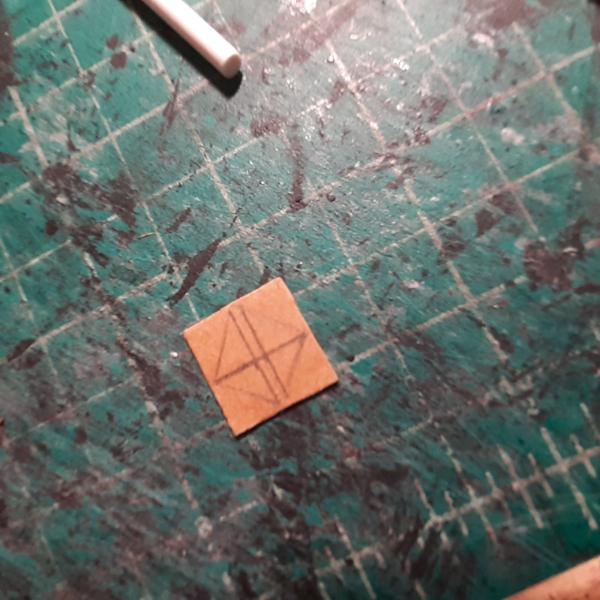
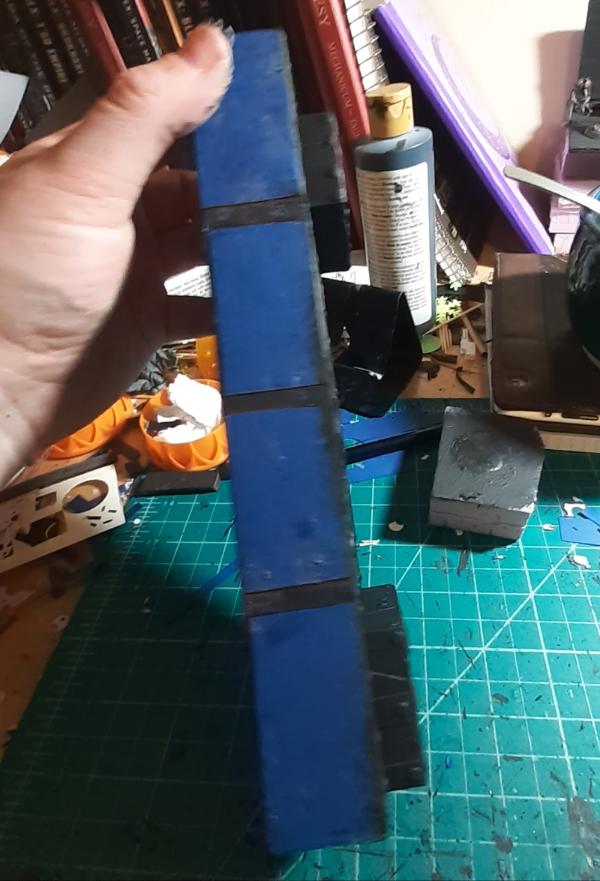
I started work on more details. These bulkhead plates.
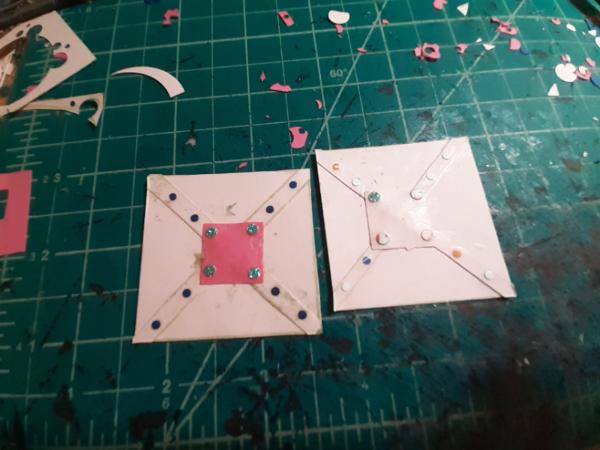
I placed the first to make sure it fit.
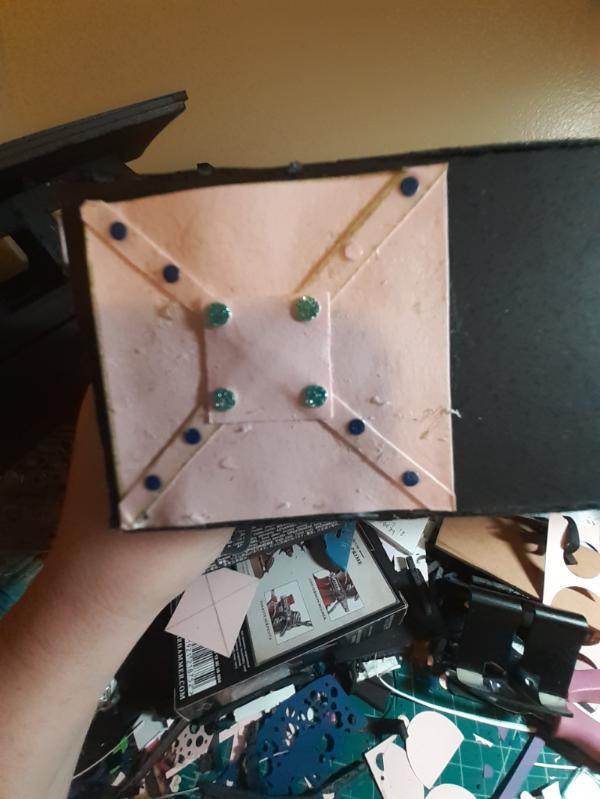
Thought maybe they needed spacers and completely mismeasured all that. But, whatever, I'm not undoing all that work.
That's it for now. More progress tomorrow.
22619
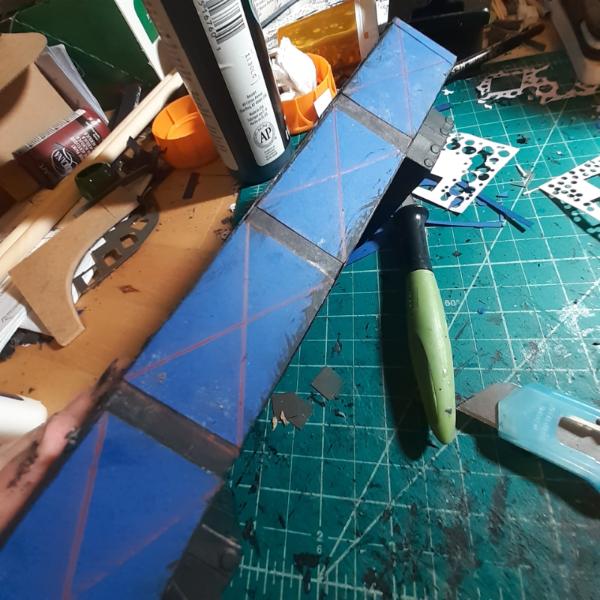
Post by: inmygravenimage
The punched round sections are excellent. And the X bulkheads are really coming together.
76303
Post by: Warboss_Waaazag
Thanks, graven. I really appreciate your feedback!
I did more work on the angled end of the walkway because it felt too plain.
And put the first layer of detail on the large flat area.
There's plenty more to do.
76303
Post by: Warboss_Waaazag
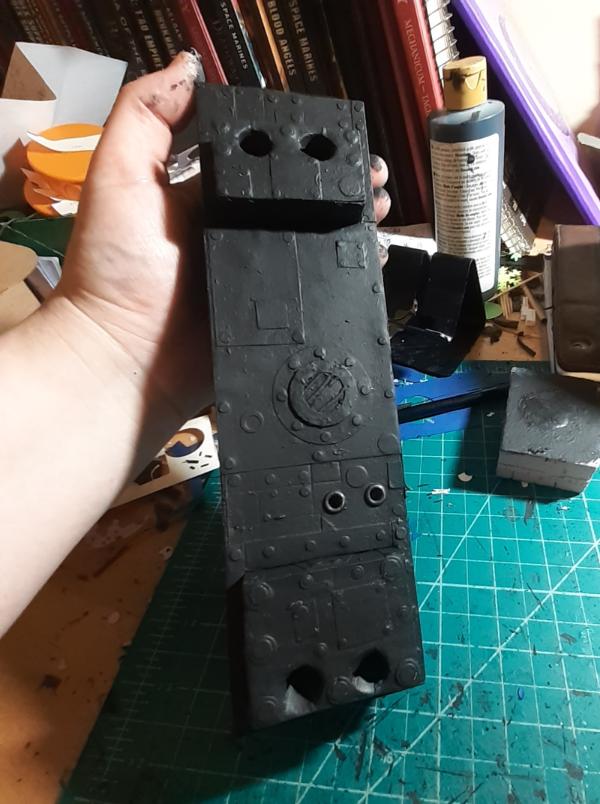
After priming the larger floor area, I started working on the second layer of details. Honestly this piece will be the first of the large ones to be completed.
Thanks for looking. There's plenty more to do.
106010
Post by: Meer_Cat
It is amazing how non-playable the unprimed/unpainted pieces look- like Jackson Pollock kinetic art in the act of flying apart and then how perfectly textured everything looks with just an overcoating of primer. The transition is amazing and one that I want to try on my next building-type terrain piece (and I've got the bits floating aorund that are just itching to get built!).
Rock on!
76303
Post by: Warboss_Waaazag
Thanks, Cat. I look at my before pictures and cringe. Then I prime them and I go, "Oh yeah, there it is."
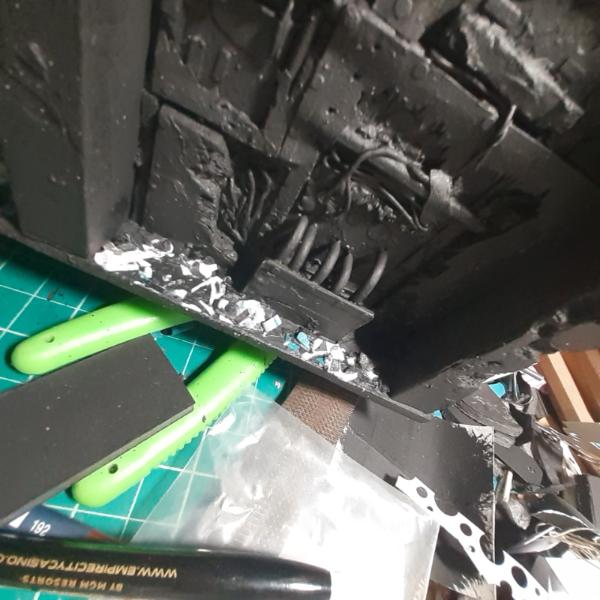
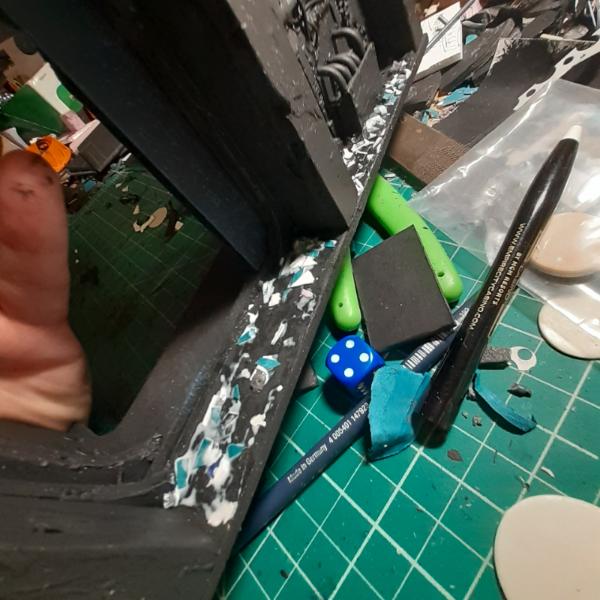
I went back to the giant piece that started all of this and started plating the back of it, before realizing there was an overhang at the top that I hadn't accounted for.
 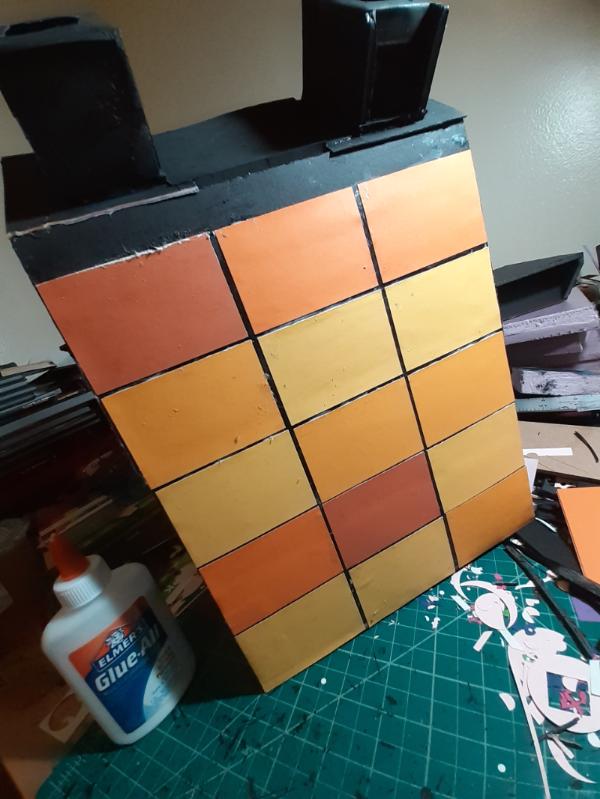
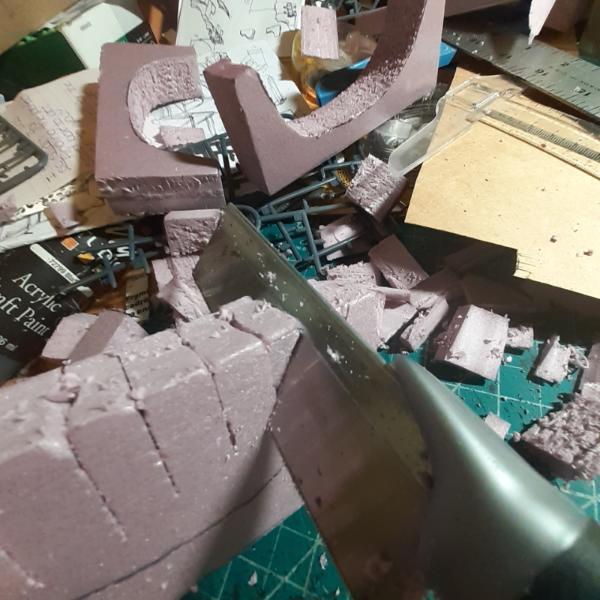
Luckiky, I had gone to my storage unit earlier that day and unearthed a very sharp blade. I made short (ish) work of that.
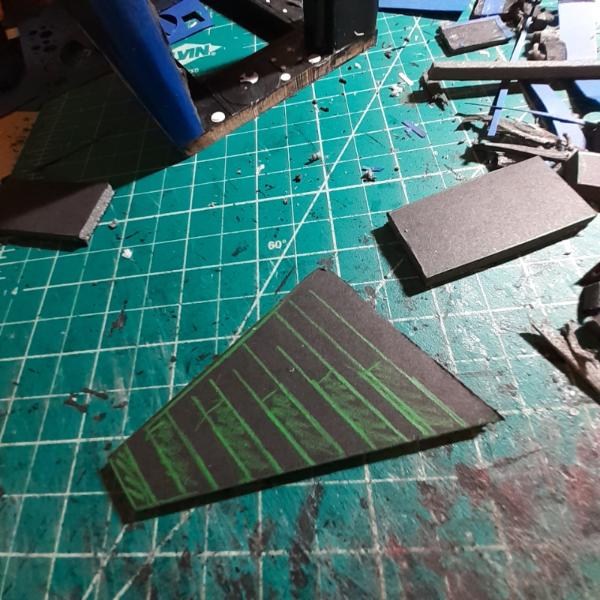
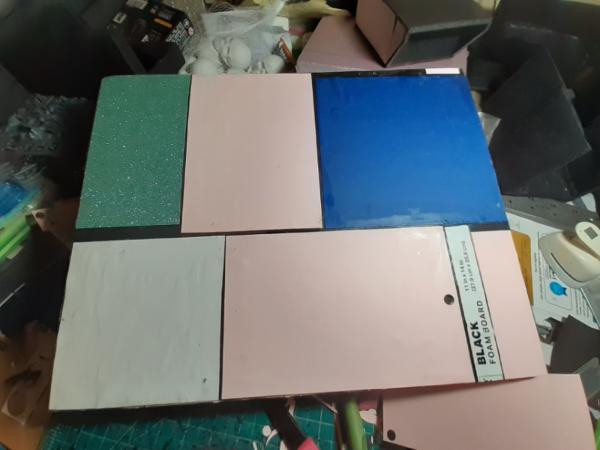
Whatever, it didn't need to be perfect for what I had planned. These were not meant to be autumnal. Those were just the colors at the top of the stack. I bought these colorful index card things because they are all precut, a reasonable size, and colorful enough to be pleasing to my eyes prior to priming.
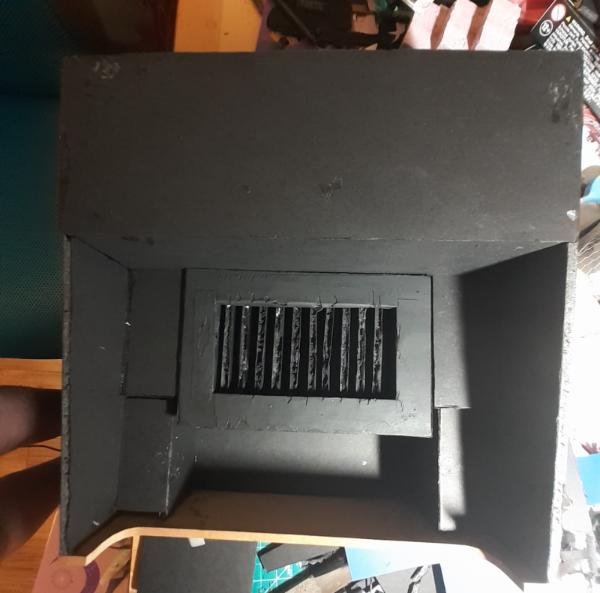
Also, after all the work to cap these vents, I decided to cut them open in anticipation for the terrain piece I'll make to fit over them.
Work is never done. Thanks for looking and have an awesome day!
22619
Post by: inmygravenimage
Really inspiring and impressive. I now have a mad terrain idea and I'm totally blaming you
76303
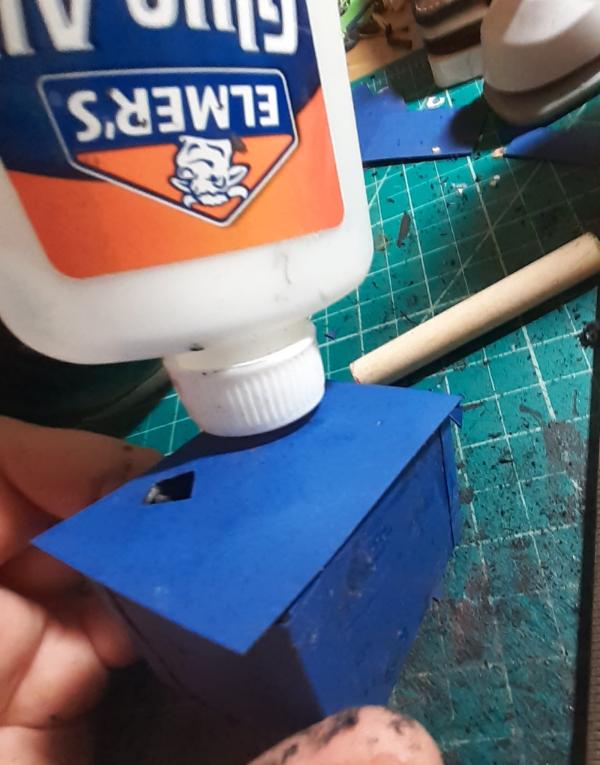
Post by: Warboss_Waaazag
Just as a follow up on this, I wanted to reveal that after I glue on the first layer of details, I coat the entire surface with a thin layer of roughly smoothed white glue (I use Elmer's). And then just let it dry. It creates a rough, uneven coat that lends itself to looking like aged metal and adds a texture for drybrushing to pick up on.
 inmygravenimage wrote: inmygravenimage wrote:Really inspiring and impressive. I now have a mad terrain idea and I'm totally blaming you
Thank you very much for this high praise, graven! Absolutely blame me. Go forth, make! I can't wait to see what you create.
76303
Post by: Warboss_Waaazag
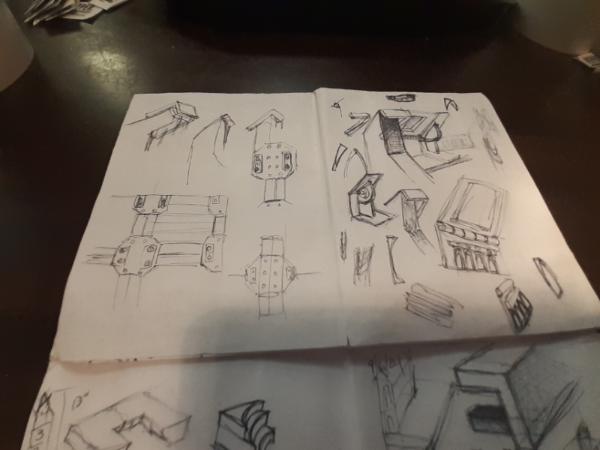
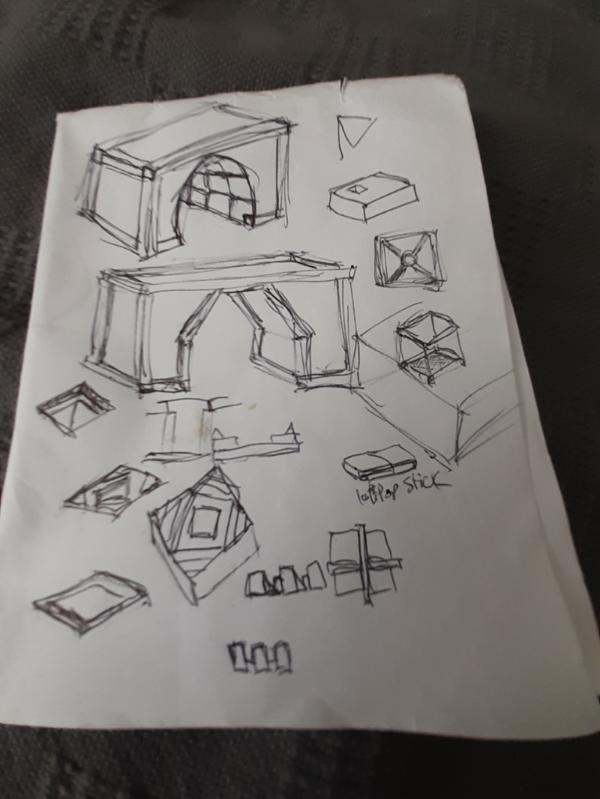
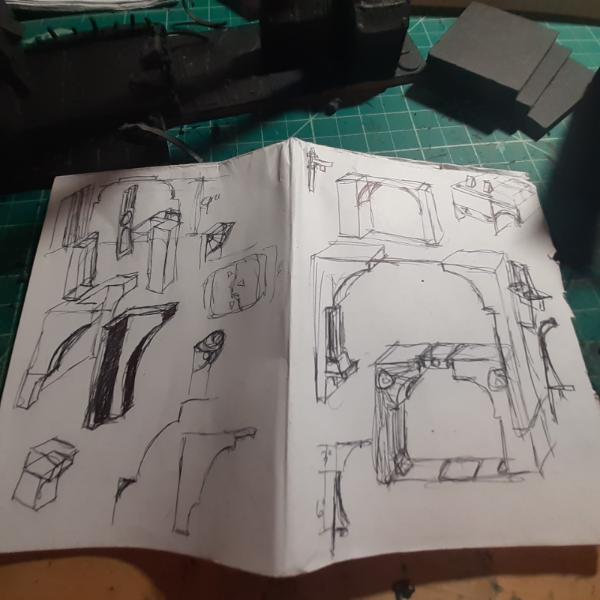
Sketches on work days. This first jumble is me trying to work out how to make a 4 way arch.
And then working through consoles and walkways.
I'll have more project shots up soon. My weekends are in the middle of the week.
22619
Post by: inmygravenimage
I love seeing your brain at work! I'm going to convert a Weapon X bunker from mcu into an endor bunker.
76303
Post by: Warboss_Waaazag
inmygravenimage wrote:I love seeing your brain at work! I'm going to convert a Weapon X bunker from mcu into an endor bunker.
Thank you! And cool!
More Archway sketches.
And trying to hint at warping effects on architecture.
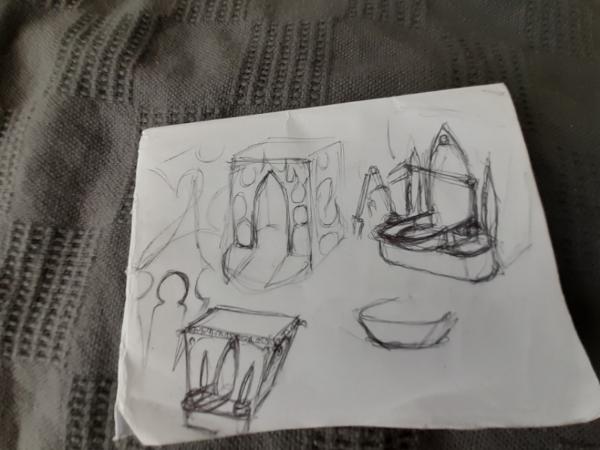
And then ideas for how to create easier rounded forms with foamcore and paper.
Maybe I'll get some work done this evening if I don't pass out in my soup. Also, I think I've been struggling with my next big project piece. I have to make a staircase. A functional staircase. And I've been fretting about it for weeks. So I think I'm just going to build one for no reason, just to work past my fears of not making it "perfect". Like, I literally intend to make a staircase just to fail at making a staircase so I can move on with my brain process to see where and what I have to fix to get it right.
134867
Post by: The_Retromancer
Thats a lot of work done for scenery! So far looking great, I like the bulkheads, step by step you will end up with some amazing terrain
106010
Post by: Meer_Cat
Ideation is the first step towards realization- rock on!
I now remember what some of your punched out bulkhead/walkway terrain embellishments reminded me of: exhaust systems gaskets! From the ones that fit at the muffler/pipe joint all the way up to the header pipe and manifold gaskets- if you could find those as scrap or surplus, they might make an interesting addition to your 'found item' pallet.
More of this, please!
76303
Post by: Warboss_Waaazag
Meer_Cat wrote:Ideation is the first step towards realization- rock on!
I now remember what some of your punched out bulkhead/walkway terrain embellishments reminded me of: exhaust systems gaskets! From the ones that fit at the muffler/pipe joint all the way up to the header pipe and manifold gaskets- if you could find those as scrap or surplus, they might make an interesting addition to your 'found item' pallet.
More of this, please!
I'll see what I can find. Thanks, Cat!
The_Retromancer wrote:Thats a lot of work done for scenery! So far looking great, I like the bulkheads, step by step you will end up with some amazing terrain
Thank you!
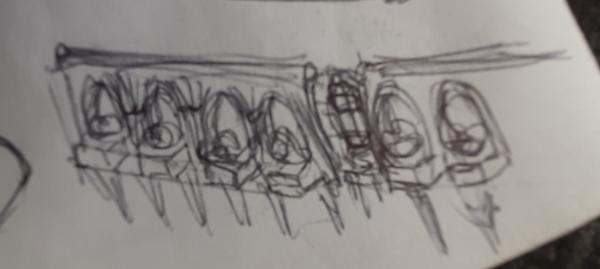
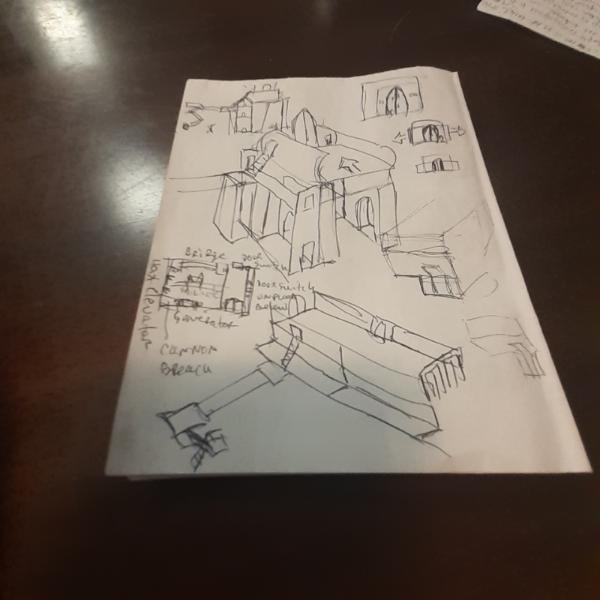
Here's another doodle. This one was ages ago, but it started me on this path of more dynamkc terrain layouts. Probably what catapulted me into doing more sketching in the downtime at work. I showed it to a coworker and they were so excited by it. It's just the broadside of a spaceship - gun turrets and a pair of bay doors sandwiched between gun batteries, but the fact that they could parse what I had drawn is really what motivated me to keep doing it. I went to an art school, but I haven't really used the sketching skills from it in a really long time. I was convinced people couldn't understand what I was doing; what I was drawing. I thought I had lost the skill. But Will told me otherwise and it motivated me to keep doing it. Thanks, Will.
I did some work on the back plating of my first big piece. The shininess the camera picked up is a coating of white glue drying. Once that cures I'll hit it with another layer of craft paint primer.
More work yet to be done. Thanks for looking and have an awesome day!
134867
Post by: The_Retromancer
Just passing by to say keep it on!
76303
Post by: Warboss_Waaazag
Thanks, Retromancer!
I finished the detailing on this deck.

And started detailing this smaller piece.
More shots up as I get stuff done.
76303
Post by: Warboss_Waaazag
76303
Post by: Warboss_Waaazag
More doodles.
And me pretending I know what to do about my stairs.
More progress posts up soon.
22619
Post by: inmygravenimage
What's the plan with the top left middle pic? Intriguing.
76303
Post by: Warboss_Waaazag
I might wind up doing a spiral staircase, which is ironically simpler to achieve. Oh, and I want to imply more stairs than I actually need to build.
119289
Post by: Not Online!!!
Didn't realise that you were a fellow sketch enthusiast!
Nice work on the terrain btw!
130403
Post by: blockade23
Stairs are something I struggle with as well. Either they look like I just put a bunch of posterboard atop each other, or they are scale weird looking.
Stairs, #1 enemy of scenery builders ;-)
#2 of course is accidentally using the wrong glue.
76303
Post by: Warboss_Waaazag
Thanks everyone! Grrrr, stairs.
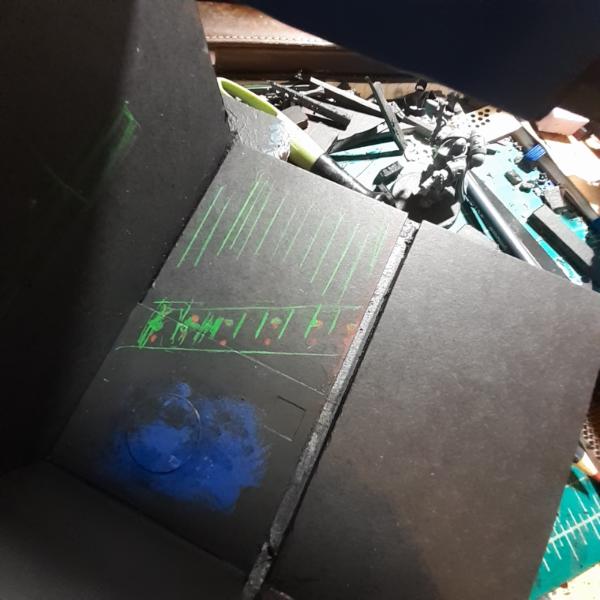
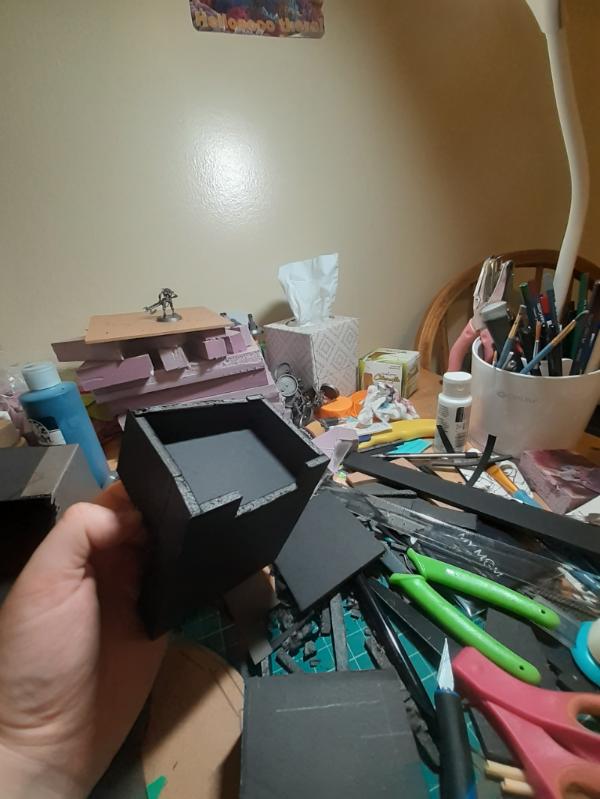
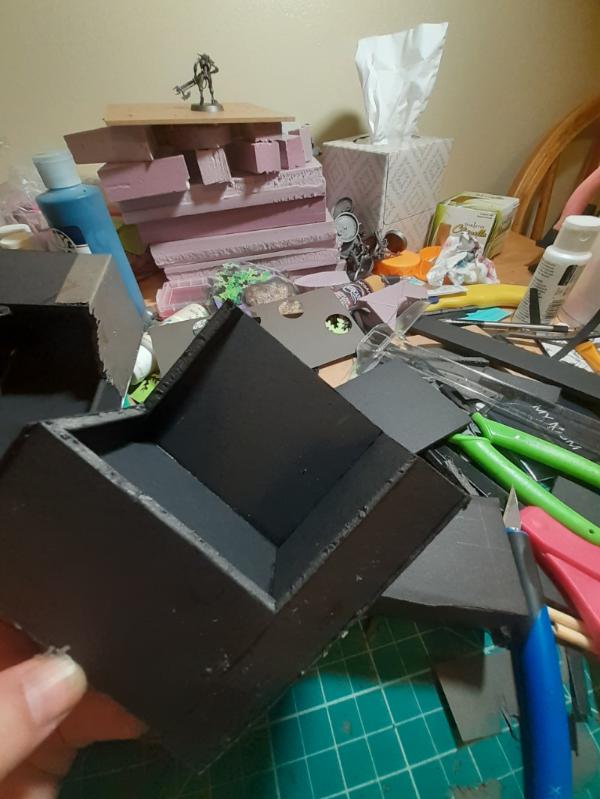
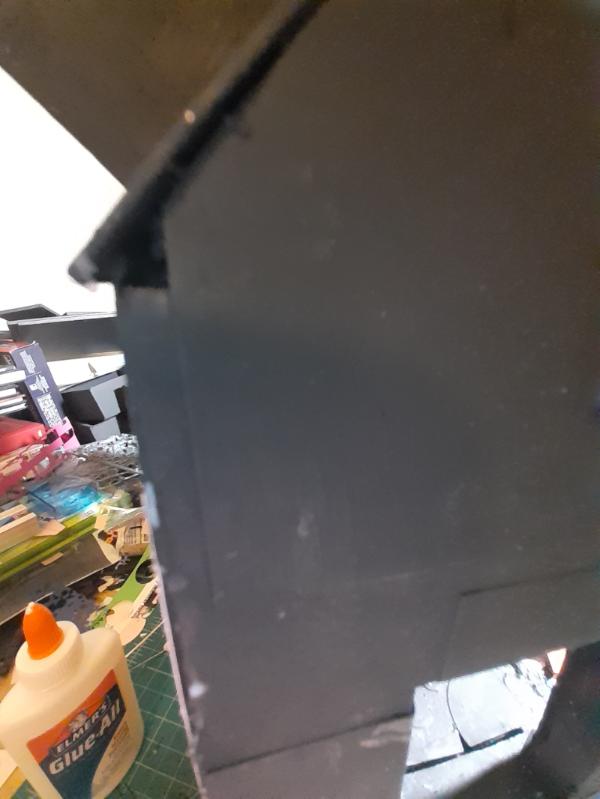
I changed gears. Sorry I didn't take any in progress shots of this thing. The main body is about 5 layers of "I don't know what I'm doing, help" and 1 layer of "ah well, hopefully the primer will cover all my mistakes, this is fine".
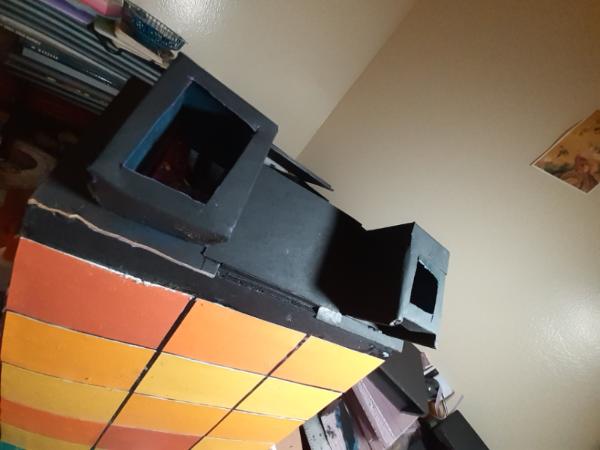
Also, disregard the messy bedroom in the background, this is the only place in my apartment with adequate sunlight for photos. Because here is what crap lighting photos look like.
98217
Post by: Skinflint Games
Great work Warboss - regarding stairs, have you checked out Wyloch's videos on YouTube? He did a great video on this type of thing: https://www.youtube.com/watch?v=5N99J7c5ifc
76303
Post by: Warboss_Waaazag
Thanks, Skinflint! I'll take a look when I have a free moment.
I didn't get any work done on my weekend as I was sick both days, but here's a patch of recent detail doodles.
I'll have more progress shots when I'm feeling a little better. Thanks for looking and have an awesome day.
76303
Post by: Warboss_Waaazag
106010
Post by: Meer_Cat
As you say "detail in layers"! It takes a certain type of mental perspective to be abel to deconstruct how you want the final look to be, and then build it up one bit at a time. It's almost like those art pieces you see that are nothing when viewed straight on, but then resolve into a sculpture or face or something when viewed at the proper angle.
Rock on!
130403
Post by: blockade23
Looking great - I use layers in some of my work, but your attention to detail between layers is wonderful.
76303
Post by: Warboss_Waaazag
Thanks, Cat and blockade23!
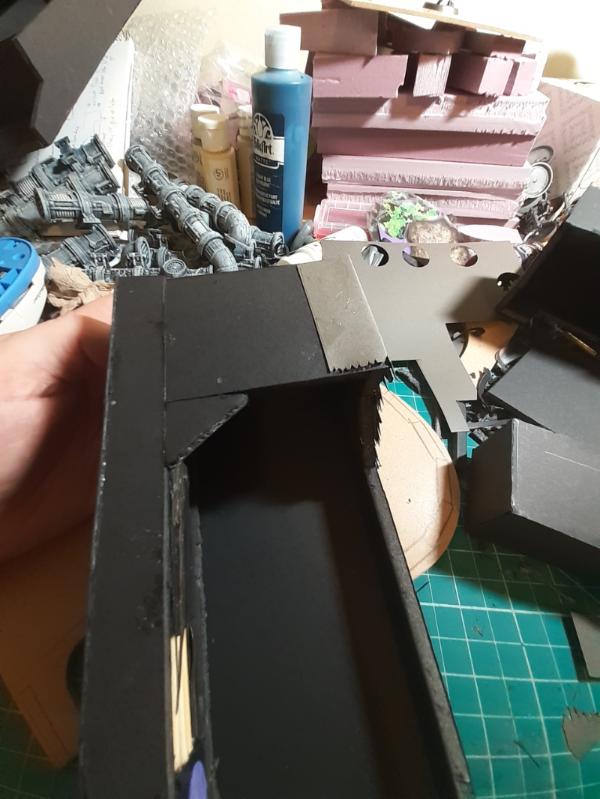
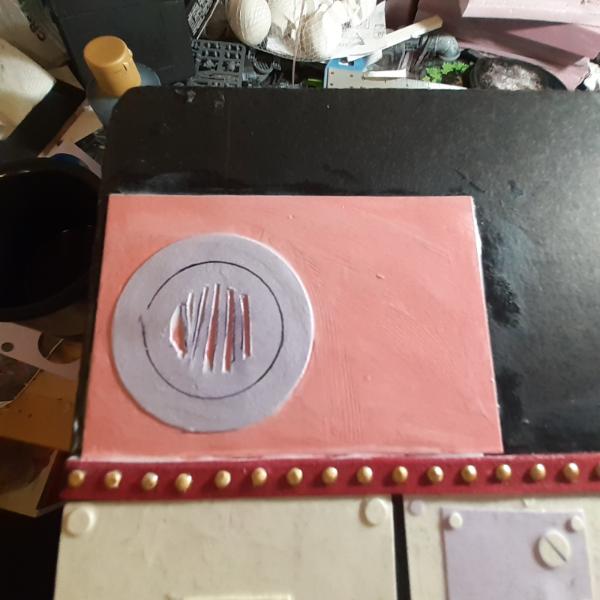
I did more work on the right side of this thing, first cutting a vent.
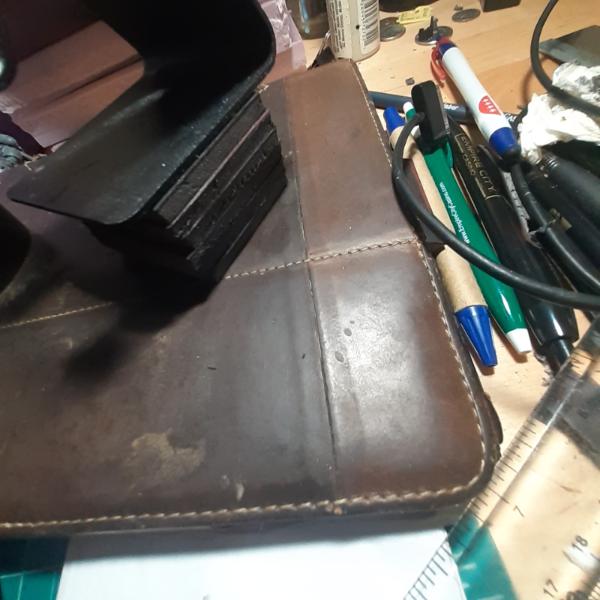
And then test fitting the ring.
Before placing it over this leather ribbon I found for cheap it has evenly spaced brass studs already in it, so I feel like the 2.37m (9 yards for those Imperial folk) for $3 USD was a good purchase.
Then more details went on and on and on.
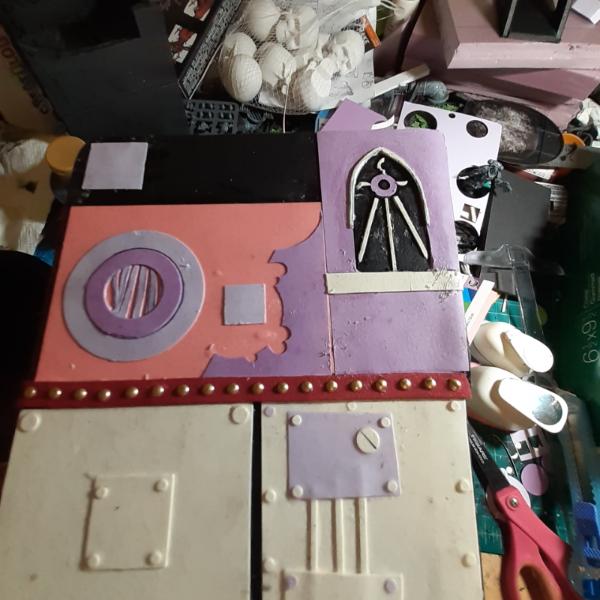  
More details to be added, but I am making good progress. Thanks for looking and have an awesome day!
76303
Post by: Warboss_Waaazag
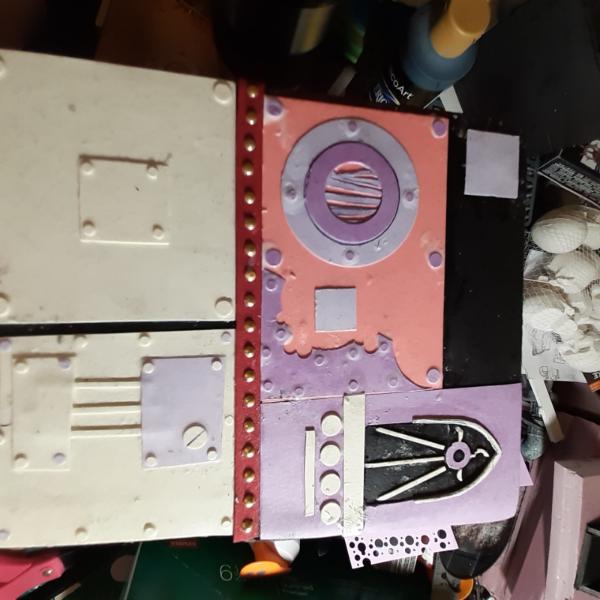
I detailed the left side of this piece.
And the top decking.
Soon I'll do the front and this thing will be nearly complete. Thanks for looking and have an awesome day!
76303
Post by: Warboss_Waaazag
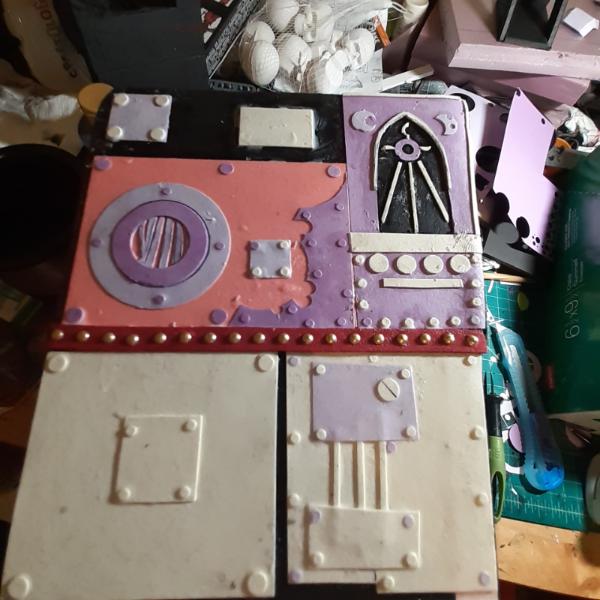
Started work on the back.
And the front top.
Built this little doodad to add to a recessed panel.
Then laid out the foundation, the details, and then, after priming, the doodad.
And then finally added the second coil to the other side of the box beneath the heat sink.
At this point I am pretending I'm almost done, but I'm probably going to spend a bit more time adding layers of grime and weathering.
Thanks for looking and have an awesome day!
22619
Post by: inmygravenimage
I'm loving the greebling. Detail work adds so much texture.
76303
Post by: Warboss_Waaazag
Thanks, graven!
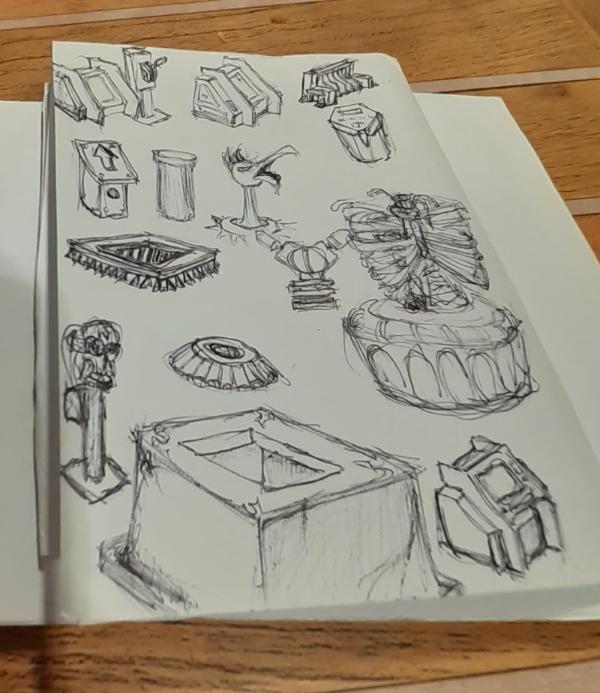
I started sketching like mad again today. There's a lot left to do.
Still struggling with stairs ideas. I'll get there eventually.
76303
Post by: Warboss_Waaazag
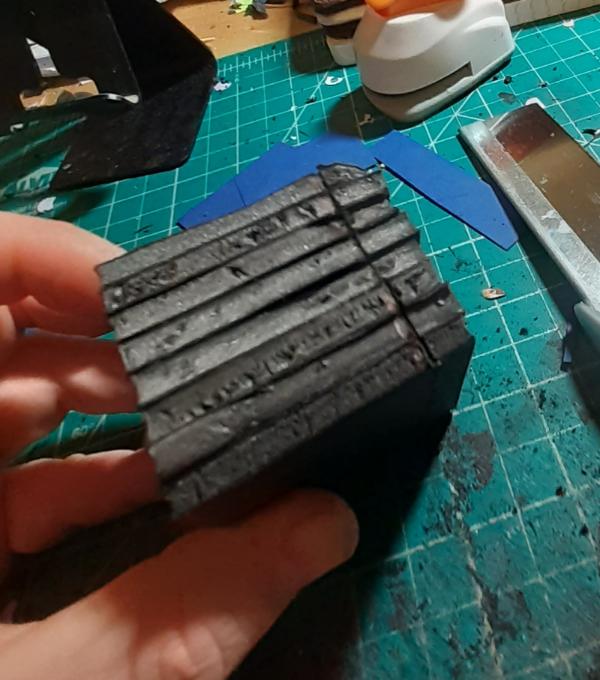
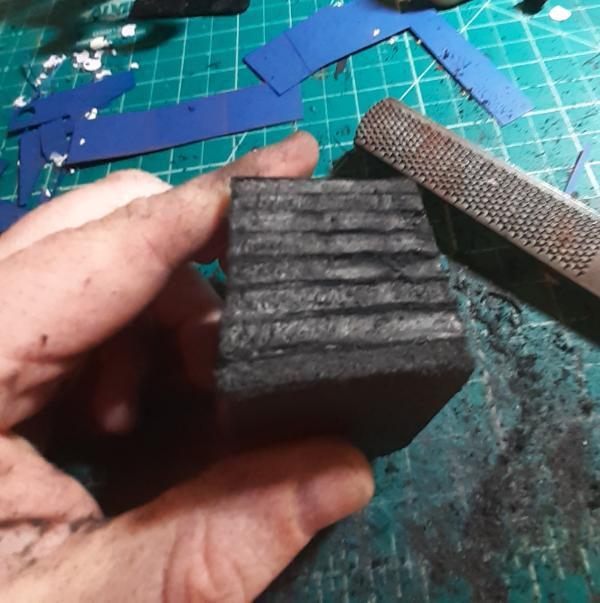
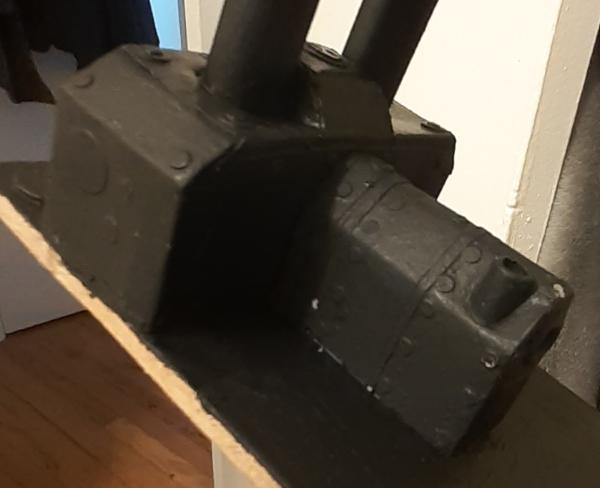
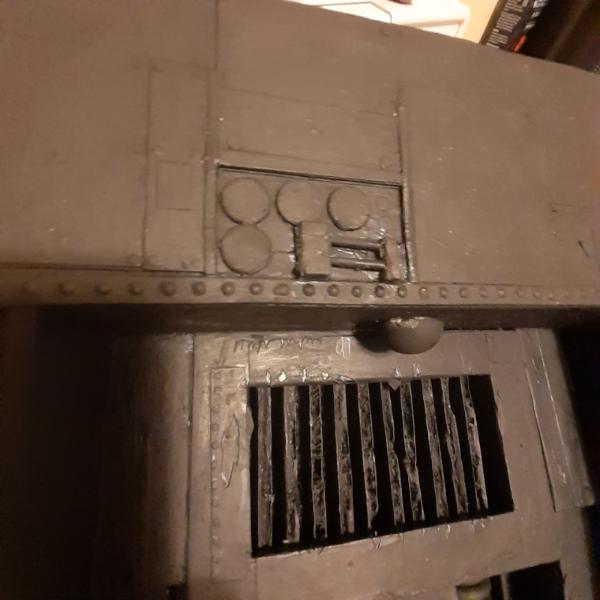
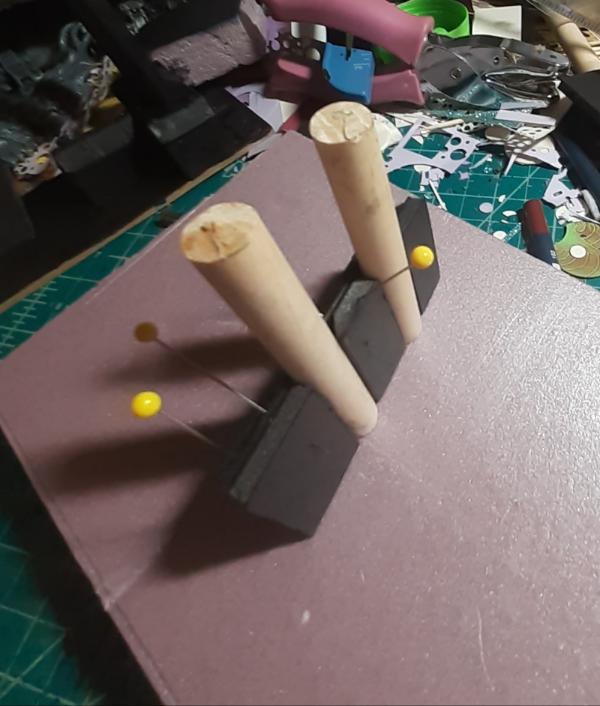
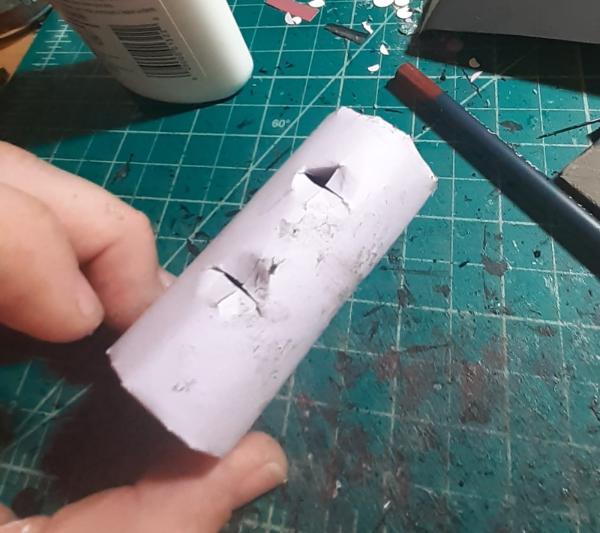
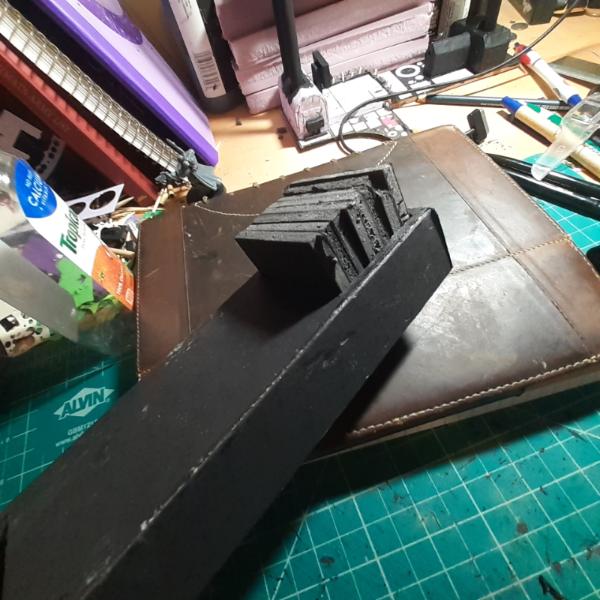
I started work on the second "boiler". I don't know what these things are, but really it doesn't matter. None of this is real.
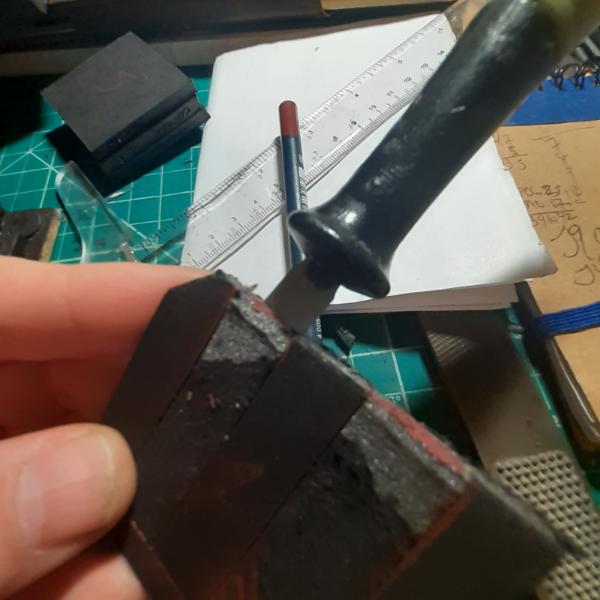
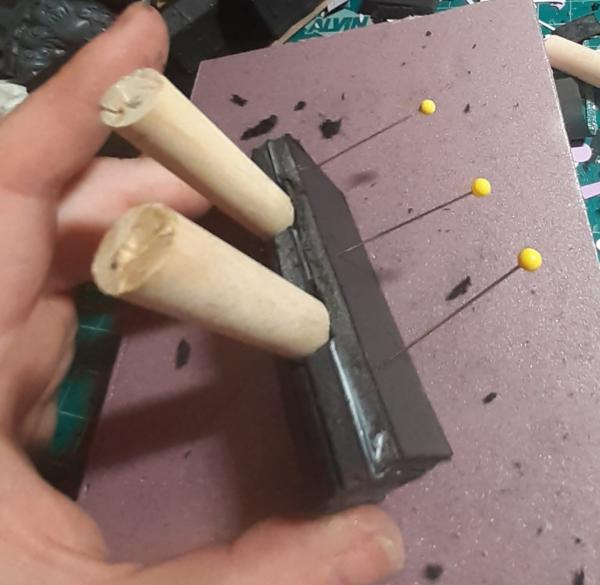
I started by carving out where the dowels ("pipes") will sit. I learned a lot from the previous boiler build and intended to correct my method's errors.
I also glued a slightly shorter piece behind this one and then cut an angled bit to lay across the top of it, which I then pinned. Pinning it, however crudely, held it in place so I didn't have to. I was working at a furious pace and the glue would barely have time to set before I was ready to glue something else on.
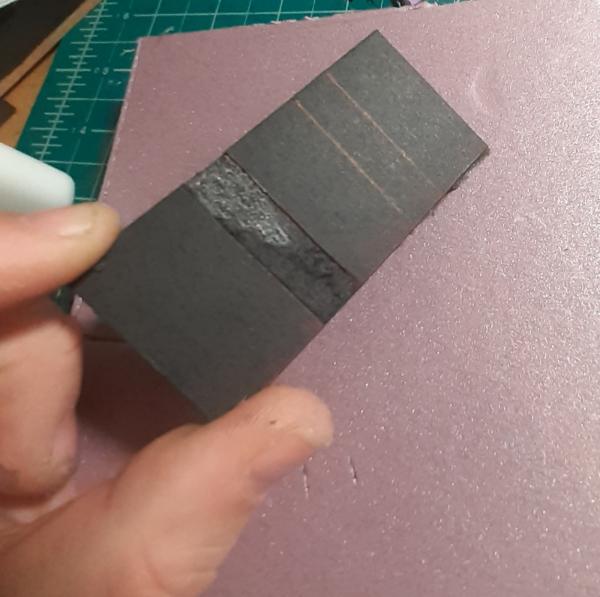
After about 60 seconds passed, I cut the channels out of this angled bit.
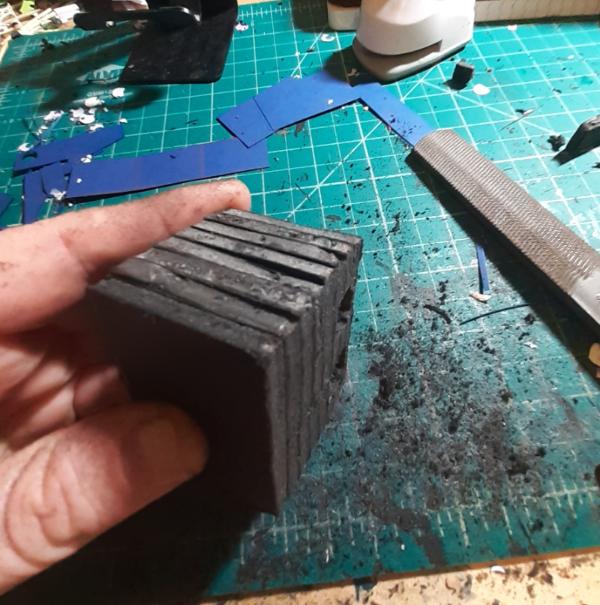
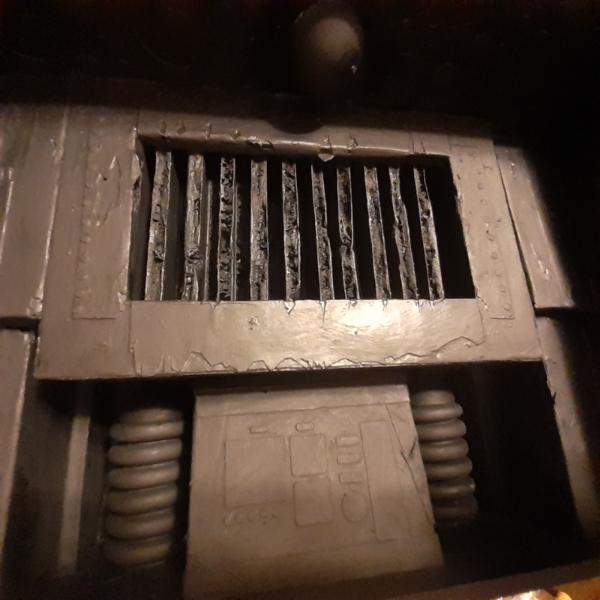
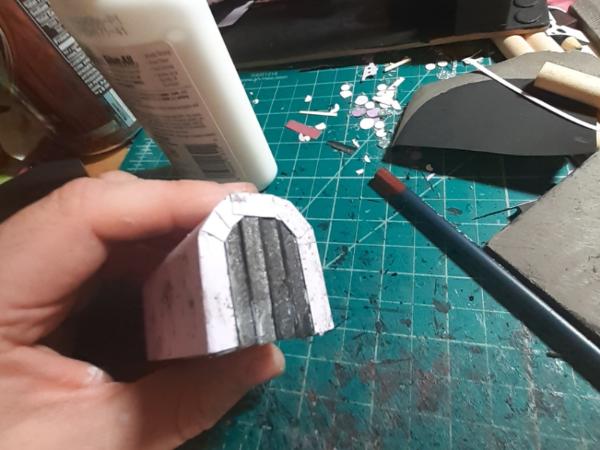
And then sliced up the next layer to hem the rods I was using as pipes in. I test fit to make sure these areas were the correct size and snugness I was looking to achieve.
You might notice I also angled the pins as I went to make sure all the glued surfaces made contact with each other.
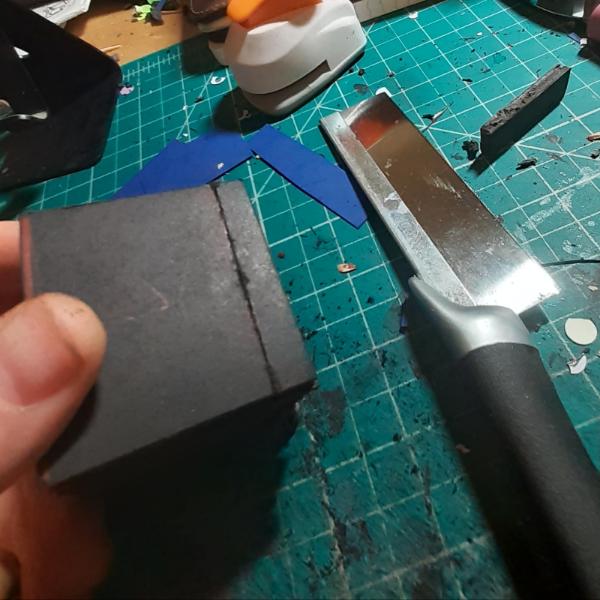
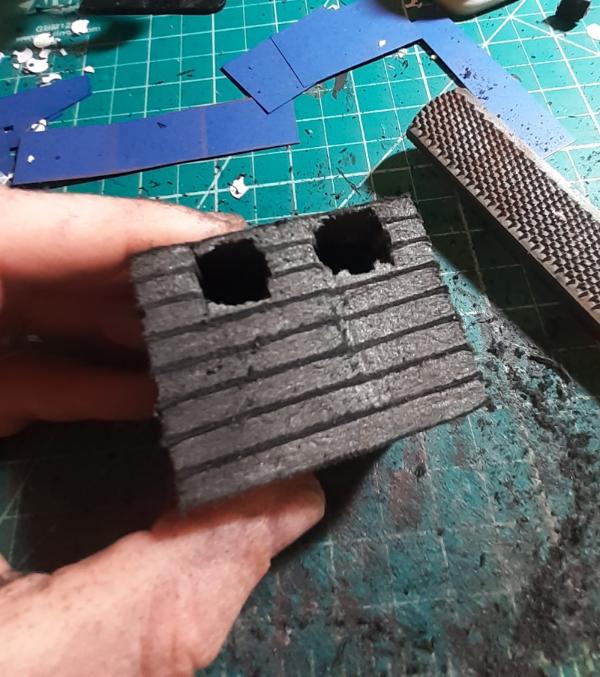
The next layer didn't need a lot of modification, so I scored the next piece at the correct channel locations and then brutalized the foamcore with a rough, rounded rasp.
 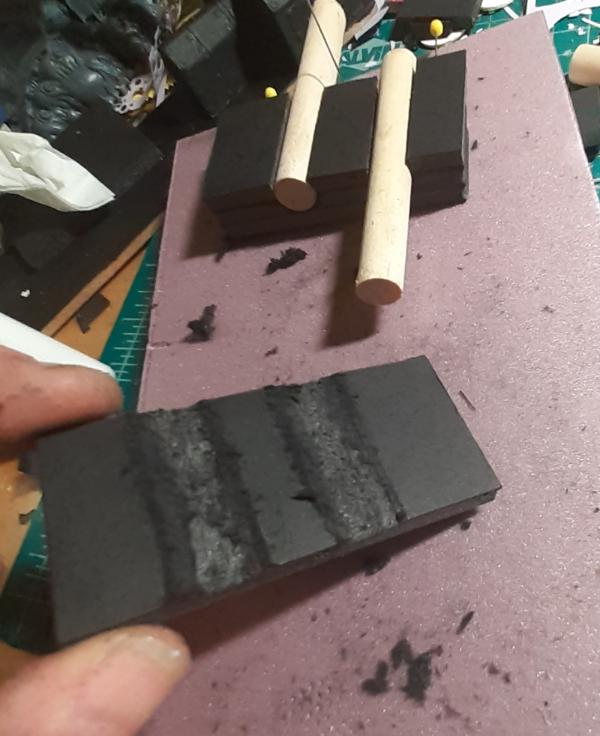
As you can see, I barely adjusted the depth, but it was enough to let the next layer sit correctly.
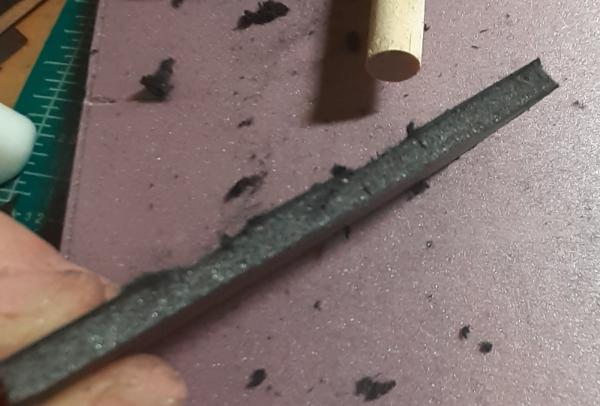 
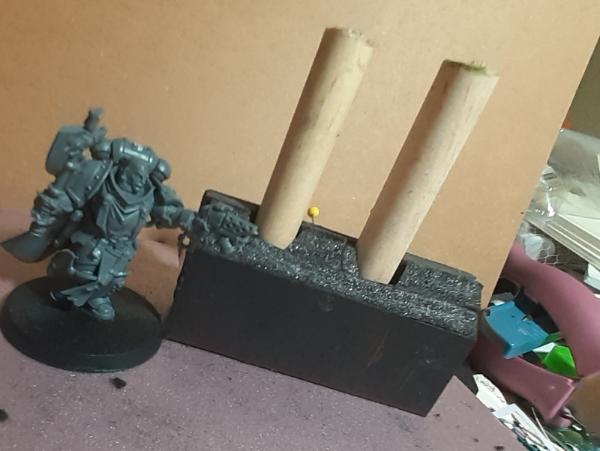
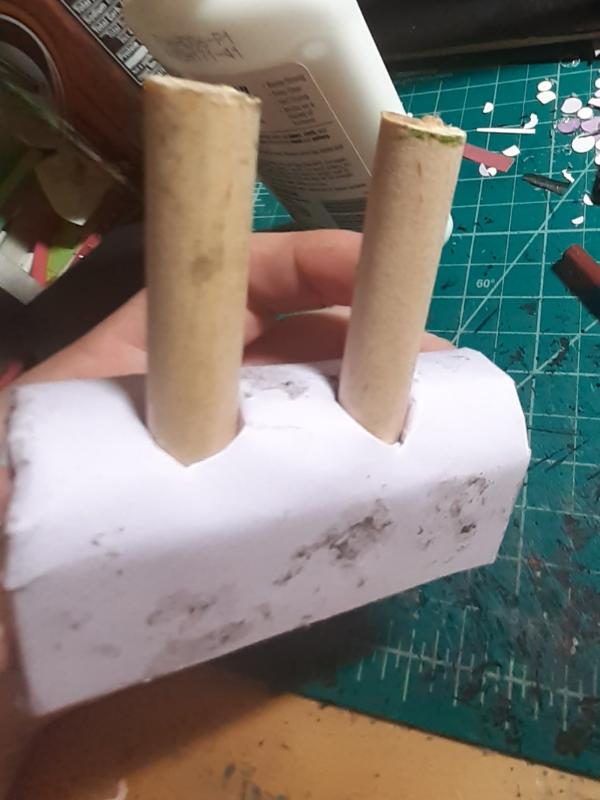
The next layers were easy with no modifications and the angled strips across their tops. Here is an unpainted Black Templar I bought off of Ebay that I have been calling "Gustavo" for scale.
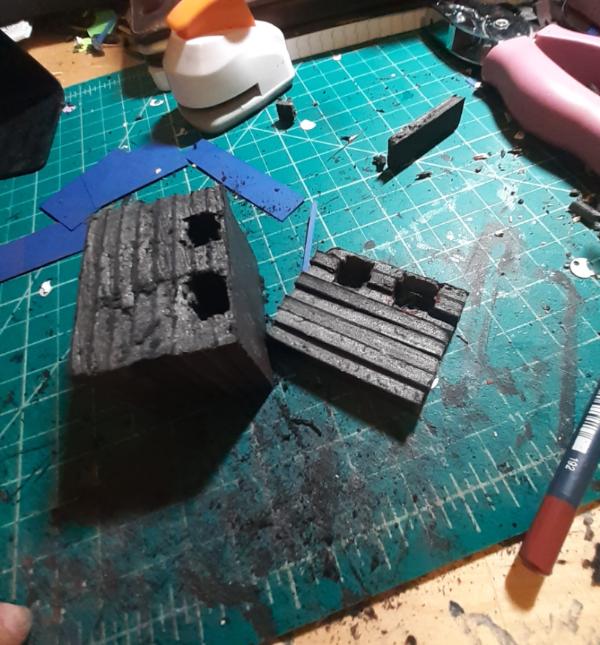
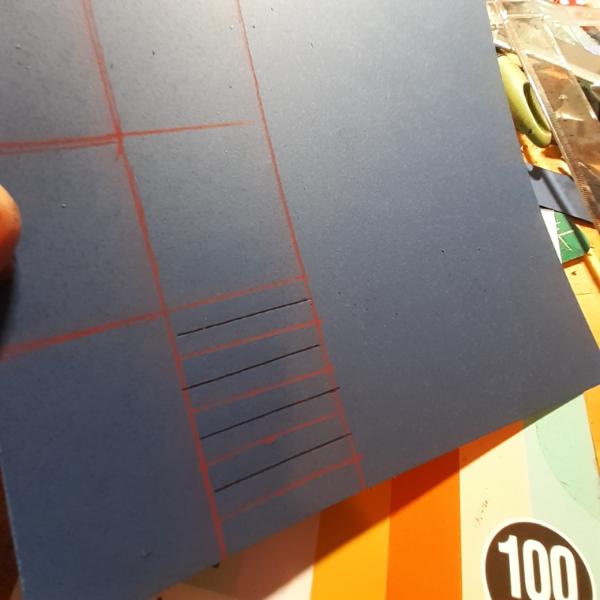
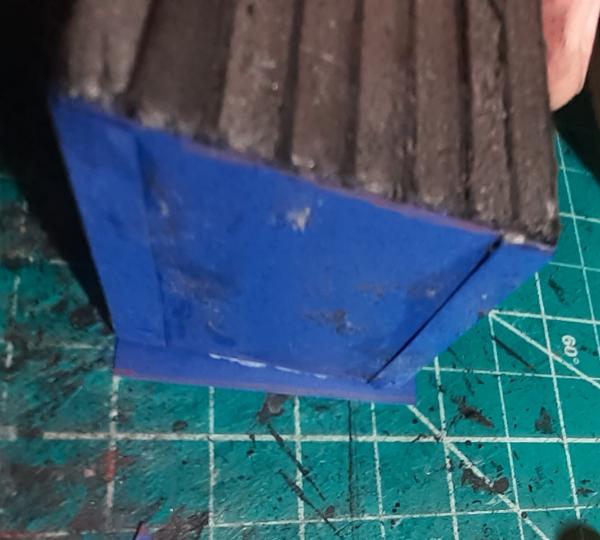
Then I rolled the shape over a piece of paper and marked where each angle of the base block ended and made a mark. After snipping the paper to size, I cut notches at each angle end and scored the interior where it would fold with a ball point pen.
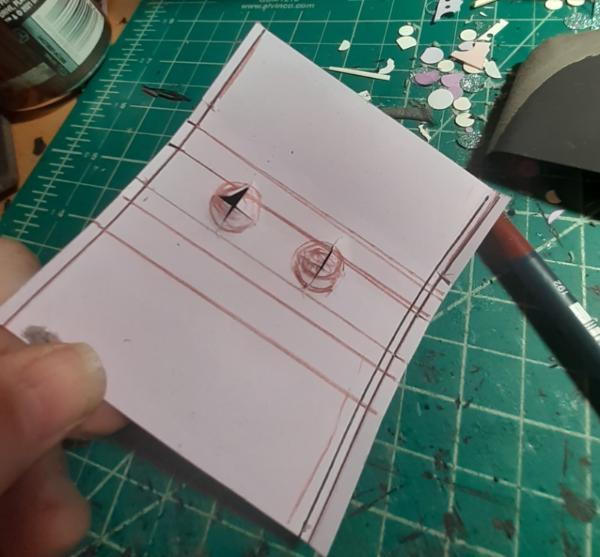
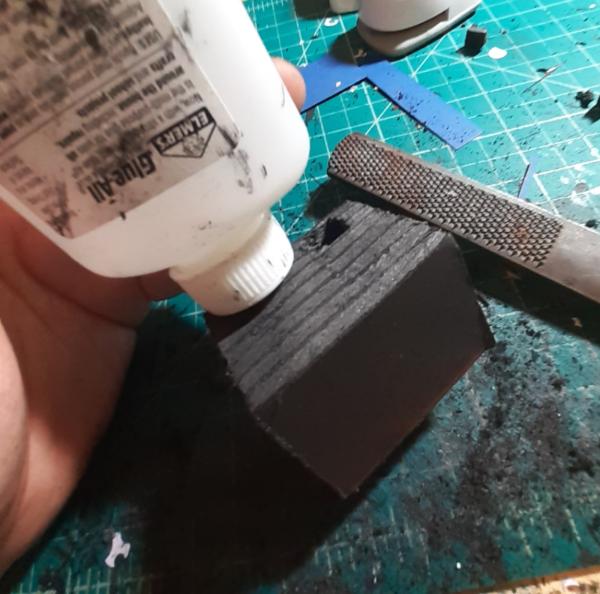
The holes for the pipes were achieved by test fitting the paper and pushing my colored pencil through the base block's holes from below. Then, at the approximates my pencil made, I traced the base of the pipe and cut an X. Then test fit again and pushed the pipes through the Xs, hence these dimples.
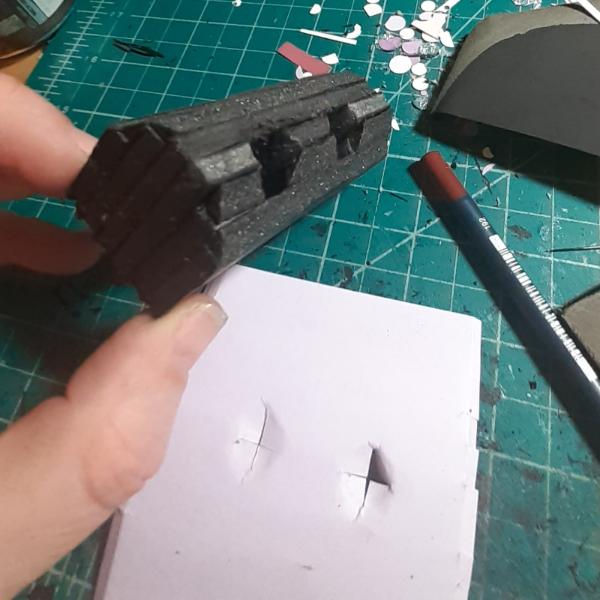
Then I glued the sheet on and folded/glued the endcaps down.
And then one last test fit to confirm the pipe joins looked ugly as hell...sigh. I guess next time I'll have to work on improving that aspect.
Now on to the details. Thanks for looking and have an awesome day!
22619
Post by: inmygravenimage
Hey, it's looking great! And paint hides a multitude of sins 
76303
Post by: Warboss_Waaazag
Thanks graven. I know you're right.
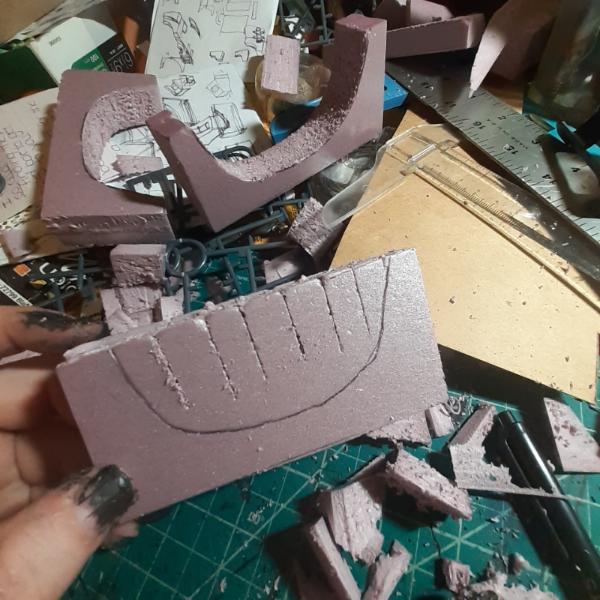
I started on a sort of work station platform. I lnew ai wanted an extra stair here, partially because I made this boiler slightly wider than the base. I used this curved bit I sawed off the letter "F" and glued it on at its edge. I also reinforced this join with a sheet of heavy paper glued to the bottom of both pieces and cut to shape. Sorry I didn't get a picture of that.
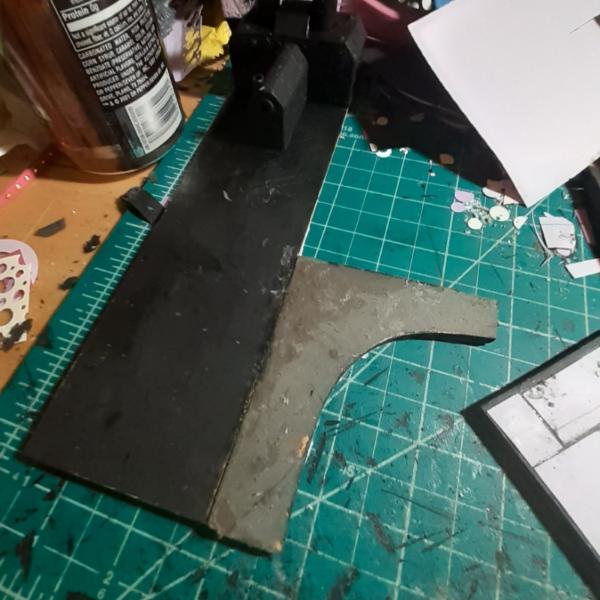
I contemplated shaving the curvy bit down, but in the end didn't bother. Then I moved on to the platform, which is just a piece of foamcore textured with paper rectangles.
And then it got a foam lip that I poked holes in every 1cm to later place toothpick fragments to represent an ancient and decaying guardrail.
And then I glued everything to the base and detailed the crap out of it.
That's it for now. Thanks for looking and have an awesome day!
84491
Post by: gobert
That’s looking funky Warboss! Loads of details crammed in already
76303
Post by: Warboss_Waaazag
gobert wrote:That’s looking funky Warboss! Loads of details crammed in already
Thanks, gobert!
I worked on a computer terminal. It's just foamcore covered with paper. I poked holes in the back of the console part and the stem part with a pin. And then widened the holes with an exacto blade before popping weensy toothpick fragments in the holes to act as pins.
Then I detailed the front of it. I also made a tiny extra bit for the side of thhe new boiler.
That's it for now. Thanks for looking and have an awesome day!
76303
Post by: Warboss_Waaazag
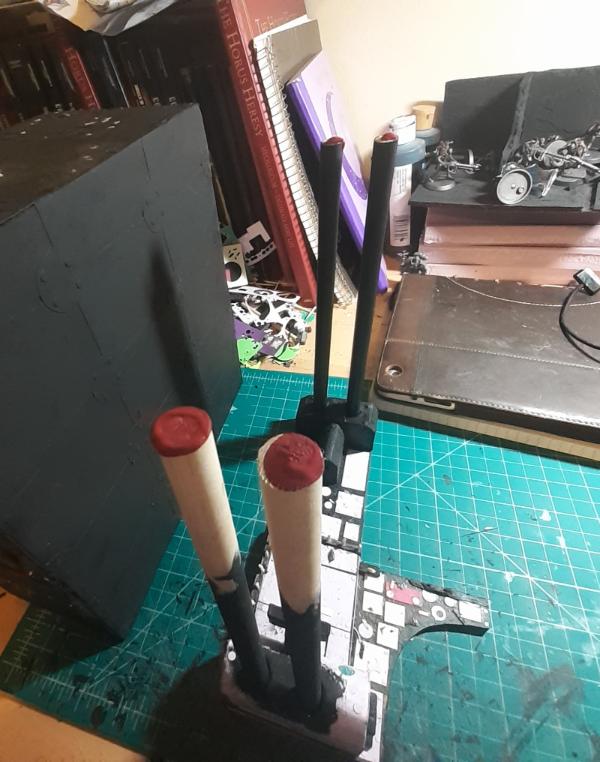
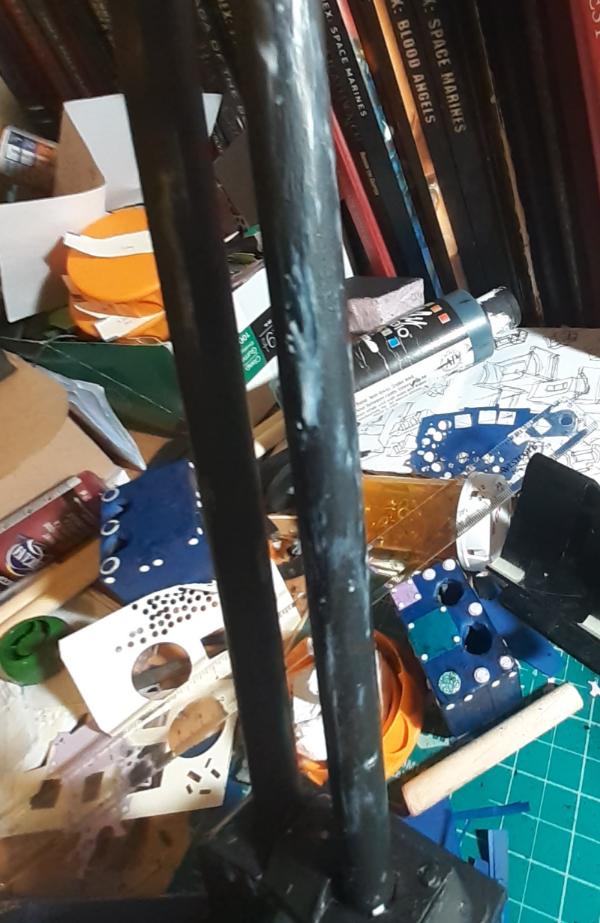
I glued the dowels-as-pipes into place as well as all the other bits and bobs to the base. Here is Gustavo for reference.
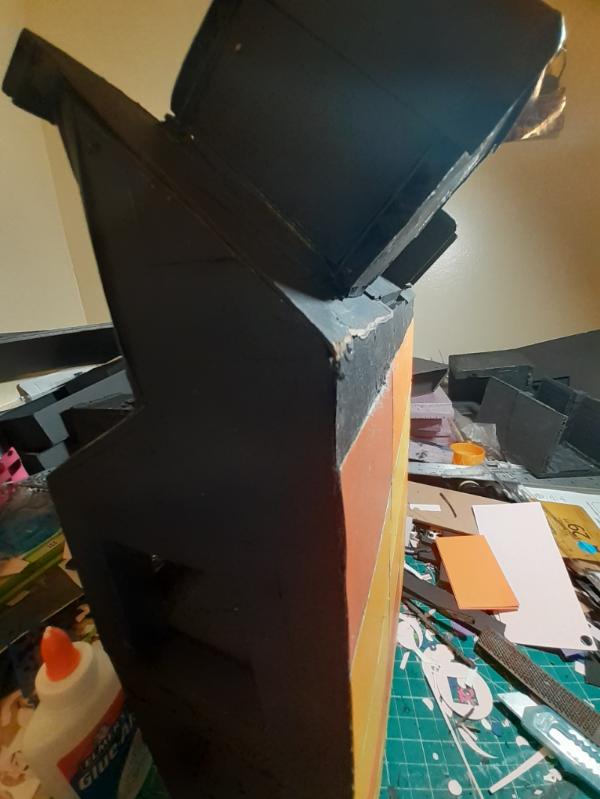
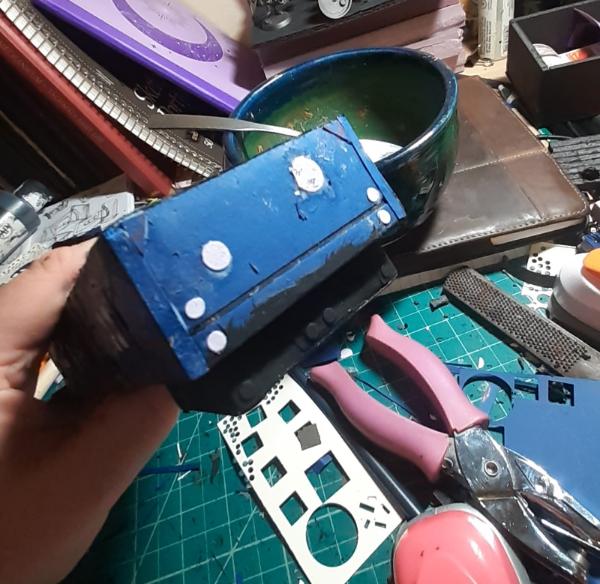
Then I got started on the box that will sit on top of this piece.
My original idea was to make extra bits, sort of like sockets, sort of like couplings, to add to this box to house the pipe ends. However, when I test fitted the box and compared it to the heat sink...
...it turns out I had already made it 1.5cm too tall. Dang it!
So, instead, I made a mock up using foamcore castoffs to illustrate how these peices will stack.
And then with the other piece to illustrate how I intend to fit stuff together.
Once the pipes piece is done I'll get started on another big box that will sit on top of the big platform and cover up the tops of those two ceiling vents from the other piece. And even still, all of these pieces only represent about 1/4 of the table's coverage.
Thanks for looking and have an awesome day!
106010
Post by: Meer_Cat
I like it!
The scale/size of the piece gives it a feeling that is almost Lovecraftian; seeing Gustavo wandering through these Cyclopean halls makes me wonder when the Great Old One is going to pop out!
Rock on.
6672
Post by: itsonlyme
This is some great work in here, keep it up.
76303
Post by: Warboss_Waaazag
Thanks, Cat! I like your cyclopean description. Catacombs of the dead and dreaming.
Thank you, itsonlyme!
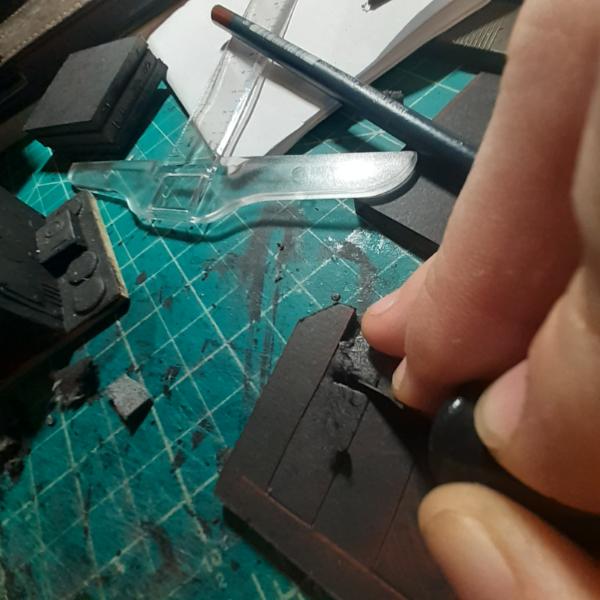
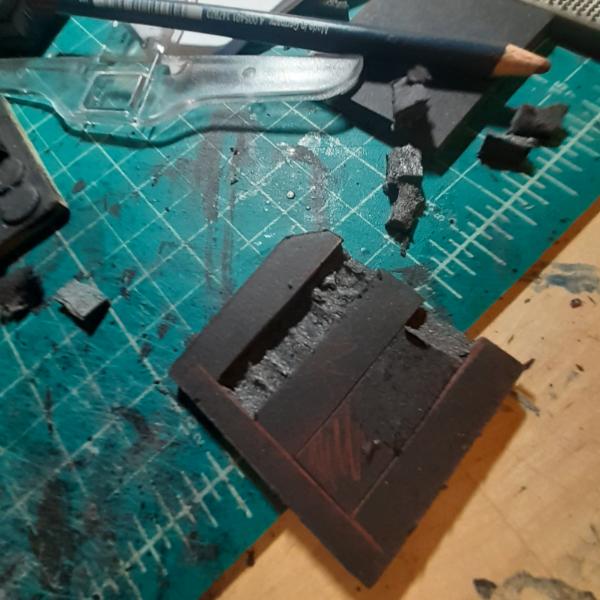
Here I present a billion photos of the start of my simple fix.
I basically outlined where the dowels were supposed to fit, measured a larger hole to make it easier to get inside of and fiddle, and then cut it so poorly I practically doubled the size of the second hole in an effort to fix it. Ah, well. Progress is still (messy) progress.
76303
Post by: Warboss_Waaazag
Sorry I haven't posted on here in awhile. This is mostly a post to say I haven't forgotten about this project (because it looms like a shadow in my overall anxiety). The past 6 days have been very hectic, but I promise I will dive right back in over the next couple of days.
More coming soon-ish.
133289
Post by: Tommygun1918
Warboss_Waaazag wrote:Sorry I haven't posted on here in awhile. This is mostly a post to say I haven't forgotten about this project (because it looms like a shadow in my overall anxiety). The past 6 days have been very hectic, but I promise I will dive right back in over the next couple of days.
More coming soon-ish.
I know that feeling. I ran out of clear lacquer and I couldn't finish any of my projects this last week.
Couldn't take it any longer, so I drove around town today looking for a store that had the right kind.
I can finally rest.
22619
Post by: inmygravenimage
It's OK mate, stuff happens, attention wavers. Better to take a break a return afresh!
106010
Post by: Meer_Cat
Right there with you, man! I very much enjoy seeing random bits and bobs stuck onto a slab of cardboard magically become highly detailed building or starship interiors- it's like those sculptures that seen from straight ahead appear to be only a series of disconfomring layers, but from the right angle become a face, or horse, or whatever. I look forward to the next installment when it comes.
In the meantime, things are also hectic here! I am _____so_____ close to finishing Kittyhawk I can taste it- and not a minute to work! It'll come, though.
Rock on!
119289
Post by: Not Online!!!
Is away for 2 weeks, Wazag builds what feels like a whole town...
76303
Post by: Warboss_Waaazag
Tommygun1918 wrote:I know that feeling. I ran out of clear lacquer and I couldn't finish any of my projects this last week.
Couldn't take it any longer, so I drove around town today looking for a store that had the right kind.
I can finally rest.
Meer_Cat wrote:
Right there with you, man! I very much enjoy seeing random bits and bobs stuck onto a slab of cardboard magically become highly detailed building or starship interiors- it's like those sculptures that seen from straight ahead appear to be only a series of disconfomring layers, but from the right angle become a face, or horse, or whatever. I look forward to the next installment when it comes.
In the meantime, things are also hectic here! I am _____so_____ close to finishing Kittyhawk I can taste it- and not a minute to work! It'll come, though.
Rock on!
Thanks friends. I really appreciate your support. I have the next 2 days off. I'll try to make some progress.
76303
Post by: Warboss_Waaazag
I have a house guest coming from Sweden tomorrow, so I used that as an excuse to clean my work space.
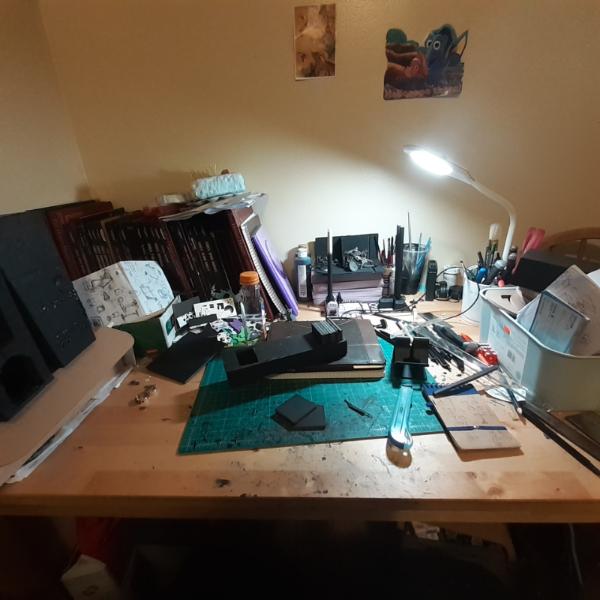
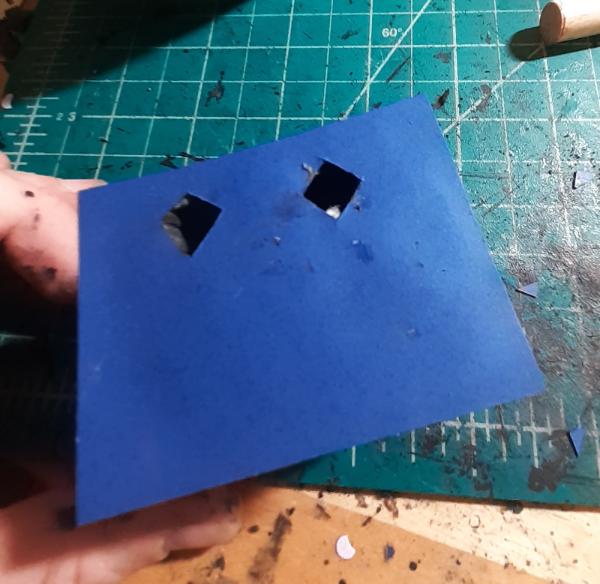
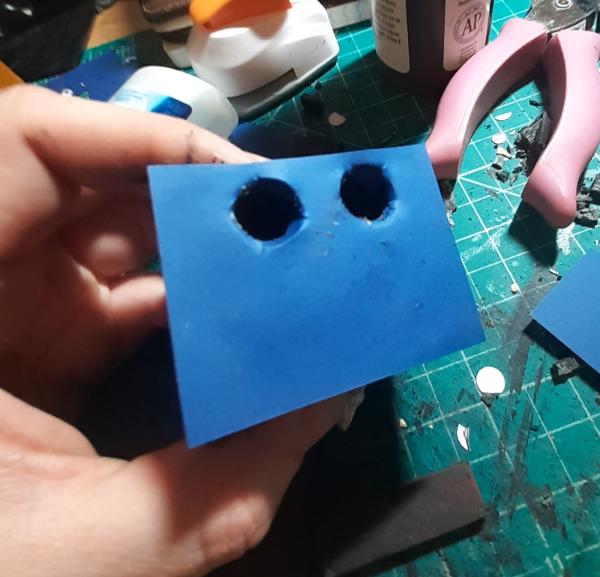
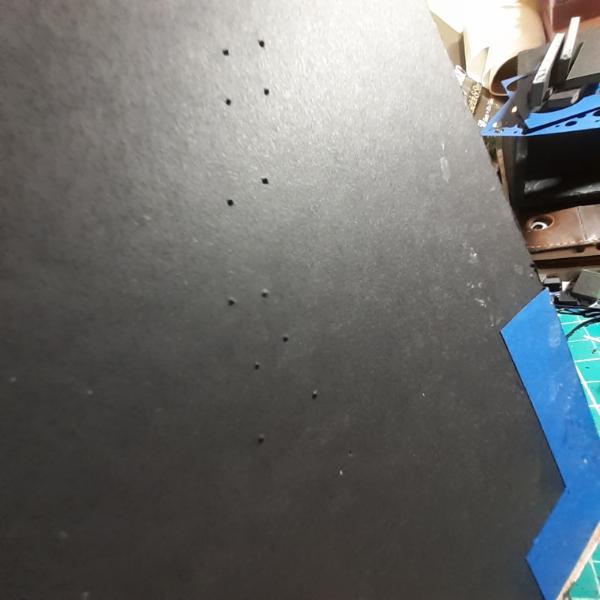
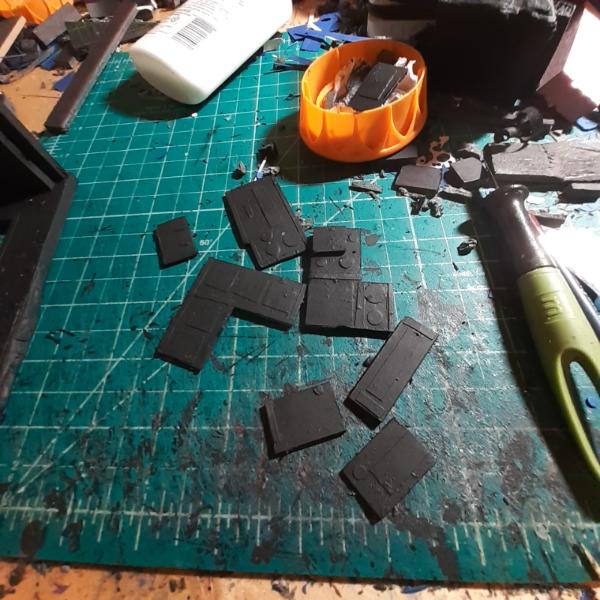
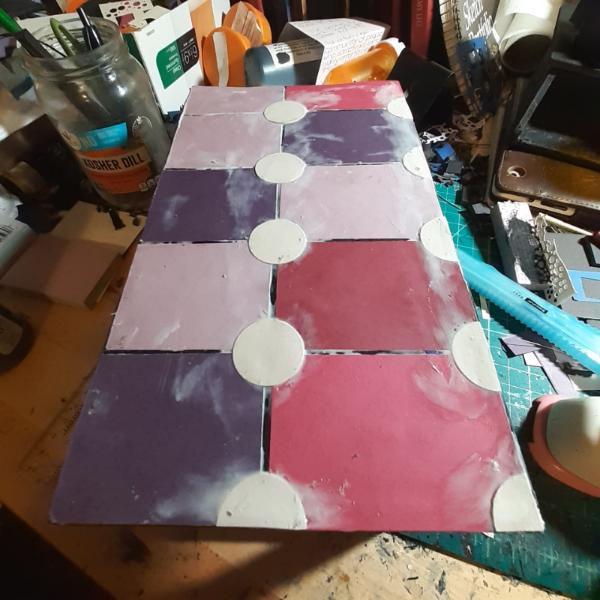
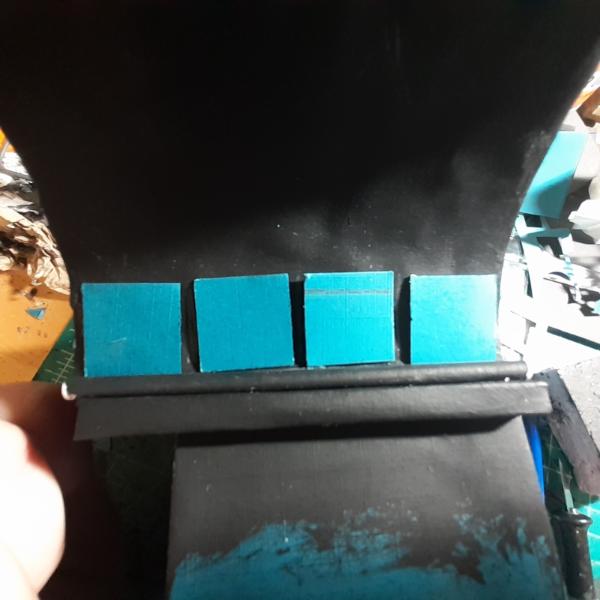
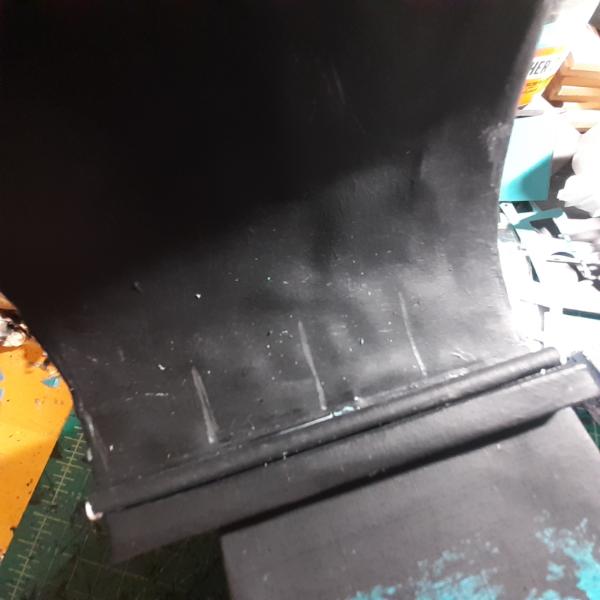
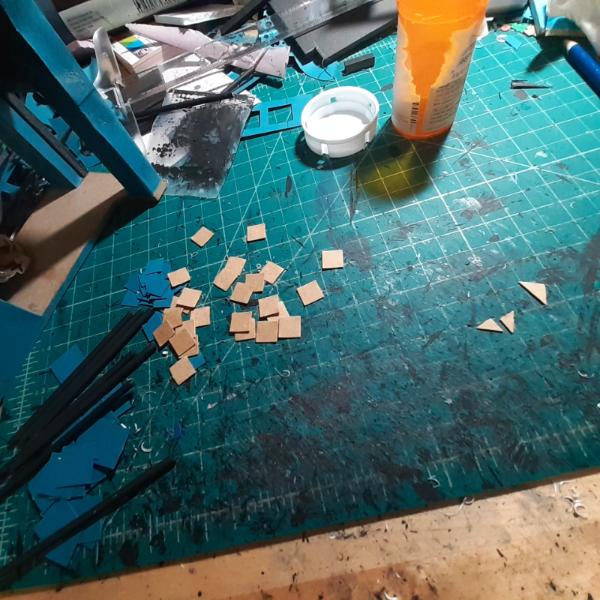
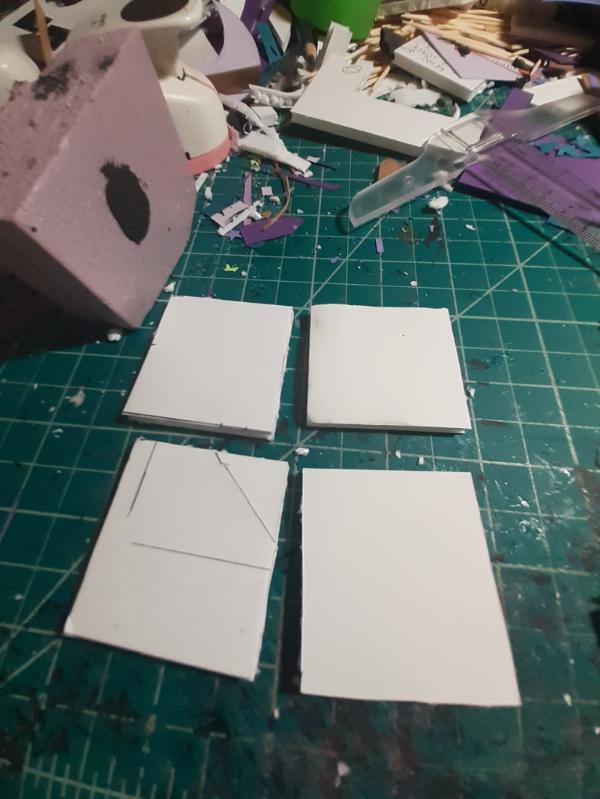
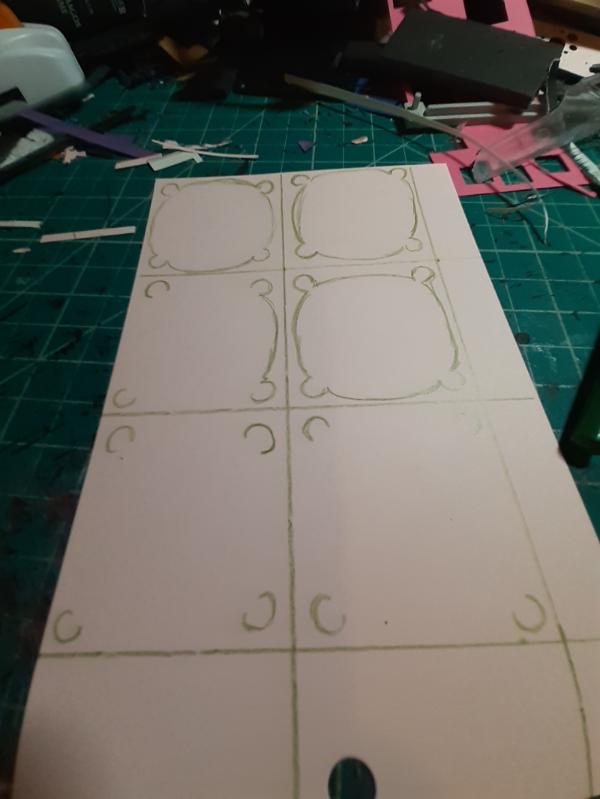
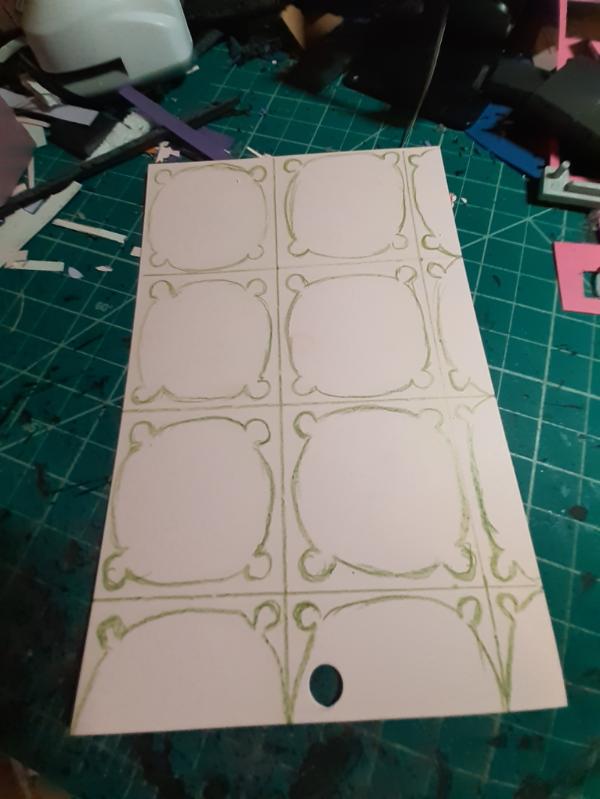
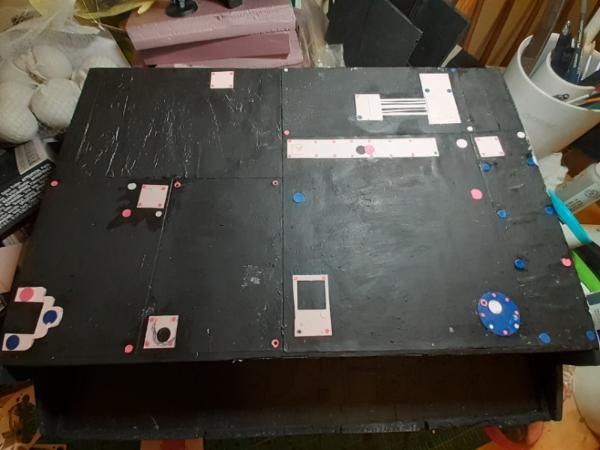
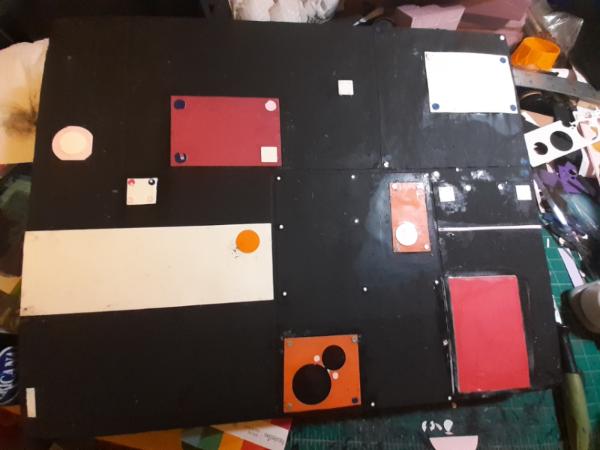
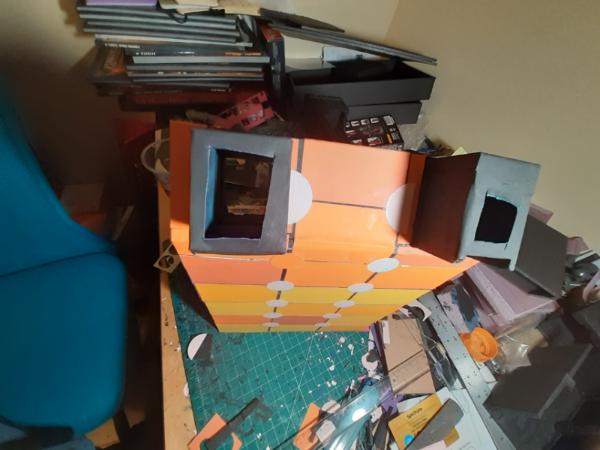
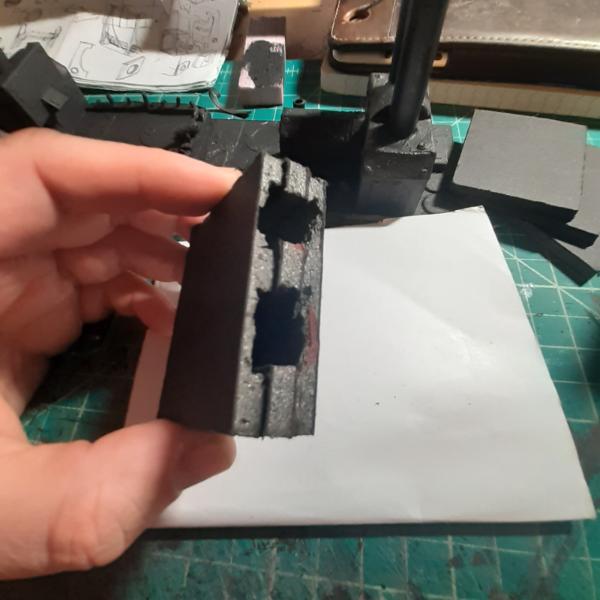
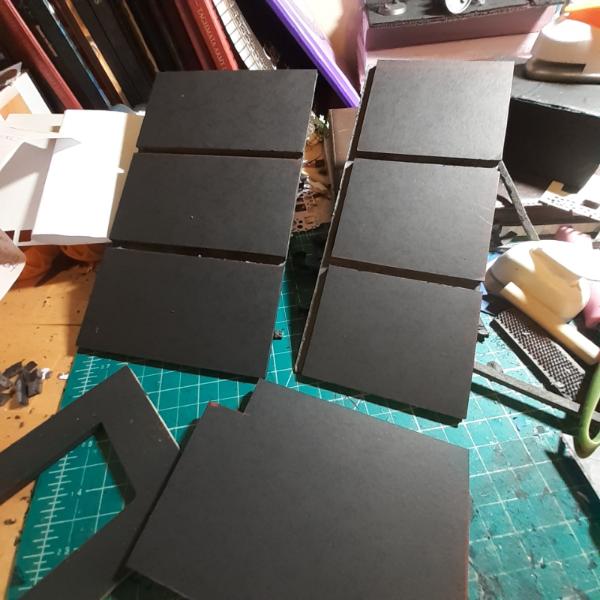
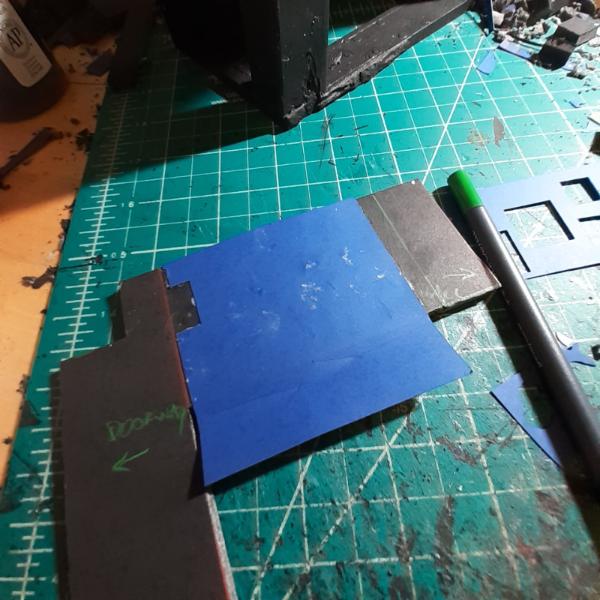
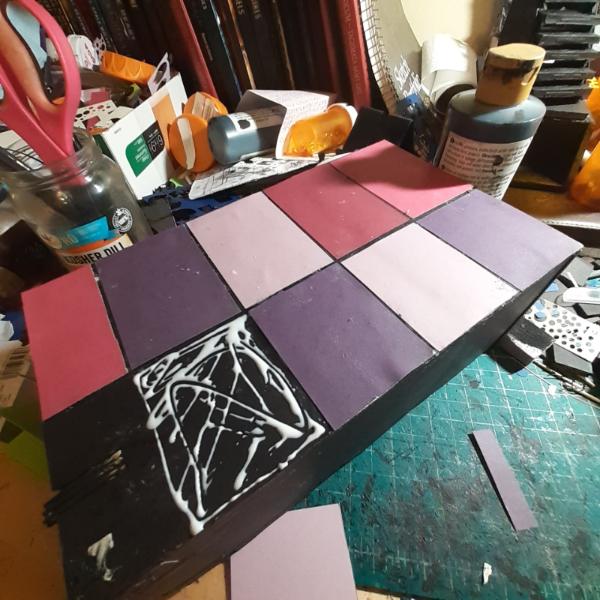
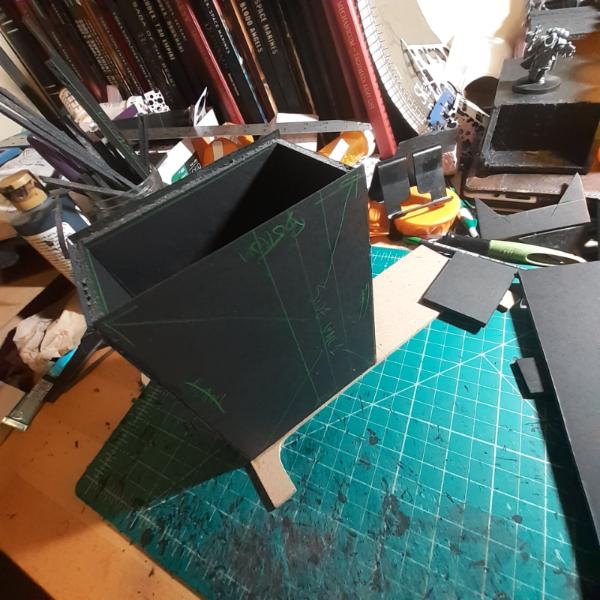
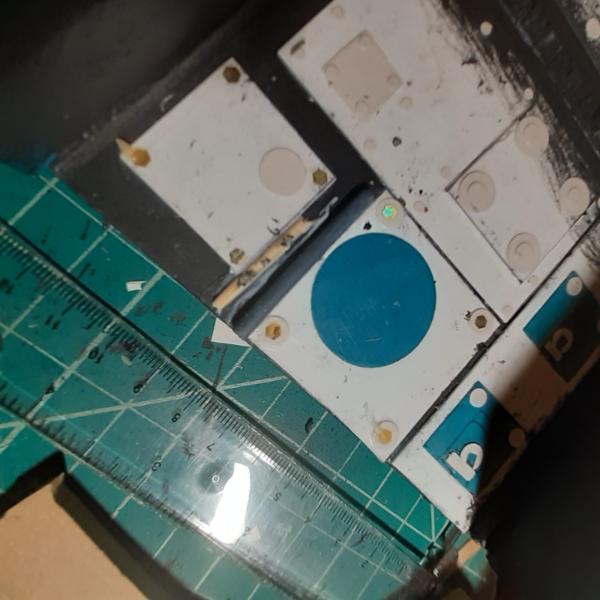
It's more spacious, but I miss my mess. Time will help me return it to clutter, no worries. I cut a bunch of squares.
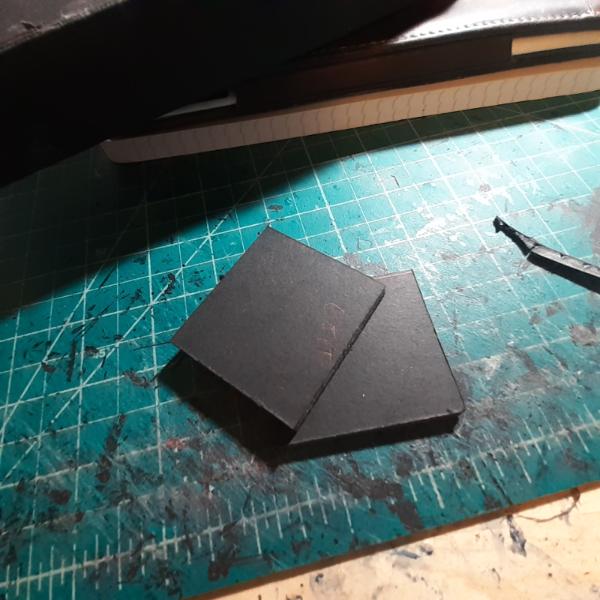
And test fit them in one of the holes...
...but not much else got done, unfortunately. Maybe I'll be more productive next week, who knows?
106010
Post by: Meer_Cat
By golly there's a table under there! Scientists have long proposed the theory of the 'primordial table', but had never been able to delve deeply enough to prove the theory.
Now we know!
Enjoy your time with your friend!
76303
Post by: Warboss_Waaazag
lol, thanks Cat.
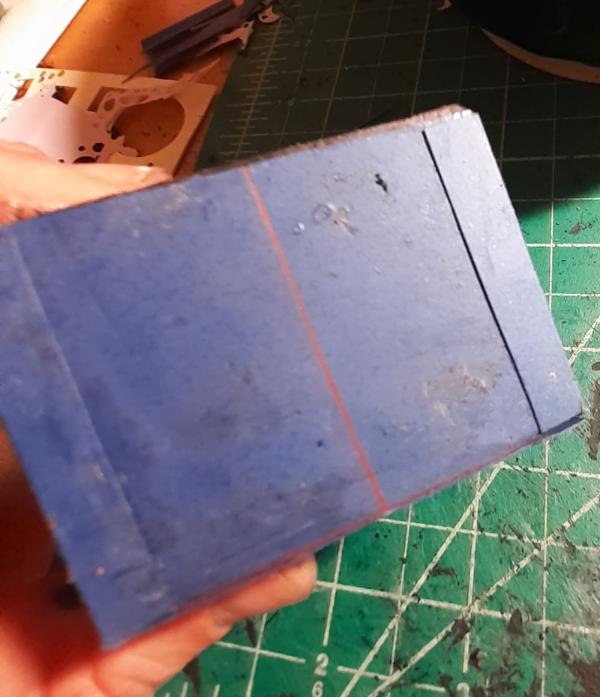
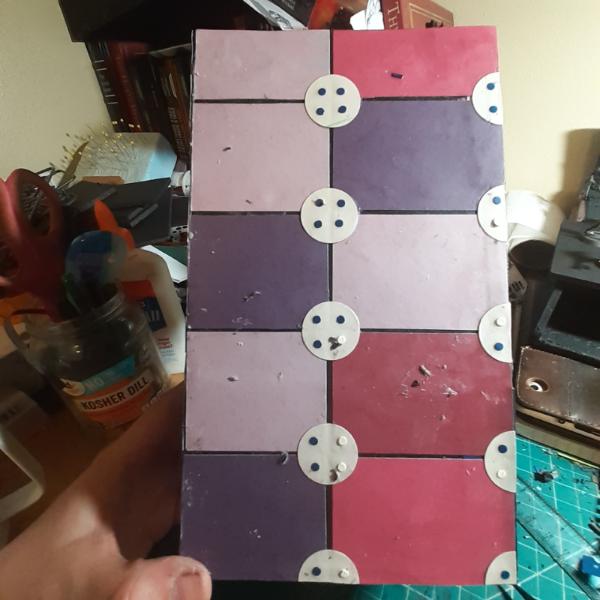
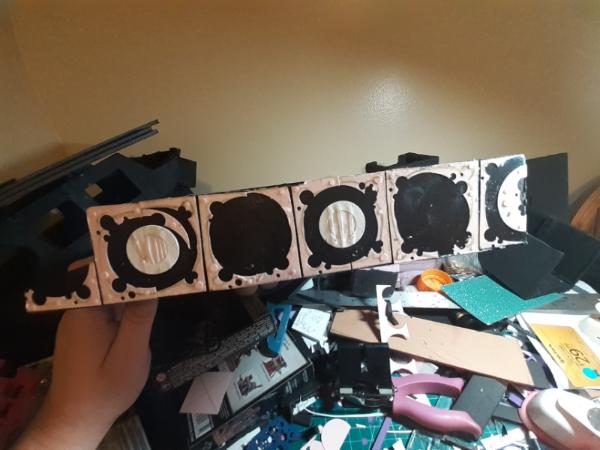
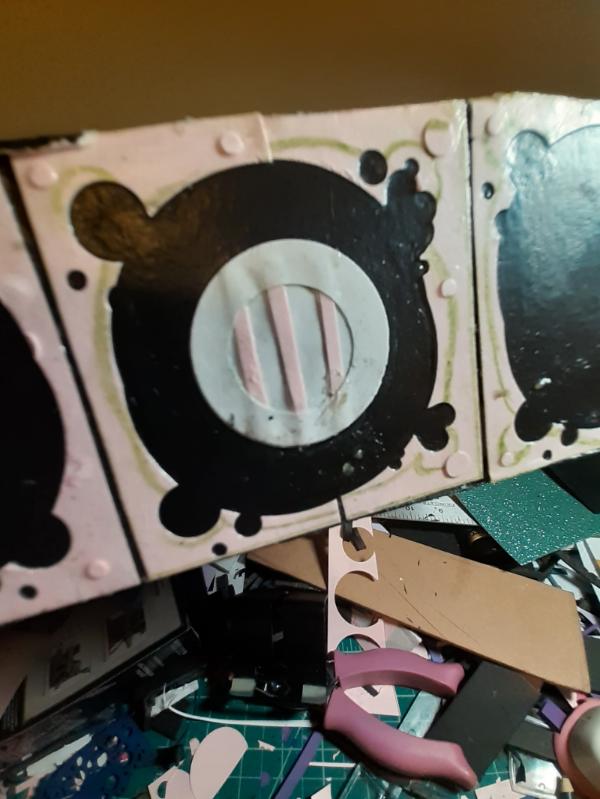
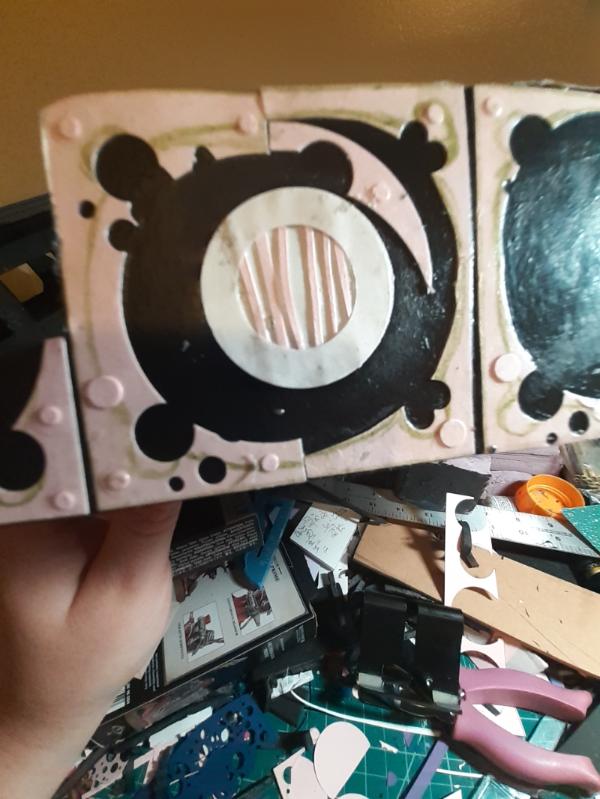
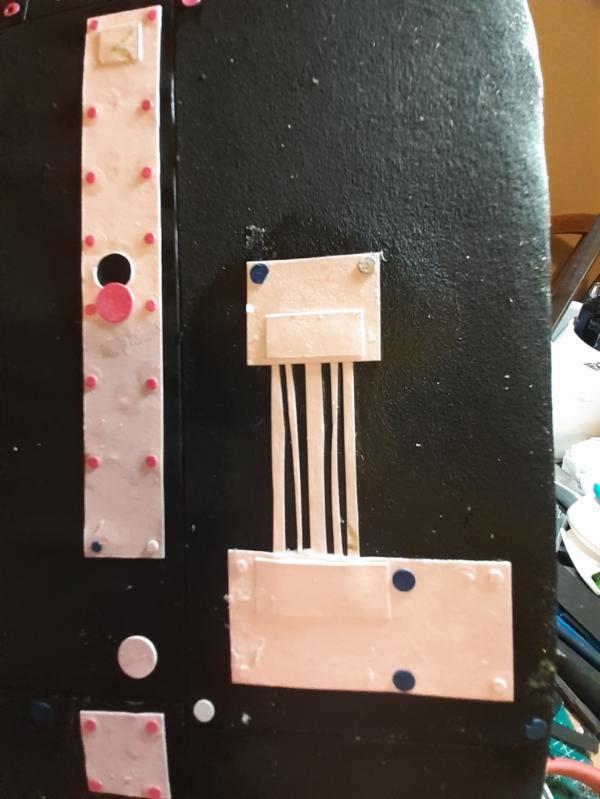
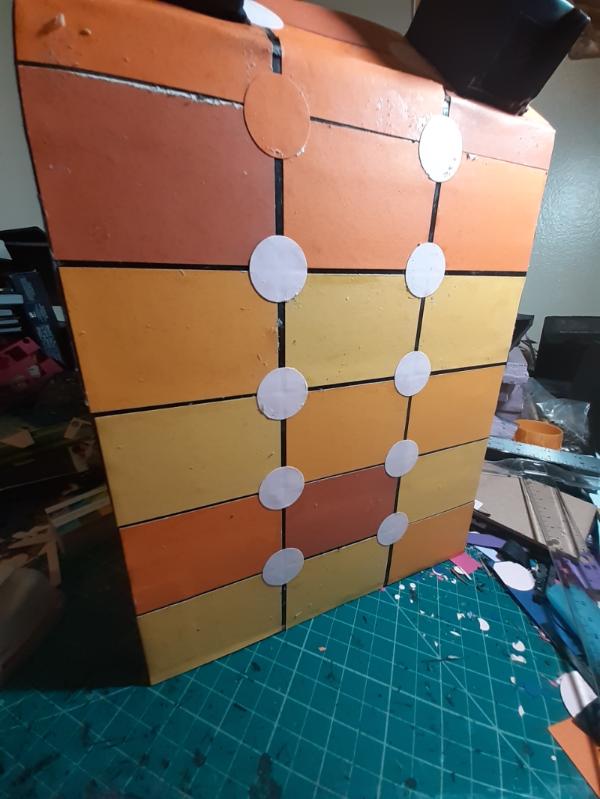
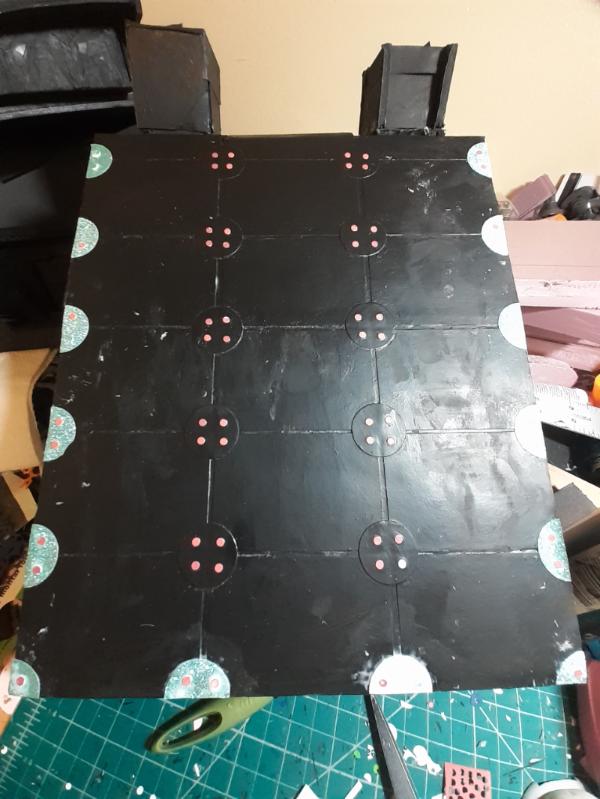
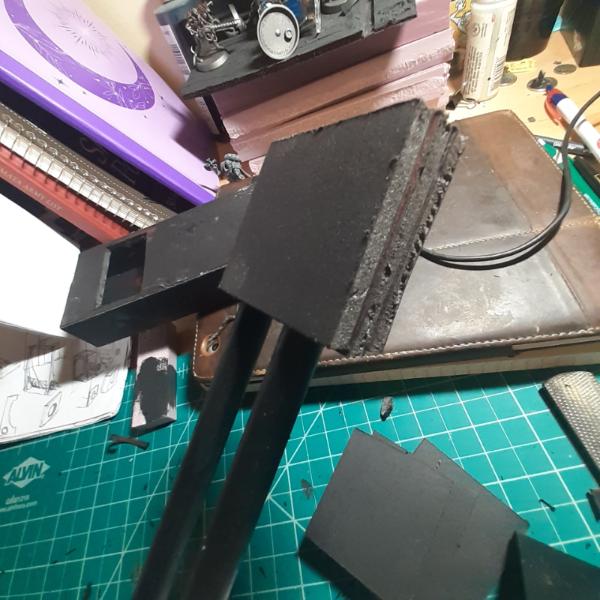
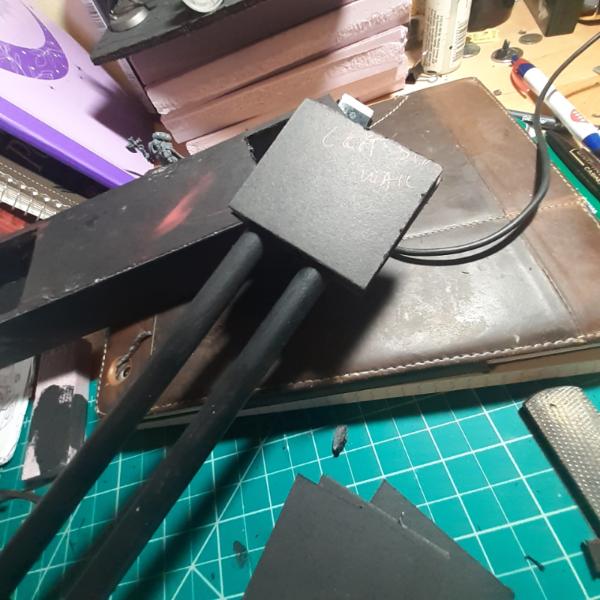
I did a quick, three step process for determining where my dowels are going to fit.
Step 1. Put blobs of paint on the tops of the dowels.
Step 2. Fit the box on top of the dowels and press down. The blobs are blobby enough to transfer.
Step 3. Fit the squares of insert into the box hole and transfer the blobs.
Now I have a rough estimate where those dowels will need to be and I can cut the squares down into shape. It also became clear to me that, as is, the box top would be 1 foamcore board thickness too short, so I factored that thickness into my design as I prepared to cut.
133289
Post by: Tommygun1918
This may be a question that cannot be answered, but how close are you from having enough for a full table of terrain?
76303
Post by: Warboss_Waaazag
Tommygun1918 wrote:This may be a question that cannot be answered, but how close are you from having enough for a full table of terrain?
For what I have planned for this project, this is about a quarter of what I want to build. If I laid all the stuff flat, I probably already have wnough for 1 table. Overall, my entire collection of terrain? I have probably about 4 tables worth of completed terrain, most of which lives in other people's homes (in my friends' hobby rooms).
76303
Post by: Warboss_Waaazag
I started some sketches for a pair of archways.
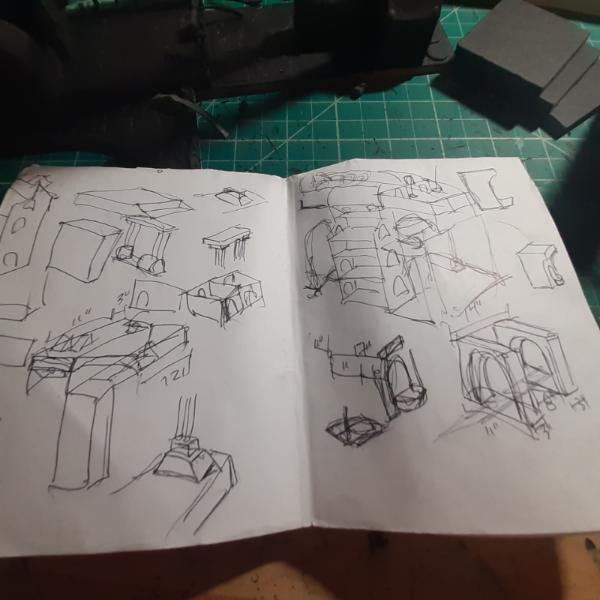 
And a piece plan for the next block to go on top of this stack. Hopefully this will make sense in hindsight.
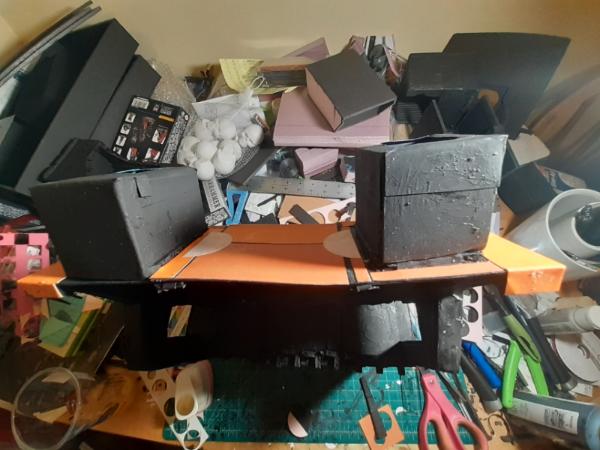
I got some work done last night. I'll upload my (unnecessarily) comprehensive WIP shots of that over the course of the next few days. Automatically Appended Next Post: On one side I did all the work without taking any progress shots. Whoops. The dowel holes.
Test fitting on the dowel tops.
All the extra squares glued together and under a sort of heavy object to make sure they stick well.
And the next day test fitted into the box housing.
It's coming along.
76303
Post by: Warboss_Waaazag
22619
Post by: inmygravenimage
I love the way you document everything, it's awesome. Keep it up!
76303
Post by: Warboss_Waaazag
Thanks, graven! I will.
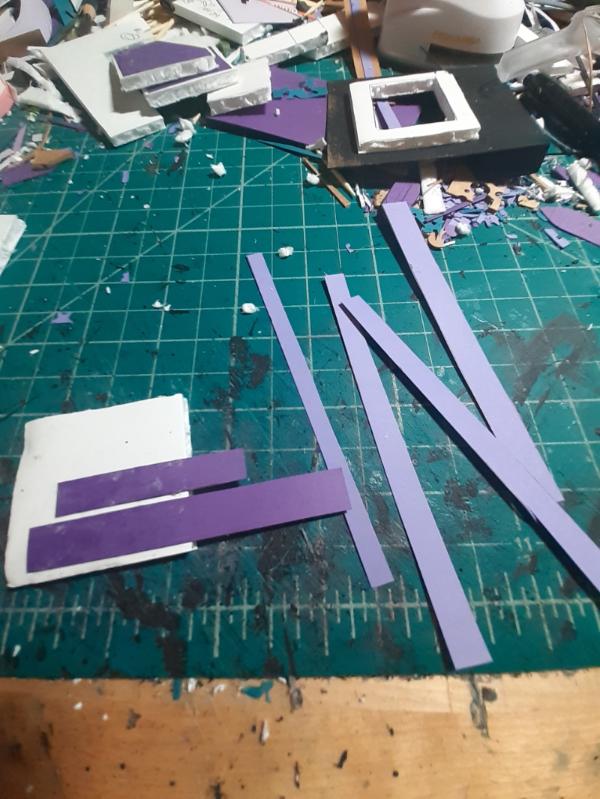
While I waited, I decided to sift through this pile of debris
...to find detailing elements...
Honestly, I was shocked by how much I was able to salvage.
...and set to work detailing this random scatter terrain bit.
I didn't get very far before I gave up and went to bed.
76303
Post by: Warboss_Waaazag
This convoluted mess is my "plan" for the second section of my board.
Aren't sketches fun?
22619
Post by: inmygravenimage
Brilliant 
76303
Post by: Warboss_Waaazag
1124
Post by: Captain Brown
Reduce, reuse, recycle.
This is going to be quite the piece of terrain.
Cheers,
CB
76303
Post by: Warboss_Waaazag
 Captain Brown wrote: Captain Brown wrote:Reduce, reuse, recycle.
This is going to be quite the piece of terrain.
Cheers,
CB
I used to have a t shirt that said reduce, reuse, reanimate. I didn't do a lot of reanimation work on this piece, but I did everything else honestly. Thanks for the encouragement, Captain Brown!
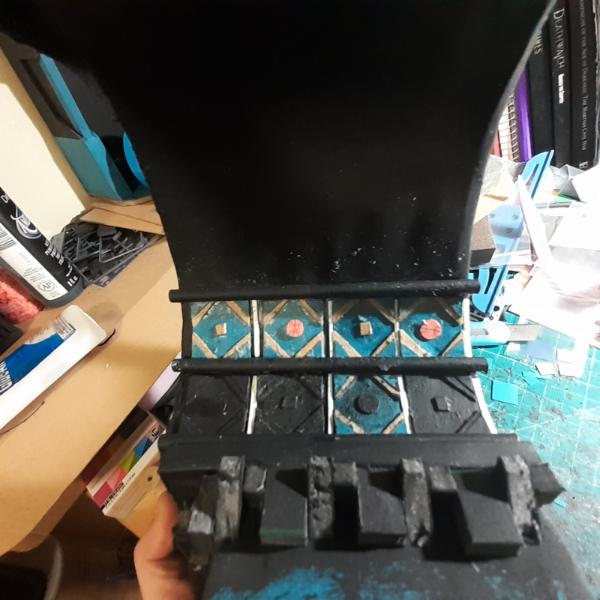
I started detailing the top box, first with pencil guidelines.
And then actual details.
And then I went bonkers...
...especially considering all this detail is on the bottom of the box and won't even be readily noticeable during gameplay.
Sides come next.
76303
Post by: Warboss_Waaazag
98217
Post by: Skinflint Games
NICE. I'm going to nick that idea ;-)
76303
Post by: Warboss_Waaazag
Sweet!
As promised here are the sides. I followed the guidelines I drew on earlier.
And then I primed the boxes and glued them in place in the middle of doing this.
Then I got on with the task at hand.
Did the front end, too.
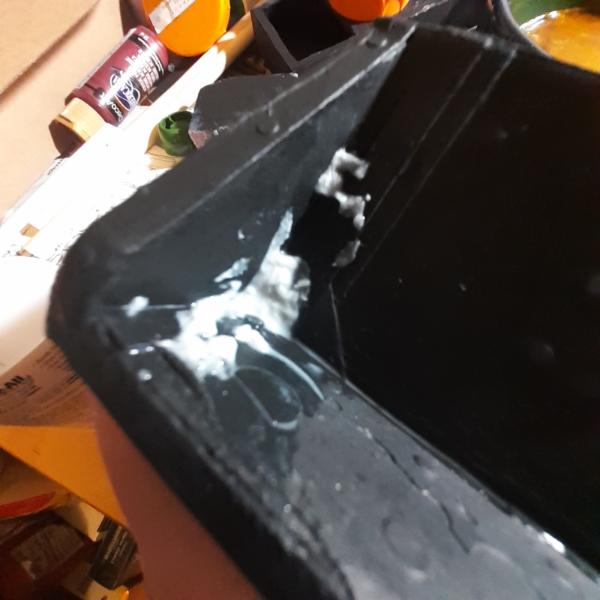
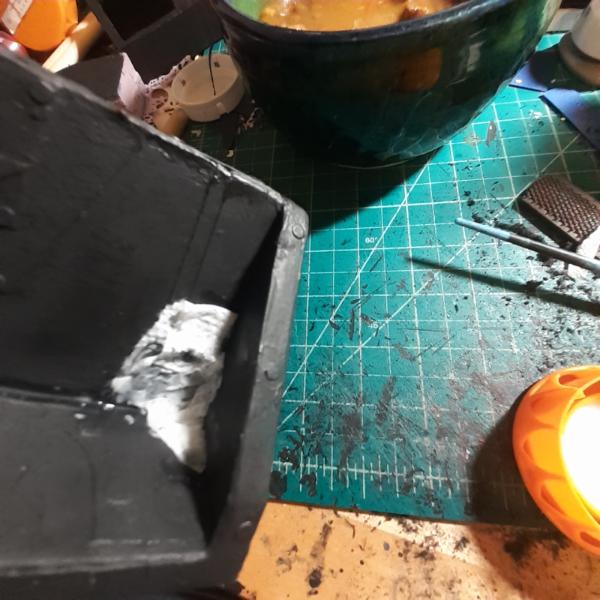
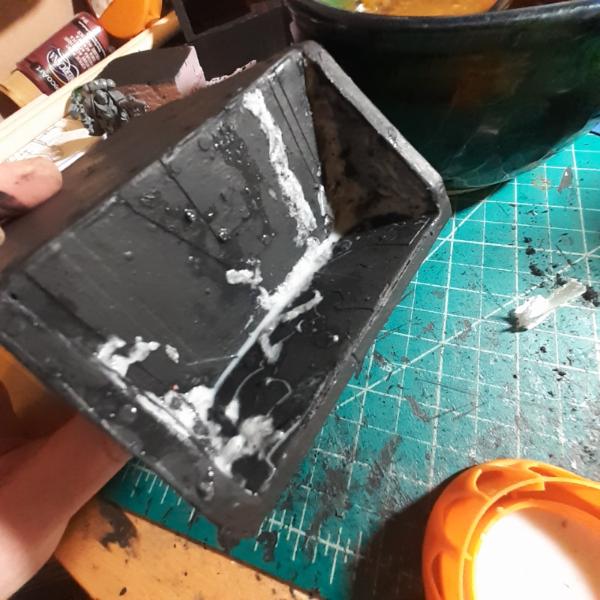
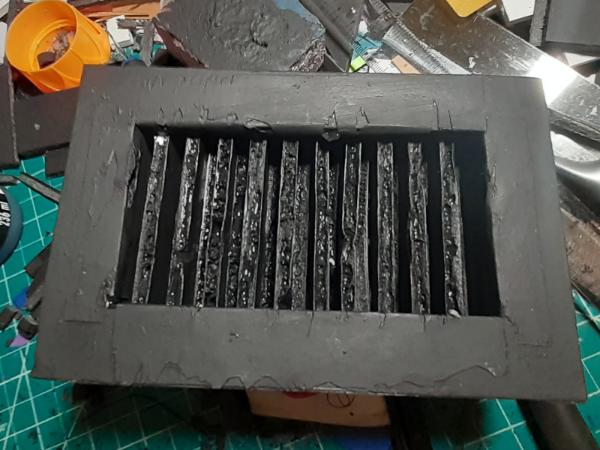
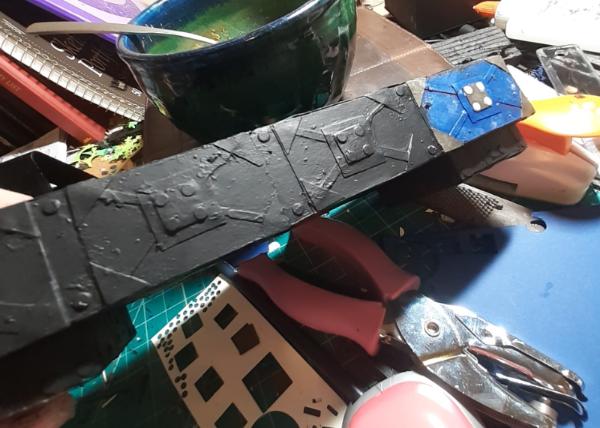
I textured the dowels. One set just with glue...
...and the other with the toilet paper method I tested on the other piece.
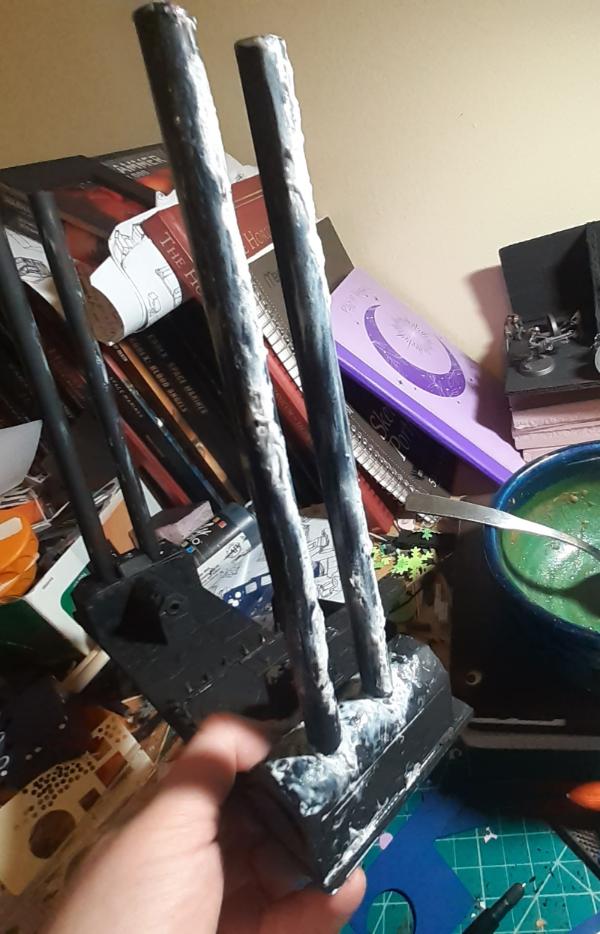
And then glued the top to the bottom.
And also, here is the other front end. Except for paint, this piece is done.

Thanks for looking. More very soon. Have an awesome day!
22619
Post by: inmygravenimage
Excellent! I have done the tp corrosion before, it's very effective.
119289
Post by: Not Online!!!
That looks very promising!
76303
Post by: Warboss_Waaazag
Thank you, folks!
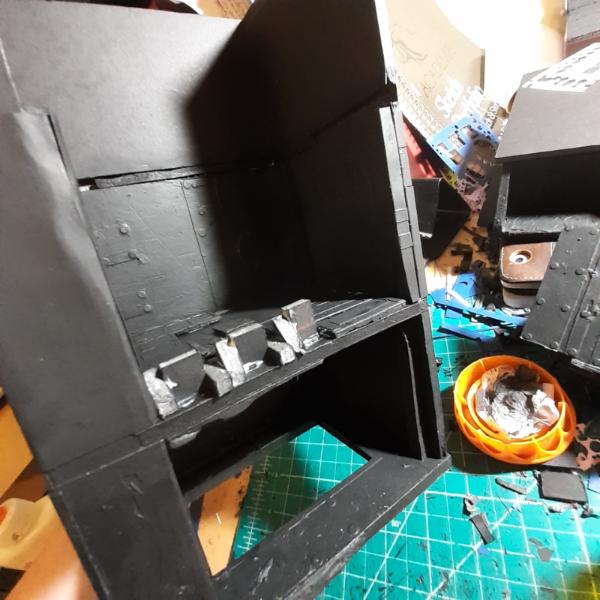
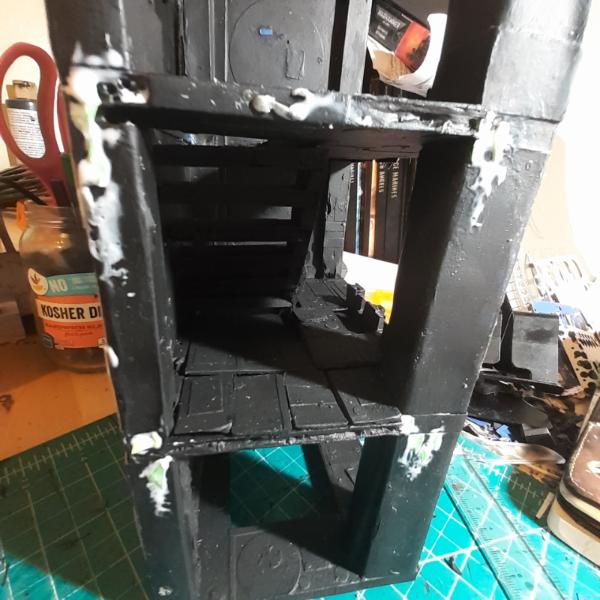
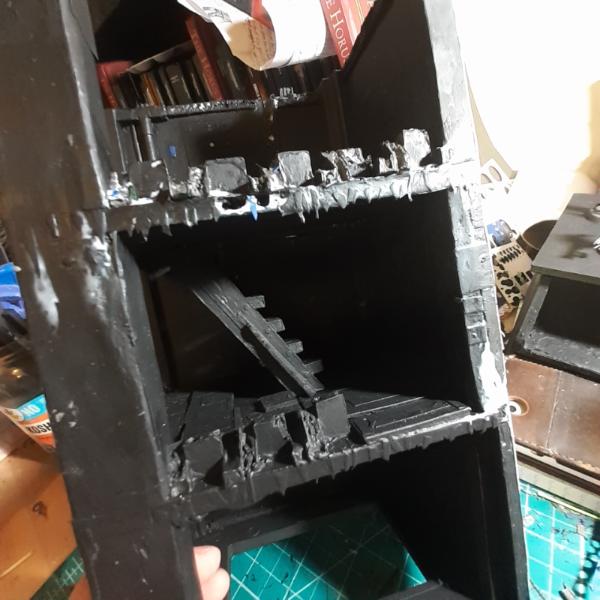
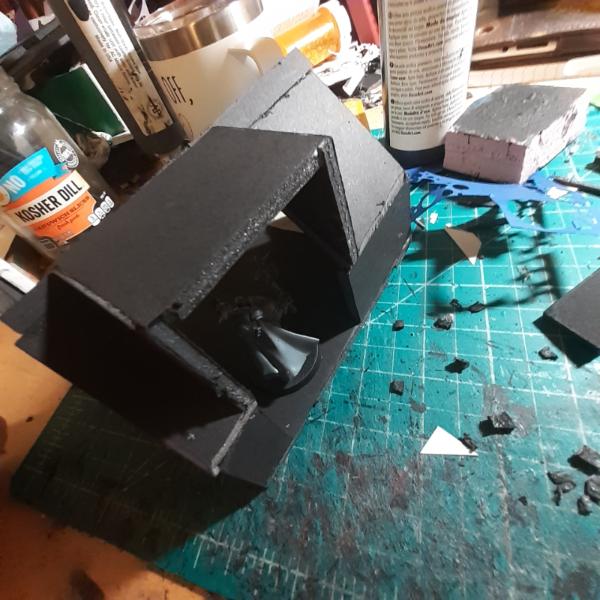
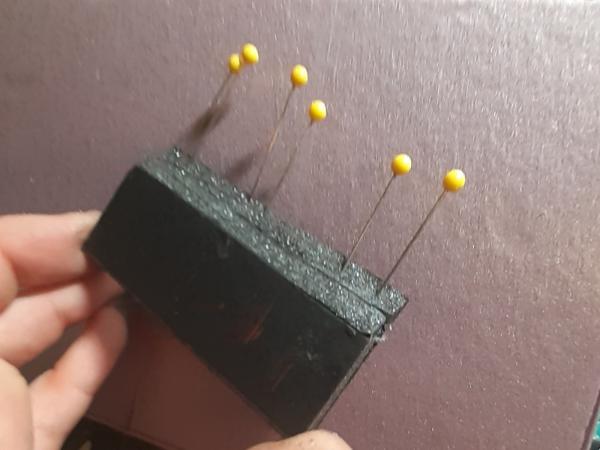
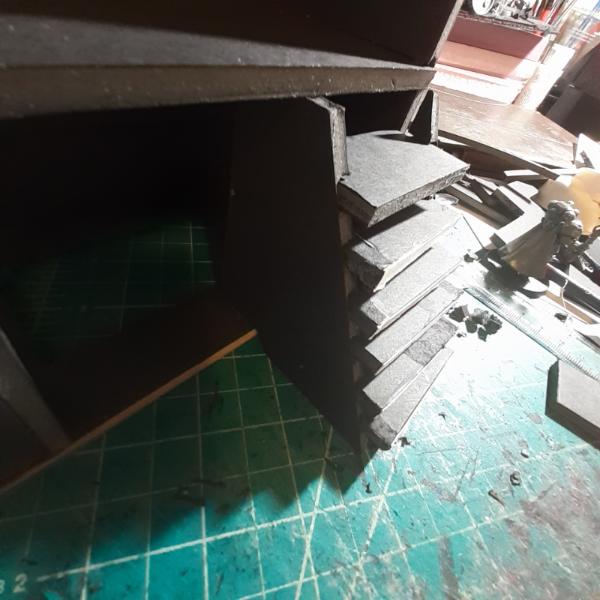
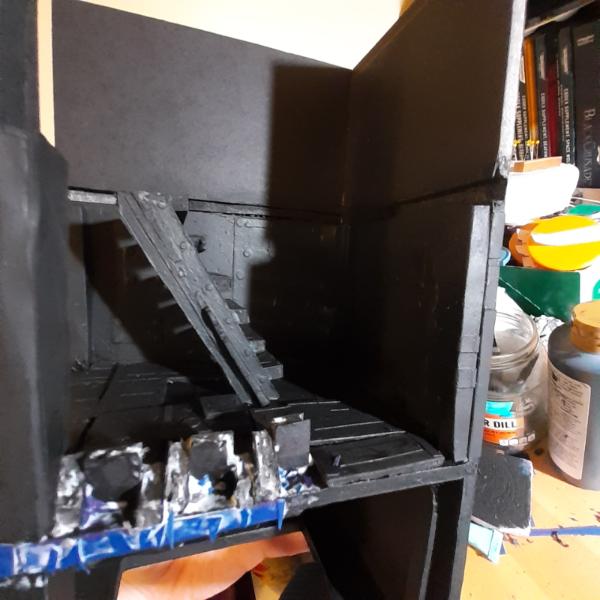
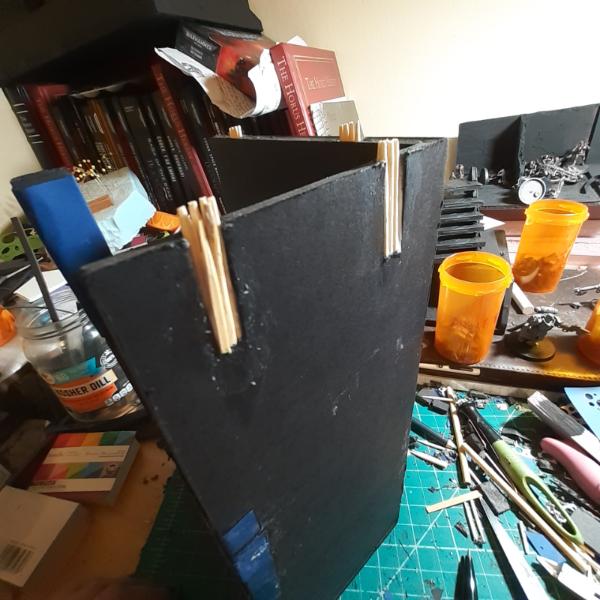
Next up is a stairwell for the 3 floor piece I started this project with. I've had this idea of using a dowel to create stability in a single standing column and this was the proof of concept build.
And, well, it worked. I carved out the other walls and a floor, too. There was a third floor glued in, but I tore it out after I realized I wasn't sure how I wanted the stairs to work for that floor.
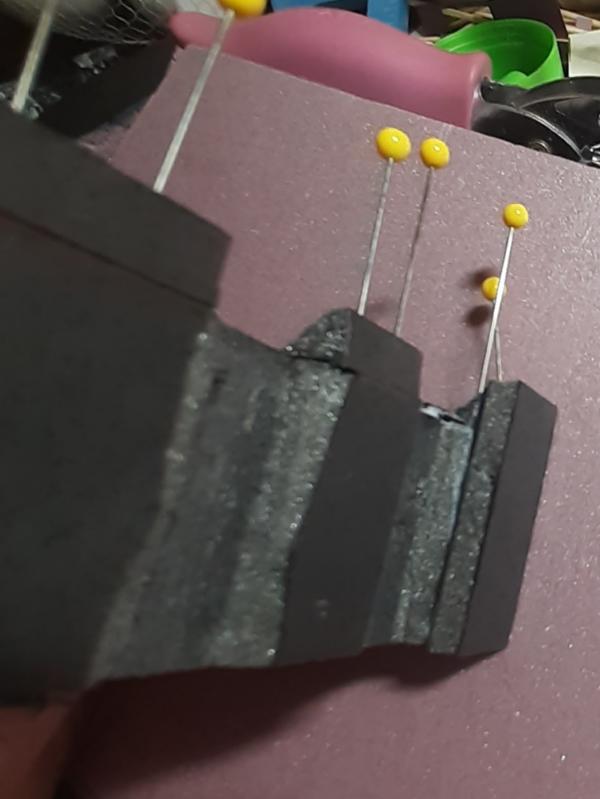
It was a complex shape that I rushed gluing, so I had to pin a lot of the panels together so it wouldn't fall apart while it dried.
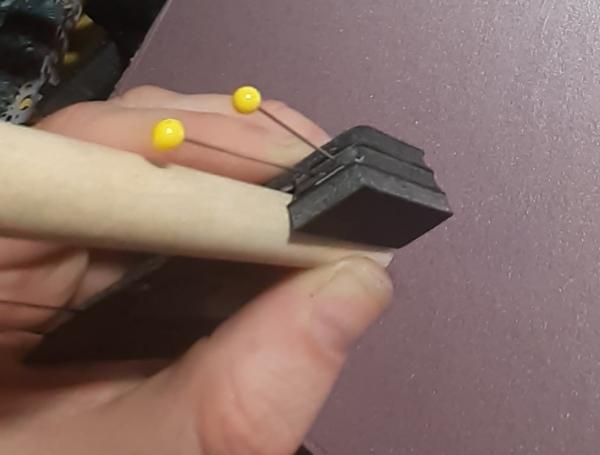
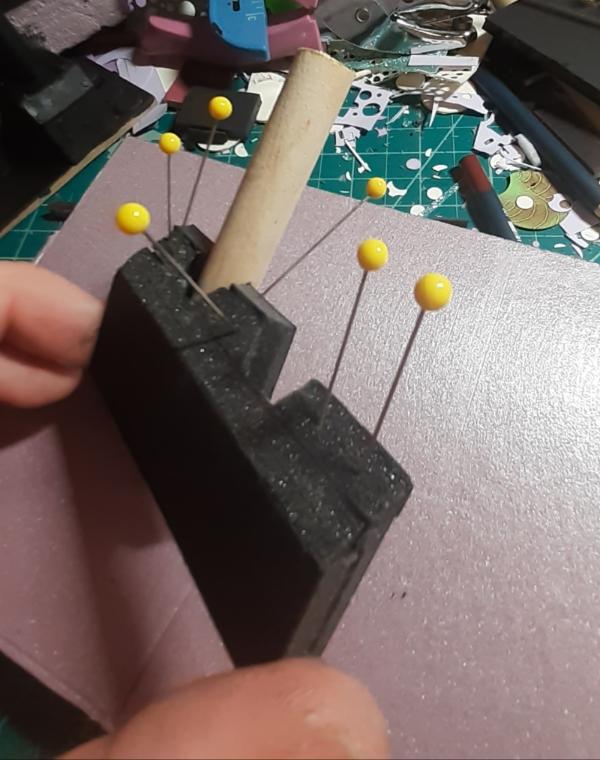
And then I decided maybe stairs wasn't the answer and a ladder was.
We'll see where I go from here. Thanks for looking and have an awesome day!
76303
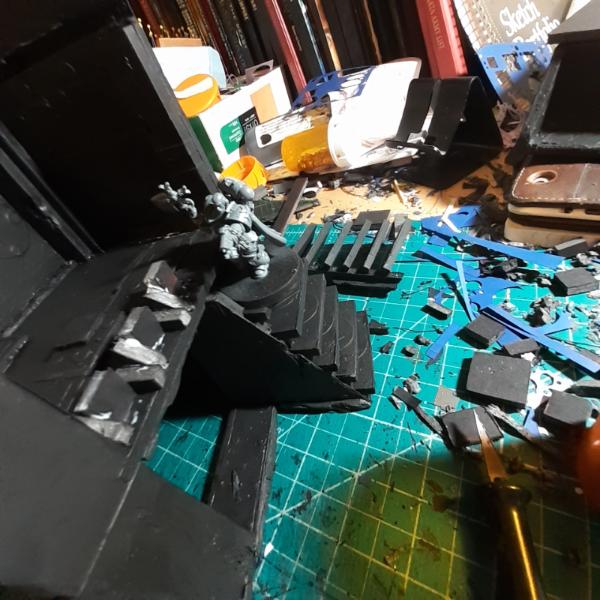
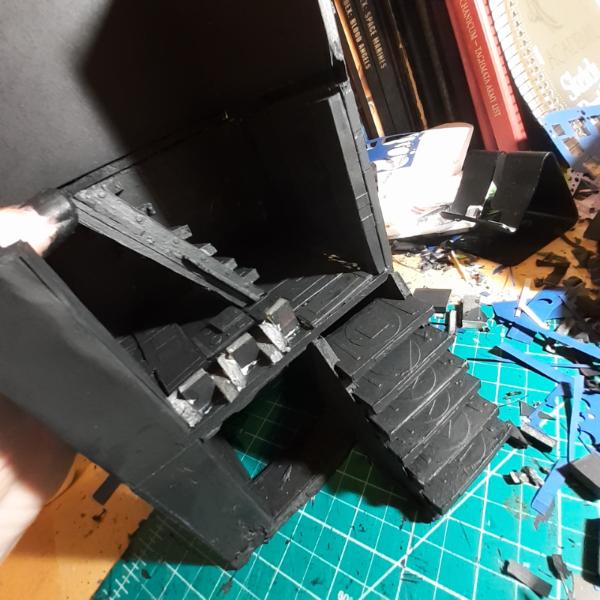
Post by: Warboss_Waaazag
Alright, so here is my stairwell sketch.
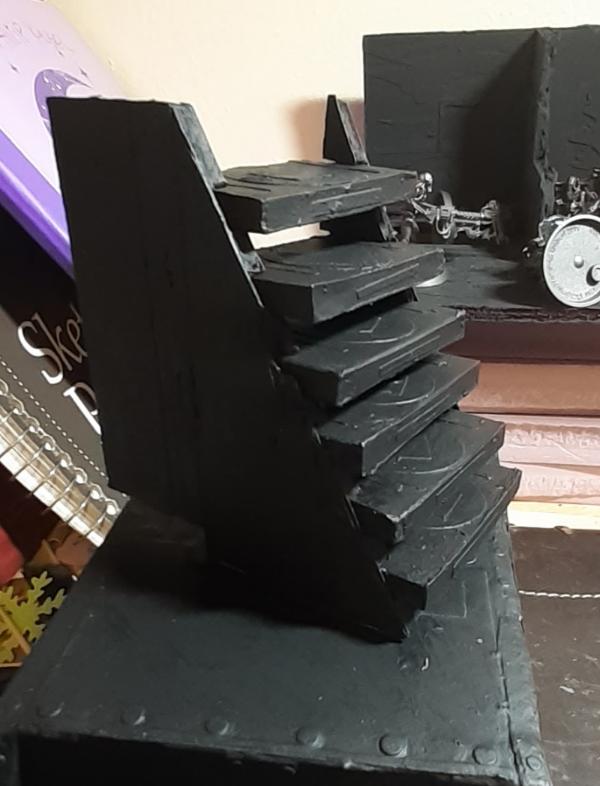
It clearly calls for stairs. Also, the ladder didn't do the one thing I wanted the climby thing to do, which was to allow models to move halfway up it and stay. So I pulled it apart and built a staircase by accidentally cutting two identical angled pieces from my foamcore. Whoops, that worked out well.
After cutting my step guides, I used the former ladder rungs to mock up the stairs and tada, working prototype.
A lot more work and details to do, but I'm on the right track. Thanks for looking and have an awesome day! Automatically Appended Next Post: Also, in case it wasn't implied, I always appreciate feedback, ideas, and critiques.
133289
Post by: Tommygun1918
So are these pieces for a smashed Hive city or a space hulk?
76303
Post by: Warboss_Waaazag
My intent is to use them for a spacehulk in a campaign I wrote and will run for some friends. But they could just as easily be used for the underbelly of a hivecity. All these pieces tackle the problems I have with both settings.
1. Why is there only 1 deck on the space hulk?
2. Why is everything so small in the undercity when it is literally the basement of a titanic superstructure?
And this project addresses my issues with a lot of terrain setups I see on the internet and in battle reports. Because either the terrain is small and functional or it is epic but static. And I want epic and functional, but above all, modular.
And to that end, I simply remove any sense of being able to store this stuff well and instead opt for "does this look cool"? If I must, I'll sleep in the closet.
Thanks for your question, Tommygun1918! I appreciate your feedback.
22619
Post by: inmygravenimage
In both cases, I think of it as one of those cramped, pipe filled, under the building corridors from so many action movies
76303
Post by: Warboss_Waaazag
76303
Post by: Warboss_Waaazag
22619
Post by: inmygravenimage
Exciting! Can I recommend/request plastic straws across ceilings and upper walls as ducting?
76303
Post by: Warboss_Waaazag
inmygravenimage wrote:Exciting! Can I recommend/request plastic straws across ceilings and upper walls as ducting?
Request? Hmm, never had one of those before. I'll see what I can do. Here are some sketches on that idea that I made while being bored at work.
22619
Post by: inmygravenimage
Some cool ideas there. Glad I helped Something else to consider is bendy straws - easy to curve and natural ridging.
76303
Post by: Warboss_Waaazag
76303
Post by: Warboss_Waaazag
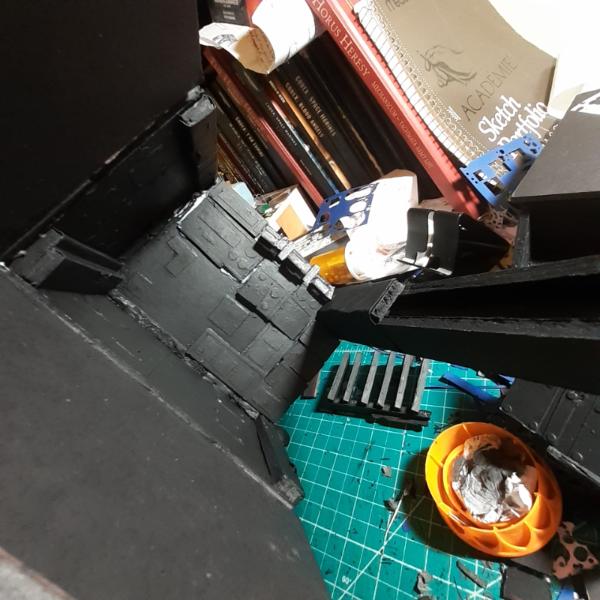
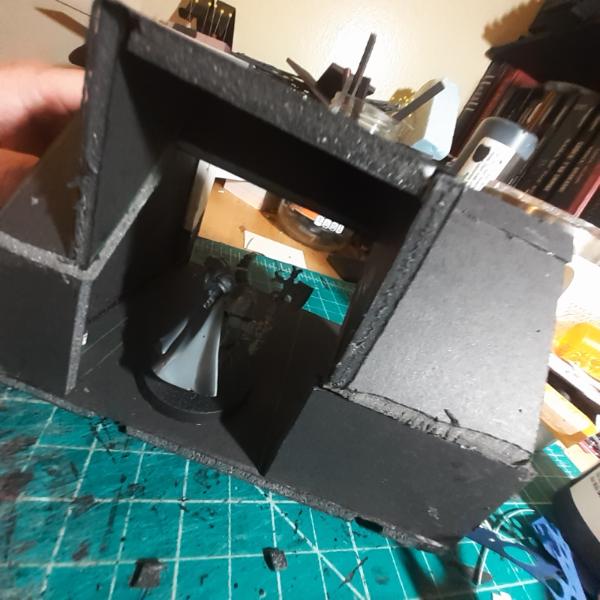
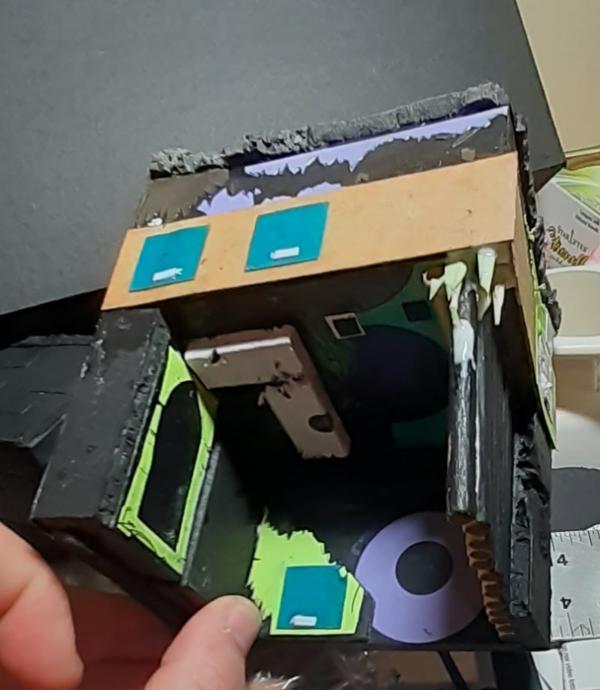
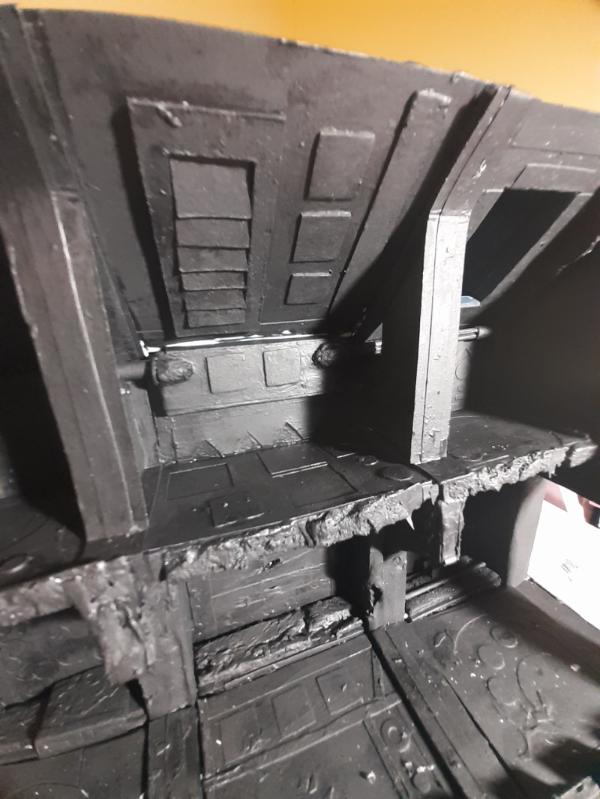
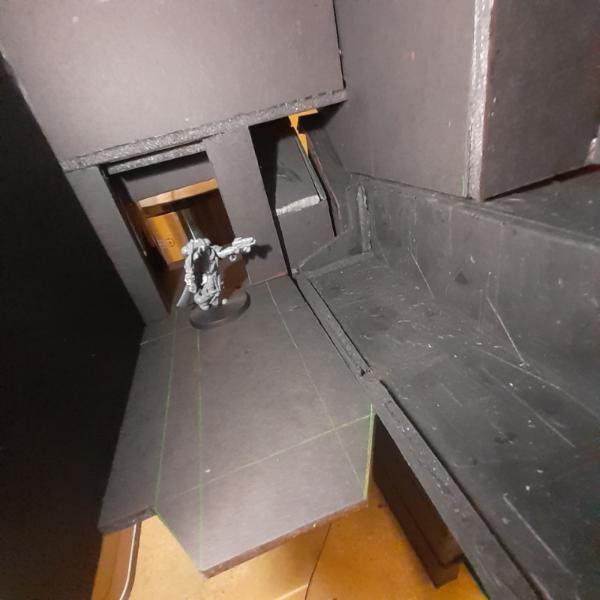
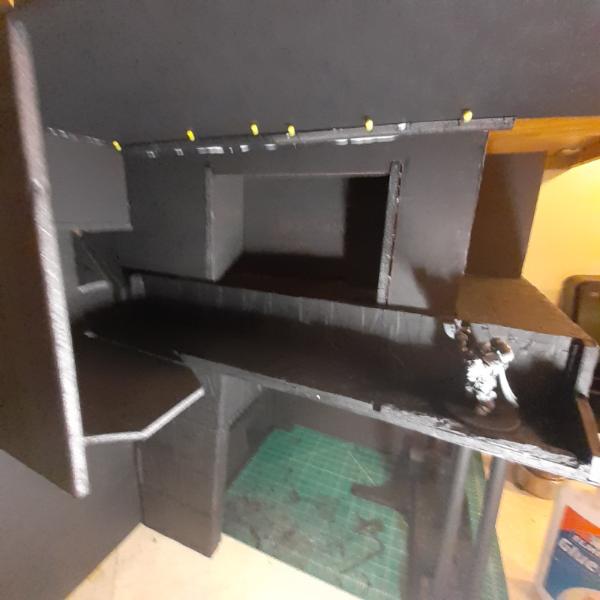
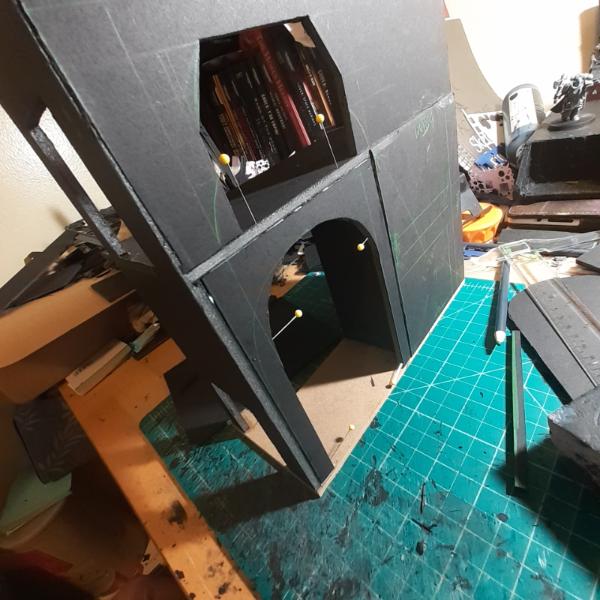
New day, new progress.
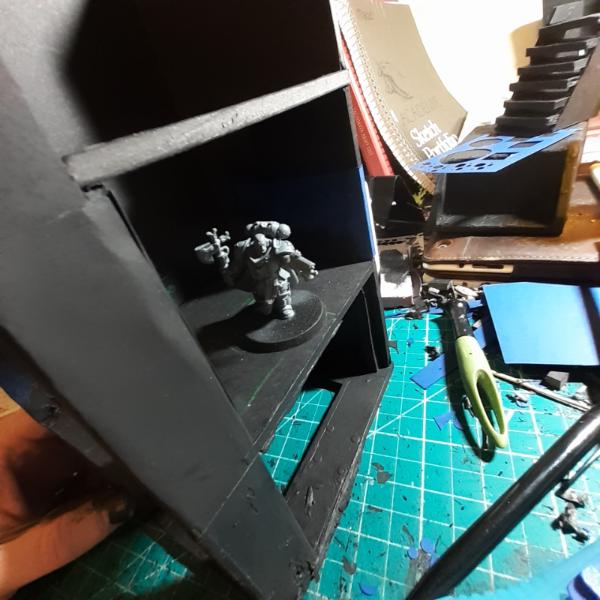
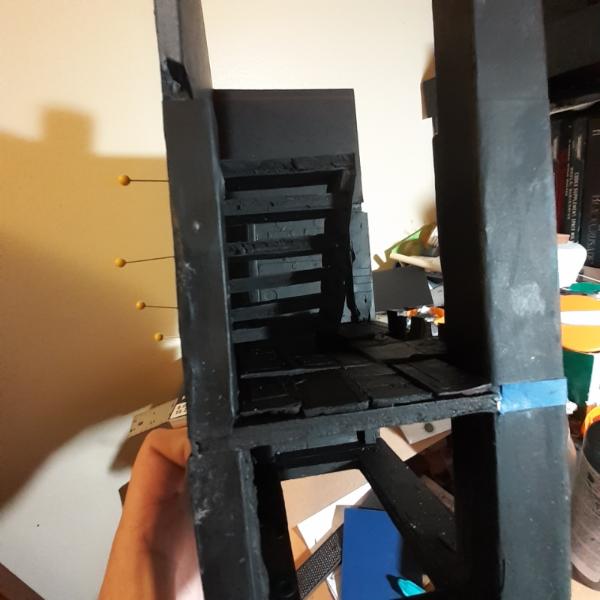
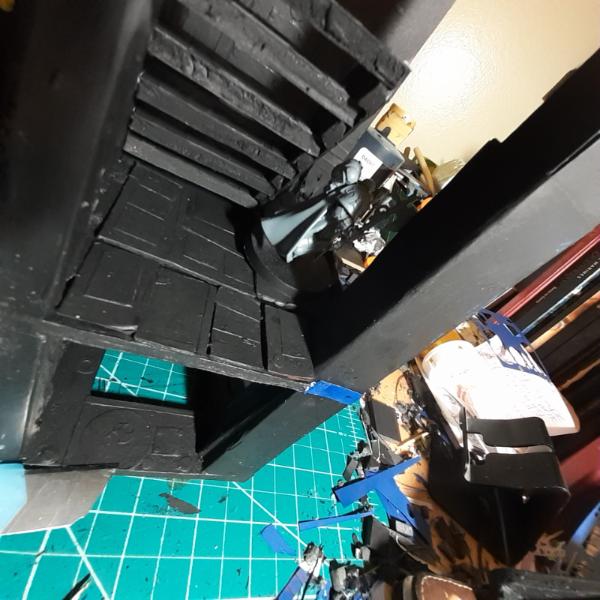
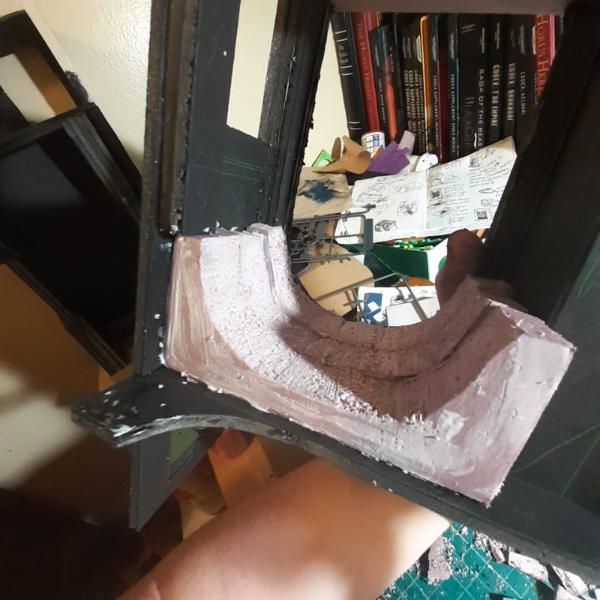
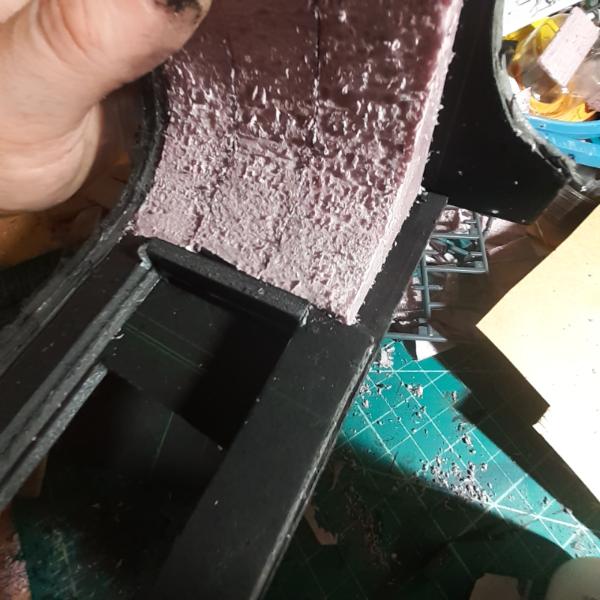
I glued the stairs, making sure Gustavo still fits. And also starting to detail the railing and overhang area.
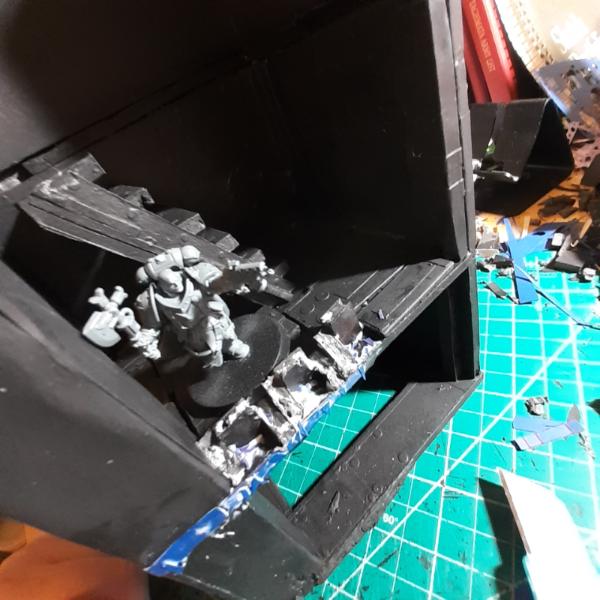   
I cut holes into the two walls and glued in clusters of toothpicks to facilitate the next level.
And then started detailing the 3rd floor before gluing it in place and priming it.
Then the walls up there:
It's nearly complete.
Thanks for looking and have an awesome day!
22619
Post by: inmygravenimage
That final shot 
76303
Post by: Warboss_Waaazag
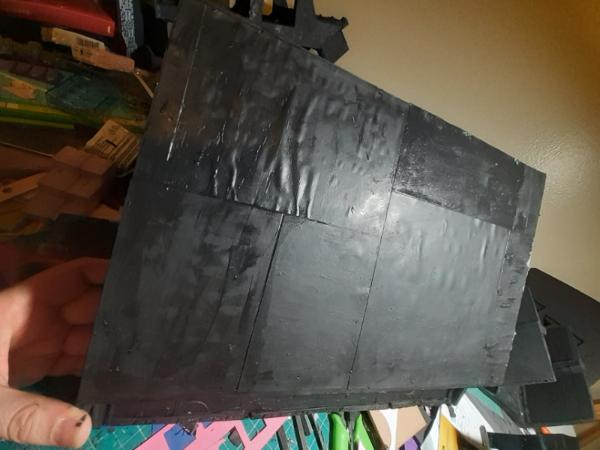
I also started gluing on the back plating.
1124
Post by: Captain Brown
I can see the rivets and the like now. I assume that a dry brush of grey will follow to make them pop a little?
CB
76303
Post by: Warboss_Waaazag
Captain Brown wrote:I can see the rivets and the like now. I assume that a dry brush of grey will follow to make them pop a little?
CB
Yes, a drybrush of some sort will come at some point. I want to try to finish all these pieces before I put paint to any, so that I can get a consistent look.
76303
Post by: Warboss_Waaazag
76303
Post by: Warboss_Waaazag
76303
Post by: Warboss_Waaazag
76303
Post by: Warboss_Waaazag
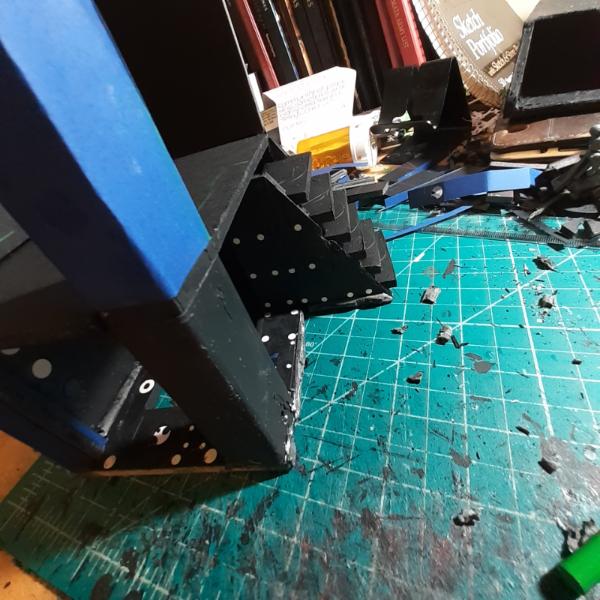
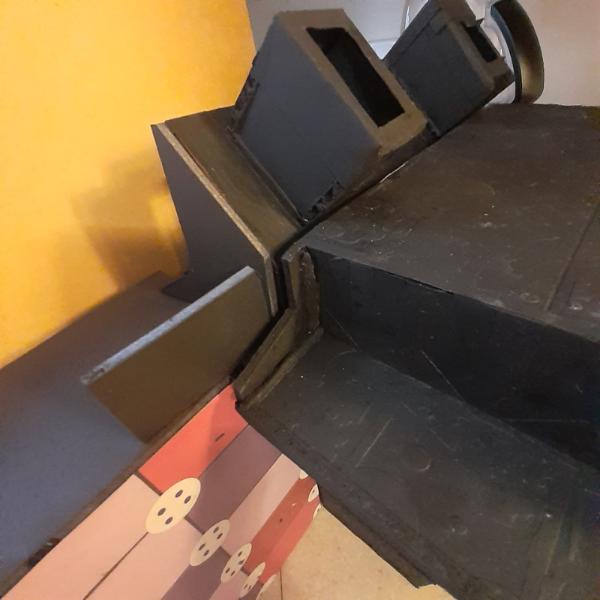
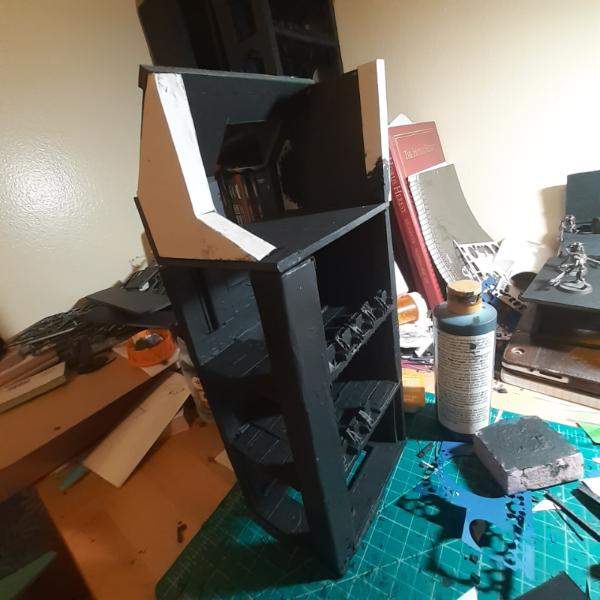
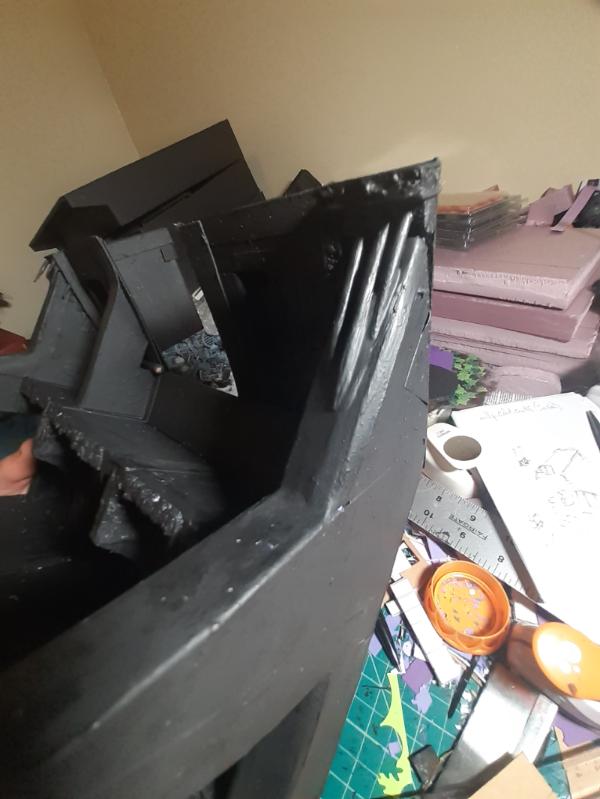
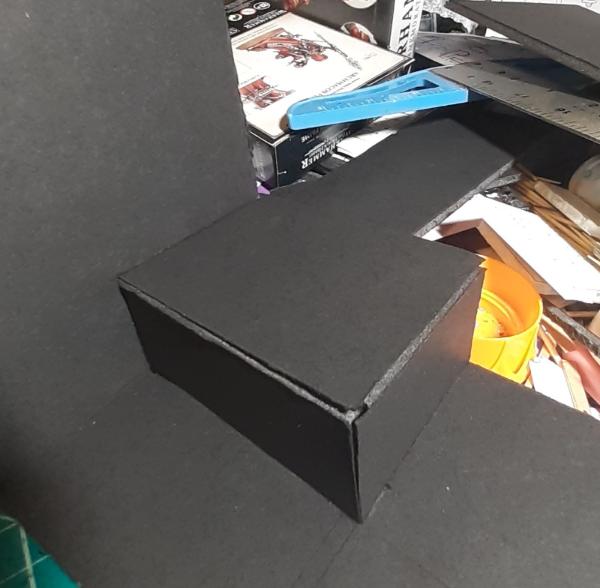
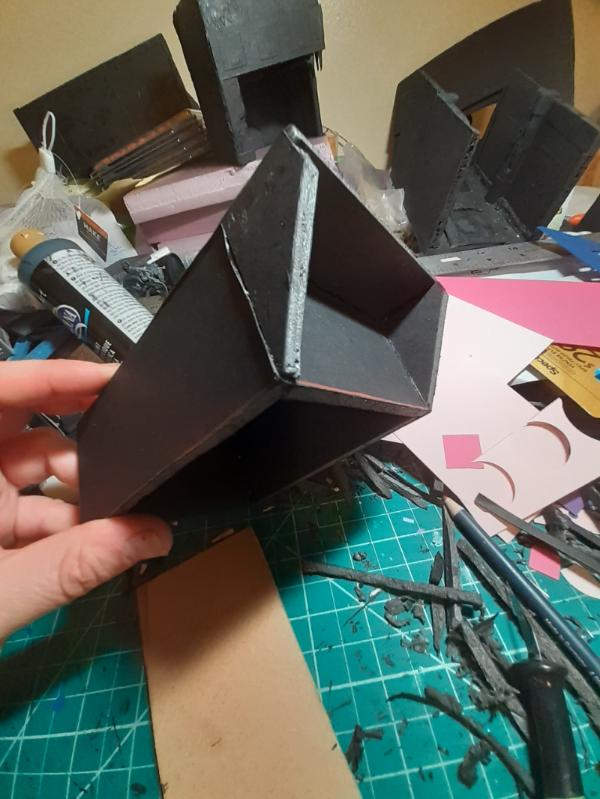
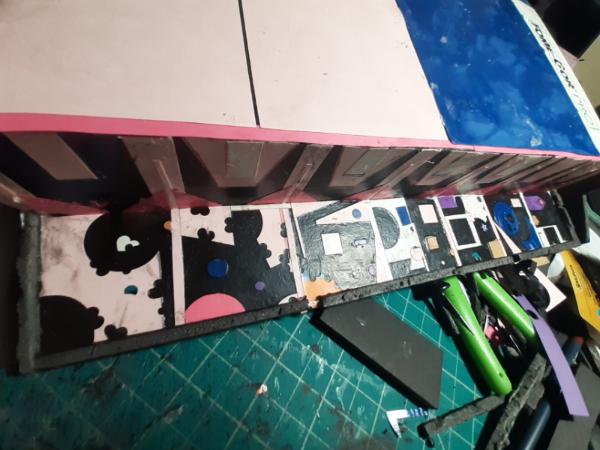
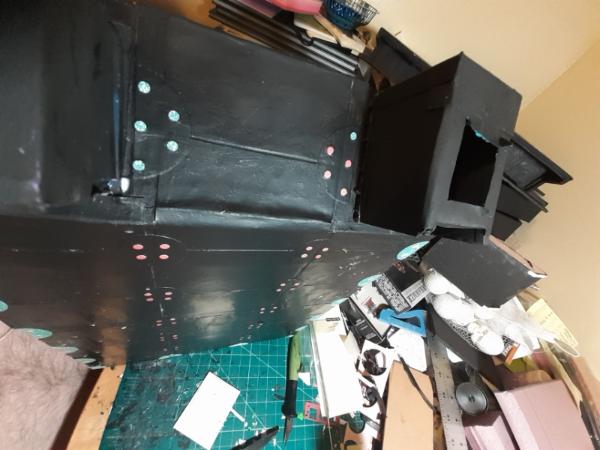
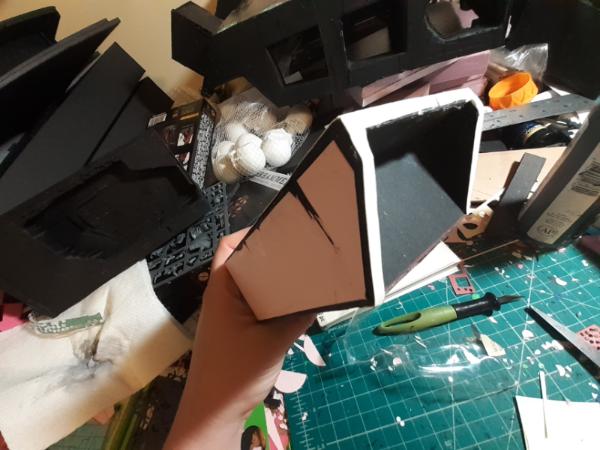
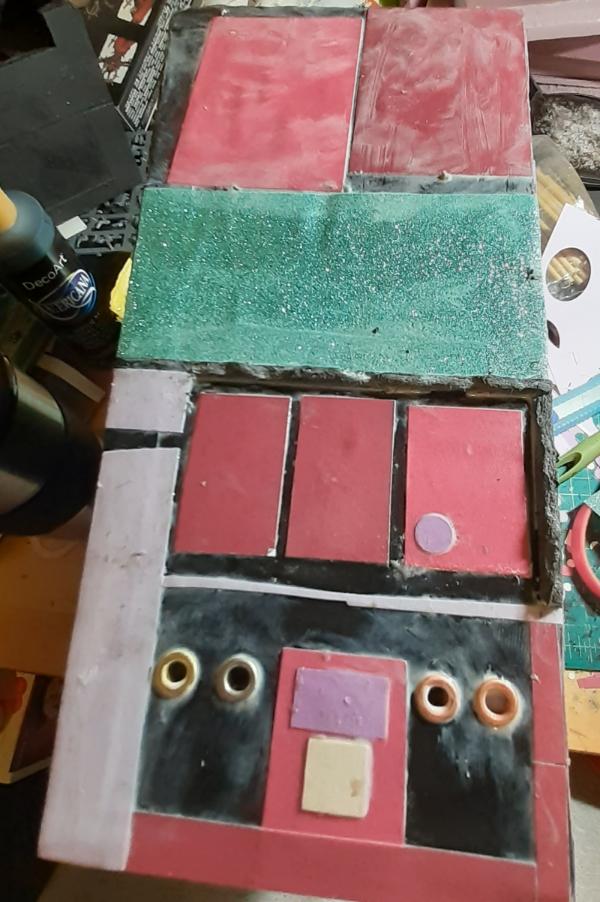
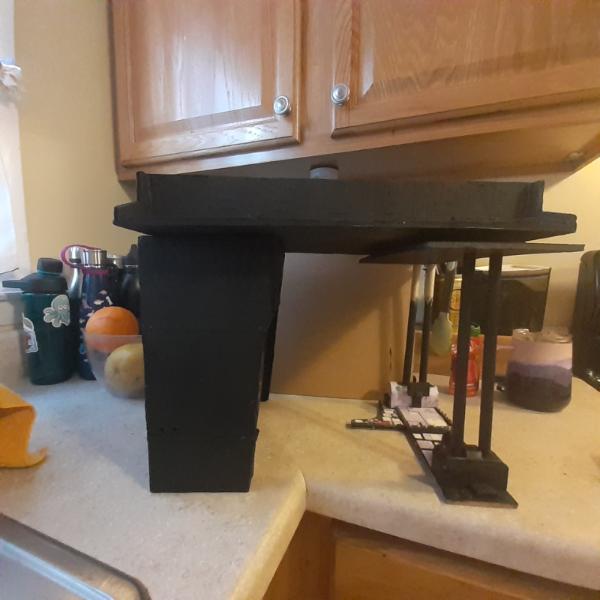
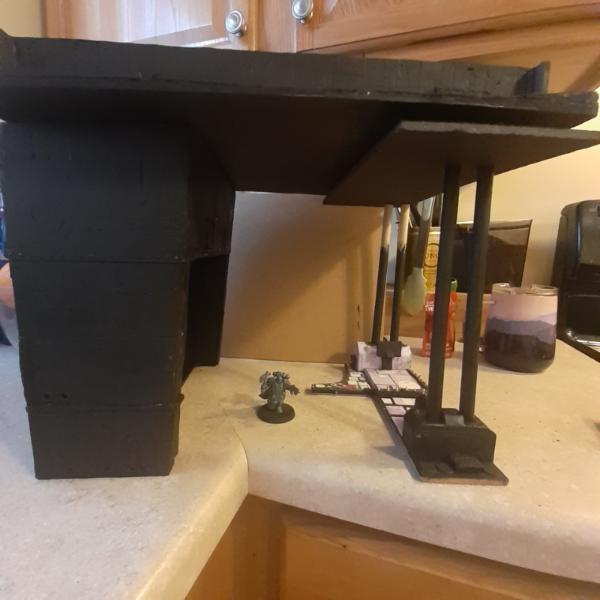
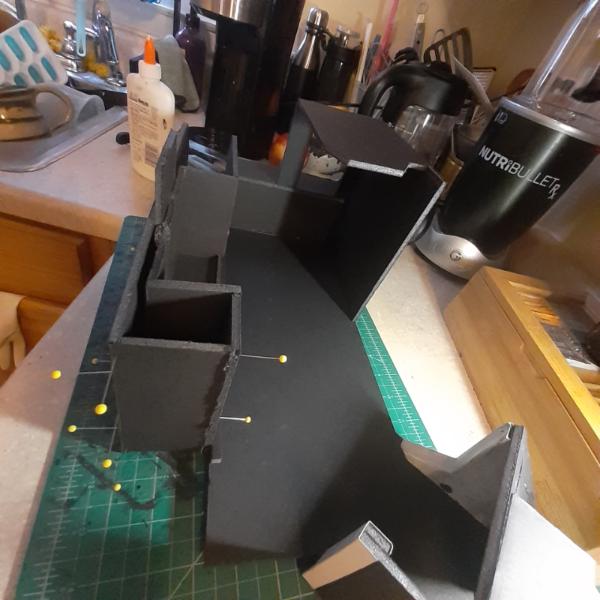
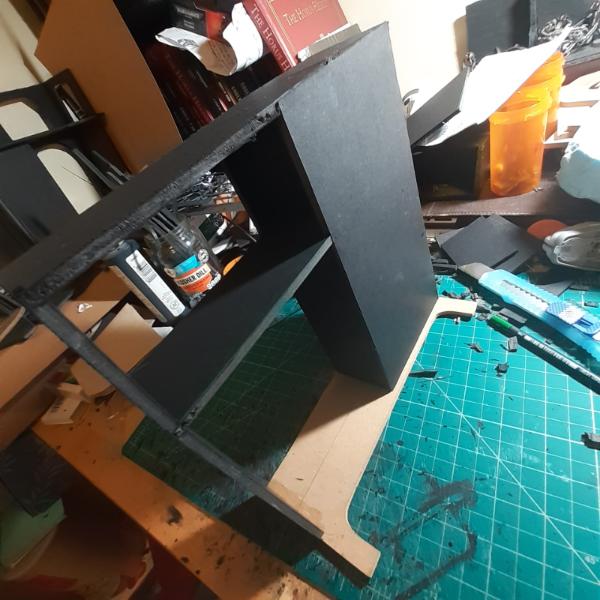
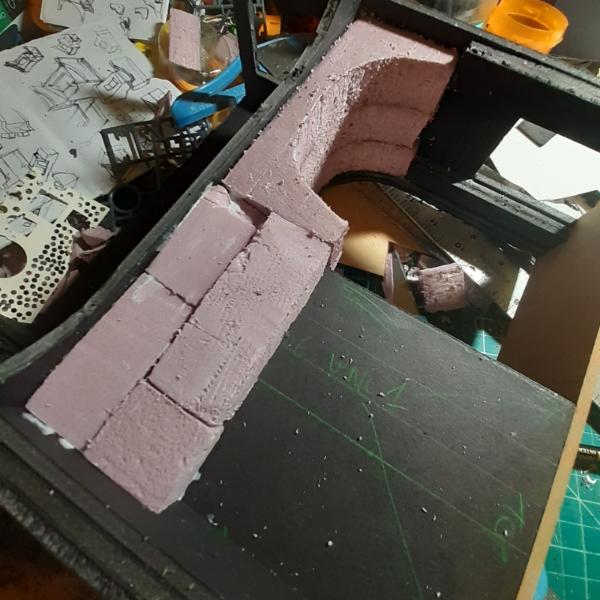
My goal for this December is to finish all the terrain for this first set (I intend to build a whole bunch of layout sets). So, with that, here is the preliminary work for the largest and most wonky piece in the set. The original idea was for a thing roughly 15" by 15" by 5", but it evolved over time. It has both top and under playable elements. The idea is that the Mission deployment will be on top of this piece and that play can (and probably will) continue beneath it. I always prefer to start players on top of things to climb down rather than the bottom, because they are unlikely to go up. This means that the initial play area is 18" off the surface of the table.
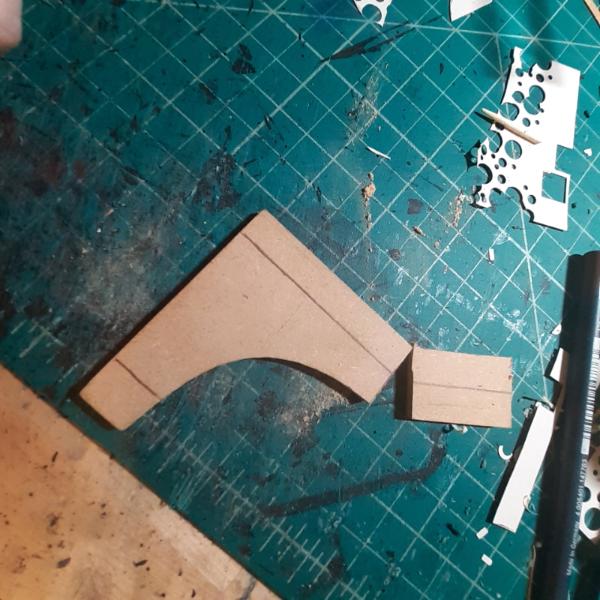
I started by anticipating a staircase at the "back" and pinned together this elbow to start it. I also thought the interior wall was a little too plain so I build a small indentation into the wall.
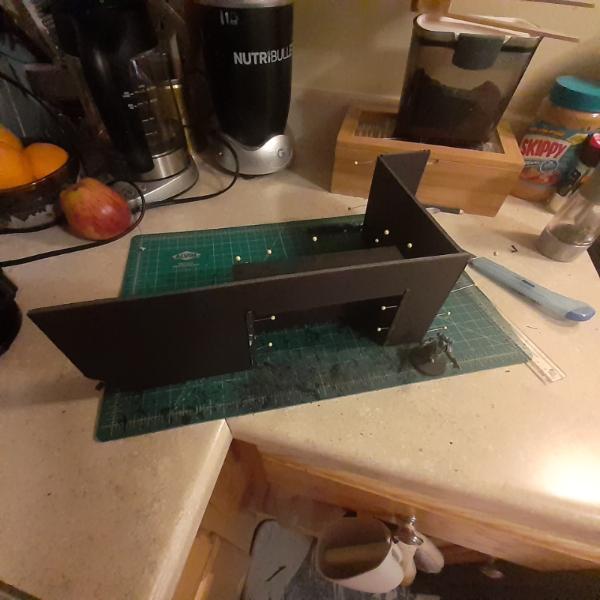
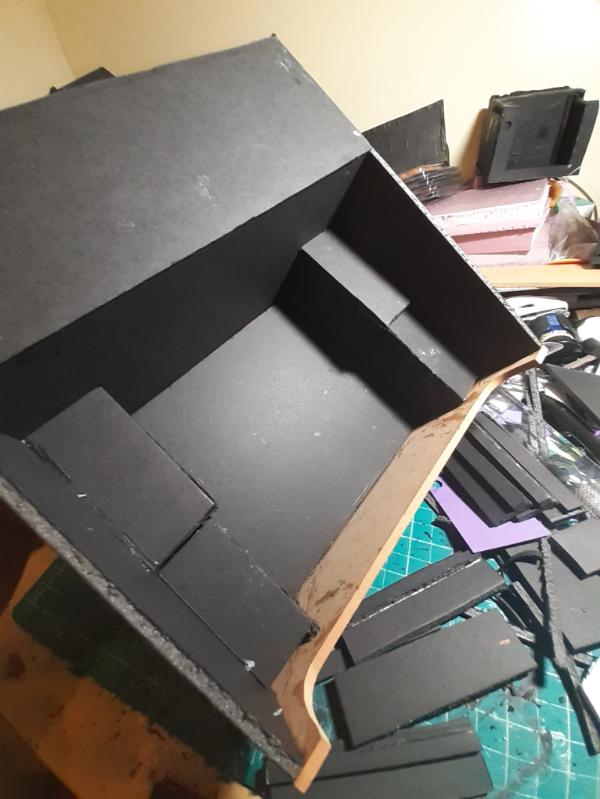
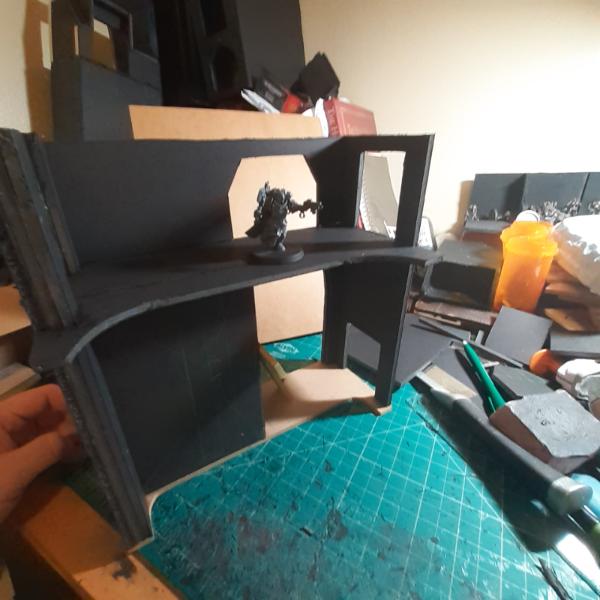
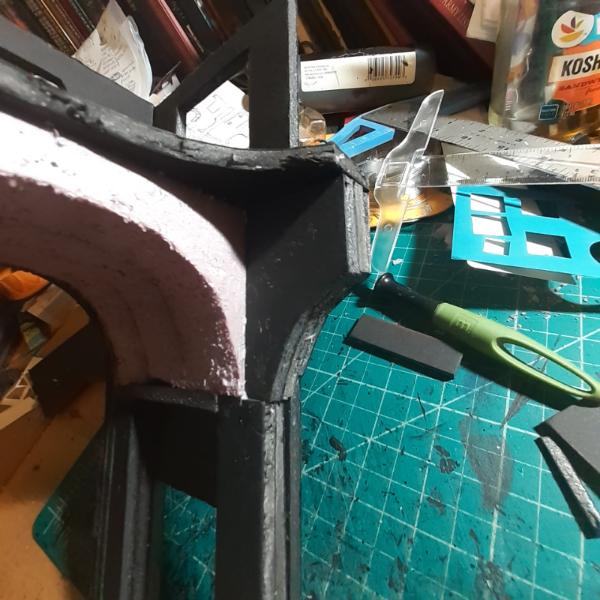
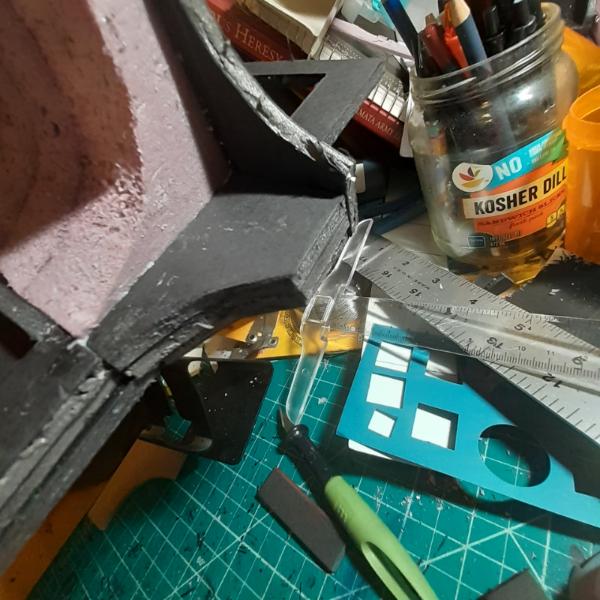
Then I worked on a balcony to fit onto the back of the stairwell's topper. There's a shelf to help it fit over that piece.
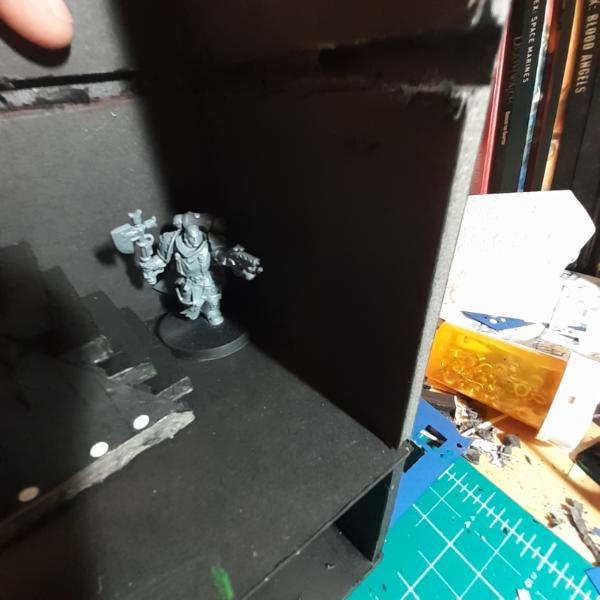
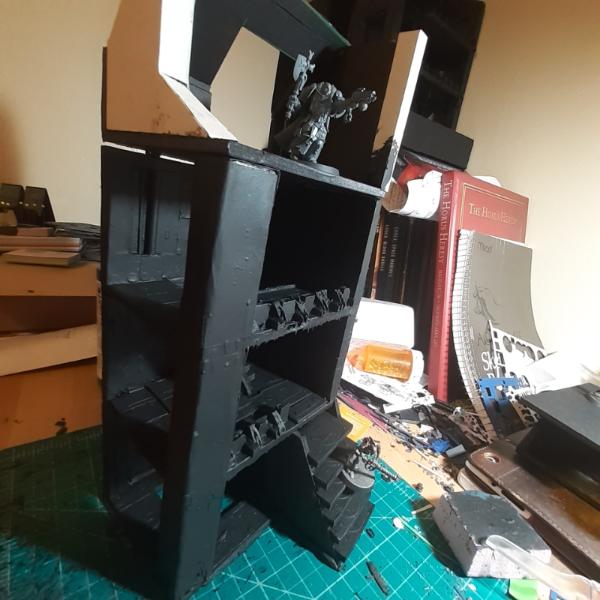
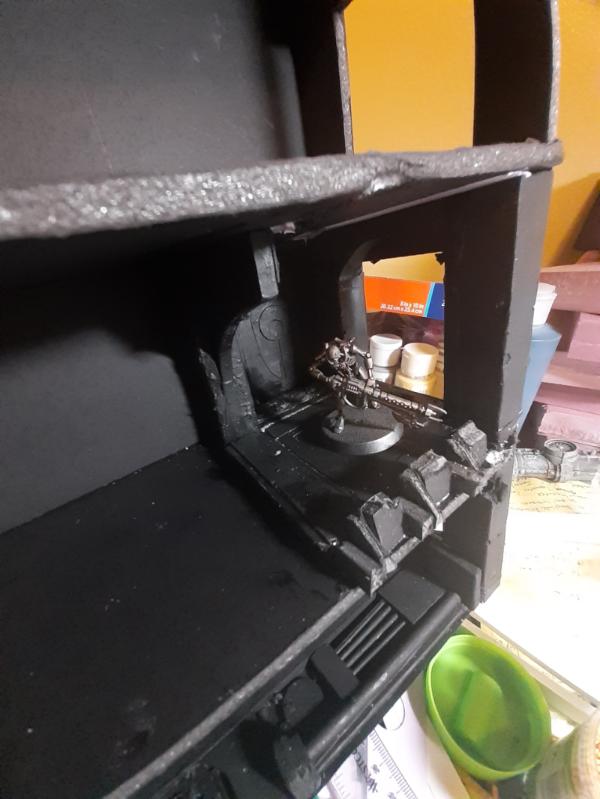
I hammered out the basic shape and test fitted it to the rest of the already build pieces. Here Gustavo models the underneath play area. (Disregard my sink full of dishes)
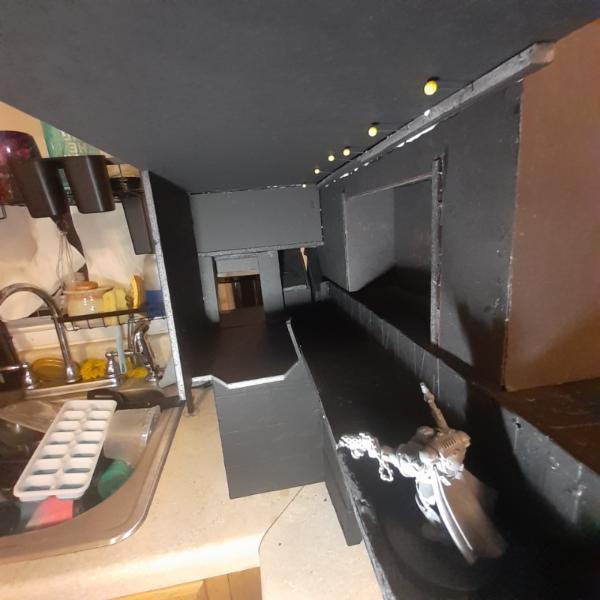   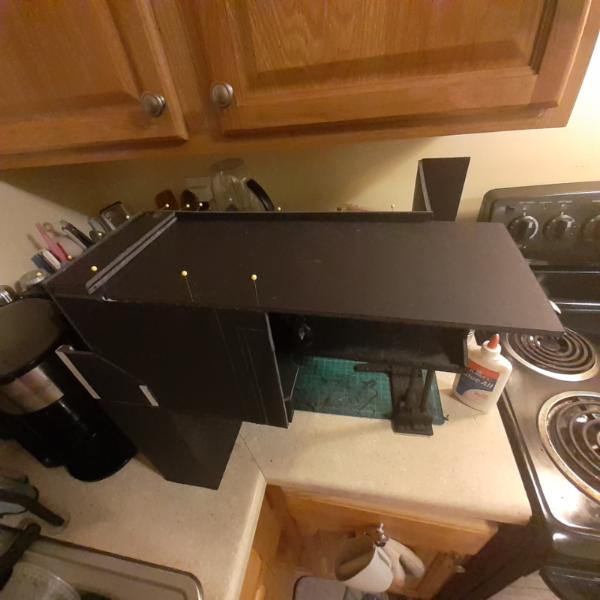
I originally thought the balcony would be strong enough to stand on its own, but as I built I realized it's not anchored to enough of the rest of the piece for that. So I will have to build a structural support piece to fit beneath it.
Here is Gustavo to illustrate the enormity of this whole set up. Don't mind the coffee maker; that's not part of the set.
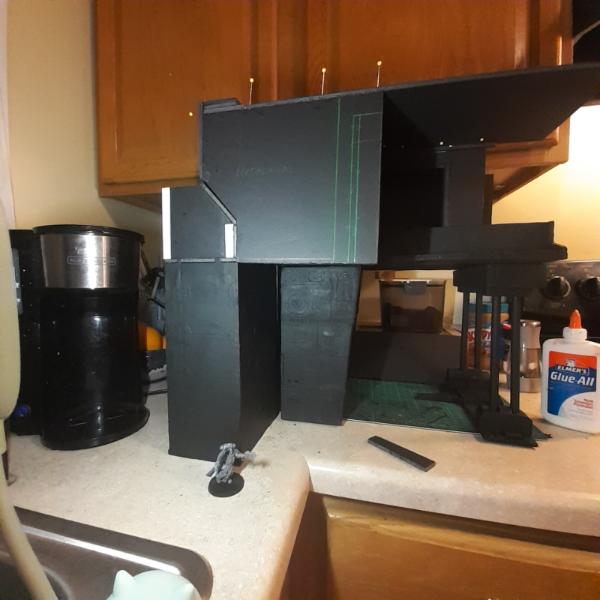
Thanks for looking and have an awesome day!
Feedback always welcome and appreciated.
22619
Post by: inmygravenimage
Wow. Breathtaking.
76303
Post by: Warboss_Waaazag
Wow. Thank you very much!
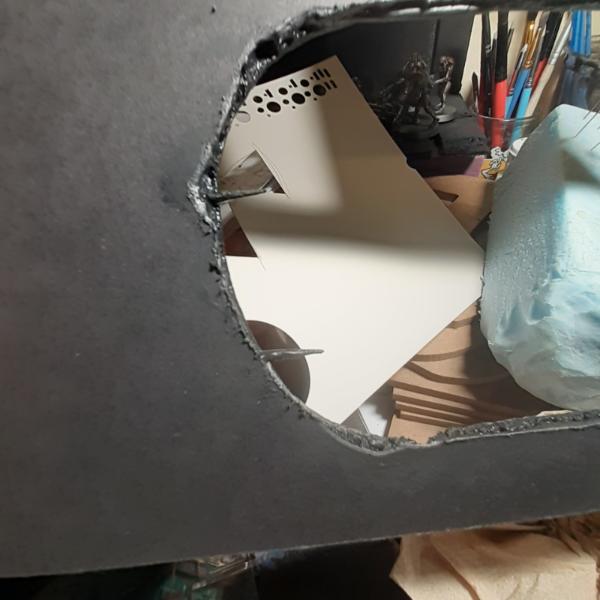
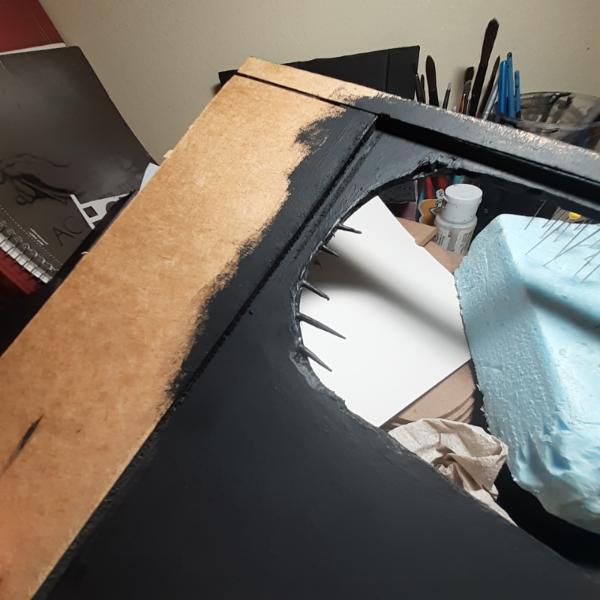
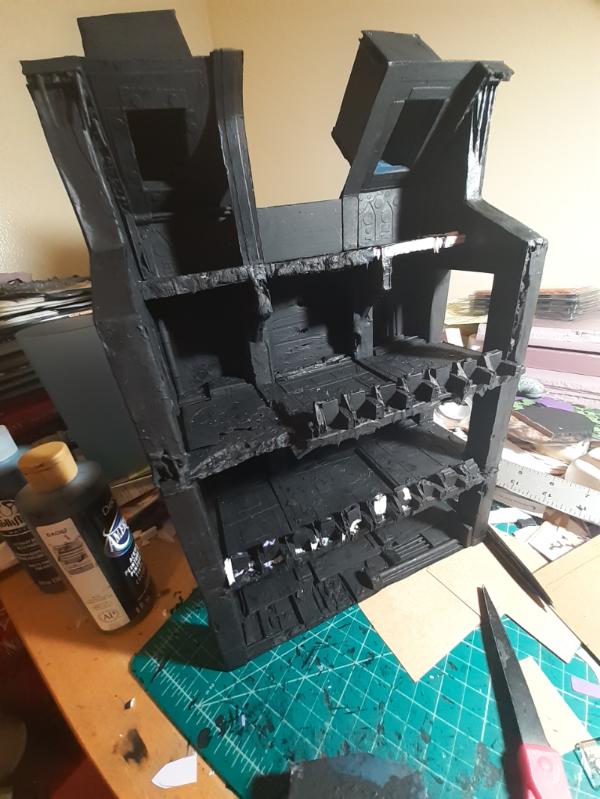
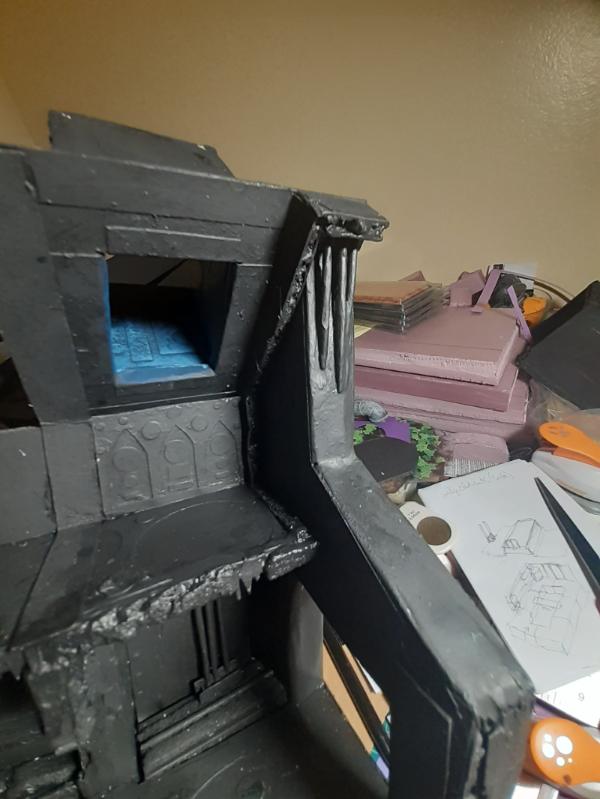
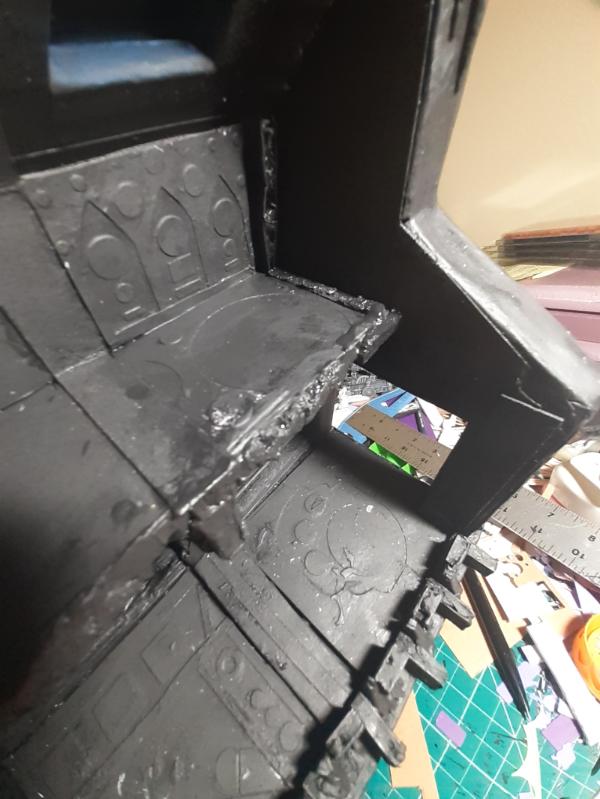
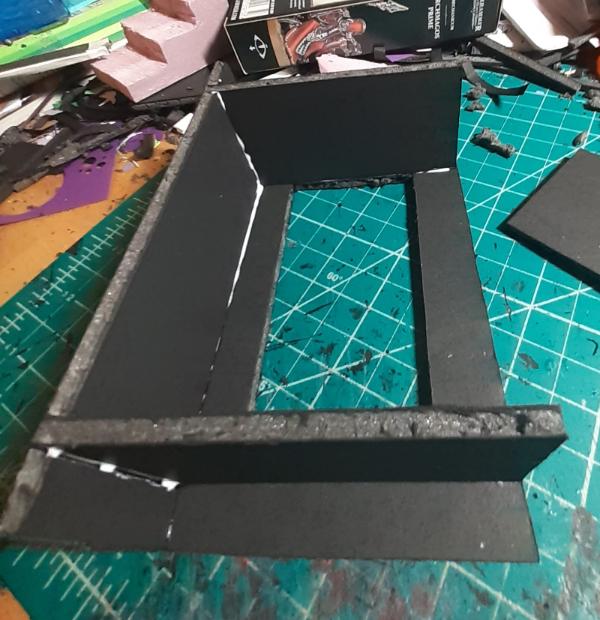
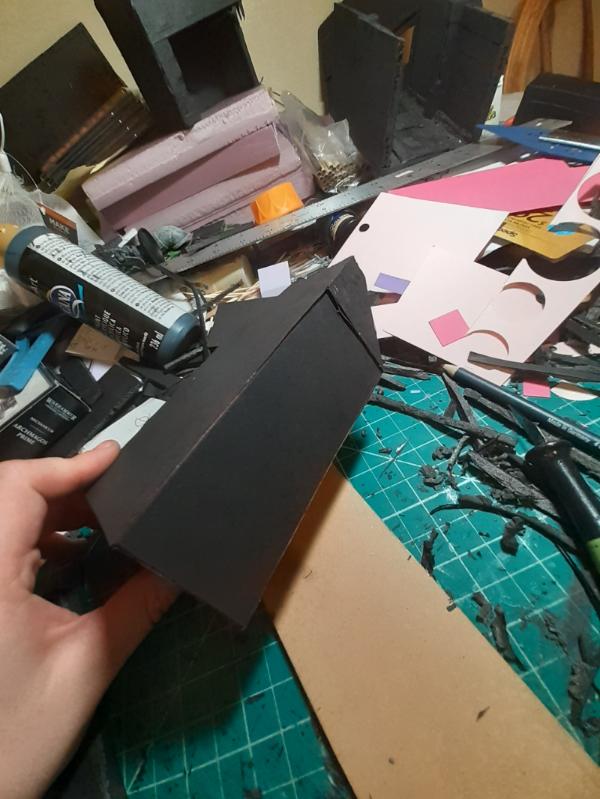
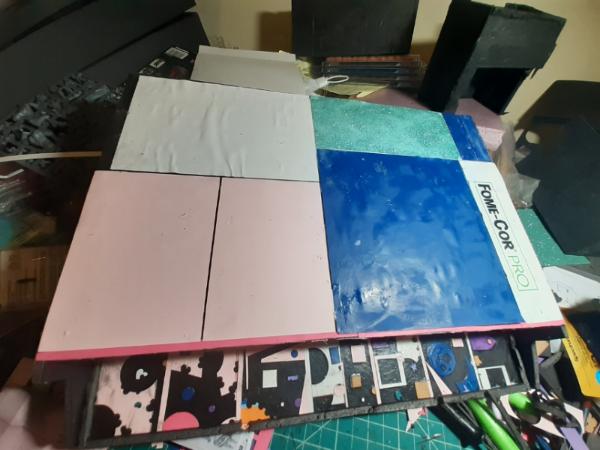
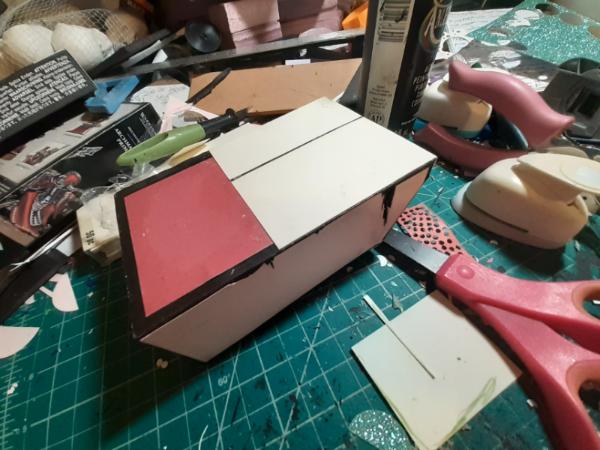
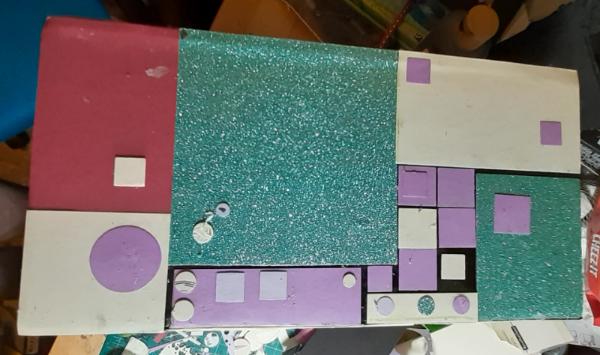
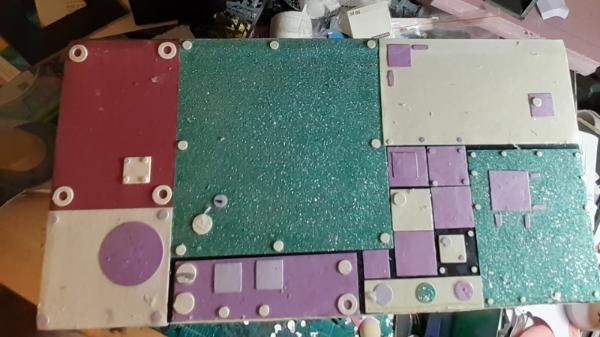
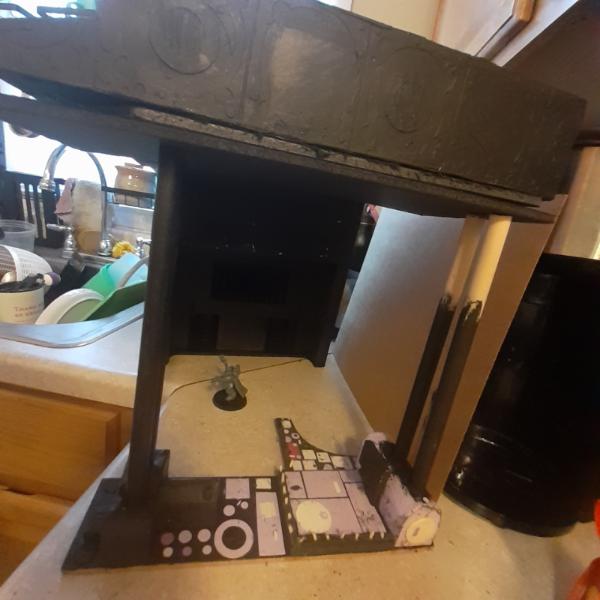
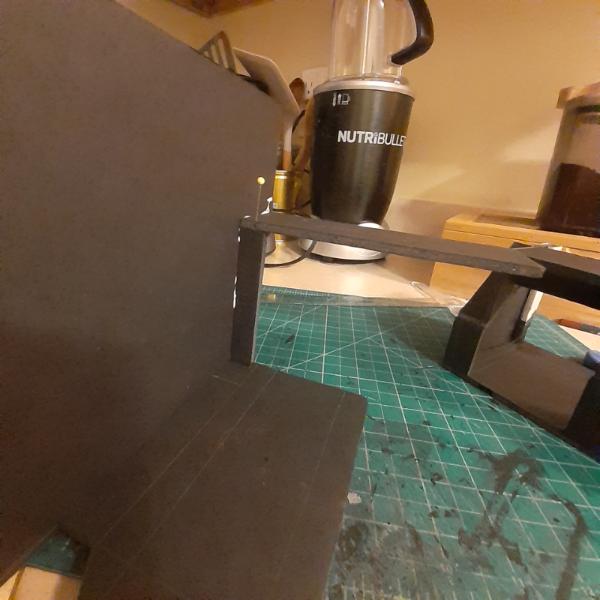
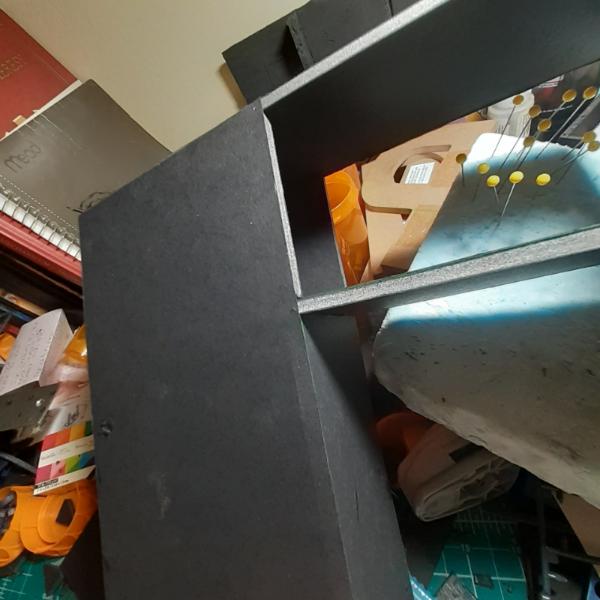
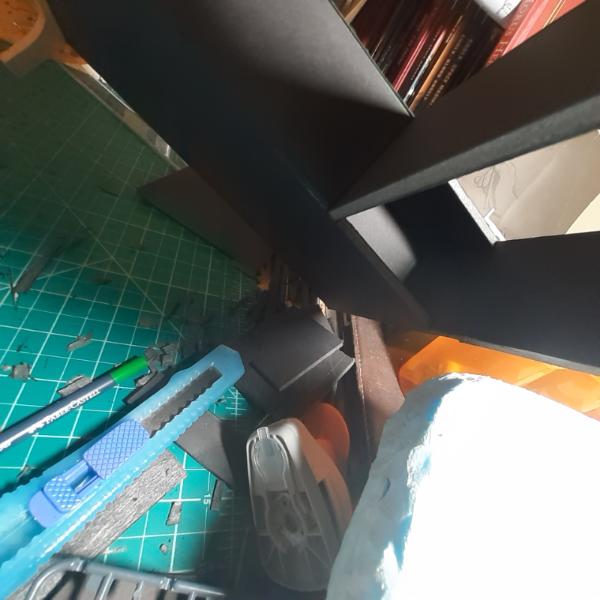
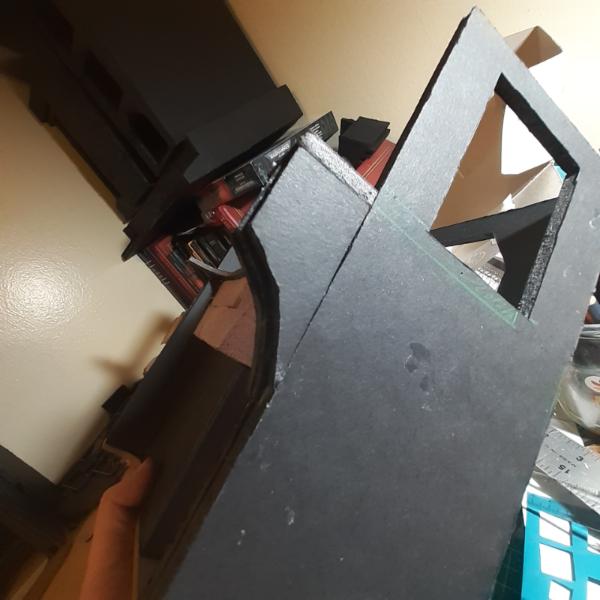
I trimmed the big thing down. Here it is in progress from various angles.
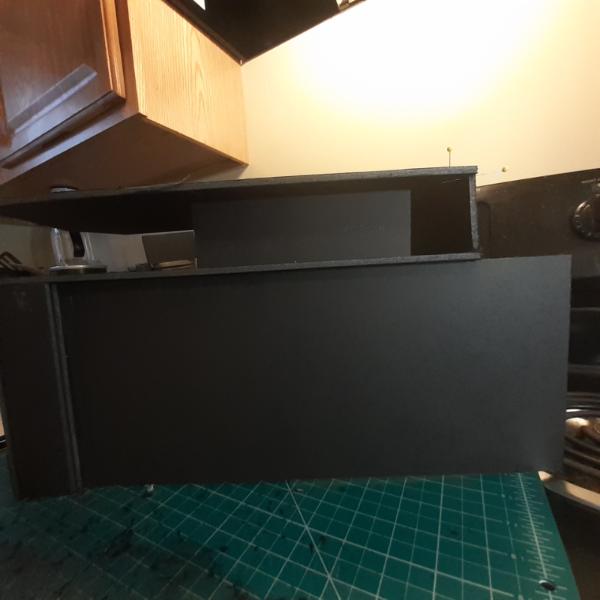 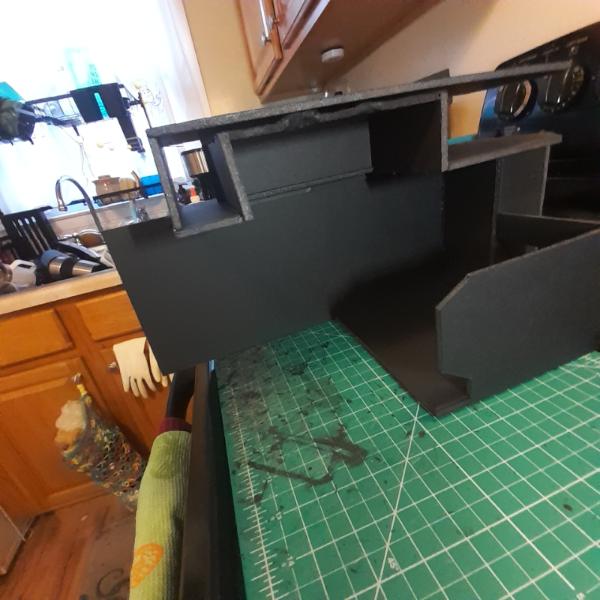  
Plenty more to come.
76303
Post by: Warboss_Waaazag
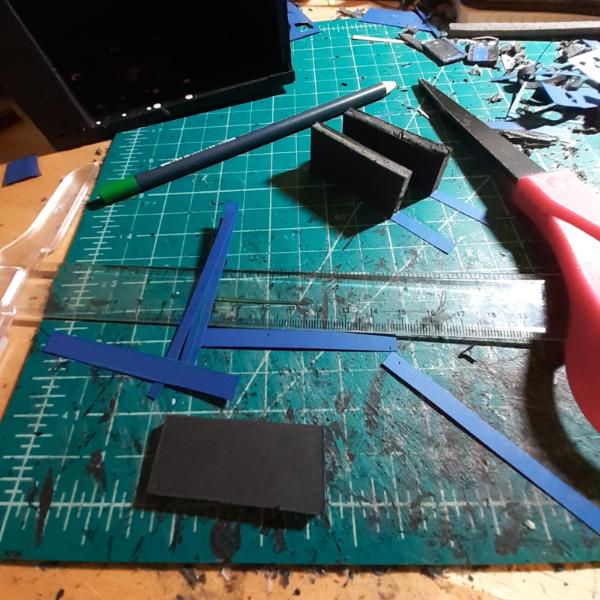
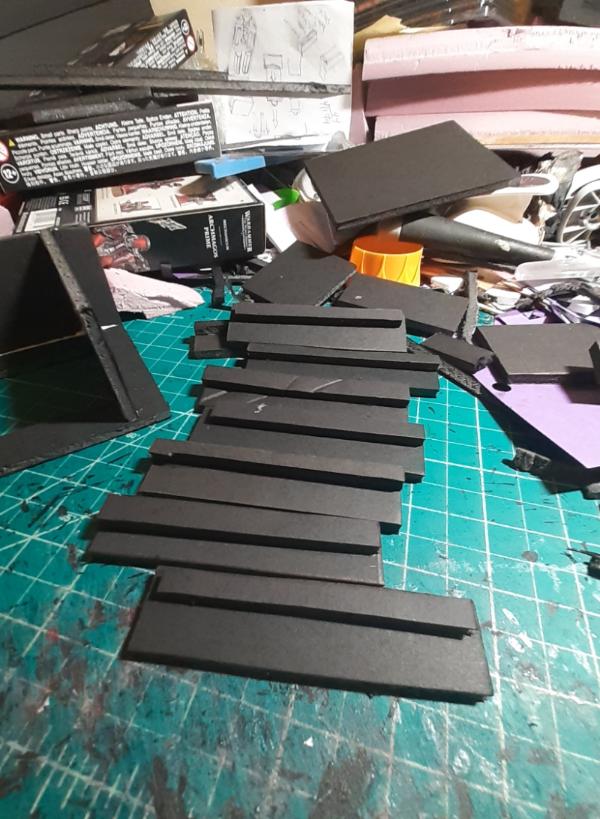
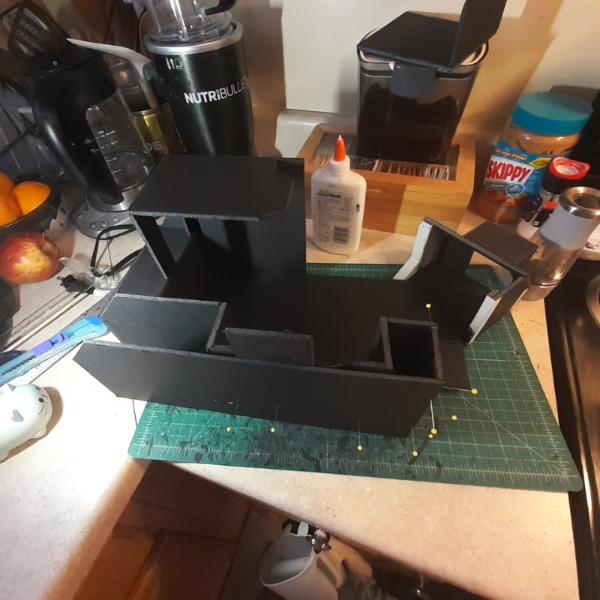
So, I paused the big piece for the moment and started work on the structural support for its balcony. I have all these mdf letters that I've been collecting for decades and decided to put them to good use. The stairwell is actually mounted on 2 capital "L"s glued into a rectangle. For this base I glued an I and a D together, strengthening the bond with a piece of paper on the bottom.
I only had a vague idea about what I wanted to do with this one, so I just started gluing shapes on, modifying as I went. Pinning as needed.
And then of course, about halfway through this project, I started another one.
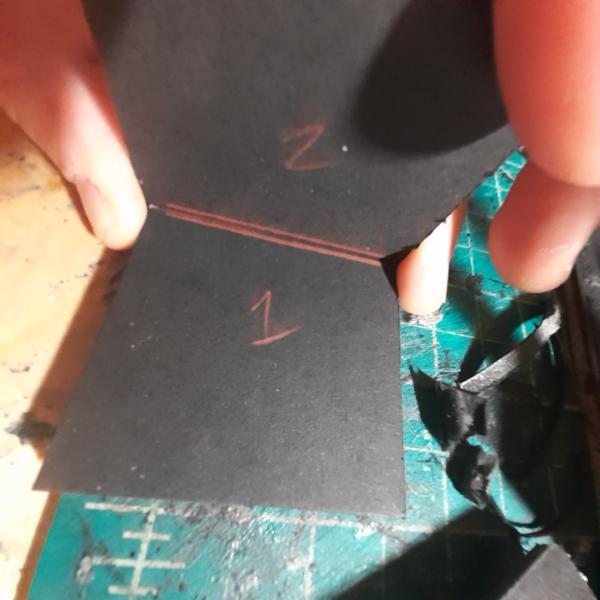
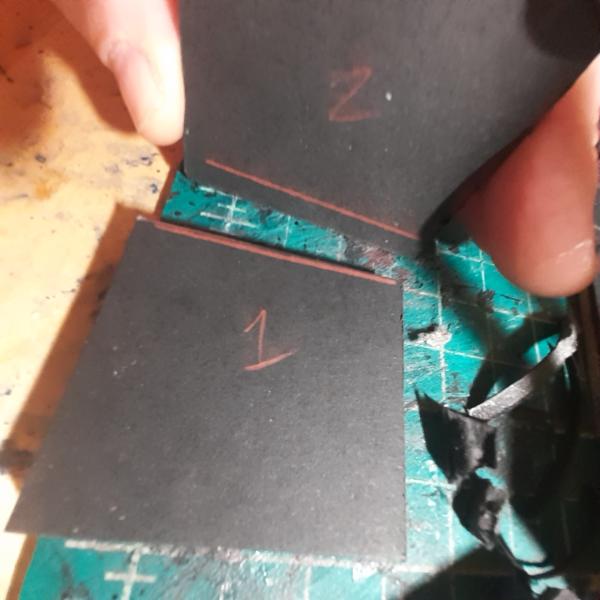
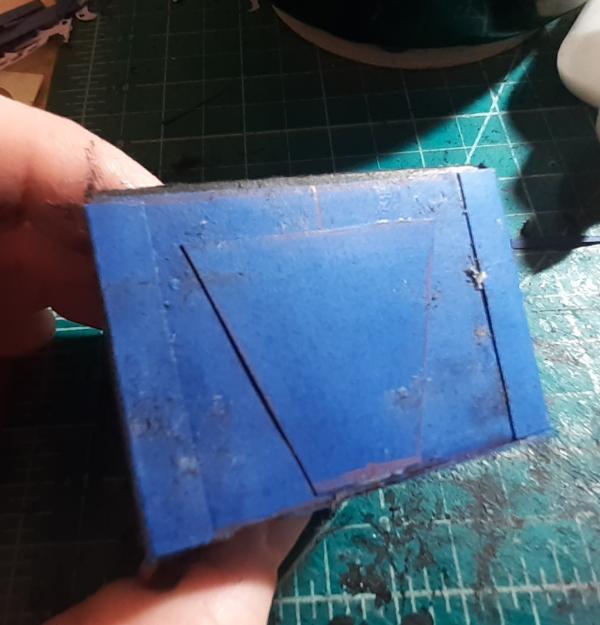
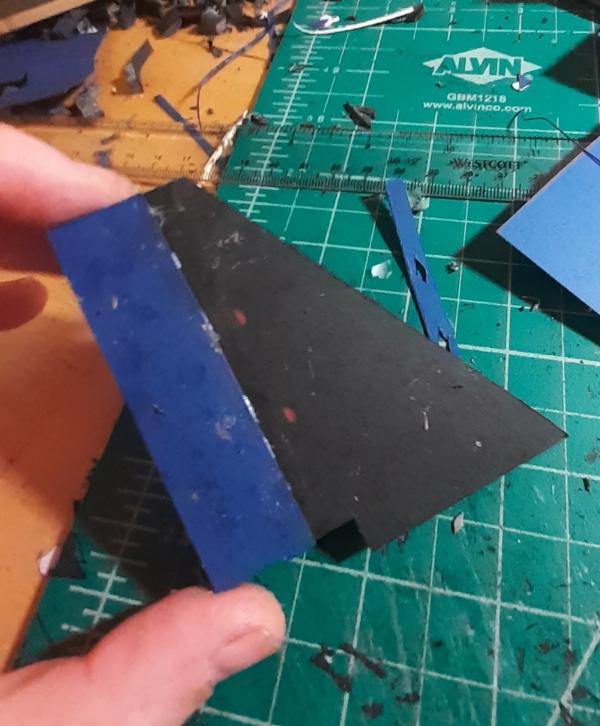
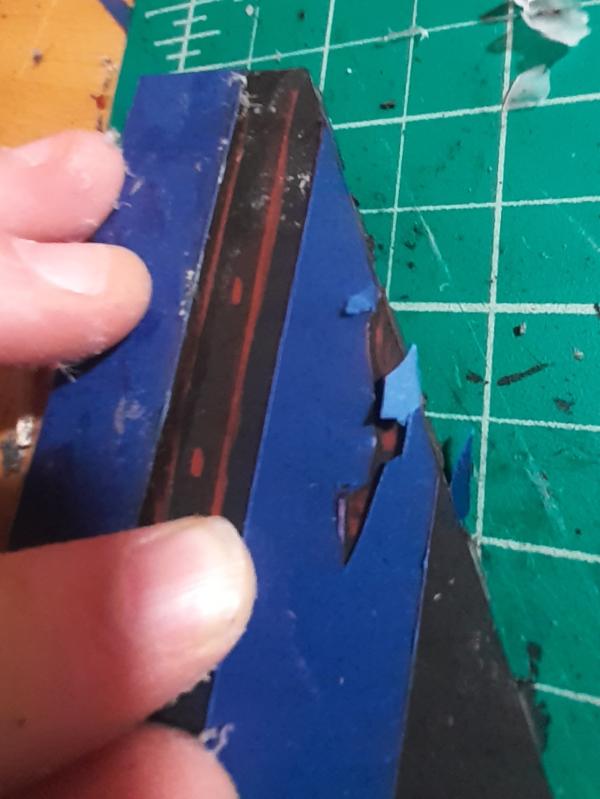
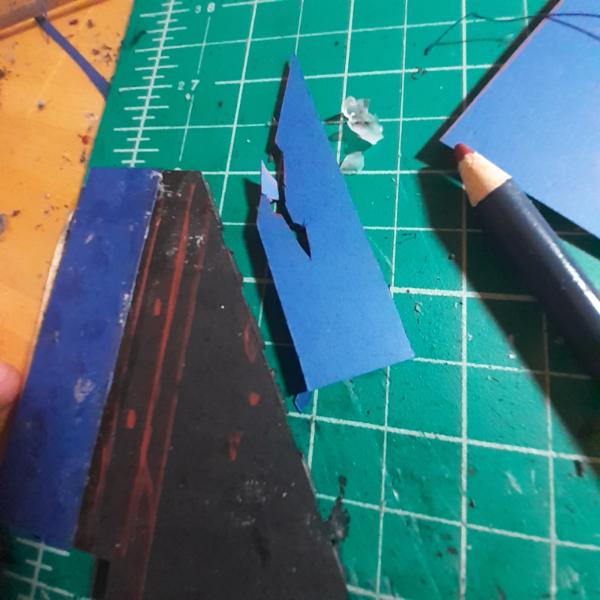
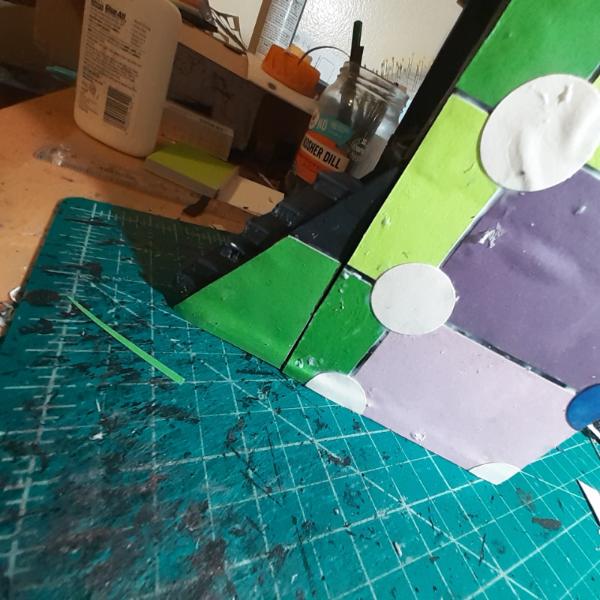
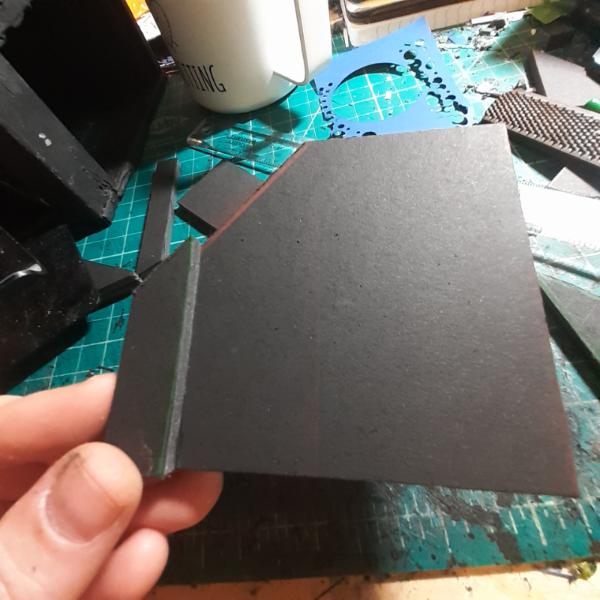
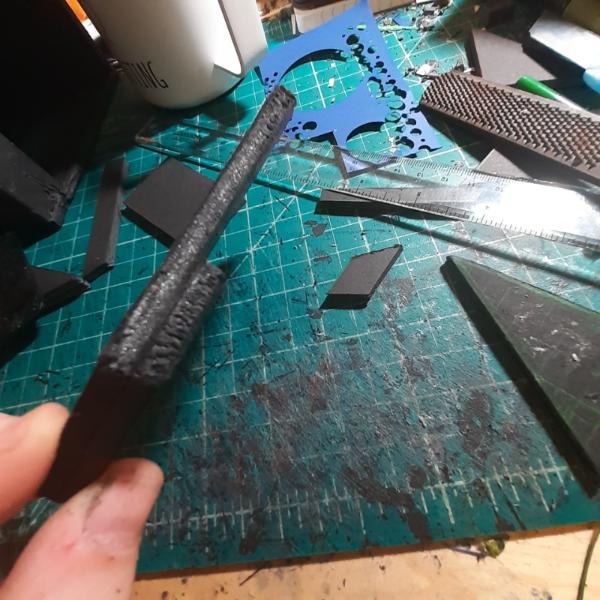
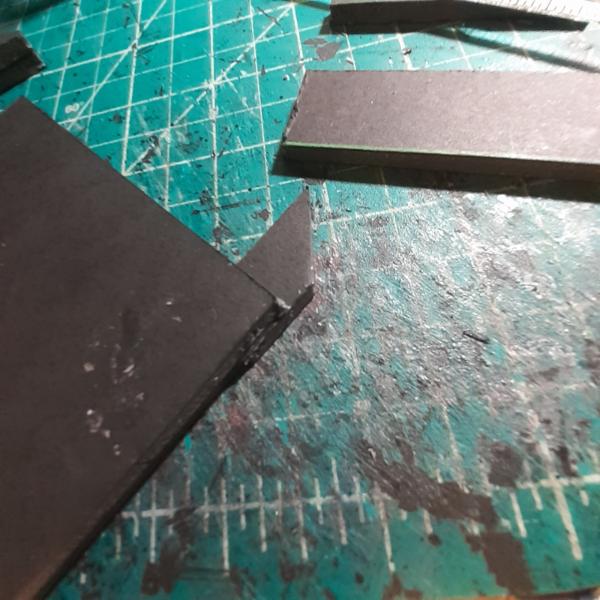
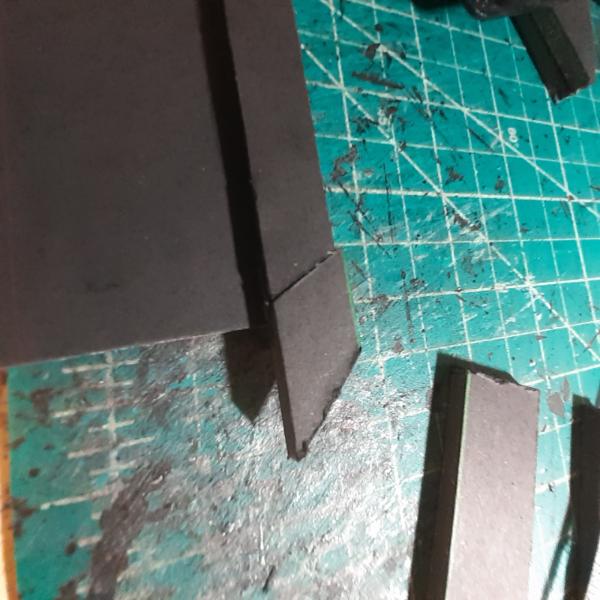
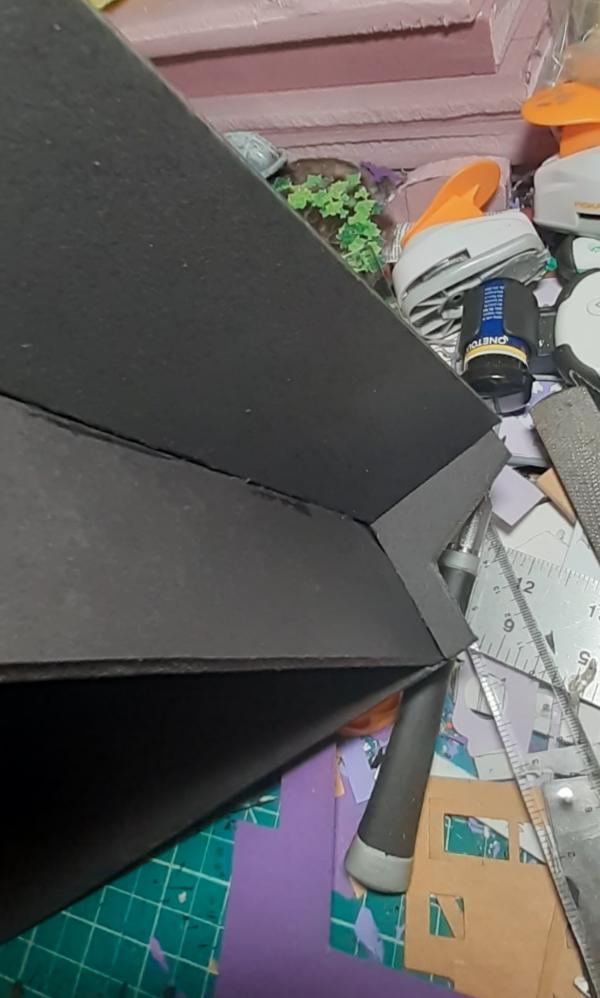
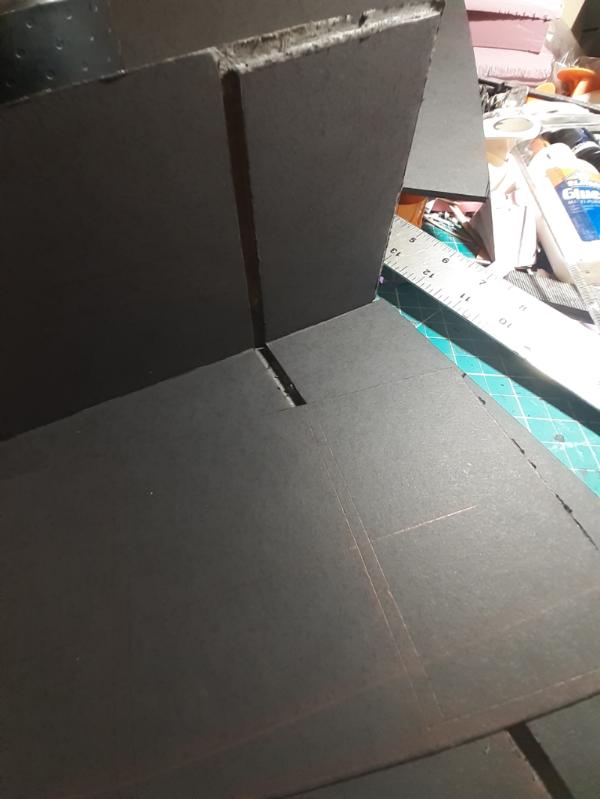
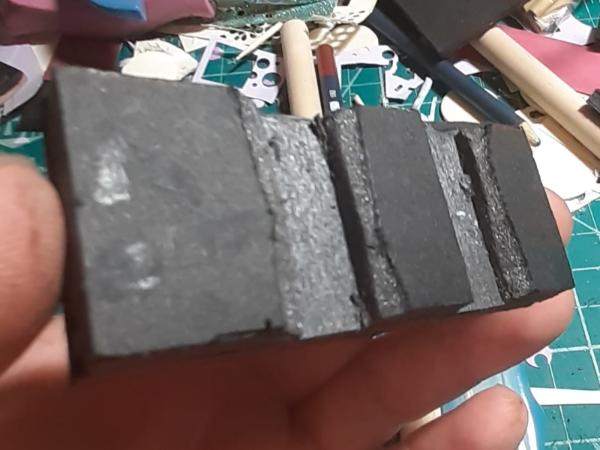
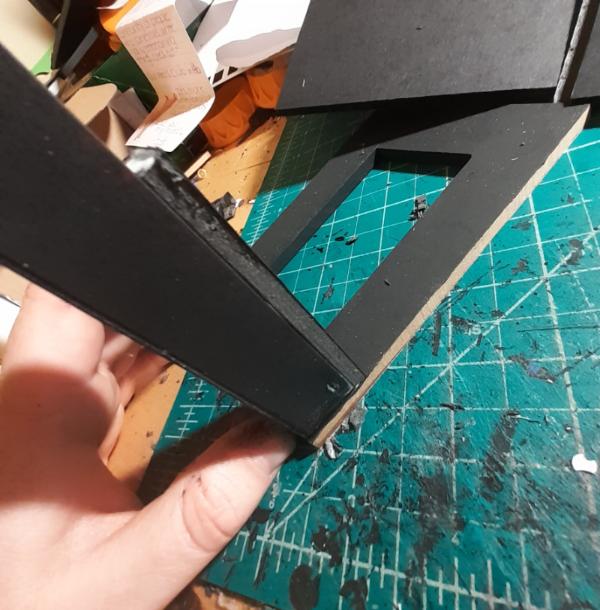
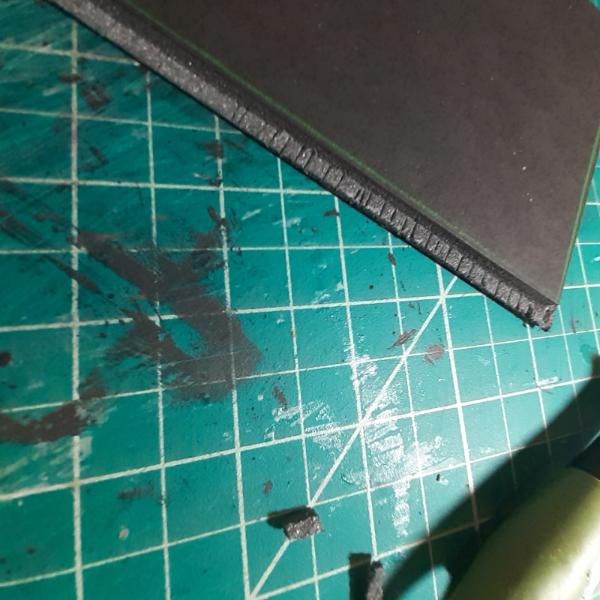
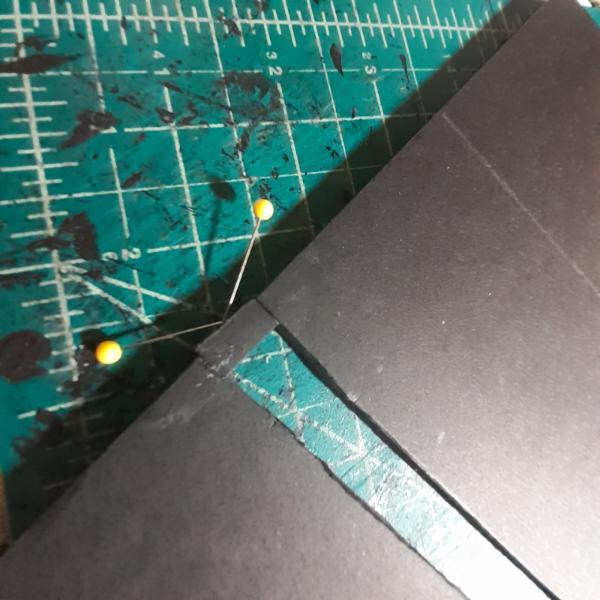
I like to create strong bonds by trimming the edge off one sheet, roughly the thickness of another sheet, so that when glued, the corner is bonded on 2 sides. Here's an illustration of how I score the leftover material on the cuts to make scraping it out easier and faster.
I then started doing some bulking out of the piece, again deciding where details would be as I went. Yet even still this was just building a base shape to build upon later.
I'm starting to ramp up production to build a lot of base pieces and leaving the detailing for later.
65595
Post by: Camkierhi
This is looking amazing. Great deal of work put in. Love the structures. I can really imagine playing on this.
76303
Post by: Warboss_Waaazag
 Camkierhi wrote: Camkierhi wrote:This is looking amazing. Great deal of work put in. Love the structures. I can really imagine playing on this.
Thanks, Cam! It's great to have you here.
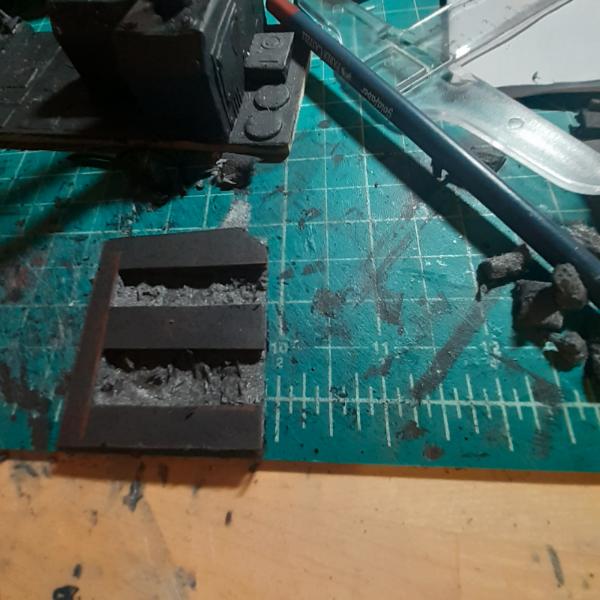
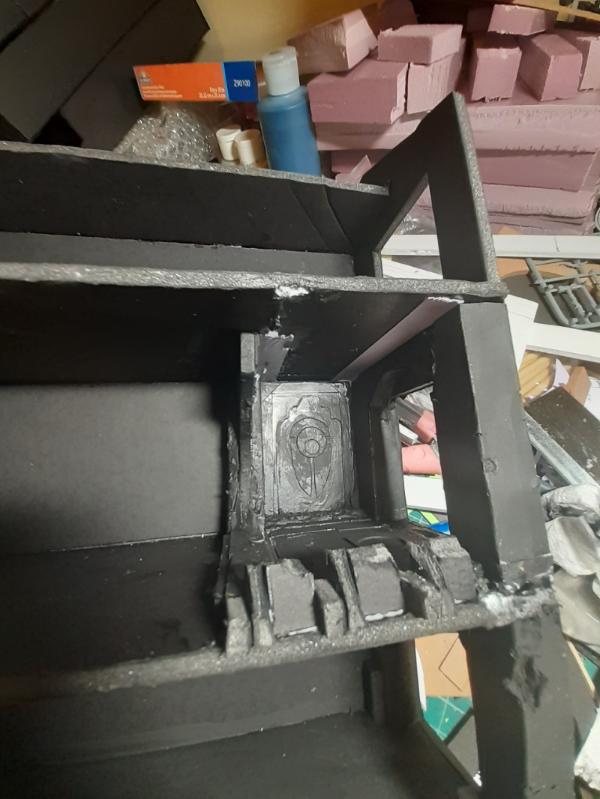
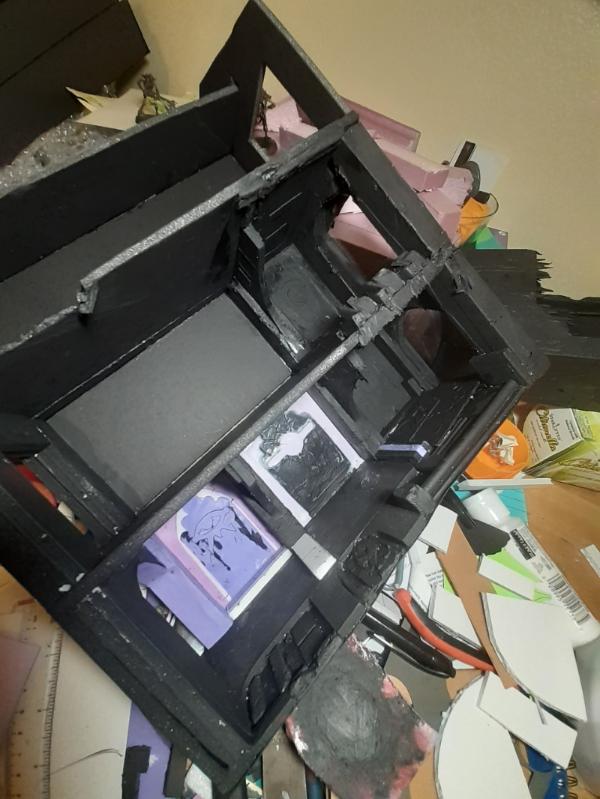
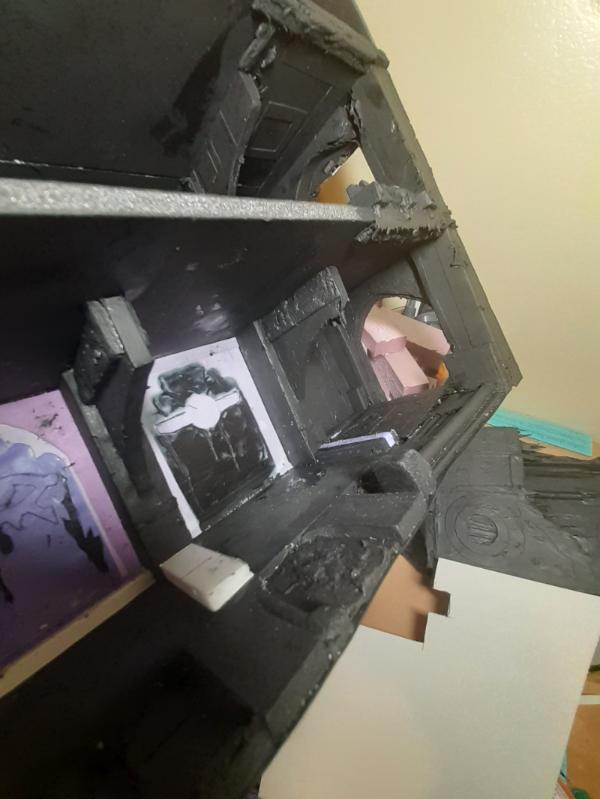
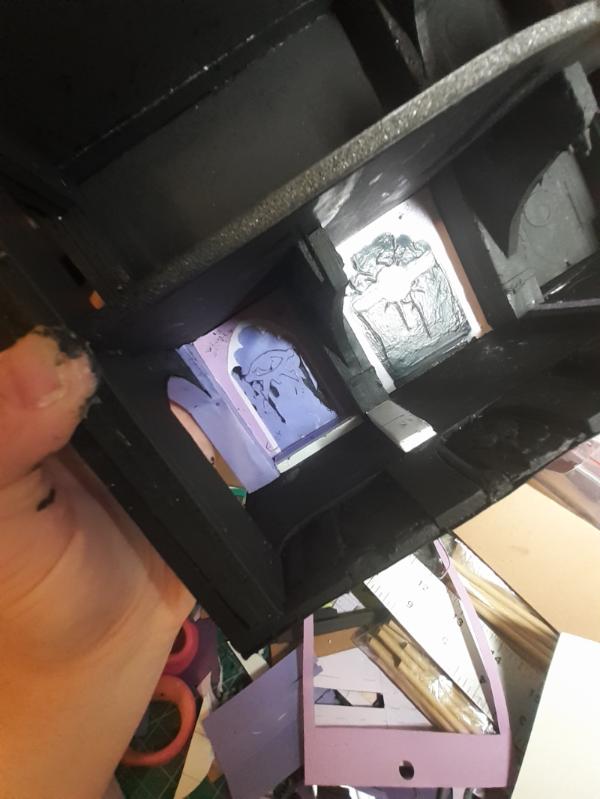
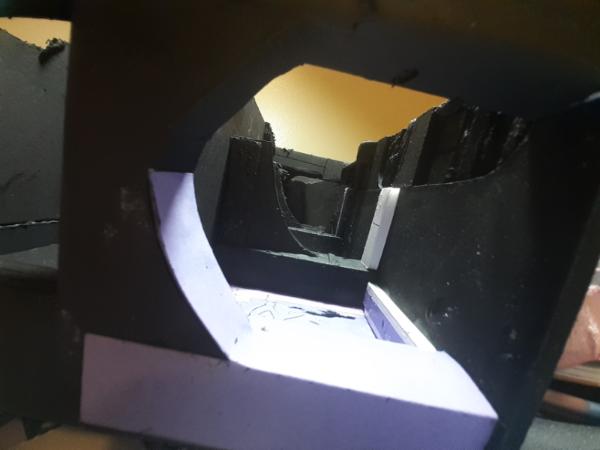
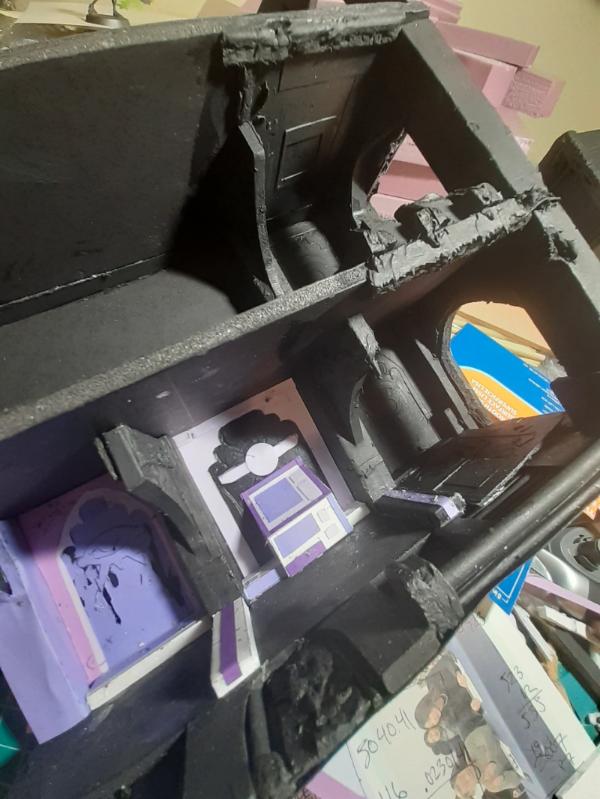
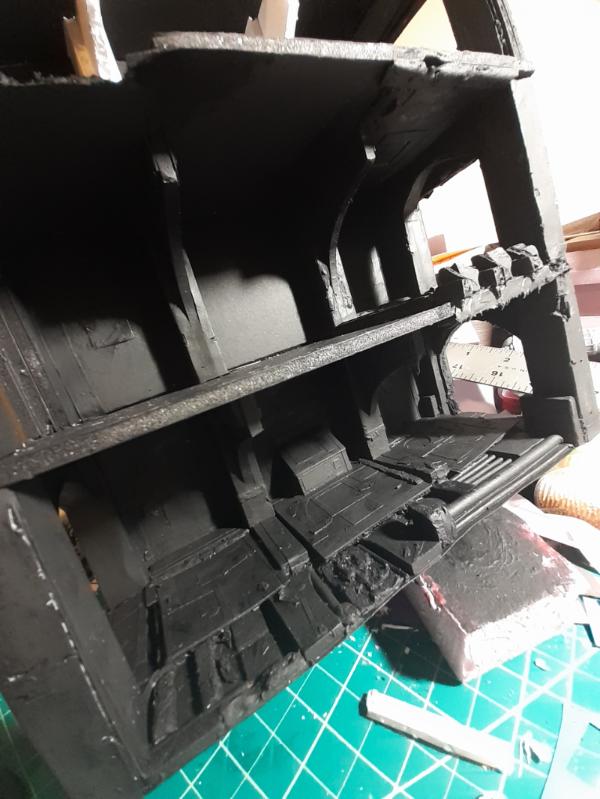
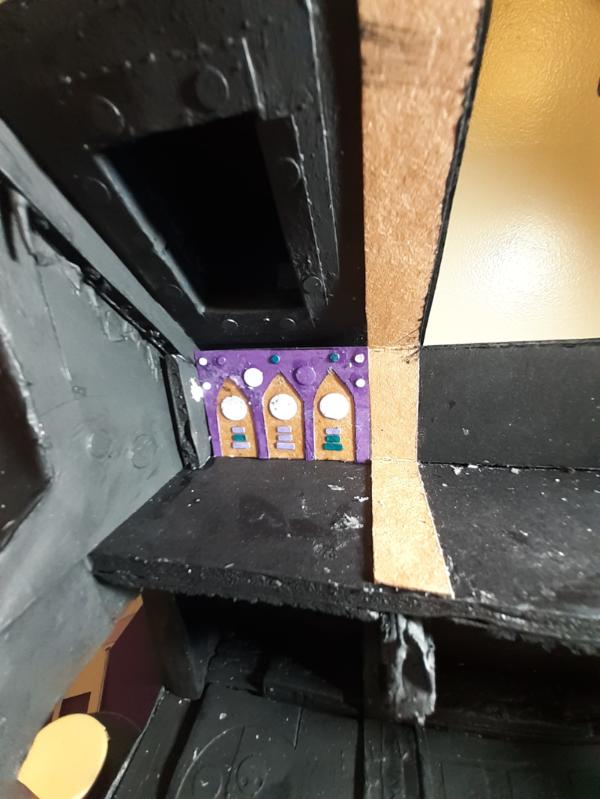
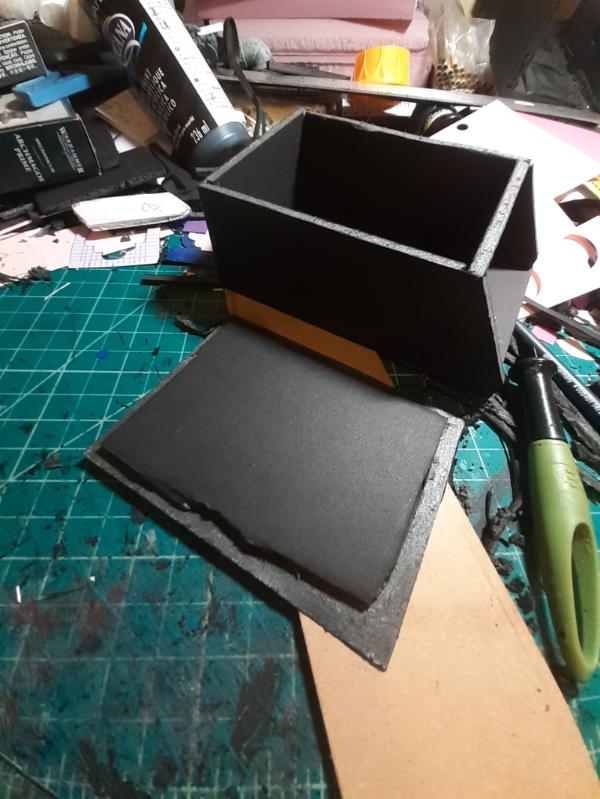
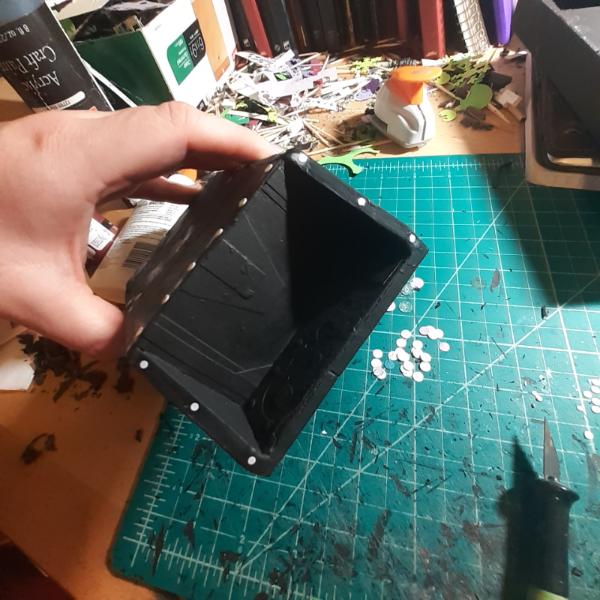
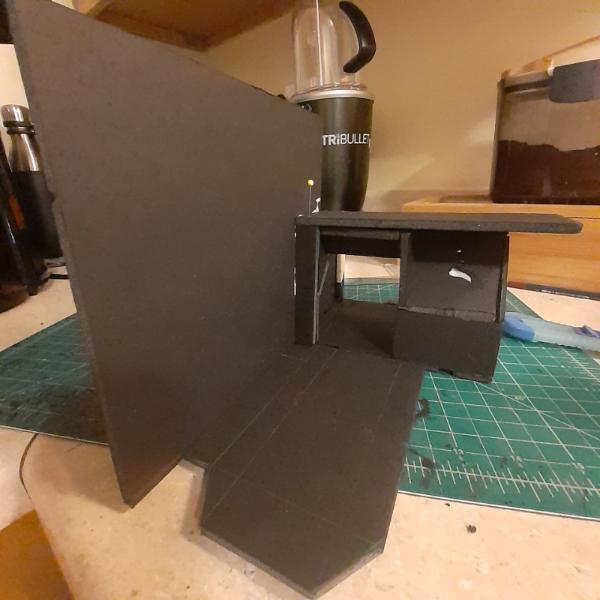
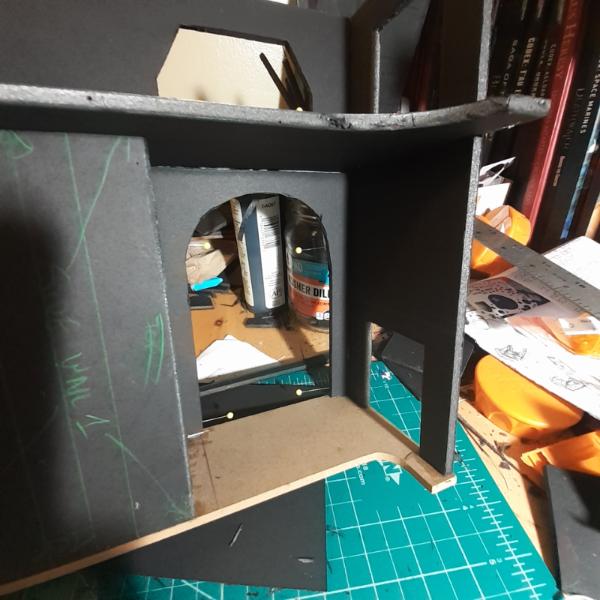
I built the simplest of base piece cores. And then struggled to adequately photograph this tiny alcove on the top floor.
With any luck it will become more comprehensible as I add detail to it.
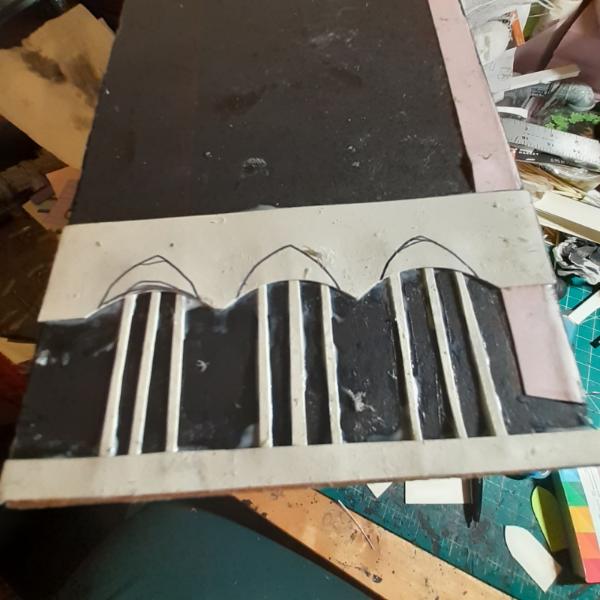
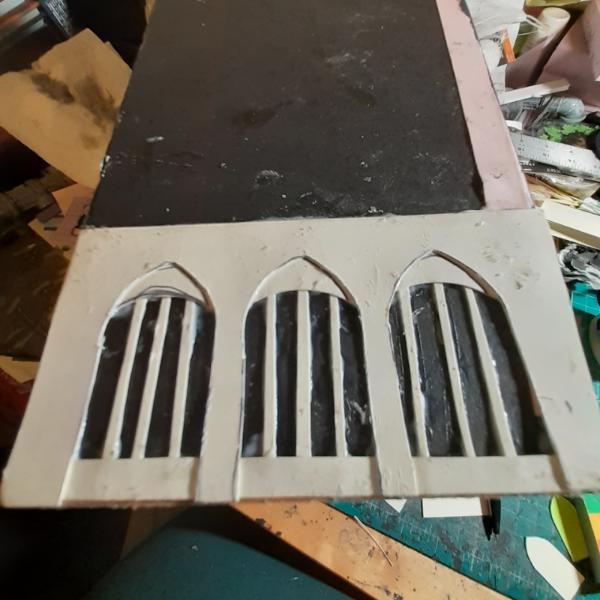
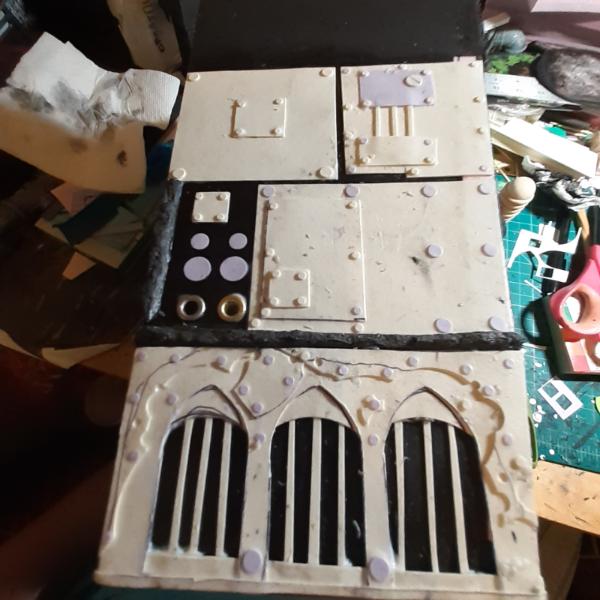
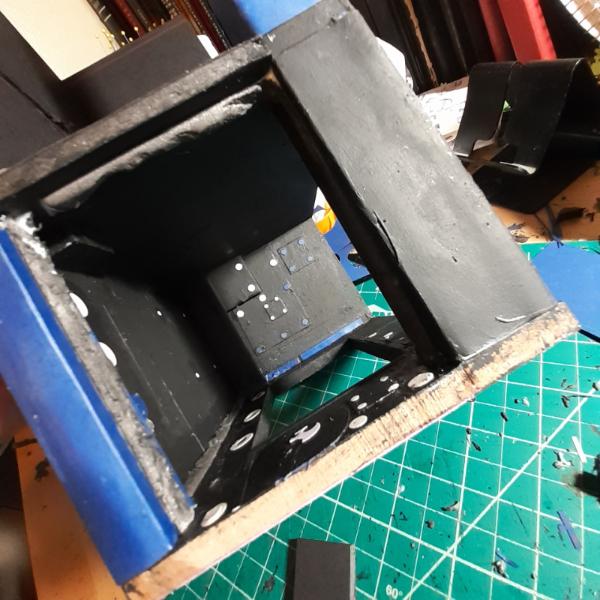
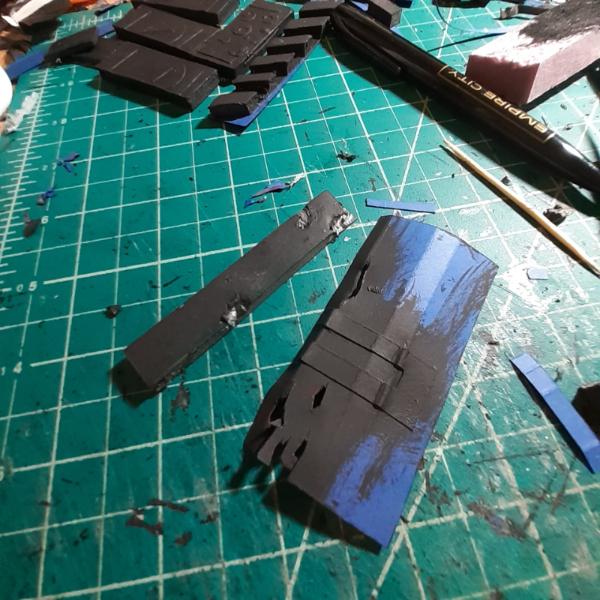
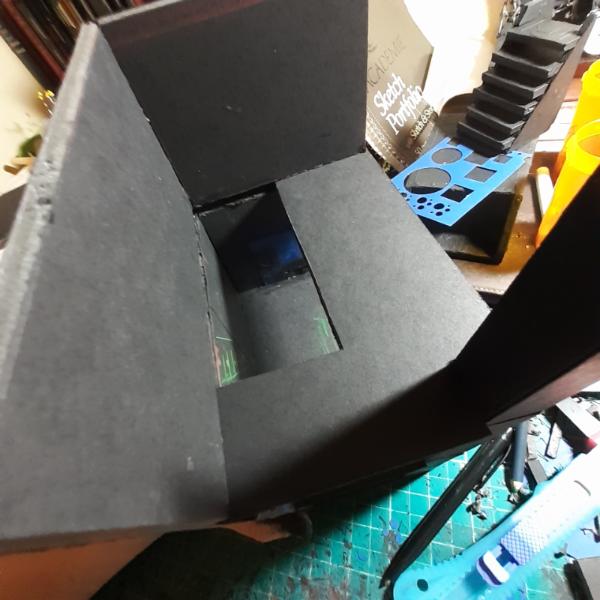
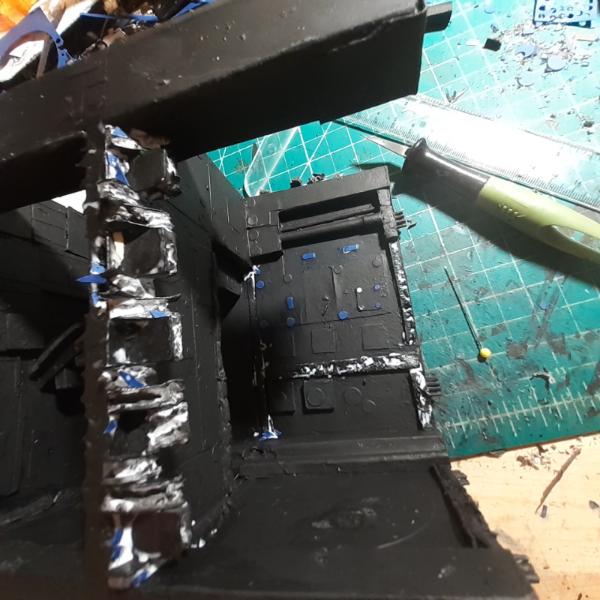
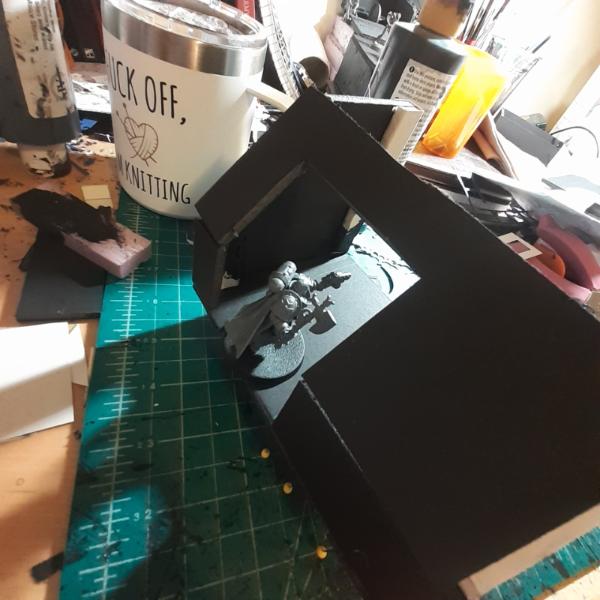
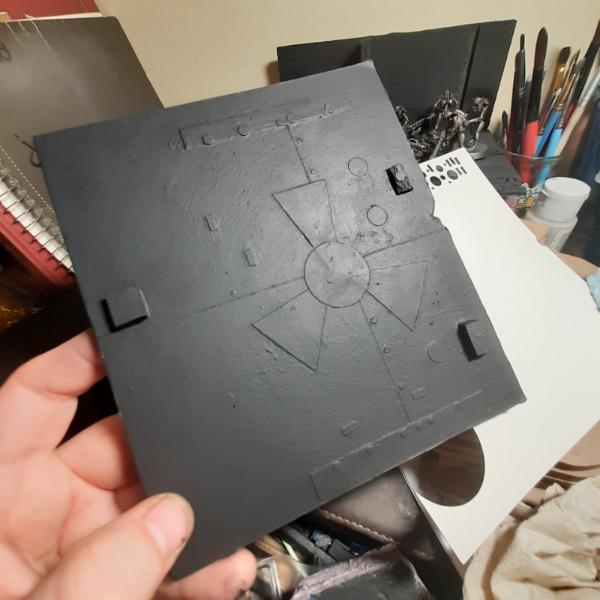
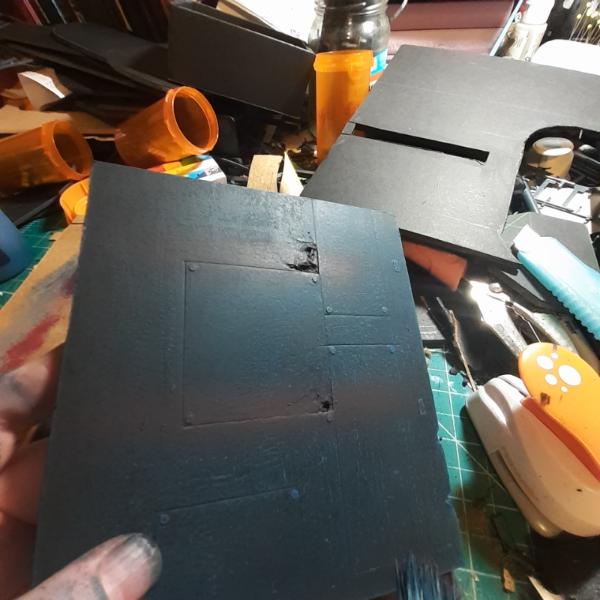
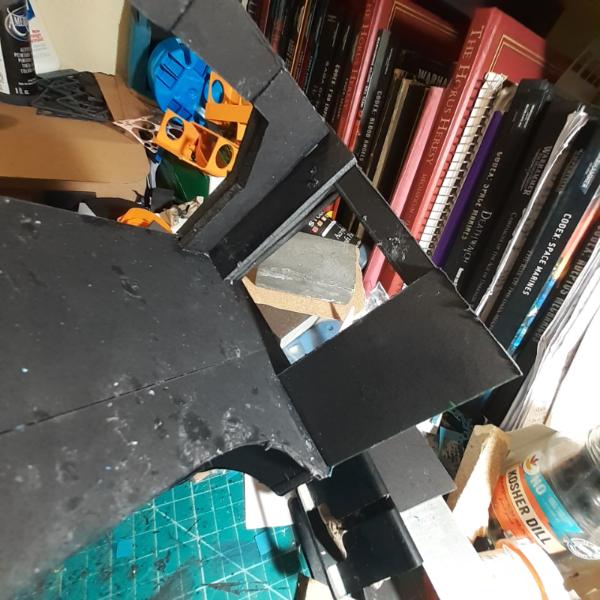
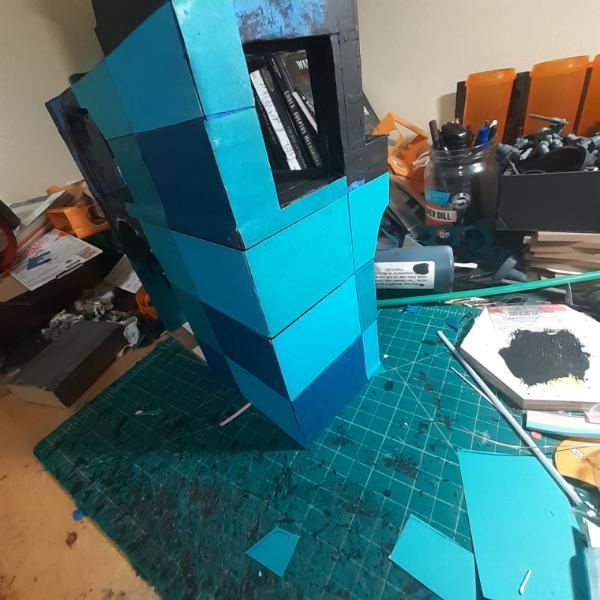
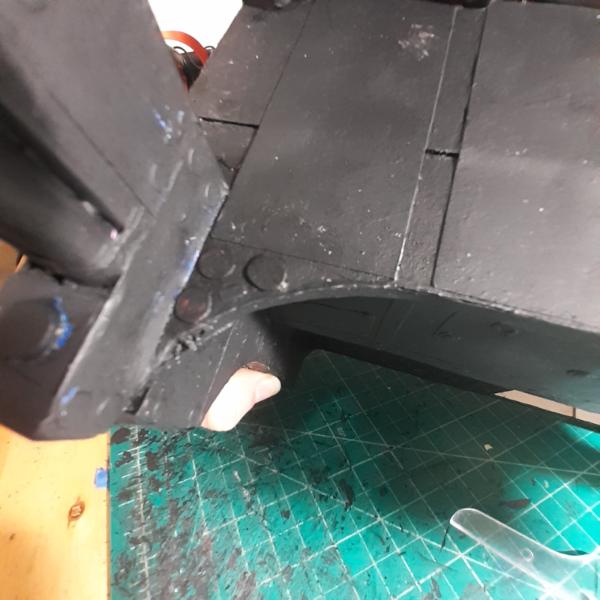
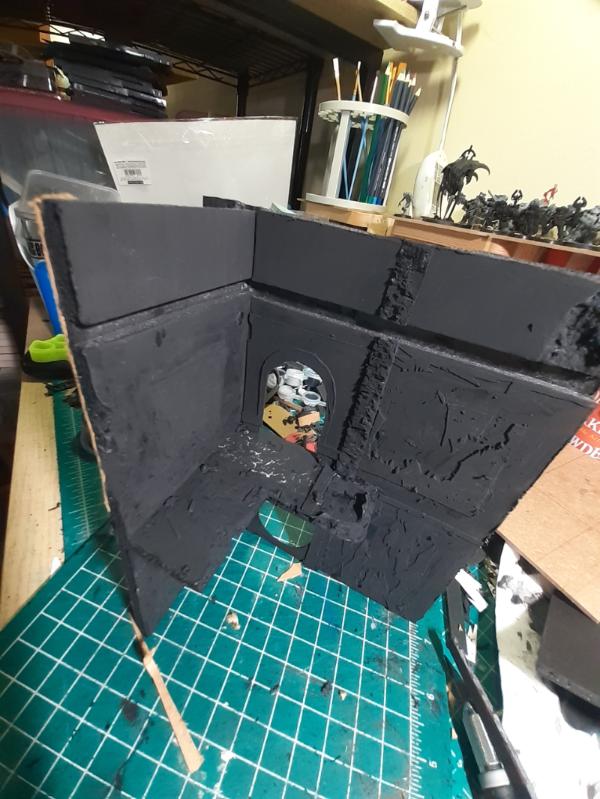
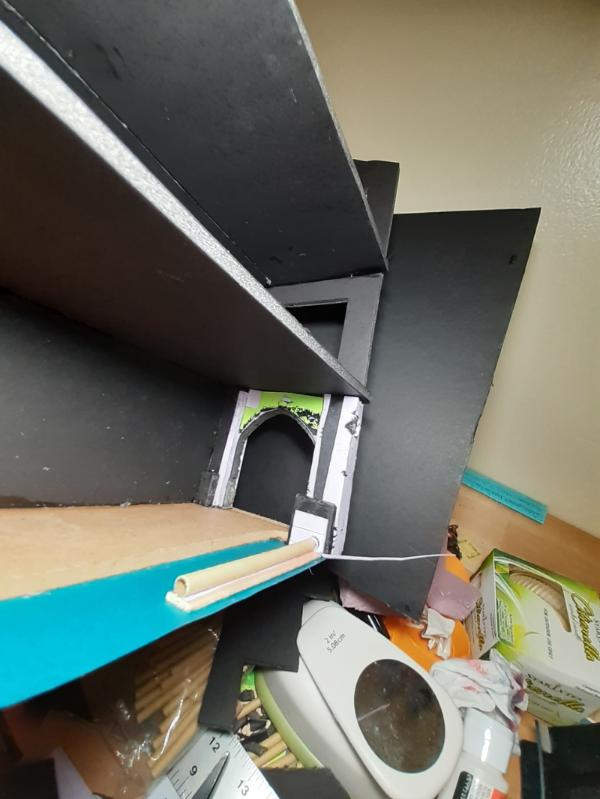
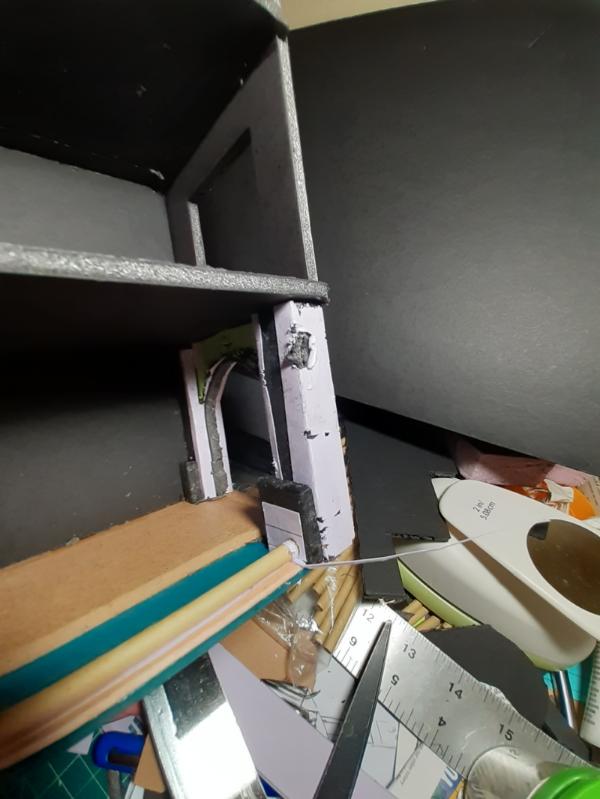
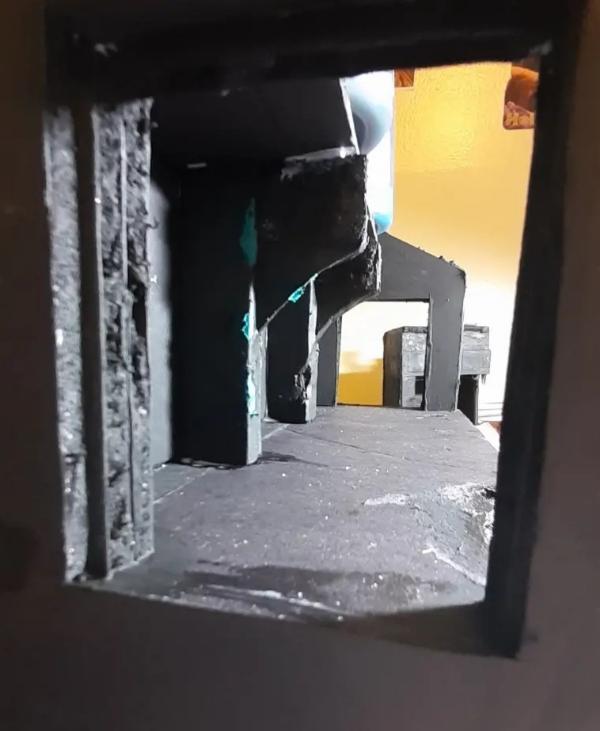
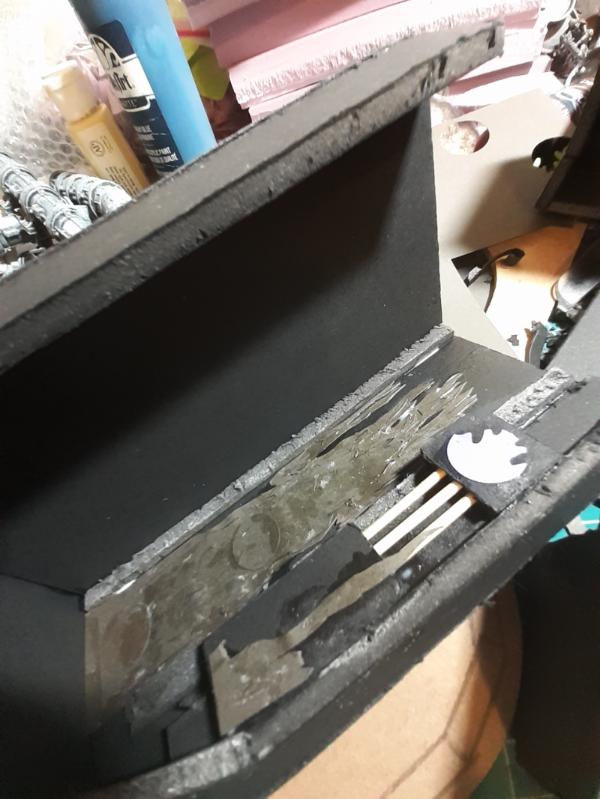
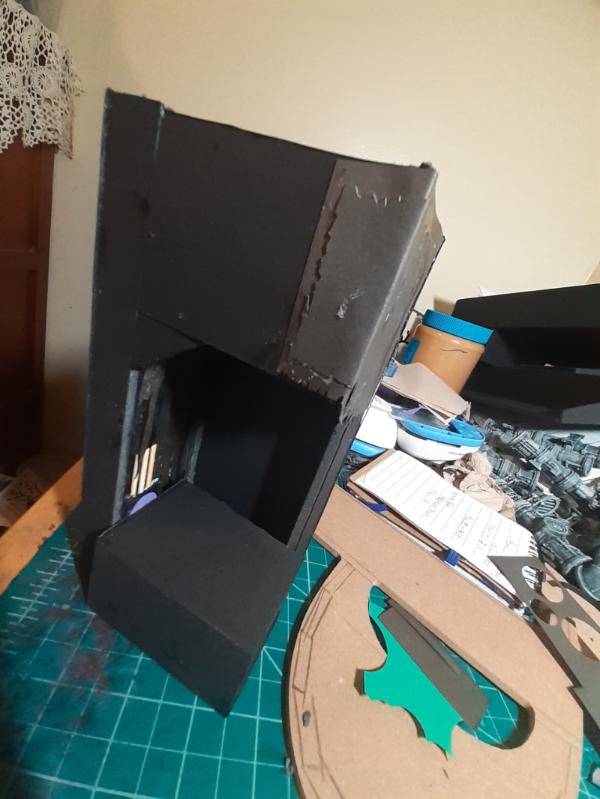
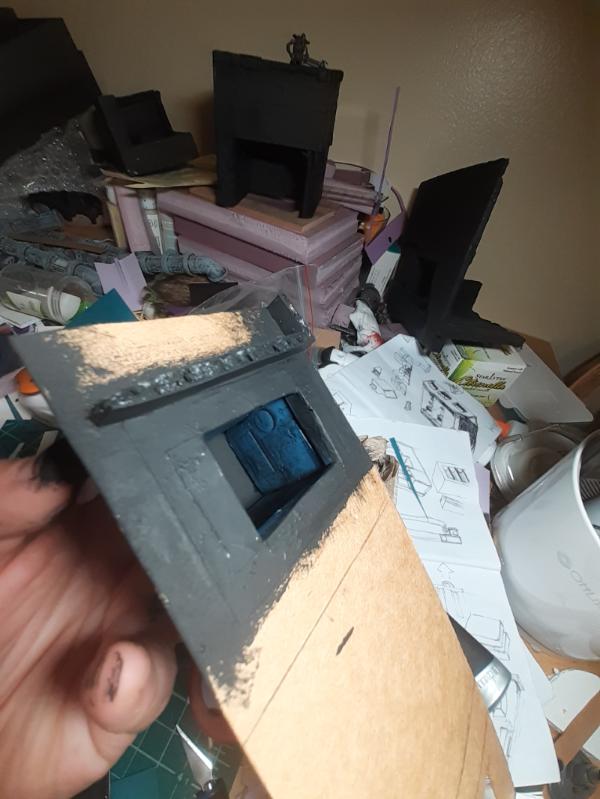
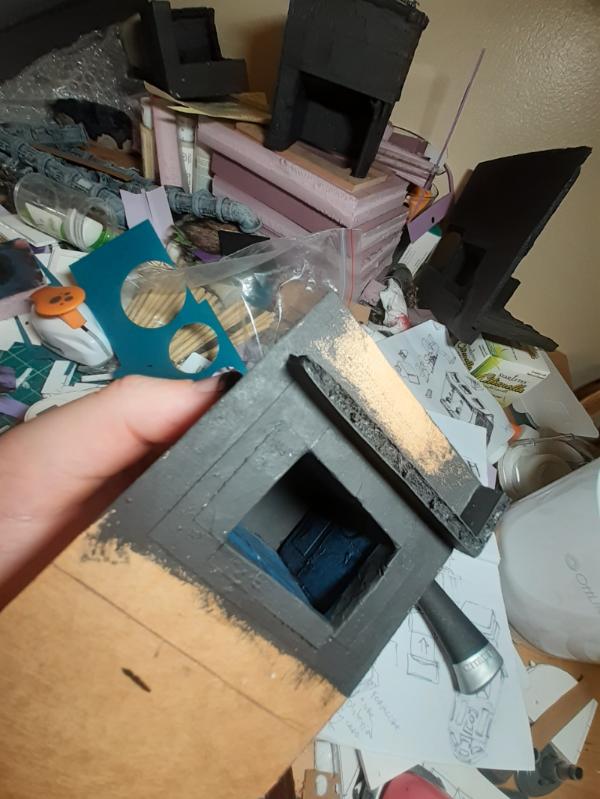
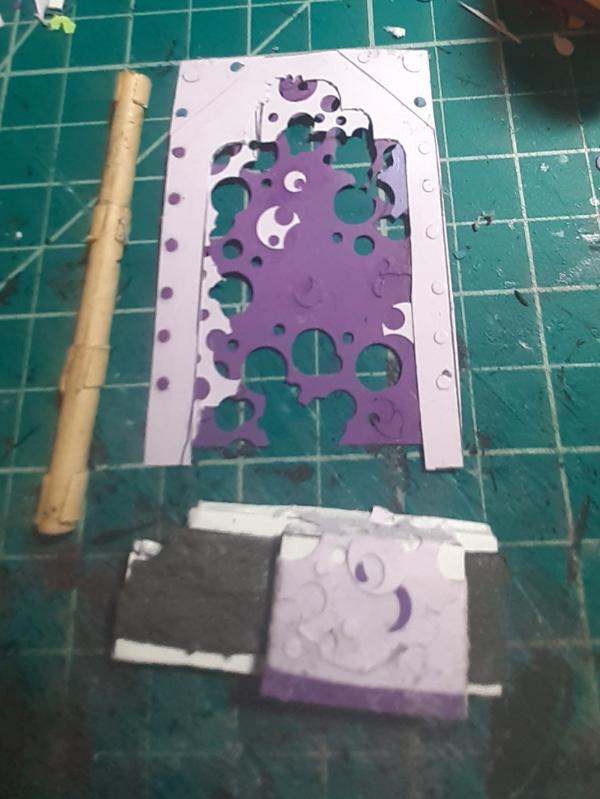
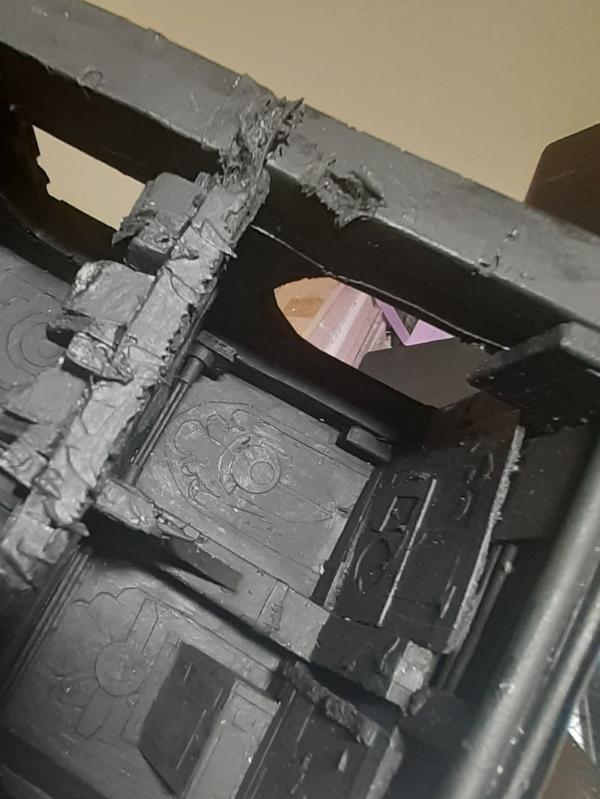
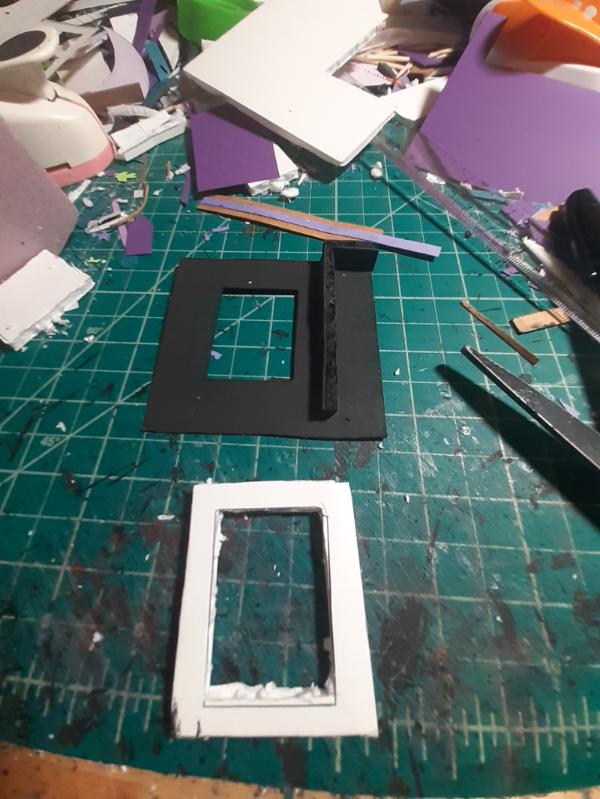
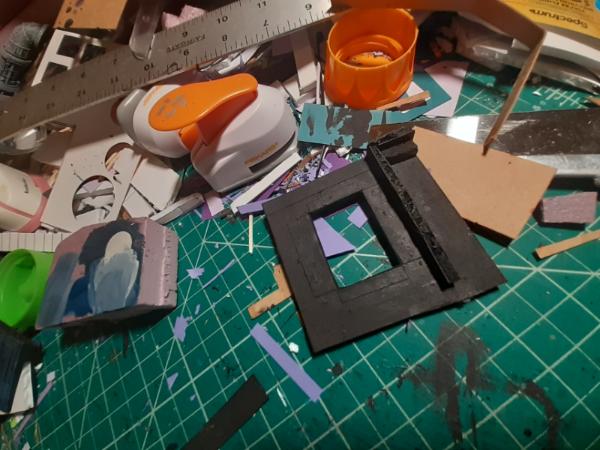
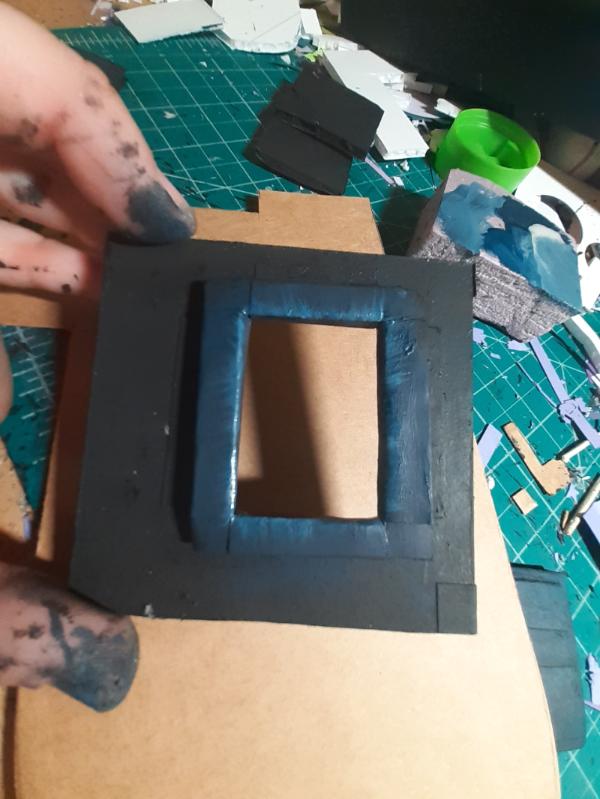
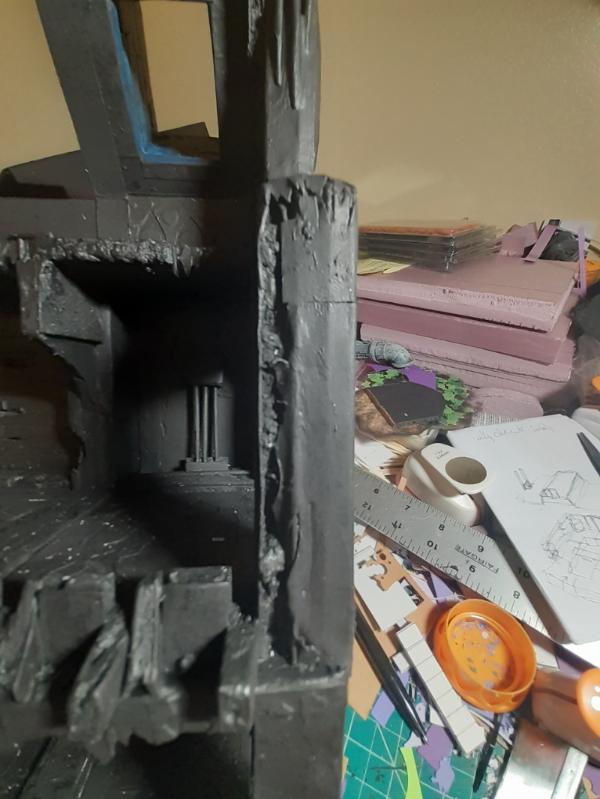
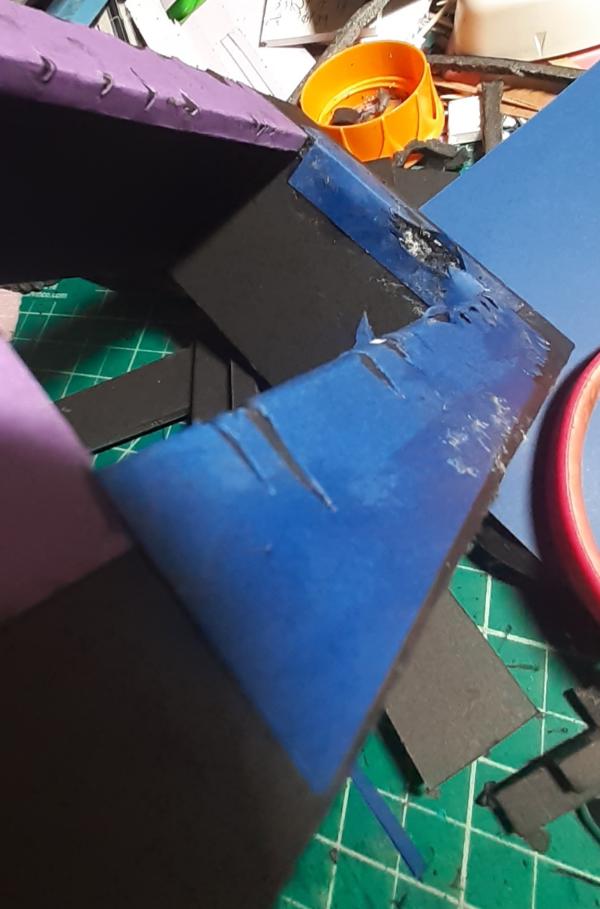
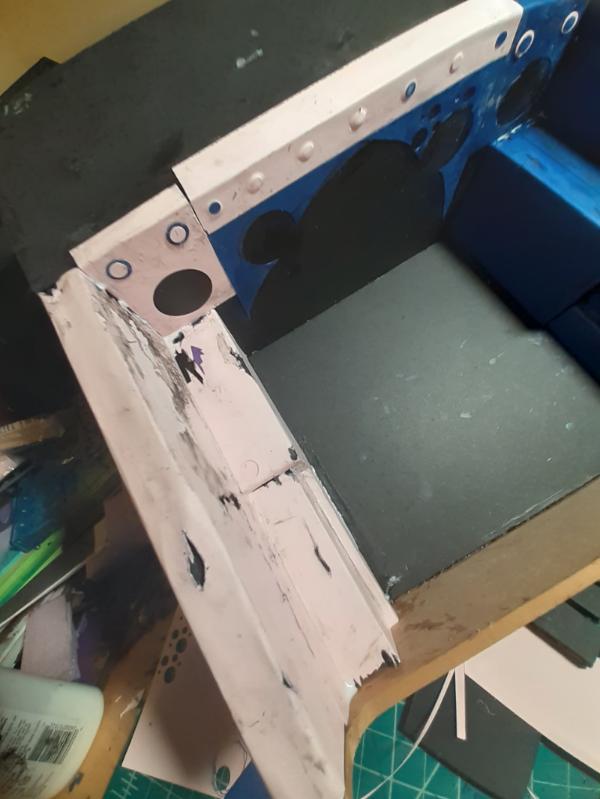
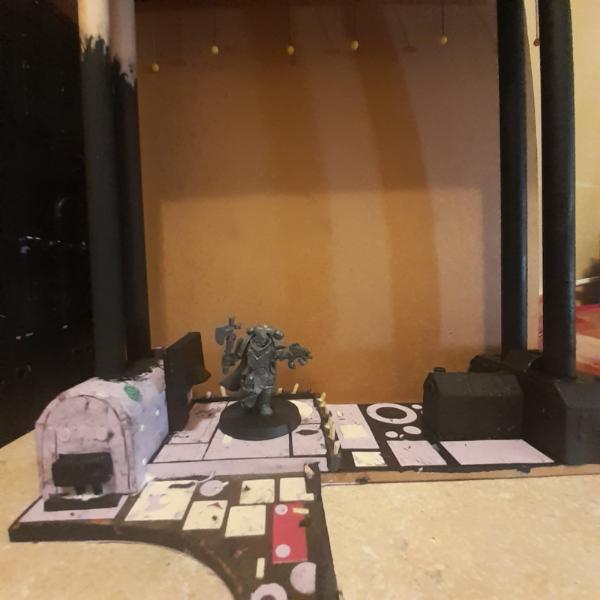
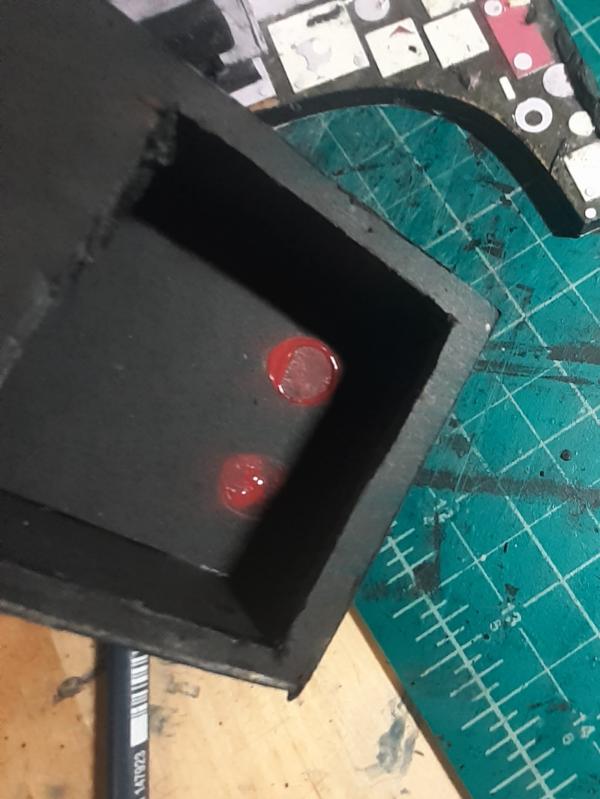
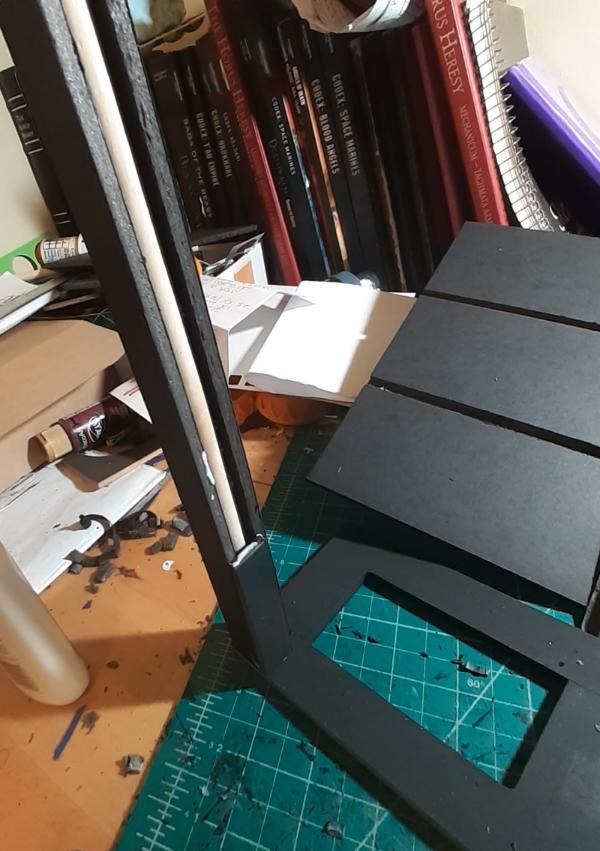
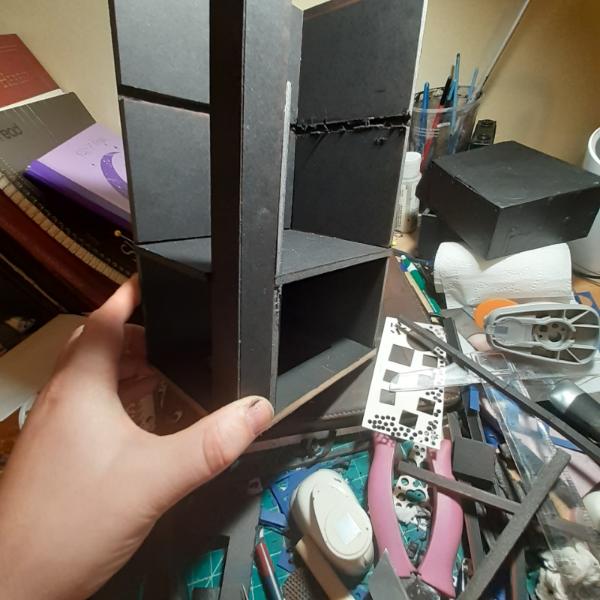
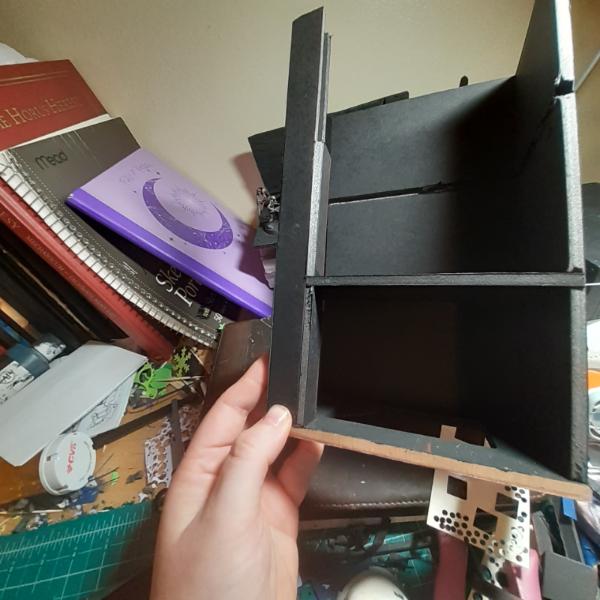
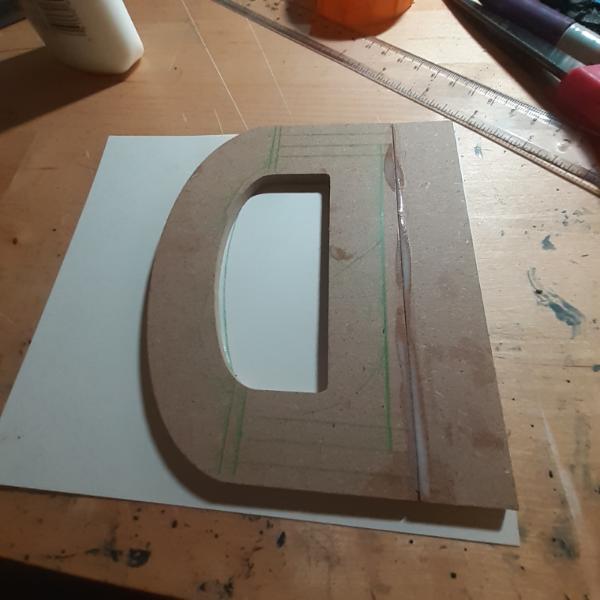
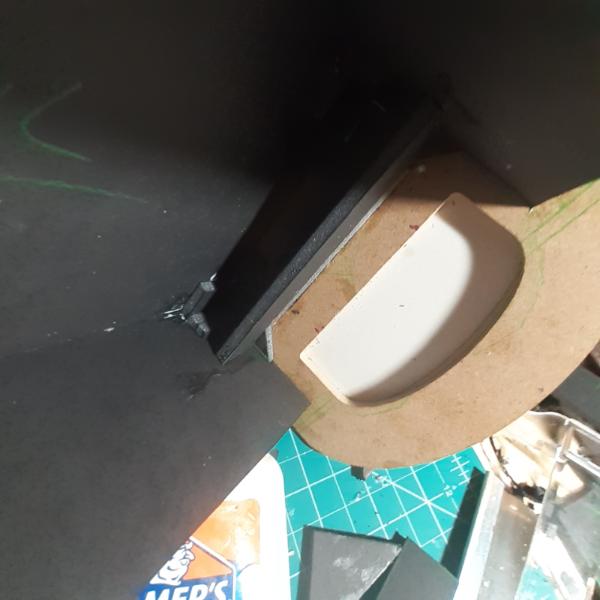
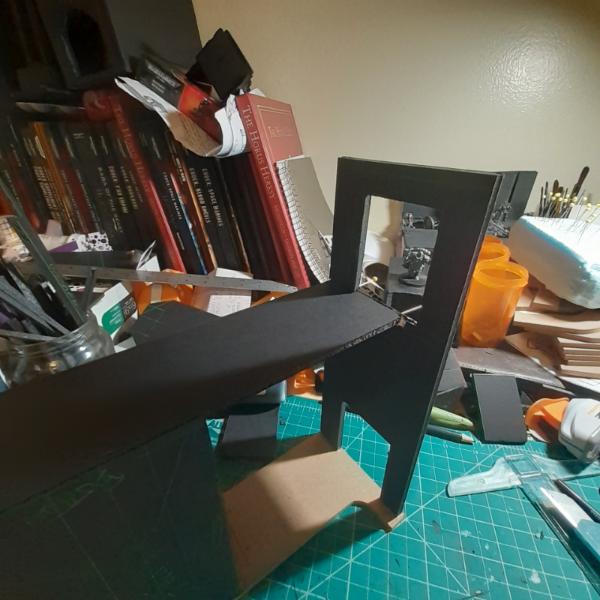
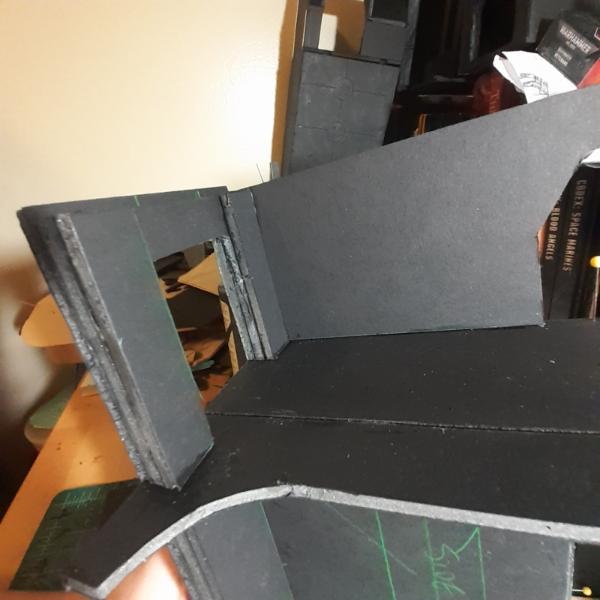
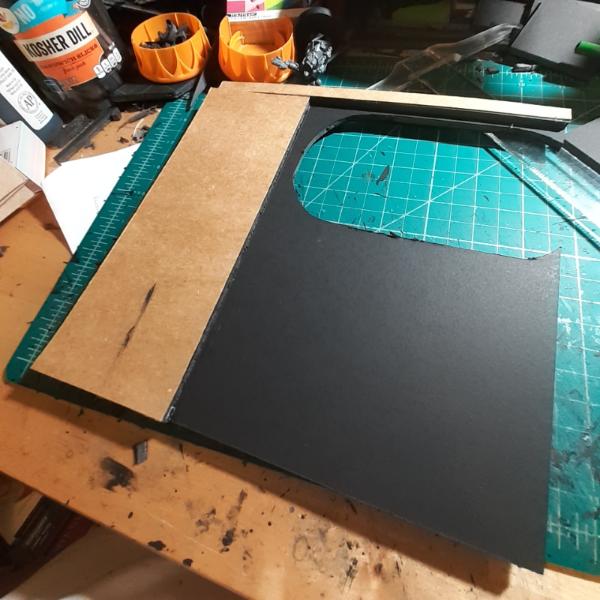
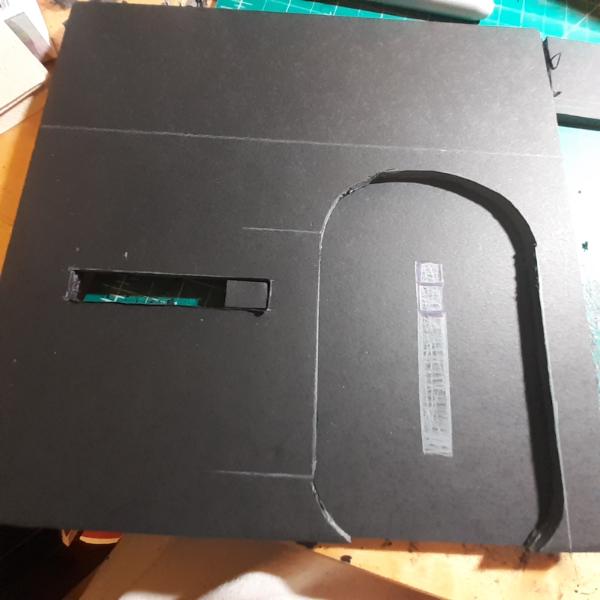
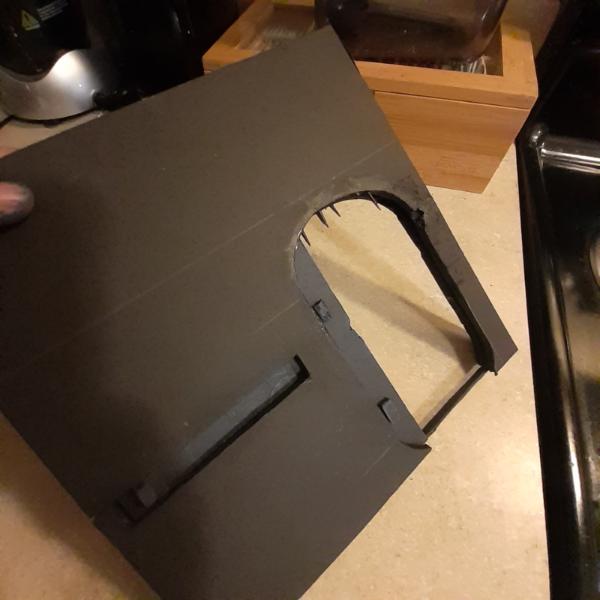
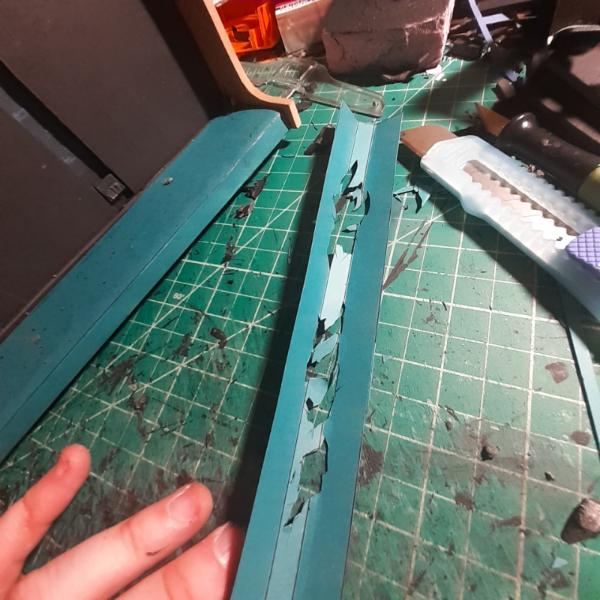
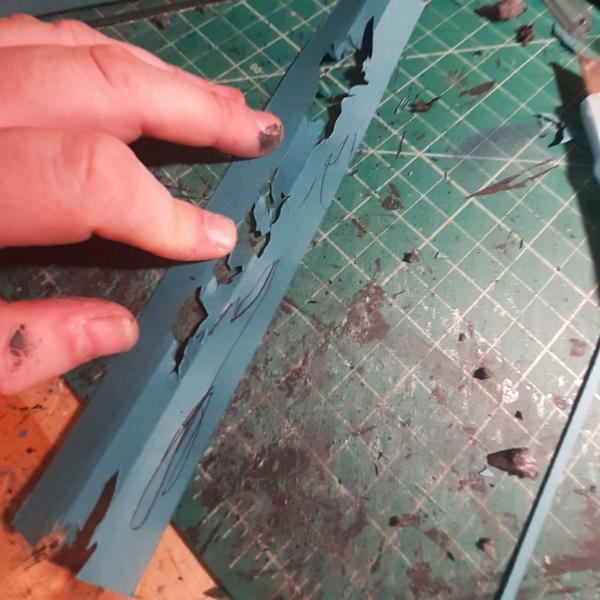
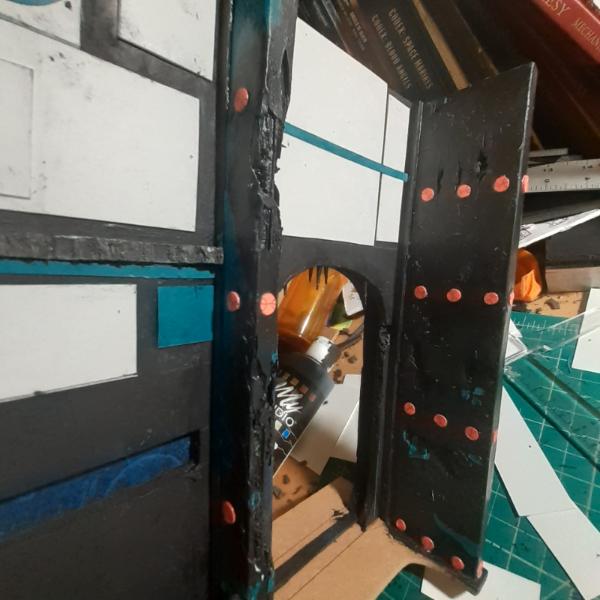
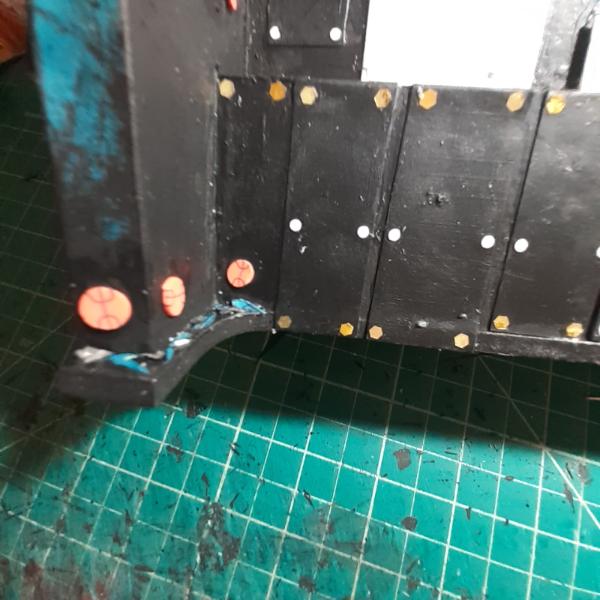
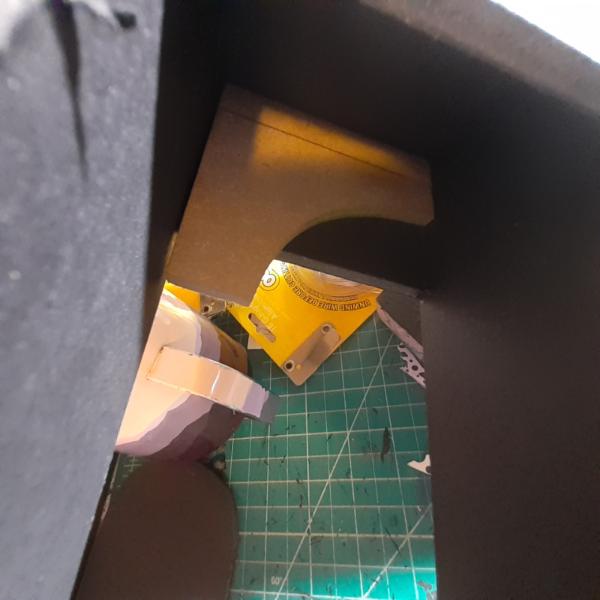
But in the meanwhile, I had the ambition to construct a working gigantic door. All kinds of stories circulate in my head about why it exists, but I don't want to spoil the Mission details in case my potential players peruse this site and blog.
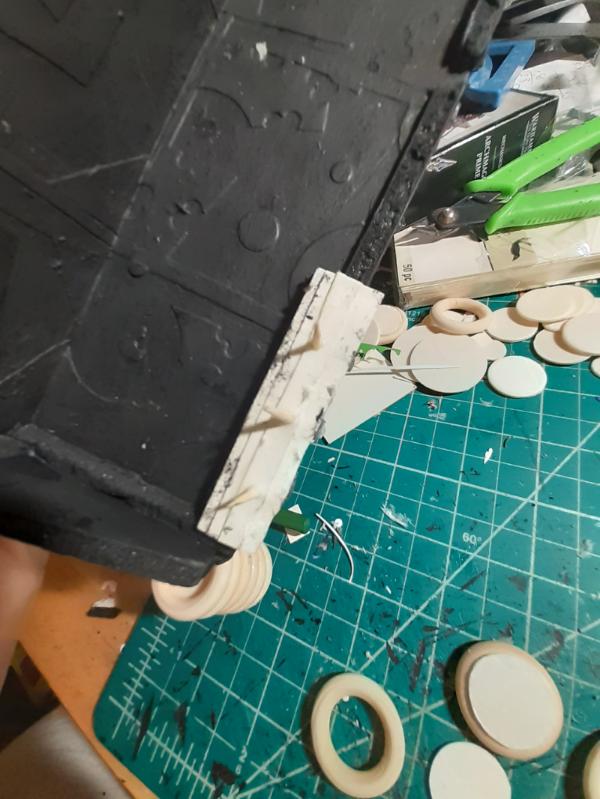
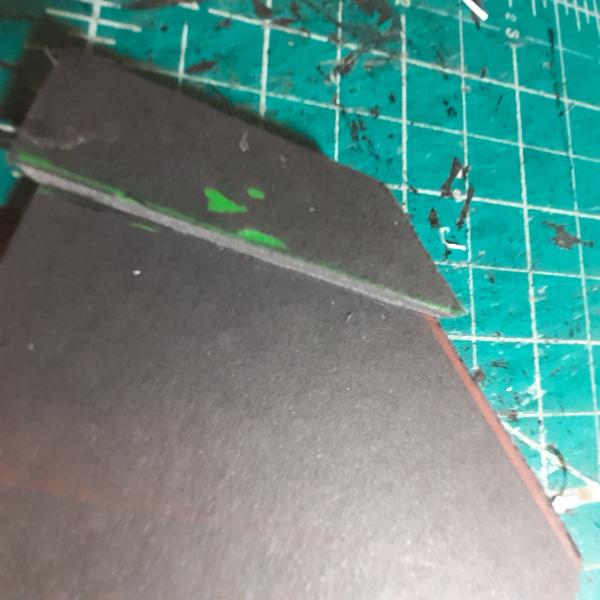
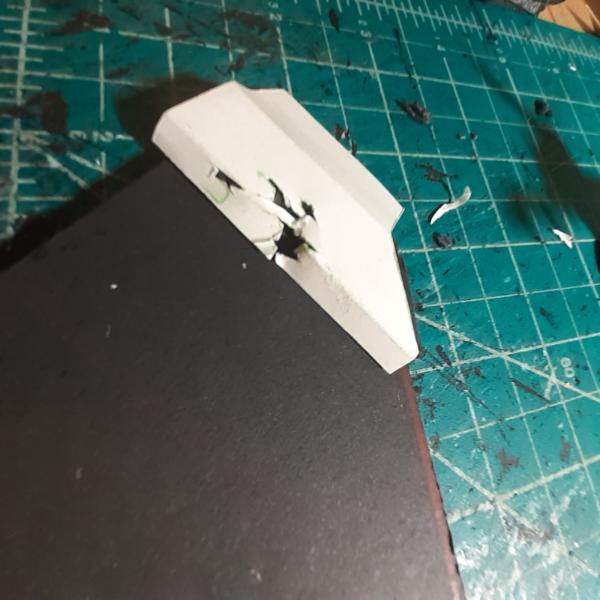
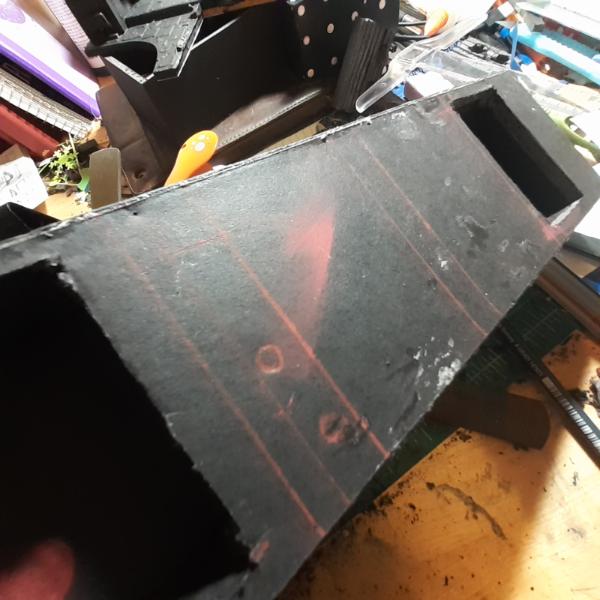
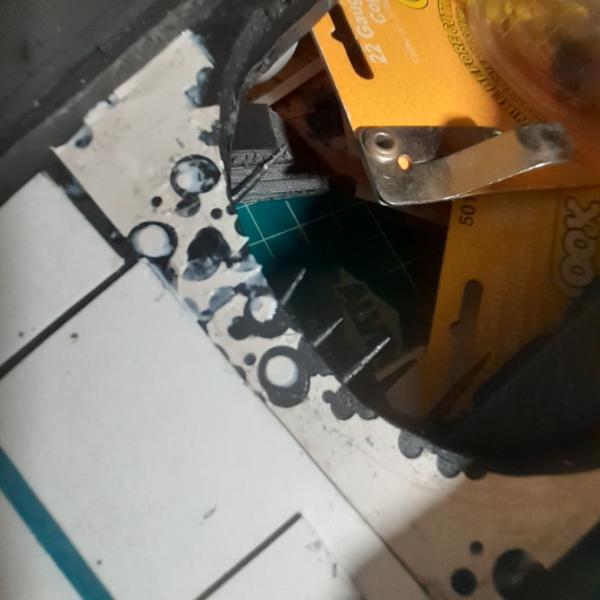
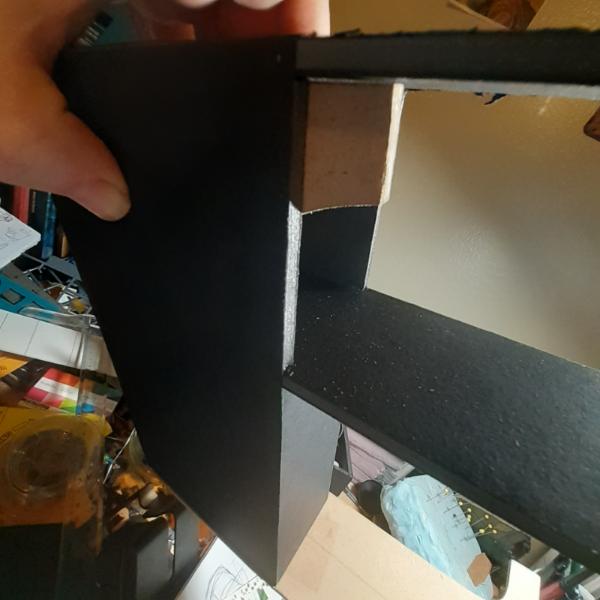
I started with a very basic shape, at the total height of most of my other pieces (roughly 9 and three quarter inches tall) and carved out a hole roughly the size and shape of the archway on the other piece. Then I built up some interior spacers in the form of another layer of foamcore and a 1mm thick cardstock layer. I added in a runner on the bottom which is literally just one of the cast off strips I have dozens of from trimming previous walls and things. Then I cut a grove in the outermost wall and used it as a guide for the size and mechanism of the door.
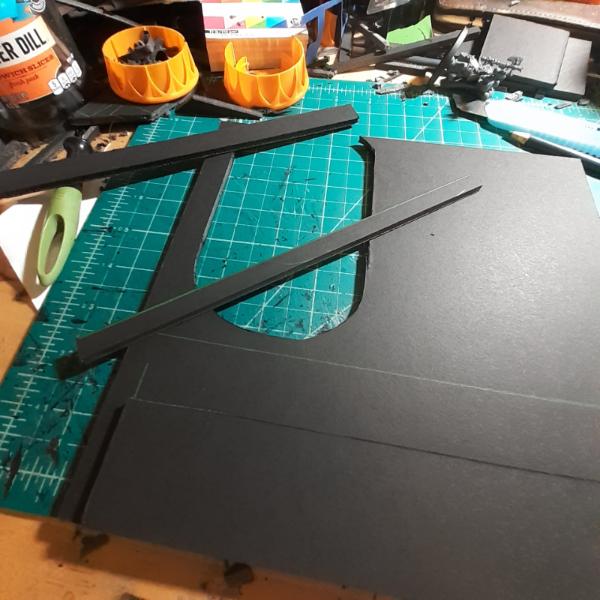  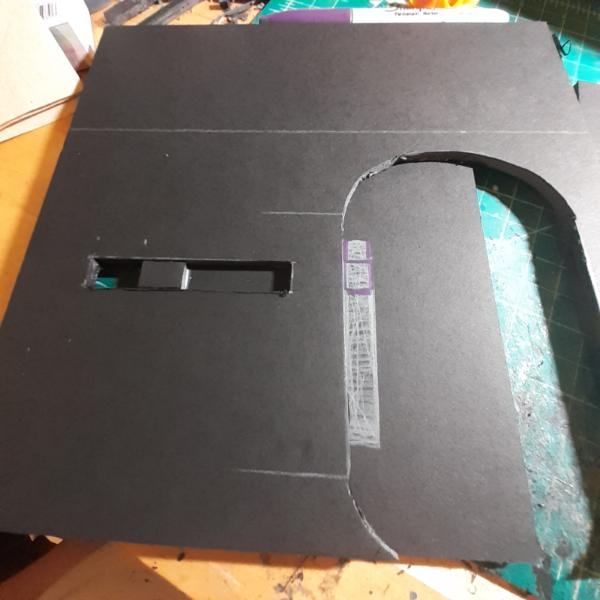  
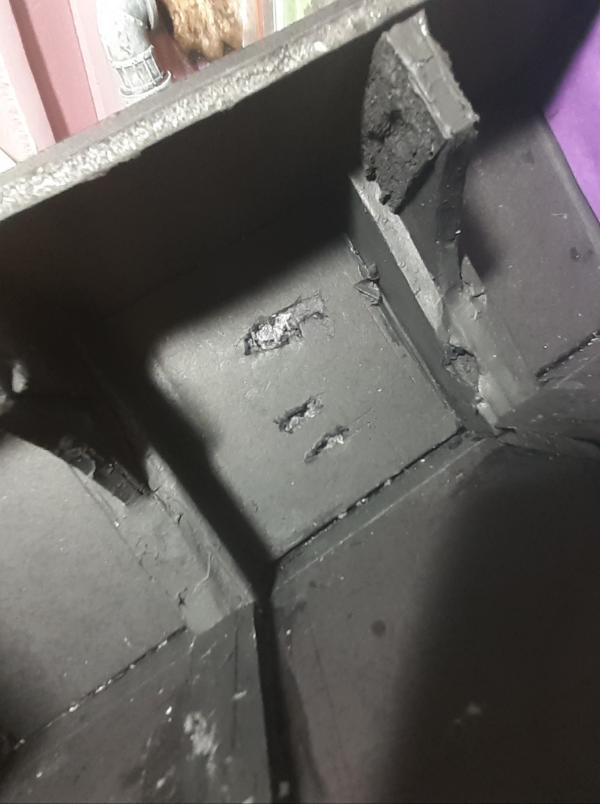
That groove ended up being too short to let the door open as much as I wanted it to, so I cut it (probably too much) and then was forced to awkwardly pin the stopper back in place.
I'll post up more progress on one or more of these projects as I make headway. Thanks for looking and have an awesome day!
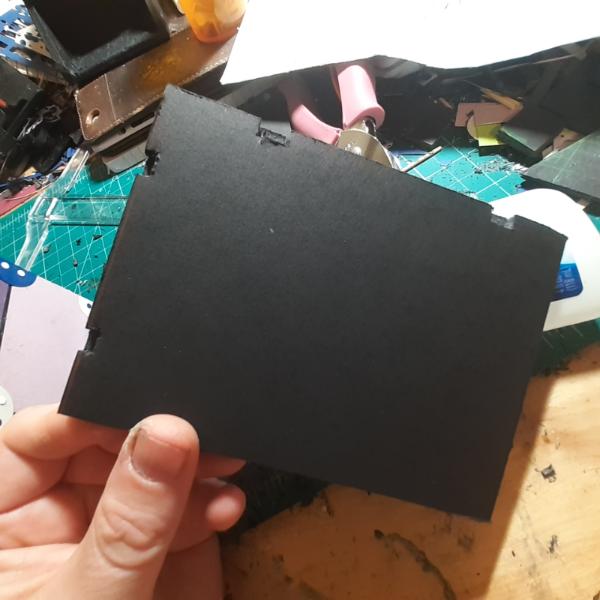
130403
Post by: blockade23
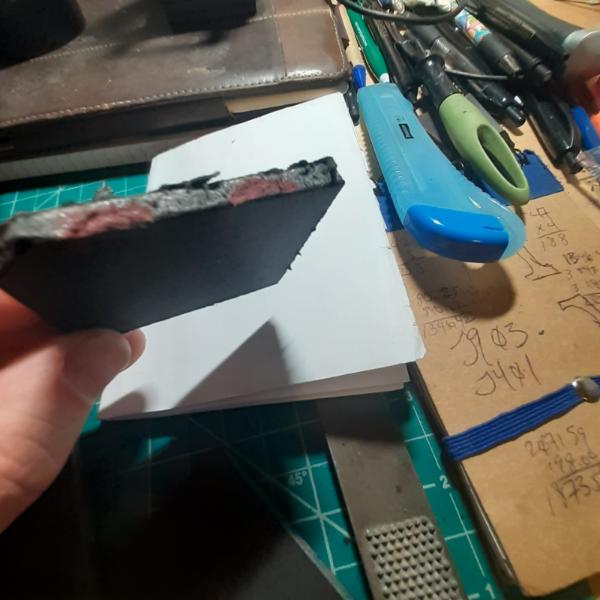
looking great! I love the black foamcore more than the white foamcore - it definitely just feels more substantial for some reason (and painting it is easier!)
76303
Post by: Warboss_Waaazag
98217
Post by: Skinflint Games
That's a really cool effect there, very convincing!
76303
Post by: Warboss_Waaazag
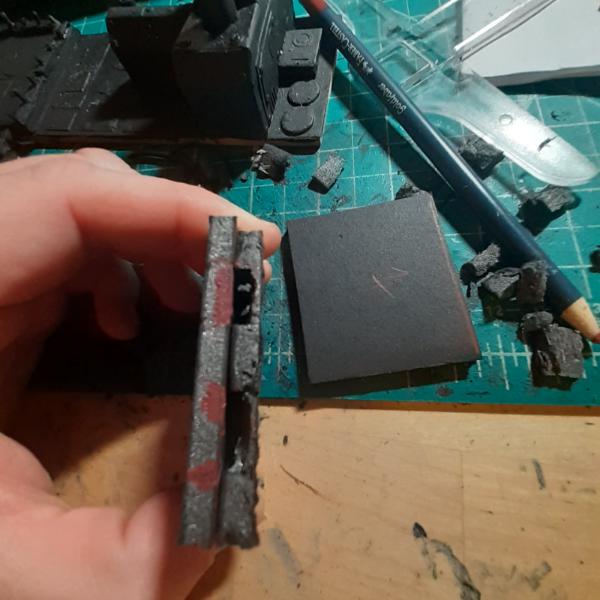
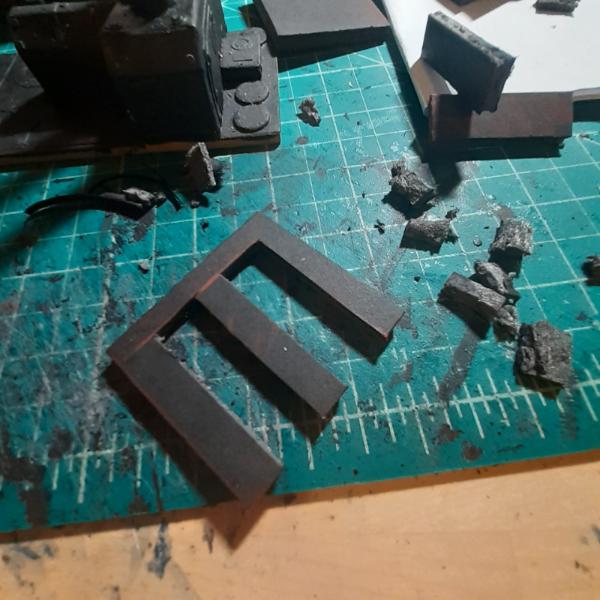
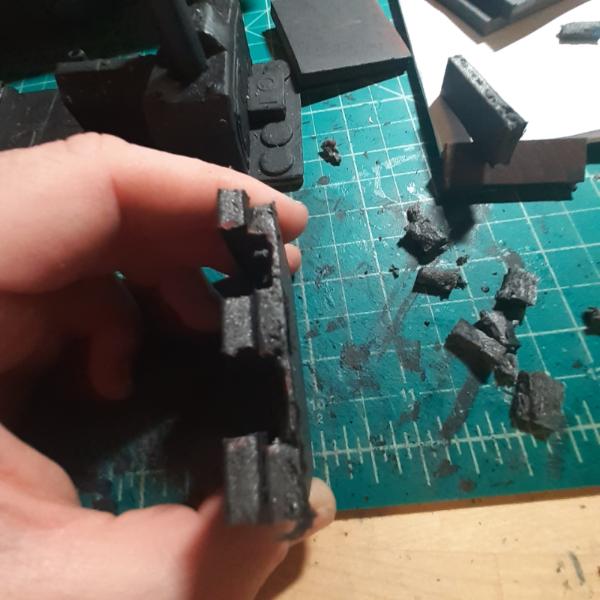
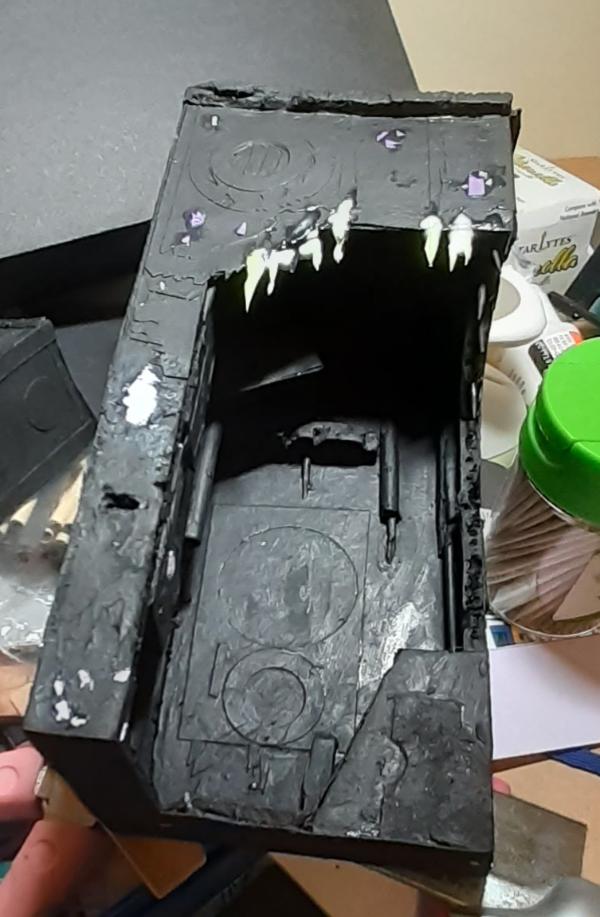
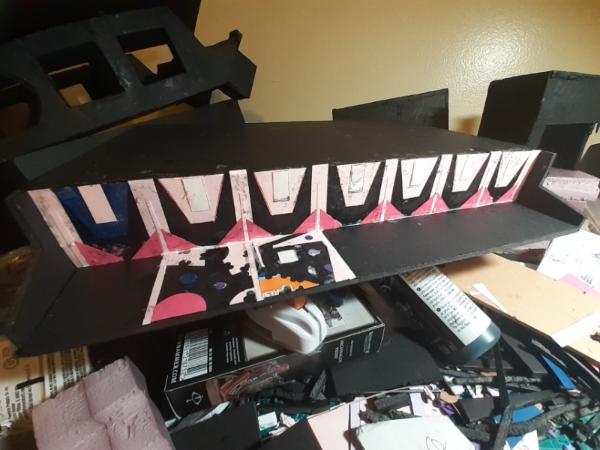
Thanks, Skinflint!
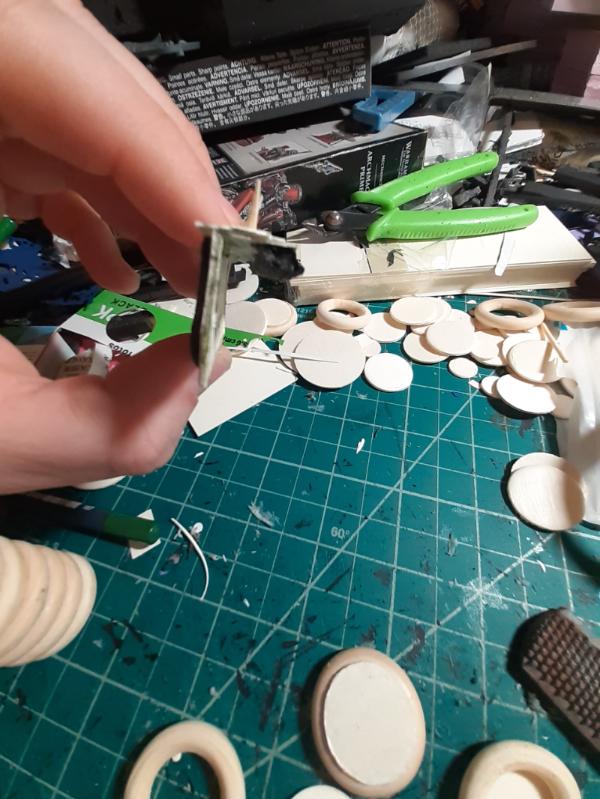
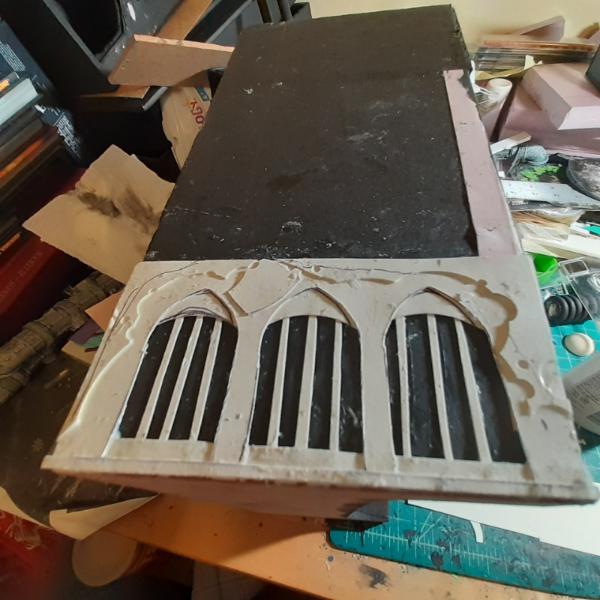
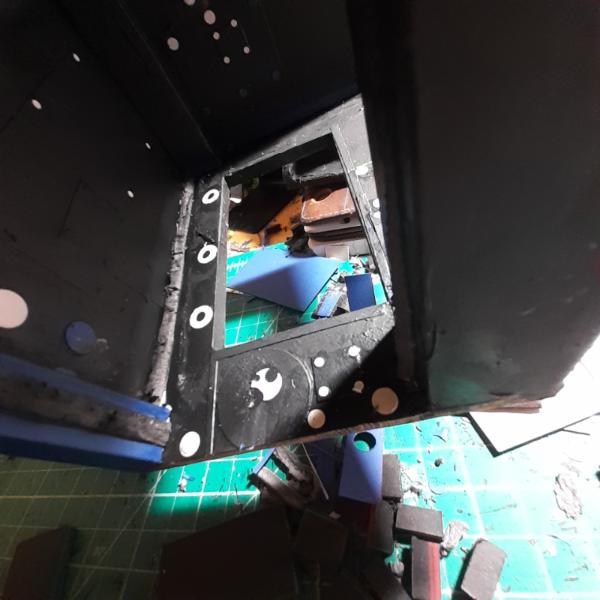
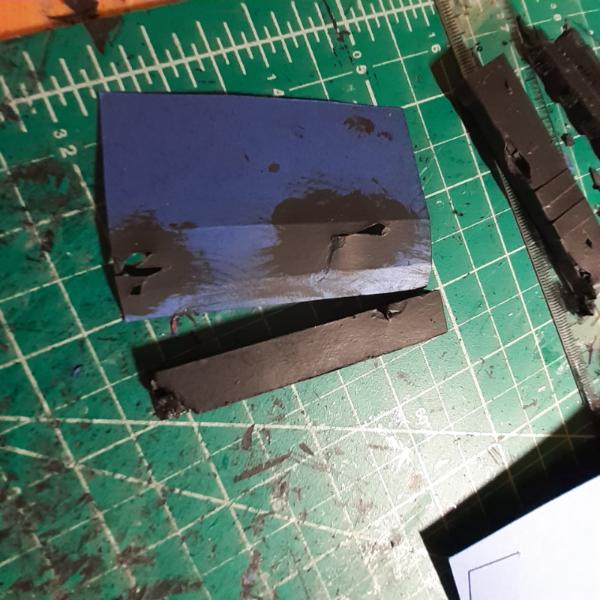
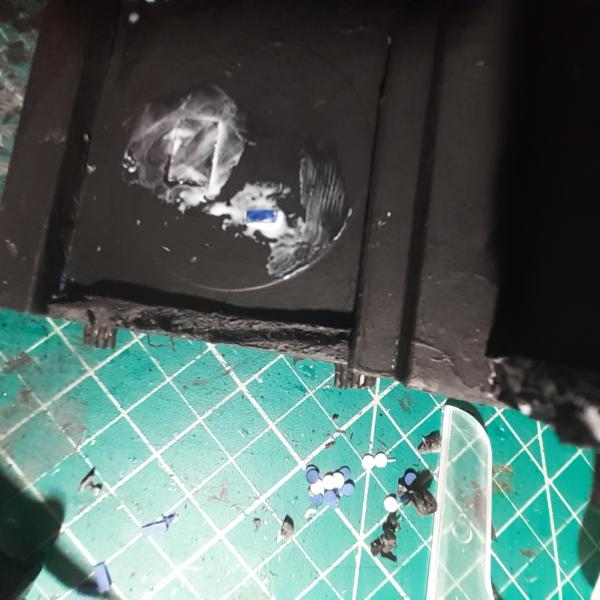
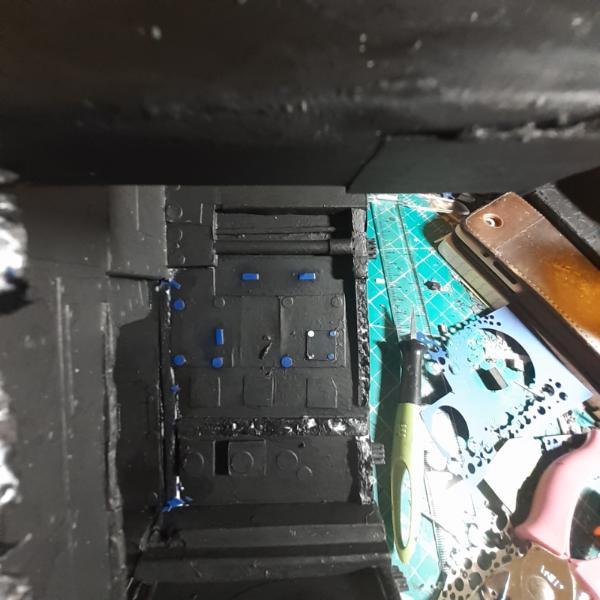
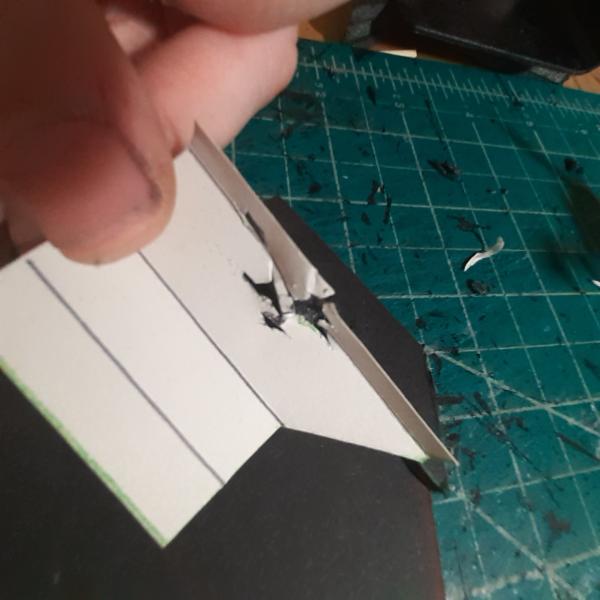
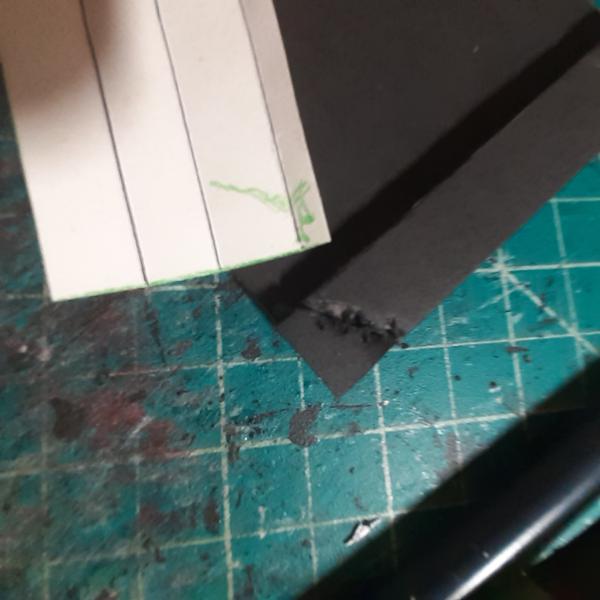
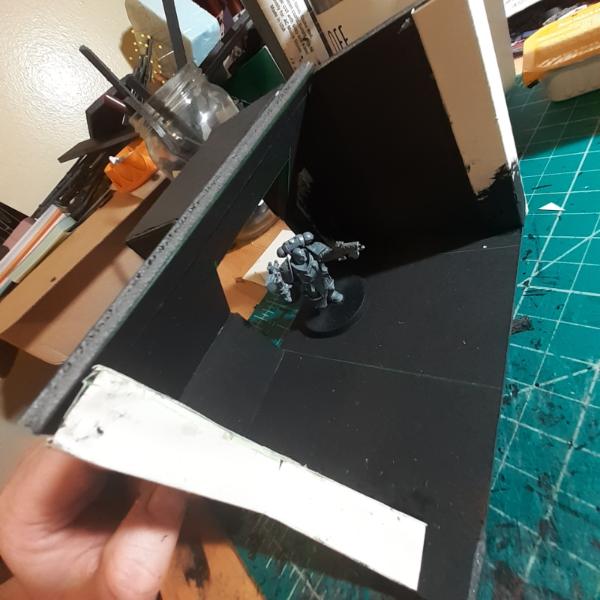
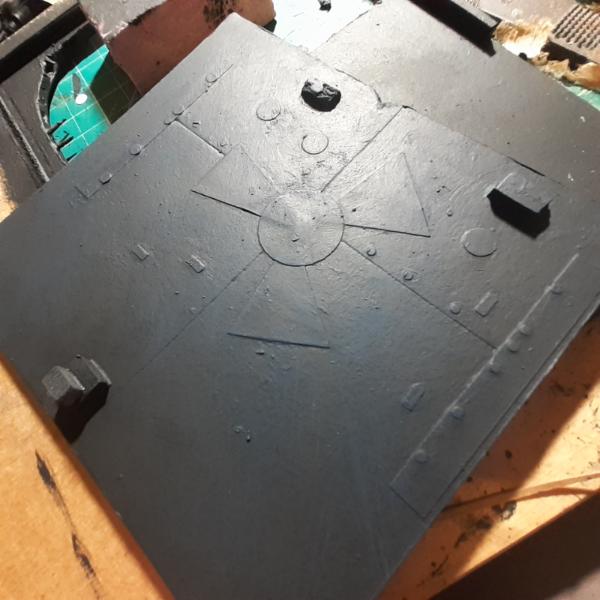
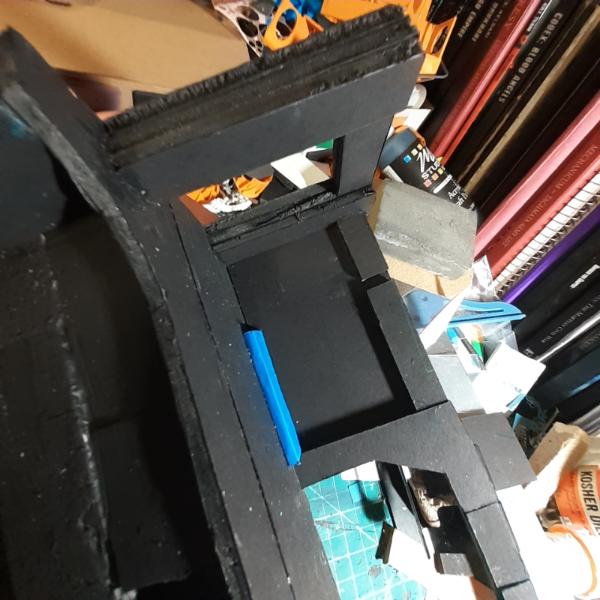
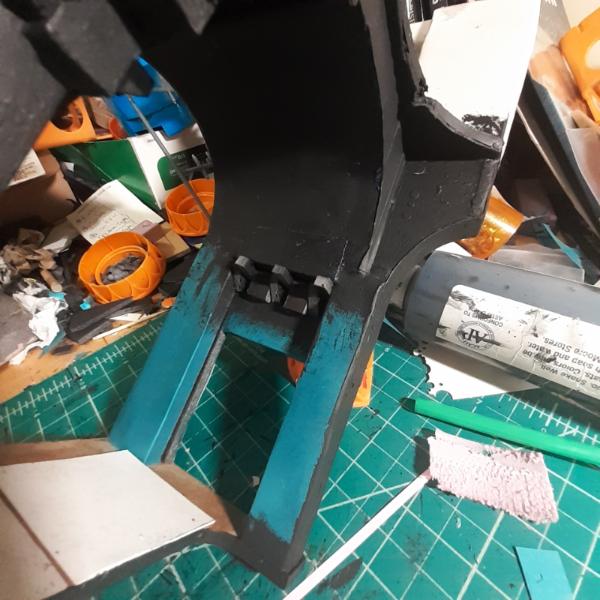
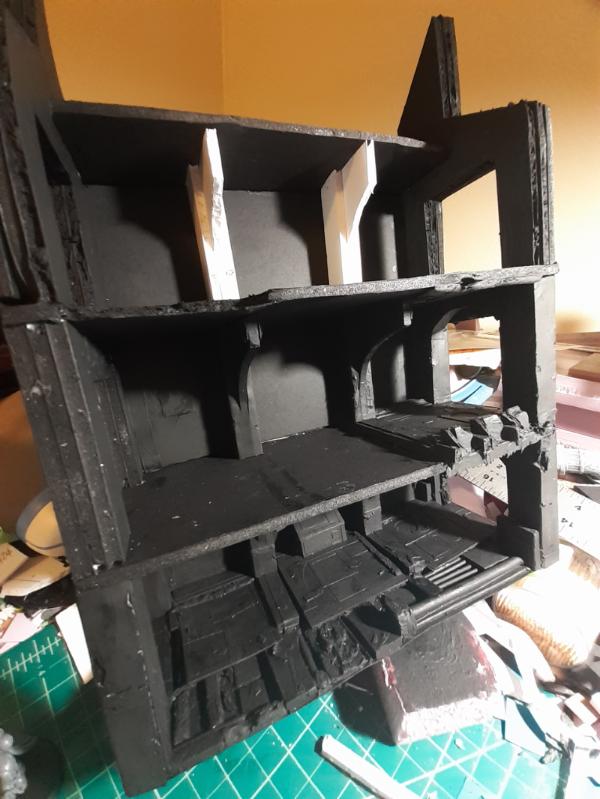
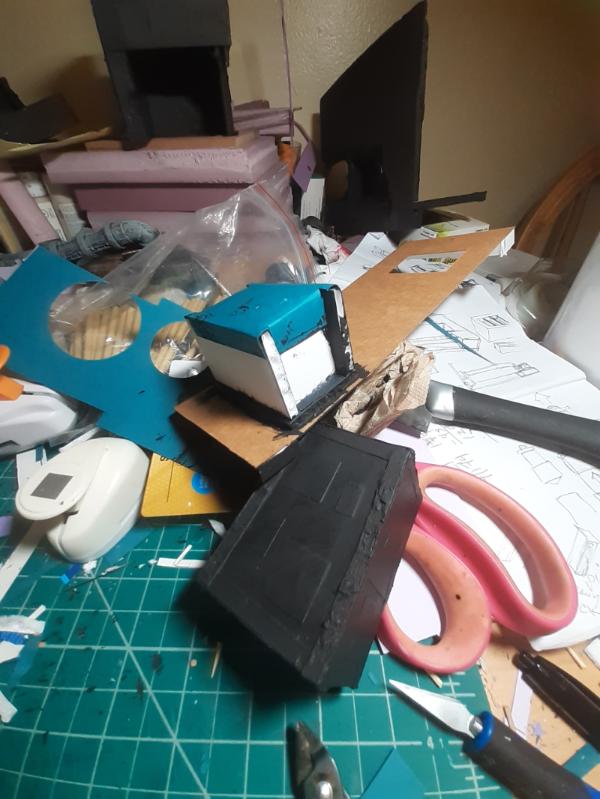
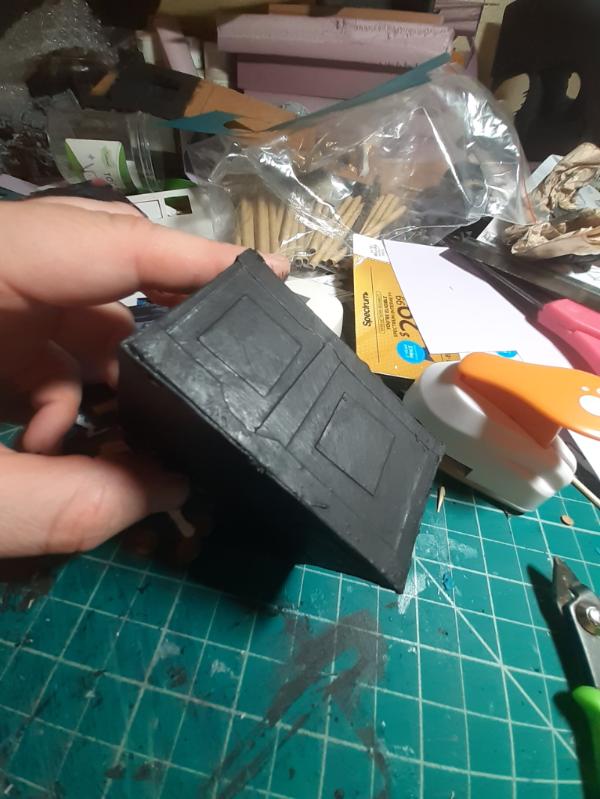
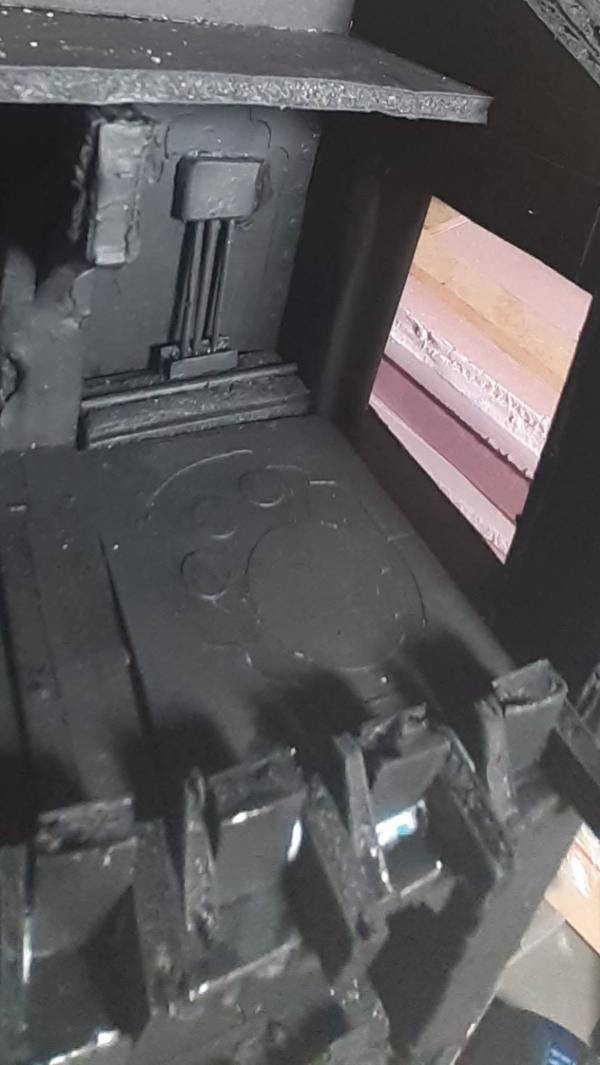
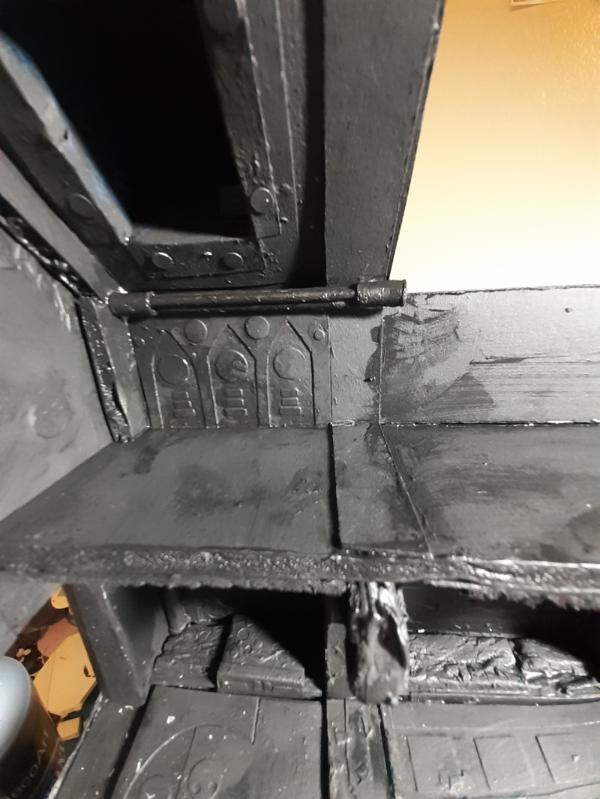
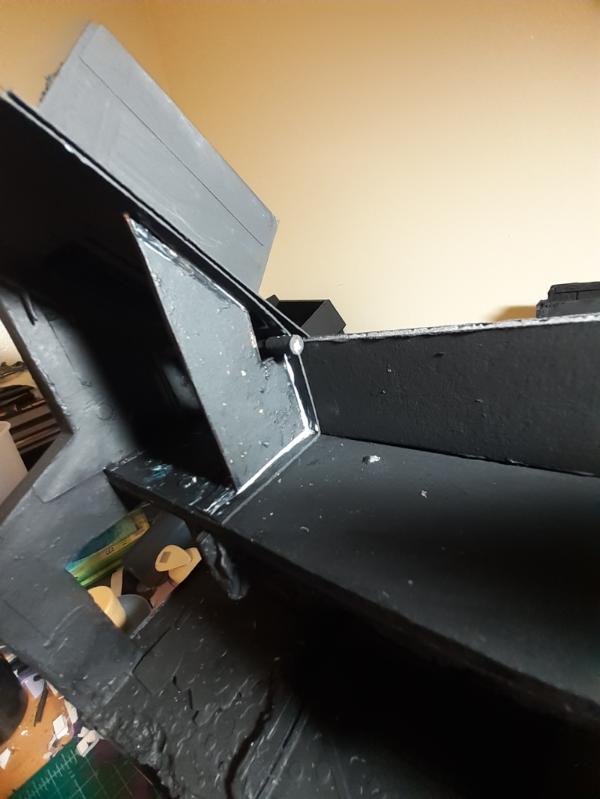
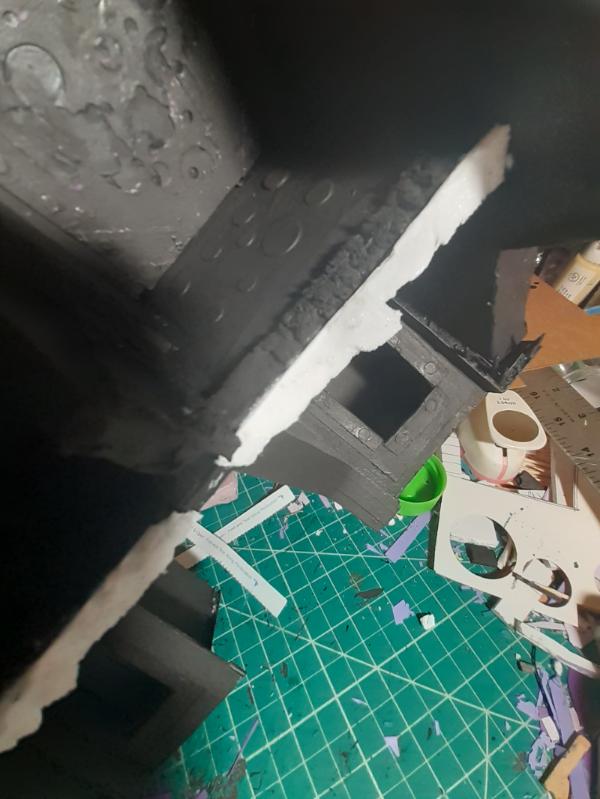
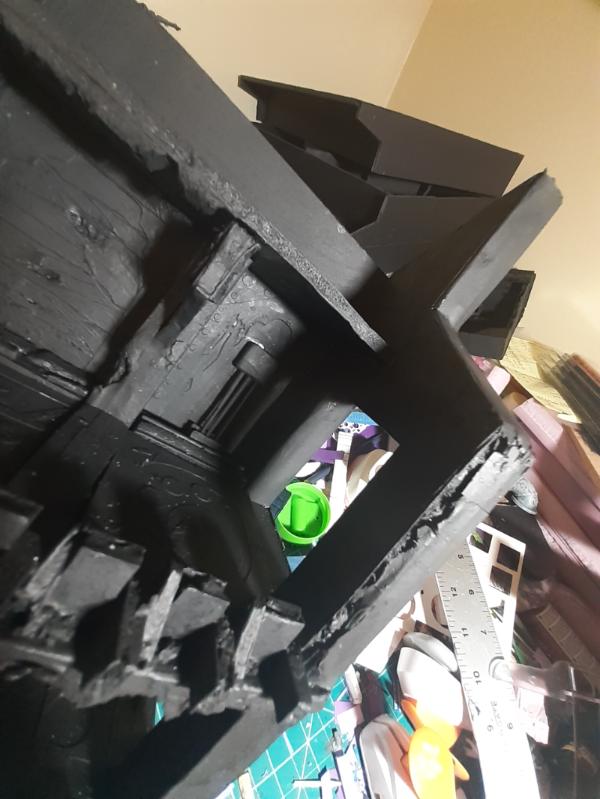
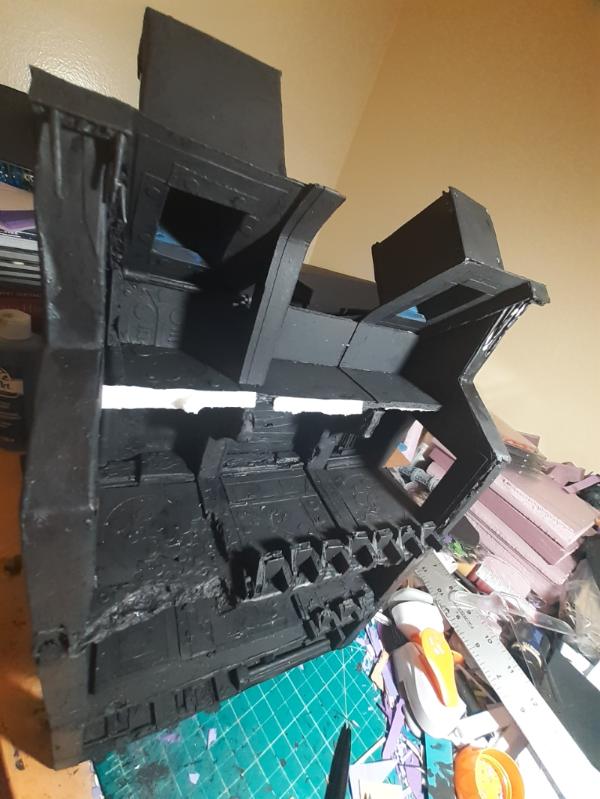
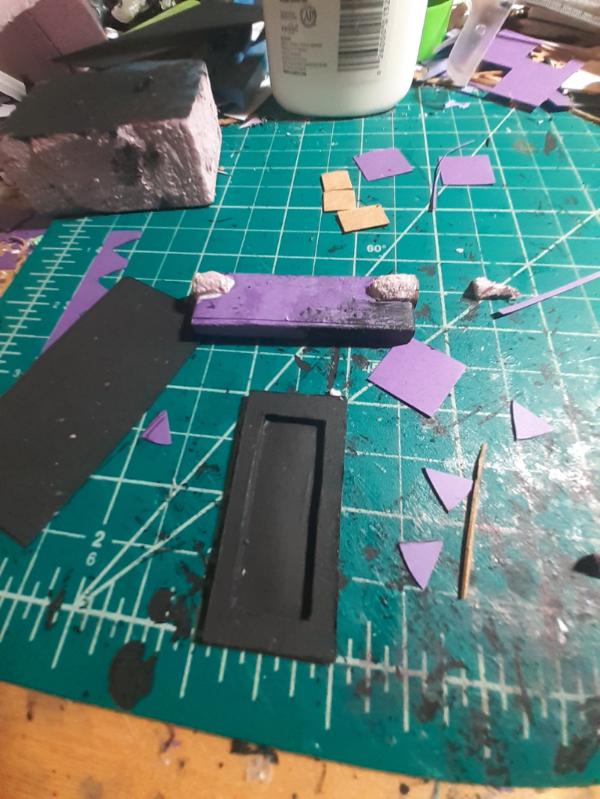
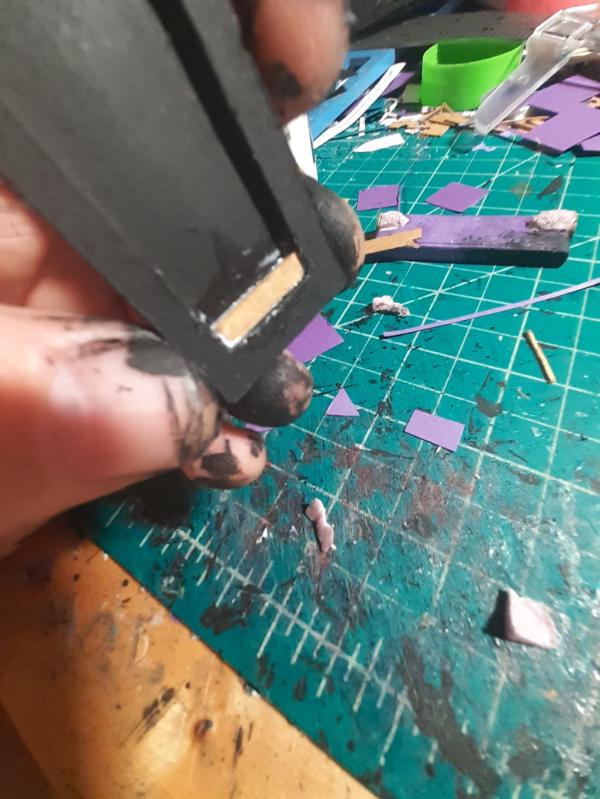
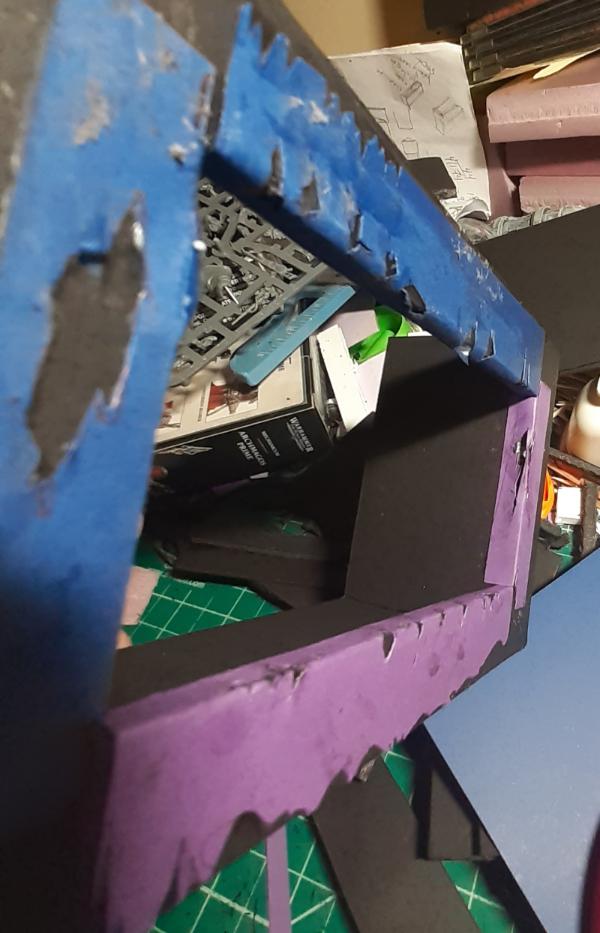
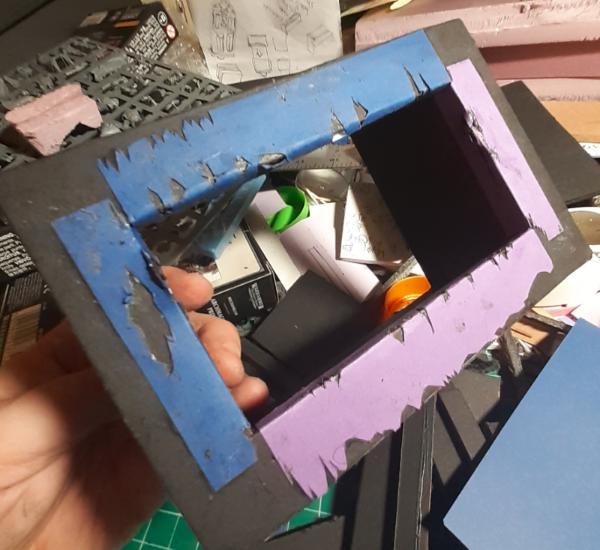
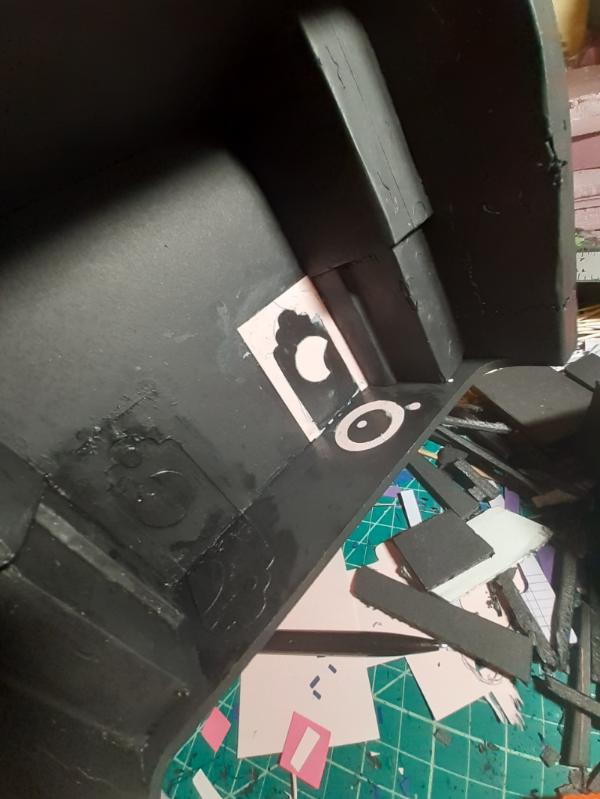
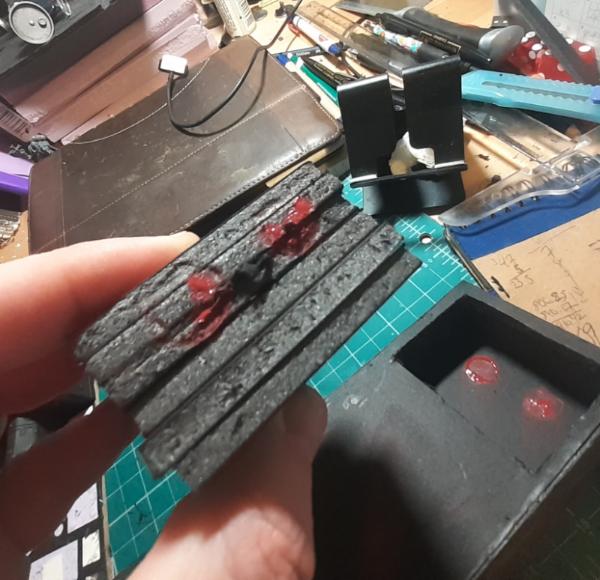
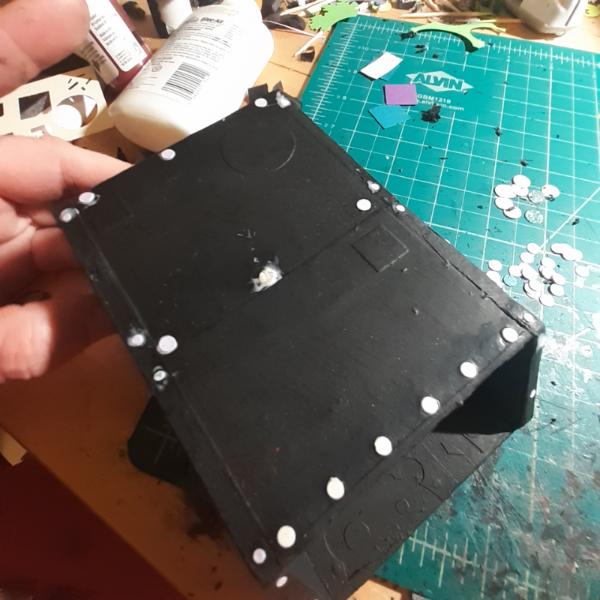
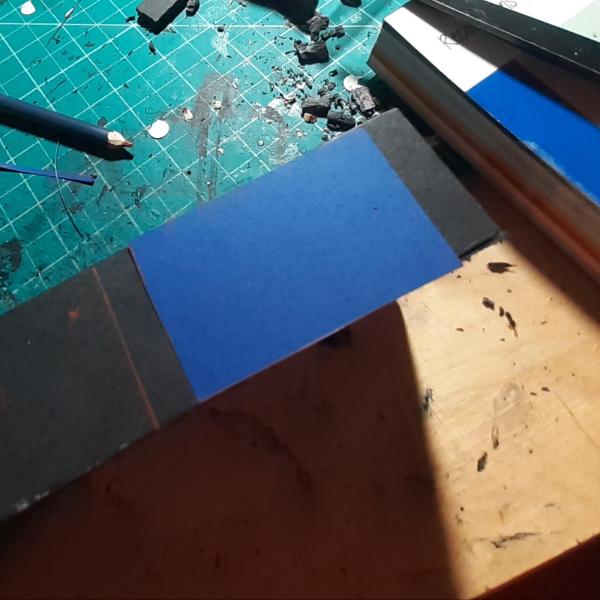
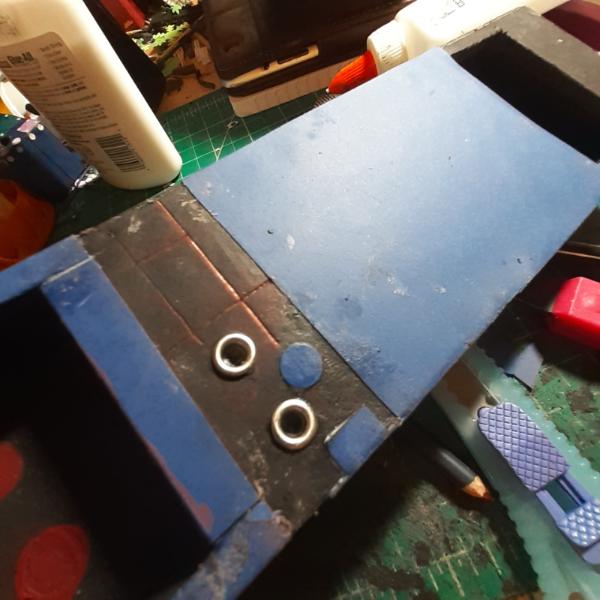
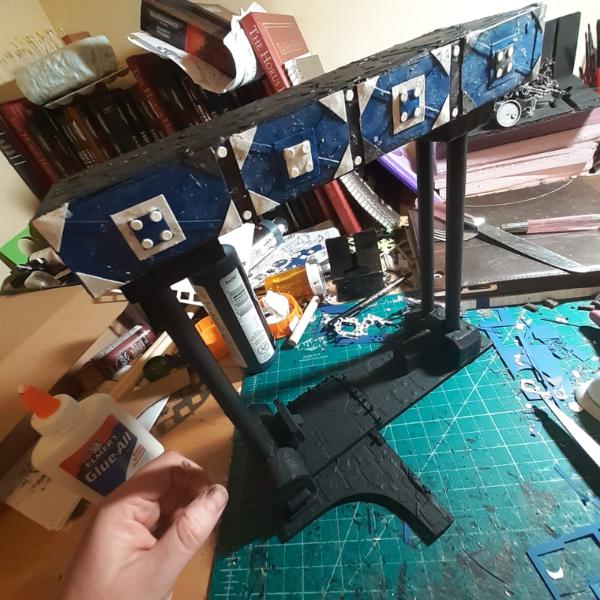
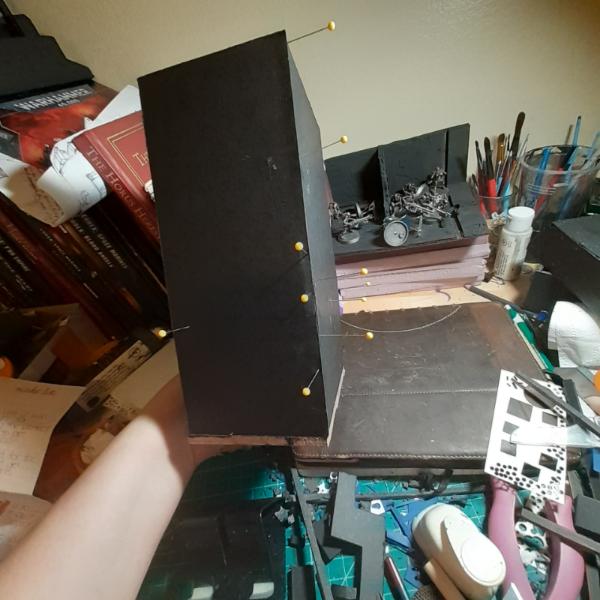
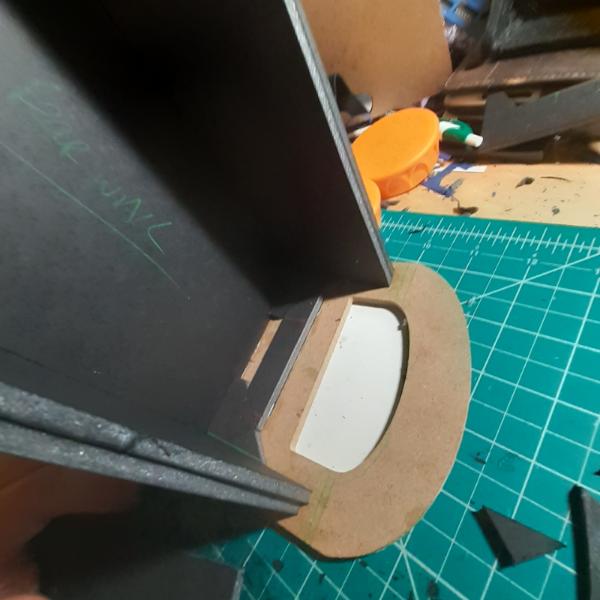
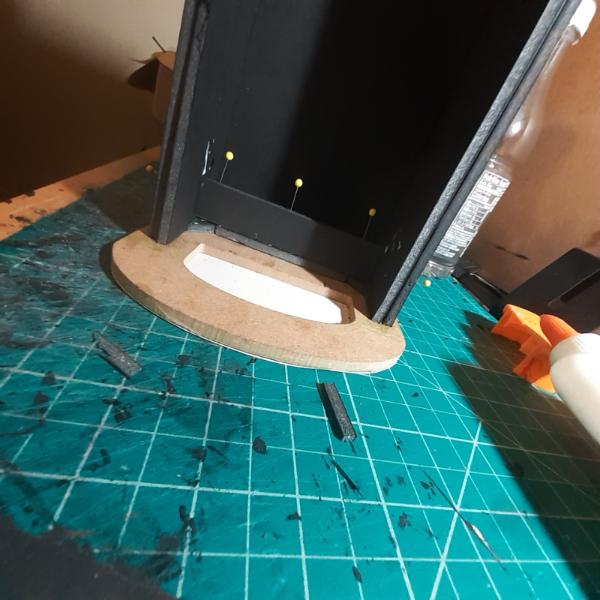
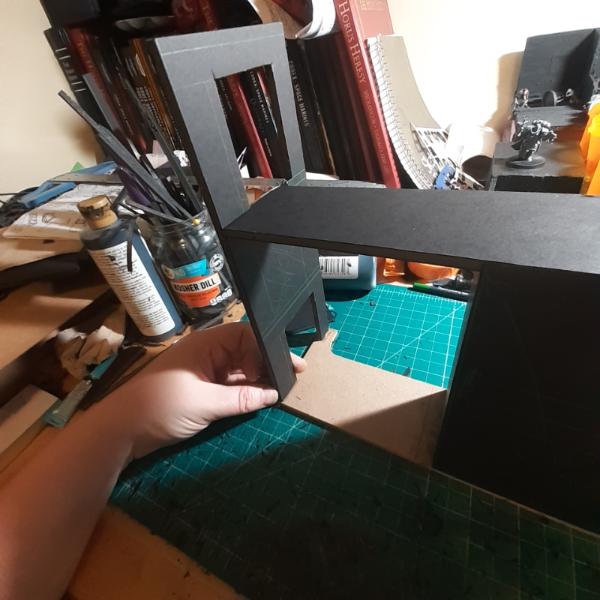
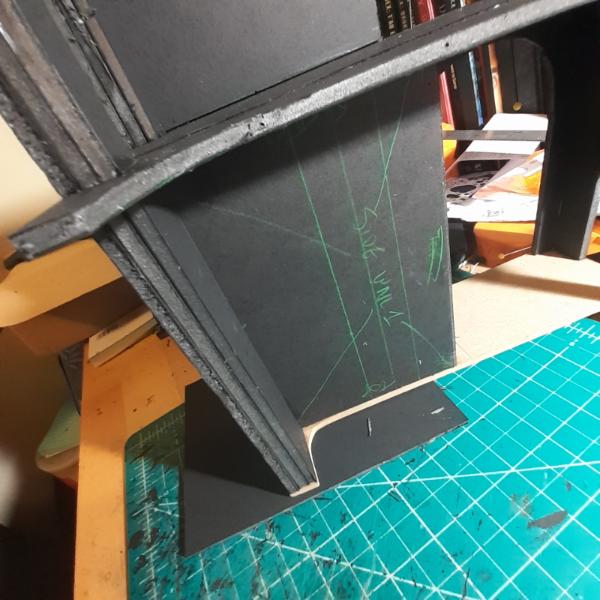
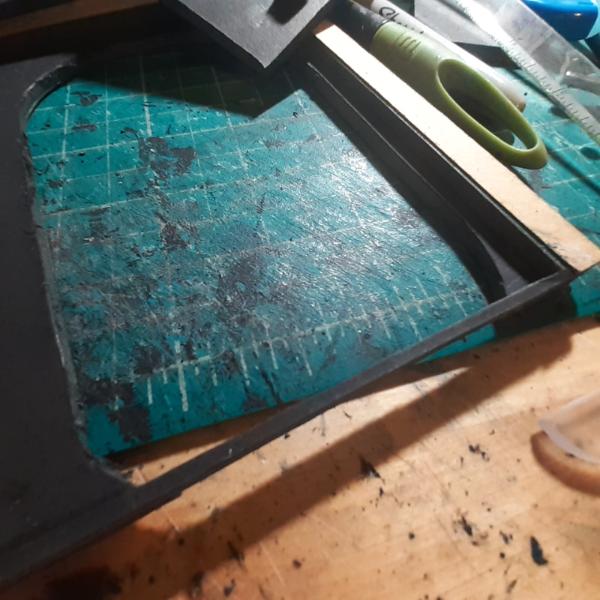
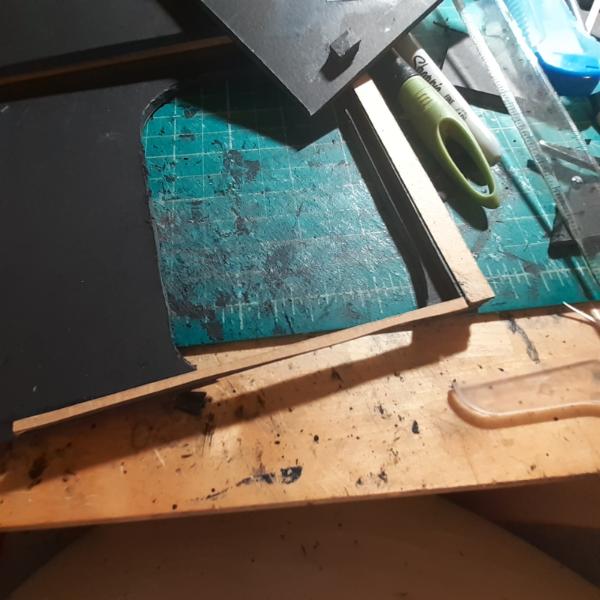
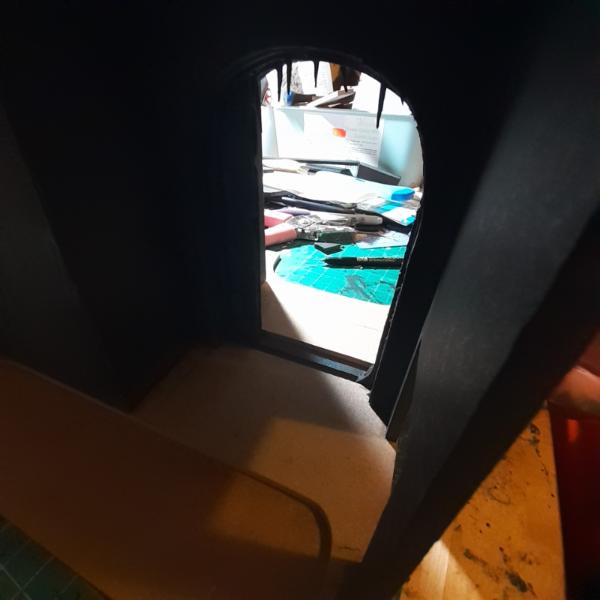
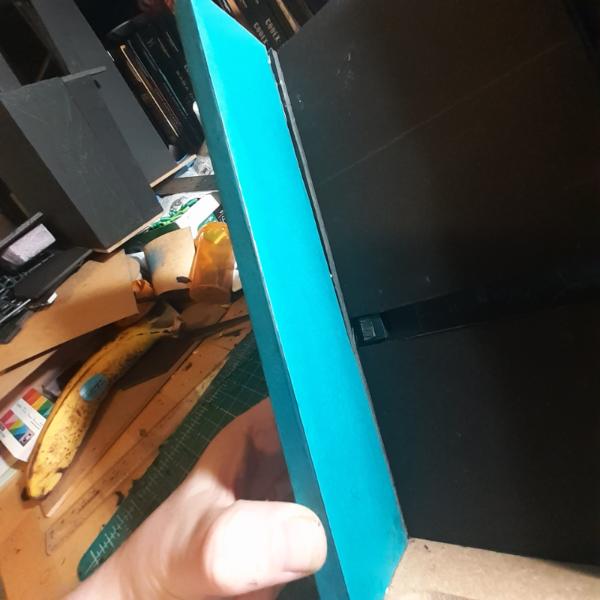
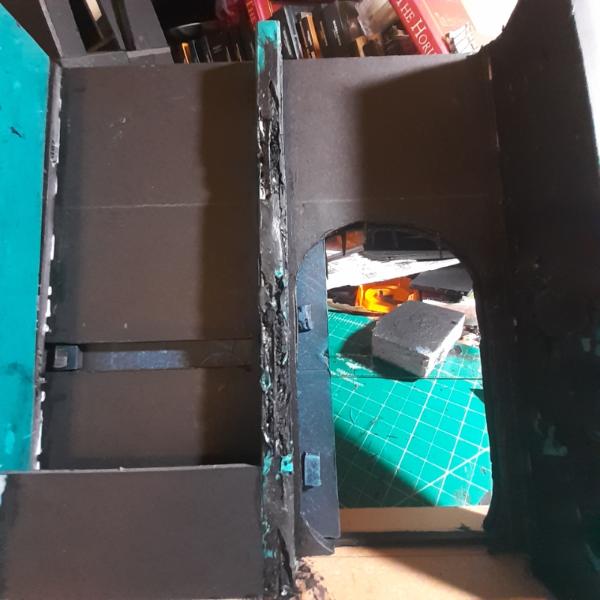
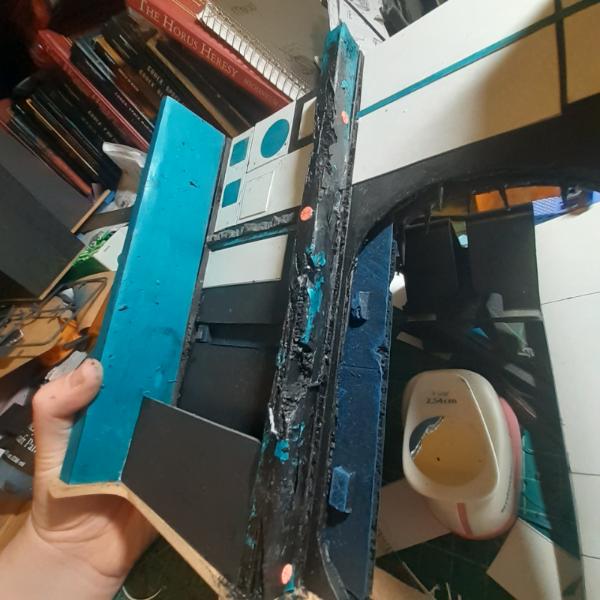
I glued the sandwich halves together with the door meat. I guess the glue counts as mustard? And now it's time to show off the door in action.
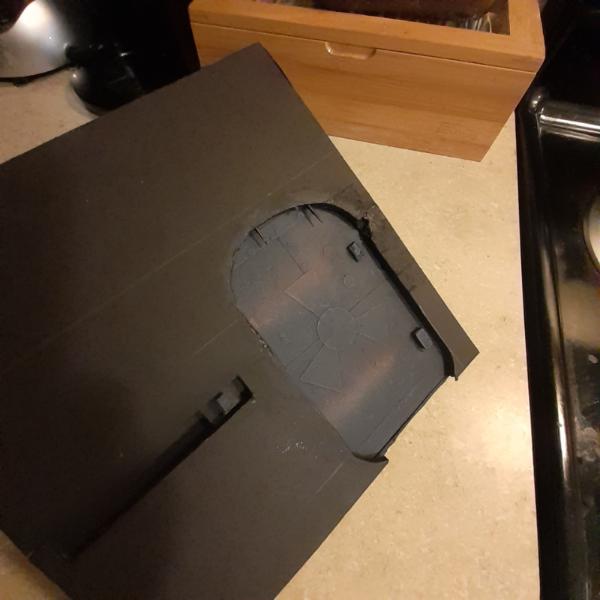 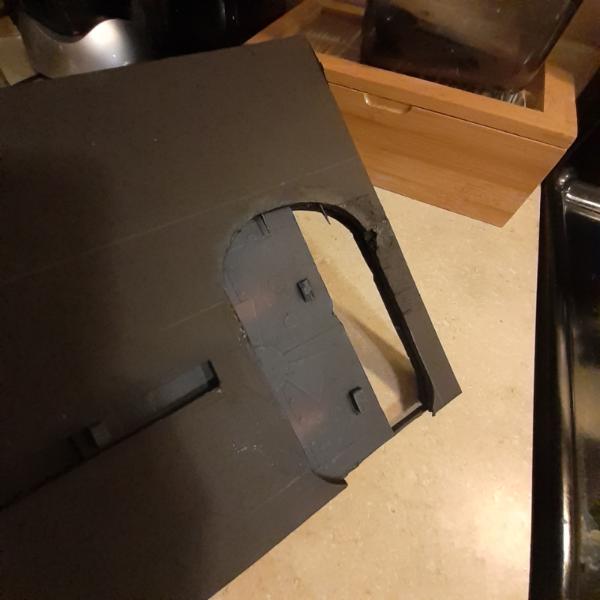 
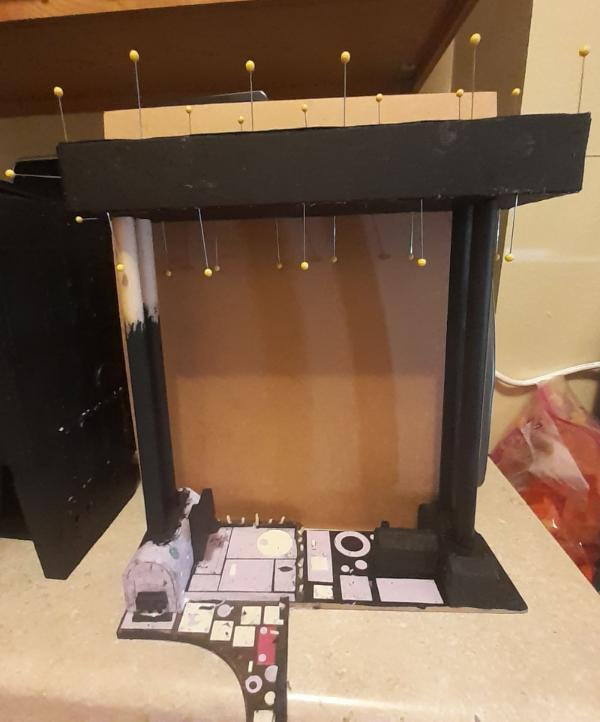
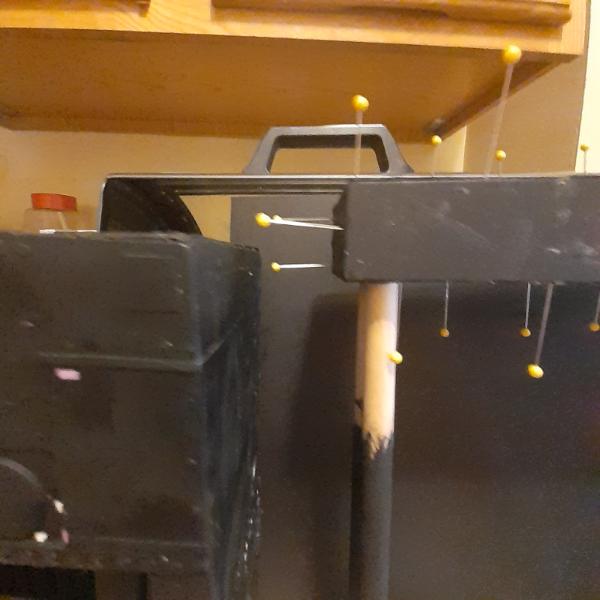
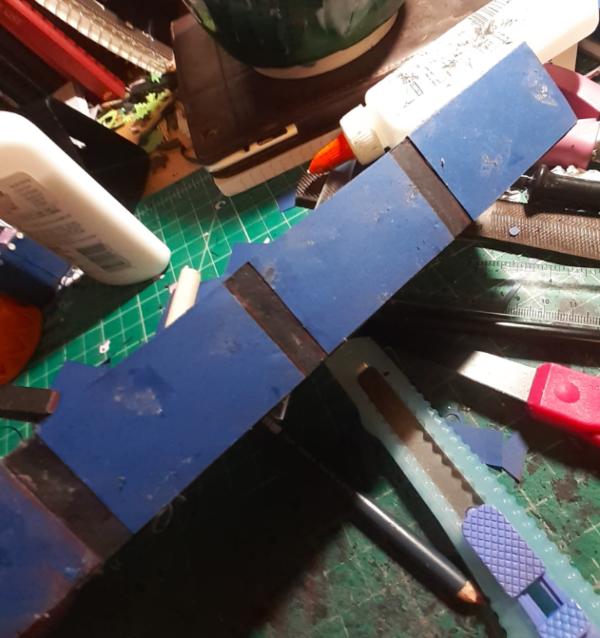
And then the whole package to its base. I used my two other WIP elevated walkway pieces to prop it up in case it tried to fall over while the glue sets.
Sandwich from above.
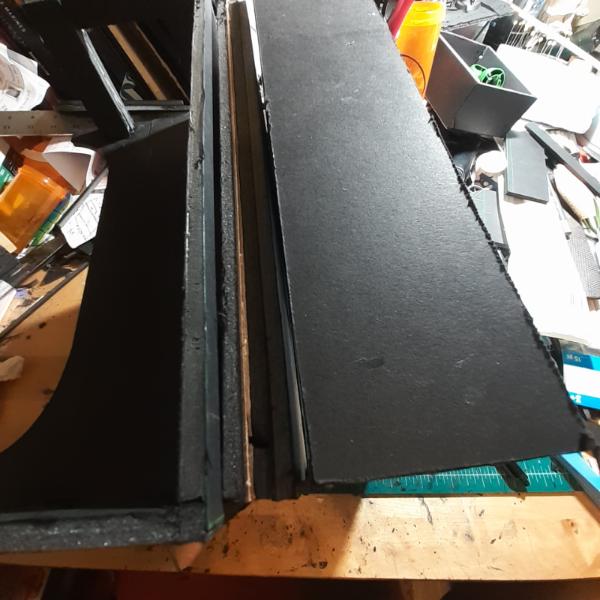
And kinda how it will look on tbe table, by way of its braces.
Only this small update today. There will be more progress tomorrow. Thanks for looking and have an awesome day!
76303
Post by: Warboss_Waaazag
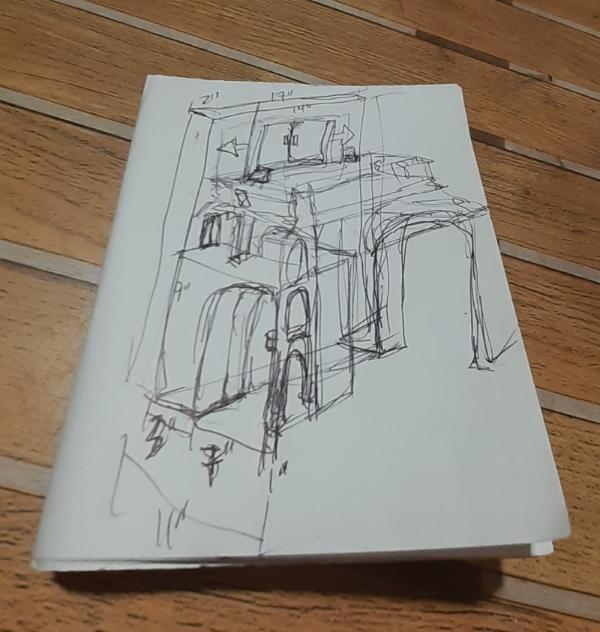
Various sketches working through design challenges.
Sorry there's no terrain today. I'm trying to be gentle with myself for taking one night off without building or writing anything. It feels uncomfortable to not be in a state of perpetual creation. I always feel like I'm running out of time.
Thanks for looking and staying with me.
Oh, also, what would be the general community interest in me posting terrain tutorials in a video format, like a YT channel? Think anyone would be interested in that? Just putting the idea into the universe.
I hope everyone has a wonderful and stress free day.
22619
Post by: inmygravenimage
Hey pal. Do not beat yourself up about not doing stuff. Firstly, you sketched! That's stuff. Secondly, you owe it to no-one. Your hobby, your way  no guilt over not making stuff!
76303
Post by: Warboss_Waaazag
inmygravenimage wrote:Hey pal. Do not beat yourself up about not doing stuff. Firstly, you sketched! That's stuff. Secondly, you owe it to no-one. Your hobby, your way no guilt over not making stuff!
Thanks graven. I really appreciate you.
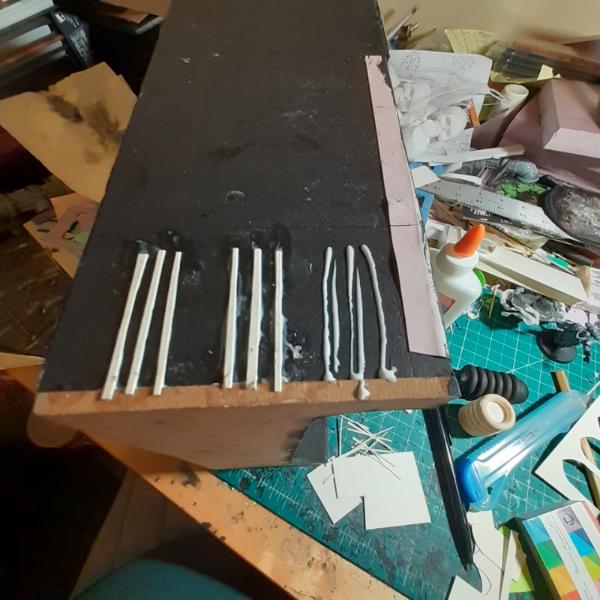
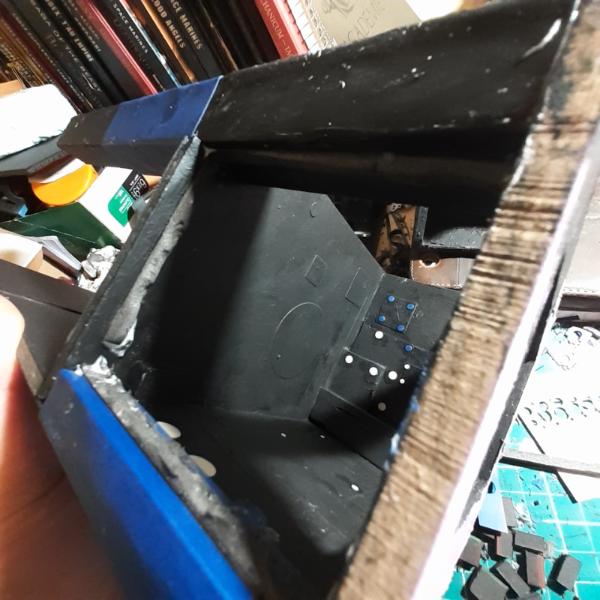
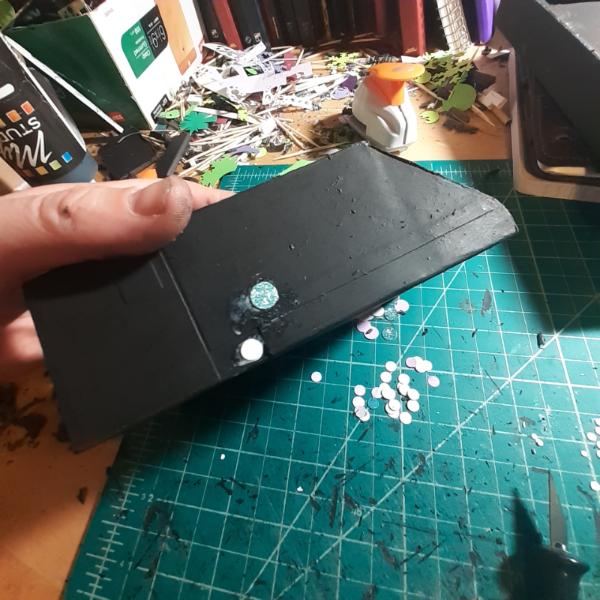
I made a small progress last night. Not much, but at least I remembered to take a couple of pictures. I added the basic under structure for a few support beams on one side of my giant door piece.
That's it. My weekend is coming up (I work 5 days straight, but my 2 days off are not Saturdays and Sundays) so I hope to get a boatload of work done on those days.
Thank you all for looking at my stuff. Your encouragement, support, and feedback has been a life line to me. Words fail me to express the depth of my gratitude. I truly hope everyone has their best day today.
126697
Post by: GreenScorpion
@Warboss_Waaazag Planning things with sketches is still doing something and while it might not feel as productive as the actual building part, hobby stuff should not feel like something mandatory, although I also feel a bit bad when I can't do something I wanted/planned to do on a given day.
I have seen a few terrain building tutorials so if you are up for it, it could certainly be interesting to watch. You make some really nice things from concept on paper into reality.
76303
Post by: Warboss_Waaazag
 GreenScorpion wrote: GreenScorpion wrote:@Warboss_Waaazag Planning things with sketches is still doing something and while it might not feel as productive as the actual building part, hobby stuff should not feel like something mandatory, although I also feel a bit bad when I can't do something I wanted/planned to do on a given day.
I have seen a few terrain building tutorials so if you are up for it, it could certainly be interesting to watch. You make some really nice things from concept on paper into reality.
Thanks, GreenScorpion. I very much appreciate your kind words.
76303
Post by: Warboss_Waaazag
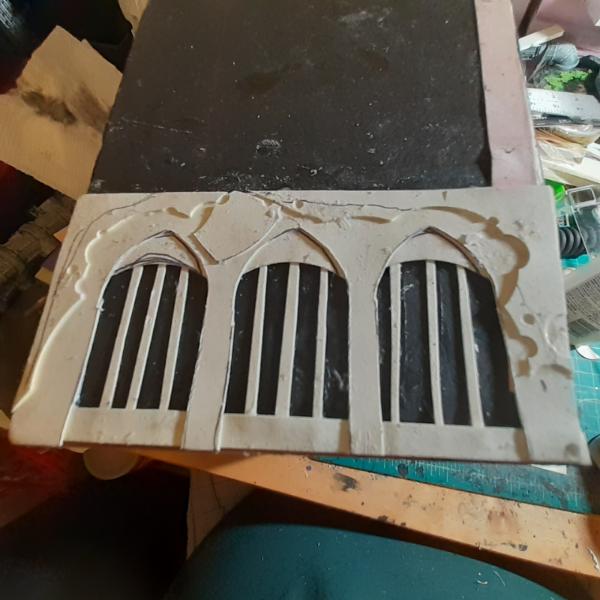
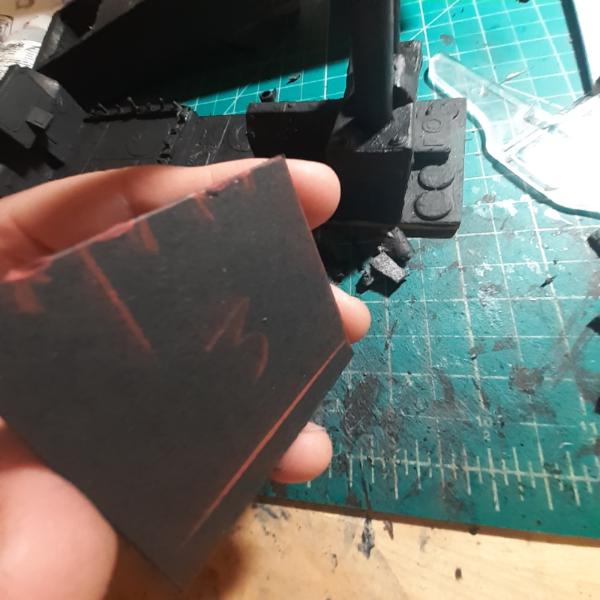
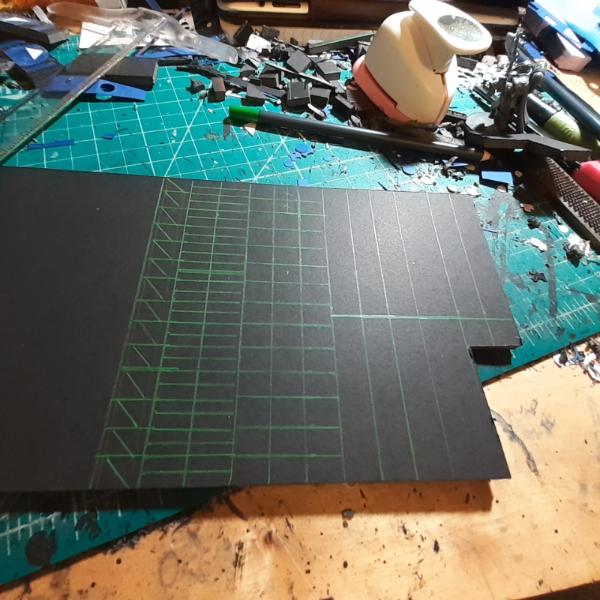
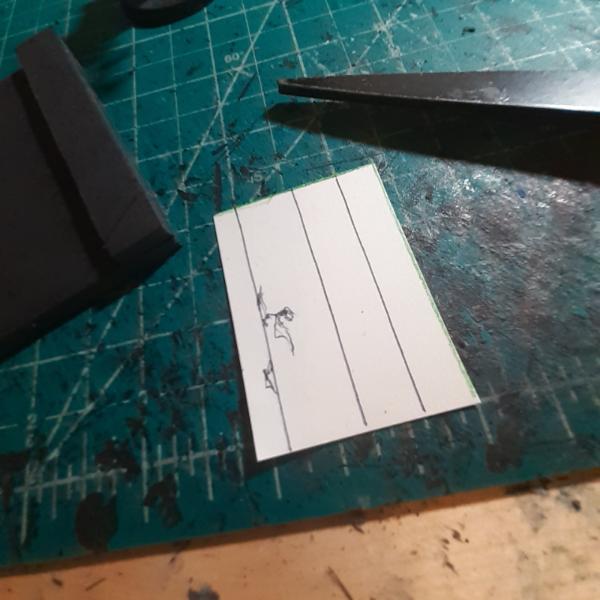
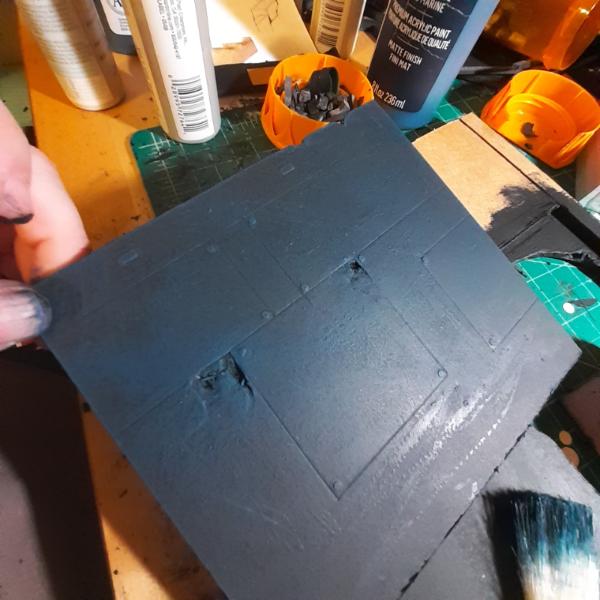
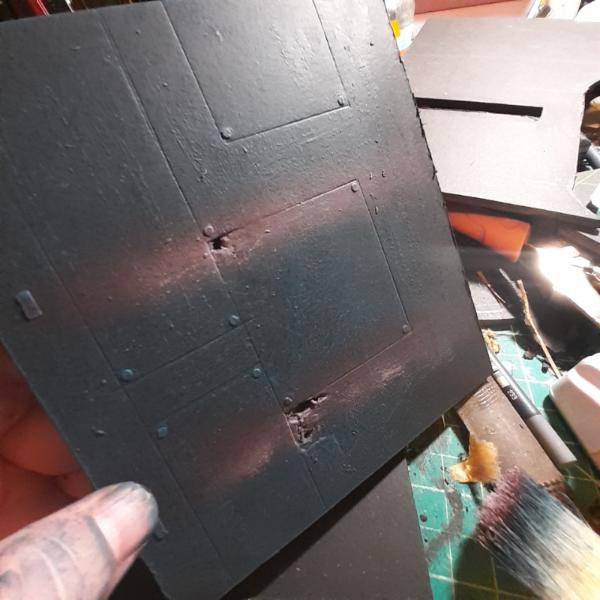
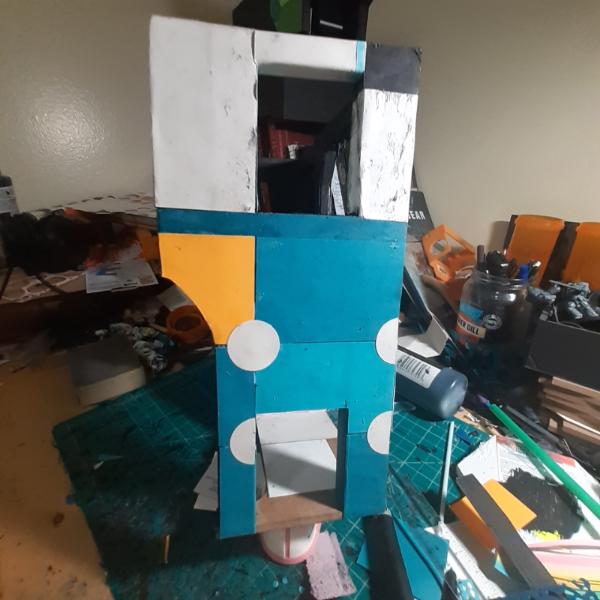
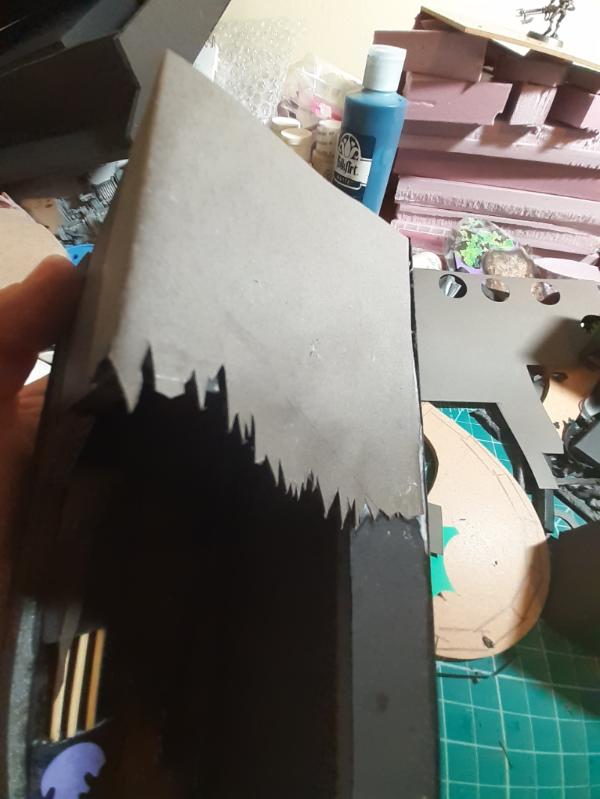
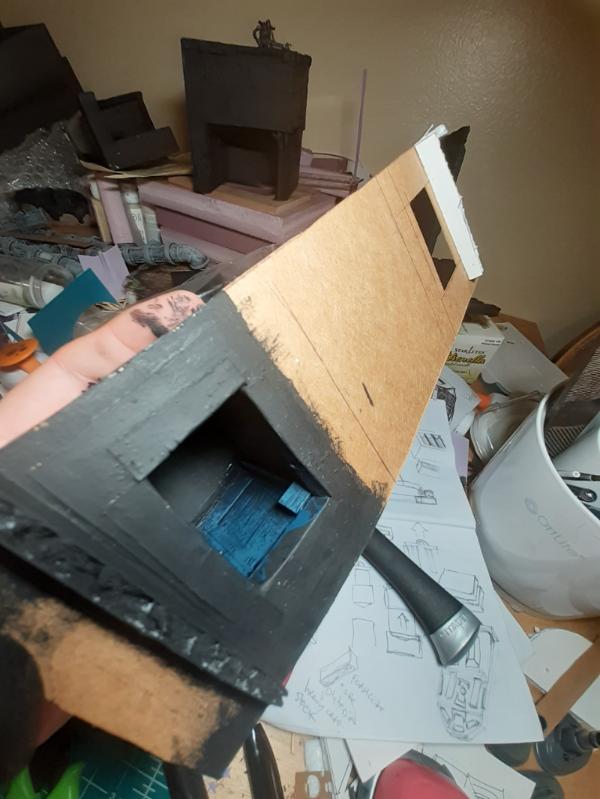
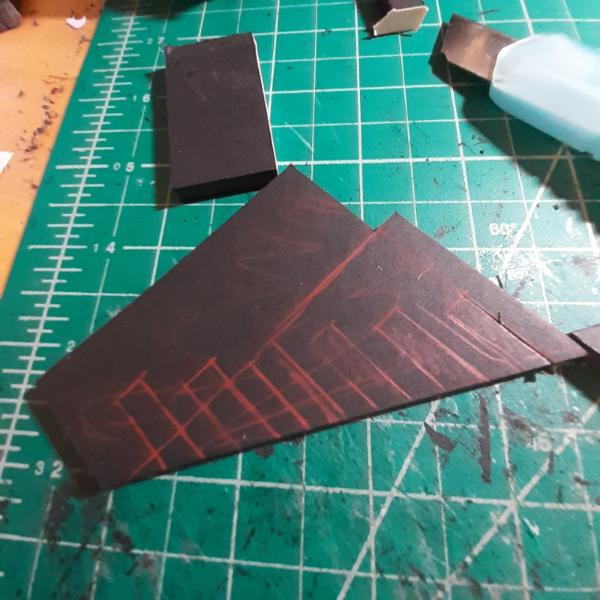
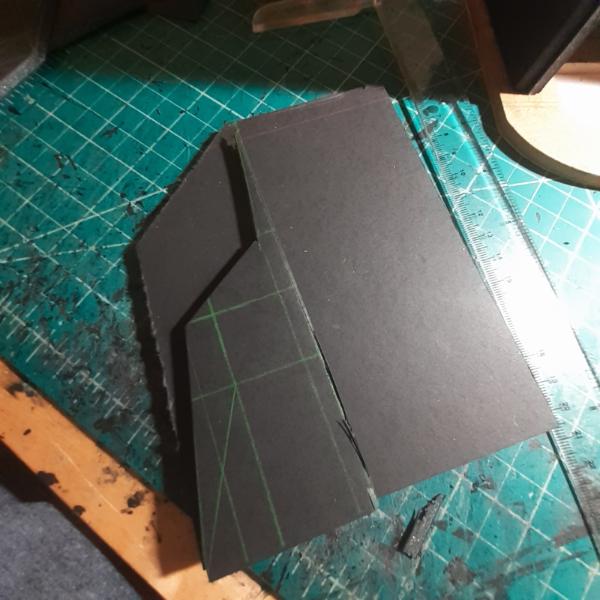
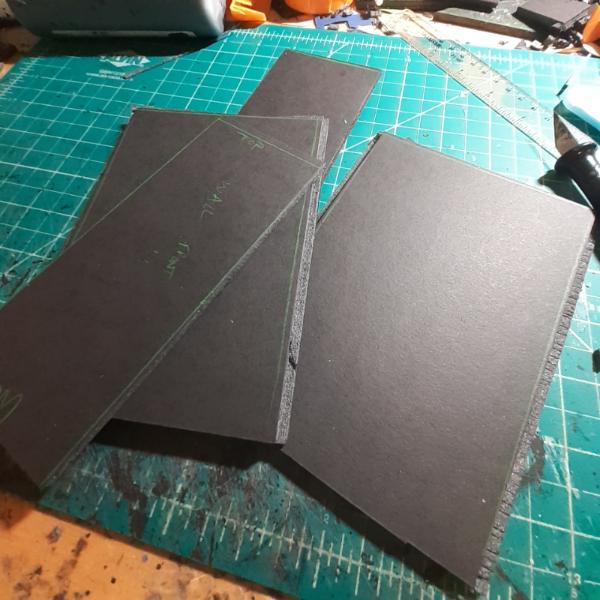
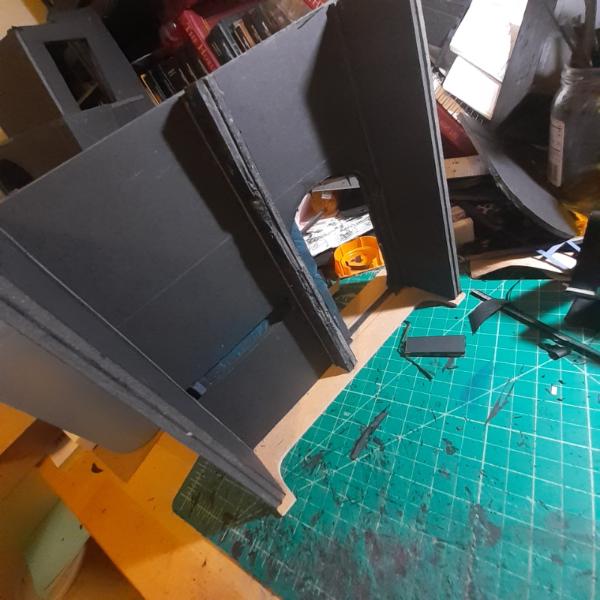
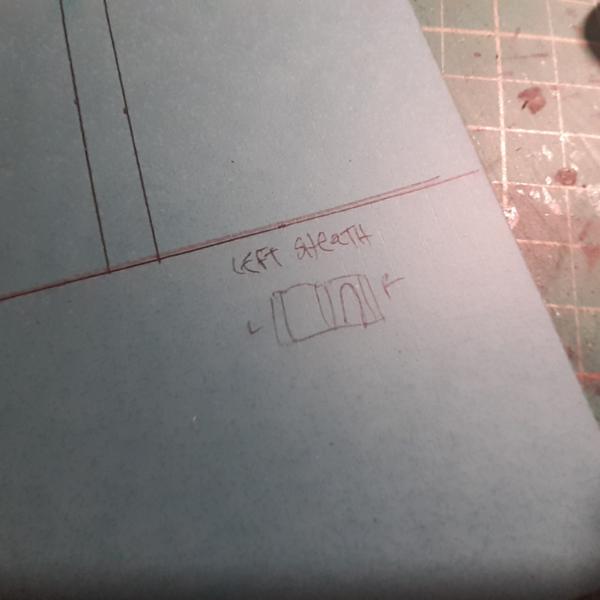
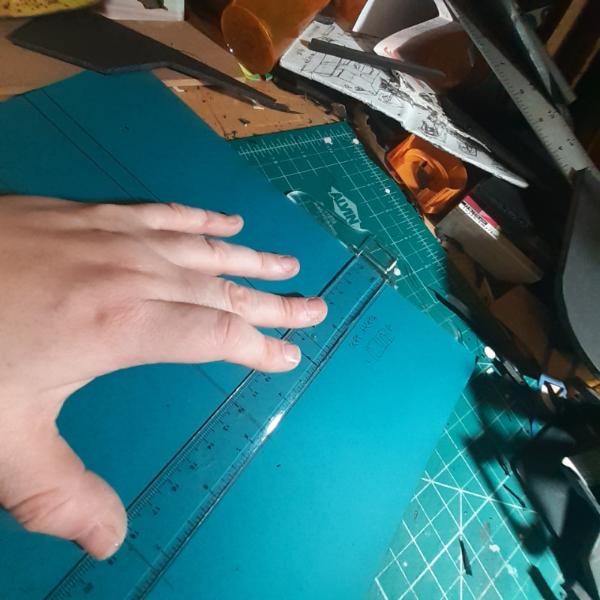
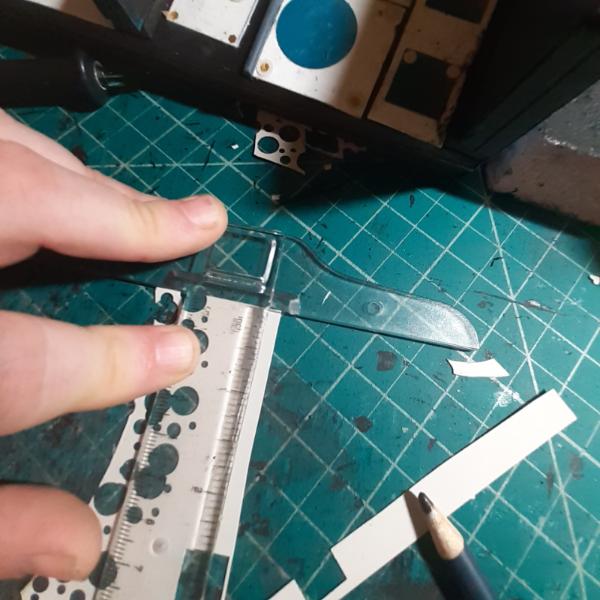
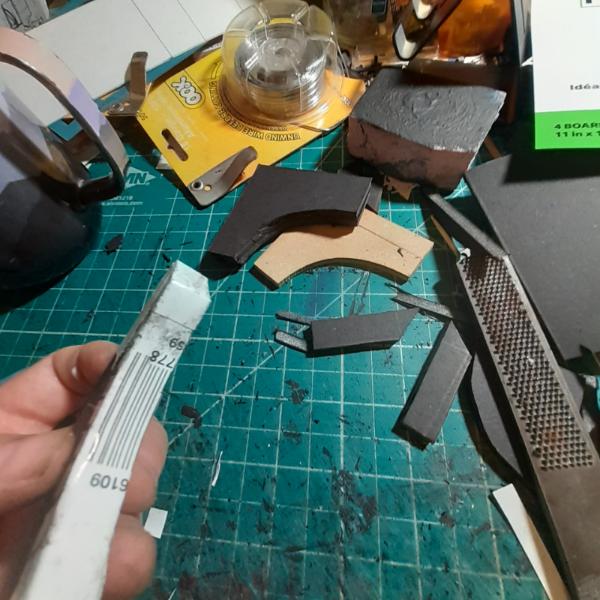
I made more progress on the big door. I had to make a sheath for the pillars I'd already glued in place, so I started with this vaguely textured paper sheet. Drew my lines on for cutting and folding, and created a little diagram for me so I wouldn't get confused.
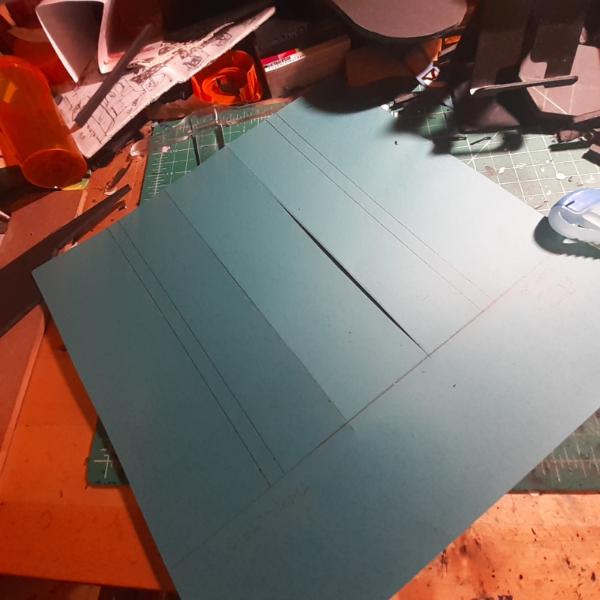 
Whipped out my trusty Invisible T Square (which I misplace at least four times a day) and made my cuts. My blades are so sharp that this plastic ruler is barely a straight edge anymore.
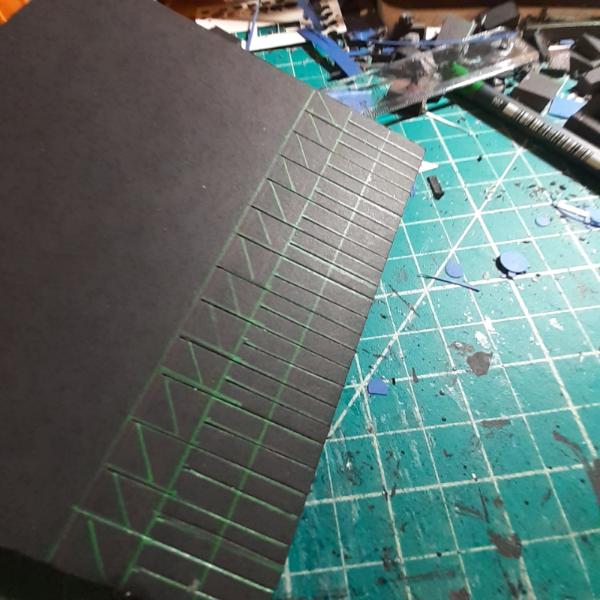
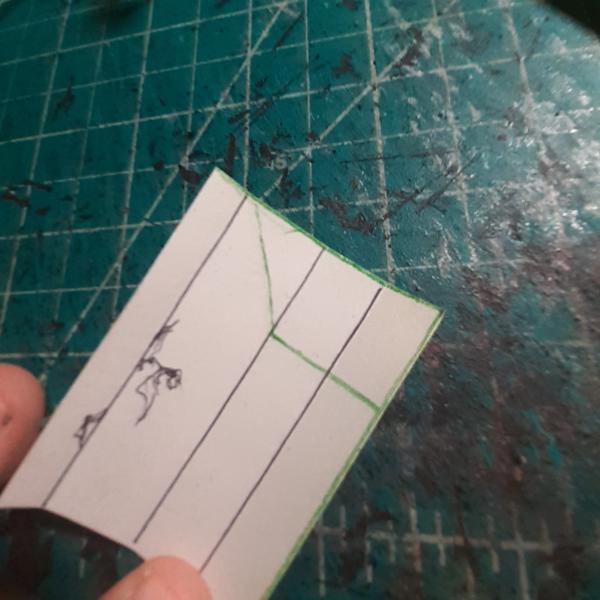
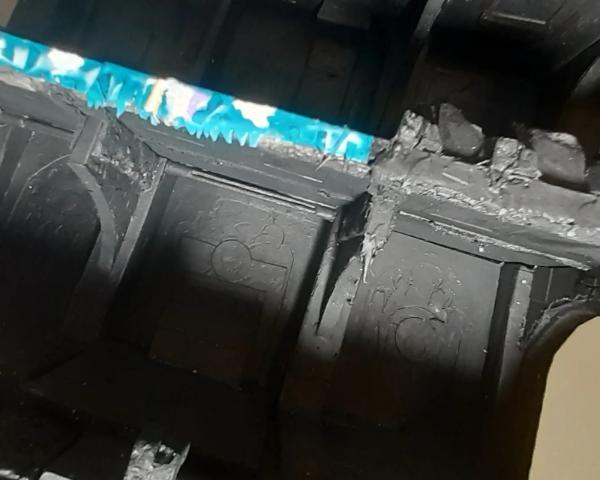
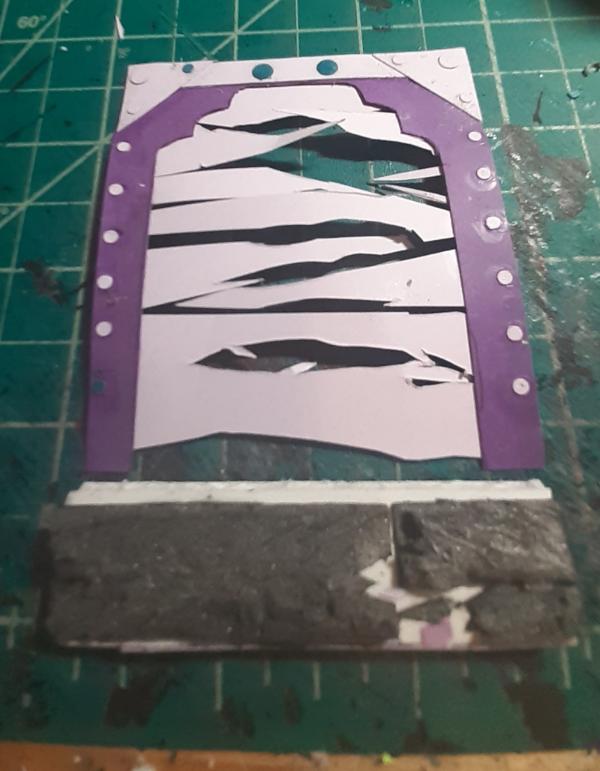
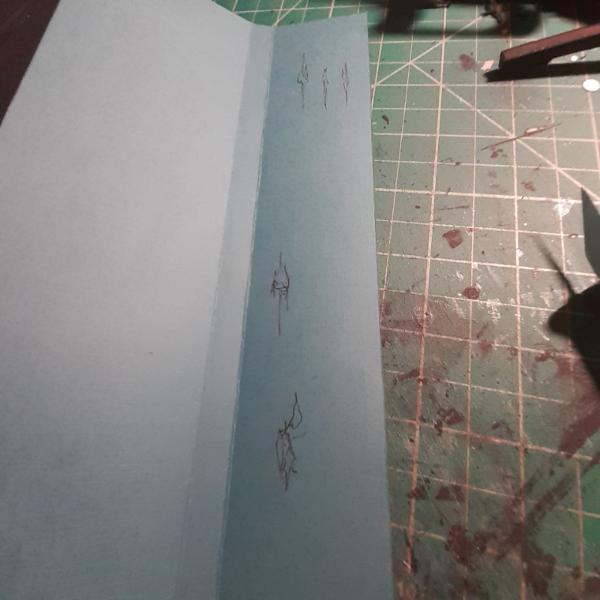
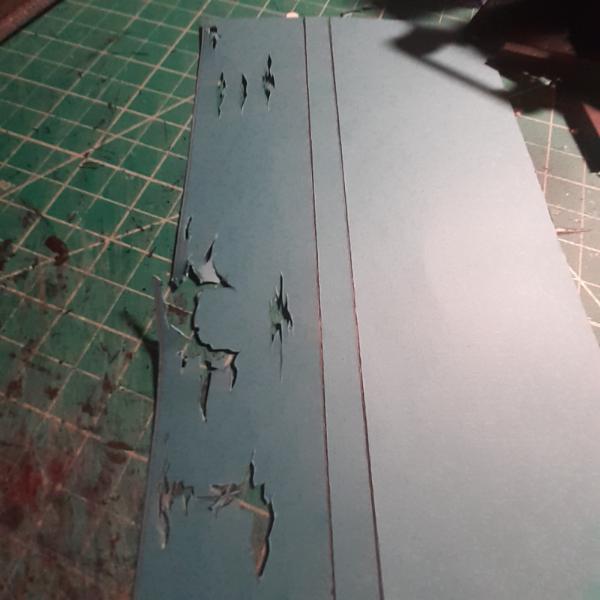
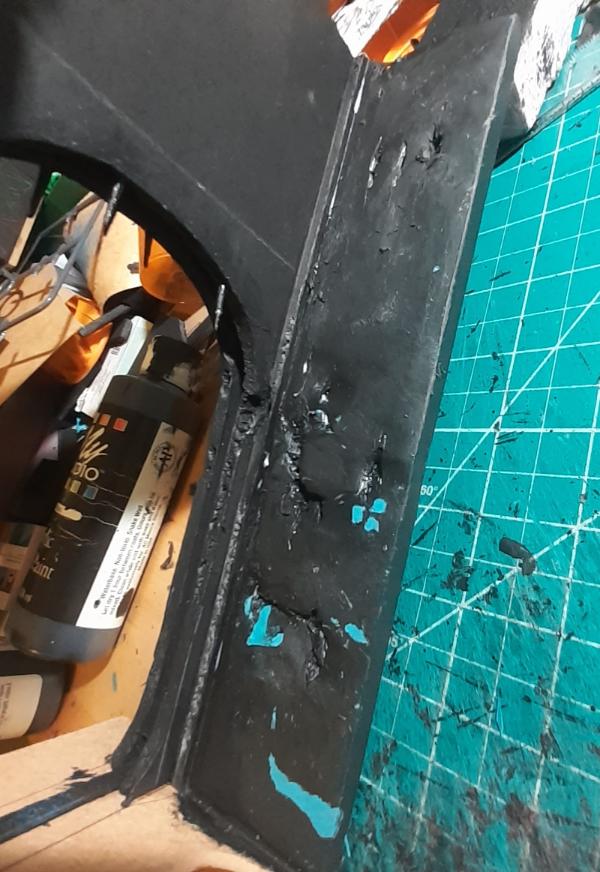
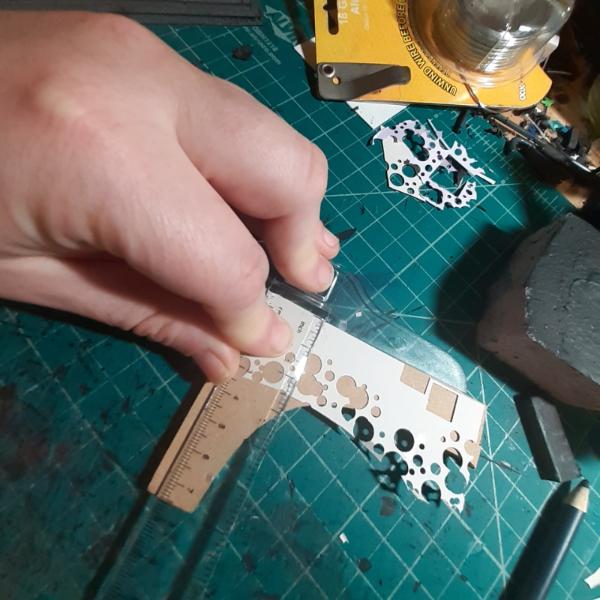
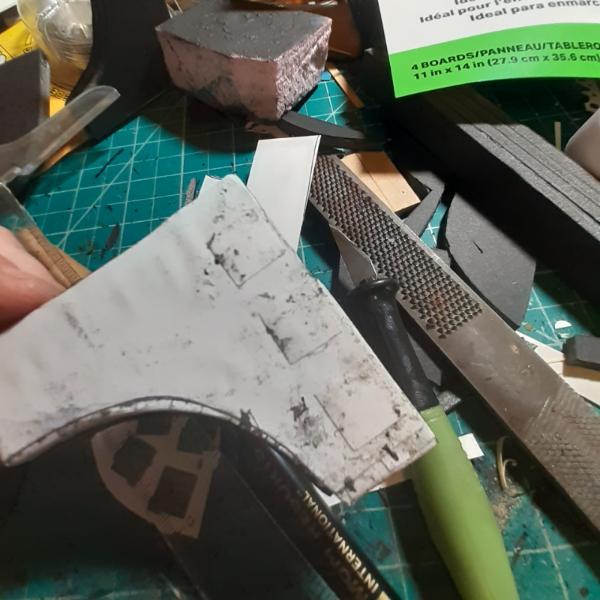
Then, after I folded my paper in the wrong direction, and then folded it the right way so it would fit as intended, I got to work drawing out the outlines of where I wanted to put the rust and decay. And then I realized I had put these marks on the inside. The idea behind this door is that there's a radiation leak where it leads to, so all the structures surrounding the doorway are heavily damaged and those further away are less so. With that in mind I flipped the paper and aligned it to the damage I already portrayed in the archway and jazzed my marks up a bit.
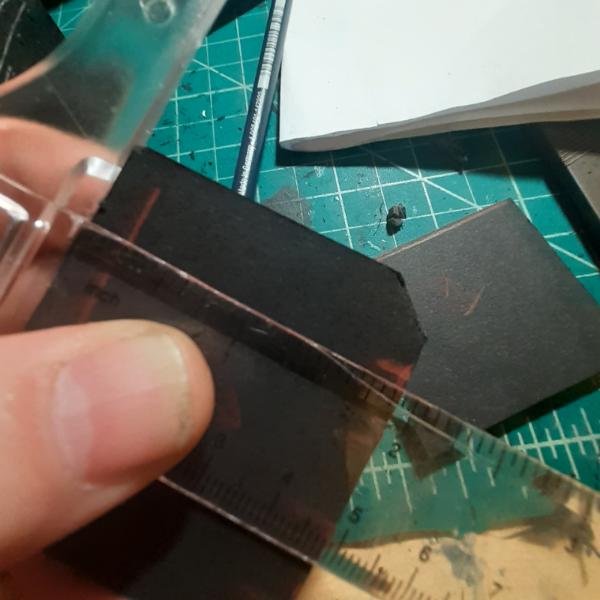
Cut the inside, flip to compare, and cut again.
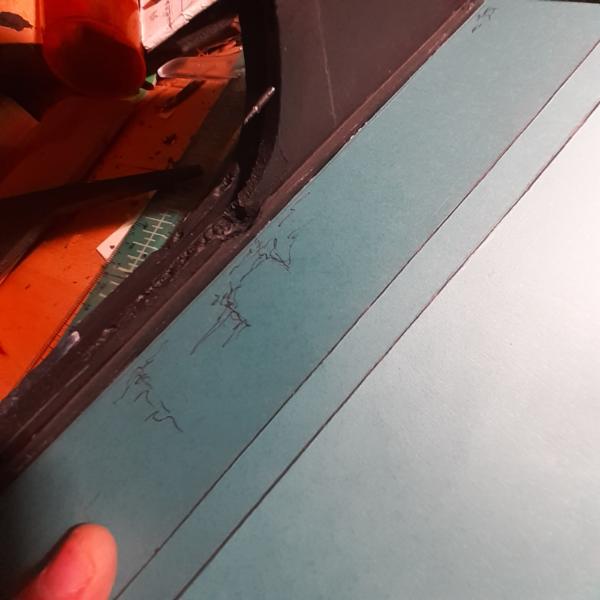
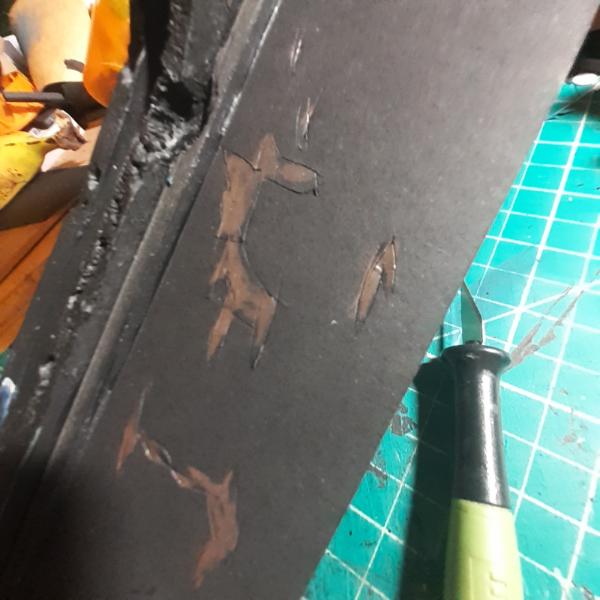
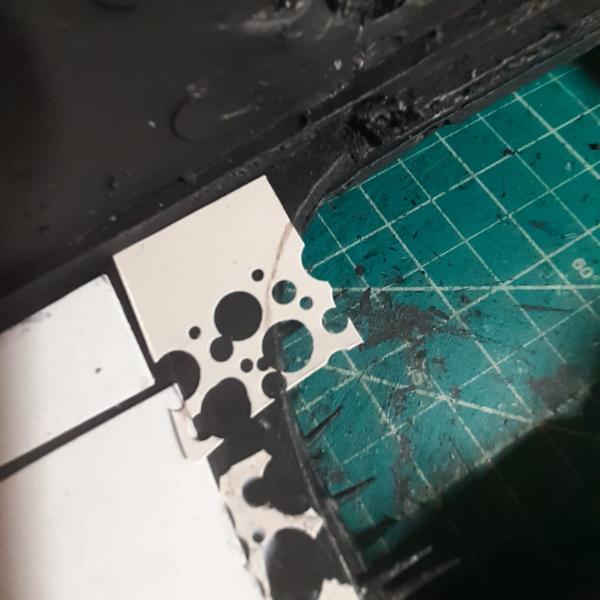
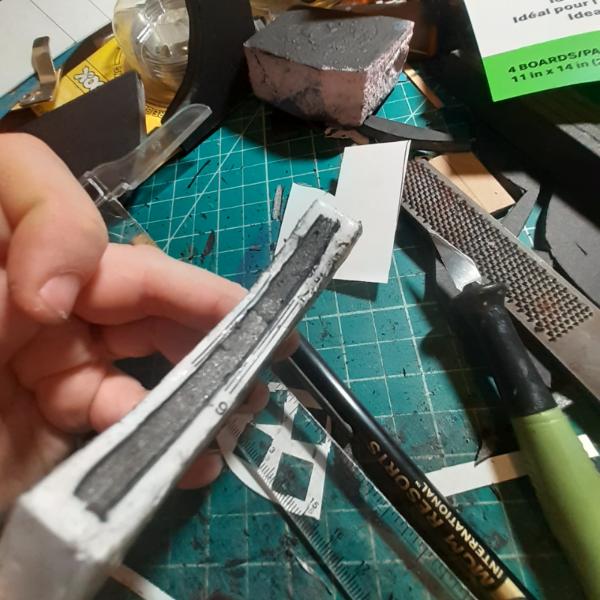
Then I overlaid the paper to the pillar and used a colored pencil to mark where the damage would show through. This process also further and naturally distresses the paper, which is nice.
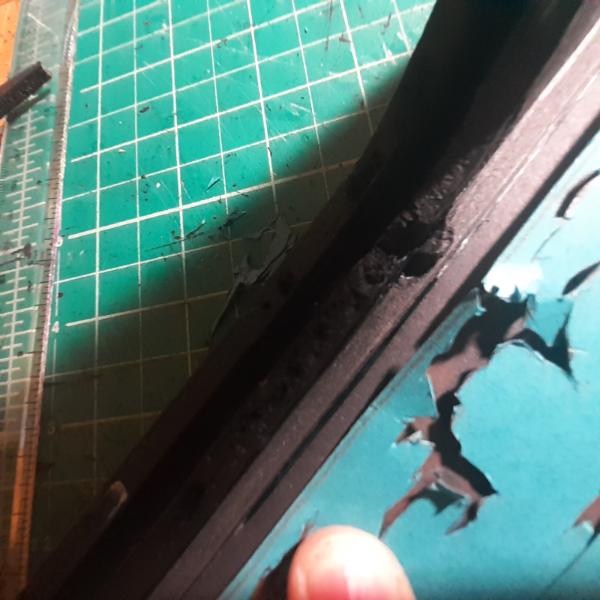 
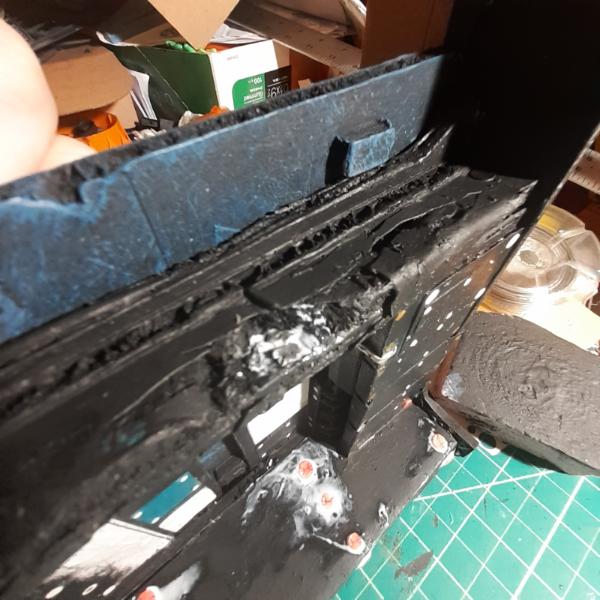
I did some basic outline scrapes and tried to peel away the paper from the foamcore, but I recently swapped my exacto blade and it turned out to be too sharp to distress the project in a satisfactory manner. So I used its sharpness to stab the bejeezus out of my outlines and go from there. It worked much better, although I wound up wiping the garbage off the blade with my bare fingers, forgetting how sharp it was and promptly slashed a good cut into my fingertip. It's been a long time since I did that. Ouch.
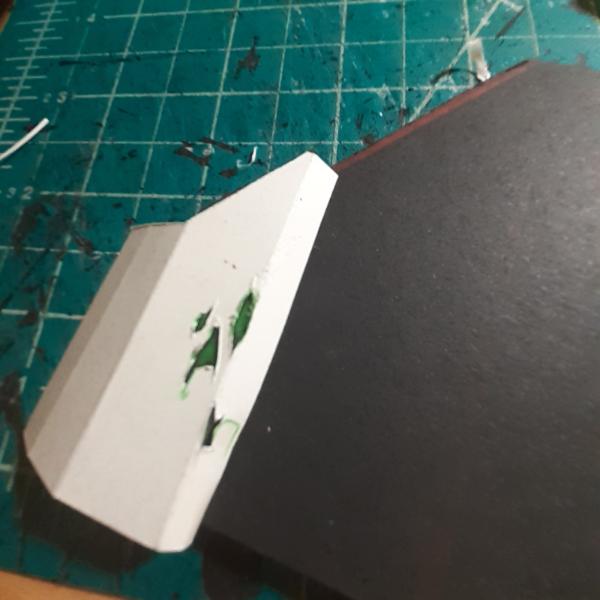
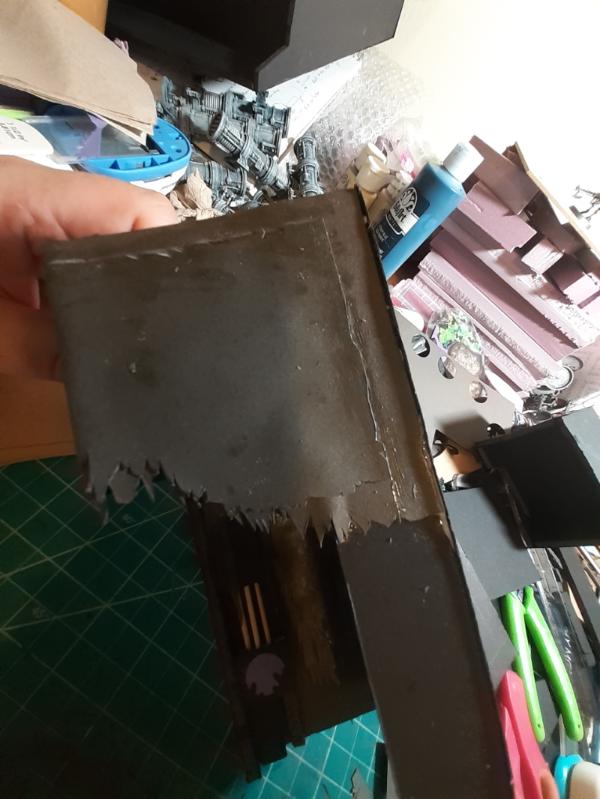
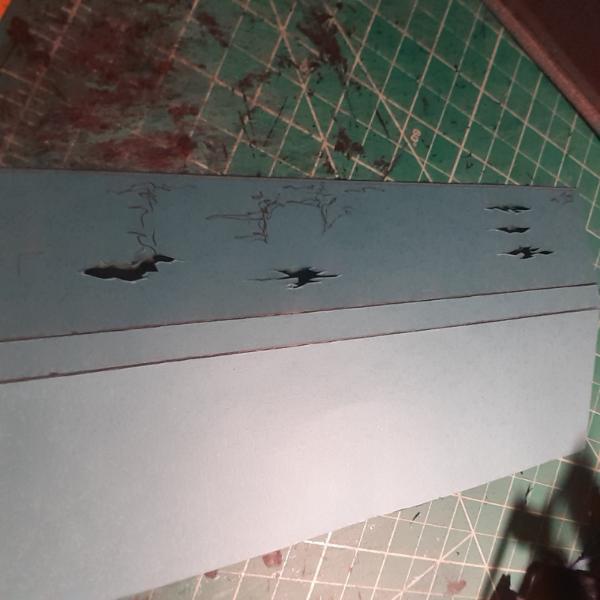
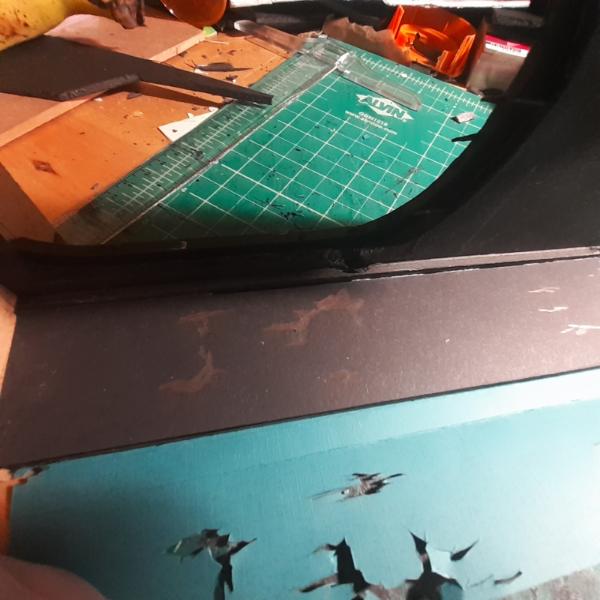
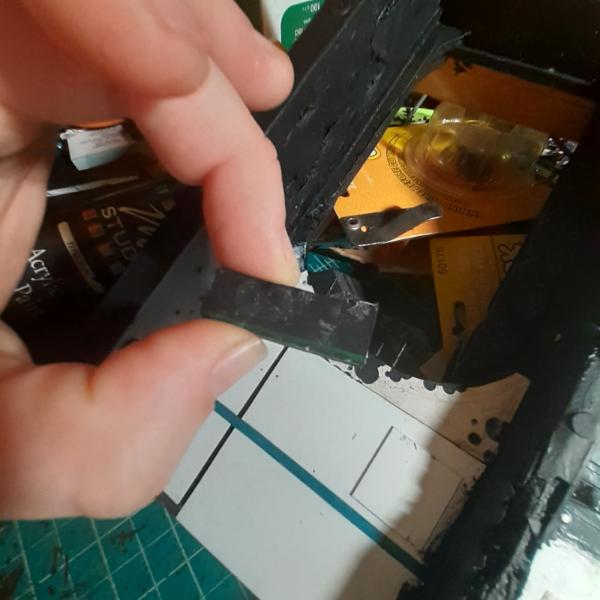
Then I sealed it with glue and painted it black, before gluing the sheath on over it. You'll notice I already painted the inside and outside of the damaged bits of the sheath to make the finished priming and painting process easier. I always use way too much glue for these damaged sheaths because I want it to help me further distress the paper. The paper I use is many-layered and pulls apart as I rub it into place. Strangely, this creates a better looking decayed metal effect than any I try to do deliberately. The extra glue also seals the paper and adds a further texture to the exterior. I spend a lot of time rubbing and smoothing this excess glue until it gets tacky and then starts to pull in interesting patterns. Bits of stray paper, foam, and drier glue globs also get stuck under this layer, adding further texture.
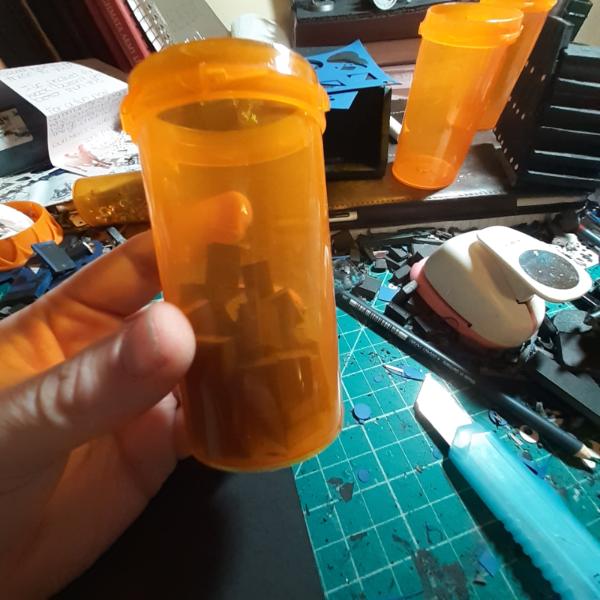
And now we come to the weirdest part of this build, where I explain my material acquisition process. You see, I grew up with the original Star Wars movies. And one brother (amongst many) who really nurtured my creativity. He bought me things like The Empire Strikes Back book of concept sketches that showcased designs that never made it into the films. I would copy and modify those sketches over and over again. The images of it are some of my clearest memories. He also brought me to exhibits of the props used in the films and showed me videos of the build process of ILM (the Industrial Light and Magic production studio was created to do all the practical effects work of Star Wars: A New Hope) and watched in awe as grown men butchered thousands of model kits and used mundane materials and items to create immense "miniatures" of Star Destroyers and X Wings and Death Stars and AT-ATs. All this instilled in me the idea that I can find details and ideas in nearly any object.
Fast forward to today, as I wander craft stores, yard sales, antique shops, 99 cent stores, and art supply stores, evaluating every item for its terrain building potential. It's why I use paper instead of plasticard, why I collect and task my friends to collect orange juice bottle caps, why I use dark brown glitter as burned shattered glass, and why I bought a jar of tiny flat basketballs to use on this project, too.

Because it works. And $4USD is a tiny amount to spend on hundreds of details I don't have to make myself.
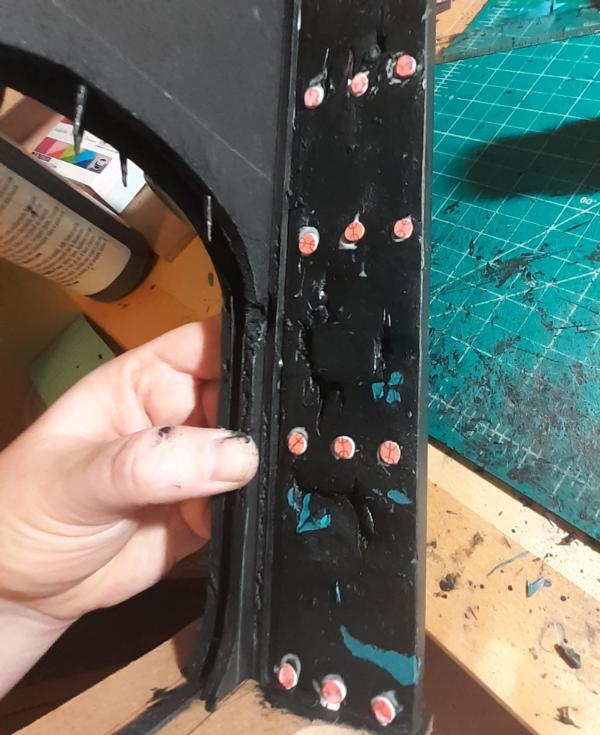
Everything is material. Let your imagination run wild. Thanks for looking. Have the best day today.
135333
Post by: Lathe Biosas
I thought those tiny basketballs were all Tau logos at first.
I honestly believed you had hand drawn each one...
76303
Post by: Warboss_Waaazag
 Lathe Biosas wrote: Lathe Biosas wrote:I thought those tiny basketballs were all Tau logos at first.
I honestly believed you had hand drawn each one...
I wouldn't put it past me. Woe betide the project I currently hyperfixate on.
126697
Post by: GreenScorpion
Good progress with the damage and the use of cheap materials for detailing is a great idea.
As someone who has built a small fortress out of used matches I do think that reuse of garbage can be great. Building something of that size with thousands of matches is probably not something I would recommend though.
76303
Post by: Warboss_Waaazag
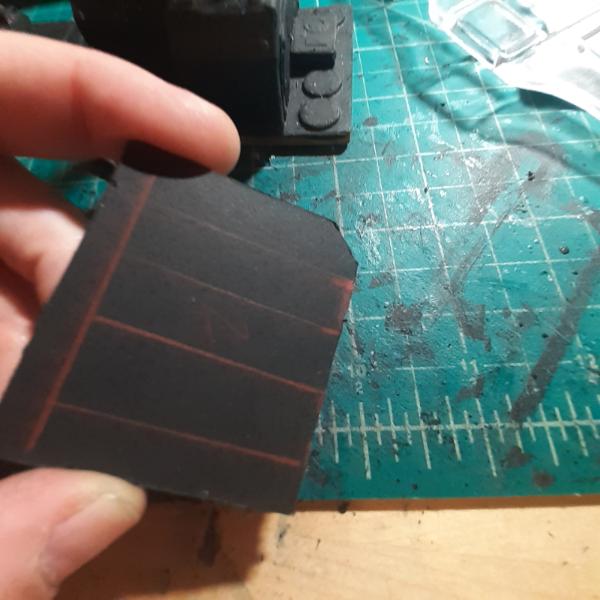
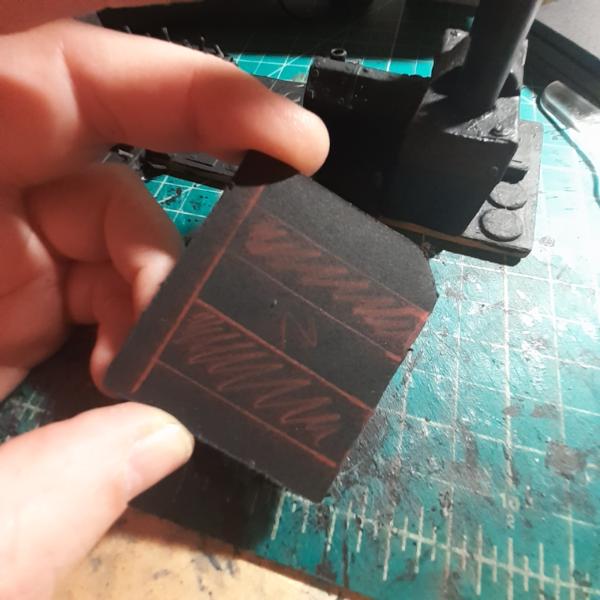
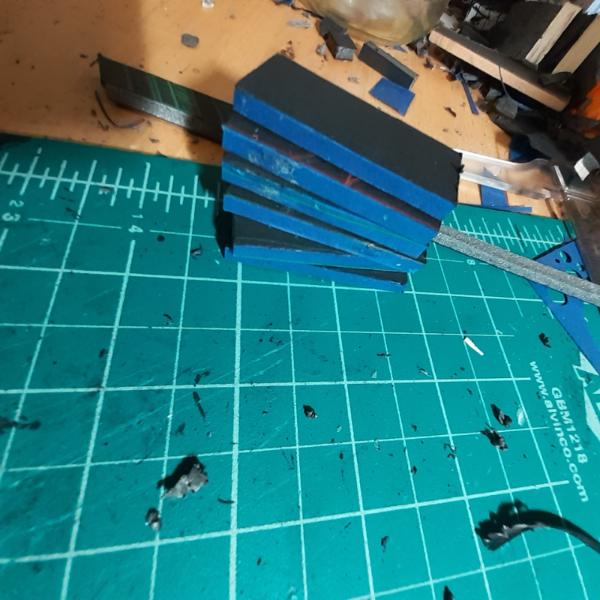
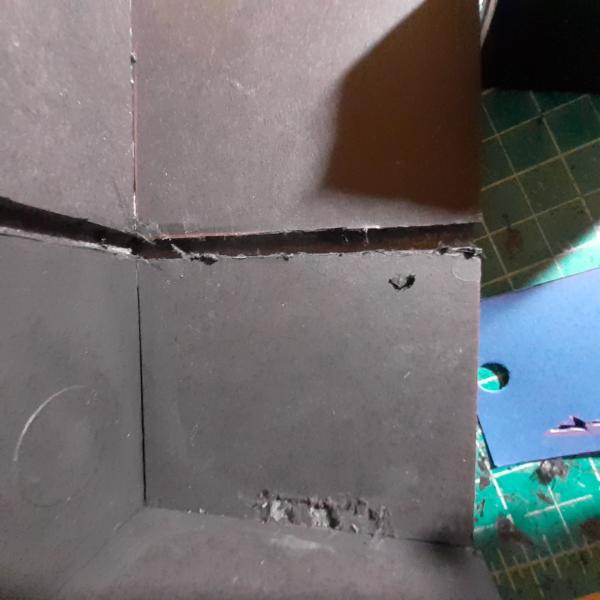
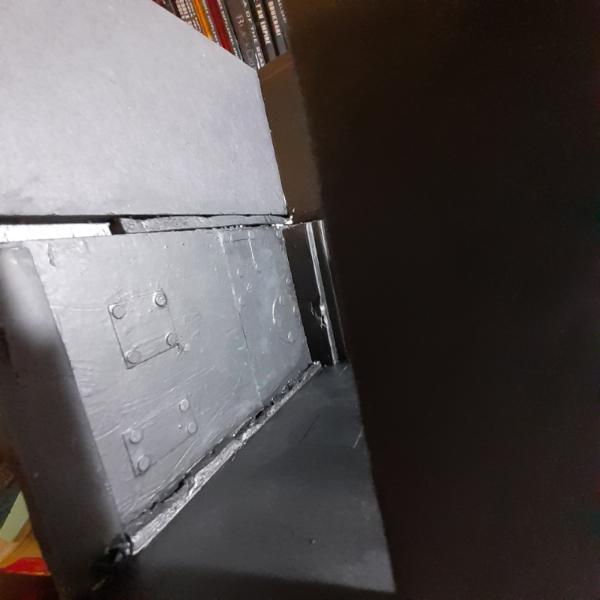
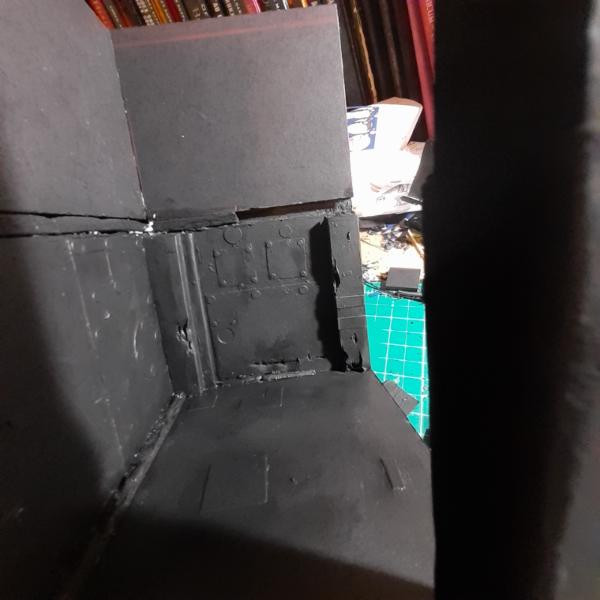
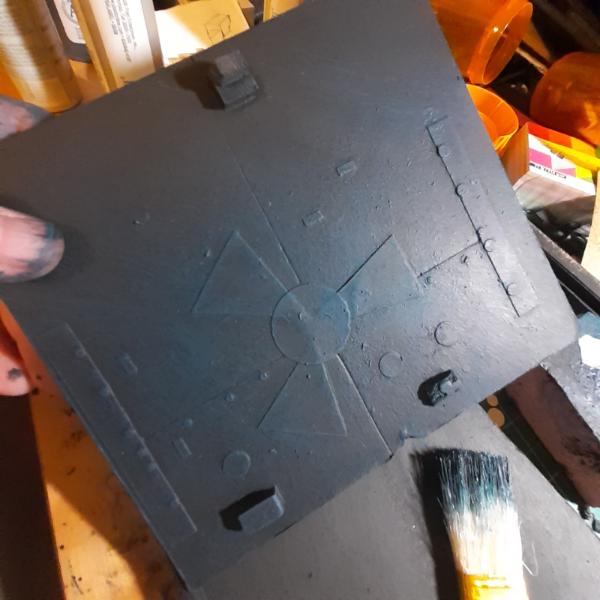
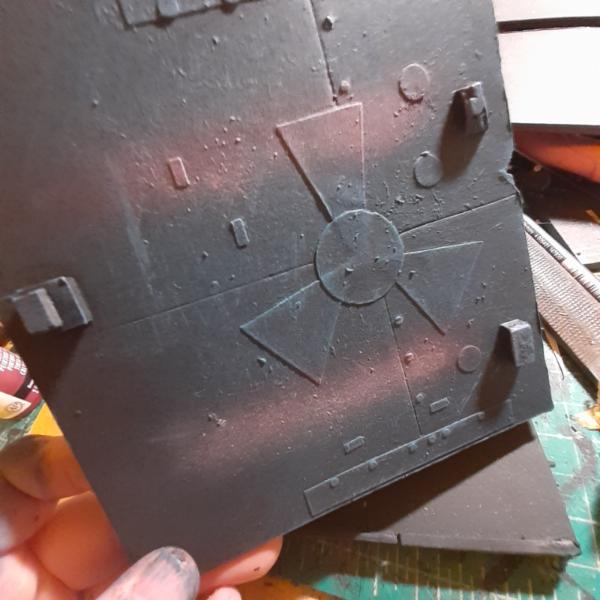
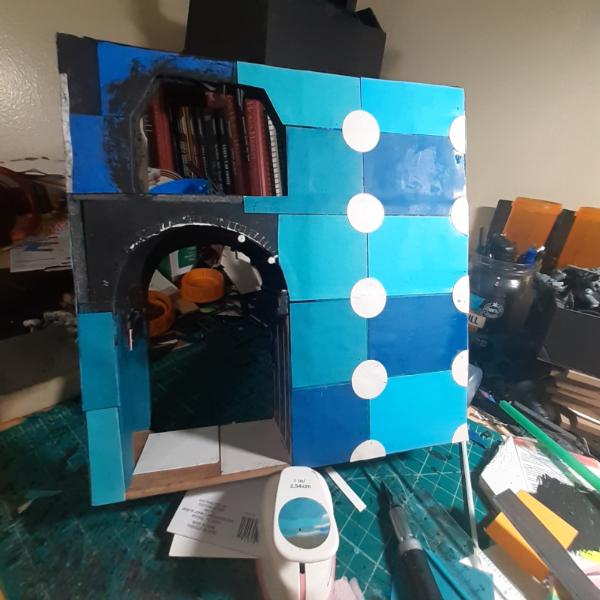
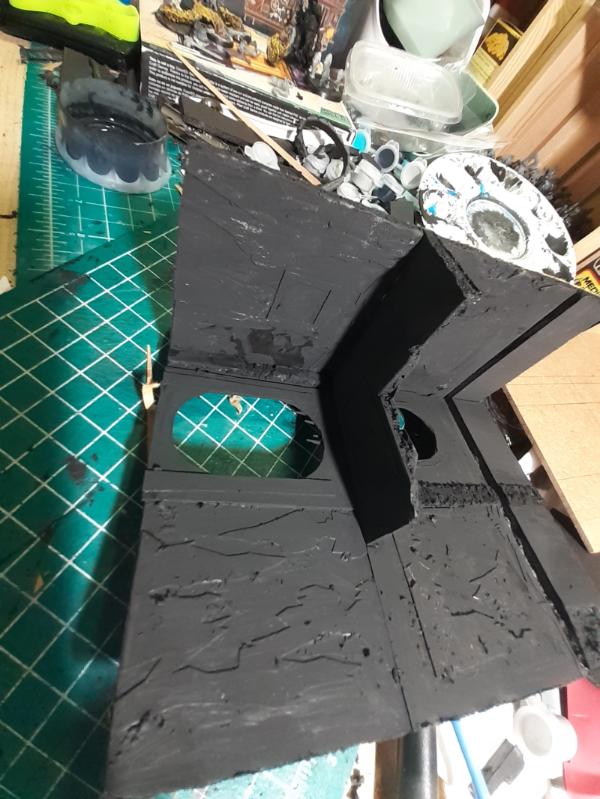
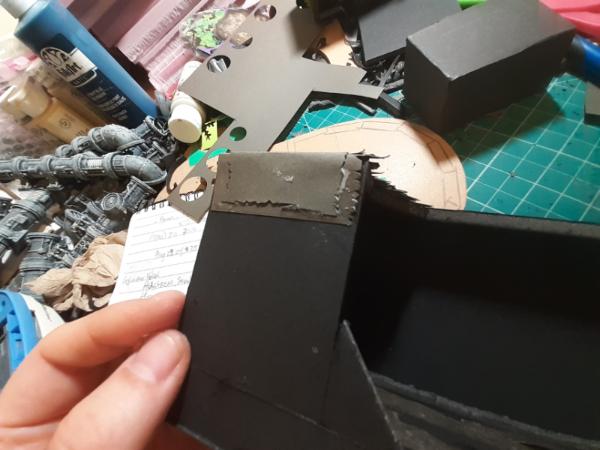
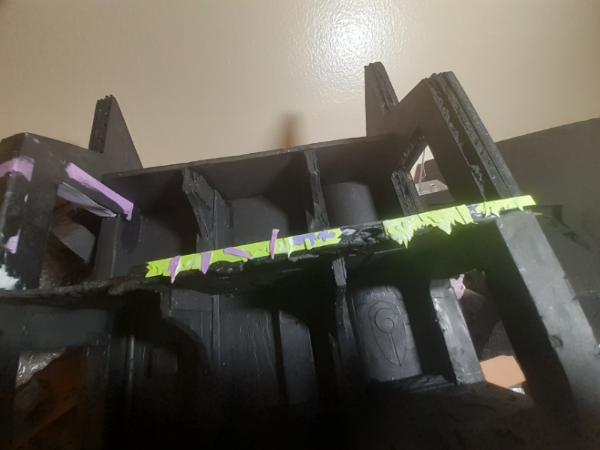
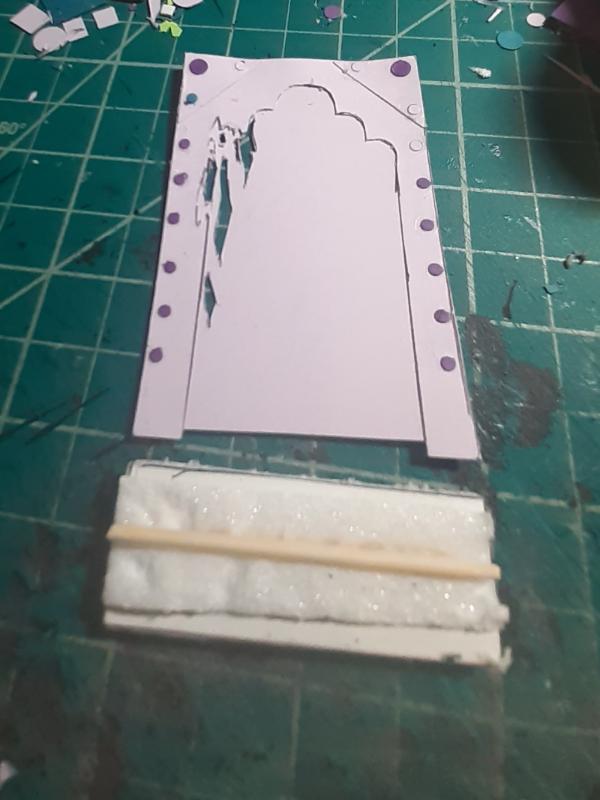
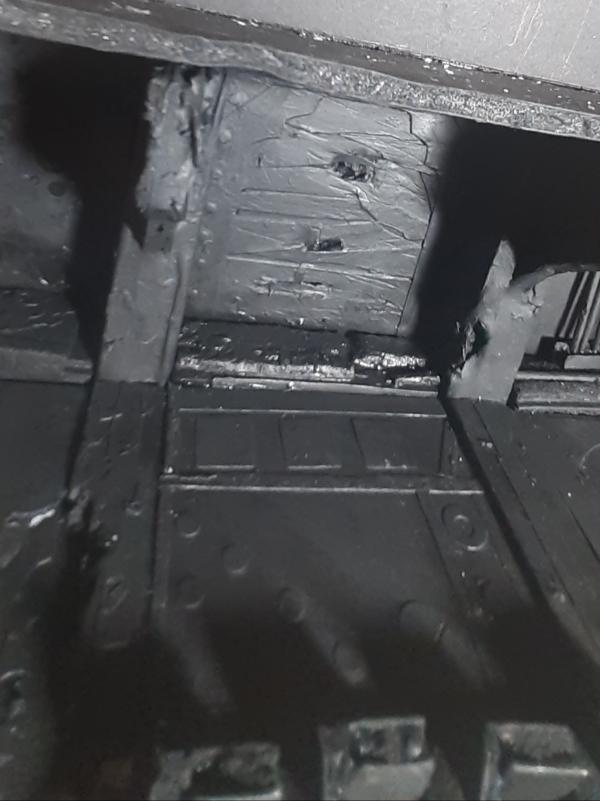
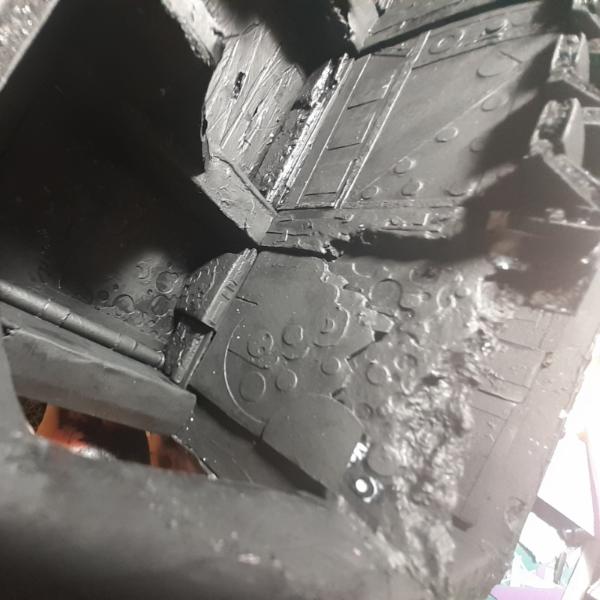
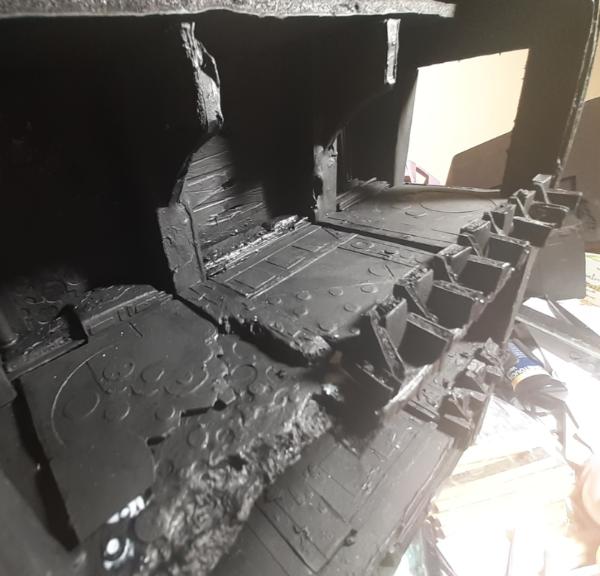
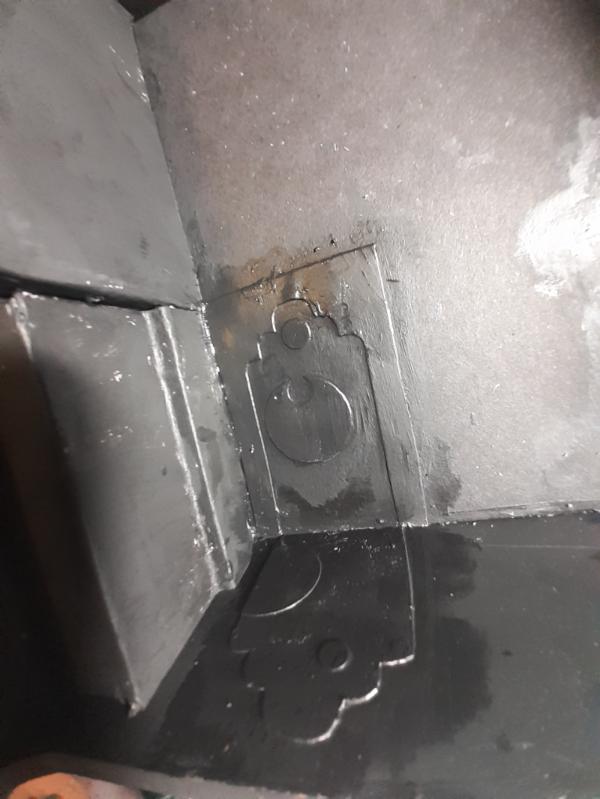
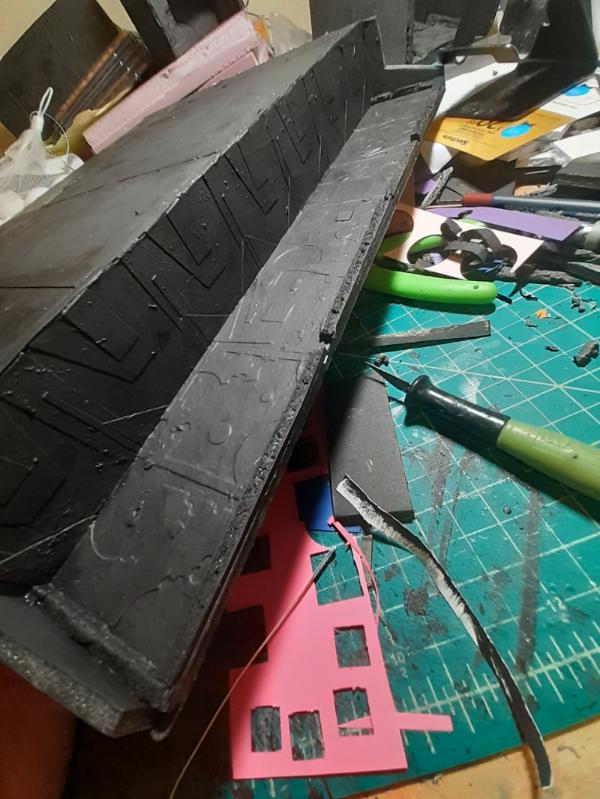
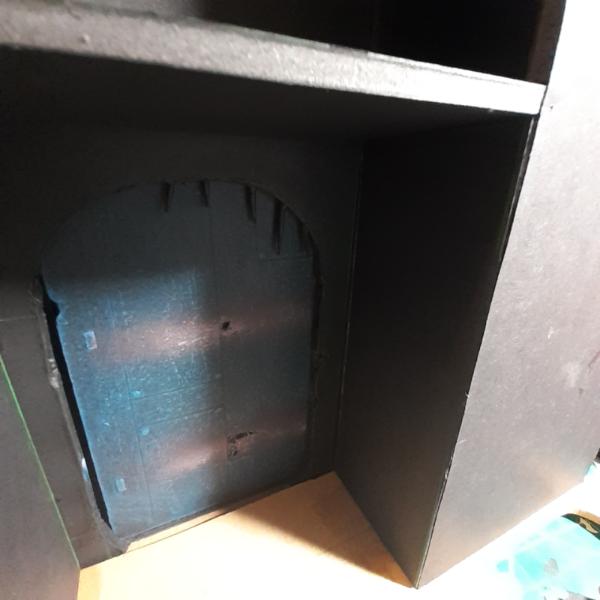
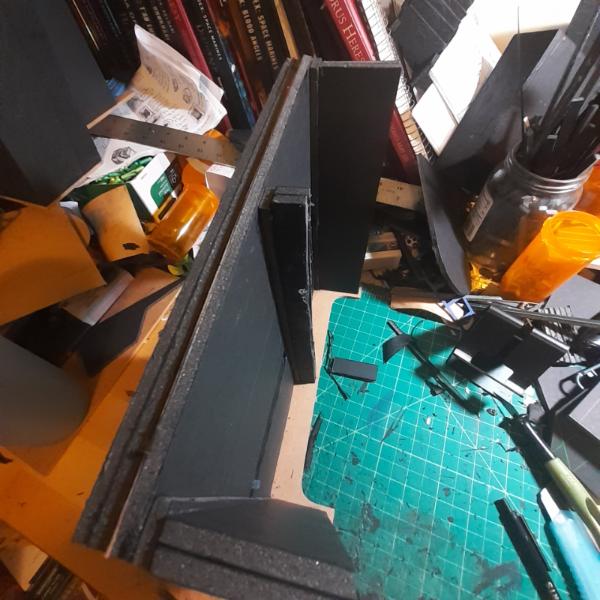
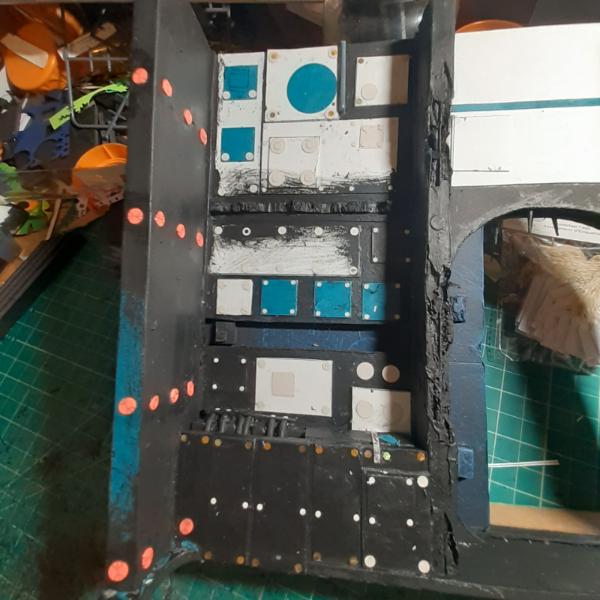
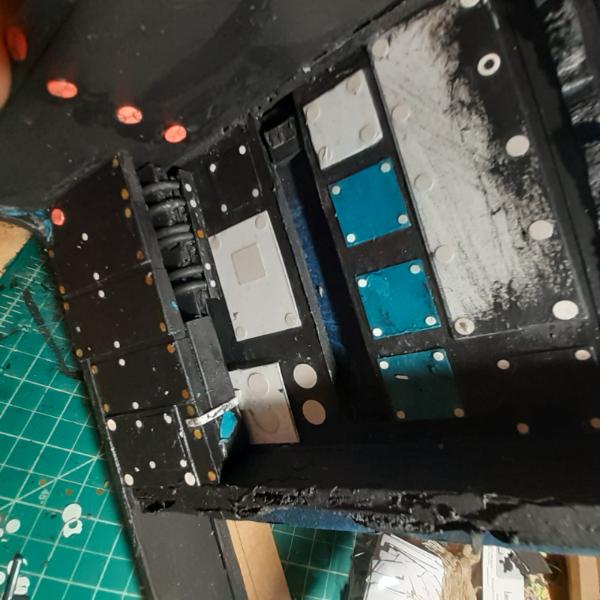
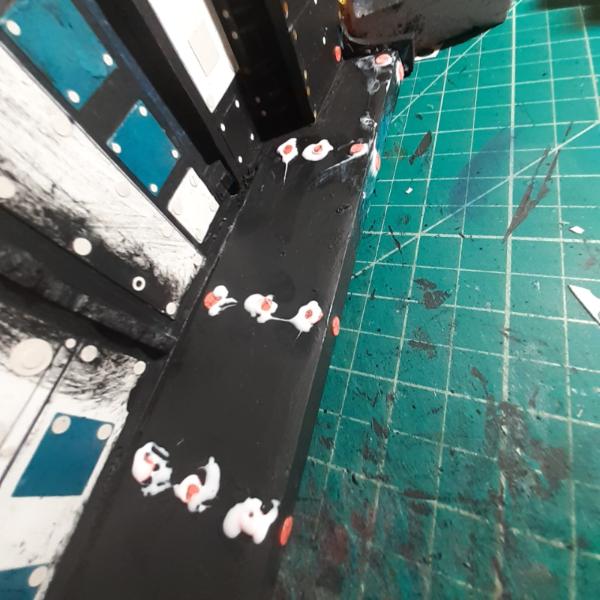
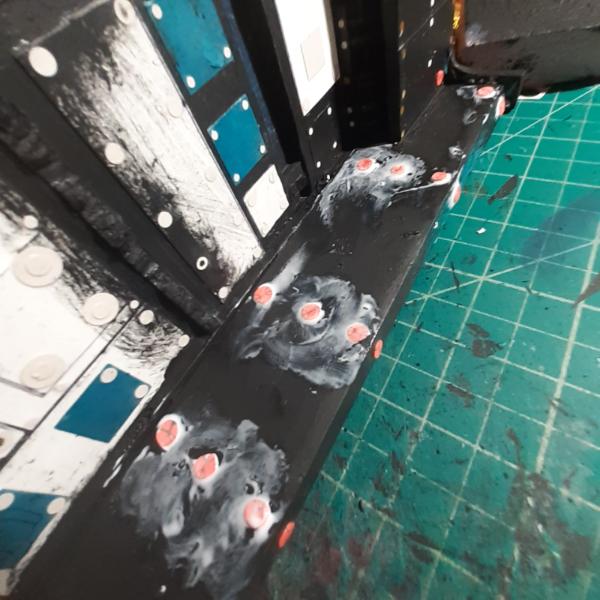
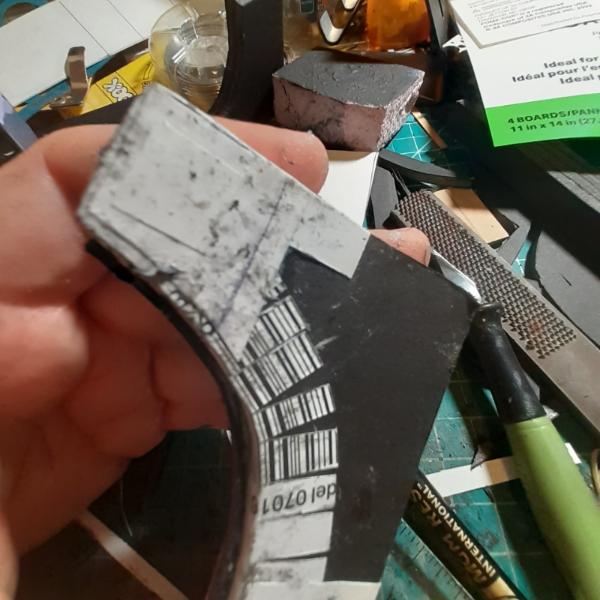
I wrapped the left column with no distress, mostly because I wanted to save myself some work.
And then proceeded to distress the heck out of the central column.
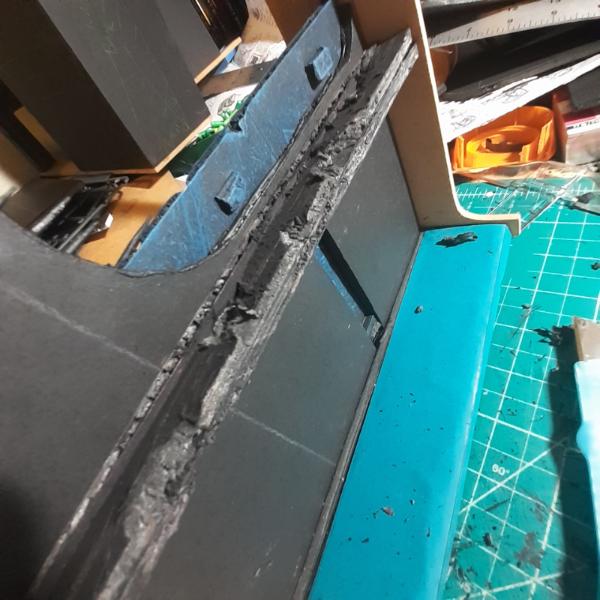
The inside and outside of my paper wrap.
And then all the distress of gluing it into place. I also glued a wall into place between the nondoor column and this center column in anticipation of the details I intend to put there (and before I primed all the details behind it, like a dumbass; yay more difficulties for no reason).
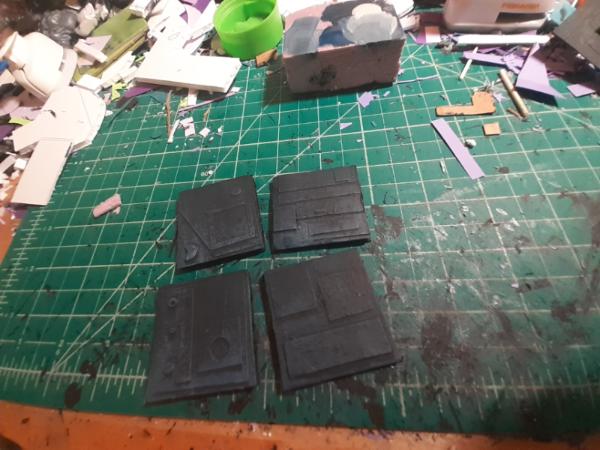
Now more basketballs and some wall dressings.
And then a quick review of finished versus WIP piles.
Thanks for looking. I'll post up more stuff soon. Have an awesome day! Automatically Appended Next Post: GreenScorpion wrote:Good progress with the damage and the use of cheap materials for detailing is a great idea.
As someone who has built a small fortress out of used matches I do think that reuse of garbage can be great. Building something of that size with thousands of matches is probably not something I would recommend though.
Wow, that sounds like an endeavor! And yeah, garbage and unusual materials seems to have become my trademark. I just went to my storage unit yesterday and dragged out a hole crate of odds and ends - lollipop sticks, wooden cubes, tongue depressors, coffee stirrers, drinking straws, broken dollhouse furniture, pieces of cheapo wooden puzzles, and more! I'm looking forward to implementing these bits on all my stuff going forward.
22619
Post by: inmygravenimage
Very dramatic. Keep it up!
76303
Post by: Warboss_Waaazag
Thanks, graven. I will!
And as evidence, I started with this sprue left over from a bunch of mecha kits my friend gave me a few years ago.
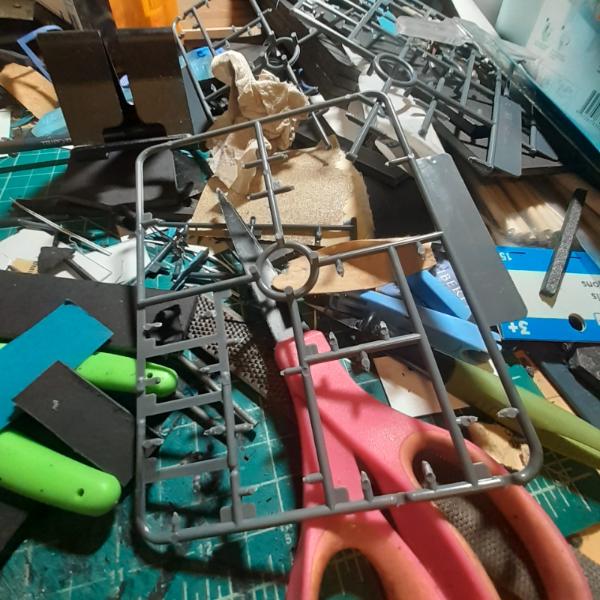
The rounded nature of these gave me the idea to have pipes coming up out of the hole I had made with the low wall. After struggling to get my paintbrush into that area, I primed the hole as best I could and then attached the sprue-pipes to a piece of spare foamcore. I shaved some grooves into the foam to create channels for these pipes to fit into and used coarse sandpaper to file away any details that might give these plastic bits away as sprue. After a quick prime and the addition of another foam chunk, I started building the insert.
Then jammed it in place, realized there was more gap than I thought, and hastily added more paper to the extra space until it fit as snuggly as possible.
More details up soon. Thanks for looking!
126697
Post by: GreenScorpion
Leftover sprues are an amazing material! If you ever need a round control terminal/table that circular part in the middle seems like a good start, it even has little feet.
119289
Post by: Not Online!!!
Very nice. I really will need to take inspiration on some of those techniques.
76303
Post by: Warboss_Waaazag
Thanks, GreenScorpion and Not Online!!!.
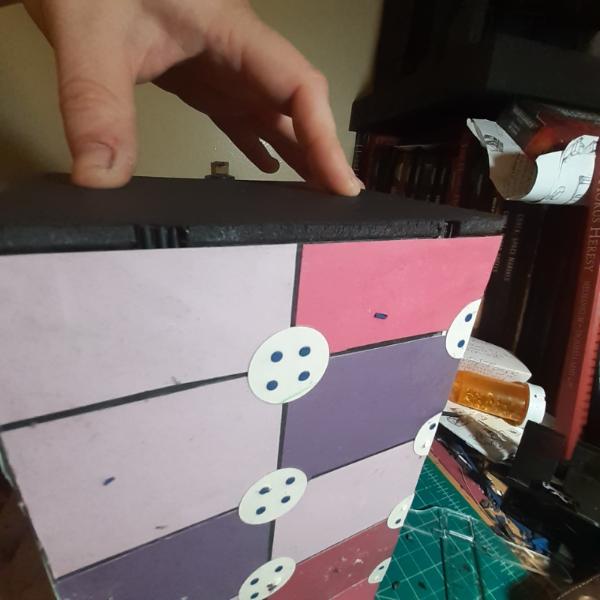
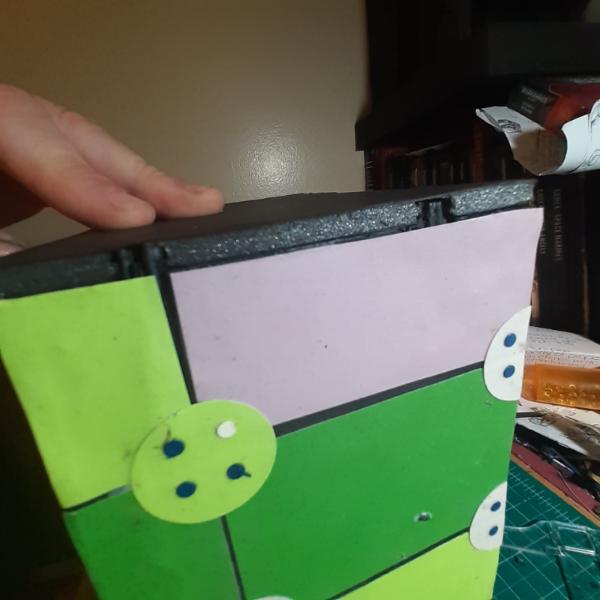
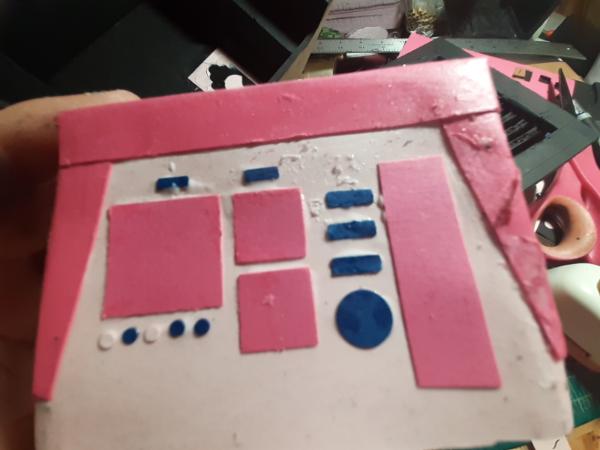
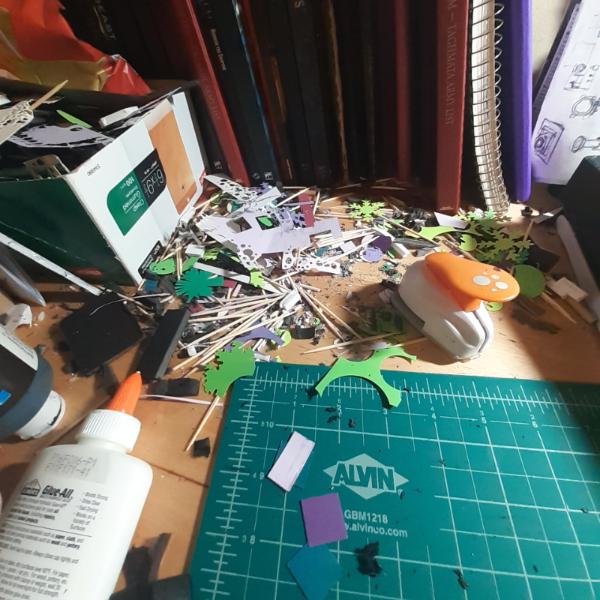
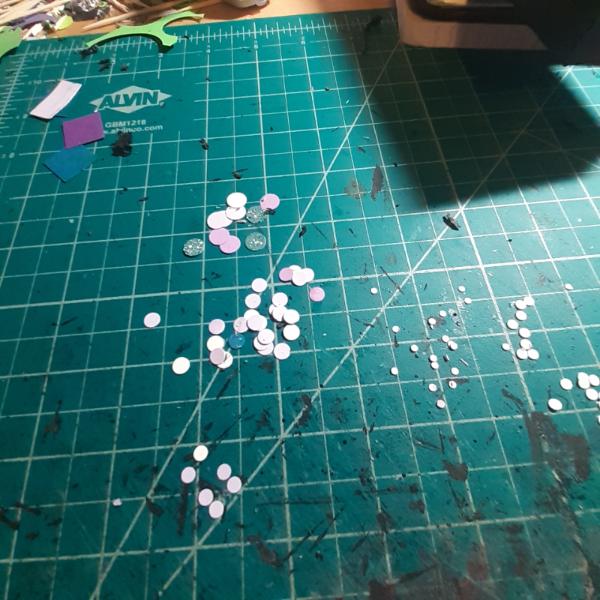
Here is my latest craft store haul. I intended to use these glitter packs as individual bolts, but now that I have started to I fear each individual glit might be too flat to even pick up paint. I guess time will tell.
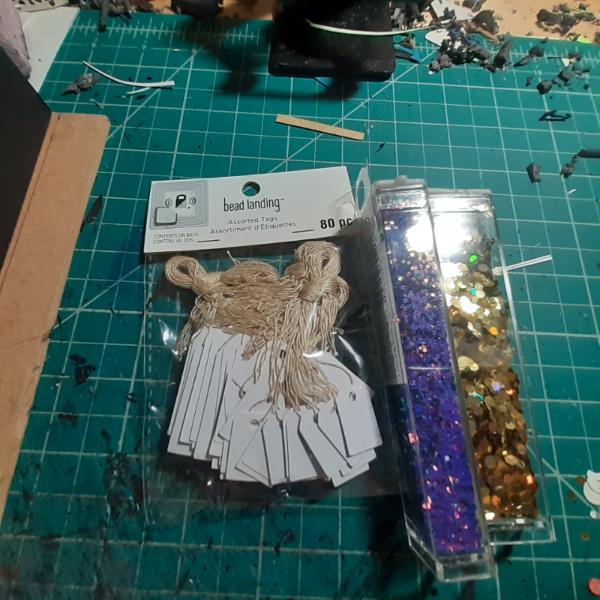
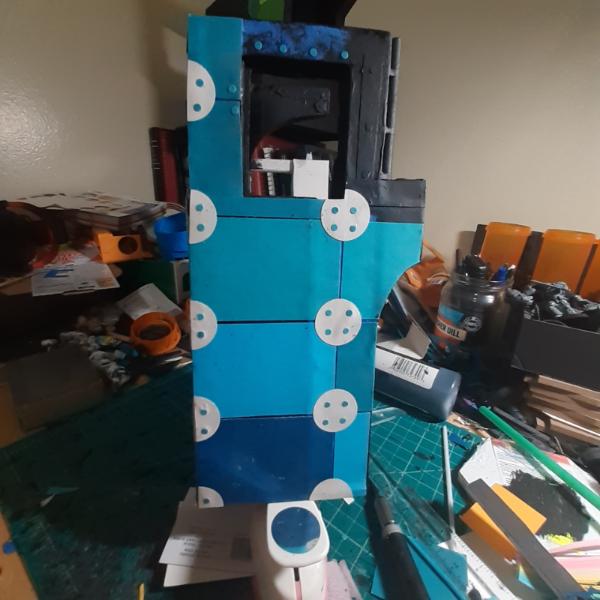
Anyway, I used the gold glitter and paper dots to add some details to the piece.
I also filed down another sprue bit to make a pipe.
And then went a little berserk with garbage in the corner.
But that's my update. I'll post more as I get it done. Thanks for looking and have an awesome day!
76303
Post by: Warboss_Waaazag
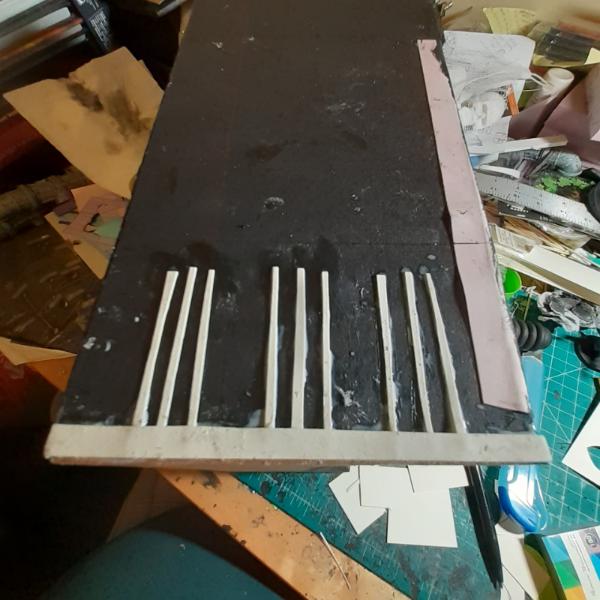
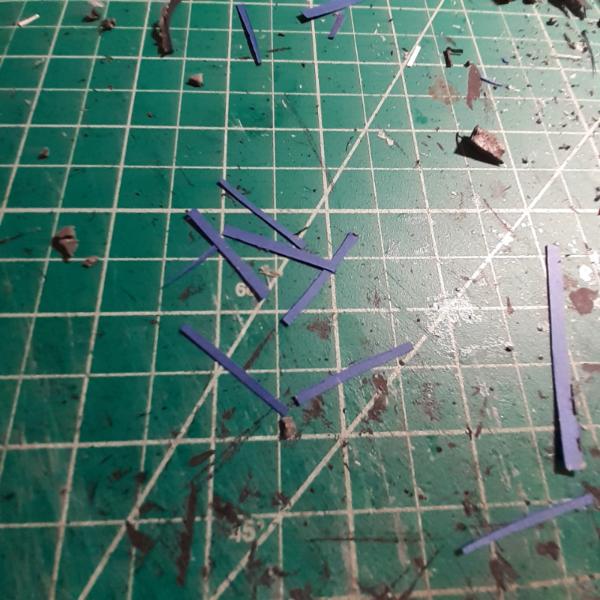
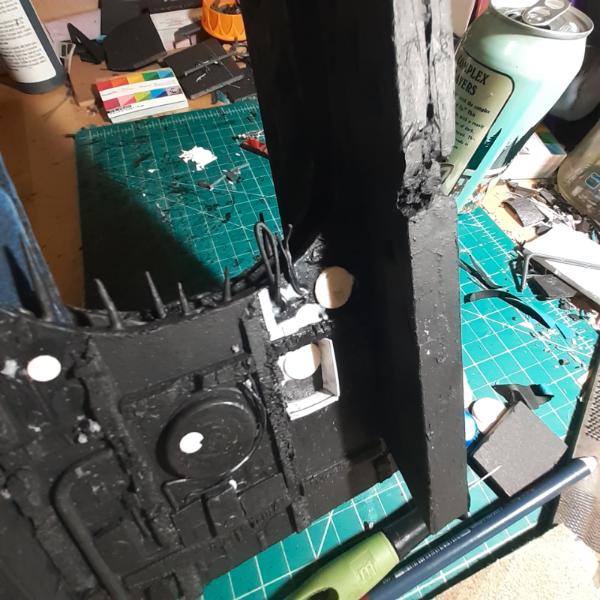
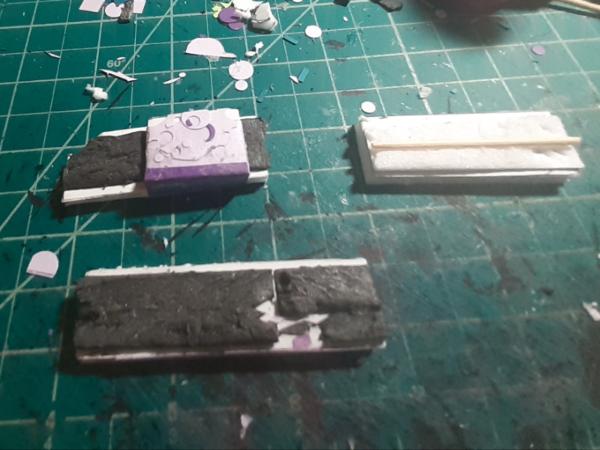
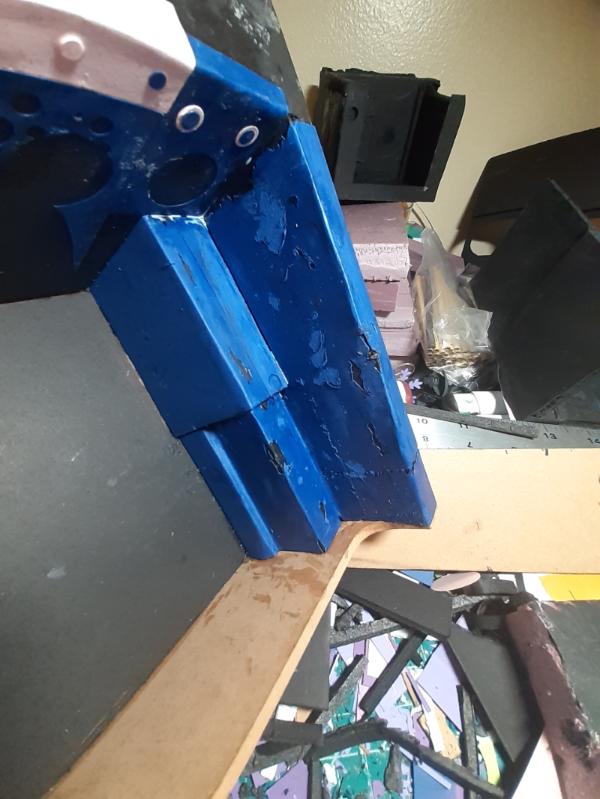
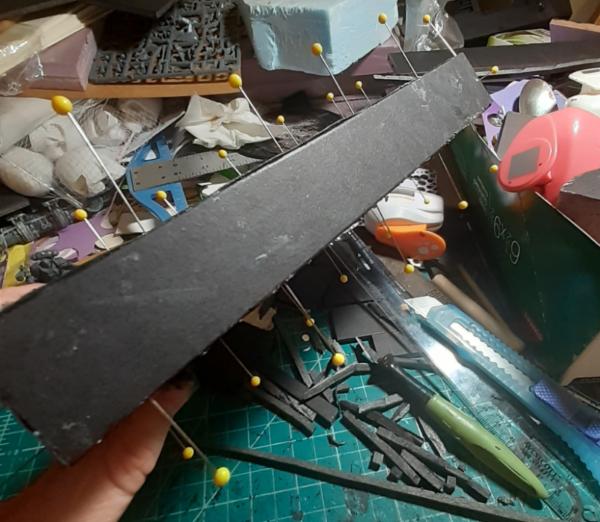
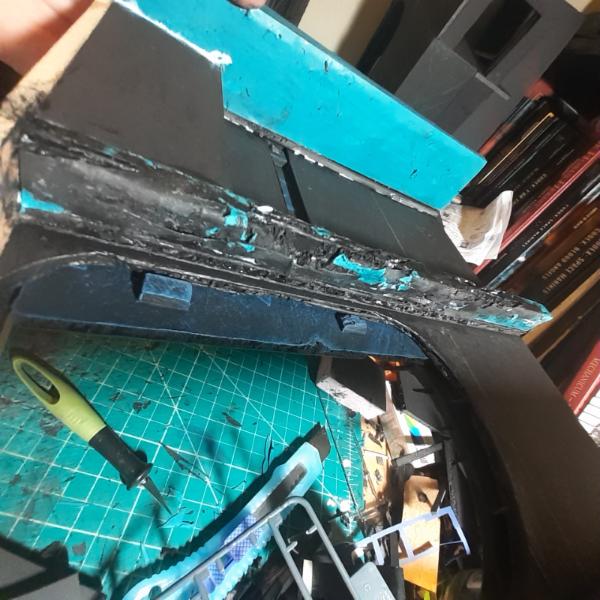
VERY little progress, but I started work on the structural supports for the other side of the big door piece. I measured, cut incorrectly, and trimmed until these slivers lined up to create an angle. Then glued them all together and used the power of HAND to make sure they cured flush and aligned correctly.
With luck I'll have more to post up later today, but this is it for now. Thanks for looking.
76303
Post by: Warboss_Waaazag
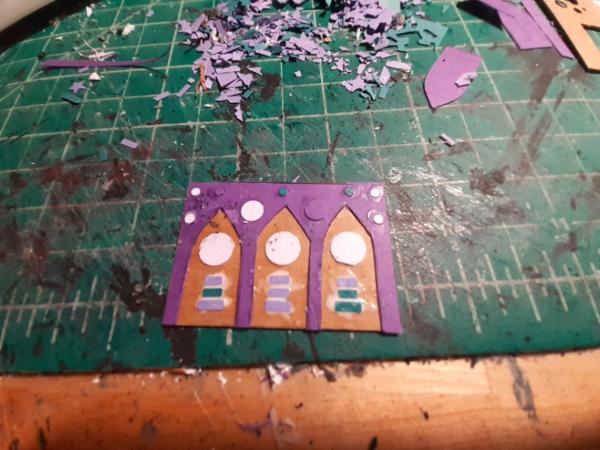
Various fiddling with scrap paper to create archway details.
Measure once, cut twice, right?
And this my trusty smoothing block aka just another cast off amongst thousands.
And then with all the bells and whistles.
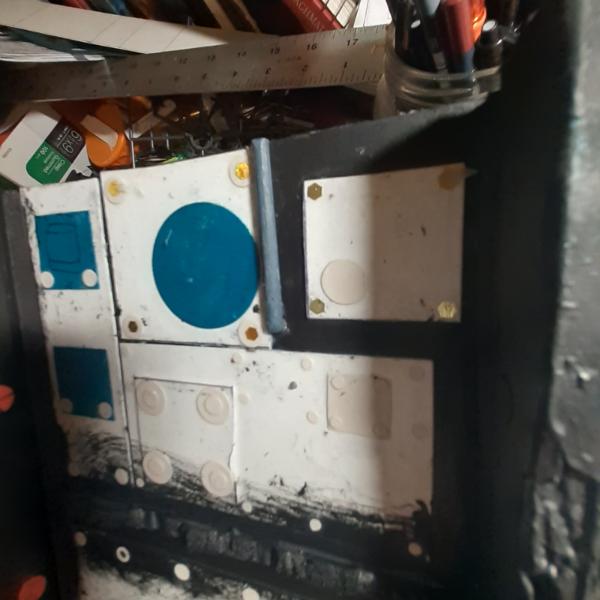
I noticed my basketball rivets were looking kind of exposed so I added some glue to smooth out their details.
During that process I noticed a blank spot in the central column, so I added more details there.
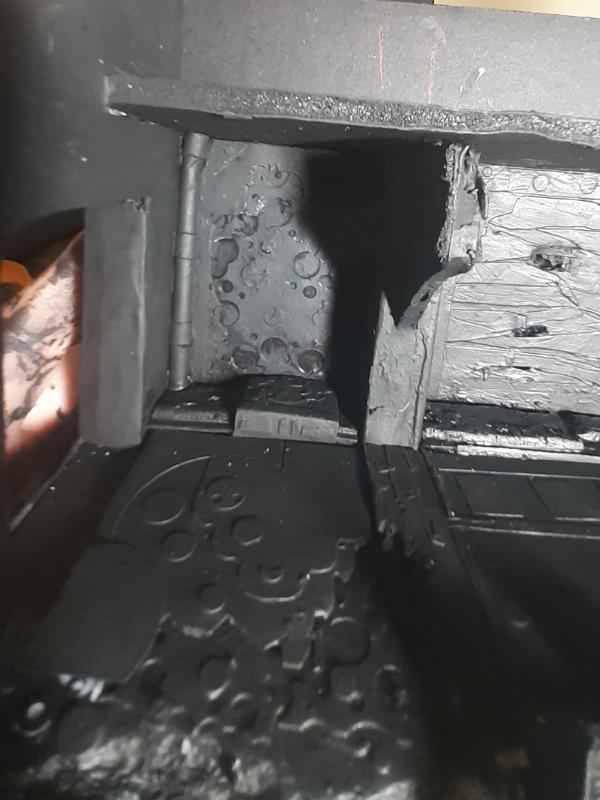
Then I detailed the second half of the big door piece, over the actual door.
And added a stalagtite next to the pipe on the first side.
Thanks for looking. I'll have a bunch more progress shots tomorrow.
76303
Post by: Warboss_Waaazag
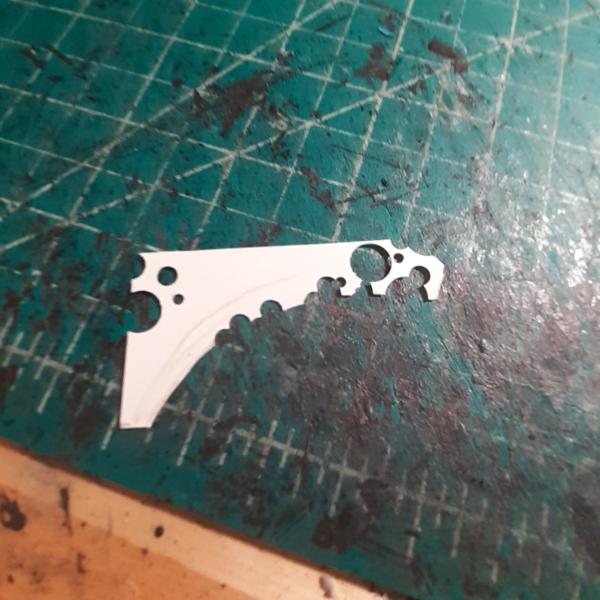
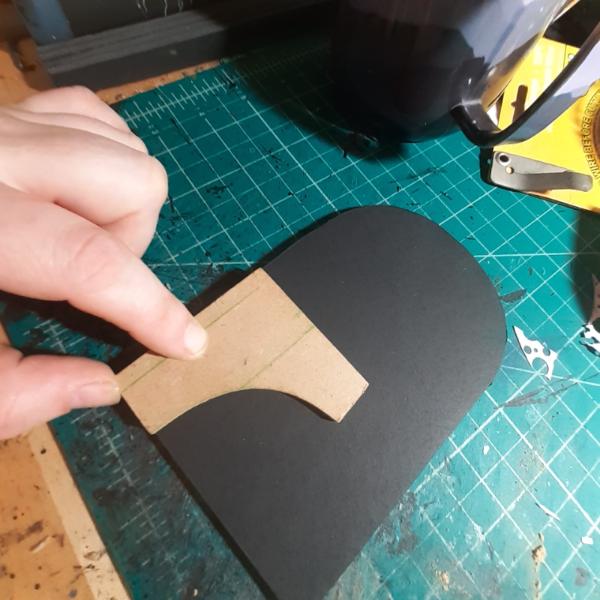
Okay, remember that alcove I had trouble photographing? Well I decided to add some details to it. First, I took a scrap of a masonite "F" and cut it down to the correct height.
And then I test fitted it to the alcove to see what the end result might look like.
On to using my template
 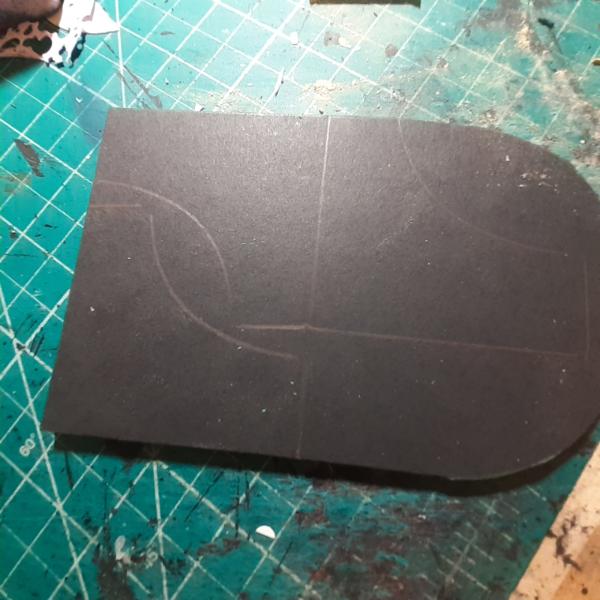
Easy enough. I cut out those original 3 and then went through a couple of base ideas about how to use them. I was thinking I might glue 2 together and then alternate them with a recessed detail. Or glue 3 together, or.... Hm. I settled on cutting out 1 more piece to make 4 in total, glued 2 together to make a thicker support. I made 2 of these; then detailed them up and decided to make a single recessed detail between them. Paper wrapping foamcore shapes is the smartest mistake I stumbled upon with this project.
Never just discard cast offs, folks. You have no idea how useful all these extra slivers of foamcore have become.
I cut a sloping widget of foamcore, too. It needed covering so I went a little silly, but it worked.
And then, tada, the whole insert glued together.
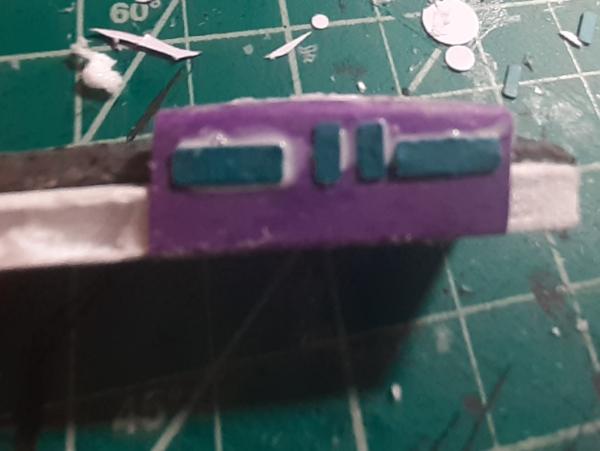
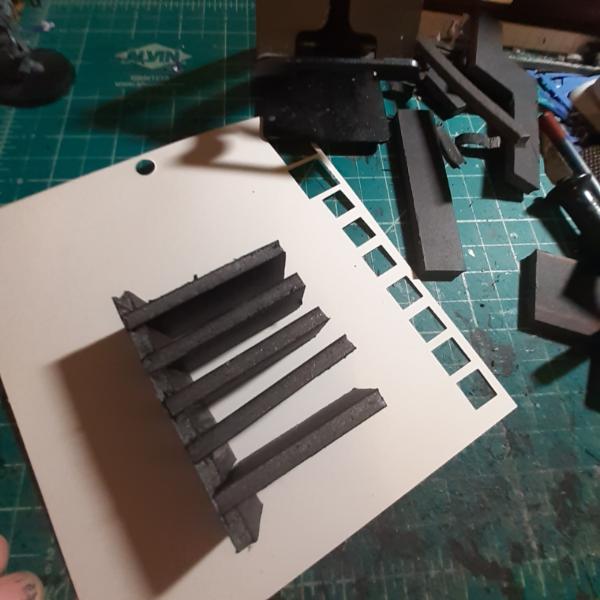
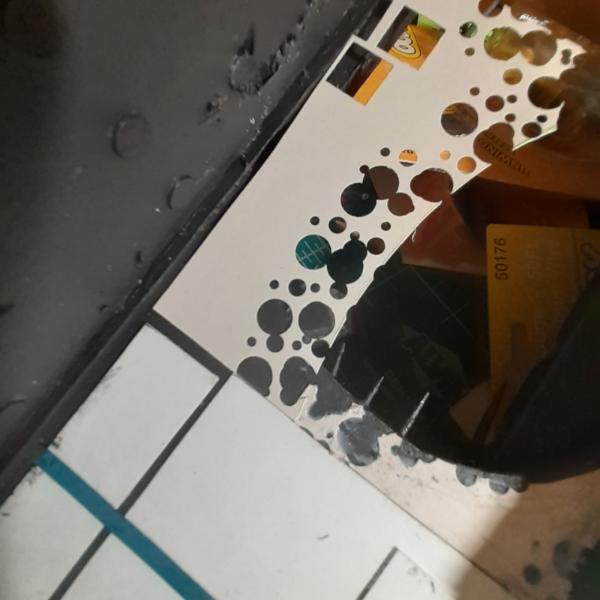
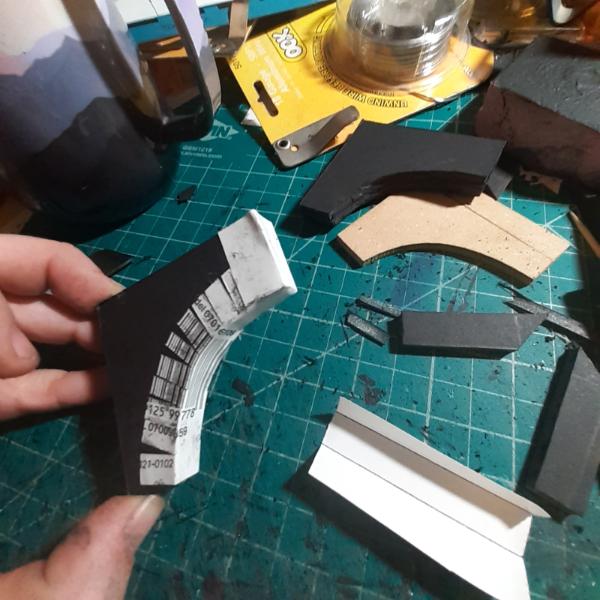
After priming the thing, I got to work on the radiator/vent thing I wanted in the middle. It took some fiddling to figure out the exact size, shape, and placement of the tines.
But I eventually figured it all out.
Here it is from the top view (which no one will ever see again).
And here it is tucked away in that impossible to photograph alcove.
This project has really brought the "insane attention to details" out of me. The number of tiny things I've made and hidden, in places only barely visible to even a scrutinizing viewer, is significantly greater than 1.
Thanks for looking and have an (insanely) awesome day!
22619
Post by: inmygravenimage
Insane and AWESOME
76303
Post by: Warboss_Waaazag
Aw shucks, thanks graven.
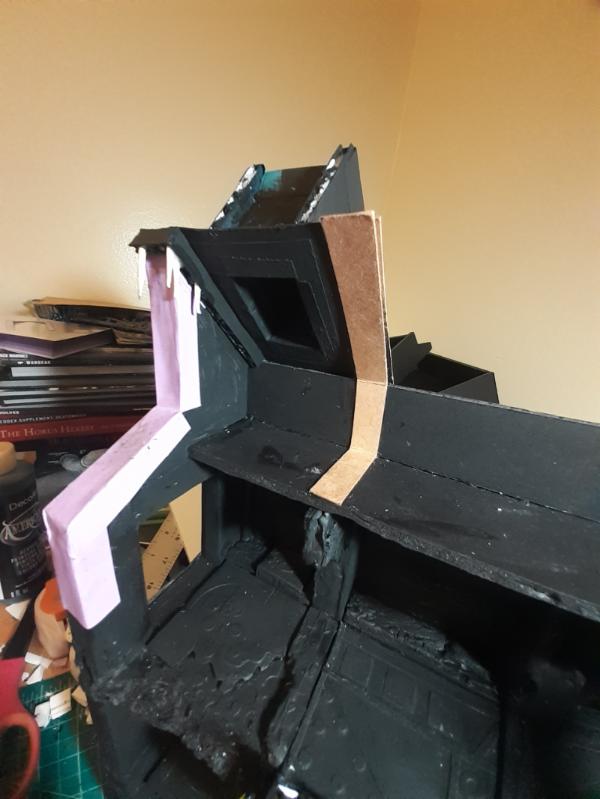
I started work on an archway for another piece.

It was a pain to carve out and I eventually shaped it with my curved rasp.
Then I started to add more details and tried to smooth the transition from foamcore to big blocky pink foam.
I felt the floor flanges needed some support, so I built one.
Slow progress is still progress. By working on multiple pieces at the same time I feel like the whole process is taking longer. It's difficult to acknowledge that I am making progress because it doesn't feel like I am. When all 5 of the pieces I am currently working on are done, all more or less at the same time, I will probably feel differently.
Anyway, thanks for looking. Have an awesome day, and comments are always welcome.
98217
Post by: Skinflint Games
This is looking awesome Warboss, love the sprue pipes, I'm nicking that idea ;-)
76303
Post by: Warboss_Waaazag
Excellent! That's why I document all of this (and totally not just to generate dopamine boosts when y'all give me such high praise. Honest). Please, nick away.
I started wrapping the archway piece and now I feel like it's wearing pajamas.
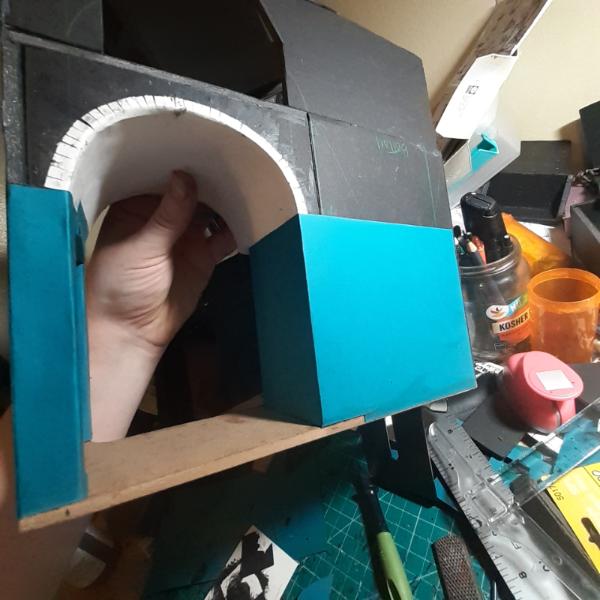 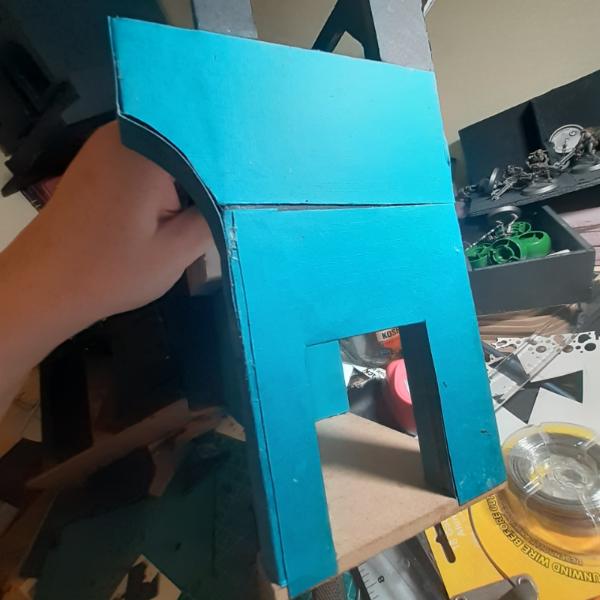 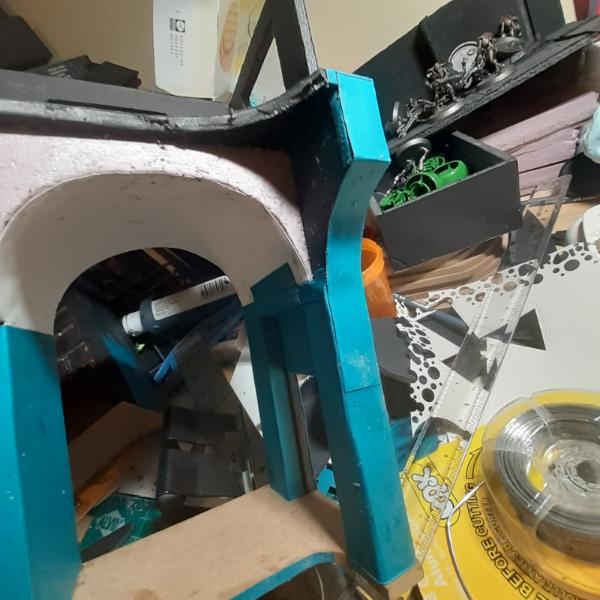 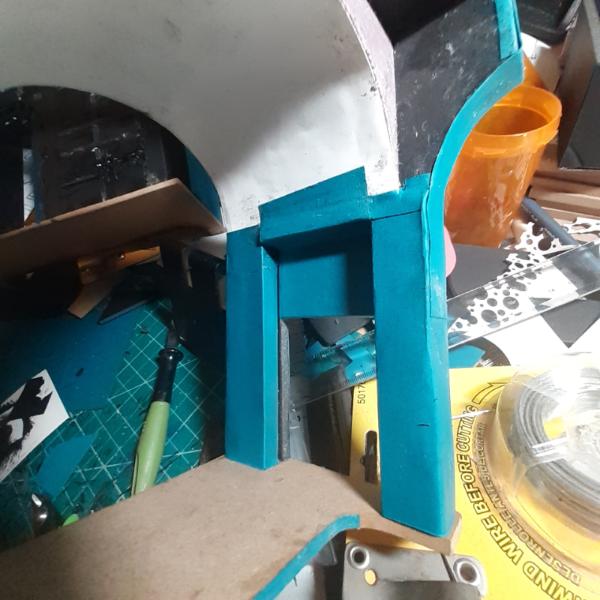
Now I am struggling with the idea of leaving this part exposed like it's made of stone, instead of wrapping it like I had originally planned.
Thoughts? Suggestions? I know it's totally on brand for 40k spaceships to have stonework and masonry onboard, I just don't know if it would look right, here. The archway is going to get gussied up with fancy ceiling tiles and the very first piece I made is virtually covered in ornamentation, but is stonework here too far fancy? I guess I just worry about collective uniformity when I'm done with the set.
Also, new, more realistic goal for my December is to complete this piece, the door piece, and the impossible alcove piece by the end of this year and save the structural support, the balcony/top cover, and all the rest of the set yet to be created for next year. I'm tired of setting impossible goals for myself.
Please, comments and feedback are welcomed and encouraged.
Thank you for looking in on me. I love you all.
76303
Post by: Warboss_Waaazag
Chugging away, I finally got to work on the other side of the giant door piece. I had the idea that this side of it was exposed more directly to the radiation that's damaged the support structures on the first side. So I endeavoured to create depth to build into by first laying out a grid in colored pencil and then using the multitude of foamcore scraps I had laying around to emulate the wall's internal superstructure.
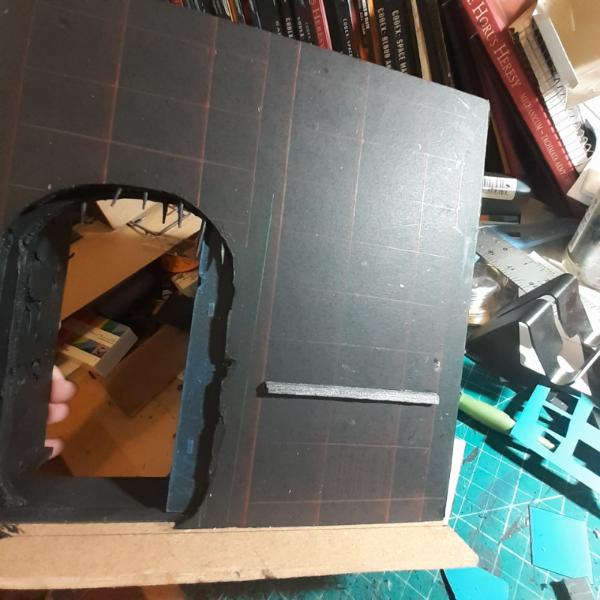 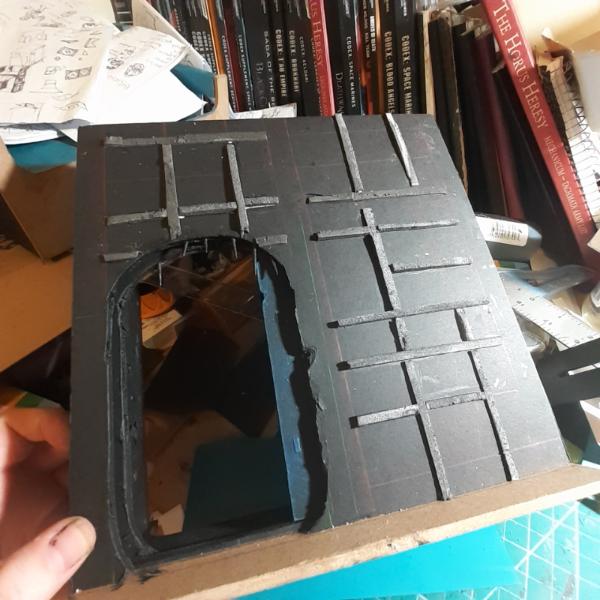
And then, after running the flat of my hobby blade over the framework to create "damage" and irregularity, I immediately got to work layering "damage" using lengths of various gauges of copper and aluminium wire, scrap paper and foamcore bits, paper circles, those mini tags I recently bought, string, and anything else nearby that I thought might do the trick. In some places I cut down into the foam of the piece itself. I wanted layers and layers and layers of detail, but didn't want to clearly define what any of it actually was.
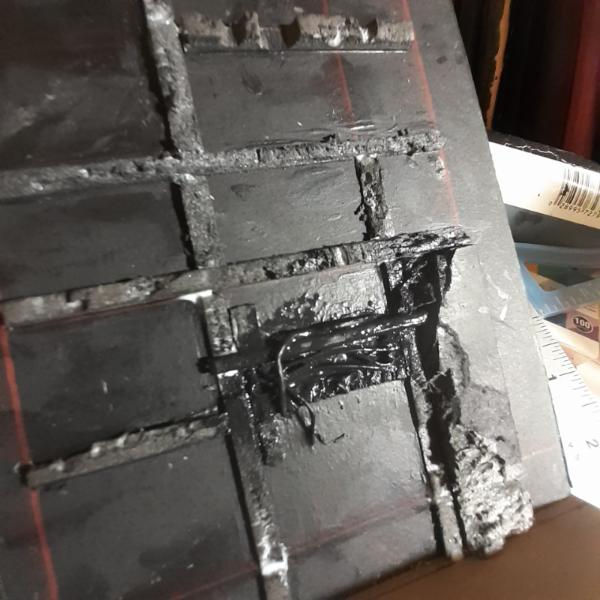
You'll notice between these shots that I realized I would need more foam strips to glue my "rotted panels" onto, even with the spaces I left for my pillars to sit in. So I just glued more strips along the lines originally meant to be the border of this pattern. I also strengthened these strips with a layer of finger-applied white glue and a heavy dose of matte black craft paint. 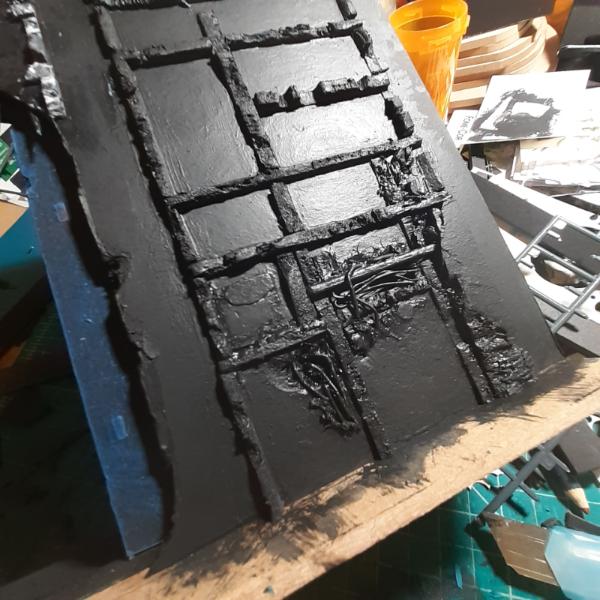 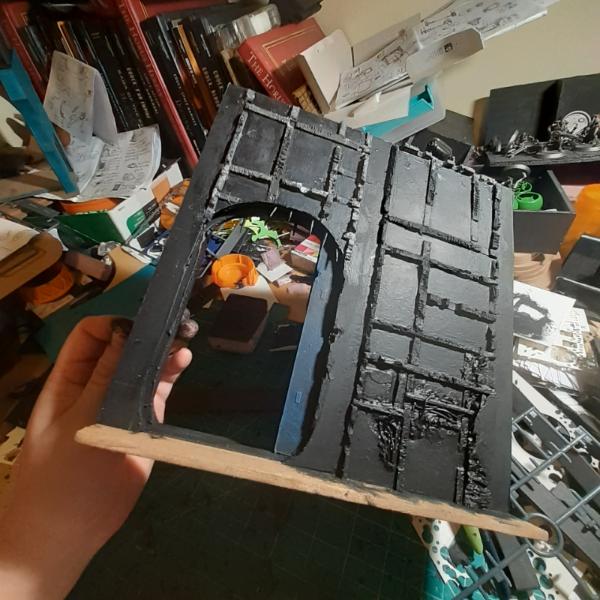
About midway through this process I realized I should finish and apply the support pillars I had planned and so got to work actually finishing them. Repetition is boring, but here I demonstrate how I used this guiding mark to cut the angles I wanted. This is roughly 1cm from the top of the strip. I just scored this with my hobby knife and then used that score mark as the guide for my blade to cut the angle.
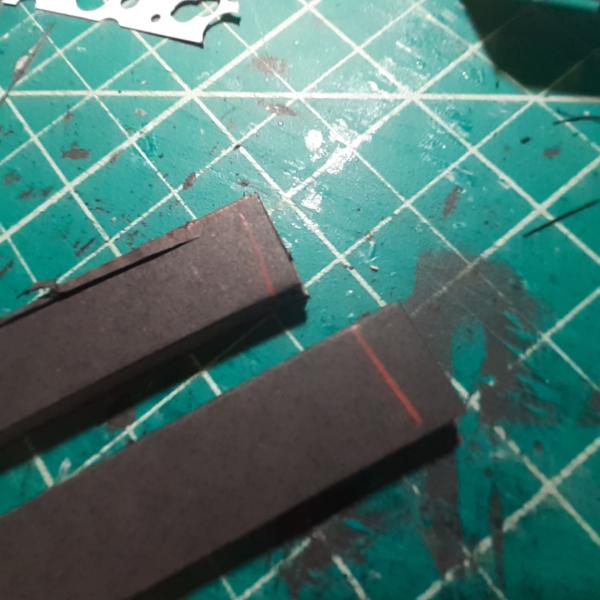 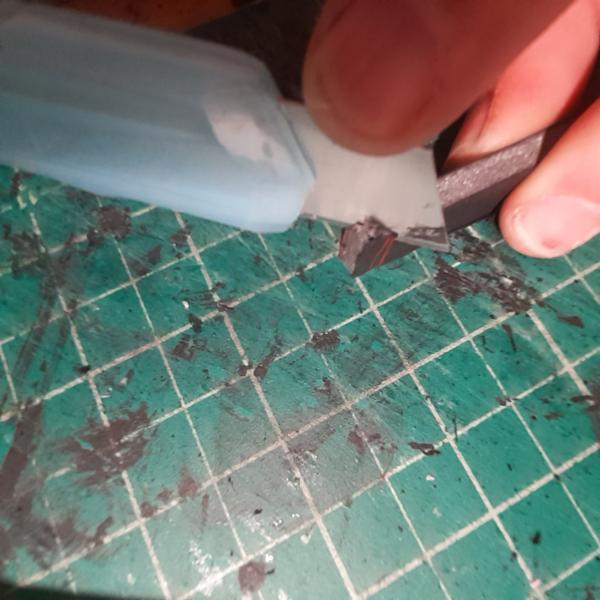 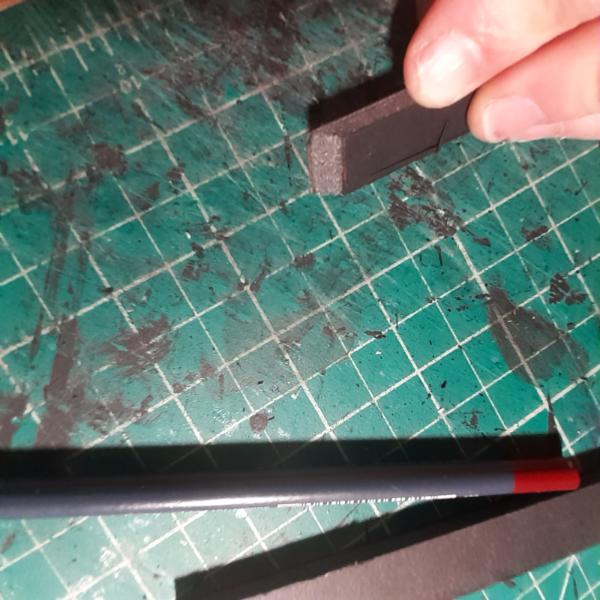
Not very interesting, but a necessary step. Then I glued them together, one strip at a time and weighed the join down with my heavy rasp while I worked on other details. The wrap was so tedious and uninteresting that I didn't bother to take pictures of the process. It's all much the same as all the other times I've wrapped stuff. Measure once, fold, test fit, be sad, frustratingly apply glue and sloppily paste the whole thing on. Then create a small extra piece to cover what the first sleeve missed. Prime black (or forget to) and glue to the main piece. Tada.
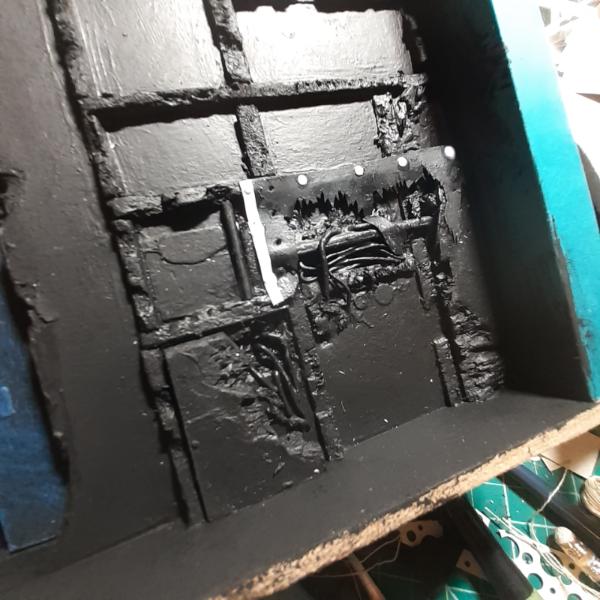
And then I spent just...so much time getting fiddly with the details until I couldn't take it anymore and put it to the side for now. I'll pick this up again at a later date.
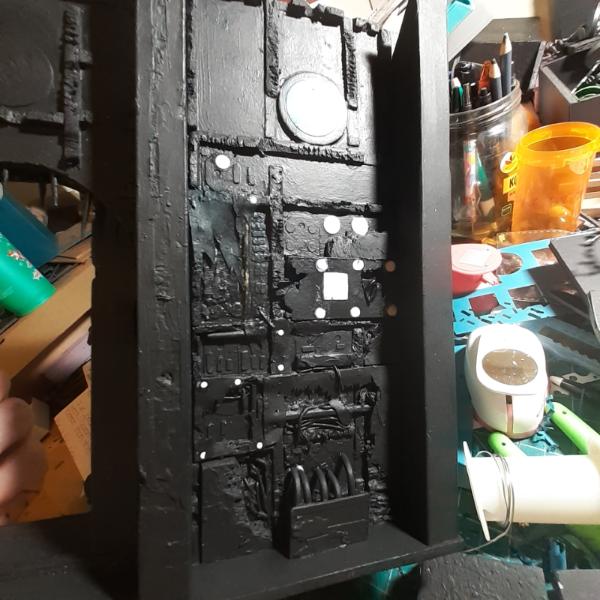
Thanks for looking and have an awesome day! I'm still open to feedback on this post and any other throughout this whole blog. Questions, comments, critiques?
76303
Post by: Warboss_Waaazag
Finally primed the finished wall.
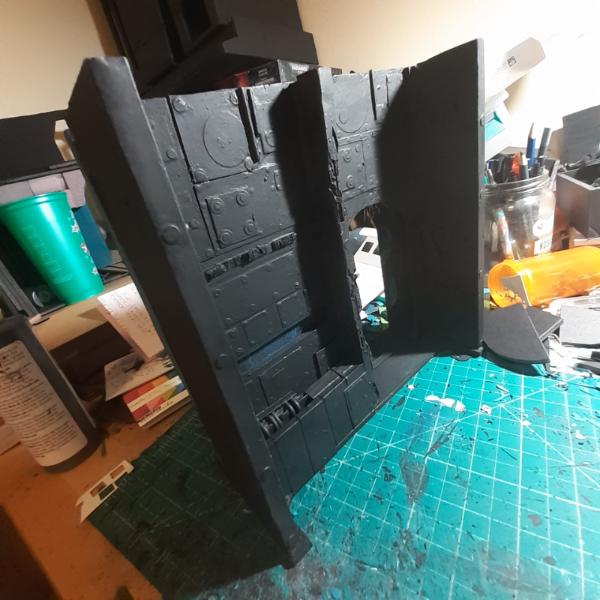
And got all 3 pillars in place on the other side.
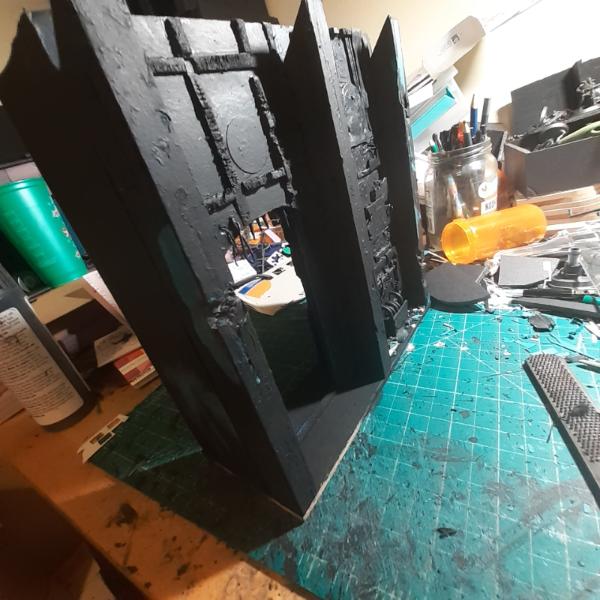
And did a ton more work on the detailed side. The bottom:
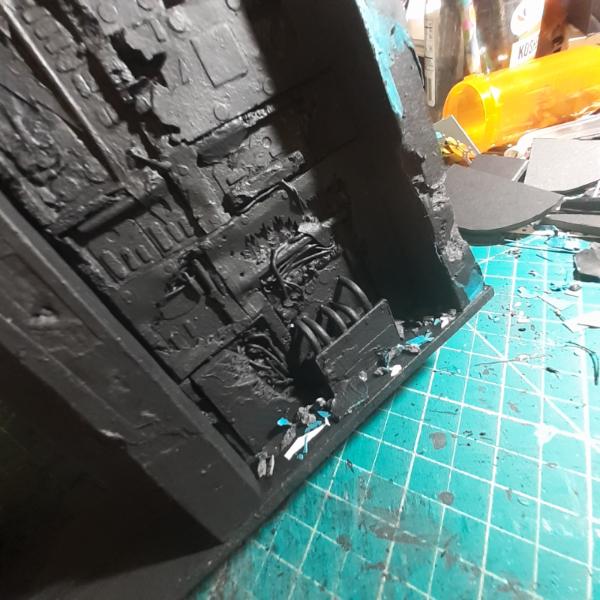
The top:
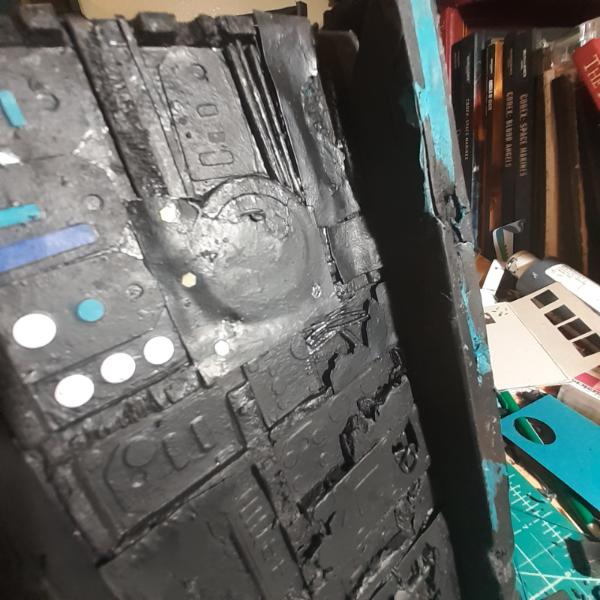
The wall as a whole:
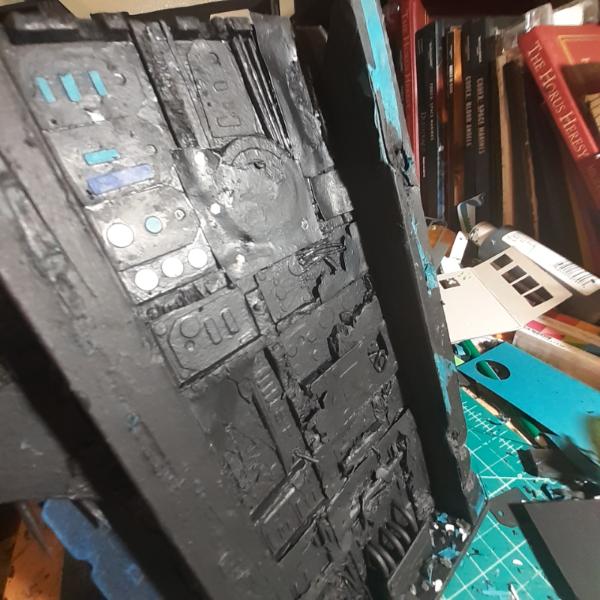
And just getting started on the wall over the door:
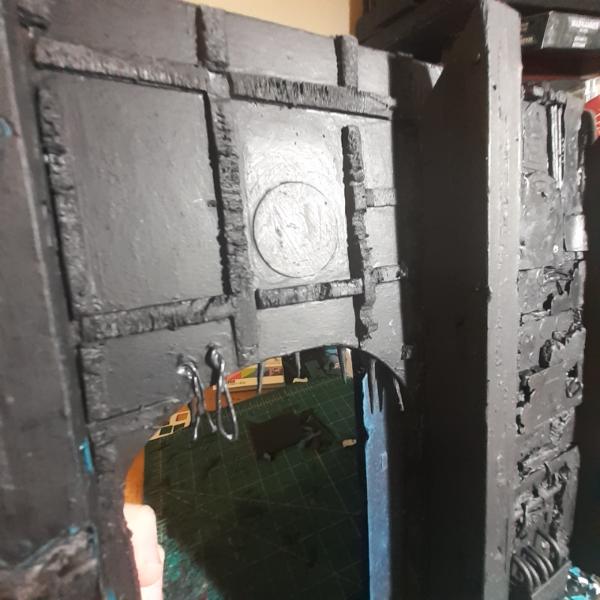
More to post up soon! Thanks for looking and have a happy and safe holiday of choice! I celebrate the Winter Solstice, personally.
76303
Post by: Warboss_Waaazag
I did some work on the stairs topper. Started wrapping it and detailing the floor.
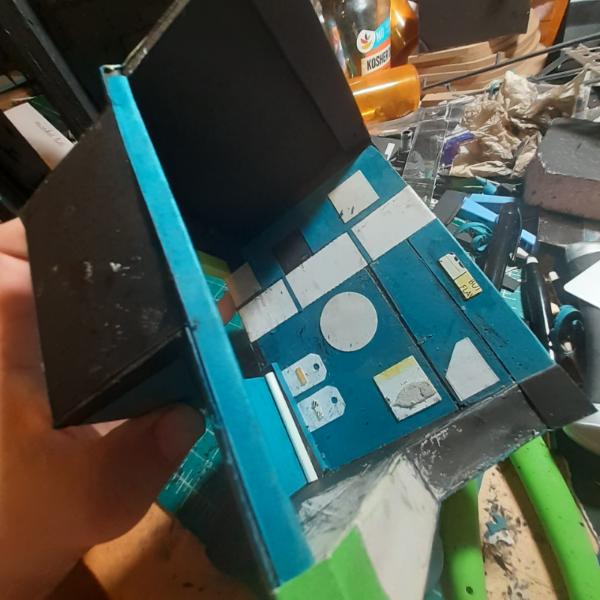 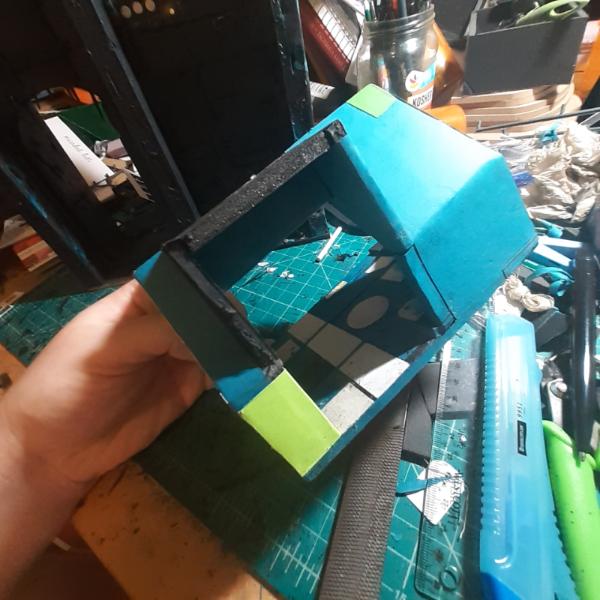
Paneling the exterior wall...
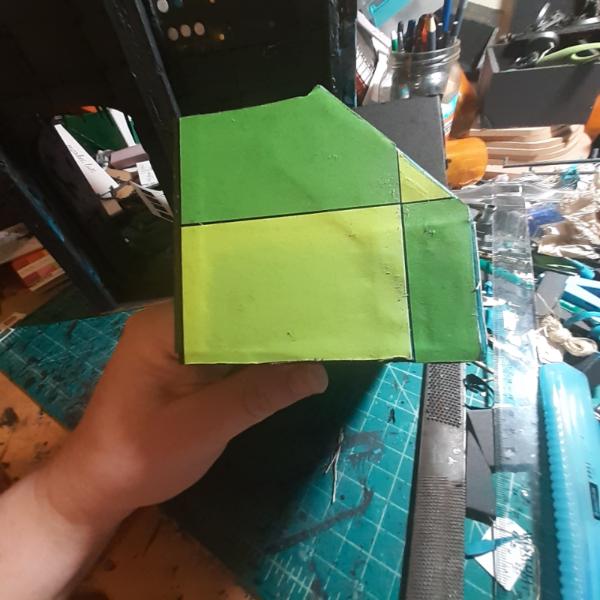
And detailing the underside/ceiling for the level below (and priming it whenever I had left over black paint on my brush from painting something else)...
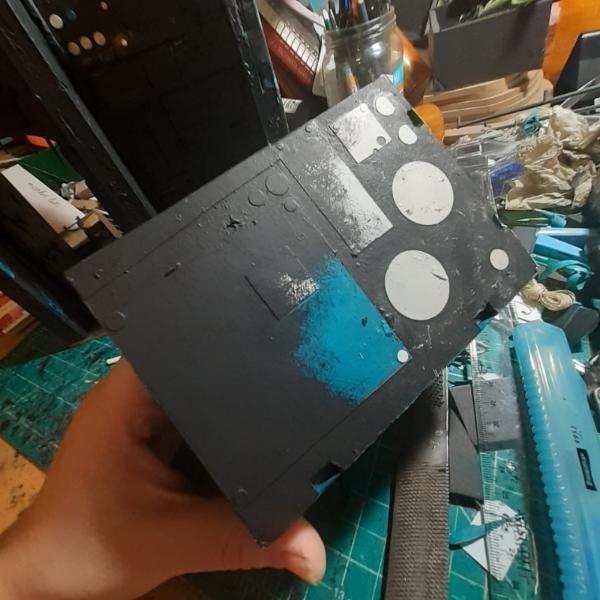
And then some ideas about what to do with the inside wall join (that's a lolipop stick cut down to size)...
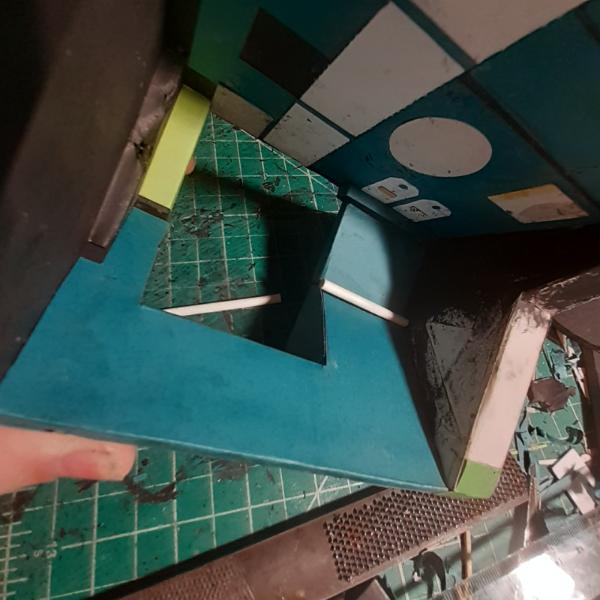
Thanks for looking and have an awesome day!
126697
Post by: GreenScorpion
Your detailing is looking quite nice, can't wait to see the full set of terrain all together when you are done.
76303
Post by: Warboss_Waaazag
GreenScorpion wrote:Your detailing is looking quite nice, can't wait to see the full set of terrain all together when you are done.
Thanks, GreenScorpion, me too!
89168
Post by: youwashock
Insane attention to detail seems an appropriate diagnosis. An epic build, for sure!
119289
Post by: Not Online!!!
This is simply amazing. Can't wait to see the final product!
76303
Post by: Warboss_Waaazag
 youwashock wrote: youwashock wrote:Insane attention to detail seems an appropriate diagnosis. An epic build, for sure!
Thank you both! I unfortunately do not have progress shots to post today. The end of the year has proven to be very hectic for me. My resolve is still set to finish this project, but I for sure am not going to meet my December goal of 5 pieces completed. I honestly will be surprised if I finish even one of them.
I think my New Year's resolution is going to be to finish at least 1 piece per month. If I finish more than that, well good. That's gravy. I'm so used to working on a dozen projects at the same time, but not really finishing the whole giant project they are all a part of. And now that I am on effective mental health meds, I have to get used to this ability to focus on one piece at a time, finish, and still retain commitment to continue with the rest of the project. This is a new experience for me. It took me 48 years to get here and I wish I had gotten the help I clearly needed decades ago, and at the same time thank goodness I finally did get this help.
So, sorry to turn this post into a PSA, but my message to everyone who needs to hear it is:
It is never too late to get the help you deserve. Use the internet as the tool it was meant to be. If you can't see a psych in person, have anxiety about the process, or are embarrassed about asking for help, remember that it takes Strength and Courage to admit you cannot do it alone. It shows Strength of Character and Humility to ask for help. You owe it to yourself to live your best life possible. Even Space Marines operate best as a Squad. They lean on their Battle Brothers for aid and survival. You and your therapist or psychiatrist are Battle Brothers and together you overcome the Daemons that threaten to overwhelm you (anxiety, depression, chemical imbalance, fear, and all the other things that weigh upon us and stop us from loving ourselves and others).
For me, the most difficult part was seeking out the help. I went to Talkiatry and even through my fear and anxiety, I found the help I so desperately needed. It's all remote video conferencing, through my phone, and they even take my insurance. Find the time, my friends. You're worth it.
I hope you all have a joyous and prosperous New Year. Stay safe, drive sober, and have an awesome day!
89168
Post by: youwashock
Sound advice. Keep safe.
76303
Post by: Warboss_Waaazag
I'll be back on track with this project come the New Year. Stay tuned, y'all.
1124
Post by: Captain Brown
Always happy to see what you have built today.
Cheers,
CB
76303
Post by: Warboss_Waaazag
Thanks, Captain Brown!
In an effort to stick to my word, here is the teeny tiniest of updates. I did some more work on the big door piece, adding details over the doorway itself. I took basically the same picture from 2 angles and I couldn't decide which looked better.
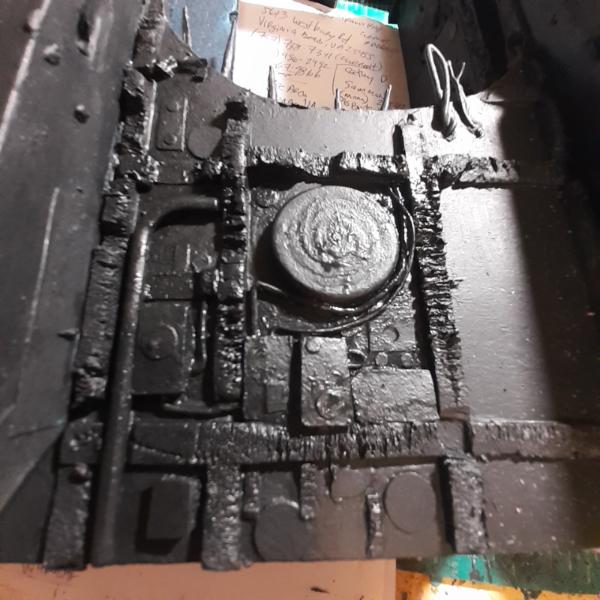 
It's my hope to finish this piece in the next week or two. Thanks for looking. Have a great day.
133289
Post by: Tommygun1918
How do you plan to finish these up paint wise.
Do you have a color scheme?
76303
Post by: Warboss_Waaazag
Yes. I intend to paint them as if they are being viewed through the augmented sensorium of space marine autosenses. Essentially cold, blue thermal imaging.
76303
Post by: Warboss_Waaazag
I started working on more details, cutting a square out of the wall.
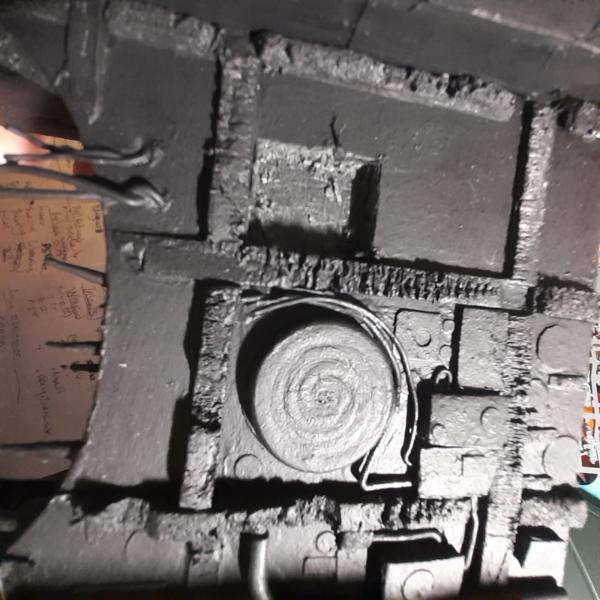
And sealing it with glue.
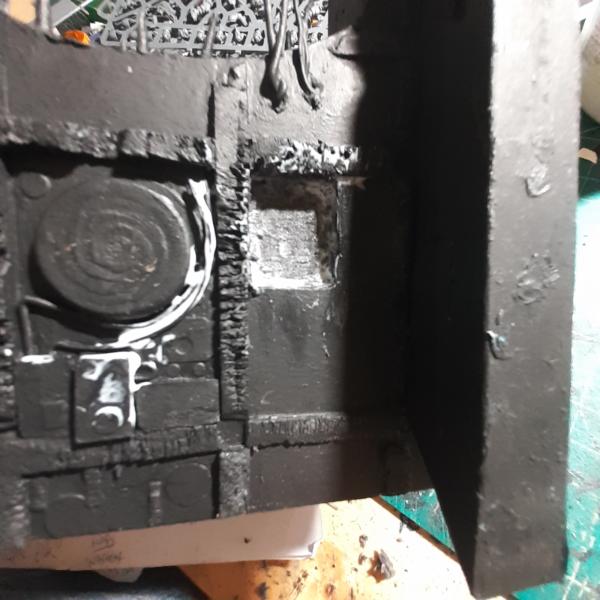
And then built a small wall in it.
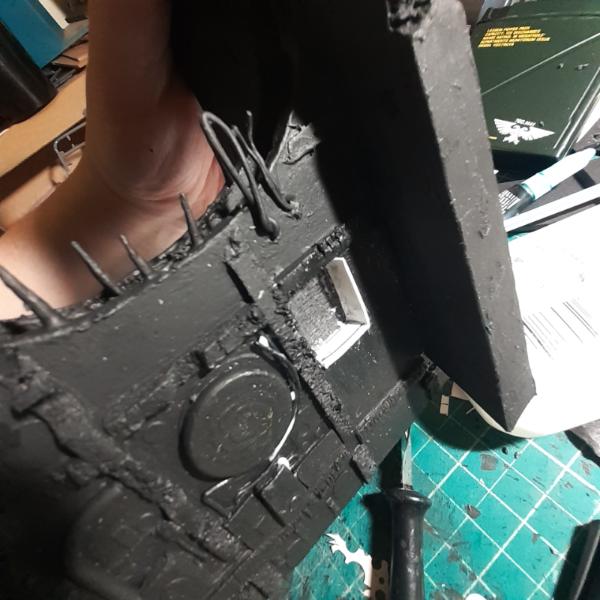
Not a whole lot of work, but it's something.
126697
Post by: GreenScorpion
Small progress is still progress 
The wall is looking better each time you update, cant wait to see the final result.
76303
Post by: Warboss_Waaazag
GreenScorpion wrote:Small progress is still progress
The wall is looking better each time you update, cant wait to see the final result.
Thanks GreenScorpion. A nice reminder to follow my own advice.
I got more work done. I took a bunch of random paper scraps and scribbled on them and cut them into plates to cover up some of the details underneath, because that's the crazy person I am.
 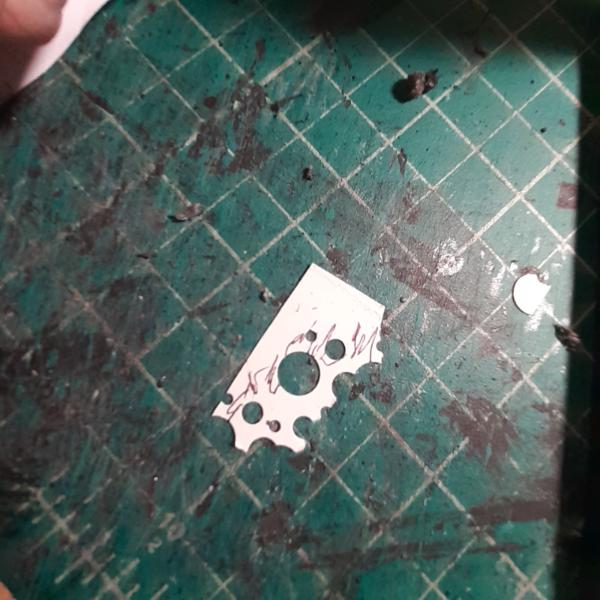 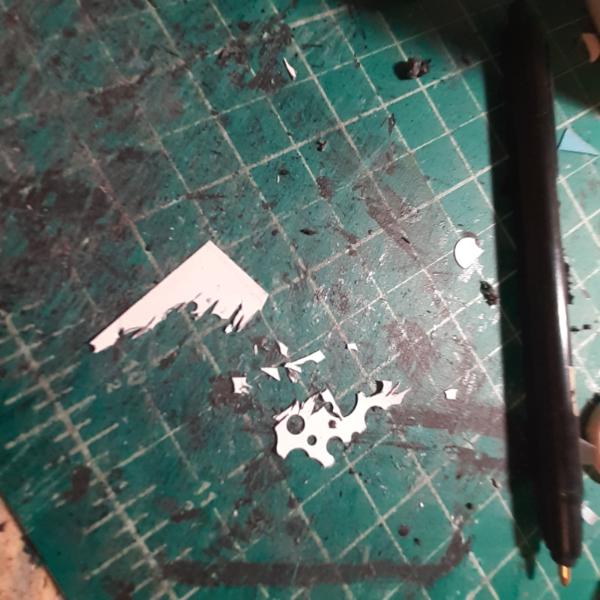 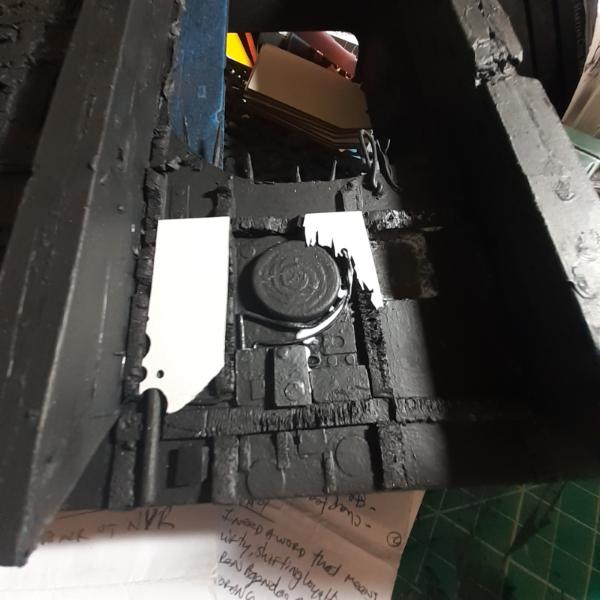  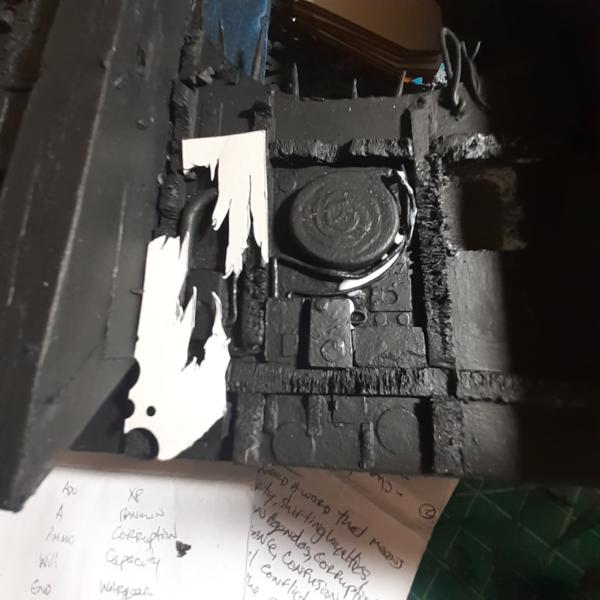
And then I gathered a bunch of random scraps and crap - including a half of a half of a plastic clothes pin, a nub of rounded sprue, tiny squares of foamcore cut in half, and a twisted jumble of the last of my 18 guage wire.

All this is going to be the "last bits" of details. And by last, I mean just another layer before I add rivets and other minor details.
Thanks for looking and have an awesome day. I'll have more progress shots up soon.
76303
Post by: Warboss_Waaazag
76303
Post by: Warboss_Waaazag
Well, I primed the wall.
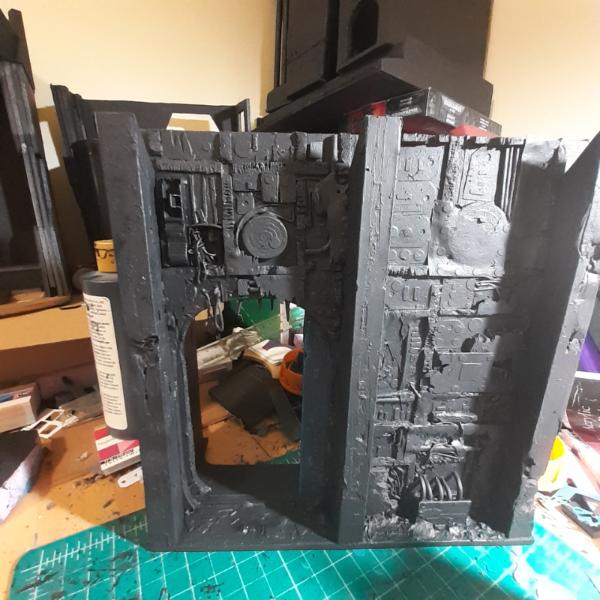
Slow progress is still progress.
133289
Post by: Tommygun1918
That looks nice and suitably wrecked. Lots of fun detail on that wall.
What percentage of completion are you at on this project?
76303
Post by: Warboss_Waaazag
Tommygun1918 wrote:That looks nice and suitably wrecked. Lots of fun detail on that wall.
What percentage of completion are you at on this project?
Overall, with what I have made versus what I want to make, I'd say about 30%. I was slacking for most of the end of last year and the beginning of this year, but I feel like I am finally starting to get back on track.
As evidence, I present the more work I have completed. I started work on the top deck of this piece, with a plastic grid mat that I think is normally used to make rugs. I cut a shape out and sanded it rough to get rid of the shine and to help the glue and paint stick to it better.
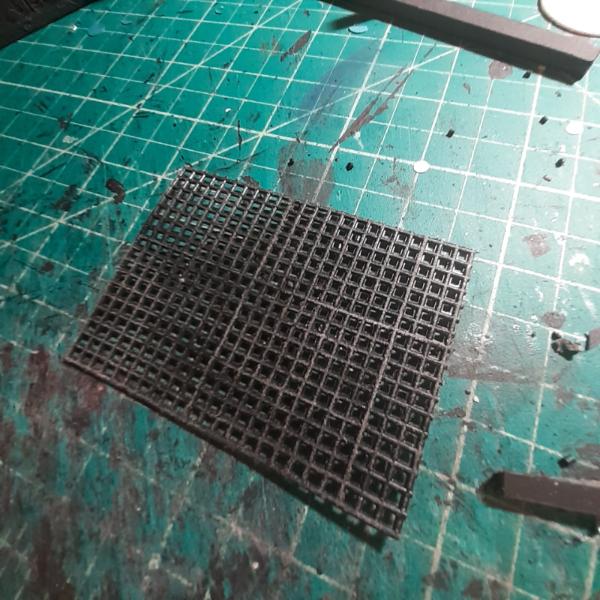
Then got started with overally detailed structural supports using scrap cast off strips of foamcore.
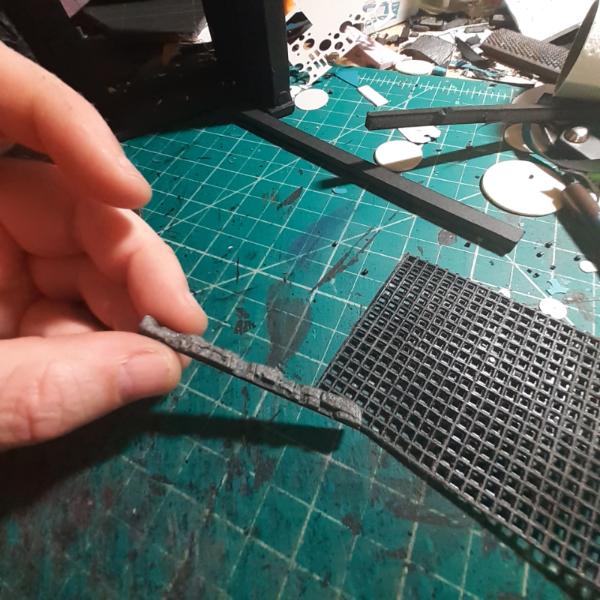 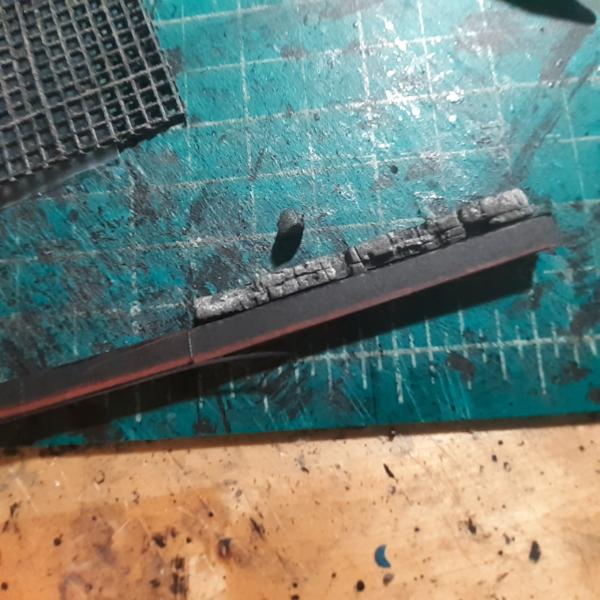
To create ruin I slice vertical and horizontal lines and then distress it by picking at it with the tip of my blade.
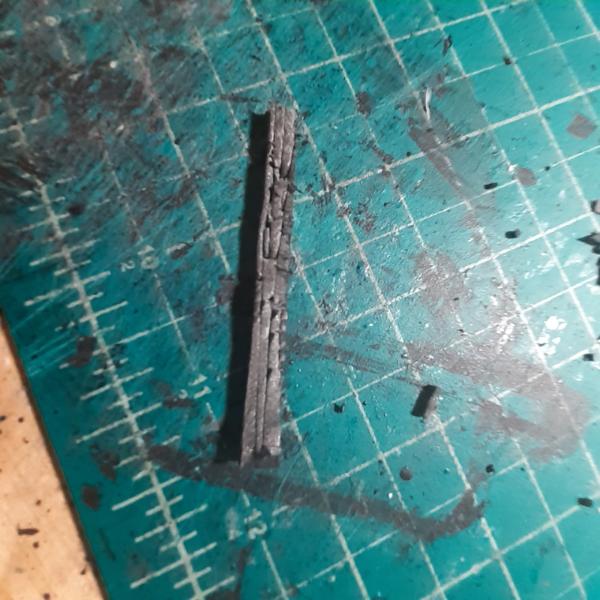 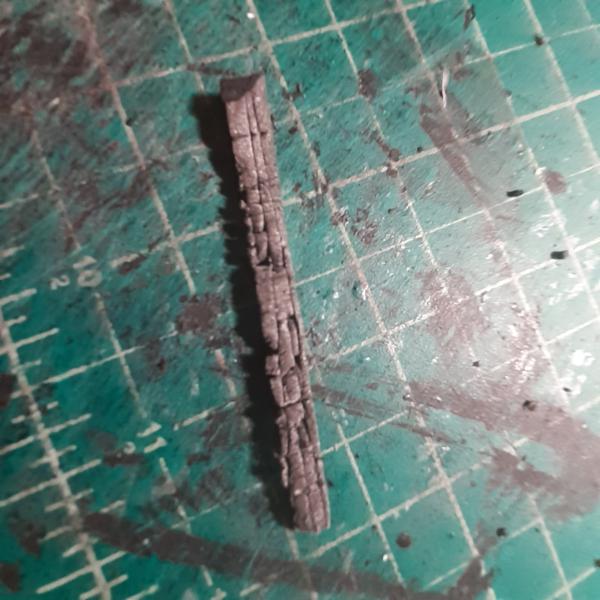 
This whole process is a lot of rough measuring and distressing to taste.
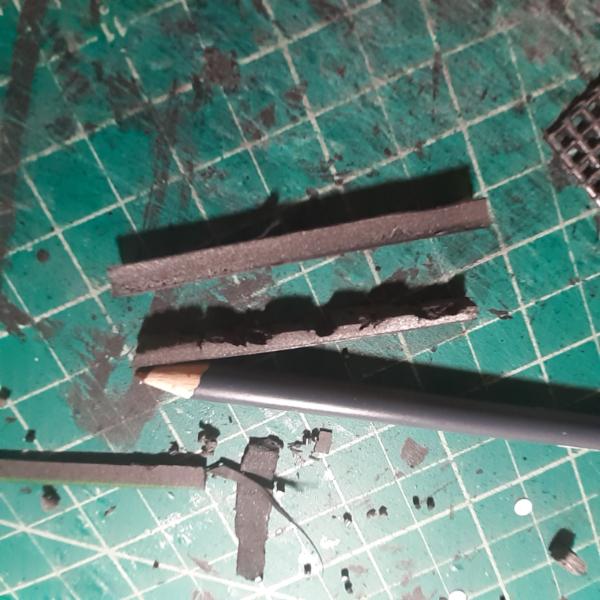 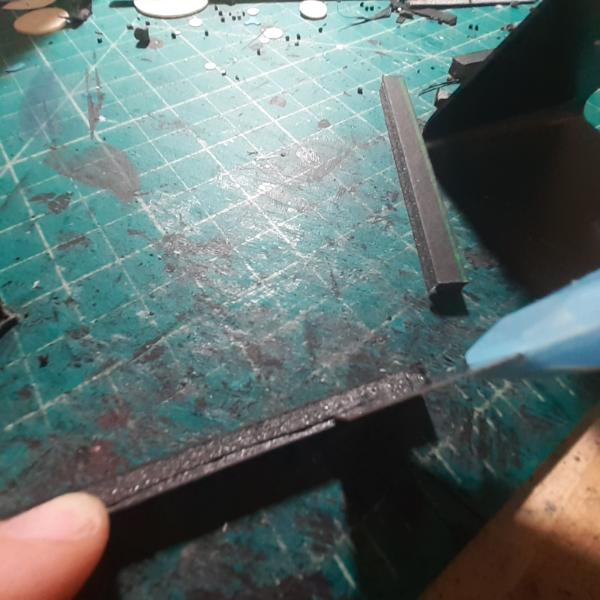
Here's the moment I realize I'm working with two different qualities of foamcore. I don't know if you can see the scintillation in the right piece, but if you can, that's the mark of an inferior product.
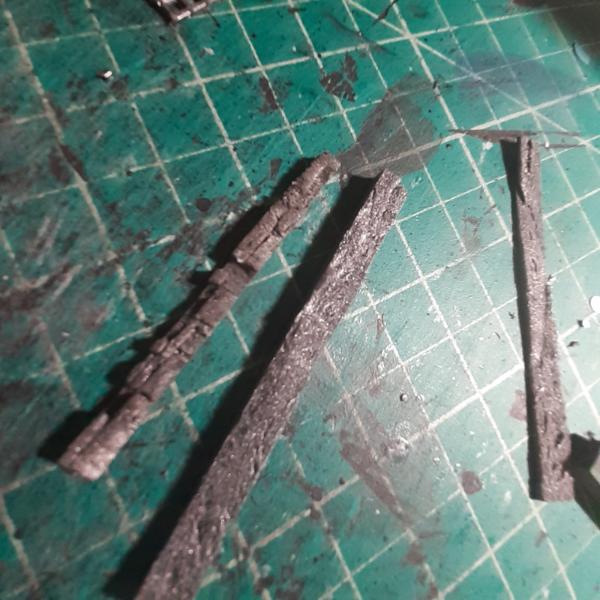
At first I thought it would be good to glue the grid to one of the other floor pieces, so I cut a groove in it to accommodate it and tried using brute force to make it stick. Ultimately, this plan failed, so I moved on without it.
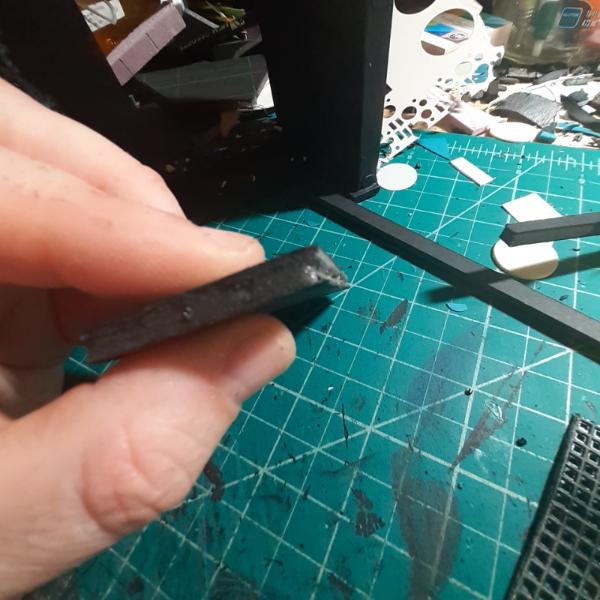 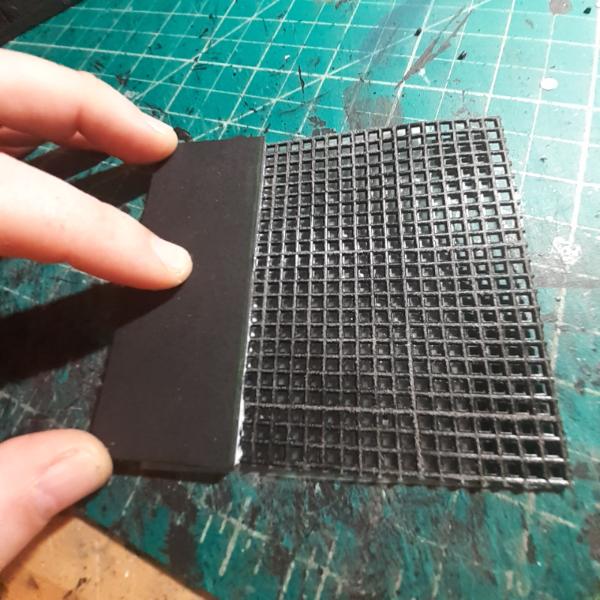
I test fit the supports and realized I needed more. The grid ia inherently flexy and I had to do a lot of work to make it keep a shape.
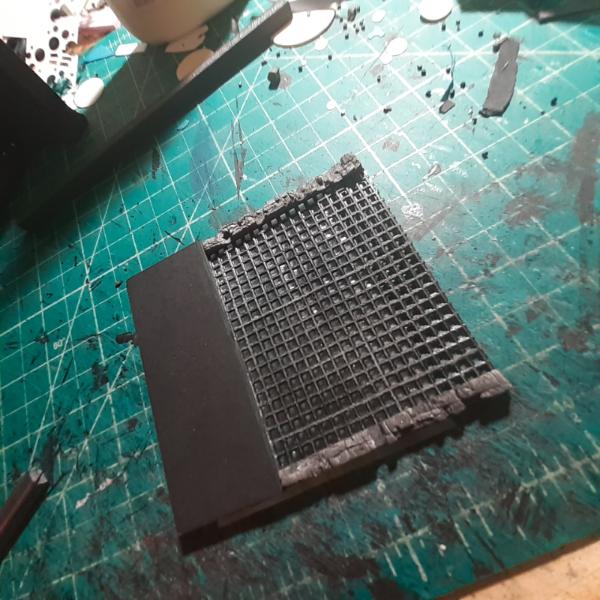
So I measured, distressed, and finagled a cross beam. Then realized it would look better with structural plates, so I prepainted a trio of squares before impatiently gluing everything together.
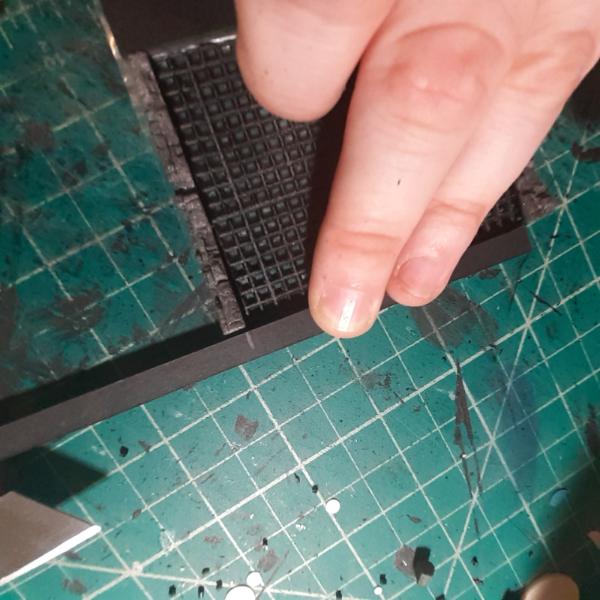 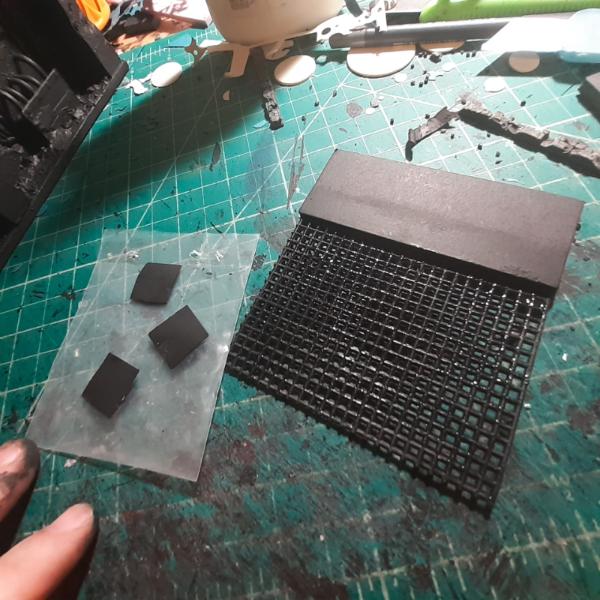 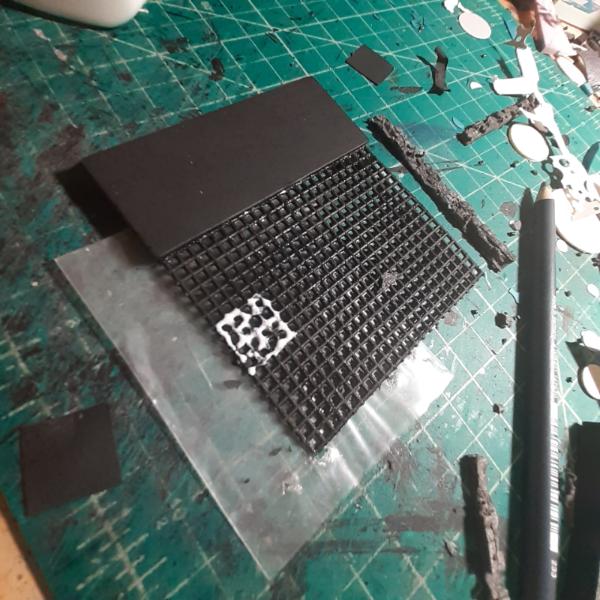 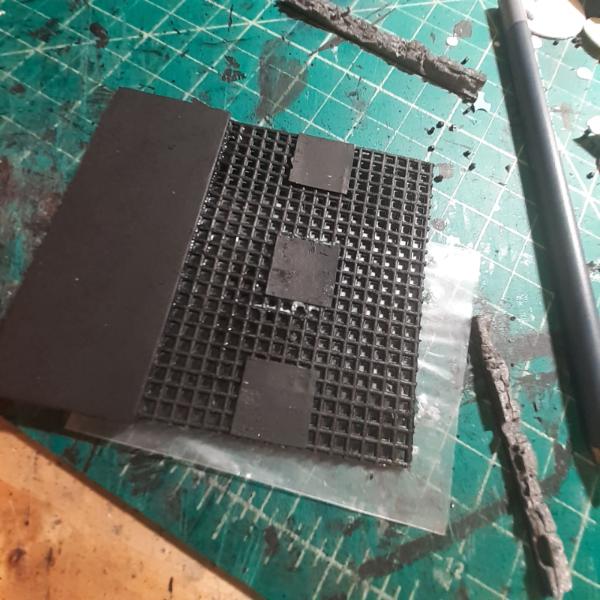
Then my rasp to weigh it down and flat as I waited for it to dry.
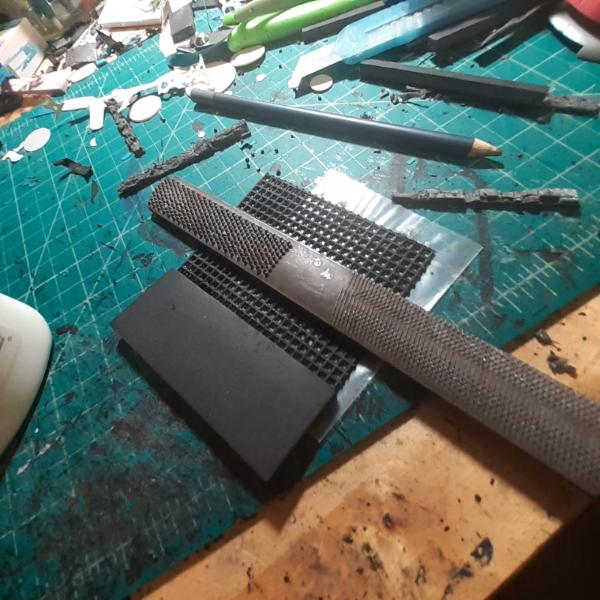
Once dry (ish), I glued the supports in place and sealed the foam with white glue, before weighing that down, too. This is the stage where the other part of the floor fell off and I just soldiered on.
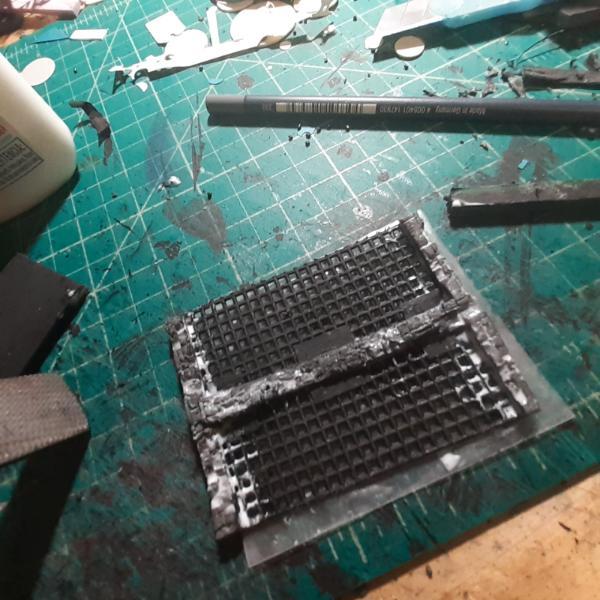 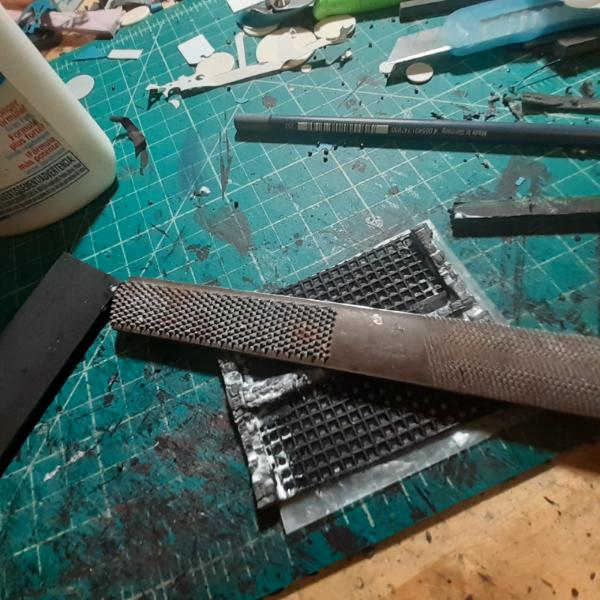
That's it for now. More progress up soon. Thanks for looking and have an awesome day!
76303
Post by: Warboss_Waaazag
So then I traced a rough outline of where the structure of the main piece would rest on the parts of this floor, before gluing the completed and primed grid in place between the two halves. I added a few extra details, too. Namely because I wasn't sure it would be stable enough without rigid plastic to hold it in place. I also wasn't sure which side was going to be the bottom side (and ceiling for the floor below). I hemmed and hawed quite a bit on this.
 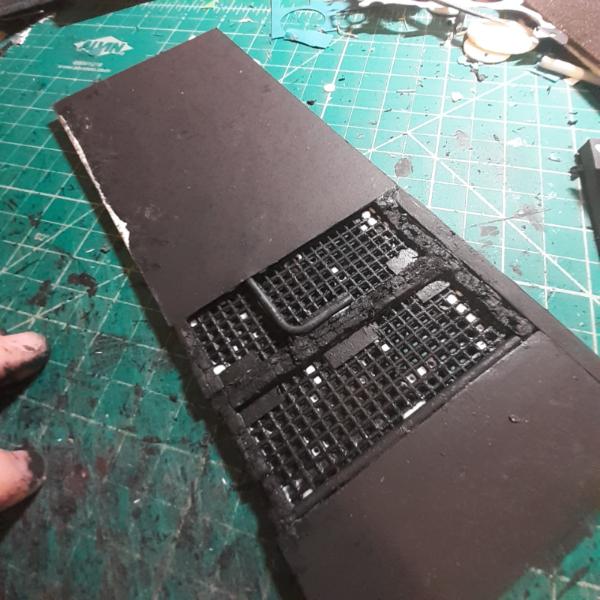
There's also a side frame of foamcore on one side because I wasn't convinced it would hold in place without it. I pinned this up almost excessively while I gathered bits for details.
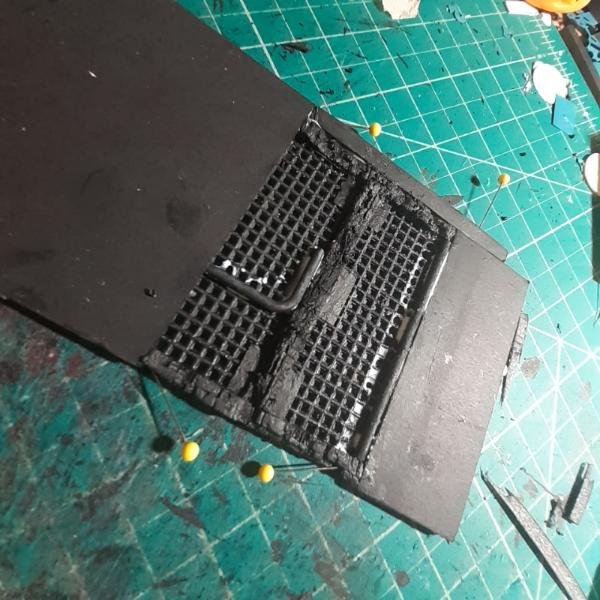
I'd love to say I was plating this just for looks, but half of it got glued on in a further attempt to stabilize and strengthen the bond between these two disparate materials - foamcore and plastic grid. Layers of glue got added, too, for pretty much the same reason.
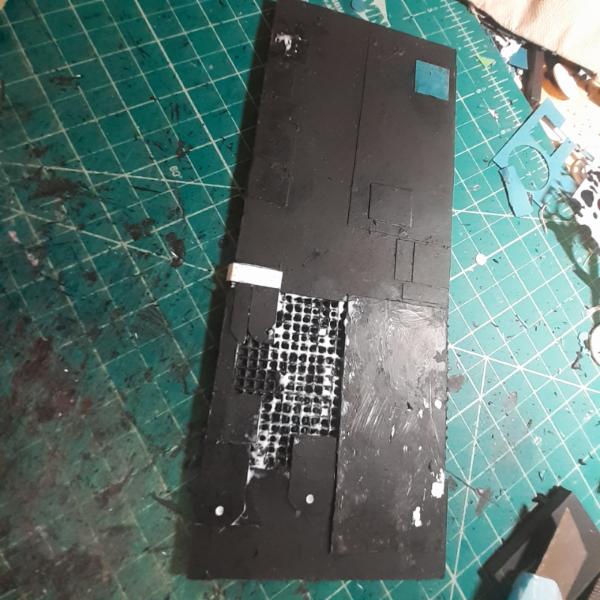
I worked on the side with the outline thinking it was going to be the bottom before I decided to flip it. This decision came when I test fitted it and saw too many gaps between the floor and walls. So I flipped it and it seemed to work out better. Also, I just liked the way it looked.
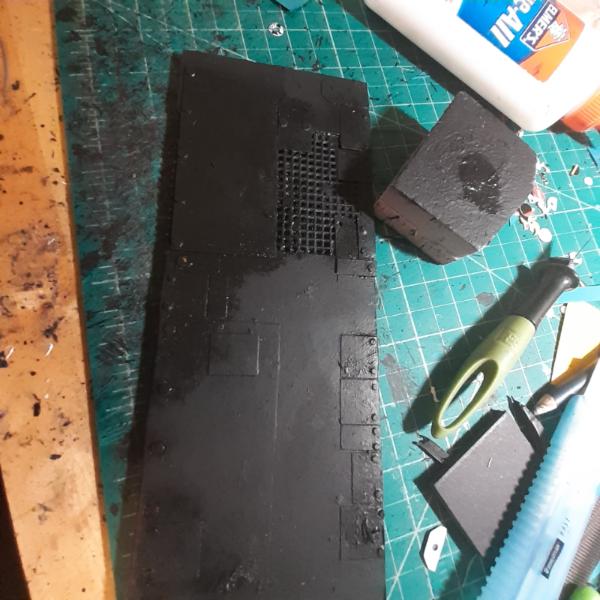 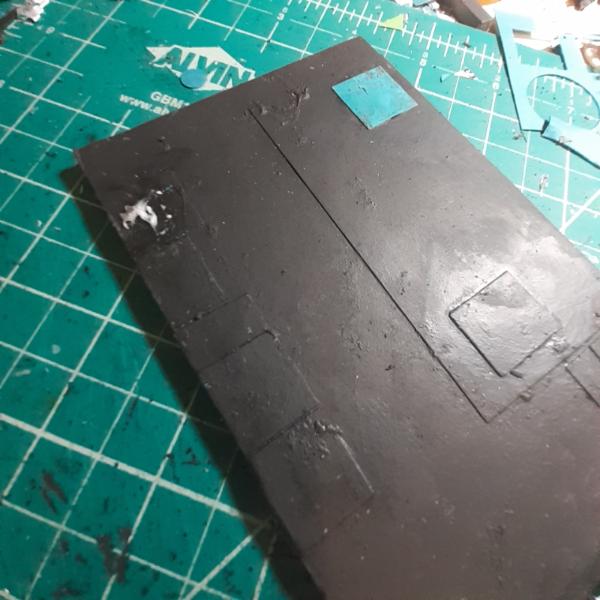
So the new bottom got guardrails to hide the missed joins and less details.
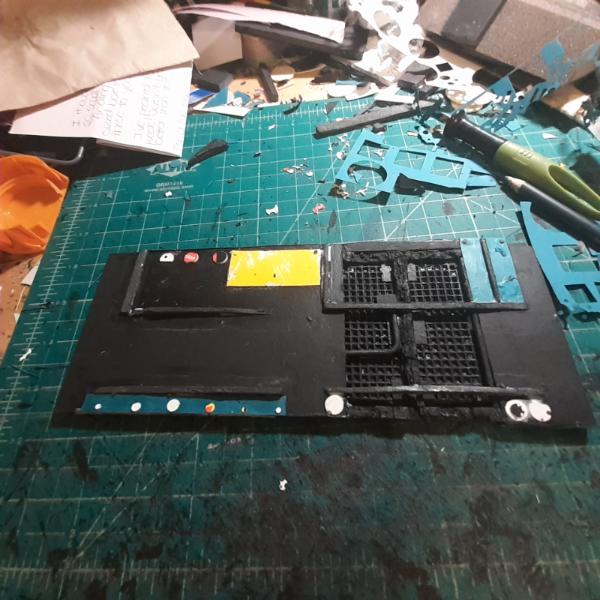
And then I glued it in place and weighed it down with a bunch of stuff that I had near to hand (which you can barely see in this shot).
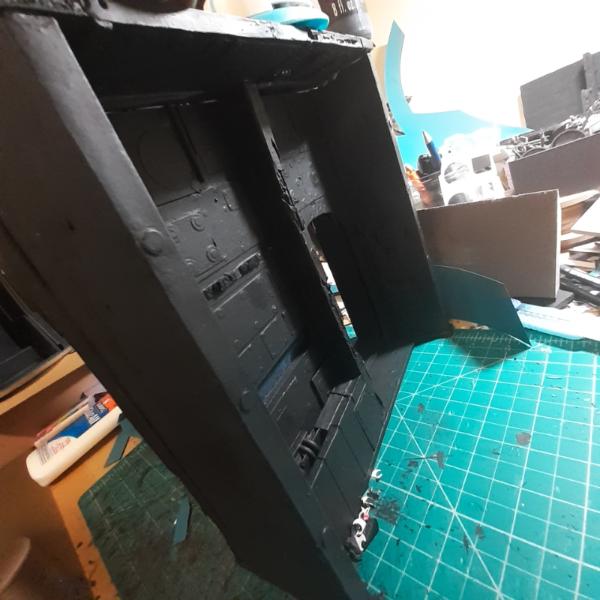
Brother Gustavo marvels at my creation.
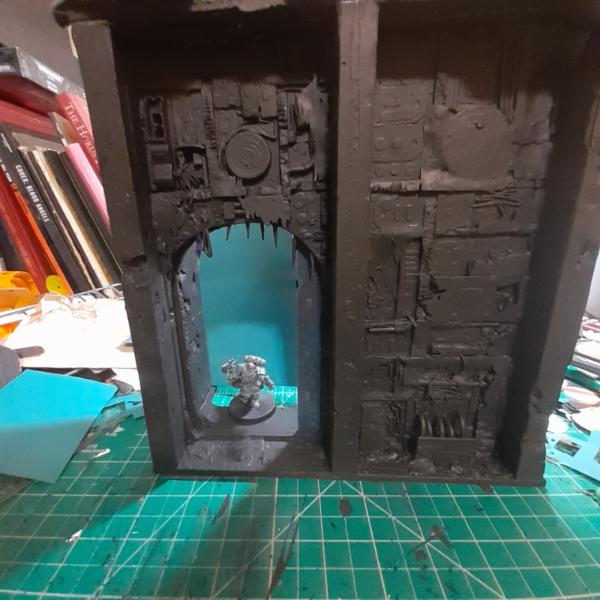
There's still a few details to add before I will be finally ready to call this one complete.
Thanks for looking and have an awesome day!
123017
Post by: Olthannon
Looks excellent, looking forward to seeing it painted up!
76303
Post by: Warboss_Waaazag
Thanks, Olthannon!
Here's a better shot of the weights.
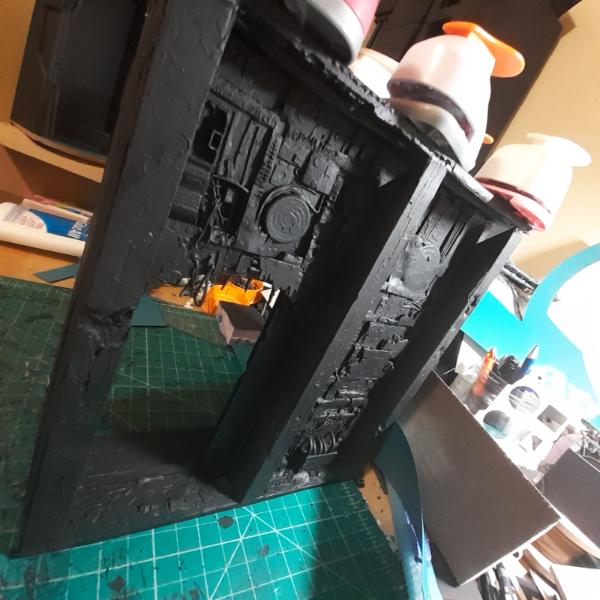
I got a bunch more shots of progress, but I have to find a minute to upload them.
76303
Post by: Warboss_Waaazag
Okay so here's the top finally glued in place.
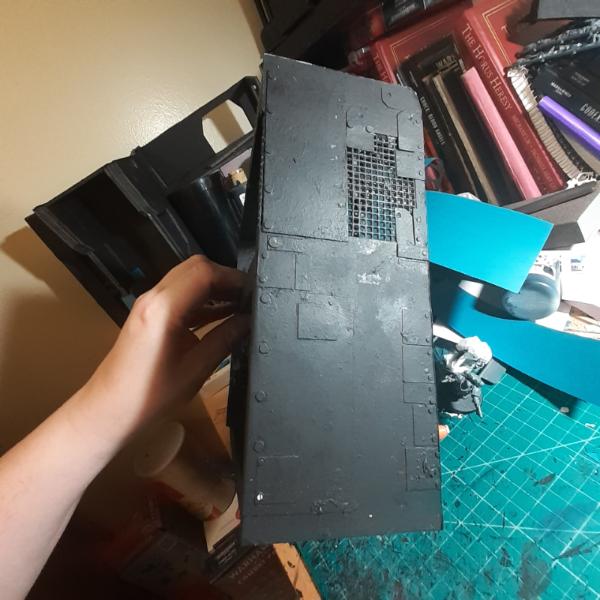
And some shots of the overhang from various angles.
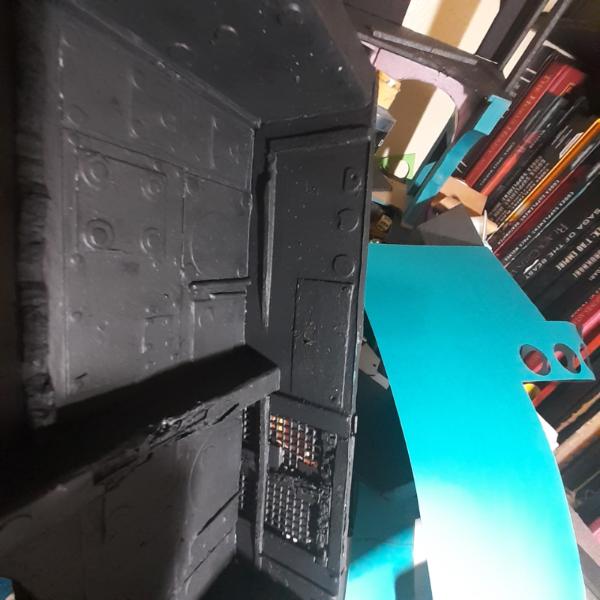  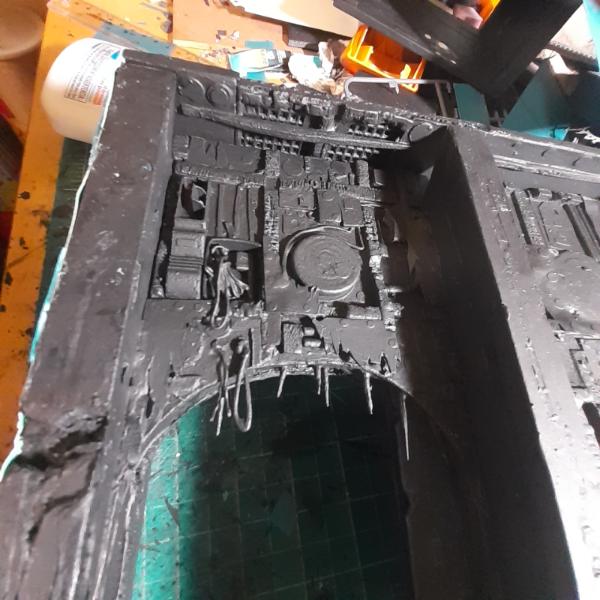 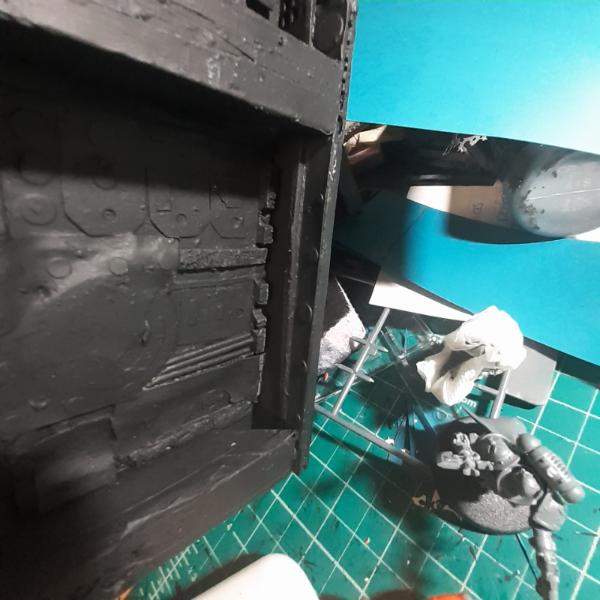
And then I plated up the sides.
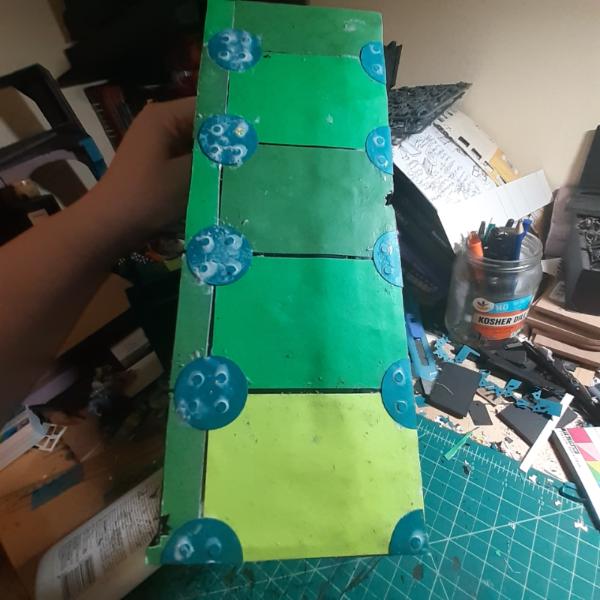 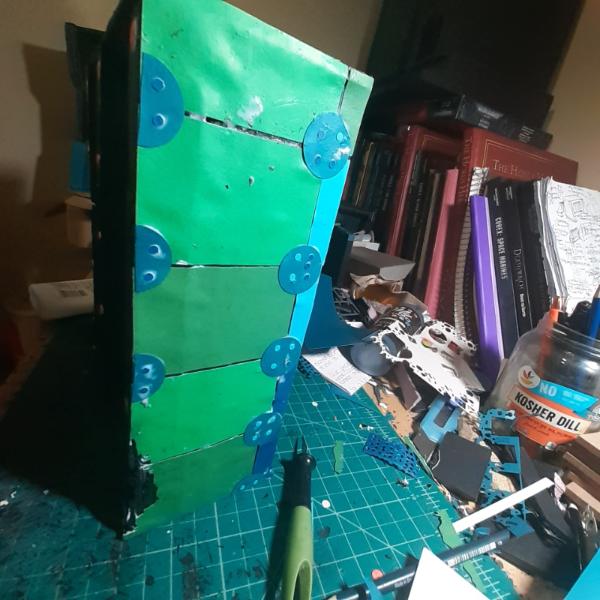
Added more detail to the floor on top.
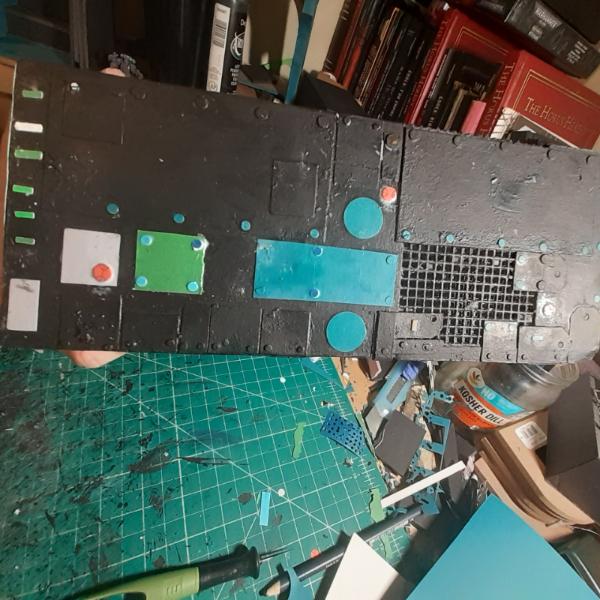
And added some basketballs to help tie this side in with the other.
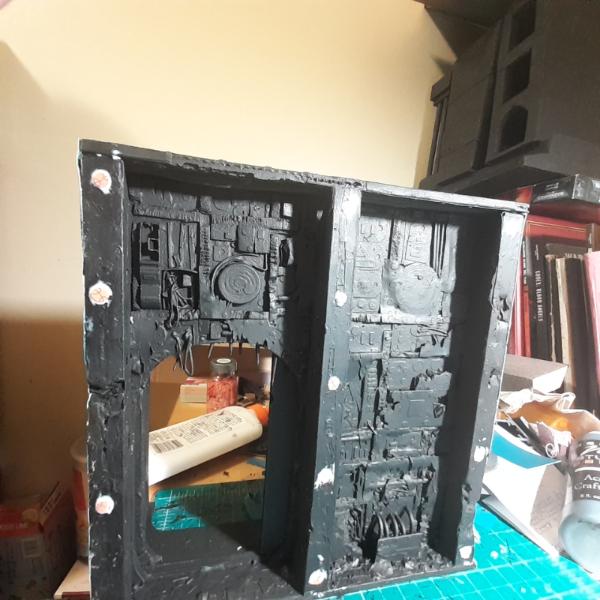
So, except for paint, this piece is officially completed. On to the next one.
Thanks for looking and have an awesome day!
22619
Post by: inmygravenimage
The details are bonkers. Love it.
100928
Post by: Alaricuk
Liking that piece Warboss, lots of nice little detail,, top shelf stuff.
76303
Post by: Warboss_Waaazag
Thank you, both!
I returned to this archway piece, briefly
And then instantly distracted myself with this support piece.
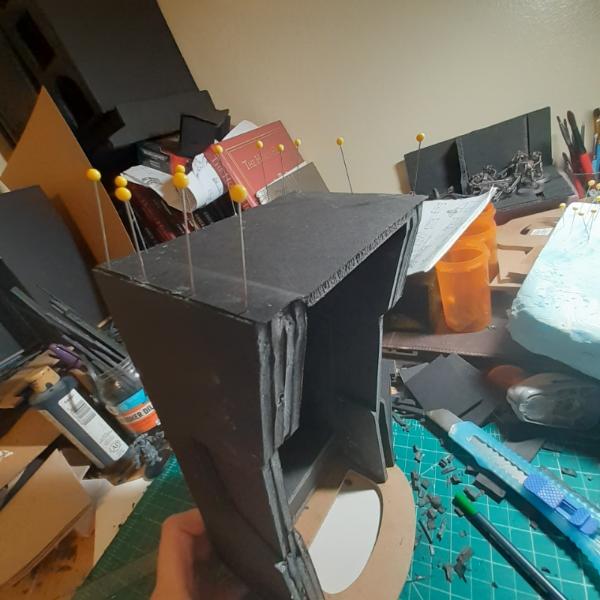
I started by using a spare D to outline and carve out a filler for this depression.
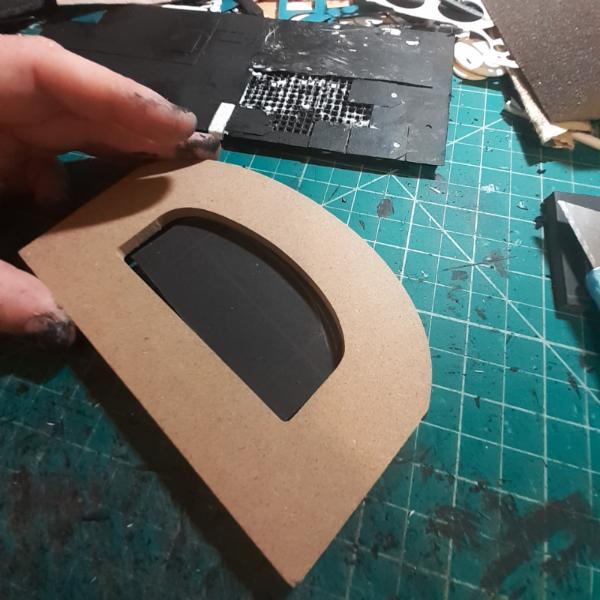 
I didn't really have a plan when I started this project, beyond "it needs to hold up a balcony above it" so all my ambitious ideas about it are hampered by the haphazard nature of its construction. I decided to go easy on myself with this one. Here's a bunch of brute measurements.
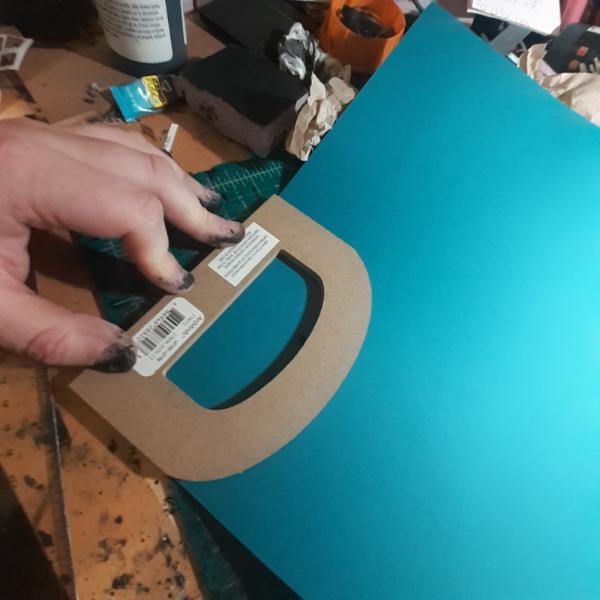  
Perfect.
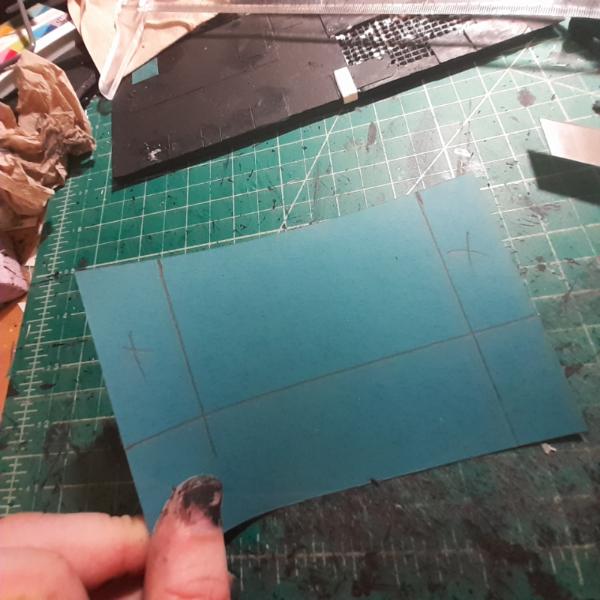
Sort of perfect...

Okay, perfect again. Time to glue.
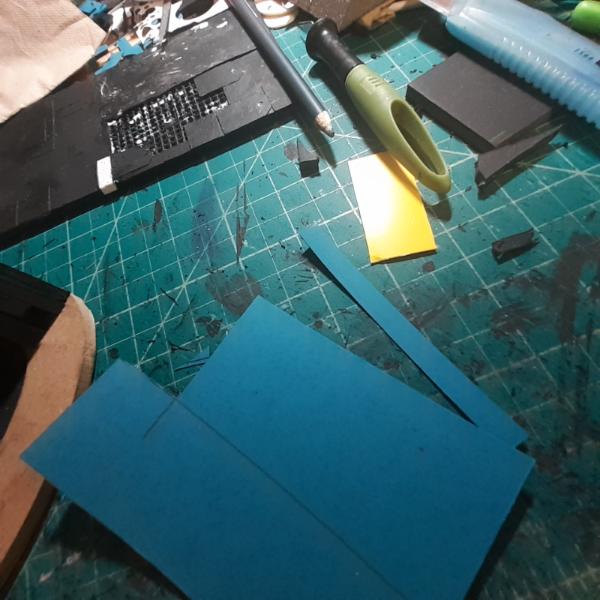  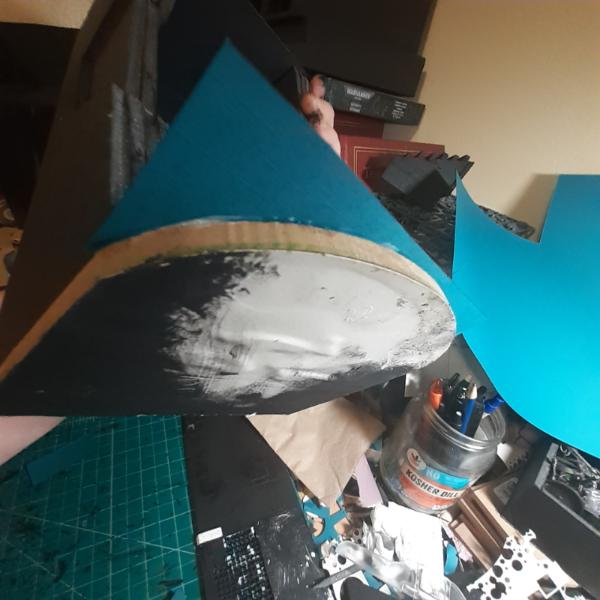
And trim and wrap.
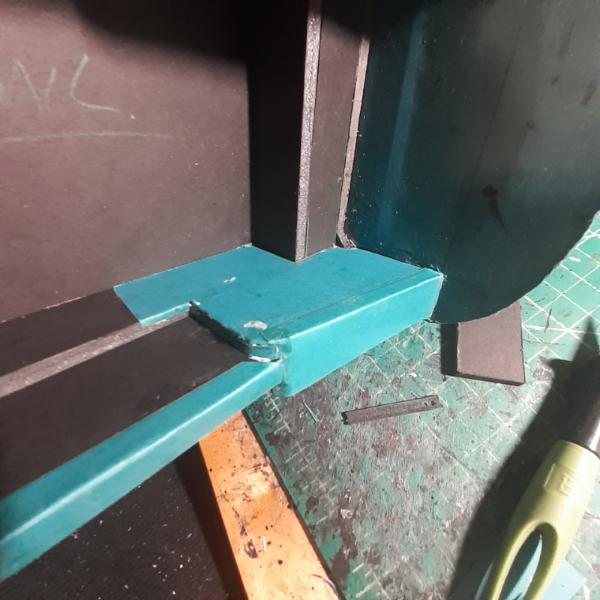
Here's the mock up with an unorthodox thing I want to try to use.
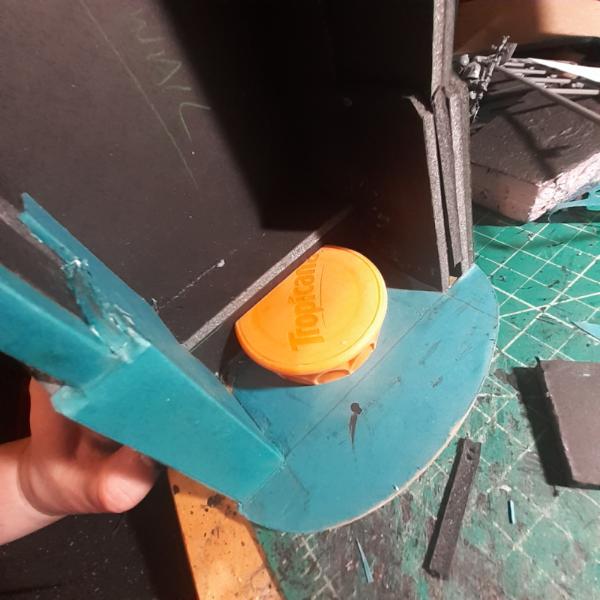
Anyone have any suggestions for what I can use to fill any gaps in this thing? Super glue and paper doesn't seem to want to work.
76303
Post by: Warboss_Waaazag
And then switched back to this archway piece. I started bulking out the doorways and walls.
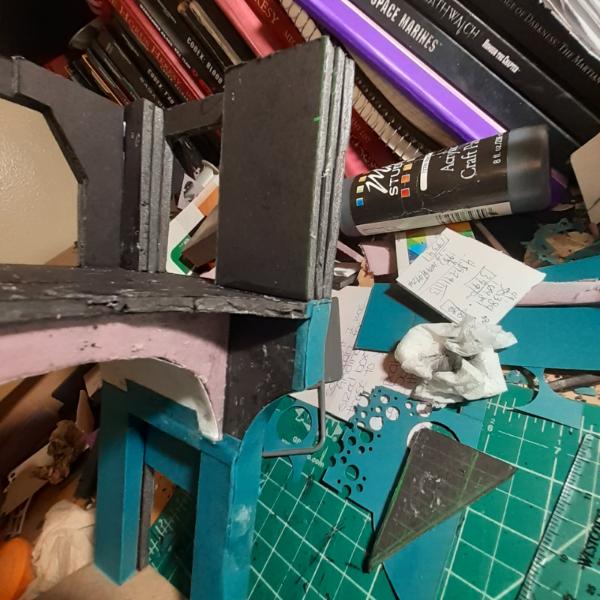 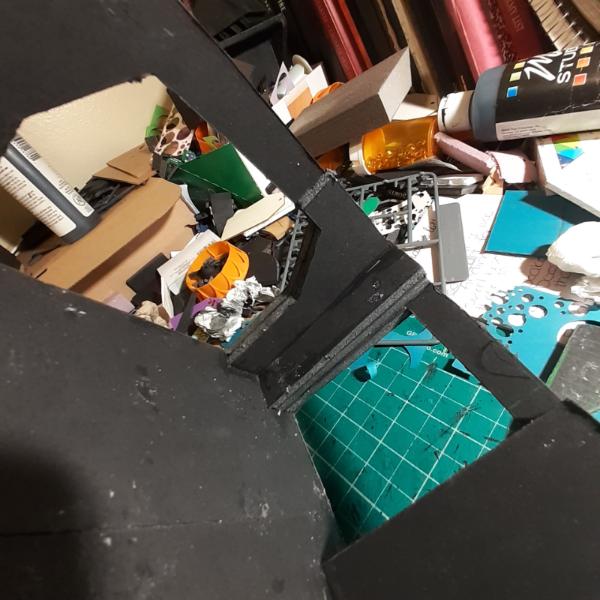
And created a shelf to clean up the bottom edge of the "stonework" created by the pink foam.
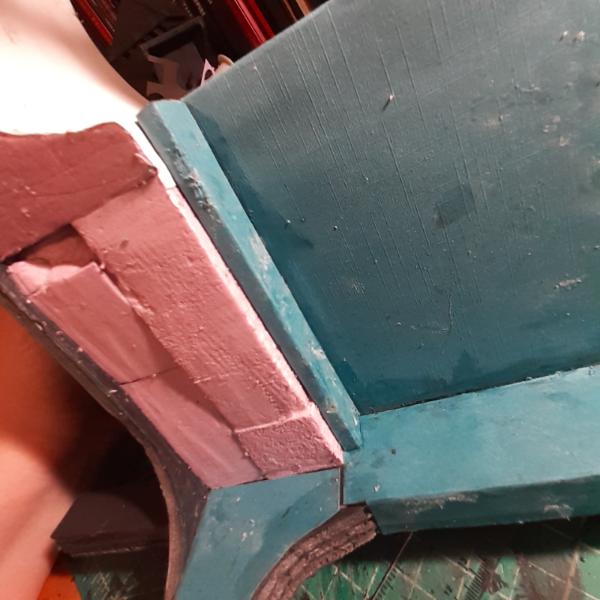
I also extended that shelf around intonthe archway, because I have an idea about details I want to add, but I think I need something for it to start at.
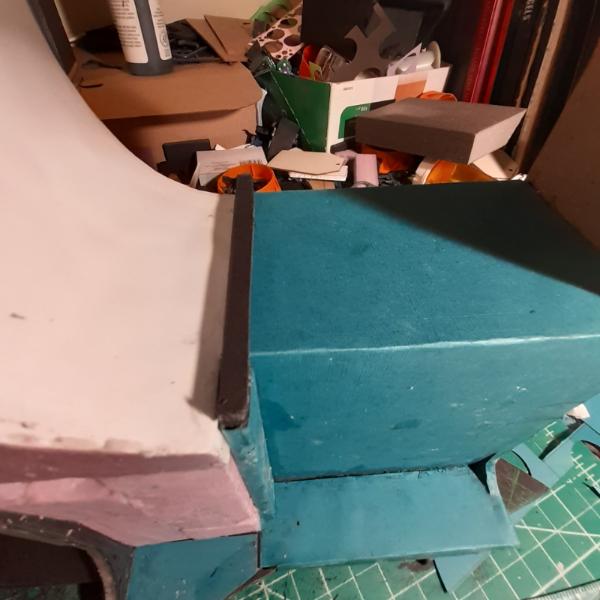 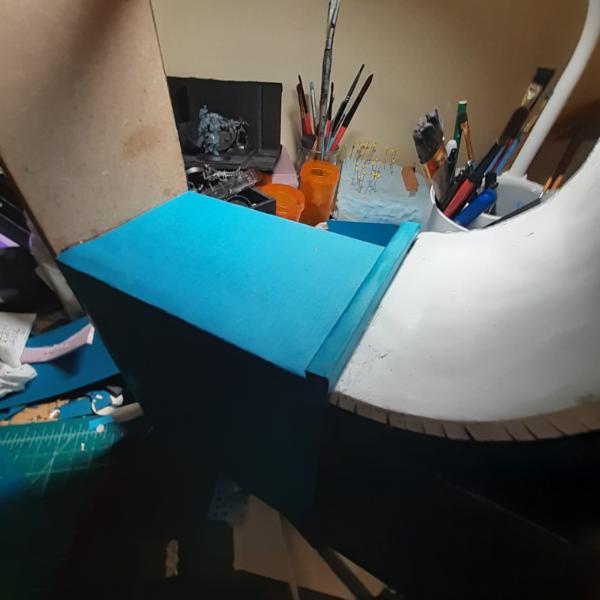 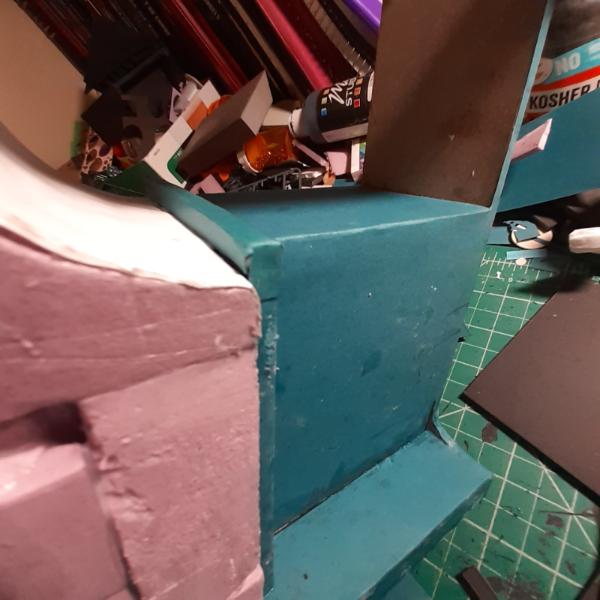
I got more work done, but I haven't eaten anything today, so I didn't have the energy to upload the photos yet. I'll shove food in my face and then get around to that shortly.
Thanks for looking and have an awesome day!
106010
Post by: Meer_Cat
Massive advances with everything you're getting done- it's going to be an impressive table, combined with all the other things you've craft over the years.
For filling gaps, especially with all the disparate bits you combine (I'm envious of your facility in doing so), you might consider a flexible spackle like DryDex or anything with either silicon or vinyl in it. They tend to come in very small containers of a couple of ounces for home repair (up to gallon and five gallon buckets for contractors) so should be affordable and a little goes a long way.
Once dry it can be sanded, but still flexes a bit so it doesn't crack if the piece it's adhering to gets moved around.
Rock on!
22619
Post by: inmygravenimage
You are frickin machine, dude.
98217
Post by: Skinflint Games
This is going to look INSANE when completed ;-)
Seconded on the flexible filler front, acrylic caulk is another way to go - we usually cook up a gunky mix of filler powder, PVA, sand and craft paint to texture and do any gap filling. Works nicely to protect the foam if you're using a spray primer as well.
123017
Post by: Olthannon
Cracking progress, second the caulk for gap filling!
100928
Post by: Alaricuk
That build is looking pretty epic, loving all the little detail here and there,, really coming together well,,
1124
Post by: Captain Brown
Warboss_Waaazag,
Good idea on using scraps to make more useful scraps there (with the plastic-card).
Cheers,
CB
76303
Post by: Warboss_Waaazag
133289
Post by: Tommygun1918
Good lord, where do you store all this stuff?
76303
Post by: Warboss_Waaazag
Instead of furniture I have terrain.
133289
Post by: Tommygun1918
Do you measure your movement through the house and can you deep strike within 3 feet from the kitchen?
76303
Post by: Warboss_Waaazag
Tommygun1918 wrote:
Do you measure your movement through the house and can you deep strike within 3 feet from the kitchen?
Yes, my tape measure is to scale. I almost crushed my house raccoon the last time I dropped it. My line of sight pointing laser can also intercept cruise missiles.
123017
Post by: Olthannon
Love the tiles, really cool bit of detail!
76303
Post by: Warboss_Waaazag
Thank you for all the kind feedback, folks. Sorry I haven't posted in awhile, I've been constantly stressed since January 20th. The Democracy I thought I was living in is being dissolved by an unelected foreign national who isn't even bothering to hide his Nazi affiliations any more. The Constitution my countrymen fought and bleed for is being desecrated and all my friends are being actively denied rights and freedoms.
As I was telling a colleague yesterday, it's difficult to play games about dystopian totalitarian futures when it's no longer satire and instead the waking nightmare of my existence. The America I believed in is dead and all that's left is the foundation of a new, corrupt monarchy.
22619
Post by: inmygravenimage
That's more than fair. The state of the states appalls me.
76303
Post by: Warboss_Waaazag
Okay, the dissolution of Democracy and the crumbling collective intellect of my countrymen aside. I finally came to the realization that I must create to remain sane. I'm returning to this project. This is my commitment to post up progress shots within the next 24 hours.
76303
Post by: Warboss_Waaazag
Okay, promises to keep...
I did some texturing to the upside down crenilations with glue and brute force.
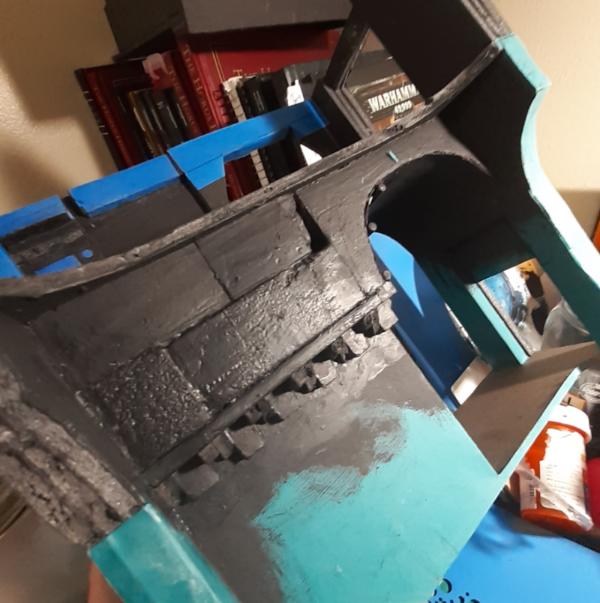 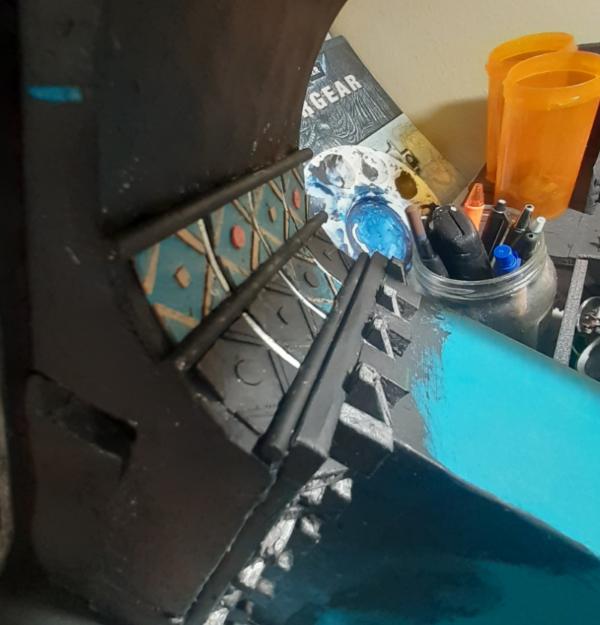
And then detailed a terminal onto the wall.
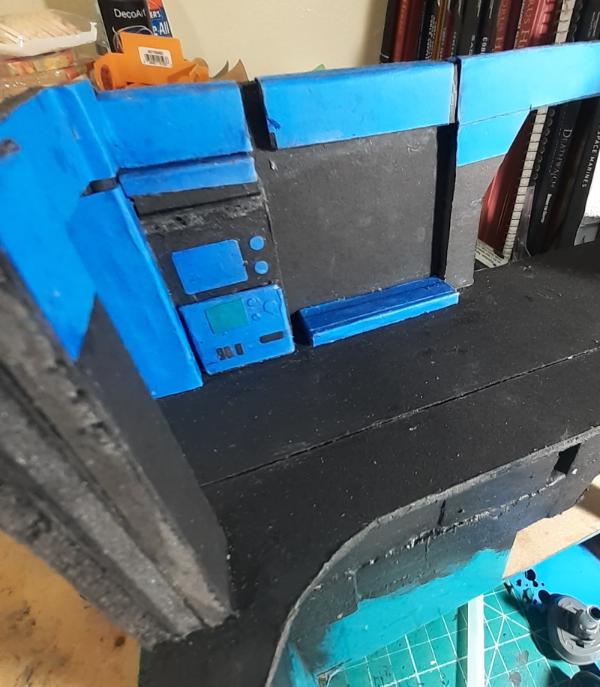
Next up is progress on a structural support.
 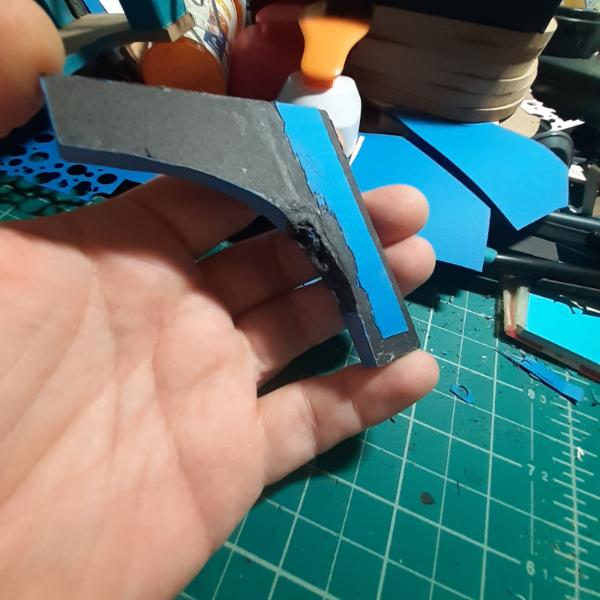
And a mock up of where it is meant to sit in that wall.
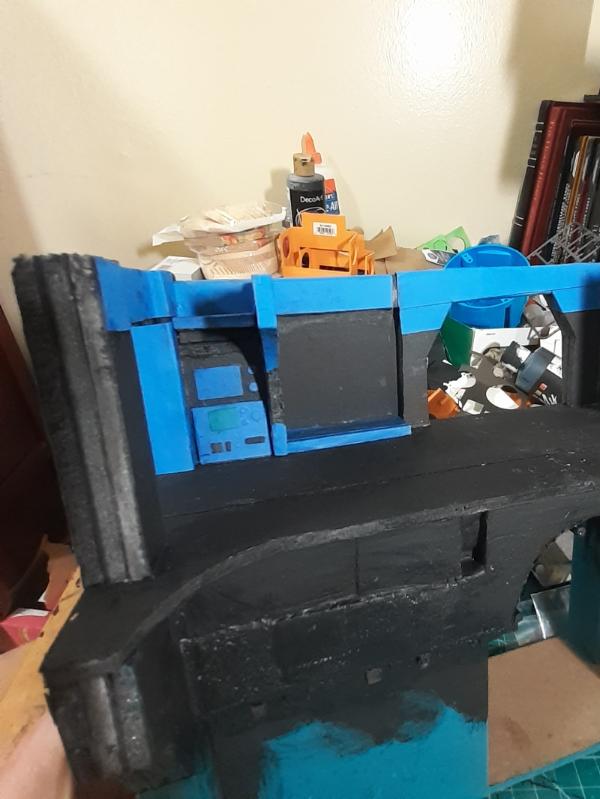 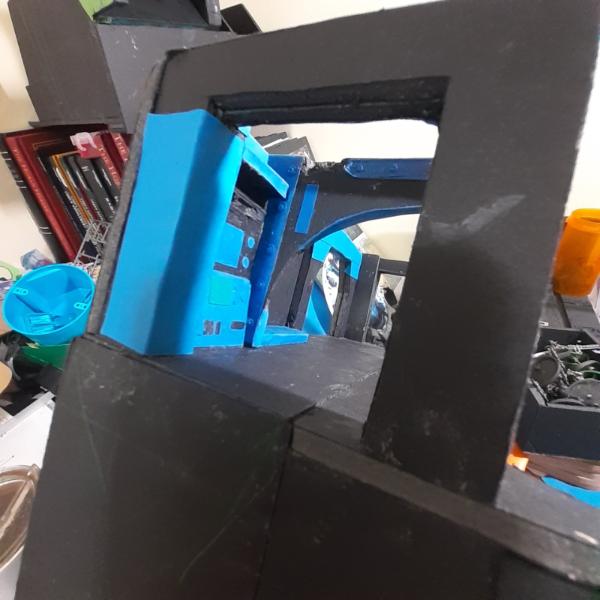
In a fury of conversion, I have disassembled Gustavo but haven't finished rebuilding him yet. So to stand in I present Brother Timothy, for scale.
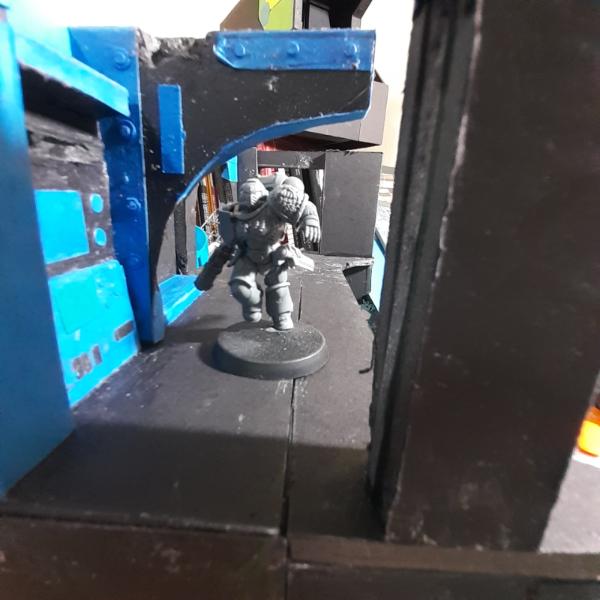
And Brother Jamandgor for scale at the bottom.
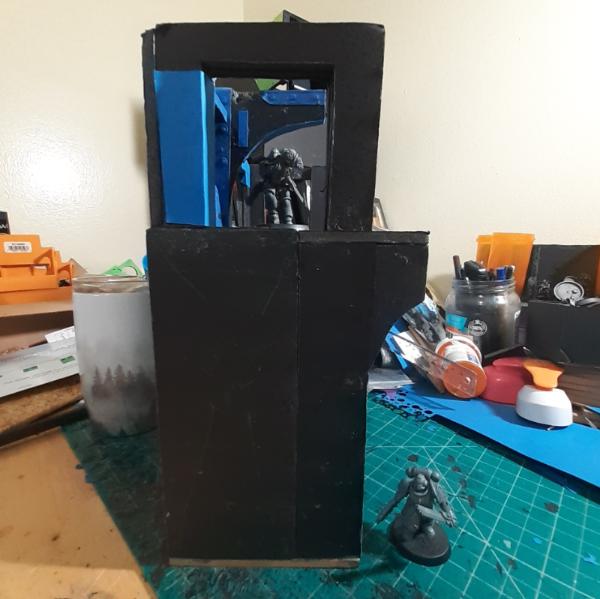
More updates soon. This project is officially underway again. Thanks for looking and have an awesome day.
133289
Post by: Tommygun1918
Nice to see more work. That arch is looking a bit Moorish.
22619
Post by: inmygravenimage
Good to see you back in the habit, buddy.
76303
Post by: Warboss_Waaazag
Thank you, friends. I appreciate the welcome back. I have been scouring the internet for examples of the architectural style of Prospero and all I can find is the depictions of Tizca and the warhammer world diaroma. Precious little, except for descriptions calling it "egyptianesque" and visual cues that are vaguely Mesoamerican. So now I have to interpret that style into spaceship interiors.
So, here is my next 24 hour pledge. I might not have the full picture of this architectural style, but I will make progress towards it and post pictures of what I have done. Tonight or tomorrow.
76303
Post by: Warboss_Waaazag
And by 24 I clearly meant 35 hours. And best of all I have no pictures to show because I didn't make any progress on this project. For this I blame my hectic work schedule and my stress-response of playing Mechabellum to the wee hours instead of sleeping. Yay, spicy brain.
But now it is my weekend and my first day of actually being free to do hobby stuff. So I will make progress today and post pics later to prove it. Thanks for your patience with me. I appreciate the support of this community. I hope you all have an awesome day.
22619
Post by: inmygravenimage
Keep at it buddy! And don't worry about pics, we know it'll be worth waiting for
76303
Post by: Warboss_Waaazag
Aw shucks, graven. I hope these progress shots measure up to your expectations.
I got real lazy with the measurements.
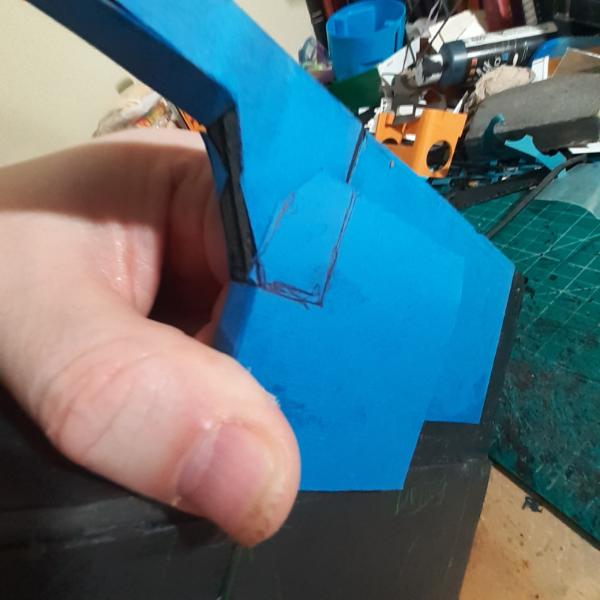
It's a very complex shape.
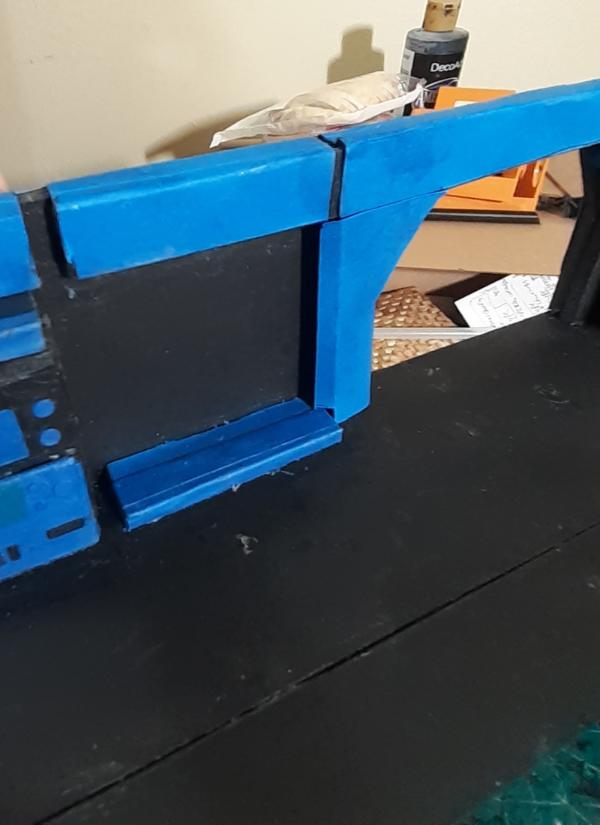
I started on some details I will call "municipal doodads". Fuse boxes, refrigerators, whatever they may be. These are just 2 chunks of roughly equally sized and shaped foamcore glued together and wrapped in paper. I wanted one to look like it had a door, so I took a piece of an unsolicited fake credit card and filed it into shape.
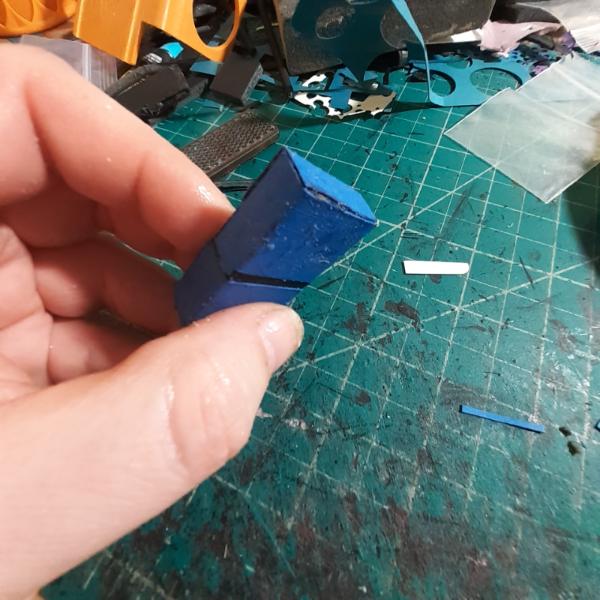 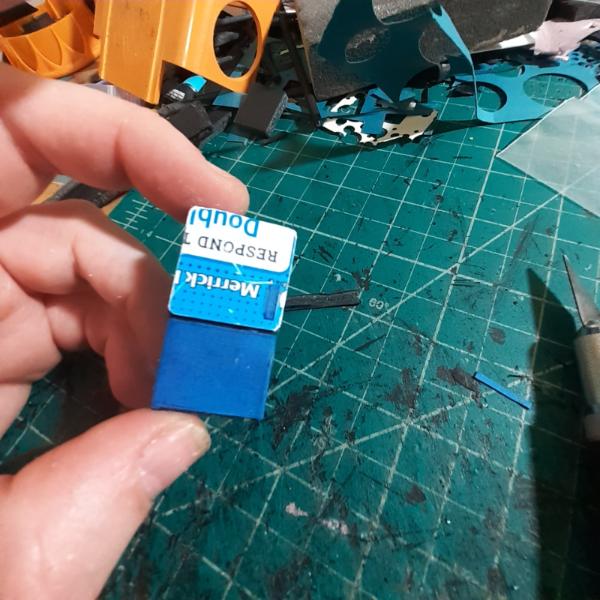 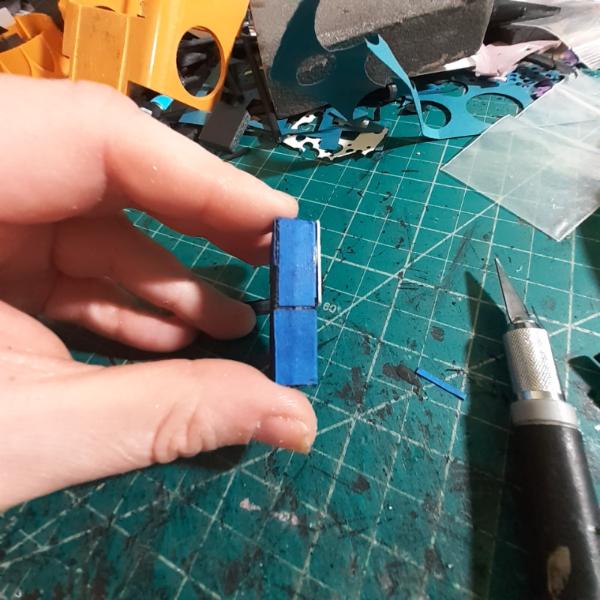 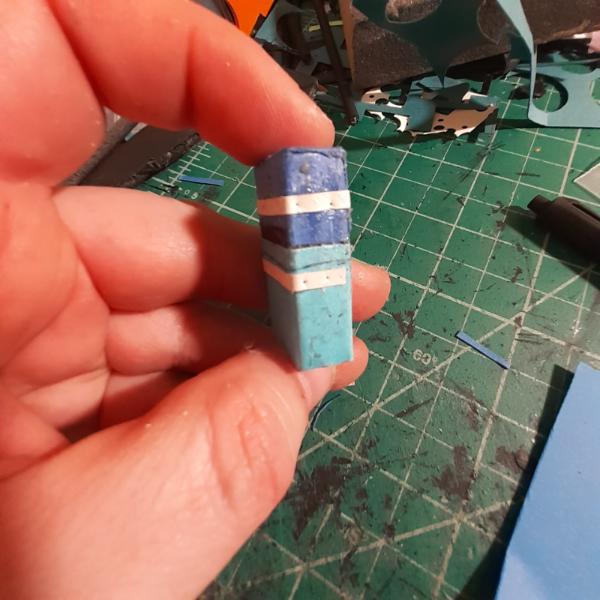 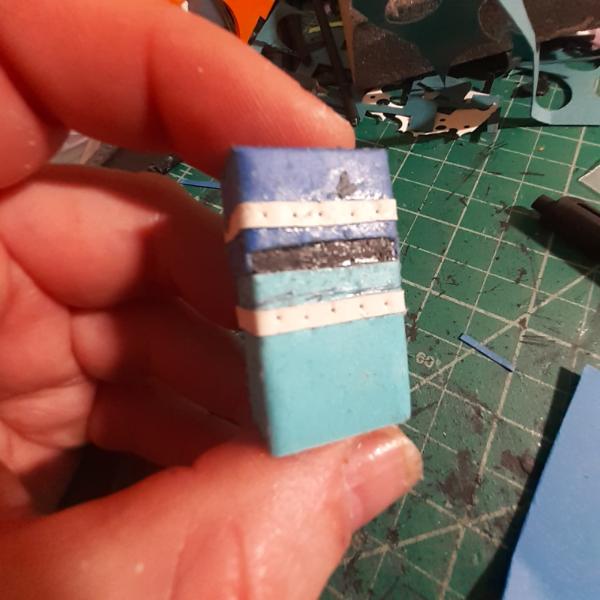
I also finished detailing the structural support. Here they all are waiting for paint.

I'll have more updates tomorrow. Thanks for looking and have an awesome day.
76303
Post by: Warboss_Waaazag
And, without further ado, I kept plugging away at my project.
Here is a mock up of where those detail boxes are meant to sit.
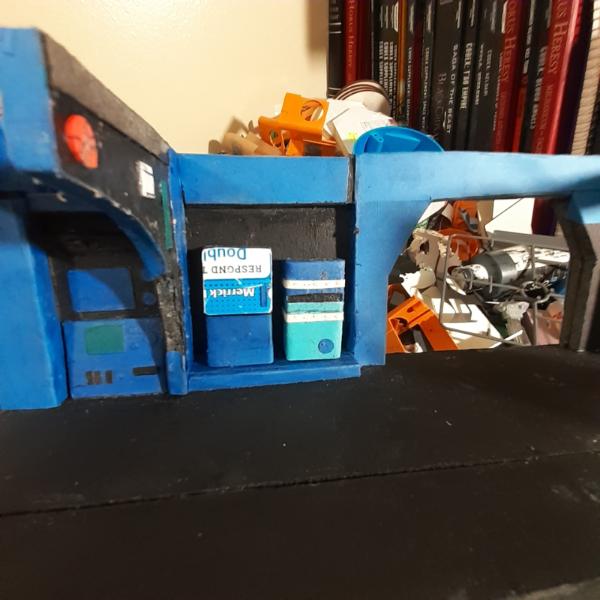
And a small photo of the prep I do for every single plastic bit I use in my terrain. In this case, the bit is an angled chunk of sprue from some Gundam accessories a friend gave me. The plastic is too glossy, there's mold lines, and a nub of extra material that gives it away as sprue. So I just trimmed the nub off with my exacto blade and sanded the whole thing. Here I show it off next to an unprepared bit.
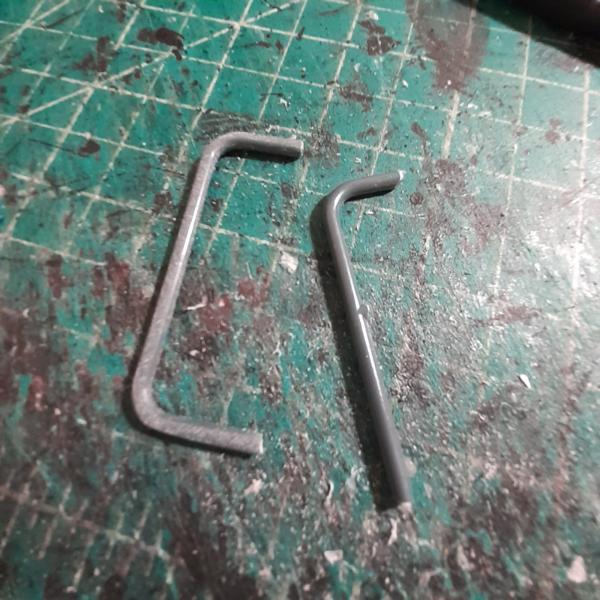
And here is a mockup of where I intend for it to go.
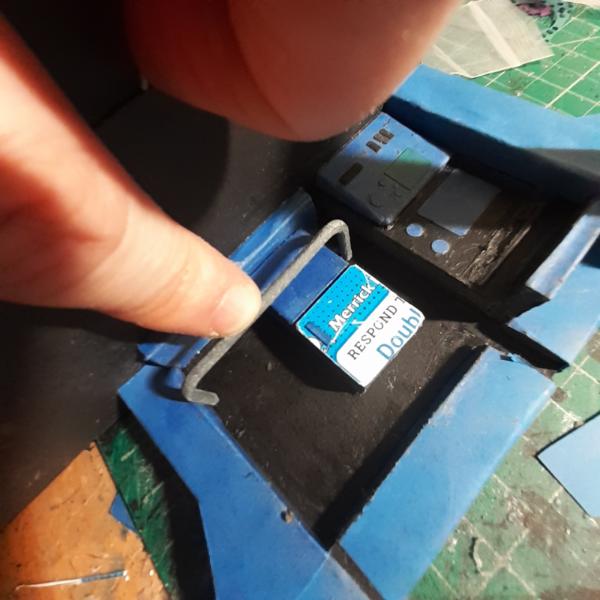
I just need to start the holes with my trusty tools: a random pin and a pen I had lying around.
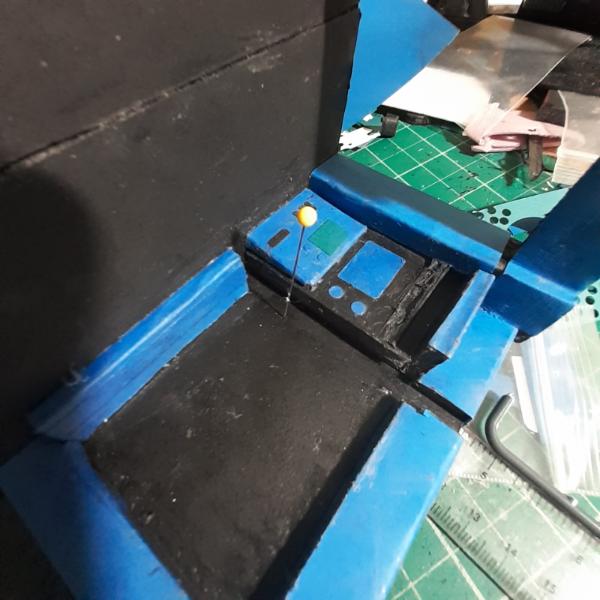 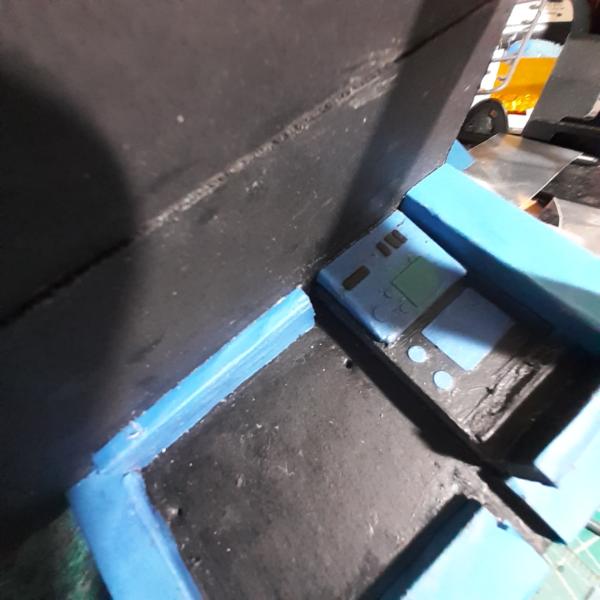
Here's more mockup shots of the rail in place.
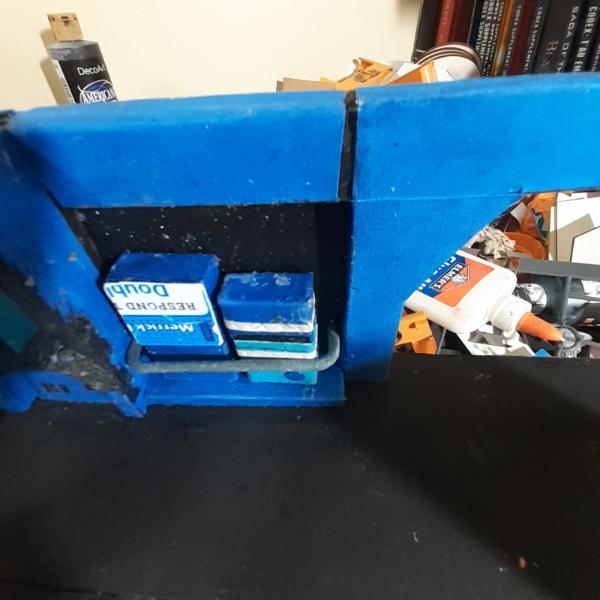 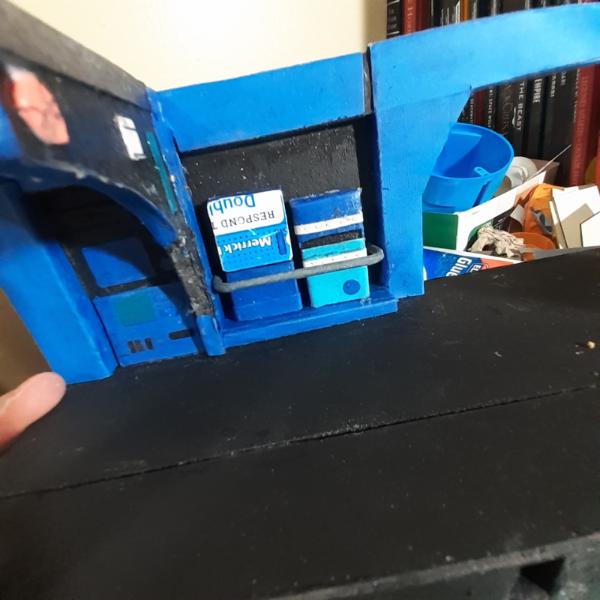
Then I moved on to detailing the wall panel they will stand in front of. Disregard that blue dot on the lower left. I had meant to pull it off from a different spot, but the glue was so tacky all that occurred was that I moved it there. And now that is where it will remain until the end of days.
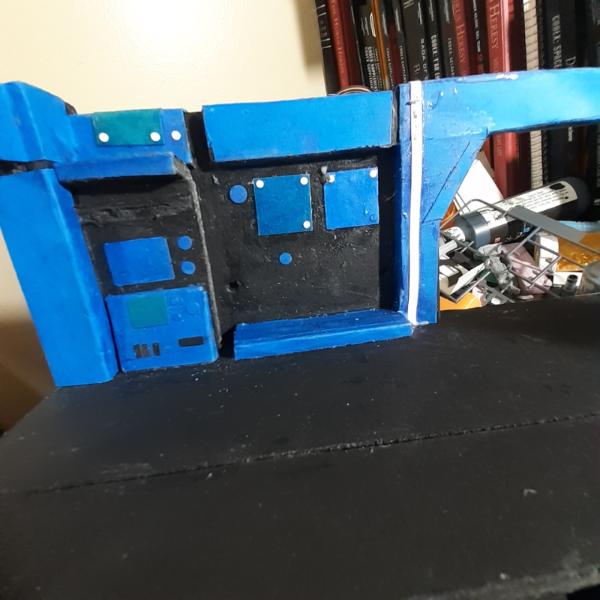
I also did some detailing on the big archway near where all these details were going to go. Here is a bad angle shot that barely shows what I did.
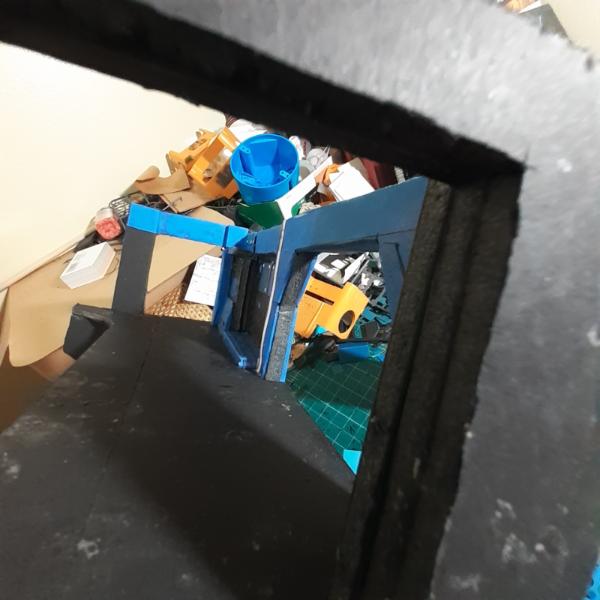
And then I primed all the parts before gluing them in place, because there was no way I would ever be able to prime it all once it was assembled. Here it is all glued together.
 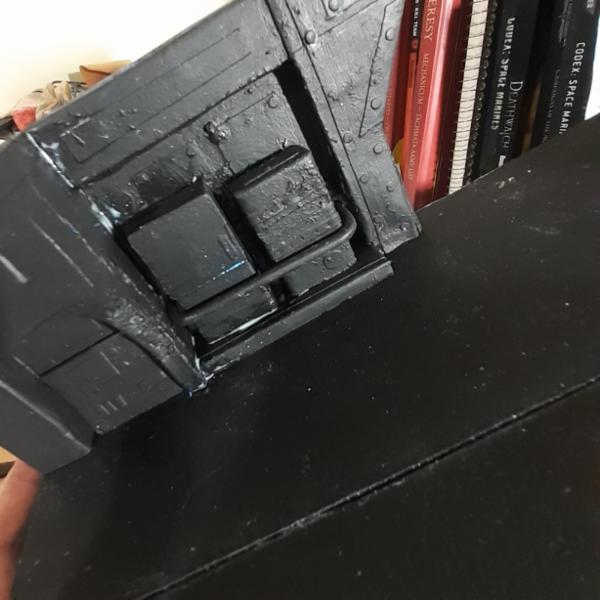
And now with more Timothy for showing off purposes.
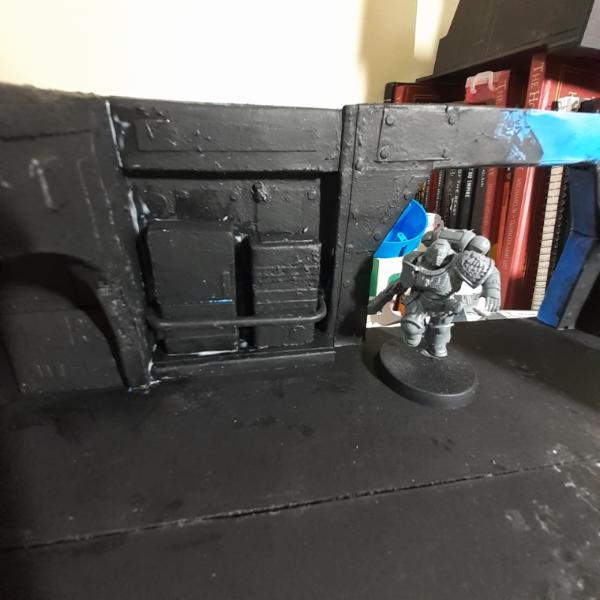
More progress updates as I make it.
Thanks for looking and have an awesome day!
22619
Post by: inmygravenimage
As always, fantastic detail work.
76303
Post by: Warboss_Waaazag
First thing I discovered I had to modify were the nubs of the lollipop sticks, as they stuck out too far on either side of the large archway. Sawing that flush was the opposite of fun.
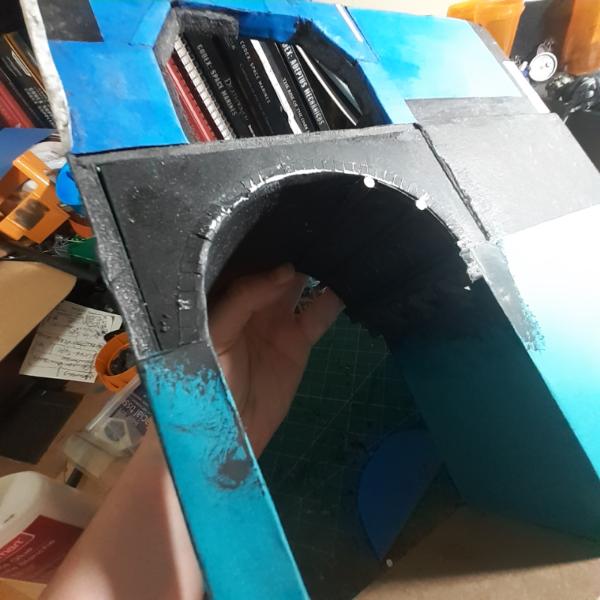
Second thing I did was decide to cover up the foam with paper and be done with fretting over stone slabs on a spaceship. But first I had to sand it flat. That turned out to be very easy.
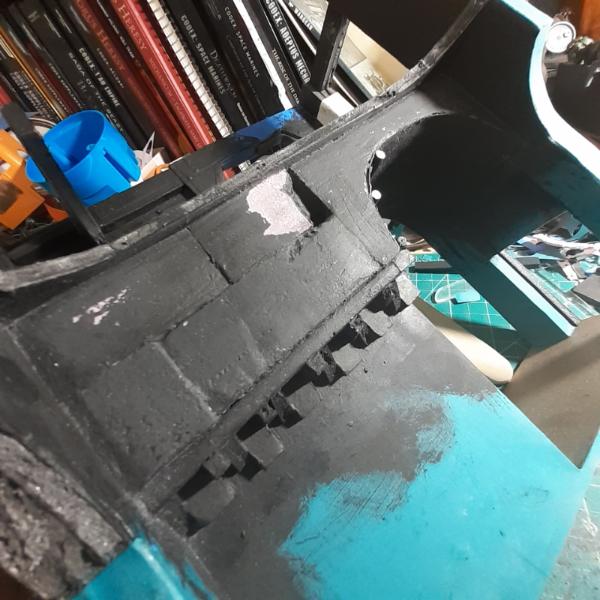
Then I test fit, trimmed, and ultimately glued a large piece of paper in place.
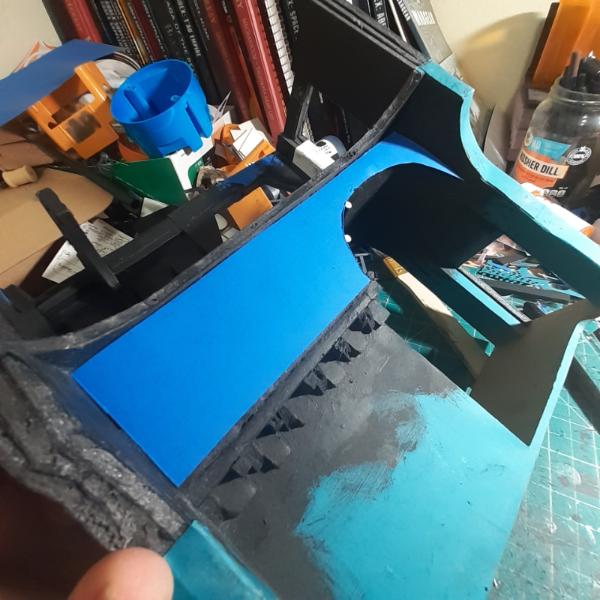 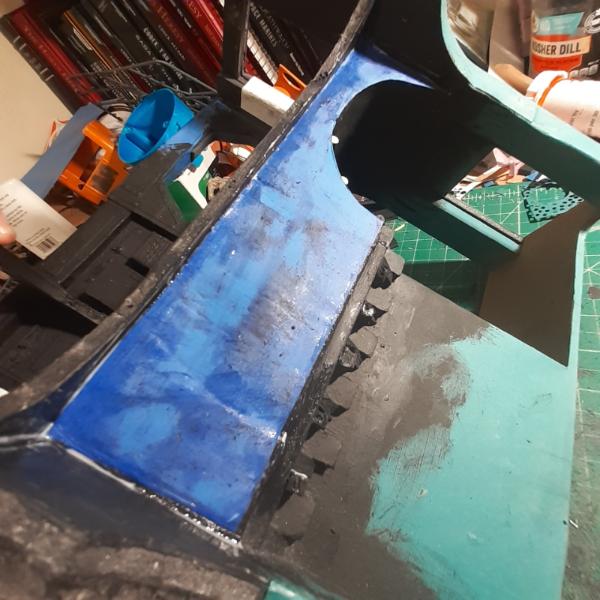
And then immediately decided it looked too flat and poked a hole in it where the foam underneath had a depression anyway.

Next I needed some lower trim, so a lot of free hand "measuring" happened. After some minor trimming that got glued in place, too.
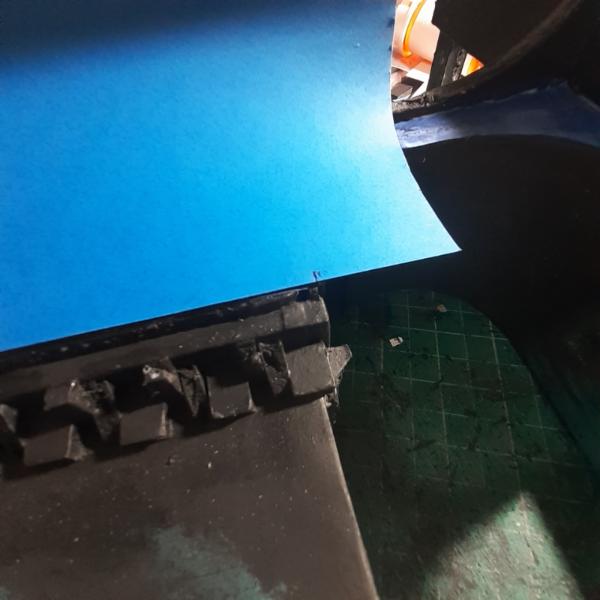 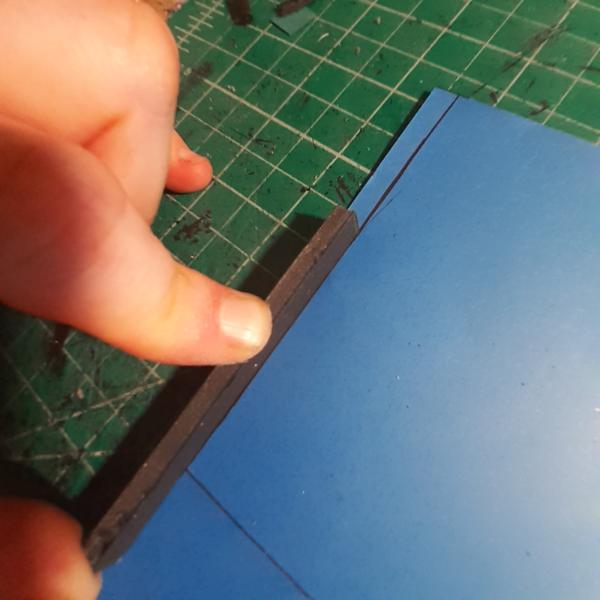 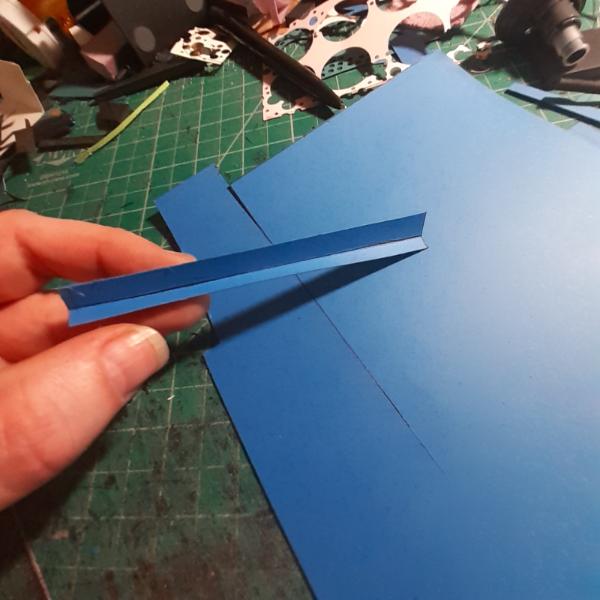  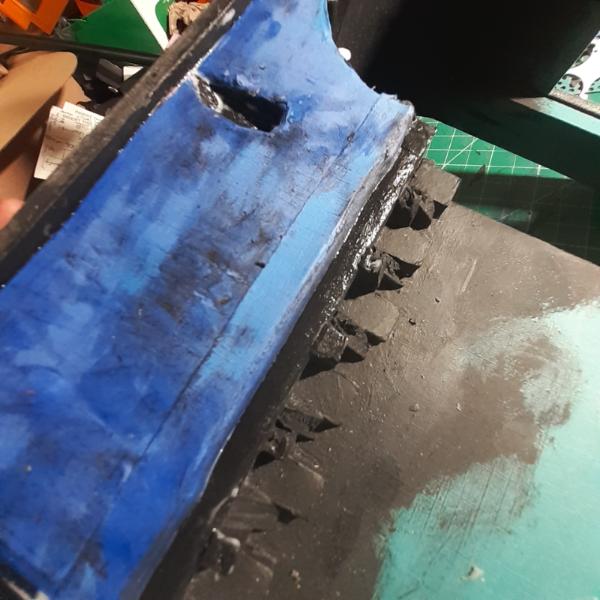
Next, I got to work on the smaller archway on the top floor, creating details with paper, glue, and toothpicks.
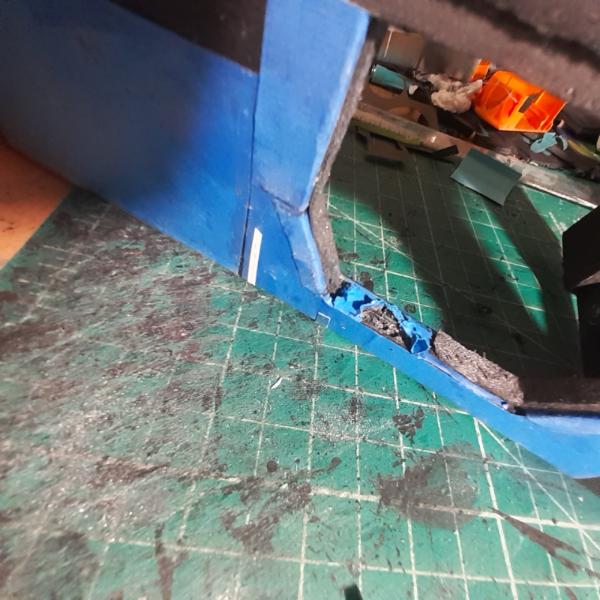 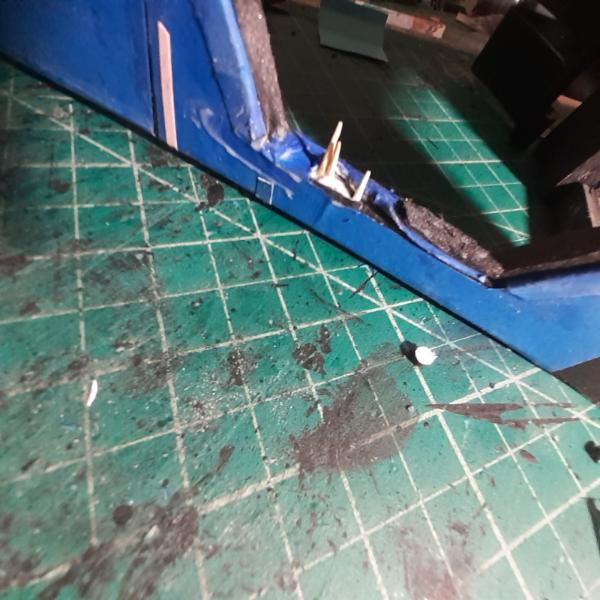 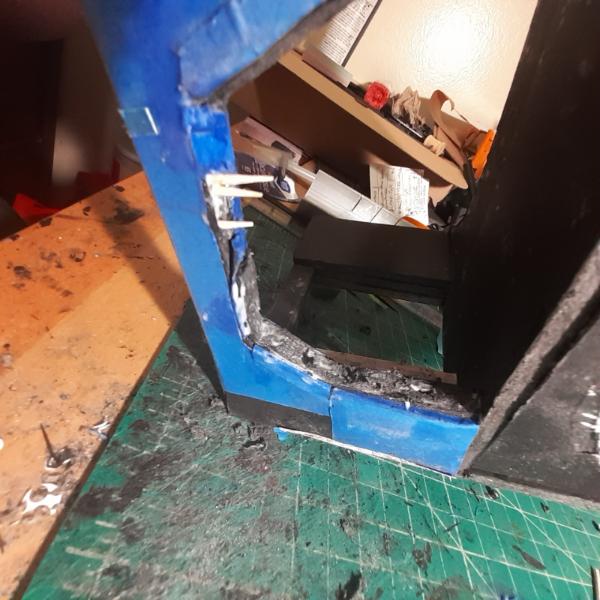
And lastly, I came home tipsy a week or so ago and decided that was a good time to add details to this piece. That's the 2 oddly shaped white panels on either doorway pictured here. Super useful, thanks past Me.
 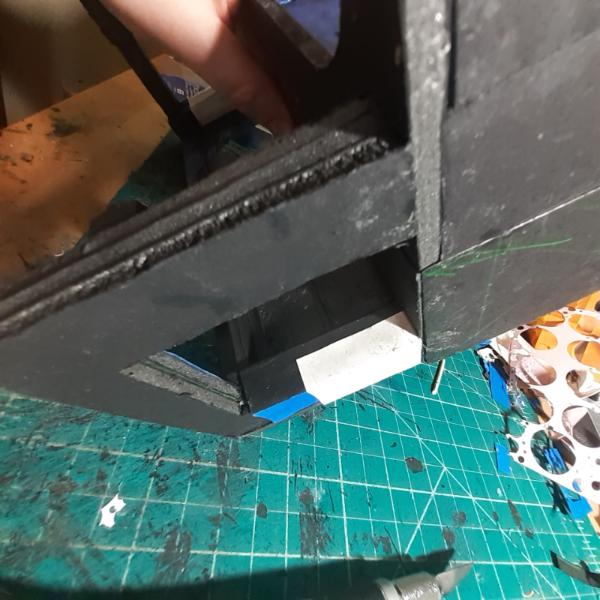
And then, at long last, work could be begun in earnest.
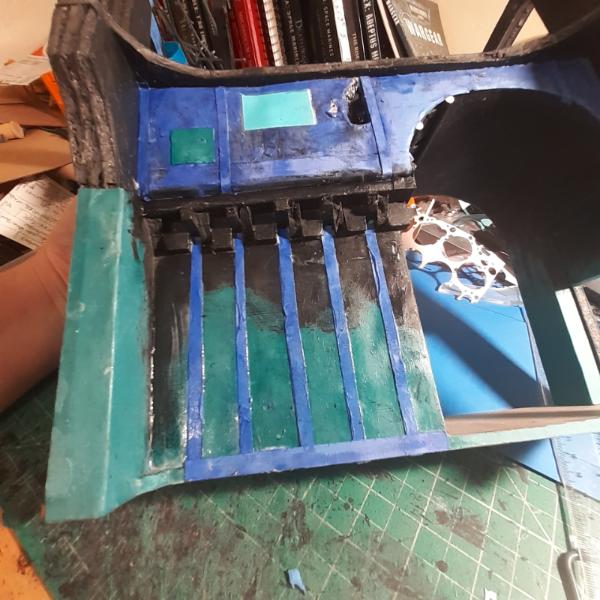
More work to be done, but I made a lot of progress today. Thanks for looking and have an awesome day.
76303
Post by: Warboss_Waaazag
The glare on most of these photos is due to the wet glue and the intensity of my Ott Light. Here I am showing off the asymmetry inherent in, apparently, most of the things I build. Sorry to all my OCD fans. This oddity will get slightly fixed as I add more details.
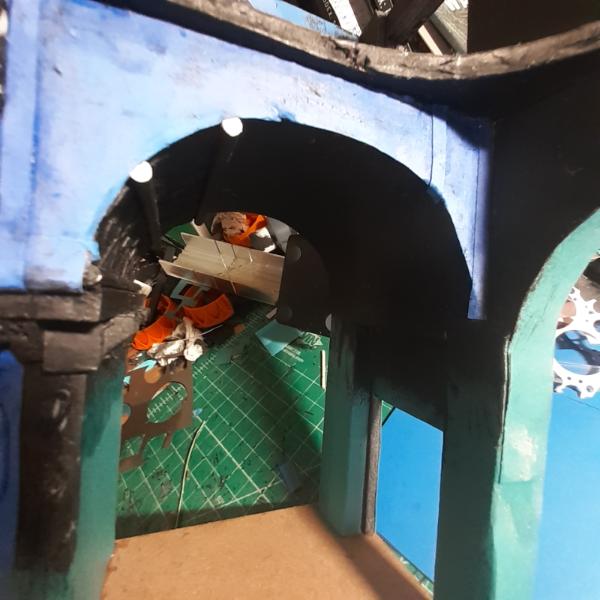
I wrapped the doorway on the left side of the piece with a geometrically-challenging piece of paper. Making these complex shapes essentially involves making rough measurements on the paper and finding the esges where it needs to fold by test wrapping the shape and making literal folds around each turn, one by one. This helps me see where a chunk needs to be cut away or a line needs to be sliced to accommodate the underlying form.
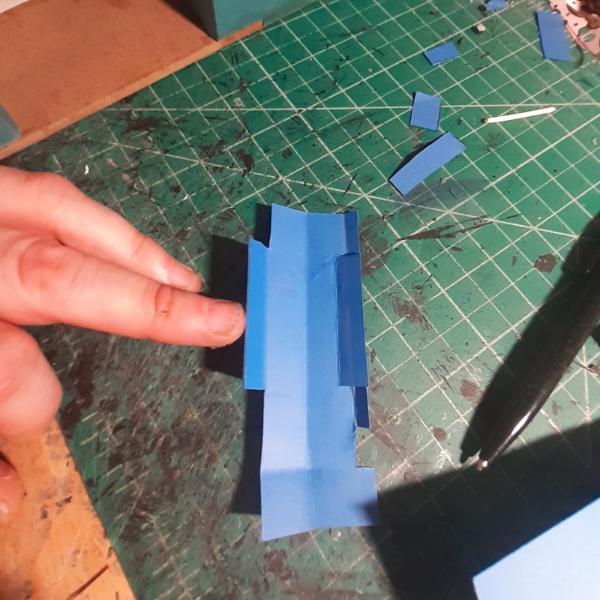 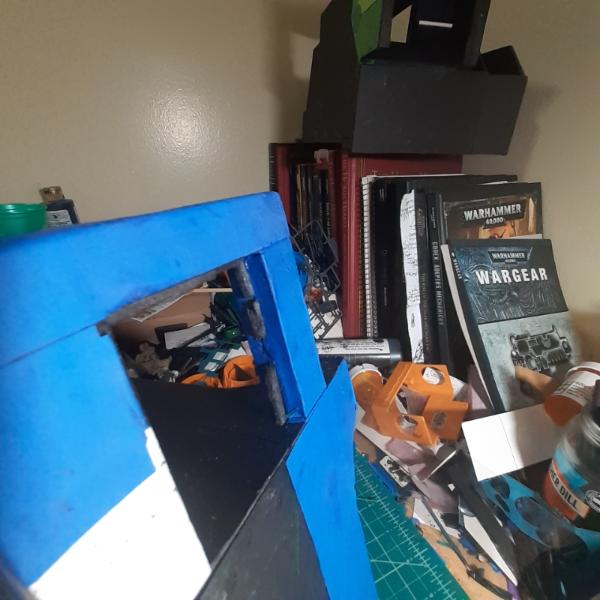
Next I started detailing the superstructure. I bought a paper product that I think is normally used to make teeny tiny paper stars or friendship bracelets? Something, I don't know, but they're just a stack of long, thin strips of uniformly measured paper ideal for making consistent banding. I'm using them extensively in this build.
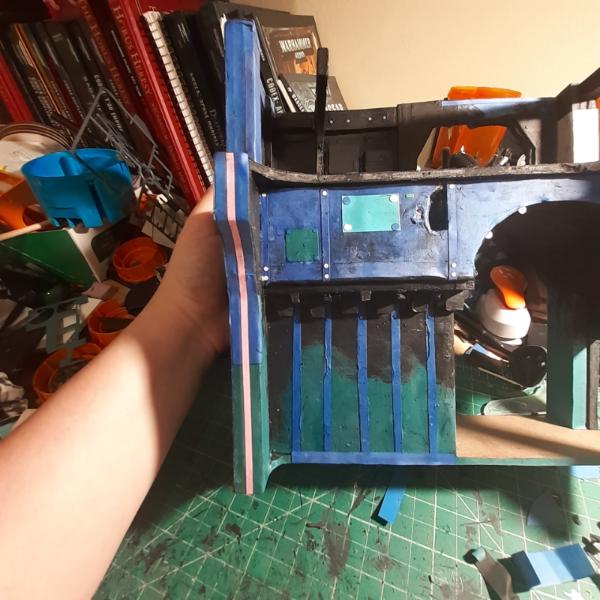
I decided I wanted some exposed piping on the far side of the piece and now that I finally found a miniature mitre box, they were easy to cut flush. I used the strips of paper to make braces and details on these wooden dowels and then coated them in white glue to hide the wood grain.
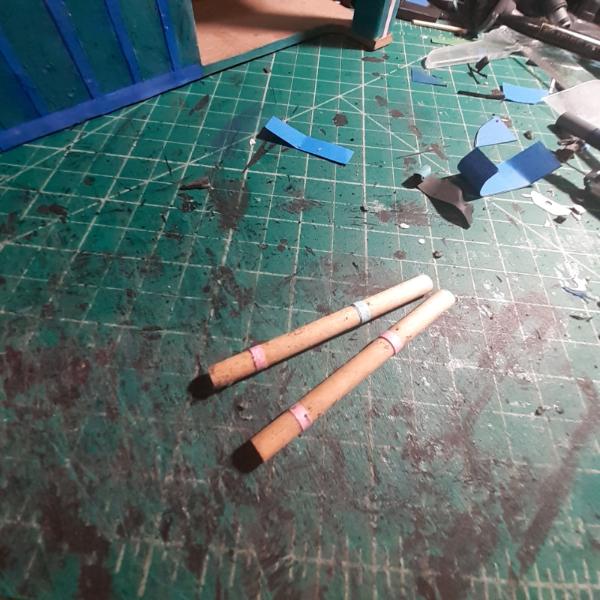 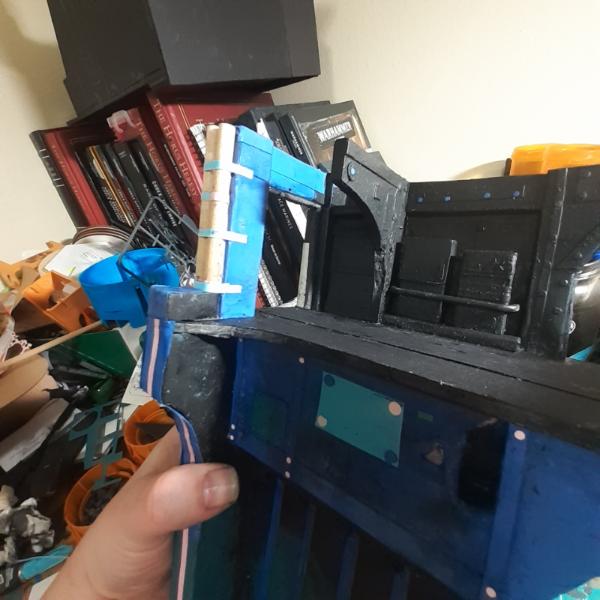 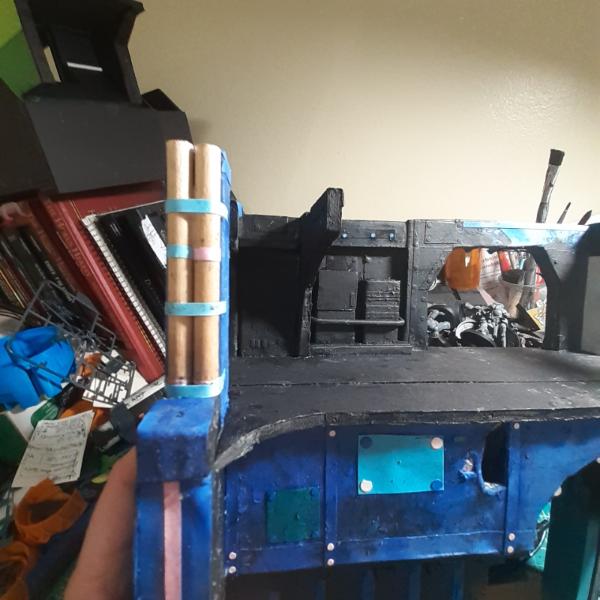 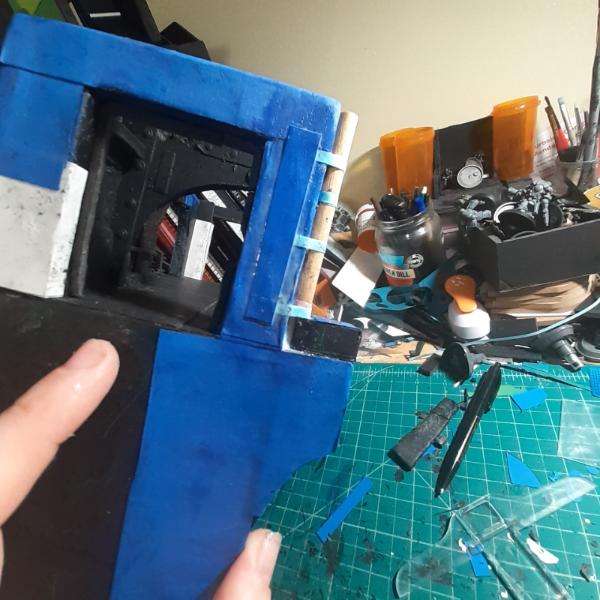
Next I moved on to more and more detailing, using the paper strips some more.
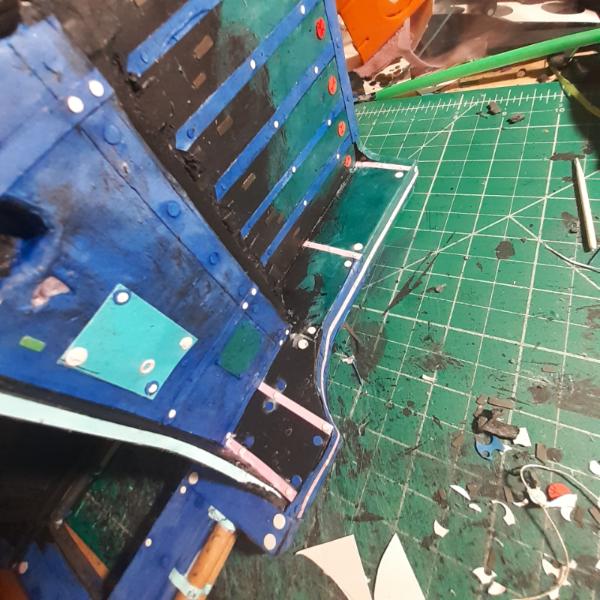 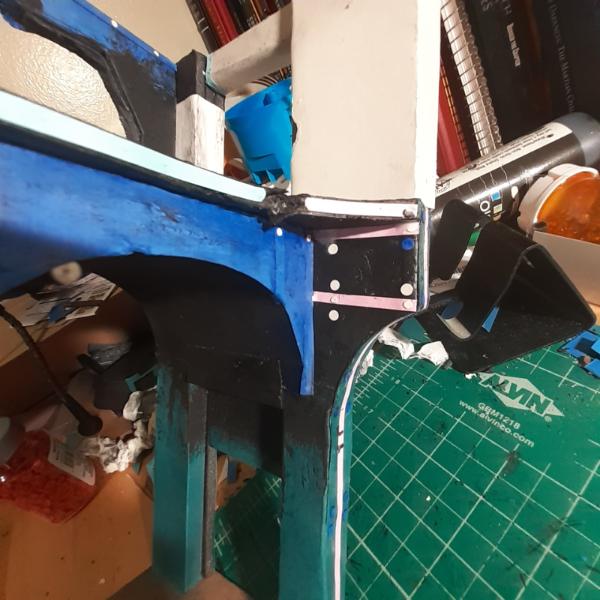
And then rivets and various other details, like the beginnings of the flooring.
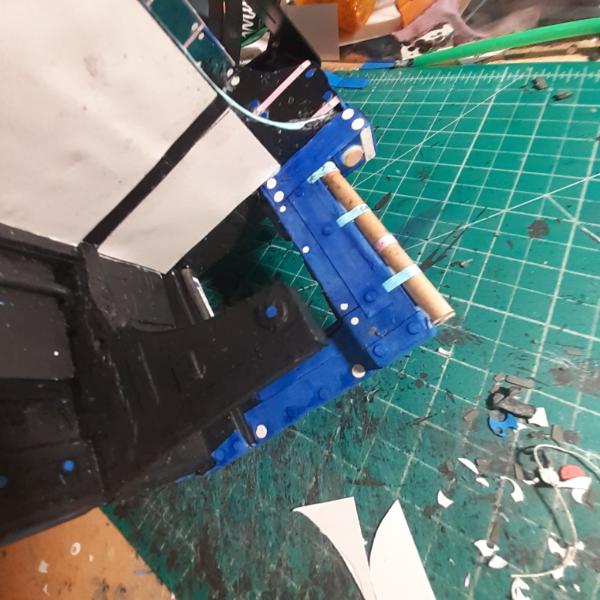 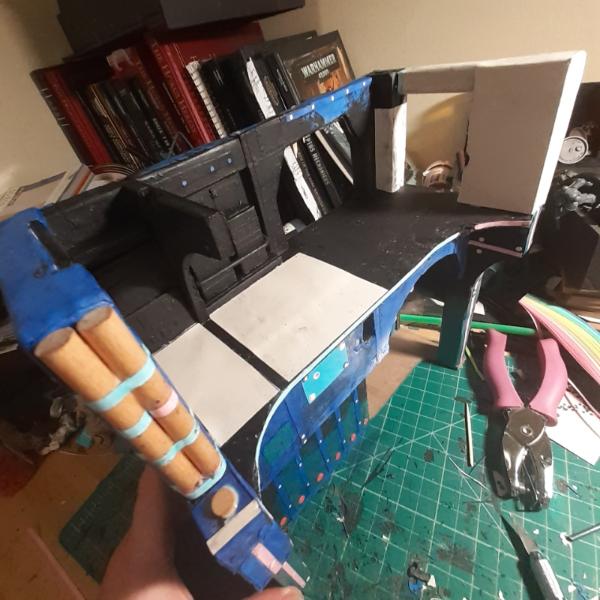
And then finally, I started to tackle the exterior. That's as far as I got. More progress as I make it. Thanks for looking and have an awesome day!
76303
Post by: Warboss_Waaazag
22619
Post by: inmygravenimage
That loose cabling makes my heart sing. Perfect detailing.
76303
Post by: Warboss_Waaazag
Thanks, graven. I appreciate your feedback and praise.
I did some work on the inner wall of the archway. It's a small area, but it deserves attention, too. Here's 3 pictures that I did not intend to look like I am slowly zooming in, but that's how it seems to have turned out.
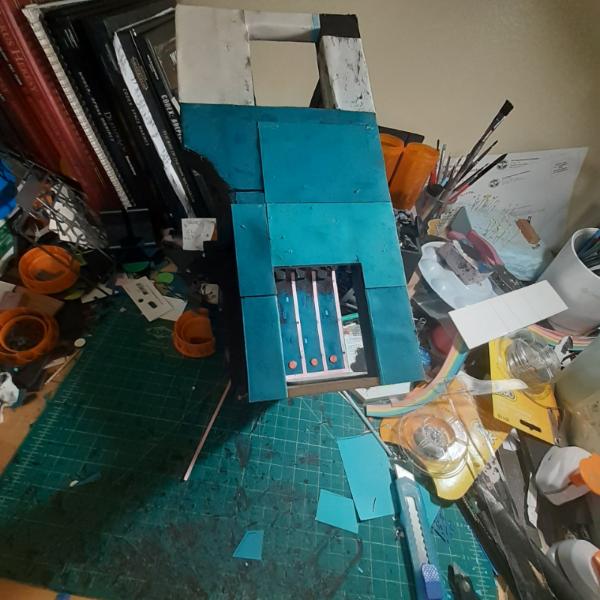 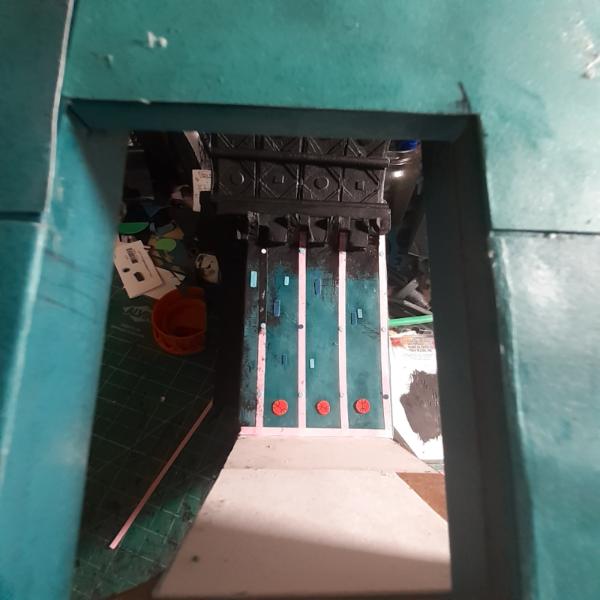 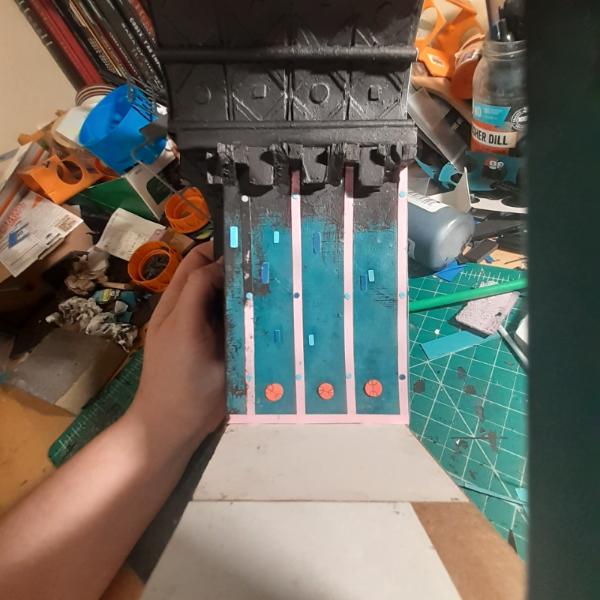
I'll work on this more tomorrow. I hope to add even more "wall guts" (i.e. cables) to the hole. I just have to add more glue for sturdiness and paint to make sure I get everything before I cover it with a detail I can't paint through. Thanks again for looking and have an awesome day.
1124
Post by: Captain Brown
Now I am starting to see the details and the walls come to life.
Cheers,
CB
62749
Post by: Dr H
Good work waaazag'. Nice to see some sprue use.
|
|