372
Post by: grey_death
Well, I got the terrain itch...I just couldn't resist it anymore. I started a new project for no good reason past I wanted to. This time around I'm taking a crack at a nature based table. I'm trying for a rolling foothills look. We'll see how successful it is. I went surfing for some research and help with the basic layout of the table and came across this from Terragenesis:  for more on the image check out http://www.terragenesis.co.uk/gallery/image.php?id=467 I ended up using that as a base for my table layout since it pretty much fit perfectly with what I was going for. On to the WIP pics: Gluing the base foamboard down to the MDF for support.  I used toothpicks for each level in addition to glue to help secure them in place. 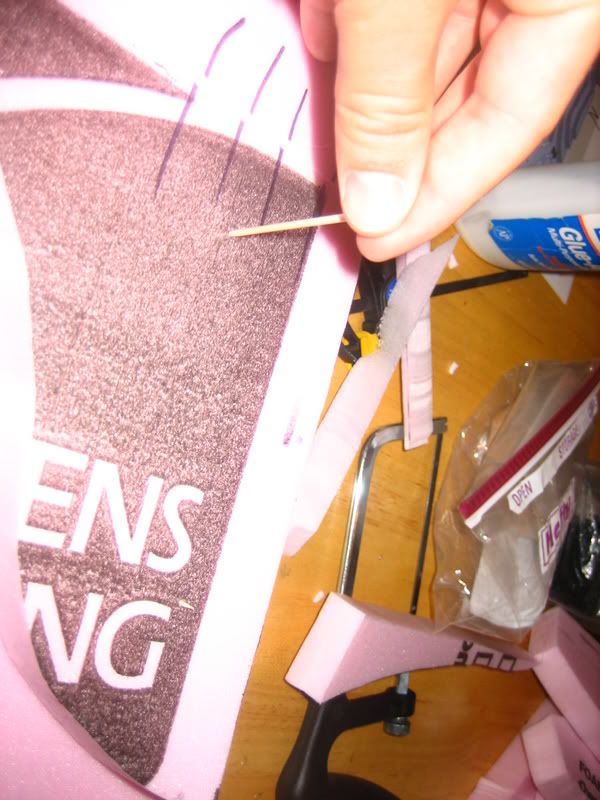 And here is the final layout! 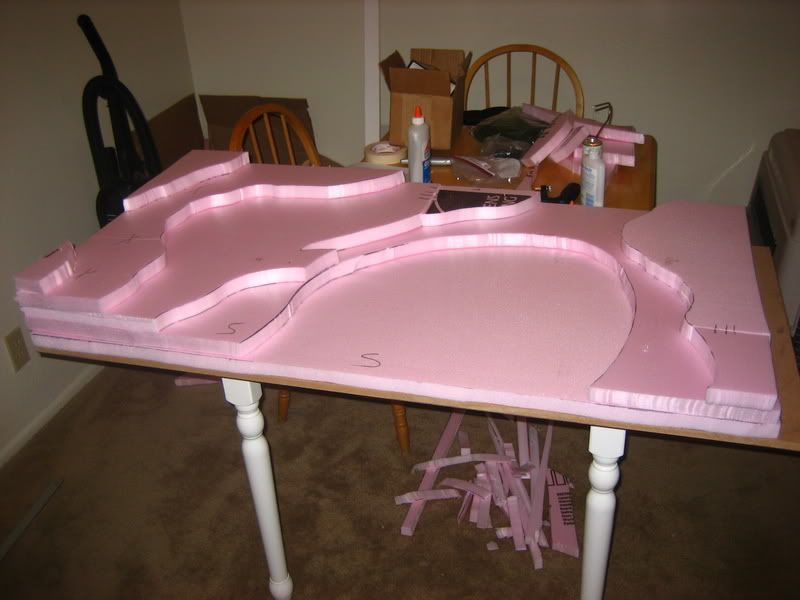 More WIP photos to follow. And I'll try and post more intent/research photos as well. Enjoy the ride!
372
Post by: grey_death
Just wanted to add a little bit of photoshop stuff: This is how the hills will be once I start working on the slopes for them. Well at least this is the intent. We'll see how it works in practice. 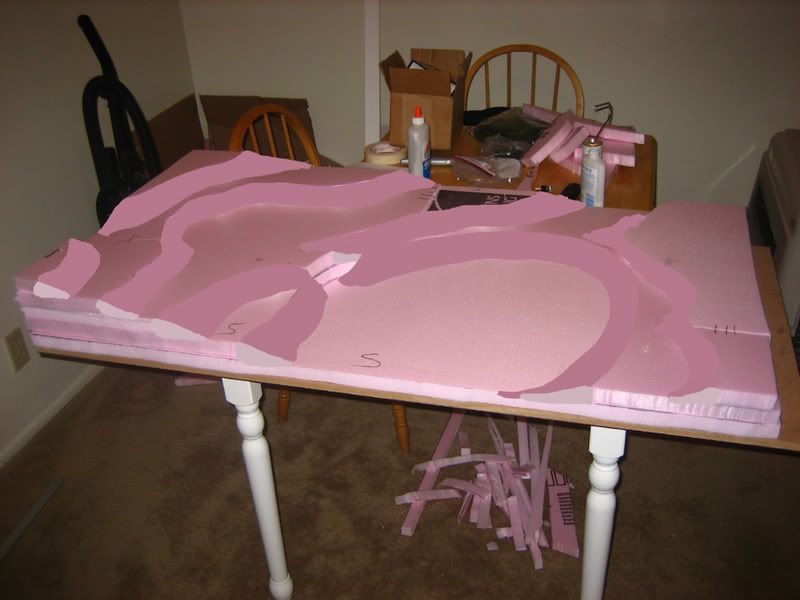
1354
Post by: shrew
looks like a great start! is the bottom part going to be some water feature like a lake or pond ? AMPHIBIOUS ASSAULT!! anyone?
247
Post by: Phryxis
I would vote against sloping the hills...
Maybe not what you want to hear, but slopes and minis don't mix, IMHO. It will certainly LOOK way nice with the slopes, but you only spend so long looking at a table before you stop worrying about what it looks like, and start thinking about how to play on it. No matter how nice a table looks, if models keep falling over, breaking off their weapons, etc. etc. you'll eventually grow to hate it.
Instead, I'd just clean the edges up with a little spackle putty (or similar) to blend the seams together, maybe put a slight bevel on the top edges, and go with it. It will look less realistic, but if you make it clear that it's stylized, it can actually look pretty cool.
131
Post by: malfred
Isn't slopy no slopy based on game?
Slopy = bad for top-heavy 28mm models.
Slopy = good for WHFB movement trays and low center of gravity models (15mm and the like)
1361
Post by: scarab
Cool!
Jagged cliffs would work too, as long as everyone agrees it's not difficult terrain. Sloping the pieces is going to move the hills further to the edge and not further to the center as you illustrate. Not necessarily bad, but something to consider. What kind of move-able terrain are you going to use with this to make it have some variert? It will need to ve relativly small give to lots of placement options.
372
Post by: grey_death
Hrm. Good points made by all x.x...I think I will end up going with the steps instead of slopes. I want it playable. And I'm expecting to only really be playing 40k.
I think I'll just try and bevel the edges a bit and smooth them out as Phryxis suggested.
As for additional terrain, I'm really not sure yet. I want trees and the like, but I'm not sure if I'm going to make them a permanent part of the table or not yet. But this comes back to having a playable table. So this might swing towards any and all additions past undergrowth being movable instead of in static.
Oh and for color scheme, I'm thinking of making it an Autumn scene. The Dakka store had an autumn table and I loved it. I think I want to pay homage to said table ^_^;. I'm just not certain what kind of ground cover to go with in that sort of color scheme. Any thoughts?
963
Post by: Mannahnin
Looks nice! I agree with you and Phyrixis on the slopes. A little bevel and a little spackle will work much better for gaming.
You?re going to want movable wood and ruin templates to break up LOS. The biggest issue with this kind of table is always that long ranged shooters on the high ground can see over almost everything, so you need some size three area terrain to break it up and make the game tactical.
Wakarus was the name of the old Dakka (RIP) store autumn table. You can get fall-colored moss and flock from Woodland Scenics and similar companies. For the majority of the play surface you?re going to want to go with the usual textured paint/glued-on sand, I think. This gives the table some texture but doesn?t break off easily. The problem with covering the table with any real nice texture/scatter is that it?s going to be breaking and flaking off constantly.
This issue aside, since you?re talking about going for a Fall look, recently I also learned about another awesome product called leaf litter, which you can see used on some model bases in the following thread:
http://warhammer.org.uk/PhP/viewtopic.php?t=30002&start=0
Here?s a great article from Reaper:
http://www.reapermini.com/TheCraft/24
Here?s a diorama:
http://www.thelastalliance.com/index.php?pid=article&articlefilename=dioramasthewhitewizard&catid=1&subid=26&artilceid=206&printerfriendly=1
And another:
http://www.hyperscale.com/features/2000/js2jb_1.htm
Here?s a place that sells it in the UK, but I?m sure you can get it in the US as well:
http://www.barrule.com/workshop/scratch%20builders%20paradise/leaves,%20feuilles,%20blatter,%20fogli.html
The only problem with this stuff is that it almost certainly won?t stand up under traffic on a high use play surface. But it gets the best looking fall ground effects I?ve ever seen. Maybe it?d work tucked into the base of some of those hills, and at the bases of the trees and walls on the forest and ruin templates
131
Post by: malfred
I thought litter was for cats and tourist attractions?
1361
Post by: scarab
As Ragnar says, the terrain need to be mobile or the table gets boring fast. As far as fall theming goes, I have a fall themed table in case it give you ideas. Admittedly, I skipped the fall foliage on the ground, but I think that's for the best in terms of play. 


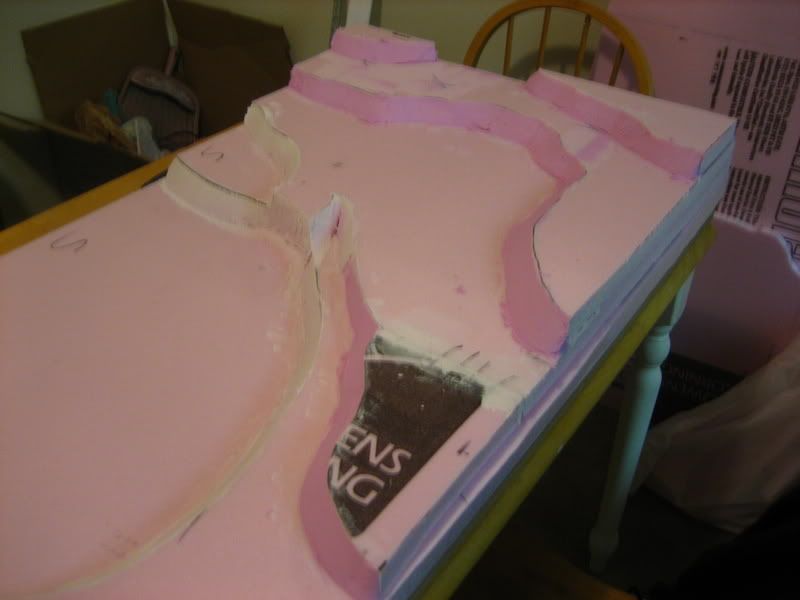
A final better shot of the contours, etc: 
372
Post by: grey_death
Man, thanks a ton for all the great reference stuff guys.
Thanks for the reminder about the leaf little Ragnar, I couldn't remember for the life of me what that stuff was called but knew it was out there. Now to see about getting a bag or so >.>...
I'm definitely going to work on putting together some clumps of trees and add in some ruins as well. Maybe some stone walls and such like back in new england, I miss going out into the wilderness only to find old run down walls and buildings. And I'll be making them modular/movable as much as I'd love to make this thing like a diorama, I have to remind myself I'm building it at the apex of playability and looks, and sacrifices have to be made x.x...And I can always make each piece of movable terrain a small diorama in itself!
I'll be trying to get some spackle and edging done tonight. We'll see how much gets completed. Updates to come.
372
Post by: grey_death
Ok, I got started on the slopes/edges of the hills. Ran out of spackle so I'll have to head to the Home Depot sometime tomorrow after work. But this is what I'm gonna go with, I'll end up rounding them out some with sand paper after it's all dried out. 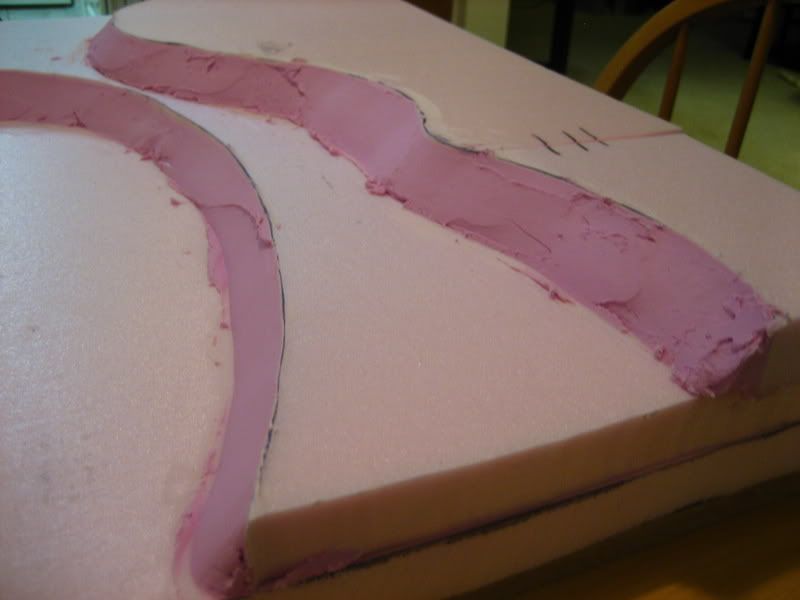 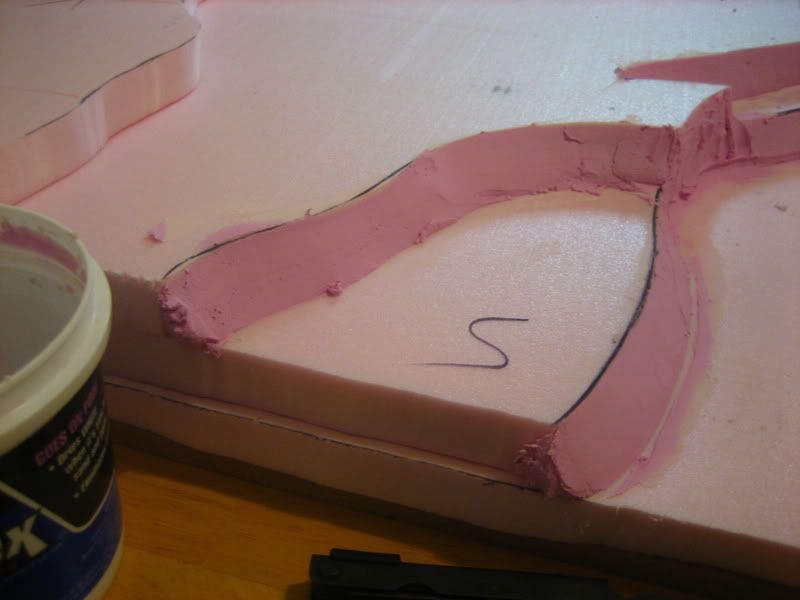 They end up feeling like a compromise between my original idea of long overgrown slopes and the hard edged drop offs I see a lot of folks go with. I think once the corners are a bit more rounded they'll really start to look just right. Thoughts?
1361
Post by: scarab
Looks good to me! That's a LOT of spacke and can get heavy. I usually add the slope to the foam itself and spackle the cracks. The foam sands well, too.
5010
Post by: Rogen
I like it, man i wish me and my friends made that kind of table. (we use the floor and text books...) : P
372
Post by: grey_death
Posted By scarab on 09/10/2007 7:22 PM
Looks good to me! That's a LOT of spacke and can get heavy. I usually add the slope to the foam itself and spackle the cracks. The foam sands well, too.
Yeah normally I try and work with filler materials to build up the area before spackle goes down. But I guess I'm just lazy and I know this will do the trick >.>.... I figure I'll snag one more container of the stuff and finish this bit tomorrow. As for the weight, I'm really not too concerned...I based it on 1/2 MDF board...
372
Post by: grey_death
Posted By Rogen on 09/10/2007 7:32 PM
I like it, man i wish me and my friends made that kind of table. (we use the floor and text books...) : P
You guys should really look into it. It's relatively inexpensive to build what I've got here so far. You can even cut out the spackle to cut out some time and cost. Throw some textured paint over it all and you've got one heck of a quick table. Spray paint for some variation and you're golden.
372
Post by: grey_death
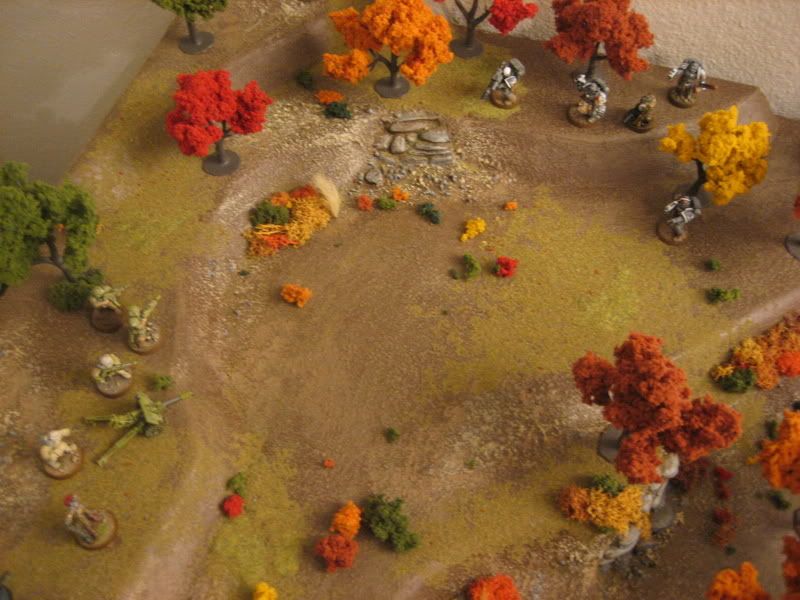
 Last of the spackle sloping. Now...to let it cure...this might take a little while... In the meantime, I need to start thinking over the layout of the ground cover and detailing for said ground. I'm not sure if I should put a road on any of the board or not, maybe just paint on some light trails instead. I also need to start thinking of colors. So short list: Ground Cover types and Layout Base colors and Highlighting colors Movable terrain types and materials needed Here are some research photos I've plucked from the interwebs for your consumption. 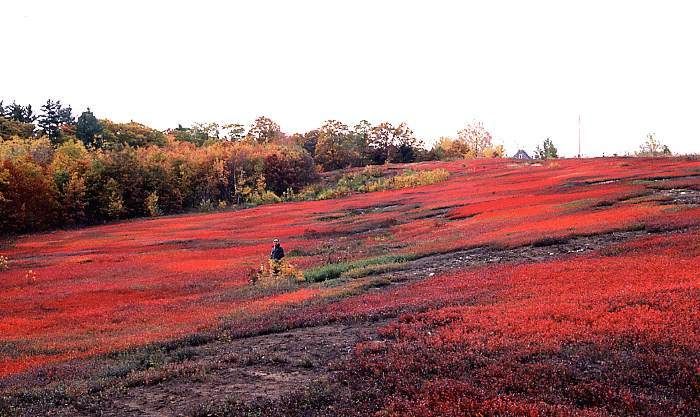 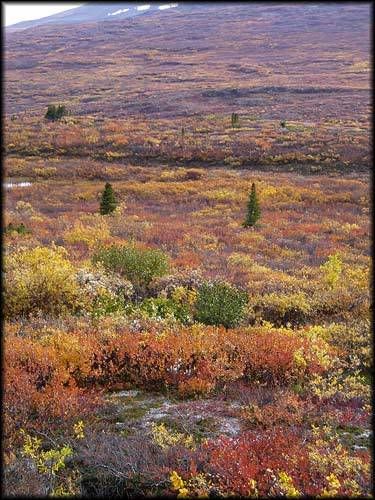  If anyone has comments or ideas please, feel free to chime in! I'm still very open to suggestions for the board right now! I need the Dakka communities feedback! Now, where is my sand paper...
49
Post by: Arstahd
Looks good. In the future I'd recommend cutting the bevels directly into the layers before you glue them together instead of using filler. You may have problems with the spackle cracking and separating as it dries and also from any bumps the table may take over it's lifespan.
I also recommend against sanding down the corners any. Keep them nice and sharp to give a stable surface for your mini's. On the first hill I ever made I made the mistake of rounding the edges. I was left with so little space flat enough to support a mini that the hill was all but useless.
372
Post by: grey_death
Posted By Arstahd on 09/11/2007 7:51 PM
Looks good. In the future I'd recommend cutting the bevels directly into the layers before you glue them together instead of using filler. You may have problems with the spackle cracking and separating as it dries and also from any bumps the table may take over it's lifespan.
I also recommend against sanding down the corners any. Keep them nice and sharp to give a stable surface for your mini's. On the first hill I ever made I made the mistake of rounding the edges. I was left with so little space flat enough to support a mini that the hill was all but useless.
I'm actually sort of planning on having to do some touch up work on the spackle. I kind of realized what I did well after the fact and just kinda went with it and I'll have to fix any issues that might pop up. As for sanding the edges, I'm not planning on making them super rounded, just enough to give more of a rolling hill feel. I'll probably be able to show that tomorrow when the first stage of spackle starts to dry enough that I can start working on it a bit. Plus with the table more than likely being relegated to skirmish duty, I'm not real worried about having the 1/8th an inch of space back, though it is a small concern as I move forward with the sanding.
1361
Post by: scarab
Cool. I like the photos of colorful ground cover. If you look at the table suface pics I posted, I think you can see that there are green areas with a splotchy ground cover with some decent texture to it. First, I always put sand down by simply sprinking it onto the wet base coat of latex paint - saves a step. Second, if you get the sand damp, it sprinkles in little clumps looking like foot-high ground cover. You might want to sprinkle some of that in!
2987
Post by: MascisMan
I know your planning on an Autumn setting but when I see your table so far I envision a snowy forest with that huge opening in the middle being an iced over lake....
just my thoughts though, great work so far!
372
Post by: grey_death
Well, it's been a long week. But I've finally gotten some time to sit down and work a bit on my table. Throughout the week I was sanding and shaping the spackle and edges of the foam. Rounding and contouring them into each other so they didn't look like two separate pieces glued together x.x. This was somewhat time consuming, but it all smoothed out nicely and I'm pretty happy with the contours now. I think now that I've got some paint on it all though, that I could have curved the edges even more than I did, but that's just a personal taste really. I put down some sand in splotchy patterns across the table trying to give some large ground cover over different sections of the table, I focused on some spots where the spackle had some issues to sort of hide where I got lazy or messed it up >.>...after that I laid down a light coat of paint to start getting an idea of what it was all looking like. When that was dry, I mixed up some textured paint and set to adding some texture around the sand covered areas to blend them in more to the table. This took 2 splashes of paint to each of the sand covered areas and it was well worth the time spent. They now work in seamlessly to the table without any hard edges. I then added a coat of textured paint across the entire table. When the first coat was dried, I added one more coat to fill everything in a bit more. Which brings us to the pictures. I took these almost directly after finishing the second coat, so it is still quite wet in the picture. I'll post newer 'dry' photo's when everything is completely dry again. 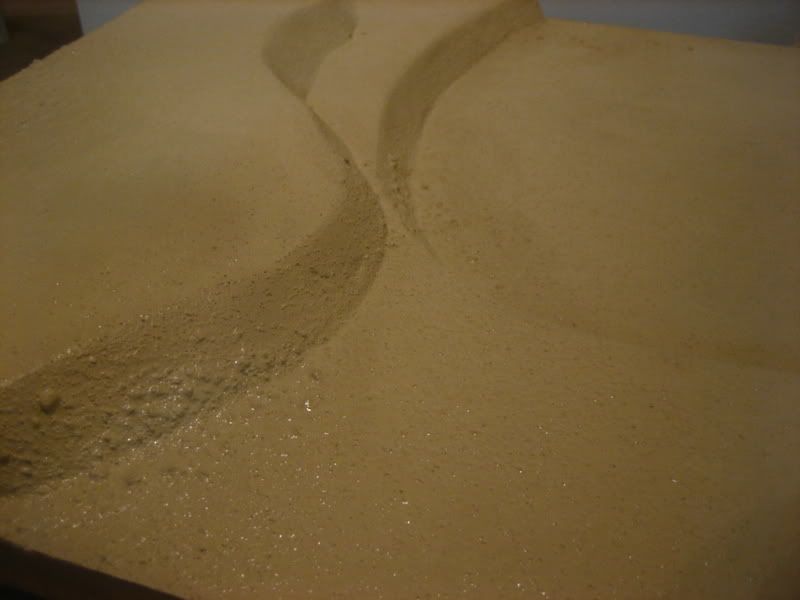  This is obviously not going to be the base color of the table. I had to destroy a paint with texture so I chose that one. I'll be going back over this with a darker color and highlighting. Note: to keep from getting streak lines in your paint as you're laying down some paint on your table, be sure you go back over the entire thing in a 'dabbing' motion, bringing the paint brush directly up and down on the table. This will break up the streak marks and help even it all out and even give you a tad more texture to your project. Next up: More paint >.>... Thoughts and comments welcome as always!
1361
Post by: scarab
Nice! This going to be one sweet table.  Is the texture something commercial or just sand mixed in the paint?
372
Post by: grey_death
Posted By scarab on 09/16/2007 2:27 PM Nice! This going to be one sweet table. Is the texture something commercial or just sand mixed in the paint?
It's commercial paint texture. I picked it up at The Home Depot years ago. It's Bondex brand 'Roll-A-Tex'. I snagged the 'Fine' version but they sell medium and coarse as well. It's a real time saver, and works better than normal sand because it suspends itself in the paint and doesn't sink to the bottom.
1361
Post by: scarab
Thanks for the tip.
372
Post by: grey_death
Painted the sides up. And like I promised, dry pictures. 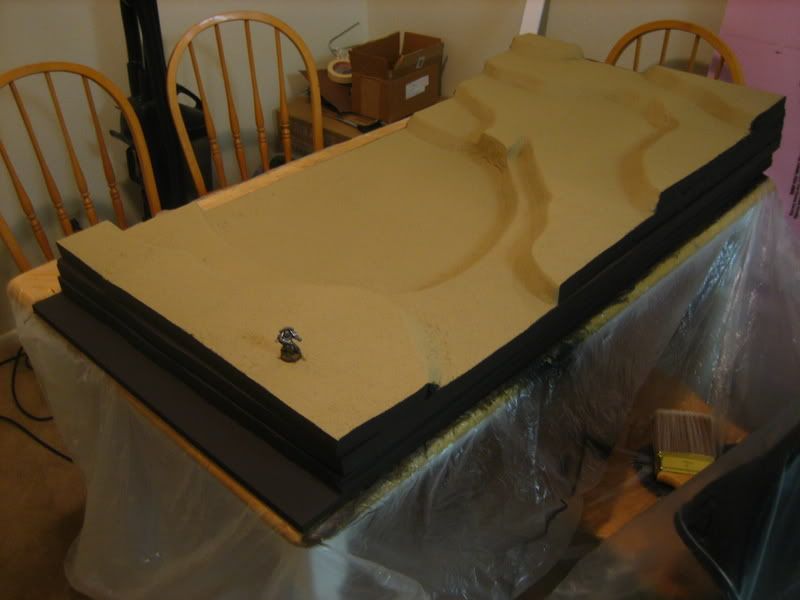 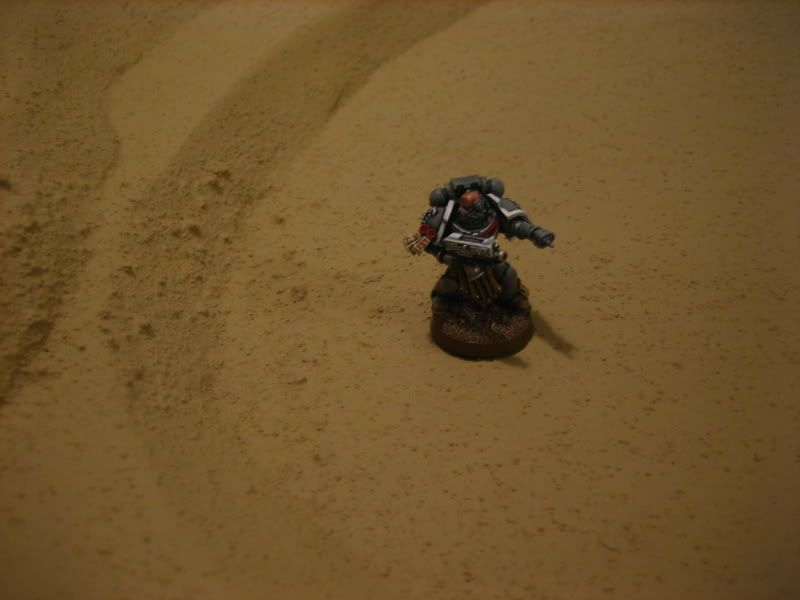 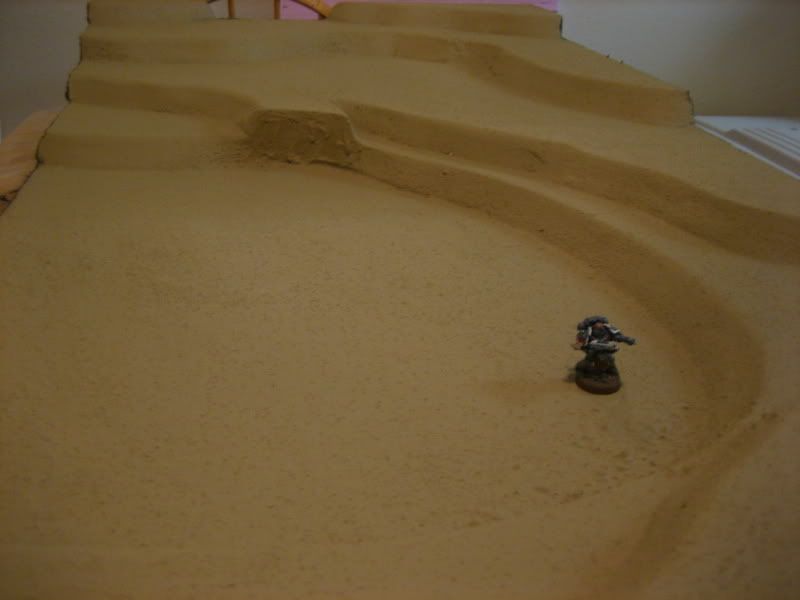 Model was thrown on there for scale of course ^_-. Currently working out ground cover ideas. I'm going to be hitting up the old hobby lobby and raiding their woodland scenics stuff. Should prove interesting. After analyzing some of my research pictures and going over Scarabs table, I'll be going with a dark flesh/bestial brown'ish base color. I've also started working on the flat drop off face in the basin. I should have done this before adding texture and paint. But at least I'm doing it! Here is a WIP Shot: 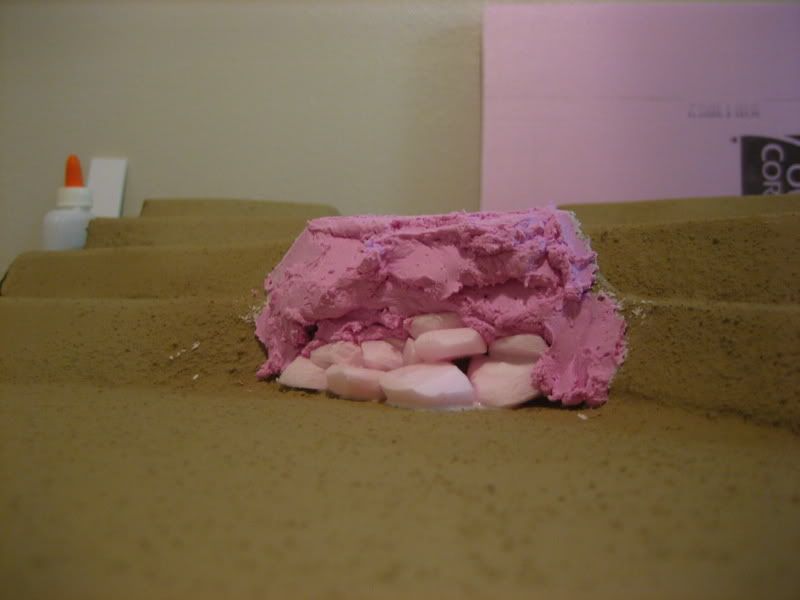 I'll be scraping and sculpting it into more rocks and adding sand and textured paint once that's all finished. Thanks for watchin so far! Still a long way to go!
1217
Post by: Corpsman_of_Krieg
How did you texture that surface so well? Is that stucco?
One of my biggest problems when making terrain is finding ways to not make whatever I'm building look like cardboard or Styrofoam with paint.
Fantastic work so far, GD. Keep it up.
CK
131
Post by: malfred
He says it's a textured paint. You can get it at Home Depot and the like.
1217
Post by: Corpsman_of_Krieg
Very cool. I think my wallet just groaned a little bit.
Off to Home Depot...tomorrow
CK
1361
Post by: scarab
I am interested to see how that little cliff works out on the whole. Could be a nice little touch.
1361
Post by: scarab
Maybe consider asking Yak to move this to the P&M Blog forum?
372
Post by: grey_death
Didn't get a whole lot completed tonight, just a preliminary shaping of the cliff face for actual table work completed. I did hit up the Hobby Lobby to see some of the Woodland Scenics stuff up close and get a better idea of what I want for when I get to actual ground cover. Found some stuff that I can and probably will use. So all in all a worthwhile trip. Oh and I had to snag another spot of glue as well. 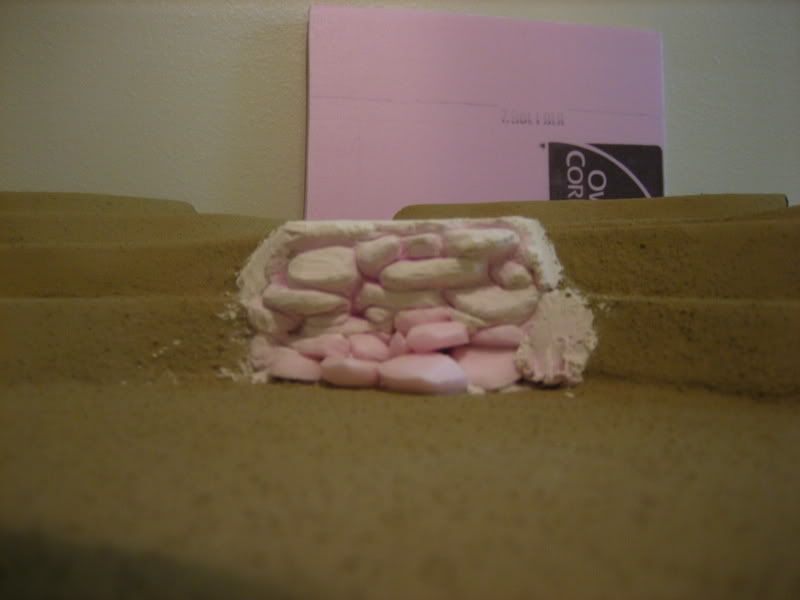 Shaping the spackle was rather easy, though I think I jumped the gun a bit, as you can tell from the picture, there is still a lot of undried spots throughout it. I expected this though and was really gentle as I shaped and scraped away, though I still had some spots break out on me. Not a huge issue, but something I'll have to be patient with in the future. I used a sculpting tool to do all the scraping and brushed the debris away with a dry soft bristle paint brush. I'll have to do some more finishing work on the cliff, but I'm going to let the rest of it harden and finish drying out before I destroy what I've got here. So it'll be another day or so before you see this in a 'finished' state.
1361
Post by: scarab
Looks good so far. I'd like to see it with more perspective on where it is on the table.
372
Post by: grey_death
Posted By scarab on 09/18/2007 3:31 AM
Looks good so far. I'd like to see it with more perspective on where it is on the table.
ask and ye shall receive: 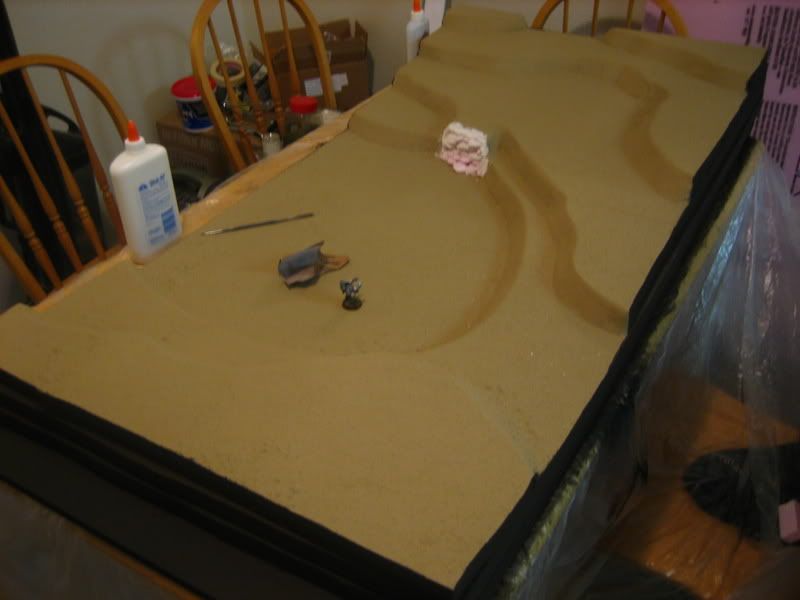
1361
Post by: scarab
Ah, that works.
963
Post by: Mannahnin
Looking really good, Aaron. And that marine looks sweet too! You should post pics of your army at some point.
372
Post by: grey_death
Posted By Mannahnin on 09/18/2007 9:47 AM
Looking really good, Aaron. And that marine looks sweet too! You should post pics of your army at some point.
Haha, I would post more pics of them...but he's the only one in the current color scheme that's finished! >_>... I've got a bunch of marines painted up from when I was first putting my army together, but since then I've done so much learning and put tons of effort into getting better from one offs and commission work. I've been putting lots of thought into getting together at least a small army of new marines and painting them up in my new white trim scheme ^_^; It's just going to be a little while before we get there >.>...I think after this table I'm going to work on the command squad I've got modeled up.
372
Post by: grey_death
Ok. Been really busy/lazy/tired this WHOLE week...and the tables progress has really suffered because of it. And now a cousin is in state that I haven't seen in 9 years. But I have managed to get a very small amount of work finished on my cliff face. I put down some sand and covered over the whole cliff with a smooth paint to seal everything over. After that was dry I put on some spots of textured paint to pull it all back together. I think this will get one last quick coat of textured paint in some areas to help blend it in more, but all in all it's finished. The dark spots are just a smooth paint. It will all be cleaned up when I put down some final paint for the whole table. 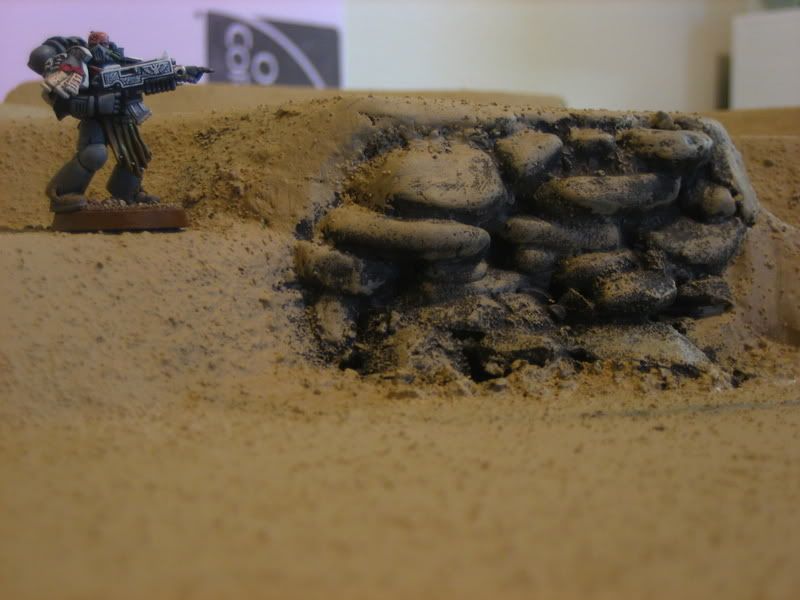 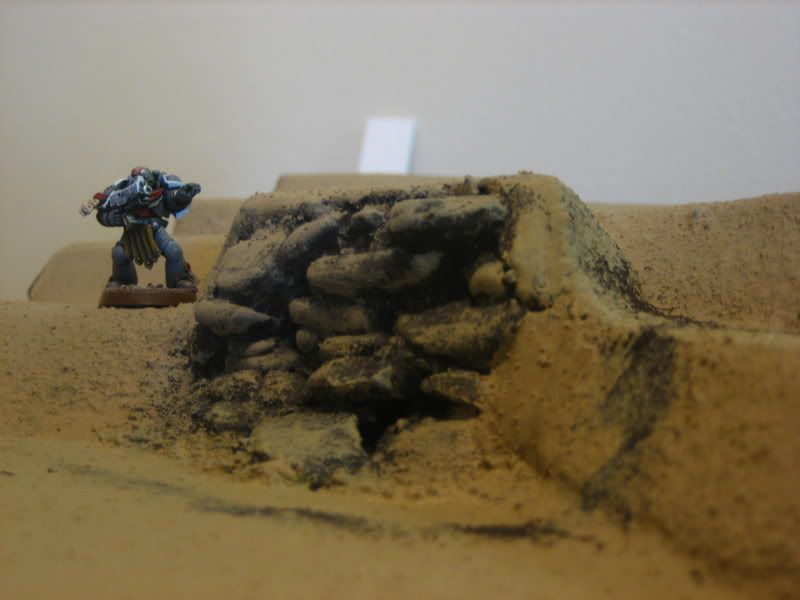
1361
Post by: scarab
That's reasonable progress.
247
Post by: Phryxis
Where is the cliff face, Sergeant Geologis?
"There it is."
372
Post by: grey_death
After finishing the cliff face, I'm now considering adding more rock faces throughout the table. Not huge ones like this but just enough to make it a theme. I feel like it might add that something extra that I need to make the table more believable and scenic, while still adding some more gameplay value. WIP's to come for sure.
224
Post by: migsula
Posted By grey_death on 09/23/2007 9:15 AM
After finishing the cliff face, I'm now considering adding more rock faces throughout the table. Not huge ones like this but just enough to make it a theme. I feel like it might add that something extra that I need to make the table more believable and scenic, while still adding some more gameplay value. WIP's to come for sure.
Sounds like a plan I am following this with interest. We see nice looking terrain too rarely.
372
Post by: grey_death
Well, spackle is down. I'm a spackle freak now btw. Here's a quick shot to show you the placements for now. Might add some more later, we'll see. But I think this might be enough. 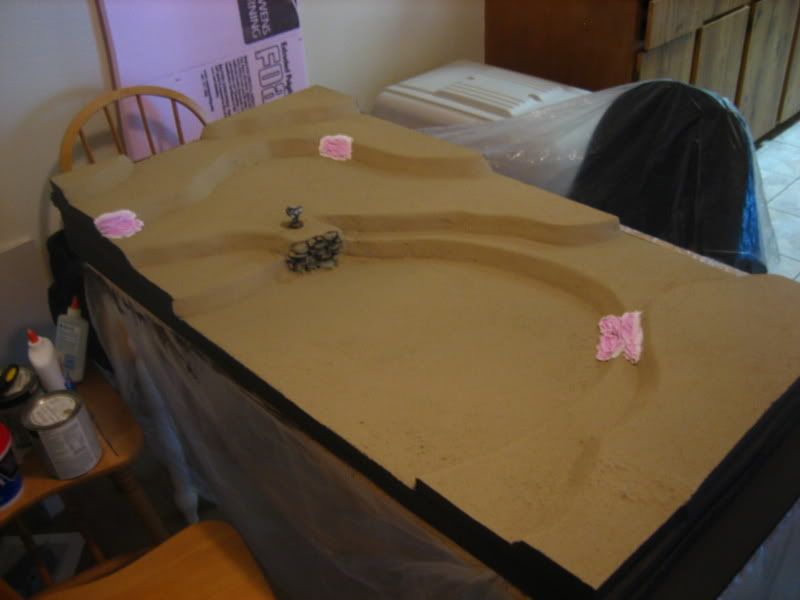 This should take a good 48 hours to finish drying...so in the mean time I pulled one of my recently completed marines out and re-trimmed him with my new white scheme ^_^; That'll be a separate thread though >.>..
372
Post by: grey_death
Sculpting out these rock formations for the past two and a half hours has put one hell of a knot in my back from leaning over this thing...but, I think it might have paid off. The spackle wasn't 100% dry as I had hoped it would be. But it didn't stop me from getting in there and making it do my bidding. There was some breakage here and there that I would have rather not happened, but you work with what you've got. Plus it's all experimental! And now you won't make the same mistakes I did! Anywho, on with the pictures of the three new rock faces! 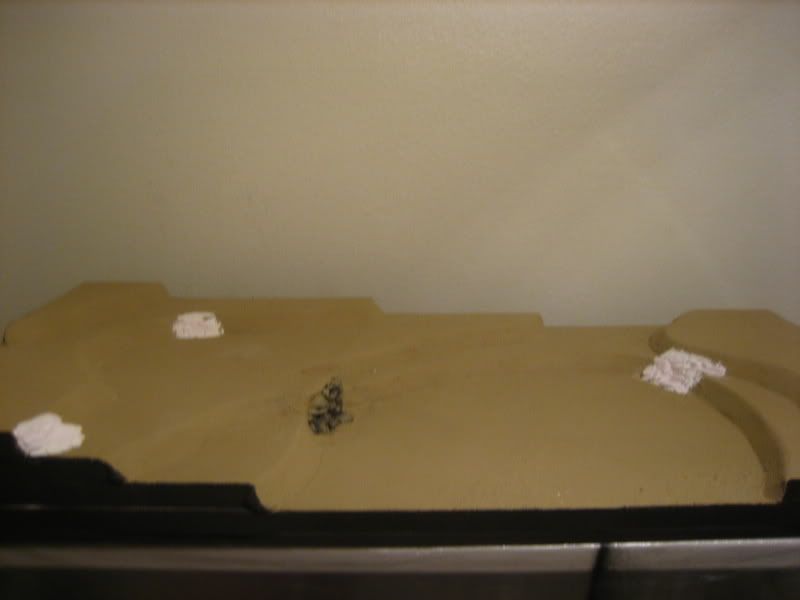 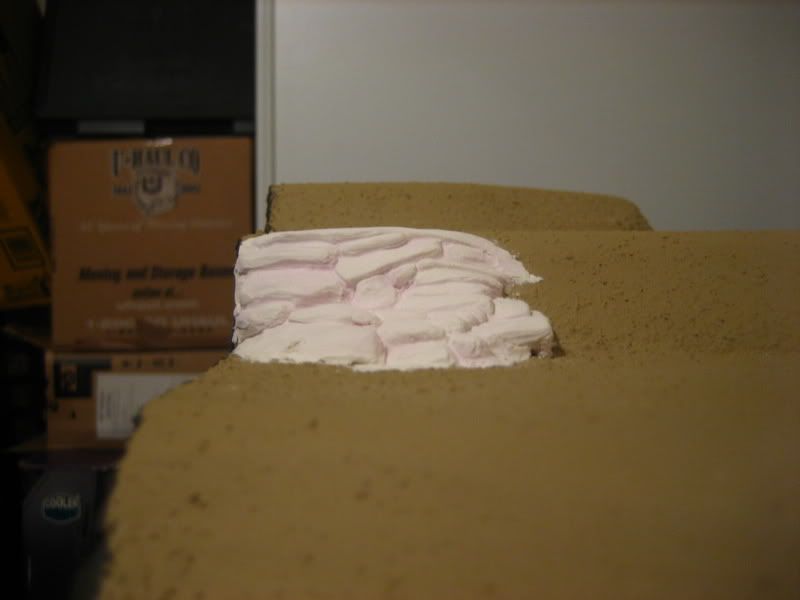 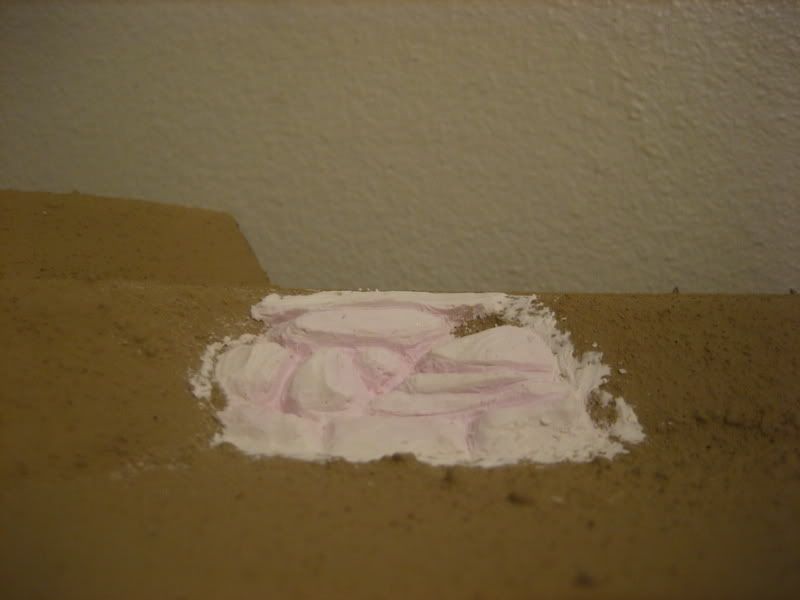 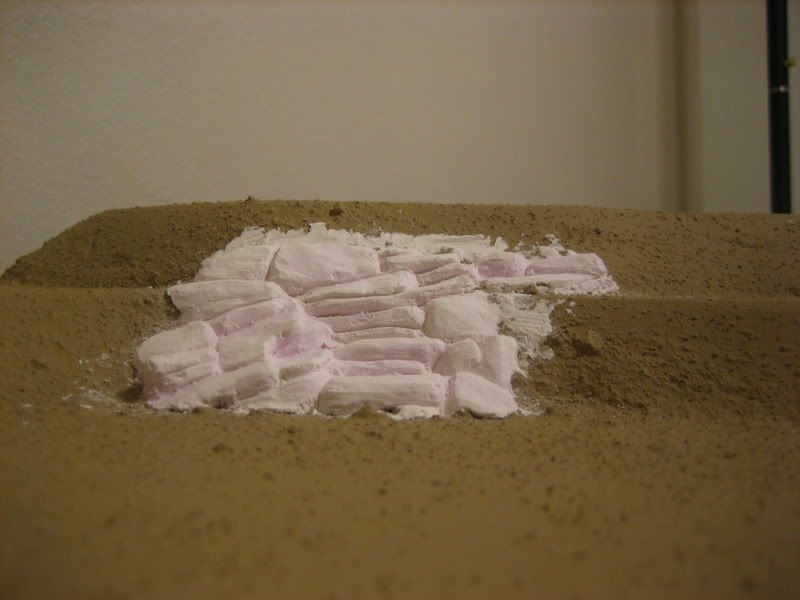 Texturing these tomorrow.
1361
Post by: scarab
Those look pretty convincing to me.
3400
Post by: Vero
Very nice table so far.
372
Post by: grey_death
Holy Crap! An update!! Well, as you've probably seen, I've been somewhat side tracked lately with my army build. Which really is a great reason to be side tracked. But yesterday I snagged some ground cover stuff and it got me motivated to get cracking on the table again. So today I grabbed up some different gravels from around my area and some appropriate paint colors and got to work. The gravel I found really works great. I just mixed it up with what I had left from the old stuff and glued it down. After the glue was dry I painted over it and I have to say I'm pretty happy with the results. 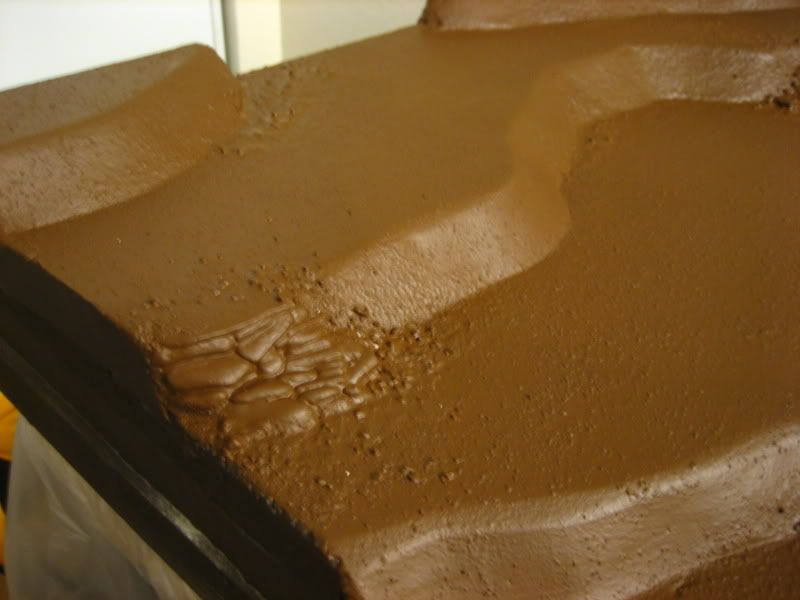 Oh and this is the base color for the table. I'll be bringing some highlighting over it all though so it won't be this dark. I've just got to let it dry through to tomorrow before I start that bit. I'll probably mix some of the highlight and base color and use that to break up the monotony of color before I give it the highlight/drybrush. Here is where we're at right now: 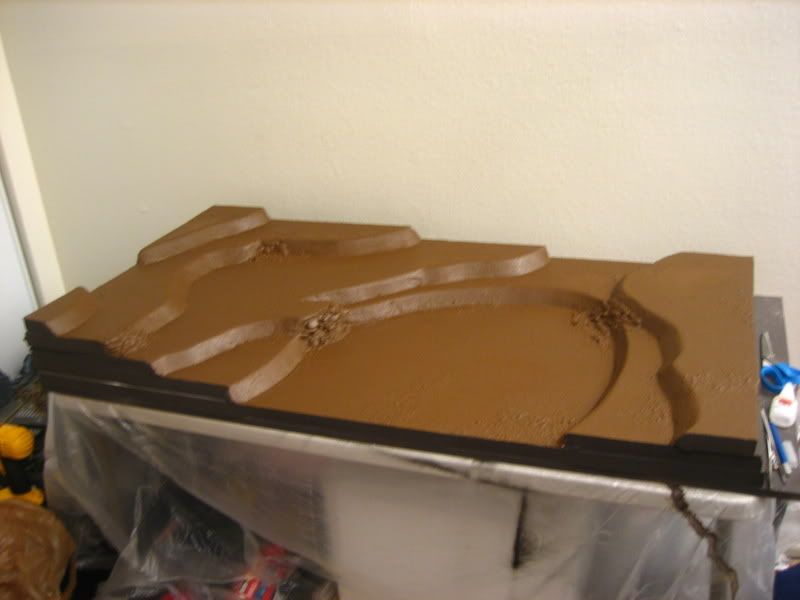
372
Post by: grey_death
First Drybrush: 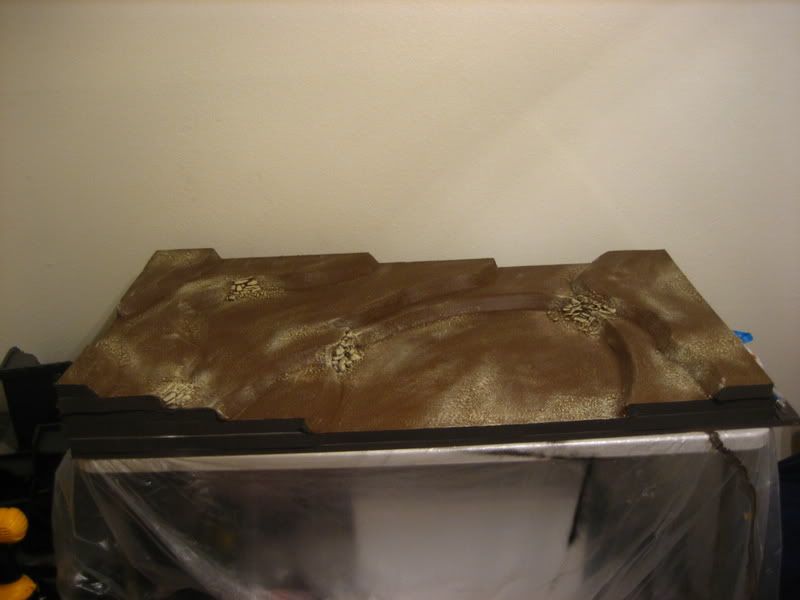 Secondary Coloring: 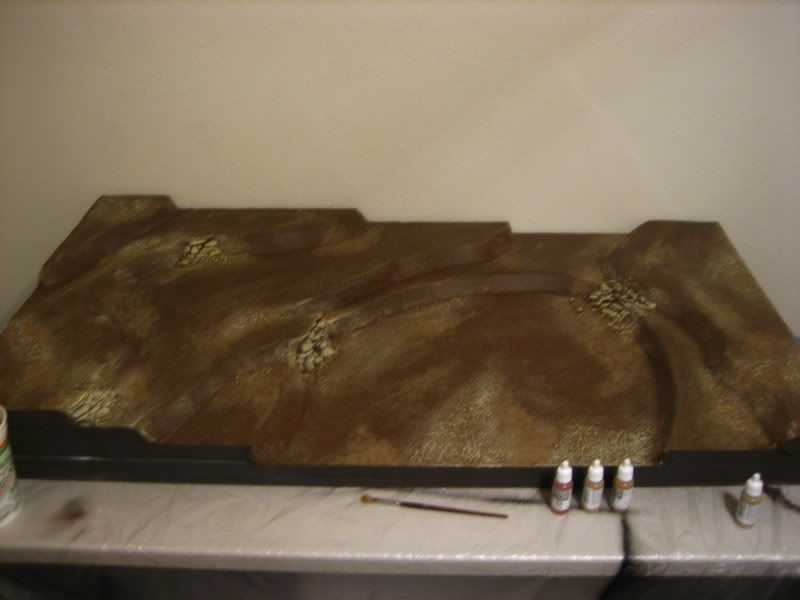 Picking out the details: 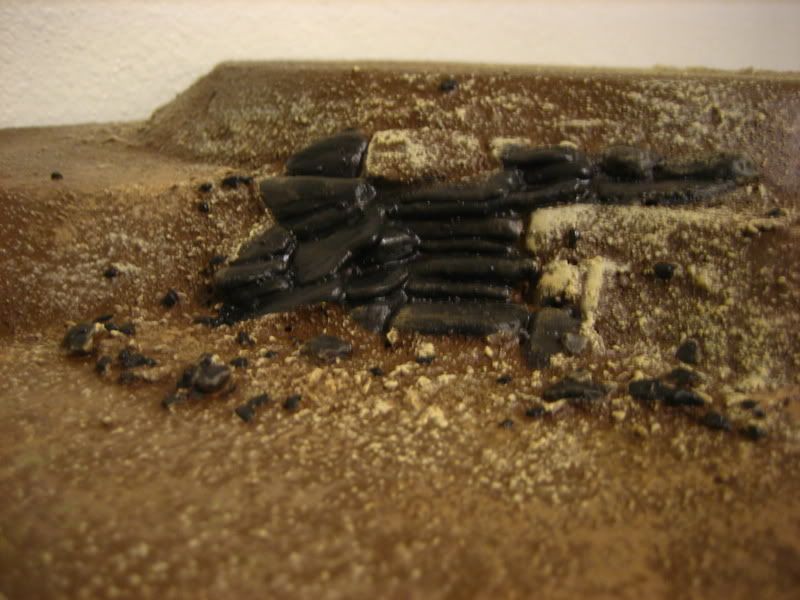 Still have some details (see: rocks >.& gt to pick out all across the table. Once I'm done finding them all, I'll move on to putting greys down for the rocks. After that it should be about time for ground cover... Comments and suggestions are much appreciated and welcome ^_^.
4670
Post by: Wehrkind
Looks really good man. I wasn't planning on making a wholly set table like that, but I am going to be using these tricks, particularly spackle, when I get working on my terrain!
One thing to look for at when you are getting "Woodland Scenics" stuff for ground cover: lichen, the spongy green stuff people use for trees and bushes, can be bought cheaper at some pet stores than at hobby shops. At least the pet store I get stuff at has it cheaper than the hobby shop. It's usually in the reptile section. They sel it in big bags for substrate for them, and often it comes in random shades of green, though I have seen oranges too.
Other random fact: I have the exact same table, only it is in my bedroom because my wife uses it as a desk.
372
Post by: grey_death
I did happen to snag some lichen the other day with that 'terrain stuff' I bought. I got a bag full of autumn colored stuff that I plan on using for some ground cover and such. I love all the woodland scenics stuff, I just never have a chance to really put them to good use/to the test. This table will give me my chance ^_-.
4042
Post by: Da Boss
Wow! That's inspiring stuff!
372
Post by: grey_death
More progress. Rock details are picked out and complete. I'm pleased with how they've come out and the effect I got overall. Colors went as such: Black, Codex Grey, Fortress Grey drybrush, base color brown (based on bestial brown) brushed into the crevices and wiped clean from the rock faces with my fingers with some left on the top sides for effect, then drybrushed lightly with my base highlight color (based on bleached bone). I like it. Rocks: 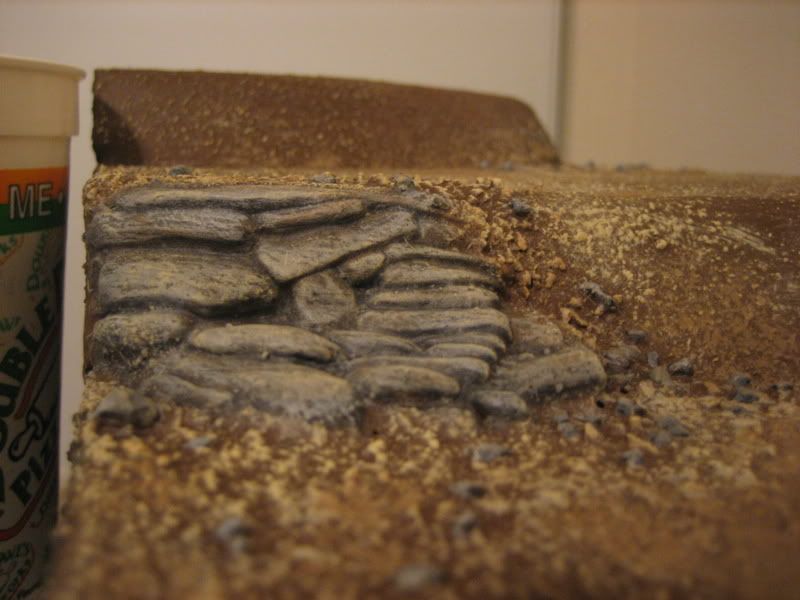 Rocks with marine for scale: 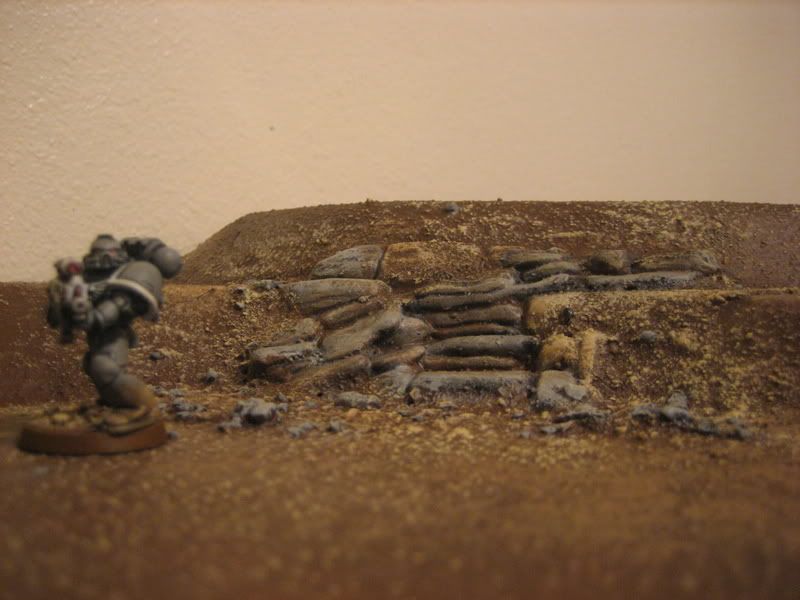 Overview: 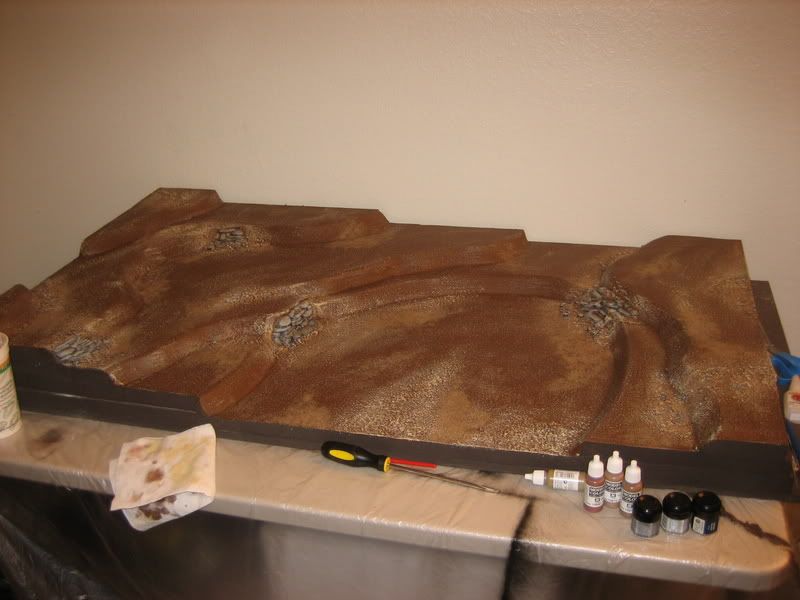
5226
Post by: TragicNut
So the middle basin is going to become a huge pit of toxic waste, right? Seriously though, it seems kind of... empty compared to the rest of the terrain.
372
Post by: grey_death
The middle has been sort of designed to be empty. I needed a nice large open spot for any large terrain features I will build after the table is complete.
372
Post by: grey_death
Ground cover in the works ^_^ 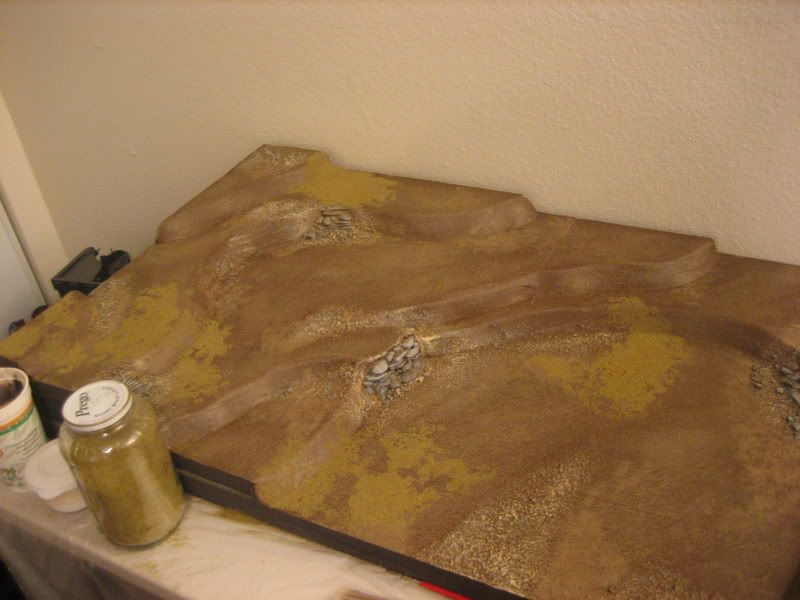
1217
Post by: Corpsman_of_Krieg
This is a really beautiful table, Grey, but I'm kind of worried that it'll be a bit small for a game.
What dimensions are you working with? It almost seems like a 3'x5' board. I've played on those before, and even at 500 points, things can get cramped if you're playing Guard as I did.
Not to point this out so late... I just was curious. It looks awesome thought, and I'd definitely enjoy playing in such tight quarters with my Templars.
CK
372
Post by: grey_death
It's around 2'x4', which I know is small. But this was more an exercise in terrain than a serious effort for a full gaming table ^_^. I live in an apartment and just don't have the space I would like for gaming >.>...And I only really planned on doing small skirmish scale gaming on this thing if anything ^_^. If I can come up with a transitional piece of terrain I could always connect this table with my cityfight table for a 2x8!! oooo...new idea for next terrain project >.>!!!
372
Post by: grey_death
Quick update on table progress ^_^: 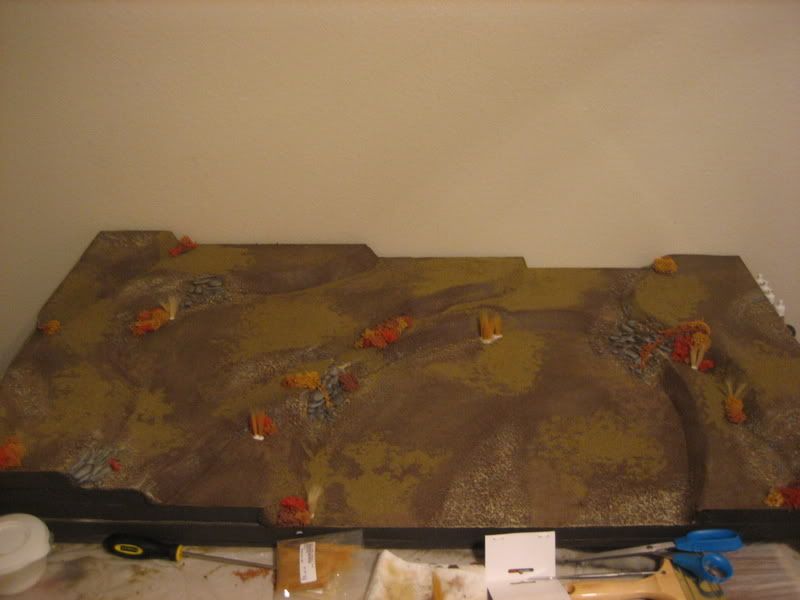 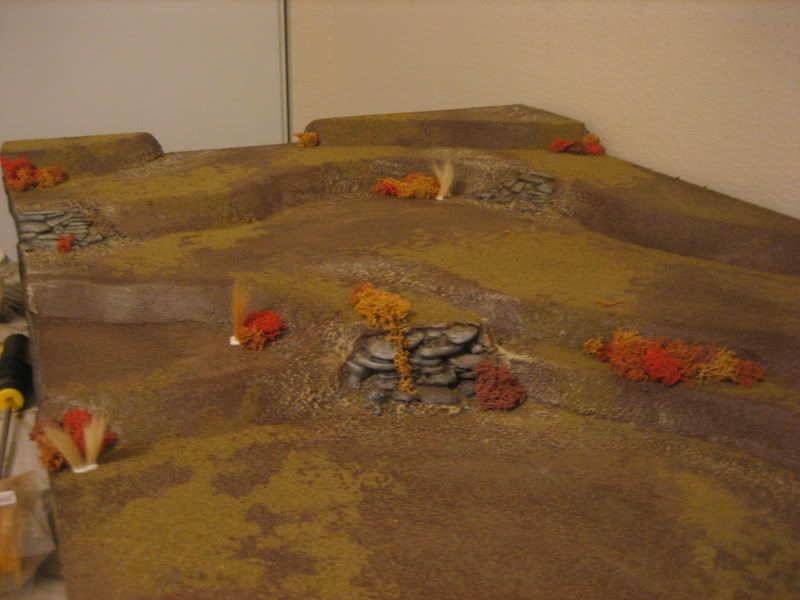 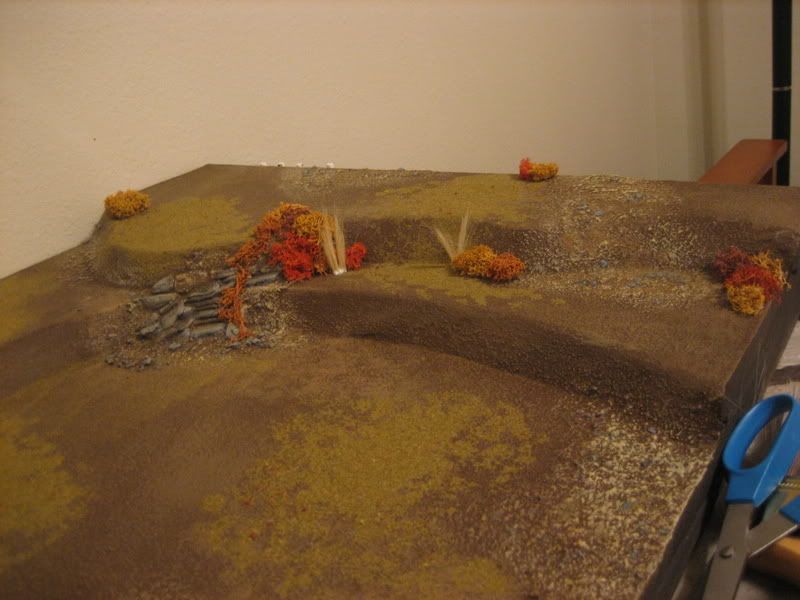 The bushes/brush/tall grass still isn't dry >.>..but more stuff goes down tomorrow ^_^.
1217
Post by: Corpsman_of_Krieg
Very cool, Grey.
I hear ya on the lack of space. I've had to trash more than 30 square feet of boards due to moving or lack of storage space. It is frustrating to no end when it happens, because it basically destroys any motivation I have to work on a new project if I know it's going to get wrecked when moving or some such.
Instead of a 2'x8', you could always make a 1'x4' transitional "slab" to connect the foothills to the city. You'd end up with a 5'x8' board that could be broken down and transported separately, and would also be able to be reconfigured for several 3'x4' combinations. Modular sections of the board, instead of modular parts that go on the board.
I'm really liking the autumn theme. Keep it up, I can't wait to see more!
CK
372
Post by: grey_death
Woot. New dakka ^_-.
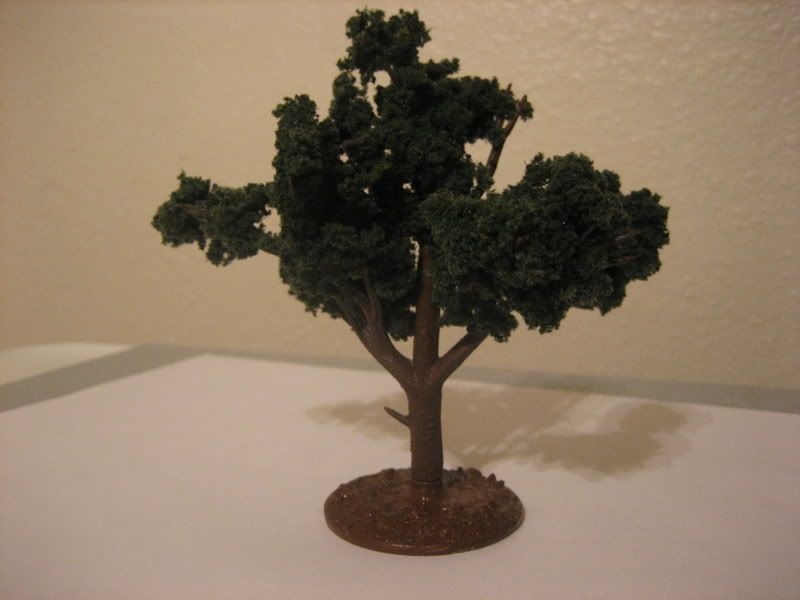
Well I got some more stuff down on the table. Added some static grass in some spots, some green bushes/shrubs. And I finally cracked open a bag of woodland scenics trees I've had for YEARS. Unfortunately they're only green trees, but I'm going to be picking up some autumn colored stuff soon, and possibly get to work on some tree templates. This table has been tons of fun and for the most part it's completed past any extra detailing work I might do to it and any additional terrain pieces I want to make for it. I'm expecting to make a good grip of tree templates (about three trees per) and some rock walls and ruins.
As to making the 1x4 transition piece, I'm really not sure How I'd end up making something like a transition piece between the two really, but it definitely would be a cool idea to toy around with. And unfortunately my city table is only 2'x2', so I'd sort of be stuck with making the 2x2 or 2x4 transition. Either way it's a really neat idea i'll have to consider doing some day.
Photos of the table are attached ^_^
3
4786
Post by: legoburner
oops sorry about the glitch with the attachment descriptions. That will be fixed tomorrow morning - I'll do a quick minor bug fix release then.
5351
Post by: Jazz is for Losers
Nice work so far.
1798
Post by: AdrianG
Very very nice. 
You've given me some very useful ideas that I shall shamelessly steal from you 
Keep up the good work.
372
Post by: grey_death
Algeroth wrote:Very very nice.
You've given me some very useful ideas that I shall shamelessly steal from you
Keep up the good work.
And that's the whole reason I did a step by step as I built it sort of blog for this table ^_^. I really wanted to get some ideas out there and see if they worked and give people some advice on what they should try and what they might want to avoid ^_^.
372
Post by: grey_death
Just realized I hadn't taken a full table picture of the finished product. Mind you the trees aren't completed, but the table is. Picture below and attached.
1
372
Post by: grey_death
I got more trees!
3
513
Post by: Symbio Joe
We based them on the big flat Monster 40k bases.
372
Post by: grey_death
Symbio Joe wrote:We based them on the big flat Monster 40k bases.
Yeah I've been considering either the flat ones or going with 40mm bases. The large flat ones sound like they'd work better for terrain though.
really it's a toss up between single bases for each or moving up to 2, 3, and 4 tree bases that I can glue the tree bases down and have the trees still be removable. This would give me more modeling chances, but would limit the mobility of the trees at the same time.
513
Post by: Symbio Joe
We gave every tree a single base depending on how big he was so a mix of flat ones and 40mm bases. There is a little difficulty wehn you use single bases some trees will fall. Putting several trees on a big base makes it difficult moving your minis through it. so we ended up making circels of trees and declaring the space inbetween as wood/ terrain zone.
1906
Post by: Da_Todfatha
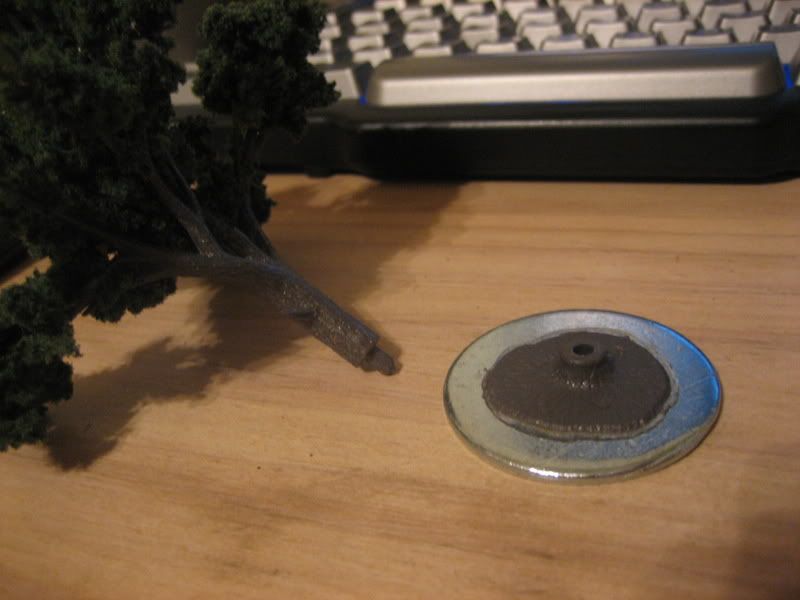
Go to a hardware store and purchase metal washers that are approximately the same size as monster bases and texture them the same way.
They are heavier keeping your trees upright, and they are loads cheaper think $.10-$.20/ea.
372
Post by: grey_death
Da_Todfatha wrote:Go to a hardware store and purchase metal washers that are approximately the same size as monster bases and texture them the same way.
They are heavier keeping your trees upright, and they are loads cheaper think $.10-$.20/ea.
Ooo..now that's an idea I hadn't even considered. I'll have to stop in and check what they've got when I head out that way. I'll have to head there either way I go (template or bases).
372
Post by: grey_death
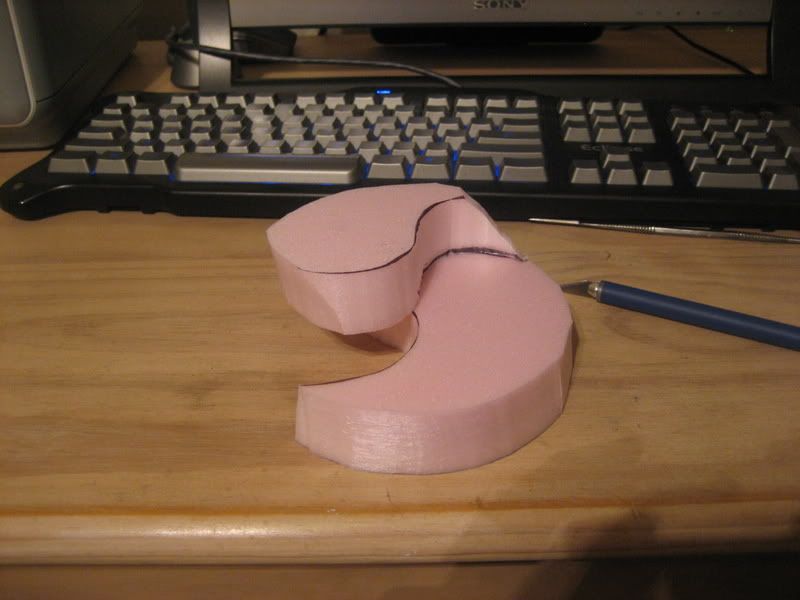
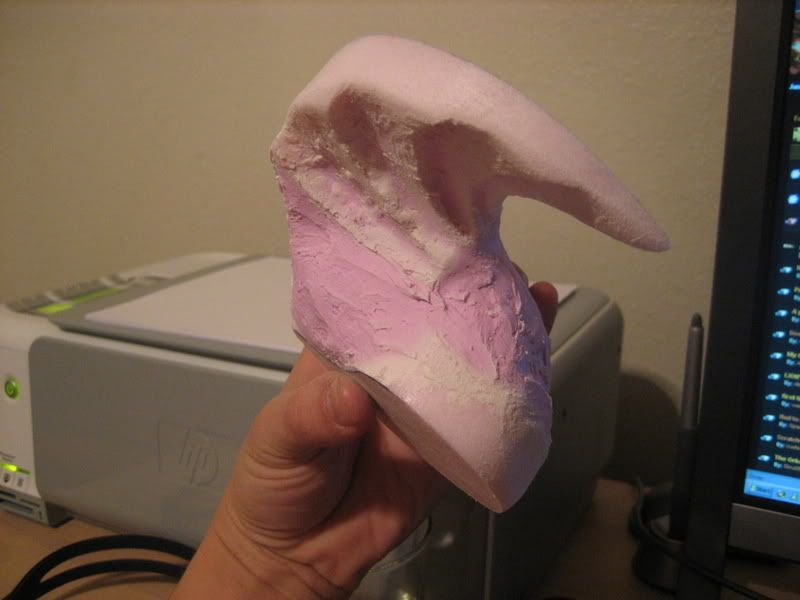
Made a modular hill section for the big open area in the center of the table. This area will be the best place for me to use larger terrain pieces. I just felt like making a hill to start off with.
2
5761
Post by: Luebbi
Really nice, now I'm getting the terrain itch as well
5164
Post by: Stelek
What's the pink gum stuff made out of?
372
Post by: grey_death
Stelek wrote:What's the pink gum stuff made out of?
The pink stuff is just household spackle. The stuff I buy goes on pink and dries white. It's a useful indicator as to when it's safe to start sculpting into it.
4786
Post by: legoburner
The table is looking really great. For some reason it really makes me feel like I am looking at the battlefield from the gaunt's ghosts novel 'Ghostmaker' (even though that was more of a jungle) and I can picture the edge of an eldar installation in the open area where your temporary hill is.
372
Post by: grey_death
legoburner wrote:The table is looking really great. For some reason it really makes me feel like I am looking at the battlefield from the gaunt's ghosts novel 'Ghostmaker' (even though that was more of a jungle) and I can picture the edge of an eldar installation in the open area where your temporary hill is.
You inspired me.
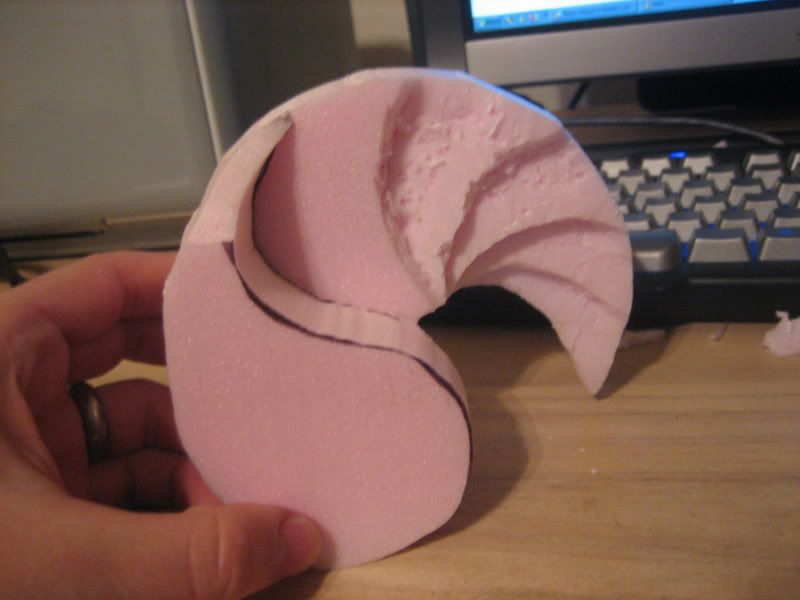
Have to wait for the spackle to dry up before I can get to seriously sanding and sculpting this thing out ^_^.
4786
Post by: legoburner
he he awesome Now I am going to email subscribe to this topic
372
Post by: grey_death
Some sanding and sculpting done. Still some more shaping to do. Just a quick update since I can't carve anymore out.
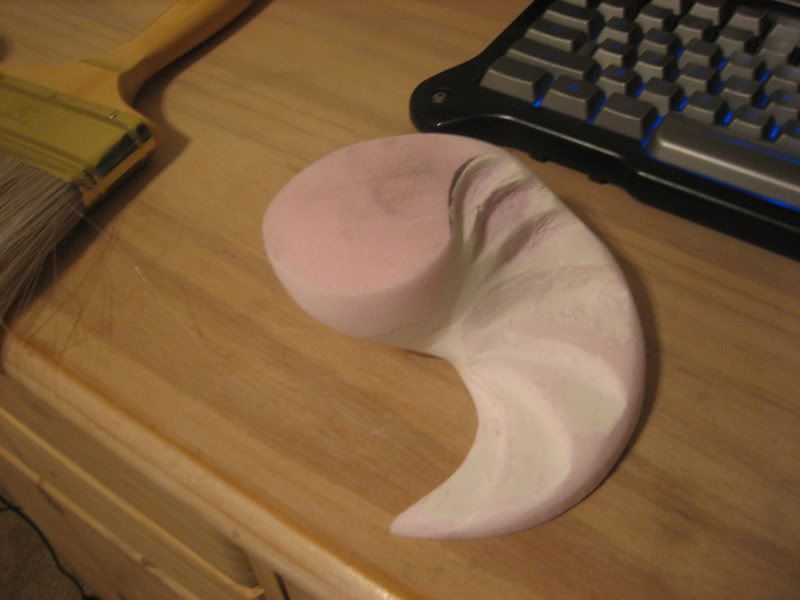
This stuff dries slow when you put it on an inch thick >.>...
372
Post by: grey_death
Quick progress report:
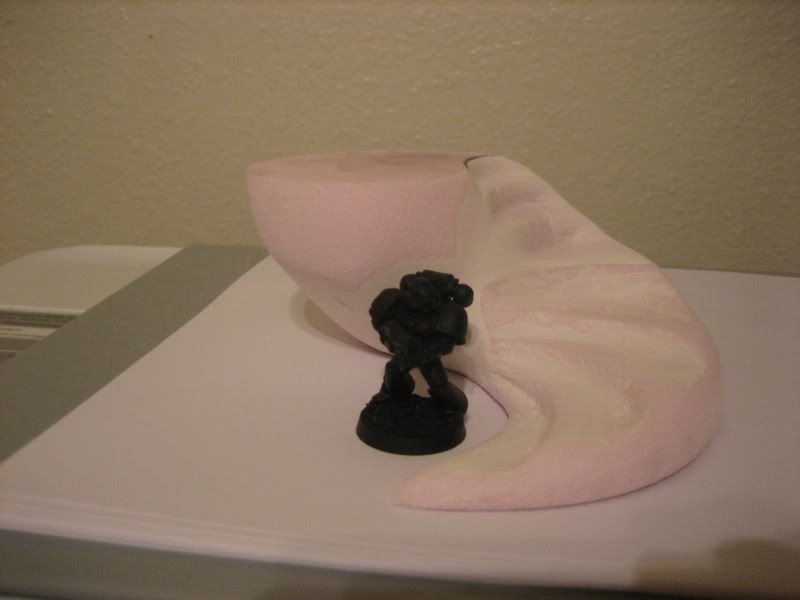
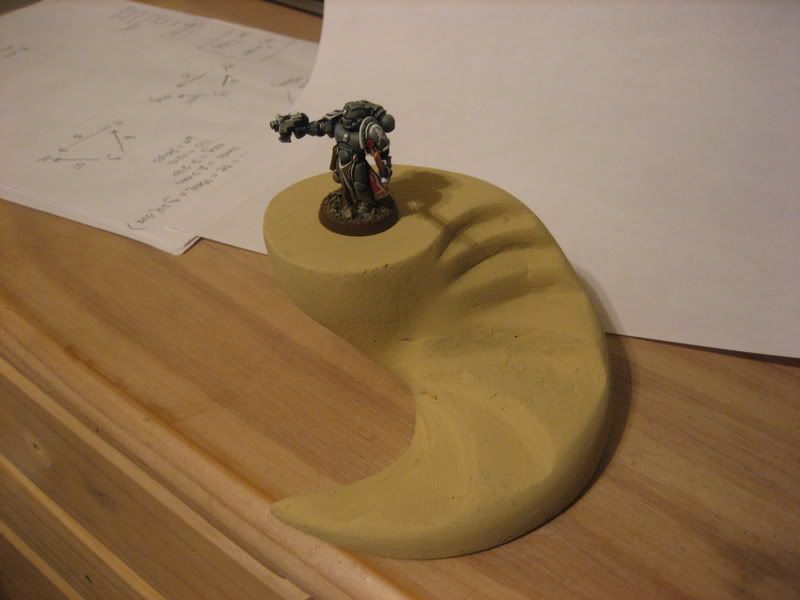
Still more paint to go. Also going to base the piece when I finally get my hands on basing mats for terrain pieces.
If I can keep my hands off my 360 controller, more gets done for the table and my marines...so far, 40k loses much of the battles....
5206
Post by: snorkle
Looks good. I would never had guessed that was a washer if I didn't follow this thread.
4892
Post by: akira5665
Good call about the washers eh? Beautiful table. Amazing attention to detail. I am very jealous.
Oh-and your Marine looks fab too!
372
Post by: grey_death
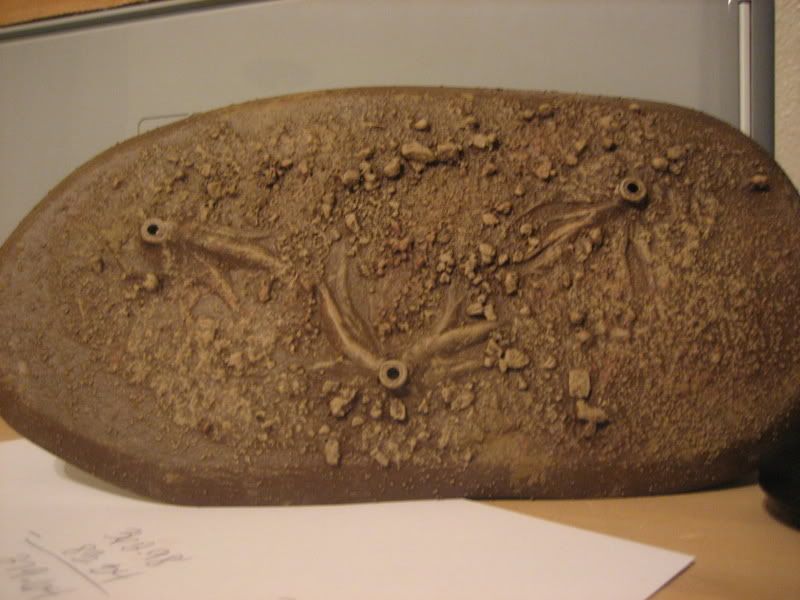
First tree template has been started.
Photo Tutorial:
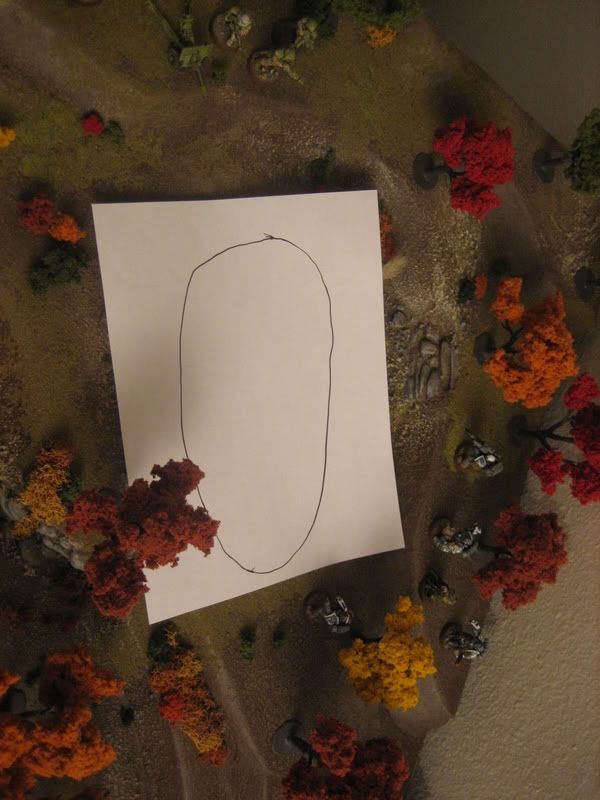
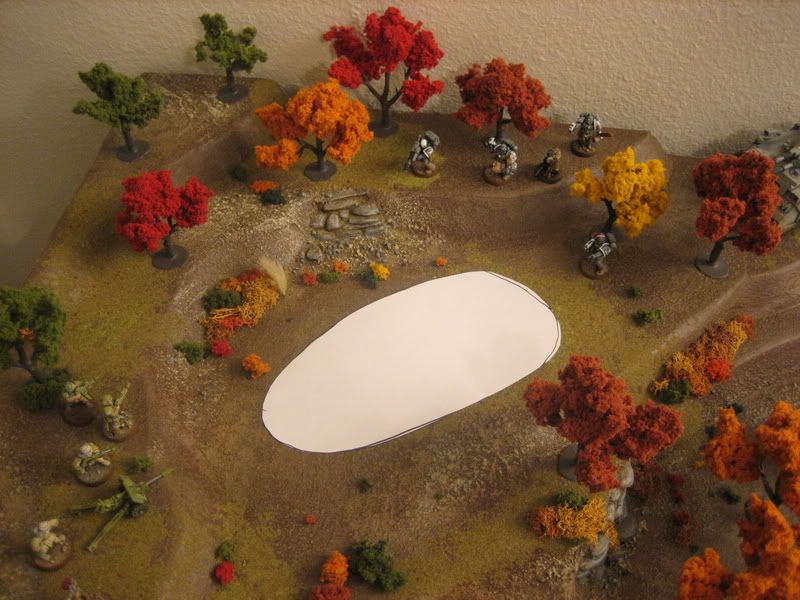
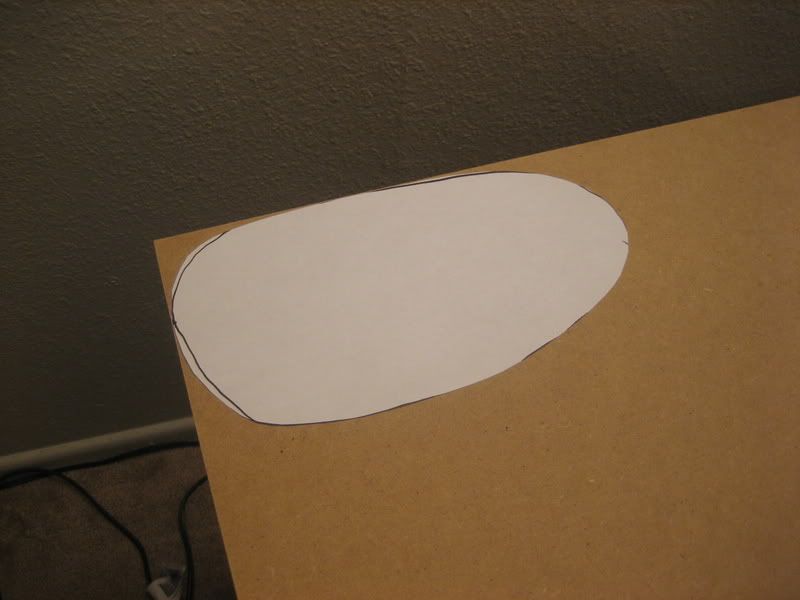
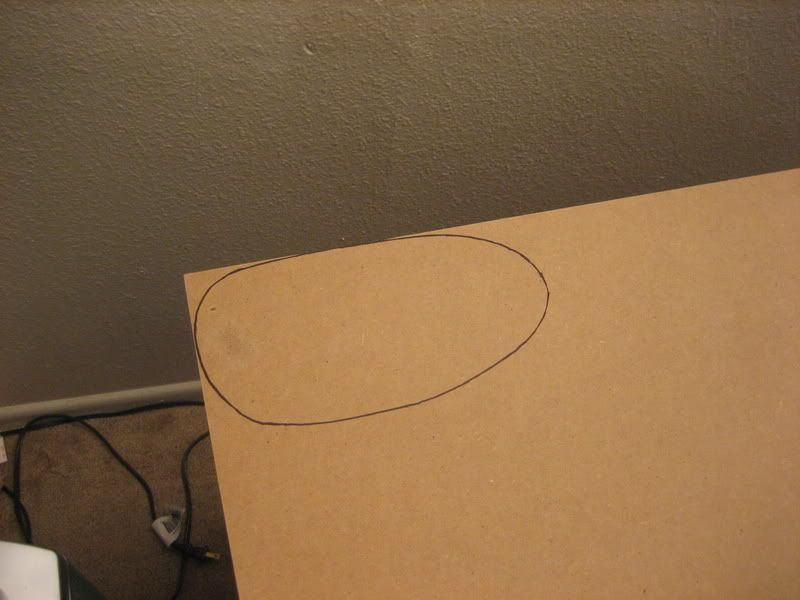
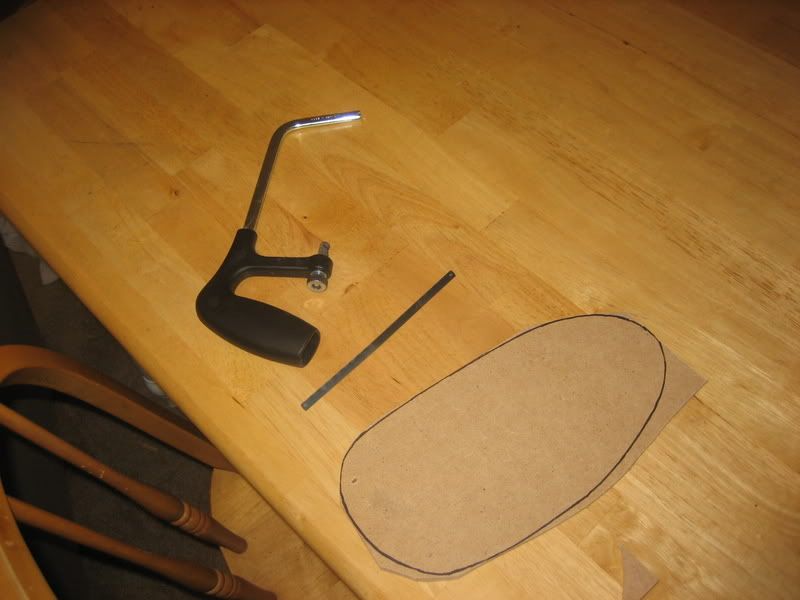
Tools and supplies used:
A Sheet of Paper
A sharpie marker
1/4" MDF board
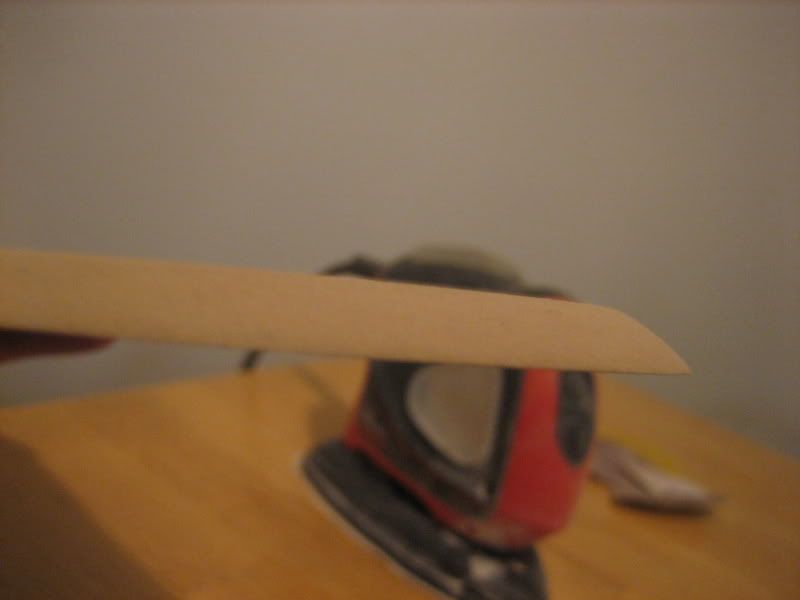
Small hacksaw (THE WRONG TOOL FOR THE JOB!! If you notice I ended up pulling the blade from the thing and using it between my hands to finish the job >_<. It can be done though >.>...just takes a while...get a handsaw if you're not keen on power tools...)
Electric Hand sander
372
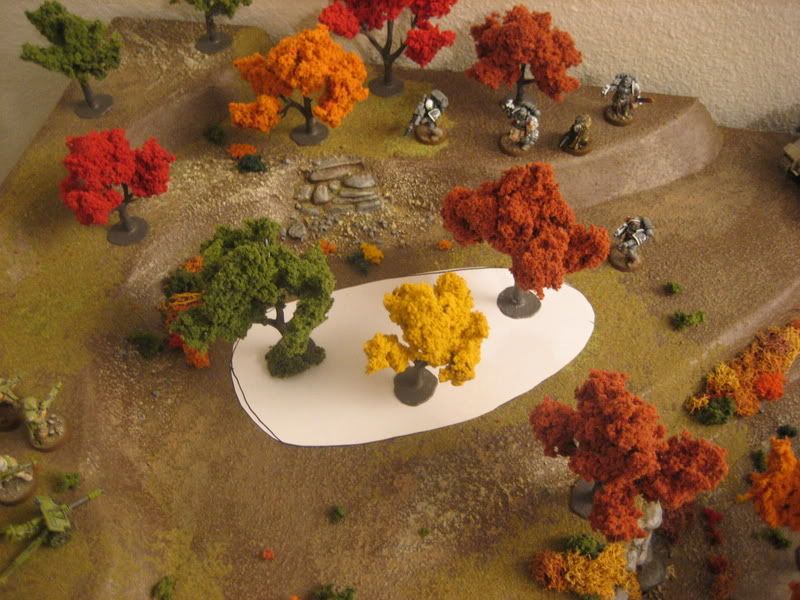
Post by: grey_death
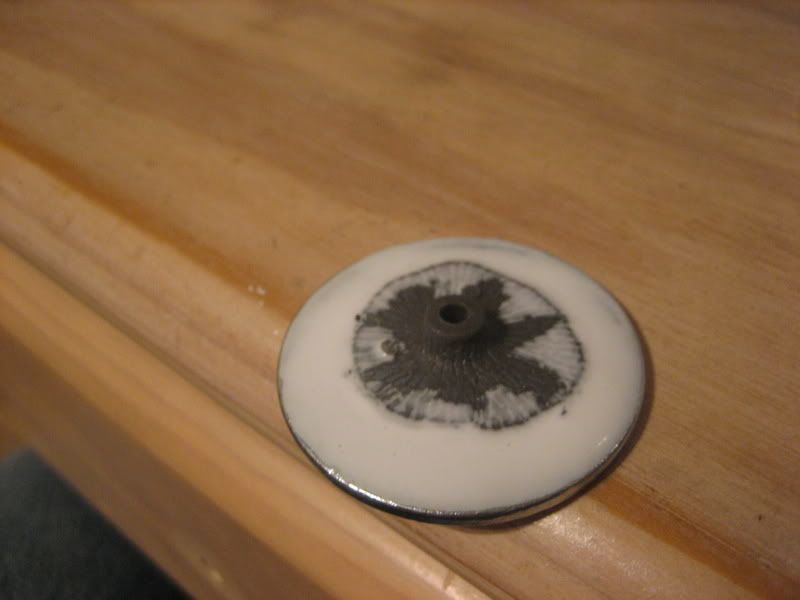
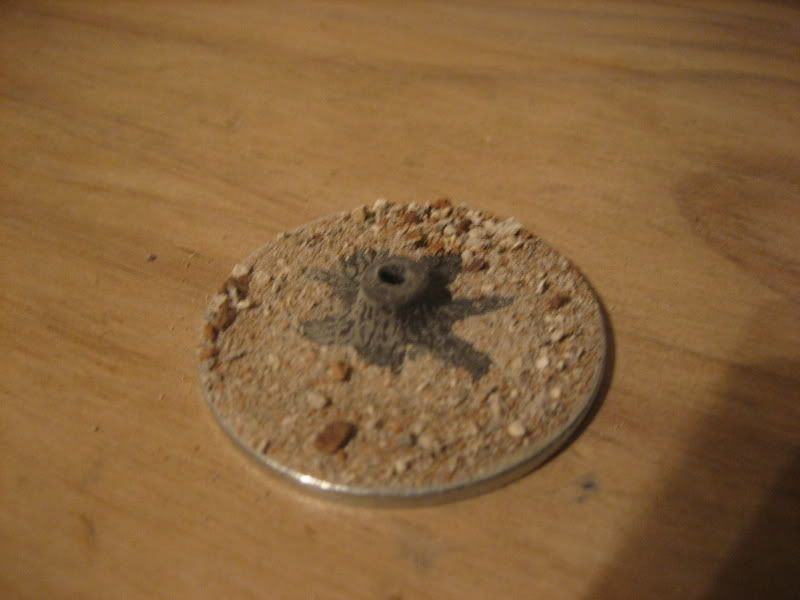
Got a little bit more work done on my tree template prototype ^_^.
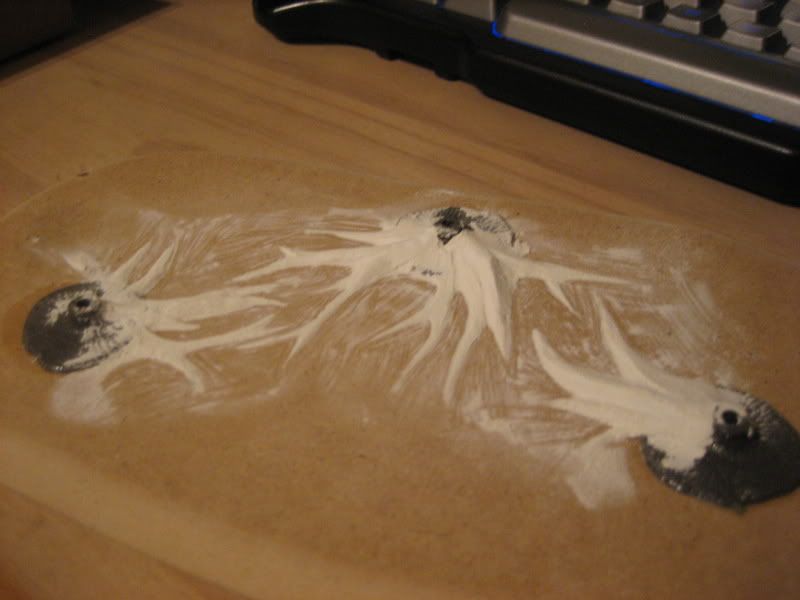
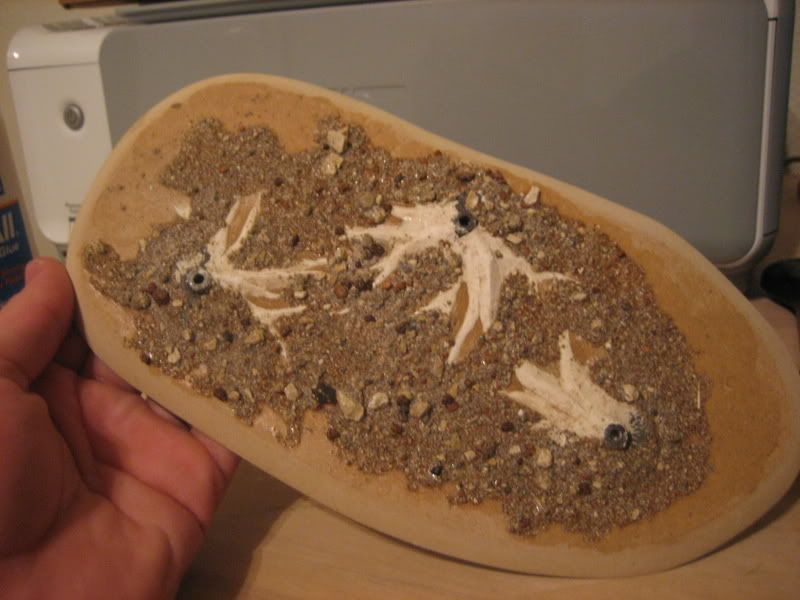
The roots are carved out of spackle. I put the sand on with a layer of regular white (PVA) glue and went back over that with a watered down mix to help seal it some more. I hate when I go to paint this stuff and it comes up in the brush...Hopefully that fixes the problem.
I still haven't hit the store for some magnets yet. We'll see when I finally get them x.x...I'm so lazy...
372
Post by: grey_death
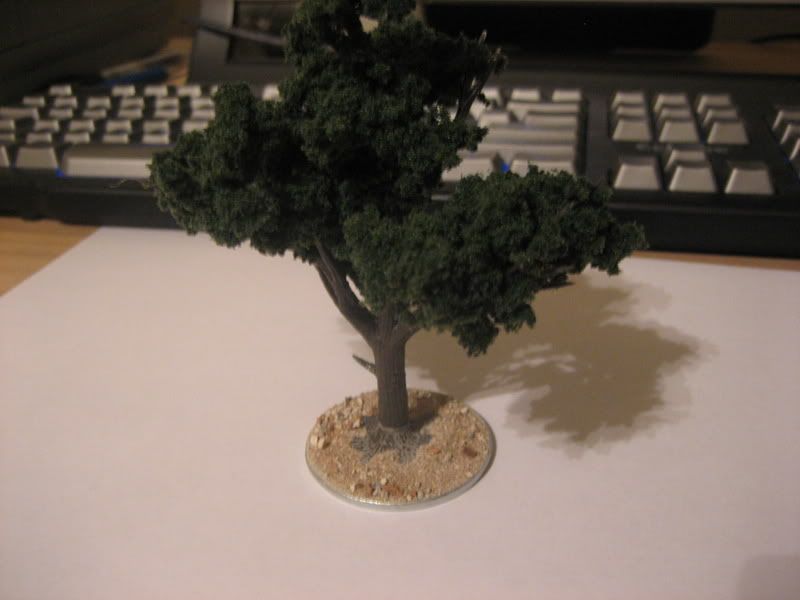
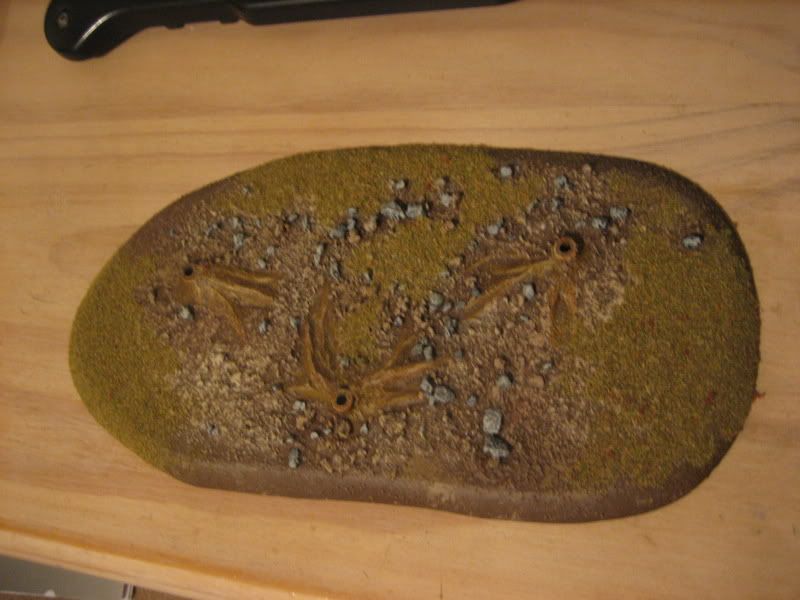
Washer Tree Prototype complete ^_^.
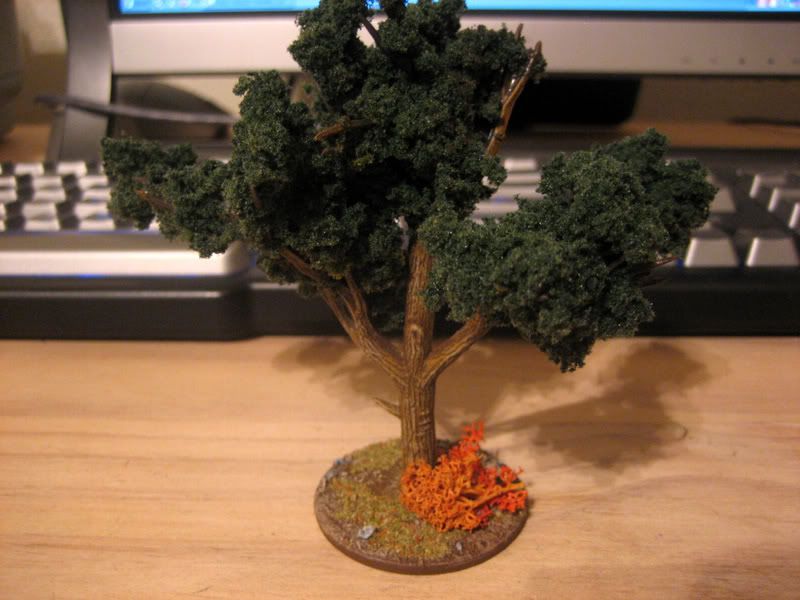
I'm rather happy with how it came out.
372
Post by: grey_death
2
131
Post by: malfred
The steppes are a nice size and seem to be able to hold
models comfortably. I admire the tree project for its simplicity and utility. I'm always glad when people make it
possible to remove trees from the forest template.
372
Post by: grey_death
malfred wrote:The steppes are a nice size and seem to be able to hold
models comfortably. I admire the tree project for its simplicity and utility. I'm always glad when people make it
possible to remove trees from the forest template.
They're still not 100% up to the standard I want them at, I still haven't purchased any magnets to put into the tree trunks. Once I get those in, the trees will be much easier to remove/replace. As it is right now, some of the trees require a bit of a death grip to get them out x.x...
372
Post by: grey_death
Alrighty, I gave the spray a go to try and break up the tree tops some. I used a rust colored spray for this test, I can always hit up wally world for some nice cheap reds and oranges.
Thoughts?

513
Post by: Symbio Joe
It becomes more and more a Bob Ross picture then a gaming table .
5761
Post by: Luebbi
I for one don't like the rust-sprayed tree, the other ones look much nicer. But truth be told, I'm jealous of your gaming table - there's just something incredibly cool about fighting on a battlefield that looks this serene and peaceful
5885
Post by: Koolidge
I almost want to write a haiku about your table...
almost...
3144
Post by: SonofGuilliman
Symbio Joe wrote:It becomes more and more a Bob Ross picture then a gaming table .
He has yet to include a 'happy little bush' that's 'our little secret' though.
Great job on the table grey_death.
SoG
5904
Post by: FearPeteySodes
Koolidge wrote:I almost want to write a haiku about your table...
almost...
Haikus are easy
But sometimes they don't make sense
Refrigerator
372
Post by: grey_death
Happy Little Bush

5709
Post by: Alan
I think those dinosaurs are already dead  . Is that a T- rex . Good job, keep it goin'.
5904
Post by: FearPeteySodes
Cloverfield
513
Post by: Symbio Joe
I hope you have children or else I have to wonder were that dinosaur comes from.
372
Post by: grey_death
Symbio Joe wrote:I hope you have children or else I have to wonder were that dinosaur comes from.

Close Enough >.>
5904
Post by: FearPeteySodes
Symbio Joe wrote:I hope you have children or else I have to wonder were that dinosaur comes from.
Sooooo you dont strategically position your plushies on your bed after making it every morning?
yea neither do i.... 
372
Post by: grey_death
Well I've got the first bit of magnets attached.
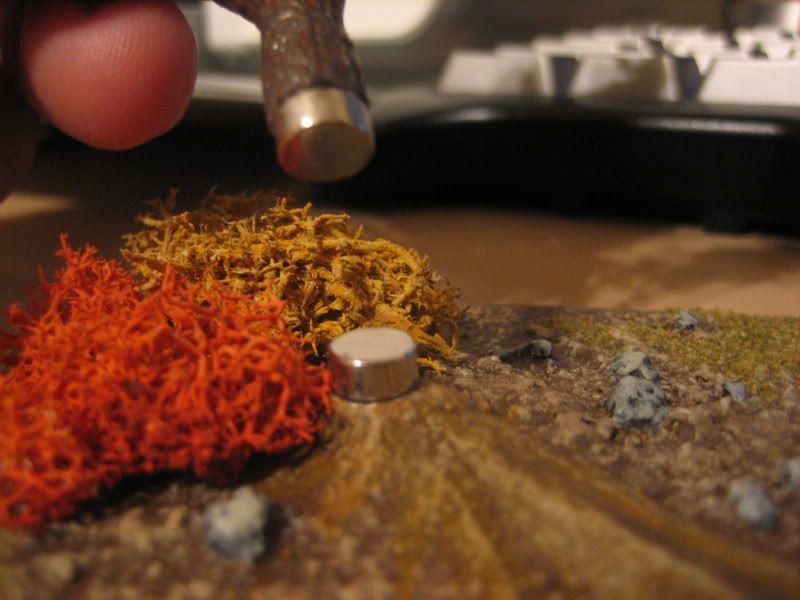
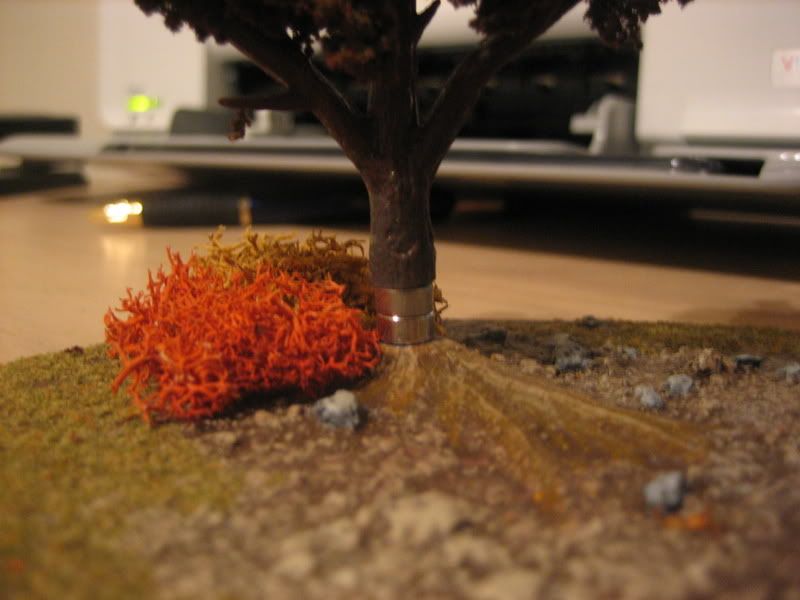
They hold very well together. I just need to paint over them now and they'll be good to go.
I also gave Braad of Warseer's suggestion to add dense undergrowth to the board some thought and used a very simple solution that I've sort of had the idea for the whole time I've been working with the trees. The Woodland Scenics trees end up losing a good chunk of their foliage while you're working on them. It's not a bad thing as they end up looking a bit less 'puff ball on a stick' when they do. But all of that extra material is still VERY useful and I've just sort of been throwing it on the board as the stuff falls off. Well, to get the nice thick undergrowth look, I've put a lot of the stuff in one area.
In the attached shot you can also see I've got the tree template integrated as well. This will be a nice way to help tie the board and the templates together, especially the washer based trees.
5526
Post by: CplPunishment
Nice table! I love the magnetic tree idea  When I get around to making a table I'm gonna do that so that I don't have to worry about them breaking off. It would also make things like troop movement a lot easier. Especially since my Catachans are unusually attracted to such places
372
Post by: grey_death
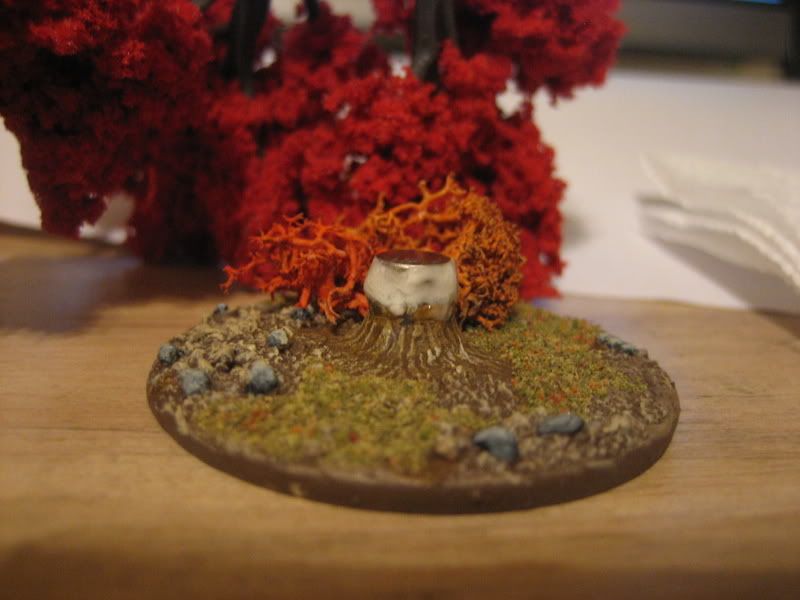
Finally got the tree template finished. Only thing I was really waiting on was super glue. I let that dry up and then hit them with some quick paint to help hide the magnets some. In the future, I plan on completely integrating the magnet into the base by sculpting around them with spackle. I am also thinking of possibly using spackle or green stuff (if I can find some) for the tree proper to help hide the magnets as well. We'll see what I can scrape up.
Anyways here's the pic:
1
5206
Post by: snorkle
The magnets blend in very well. It makes your already great table even better.
372
Post by: grey_death
Testing out a new product I found.
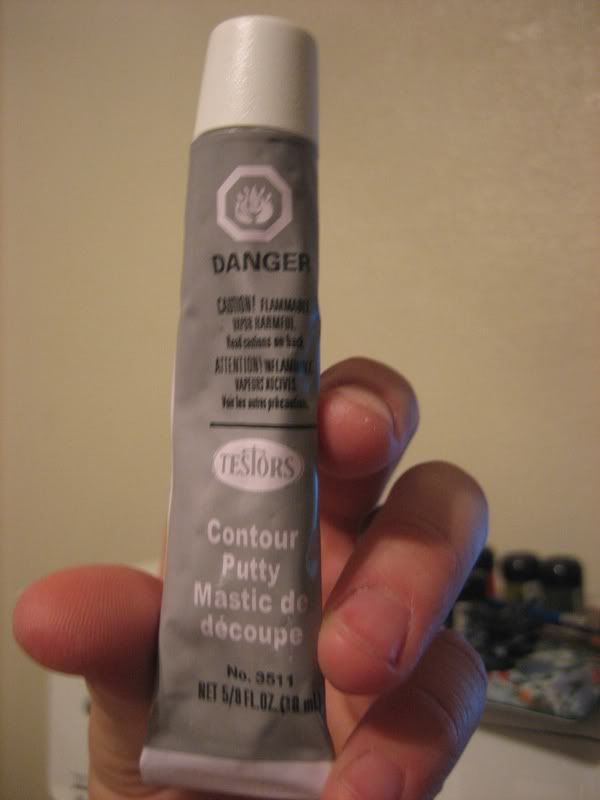
Have to let the stuff dry completely and we'll see how it comes out when painted. this might be a quick and easy way to hide those magnets ^_^.
The stuff isn't hard to work with so far, though the application is a bit messy. It's got an oily liquid that I guess keeps it workable for longer while in the tube. I found putting some on a paper towel and using it like spackle ( <3 spackle) for what I'm doing worked well. I want to see if it works well enough to use for gap filling on models as well.
Stay tuned for the results.
372
Post by: grey_death
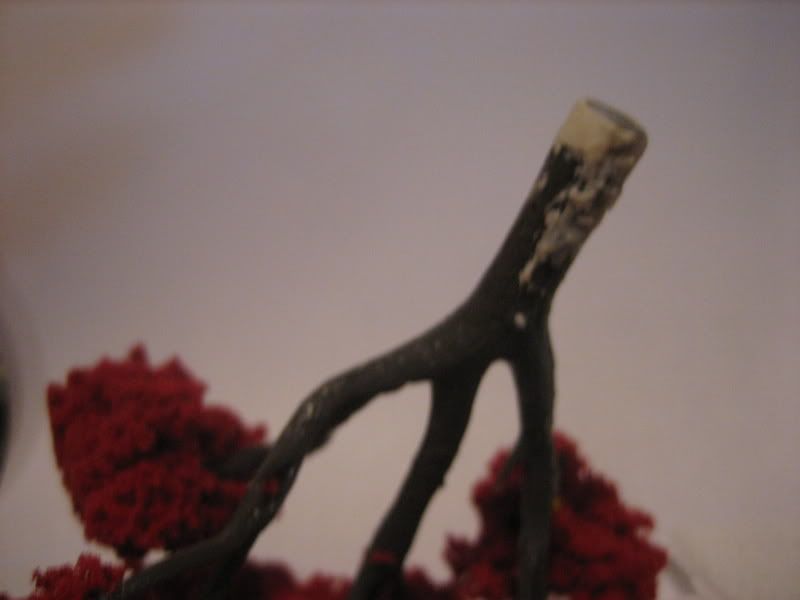
The testors contour putty worked like a charm. When it was about half way dry I pressed the back edge of my hobby knife into it to create some bark texture. I let it dry and added some more lines with the hobby knife and tried to get it to generally fit in a bit better. hit it with some paint and it's good to go. check out the results:
2
372
Post by: grey_death
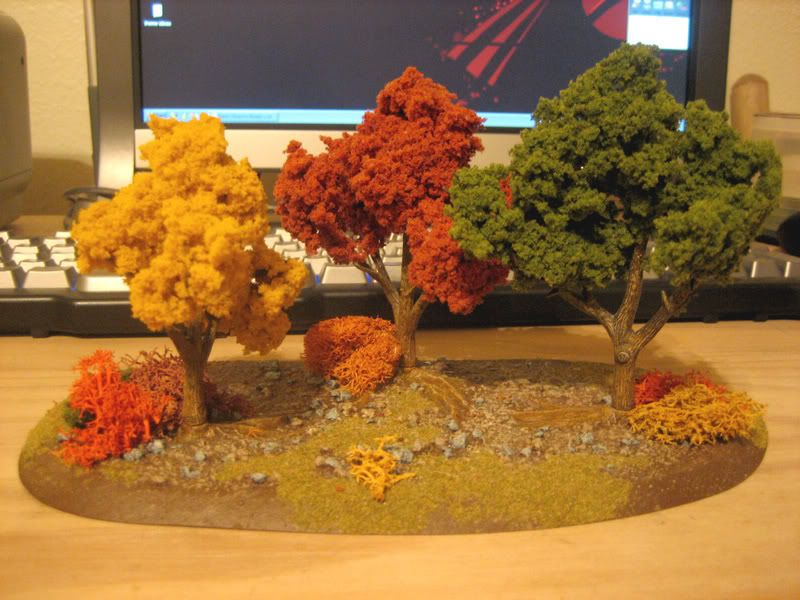
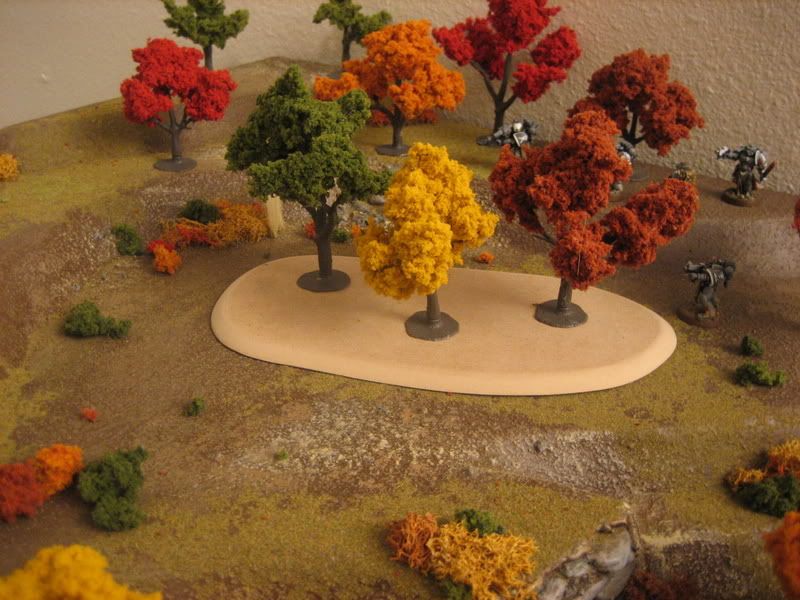
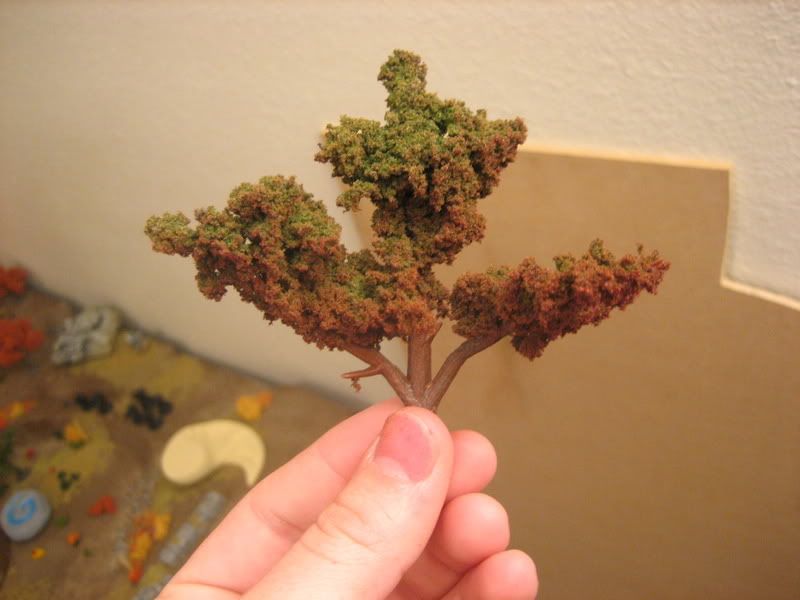
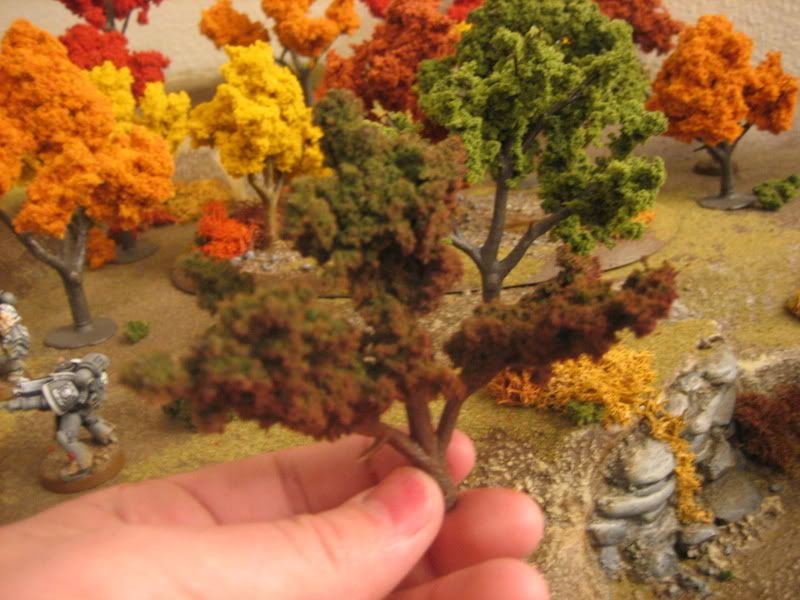
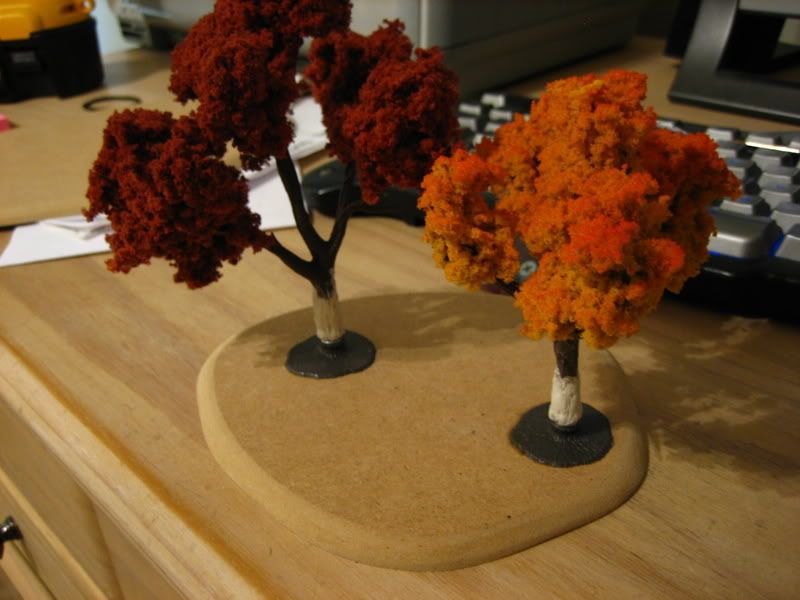
Finally got around to spraying the tree tops. The color breaks up nicely. And while noticeable on them in person, you can really only tell the big difference with the yellow and orange trees in the photos. Check em out:
1
6005
Post by: Death By Monkeys
Man, those breakaway tress are terrific - makes me want to go magnetic logging!
Seriously, though, that's a great idea and they look excellent.
6181
Post by: Doctor Optimal
Awesome, just amazing. If you paint over the shiny parts of the magnets you could have adaptive scenery (trees getting knocked down).
4670
Post by: Wehrkind
I really dig the magnetic trees! I have been trying to devise some clever plan involving forrests that look good and actually allow mini's inside, but damn, you just nailed it for me!
Something wonderful to add to the Book of Magneticus Rex!
372
Post by: grey_death
Death By Monkeys wrote:Man, those breakaway tress are terrific - makes me want to go magnetic logging!
Seriously, though, that's a great idea and they look excellent.
Thanks, it's been a labor of love ^_^.
Doctor Optimal wrote:Awesome, just amazing. If you paint over the shiny parts of the magnets you could have adaptive scenery (trees getting knocked down).
I really wanted to be able to paint over the shiny bits, but unfortunately when I tried it, it just ends up coming up after a few clicks of the magnets. I can still make the adaptive scenery things happen though, I've got plenty of loose foliage in a box by the table ^_^.
Wehrkind wrote:I really dig the magnetic trees! I have been trying to devise some clever plan involving forrests that look good and actually allow mini's inside, but damn, you just nailed it for me!
Something wonderful to add to the Book of Magneticus Rex!
Glad that people can find a use for this on their own tables ^_^.
A quick note, when you're matching up the magnets to put together, make sure you're aware of which sides attach and which repel. As long as you match up a tree for every magnet, it's not a huge issue. But say, you put all of your magnets on without thinking about that, you could end up with trees that won't attach anywhere!
372
Post by: grey_death
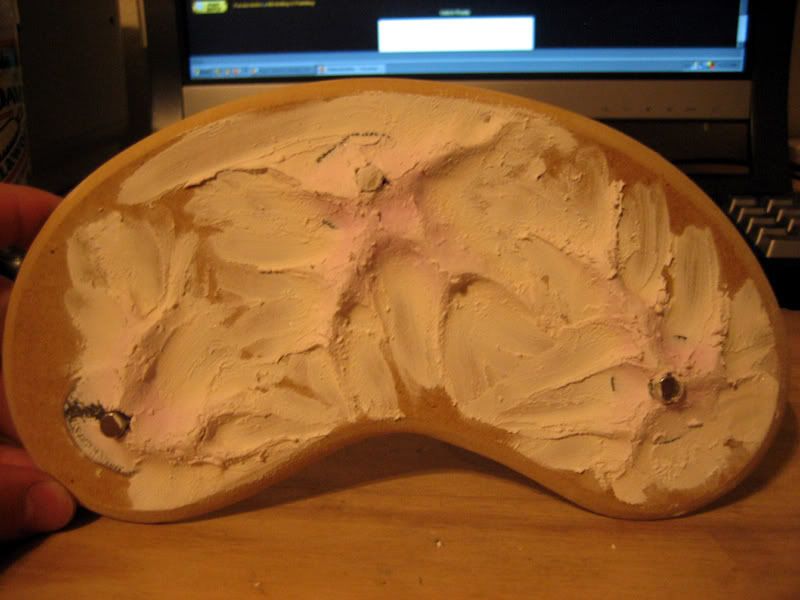
New template.
All the spackle work was done by pushing my finger down along the edges. Push down on the stuff to get it to secure to the board and not pull it apart.
963
Post by: Mannahnin
Sweet work. The bright primary colors that the trees start with detract from the table IMO. Changing up those colors and making them more realistic makes a big difference.
372
Post by: grey_death
Some more progress with my trees.
Finished another template base. Unfortunately my supply of magnets had dried up. I'll have to either find another supply or have the store start ordering for me. Either way, it's going to be a bit before I can get all of the trees on magnetic bases. So this is the end of the line for a bit.
3
5793
Post by: drunkorc
Nice work Ddue, We lost our old Gametable at work when it went out of Bizz, it was a 8 x 4 Cityfight table, had sidewalks and street lights that really worked.
not to mention part of an Airport on onside...Sniff..sniff.. A guard tower with a gate, it took us about 2 Months to make..Sniff..sniff..but now its lost.
Owell time to make a new one.
4670
Post by: Wehrkind
I love the Hearth Stone sitting next to your table. Don't leave Home without it!
I had an idea for your magnets. Firstly www.kjmagnetics.com is an excellent site for cheap rare earth magnets of various sizes and strengths. Their clearance section can score you a plethora of dirt cheap power. Plus the guy sends you free samples on big orders, so you can get all sorts of neat things. I really love the site.
For the trees: instead of using two magnets, why not use one magnet and one flat head screw or nail? Say magnitize the trunk, then just put the screw or nail in the stump flush. Unless you really need 10kgs of force holding it together, and unless screws are more expensive than magnets, it should work out.
5844
Post by: Accuracy by Volume
Where did you get that spackle stuff you used on the magnets? Ive been trying to find a way to cover the magnets on my table for a good bit now with limited success.
6005
Post by: Death By Monkeys
Actually, I was wondering about that. Why not just use some GS instead of the putty?
372
Post by: grey_death
Some replies!
drunkorc - good luck with building the new table. I did a small 2x2 cityfight piece a while back. I still haven't finished painting the thing. You can check it out in my photodump post.
Wehrkind - good thinking on the flathead screws. I might have to give that a go and see how it holds for me. As to the website, I'll have to check it out. Scarab gave me an address a long time ago when I first had the magnets idea, I just never got around to ordering any. And thanks for the comment on the hearthstone ^_^. I was bored one night and had 20 minutes to kill.
Accuracy by Volume - The putty I use on the magnets I picked up at the local hobby store (Hobby Lobby for those who have em). I'm sure you can pick it up just about anywhere you can find a good assortment of testors products.
Death By Monkeys - The putty is pretty low hassle. I just squirt the stuff around the magnets and start shaping. Let it dry some and get to texturing it. That and I don't really have a good supply of GS around here.
6005
Post by: Death By Monkeys
Ah, okay - just curious. I had used the Testors putty back in my airplane modeling days and found that while it worked well for model airplanes, once I tried using it for GW models, it was a bit fiddly to use due to the consistency. But I'm glad it's worked well for you - the trees look great with it.
372
Post by: grey_death
Well I'm back at it. After putting together my hills tutorial I've got the itch to try out a new bit for my tree templates. I got the idea to use one magnet and a screw as my connections instead of two magnets to help make the trees a bit more wallet friendly from Wehrkind . I set out to find a suitable bit of hardware and found some +6x3/8" Flat Head Phillips Screws at The Home Depot. They are just long enough to dig through the tree bases and into the MDF board with a bit of help from the old power drill! Though I'm sure if you don't have a power drill they'll work just fine with a hand screwdriver if you put a little backside into it. Anyways, here are the preliminary results:
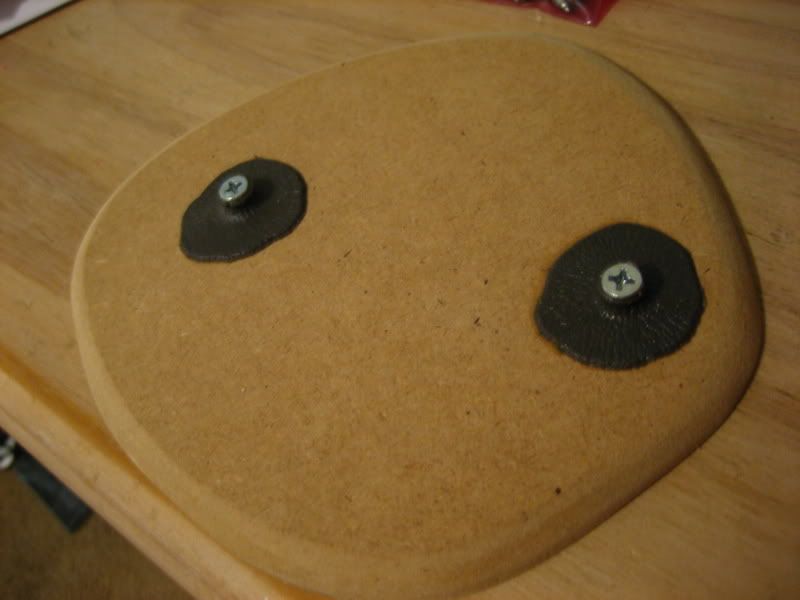
I plan to work the base in the same manner as the other two templates. The connection isn't as powerful as the two magnets is, but it's passable and maybe now, when I go to remove a tree the whole template won't move if I don't hold it down!
As an aside, the two tree template fits into many more spots than the three tree templates do. The smaller size makes it much more versatile.
6467
Post by: Imperial07
Do those model train scenery size trees actually fit 40k scale SM's?
372
Post by: grey_death
Wow, has it already been a month since I last updated this thing >.>?
As for the trees, if you scroll back through the thread, I'm sure you'll see some photos of finished trees with models near them.
7240
Post by: Warboss182
That looks rad man. Cant wait to see what the final product looks like
|
|