3309
Post by: Flinty
Hi all. The re-release of Necromunda has made my brain catch fire with pent up modellyness. As the new edition is also rather lacking get in scenery compared to the amazing both anza of the old box set I've geared up to produce some reasonably knackered buildings  Unfortunately I'm a structural engineer by training so I'm not going to be able to leave it too simple because it will just annoy me in future. Lots of gubbins, beams and services are on the cards!
So starting with this:


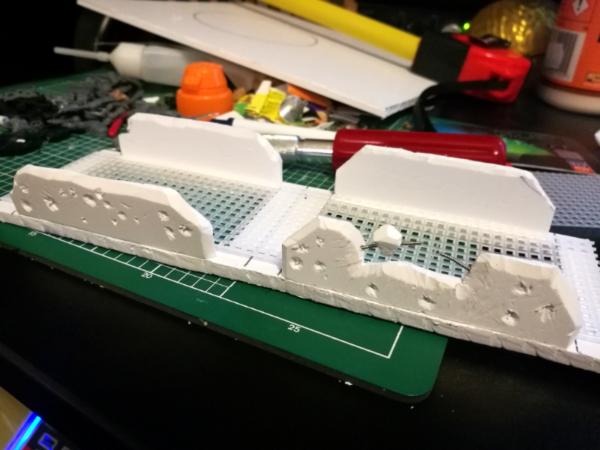
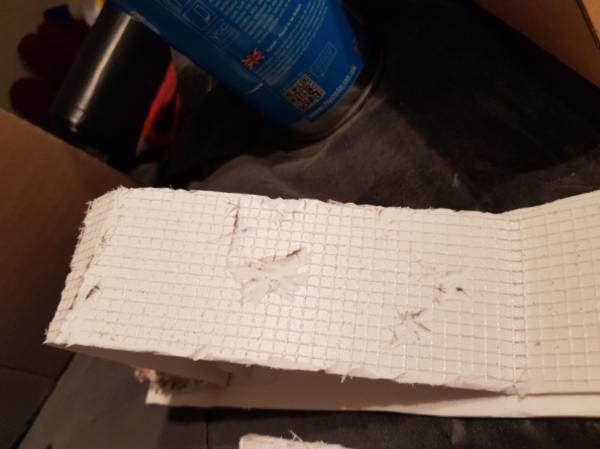
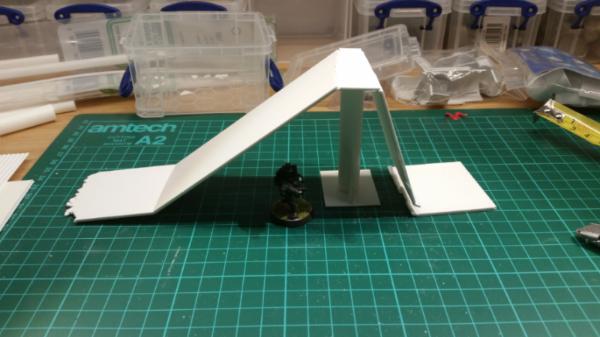
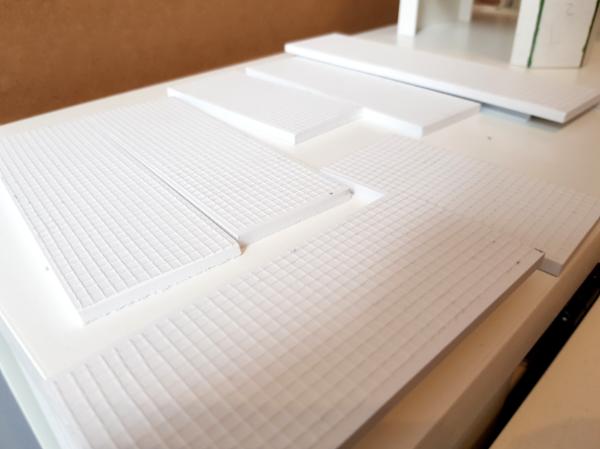
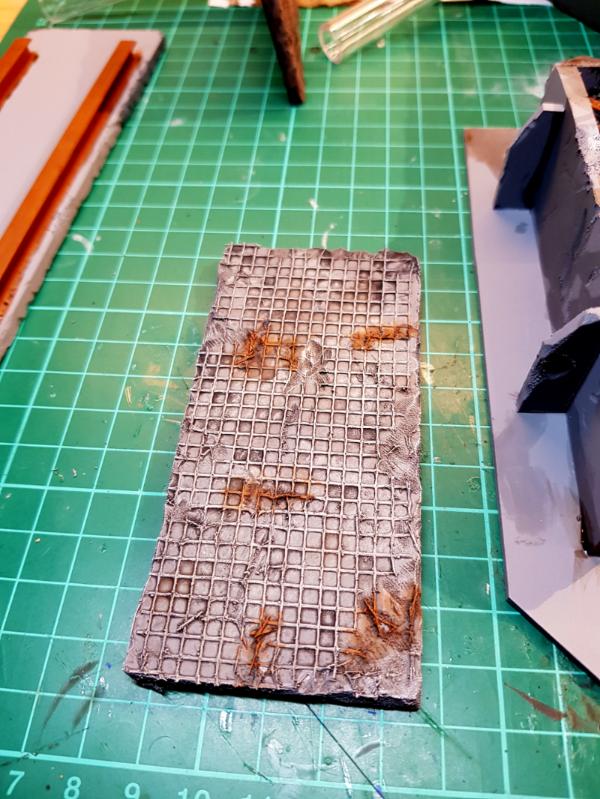
I've gotten this far tonight. A broken bridge for use as an access ramp or just scatter terrain. Thus was a warm up to get used to using some of the sea of foamed PVC I picked up. It seems pretty east to work with. Time will tell on how robust the budings end up being... Still to do on thus is to add some I beam stubs to the column and add a sandbag emplacement on the fully collapseductive bit. I might add some random buts if plasticard texture to the deck as well to break up the flatness of it.

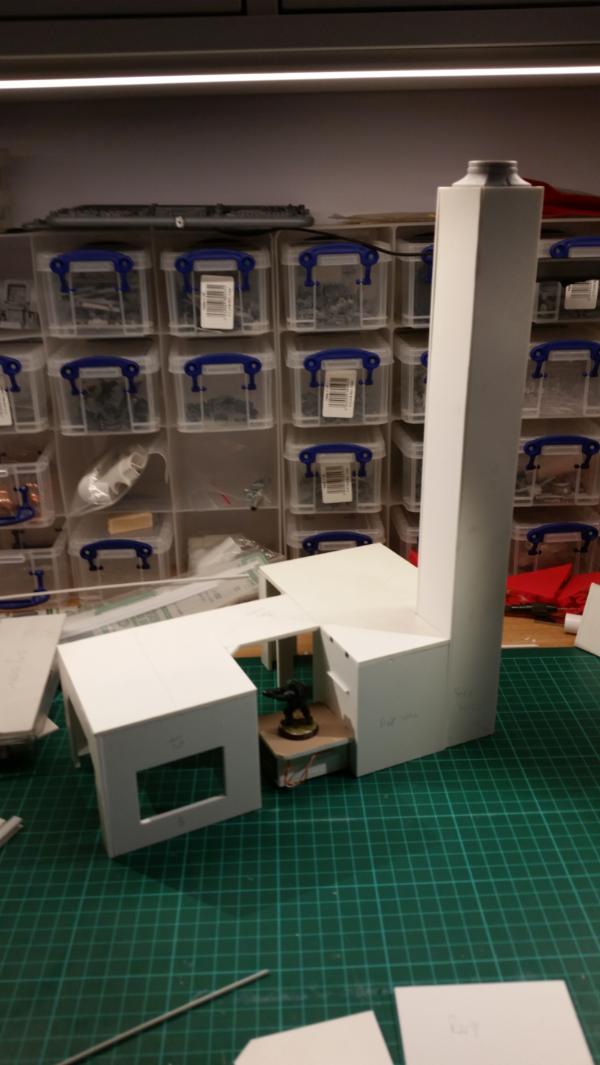
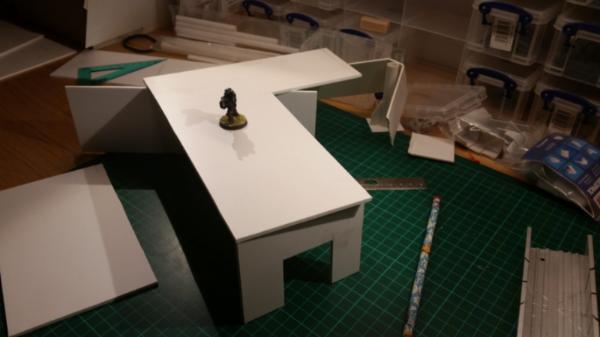
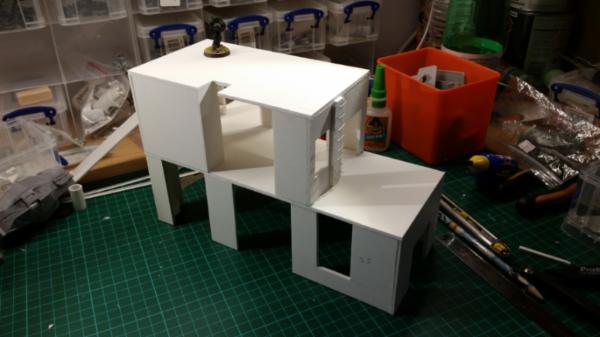
Also made a start on a big 2 storey piece. About 10"x8" l shaped thingy. I'm largely working from memory on the kinds of tetrain I enjoyed playing on the most last time around, so this stuff will probably end up being reasonably similar to the old card stuff.
Hopefully more progress tomorrow!
2771
Post by: Infantryman
Looking good so far! I used to be a Necromunda guy ages back, and just gave the new edition a shot tonight - seems like it'll play great. I'll definitely have to crank out some terrain to match, so unless I forget about this subforum I will keep an eye on your project.
M.
3309
Post by: Flinty
W00t. After spending all weekend socked up in bed with man flu, some progress today.
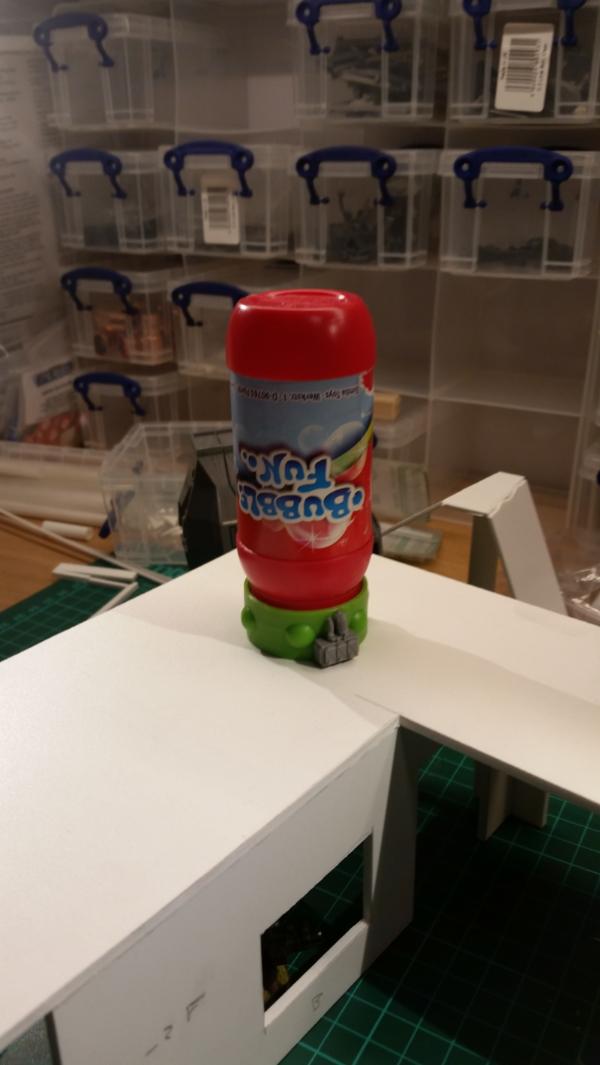
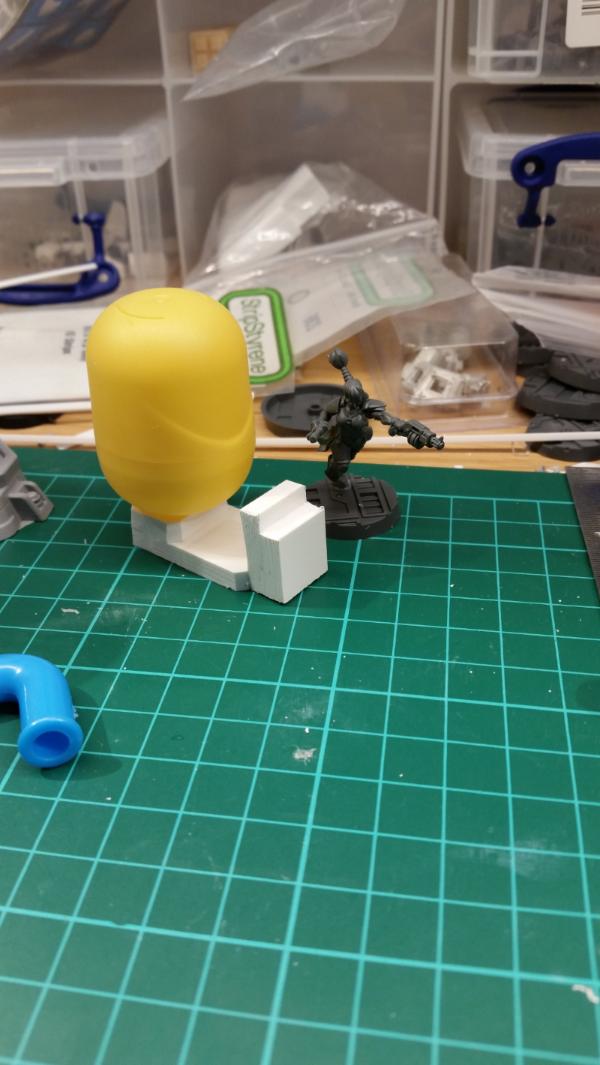
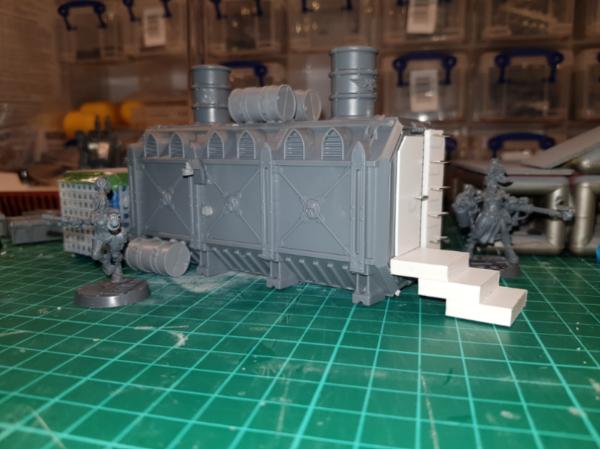
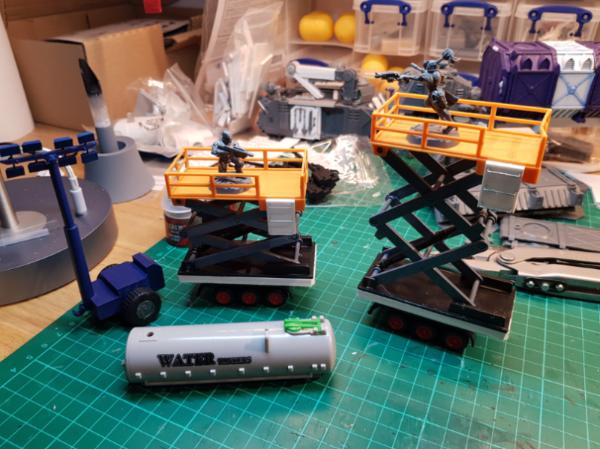
Item 1, courtesy of my 2 year old daughter, a silo canister thing as scatter terrain. Ran out of bubbles and I claimed my prize  Only needed to add a lascannon power pack as some kind of regulator. I might add more cables later, but I might get lazy.
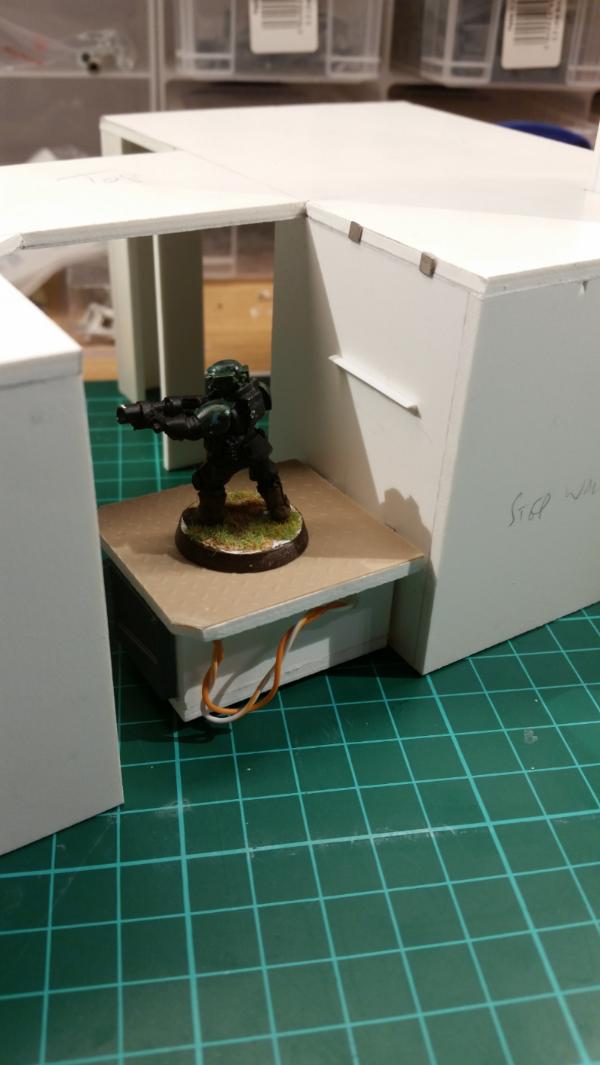
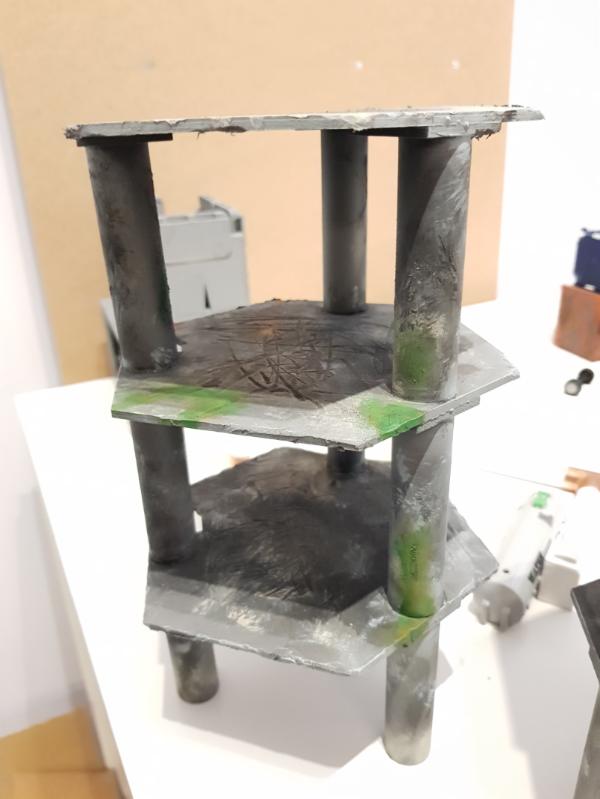
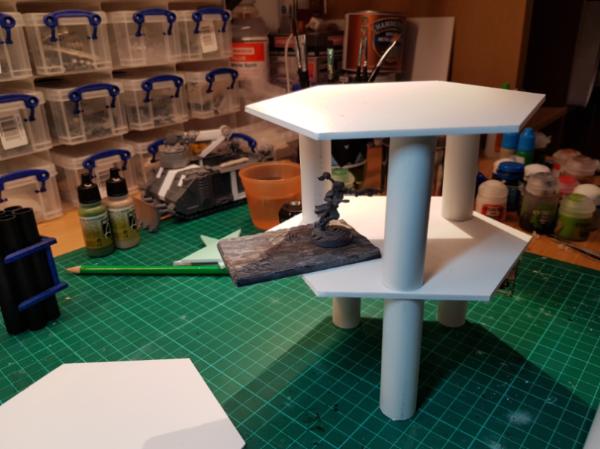
Next up a lift platform. Planning on running this up a 3 storey structure at some point in the future in the same way as the green structure from the old Outlander expansion. Planning on magnetizing it for use in game. Will report back about how that goes...

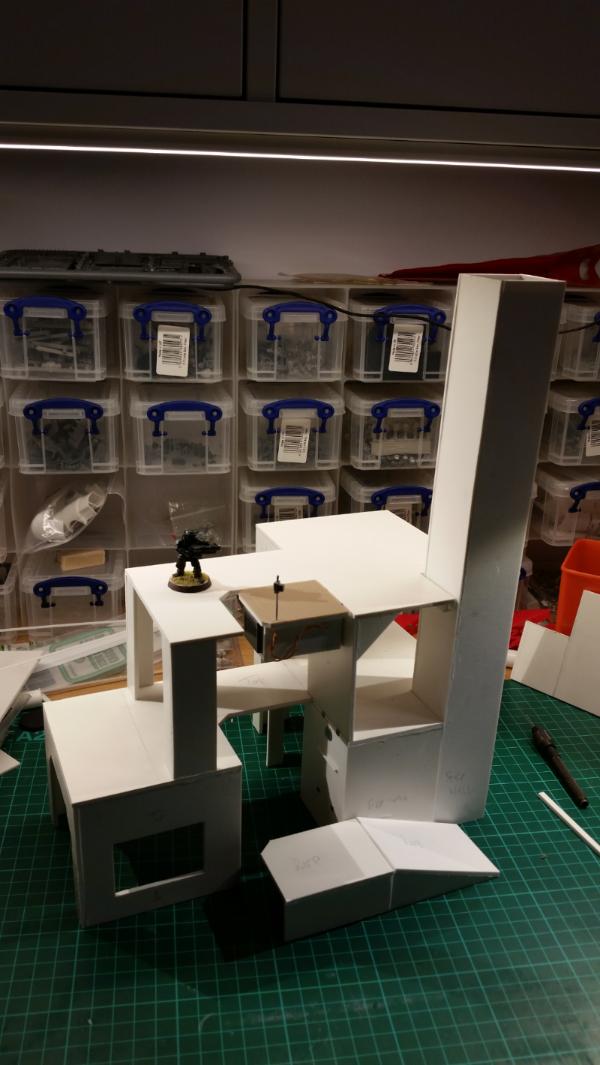
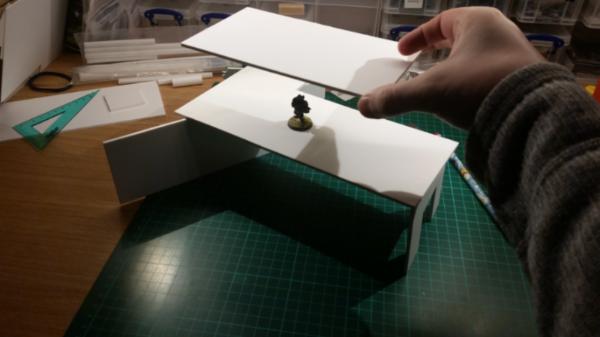
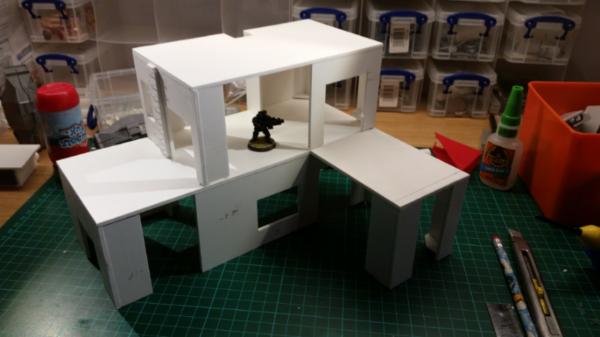
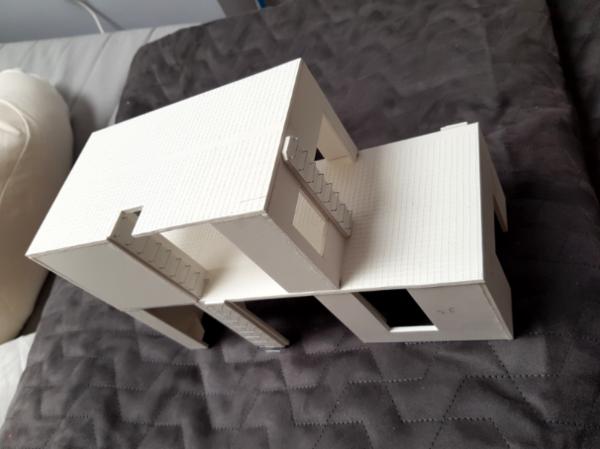
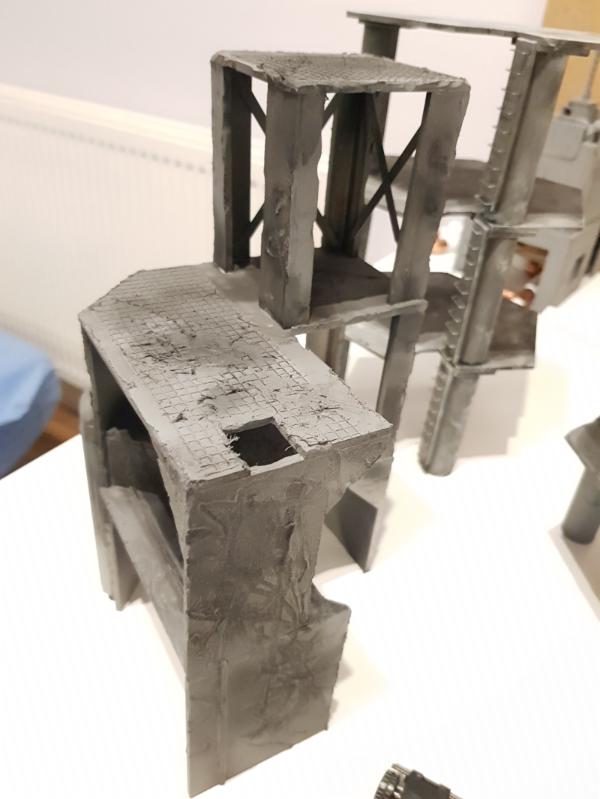
And then there is the first real building done. I am planning on making this a 2 storey job, but might actually magnetization the upper storey for additional flexibility on the board. I can say that i am very satisfied with the foamed PVC. It's light, reasonably stiff and easy to work with, at least for the kind of simple straight lines I'm after.
The last image shows the internal stiffening works that were needed, which us not actually terribly much considering. But better safe than sorry


After I get the upper floor done I think I'll be moving onto some kind of services tower to surround these things.

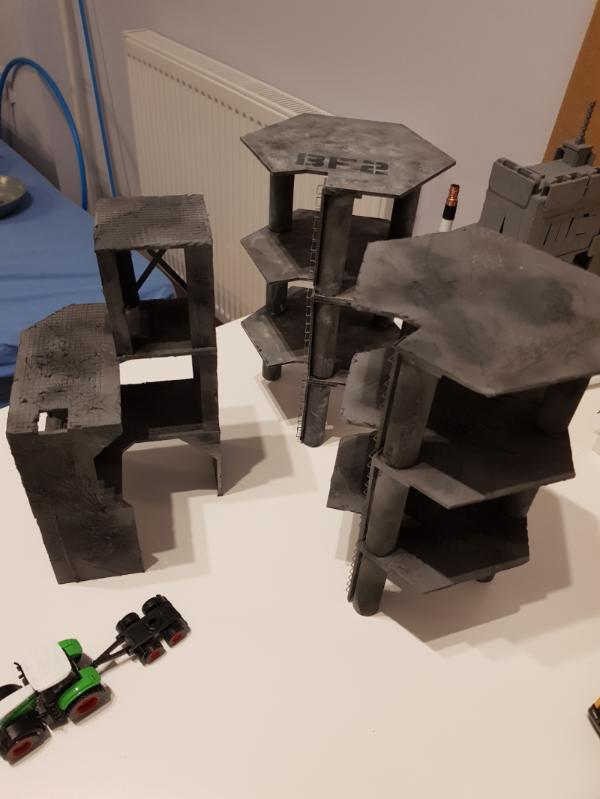
They were halo blocks drop pod thingies that I got for £1 in tesco ages ago but haven't done anything with. They have lots of vents and techy bits so I think they will become some sort of refinery or process towers with surrounding support structures and equipment. Try to bump them up to 2 storey things as well.
Hopefully I can sleep a but better now I'm actually making progress
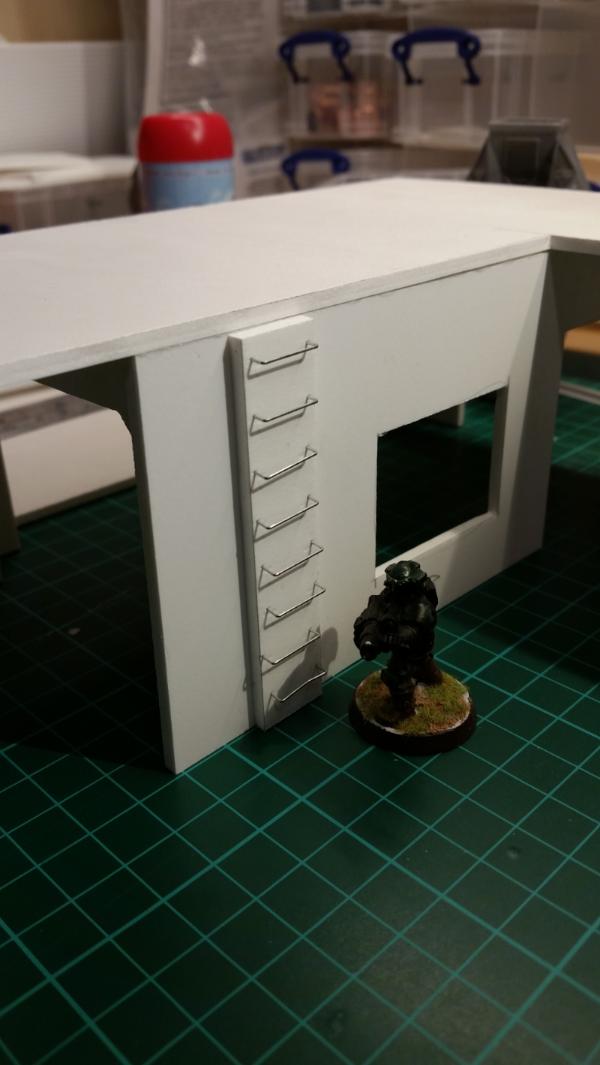
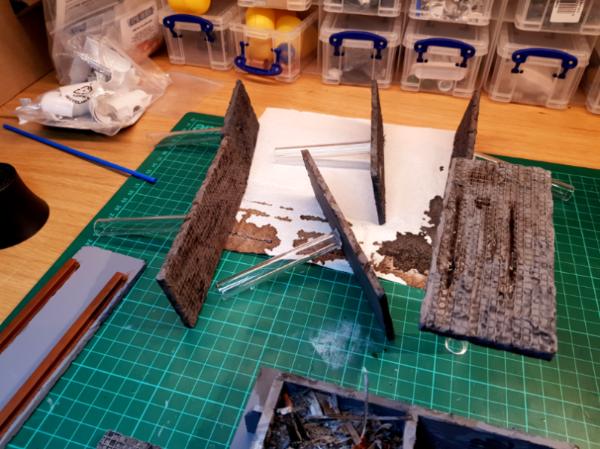
Automatically Appended Next Post: And I think I've just found my go to method for ladders.
The foamed PVC gives pretty good grip on standard staples. It even gives me the option to deform and break some if I want. Yaaay. I may still pick up some other ladder kits for variety, but at least I now know I can crank out super easy standard ladder sections as needed.
2771
Post by: Infantryman
Huh, somehow I'd not thought to use staples for ladder rungs - what size were those?
M.
3309
Post by: Flinty
I think they are 12mm x 5mm staples and I push them into 3mm thick substrate. I might try the 2mm thick pvc I've got as well and see if they stay as well stuck. It's just for show anyway. Not like I'll be hanging anything off them.
Anyway. Got another couple of hours done tonight. Good thing too as I'll be away with work until late tomorrow.
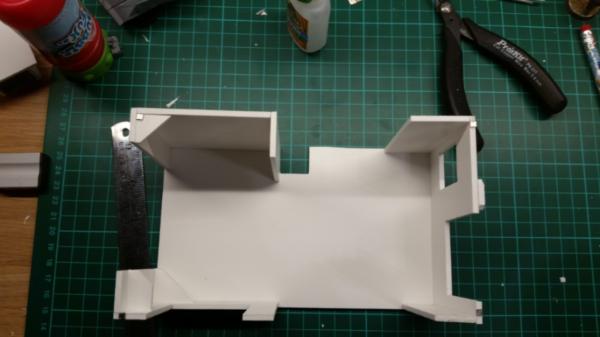
2 storey big thing is now done, bar the ladders and decoration.
And a shot of the underside of the top storey showing the magnets. They might not be robustly stuck down for long term use but I thought it was worth trying.
And a simple single storey platform. Planning on adding some biggish bits of piping up the side and along the top into the middle to add some cover and character to the piece. Some kind of flue or vent thing will also be added for the pipes to serve.


And my little pot of plumbing bits that will soon be turned into pipe corners, connectors and vents/chimneys Hooray for Screwfix is all I can say.

111574
Post by: craggy
Looking good so far. Hope you're practising painting hazard lines.
3309
Post by: Flinty
Heh. I free handed some on my hydra ages ago. They are tricksy things. Might invest on some low tack painters tape and a yellow spray can.
2771
Post by: Infantryman
Nice! I just picked up my Necromunda starter box so I will probably not be far behind in the terrain making...
M.
3309
Post by: Flinty
Neato. Looking forward to seeing the WIPS.
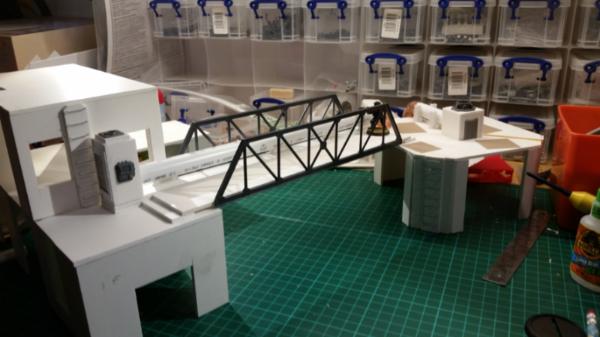
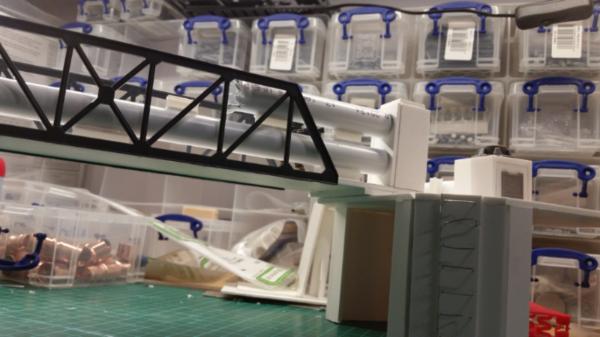
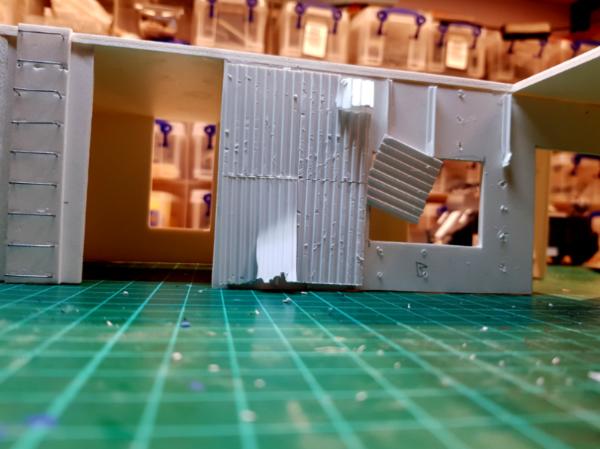
Some more progress from a couple of hours last night. A reasonably elaborate bridge section. Not planning on doing more than one of these but it was good fun. I realise that it's unlikely that the massive damage to the upper pipe could occur without any impact on the surroundings, but me. I might paint some damage on but otherwise, maybe they just fixed everything else and left the busted bit as a reminder or a curse or something... probably mostly something
The pic's areally from a couple of different stages, before and after adding the second pipe section.


2771
Post by: Infantryman
Nice! This is shaping up something fierce!
Might be worth mentioning: The current edition of Necromunda evidently does not have rules that pertain to gaming in 3D - nothing about climbing, falling, or being above/below someone.
M.
3309
Post by: Flinty
Thanks. It's good fun so far. My understanding is that the 3d terrain rules are in the Gang War supplement. There is a thread on the specialist games forum here.
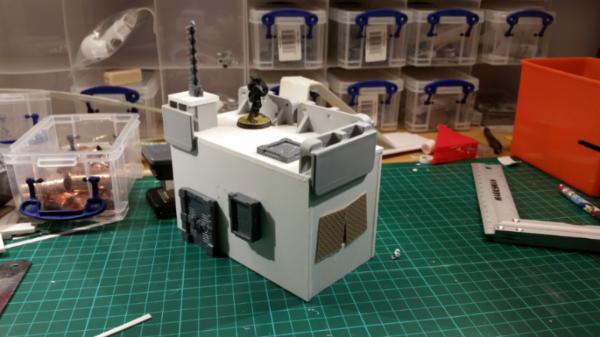
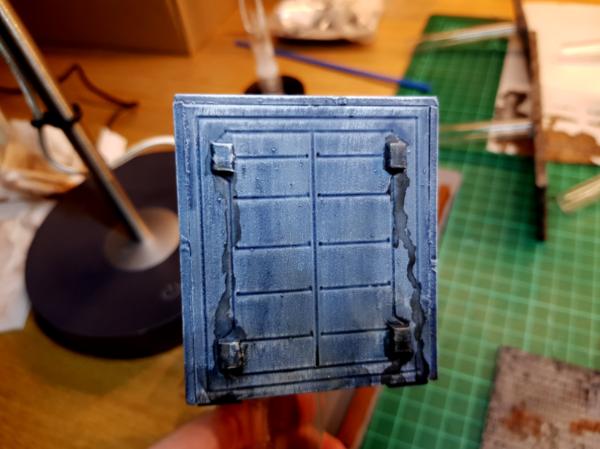
Anyway, another hour or so has led to a small blockhouse/converted command post thingy. Not intending to let models in as it's all locked and boarded up, but should act as a nice Los blocker. I was planning to put it on a higher level platform as a Base, but again I might magnetization it for use on other terrain pieces. Time will tell.
I just noticed that I forgot the ladder on the end. Otherwise this bit is done.

113570
Post by: beradical
Really cool looking so far!
Also, Yes the 3d terrain rules / guidelines are in print inside the Gang War supplement #1
3309
Post by: Flinty
Thanks, beradical.
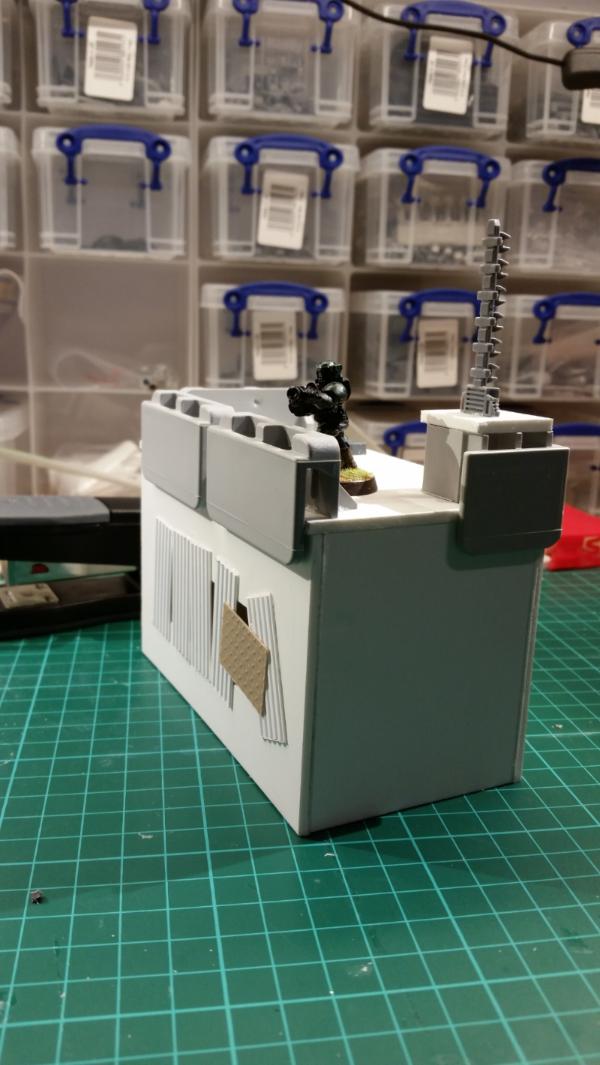
Finished the blockhouse Base. Just a simple rectangle this time. Not everything can be super complex!
I've left the blockhouse loose to maximizer flexibility. Just put the barricade section and a simple bit of plastic angle to help hold it in place. Should be enough to resist knocks and means I don't need to muck about with magnets.


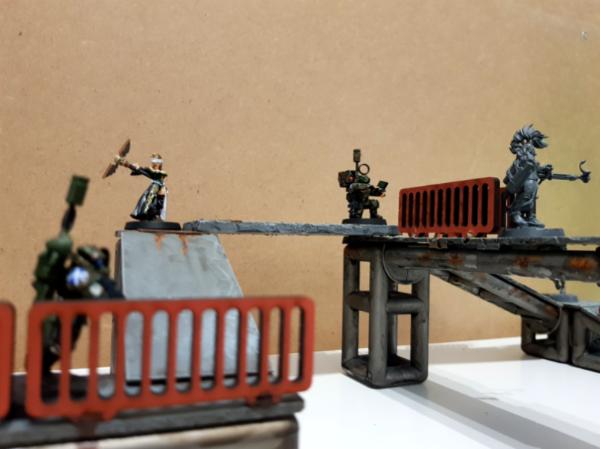
Also trimmed up a bunch of 50mm wide, 5mm thick pvc of various lengthe to act as walkways. Put some plastic beams beneath a couple but otherwide they seem stiff enough to work without further strengthening. Might put some checker plate on as dressing but otherwise will rely on the paint job to add interest to the bridges.
54372
Post by: kernbanks
Awesome work, copper bits laying around? I always return that excess as it is pricey but I just got a big gift card for the hardware store and will probably getting a bunch of PVC fittings.
You hand pressed each staple or did you space off the nail gun some how?
Are those MDF railings/roof top cover add ons?
3309
Post by: Flinty
The copper bits were about £10 all together from a local trade retailer, so pretty cheap in the end. I think they were actally cheaper than the plastic equivalents! For the staples I just unfolded our normal domestic stapler and use a random bit of offcut pvc as a spacer. Just remember to put something hard under the backing strip though. First couple of tries I ended up stapling the thing to my cutting mat
The cover/edge bits were random bits of packaging I got with something a while back. I can't remember what it was, but as soon as I saw the bits I knew I'd find a use for them eventually.
10972
Post by: Ruglud
Brilliant - love all of his 
3309
Post by: Flinty
Yerg. Spent the weekend with my lungs trying their best to escape via my oesophagus... no fun. Oh well, managed to do some bits and pieces, and had a solid 2 hours tonight to finish off some scatter terrain.
Pipe and process terminal thingy. Is it air? Some flammable liquid or gas? Or does it even work at all? Who cares if you can hide behind it!
Also bashed out some jersey barrier type barricades. Not perfect as the angles are a bit harsh between the lower bits and the main barrier. I might add some GS to angle it out a bit more when I get to the point of filling the main scenery pieces. Still very much in construction mode just now to get the main buildings sorted before heading back through them all to add final details and filling. Also planning on distressing them with a dremel at some point, but we will see how much of that I actually do.
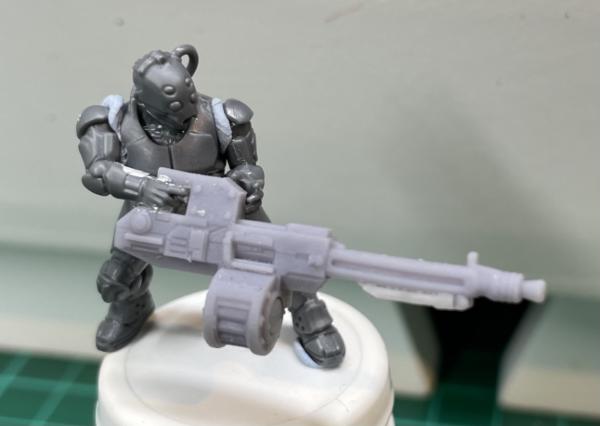
Anyway, just a few pics this time, with my good old stand in Kasrkin grenade launcher dude.


68152
Post by: JoeRugby
Great stuff dude, looking forward to seeing more
29836
Post by: Elbows
Supremely good work, and very very much in line with the original ethos of a proper Necromunda table. Well done.
3309
Post by: Flinty
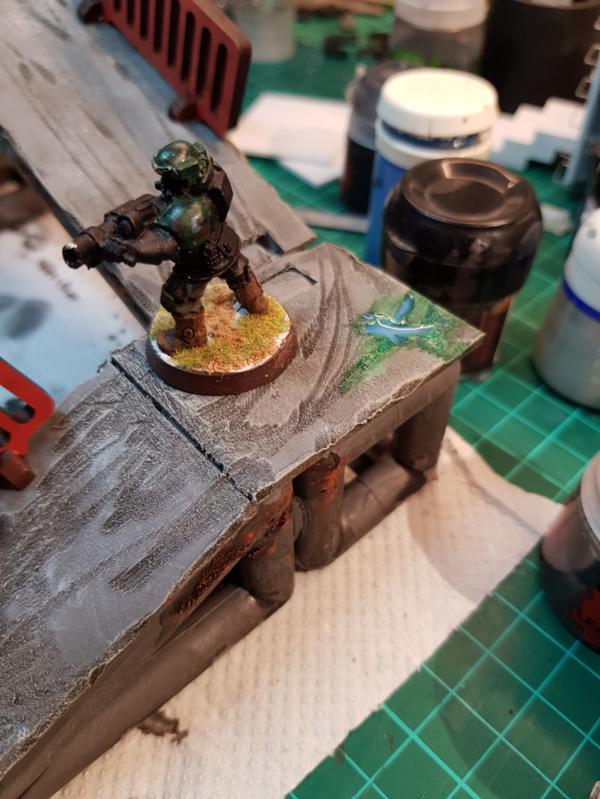
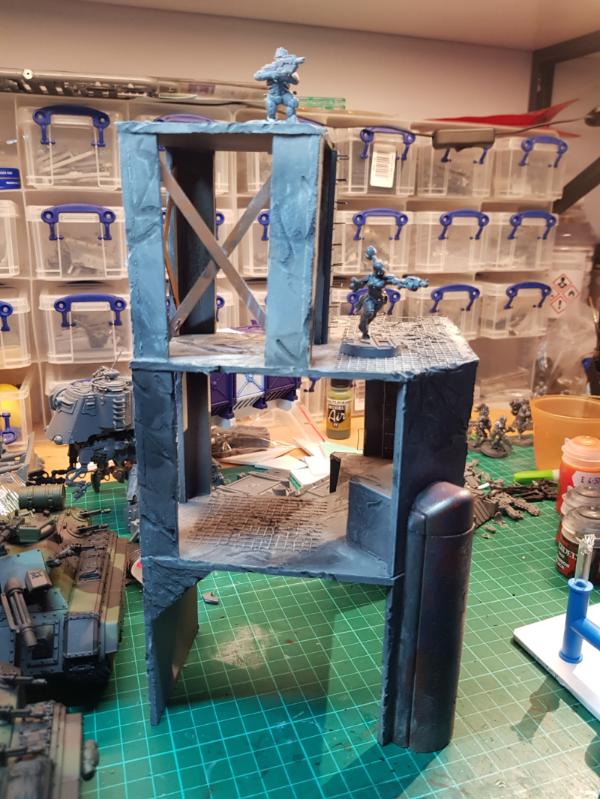
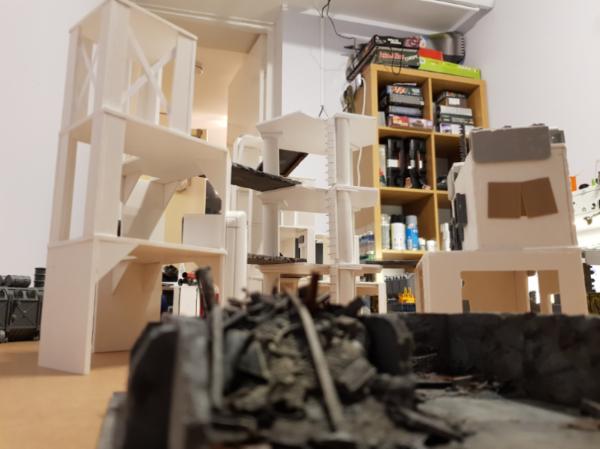
Thanks guys. Will hopefully get an hour or so in tonight. Waiting for the kids to collapse just now. Got the 1st floor deck of my lift platform building done just at the end of last night, so need to do the next bits on that. Automatically Appended Next Post: Yarr. So my hobby time tonight has netted me a tower! A solid 13" (oo-er missus) of mostly rectangular talliness. From a distance it looks reasonably straight, and it can stand on its own so I'm pretty happy with it even if it's no super perfect.
Plan for this one to be the corner of a 4 storey thing with a lift platform. As with most of my stuff the floor area will step back over its height but there should be plenty of space to connect walkways to from the other 2 and 3 storey bits. Will hopefully finish the bulk of it tomorrow. Now to go pick dried super glue gel off me fingers!
117728
Post by: TheSquigLebowski
Really good stuff, putting mine to shame, really like creative uses of alot of bits, love the little pipe run, might have to make some of them
13518
Post by: Scott-S6
Looking good mate!
4362
Post by: Ozymandias
That lift with the magnets is genius. I'll have to steal that idea.
3309
Post by: Flinty
Thanks guys. Steal away Just remember to post the results!
Pretty much finished the main build for the lifty building now. Some open space some Los blocking stuff and plenty of places for platforms and gantries to come in.
I've started to dress it a bit with random gubbinz but need to add some more wiring and small pipes and stuff just to reduce the wide open spaces a bit.


4179
Post by: bubber
Great work so far.
However - the ramp does not meet current British Building Regulations, specifically Part M. Necromunda must have more lax regs.
3309
Post by: Flinty
 bubber wrote: bubber wrote:Great work so far.
However - the ramp does not meet current British Building Regulations, specifically Part M. Necromunda must have more lax regs.
It's fine. The building manager will get a risk assessment done justifying the deviation. And then shoot any inspectors that get too nosy in the face
3309
Post by: Flinty
So having spent the time since Xmas drooling over the content of the box and revisiting the awesomeness that is the underhive it's back to work. Cleaned up all of the terrain so now I'm trying to put the gangs together. The Escher models are amazing but damn are they fiddly!
Also I was reminded that the underhive is a pretty dim place so I thought I would brighten things up a bit. Behold the Flinty pattern industrial emergency light unit To be found anywhere that someone needs to escape something else. Possibly British Standard compliant...
 Automatically Appended Next Post:
I will whomp up a few more of these to add a bit more character to the outside of my buildings. Not too concerned with dressing the insides of things so much as barricades can easily be added as desired for that and I think if the building's are too busy inside they'll be that much harder to use.
24297
Post by: Viktor von Domm
Genius of an idea!!! Will this be later on done in osl...? That be a suicidal project then... 
3309
Post by: Flinty
Oh God. .. hadn't thought about OSL... hmm well I can darken the grey I had planeed down a bit that would make it easier.
24297
Post by: Viktor von Domm
Osl isn't always a must...but with that setup certainly a true pain in the rear... 
61618
Post by: Desubot
You should make your life worse instead by making those LEDs 
this is coming up great man.
2771
Post by: Infantryman
See if you can pop the smile off and flip it upside down - that should just about do it.
91014
Post by: lucren
I like it! Want to see more!))
3309
Post by: Flinty
Thankee kindly. Hoping they paint up just a part as well as your Sector stuff.
Had a bit more time tonight so I prepped the bits for 2 more of these. They will each have different dressing to give some cover up top. Variants of pipes, boxes and the cooling units I've been working on with some space for other barricades.

Speaking of cooling units, I've done another variant with wire grilles that I think looks much better but the time investment to make them doesn't really add up so I probably won't make any more by hand.
Another random find on the interweb here. Turns out people like using patterned tape for crafting paper based stuff like cards and wrapping. So I picked this up to see if it will work for zero effort hazard striping. Thus particular stuff is black and shiny gold so it might need to be restricted to items that particularly hold the omnissiah's favour. I also have some simple black and white chevrons and some red/yellow I think in transit. Should be interesting to see how well they fit in.

3309
Post by: Flinty
So with the birth of a new year I managed to get another couple of buildings sorted after concentrating on dressing pieces over the past few days.
So here are the newborns with their older brother


Still need to finish dressing them, especially things like lights and ladders but they're mostly done now.
3309
Post by: Flinty
W00t. Some more progress.
Lightly dressed the 3rd of my industrial buildings. Leaves more space for bridges and barricades.
Also completed a random blockhouse/stair entrance thingy and an aggregate stockpile storage thingy. Stuff left to do includes filling one of the aggregate hoppers with stuff and leaving a few scattered scraps in the other. And then adding weathering and ladders of course.


97944
Post by: Ubl1k
Woah dude this stuff is incredible, i thought my Shadow war/Necromunda stuff was nice, looks like garbage now.
3309
Post by: Flinty
Thanks Ub1ik, although I'm sure your stuff looks great. Fancy sharing? I'm always looking out for stuff to steal... I mean inspire me
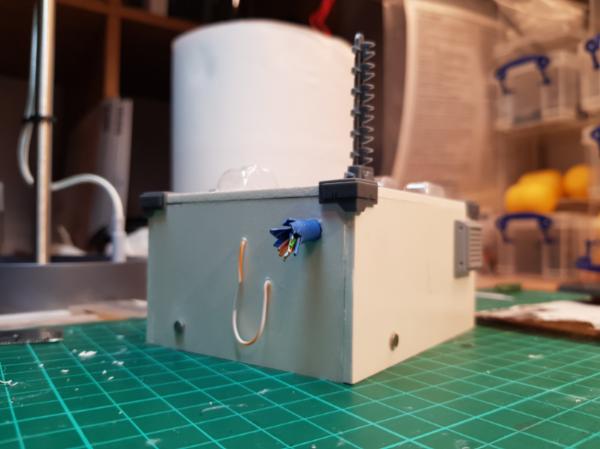
Plan for tonight us to fill in one of the aggregate hopper thingies with junk and sand and then maybe try and do some industrial gas storage cylinders. Will need to cracking the GS out for that so will do some filling at the same time. Automatically Appended Next Post: A bit more progress. No gas cylinders, but I did make a services building with secure entry and a bunch of pipes coming out. Currently trying to work out how best to magnetize the sucker for storage and modularity.
Also PVA'd some aluminium foil into one of my aggregate bays. If it dries OK then I can do an outer deep layer of PVA to hold random offcuts, scrapings, damaged bits and pieces and a healthy dose of basing sand as a recycling hopper. To be continured.

7222
Post by: timd
Great idea on the security/fire lights.
Could also use the sprue pieces from the orange template sprues. Paint the back 3/4 silver and then cover the sliver with your base color, leaving a bit of the orange showing. Silvered interior should produce some sort of glowish effect.
T
3309
Post by: Flinty
Hmm. My ladies are up to something. Not quite sure what it is yet but it looks pretty technical and it must draw a hell if a lot of power because they have, ahem, "liberated" a rather large generator to power it all.


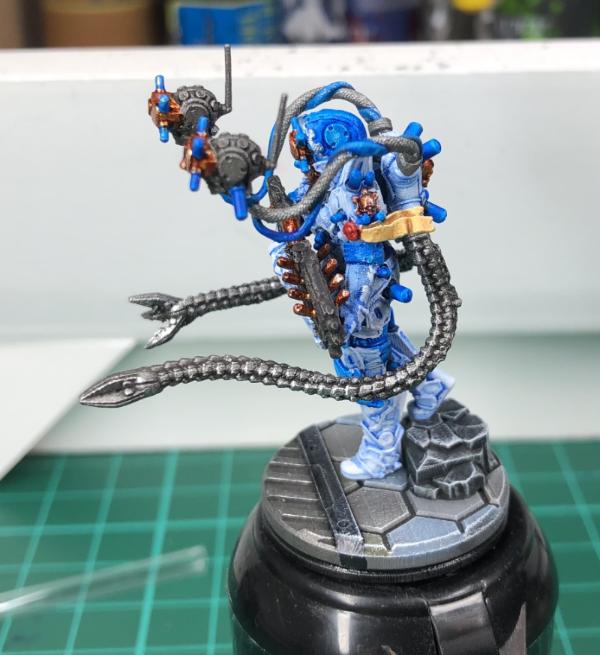
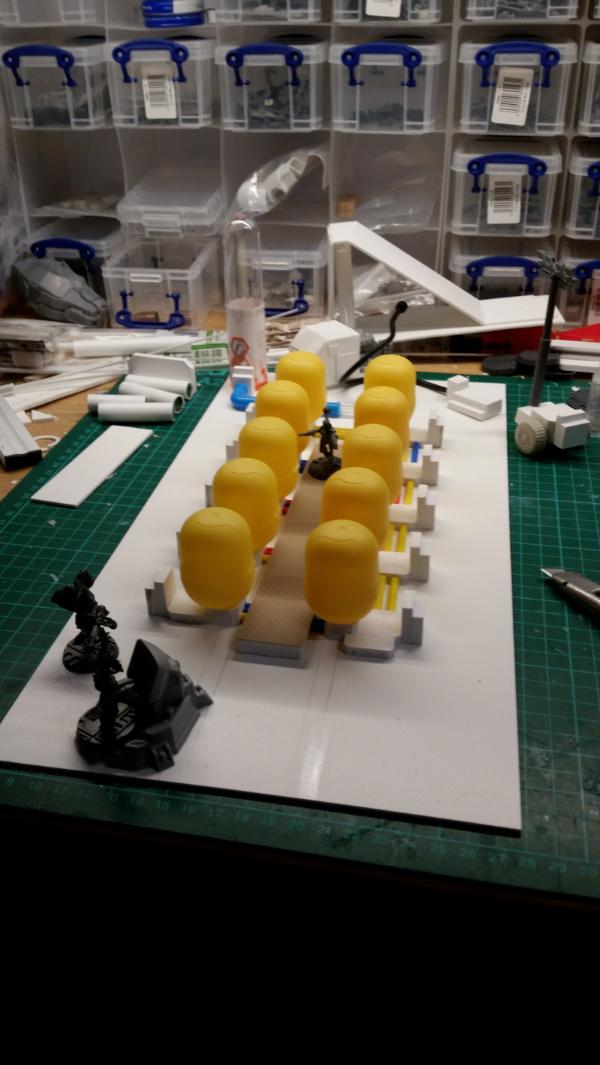
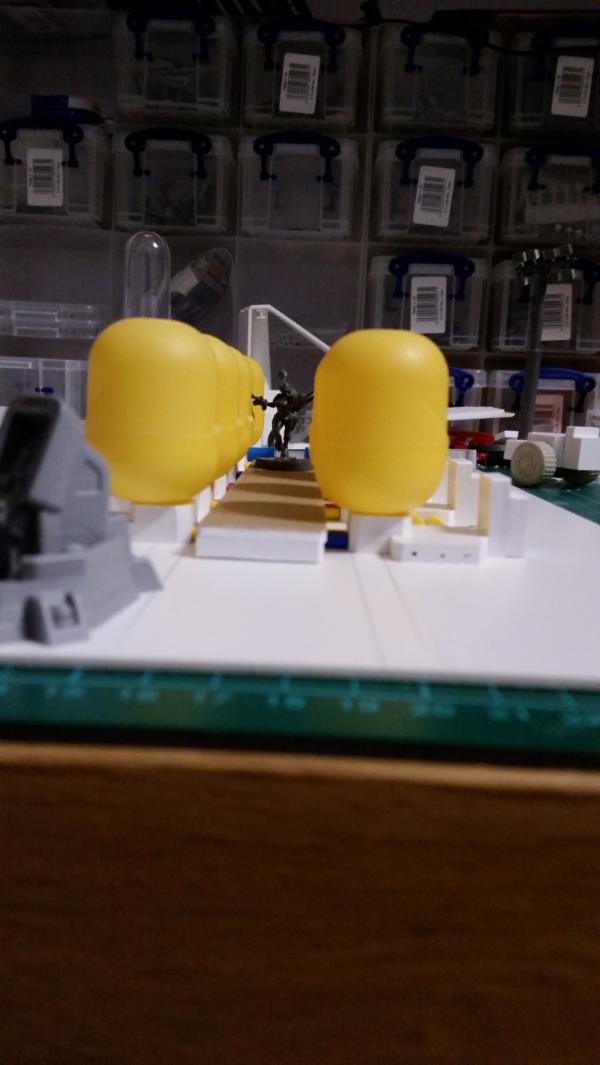
So this a random chemical works/illicit still/genetic experiment/servitor development station that burned through my brain last night while I was trying to sleep. My 2 kids rather like Kinder eggs and I was sure I could do something with the yellow pods and this occurred to me to try.
So an array of technical pod thingies connected to chemical tanks and a generator with cables and pipes to be liberally strewn around. Enough space to move about each pod but compact enough to fit on my shelves. This should be something my gang will fight tooth and nail over
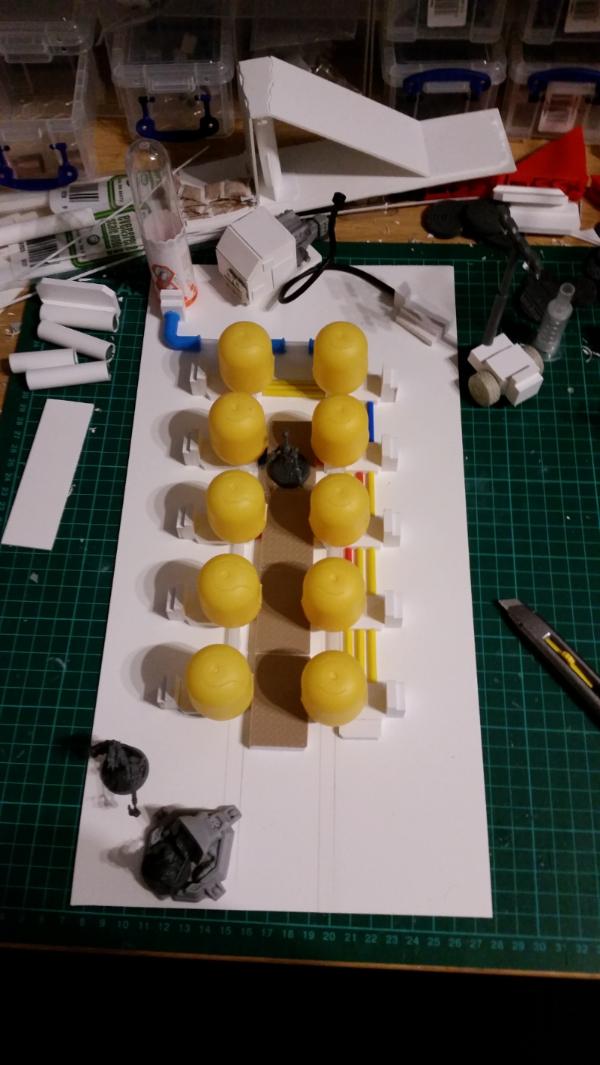
Still in progress but I've got the main components fleshed out. I still need to do a rack of chemical tanks to sit somewhere near the pods in the same way the big silo at the end is.

And a detail of a completed pedestal incorporating a control panel/technical control thingy.
 Automatically Appended Next Post: Automatically Appended Next Post: @Timd -great idea on the coloured lights. I'll try it a bit later. The orange plastic is a bit harder to work with as it's prone to shattering but its worth a try
43709
Post by: boundless08
Wow your work is amazing! You've knocked out a massive amount of amazing looking terrain in such a short time. How are you cutting and chopping up your foamed PVC? I got some but find it very spongy and hard to cut with my hobby knife.
All I've done so far is this bridge as I got annoyed with cutting it, and you can see my edges are pretty rough :/
3309
Post by: Flinty
The edges may be rough but it fits the worn look very nicely
I have a couple of metal rules to get a good straight line and then just don't try and cut all the way through in one go. The 2mm stuff takes 2 to 3 strokes, the 3mm takes about 5 stroke and the 5mm thick stuff takes a bit more. By the time you get most of the way through the thickness of the knife breaks the whole bond.
61618
Post by: Desubot
Oh i like that V6 tau engine
3309
Post by: Flinty
I had used the barrel on something else a while back and these remains were definatly shouting "engine" at me
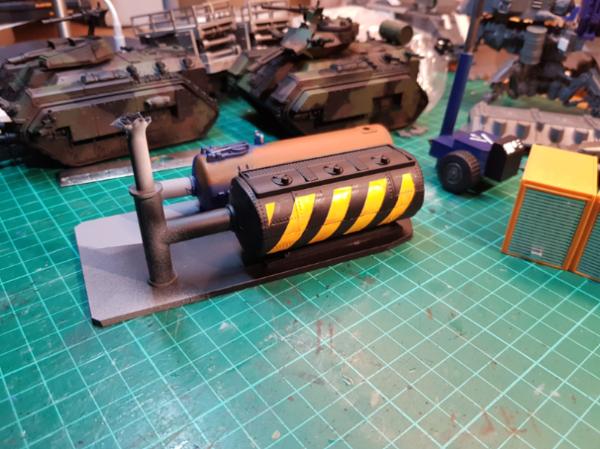
Plan for tonight is to see if I can cobble together some small bore pipes to contact to gas cylinders. Let's see what I can find in the house...
10972
Post by: Ruglud
Really inspiring work. Those DIY drinking straw couplings look great. Saw a pack in the local Poundworld Plus, may have to pick a few up...
I'm also impressed with your Really Useful mini storage crates... Great idea for all the bitz and supplies
3309
Post by: Flinty
Thanks. I have 2 sets of the box storage things and it still isn't enough!
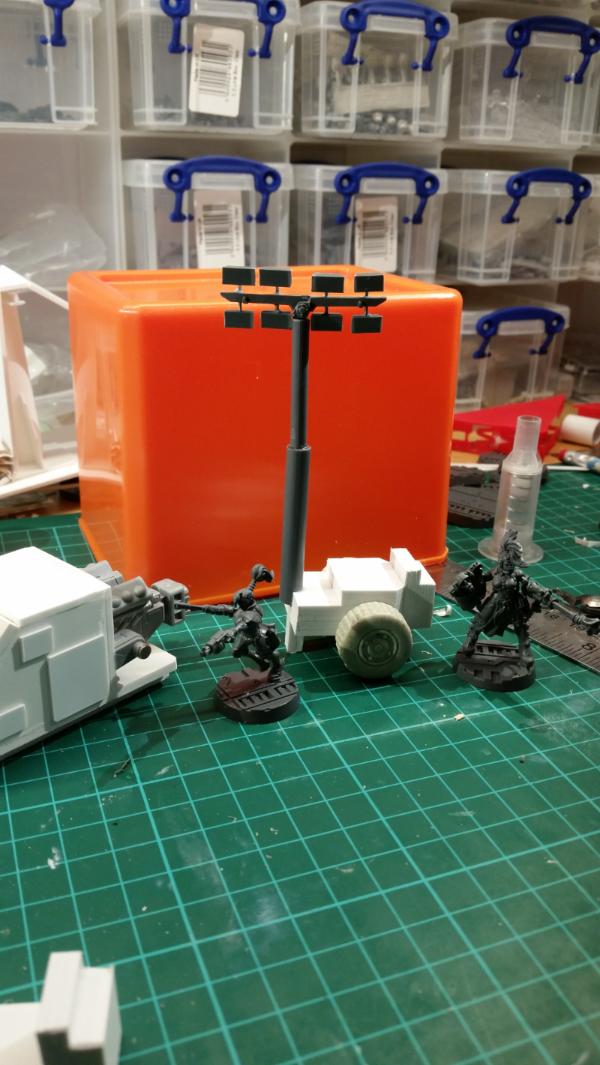
Yesterday's progress included a) some boring pipes cut to size to connect the tank pedestals, b) a GS press mould to get nice round ends on my upcoming g gas tanks, and c) this rather over elaborate portable floodlight. The ladies really do mean business at this facility
With all the lights I'm making I'm thinking that my gang names will all need to be puns on or relating to light... The light bringers, Illuminati, Luxus Alphas, that kind of thing, but better!
 Automatically Appended Next Post: Automatically Appended Next Post: So it looks like my current GS is pretty dead. Just about usable to fill in the ends of my gas cylinders, but no good for find work. Oh well, it had been sitting about for quite a while.
So progress tonight was good. Everything is pretty much done now barring the final touches on the gas cylinders and cutting power cables to length. Just need to cut a Base and stick everything down. Thinking that I'll leave the generator, lights and the spare cylinders loose so they can be used as scatter terrain of The Facility (note the capitalisation...) isn't on the board


3309
Post by: Flinty
Woot. Lots of gluing tonight. The main parts of The Facility are now mounted on 2mm pvc. It's still a bit flexible for my liking but I do t cureentry have anything else suitable. I can always mount it on something else in due course.
The kinder pods are still loose because I'll need to paint the thing before gluing those down. Also the gas cylinders are still awaiting new GS so they're in limbo a bit but all the other major parts are down.

Also PVAd the heck out of my spoil heap adding rubble and rubbish. Let's see how much actually sticks...

3309
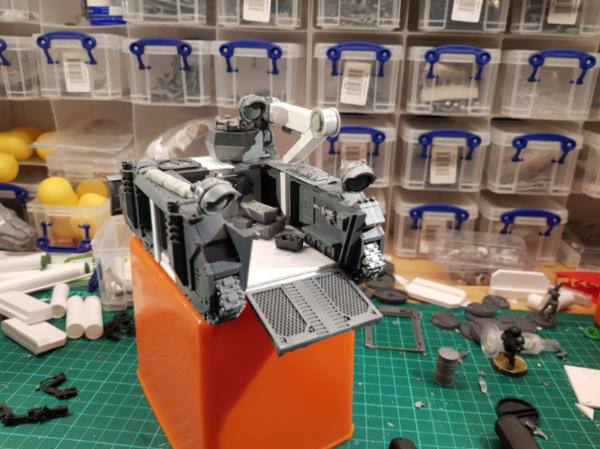
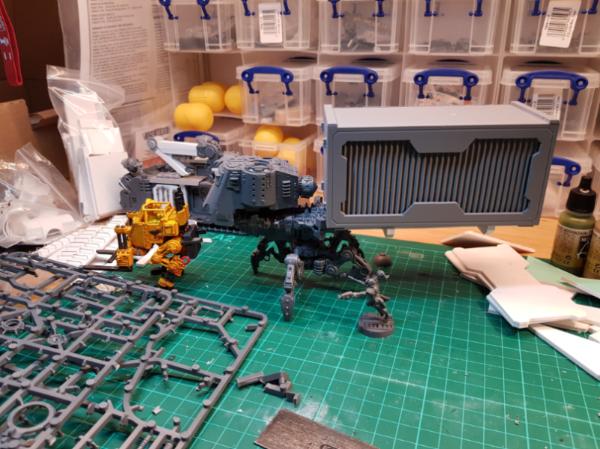
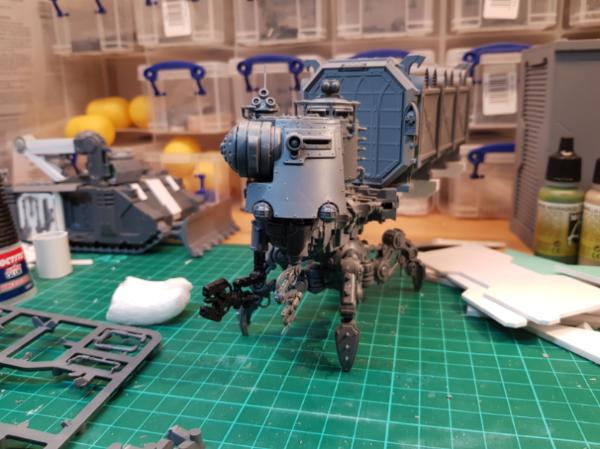
Post by: Flinty
W00t! So I found a rhino chassis still on the sprue left over from a previous aborted project and was planning on turning it into an underhive transport and engineering vehicle. I then had a bit of a dig ghrough boxes i havent opened in ages and found 7 imperial guard vehicle upgrade sprues with most of the stuff still attached Paydirt! So instead i spent the evening snipping, trimming and scraping to get a bunch of stuff cleaned up for use. I'll do the chassis tomorrow before festooning it in STUFF!
Is it just me or is that old upgrade sprue basically the best thing GW has ever produced?
24297
Post by: Viktor von Domm
i love when peeps use kinder eggs...there should be a competition simply about using these as a main ingredient^^
3309
Post by: Flinty
Tell me about it
For modelling purposes I think the older true cylinder pods were better shaped, but these ones will do fine for these purposes.
I've even started harvesting the rubbish plastic tat that comes out of them for oddly shaped creatures and mechanical gubbinz.
104890
Post by: ScarletRose
It all looks great, I especially like the rubbish pile for some reason it looks realistically like the sort of structure and piled up junk you'd actually see.
24297
Post by: Viktor von Domm
 Flinty wrote: Flinty wrote:Tell me about it
For modelling purposes I think the older true cylinder pods were better shaped, but these ones will do fine for these purposes.
I've even started harvesting the rubbish plastic tat that comes out of them for oddly shaped creatures and mechanical gubbinz.
Get out of my mind!!! 
Best version was back in the days when they produced them stackable...the ribbed ones...
And yeah, the odd plastics gimmicks is often very amazing and highly potential stuff!
3309
Post by: Flinty
Was that an original German thing? I don't remember any stackable pods.
26139
Post by: Skalk Bloodaxe
Subbed.
Your work is excellent. I especially appreciate the symmetry of your panels. Clean lines and layering for detail are essential in projects like this to keep it from looking Orky. Your skill with a hobby knife is apparent and your creative eye for detail is inspiring. I'm looking forward to seeing more of your work.
I would like to share an idea for the patterned tape if you haven't done it already- apply a piece of the tape on a scrap piece of plastic and spray it with a matte clear coat spray. You may find the result is a subdued finish on the tape. If it isn't, a 2nd coat may achieve the result. Also, I'm not familiar with that tape and I'm interested in seeing what I could do with it. I'd really appreciate it if you'd share the company name.
3309
Post by: Flinty
Thanks Skalk. Too kind. The multi storey buildings are still a bit rickety and not perfectly straight but I'm glad it's not looking orky.
The tape is called Washi tape and people appear to use it for making nice papercrafts. I haven't done anything with the tape as I'm still deep in building mode. However I really am running out of building materials so i will need to force myself to do some painting soon.
3309
Post by: Flinty
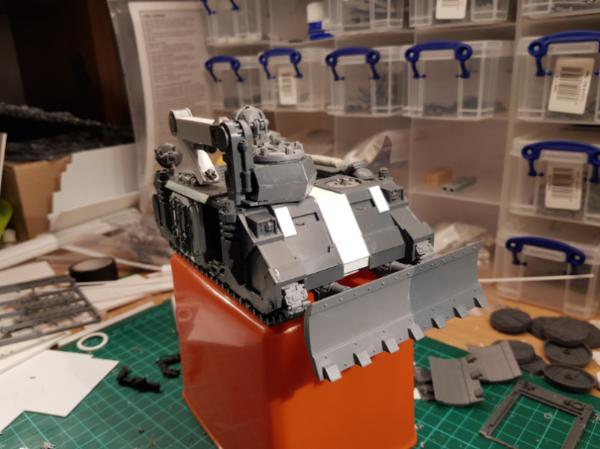
So the Rhino chassis became this.
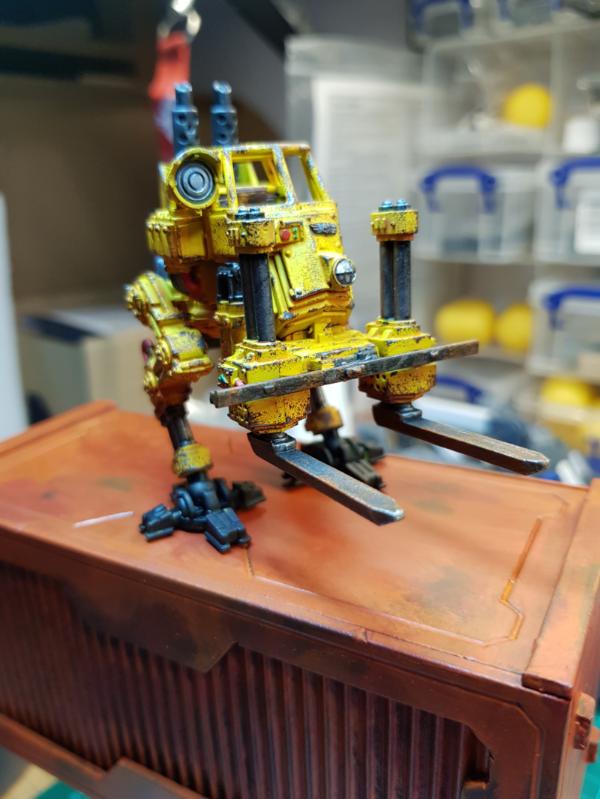
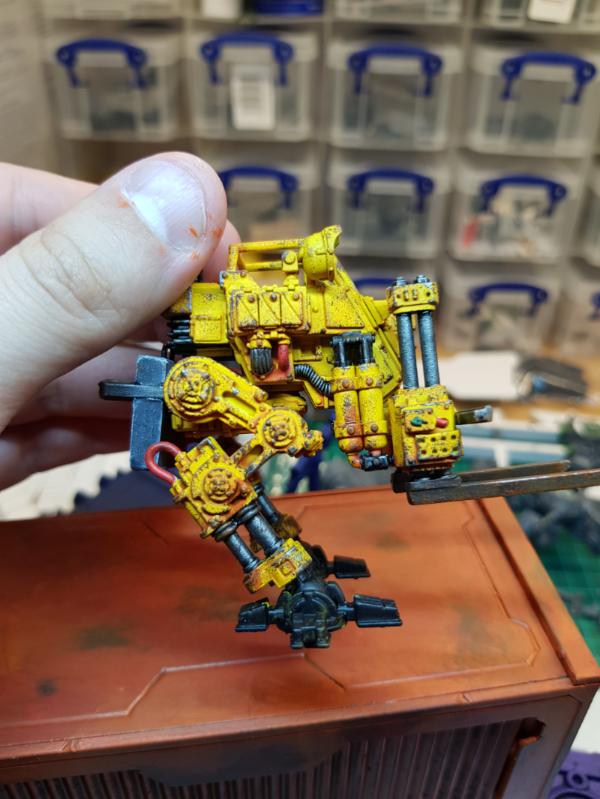
I found a Sentinel that became a Jekub Class walky forklift
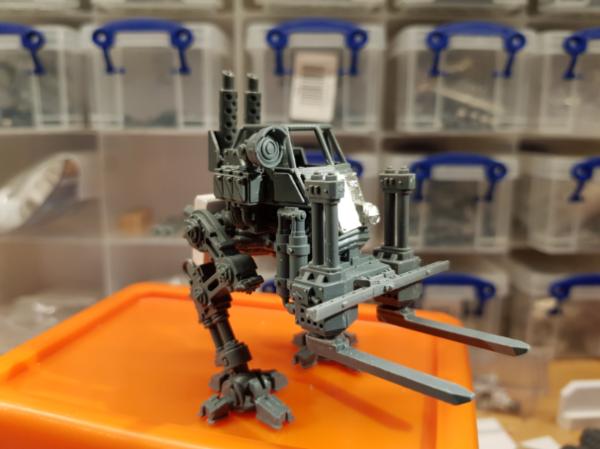
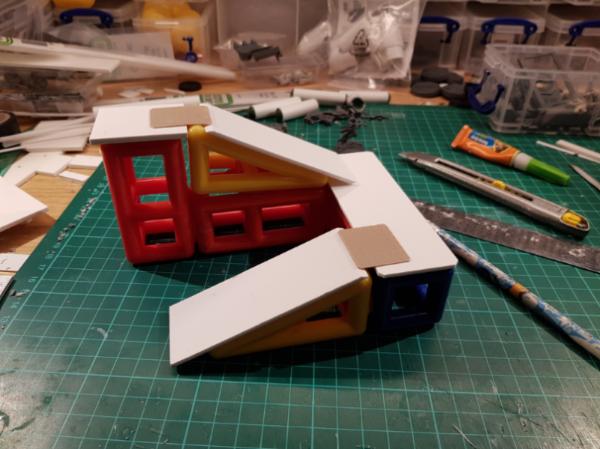
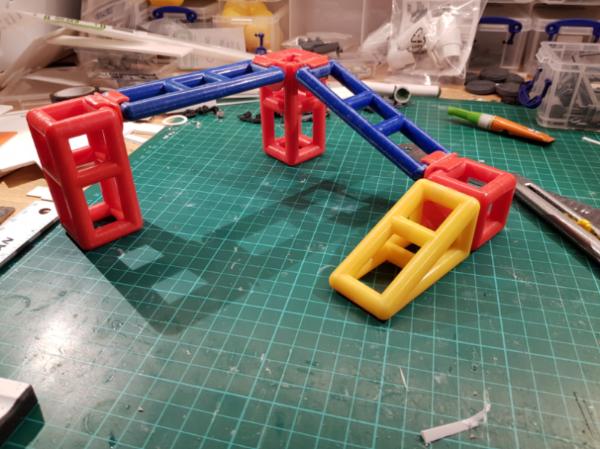
And I scored a crate full of toddler construction toys
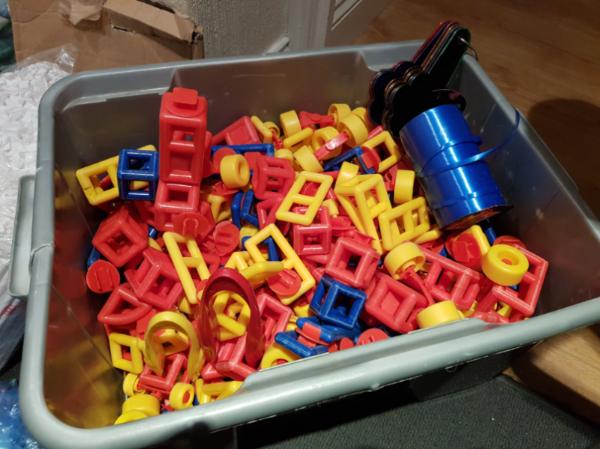
That work pretty nicely as horrendously over engineered walkways and platforms. Just need to sort out something to use as edge protection/handrails as it's a bit sparse just with the flat platform topping.

And finally got around to finishing off my modular pump building thingy with various magnetized trailing pipes


Phew. On the upside, yaaaay progress. On the downside I'm coming ever closer to the horror of the painting-ocalypse where all my hard work goes down the drain with a paint job I'm not 100% happy with... really need to get over this paint fear
Anyway, off to a wedding this weekend so the whole project will need to go on hold anyway.
C&C welcome as usual.
26139
Post by: Skalk Bloodaxe
NEAT! I've always been a fan of abandoned industrial vehicles in scenery. I usually go for 1/35 to 1/48 vehicles depending on how they scale up visually. I haven't ever used GW stuff foe it but now that I've seen yours I'm going to reconsider it.
I've noticed other bits of your project has similar items. In my experience that kind of plastic is too soft to hold paint well. I know there are spray paints available to bond paint to plastics like this but there's also the gluing issue. I've tried using cross stitch plastics, coffee can lids, kids toys, etc because the shape or design was cool but my end result was wasted time and another hunk of plastic went into the recycle bin.
The other challenge you have is to force the scale to perspective. Not just within the individual piece but also with the rest of your collection.
No disrespect intended at all. Your skill is readily displayed in your other projects, I'm just thinking you're going to have problems with your choice of materials.
9910
Post by: CommissarKhaine
Rhino is looking good,and so are the kid's toys. Nice find!
3309
Post by: Flinty
Thanks guys. Regarding the kids toys, yeah the scale will be off a bit, so it's a bit of an experiment just now. I'll try and bang some paint on the test pieces next week and see if they are worth keeping. The plastic they are made from is pretty hard and they are all scratched to hell from use so hopefully they will take the spray undercoat ok.
22442
Post by: nettraper
It's one thing to have a desk area filled with parts and various bits , its another coming up with creative ways to combine them into meaningful terrain.
Nice job man, I am super jealous of the first stack, it would be a pleasure to roll some dice on it !
3309
Post by: Flinty
Thanks Nettraper. Too kind.
Some more randomness for conversion. So as mentioned above I was at a wedding this weekend. Good fun. Instead of confetti the happy couple distributed bubble mixture in the following extremely usefully shaped container.
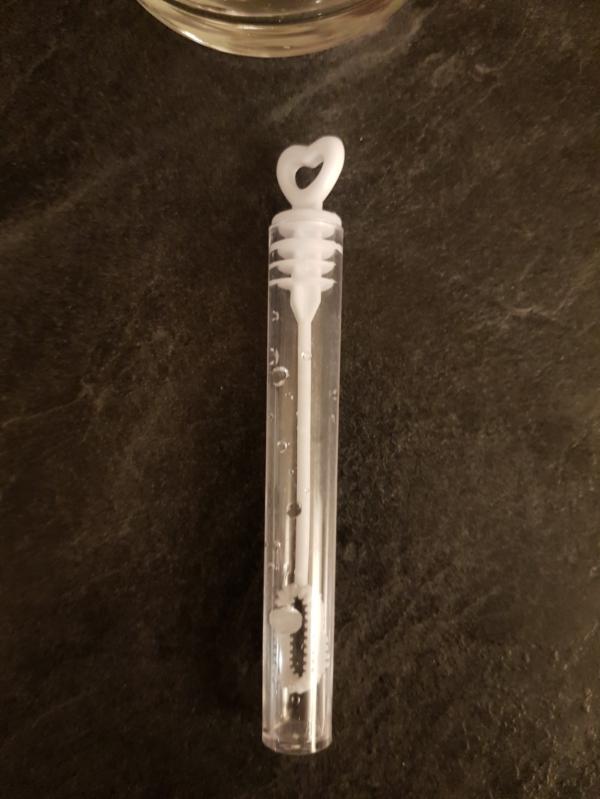
So I may have incited my son to "liberate" a few more discarded examples
And so tonight I whomped up the following scatter terrain with a few of them. They are not quite perfectly cylindrical, but i dont think the error is too noticeable. The package is a little too big to fit on my Powerlifter, but as I will never actually do that anyway again I should be able to hide the slight discrepancy.

Not quite sure what I'll use the bubble wands for yet. The plastic is a bit flexible for most uses. However the stopper bit is an interesting shape and could be pressed into service as electrical gubbinz or possibly a heatsink type thing. Time will tell.
26139
Post by: Skalk Bloodaxe
That was the best laugh I've had this weekend. No doubt the little man was on a mission for daddy. My son can relate many similar stories.
3309
Post by: Flinty
He got very excited, yes
In other news, the ladies were reporting that they were feeling the cold a bit. So rather than making them put on a jumper, it was way easier to make them a couple of industrial space heaters. Now they just need to worry about obtaining propane and/or propane accessories.
Nice quick builds that will hopefully add character and do a bit of sight line blocking.


2771
Post by: Infantryman
That's actually pretty clever scatter terrain!
26139
Post by: Skalk Bloodaxe
Excellent built on the space heaters. You may want to consider plugging the center a half inch or so deep with a round gribbly bit like a tank wheel etc. It'll simulate the heating element. Unless of course you're going over the top and scratch building something for it, or have already figured out that it will look awesome "as is" on the table and not facing the scrutiny of a macro lens photograph.
3309
Post by: Flinty
Thanks guys. I've basically been thinking about what other practical devices are used in industrial settings and seeing what similar things I can cobble together with the stuff I've got.
@Skalk - I was wondering about sticking something in the end based on the examples I found online. The thing is supposed to be a liquid or gas fuelled jet heater so i may stick a burner wand type thing in there but otherwise will keep it clear. My aim is to get stuff that looks pretty close rather than perfect replicas though, so I may not bother
29836
Post by: Elbows
Clever idea. I once melted a bumper off of my patrol truck with one of those by accident.
I can't wait to see this table done and painted.
3309
Post by: Flinty
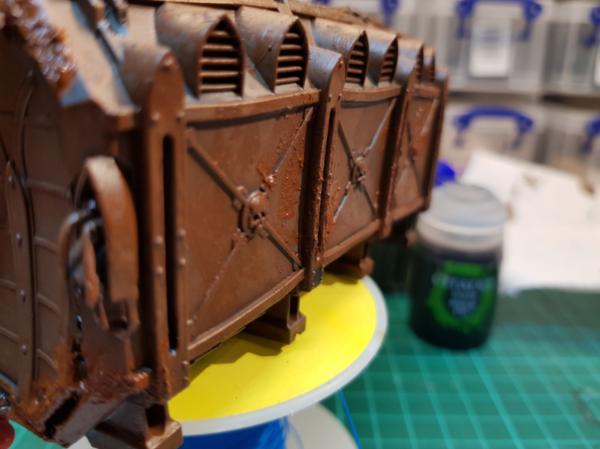
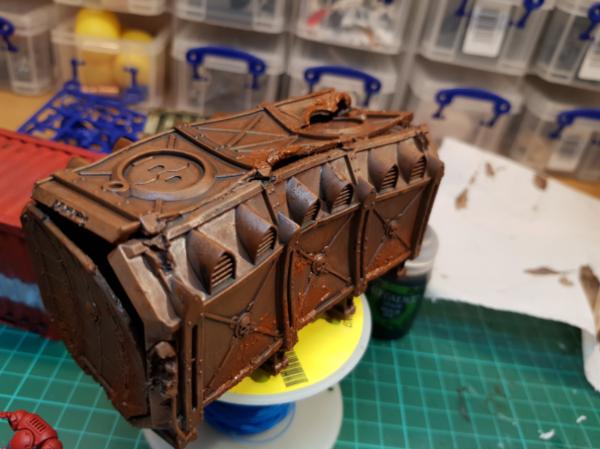
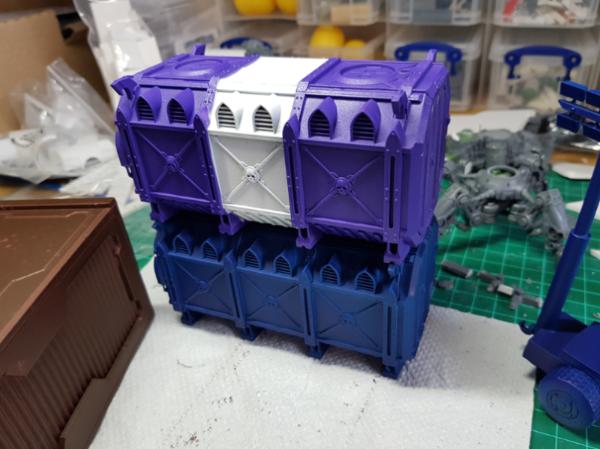
Wow... so half way through February already... What the flippety flip happened to the time!?
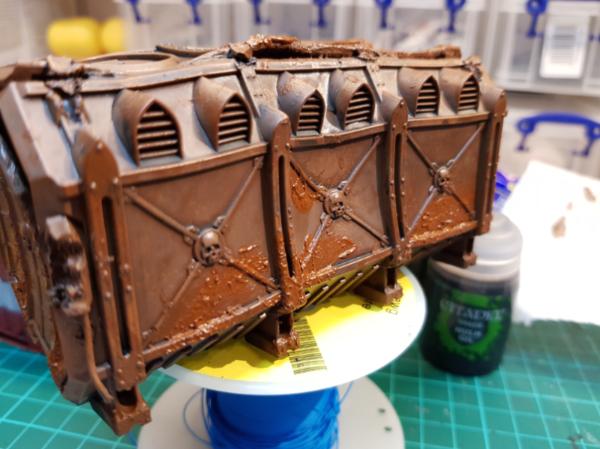
Anyway. Through combination of birthday and awesome parents I got 2 sets of Munitorum Containers. Built one normally then my brain went a bit squiffy again.
What do the ladies need? They have heat, a wacky hi tech factory thingy and some vehicles to help them move stuff about. Probably quite a few ladies involved on the site. Seems like sweaty work, and possibly dangerous with all those chemicals being thrown about.
I'm sure the ladies would like to refresh themselves occasionally. So I built them a toilet and shower block from a converted container... of course I did...


A sneaky wee emergency shower on there as well. I will be practising my ISO standard symbols shortly
Comments and critique welcome as always.
9910
Post by: CommissarKhaine
That's pretty inspiree; I love how you're bringing your table to life with all the real-life needs of your gang, that's a brilliant source of inspiration
59054
Post by: Nevelon
You should hang a towel on one of the rungs of the ladder.
Very nice looking work!
3309
Post by: Flinty
Thanks guys.
Nevelon- great idea! Now to look up model fabric tutorials
2771
Post by: Infantryman
I'm with Khaine; those concessions to life may not matter much in battle, but when it's time to talk terrain and appreciate it, it just goes that much further in my mind.
3309
Post by: Flinty
Indeed. Given that I currently have zero opportunity to actually play the games, I'm limping along.building terrain that is interesting.
I've been doing a bit of research online and have a few more container ideas to play with.
I have to.say that while the Munitorum Containers are lovely models and super easy to.put together, they are pretty much the least efficient way to pack cargo that I've seen for ages
Automatically Appended Next Post:
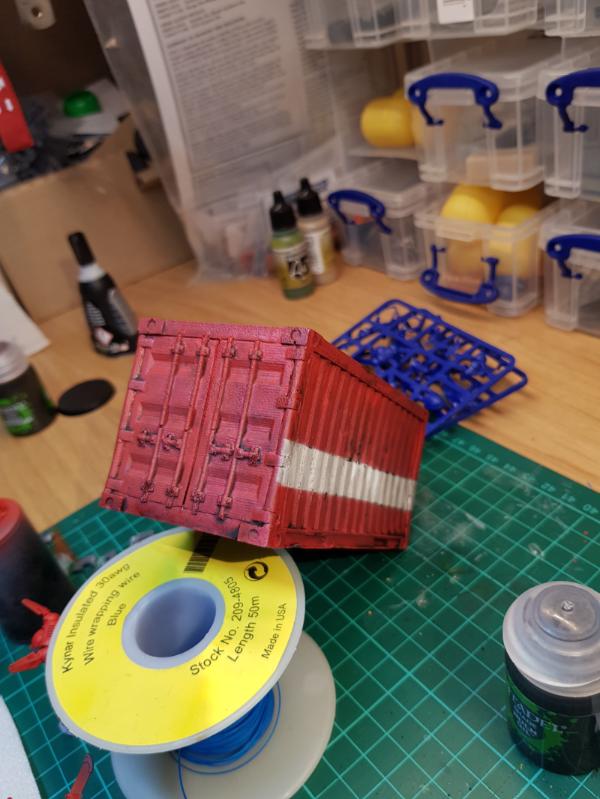
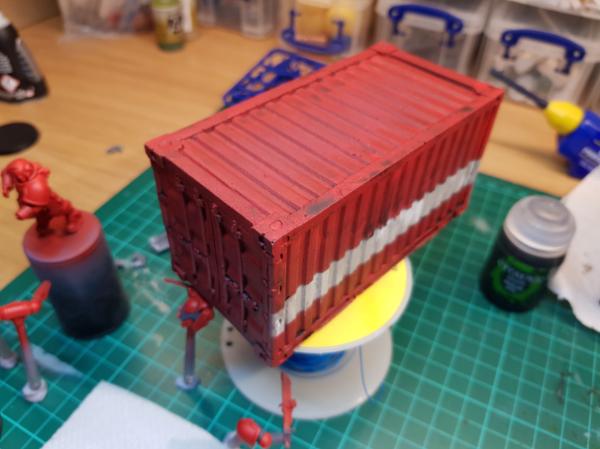
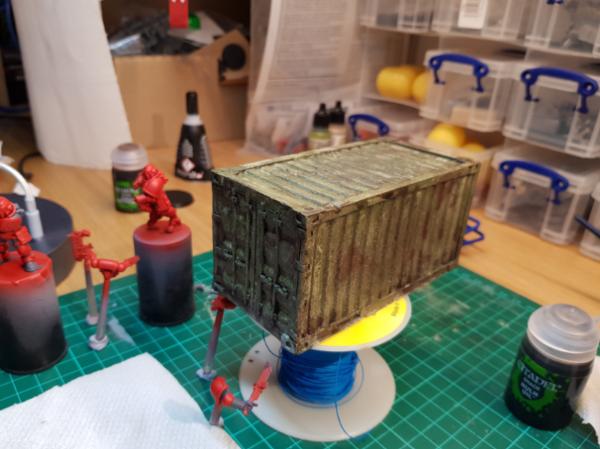
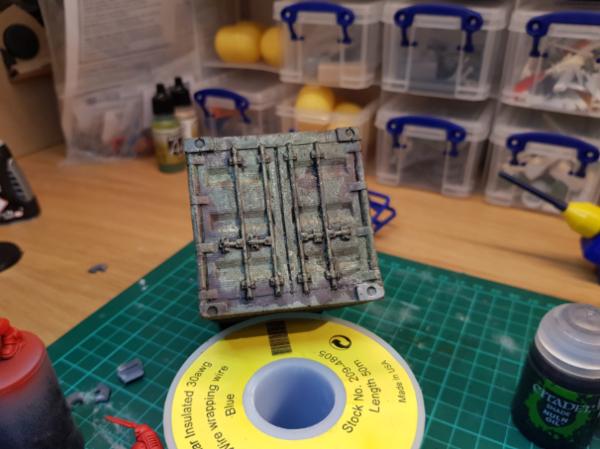
And here is container conversion no.2. Reasonably vanilla watch tower. I've been meaning to do one for ages and I'm now glad I held off so I could use the Munitorum container as a basis. Pretty sturdy, so the edging and support beams are more for show than actual utility. The overhang makes it a touch front heavy, hence the extra buttressed down the bottom. It was fine when just standing there but if it gets knocked it could fall I think SO I added a bit more stability.


111574
Post by: craggy
The shower and toilet block is great! Love the concept and the execution.
26139
Post by: Skalk Bloodaxe
Having a "home base" is an excellent idea. I made a home base for my Redemptionist gang back in the day, still have the original model I built. The base actually gave me inspiration as to how my gang should be built, and when we played a rescue or raid mission and I was the defender I brought my "home base" scenery out.
19143
Post by: IceAngel
Wow, great stuff. Very inspiring work.
3309
Post by: Flinty
Thanks guys.
@Skalk- indeed. Makes it a bit more personal and interesting. It's like the very awesome thread on objectives. Every object tells a story
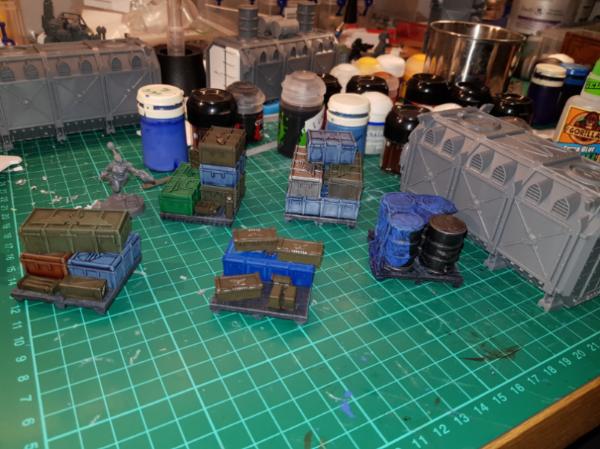
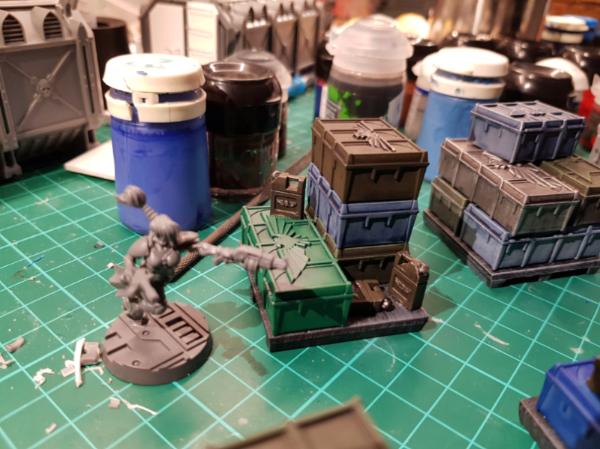
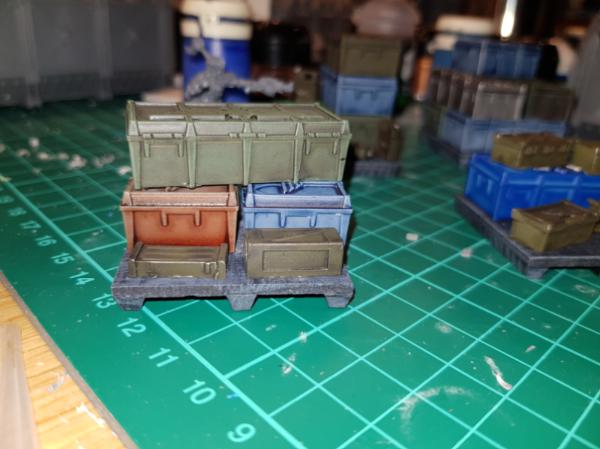
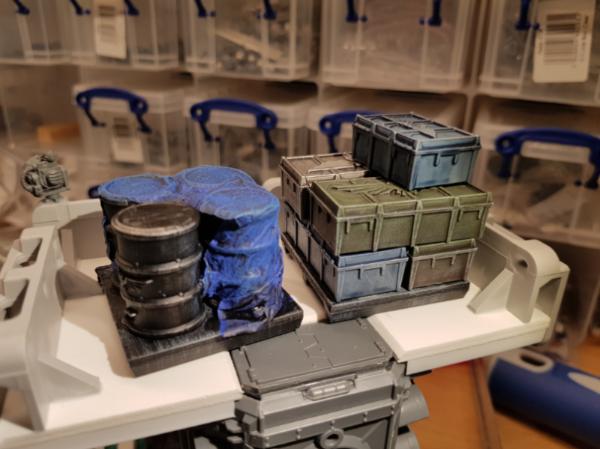
So work is crazier than it has been for a long time so hobby time is limited right now. It's taken me a week to get another normal container done, and tonight some simple pallets for all the random stuff that comes along with the containers. Planning on a couple of pallets each of barrels and crates.


Based on thisas a template
81837
Post by: Cleatus
Love this thread. Subscribed for updates.
3309
Post by: Flinty
Good grief... updates.
Work has still been frantic recently with 12 hour days the norm... blah. Oh well it provides funds to waste on bits of plastic and toys.
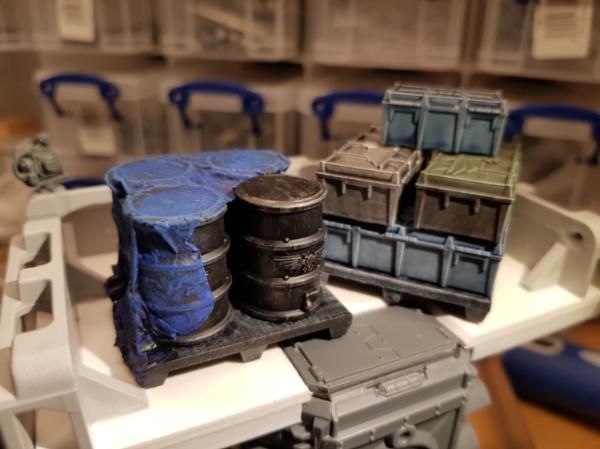
Having pretty much run out of things to build I've actually had to get out the fuzzy sticks! I haven't done any painting for about 2 years at this point, so easing myself back in with some simple terrain.
So it's gone from this
To this


Sure it's not going to win any prizes but I think it looks ok. Might hit the tubular supports with a dusting of orange for corrosion, but I might leave that to the next one that I have distressed with my dremel.
The barriers are from atenocitis workshop. I was trying to work out how to do railings simply and cheaply, but in the end splashed out on these pre coloured mdf jobs. I think they should do fine for my standard of painting.
3309
Post by: Flinty
So being ill I've got a bit more time compared to current work status. Huzzah.
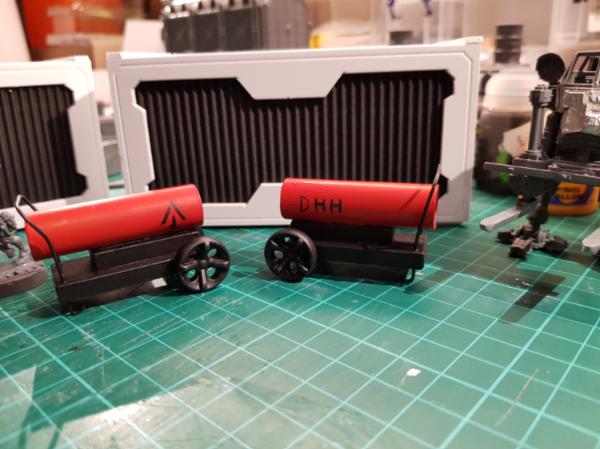
So I've finished my space heater scatter terrain. The Ladies obviously have good connections with Down Hive Hire. Or they've nicked them
Also put together a couple of the Plascraft containers my dad got me for my birthday. I think they look really good and are super cheap at about £4 each. A bit flimsy, but what do you expect for the price.


They are currently the turntable drying so hopefully be able to do a quick paint Job on them tomorrow.
3309
Post by: Flinty
My wonderful father has decided to lend me his full.airbrush kit.
As I have no idea what I'm doing I decided to start with something that is supposed look pretty wrecked. I am of course referring to dsteingass's fantastic rusted metal tutorial.
Remarkably easy to implement in a simple sense as I managed to.do it together with my 5 year old son. No real prescision required in the stages I've done so.far. let's see If I can pull the rust layering off as well.
Anyway. Basically, you paint the thing Brown. Add salt and then 2 decent layers that you bash the heck out of with a brush to get a marvellous scratched multi.layer effect. Check the link his stuff is amazing!
Anyway, my own poor interpretation below
Rusty and salted


Mid layer


Salt all.gone and top layer scratched about.

99
Post by: insaniak
Fantastic stuff, so far.
3309
Post by: Flinty
Thanks Insaniak. I guess the blogs page is the best place for this.
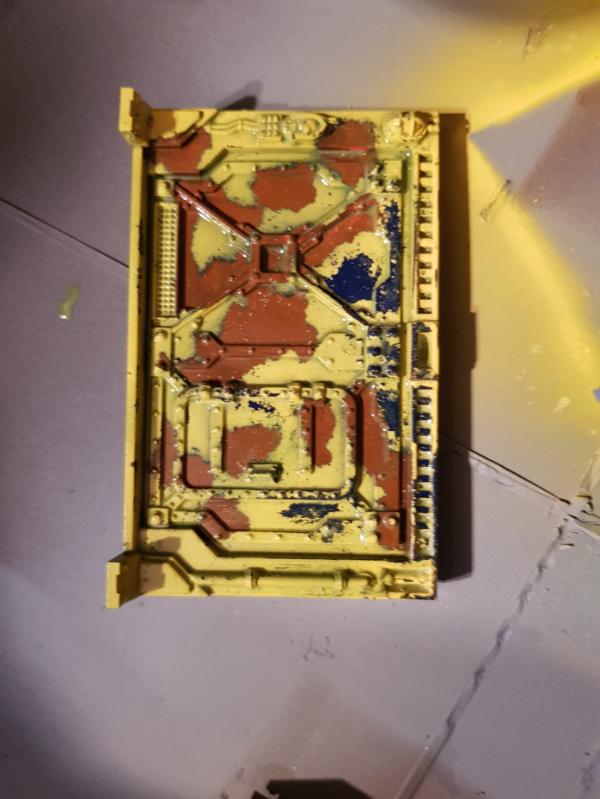
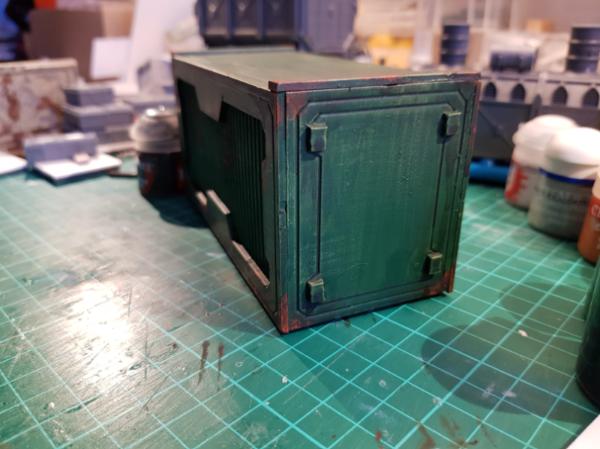
Anyhoo. Playing with painting techniques. Some sponge weathering on a container. Its the first time ive tried it so i hope it looks reasonable. The green went a bit darker than I had originally wanted, but some heavy drybrushing rust spongeing and a bit of a wash and I think it looks ok.
From this
To this


Is the sponging ok? Too much or too little? In the right places?
Answers on a postcard
99
Post by: insaniak
The weathering you have looks good, but is all quite big... I think you want some smaller patches as well.
3309
Post by: Flinty
Argh. Work still really limiting my free time just now.
@Insaniak. Thanks for the tip. I'll try to be more subtle on the next one.
In the bits and pieces of time I've had recently I've been able to play with the loaner airbrush and base coated a bunch of scatter terrain. I've also managed to finish off a couple of pieces of pallet based cargo.

The tarp covering the barrels comes from an awesomely simple tutorial from the insanely prolific Camkierhi. Many thanks!
With more bits in the wings waiting for stuff to be stuck to.

I've got a week's holiday coming up so hopefully I'll be able to power through some more. Maybe even get some yellow on Jekub
3309
Post by: Flinty
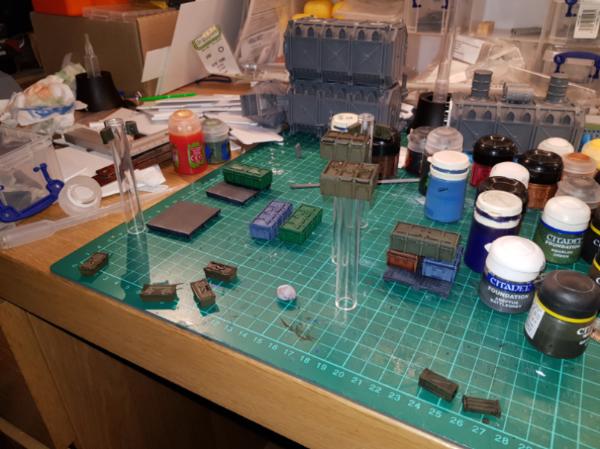
A bit more random progress. Filled the gaps in a few bits of scenery and undercoated a few more things.
So generator and floodlights are now filled and waiting for undercoating.

Containers and Jekub are now primed and waiting for airbrushing.

The second walkway I made out of Mobilo and off is now dripping with nuln oil in advance of a bit of detailing and railings.

And the secure stair/lift entrance thingy and the scrap pile are also undercoated.

Will hopefully get time over the next day or so to do some more airbrushing of base colours.
Also I got a new lamp. Let's see if it helps at all...
61618
Post by: Desubot
Nice pile o boxes
Personally if i was going to cover them like you did with a tarp. id cut out some cheap foam to save a buck and make like 20 extra
3309
Post by: Flinty
I thought of that after I'd covered them... however, the tissue actually clingsvover some of the details that come through the tarp when drybrushed. Possibly not realistic but a nice effect
3309
Post by: Flinty
Holidays... huzzah. Daytime childcare and therefore daytime modelling time. Even more huzzah.
So today I mostly stole someone else's idea again. I'm going to say it's Camkierhi again because i went through his thread on terrain basically with a notebook open and ready, but apologies if I am in fact stealing someone else's idea.
To texture my buildings and walkways I've added some plaster board filler tape. It's self adhesive and easy to cut. I will also be going over all of these surfaces with my dremel a bit later to roughen it up more but for now it's all pretty pristine.

69494
Post by: OneManNoodles
Very nice, now you've just got to get some details on them!
The ramps are a really interesting idea.
Good to see your thread finally got moved to the right place
9910
Post by: CommissarKhaine
That's a nice amount of terrain you got there, it'll make a lovely table! And don't sweat it, all the smart folks follow Cam; he makes amazing things and explains how he does it - what more could you want?
3309
Post by: Flinty
Thanks guys. A tiny Cam in a box that would magically creep out at night and finish all my unfinished stuff would be the best... but I'll just have to be satisfied with absorbing his expertise as best I can over the interweb.
So family has left and the mancave is my domain again! Huzzah!
So a little bit of progress tonight.
Washing the walkways. Some with nuln oil, others with agrax and some with a combination.

Base coating the steel beams there they exist under the walkways. Not sure if I'll complete them as a red lead oxide type finish or a dirty rust finish.

Heavy grey drybrush on the container to make it super scruffy. Next to do some scrapes down to metal and some light rust sponging (if I can control meself this time...).

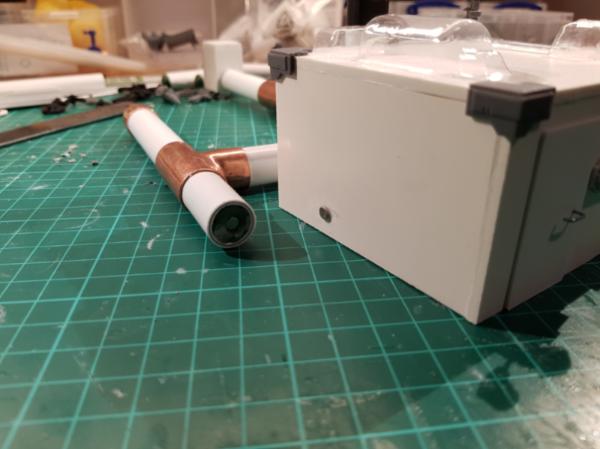
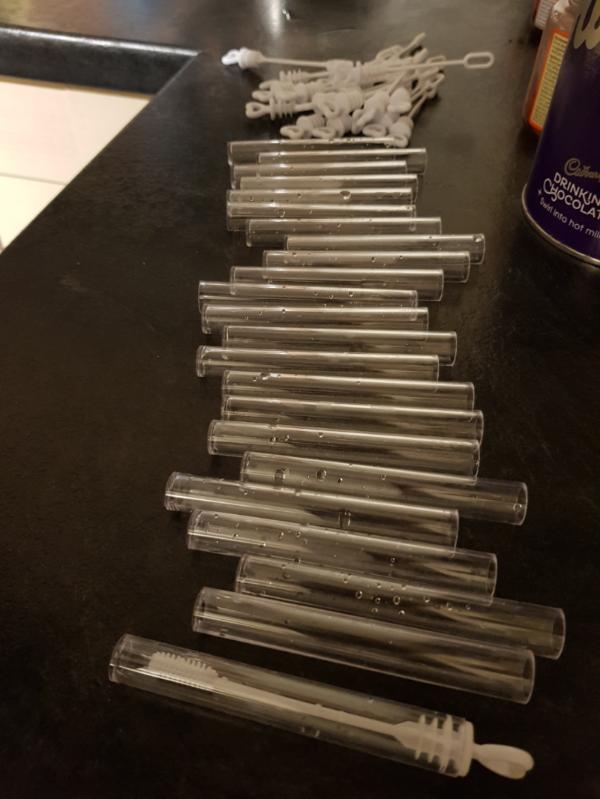
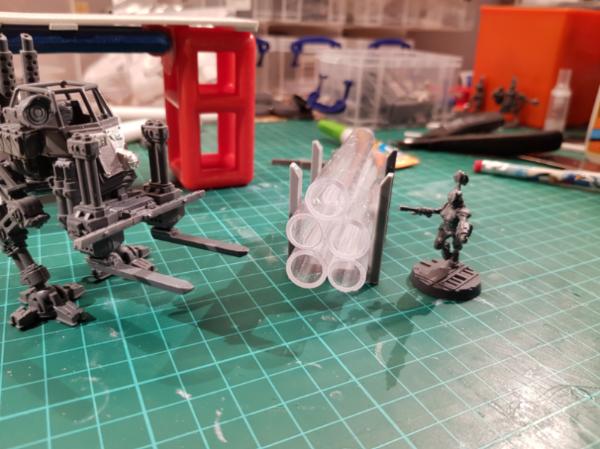
Smashed up one of my clear bubble solution tubes to put on this wrecked light/heat tube. Using this as scatter terrain and as the primary source of light and heat in my bit of the underhive. Think hard-core sci fi plasma tube. Planning on making a few undamaged ones with Lads if I can get my act together regarding soldering.

And used a bunch mor3 if the tubes to craft a paintbrush station. The old wrecked drybrush fodder ones I can dump in the middle, with 6 tubes for nicer brushes to be on standby.


Nowhere near finishing anything yet but quite happy with the progress tonight.
C&C welcome as always.
3309
Post by: Flinty
A bit more progress.
Finished my prototype walkway section
Done a bit more washing on the rest.
Grubbied up the container a bit more

And blocked out some colours on the spoil heap with a first Brown wash around the rusty metal bits. Need to follow this up with a nuln oil wash over the whole thing tonight.


So with my first walkway done I can now actually connect the 2 freestanding Mobilo based pantries I finished earlier. Yaaaay.

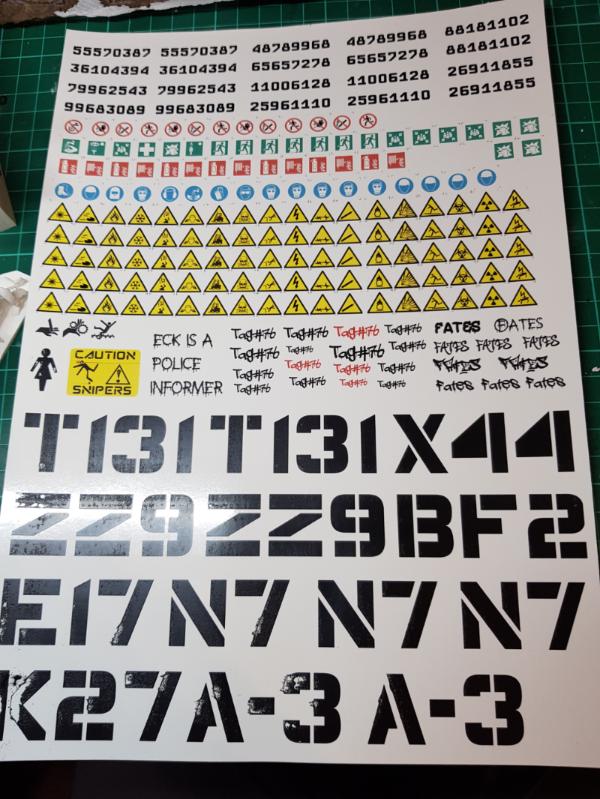
And today I've tried printing out my own transfers on waterslide paper. Let's see how well that goes. A bunch of random numbers for buildings and containers some graffiti and a lot of ISO standard signage to make sure that the ladies are aware of the hazards around them. The "warning: Laser beam" one is particularly ironic I feel
3309
Post by: Flinty
Small update today. Watched Doctor Strange, so just a little time available to add some random detailing to some pieces.
I think my favourite is the cladding

And some severed cables from my modular plant room thingy.

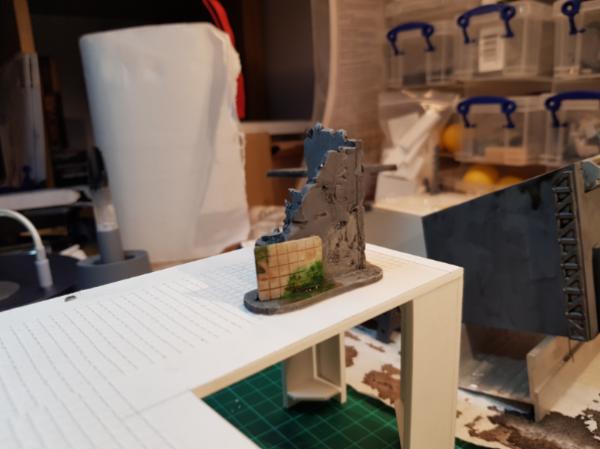
A little general underhive abuse for the ruined corner.

And the waterslide transfers i printed for interest. The big sector designation numbers got.a bit trashed during the print unfortunately. However I don't think this will necessarily be a bad thing as the building to which they will be attached are also likely to be pretty beat up. I can also probably just paint back over the slides if i want to neaten them up.
55408
Post by: Graphite
God DAMNIT. Now I HAVE to buy the Orlock book if it gives me half a chance of throwing lasbolts around this thing....
Seriously, that's coming together incredibly nicely. Very, very good.
1124
Post by: Captain Brown
Great terrain Flinty.
Cheers,
CB
3309
Post by: Flinty
Thanks guys.
@Graphite - Just let me know when
Some more random progress work for today.
Various things got airbrushed and drybrushed to complete their base coats.

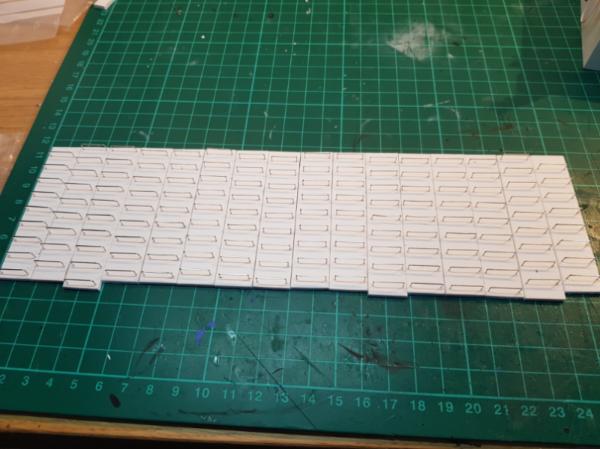
And I made a supply of ladders to add to the building stack. This should cover the buildings currently completed. I folded and bought sometimes 3mm foam pvc though so there might be a few more multi storey buildings to do.
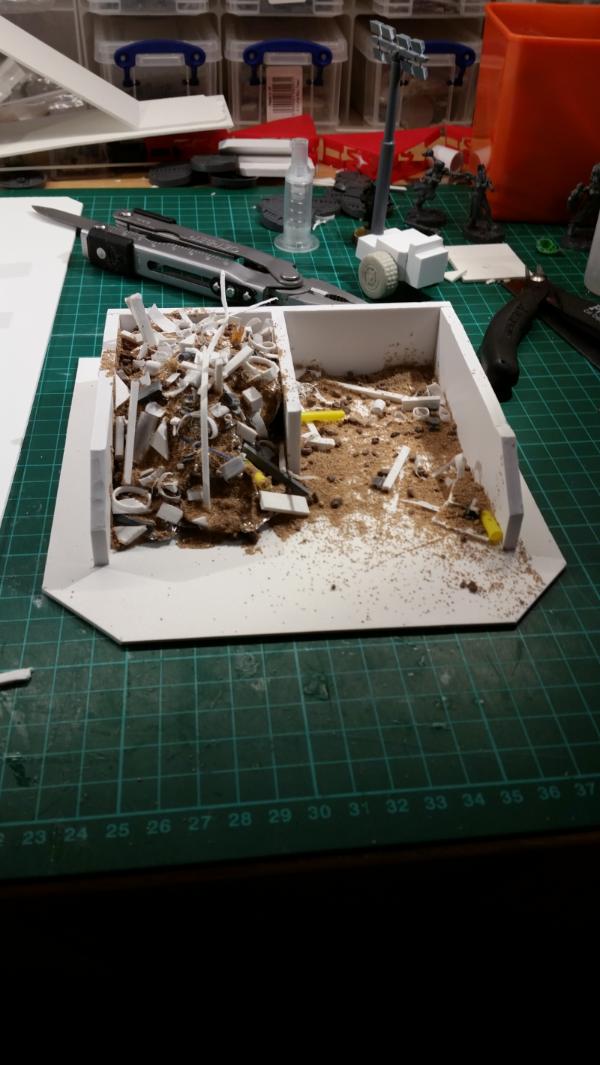
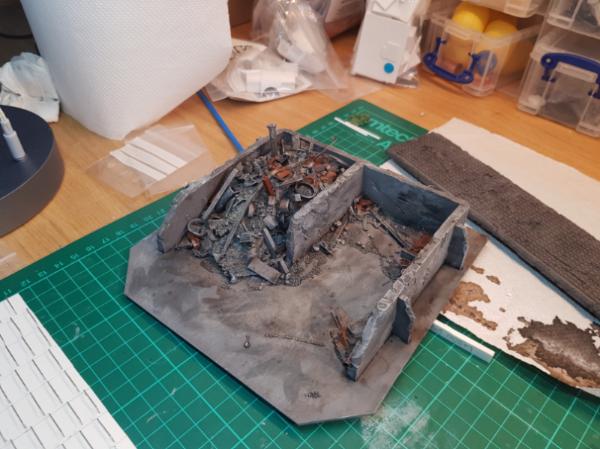
And a final couple of shots for my completed spoil heap. I might add a couple of graffiti transfers to it but otherwise it's done.

3309
Post by: Flinty
Some more fiddling tonight.
Tried out my graffiti decals and finished off the ruined corner


Pretty happy with the decals so will proceed to festoon the other bits of scenery with them. I've got another 4 sheets waiting for tags, signs and artwork
I also blocked in colours and washed the secure stair thingy and one of the hatches from the box. It was a bit dull though so I didn't bother photographing them particularly. Onward bit by bit. Automatically Appended Next Post: Also I have a plan to turn an Onager Dunecrawler into another civilian works vehicle. Let's see if I can work some eBay magic to get a kit cheap
9910
Post by: CommissarKhaine
Looking good? Curious to see what you'll do with the dunecrawler p
30344
Post by: monkeytroll
Interesting terrain, liking this stuff.
3309
Post by: Flinty
Heh. I have to get one first but it should be good fun if I can.
Anyway, before the fun of building new things comes the effort of painting the stuff I've already got. Damn airbrushes make scenery easy!
This is about 2/3rds of the box set barricades and bulkhead largely done now. Using the same salt weathering and scratchifying method used earlier but with slightly different colours.
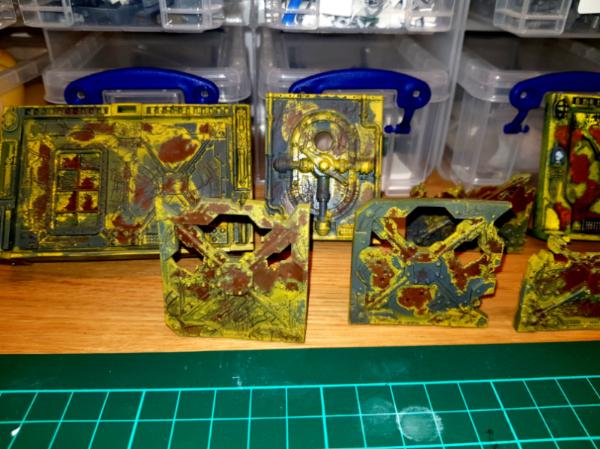


Still need to wash them and pick out the details but they are looking pretty worn and abused so far Then there are a couple more each of bulkhead and barricades to do the same in a different set of colours.
And one I did as full metallics for fun.
Also finished the secret stair entrance thing. Still don't know what is down there but be sure to wear the right PPE when you go Also watch out for Eck (The graffiti on the back is inspired by some real graffiti I remember seeing when I was a kid. I don't know who Eck was but it seemed he hacked someone off...)


So, next on the table is Jekub. I've done the yellow base coat so now to see what I can do with it hopefully without wrecking the yellow too badly!
9910
Post by: CommissarKhaine
Looking good. How much terrain have you got by now?
3309
Post by: Flinty
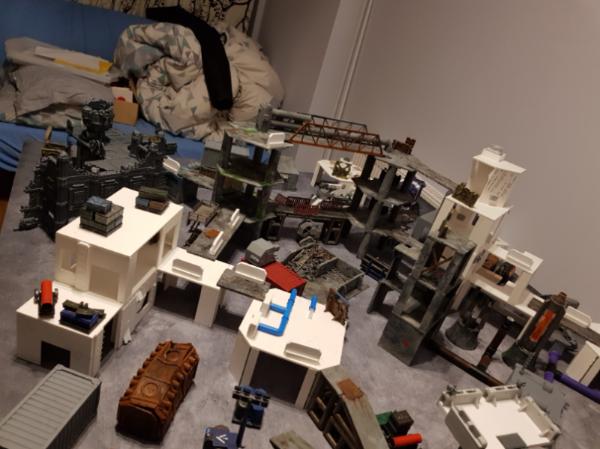
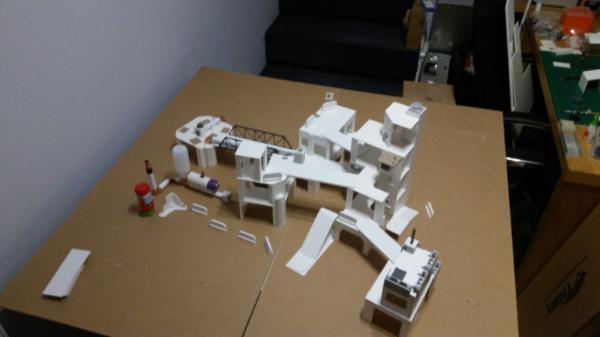
I need to do another group shot in the table.
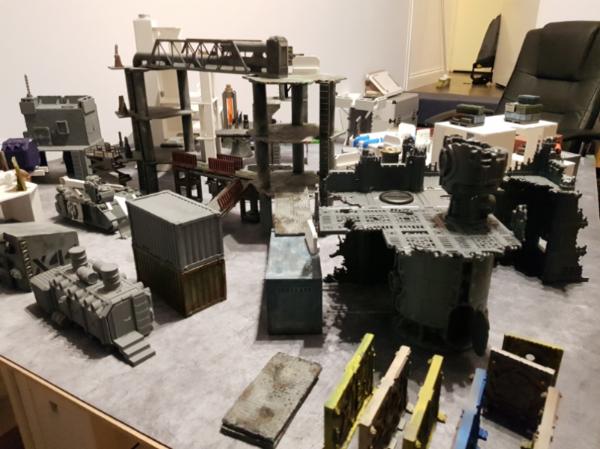
From the PVC I've got 1no. 4 storey.tower, 1no. 3 storey tower 2no. 2 storey buildings where the top storey is removable to play each as 2no. 1 storey buildings. 3no. 1 storey plant platforms, 2no. Stand alone LOS blockers that you can't really get on top of.
Then there are 2 Mobilo based walkway/ramps 3 normal containers, and containers converted into watchtower and shower block.
Also some random pipework bits and jersey barrier type barricades on top.of the stuff from the box set. And the genny, lighting unit and space heaters.
Vehicle wise there is jekub and the rhino.
I've got another 2 Plascraft containers and either 1 or 2 more Munitorum containers yet to build so I think I'm fine for scatter terrain. I've ordered a few more sheets of 3mm PVC to do a couple more 3 storey towers. I think.im fine for low level building at the moment and they are easy to bulk out with ruins and suchlike.made from offcuts but I feel I'm.lacking in the verticality stakes.
55408
Post by: Graphite
Did you airbrush the metallic paint in the end?
3309
Post by: Flinty
I haven't tried putting mettalics through the airbrush yet. The hatchway and Mobilo stuff that is all silver I did with a rattlecan of leadbelcher.
9910
Post by: CommissarKhaine
Definitley sounds like time for a group shot
3309
Post by: Flinty
Will do, but not tonight
An evening work do happened today so only about an hour of hobby time. My new PVC arrived so I did the only responsible thing and started building more stuff... painting can wait
First up though is a heavily washed Jekub. Doused the poor thing in Cassandora Yellow last night and left to dry. Rather a nice warm result I think. Next up will be picking out metallic bits of hydraulic cylinders and cables and pipes and stuff prior to weathering.

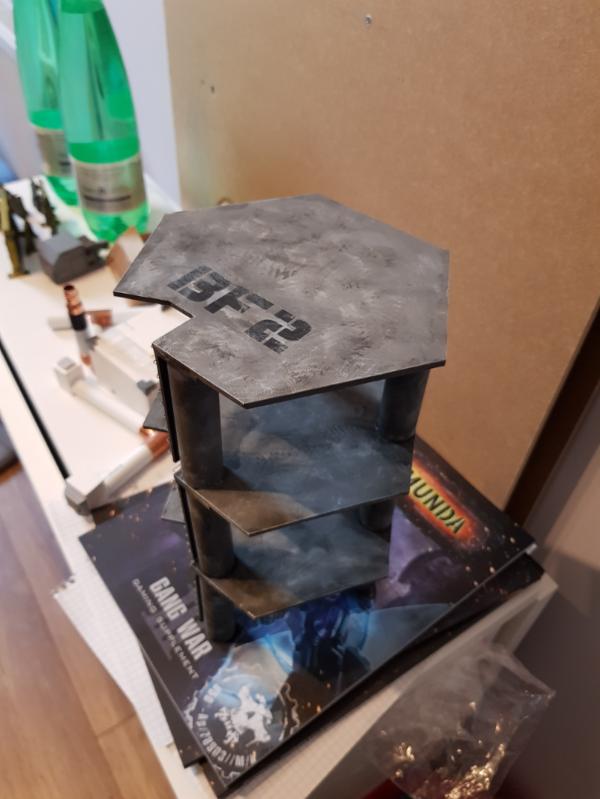
And so onto the new buildings. As noted above I need more verticals. So a set of simple repeated regular hexagons with tubular supports. The tubes come from some random plastic pipe I picked up for cheap at a closing down sale. Hooray for financial efficiency.

Pretty sure I've got enough bits for 2no. 3 storey towers to connect walkways to the other 2 taller buildings.
Also still got my the on an eBay Dunecrawler. Let's see how my luck holds. If it falls through I may well just go with the Starting Skitarii set for a lifetime supply of bionics for my gangs
3309
Post by: Flinty
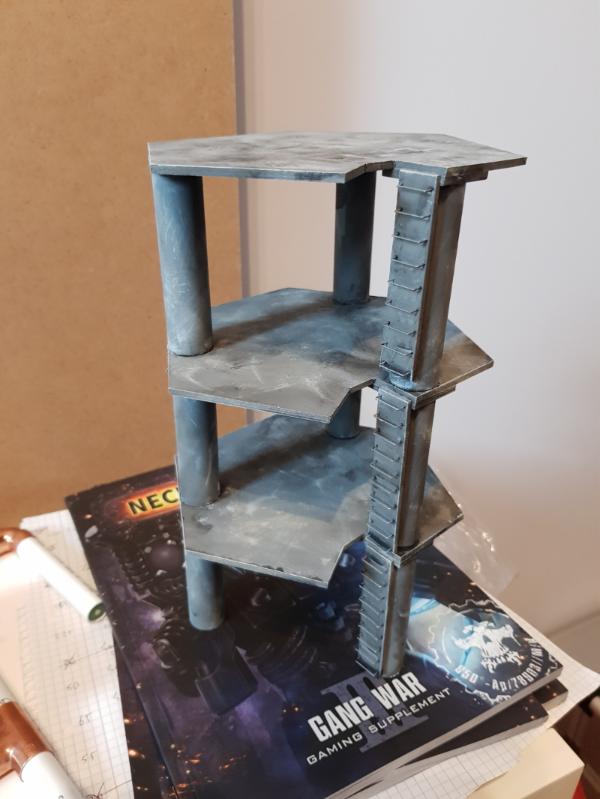
Tower 1 build complete. This one is a Very simple platform tower intended to be 1 of 2. It's really just a nexus for walkways so no dressing needed other than ladders.
Start on the next one tomorrow probably. Cutting the column tube was the hardest bit just to get a decent flat end. Some trimming was required but I think it all looks pretty straight. Thankfully the PVC platforms have a bit of flex in them to allow the columns to be straightened with a bit of residual stress left in the structure. It shouldn't tear itself apart... hopefully...
Pictured here with my earlier 3 storey tower. The heights are not quite exactly the same but there should be no danger of models slipping off the walkways due to unpleasant gradients.


30344
Post by: monkeytroll
Nice Simple, effective towers with multiple uses within a terrain set.
Also, Jekub looks good in yellow
3309
Post by: Flinty
Thanks Monkeytroll. I was trying to tell some kind of story with The rest of my buildings so it's quite nice to have some simple neutral pieces. Regarding Jekub, the washed yellow does have a lovely CAT/JCB feel I think. Hopefully I won't cock it up during the weathering stage...
30344
Post by: monkeytroll
Still trying to remember how this painting malarkey works after my long absence, but yellow was always my favourite for weathering, seems to take a variety of techniques very easily.
1124
Post by: Captain Brown
More great stuff.
Cheers,
CB
3309
Post by: Flinty
I've just nicked one of my son's sponge brush things thatvjs giving reasonably good results so hopefully I can just do a simple set of sponge weathering. Time will tell
So I got out the whole set for a bit of a lookee.
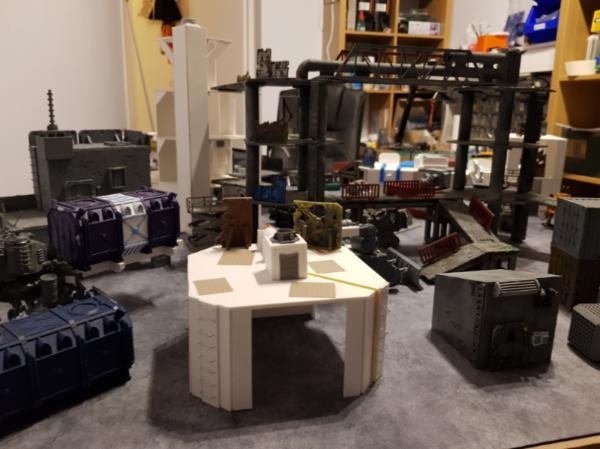
Last time I did that I had this much.
Now i'm up to this much
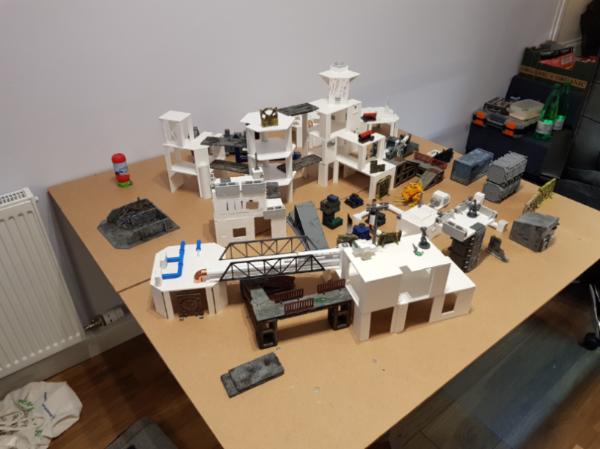

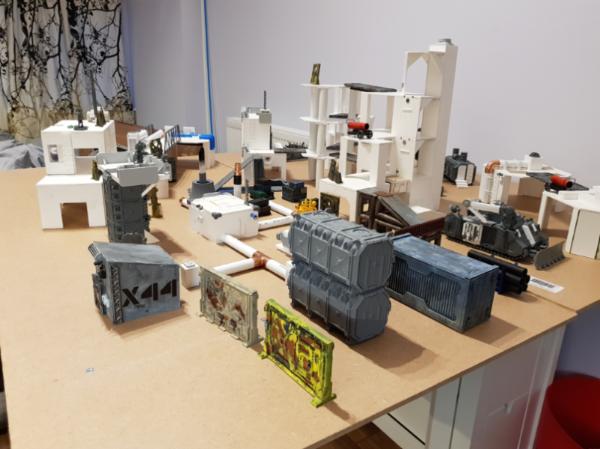
Definately a decent load now Maybe not enough for multiple loadouts but definitely enough to position in lots of fun layouts.
Left to build is one more hex tower for height and a few more containers for scatter. Then the painting must begin in earnest as I've just pre ordered 2 boxes of Van Saar
3309
Post by: Flinty
So I lost the eBay auction for the dunecrawler. Oops, see what I seem to have ordered

Lots of lovely walky tank loveliness...

Just put the legs and cockpit bit together for now as I need to do a hell of a lot of dry fitting for a while. The tolerance on the parts is amazingly tight. really nice kit to put together.
The reason I got it is because it will complete my triumvirate of industrial vehicles. First was the embiggened rhino transporter

Then came Jekub
And now that I've done a bunch of containers as scatter terrain I realised the I needed some kind of container transporter... So here comes an Onager based walker transport specifically for.lugging containers around!


I'm intending to try and make a cargo deck capable of taking both the Munitorum Containers and my Plascraft ones, but we shall.see how well I can make a modular cargo rack.

I did toy with putting the legs more centrally under the defiler chassis I'm using to extend the cockpit support, but I think it makes it too back heavy when the containers are in place.

Still plenty to do to trim.down the defiler chassis appropriately and to build up the cargo rack at the back. Likely to use thick strips of pvc or sprue offcuts to build.the rack, but I'm not quite.ready to do.detailed planning of that yet. Quite pleased with how it's going considering the onager is actually quite a bit smaller than I thought it would be...
30672
Post by: Theophony
That’s a massive table of Necromunda goodness.
Can’t wait to see how the skitari walker turns out.
30344
Post by: monkeytroll
Definitely intrigued to see how the cargo walker grows. Right choice with the off-centre legs, other version looks clunkier.
And now I want some of those legs.....
3309
Post by: Flinty
Thanks guys. The Onager kit is super lovely. I think you could do all sorts of things with the legs certainly.
Made some progress tonight in building the cargo cradle but there is a lot of GS drying just now to hold magnets in place so I can't do any pictures that would be meaningful. Hopefully be in a position tomorrow to share more. Then I need to sort another crane boom
3309
Post by: Flinty
Ah-ha. Glue and GS dry enough for some interim pics.
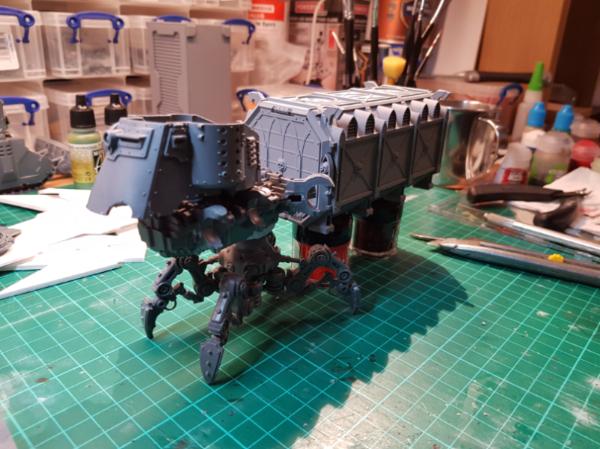
Shown with a Escher ganger and Jekub for scale. It turned out to be quite large in the end


And it fits both of my container types
Shot of the cradle

The cab and chassis are both magnetized to allow disassembly for storage and transport, if I ever need to.

And here is how it all stays stable... turns out I still have the remains of a space pipe that I turned info an ork bike for a friend. Folded it up, glued it in as a counterweight

Still loads of dressing and details to go but the hard bit seems to work. I was also thinking of doing a flatbed module for the cradle as well so it can transport my pallets as well... this way madness may lie however...
C&C welcome.
30344
Post by: monkeytroll
Flatbed sounds good, also a curtain-sided container, and maybe a meshed in bed
Did you consider a support "wheel" at the back (I use wheel to signify a single wheel, a ball-type affair, a pair of wheels, legs etc) - not sure that it needs ond, just curious as to how it looks with something there.
30672
Post by: Theophony
That is a beautiful Necromundan Tarantula. Very insect like, especially the first one. Could be a cool caravan piece headed between spires.
3309
Post by: Flinty
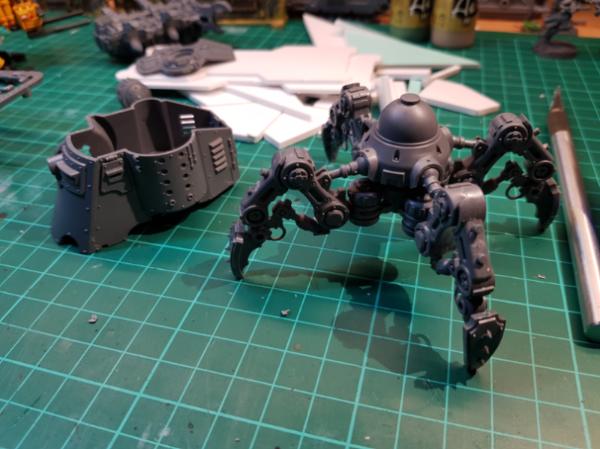
Small update with a bit more of the Onager details fitted.

It is a lovely kit. Still debating whether to fit the extended foot pads or not. The engineer in me says they should go on. The Invader Zim fan in me wants the spike feet to show
42662
Post by: master of asgard
You could say that it has an anti-grav module that supports all the weight, and the legs just move it along. Then it makes more sense to keep the spikes!
30672
Post by: Theophony
I say stay with the spiked feet. Maybe you can use the slippers under the cargo container somehow for when it unloads.
30344
Post by: monkeytroll
Spikes > Engineering
3309
Post by: Flinty
Heh. Dakka has spoken. I'll stick.with the spikes
It means I can keep.the feet for some other project as well, which is a bonus. Definately feeling that suspensor tech is built in there somewhere.
Out of.town with work just now but will hopefully.get some more hobby time over the weekend.
26139
Post by: Skalk Bloodaxe
Wow.
For what my opinion is worth, start painting. You're already chest deep in awesome, but I've noticed this a LOT on Dakka- buildbuildbuildbulid... and then hate the project because it's overwhelming to paint.
Not taking anything away from the awesome builds you have, the creativity is excellent and I find it inspiring to do some vehicles of my own.
3309
Post by: Flinty
Thanks Skalk. This blog has been on a bit of a slow down because my Van Saar boxes turned up and I've been giving them a bit of love. But I do feel the airbrush calling me.for the scenery again. Work is ramping up.a bit though so it might need to wait until the weekend.
1787
Post by: howie
Firstly, good morning.
Some lovely looking ideas which i plan on borrowing to transform some of my own scenery. A big fan of your industrial vehicles conversions, the dune crawler has Adeptus mechanicus shenanigans written all over it.
Just a quick one, the plaster board filler tape when you put it down is it still sticky? Sorry I'm not familiar with the product and just thought I'd get clarification before I went out and bought a boat load.
Flinty wrote:Holidays... huzzah. Daytime childcare and therefore daytime modelling time. Even more huzzah.
So today I mostly stole someone else's idea again. I'm going to say it's Camkierhi again because i went through his thread on terrain basically with a notebook open and ready, but apologies if I am in fact stealing someone else's idea.
To texture my buildings and walkways I've added some plaster board filler tape. It's self adhesive and easy to cut. I will also be going over all of these surfaces with my dremel a bit later to roughen it up more but for now it's all pretty pristine.
Keeep up the good work! Looking forward to seeing some paint on the walker and the finished sentinel.
3309
Post by: Flinty
Hi Howie, the is for the interest. Please steal away and repost you verions so I can reciprocate
Regarding the plaster board mesh, it's tacky on one side so it will stick in place unless you are trying to pull it off. It's definately not super sticky. However as soon as you get a few layers of paint on it any residual stickiness that is exposed will be neutralized and the primer should also work to hold it in place.
A massive roll is about £5 so I wouldn'tbe afraid to experiment
1787
Post by: howie
Ah awesome! I'll try and get some for sure, I'll be using it for corridors in a zone mortalis esque board. It looks perfect for that sort of flooring.
When I get all the pieces I require I'll be making my own thread.
Keep up the great work!
9910
Post by: CommissarKhaine
Nice table you got there! Onager is looking ace as well, those things are going to look great once painted.
43709
Post by: boundless08
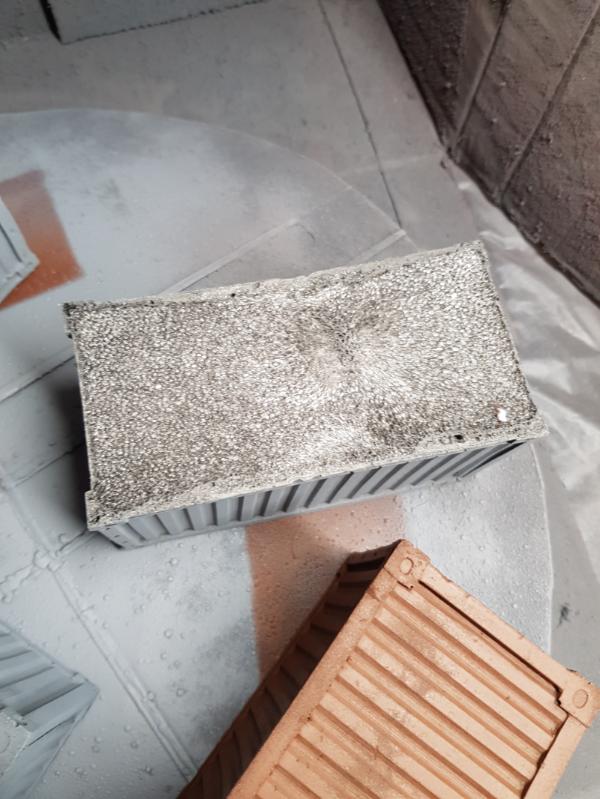
That looks great man, I'll have to try that myself. Very natural looking concrete
3309
Post by: Flinty
Thanks Boundless. It's a nice grubby effect so far.
What I didn't post last night was the masking I had done on the purple container. It seems to have worked ok. I lost a little but of the white coat but nothing that can't be touched up. And it's not like containers in the underhive are going to be pristine...

Hopefully get time to grubby up the containers tonight.
13518
Post by: Scott-S6
You should cut some strips of perspex and put a 9 0 degree bend in them.
Then, when a model only makes it part way up the ladder you can slot it into the rungs and place the mini in the correct spot.
26139
Post by: Skalk Bloodaxe
 Scott-S6 wrote: Scott-S6 wrote:You should cut some strips of perspex and put a 9 0 degree bend in them.
Then, when a model only makes it part way up the ladder you can slot it into the rungs and place the mini in the correct spot.
That is an excellent idea, thanks for sharing it.
13518
Post by: Scott-S6
 Skalk Bloodaxe wrote: Skalk Bloodaxe wrote: Scott-S6 wrote:You should cut some strips of perspex and put a 9 0 degree bend in them.
Then, when a model only makes it part way up the ladder you can slot it into the rungs and place the mini in the correct spot.
That is an excellent idea, thanks for sharing it.
No worries. If you're going to the trouble to make actual rungs then might as well use them for something!
For bending, cover the perspex with a couple of pieces of wood except for the strip you want to bend. Heat with a heat gun and then bend over a piece of wood. Take care to get the bend line perpendicular or the platform you create will be wonky.
3309
Post by: Flinty
Thanks for the idea Scott. I'll Definately keep it in mind. I'm not.sure how strong the staple friction bond is, but I'm sure I could superglue them back in if they fall out. Work.is intruding again unfortunately but hopefully get a bit of time for.more container shenanigans this weekend.
24297
Post by: Viktor von Domm
lovely piece...the weathering looks really good...my only nitpick is the batteries...i think there needs to be some kind of different colour...to make them more convincing...also...maybe add to the upper part of the pistons some hazard stripes?
30344
Post by: monkeytroll
Very nice, the forks came out particularly well
3309
Post by: Flinty
Hmm... I've been neglecting this blog a bit. Distracted by life, work and the airbrushing of tanks...
So.i wasted some more money on some.super cheap toy vehicles with interesting payloads.

And turned them.into some more scatter terrain. I'll.probably stick the water tanks down to something else, either a couple of small.individual.bases or as dressing to.some of my existing larger buildings.
But I've not been totally neglecting things. Look undercoated and airbrush mottled scenery!

I just need to vigorously drybrush them a few other grey tones and maybe add another dirty wash to some specific parts. Oh and then transfers for numbering and graffiti.
81837
Post by: Cleatus
Interesting vehicle finds. Terrain is looking good.
30344
Post by: monkeytroll
Nice scissor lifts you have there ....could be interestingI
Nice decayed brutalist feel to the terrain now it's started to get greyed in....
106010
Post by: Meer_Cat
Hey Flinty!
I've now just finished going through your whole thread here, looking for ideas to steal, err- pay homage to, yeah, that's the ticket! Unbelievable imagination here- everything so well done and new things flying out a mile a minute! 
To do so much with basic foam board and bits, truly well done. The Skitarii crawler based cargo hauler- holy cow.
I've got a _lot_ to learn here- thank you!
30344
Post by: monkeytroll
New tankage is nice, as is the tower. What's that you used as buttresses on the tower?
51769
Post by: Snrub
Clever use of the toy tanker trucks, Flinty. They'll look nice and convincing when painted up.
3309
Post by: Flinty
Thanks Shrub. Heat in hoping that just a quick grungy paint job will look quite convincing on them.
Meer-cat - you are too kind Inhave the benefit that i work on building design every day at work, so no lack of inspiration. steal away but just post so I can steal right back atcha
@monkeytroll. Sorry, i may be misunderstanding but there are no buttresses on the tower i just posted. The rounded thing on the corner is a bit of cable containment that I had spare from running AV cables at home and it seemed to fit at 32mm scale as well.
If you meant the columns on the octagonal towers, they are commercial plastic water pipe from a local.diy store. 15 or 20mm diameter iirc.
30344
Post by: monkeytroll
Yeah, buttresses wasn't the right term to be fair, it was the cable conduit I was referring to, for some reason I thought it was on each support rather than just one, so my brain just reached for buttress when I asked.
69494
Post by: OneManNoodles
Sweet work Flinty, good you see you getting some paint on these.
3309
Post by: Flinty
Thanks OMN
@monkeytroll. I see what you mean it's an L shaped building and only really has one of those corners and it was a bit it blank so I found something big to fill the gap
WIP on my new tank feature. That's the base coats down. Now to sponge on a variety of other colours to make it look all.scratched and beat up.

30672
Post by: Theophony
Almost sad to see such lovely straight and crisp hazard stripes damaged by weathering  .
Nice work on the most recent towers .
3309
Post by: Flinty
Thanks Theophony. For the hazard stripes, I just use masking tape so they are super easy. I go black first then mask the black off to spray white. I then leave the masking tape.on and put a couple of coats of sunburnt yellow and a good helping of Cassandora yellow wash. A little tidying up is needed to catch leaks, but tidying up the black over the yellow is easy enough.
For the weathering I was thinking some heavy messing around the edges but leave the majority of the stripes intact. The other tank is supposed to be rusting heavily on the top but reasonablyintact lower down, so again heavy sponging at the interface but leave a fair chunk of the blue visible.lower down.
3309
Post by: Flinty
Cross posted from the hobby motivation thread.
Ah-ha. I've now gots me a Hidden and I can get back to not playing WoT endlessly!
So here is the final draft of the plasma generator heating system element thingy. The coloured tube isn't glued in yet because I'll do that after painting the bits, hence it's a bit wonky.
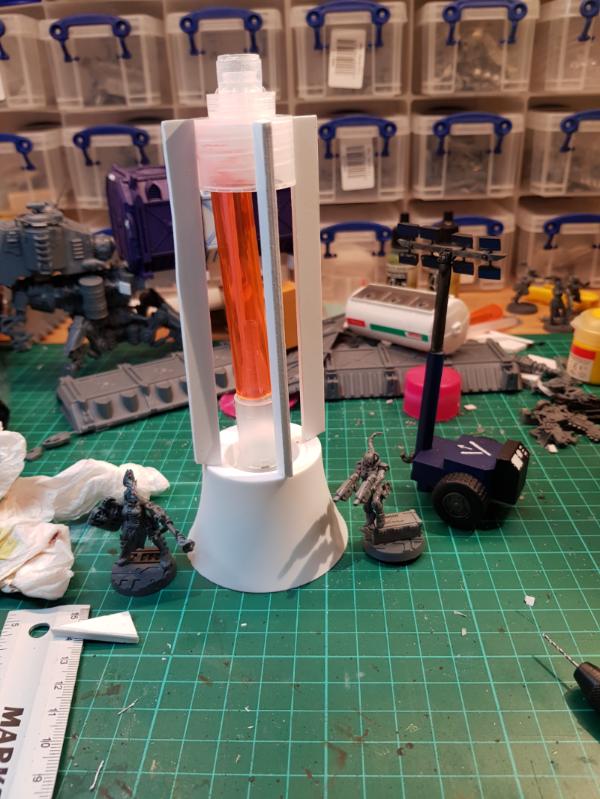
And here it is with one that had rather too many friendly fire incidents

And then the busted one with some busted support pillars now that I've decided on the final details.
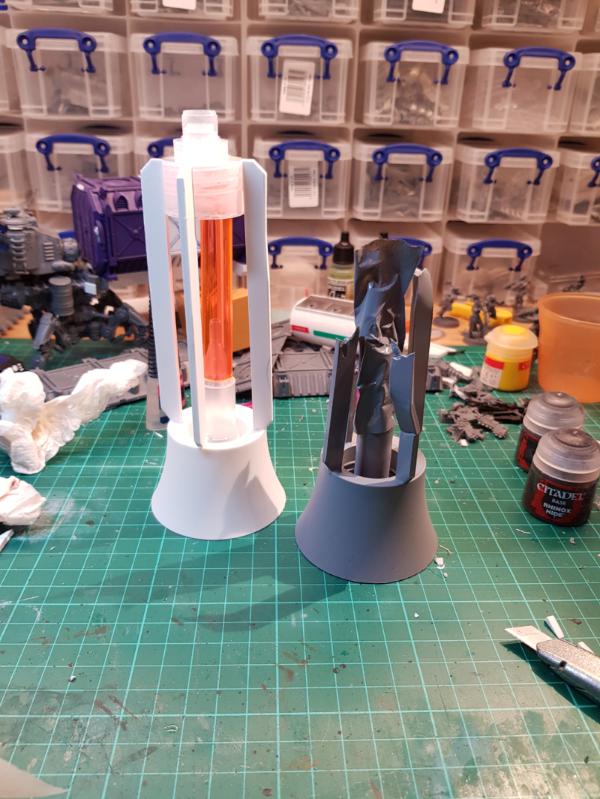
Pretty quick, colourful and finally a use for the awesomely (and awkwardly) shaped caps that come with the Matey bubble bath that my kids seem to drink given how fast we go through it...
For anyone that is interested, every component (ecmxcept for the pvc struts) comes from something that once contained a soapy solution. Matey cap, bits from a soap dispenser pump and the coloured but used to have bubble solution in it
51769
Post by: Snrub
Great bit of terrain, Flinty. Bottle caps, and bottles in general, are excellent for this sort of things since they come in a massive (and useful) range of shapes.
30344
Post by: monkeytroll
Nice job keeping it bubbling along
106010
Post by: Meer_Cat
I love the plasma generator heating system element thingies! Terrific terrain bits! Especially when they're made of salvaged/scavenged bits and pieces! I'm motivated to try something similar now.
3309
Post by: Flinty
Bah... The downside to free recycled materials... It appears the plasma whatsits aren't very stickable...
I used a bit of tape to mask some hazard stripes and manages to pull the paint and primer away :(

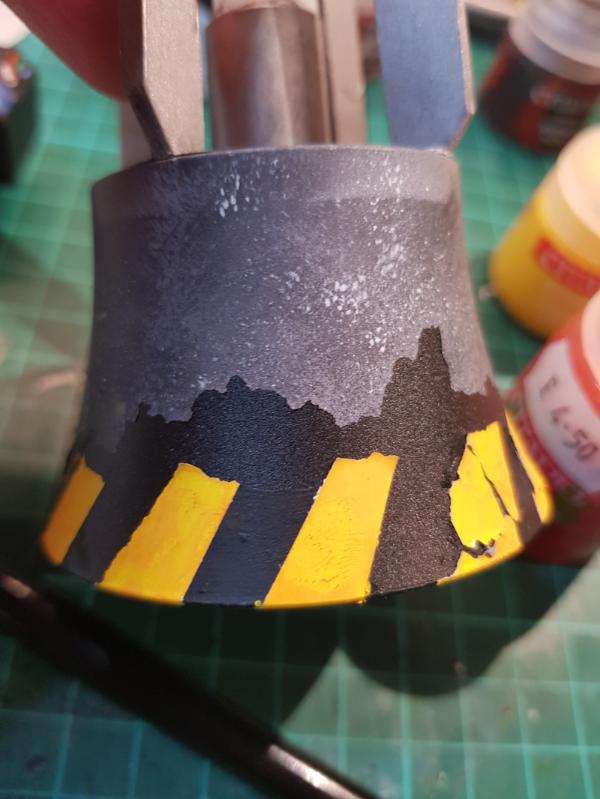
The superglue isn't very super either.
Oh well it seems to be ok as long as I don't actively pick at it. I'll just prime it up again and leave it alone.
121101
Post by: Evil-D185
Yes I have noticed that over the years that toy's and plastic bottles and lids are often very glossy and do not take the primer well if at all.
best is to always sand it before priming with fine sandpaper and clean it with cleaning alcohol
51769
Post by: Snrub
Eh even with the unfortunate handling damage, it still looks good. It looks right even. A little bit of chipping around the black areas and you'd never know it wasn't supposed to be that way.
3309
Post by: Flinty
The lid was already textured as well so I thought it would work. Oh well... no big deal.
I did think about just working around the damage but in my head it's a concrete plinth with gubbinz bolted to it so any bits being jet black just didn't seem right. Its fine, I just need to do a few layers of grey sponging to get back to where I was. Not too bad.
106010
Post by: Meer_Cat
For things made of soft or slippery plastic I use Rustoleum as the primer, and then put a basecoat of real primer on top of that, so everything sticks. I like the damage hazard stripes too- there's a technique in model railroading to put down the base color, then lay down some rubber cement then paint the top color, then pull the stretchy rubber cement away to leave tears like that- you've got it without trying!
It all look sgrea tto me 
3309
Post by: Flinty
Cross posted from the progress club thread...
For myself I have managed to escape the call of the tanks tonight and actually finished my plasma thingies off. The tape wrap around the plinth didn't quite work as well as i'd hoped, but I think it's good.enough to.stop.fiddling with. On the other hand, the glow effect that you get when looking down on it I find quite pleasing

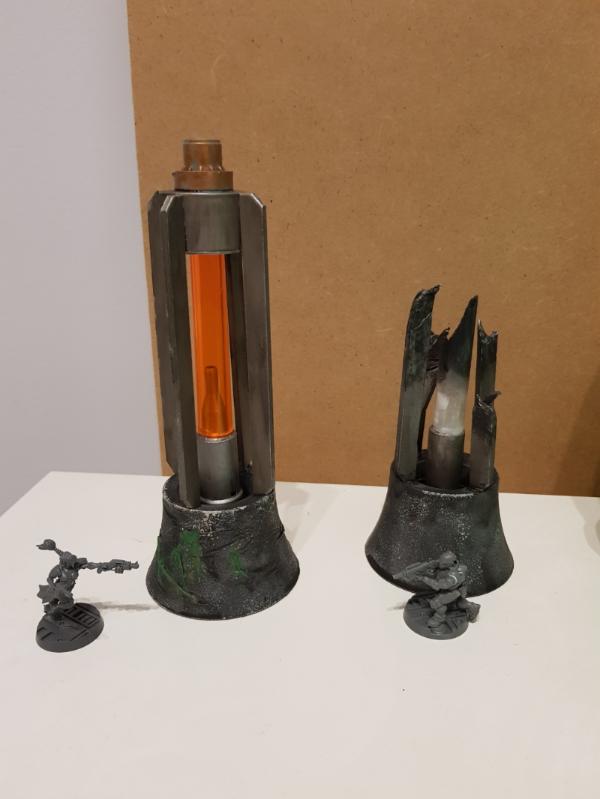 And
And 

I also cracked out the airbrush tonight to paint some model.railway wagons for my dad. Getting better at mixing thinner with the various paint types I've got. The Tamiya ones appear to.need loads of thinner to.get them to.come.out of the brush at all...
Unfortunately, my experience.with the Instar blue I used on a test Primaris basically turned it into a wash... more practice needed still...
106010
Post by: Meer_Cat
Me likey- nice plasma thingies!
And I absolutely love watching you guys take random bit of what would otherwise be 'junk' and fashion something incredibly clever from it- well done! 
9910
Post by: CommissarKhaine
So stealing that plasma core idea. Well done, good sir!
3309
Post by: Flinty
Go ahead, and good luck.
I totally forgot to add some little imperial eagle thingies from the Munitorum container kit! Oh well, too late for this one, but I've got a blue bubble.solution tube lying in wait for the next set of cast off bottle tops,.so I'll probably do one more.
112691
Post by: Supershandy
Hi Flinty
It does take some experimenting to find the right level of consistency for using INSTAR in an airbrush, it doesn’t need a lot of thinner and a little goes a long way so you’re better off using a dropper to thin the paint before firing it through the gun.
Will be great to see how you get on
3309
Post by: Flinty
So I was wondering what really really needed... and the answer was obviously, MORE CONTAINERS.
I got a good deal on some micro arts "hard foam" containers on eBay so here they are primed. The level of detail is really good and one of them survived being dropped quite far with minimal crushing damage. Some of The surfaces are a bit pitted but for containers in the underhive I think that reasonably realistic


And here is the underside with the foam pattern.
I've also been working on a knackered GW container for the funs.
From this

Via this

To this


And last night I finished off knackering the locking mechanisms and lights in interesting ways with my dremel


C&C welcome as always.
120033
Post by: Excommunicatus
+10 for brilliant modelling
+100 for using 'knackered'. Not enough people do.
9910
Post by: CommissarKhaine
Looking good. That's going to be one lovely underhive once it's all done
120033
Post by: Excommunicatus
I've read through this thread at least once before and have boggled at it at least once before.
I just did so again.
All I have to say at this point is that you're a [Expletive Deleted] lunatic, mate.
3309
Post by: Flinty
Thanks guys always inspiring to see that others are interested by my ever so slow tinkering. And one day I may even play a game on all of this stuff. I'm starting to get rammed by work again though so hobby goes on slow down again :(
Roll on retirement plan A (massive lottery win).
68152
Post by: JoeRugby
Great stuff flinty
20895
Post by: karimabuseer
Awesome work. You'll get a big lottery win and then you'll have no excuse not to get this stuff finished asap!!
3309
Post by: Flinty
Or just hire someone to paint it half decently
So progress on the Necro terrain has slowed down due to work and my little.kill team project protruding into my free time. However I have been able to abuse my works 3d printer for.a few bits and bobs.
Wall gubbinz

Vents lots of vents
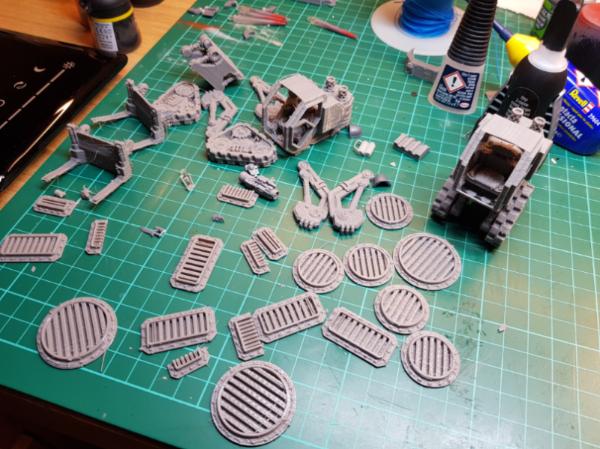
And a super cute little.industrial.loading vehicle thingy that I.loke so much I.made 2
This is the first time.printing anything and I'm.a.bit disappointed.at the quality from.what i thought was a decent commercial Makerbot. However it was all.free so I can't complain too hard
Now to.work out what to.sticm the gubbinz to.
81837
Post by: Cleatus
Impressive 3d printed gubbinz!
107727
Post by: amazingturtles
Vents! Always good to have around, aliens gotta crawl out of something. they are very neatly done too.
3309
Post by: Flinty
The vents are actually the best things of the lot. I think they benefit from being pretty flat with minimal shapes to cause problems with the print.
I must also emphasise that I designed none of these things. Thingiverse for the win!
10575
Post by: vonjankmon
Looks like you may have a bit of under extrusion going on with your prints. It's most obvious in the loading bots lower portions. May also just be due to printing to quickly.
3309
Post by: Flinty
Could well be. I was basically just using the machine that work happens to have. Turns out it's several years old and therefore pretty obsolete, so that's probably not helping things any
61618
Post by: Desubot
Flinty wrote:Could well be. I was basically just using the machine that work happens to have. Turns out it's several years old and therefore pretty obsolete, so that's probably not helping things any
Well old or not seems pretty functional to me.
those are some nice parts.
3309
Post by: Flinty
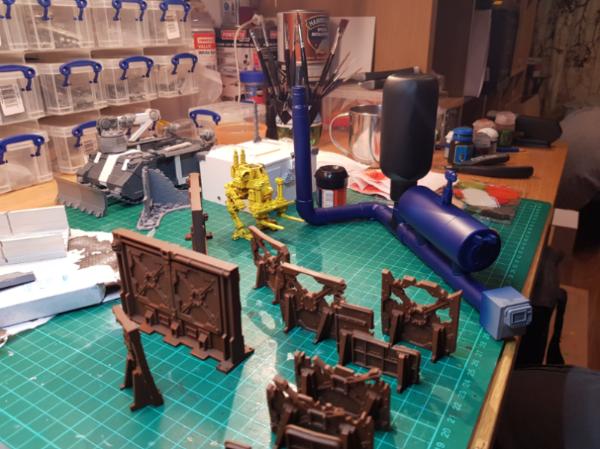
I promised myself I wasn't going to do it... but then GW came along with the derelict factory kit and I had to get involved with some sweet Sector Mechanicus action. The thing is utterly massive!
I also picked up some plasma conduits and the funny little generator thingies, but they are still boxed.
So it's built, but I'm keeping it a bit separated for now for easier painting.
And from below with some accidental, but entertaining lens flare

Still not quite sure how I'll be doing it, but likely some mixture of grey concrete, Brown rusty metal and some verdigris affected coppers to taste. Also planning on adding some rebar coming out of the ruined columns, just because.
I've been abusing my work 3d printer again so some more gubbinz pics to come, but for now to London with me for worky tribulations :(
3309
Post by: Flinty
Rather than starting a new thread, I'll use this one for gang progress as well. Graphite and I are slowly building up.to possibly even playing a game of Necromunda, and I have come up.with a reason to get my Van Saar into the monthly painting comp. So here goes!
Proof pic of the first 4 on the mobile painting table.of fun.
I'm starting with my leader and 2 champions and a 2nd phase grenade launcher guy. Using the GL guy to try out a scheme to make them.look a bit like poison dart frogs. Figured that went with the whole.rad/toxin protection suit thing that Van Saar have going on. If it doesn't work then I'll.revert to a concrete grey style camo scheme that worked rather nicely on my reiver scouts.

61618
Post by: Desubot
Why not Hazard yellow like most radiation signs. maybe grey black white and yellow urban camouflage if you are feeling particularly masochistic. (i think its a trope for radioactive barrels to be yellow)
also you should make any radiation based weapons glow blue like Cherenkov radiation
Your team is looking sick man.
3309
Post by: Flinty
Thanks Desubot. Hmm. I might do the rad cannon guy in yellow actually. Good idea. Given that you get yellow poison dart frogs as well, and it's a gang not an army... lots of room for multiple schemes Automatically Appended Next Post: Although actually, according to my sources a group of poison dart frogs is in fact an army
95443
Post by: Midget Gems
Great work on the containers Flinty, I like the tactful use of a persuading hammer
You've built a really nice derelict factory as well, I always feel like I need more terrain but never get around to it.
Good Luck with your entry for this months challenge fun idea with the poison dart frogs colour scheme.
3309
Post by: Flinty
Thanks MG. Regarding the factory, the kit itself is doing all the heavy lifting really. I've just added a couple of light touches of interesting gubbinz. I still.need to.find/print some ladders first as the kit unfortunately doesn't come with any.
Anyway. Some progress on my breach team. The first 2 are almost done with base coating. The blue hasn't come out quite as dark as I was originally intending but.i thinkits good.empugh for a mook. Also.trialling a yellow.radiation scheme as suggested for my rad cannon dude. There is absolutely nothing clever going on here at all

89168
Post by: youwashock
Awesome looking spread.
55408
Post by: Graphite
This should be brutal. Looking very, very good. Lots of solid things.
68152
Post by: JoeRugby
I do love a table pic
3309
Post by: Flinty
Thanks Joe. As it turns out it was quite brutal. The Vortices of Van Saar started off well with plinking flesh wounds on to several of the Press Gang Orlocks. Unfortunately flesh wounds was about all I could manage so Graphite's gang just kept on coming. Then it just descended into farce with 3 or 4 of my gang totally unable to get anything on the pinned champion that was right in front of them, and a lowly ganger with an emergency sawn off shotgun ran up and took out 3 of them over the course of a few turns.
So the Vortices bottled and ran off to lick their wounds and to plan their comeback after a shaky start
Some in-play shots
I see you...

86442
Post by: bobbuilder
excellent stuff
3309
Post by: Flinty
Graphite managed to mosey on over last night for a bit more gang related entertainment. 2 games were managed, largely because the first game lasted only one turn.
As the wounded underdog the Vortices needed to reclaim some face in the local community and decided that the best thing they could do would be to break something of value to the Press Gang! So we went through setup, pre game stuff and deployed the gangs. Graphite had 5 sentries guarding against the unknown advances of my 6 remaining fighters.

Just peeking through the terrain, the Vortices could see their goal... The Press Gang's portable toilet block! The Press Gang had inconvenienced the Vortices, so the favour was about to be repaid in kind. But with the watchful sentries, Care would need to be taken.

I got initiative. My leader pulled out a massively souped up combi plasma (Overcharged, experimental rig and hyper autoloader tactic cards), moved a bit to line up the shot and then annihilated the khazi in the first shot of the game
The Vortices then proceeded to fade back off the board while the Press Gang wondered who had had the nuclear curry.
That netted the Vortices a promethium cache. Yaay for fire! And enough cash for a couple of suits of mesh armour and a sparky stick (shock stave).
Onto the next game. Everyone in both gangs were now recovered and itching for action. A border dispute seemed like the best way for the gangs to settle their new grievances.
This is when it all went a bit weird. My rad cannon champion decided that it would be good to get right into the Press Gang leaders face, 2" away from each other at the top of a big tower. Remember the tower. This becomes important later.
Graphite wins initiative and the leader charges my champion and caves his face in. Return fire from a lasgunner points a wound off the leader, who next turn proceeds to crawl around the corner a bit to get some more cover. A second plinky lasgun shot (which fails to even wound the guy) and...

Oopsy. S7 hit, 2 damage, and Kane is left groaning I a crunchy puddle at the base of said tower.
"Did you see that? Did you? Anyone? No? Damnit, that was so cool! Let's shoot him again for good measure!

End of the second turn and we both failed the requisite bottle rolls, and the gangs hadn't even fully turned up!
Other highlights include my other champion being placed in a very precarious position by Graphite, only to fail her nerve check and instantly leg it. My suppressionaser dude knocking a recently deployed juve back off the board, and the piece we resistance, Graphites heavy stubber guy massively fluffing a shot at said laser shotguns and drilling 3 rounds into a pinned friendly lying about in the way.

55408
Post by: Graphite
Much hilarity. Newcromunda is GOOD. More pics to follow from my PoV...
Many thanks to Flinty for hosting, and the awesome terrain. Getting into CC with Van Saar in a Sector Mechanicus is neigh on impossible, but Orlock close range shooting is savage.
Automatically Appended Next Post:
Worth noting - so far in campaign, the only thing my Heavy Stubber has hit is his own ganger. It seems reasonable that he now has a head wound lowering his intelligence.
55408
Post by: Graphite
Having escaped from the Ork infested Unpleasance dome, intrepid local journalists "The Press Gang" fled to their fastness in the ruins of The Basilica of St La'ri. Led as ever by "Citizen" Kane, they have returned downhive once more in search of trouble at the instigation of arch-maniac (Possible itinerant Ministorum preacher, self proclaimed Armageddon war veteran) "Cliffy" Yablonski.
They've found a little slice of hive contested by the Vortices of Van Saar. Violence immediately ensues for control of a Tech Bazaar!
Triple J, the Heavy Stubberman, sets up his field of fire.
Joker sets up. Hidden under his jacket, a sawn off shotgun, for close encounters

Triple J climbs down from his vantage, feeling exposed. And is then repeatedly shot. Pinned, flesh wounded, but not out!

Joker gets into an unending firefight with... most of the enemy. Heavy cover helps, but not enough - he ends up with two flesh wounds.
Unfortunately not pictured - Joker then goes on a Sawn Off Shotgun Rampage, frustrated at the inaccuracy of his Autogun, and mauls his high-tech opponents.

Victory to The Press Gang! The Tech Bazaar is ours.
Now to kick back and hire on some help. A Juve is allowed to join the gang from back home, and a new ganger with Lasgun signs on along with a second Juve. The new guys, plus Cliffy and Raptorman the shotgunner pull guard duty. Rumours abound that the enemy wants payback and has been angling for the gangs "Facilities".

"You see anything Jim?"

"Nothing here Pete"
<Sound of massively overcharging combi-plasma>
So, the toilet block is toast, and we never saw them coming. Or going. In the confusion, the Vortices claim a Smelting works.
They're obviously far too close time for a bit of a "Chat" - which rapidly devolves into a border dispute. With his leader having recently fallen off the top of a very tall thing, Triple J shows the kind of judgement we've come to expect and opens fire at an enemy ganger behind cover. And also behind HST, The Press Gang's double autopistol man.
Who he proceeds to hose with bullets.

Another loss to the Press Gang over some great terrain. They'll be back...
3309
Post by: Flinty
Nice pics
And the Narrative...Is...FORGED!
3309
Post by: Flinty
Progress... whoda thunk it.
Mojo is creeping back in after mid-month doldrums. The schemes didn't 1uite work as I had envisaged and a week of holiday away followed by family illness just combined to kill enthusiasm. Thankfully I have the spectre of the painting comp to push me onward. So some progress to the point that I'm actually getting happy with the results. Funny how a bit of highlighting and a couple of washes can make you so much happier with a scheme
Anyway. Some pics.

Grungy base

Going to try and hit the blue bits with my new harder and Steinbeck airbrush for a trial of spray based OSL.
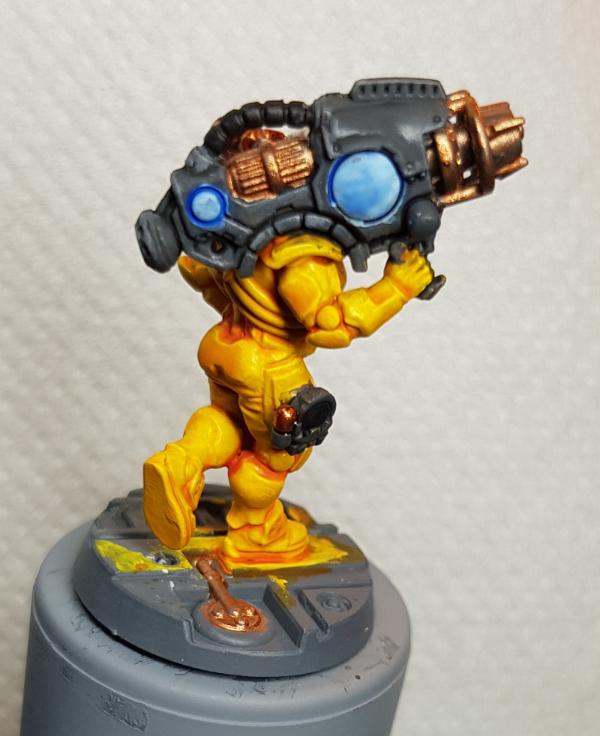
This green turned out a bit shiny, but its growing on.me.

Just seen that the barrel needs touched up a bit, but otherwise I'm happy.

3309
Post by: Flinty
And the first 4 Vortices are done and final pics posted for the painting comp for Feb.
Tried out some OSL using my new airbrush, to mixed success. I'll keep trying I think it just about worked on the heavy's face but I couldn't quite get a decent gradient on the other bits.
They haven't come out quite as I had intended, so there is that lingering sense of disapointment that ny skills cant replicate my inagibation. However i do think they are passable at least and fit to face down Graphite's Press Gang. Moving back to BSF for a bit, so ill have time to ponder schemes for the next few guys. Something virulent in orange I'm thinking
Breaching team photo
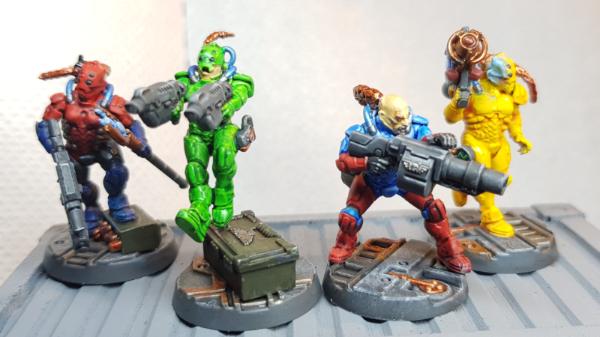
Leader with her trusty hyper mega autoloader plasma gun of much entertainment.

Detail of the OSL on champion 1

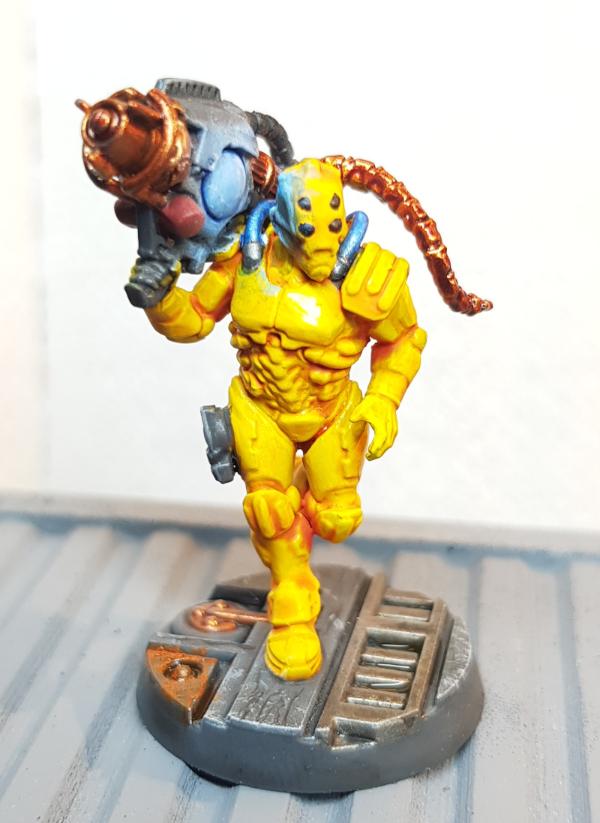
Shouty breachy Dakka champion
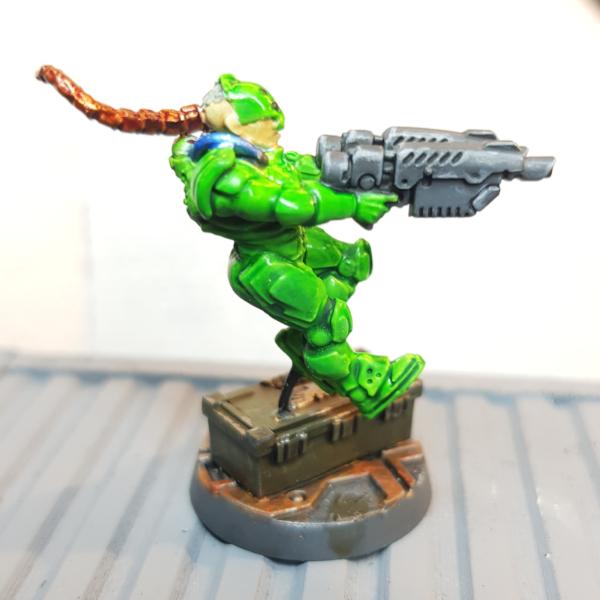

And a rear shot of my grenadier with his weapon and ammo 'liberated' from a shipment bound for the Emperor's Finest somewhere the galaxy.

68152
Post by: JoeRugby
Good Job dude I really like the OSL
55408
Post by: Graphite
That is looking absolutely gorgeous.
Also - bit of a plug - their current opposition, The Press Gang can be seen here since I finally took some halfway decent photos.
3309
Post by: Flinty
W00t. So I managed to get a cheap second hand land speeder storm.
Lookit!

And we those legs? Why yes they are
I thought my container hauled needed a leggy escort friend
90488
Post by: The Riddle of Steel
Land speeder truck conversion is looking really good. I will be watching to see how it turns out.
-Rids
3309
Post by: Flinty
Thanks Rids.
Just finished putting it all together. The legs are still loose, but I'll fiddle around a bit more for posing before gluing them in place.
The HB moves and can be removed

Being modelled by my beautiful assistant Vortices. I deliberately connected the legs quite far back as I reckon counterbalancing a couple of pilots is easier than whatever heavy-ish load they might want on the rear platform.

I think they probably get through quite a few of those front sensor units

And escorting my cargo hauler

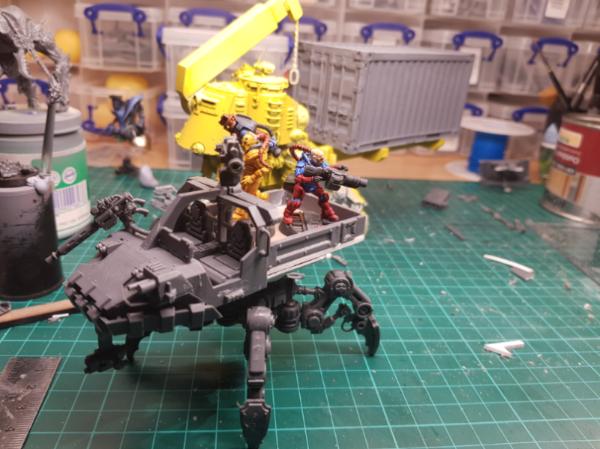
I've got enough legs for one more of these things. Just waiting for my super cheap Conquest land speeders to arrive for one more little leggy friend, in a light scout format rather than load hauling
Thinking that the legs will be more centralised beneath the pilot in the last one to keep the pilot and gunner more steady in the centre of movement. I think the cargo versions might not give the smoothest of rides
10505
Post by: Mellon
That looks really good!
You inspire me to mod a landspeeder into some sort of floating platform for my ancient genestealer patriarch on a throne...
96209
Post by: MacPhail
Love that Landspeeder mod! It's a great prop, but it feels like it needs some game stats... I'd drive that thing into battle in a pinch. Very much looking forward to paint... what's that yellow you're using?
1124
Post by: Captain Brown
Neat conversion Flinty.
Cheers,
CB
3309
Post by: Flinty
Thanks guys. Always nice to see people interested in my footling.
@Mellon - go for it. The land speeder model is so versatile. I also made a recon buggy thingy put of the back end of one and a falcon turret

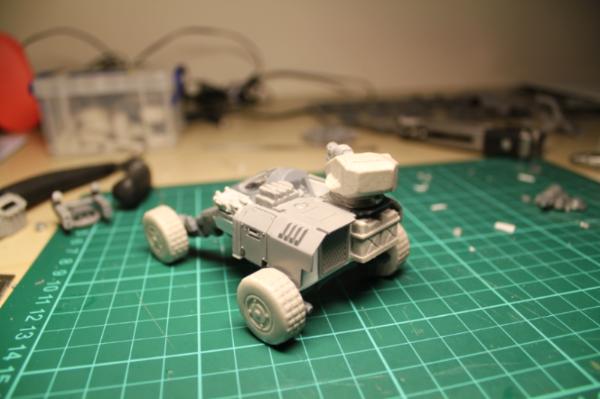
@ Mcphail - a very small chimera perhaps it's been mentioned that Necromunda night get ash waste vehicle rules at some point, so I'll just keep it safe until thise days arrive
The yellow is either sunburst yellow or flash glitz yellow. I think the former one, but I 5hi k the latter is just the modern replacement anyway. Not quite the same but close enough. I used it for my other utility walker, Jekub
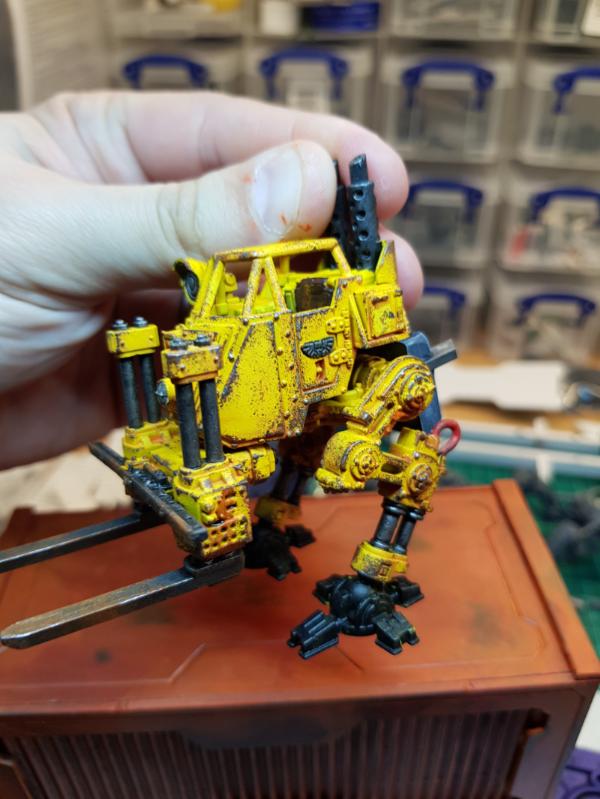
I might have a leg problem...
90488
Post by: The Riddle of Steel
All of these vehicle conversions look great (cargo hauler, buggy, and Jekub). The fork lift attachment on the front of Jekub in particular looks very natural, like it is a real kit. What is it made from?
Also, the weathering looks good on that yellow paint job.
-Rids
3309
Post by: Flinty
Thanks Rids. The hydraulic bits are from the ork dreadnought arms... or maybe it was the killa Kan arms. I forget. The prongs are just trimmed down sprue.
51170
Post by: sockwithaticket
Nice vehicle conversion, especially the Falcon buggy. It's sleekness is very Van Saar.
3309
Post by: Flinty
Thanks Sock. Although the buggy was done as a Hellion attack bike counts as for my Starcraft themed Deathwing/Ravenwing force. It was also a fun build (and i should paint the poor thing at some point)
121677
Post by: mcmattila
I really like those utility vehicles. Jekub is my favorite, I'm getting the "power loader from Alien" vibes from it. To me it also fits the 40k universe perfectly.
3309
Post by: Flinty
Ah-ha... only 2 years since any kind of Necromunda progress. Some counts-as cyber mastiffs, that will also see duty in Stargrave as well.
And some other lovelies for the underhive. A spider rig lady and an arachnirig thingy to bulk out my Van Saar.

65298
Post by: Afrodactyl
Love everything in the thread Flinty, I can't wait to see how the spider rig turns out. Keep up the good work.
3309
Post by: Flinty
Thanks Afrodactly. It was all great fun to make.
Cross posted from the monthly painting comp, the doggoes are done.
Going to come up with more names...

Starting with Athena
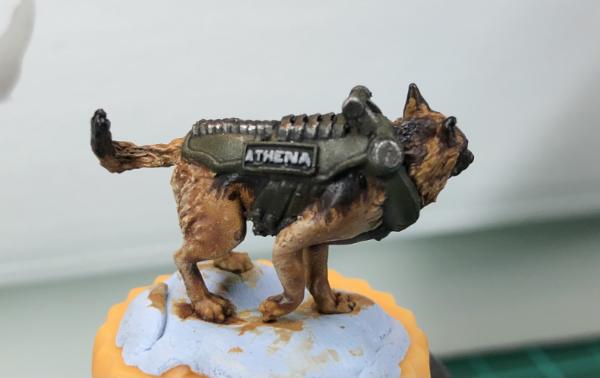

Moving past the cyberiest mastiff around
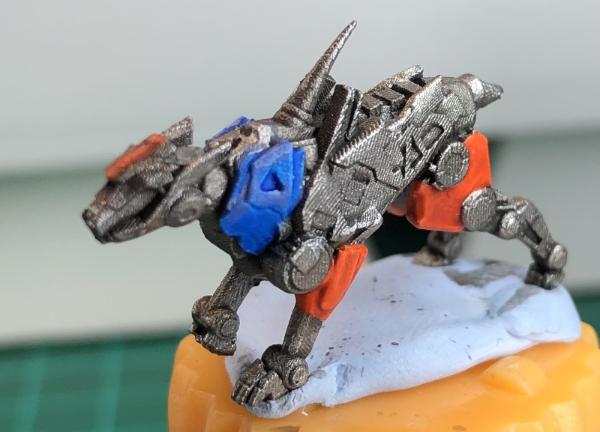
And then on to the Goodest boy ever to come out of Cadia


Not totally happy with the texturing in the body armour on Cadian Boy, but if i try to do anything else to it I’ll
Probably wreck it, and I’m definitely happy enough with it
518
Post by: Kid_Kyoto
Loving the Paw Patrol, I'd have named the helmet one Cadia so you could make Cadia stands jokes all day long. But Cookie Hopper works too.
3309
Post by: Flinty
Hah! nice one. I almost called it Ian, short for "Cadian dog", but my son insisted on Cookie Hopper, and who am I to fly in the face of offspring demands!
Also, he is clearly sitting
61018
Post by: Guardling
Nice doggos, just need one with a jet pack...
3309
Post by: Flinty
That can be arranged
https://www.thingiverse.com/thing:774631
Also thanks for the kind comment
112558
Post by: Viterbi
Love your far future Paw Patrol. Now that's a crossover me and my kids would watch
The neglected robot looks very cool, he reminds me a bit of Roberto from Futurama.
3309
Post by: Flinty
Thanks Viterbi. Need to get a seat for the poor chap, then to rough it all up. Probably use of the of the GW crates from the Munitorum Container kit for some combined data and physical loot action
Managed a bit of hobby progress last night. Playing about with contrast paints. not too taken with most of them, but the light blue is lovely. Not sure if these guys (and possibly gals) will be crew or random encounter duders. I have plenty more to play with though
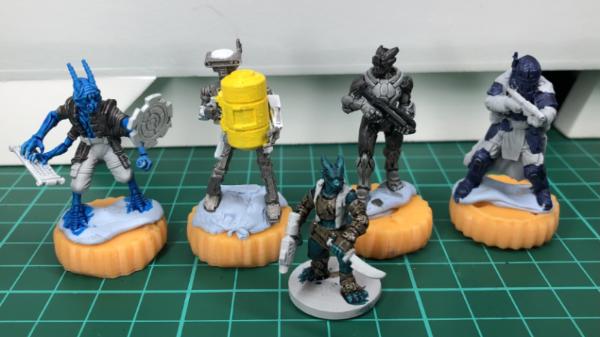
I think I may have been applying them too thick, so I've ordered some contrast medium to water the darker colours down a bit more before applying.
Foir the grey bot, even after the contrast, it needed a nuln oil wash and I think I'll also hit it with a light drybrush as well. Not really meeting the promise of a single action to get decent results
3309
Post by: Flinty
Progress on the Van Saar Arkeotek code named Ice Queen.
My efforts at a blue tinted white armour are passable at best, but I must press on!
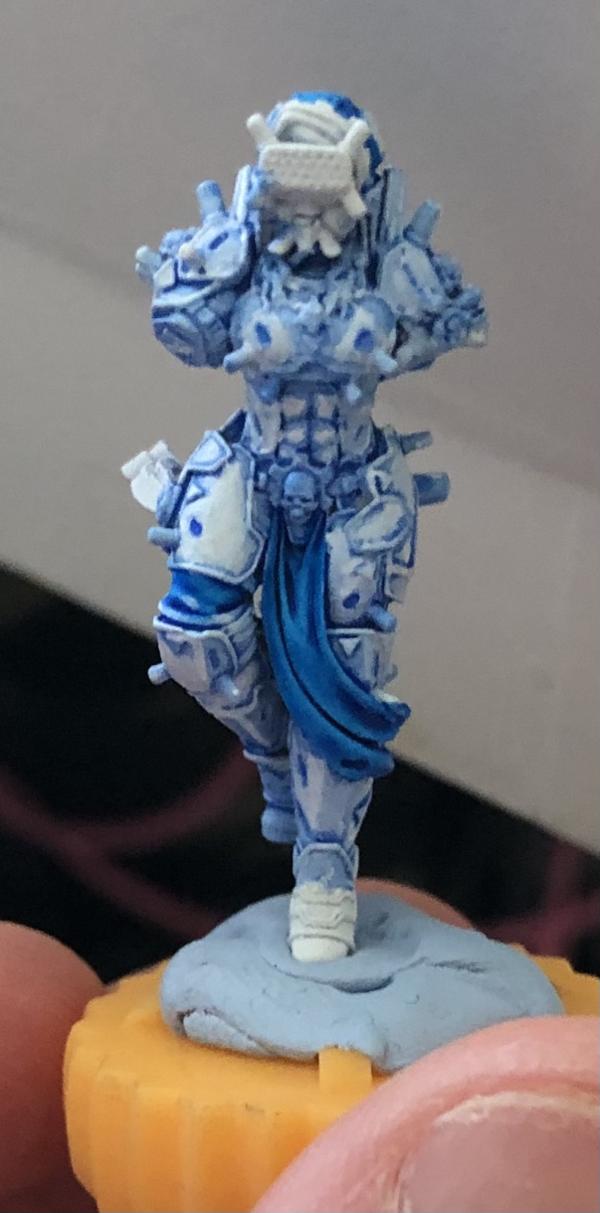

I have also done some airbrush shading of the spider tank. It was rather easier with the Kodiak shuttle as the surfaces were all
Rather larger, but I’m satisfied with the results for now. On to the detailing on that one. I got a darker grey for the joints and stuff, but I’m a bit worried it’s a bit too green. I’ll
Give it a shot anyways.

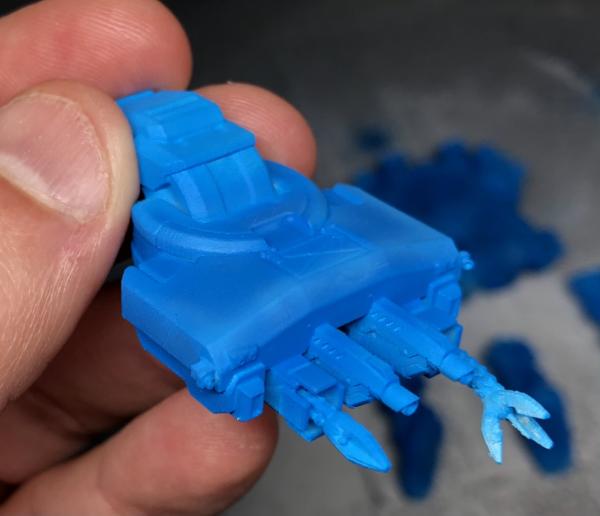

Inspired by fellow Dakkaite ced1106 I have printed a small scenery tile to act as a dressed backdrop for future pictures. Need to paint that now as well, of course...
It has the rather nifty feature of a modular central detail. I have just printed a simple inlay for now, but it can also take various types of consoles, servers, water treatment and generator gubbinz. Even objet de art or a teleported is available.

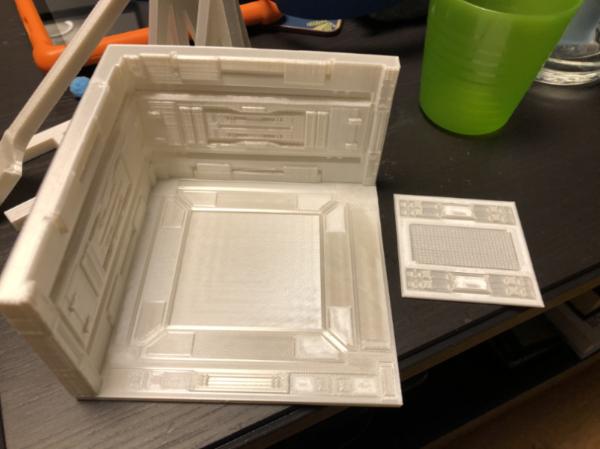
It didn’t print perfectly, but on its own the flaws shouldn’t be too noticeable.
3309
Post by: Flinty
I managed to push through the trough of dissatisfaction (largely thanks to the monthly painting comp) and with the help of a brand new brush tidied up Elsa (geddit? Ice Queen? Elsa? See what I did there? SEE WHAT I DID!)
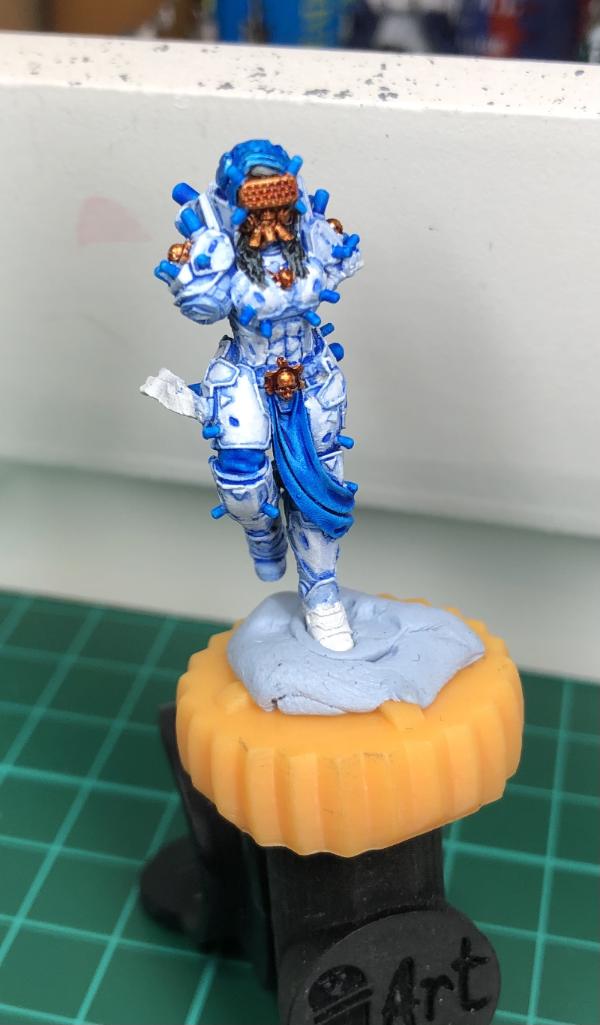

Not really going to be winning any awards, but it looks not horrible at arms length which is all I can ask for
Still a few details to pick out and some metallics to add some highlights to, but definitely getting there.
Getting her tentacles and support servoskulls sorted next. Some simple Metallics and colour matching to Elsa’s scheme so shouldn’t take long. Then it’s on to the spider tank.
I tried getting a new mid grey, but instead managed to buy some weird green that Vallejo insists on calling Heavy Grey. Oh well. Ordered London’s grey instead so hopefully that will work better.
Automatically Appended Next Post: Oh yeah, I also printed a few more centrepieces for the photo hall.

(Not the polar bear though)
3309
Post by: Flinty
Finished a Codebreaker and a Runner for Stargrave around the edges of working on the spider tank
Codebreaker


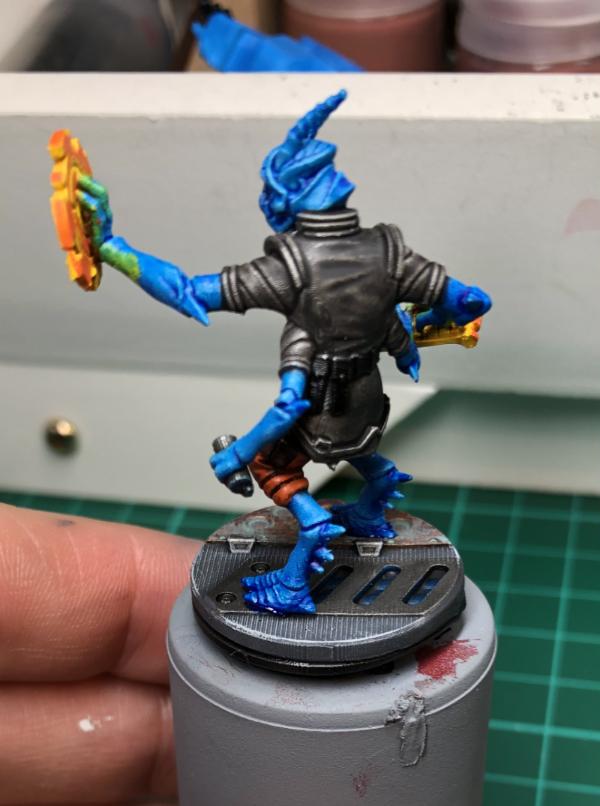
With his? Her? It’s? Fancy schmancy virtual deck
And the cute little kobold out her super awesome lucky red jacket that she is super fond of

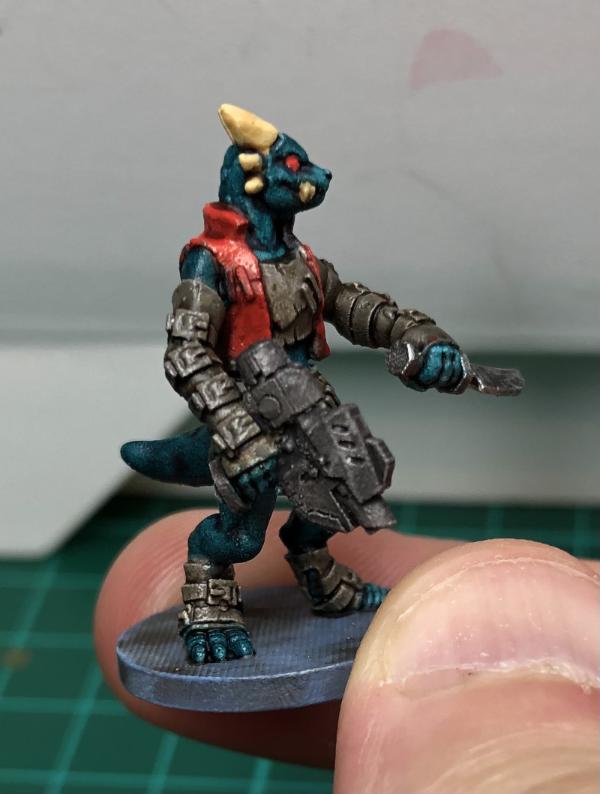
I have 4 build plates all lined up for the Mono, but I am forcing myself to finish the spider tank first, otherwise I’ll never get it done!
112558
Post by: Viterbi
Great updates, Ice Queen came out really cool, the white/blue scheme is very effective. And love the Stargrave crew members, the Codebreaker looks especially nice!
3309
Post by: Flinty
Thanks Viterbi!
Updates with some random Stargrave related nonsense.
A small pack of wolves to use as guard dogs for bad-guy factions in Stargrave 1 player. Not my finest painting work, espectially the grey ones, but meh, good enough for mooks. Need to finish a batch of bases for them.’starting to run out of bases actually. Need to print a few more.

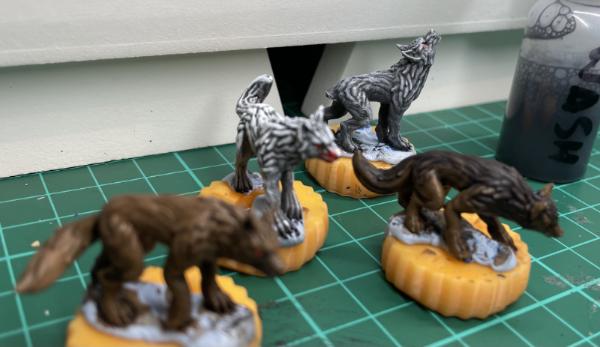

And a couple of crystal spider thingies to use as the lava mite whatsits. I tried one with a white highlight to try and get a glinty effect, but it just looks a bit frosty I think Oh well, they still look nice in green I think.
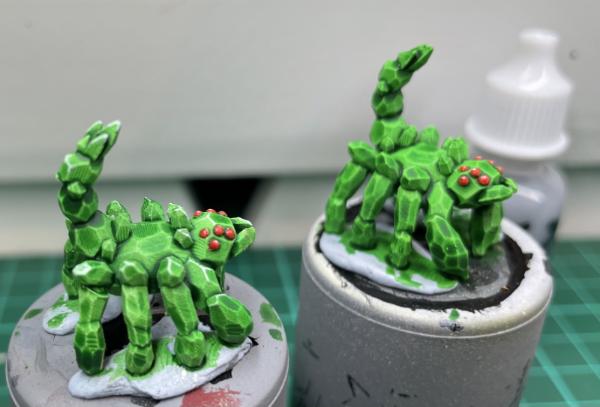
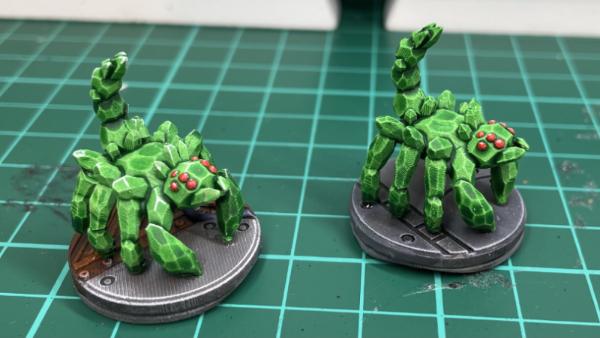
122359
Post by: tzurk
Some great minis on this page!
Codebreaker and the kobold are beautiful sculpts that you've done justice with paint.
Lovely texture work on the fur and the rock/gemstone spiders too.
Thanks for sharing - keep it up!
112558
Post by: Viterbi
Crystal spiders look really cool, gotta love all those easy edges when painting And from the limited experience of two games, guard dogs die fast, so simple paintjob will do
3309
Post by: Flinty
Thanks guys.
The gem scorpions are mostly done with contrast paint over a white base. The one on the left I added a few pure white edge highlights, but it didn’t add that much, so I didn’t do it in the other one. He hard edges did make it easy though
3309
Post by: Flinty
After being away for a couple of weeks on holiday, racing to catch up on the monthly painting comp. this month for Rebel Scum, an A Wing for use in Stargrave/Necromunda/kill team etc. as scenery.
I printed this thing a few months ago and it’s been sitting around waiting for the right moment. After my learning process on the Kodiak a few months back, decided to go all out with the airbrush again.
Original print

Under coated with filler primer
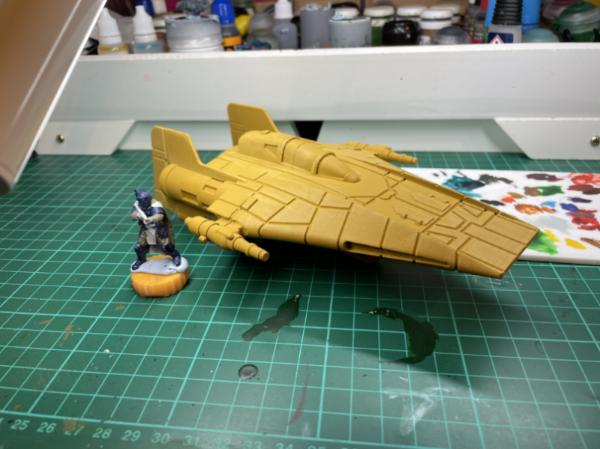
And current progress point at the end of the main Airbrush phase.
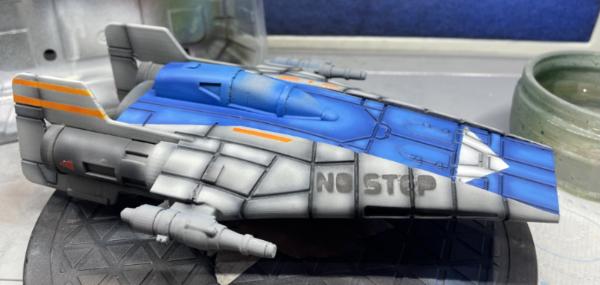


Some stencil work reusing stuff I printed for the Kodiak. The “no step” text is probably a tad big for the scale, but it’s as small as I can print the text, and I like the idea of the pilot really wanting no one to step anywhere near the missile tubes
Next steps are to do some normal brush painting for details in the engines, cannon, landing gear and canopy. A range of silver and coppery metallics methinks. I might then Go back to the airbrush for some soot staining. I also have some streaking fluid that I have been too scared to use on anything yet. Maybe it’s time!
1124
Post by: Captain Brown
Really like it Flinty.
Cheers,
CB
3309
Post by: Flinty
Thanks Captain!
Cross posting for the comp thread for the record. Calling it done now. This a wing is ready to take on the empire all by itself! (Or alternatively sit forlornly on a landing pad while space vagabonds scrabble around it looking for anything that seems valuable and isn’t nailed down)
Painted to look used, but well maintained, so no rust on the super high tech magic space interceptor. The weathering liquid I have appears to be some kind of grungy oil residue thingy. Leaves an interesting effect, but I ended up applying it sparingly, and even then I rubbed most of it off again. If it’s designed to do streaking, then I can’t make it work. It’s a water based thing, so I might need to go whole hog and get some oil based streaking fluid for the next project.
I was thinking of doing some edging in silver around some of the panels, but chickened out. If I mess it up, it would be too hard to fix!
Quite fond of the last pic. The perspective makes it look like the thing goes on forever
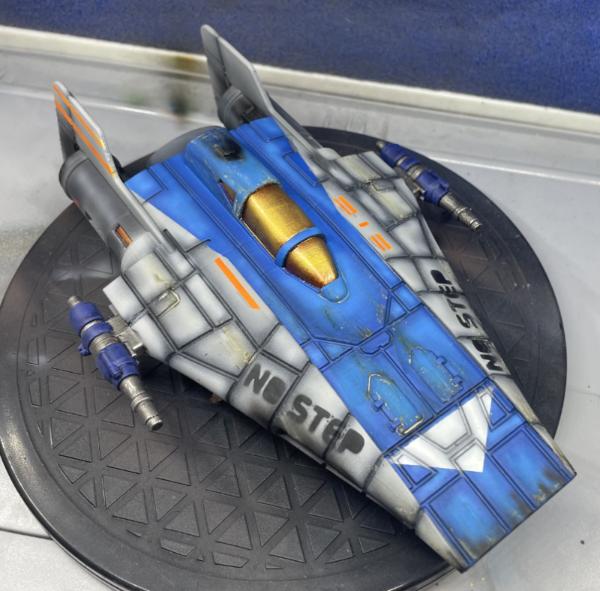


121475
Post by: Flapjack
Nice work, especially on the stargrave stuff. It's a game i'm looking into myself so it's cool to see your stuff. The space ship looks great!
3309
Post by: Flinty
Progressing with some jetbike models i printed as counts-as grav cutters. The green goblin style hoverboard has never done that much for me, and I think they should stay the province of dark eldar.
First off, a couple of horrendous mis-prints that I did whilst still learning the ropes around print settings and support placement. These will just be scenery added to something and half-buried

And the four clean versions. The red and green ones were prototypes that are still a bit messed up, so I’m planning on sticking tissue paper tarpaulins over those, with the purple and blue ones used for the game (that I may never play again, but ho hum). Bonus points if you spot the theme
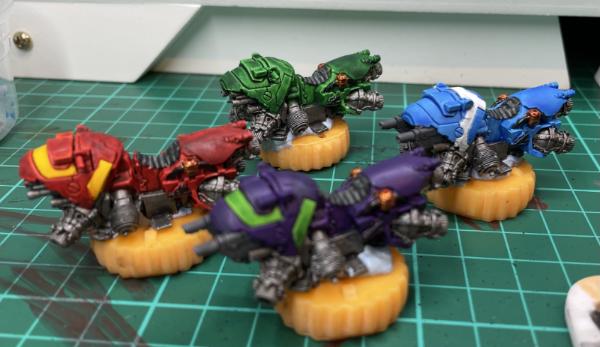
As always, thanks to the monthly painting comp for providing motivation
18509
Post by: endtransmission
The grav bikes look great. What are you doing for riders?
I wasn't a fan of the gravboards until I actually saw one in person over the weekend. They also look a lot better when not on the massive flying stands; much like the Orlock jump pack guys.
3309
Post by: Flinty
Thanks endtransmission.
the bikes came with some separate printable legs, so I have frankensteined them together with some Van Saar torsos. They are on the priming turntable just now, but pics tonight hopefully.
The bike models are awesome, and the associated riders are equally nice looking, but the only way I could get the riders to fit was to print the feet separately... I must be doing something wrong, but not sure what it is... Its possible the riders were supposed to be attached to the bike before printing, but that obviously has its own problems.
Oh, yes, flying stands... need to sort something there as well, although the bikes have obvious undercarriage, so maybe they just get played as grounded Automatically Appended Next Post: Tarps!

And the first rider takes form.

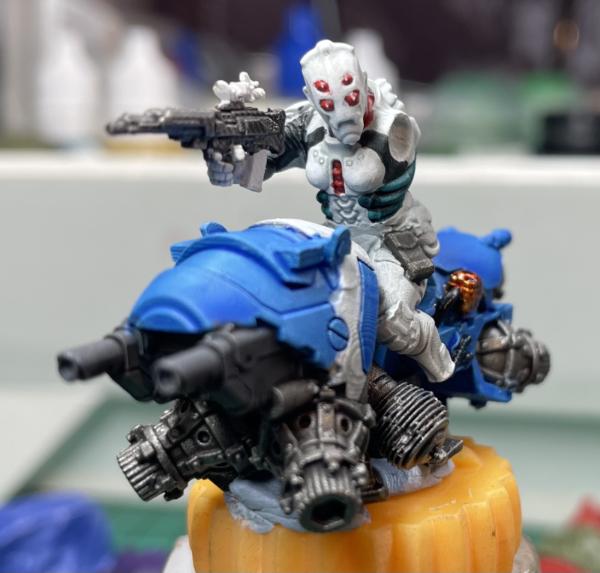
3309
Post by: Flinty
Just finished my mecha-wolf for the monthly painting comp. Decided to try for some low-light OSL again, after my so-so results on the Ambull a few months back.
I think it came out much better than the ambull. The airbrush was super-easy to get nice natural surface effects, especially compared to my god awful attempts first time round with hairy brush(spoilered to save my embarrassment)
Turns out I can't really blend with normal brushes very well at all. More practice needed in due course. The red didn't come out great, mostly because I just did it straight over the horrible previous grey highlight attempts, rather than for the blue and green where I went and re-blacked the surfaces.
Also turns out that the dark blue on its back came from my Space Marine Paint Set Ultramarine Blue. This paint is about 32 years old at this point having been purchased around 1988, and is absolutely perfect consistency, re-mixed well, and went through my airbrush silky smooth (after a bit of thinning, of course). The pot lid disintegrated on opening, but I managed to save the bulk of it into a spare dropper for future use.
Not sure what I'll do with the wolf, but it can sit in the display case until another Stargrave or Necromunda game comes along needing a big nasty mecha-wolf thingy!

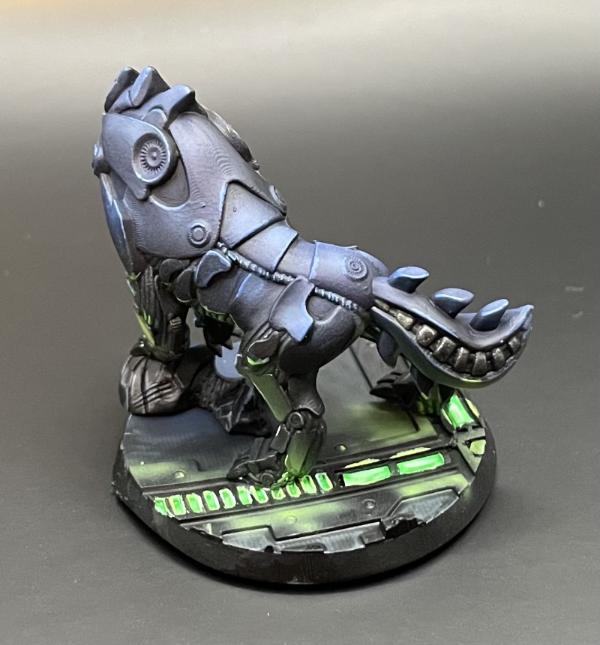

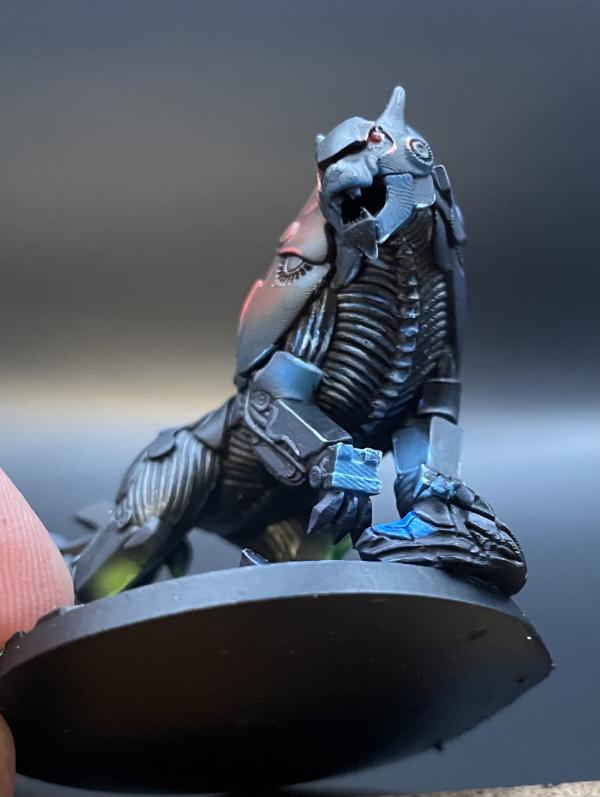
1124
Post by: Captain Brown
Nice Flinty.
I still have a Ral Partha Blue in its original bottle that still serves as the base colour blue for my Aliatoc craft world models. Glad you could save your Ultramarine blue.
Cheers,
CB
130965
Post by: DoctorDanny
Impressive stuff. I especially like the codebreaker.
3309
Post by: Flinty
Thanks. It’s a favourite of mine also. Combination of a really cool model and I managed to stumble on a decent colour scheme for it. I don’t always get colour combinations right
121268
Post by: Gwyn chan 'r Gwyll
Maybe green eyes for the water wolf? If you're going back for them.
116601
Post by: Syro_
I really like the look of your two elemental wolves. About the water wolf eyes that you mentioned, maybe a very light powdery blue?
88921
Post by: Stevefamine
Came for the terrain, enjoying the cyberpunk sci fi
Great tiles as well!
112558
Post by: Viterbi
Those elemental wolves look great! Would vote yellow eyes for the water wolf that should contrast nicely.
3309
Post by: Flinty
Thanks guys. I tried out green with a bit of OSL, largely because I like green. I knew it would be a bit subtle, but I think its ok.

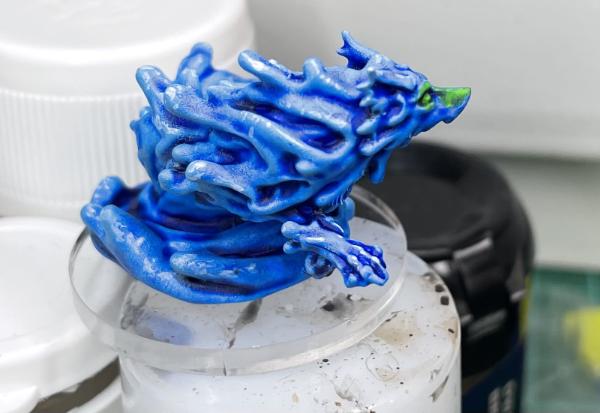

Maybe just needs a touch of lighter green or pure white point highlighting and I'll call it a day.
3309
Post by: Flinty
New puppy == super limited hobby time.
But I did manage to print a lovely 2nd Dynasty shuttlecraft. Some of the parts need a touch of sanding as the tolerances are a bit tight, but otherwise it has printed and slotted together brilliantly well. Printed at 0.1mm layer height.
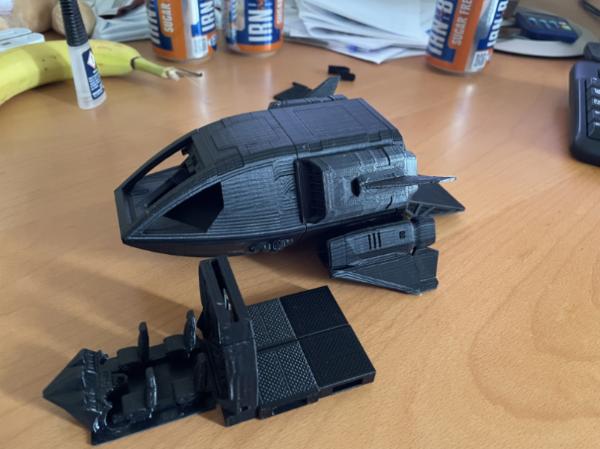


518
Post by: Kid_Kyoto
Very nice! Can't wait to see it painted.
123017
Post by: Olthannon
I really like the Mass Effect models, those are dead cool. The shuttle looks great, looking forward to seeing it painted.
112558
Post by: Viterbi
That printed stuff looks amazing, can't wait for some color on it.
3309
Post by: Flinty
No colour yet, but I have added to the primed motor pool!
What could they be transporting with such care (and with such heavy weaponry)? Is it a good idea? What are the rather hasty biohazard symbols meant to mean? What could possibly go wrong?!

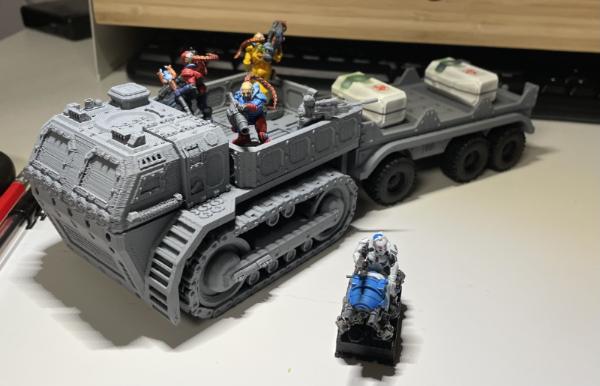


The layers seem pretty obvious in the close ups, but with a suitable paint job and some weathering it should all fade away at table-top distance.
The models are really nice. If I do another one, I might resin print the cab to get a smoother finish on the bit thats the focus.
123017
Post by: Olthannon
They look excellent Flinty. I like those big old tracks on the front.
62835
Post by: IGtR=
Interested to see how these paint up - I am always fascinated to see how layer lines look once painted (as I only have a couple of 3D printed models for DnD and don't print myself).
Do you consider it worthwhile ever using a fancy filler primer or trying to fill in the most prominent with say liquid greenstuff?
Thanks for sharing
1124
Post by: Captain Brown
Flinty,
I do like that tractor rig print. I have been trying to make something similar out of an old Fire Truck frame without success.
Cheers,
CB
55408
Post by: Graphite
That's a fine looking rig. Would be a shame if something... explosive were to happen to it
3309
Post by: Flinty
The other likely fate is for it to be ambotted into tiny dead pieces
Automatically Appended Next Post:
 IGtR= wrote: IGtR= wrote:Interested to see how these paint up - I am always fascinated to see how layer lines look once painted (as I only have a couple of 3D printed models for DnD and don't print myself).
Do you consider it worthwhile ever using a fancy filler primer or trying to fill in the most prominent with say liquid greenstuff?
Thanks for sharing
I have tried using filler primer with variable results. If you have a full set of sanding sticks (that I don’t) you can get in to details to smooth everything.
I have some sanding sponges for large surfaces and it worked well on my shuttle as I was able to get the sponges to all the main flat surfaces
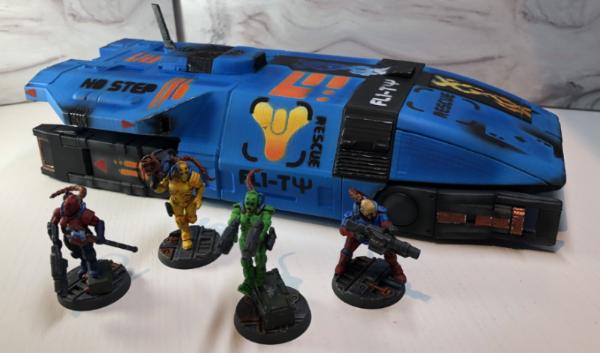
Here is a 10mm scale hall pelican with no sanding and as long as you don’t do dry fishing the layer lines are not too noticeable

Amd an awing with no sanding
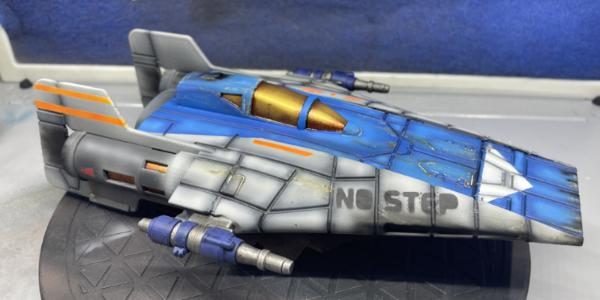
These were all done with 0.1 layer height I think. At arms length and using an airbrush for shading, I think you get perfectly acceptable results. I am Definatetely a “good enough” type of person though
3309
Post by: Flinty
And the next spacecraft is nearing completion. Painted this one for the monthly painting comp again.
Learned about black basing, and have further developed airbrushing experience. It’s working much better for me now.
Starting point
Filler primer

Black basing practice on the underside

Topside progress
Intermediate shot
Final details

And some final shots just before the varnish layers go on. Planning on running a gloss layer over the canopy.
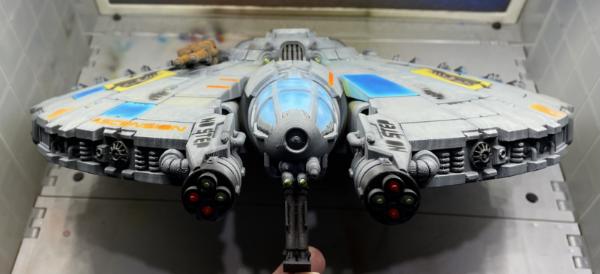


1124
Post by: Captain Brown
Nice spacecraft Flinty.
CB
3309
Post by: Flinty
Thanks CB!
A couple of final pics with the varnished canopy, and the full scenery air-wing

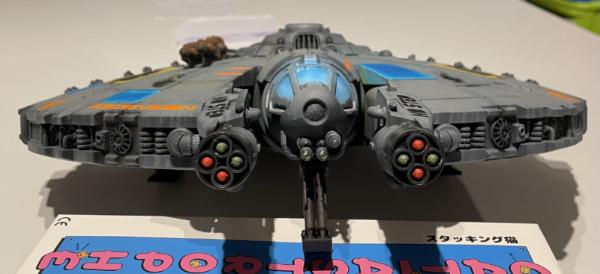
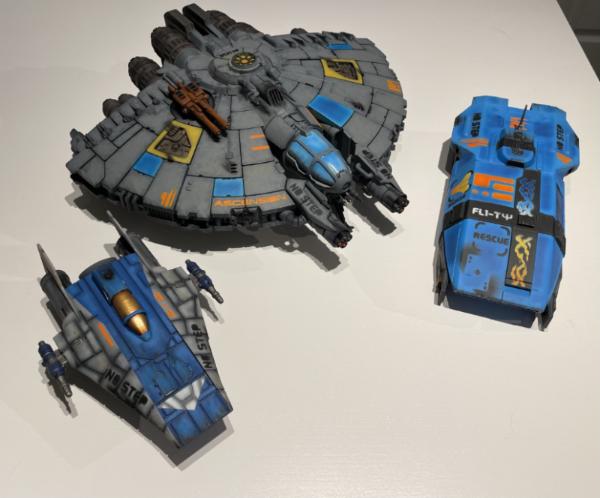
76303
Post by: Warboss_Waaazag
Outstanding work. Those spaceships look fantastic!
3309
Post by: Flinty
With the gracious agreement of my long suffering wife, the Ascension has reached its last resting place. On the wall over the living room PC

Amd how the magic happens. I picked up a wall mount for a speaker and it seems to be just sturdy enough. I might need to do something about stopping the various rotating adjustment joints from adjusting themselves…
I felt all kinds of wrong drilling hole in the thing to screw it on the orange mounting block!
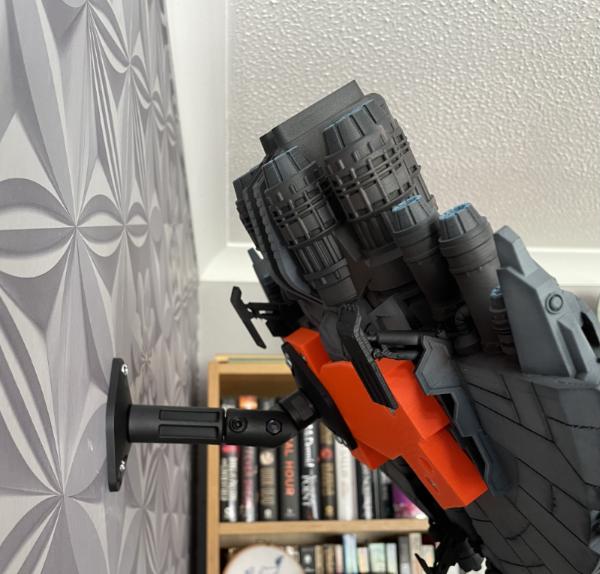
116601
Post by: Syro_
Very cool!
|
|