494
Post by: H.B.M.C.
"He who dies with the most toys wins." - Malcolm Forbes
Hello all,
For a long, long time and on many, many occasions I have stated that I have a certain affinity for terrain. Occasionally glimpses of my terrain-created insanity have leaked through, but I've never sat down to start something quite so... well... insane as the task that I am about to undertake.
Firstly, let's just set the mood, using the thing that inspired the title for this P&M Blog.
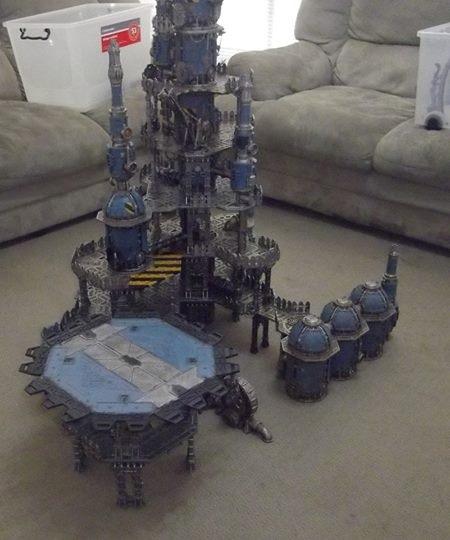
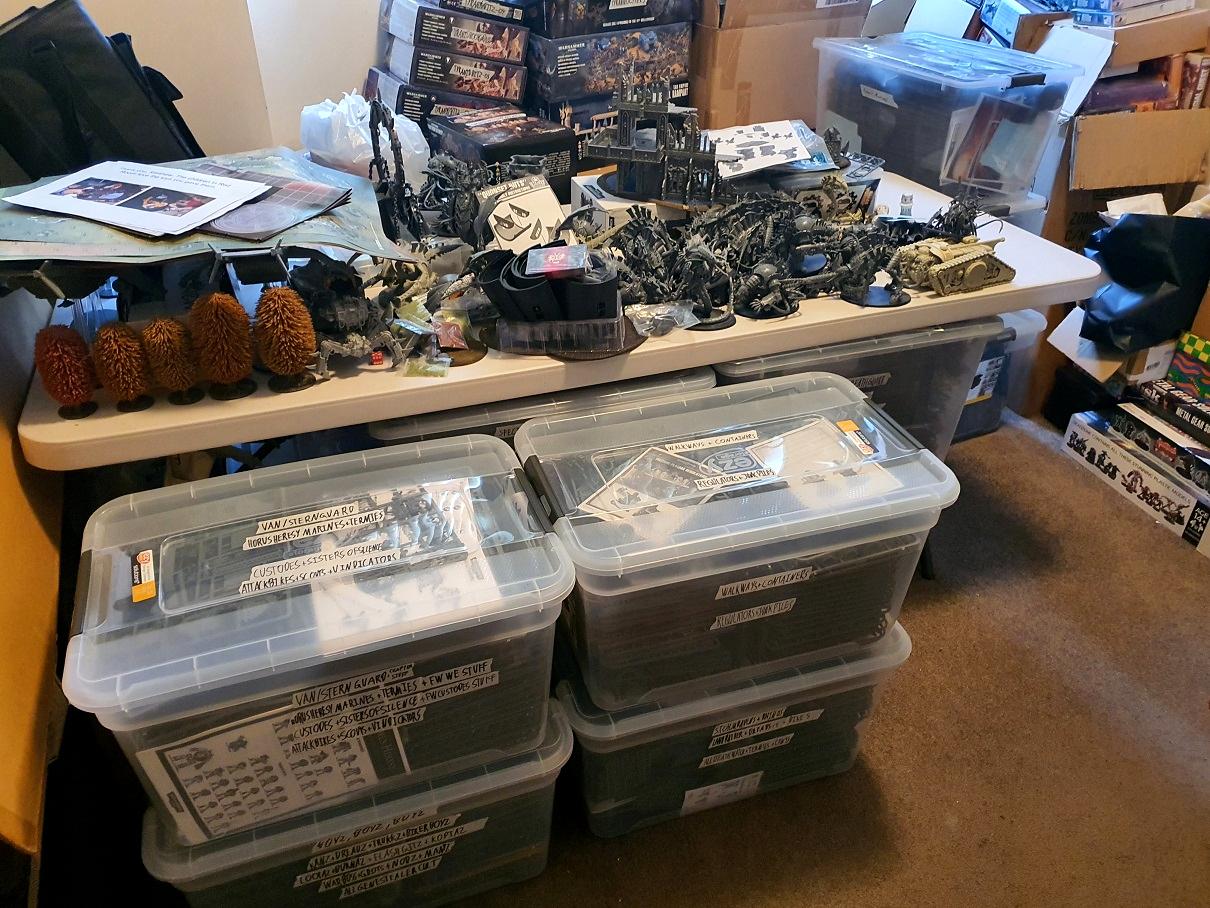
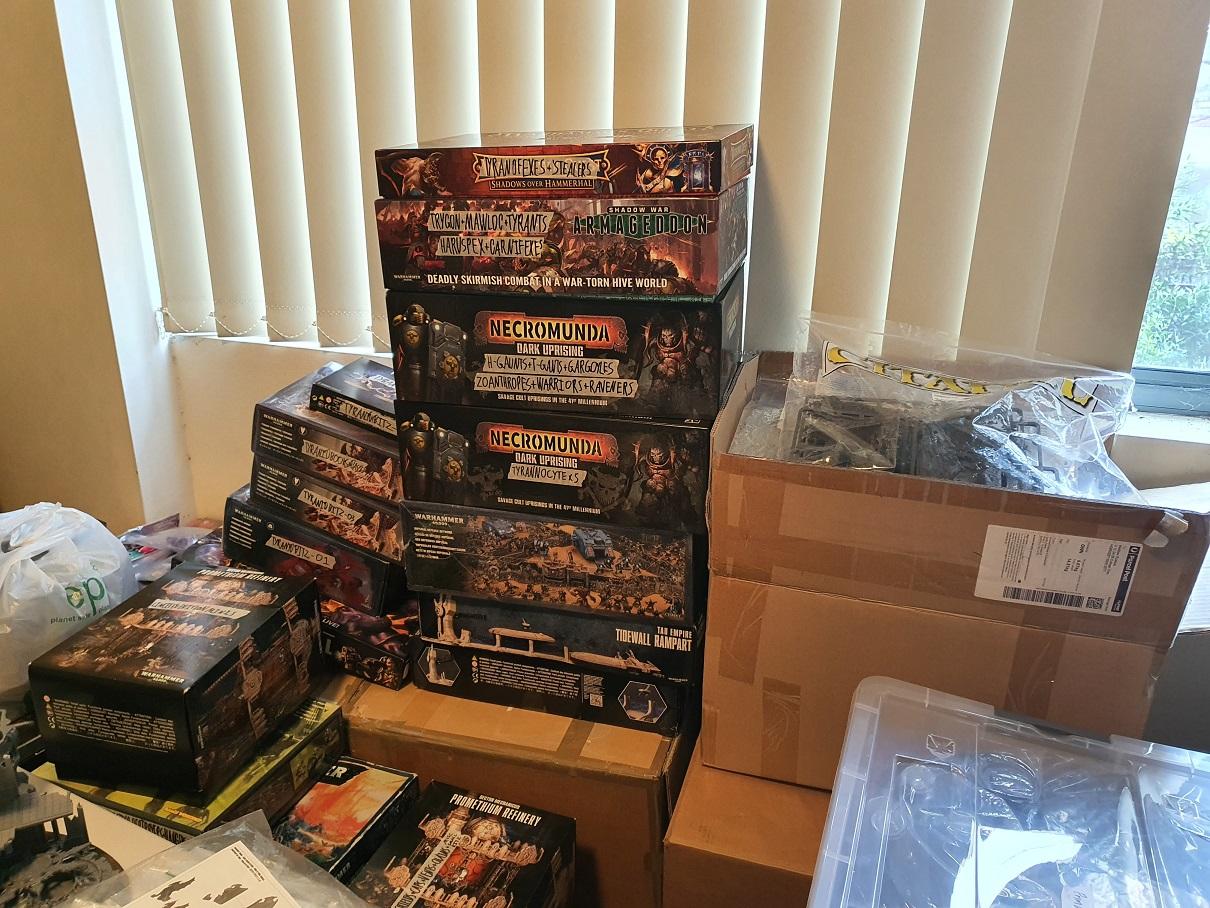
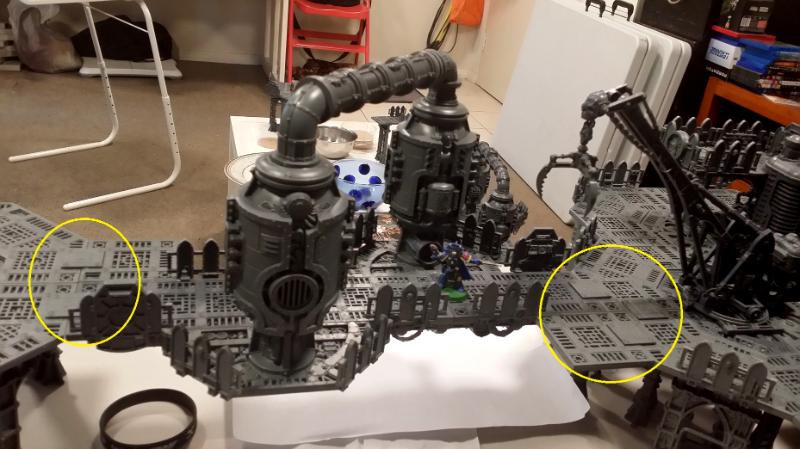
Ok, so, I like GW's terrain. There are very few pieces of what they have offered over the years that I have not liked, and I own scads of it. I have tables worth of CoD terrain that we'll get to one day, but for now I want to just focus on GW's industrial terrain, their Sector Mechanicus stuff. First showing up with the fire-and-forget Shadow War: Armageddon box, this terrain is ostensibly a replacement for the Necromunda terrain that I love so much.
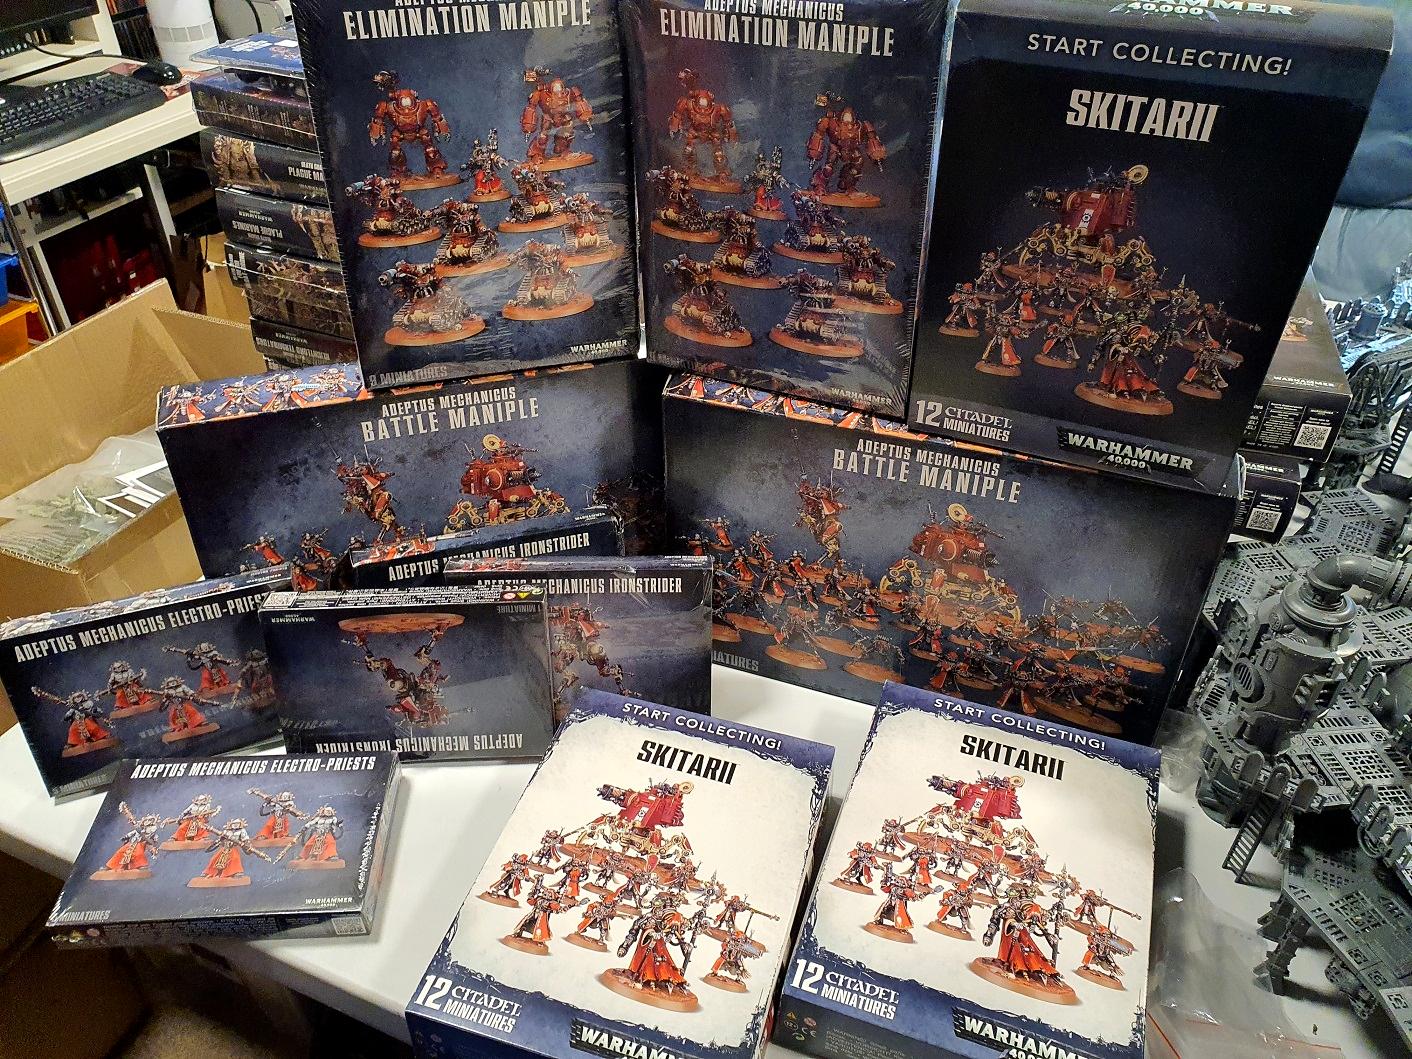
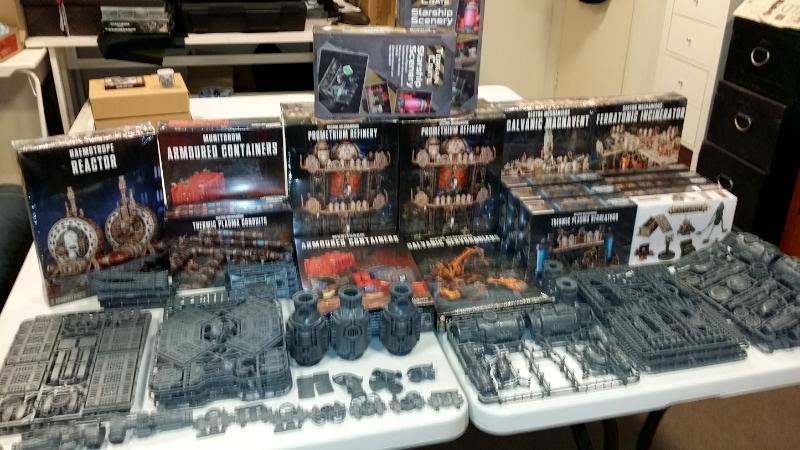
I like this terrain so much that I... well... bought a fair amount of it.
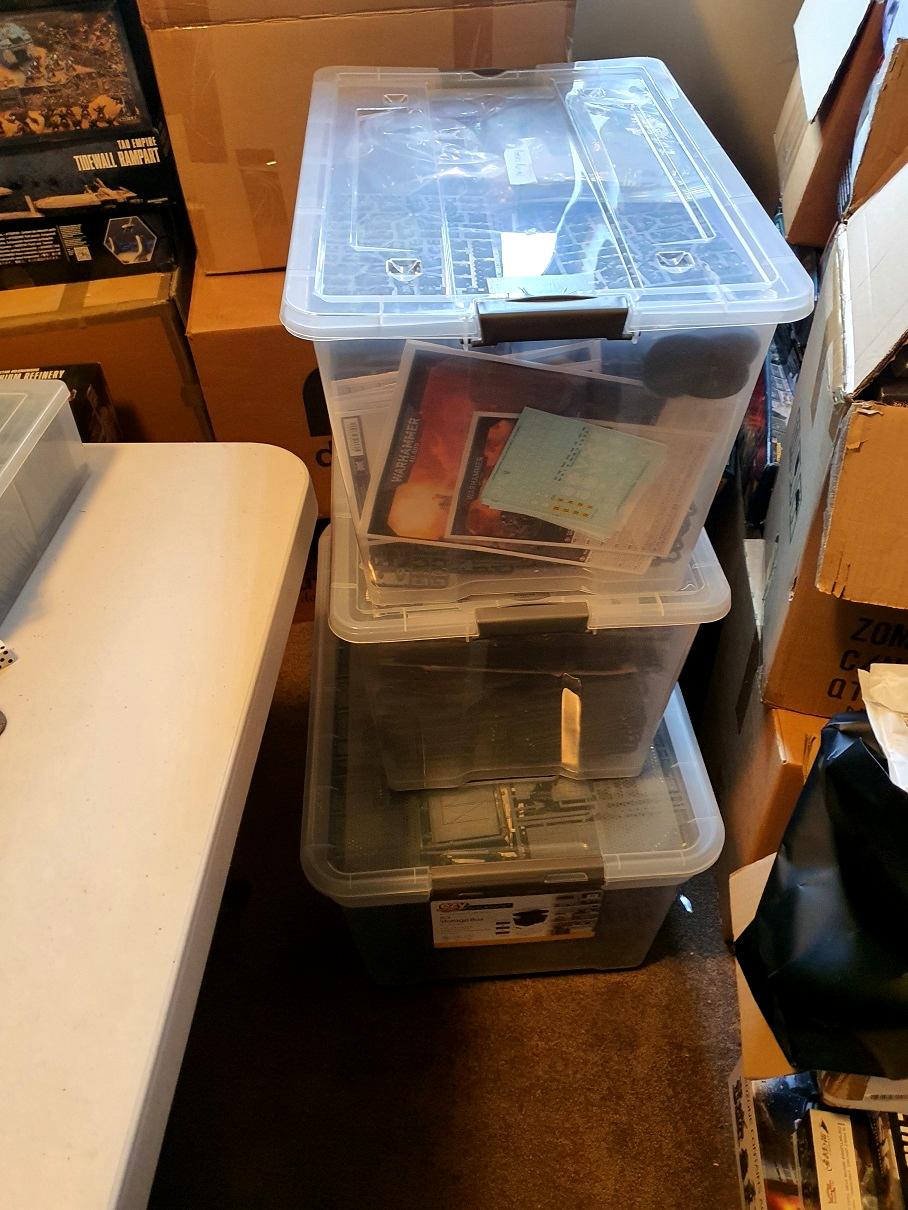
Also, there are no repeat items between the first and second picture. 
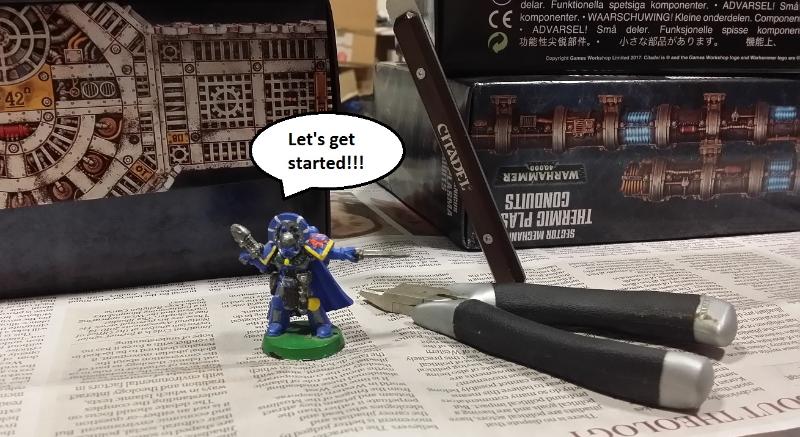
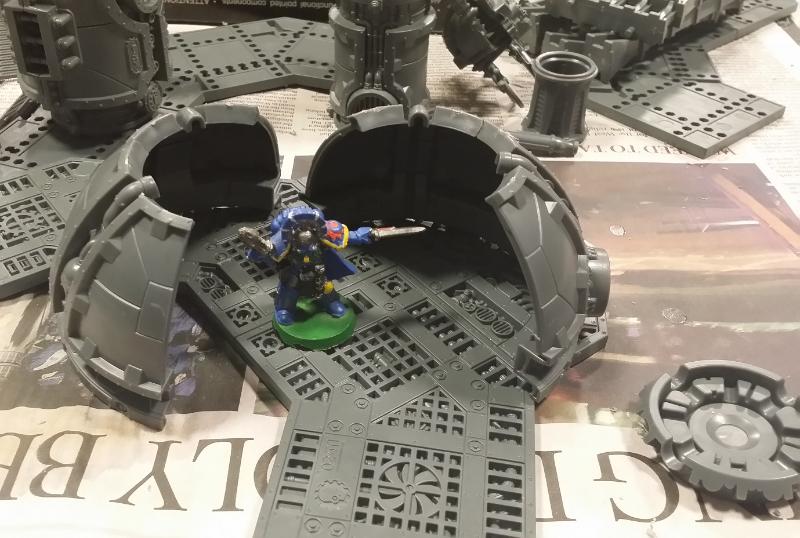
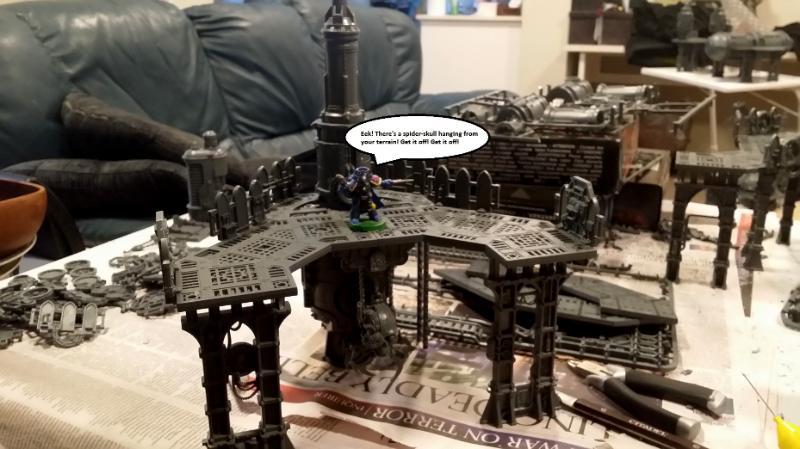
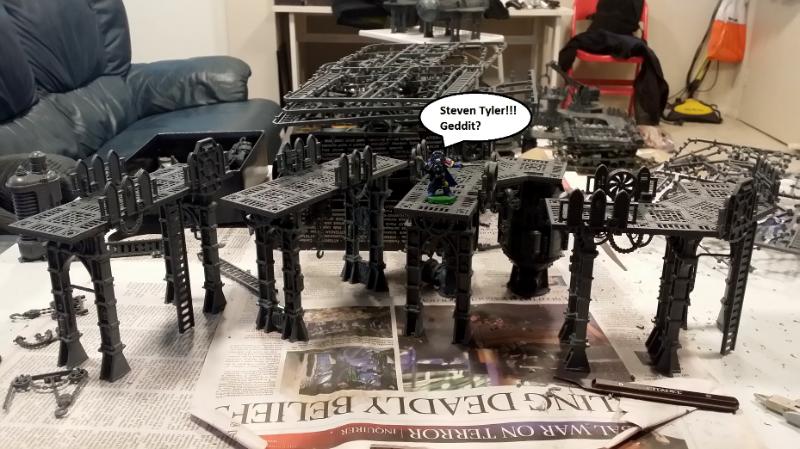
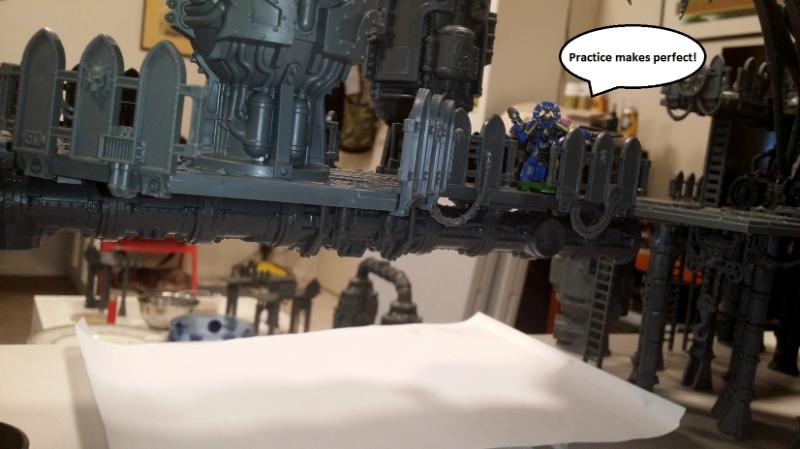
Now I've built a few pieces that we'll get to in a little while, but for now we need to start organising this nonsense. I cannot do this alone though, so to help me out I turned to an old friend, someone who has not seen the light of a 40K table in quite some time. He is my first (and most faithful) Ultramarine commander, Captain Short Sword:
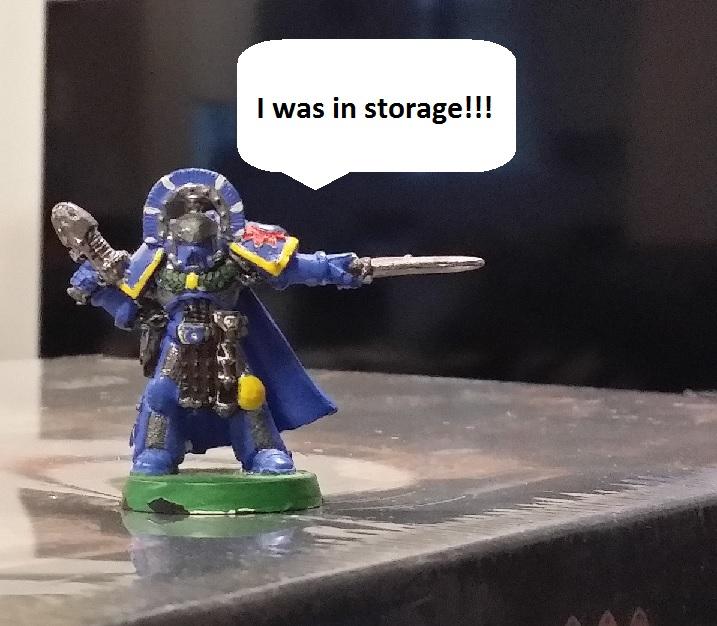
Captain Short Sword will be popping in and out of pictures both to provide scale and, of course, his endless wisdom borne of years of service to the Imperium.
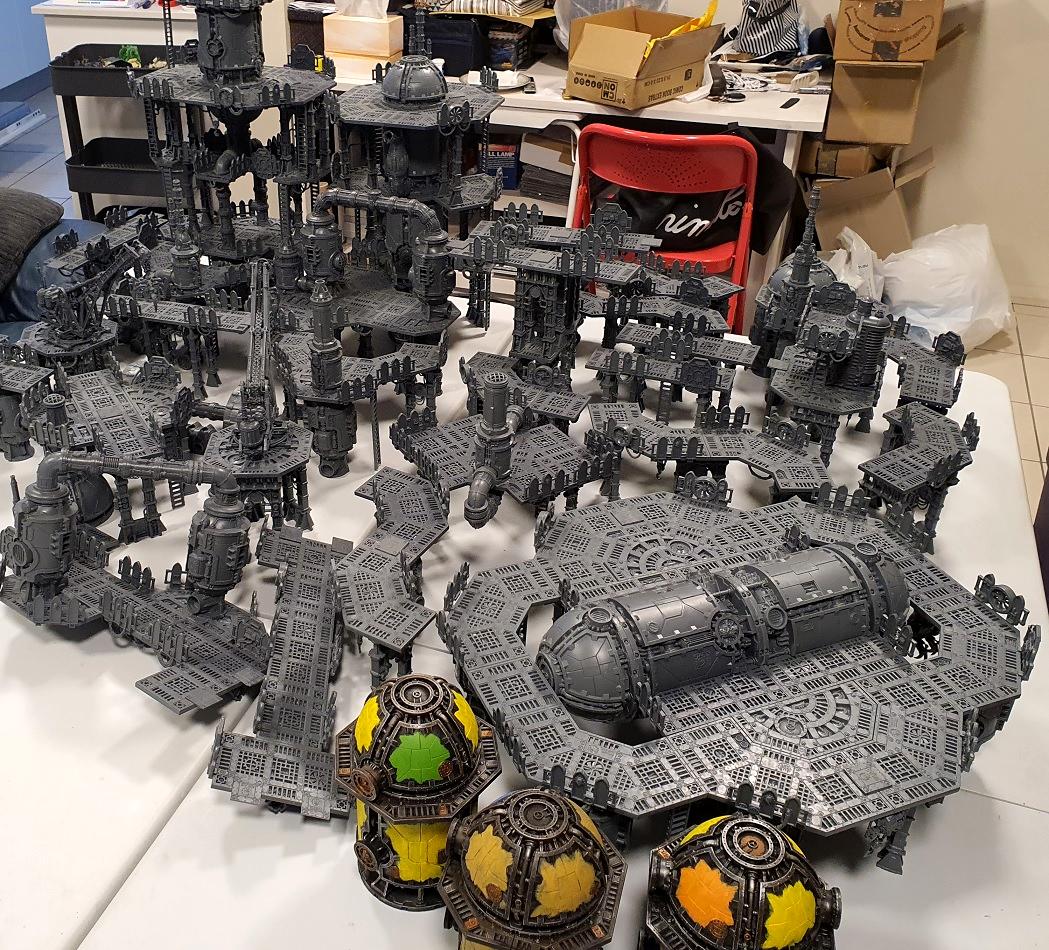
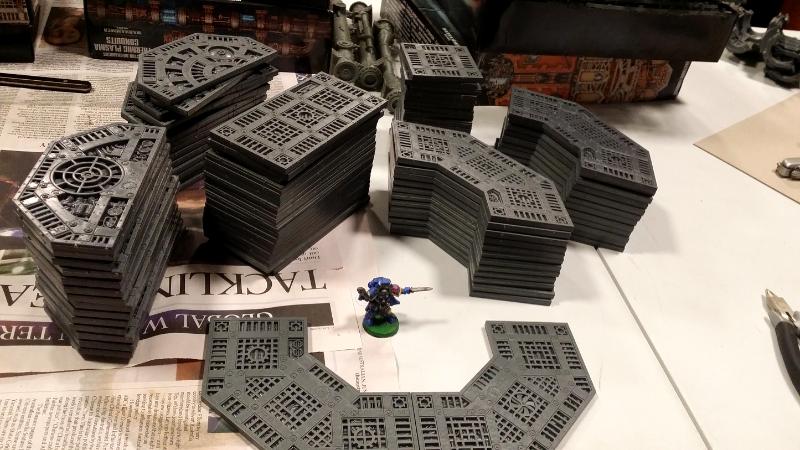
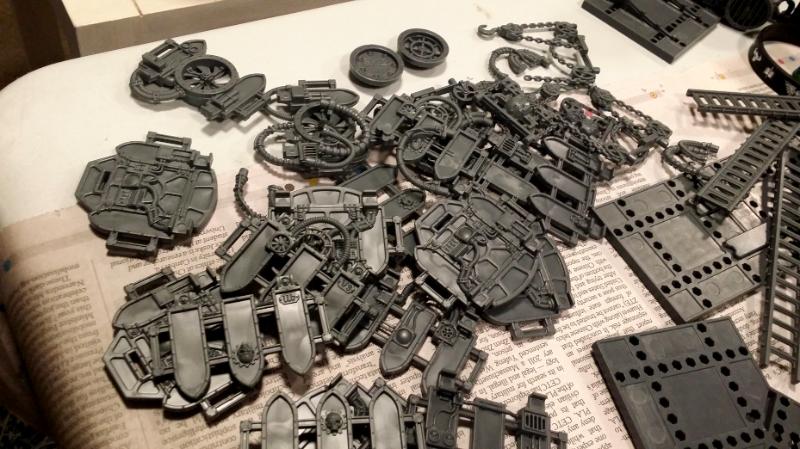
As you might imagine, there's quite a lot of stuff to go through. Almost too much the handle:
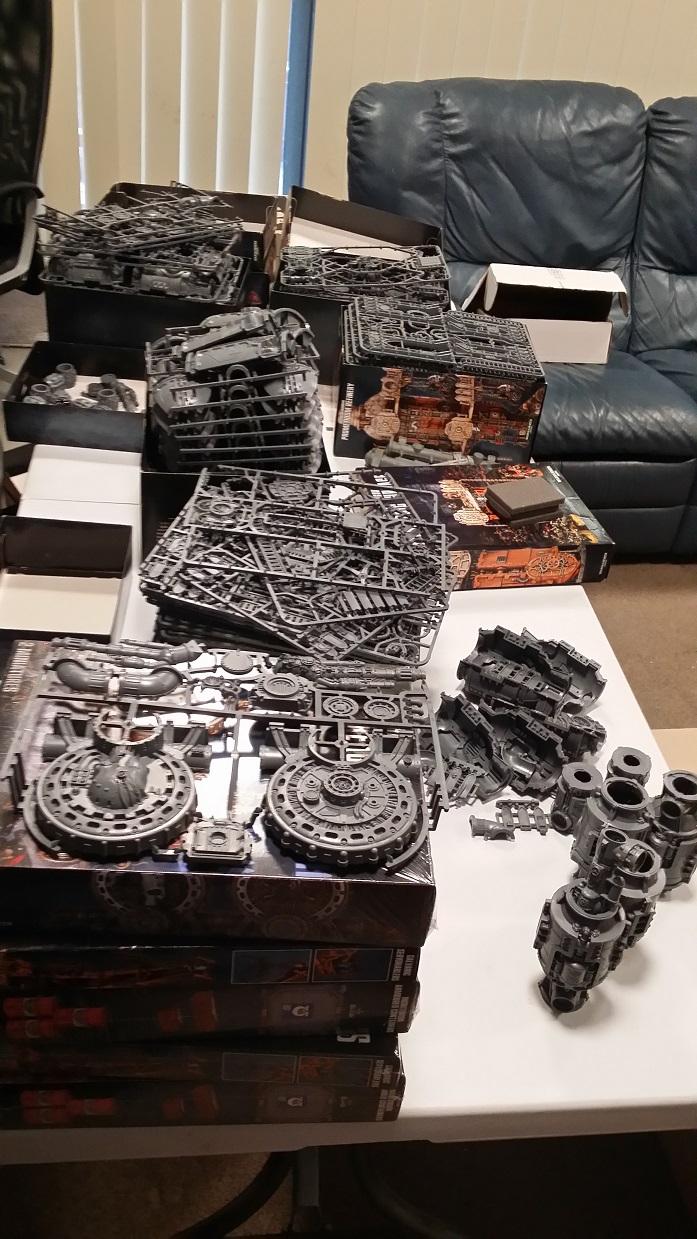
... but with a bit of encouragement from Captain Short Sword I managed to bring some semblance of normalcy to the endless boxes of plastic sprues.
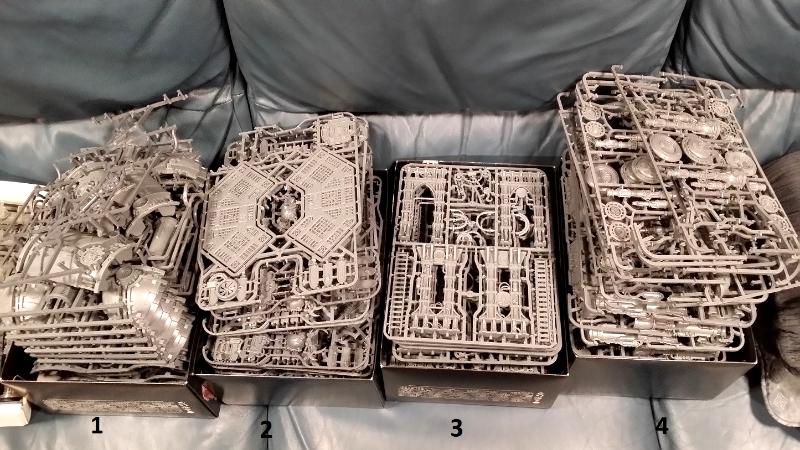
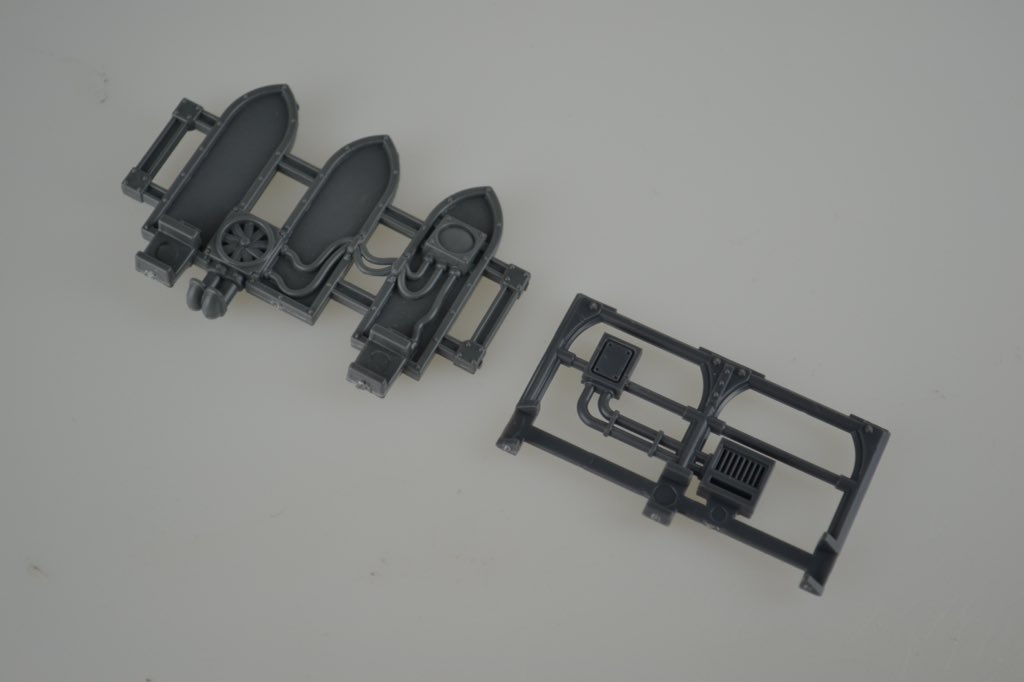
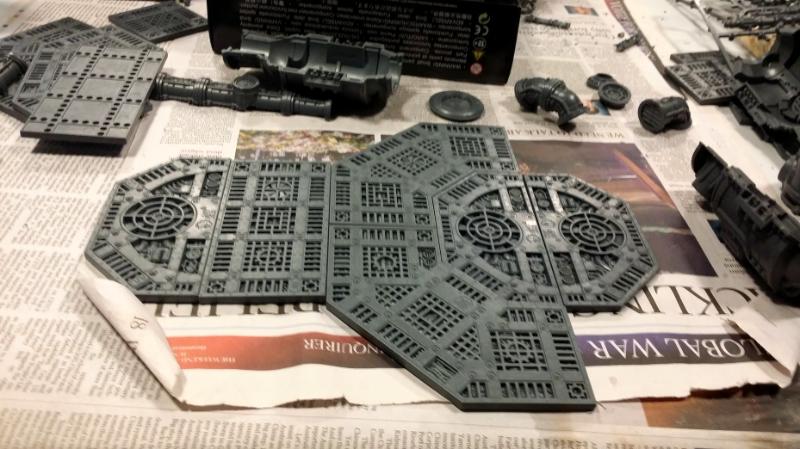
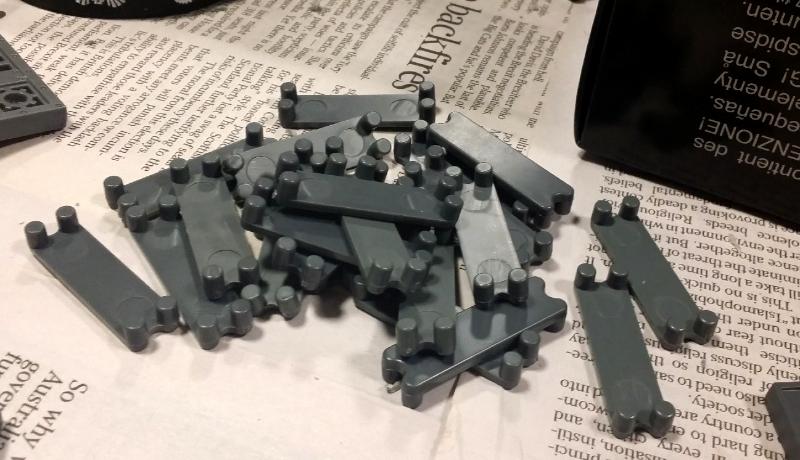
Box 1 - That's a combination of Stacks and Domes, mostly full sprues.
Box 2 - That is nothing but Curved Walkway sprues, mostly full.
Box 3 - Nothing but strut sprues, almost 100% full, with nothing cut out.
Box 4 - Many, many Furnace sprues, about 60% full, the rest with parts cut out.
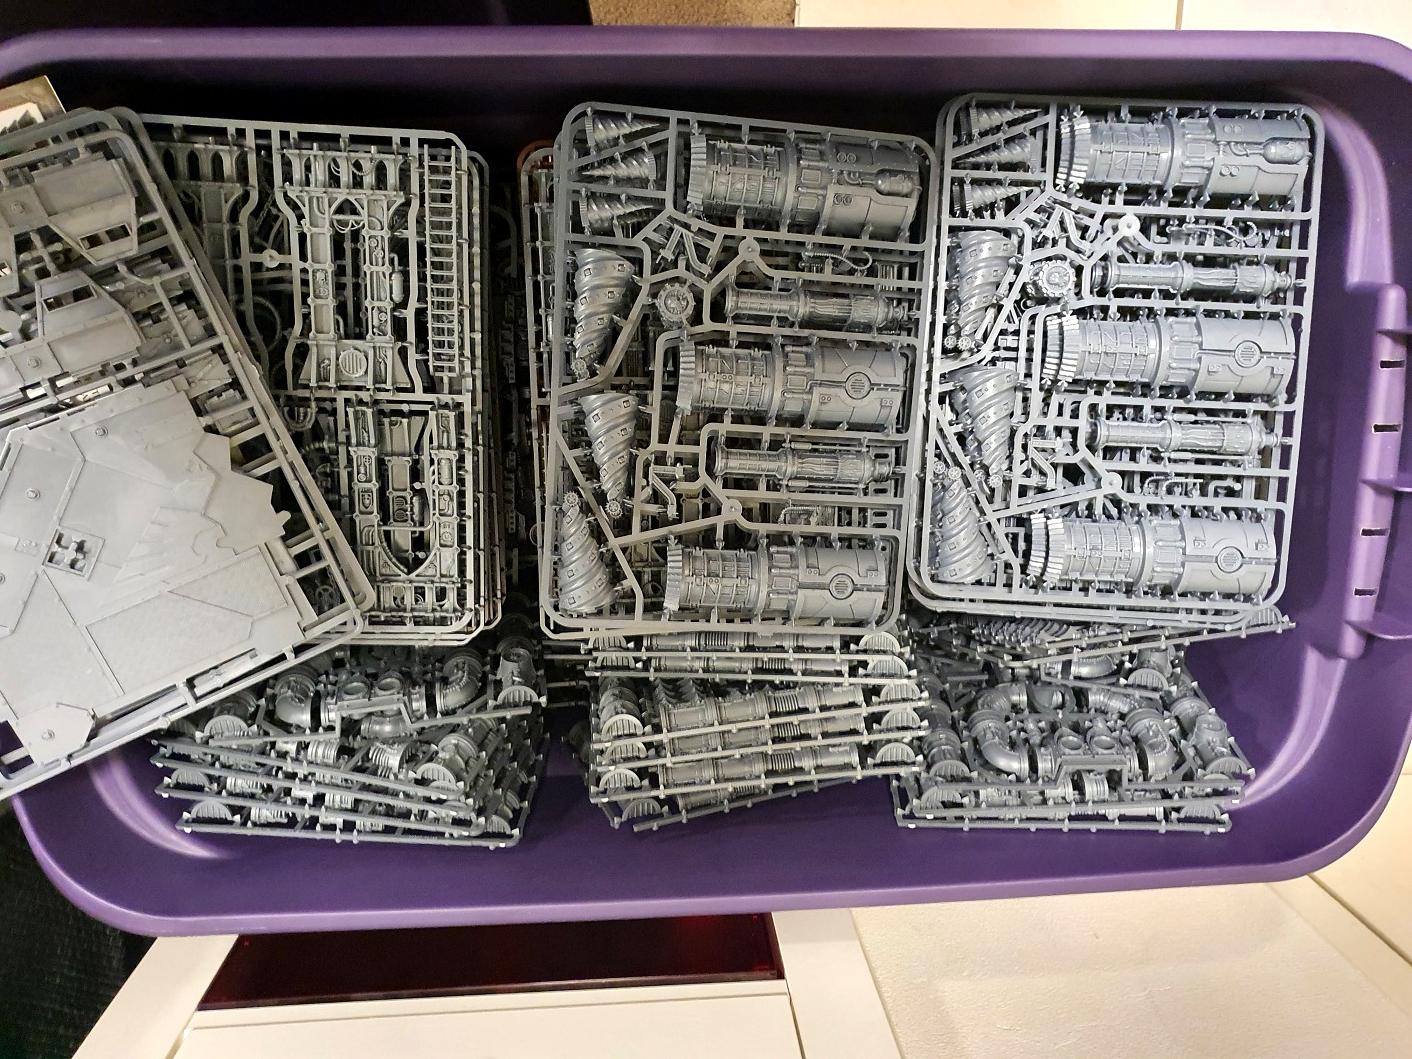
"Stacks? Domes? Furnaces? What the hell is that maniac talking about?" I hear you saying. Well, to simplify things, I will refer to the Sector Mechanicus sprues as follows:
01 Sprue - Curved Walkway
02 Sprue - Straight Walkway
03 Sprue - Circle Walkway
04 Sprue - Dome
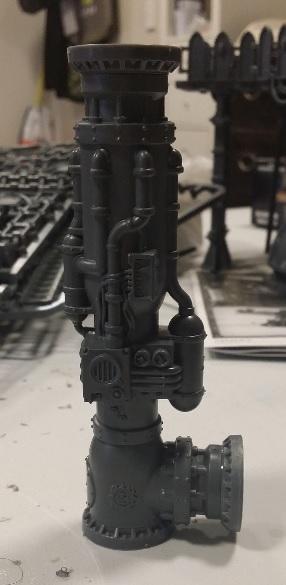
05 Sprue - Furnace
06 Sprue - Stack
07 Sprue - Struts
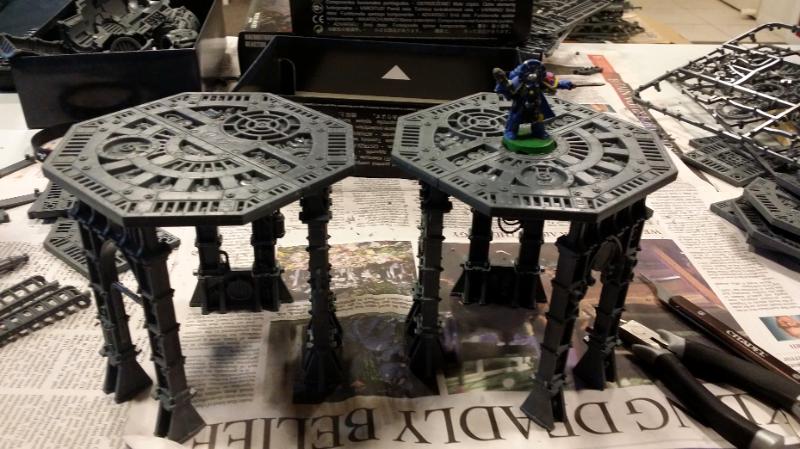
So with everything in some kind of order (?), it was time to... well... I'll let Captain Short Sword say it:
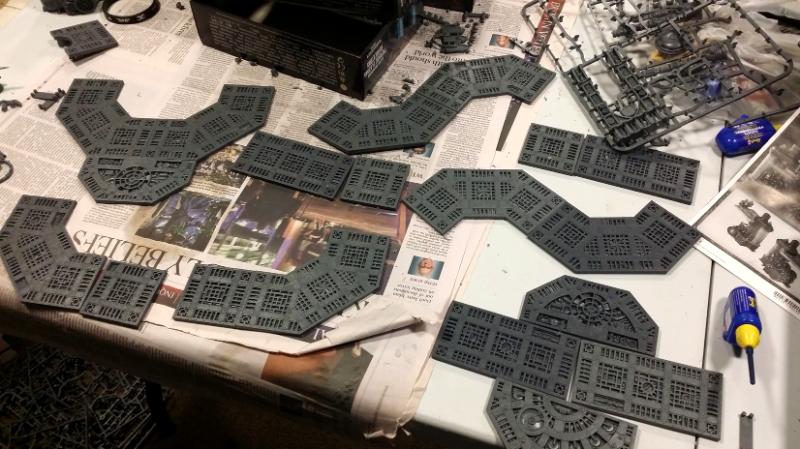
I decided to just start today with the walkways. Get everything that wasn't off the sprue cut out and cleaned up. Walkways are easy to store, basically 2D, and knowing exactly how many I have of each will go a long way to getting all of this organised. It took a couple of hours, and an entire Billy Joel Greatest Hits double-pack, but we got there in the end:
In total that's:
A. 18 short straight walkways.
B. 19 long straight walkways.
C. 24 curved walkways.
D. 29 circle walkways.
... plus an extra set of double curved walkways that was already built, but constructed using the peg thingies in a way that made it impossible to use in one of the buildings I had already made, so it became a spare that I'll work something out for later.
Preparing and cleaning all those walkways left a big pile of plastic clippings, but thankfully Captain Short Sword volunteered to clean it up for me:

That's all for now.
Soon I'll show off the few buildings I have made from this, and where I intend to take it...
Thanks for reading! 
BYE
20609
Post by: Tyranid Horde
Insanity is one word for it! Subbed, always like seeing what people can do with GW's terrain.
10667
Post by: Fifty
You have an even bigger problem than I do... and I have at least 40 of each flavour of Aspect Warrior.
51769
Post by: Snrub

Ya mad bastard! Look'it all that terrain!!
That's about 5 boards worth for crying out softly.
I think we'll also need evidence of this "tables" worth of CoD buildings too. Sounds like a lie if you ask me... 
Subbed and eager for more!
494
Post by: H.B.M.C.
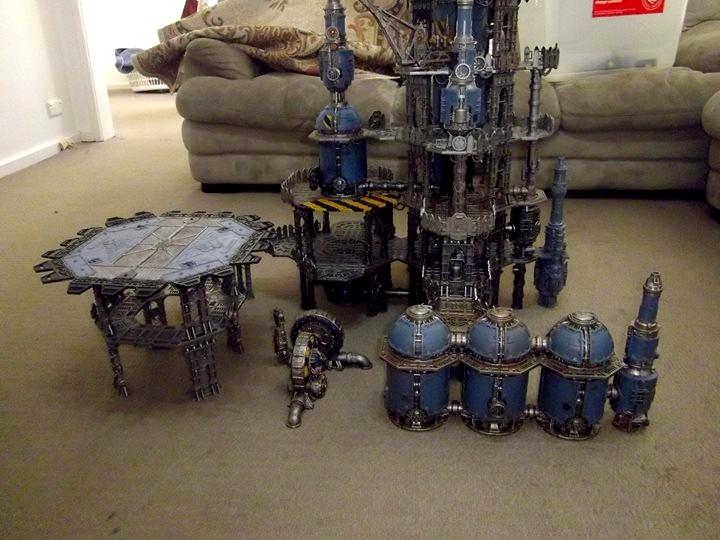
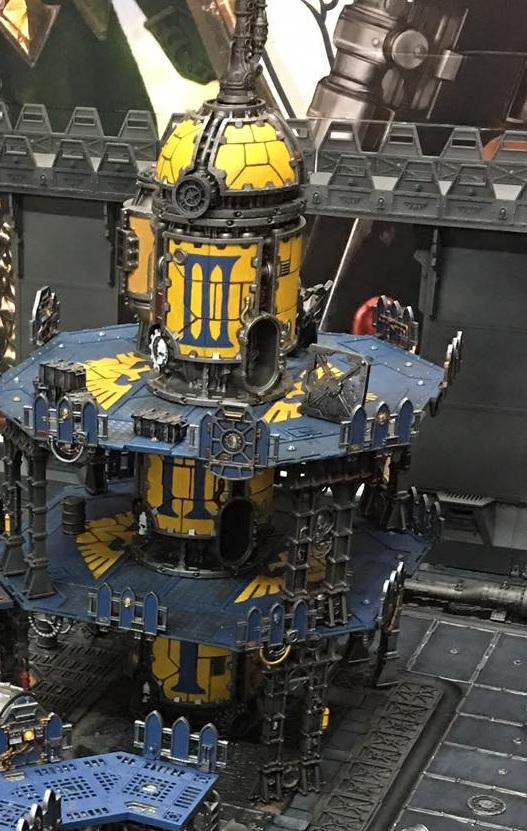
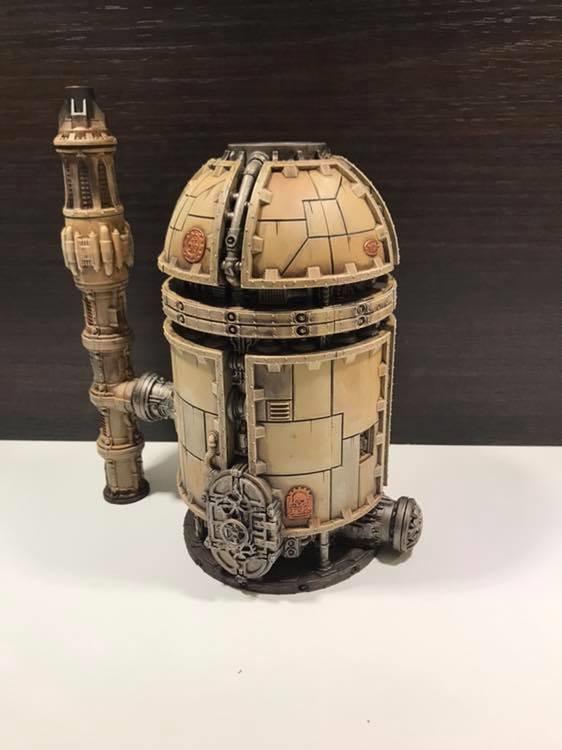
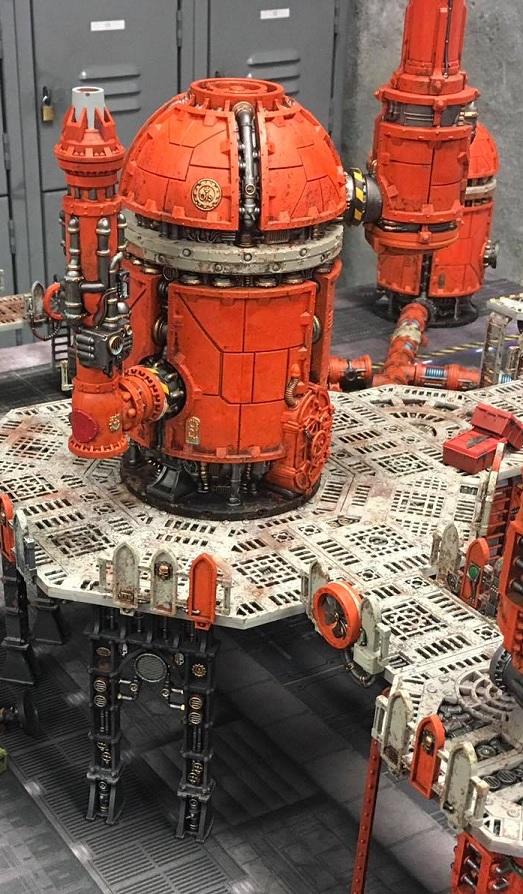
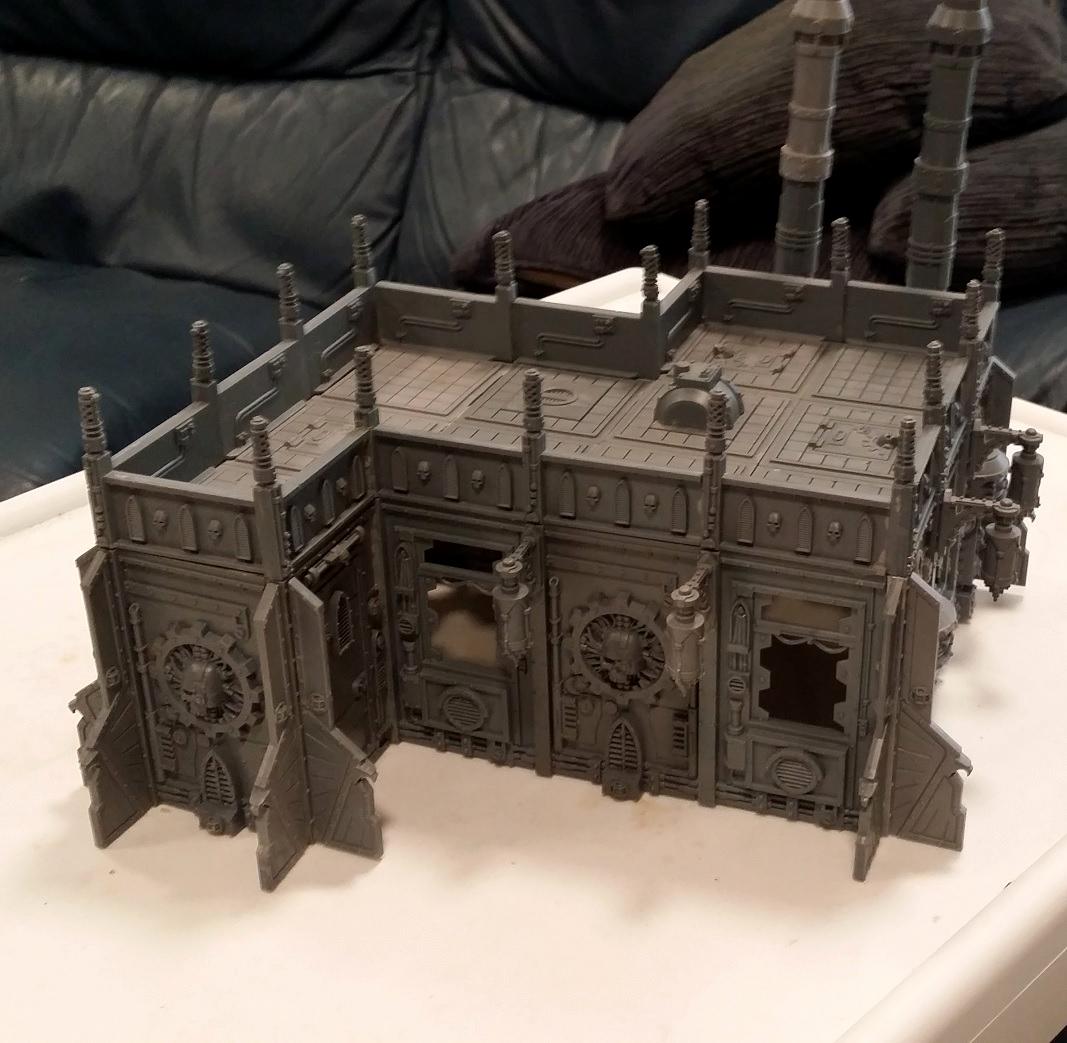
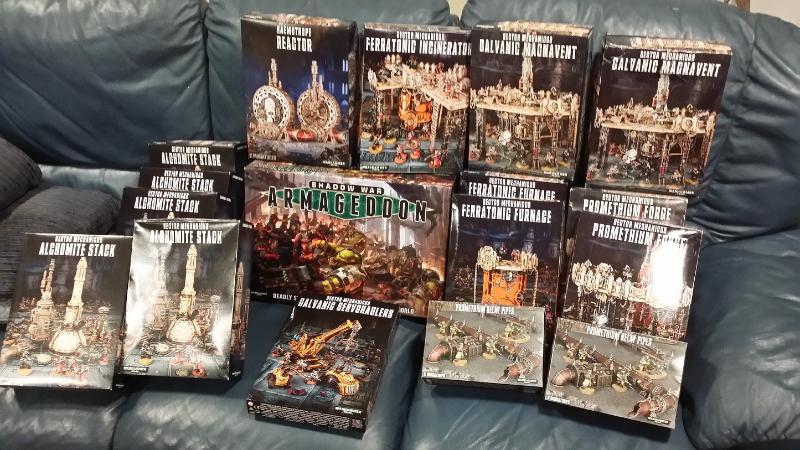
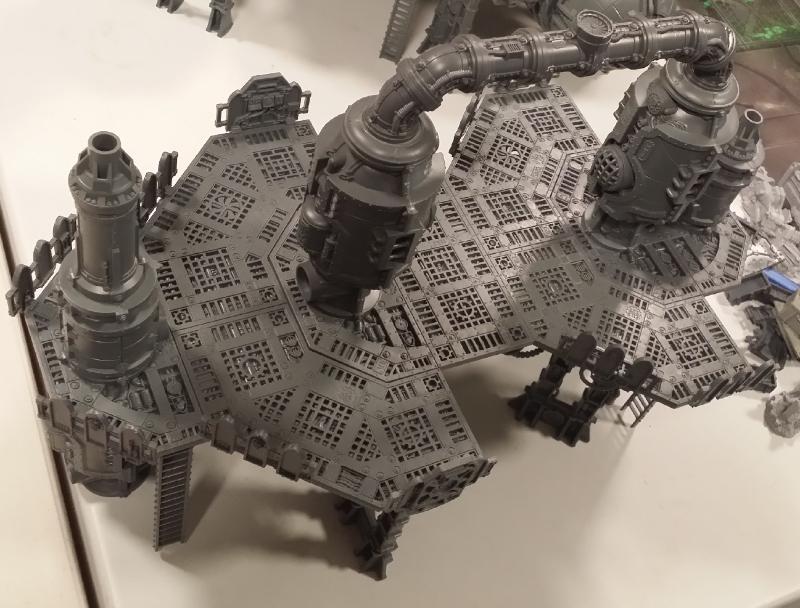
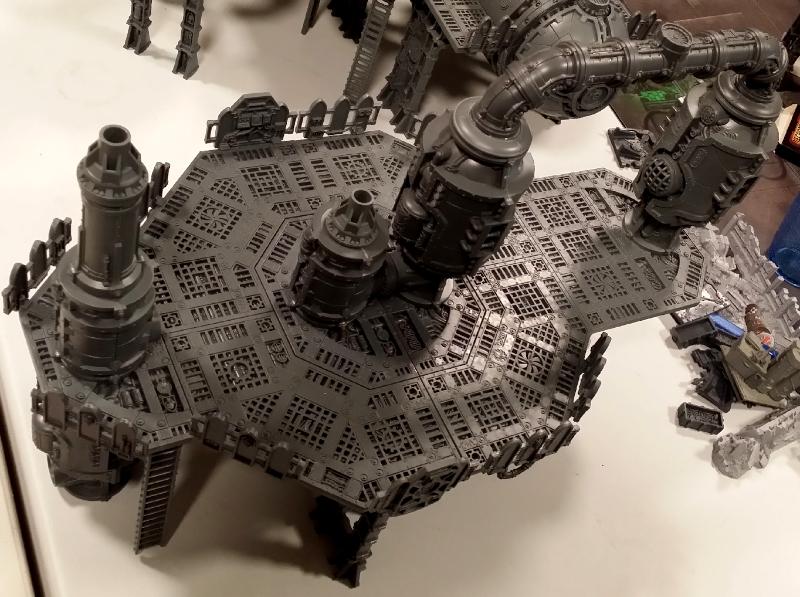
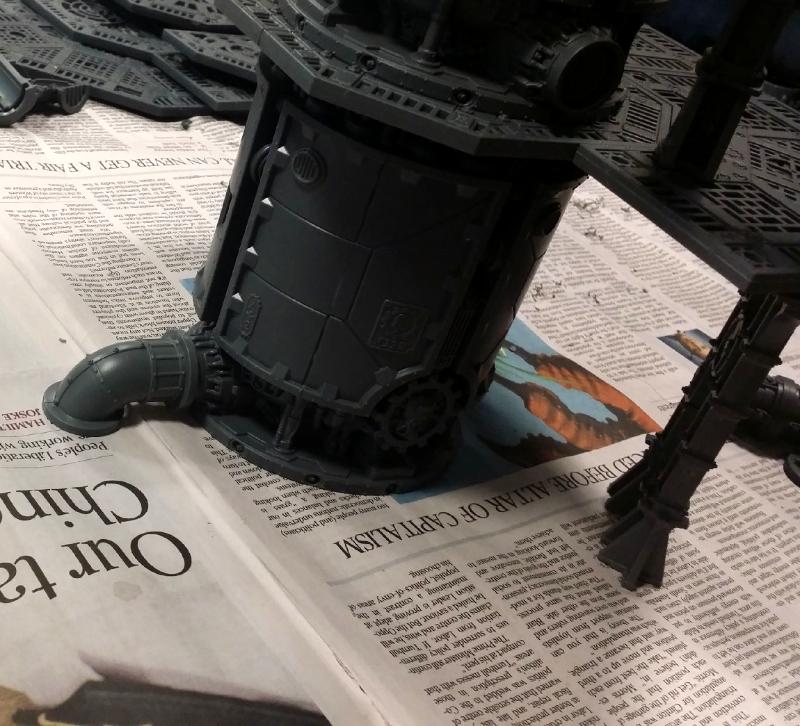
Here's some I prepared earlier... I have experimented a little bit with the Sector Mechanicus terrain, making 3 buildings (plus one platform that was a mistake), mostly out of the stuff I got initially and some bitz ordered stuff. So before I get into building the new stuff I thought I'd show off some of the pieces I'd already constructed. The Nipples In GTAV there is a set of buildings I've seen people refer to as "The Tits". They look like this:  I wanted to do something similar to this, and, never one to do things in half-measures, this was the first thing I attempted when using the Sector Mechanicus kits. 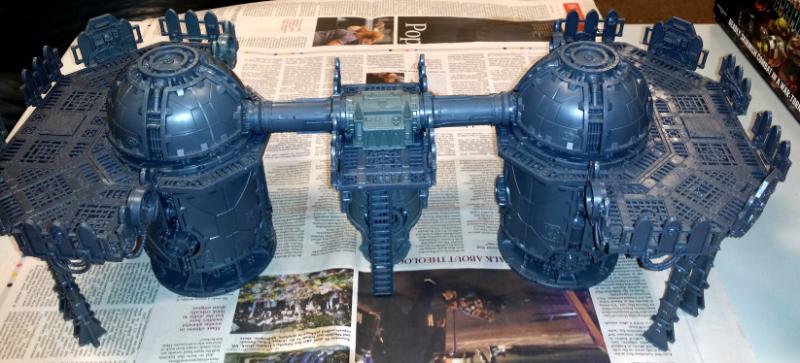     It's three separate pieces, two that are basically mirrors of one another and a central piece with a ladder on either side leading to the control panel thingy from the old Promethium Pipes kit. The mistakes I made when building it were that the two main platforms have no ladders up there, and the railing goes all the way around meaning you cannot connect it to other Sector Mechanicus structures. Still, I think it looks cool and it almost came out exactly as I imagined it. If the Plasma Conduit pipe kit had been around at the time I reckon I could have made it so the pipes curved out from the top of the 'nipples', and connected rather than via the centre console. In any case, I like it. The Skull Generator I was't 100% sold on the Haemotrope Reactor when I first saw it. A little too... skully, if that makes any sense. Of course I was viewing that kit in a vacuum, and had no idea of its potential when combined with other kits. Not satisfied with just building one on the ground (I will eventually; I have 3 others still to build!), I figured I'd tie it to some other Sector Mechanicus parts. Thus, the Skull Generator was born. 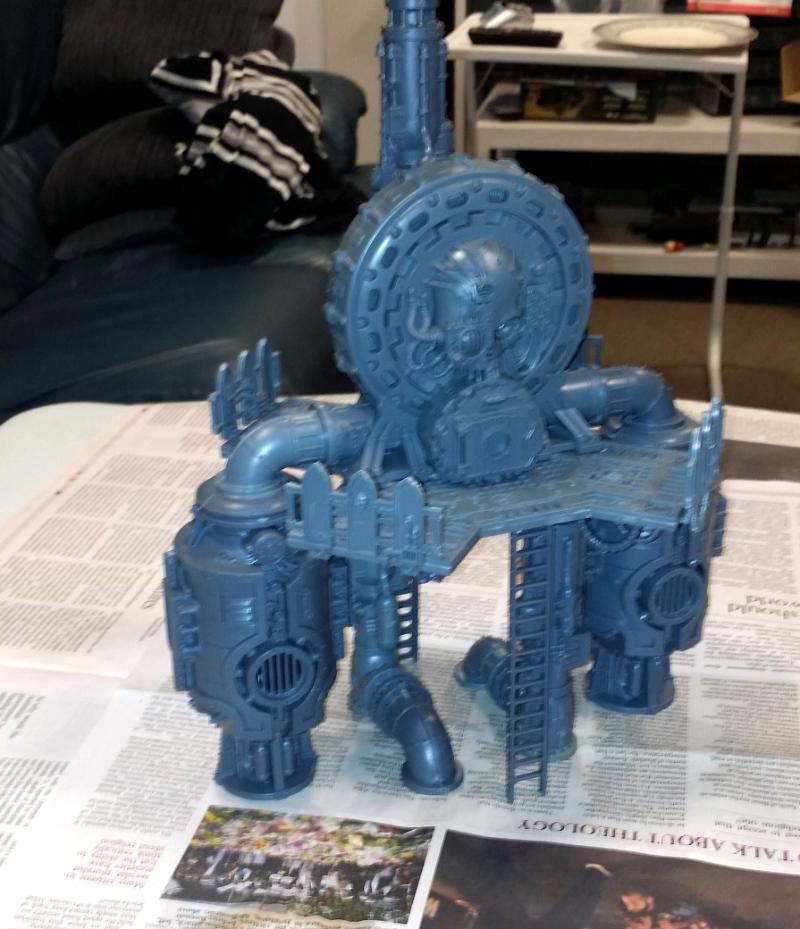  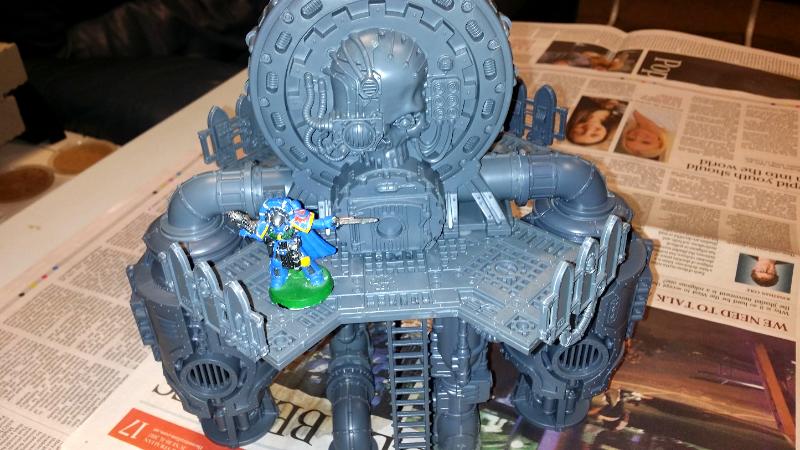 When looking at this you'll see two there are two pipes running straight into the ground from underneath the platform (best seen in the second picture above). Those were not originally part of the building and were added once the rest had been completed. The reason for this is when I finished I realised that the generator was connected to the two furnaces, but nothing was holding the platform up!!!  I shoved in the two pipes both because I didn't want to use any struts and because I thought it looked thematic. The Mistake Platform Not everything goes to plan when you are experimenting, and at the time I knew nothing of Ray Dranfield's Twitter and the excellent information he's given on his own terrain. So with this one, I kinda got some stuff wrong.  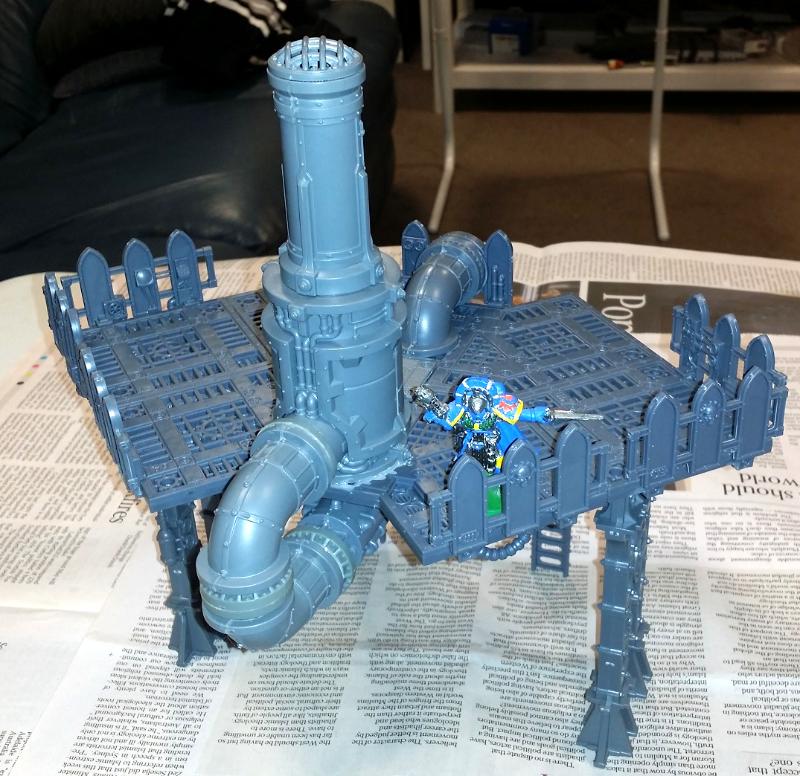 What you see here, The Mistake Platform, is actually the first go at the Skull Generator. I wasn't sure on how far the pipes would go and put more flooring into this than I needed to. Not wanting to waste the platform I decided to turn it into something else, putting the small kiln from the dome sprue at the back, looping a pipe around and under, which then feeds back up to the top layer and out to the fan on that railing. It makes zero sense, but it's a 40K building so who cares? Pipes a'Plenty I went a bit nuts with this one, using many, many furnaces and linking them all the various pipes. Just a nice multi-layered piece and the tallest one I've made so far.     These pictures are older than the others you've seen, so no Captain Short Sword to show how big it is. Trust me though, he was impressed. Far taller than his sword is long.  That's all for now folks. When there are more updates, I shall provide them! BYE
120033
Post by: Excommunicatus
Worthy of laudation.
As a Cardiacs fan, that is the highest-praise of which I am capable.
30344
Post by: monkeytroll
The tower furnace piece is very cool, like that a lot.
110309
Post by: ListenToMeWarriors
I knew from your posts that you have a lot of terrain...but seeing is believing. Some exceptional builds here, I think that The Nipples are my favourite with The Skull Generator a close second.
And more Captain Short Sword please.
9910
Post by: CommissarKhaine
Impressive... You made some great combinations, looking forward tgo see what else you can pull out of your hat
116402
Post by: Dr. Mills
Subbed and exalted good sir!
I'm currently after ideas for my own industrial board, and along with Captain Short Sword adding humour this thread will be looked at.
Daily.
20609
Post by: Tyranid Horde
Quite like your tall furnace building, all excellent work!
99
Post by: insaniak
Yup, this is off to a cracking good start.
518
Post by: Kid_Kyoto
Defiantly watching this!
120534
Post by: acrowsperch
The Skull Generator just screams "Yes Man"-esque AI console to me--
looking forward with interest
13817
Post by: Carlovonsexron
As someone who is unlikelly to ever own much, or even any of those kits (no space in a Taipei apartment!) I am so, so, so happy that I can live vicariously through you, you mad man, and see someone do that which I can only dream of.
494
Post by: H.B.M.C.
Sorry to trigger your sub alerts for anyone who has sub'd this thread, but no updates today. My mother was visiting, so the pile of endless sprues had to vanish into another room for a while, so haven't had a chance to work on anything else.
The next two days will be all about building some of this stuff, so I'll provide updates as they arrive.
My aim is to have enough for one 4x4 of Necromunda terrain by Monday, when I have a bunch of people coming over for a game.
4514
Post by: Myrthe
YESS !!!!!
As inspired as I am by the sheer awesomeness of this thread and H.B.M.C.'s ambition, I am equally relieved that I've found a kindred terrain spirit that makes my endeavors seem restrained by comparison !!
Thank you, H.B.M.C. for your vision, creativity AND for giving me someone to point out to my wife when I defend my outlandish purchases and say "See, I could be worse".
Can't wait to see how your project evolves. Have a great time with it !!
20983
Post by: Ratius
More commentary from the UM captain please, funny stuff.
98217
Post by: Skinflint Games
Can never have enough terrain related lunacy. So very subbed.
16387
Post by: Manchu
Wellllll color me subbed.
I have a similar addiction to affinity for terrain. You first few builds are excellent. Now get some paint on ‘em!
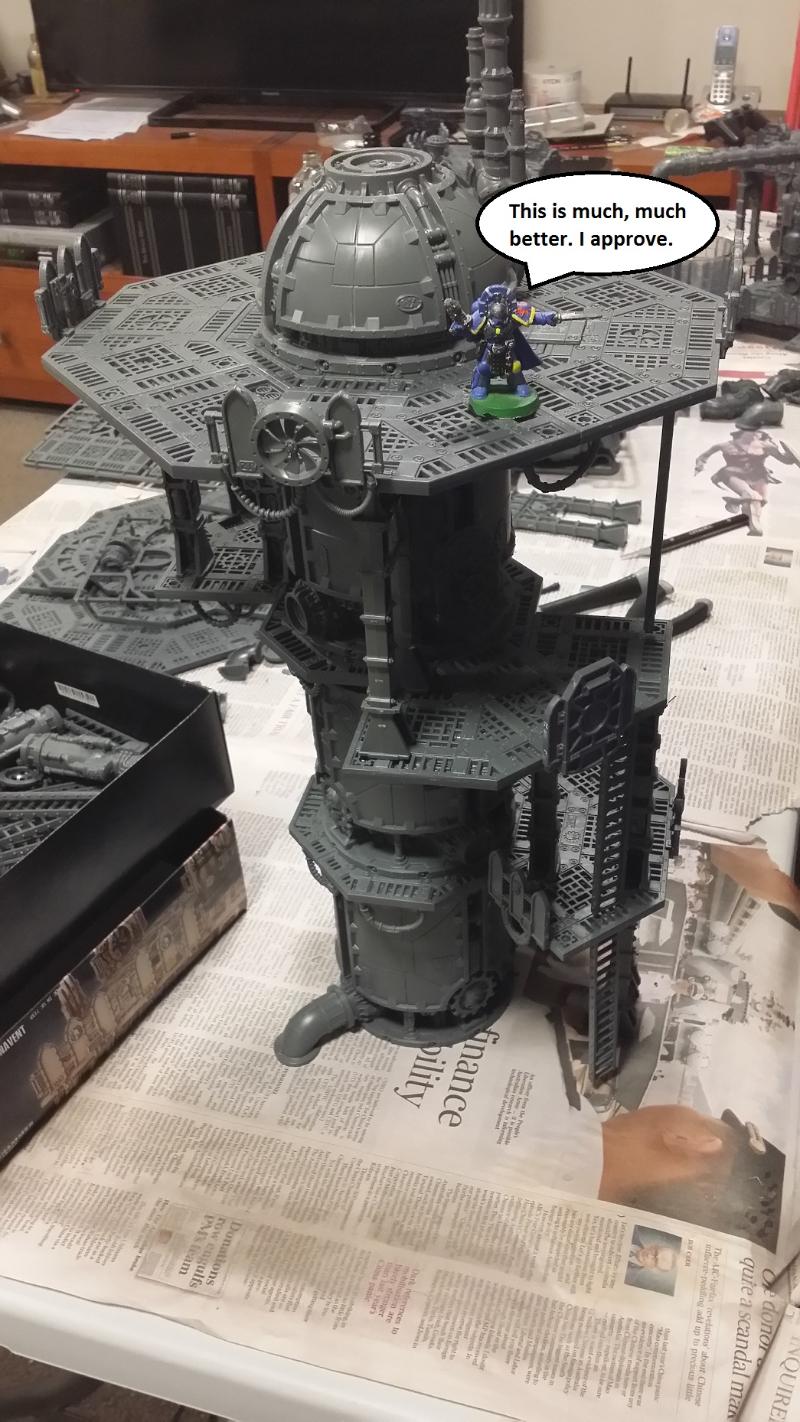
494
Post by: H.B.M.C.
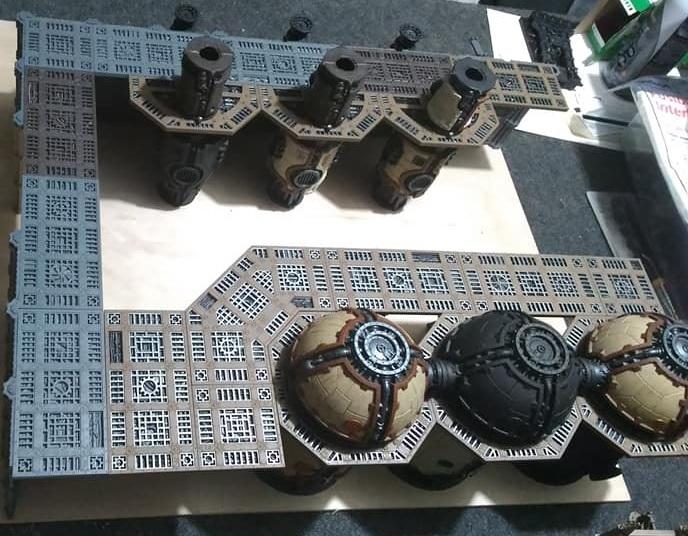
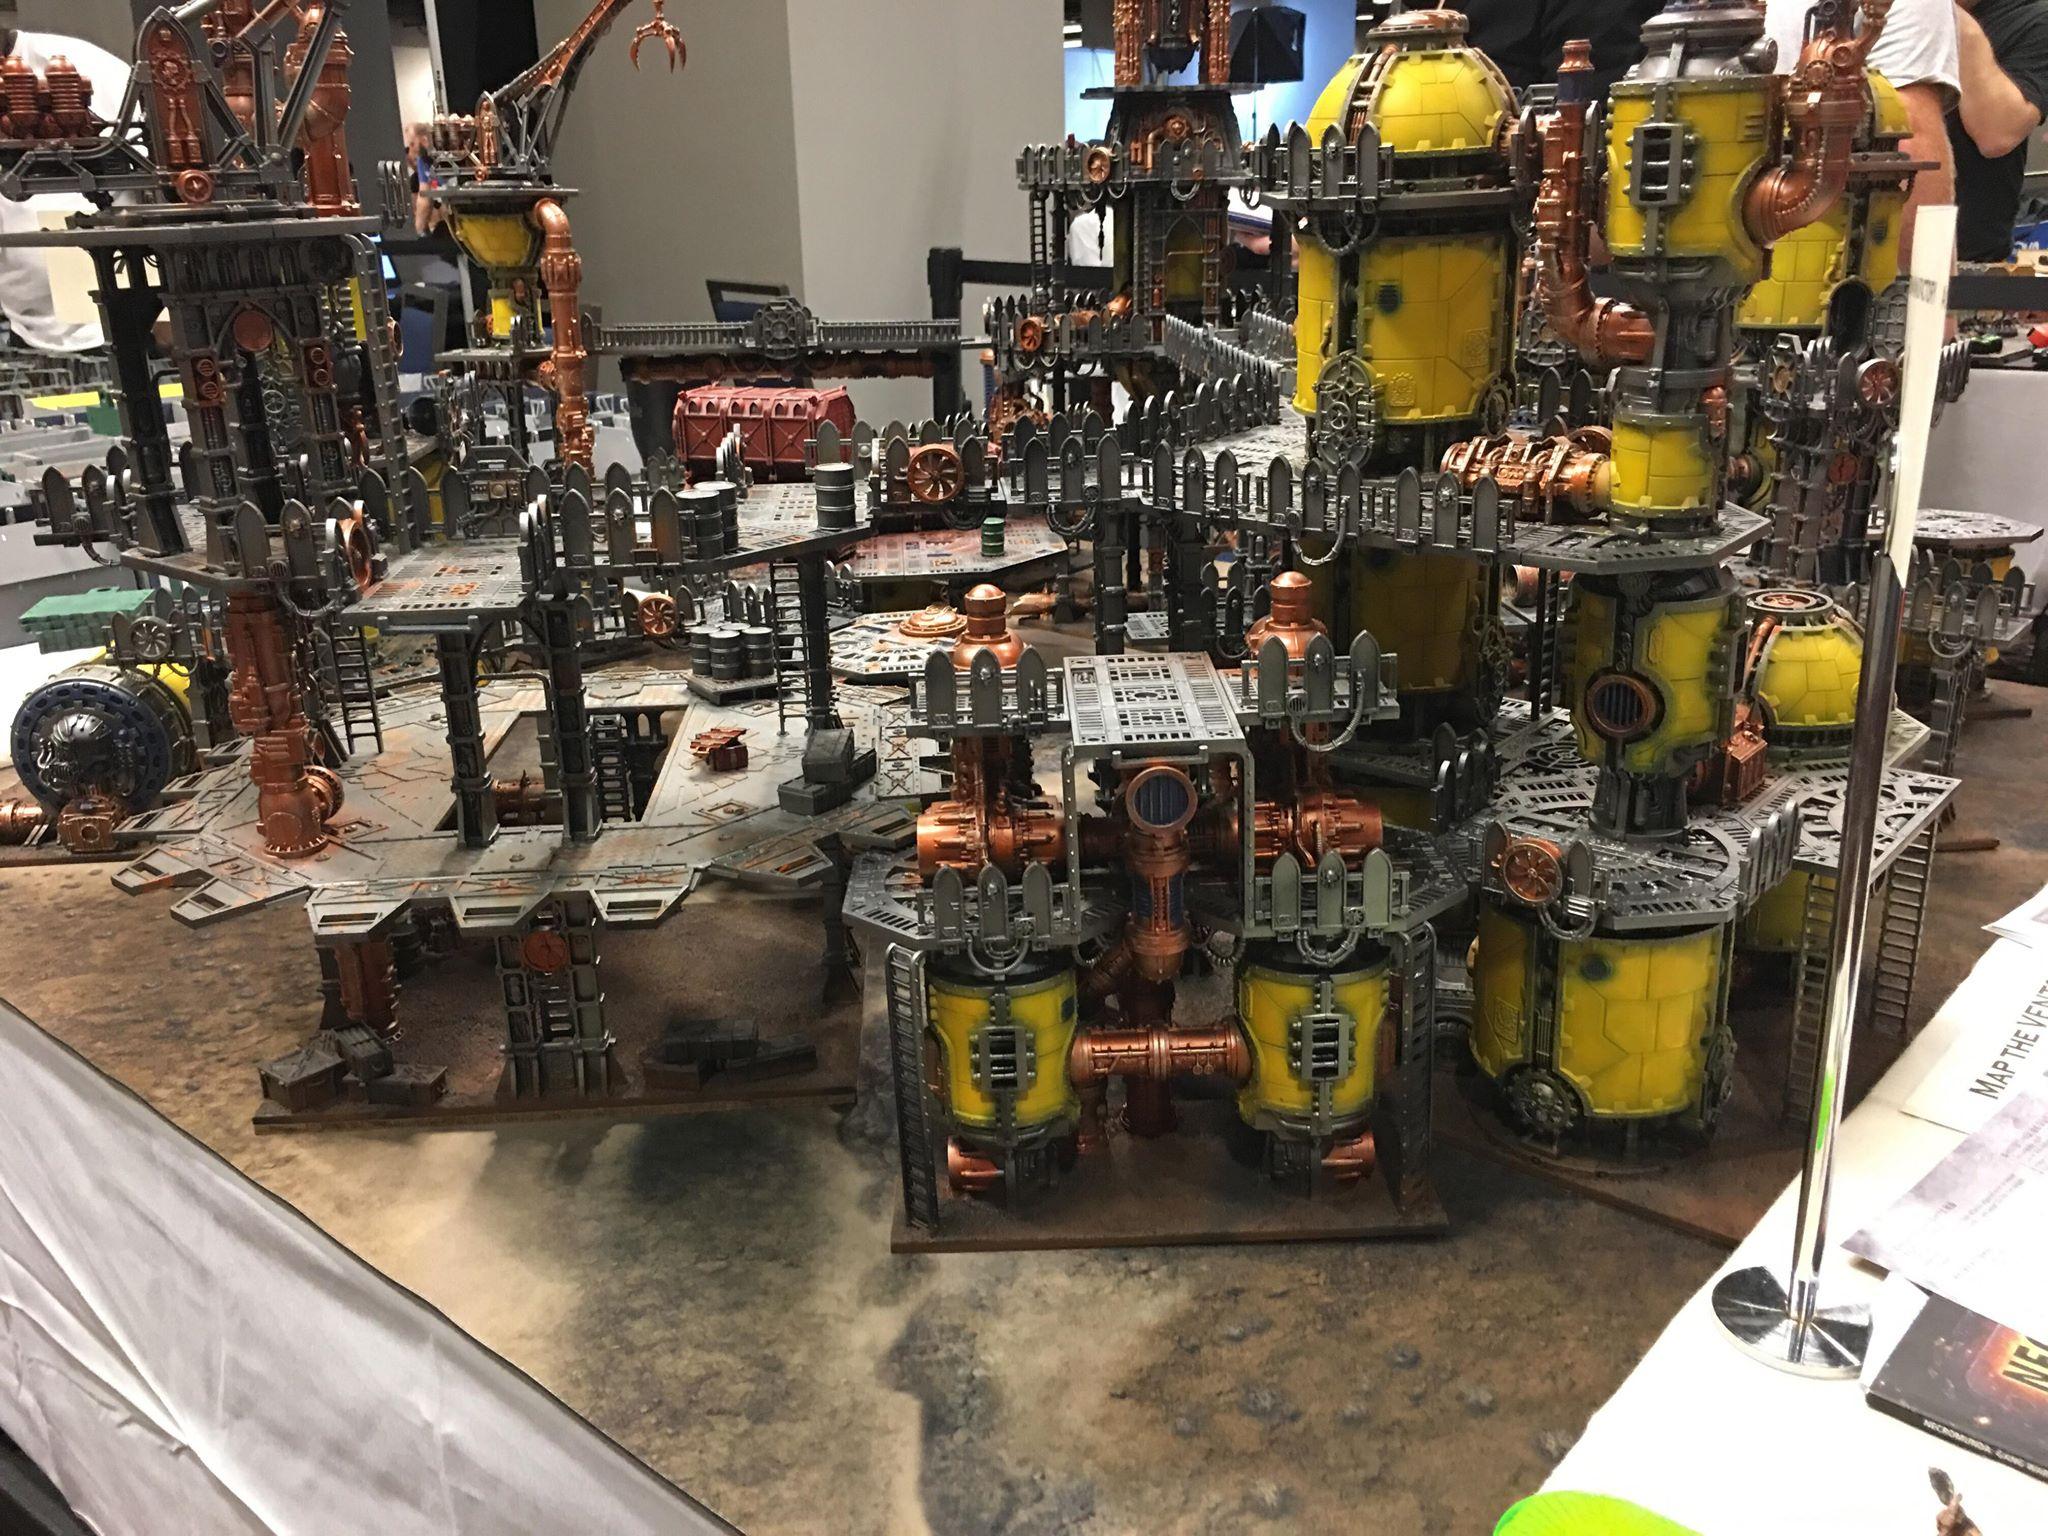
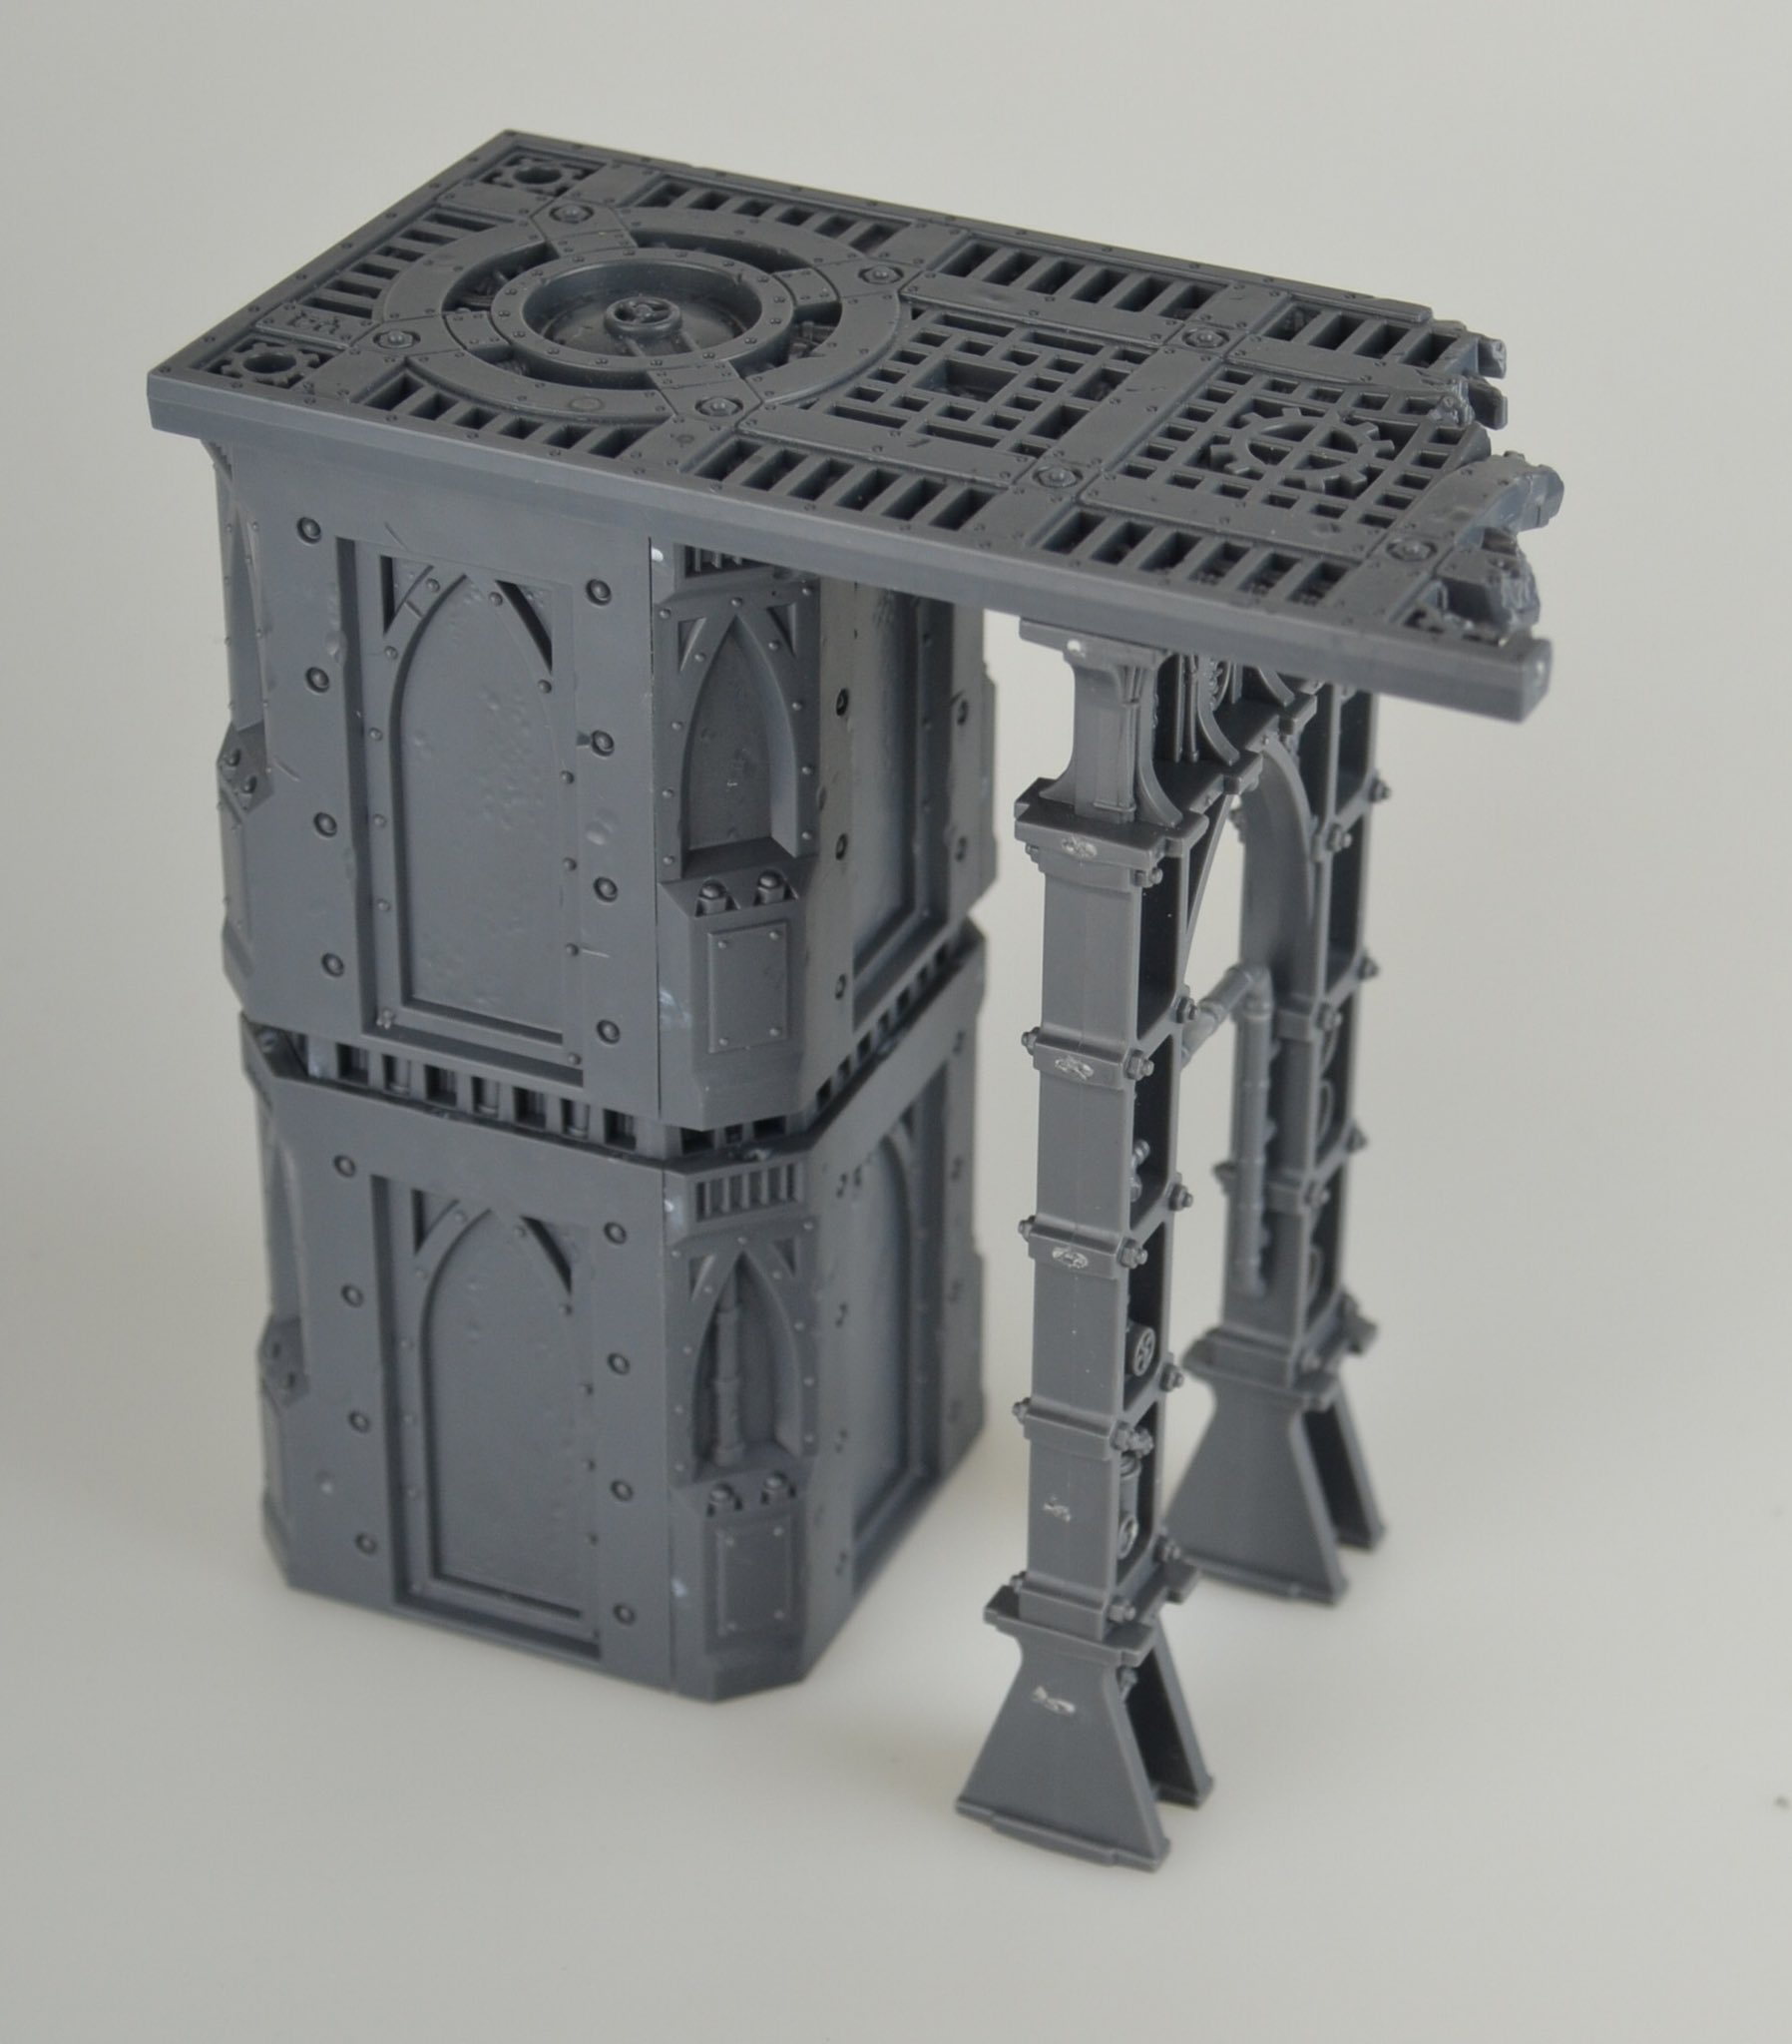
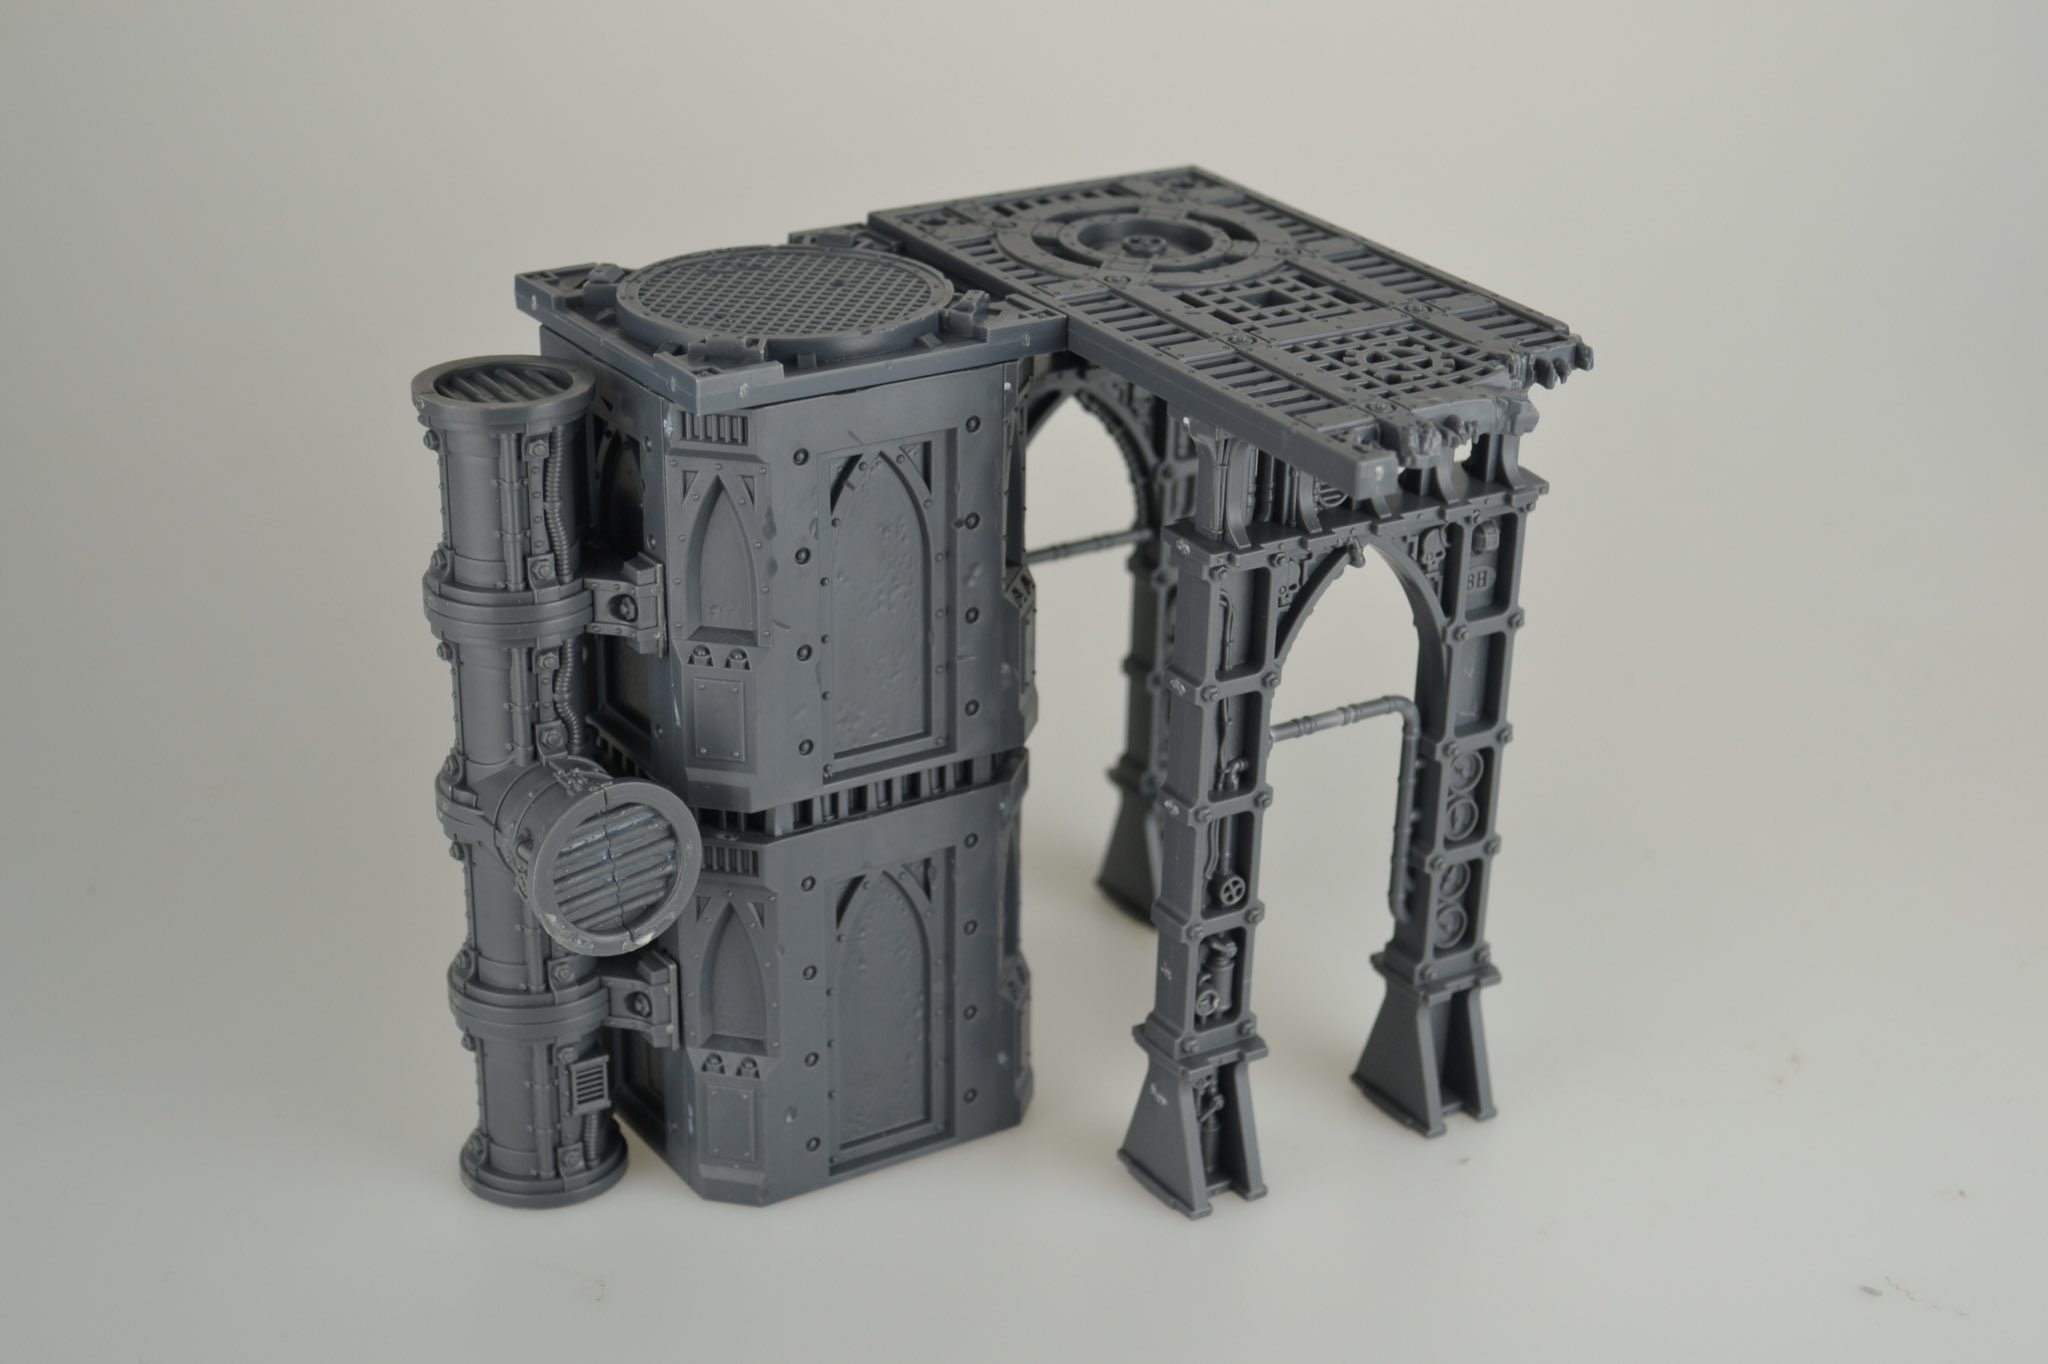
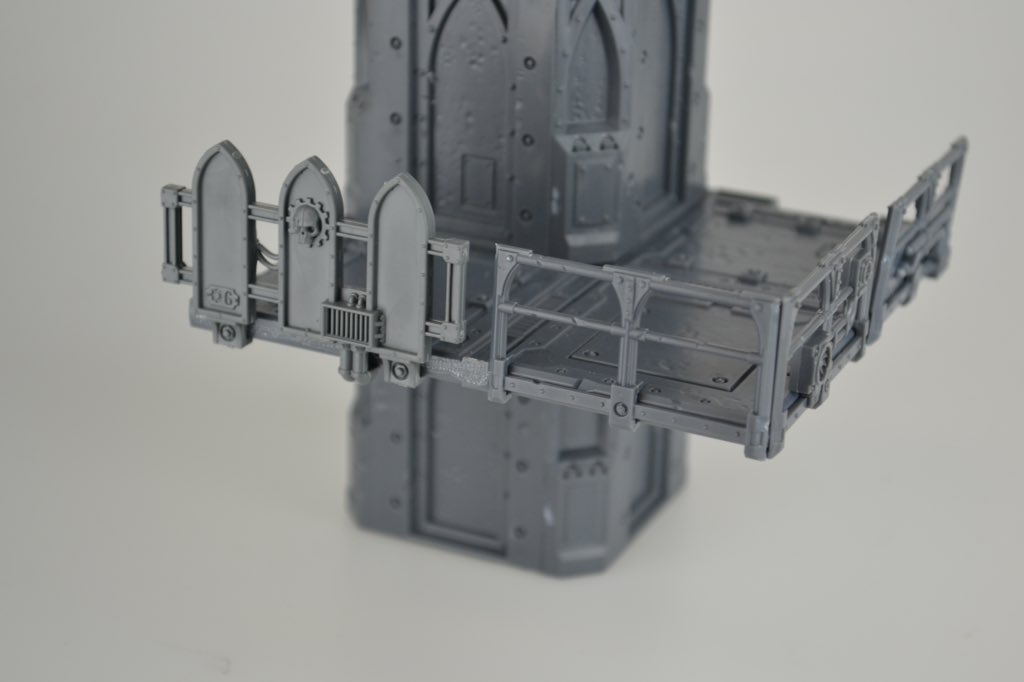
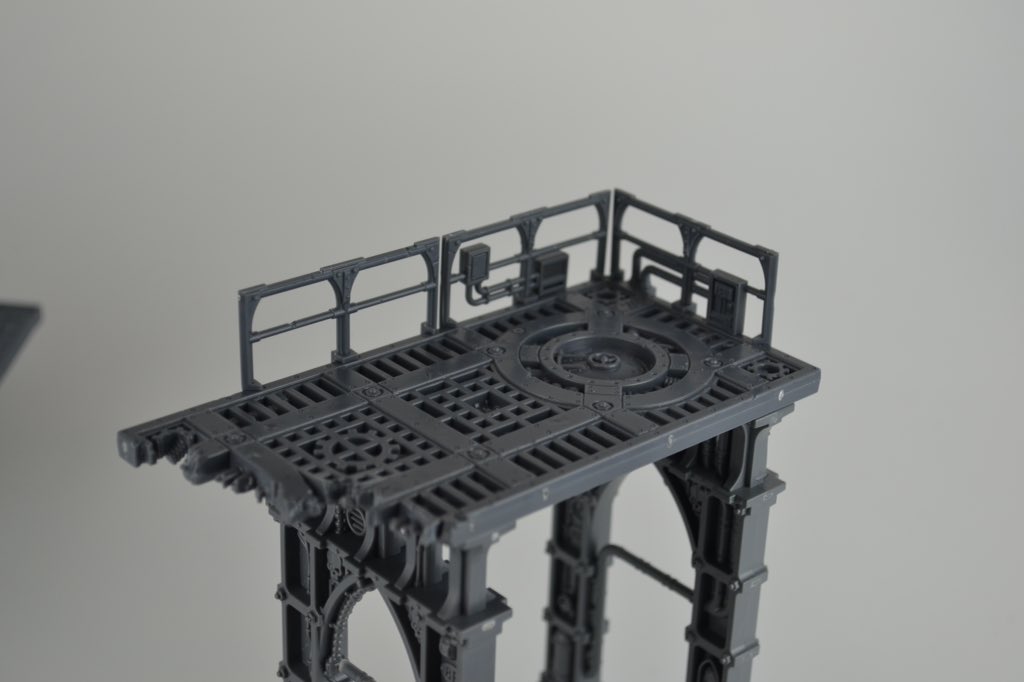
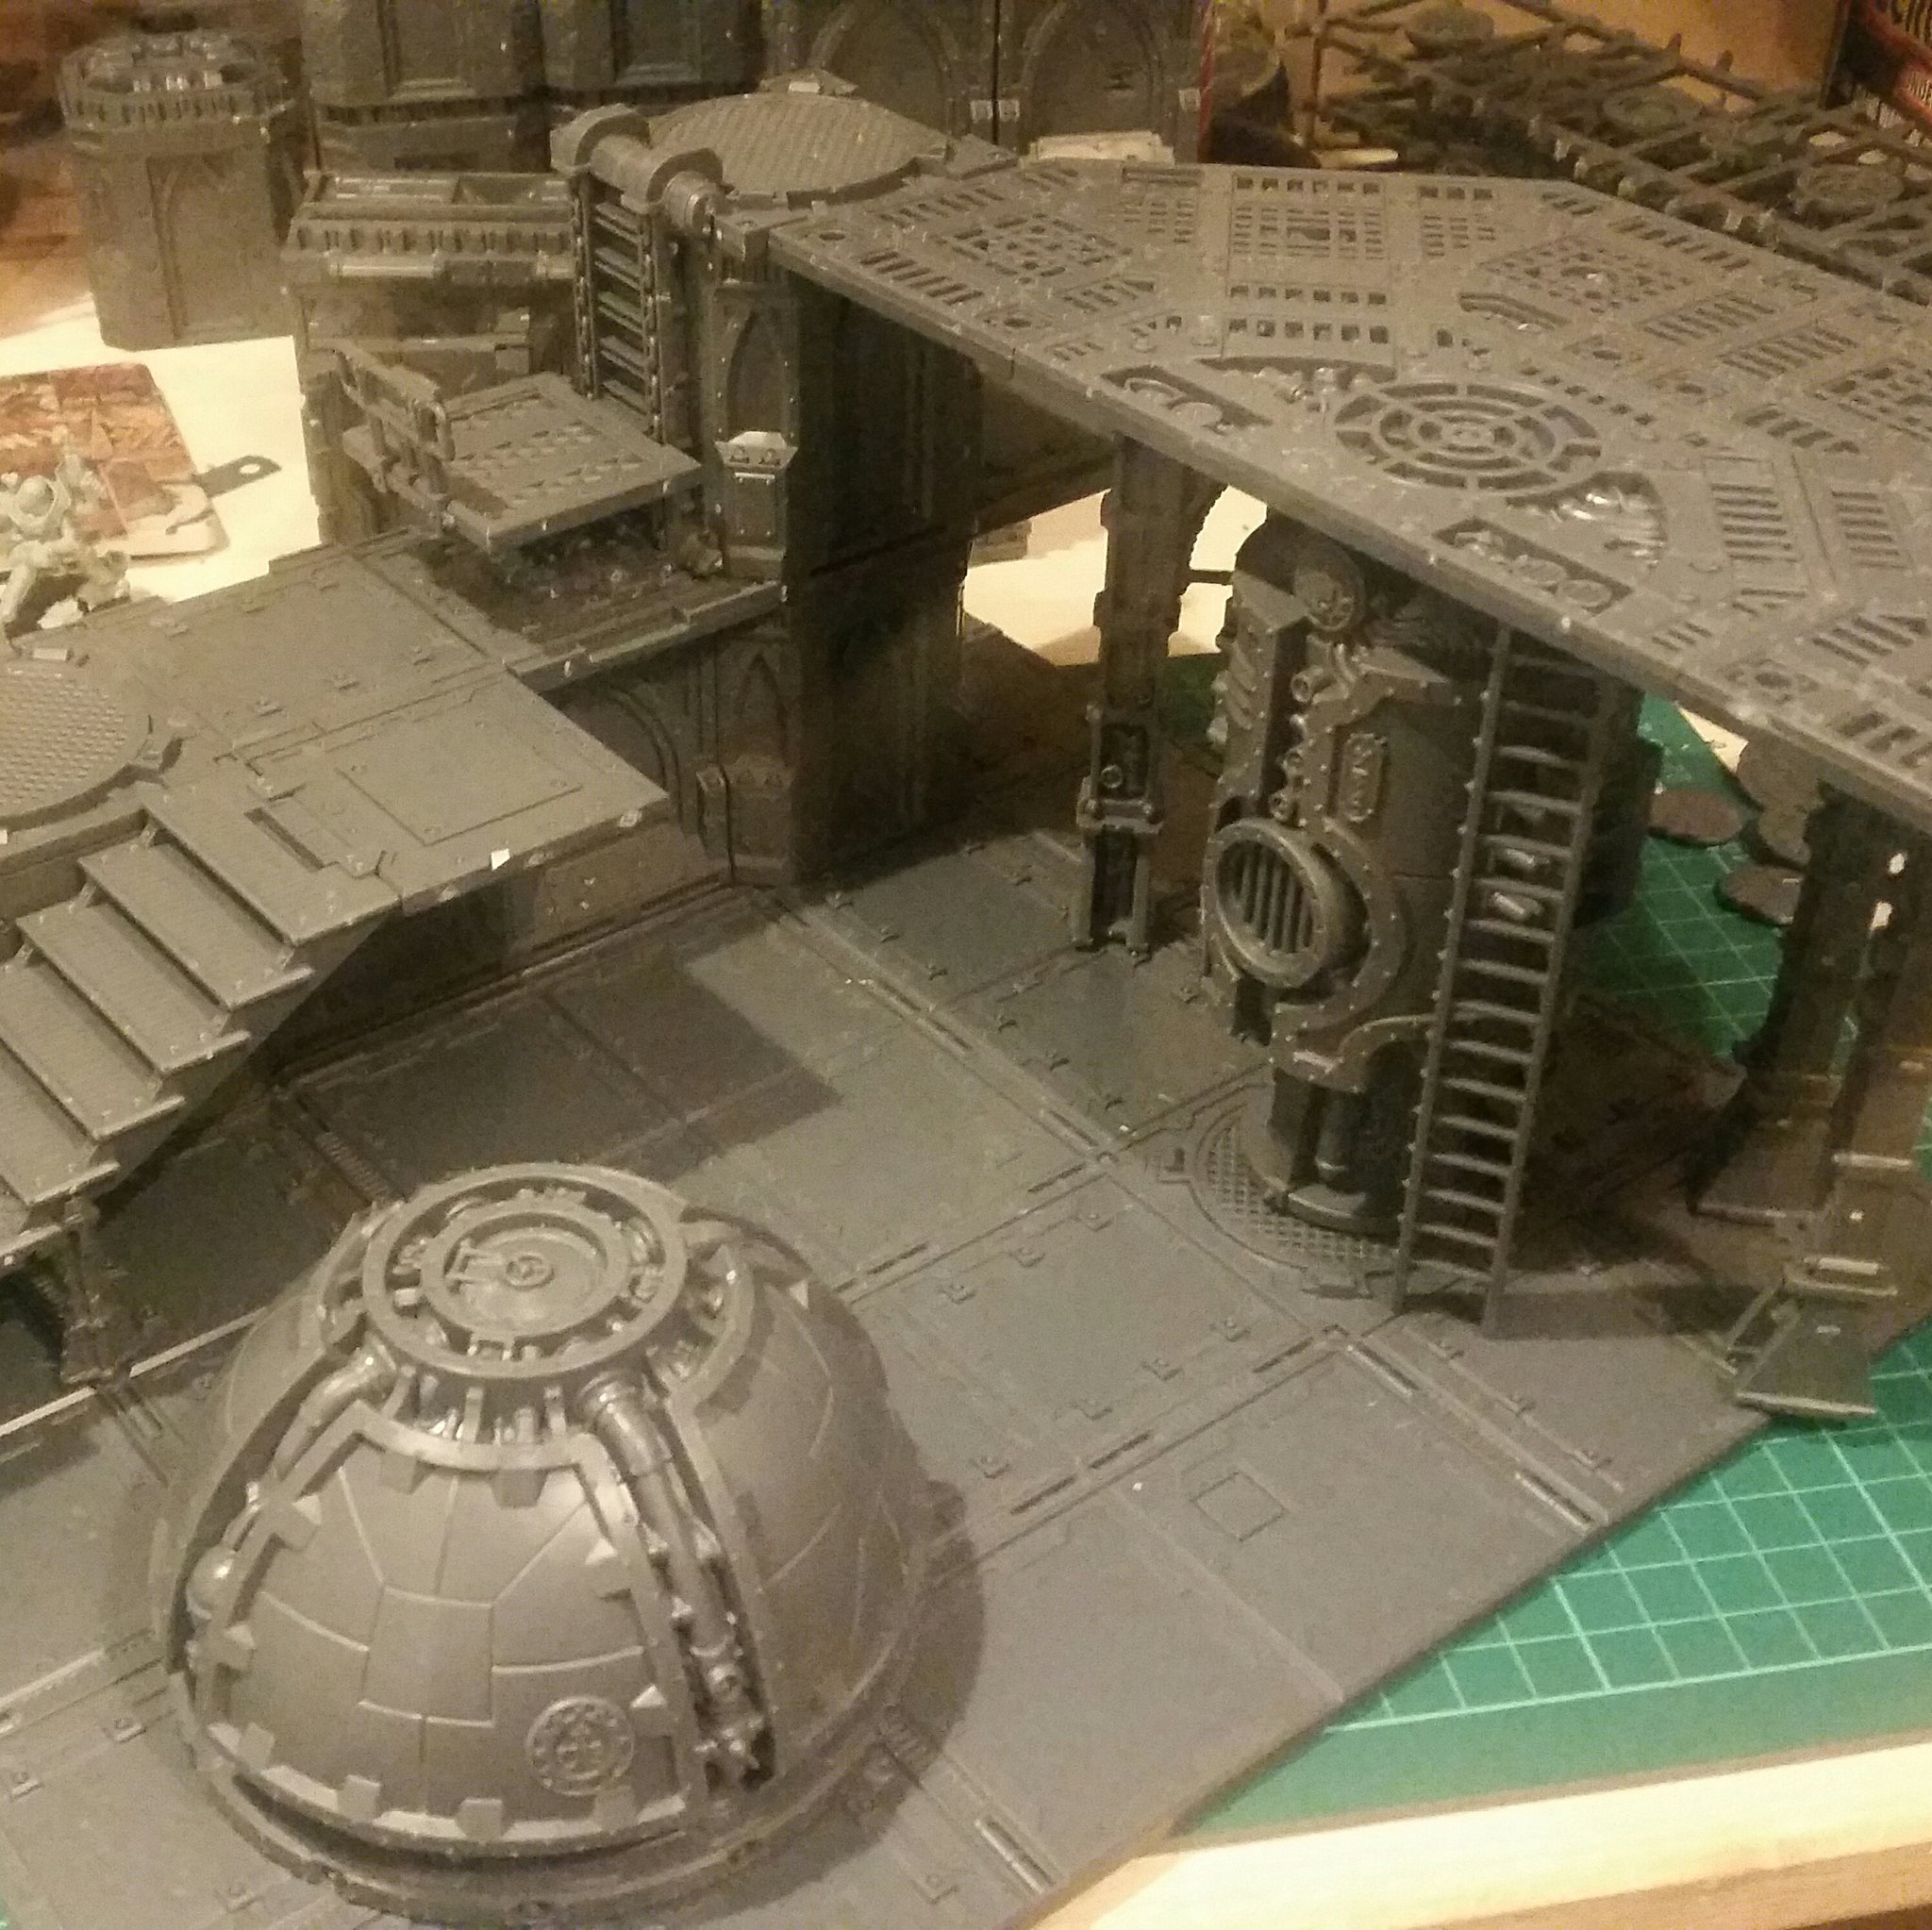
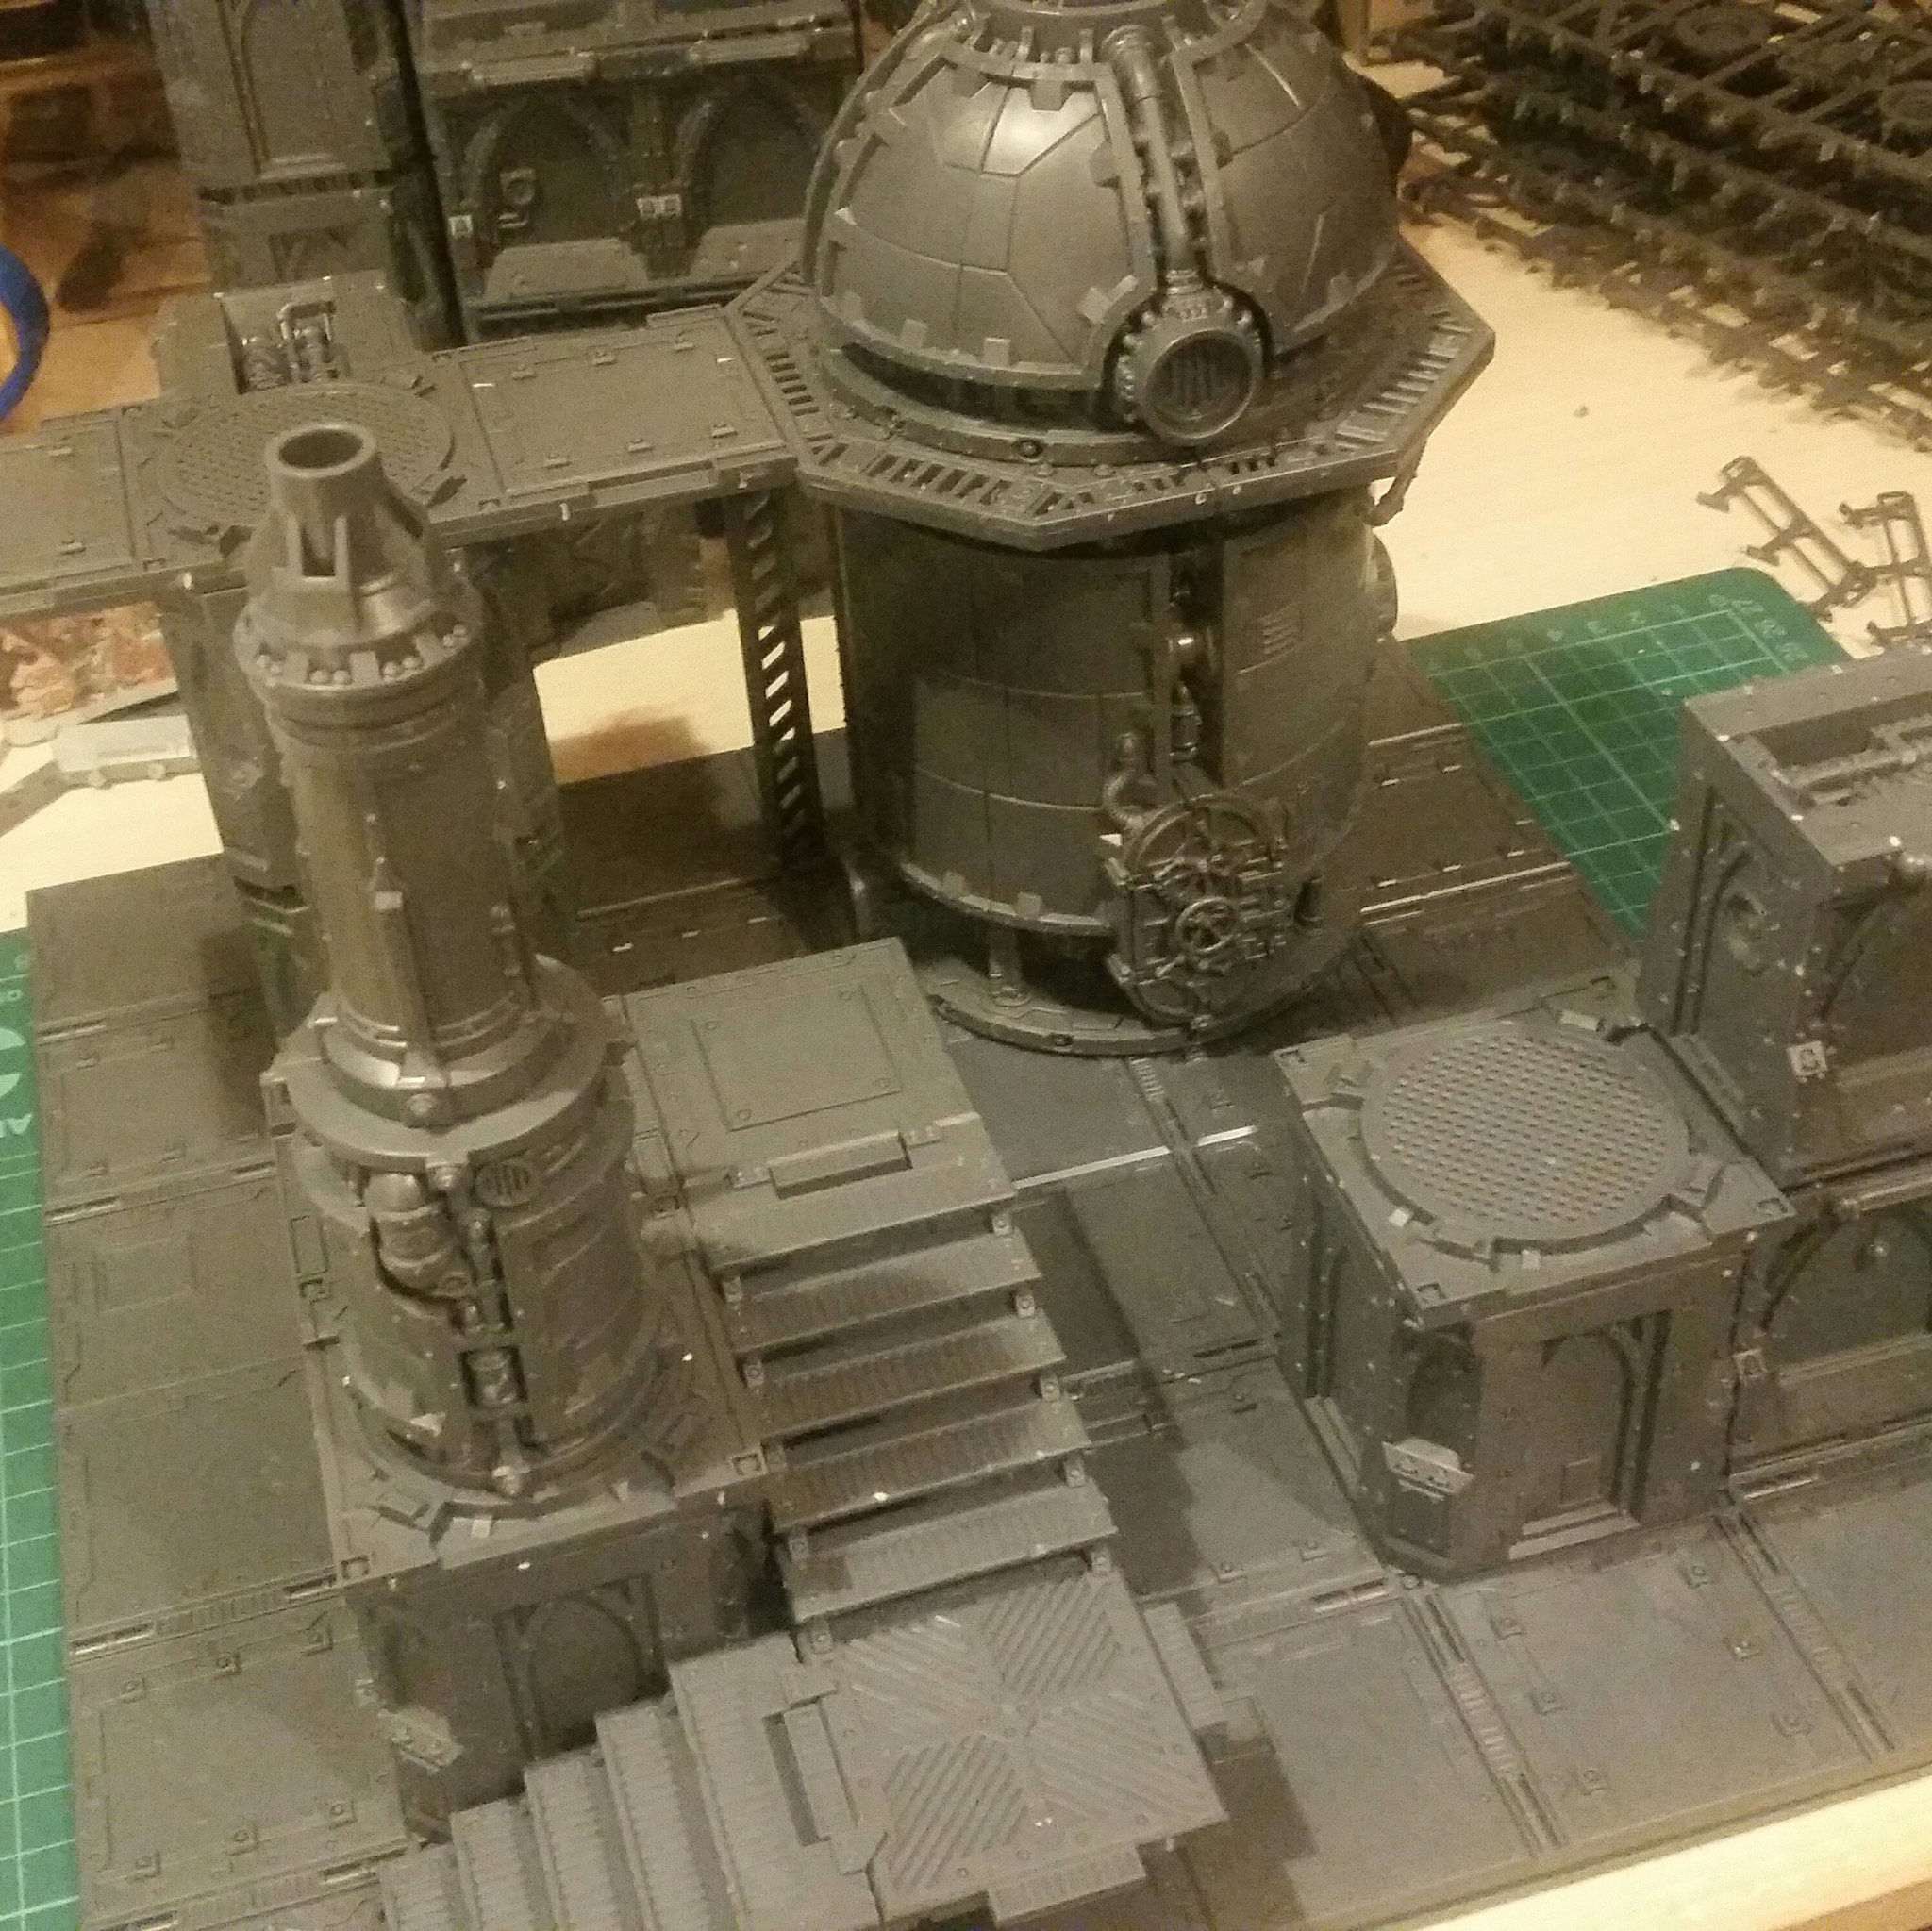
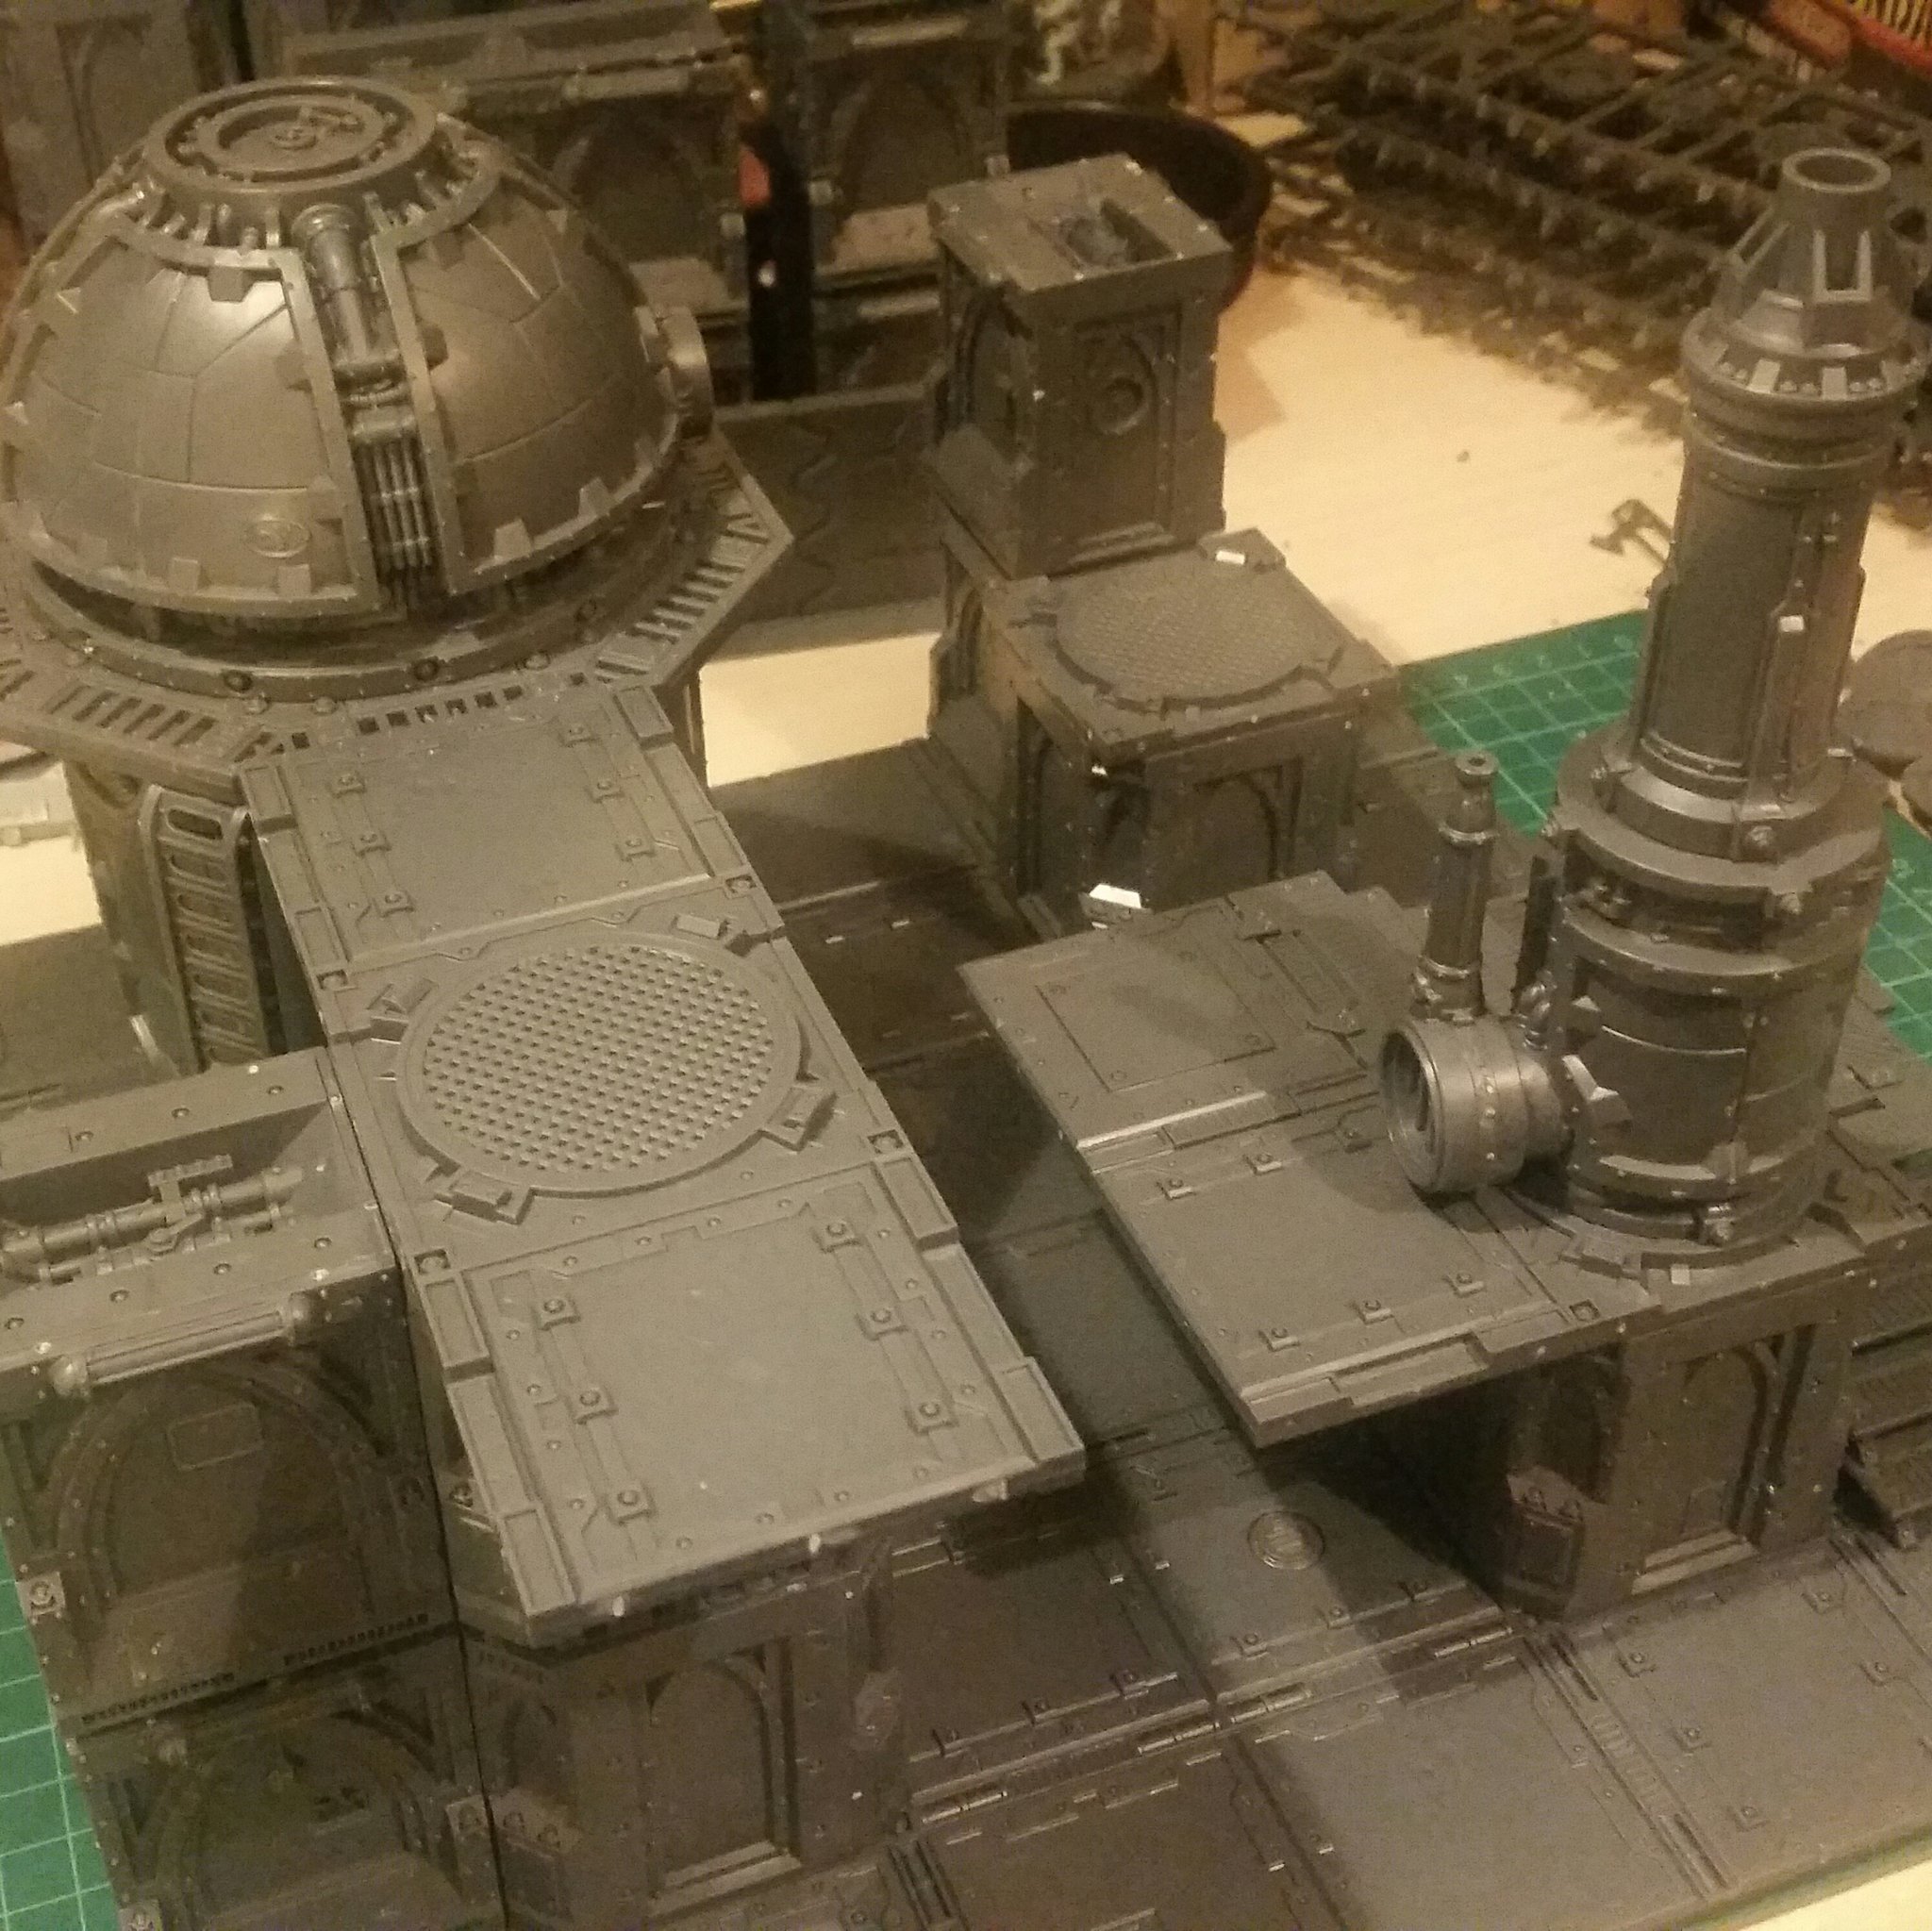
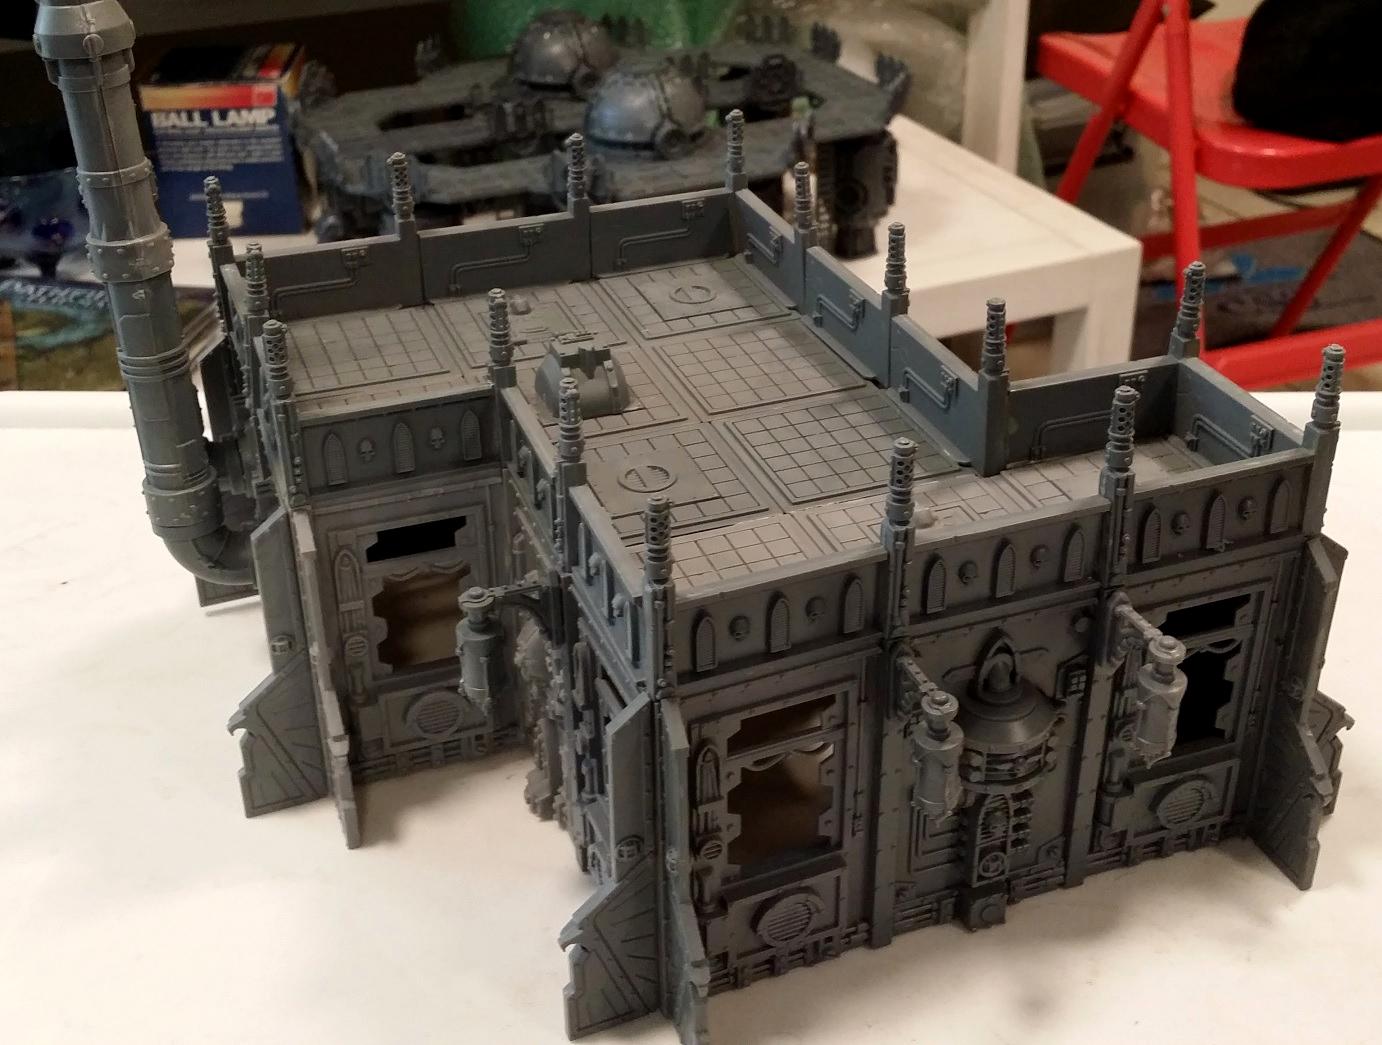
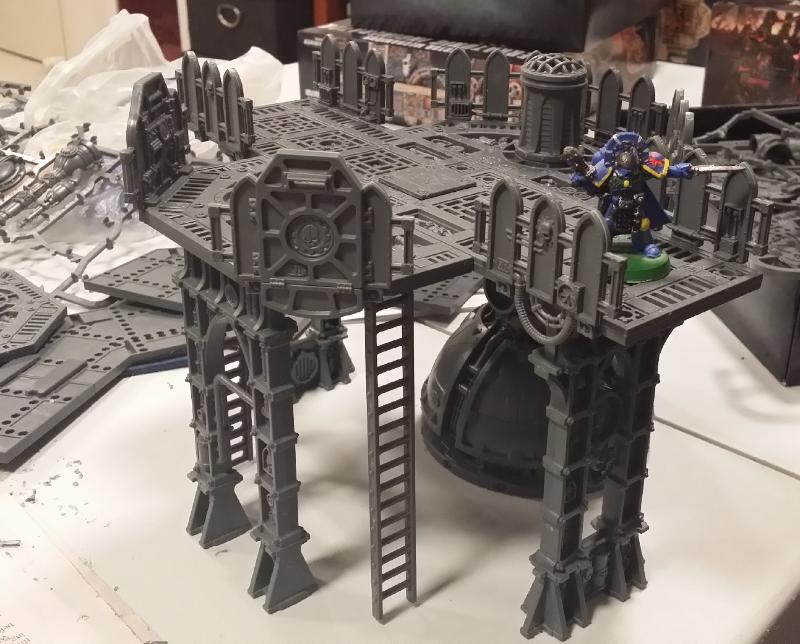
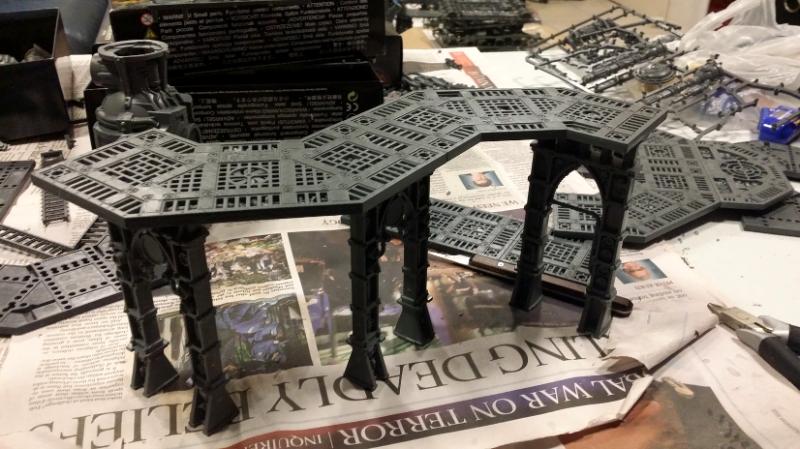
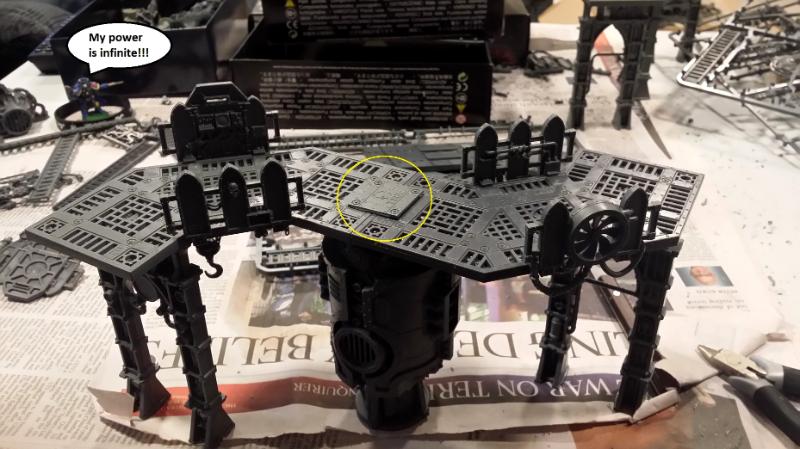
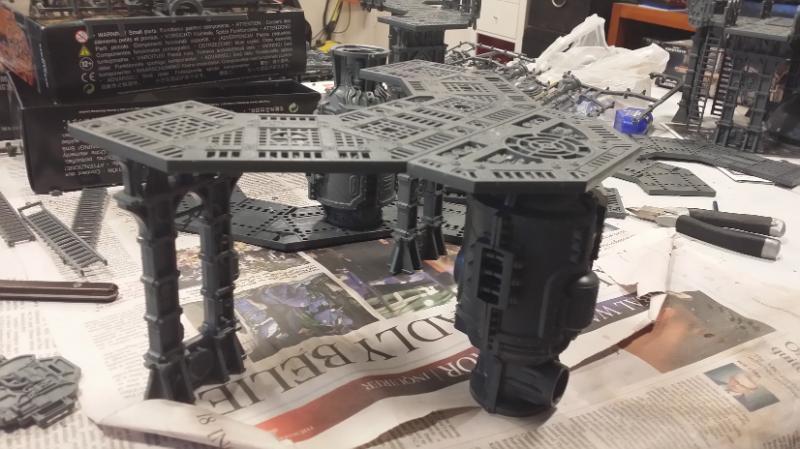
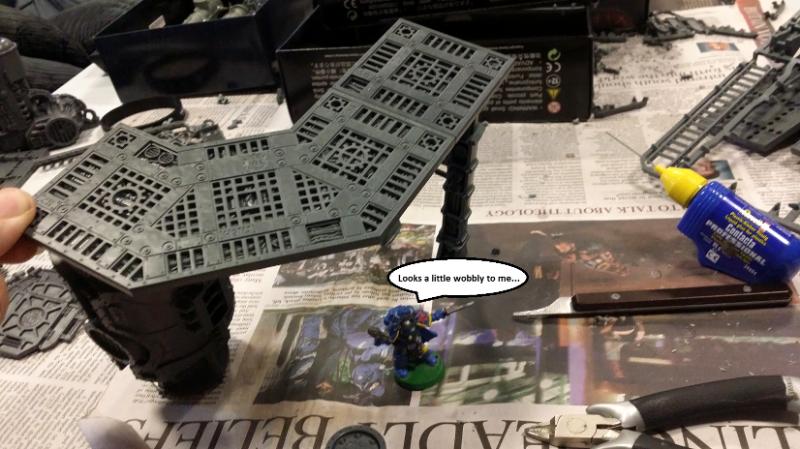
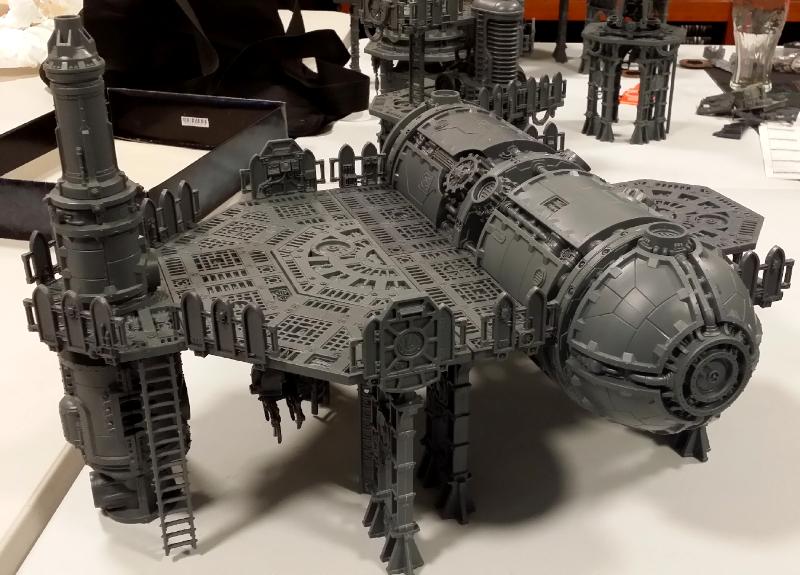
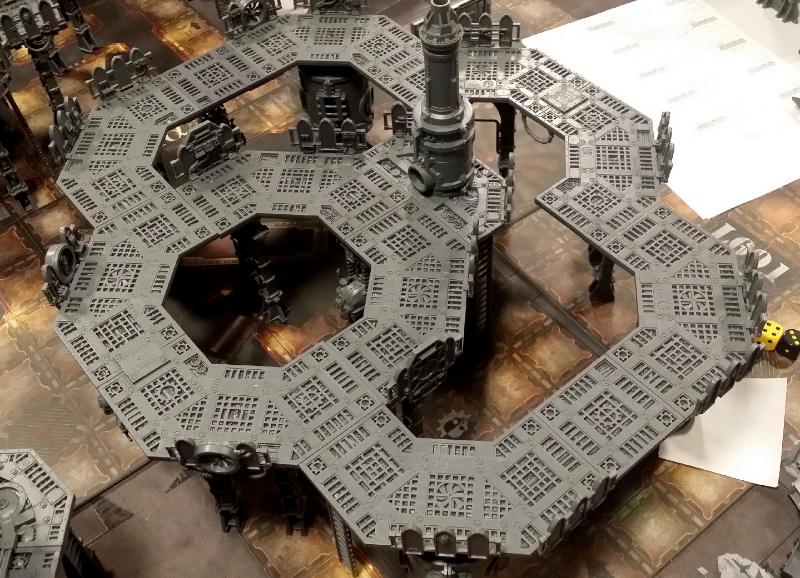
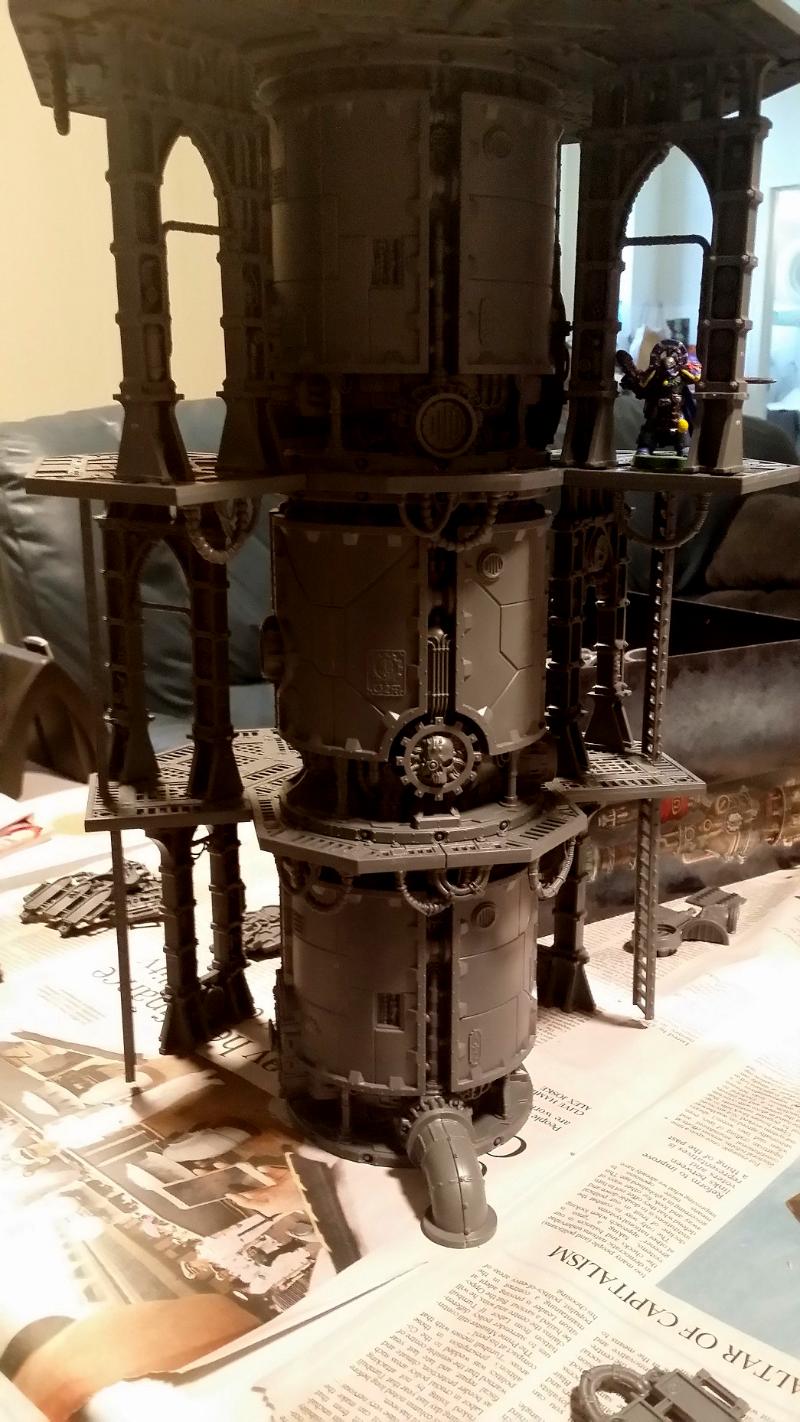
"No plan survives first contact with the enemy!" - Helmuth van Moltke Captain Short Sword Today I built one building. Yes, I know, only one. That doesn't seem like a big deal, but when you see the finished product you'll see why it took so long. Along the way I found some mistakes, changed the layout design completely for the outer platform, and discovered that making it modular allows me to do more "inside" bits that fit within the outer ring (that'll be tomorrow's task!). I also found a way to not use 10 of my 19 remaining long straight pieces, only using 4 in the end. Good for saving limited resources. I call this new piece... The (Modular!) Generator Platform When you see Sector Mechanicus terrain you normally see between 1-3 levels (any higher is a bit silly, except for massive pieces). For the most part though, the solution to any given situation with the Mechanicus terrain is "make it taller". Very few times has anyone said "make it longer". I've seen a few people take the Stack, turn it sideways, and add it to the Haemotrope Reactor. It looks pretty good and I intend to do that myself once I can figure out the "blank space" issue that occurs when you separate the two halves of the reactor and put something between it. But I wanted to do something a bit more ambitious than that, a long-flat pieces that was above ground. I actually found something similar to what I was thinking at the NOVA open (a couple of friends of mine went): 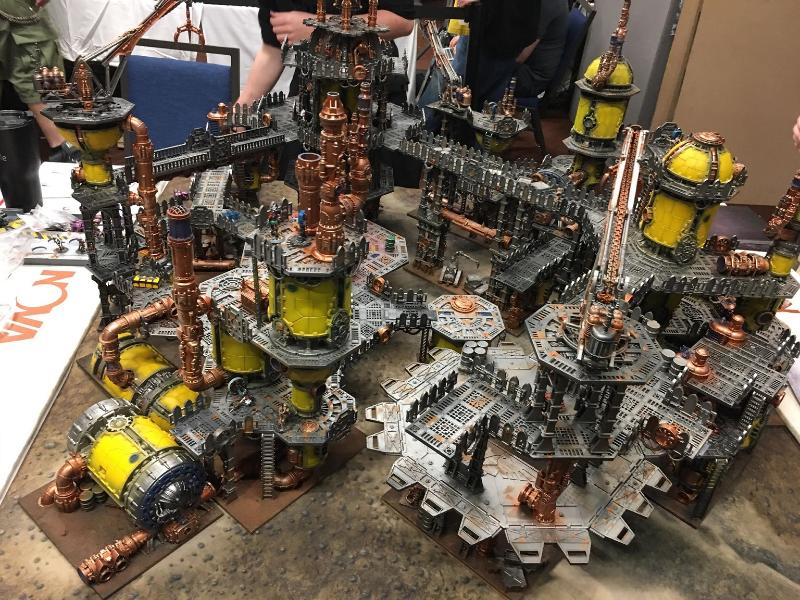 That's an amazing table, but if you look towards the bottom left you'll see examples of what I mean; both the Haemotrope Reactor extension and above that a Stack/Dome combo out flat on the table. So, again, me being me, I don't do anything in half-measures, so I decided to make something much bigger... 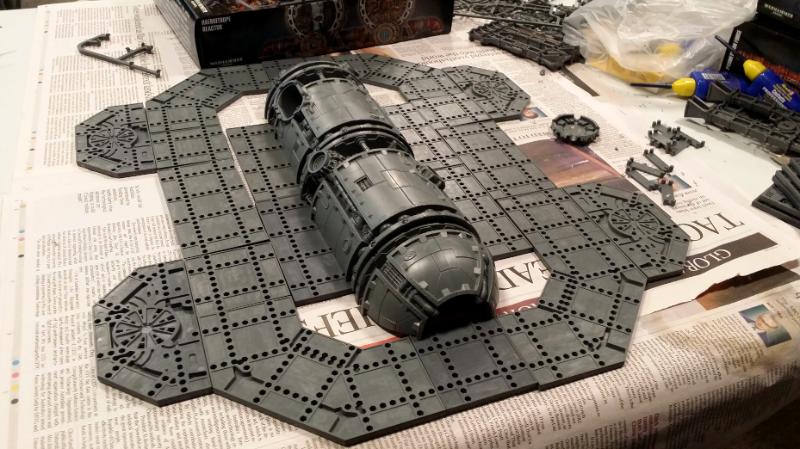 This is the basic layout of what I'm going for, or at least it was, as that changed as time went on. The idea is that that centre bit can be taken out, leaving the walkway around it. The bits off the long sides were added at the last minute to give it a bit more than just a ring and to make supporting it a bit easier. The dome had to have no platform between its two halves as the part that goes on top cannot be extended. So it means that the bottom half of the combined stacks (under the central platform) will actually be a bit lower than the domes on either end. This turned out to be a minor issue, as the floors are still quite thin. Captain Short Sword also wanted to hide inside for a bit. I don't know why. 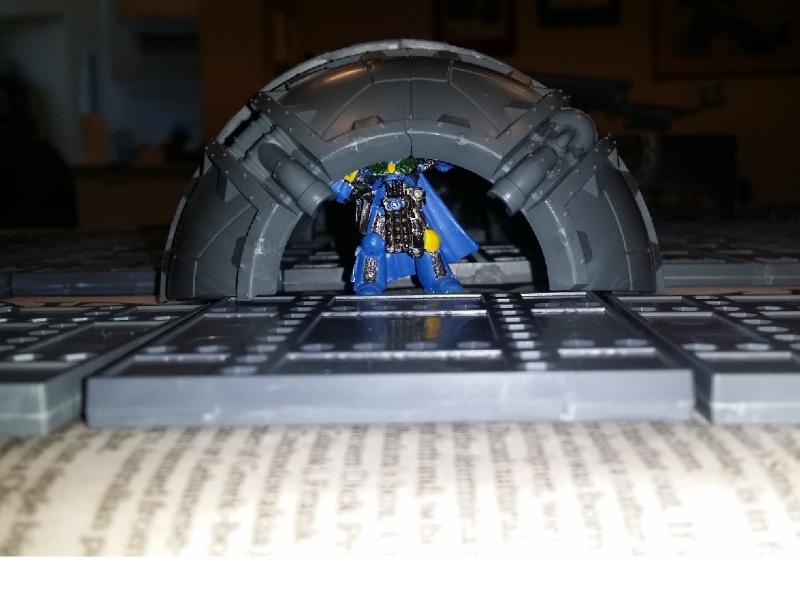 So I had part of it made from a loose stack and dome I already had, but I needed more! Off to the pile'o'sprues I went... 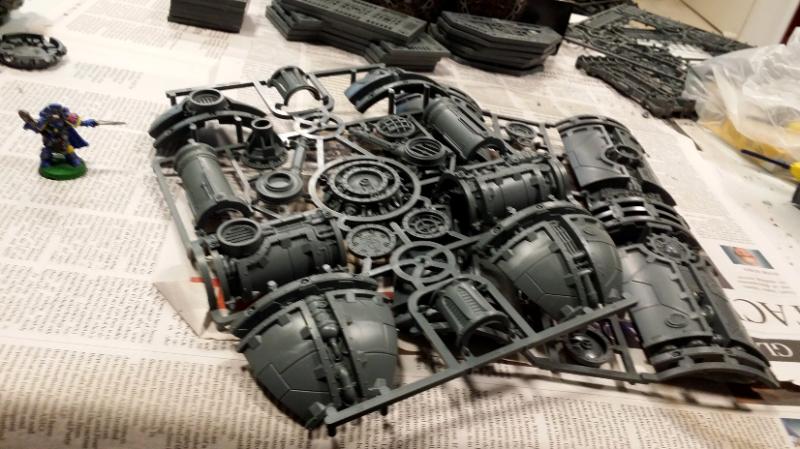 In order to make everything fit, and more importantly, fit flat on the underside, I had to position those clips in places that they normally do not go. This required some creative cutting, as you can see from the example below:  I refined the internal platform to save me using two of the long straights - you're not going to see it, so why use so much material? - but I need the stacks to go over the clips, hence the cutting above. However, when you do that, there are fewer points of contact, so things begin to sway...  I resolved that with temp clips, but I still had to do some more creative cutting to make everything work:  Going up? It's starting to look like an elevator when you put it like that. You can see where I'm heading with this now: 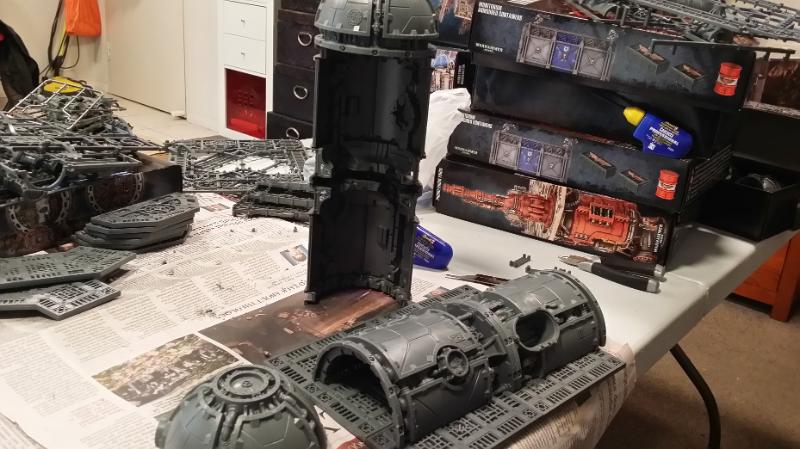 With the inner platform finished and centred, you can see how it fits inside when both the domes are in place. Captain Short Sword thought we should save it for posterity: 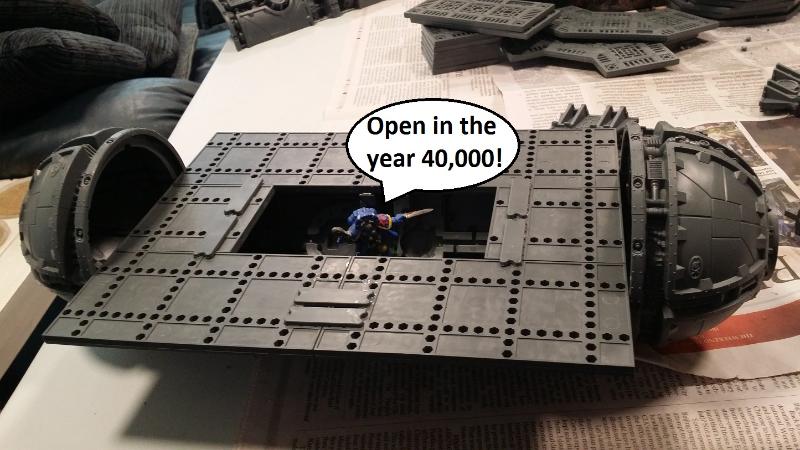 Some more glue, a lot of time holding it in place, and a quartet of struts and we're nearly done with the centre piece: 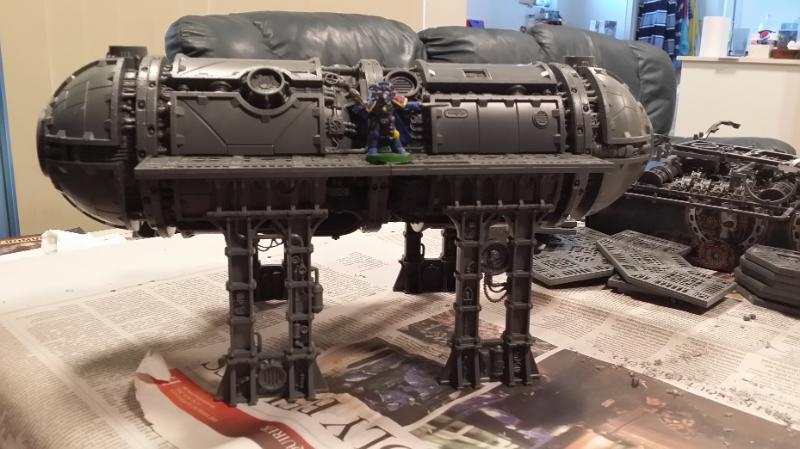 Then I decided to alter the layout, finding a more interesting idea that used fewer strait pieces (which are rare) and more curved pieces (which I have TONS of). It also let me use the piece I had already build as part of the Pipes'O'Plenty piece but couldn't use. Of course it required more creative cutting: 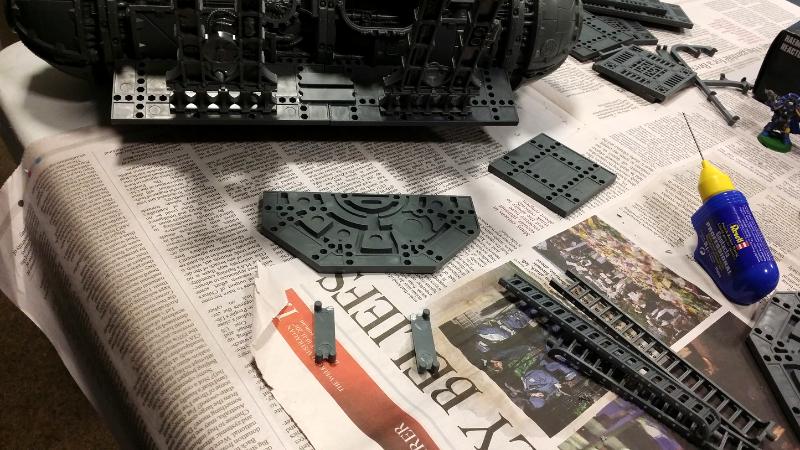 We'll come back to that piece later on, but as a quick aside (or three) I do have to say that if there is one thing I don't like about the Sector Mechanicus terrain it's that there are so many damned contact points for the pieces and the sprue: 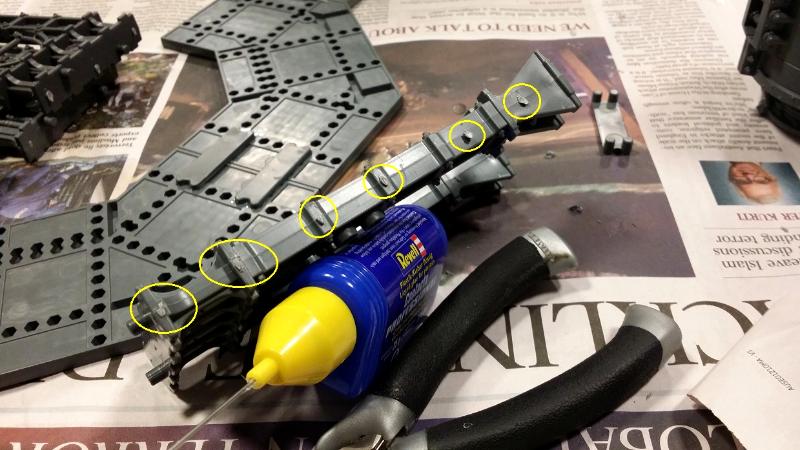 It really makes cleaning these sorts of pieces a chore. The shield bits around the edges are the same, as are the ladders. Pain in the neck! Also, just for you Manchu, here's a painted mini:   Whilst I was putting these asides together, Captain Short Sword got a bit bored and started looking for things to play with. He found one of those release day Shadow War Armageddon wrist band thingies, which he immediately took into his possession: 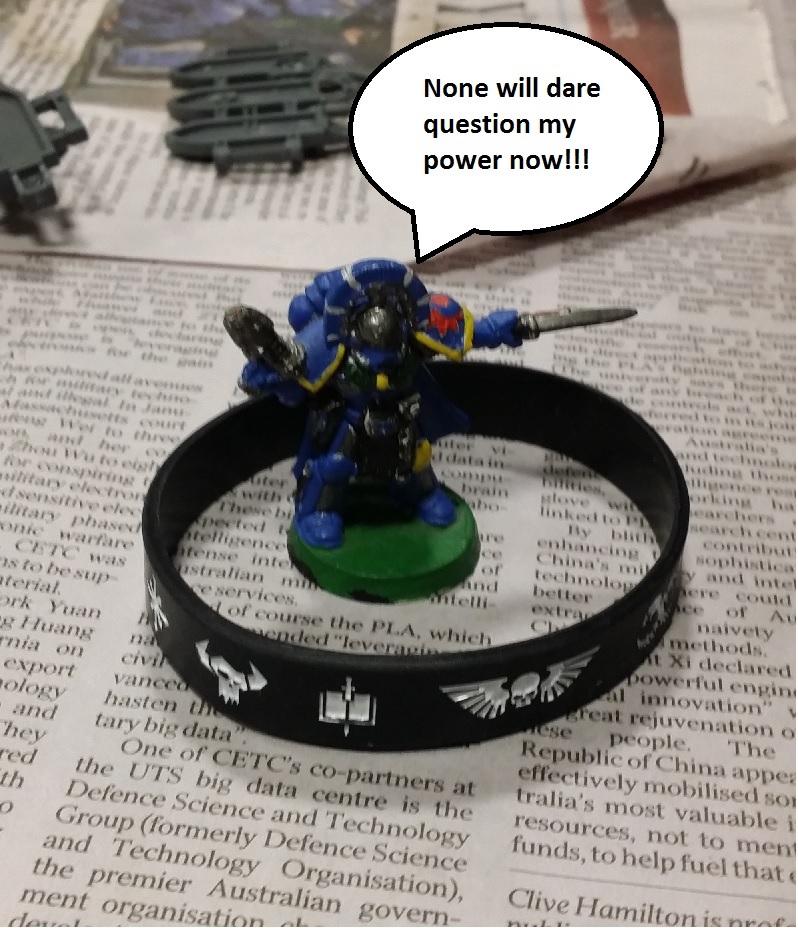 So with the changed outer ring layout, it was time to get it all together. The Pipes terrain taught me that you do all the floors you intend to use at once, and never add to them later, otherwise they can end up drying at a slightly off angle that never sits right with the original. Plus those connectors, once glued in place, do not come out, so you get it right first time, or not at all. Here's the final side about to get stuck together: 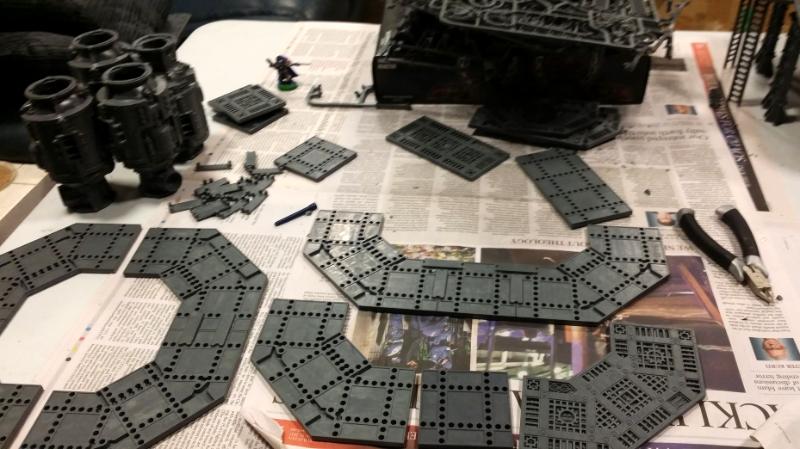 Once it was done, these guys showed up!!! 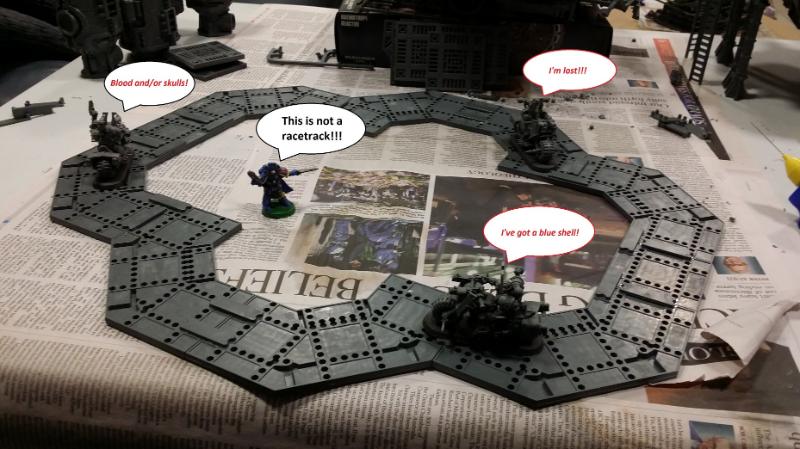 With those ruffians dealt with, I moved onto adding support struts and furnaces so it would stand up:  Next were some shields, the ladders Captain Short Sword reminded me about, and some other hanging wires/that skull spider thing, and this pieces was done!0 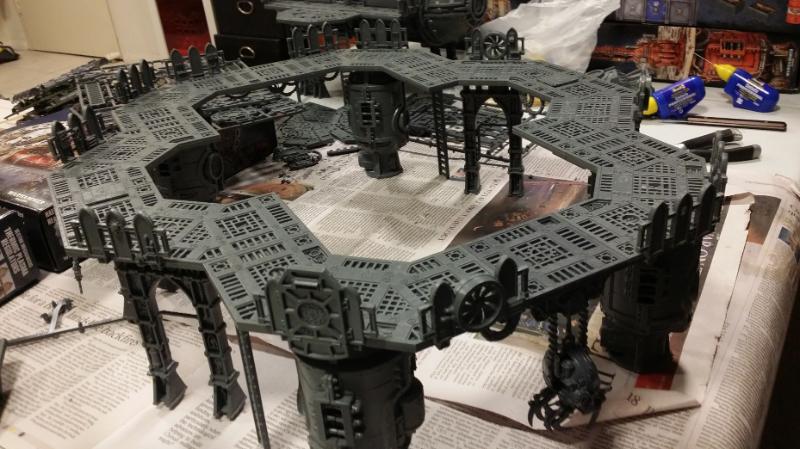 Now, back to the centre piece. The Thermic Plasma Regulator sprues contain smaller versions of the regular side shields. They've got 2 posts rather than 3, and fit perfectly to give some defined edges to the inside part: 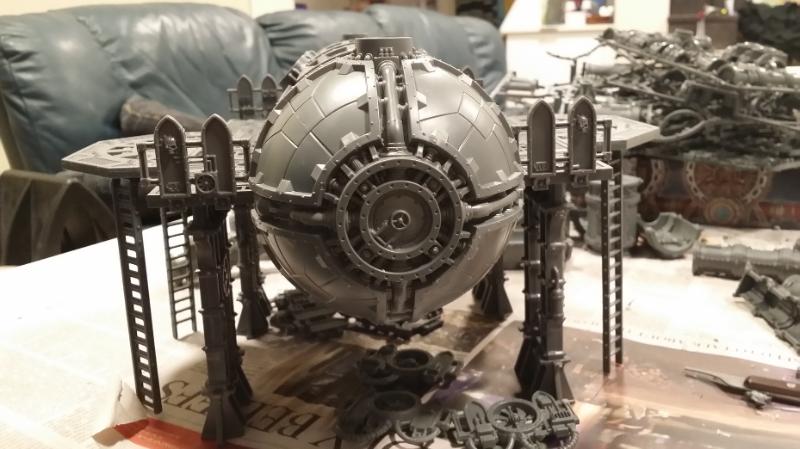 So, with everything now completed, it was time to see how it all fits together!!!  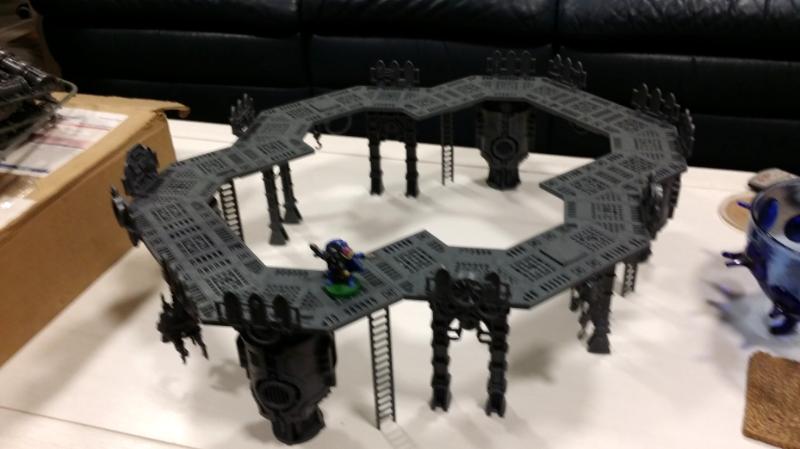 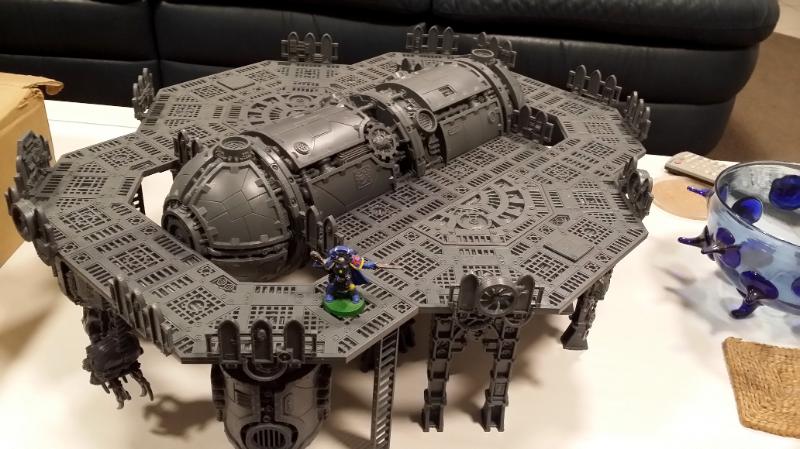 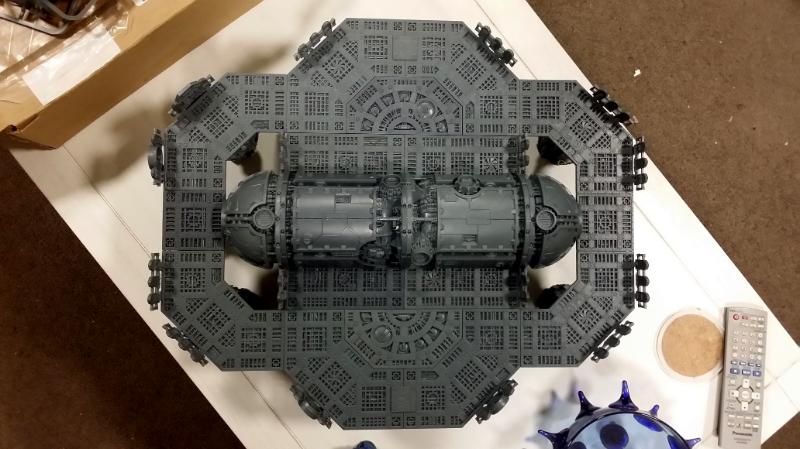 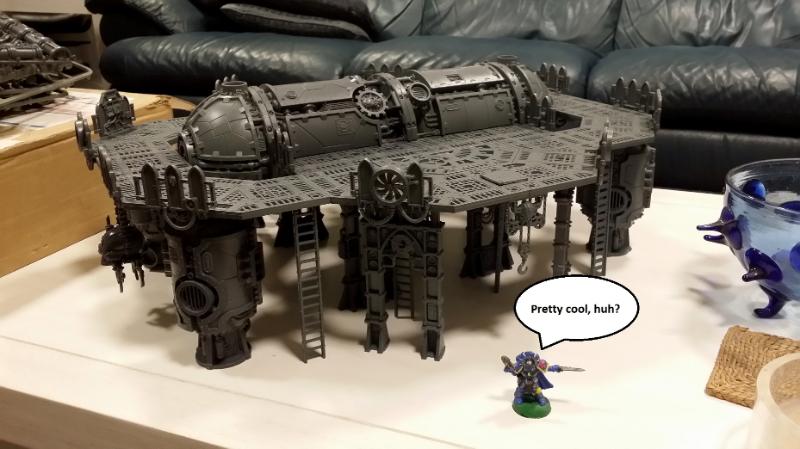 I am exceptionally pleased how this turned out in the end, especially with the change in layout compared to that first test layout. Everything fits snugly inside, with lots of supports and other various things there. It's got ladders a'plenty, and areas where other walkways will join up once they're made. All in all a worthwhile day's work! And some final words from my faithful companion, Captain Short Sword: 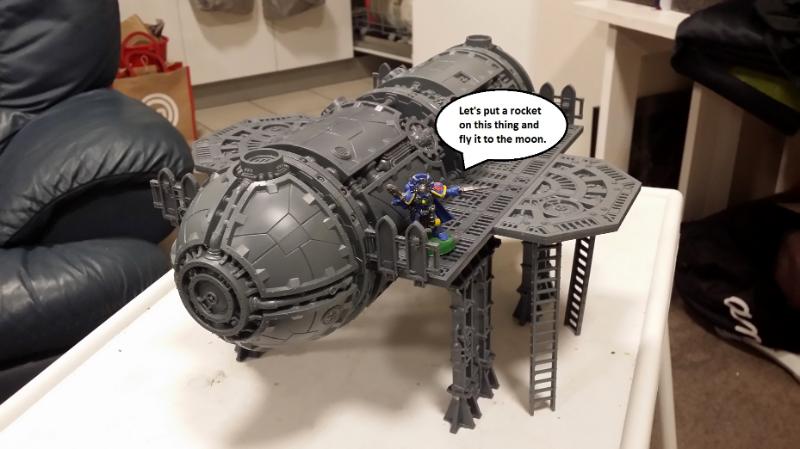 See you later for the other buildings! BYE
494
Post by: H.B.M.C.
Ignore!
99
Post by: insaniak
That's... large. Very cool, though.
9910
Post by: CommissarKhaine
Now THAT's some terrain... I agree with captain shortsword, add rockets to it
77209
Post by: Gallahad
Very cool! I look forward to seeing more.
3309
Post by: Flinty
Very cool.build. now to.work out where you can store it
16387
Post by: Manchu
The generator platform is awesome! I love how much surface area you have elevated up there - I am imagining a ton of scatter terrain from the adeptis munitorum sprues dressing up the platform. The fact that the generator “interior” piece can be removed is great. This is the coolest build I have yet seen with the new terrain.
10667
Post by: Fifty
That is a very awesome piece of terrain.
54522
Post by: Jpogfreak886
Wow, I love following big terrain projects, and you're doing some great stuff with these kits! keep it up!
105865
Post by: Rolsheen
Amazing piece of terrain, the only thing I don't like is the mech icon being sideways
494
Post by: H.B.M.C.
 Rolsheen wrote: Rolsheen wrote:Amazing piece of terrain, the only thing I don't like is the mech icon being sideways
Unavoidable really. These pieces were designed to go up, not out, so that was destined to happen. It's why the two doors on the stack are on the underside. I didn't want side-ways doors on the top.
518
Post by: Kid_Kyoto
Great terrain, cool funny commentary and the return of HBMC's trademark 'BYE'.
Definitely worth watching.
51769
Post by: Snrub
I love this thread already.
I foresee many good stealable ideas coming in the future.
83680
Post by: ChazSexington
Love it!
110201
Post by: FeistyRips
Amazing terrain, certainly perfect for Necromunda. I'd love to play on this! Keep up the good work, I'll watch this spot! 
30344
Post by: monkeytroll
Excellent stuff. The modularity of the 'interior' is a huge bonus
494
Post by: H.B.M.C.
I was up 'til 2am finishing several pieces. It's now 7:30am and I've got people arriving in a few hours. I've got a bunch of walkways that need completing, and then I'm "done" with this batch. I've been taking photos the whole way, so I've got a couple of post's worth of stuff to show. That'll have to wait 'til either this evening or tomorrow.
116546
Post by: War Drone
@H.B.M.C. ... I wish to lounge on your couch, wearing a chiffon toga, feeding you grapes ...
494
Post by: H.B.M.C.
I wanted to get all the walkways done prior to 10am. Got 'em completed at 9:55am.
Now to clean up the sprues and boxes and endless, endless piles of plastic shavings.
Here's a sneak peak of the madness to come:

Also, seriously, feth this sprue in particular. I am so sick of cutting out struts...
494
Post by: H.B.M.C.
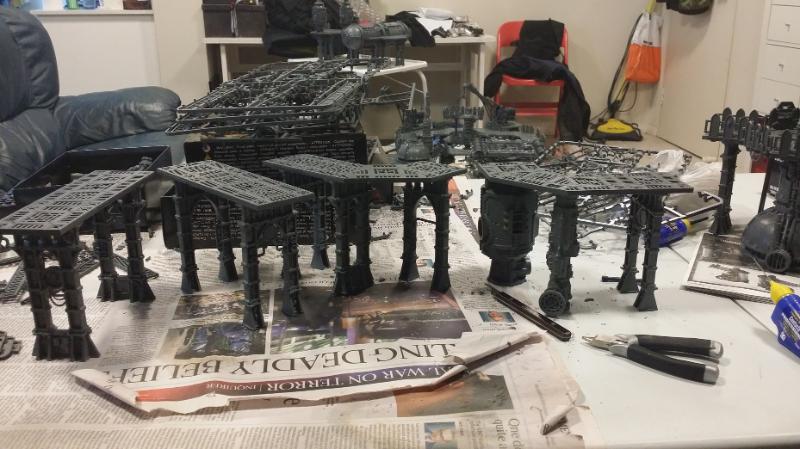
Compared to Saturday, Sunday saw the completion of 5 smaller buildings, designed to act as both standalone pieces and to interface with the big outer ring I made yesterday. The best part is that, with the exception of the first one, they're small enough to fit in various configurations, creating different types of surface areas, hazards, cover and so on.
So with that preamble out of the way...
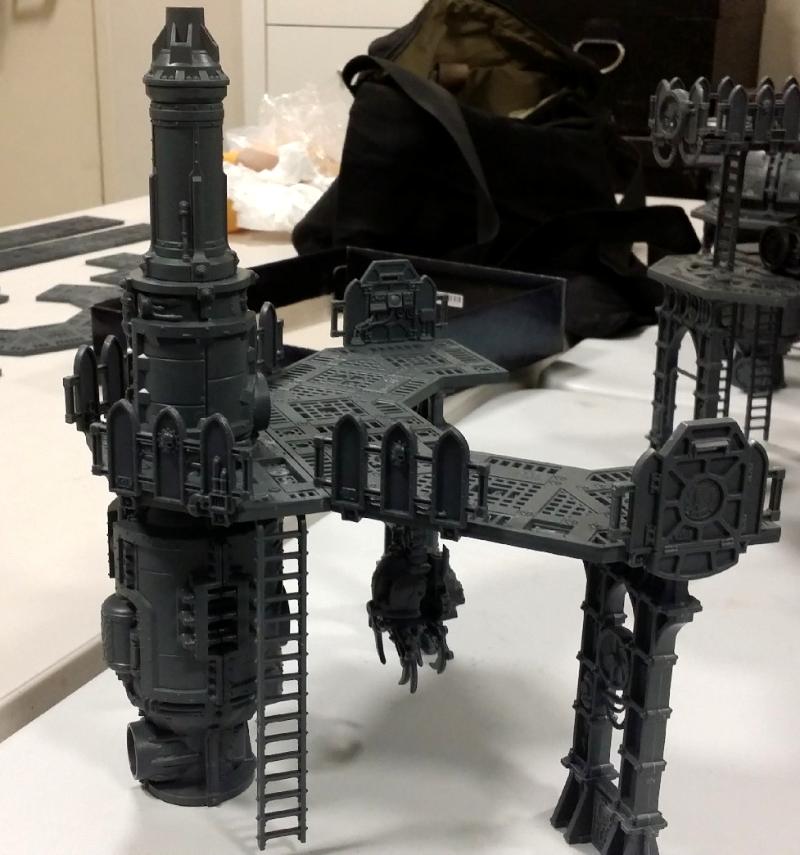
The Space Shuttle
I called this one the space shuttle purely because of its flooring layout:
Weirdly minimal connection points here, but a lot of supports:

The idea with this one was to have some more linking pipes, but in a way that was higher than normal. Also gave chance to test out the Thermic Plasma Conduits kit for the first time:

I got the main platform built whilst the pipes cured; once again Captain Short Sword was quick to remind me of how I keep forgetting to add ladders:

Let's quickly talk about these pieces:

These pieces are fantastic, and are included in most of the Sector Mechanicus kits. They fit onto many of the pipes/vents, and usually do so both ways around. They fit into one another, and can be glued in all manner of ways. They help 'bridge the gap' in a lot of pieces, where pipes are too long or just not long enough. Fantastic part. Always keep them in mind when building.
Specifically, with this build, two of them allowed me to connect the small kiln to the larger furnace whilst keeping both larger parts centred in the "rings" that are on each of the flooring panels:

I also added a downward pipe from the Thermic Plasma Conduit kit so that the second furnace is connected to something. This is a general rule for almost everything I do: I don't like things that stop without an end. Things need to have logical end points. This is why my fav tileset of all time are the 1st Edition DOOM boardgame tiles that FFG made. They contained small end points that connected to any point, allowing you to create complete rooms without "open" ends (other than entryways). It's why I parts-ordered so many Space Hulk end-cap pieces when the 3rd Edition of that game out. Things need to have a start and end, so that pipe leads "deeper" into the hive or the sub-surface pipes or whatever. Makes it feel more connected to the world around it:

A few shields and it's'a done!

And this is how it looks added to the outer ring. You can flip it 180 as well and it works just as well:
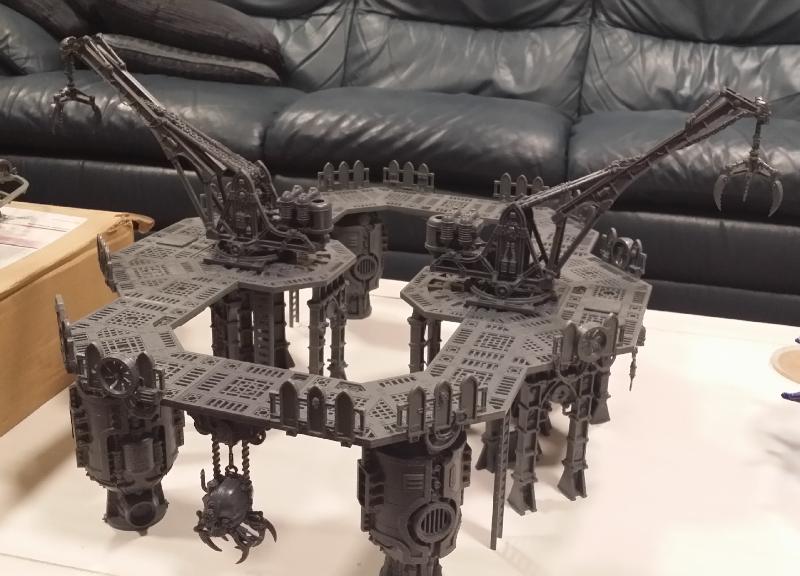
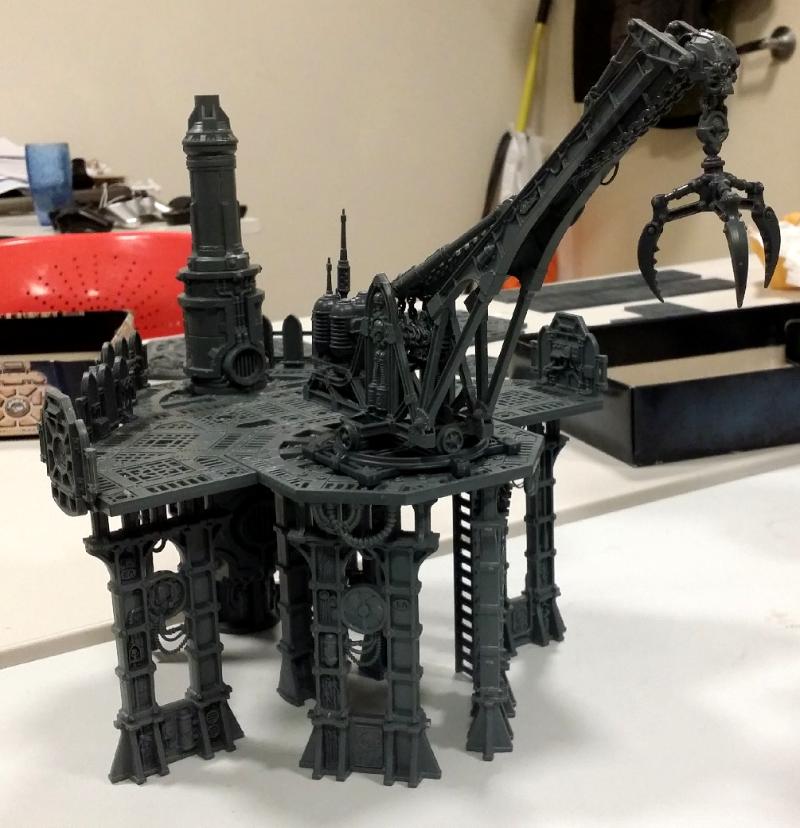
 The Klawz
I wanted to build a pair of smaller buildings that could slot into all sorts of places, and even go on top of other buildings if need be. They're actually the first step of a larger project to build a few repair gantries for my Knights, and these two buildings would go on the larger gantries for my Castellan and Valiant (y'know, once I build those...). These are the base parts:

Base tower construction done:
You can probably figure out what's about to happen next...

Completo!

And whilst not specifically designed for this, you can see how they work with the outer ring:
Ok, next post will have two more smaller buildings.
BYE
51769
Post by: Snrub
How many terrain sprues in total do you think you have?
494
Post by: H.B.M.C.
Best estimate is 111.
Curved - 13
Straight - 9
Circle - 12
Dome - 8
Furnace - 15
Stack - 7
Struts - 13
Plasma Conduits - 4
Plasma Regulators - 6
Containers - 8
H-Reactor - 4
Servo-Haulers - 4
Promethium Pipes - 8
On top of that I have bits ordered numerous extra parts, specifically from the Strut and Furnace sprues, along with numerous other walkways of all types.
51769
Post by: Snrub
Yep. Certified mad man.
How many buildings/structures/etc are you hoping to get out of it. I know you said in your OP 4 tables worth, but any idea how many individual units are you looking at/hoping for?
107997
Post by: darkstar6783
I like where this project is going!
It is great to see unique creations that I have not seen before.
Thanks for sharing all Your work!
Look forward to see Everything else You create!
Are You going to Air Brush the Terrain Or hand paint everything?
17376
Post by: Zid
awesome!
518
Post by: Kid_Kyoto
Currently the most exaulted thread on Dakka, with good reason!
16387
Post by: Manchu
Need a group shot. And some appearences by the other painted mini character, Warrick P. Smith.
30344
Post by: monkeytroll
Really loving how these slot into that main ring.
61618
Post by: Desubot
Cool beans. this is quite intense
120534
Post by: acrowsperch
Super creative use of flooring~
494
Post by: H.B.M.C.
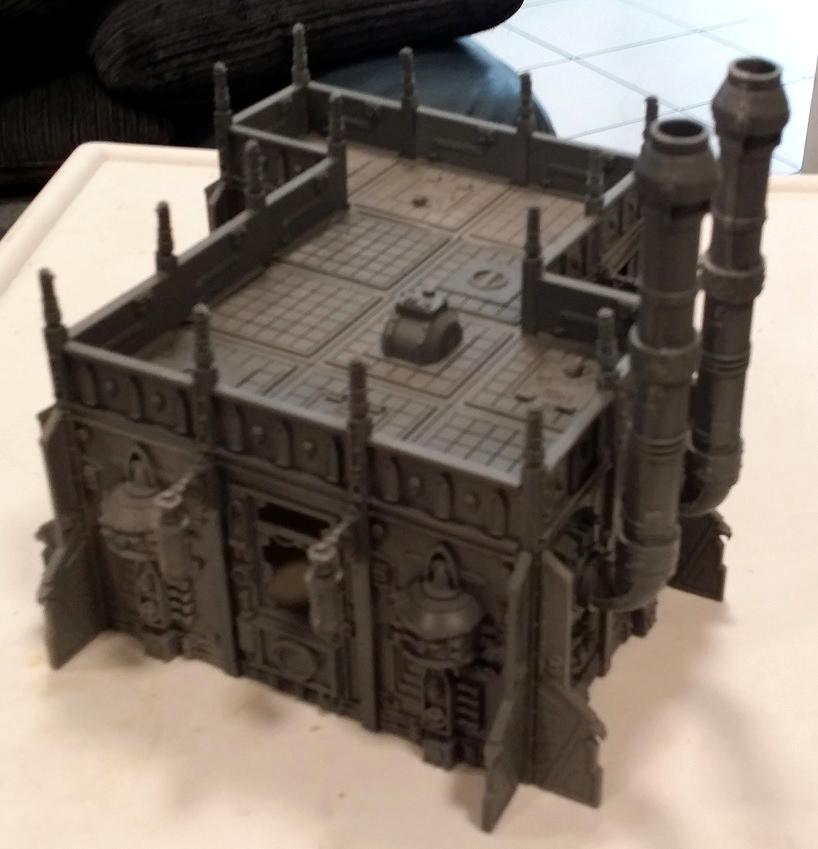
As the hours on Sunday whiled away, I had two more buildings to get done. It also means that there are some gaps between photos where I get more done than I have documented. Apologies of some buildings go from "the supports struts are now drying" to "it's done!" very quickly. I was in a bit of a rush. I had made the Space Shuttle, designed to be another 'big' insert for the outer ring. I had done to the two Klawz, which occupy the smaller sides of the outer ring. Now I wanted two slightly larger buildings that would go into the bigger slots at the short ends of the outer ring. So we'll start with... The Conduit Platform The Thermic Plasma Regulator kit is a bit of an oddity among the Sector Mechanicus pieces. There are elements of the kit that work perfectly with the other parts of the range, and then there are others that are unique. To me the strangest part of the kit is that it's very short. It doesn't fit within the 5" level pattern that most of the other Sector Mechanicus pieces fit within. And it's not even half-height, like the Dome or the Kiln that comes on the dome sprue (which, if put on top of one another, makes a single 5" level - I've got a good example of that with the walkways I built - next post!). So it's a bit of an awkward kit to use because you can't put it "under" things in quite the same way. Still, I wanted to add a little bit of height to the next piece without going a whole extra level up, so in that respect for a small piece that gives a little height it works quite well. All of this is because of it's unique 1x1 walkway piece that clips onto it. It has the same joins as all the other Sector Mechanicus platforms, but one side has a divot in it (and some brackets underneath) that hold it steady. I wouldn't put too much on it, as it's liable to tip over, but if you're clever about it you can make some interesting pieces. Anyway, with that in mind I decided to make a small platform that linked to the outer ring. It started off a bit like this: 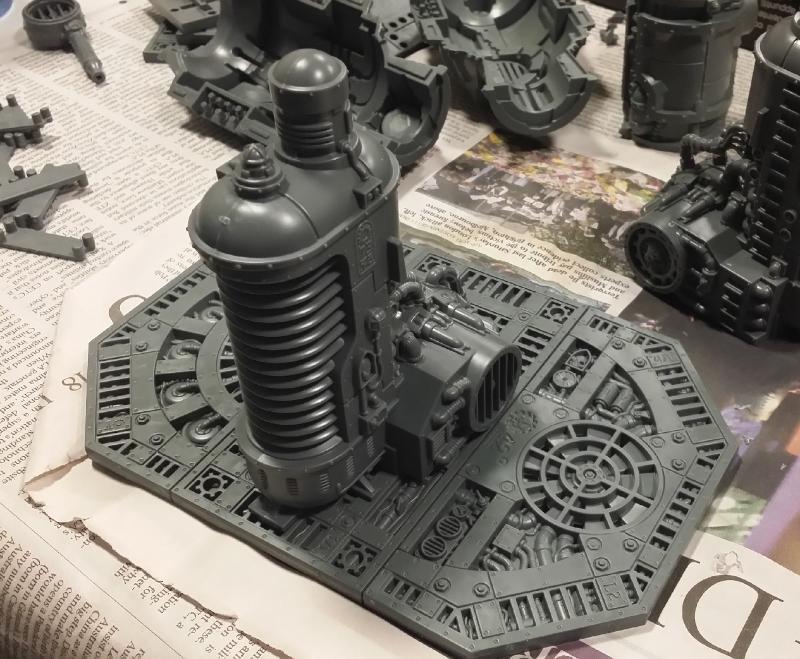 Whilst the strut dried, I used the main regulator to prop it up. As you can see, it's just a little bit shorter:  I then made the platform that would come off the front of the regulator. I also put shields all the way around it, meaning there was no clear way up...  So I needed to add a hatch (and a ladder). If you ever need to stick a hatch flush against a Sector Mechanicus platform, be sure to cut away the guide-tabs on the inside. They're there so that they will slot securely into other pieces, but aren't much good when you're trying to make it stick to something it doesn't normally stick to:  I also had to cut down a ladder to fit. From now on I will be cutting the lower posts on every ladder off because it makes them easier to work with, they don't catch on the ground as much, and there's less chance of them coming loose: 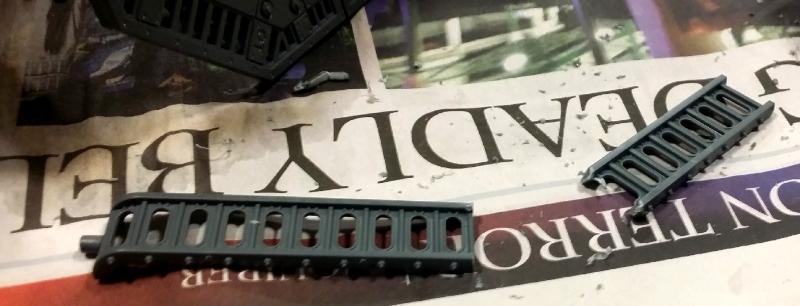 You can see this has two ladders (just to keep Captain Short Sword happy). See how the ends are very close to the ground? It's so much better with them removed!  And then like magic it was done!  Between the last photo and this one I added a small square piece from the main platform sprues to the front. When inserted into the outer ring it was leaning back a bit. With this piece I can "hook" the platform in front and it stays completely level. Thanks for that trick, Mr. Dranfield. 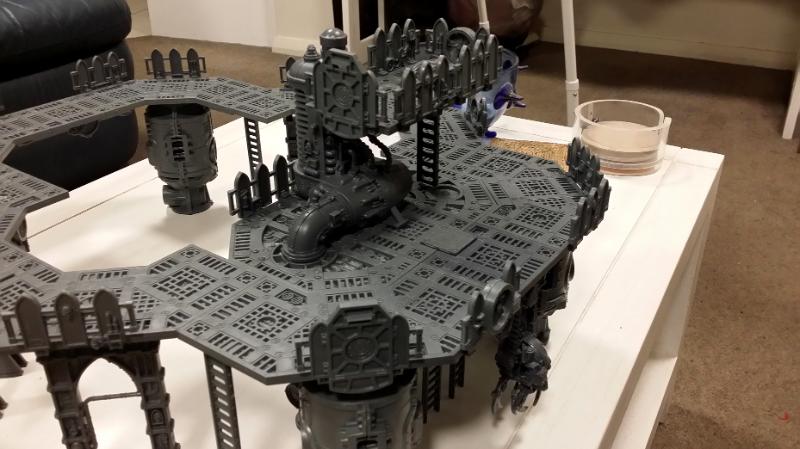 And here it is with both Klawz platforms in place: 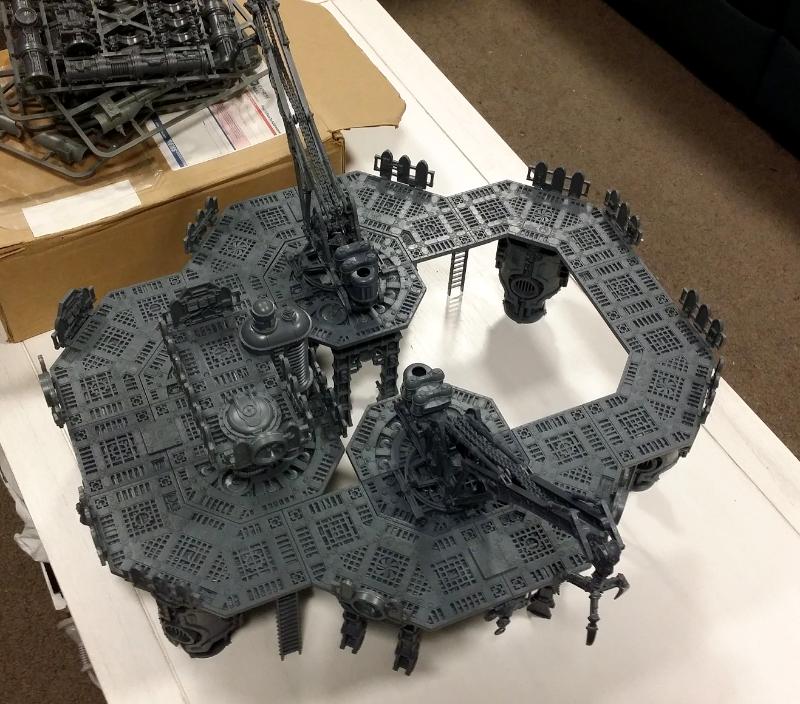 The Bubble Platform The Bubble Platform I spent quite a while piecing this one out. I couldn't quite work out what I wanted to do, and several versions of it almost crossed the outer ring from short end to short end. In the end, and not just because of limited time, I decided to keep it to a close that would allow it to be placed inside the ring at the same time as the Conduit Platform. And it uses a Dome, hence bubble. The basic layout was the same as the Conduit Platform - two halves of the circle platform separated by one long straight platform:  I wanted another little kiln off to the side like on the Space Shuttle, but this time shooting off the platform rather than being in line with the rest of it:  These bits remain some of the most useful parts across all the Sector Mechanicus kits:  And this three-way pipe is, I think, my fav single piece across every kit. Even more than the furnace:  Then like magic it was done:  From the back:  When slotted into the outer ring: 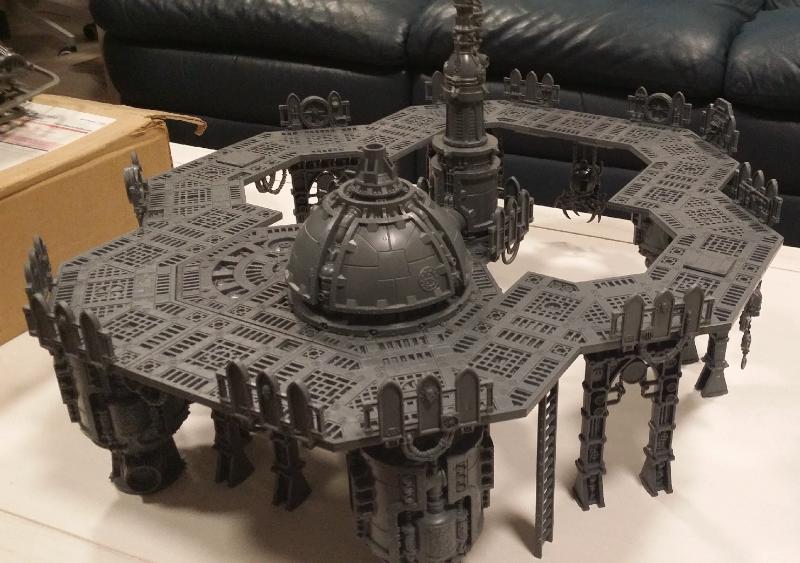 Alongside the Conduit Platform: 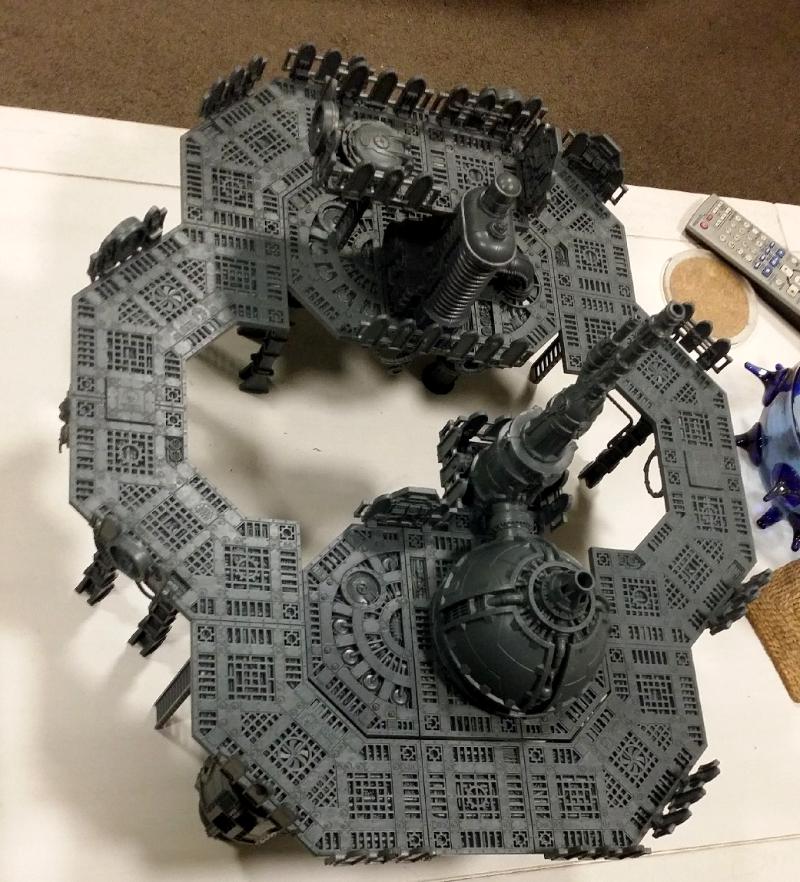 Now with one Klaw:  It doesn't fit with both Klawz slotted in, but as I said in the last post the Klaws are designed to stack where necessary, such as in this example: 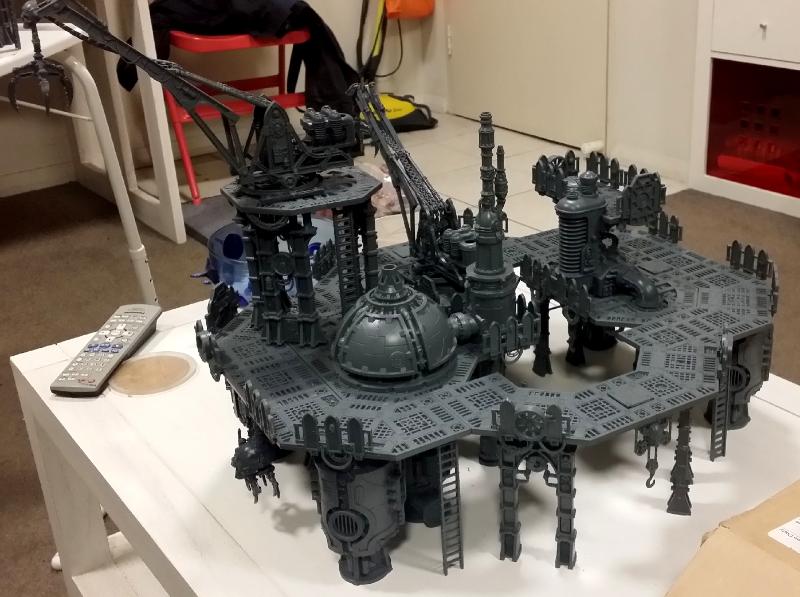 That's all for the buildings for now. Next up we have what I'm simply calling... Platformapalooza!!! BYE
16387
Post by: Manchu
The upper level of the conduit platform is sniper heaven.
223
Post by: Gordy2000
Man, this is genius - and for someone who will be starting a pile of this terrain (not a scratch on your collection though) in a couple of months, wonderful inspiration.
Now I just can’t wait to see it all painted....
51769
Post by: Snrub
That is a wonderfully modular terrain system. It's nice that the platforms are big enough to get a squad up on to and move around on.
494
Post by: H.B.M.C.
I'm bored and stuck at home after the doctor's this morning so... here's another blog post!
Platformapalooza
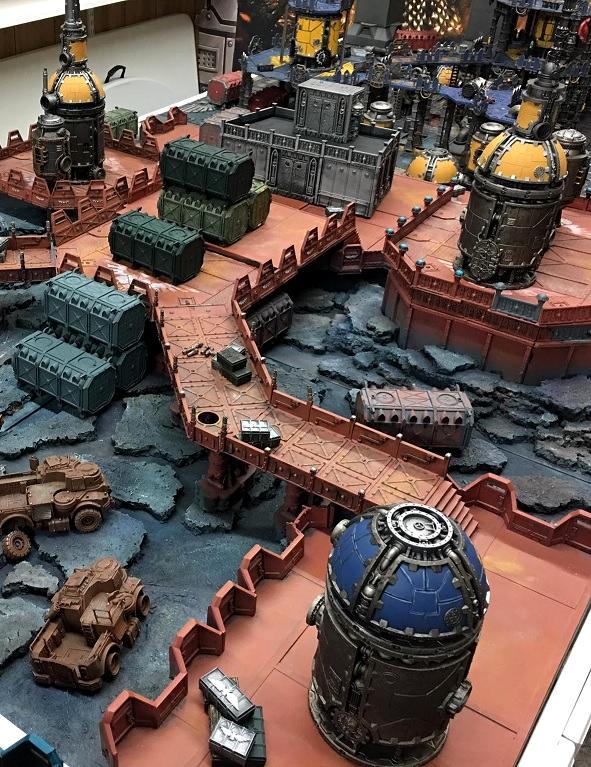
It's all well and good to make a bunch of cool looking Sector Mechanicus buildings, and whilst any of them would fit perfectly in a game of 40K their intended use is actually Necromunda. Necromunda buildings need to connect to one another with walkways, and so far the only walkway I've made is that outer ring (if you can call it a "walkway", that is). That makes a good centrepiece (as you'll see), but it needs stuff to branch away, and the only way to do that is with walkways. Lots and lots of walkways.
So from about 11pm through to 2am, and then from 7am through to 10am (1 hour before my guests were set to arrive), I built walkways!
I built 8 of the damned things, some very simple, some quite complex. So here we go...
The layouts were simple. I wanted two regular straight walkways, two that had a corner, two that were wiggly and curved away (in opposite directions), one straight one that was a bit chunkier with stuff on either side, and one that looped back on itself with some space for some industrial stuff to tie it in thematically. I will likely end up doing more of these as time goes on (and may even chance a few double-high walkways!), but for now I needed a base 'set' of walkways, so I began with these layouts:
Of course, with so many things to put together, I had a panic moment of whether I had enough clips! Luckily I found a bounty of them among many, many untouched sprues:
Now these would have to stand on their own (literally), and consisted of very few pieces, and the longer they were, the heavier they are, meaning if there's a central point of contact there's more weight bringing it down. As such the clips had to do a bit more work than normal. In places I might do a single clip because the piece would be clipped to a few others, or held up by various machinery, I attached them with 2+ clips. One of the wiggly bridges actually has a furnace as its main connection point (didn't want to use struts for everything, both because it's boring and because, as I've said before, feth that sprue), so it has a square piece on top for extra strength.
Just for fun I decided to put them into a single layout just to see if I could. I wouldn't get a chance once the shields were in place and I can no longer place them all flush against one another, so this was just for kicks. Unfortunately, whilst doing this some creatures broke free! Captain Short Sword had to deal with them:
I then had another terror moment where I thought I might run out of struts. I went pouring through the various boxes I had until I came across this one:
Crisis averted, for now. Might need to bits order a dozen or so more... 
One handy tip that I picked up from the man, the myth, the legend, Duncan 'Two Thin Coats' Rhodes in one of the videos that came out right around the release of the Sector Mechanicus stuff, was that when putting together anything that has four sides, put together 2, then the other 2, then put them together. Don't try to do each piece one at a time, as fitting that 4th piece in will be far harder. This only applies to the Dome and Stack right now, but who knows what GW will put out in the future.
By the Emperor you get a lot of shields when you have this many tile sprues...
Another fun tip - This little spout, which is from the dome sprue, fits perfectly into the middle fan bit on this half of the circle platform. The little guide tabs even slot right in.
I mentioned in the last post how the Dome and the Kiln from the dome sprue are half-height compared to everything else, so that when combined they make a standard full level. That's what I'm doing here, using the Dome/Kiln as a supporting strut rather than something that goes on top of a platform:
And like magic, it's done!
Wiggly Walkway A...
... and Wiggly Walkway B. You can see in this pic the spare piece used to provide extra stability/support to the overall construction, and also that Captain Short Sowrd has been retreating to his 'Ring of Power' that he found earlier when he's not joining me for scale shots or reminding me about ladders or warding off Berzerker Bikes or taking care of unleashed lizard beasts:
This was the start of the U-Shaped Walkway:
And this was the end of the U-Shaped Walkway!:
The curved platforms proved to be a bit more of a challenge than first anticipated:
It wouldn't take much to knock one of them over, so more support was required, using the best piece across all kits once again:
Almost done!!!
And done!!! 
One thing that's worth pointing out is that all the shields across the edge are done in a semi-random way. I'm the type of person who likes things to be as symmetrical as possible, so having evenly spaced shields is what I've gone for in most places. I am intentionally not being precious when it comes to the type of shield either, be it a rather plain one, or one with a fan blade, or one of the cool solid ones with the control panels on the other side. Both for my own sanity and just because, I think, it makes better terrain, I would often grab shields without looking at what it was first, and then ensure that where I had two of the same type of walkway, the shields were in different positions on each one, and sometimes in different quantities. Drives the obsessive compulsive side of me crazy, but I'm ok with that.
So I finished those last pieces at 9:55am, giving me enough time to get the tables set up for the day of Necromunda that was to come. We didn't get in as many games as we first wanted (we're very new to the new rules and are taking time not to assume rules just because I know Oldcromunda so well).
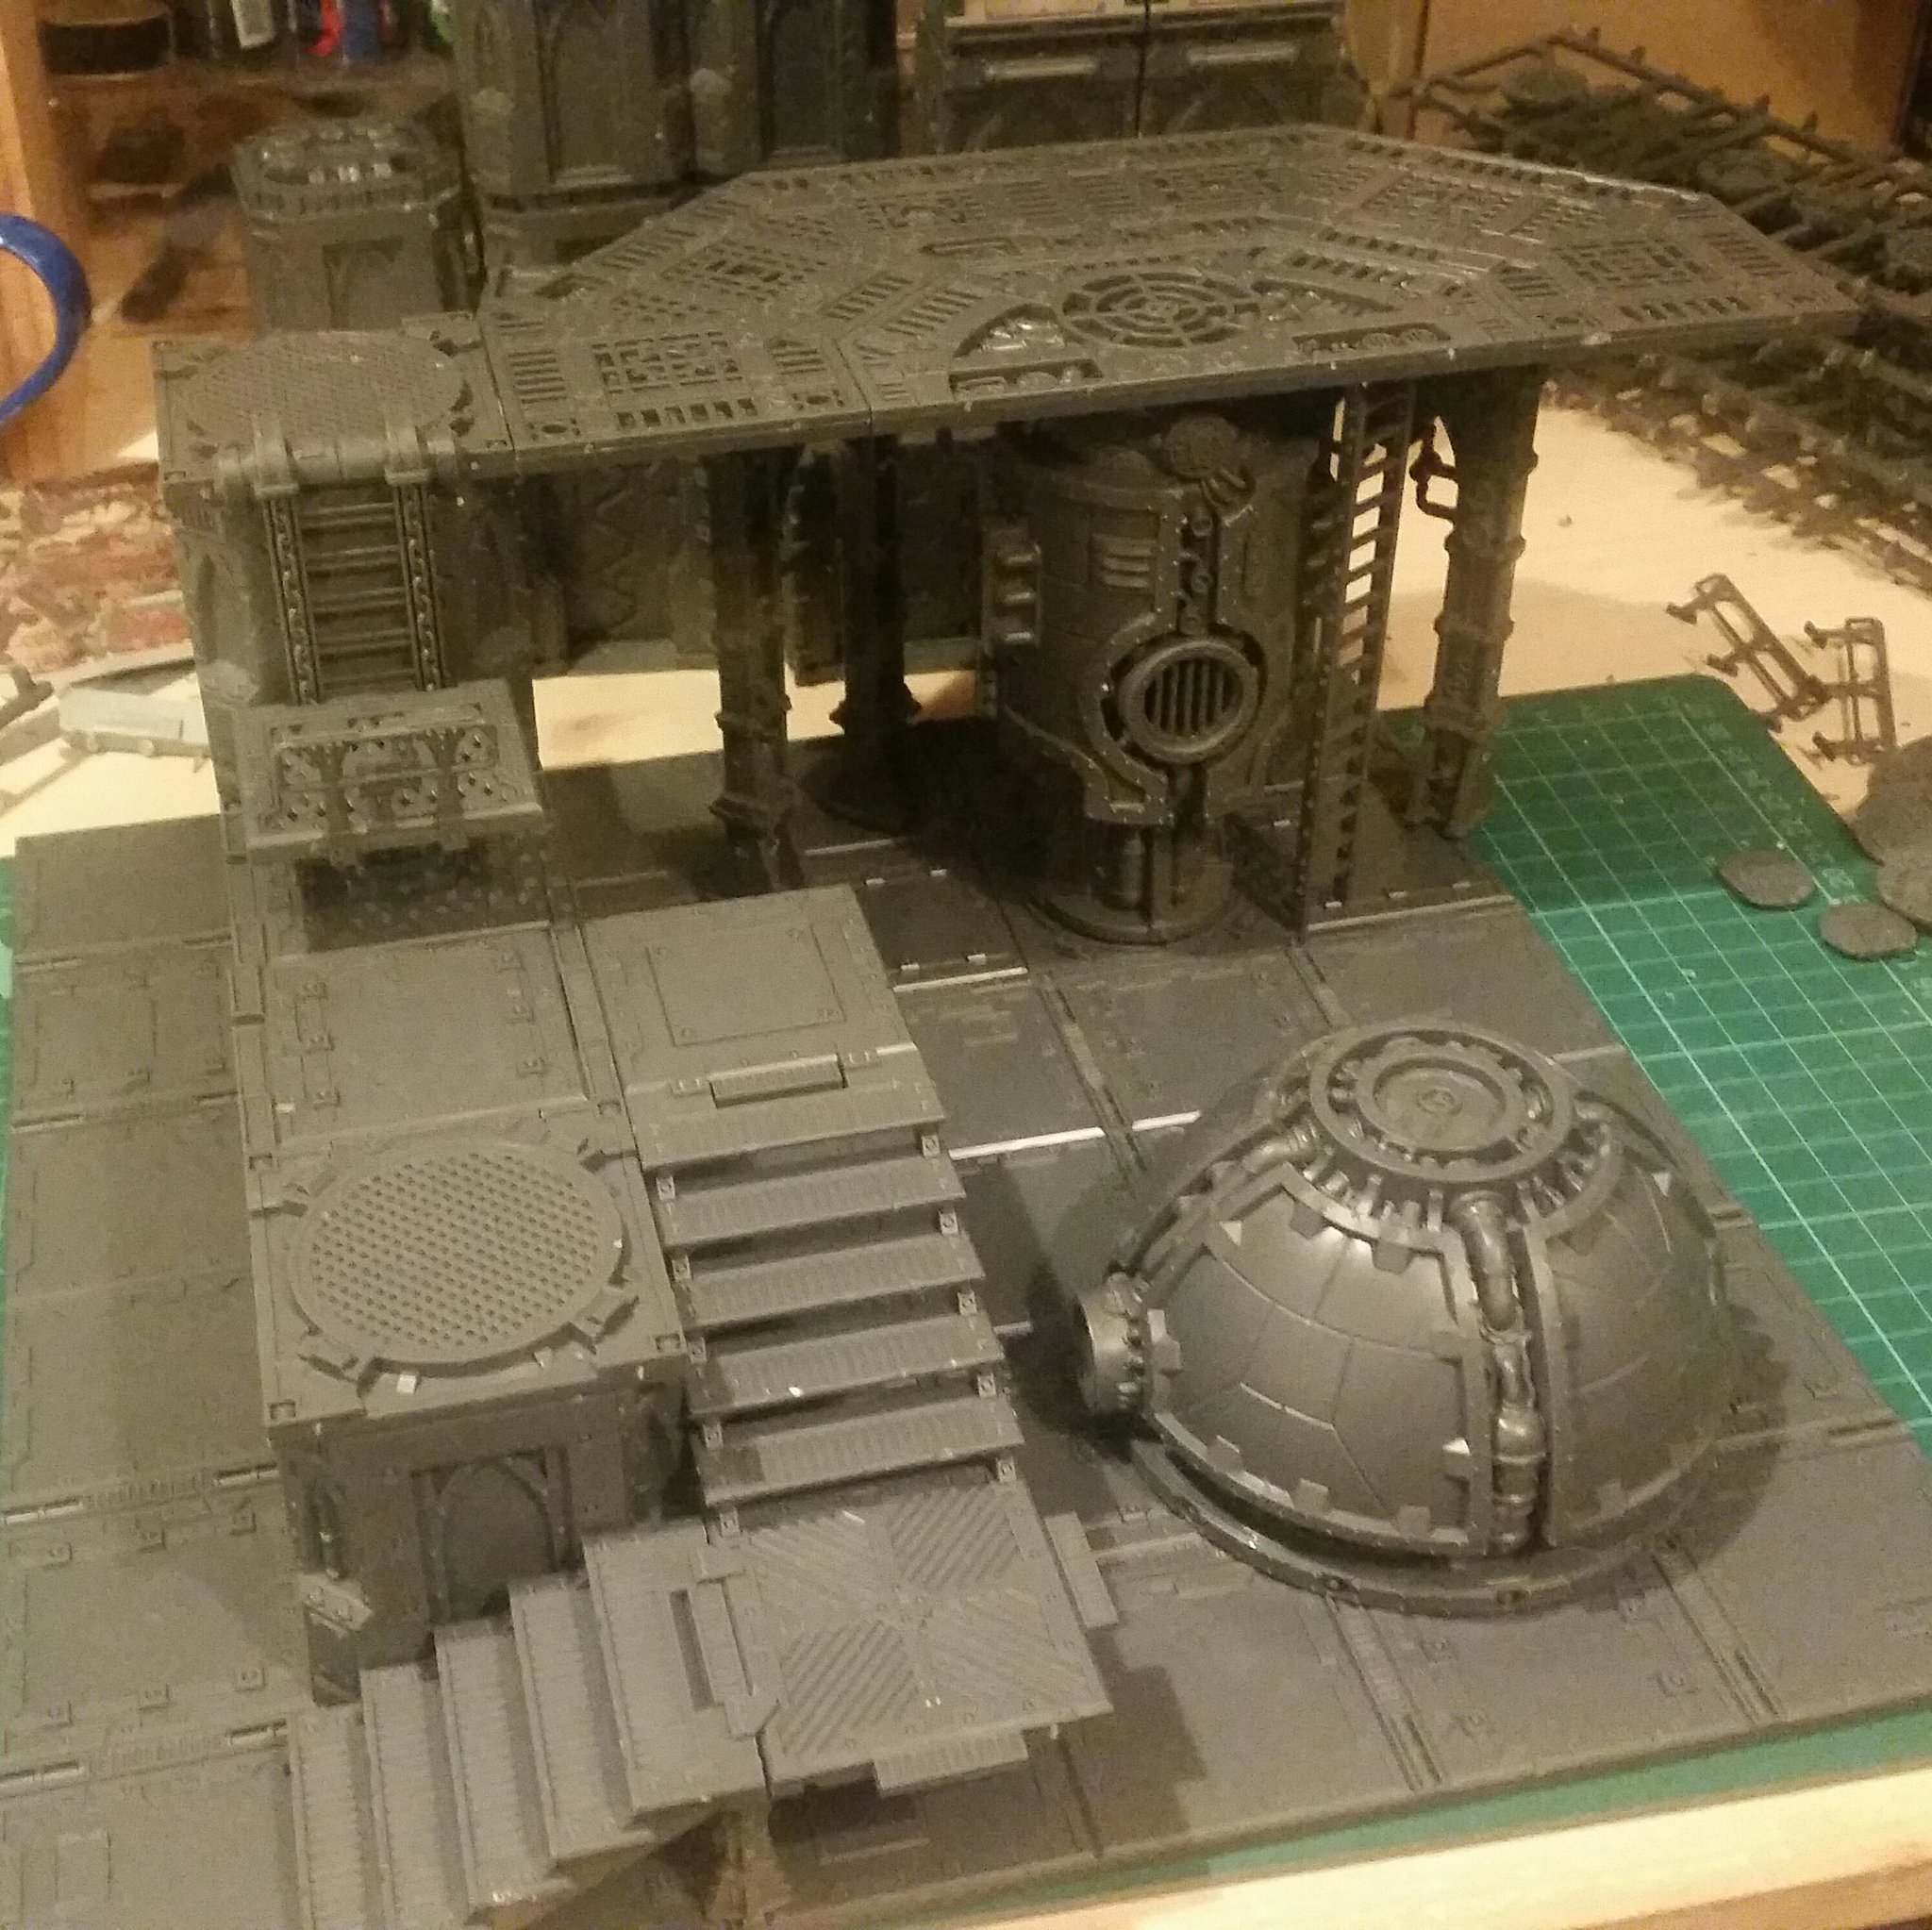
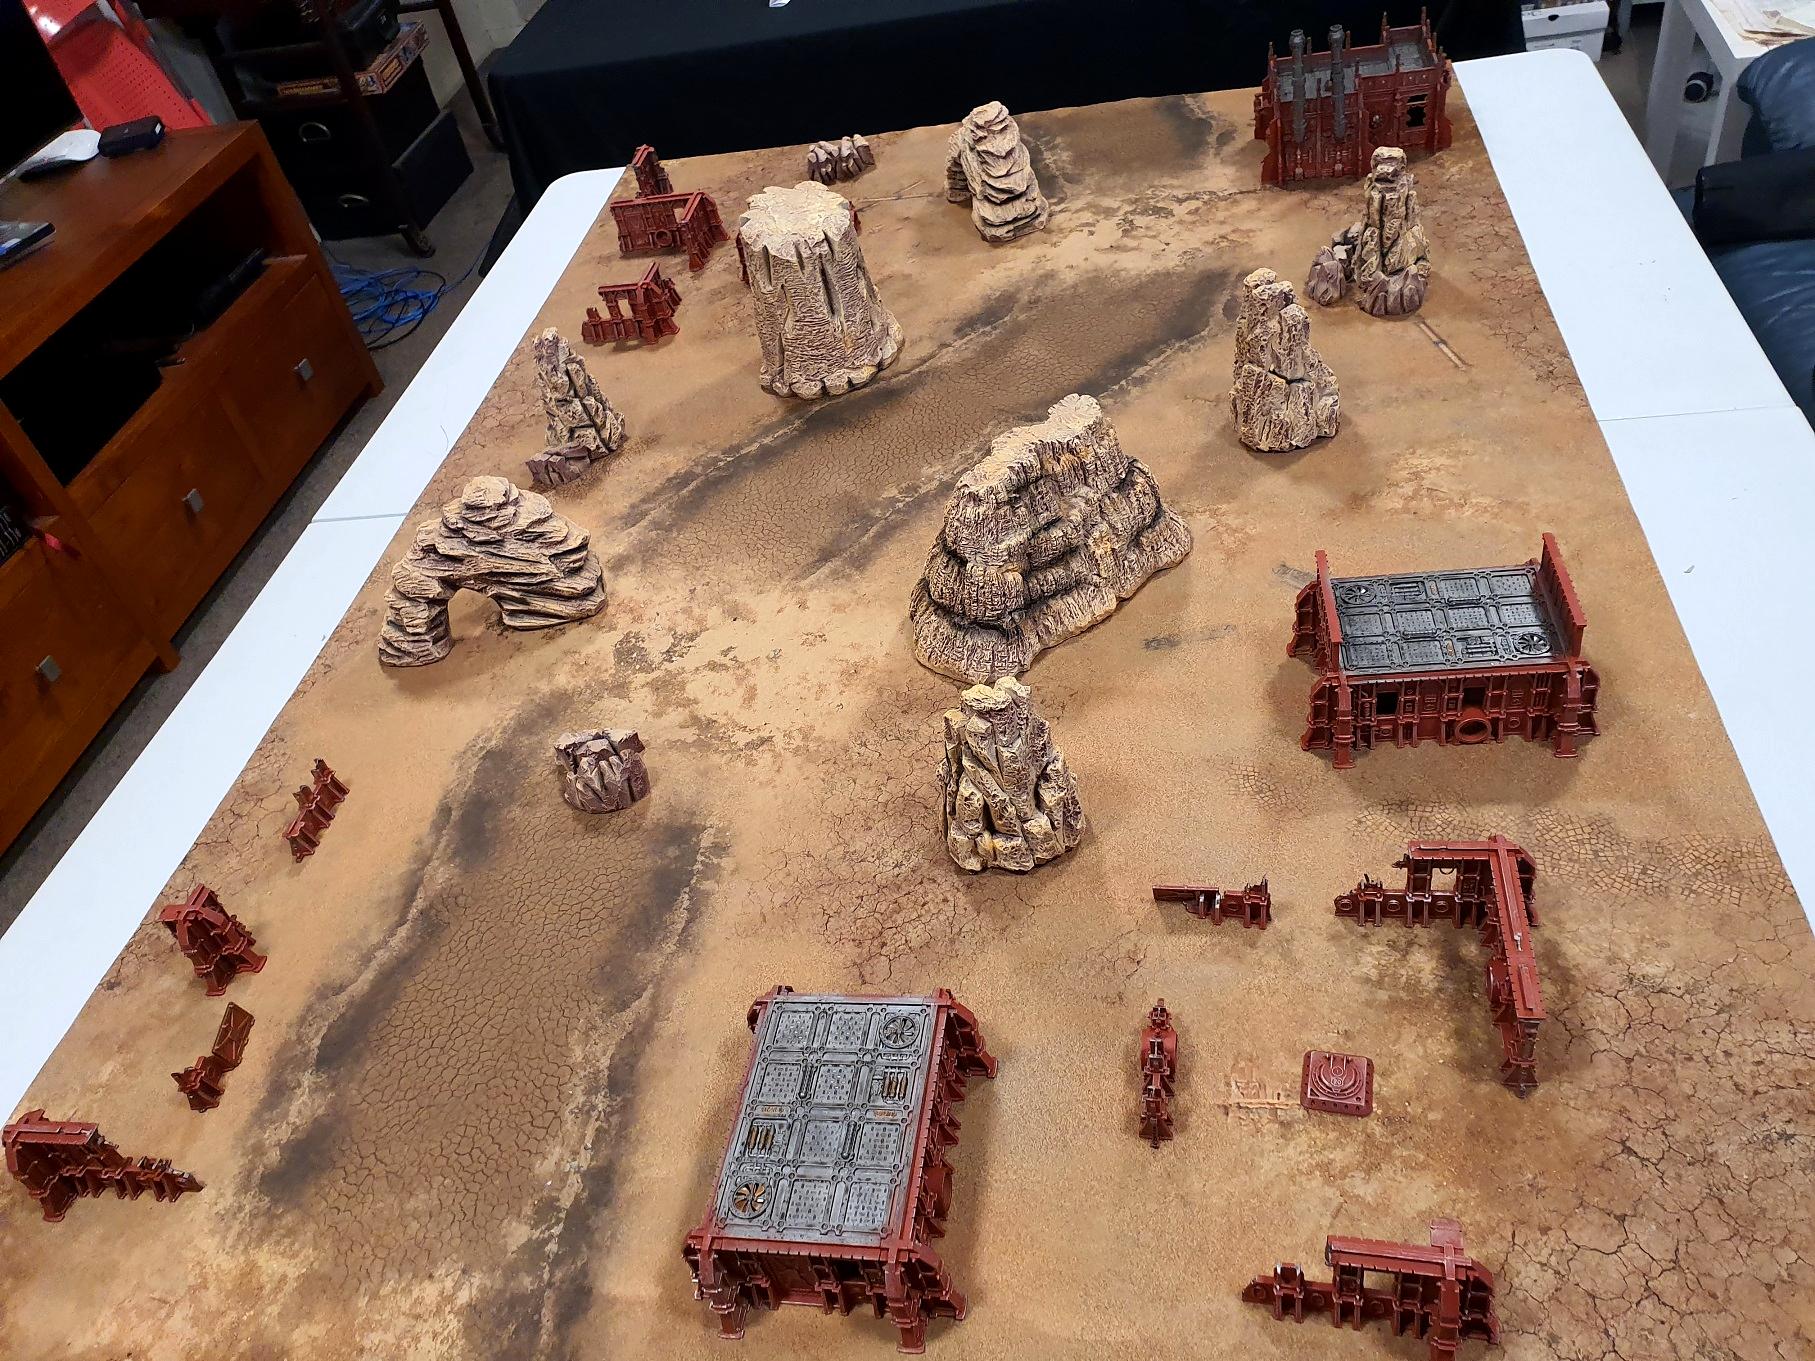
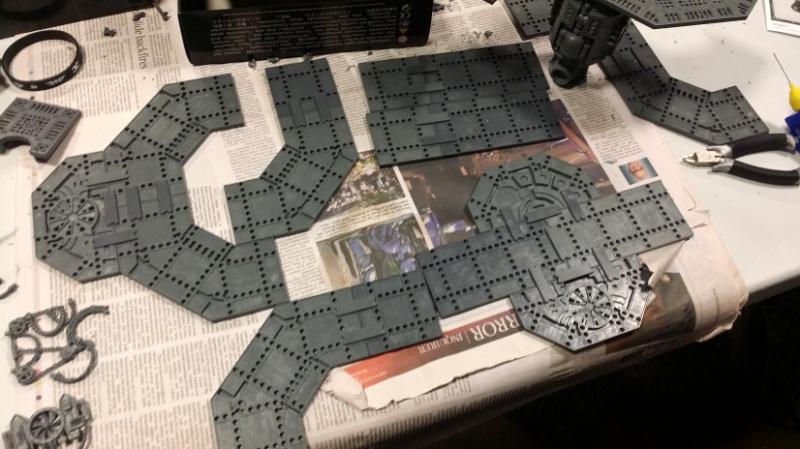
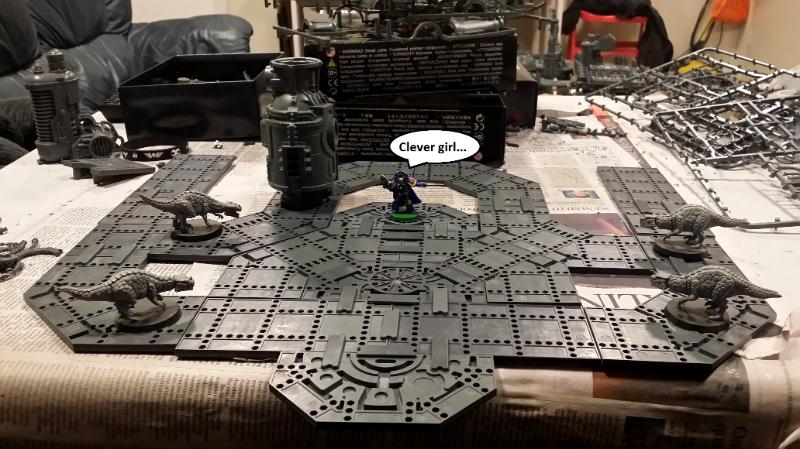
Combined with the Tri-City Gamemat.eu 4x4 mat this is what it ends up looking like when all put together:
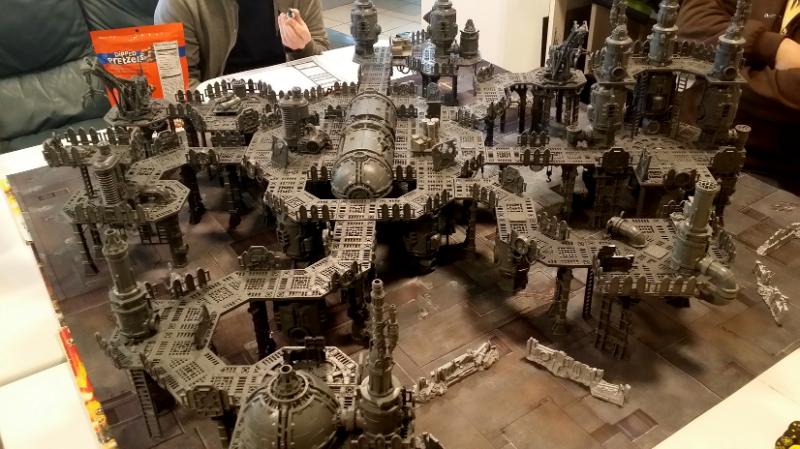
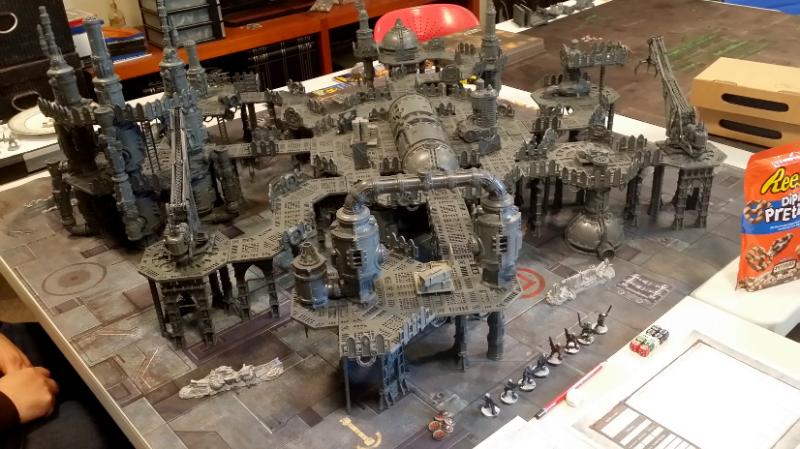
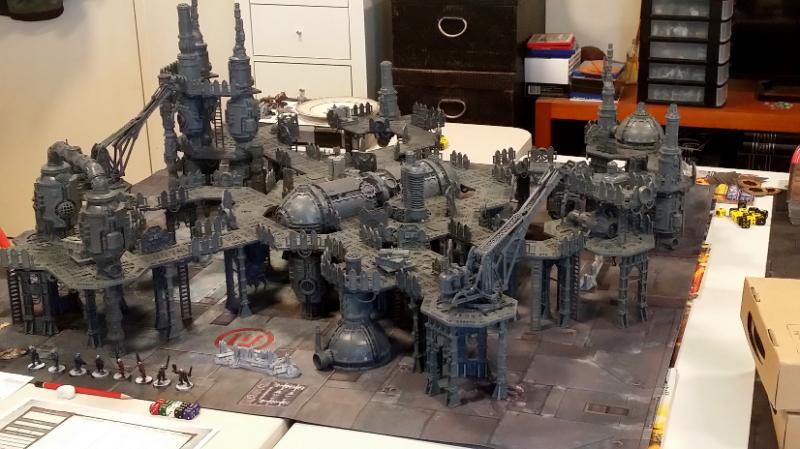
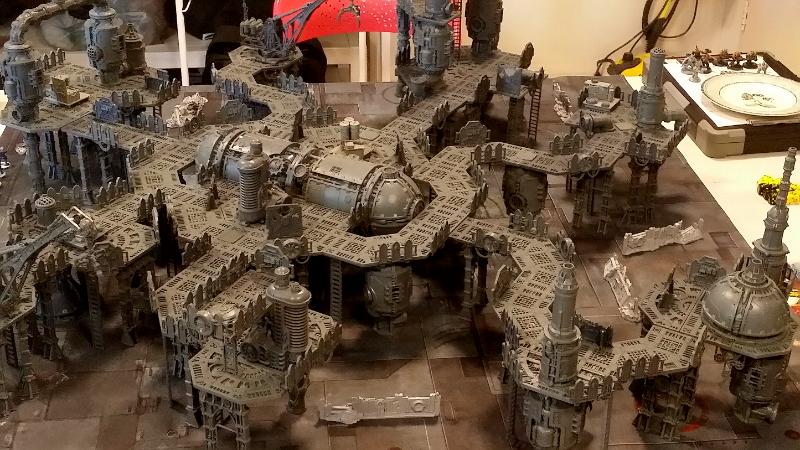
I'm very, very happy with it, and the modularity of the big outer ring and the various parts that fit with it proved to be quite popular.
So where does it go from here? Well if you think my industrial insanity has been cured by this extravaganza of construction, then you are mistaken. I still have tons of stuff left to build, and you better believe that as soon as this and this return to stock, I'll be getting them... plus I need a 4th set of the Plasma Regulators... need to order more struts and connector clips as well... what was I saying?
Oh, yes, where does it go from here? The answer is simple: The only way is up!
BYE
16387
Post by: Manchu
Holy hell, what a 4x4! Paint Paint PAINT!
51769
Post by: Snrub
That is a gorgeous table right there.
Now all it needs is another couple of levels.
30344
Post by: monkeytroll
That does look like a very fun table
116546
Post by: War Drone
116402
Post by: Dr. Mills
Excellent job, can't wait to see some paint slapped on it!
116546
Post by: War Drone
Oh, and the offer with the grapes still stands ...
3309
Post by: Flinty
What a table. Great stuff. If you're finding that the walkways are a bit.flexible, you could also stiffen up the underside with some trimmed.down sprue.or evergreen style I section beams.might sav3 on the clippy connector bits.
120534
Post by: acrowsperch
This is fantastic !! What a great table to play on-- your mates must've been proud!
494
Post by: H.B.M.C.
Only a short update today as I continue to be stuck at home...
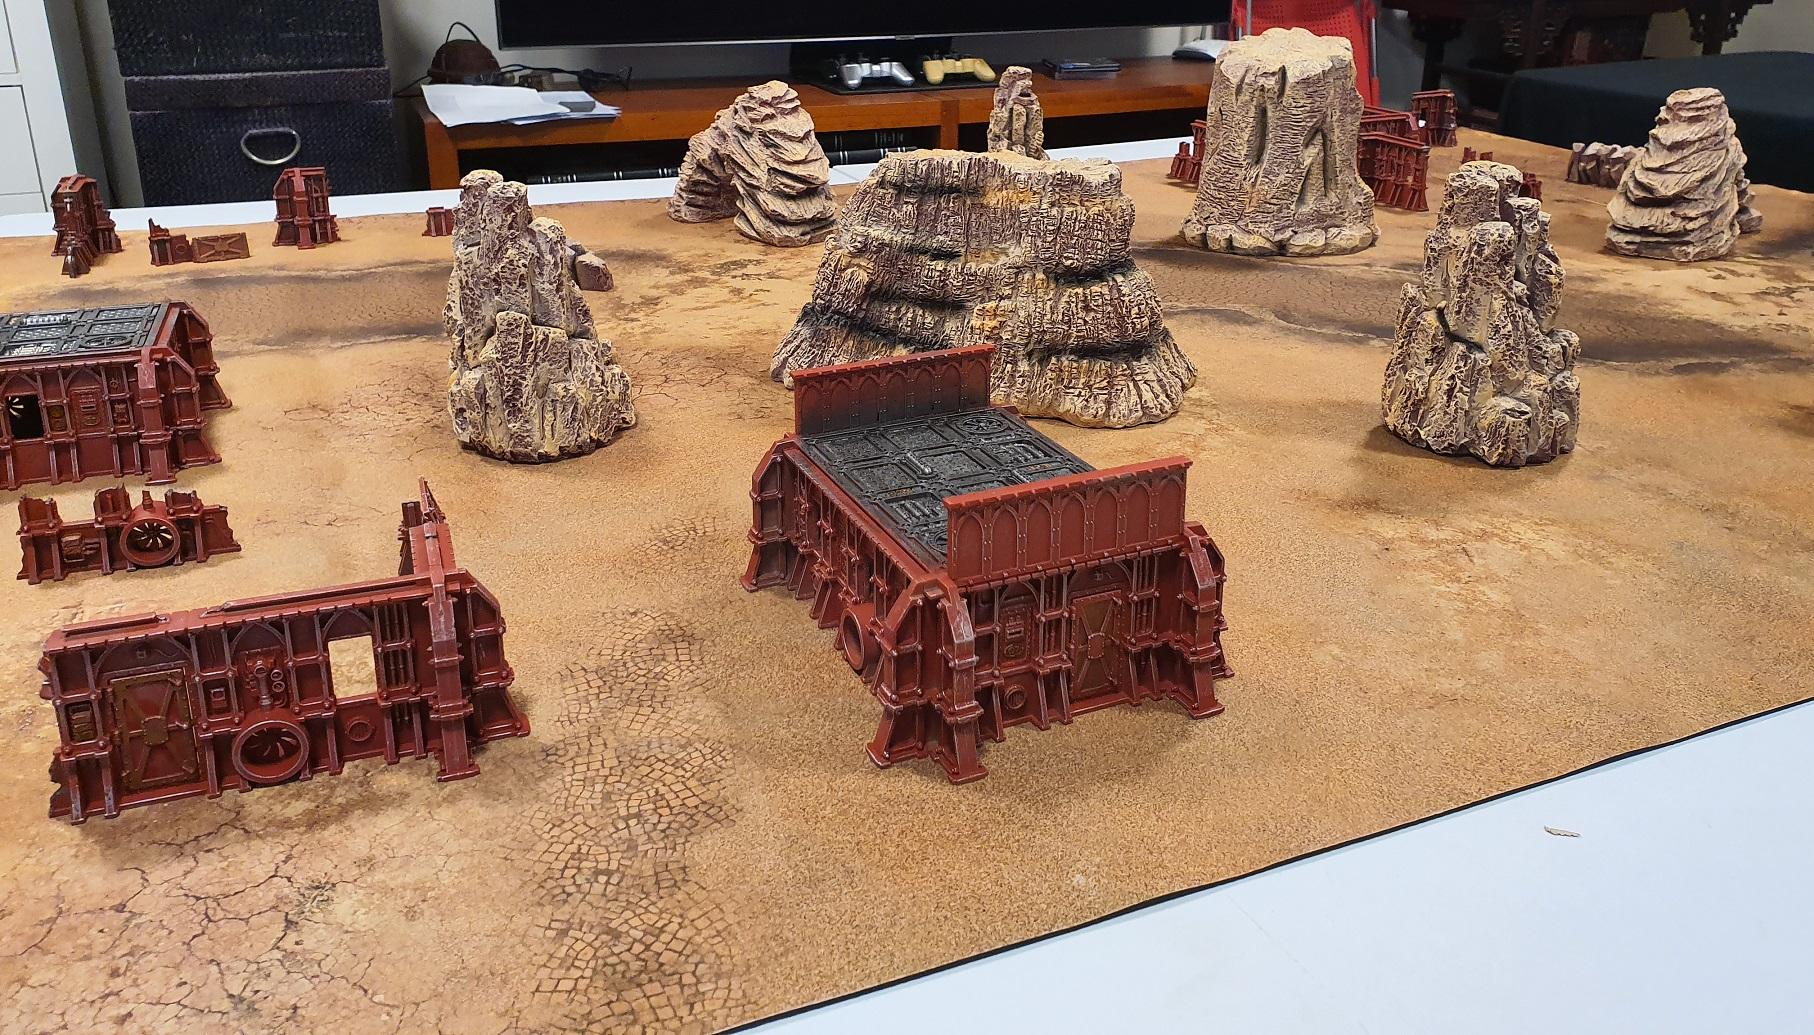
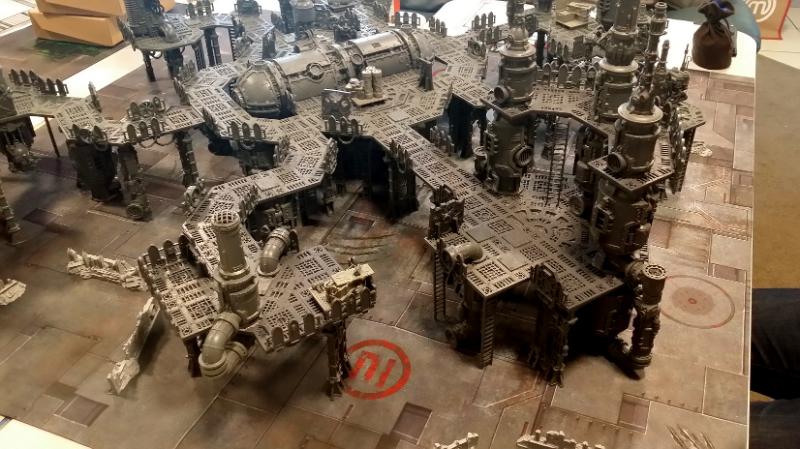
The U-Shaped Walkway
I wanted to talk about this piece and the fortuitous way that it worked out. You've already seen it as part of the walkway post I did yesterday, and you can see it in action in the bottom right of the pic below:
The purpose of this piece was to be a walkway that loops around and goes back the same way, just slightly off to the side of the original path. It works well for its intended purpose, but when building it I specifically didn't put any shields into the inside curve as I figured it might work with other terrain pieces. So here we have a few examples of how that works.
Here is the individual walkway itself:
Here's how it works with one of the Klawz:
Here's how it goes with the Generator Platform:
It works really well with the Space Shuttle, going this way...
... and the other way:
It slots neatly into the Outer Ring:
Plus it leaves enough room for one of the Klawz:
I didn't start out planning for these terrain pieces to be as modular as they are, but once I realised that the Generator Platform didn't need to be glued to the ring of walkways I wanted to put around it, it opened up a whole set of new avenues for building configurations. In hindsight I probably should have made the Outer Ring two pieces, but we learn as we go. I have even entertained the thought it building a second Outer Ring. Or, I would, if not for...
Crisis of Construction
I'm running very low on struts - I have 13 left - so much so that I parts ordered another 9 off eBay and am waiting, endlessly, desperately, for Bits & Kits to restock their Sector Mechanicus kits. I'll be getting more struts, more clips and, most importantly... more platforms.
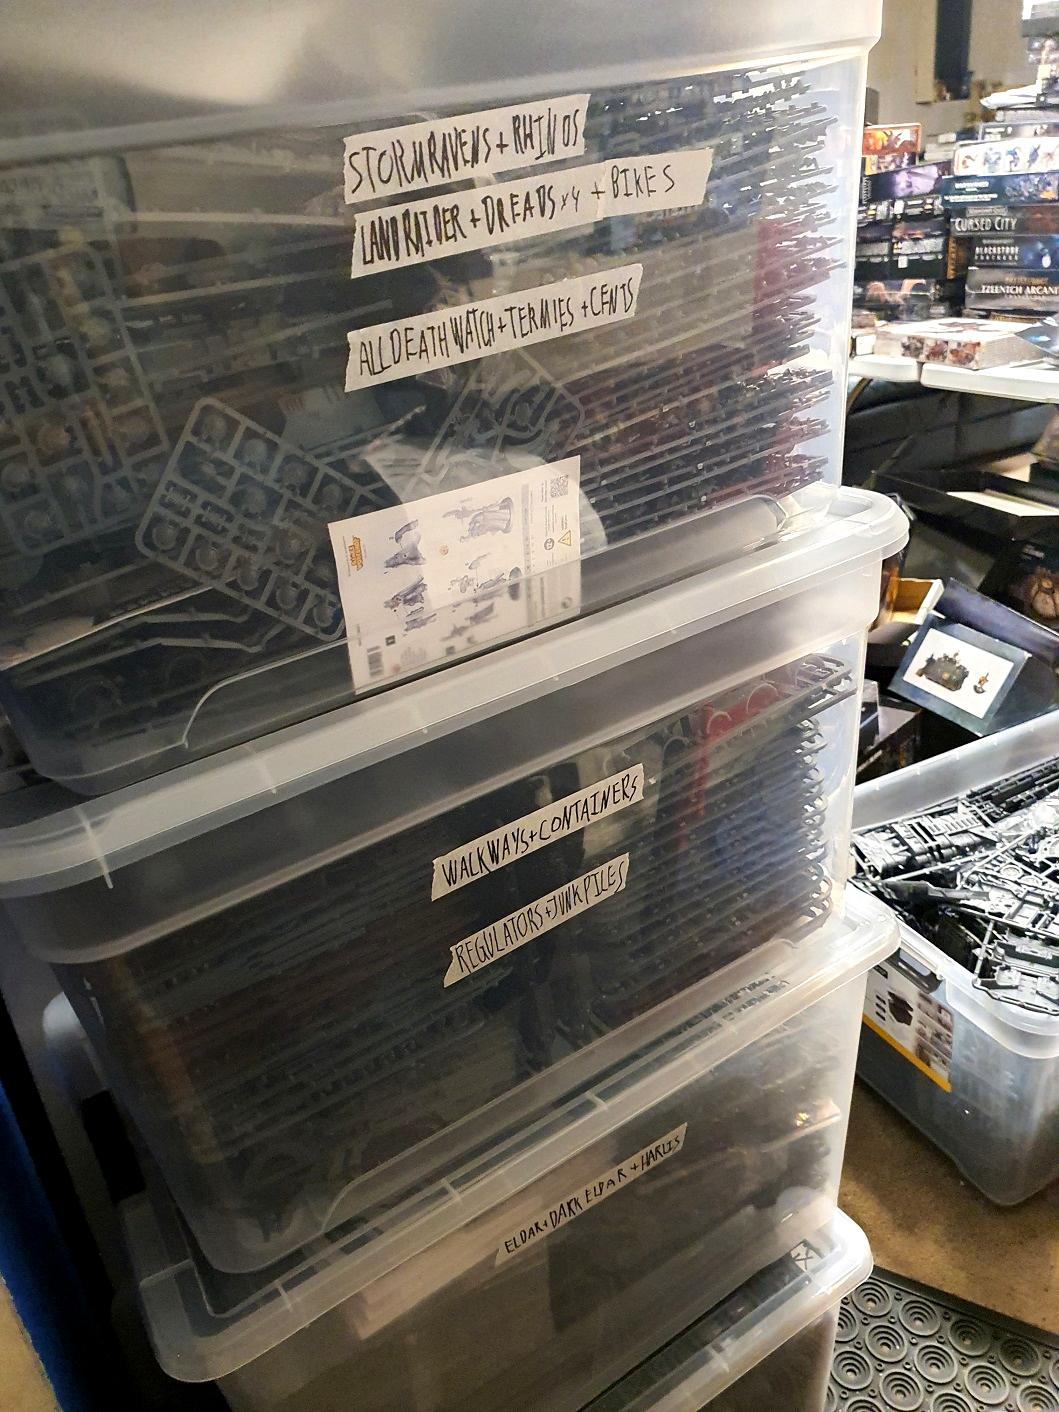
This represents my current stock (organised into approximate future building plan layouts):
It's a damn-sight less than the heavy box filled with platforms that I had a week ago, although from this thread you can probably see why. It's just slightly below what I think I need to go upwards with the next phase of buildings, so it will need to be improved upon. I also want to do two more wiggly walkways, as they're more useful if I have two of each 'direction'. I also have 4 stacks and 2 domes left. Tons of furnaces though. I must have 8 untouched furnace sprues kicking around.
So I may have to get creative during the next phase...
BYE
26800
Post by: Commander Cain
Exalted due to pure madness! I don't think I would have the willpower to build all those bits without going insane but the end result looks fantastic!
GW terrain has really improved so much since the last time I bought any, the way it all fits together looks like there are pretty much unlimited configurations. Any plans to add some of the new city terrain or a void shield generator at some point?
9910
Post by: CommissarKhaine
Loving the interchangeability of it all. I really should get started on my terrain...
104020
Post by: Crimson_
Super impressive, i'd like to play on that!
54849
Post by: steam
WOW. I am glad that you shared this link! Its amazing
116693
Post by: phillv85
This is amazing. I’m going to build the rest of my Sec Mech terrain tomorrow then order some more on payday. I feel inspired.
514
Post by: Orlanth
 H.B.M.C. wrote: H.B.M.C. wrote: Rolsheen wrote:Amazing piece of terrain, the only thing I don't like is the mech icon being sideways
Unavoidable really. These pieces were designed to go up, not out, so that was destined to happen.
It's why the two doors on the stack are on the underside. I didn't want side-ways doors on the top.
Turn the two mechanicus icon circles into the base for vents, a couple of fans will hide the problem. Automatically Appended Next Post:
In Australia you should remember to always shake out your Forgeworld before putting it on. Automatically Appended Next Post: H.B.M.C. wrote:Only a short update today as I continue to be stuck at home...
The U-Shaped Walkway
I wanted to talk about this piece and the fortuitous way that it worked out. You've already seen it as part of the walkway post I did yesterday, and you can see it in action in the bottom right of the pic below:
Stop! STOP! STOP!!
Impressive but you need hand space for gaming. You need some long connectors so you have space between terrain units, mostly for hand access.
3309
Post by: Flinty
If it's just struts you need to support walkways, then you could.just go.get some commercial 12.5mm or 15mm pipe.and cut it to length. Lots of heavy duty circular hollow section columns to use as supports.
97127
Post by: Kharne the Befriender
This thread gives me the inspiration i need to turn my Forgeshrine into a sector mechanicus table
This is beyond fantastic work
514
Post by: Orlanth
Do these units stack without glue. I wonder if the pieces here could be layered on each other.
92192
Post by: TGG
What Kharne the Befriender said. Amazing work!
494
Post by: H.B.M.C.
 Orlanth wrote: Orlanth wrote:Do these units stack without glue. I wonder if the pieces here could be layered on each other.
Depends where the struts/ladders and other supports are. For instance, I have two short walkways that are 1 long and 1 short walkway long each, the two on the left in this picture: One of them has a ladder in the middle. The other doesn't. The one that doesn't perfectly slots over the top of this: ... with one strut on either side. The one with the ladder can't as the ladder is in the way. Actually, here's a quick photo of what I mean: 
90488
Post by: The Riddle of Steel
Epic. I love it. My own setup is looking rather puny by comparison. I particularly enjoy the big horizontal tube and dome thingy in the middle of the ring. It just has such a natural look to it.
I can’t wait to see this go to the second level.
107727
Post by: amazingturtles
This is beautiful madness.
51769
Post by: Snrub
I think this table will make most peoples tables look sparse in comparison.
494
Post by: H.B.M.C.
Crisis potentially averted. Just picked up 3 Galvanic Magnavents for 45% retail cost.
69494
Post by: OneManNoodles
This is nuts, I love it!
Only wish I could justify doing something like this myself.
9910
Post by: CommissarKhaine
Loving it, but how playable is that setup? Looks brilliant though, and as long as you don't need to acces the floor underneath, probvably quite playable.
20609
Post by: Tyranid Horde
Just catching up on the thread again; when all put together the terrain looks great!
With the different elevations, a Cities of Death game wouldn't go amiss on it, that's for sure. LEDs would help for the undersides if you're going as far as you're going already
95191
Post by: godardc
You know what is even more impressive than you wonderful board ? The speed at which you made it. Incredible ! Keep doing the great stuff guy
514
Post by: Orlanth
Your slacking H'. You cant hide a Titan and a dozen super heavy tanks behind that.
494
Post by: H.B.M.C.
I'll have you know that I don't own any titans, and I don't have a dozen super heavy tanks. I have 10, but that's not 12.
686
Post by: aka_mythos
Do you have colors picked out for painting this?
494
Post by: H.B.M.C.
I'm still in two minds about that.
On one hand full colour with silver done in all the nooks and crannies would look cool, but it'd take forever.
Then there's this guy's method, which seems very effective and quick.
16387
Post by: Manchu
Do you have or have access to an airbrush?
121849
Post by: txaggieof08
H.B.M.C. wrote:Here's some I prepared earlier...
I have experimented a little bit with the Sector Mechanicus terrain, making 3 buildings (plus one platform that was a mistake), mostly out of the stuff I got initially and some bitz ordered stuff. So before I get into building the new stuff I thought I'd show off some of the pieces I'd already constructed.
The Nipples
In GTAV there is a set of buildings I've seen people refer to as "The Tits". They look like this:
Those building are, I believe, based off two MASSIVE tanks on the Mississippi in Baton Rouge, LA. LNG I believe. They're visible from the top of the I-10 bridge looking down, and look like giant ..... well boobs.
494
Post by: H.B.M.C.
Well most things in GTAV are based off of LA, so it's not surprising that they included those.
Anyway, some reinforcements have been ordered. The upward climb begins soon...
121849
Post by: txaggieof08
H.B.M.C. wrote:Well most things in GTAV are based off of LA, so it's not surprising that they included those.
Anyway, some reinforcements have been ordered. The upward climb begins soon...
Not the City in California. Baton Rouge would the the capital of the state of the state of Louisiana.
11
Post by: ph34r
Really great project HBMC. Do you have a vague idea how much storage space it might take to pack away?
120033
Post by: Excommunicatus
'The Tits' are also a reference to Naked Gun, IMO.
"Everywhere I look, something reminds me of her."
3309
Post by: Flinty
 Excommunicatus wrote: Excommunicatus wrote:'The Tits' are also a reference to Naked Gun, IMO.
"Everywhere I look, something reminds me of her."
Just click the link...
120033
Post by: Excommunicatus
Ah. Mea culpa.
494
Post by: H.B.M.C.
I think we're... drifting... from the main topic at hand.
So, in light of that:
As I said before, the only way is up.
518
Post by: Kid_Kyoto
H.B.M.C. wrote:I think we're... drifting... from the main topic at hand.
So, in light of that:
Tits?
494
Post by: H.B.M.C.
[Ignore]
3309
Post by: Flinty
It's the potential represented by the still massive pile of sprues just stage right that is the best bit
494
Post by: H.B.M.C.
Those are all new, too. They're the three Galvanic Magnavents I got off a guy on eBay who was selling them for 55% off.
494
Post by: H.B.M.C.
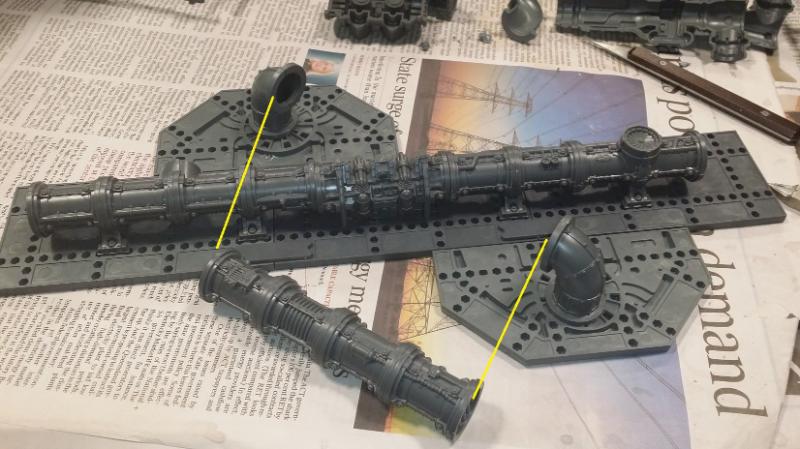
Sometimes things don't go as planned. Sometimes you bite off more than you can chew. Sometimes your eyes are bigger than your stomach. Sometimes what you hope would work doesn't quite end up working the way you intended.
The Underpipe Bridge
I have a big building planned (you'll see it in the next post), but part of that big building is a bridge that connects it to another big building, and at a significant height (3 stories up, or 15"). I didn't want to have to precariously balance a bridge on three struts placed on top of one another so I decided to make it free-standing.
I also wanted to have pipes running under it, something that the Thermic Plasma Conduit kit is quite happy to provide what with its modular "feet" that allow you to place them on the tabletop, but also under flat surfaces. The idea behind this is that the pipes on this bridge would run from one big building to the next, but the bridge itself would be a free-standing separate piece that could be moved elsewhere. I'd also be making full use of Ray Dranfield's little clip trick that he designed into the Sector Mechanicus kit.
This was the basic idea behind it. Three long sections, the pipe running under it (but not right to the edges). I then added the two side parts on because I had a wonderful idea! I was going to add a cross pipe just like the Space Shuttle piece has. What could possibly go wrong?

So with that idea firmly in my head - besides, a long straight bridge if boring, right? - I looked for the parts I needed to get it done. This would use the last of my Thermic Plasma Conduit bits (never fear, a second box is on the way!), but it'd be great... right?
I spent a great deal of time measuring out where each of the furnaces would have to go to allow the pipe to connect overhead. That in turn meant a lot of time moving the two half-circle platforms around, and even more time fething about with connectors to make sure everything matched up. I'd have to get the pipes into the tops of the furnaces flat, and at the right angle, and at the right distance, all whilst some of it was gluing.

Covet the small caps you get in most Sector Mechanicus kits. They can help you cover that tiny bit of extra distance when you need it.
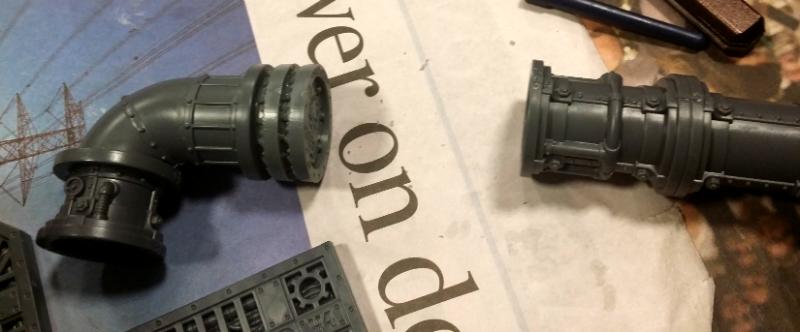
With everything measured up it was time to start adding all the various components. With pipes on the bottom it's not flat, which means you have to be very careful when things are drying.
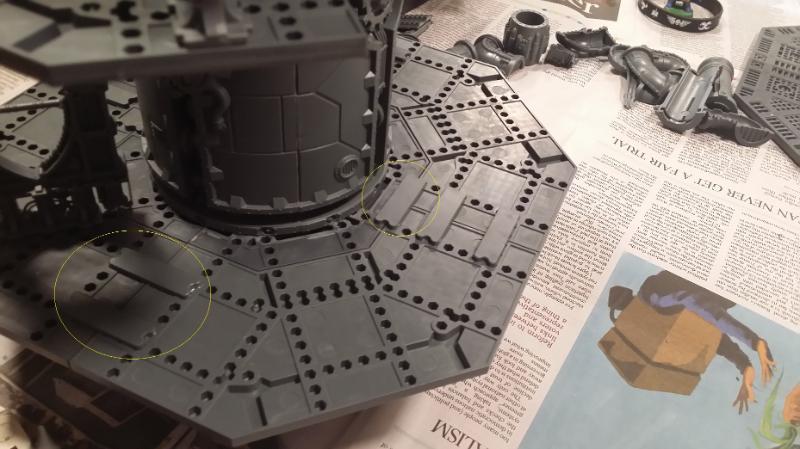
Everything is now in place (other than the clips at either end) and I've added in all the shields. The one I've circled is one I will eventually end up tearing off to make room for the sudden emergency expansion this bridge required.
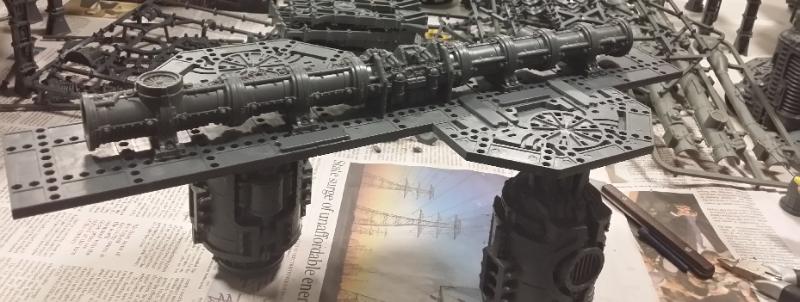
One thing I didn't factor in when I had my 'great idea' to add a cross-pipe running over the bridge is just how damned heavy it would be. Adding in the two half circle platforms, the two furnaces, the big pipe and the connecting corner pipes (plus the extra shields and connectors) all adds up, and in the end whilst it worked, it didn't quite work as well as I had hoped. Worse, I was afraid of one of those clips coming loose, with miniatures on top, when it's 15" in the air... nope.
So in the end I ripped off that shield as I mentioned before (it was in the way), and added some small platform expansions with extra clips. The below shot shows the expansion and how it connects to two pieces where you can fit it (the only two I had at the time).
Now I'm in a situation where the pipe running along the underside isn't centred, and I can't get it off as the glue has long-since cured. I will have to try this one again, this time not putting on the extra bits along the edge that just add weight, and making a more plain bridge, even if that is more boring. The pipes are nice though, as the below shot shows.
Oh well. Better luck next time!
That's all for now.
The first of the two big buildings is coming up soon.
BYE
75338
Post by: Inquisitor Kallus
great work, looks fantastic. Looking forward to seeing it all complete
494
Post by: H.B.M.C.
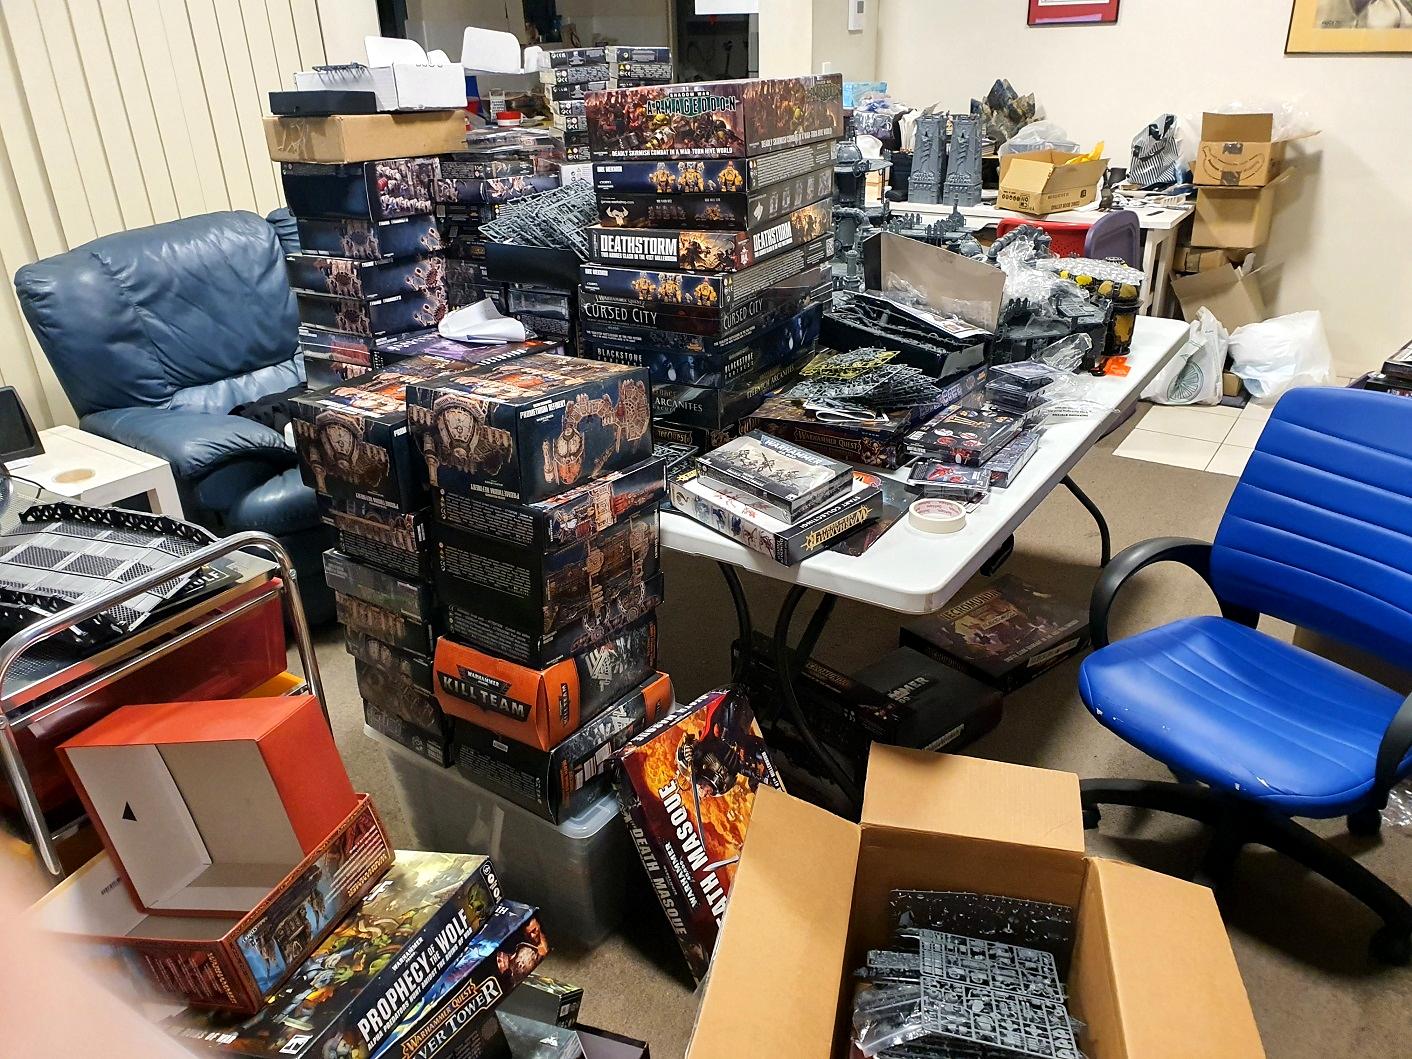
Apologies for my absence. Things have been quite busy of late and I've not been in the building mood. On top of that, the last two constructions, one of them being that bridge, and the next being the tower that I will post once it is complete, have left me a little drained as they did not come out quite the way as intended, and also drained because they drained my reserves of floors and pipes. So I decided to fix that last particular issue. Reinforcements!!! With many plans and an unending ambition to build bigger and more impressive things (and a growing library of people's own Sector Mechanicus pics on my HD) I have been inspired to build some more things. Of course, I am quite low on flooring, and have more walkways (including a couple of tall walkways) to complete, so after parts ordering a bunch of curved walkways (and some very yellow Ork Bikes and 2 sets of the nice new Orky barricades) and a few more struts, and even picking up an Alchomite Stack on eBay for less than half the regular price, I saved up and put together a small order (small compared to the others) to restock on various parts. What's in the box???  Nothing other than Blackstone Fortress (and some other things): 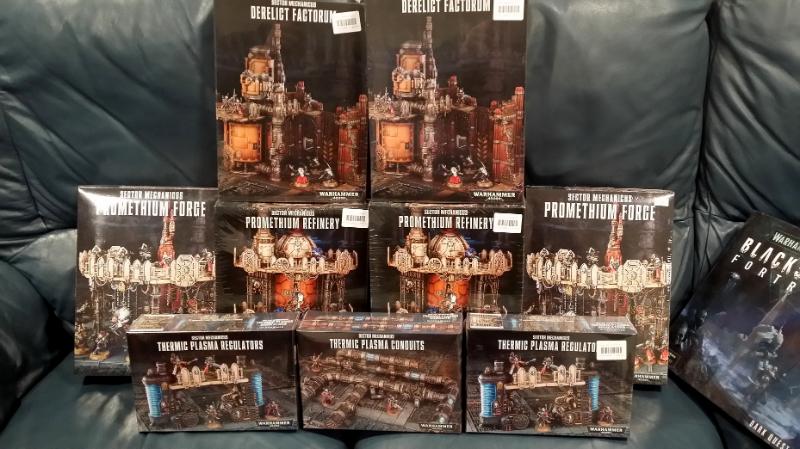 Now it's worth pointing out that not everything in that pic was in the box. The pipes weren't, and the two Promethium Forges weren't. But why did I buy two Promethium Forge boxes? Well the truth is... I didn't mean to. They were an accident. See, I was sick of waiting for GW to get the Sector Mechanicus Killzone back into stock, so I thought, bugger it, let's just get a pair of Promethium Refineries, some more pipes, the extra Thermic Plasma Conduit box I've been meaning to get, and be done with it. So I went to my guy, gave him the order, and that was that. Except I didn't tell him Promethium Refineries. Instead I got them mixed up and told him Promethium Forges. And he went and ordered exactly what I told him. 100% not his fault. I'm the one who got it wrong.  Then GW went and released that Derelict Factorum and, well, I knew I had to get those. So I did the order for another set of pipes, the two Promethium REFINERIES (I must've checked that 5 times), and two Factorums. In the end I didn't get the second set of pipes as my guy sent me another set of Regulators. Oh well, we'll figure that out tomorrow. Oh, and Blackstone Fortress. So there we have probably the last great expansion for this project. I might order more floors/struts/connectors from hereon in, but I don't see myself ordering too much in the way of more Sector Mechanicus terrain. A pair of Void Shield Generators (to go with the polystone one GW originally put out) would be swell though... One last thing! A driving force behind this blog wasn't just to catalogue the creation of this terrain. A big part of it was finally putting my money where my mouth was and showing off the things I'd only talked about in the past. I mean, I could tell you that I have 30+ unbuilt loyalist Terminators, or an entire pre-Heresy World Eater army still on the sprues, or an entire AdMech army with multiples of every unit type still in their original boxes (all of those are true BTW), and really what does it mean if I cannot show it? I mean, why even believe me? I have always been someone who adores tiles and maps, be they GF9 vinyl D&D maps, Space Hulk tiles, Christopher West's fantastic creations, BattleTech Hex Maps, or even the Star Ship Trooper RPG maps (which I really do own), right down to my fav tiles of all time, the 1st Ed DOOM boardgame tiles, of which I have two sets, because they're frickin' amazing tiles. But... I could be lying about all this, right? How would you know? So pictured below is something I received recently. It was from a Miniature Market sale that happened in May I believe, but they only just arrived as part of the order were the Mophidus (or however they're spelt) Infinity RPG tiles which, as I have since found out, aren't available in retail yet (or to retailers) which meant that my order was just sitting there waiting for something to come out that might not be available for a long time. So I asked them to kill those two tile sets and just send the rest. 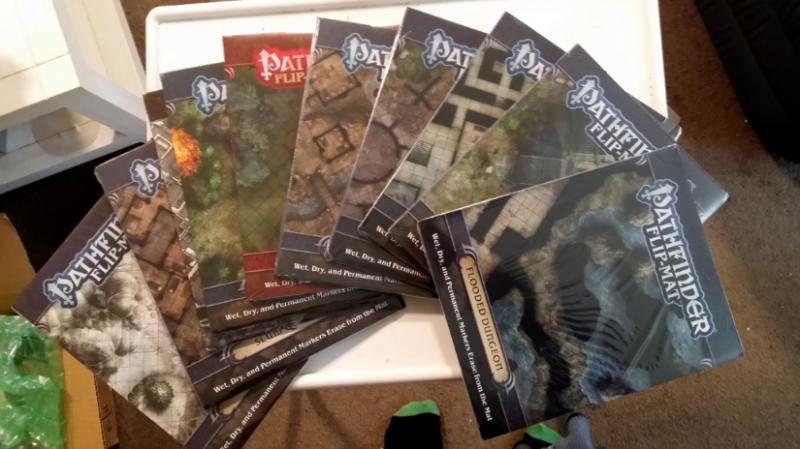 If you're interested, in that pile we have: I think Paizo flipmats are great, and I have a good chunk of their catalogue. I'm not so hot on the Starfinder ones, weirdly enough, despite being a sci-fi fan rather than a fantasy fan. The Starfinder Asteroid map, which you might be able to just make out in that photo, is the only one I've liked so far. The rest are just fantastic and generic enough to be used almost anywhere. Anything that's a little more overtly fantasy-esque makes good fodder for Chaos cults and more primitive worlds. Anyway, that's all for today. I'm going to try giving the Lift Tower the final touches over the weekend. I'll post it once it's done. BYE
10667
Post by: Fifty
Hah I have LOADS of those flipmats too, and loads of the tiles. I love them too.
518
Post by: Kid_Kyoto
Insanity!
494
Post by: H.B.M.C.
It's also worth mentioning that this isn't the first time I've bought something by accident. I once bought a Land Raider by accident. "How the hell do you buy a Land Raider, of all things, by accident?" I hear you say. Well many moons ago, when what we now know as Mierce Miniatures was actually a UK retailer known as Maelstrom Games (they shipped free to Oz, and had a discount - everything was less than half price for us back then... before the fething embargo... that ended badly for everyone... what a mess...?). Where was I? Oh yes... Their discount structure was based upon how much you bought, so the more you bought, the more the discount. They also had sales every now and again, and I wanted to see if the flat discount code superseded the gradual discount. The store said I needed to add £X worth to my order to get to the next discount bracket, so I added a Land Raider to my cart (it was the necessary price), saw that the discount didn't increase, and then went about finishing off the order. Forgot to remove the Land Raider though. So I ended up with a spare Land Raider. Go me!
106010
Post by: Meer_Cat
There is no such thing as a 'spare' Land Raider- they are all essential!
51769
Post by: Snrub
Oooh. Good supply drop.
When you say an entire pre-heresy world eaters army, just how many bodies are we talking here?
494
Post by: H.B.M.C.
I supposed that does require some clarification.
Let's see... what did I put aside. I think there's around 50-55 Marines, 5 Cataphractii, 5 Tartarus, 5 of the FW ones with the double chainaxes. A couple of Contemptors, a few various HQs. Got FW upgrades and shoulder pads for any mini that would take it. So it's mostly infantry. Couldn't be bothered with a whole other set of vehicles. I have enough tanks.
The unbuilt AdMech army... that's a little more serious.
That's:
Cawl (because of course).
2x of these these.
2x of these.
2x of these.
Spare one of these.
2x of these.
Spare one of these.
Extra pair of Skitarii boxes.
This guy!.
A set of these guys.
One set of these guys.
Two sets of these guys.
3 sets of these guys (wow... I have 9 of them?).
1 set of these guys.
Probably 12-15 of these guys.
2 of these and 1 of these (it was meant to be the other way around, but ok! Whatever!).
About 12 of these guys.
3 of these guys (2 of them are built actually, now that I think about it).
One of these.
One of these.
One of these.
Two of these.
One of him.
One of him.
Pair of these.
Pair of these.
One of these.
Two of these.
No big robots yet, but I do want one of each of them.
494
Post by: H.B.M.C.
It's been a long time since I've had the time to sit down and build anything... and that still hasn't happened... but I did find some time today to restock and clean my supply of flooring: 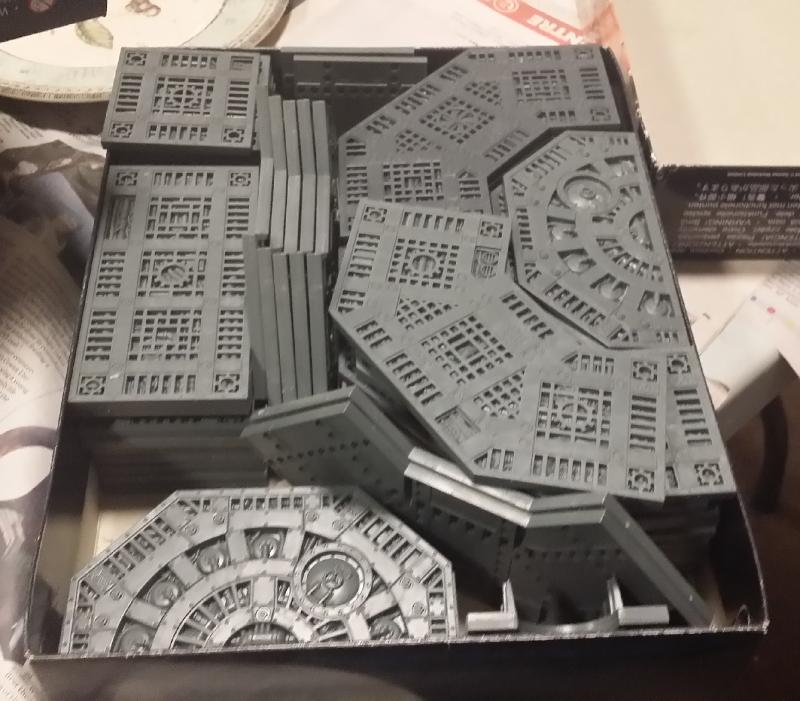 And I also took the time to go through and de-sprue/clean all the struts I own: 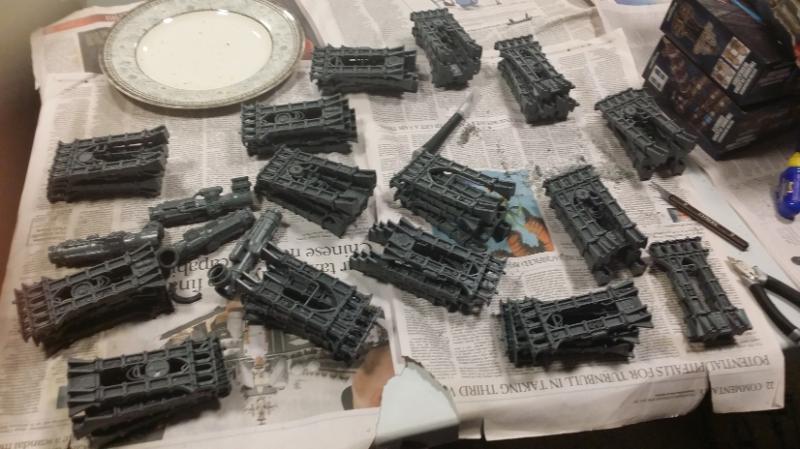 That's 58 of the things, or 14.5 of this sprue. I hate that sprue, but the hard part is out of the way. They're all cleaned and ready to be used.
104020
Post by: Crimson_
Yes, the madness continues
30672
Post by: Theophony
When you said reinforcements I was hoping you would have gotten recruits to help prep the piles. But I suffer the same problems that you do about buying the stuff then buying more to take my mind off the last pile .
96209
Post by: MacPhail
This is a remarkable undertaking! I'm a little intimidated on your behalf at what painting it will require, but it will be a thing of magnificence when done.
494
Post by: H.B.M.C.
Man my hand hurts... 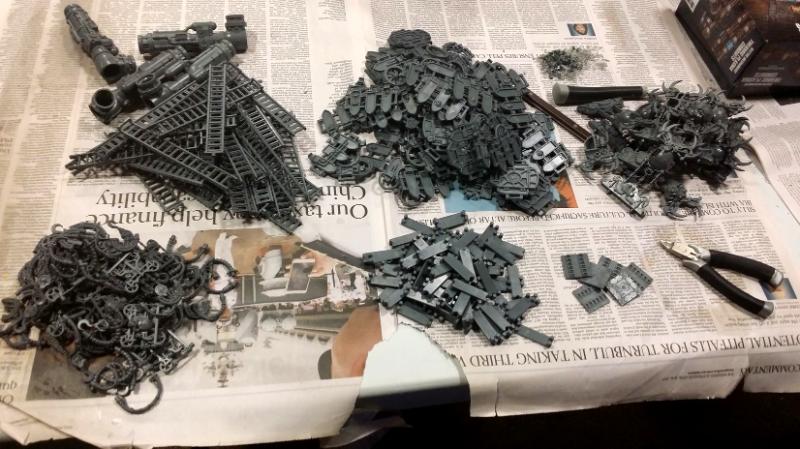 Figured it didn't make much sense to leave 20+ sprues with half the stuff still on them, so I spent a couple of hours clipping the rest off. No cleaning this time - I'll clean them as I need them - but at least they're sorted and in boxes (and it means they take up far less room!). And those piles got a bit bigger in the end, as when picking up an empty box to put them in I found 5 more sprues in similar states of half clip-ed-ness. HA!
30672
Post by: Theophony
Now you need a cheap blender for the sprue to make base rubble. You’d have enough for a whole table .
514
Post by: Orlanth
H.B.M.C. wrote:Man my hand hurts...
Figured it didn't make much sense to leave 20+ sprues with half the stuff still on them, so I spent a couple of hours clipping the rest off. No cleaning this time - I'll clean them as I need them - but at least they're sorted and in boxes (and it means they take up far less room!).
And those piles got a bit bigger in the end, as when picking up an empty box to put them in I found 5 more sprues in similar states of half clip-ed-ness. HA!
The vast pile of pulleys in the bottom right corner look useful. You have enough to use as bogey wheels and mount some of your terrain pieces as mobile gantreys.
494
Post by: H.B.M.C.
I have so many of those giant servo-skull crane things that I'm going to mount some of them on bases kit-bashed with spare Sentinel weapons and make a new unit.
21358
Post by: Dysartes
I take it they're not your favourite component for use on these kits, HBMC?
494
Post by: H.B.M.C.
There's nothing wrong with then, they're just of limited use.
494
Post by: H.B.M.C.
Everybody panic!!!
The Promethium Refinery is out of stock online!!!
104020
Post by: Crimson_
You bought em all?
494
Post by: H.B.M.C.
Possibly. I have bought, over time, 5 of them. And 3 Derelict Factorums. Probably about 6 Galvanic Magnavents. Maybe 8? At least 10 Alchomite stacks. So much other things.
Anyway, it's saying "No Long Available" at GWOZ, whatever that means.
Shame, it's the best value of all... ah, that'll be why. And everything else is Direct Only. Good job GW.
5946
Post by: Miguelsan
The wonders of living in places with lot's of space. That amount of terrain home and I'd be sleeping on the entrance.
M.
3309
Post by: Flinty
 Miguelsan wrote: Miguelsan wrote:The wonders of living in places with lot's of space. That amount of terrain home and I'd be sleeping on the entrance.
M.
Nah. Just build an extension to the house out of GW terrain kits
494
Post by: H.B.M.C.
Got a reply from GW.
It's gone and they don't know if it'll ever come back.
99
Post by: insaniak
Orlanth wrote:
The vast pile of pulleys in the bottom right corner look useful. You have enough to use as bogey wheels and mount some of your terrain pieces as mobile gantreys.
A table with a giant cable car running through the middle of it would be pretty cool.
9667
Post by: Lord Castellan Mik
Awesome work mate
Mik
494
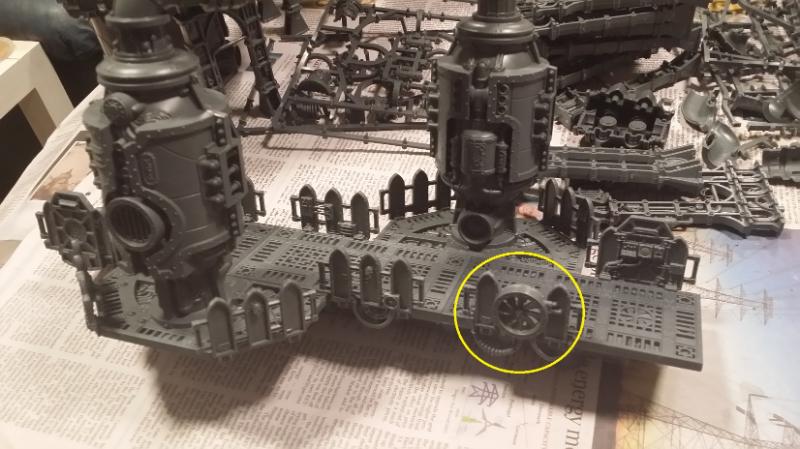
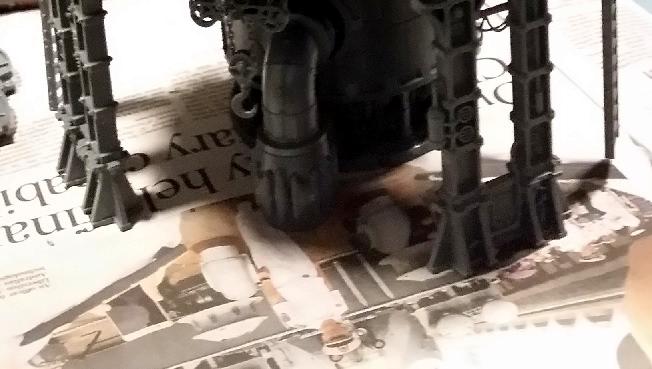
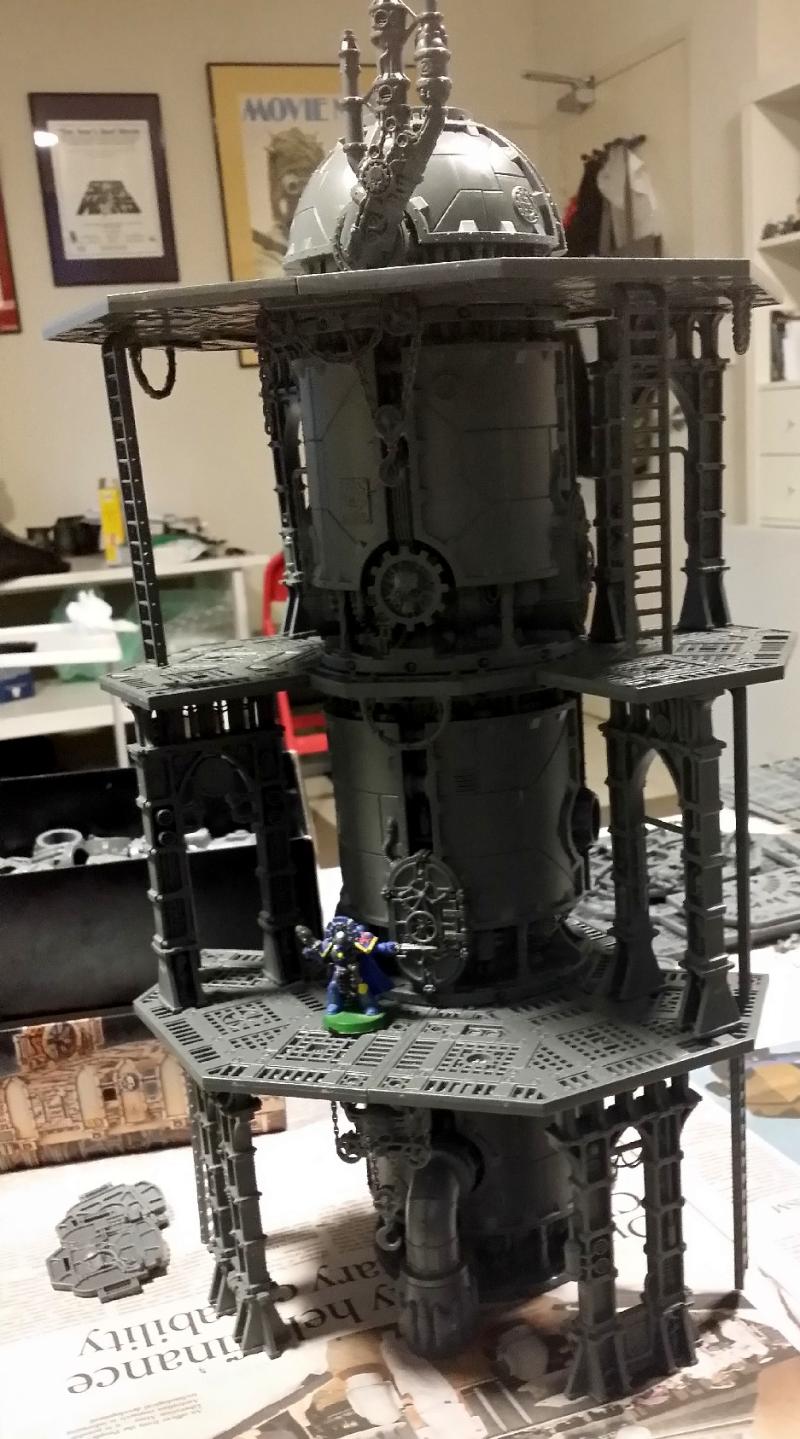
Post by: H.B.M.C.
And we're back!!! One part of long term products is keeping your motivation up. Suffice to say it, the failure with the long bridge was a large drain on said motivation, and whilst I still built most of the next building, when it didn't turn out as I had imagined it I basically kinda stopped. That's why we've been so long without proper updates. Well, inspired by some reason pictures I found and the recent weekend where I cleaned 80 million tiles and de-sprued a bazillion struts, I decided to get back into it. But before we get to the upcoming stuff, I did promise that now that the basic buildings and walkways were done I would be going up with future buildings. With that in mind, I bring you... The Lift Tower - Part 1 The Outlanders expansion for Necromunda came with two new buildings. One of thse was a smaller 2 story watch tower, a nifty piece, and the armoured walkway, which is a wonderful bridge. However the far more impressive pieces was the bright green three-story building that had a small cargo lift off to one side. (NB: To our American friends, lift = elevator. ) Towards the middle left of this pic you can see it, sitting between the two first-story parts that head off towards the left edge of the pic:  In game it had a simple rule - you could go up 1 level with it, costing 1" of your movement (rather than the usual 3"). Calling the lift to your level cost 1" of movement as well. So if it was one above you, calling it cost 1", stepping onto it cost 1", and then going up or town cost 1". Quick way to move around compared to having to expend heaps of movement going up and down ladders. So I thought, well, the stack sprue has a big chunky door on one of its four sides, and the whole kit stacks really well. What if I turn that into a big lift shaft? And what if one of the levels had a way to exit the lift on either side? In fact, I gave a sneak peek of this layout a few posts back. It's not exactly how it turned out during the initial build (or even now that it's finished). So let's get on with the show... As with everything, it all starts with a big pile'o'sprues. Here are a bunch of stack sprues (can you believe I still have 8 more of these things to go!): 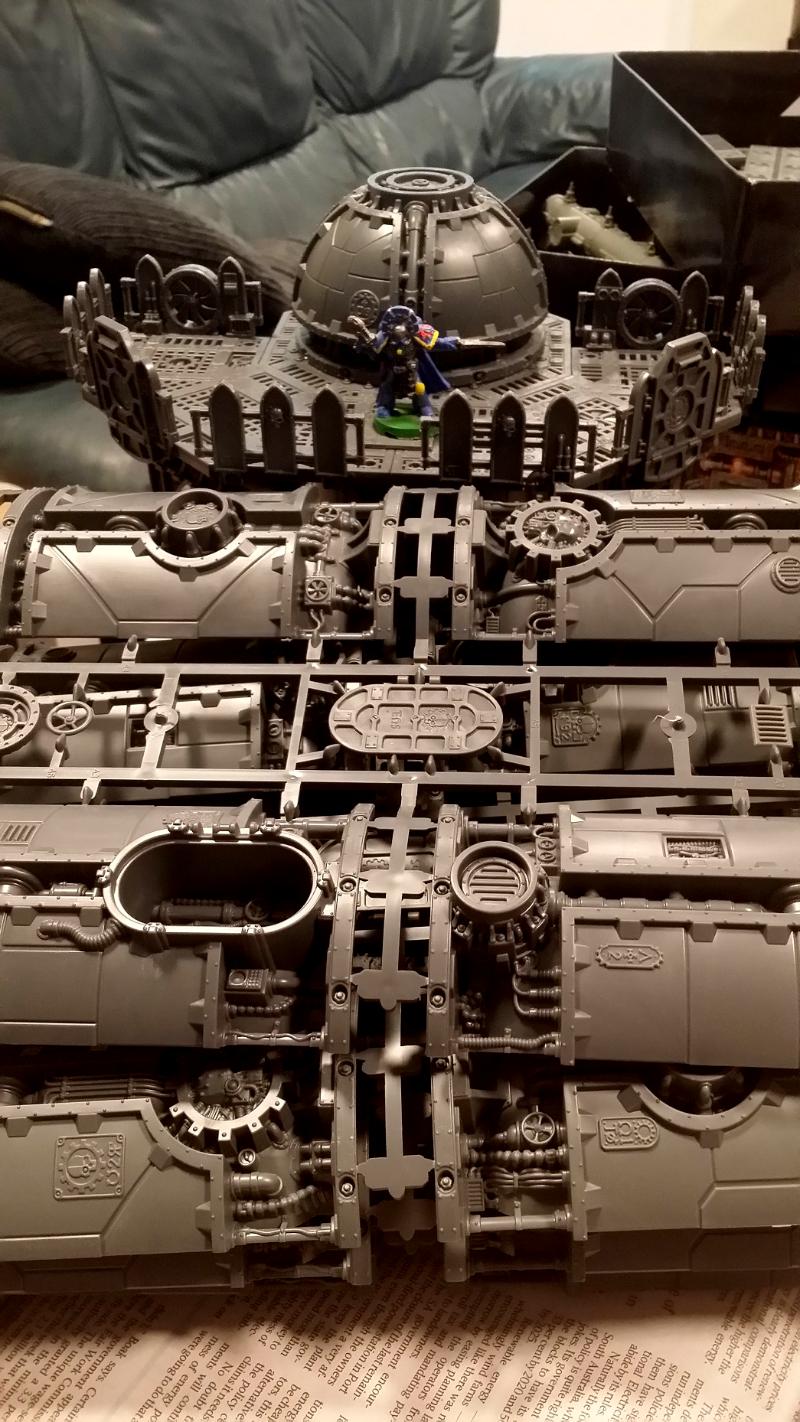 Here's the first floor layout ready to go: 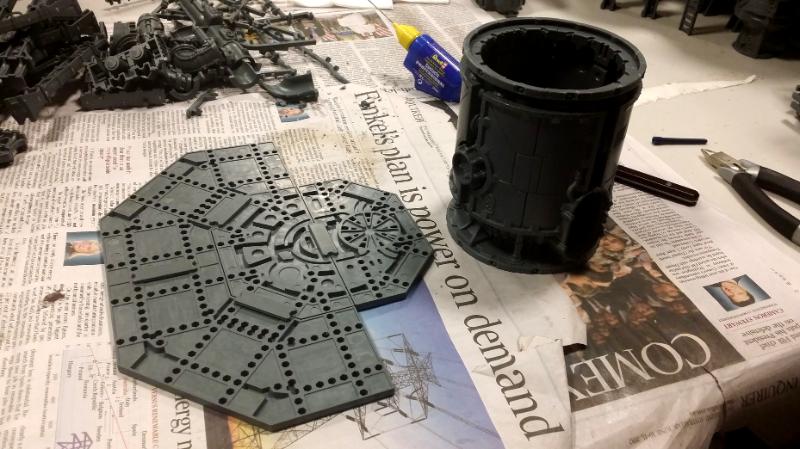 Where the struts for the first floor will go. Struts turned out to be a real pain with this piece because, as it turns out, when you try to make this kit do things it was not designed for, it fights back!:  Case in point, you're not really meant to join the curved walkways to the circular walkways in this manner. So it requires a bit of cutting on the clips to make them fit together flush. Otherwise you have clip overhang, and that looks quite bad: 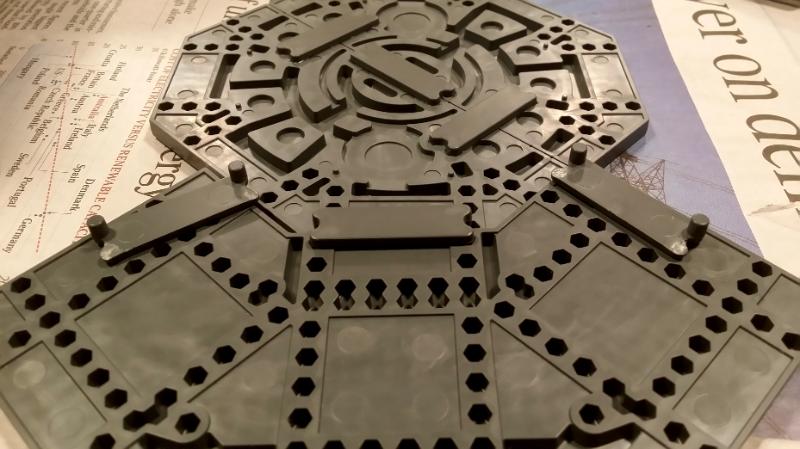 Now that they're attached you can start to see what I meant by a lift with doors that exit on either side. In fact, you board the lift one way, can get out on the second floor at one of two doors, and then exist the lift on the top floor by a door on the opposite side to where you originally got in at the bottom. But that's not what happened in the end...: 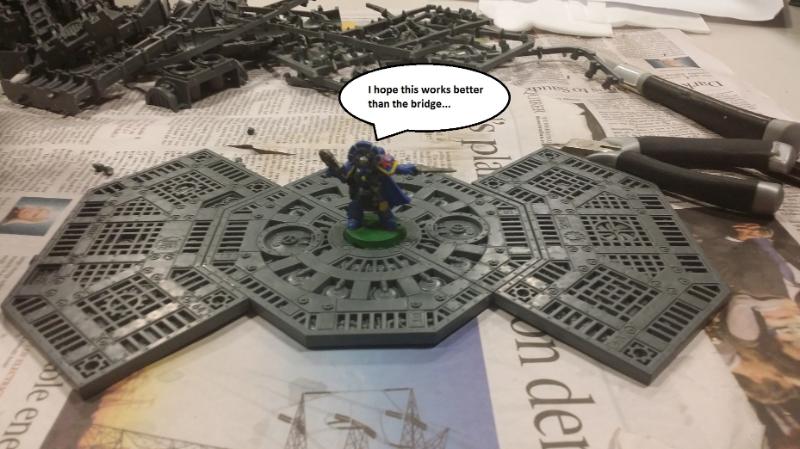 You and me both buddy... With the stack on the first floor drying, you can start to see how this is all coming together. Captain Short Sword is back in his power ring again: 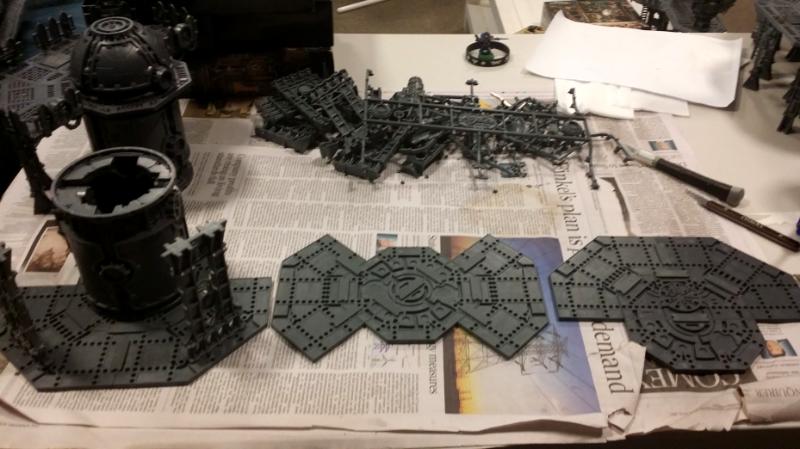 I didn't bother taking pictures of more stacks going together - seen one big cyllander you've seen 'em all - so we'll skip to the strut-less dry fit of all three levels. 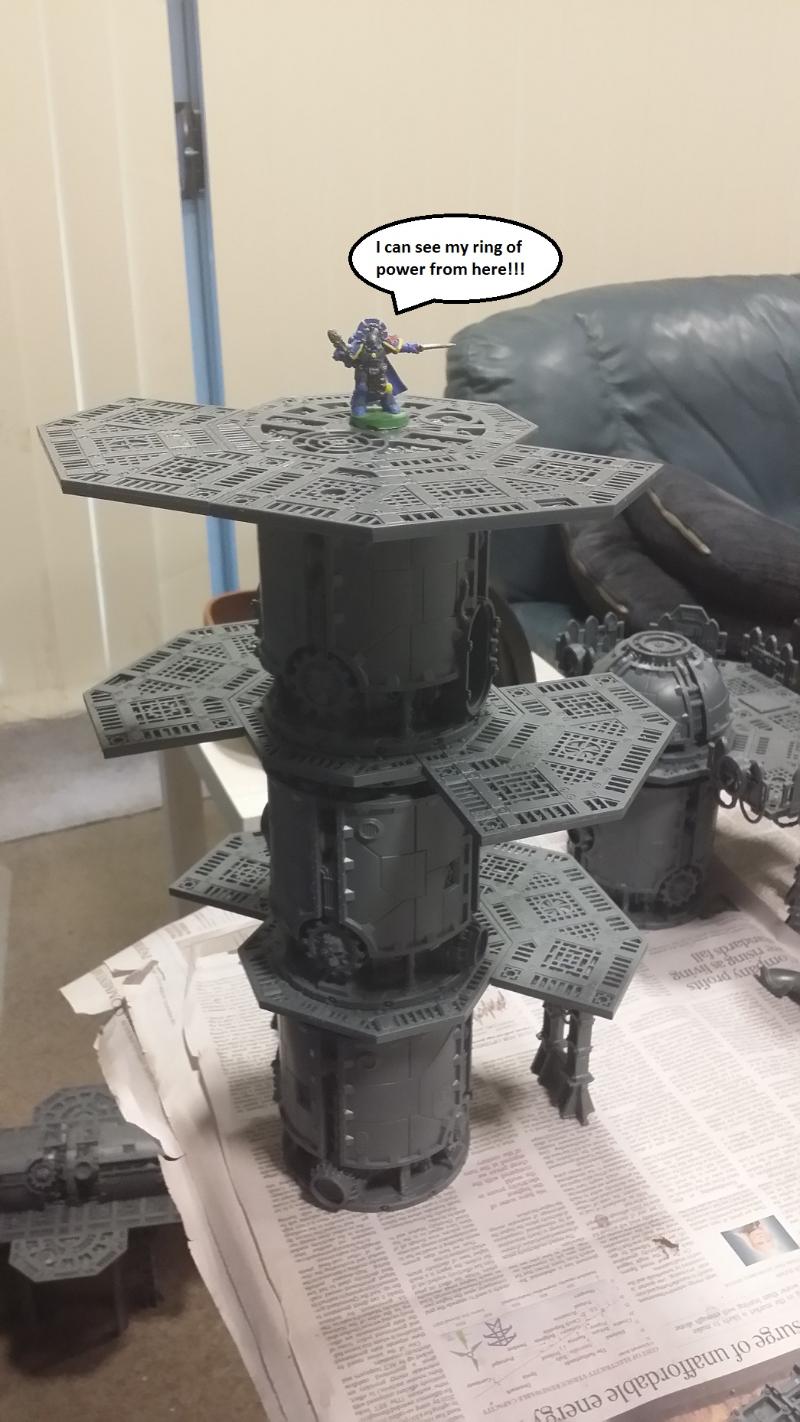 It was here I realised I'd made a mistake. Even whilst building it I thought that it was one level taller than I originally thought, making the exit to the elevator not the actual top. And whilst the platforms were correct (in essence) it also meant that the double-lift exist wasn't the middle of the lift, it was the top (even thought there was a platform above it). This is actually meant to be where one side of the free-standing bridge is meant to join up, so I was disappointed with where this one was going. I have since salvaged it to the best of my abilities, but at this point I was let down by yet another building not coming out as I had intended. Prepping the four lift doors: 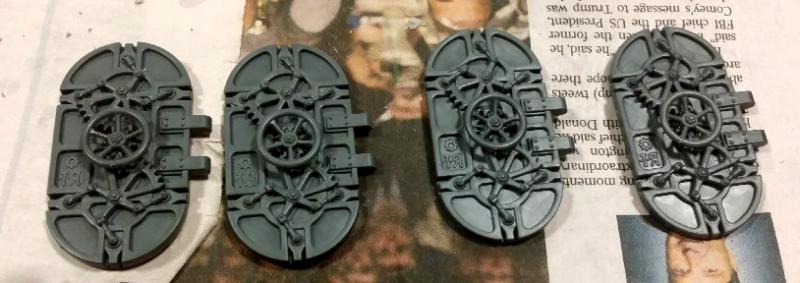 I mentioned earlier than the kit fights back when you try to put things in places where they're not meant to go, such as struts holding up platforms stuck on at angles that where they don't normally work, including room for the clips you've had to use 'cause there was no other place they could go. This involves lots of cutting and hacking to make things fit, such as...:  And when put in place this is how they look: 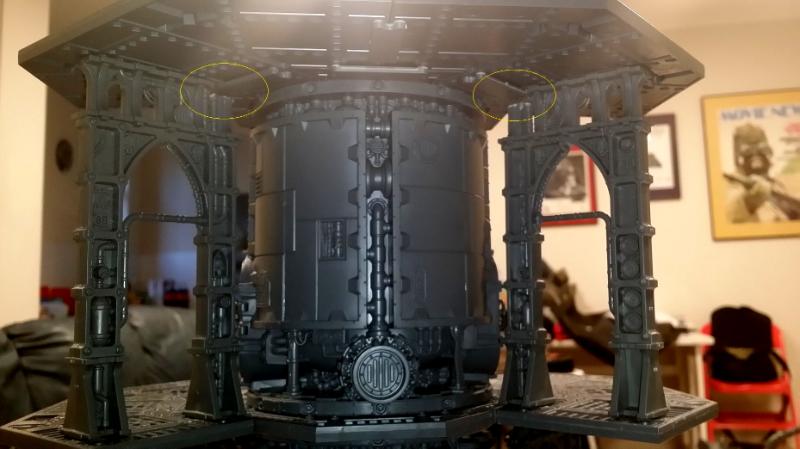 Sorry for the over-exposure on this. I caught some of the lights from my living room. Dakka's auto-filter killed the worst of it so you can still see what's going on. Second story goes on!: 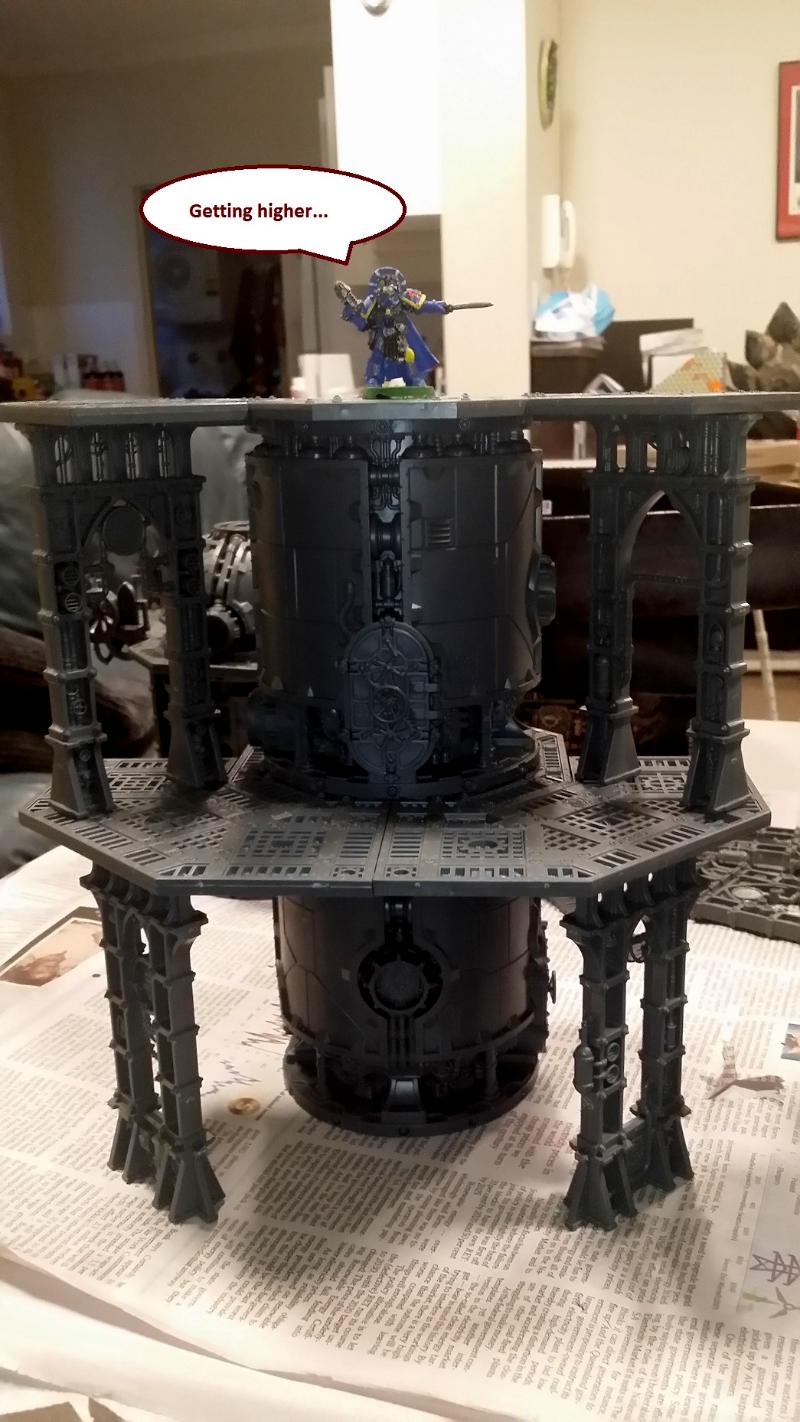 Third floor test fit with struts in place (note they're not glued to the second story platforms yet): 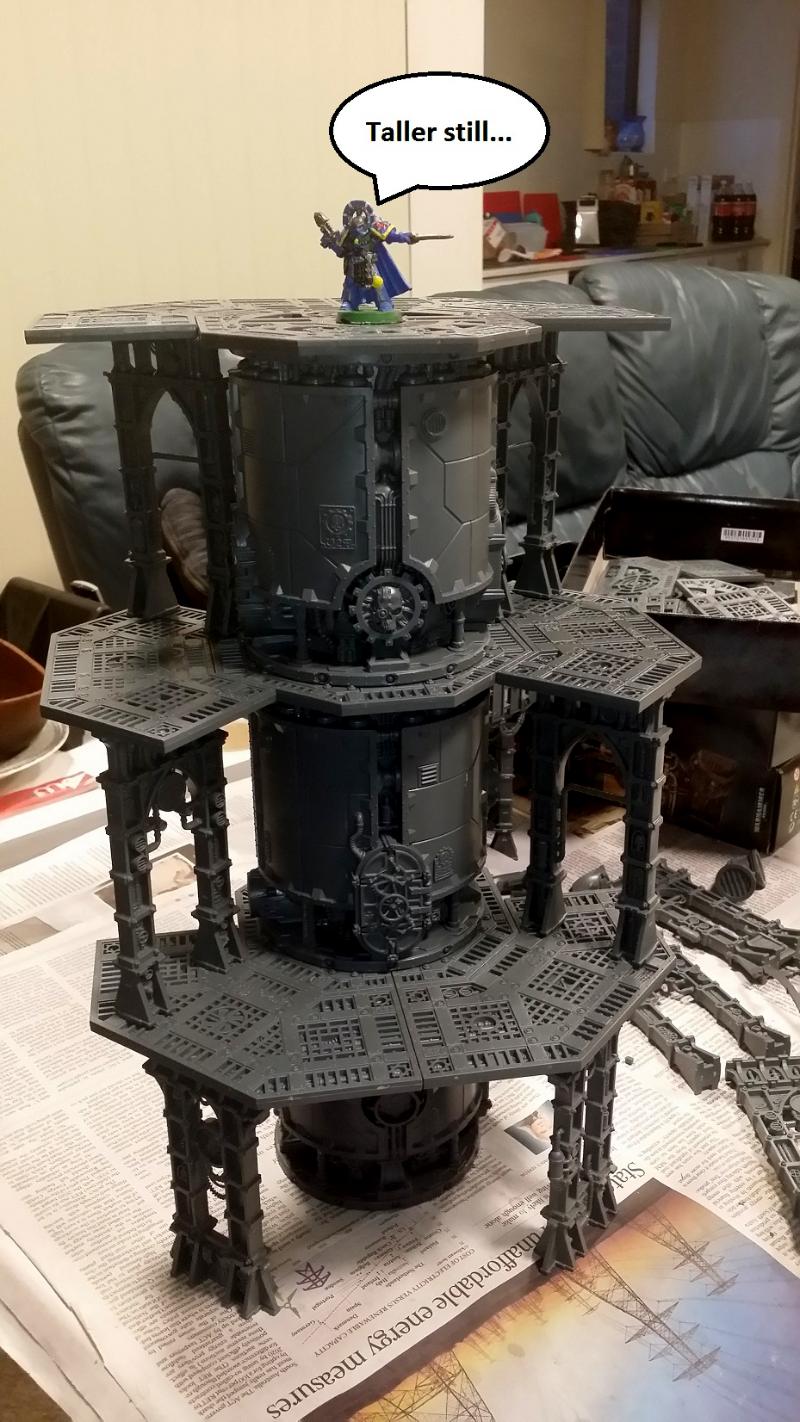 From an alternate angle with mostly everything done: 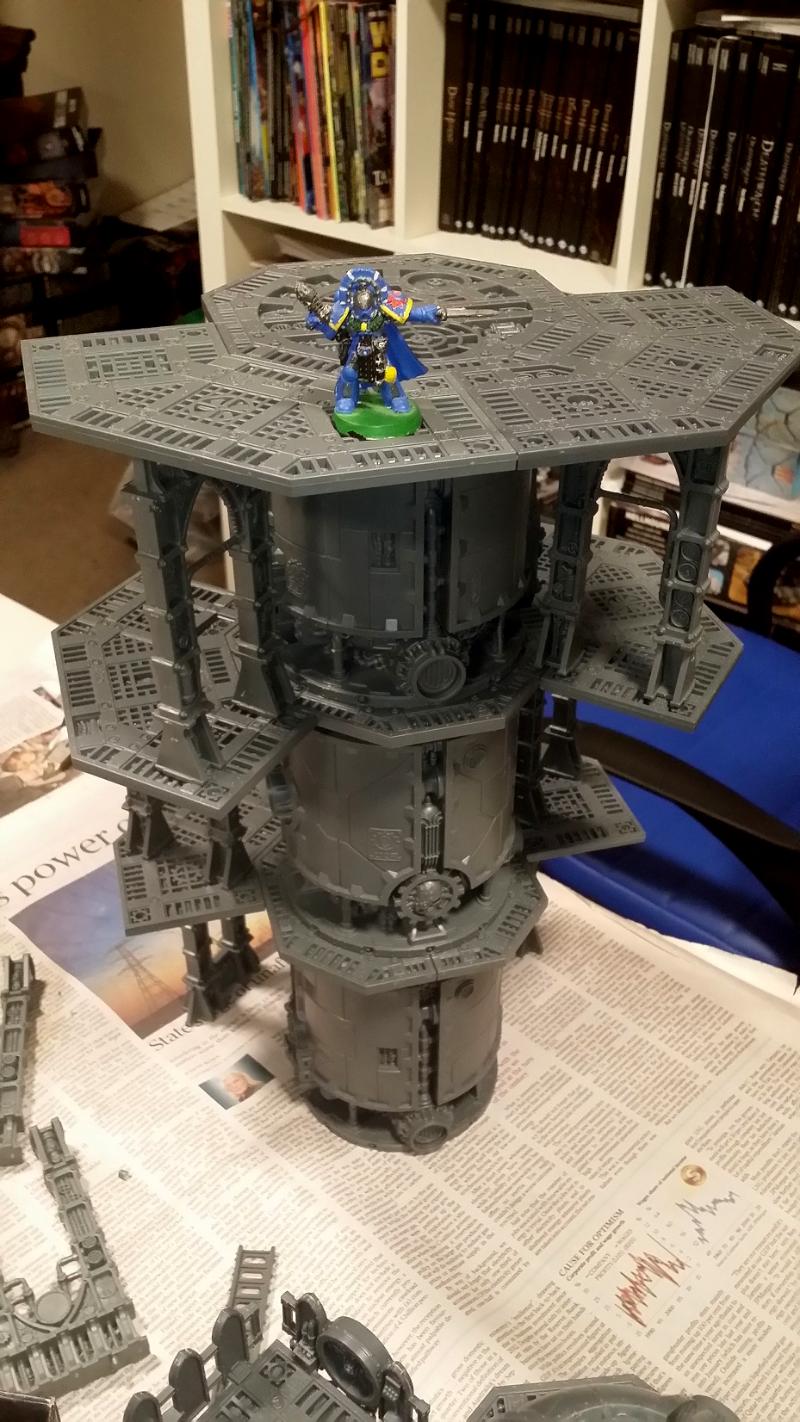 Not wanting to add yet another stack to the top of this, I just went with a trust spare dome: 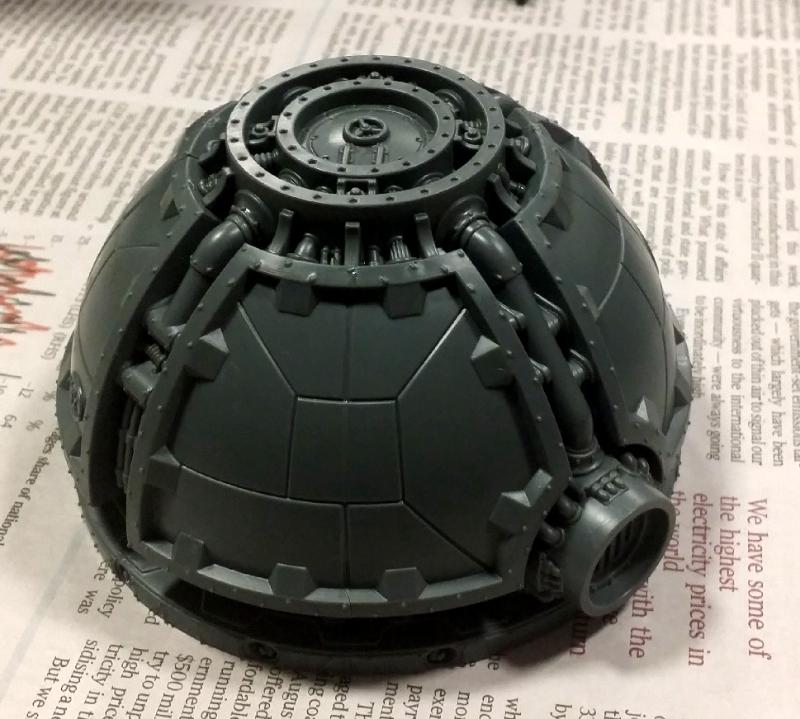 And the initial build was done (here's an example with it plugged into the Outer Ring):  But I wasn't happy with it, and obviously it's not complete (no underwires, no shields, no ladders). The other issue is that whilst it's not lopsided, it looks lopsided in the way that the levels are arranged. In the next post I'll show you how I went against my original tip from a few pages back about always finishing your platforms first and never adding to them once they're done, and also how I finished it and made the best out of what I could. But before then, a tiny update on the free-standing bridge. There was a point whilst part of the Lift Tower was drying today where I decided to quick fix up the last part of the bridge that I never got around to. The Thermic Plasma Conduit contains some broken pipe ends, the types of things I tend to avoid most of the time as I like complete buildings that aren't ruined or broken: 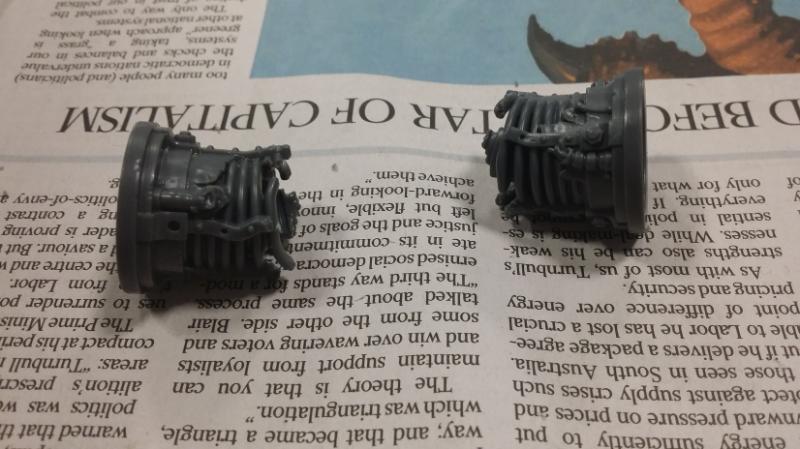 But part of this bridge, the Lift Tower, and the other building that's coming next (eagle eye'd people might notice some of the floor plans sitting and awaiting glue in some of the upcoming pictures) is meant to be a connector for a longer pipe network that, over the decades of misuse, has broken down and is no longer connected:  With the broken end part: 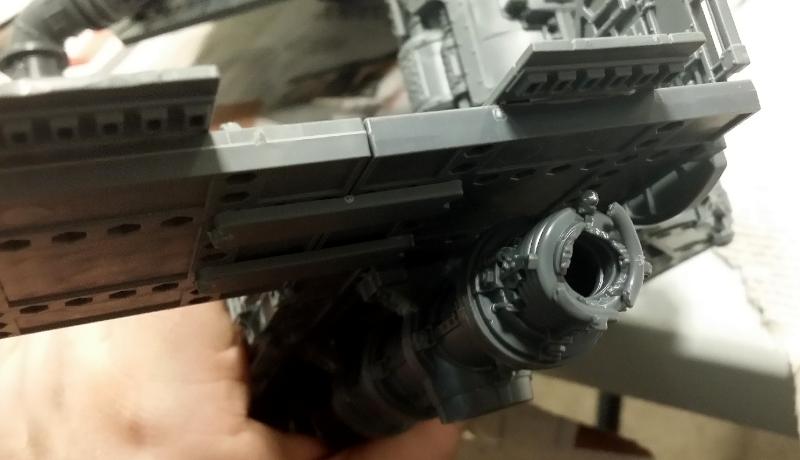 And done on both sides: 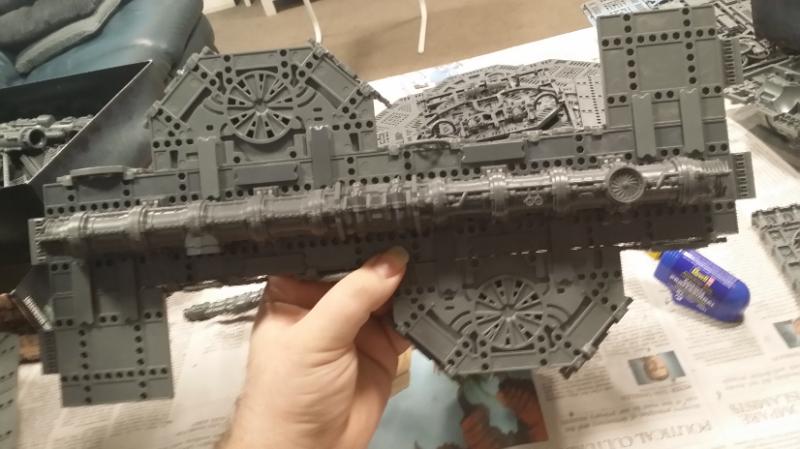 Version 2.0 of the bridge will have the same thing, but unlike this one it will gun centrally along the length of the bridge, and won't be off to the one side as this one is now. It also won't have big flanges out the side, not any big furnace/pipe handle going over the top (though that does make it easier to carry!). Until then... BYE
86442
Post by: bobbuilder
immense project looking forward to seeing more
62565
Post by: Haighus
Monumental project, I look forward to seeing the developments! Especially how you integrate the manufactorum parts into the overall design.
So with the lift tower, is the idea that the lift is internal to the silo? How are you planning to differentiate the lift shaft from any other silo stack? Will it just be the paint job with appropriate hazard markings and floor signs? Are you going to add a control panel to every floor? (The Necromunda objectives set has some control panels that would work well).
494
Post by: H.B.M.C.
 Haighus wrote: Haighus wrote:Especially how you integrate the manufactorum parts into the overall design.
Yeah, about them.
I've got three Derelict Manufactorum kits, and I'm not so hot on combining them with the Sector Mechanicus kits. There are a couple reasons for this:
1. I like Necromunda buildings to be lots of platforms and gantries, rather than solid buildings. It's too... normal for regular Necromunda.
As for what I'll do with that kit, well the 18 flat non-ruined panels I have from the 3 kits will go into building a solid building. The ruined sections... not sure what I'll do there. Maybe I'll make a larger building in multiple sections, with ruins along the edges to show a shell hit.
One of my biggest Cities of Death buildings is like that - a manufactorum in four sections, all representing a once-larger building that blasted to hell and back. I should take some photos of my CoD stuff if anything just to prove that I really do own TONS of the stuff. Like the time I built my own fortress/ bunker before GW went and made the Planetstrike bastion kits.
2. I like complete buildings. I have so many ruins, and so many GW kits contained ruined sections, so I was happy when the Sector Mechanicus stuff didn't. Of course, I like the ruined sections from the Derelict Manufactorum, but I want to combine them with this kit and this kit and make a Deathworld table.
Of course then the Deathworld Killzone went Last-Chance-2-Buy, then vanished, so i'm not sure how I'm going to do that now. 
Haighus wrote:So with the lift tower, is the idea that the lift is internal to the silo? How are you planning to differentiate the lift shaft from any other silo stack? Will it just be the paint job with appropriate hazard markings and floor signs? Are you going to add a control panel to every floor? (The Necromunda objectives set has some control panels that would work well).
I have two sets of those control panels, come to think of it, but to answer your question I'm not sure how I'd do it.
I will say that if you look at the kit itself behind that door there's a lot of mechanical crap that is 100% not a elevator (I doubt a person could even fit in there!), and I've left the door off most of the other stacks I've built so the machinery shows through. So it's easy to justify that it's a lift simply because you can say that behind the door is where the lift is, whereas the other stacks have 'maintenance opening' that's full of random machinery.
8745
Post by: Llamahead
Use none GW components? Model railway stuff and fish tank plants would be a place to start.
62565
Post by: Haighus
Huh, how have I never seen the barbed bracken sprue before? I've looked at the creeping vines!
Thanks!
494
Post by: H.B.M.C.
Everything you saw in the previous Lift Tower post was completed quite a while ago, and as I mentioned in that post I was never really happy with it. Combined with the bridge that didn't work out the way I wanted it sapped my motivation. Well after spending too long doing nothing except accumulating more and more bits I decided to finish the tower off and make into a more useful and less lopsided building.
So here we go...
The Lift Tower - Part 2
I wanted to add a bit more support to the tower, as the taller something gets the more its centre of gravity can shift. This goes doubly for a building where the platforms go up in an angle and even moreso given my intention to make the top level larger (wait 'til you see the next big building... I'm taking that to somewhat to the extreme). Simplest and least parts intensive method for adding stability that keeps in with the theme is just just add pipes!:
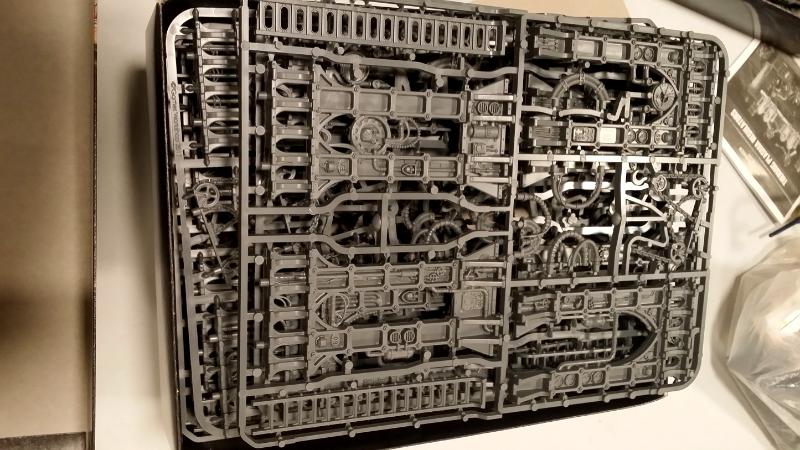
The Furnace sprue, pictured below:

... is without a shadow of a doubt the most useful of all the Sector Mechanicus sprues. You get the furnace itself, which is equal parts centrepiece for smaller buildings, or for larger buildings in large quantities (oh the plans I have...), a wonderful alternate support point for when you don't want to use up more struts, and generally a good size for any type of building. You get the three way pipe, which as I've said is my single fav bit in the entire suite of terrain, useful for just about anything. You get a straight chimney, a curved pipe, a bunch of end caps and some big vents/hatches.
And then you get that thing right in the middle. You can see fan blades in the middle of it, but the GW sprue pic doesn't do justice for how thick that piece is. And, if I'm being honest, I haven't really figured out what to do with it yet.
I mean, look how many I've taken off the sprue so far (yes, I made them into a sadface):
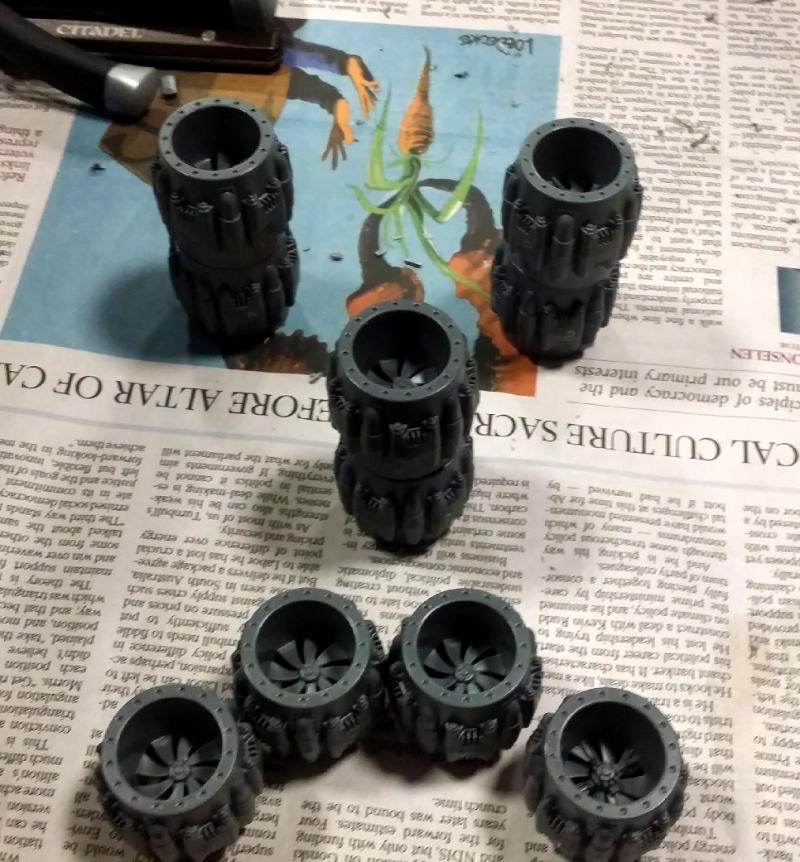
... and I have so many more. Maybe 20 more of the damned things.
I've saved so many shots from the internet with examples for inspiration, and I've seen this bit used in a few places, but still it alludes me as to its real value. Nevertheless, I got a handy dandy curved pipe and used it along with an endcap to give the tower some more stability on the opposite side to the one from above:
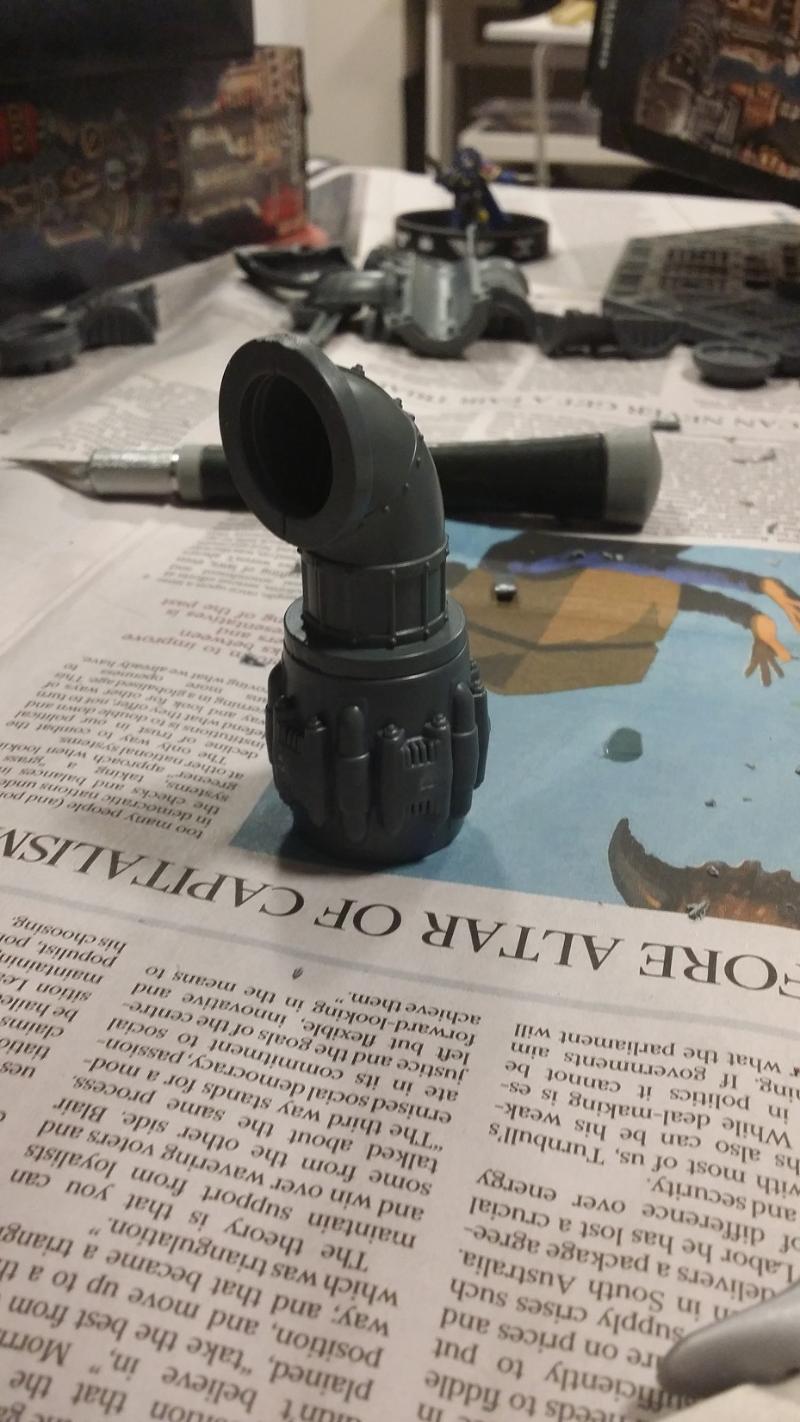
This next picture is actually a cut-out from a larger picture you'll see in a bit, hence the pulley hook in that pic that wasn't there at the time I added it on:
With the extra stability out of the way it was time to do something I specifically recommended against doing early on in this blog. I am of course talking about adding platforms to an already complete floor. This can cause all kinds of problems with drying, as things can dry at slightly different angles. In the Pipes a'Plenty building that entire first floor ground section was added afterwards, and it angles up slightly, meaning the struts are actually a few mm in the air. Drives me nuts. Since then I have always made sure I am done with the floors prior to moving onto something else.
Well, to salvage the Lift Tower I wanted to add more walkway to the top level, and knowing what could happen, I decided to go heavy on the structural supports. The walkway itself got two clips, rather than just one in the middle, as I wanted as much surface area holding them together as possible (without going overboard).
Emphasising the need for as much support and strengthening as possible, attaching this would mean 5 underside connection points, highlighted below:

And here it is with the platform glued in place, clips in frame highlighted:
I would go on to add some of the flat pieces you can use to clip walkways to larger sections just to further keep everything flat. You'll see one of them on top in an upcoming picture. But the next stage was Captain Shortsword's favourite... LADDERS!:

Next up it was time to fill some blank space with lots of those hanging wires. Grabbed a handful of them and just went to town:
And even more (here's the rest of the picture you saw above):
When it comes to adding shields, the "handles" on the side can often be a bit of a problem. But, thankfully, they're really easy to remove, and cut down on the side of the shields quite a bit. It allows you to fit them in without blocking ladders:
And now it's basically done (apologies for the weird lighting in this pic):
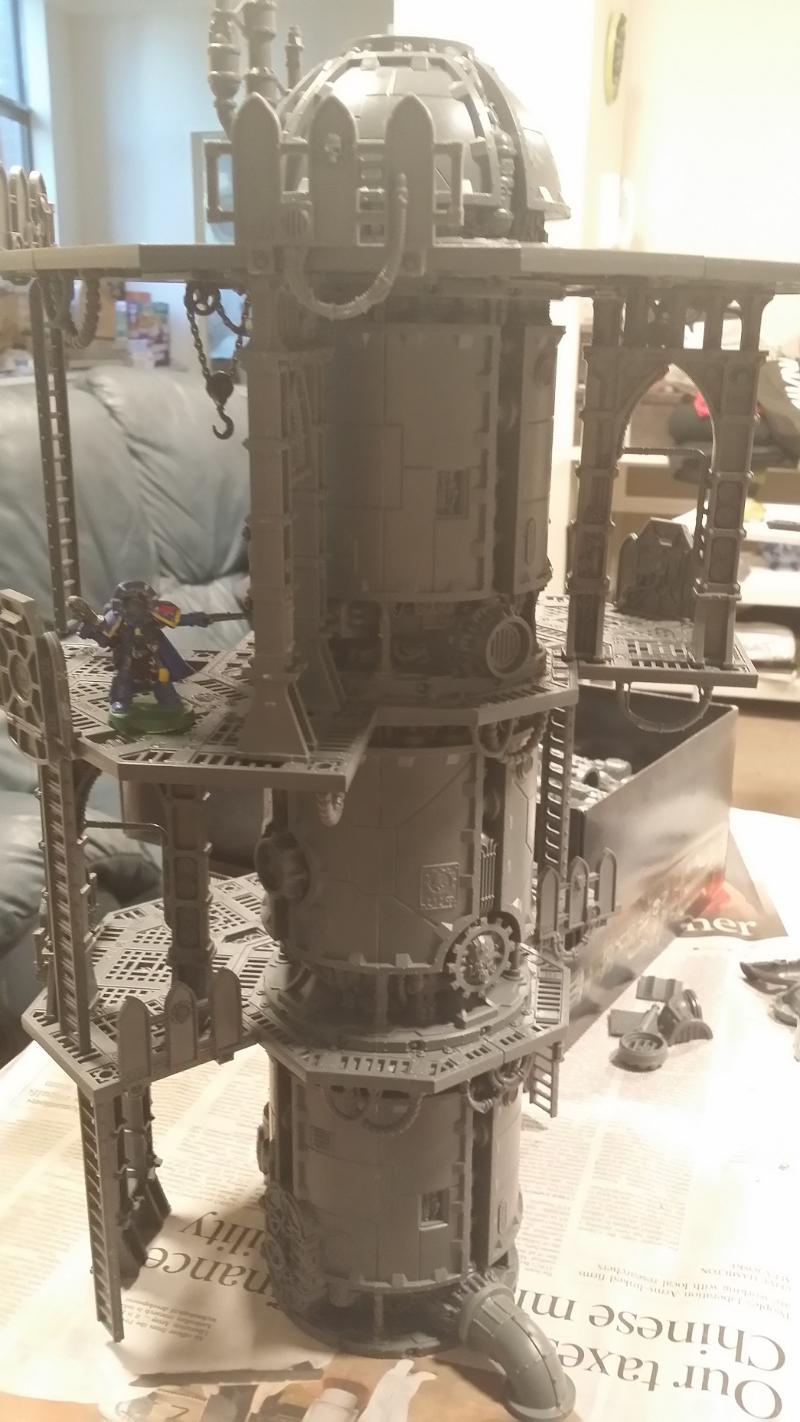
From the other side:
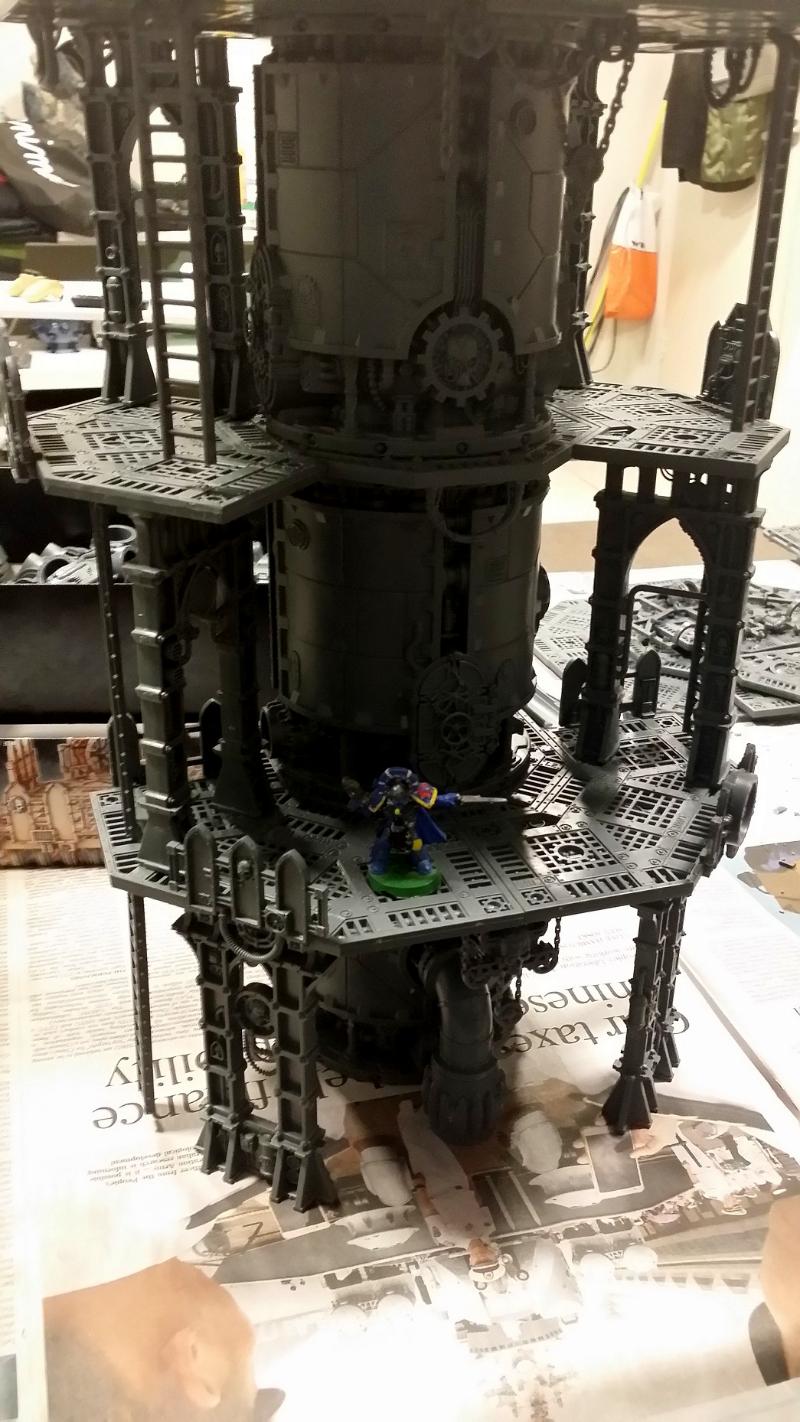
I also added a chimney to the top of the dome. Captain Shortsword was quite happy with the emergency redesign:
I really like the Lift Tower now. The including of the wires, ladders and especially the shields really add a lot to the piece, and the complete walkway around the top not only makes it more useful, but it feels less like it's leaning over. It's still not perfect, but any slump in motivation I had in its first incarnation is gone and I'm raring to get back into it.
So what's next? Well as I mentioned in the first part some eagle-eyed readers might have noticed a set of floors stacked off to the side in some of the photos (especially the last few). There are also a lot of pipes floating around in some of the pictures. These are where things are headed, and as is the whole point of this phase of construction - the only way is up!
BYE
120215
Post by: StormX
Nice job man, looks fantastic.
494
Post by: H.B.M.C.
I have a question to ask all of you in regards to the next build!
Before moving onto the next big building there's something I wanted to get out of the way, an idea I've had rumbling around in my head that actually requires very little effort. Not only that, it goes towards another aspect of this whole project, that being that it's not all for Necromunda. Some of it just intended to be general 40K terrain. There's a good amount of crossover to be sure, but some things I'm building just for the purposes.
Ever since I first started scouring the Internet and saving pictures of other people's Sector Mechanicus tables, all so I could steal be inspired by their ideas as I went along, there was a reoccurring theme using the stacks and the domes. A lot of people do them differently, but they all have a similar look. Here are some spoiler'd examples of what I'm looking at doing:
The thing is, I'm not quite sure whether I could have platforms between the stack and the dome, or no platforms, or a platform and no dome. But before we can get to options, we need to build the things!
The Three Towers
First thing's first is to gather together all the necessary sprues for such an endeavour (I still have 5 stacks and 5 domes spare after this! Yes I'm crazy!):
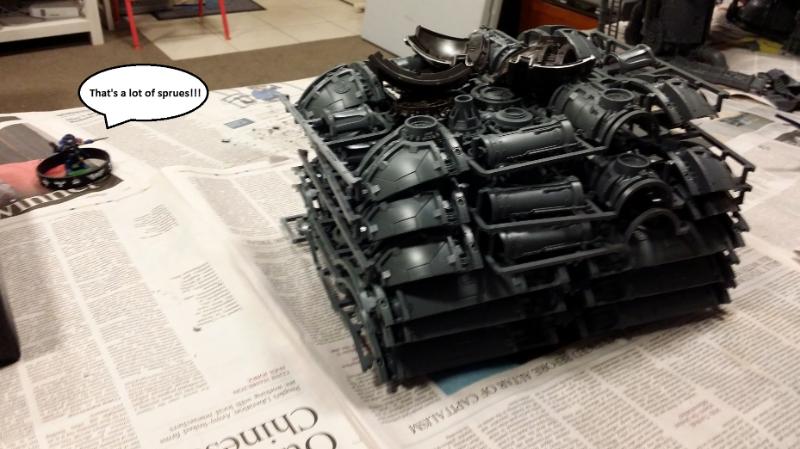
I won't bore you with the details of building domes, as you've seen one you've seen 'em all. They just magically all got built:
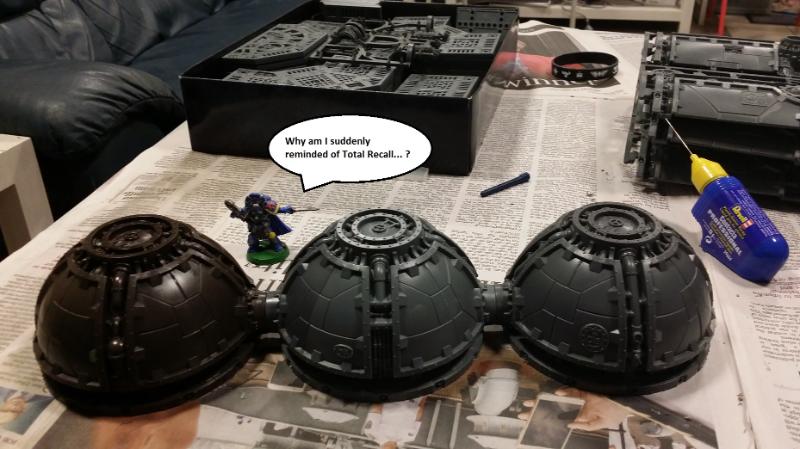
And then so did the three stacks. Interestingly after making the Lift Tower, where I had to give one stack two doorways, I ended up with two panels that had the pipe around the mid-point of the piece, which turned out to be fortuitous as I could put one either side, much like I did with the dome above it, meaning they can all interconnect once I add various end pieces and what not to bridge the various gaps between each tower:
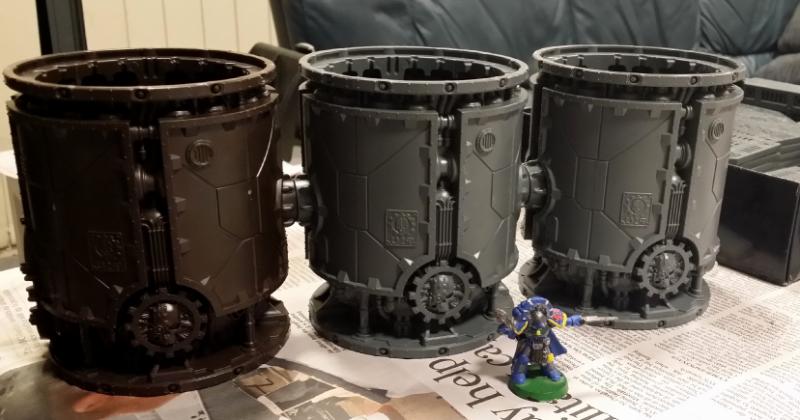
So we get to the four possible options for building these things (again, there will be connectors that make them line up a bit better).
Option 1:

Option 2:
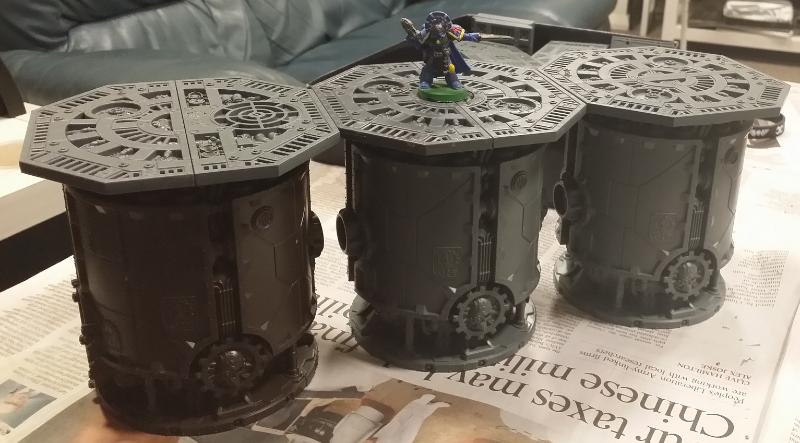
Option 3:
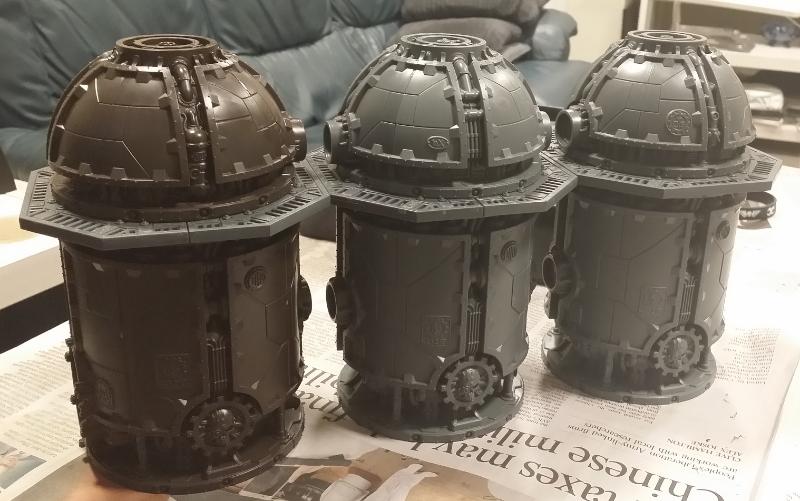
Option 4:
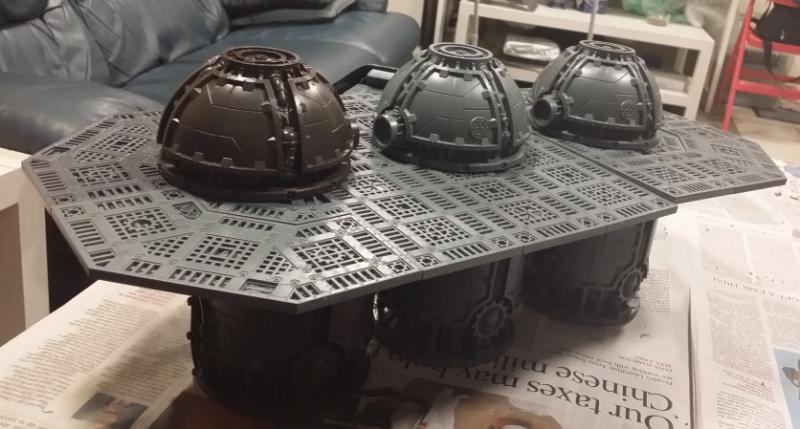
Ok, Option 4 isn't really an option. It was just me going crazy and seeing what it would take to link them all in one single building. Really I am only entertaining the first three options.
So what do you think? Please let me know!!!
Finally, for my eventual second round of walkway expansions, I plan on doing some longer ones and even a double-decker one. With the pieces already build I figured I'd do a mock-up of what I intend that to look like. If anyone has any suggestions for this Double-Stacked Walkway (as we'll call it for now) please chime in!:
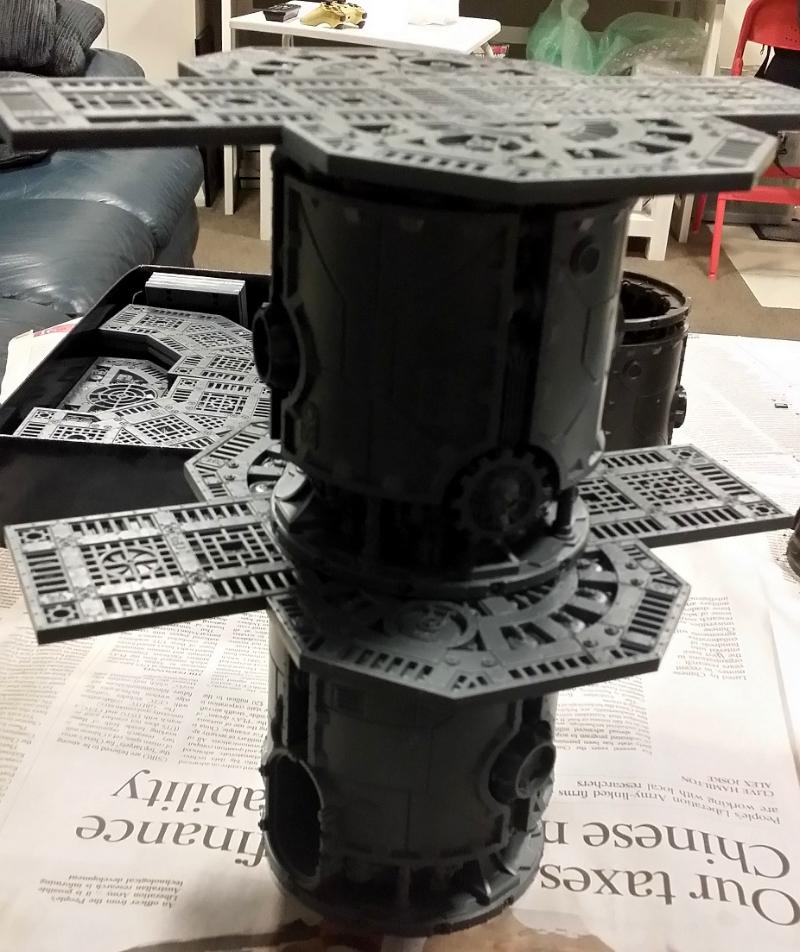
119098
Post by: hvg3akaek
So what do you think? Please let me know!!!
Since you have the pipes there (which is cool!), definitely go with a build that allows them to be joined! So, #1 would be my go-to, unless you could find small pipe pieces to make #3 work. Or, add in a little more platform between the stacks, and have long pipes between those in #2.
but no, I think #1 is best.
3309
Post by: Flinty
If You want it as blocking terrain then just go with 1. If you want it to be a usable platform then 2. 3 just seems to be a waste of platform bits that could be used to better effect elsewhere.
518
Post by: Kid_Kyoto
So when's the big party at HBMC's house to break these in?
I'll bring the chips.
61618
Post by: Desubot
IMHO
option 1 looks best. and should be good for LOS blocking If you could add some basic pipes inbetween or just say its LOS blocking (in your local group)
option 2 seems kinda blank on the top feels unfinished
Option 3 the platforms are so small its kinda useless for most models
Option 4, the platforms are soo large that it kinda obscures the bottom layer which is kinda a waste.
you could maybe do option 4.5 by only putting the walk platform on one side if its possible.
494
Post by: H.B.M.C.
Any other thoughts before I break out the glue?
I have a 5th option I discovered yesterday (more on that, with photos, in another post - yesterday was oddly productive) that I might go with that combines option 3 and option 4 in an interesting way.
54522
Post by: Jpogfreak886
I agree with what everyone above is saying - option 1 looks the best together, which option 3 being my second choice.
494
Post by: H.B.M.C.
Would any of you be surprised if I said I could actually do option 1 and 3 and still have 2 stacks/domes spare?
110309
Post by: ListenToMeWarriors
I don't think anyone will question what you are capable of regarding your terrain collection.
Personally I prefer the look of option #3, but overall #1 is probably the better one to go for.
And that Total Recall joke? Brilliant stuff
21358
Post by: Dysartes
H.B.M.C. wrote:Would any of you be surprised if I said I could actually do option 1 and 3 and still have 2 stacks/domes spare?
At this point, dude, I don't think we'd be surprised if you did options 1-4, plus this #5 you've mentioned, plus a half dozen other things, and still had spares at the end
494
Post by: H.B.M.C.
We have a fifth option!
After thinking about what some people have said, I started wondering about how I could get the best of all worlds. My thoughts came back to a piece I made as part of Platformapalooza, the U-Shaped Platform:
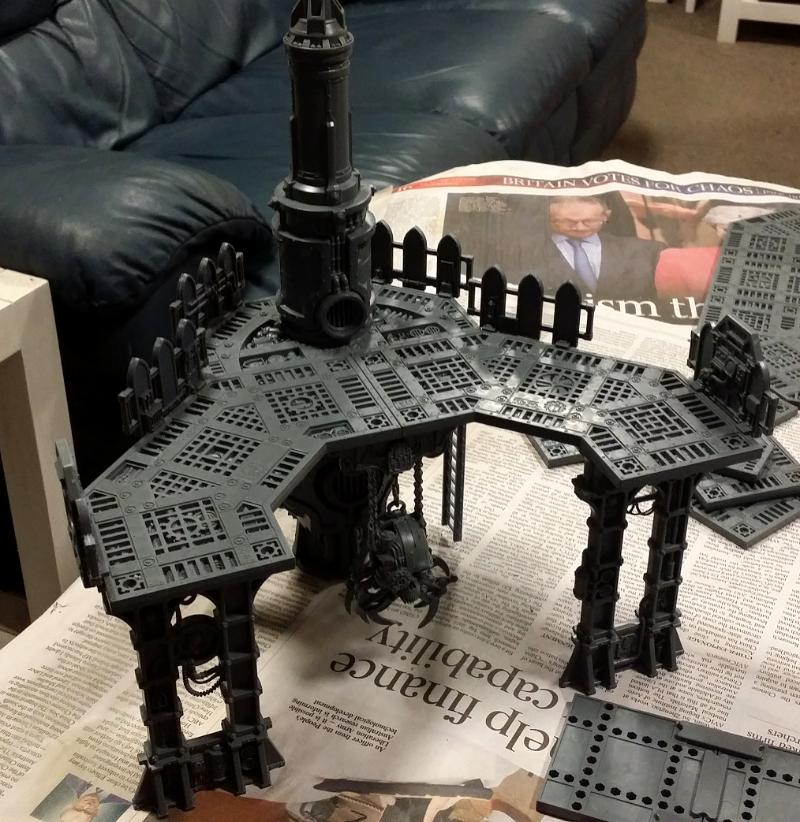
As I said at the time, I intentionally left no shields along the inside so that it could slot with other buildings. I've been waiting to build a second U-Shaped walkway for a while, and I want to build more straight walkways, so why not combine the entire thing and kill every bird with all the stones!
So... how about this as a 5th option?:
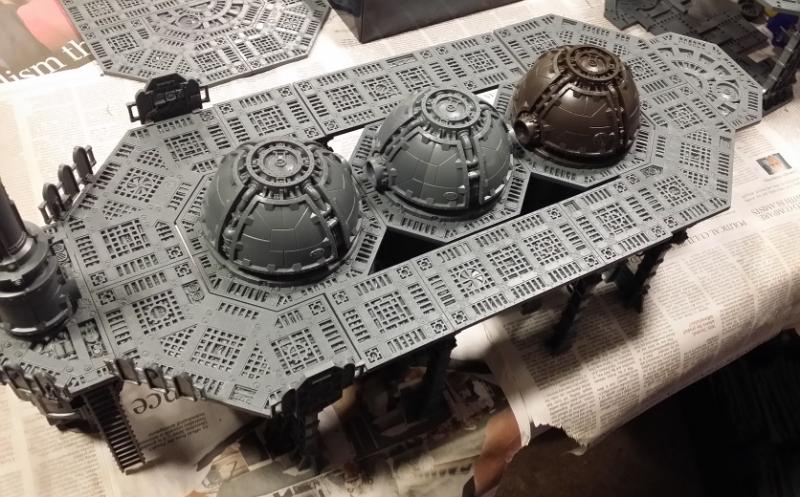
And a different angle:
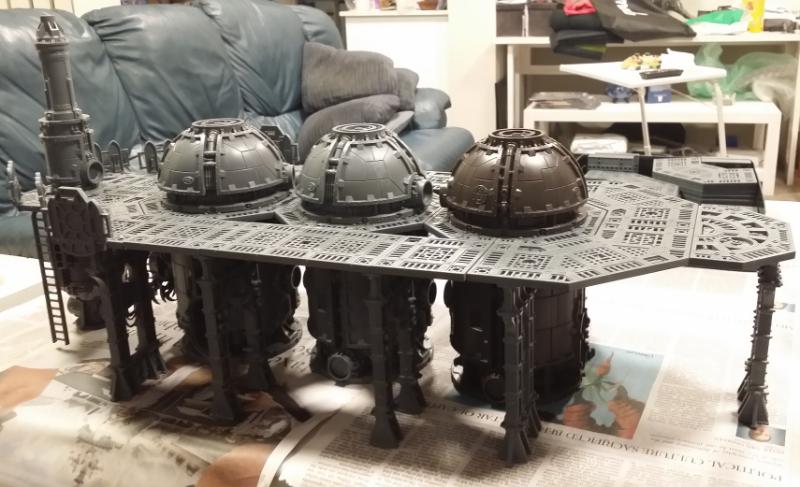
And this is how it would all split apart:
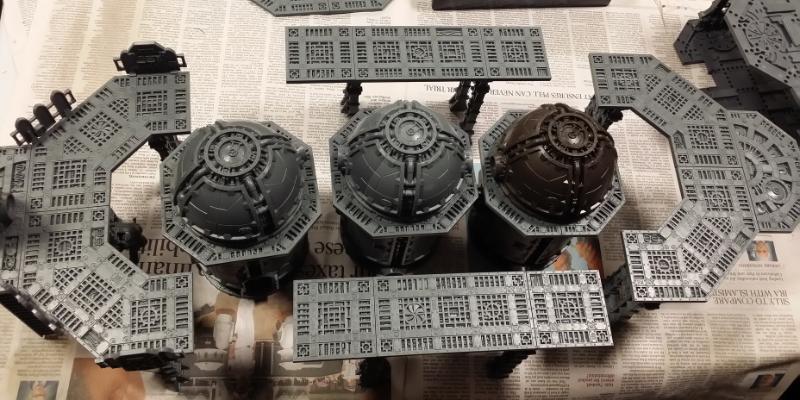
Outside of the stacks, domes and the original U-Shaped Walkway this is all dry-fit, so it's easy to change.
So lemme know if you think that works as a way of combining the various options.
In the meantime, the next big tower continues to grow as I test fit all the various levels:
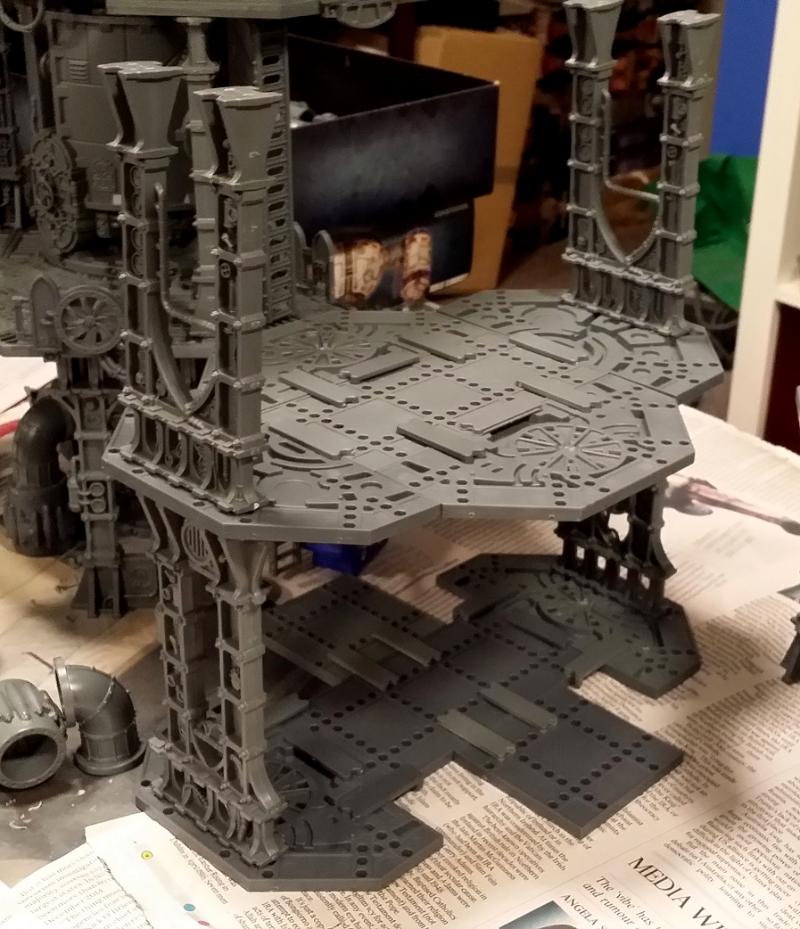
Dry fitting this stuff can be a nightmare when the clips are loose and don't hold together!
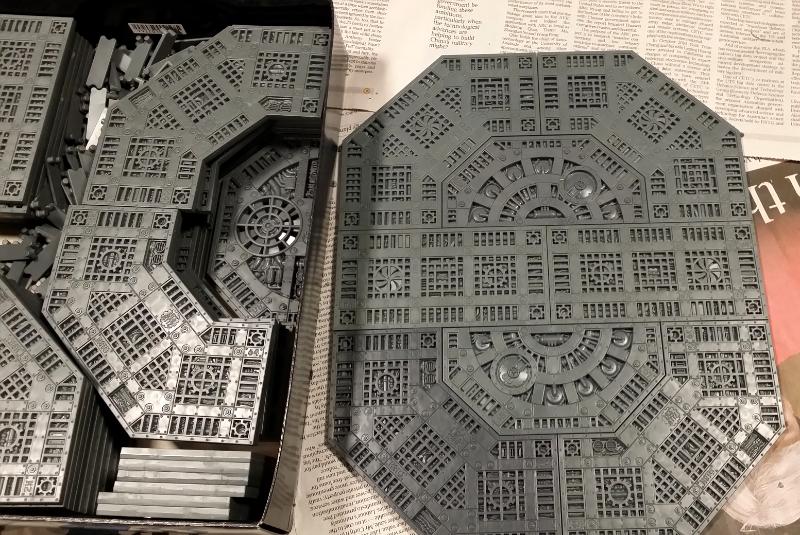
It's going to be four stories tall.
9910
Post by: CommissarKhaine
5th option rocks! Depending on how stricttly you guys play the rules, the openings between the stacks might allow for LOS, RAW. Easy to agree on before the game though
119098
Post by: hvg3akaek
5th option could work - but I'd still suggest trying to make the pipes collect together (even if they aren't glued), as I think the 'break' in the pipes loses a bit of the aesthetics. Plus, its an extra bit of cover you can hide next to!
494
Post by: H.B.M.C.
Oh the pipes on the individual towers will connect (or have the hatches/spacers put in to take up the gap). They're just not on yet as I haven't done the final fit.
There won't be any gaps between the domes/stacks in the finished version.
20609
Post by: Tyranid Horde
I like the fifth option the best, although I think there's a bit of clutter underneath and it might get a little fiddly. Connecting the silos together would help with LOS blocking.
105865
Post by: Rolsheen
I'm the guy who built the top example you showed, I went with option 3 so that it would be a connection point for walkways, other buildings
494
Post by: H.B.M.C.
Ah cool. So that was your monstrosity being sold on Facebook. It's where I nabbed all the pics. A truly inspiring piece.
69264
Post by: ecurtz
Can't you do 5 but leave the domes unattached? Then it can also serve as a large open platform.
5946
Post by: Miguelsan
I'm voting number 3. Seems the more appropriate to my eyes.
M.
86442
Post by: bobbuilder
great work, I feel your pain on cutting around the connecting joints, something I had to deal with on my rig, right pain, look forward to watching this grow
494
Post by: H.B.M.C.
Ray Dranfield, the designer of all this fantastic terrain, has a Twitter feed. On that feed, he just linked to this Instagram account called 'Addicted to Kit Bashing.
54522
Post by: Jpogfreak886
This is an amazing account - really highlights how well everything is thought out. Great if you need EVEN MORE inspiration.
51769
Post by: Snrub
I've said it before and i'll almost certainly say it again. You're a bloody mad man. This table will be an absoute beast when you finish it.
While I'm probably a bit late to the party, choice one of triple silos is my favourite, choice 3/5 is probably more practical for a Necro table though.
494
Post by: H.B.M.C.
Well it has finally come time to put together what I've been experimenting with, and in the end I opted for the best of all worlds, that being option 5. It gets me a second U-Shaped walkway, which I was going to build anyway, two more straight walkways, which I was going to build anyway (only they're a little longer), and I get a modular set of three towers. All the pieces are useful individually and together.
So here goes...
The Three Towers + Modular Walkways
To start with there was a problem. With the original U-Shaped Walkway had a spider-drone thingy hanging from it which, as it turned out, stuck out a little bit from the inside edge of the platform above. This meant that when you put anything on the inside curve, it would cause the spider-drone to bend back. Once the pegs on all the underside pieces (clips, struts, wires, etc.) are in there they do not come out, so I went and found a pair of pliers for some impromptu terrain surgery:
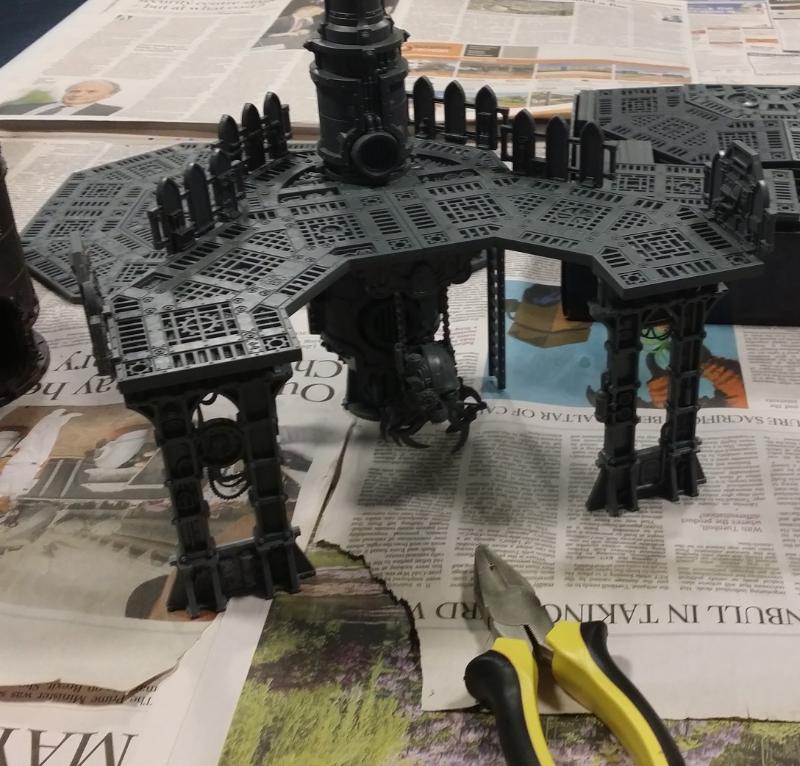
The end result isn't pretty, as the pegs are in there and will be forever (circled in the pic), and the spider-drone is now harder to use without the pegs to hold it in place. It's not the end of the world though. I have around 30 or so of those things unbuilt, so I'm not concerned.

I needed to use more of the end-caps to act as spacers on the three towers, as the pipe-ends on each piece don't reach across to the next piece, but a single end-cap slotted into each one works perfectly. I'd need to cut them out first, so decided to go back to some of my original furnace sprues (that have been cut down) and just desprue them completely:
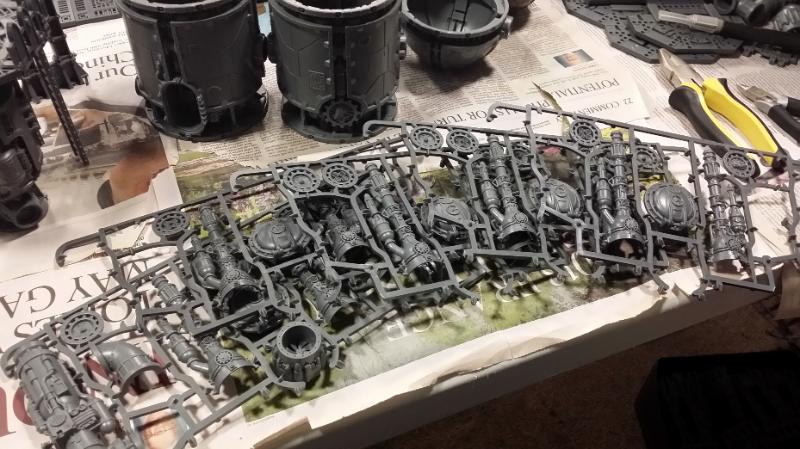
And now you can see the towers with the end-caps in place, and how that fits:

Next up was making the straight walkways. A simple process that used 2 double length and 4 single length platforms:
And the last piece was the second U-Shaped walkway, this time using the three-way pipe as supports at the end, with some more pipework and a kiln/chimney on top.

I added in the shields round the edges, a newly build spider-drone (slotted in a bit further back this time), and put in some more under-wires in this (and the original U-Shaped Walkway), and it was done:
Here are both of them side by side:
Up next was the crucial stage of adding the platforms to the towers, and keeping them centred so that everything still matched up afterwards:
It begins to come together!:
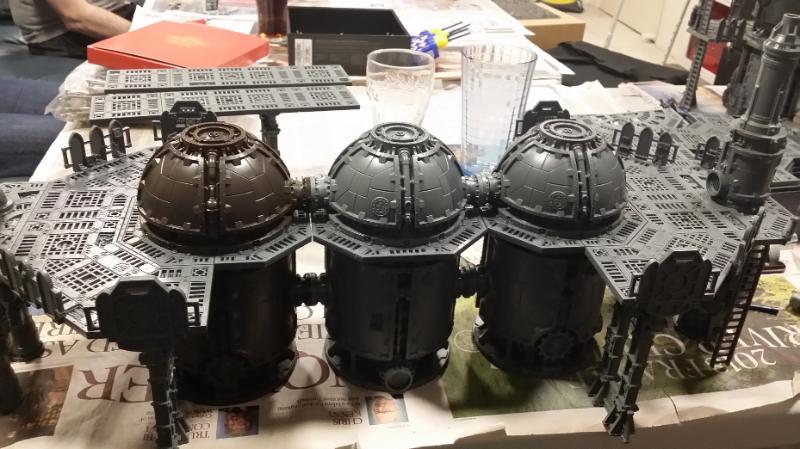
Finally I added the shields to the straight walkways as well as the small plastic square plate you get on the straight walkway sprue. Added one to each end of the straight walkways so that they clip in very easily:
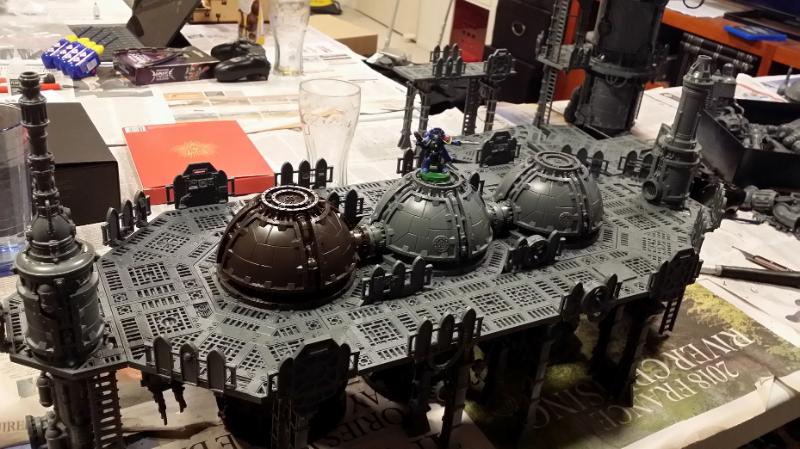
And that's it! It's ready to go and complete. Turned out exactly as I wanted it:
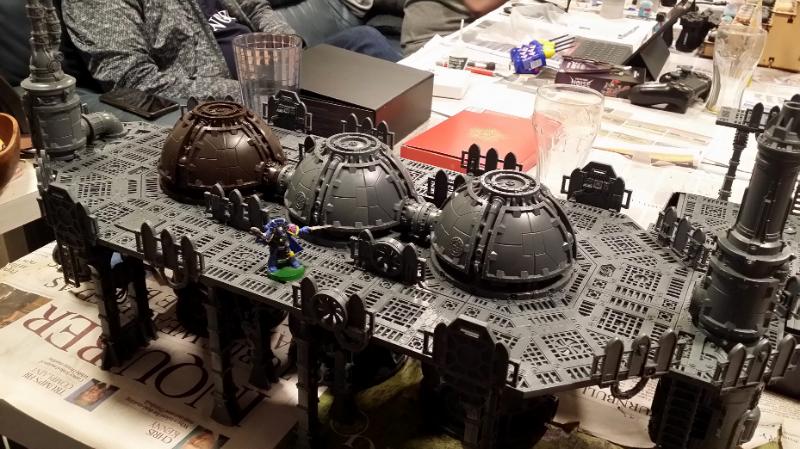
Of course this is how it all breaks apart, allowing me to use all the various bits in combination with all sorts of other parts pieces I've made, including the Outer Ring:
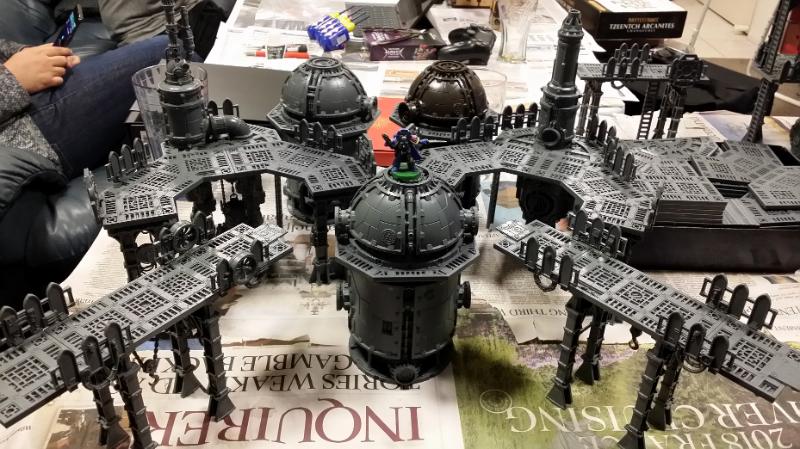
As I've been playing around with the curved walkways, coming up with all sorts of new configurations for them, you find the odd things that work even if it wasn't intended, such as this crossed-walkway platform using the two U-Shaped Walkways. I love how it's always so easy to come up with new configurations of floors:
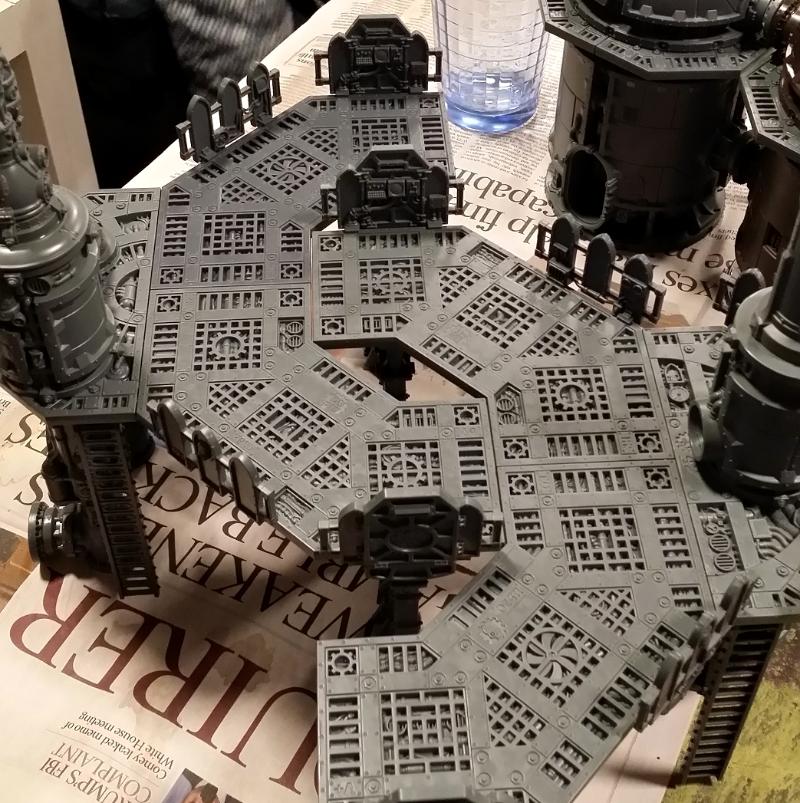 Insanity Check-In
I didn't call this Blog "Industrial Insanity" on a whim. It really is an account of building these fantastic kits and my insane methods of purchasing and organising terrain. To illustrate that, here are some insane photos...
This is my box of struts. It is three layers deep (that's a Promethium Forge box filled with the things):
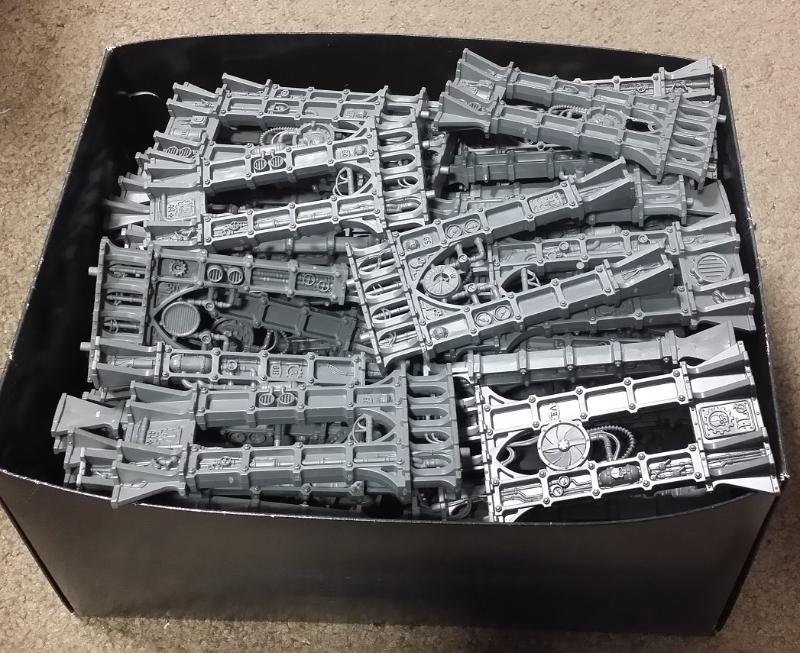
All that despruing I've been doing recently? Well it's created quite the pile of empty sprues:
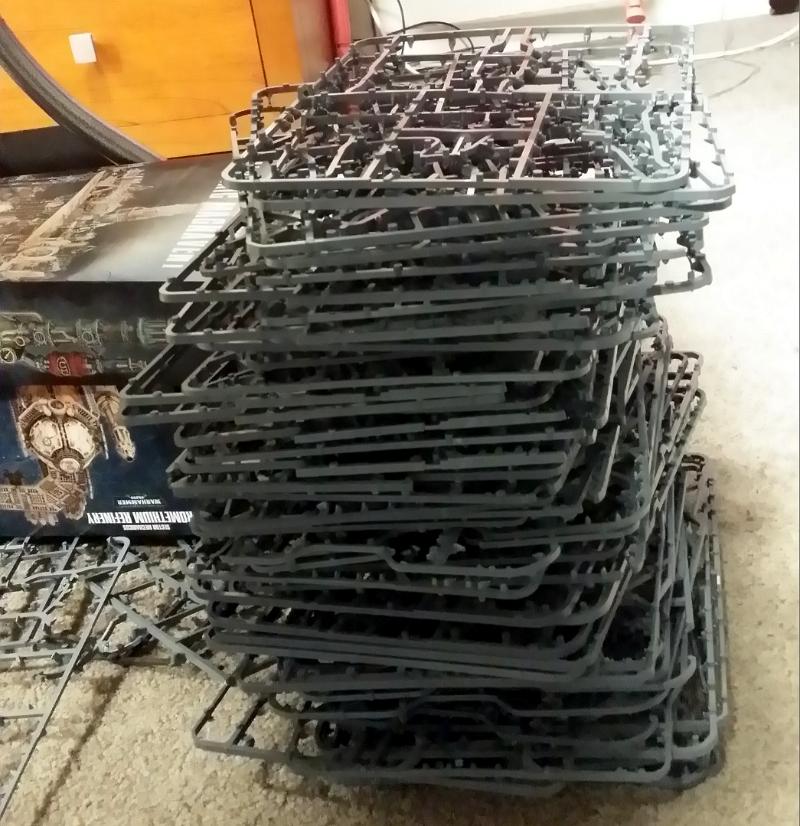
I have dozens upon dozens of clips to hold everything together:
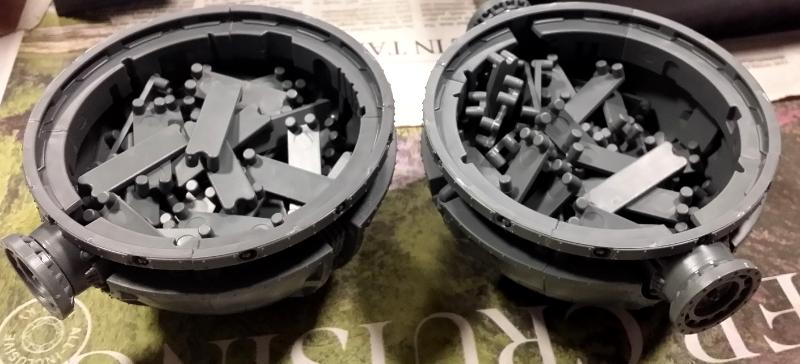
I continue to keep a massive amount of platforms, and they truly are the life-blood of these buildings. Without these things nothing would work:
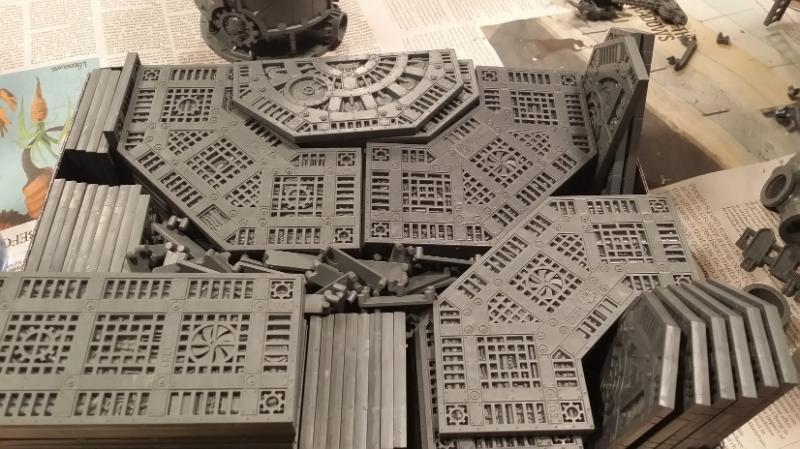
And lastly, the furnace sprue. It has my two fav pieces within the entire Sector Mechanicus product range, namely the three-way pipe and the furnace itself. They're also like McDonald's fries in that almost every kit comes with at least one. I've made so many of these and yet still have so many spare:
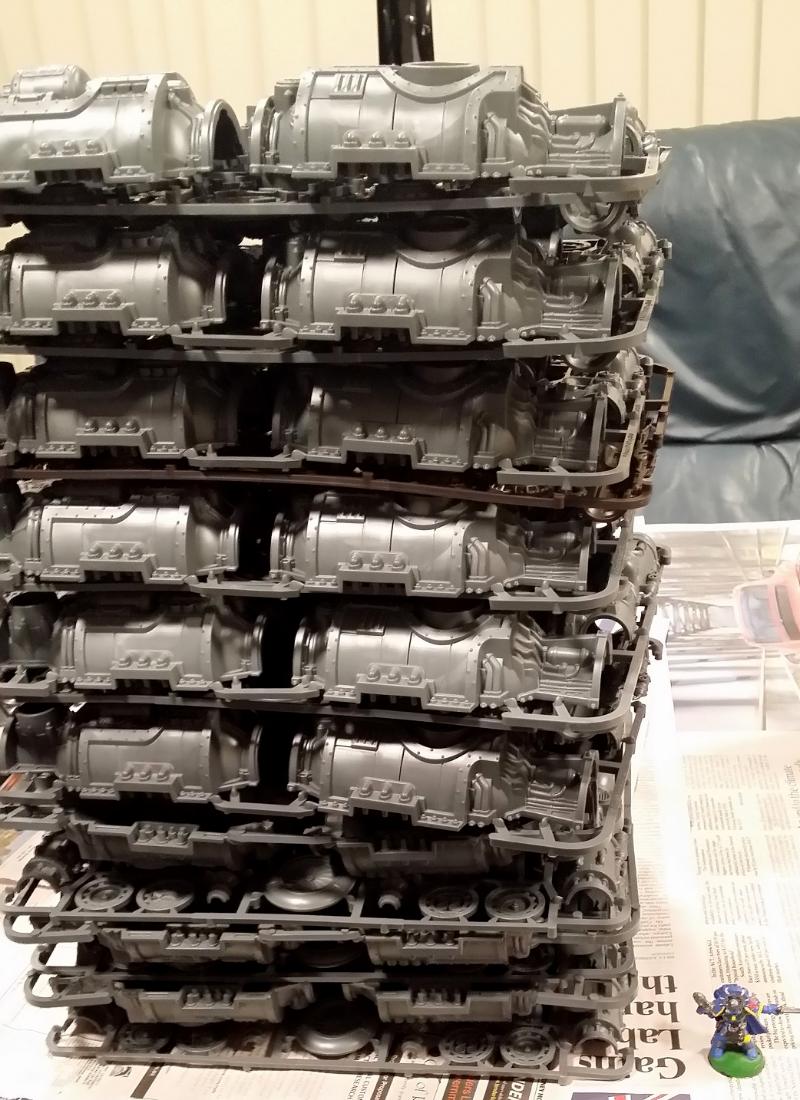
That's 17 of them. Untouched. Unused. Not a single thing clipped off yet.
Yes, I know I'm crazy.
And that's all for now. After this build, the next thing is... the monster...
BYE
21358
Post by: Dysartes
...I don't think you can make the v3.5 Chaos Codex out of these kits, HBMC.
That's some really nice work on these pieces - any chance of a table shot with all the terrain on it, if it'll fit?
494
Post by: H.B.M.C.
GW posted this on their facebook:

Interesting to note that they didn't do anything to fill "inside" bits of the generator underneath, but do appear to have cut away the pipes.
It's making me wonder if I should still build one like this...
686
Post by: aka_mythos
Do you plan on incorporating pieces from the Mekboy terrain, the GSC drill, or the Sector Frontera terrain that all seems atleast stylistically compatible with the Sector Mechanicus kits?
I’m interested to see what you come up with.
62565
Post by: Haighus
The Fragdrill in particular is straight up SM terrain, with some very interesting components. I'd be interested to see what you could do with that!
494
Post by: H.B.M.C.
Haighus wrote:The Fragdrill in particular is straight up SM terrain, with some very interesting components. I'd be interested to see what you could do with that!
 aka_mythos wrote: aka_mythos wrote:Do you plan on incorporating pieces from the Mekboy terrain, the GSC drill, or the Sector Frontera terrain that all seems atleast stylistically compatible with the Sector Mechanicus kits? I’m interested to see what you come up with.
I have a pair of Fragdrills. One will end up looking like this: 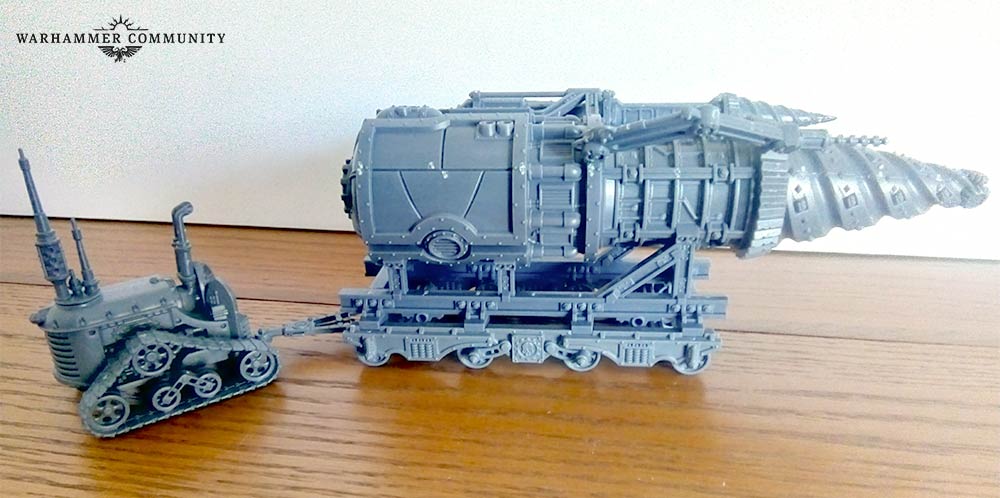 The other one will be built as you'd normally expect, but probably bigger than the stock kit (because it's me!). The buildings from the Frontier World Killzone are interesting. I do like the single-story non-ruined building (of which I have 4 sprues, so enough to make 2 of them), but I'm going to see what options there are for them (if any). I want to know if they can stack! My intent with the Frontier World stuff is to incorporate it somehow into a little overrun Mechanicus outpost. Combined with the ruined parts of the Derelict Manufactorum, and some of GW's creeping vine stuff, I want it to be workable as overgrown terrain and/or the remnants of a settlement on a death world (harder now that the Deathworld Killzone is gone). On that subject, there was a CoD Mechanicus building I made a number of years back that pretty much fits with this purpose: 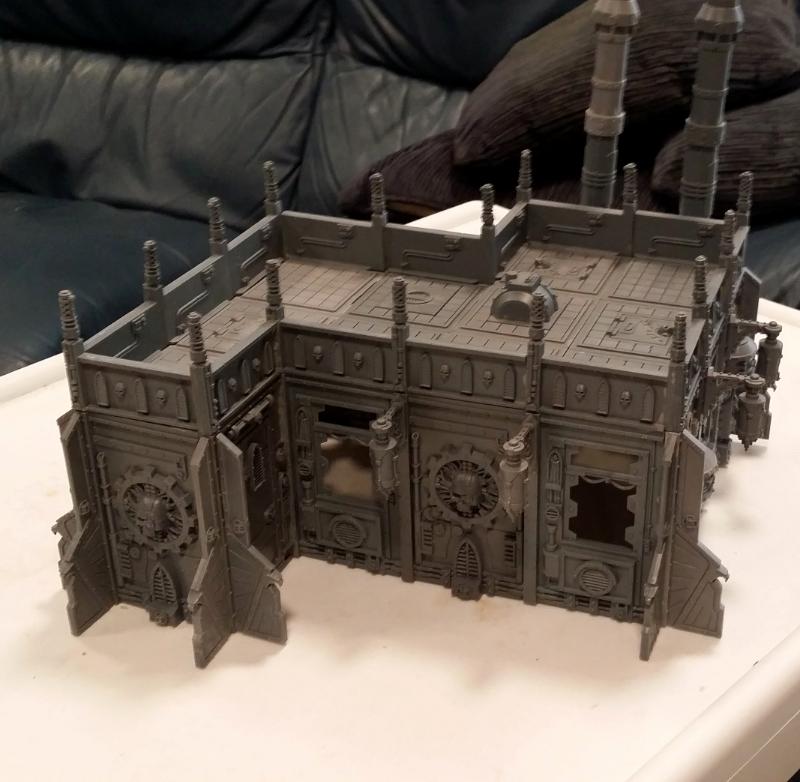 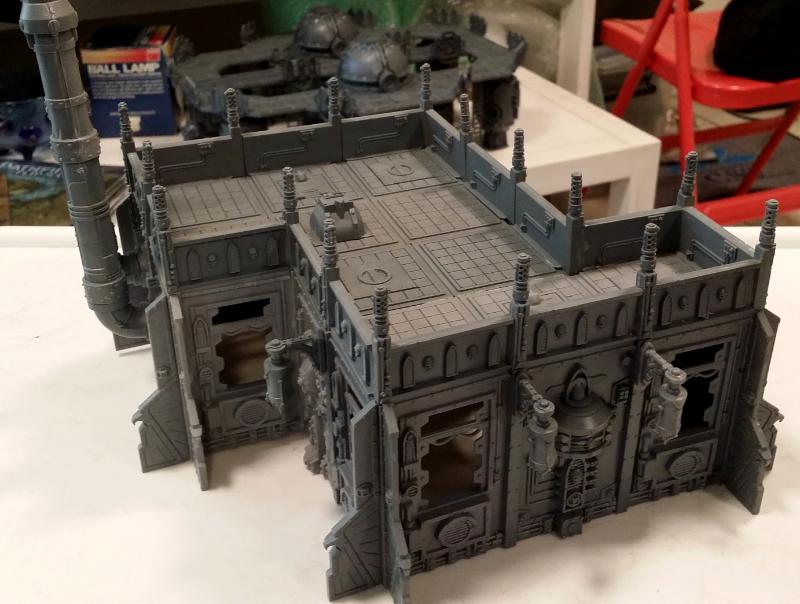 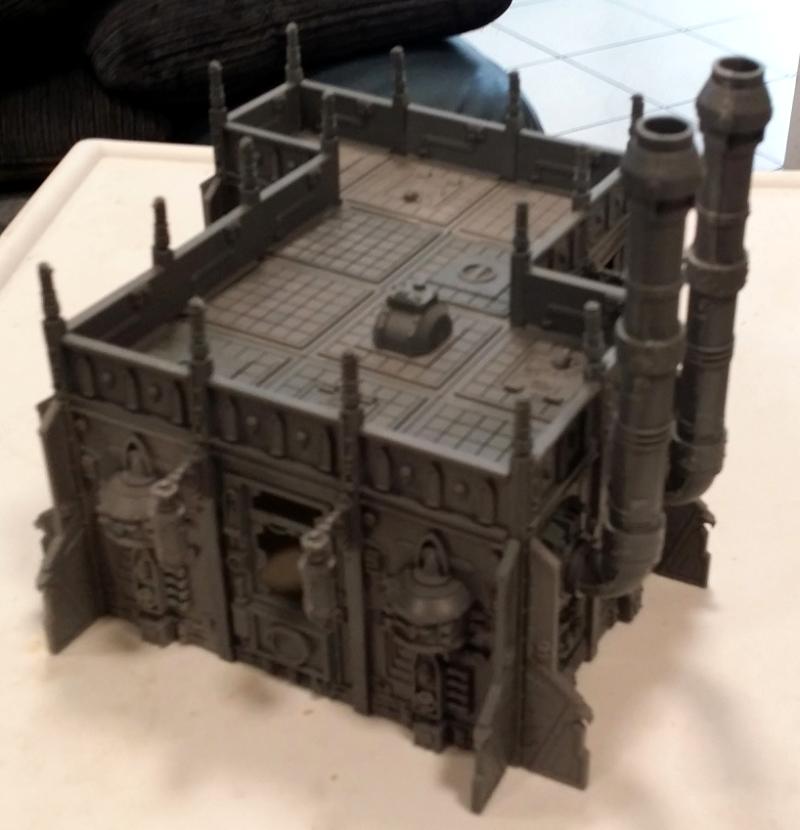 Inside corners are a complete bitch with the CoD kits, but I made it work. I've always liked this little outpost, and it should fit with the rest. As for the Ork terrain? I don't have the Mekboy Workshop, but I did pick up two sets of the junk piles from the Speed Freeks box. They, like the terrain from Rogue Trader, are in a box whilst I figure out what to do with them. And, y'know what, whilst I've got my camera going, let's take a few more photos! The modularity of my Sector Mechanicus terrain is a major factor that I honestly never planned for. When it turned out so well with the Outer Ring, I figured let's keep going. The recent Three Towers that I build was made with that ethos in mind, and to show you how different elements of it work together and with other parts, here are some extra pics: 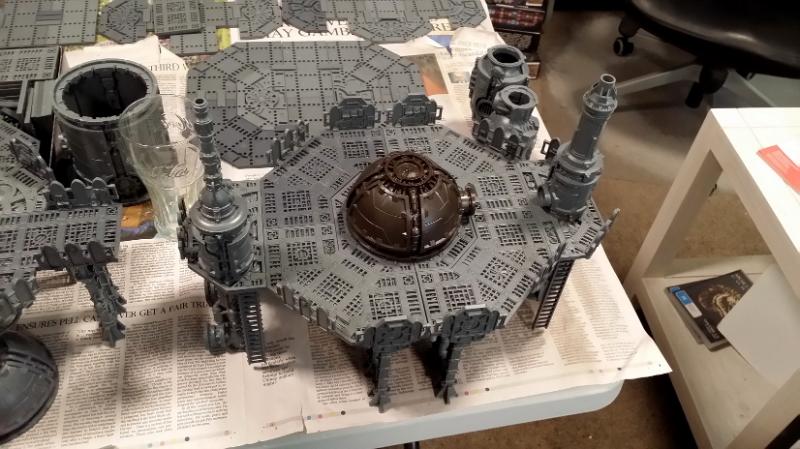 That's the two U-Shaped Platforms with one of the towers. Works well as a standalone piece, much like the two main towers that make up The Nipples. Also you can see The Monster starting to take form in the background. That's almost its final layout. I made slightly longer straight bridges for the The Three Towers, and they work just about everywhere: 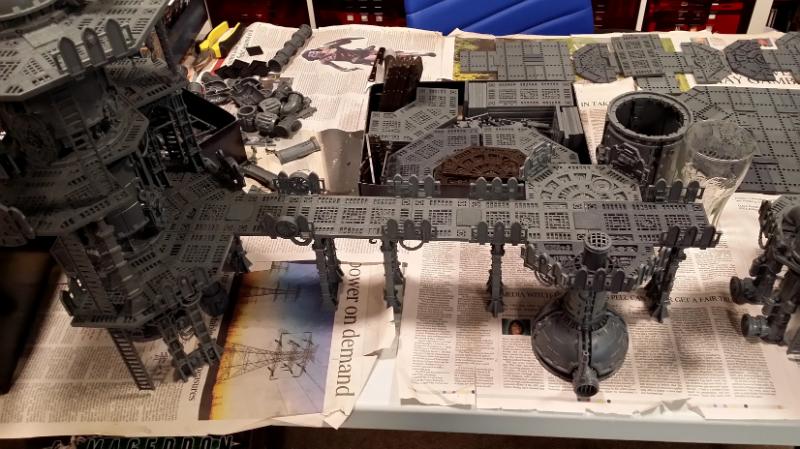 Finally when you combined my original straight walkways with some of the towers, you can do more interesting things with the Outer Ring: 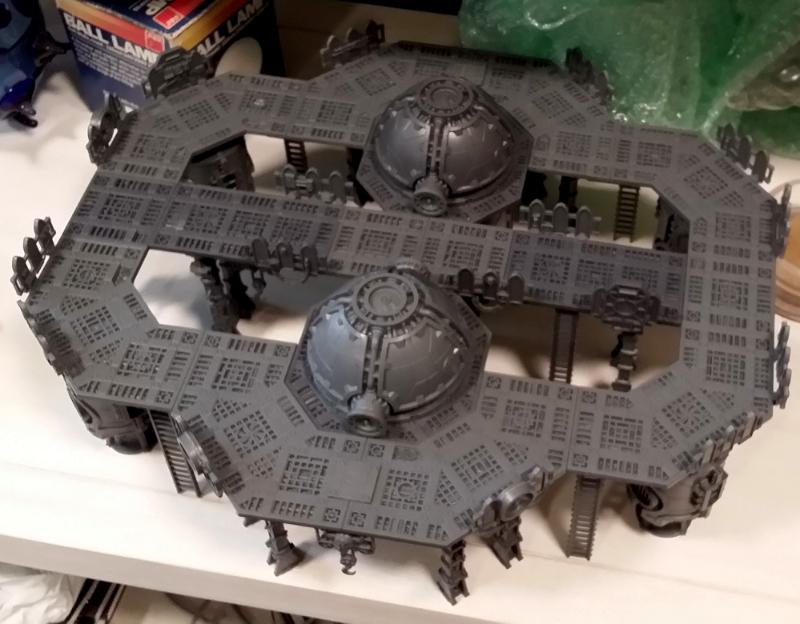 Also Miniature Market did a sale towards the end of last year... and I may have bought more maps that only just arrived as one of them was a pre-order: 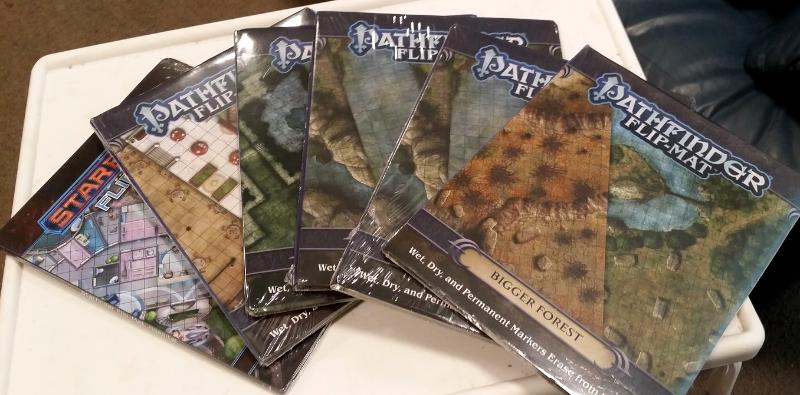 That's all for now... BYE
494
Post by: H.B.M.C.
I have a question for y'all.
I've been thinking on and off about what other things I can do with my as-yet untouched mountains of Sector Mechanicus terrain. I've got a few interesting ideas floating around for some more Necromunda-y pieces, but then I thought to myself:
What if I remade the original Necromunda terrain using the Sector Mechanicus kits?
Rather than being, at most, 9" tall they'd be about 15" tall at the highest. I am building a building that is taller than that now ('The Monster', or 'Rita Tower' to use its official name), but I'm wondering if it would be interesting to put together a set of Sector Mechanicus stuff that mimics, as much as possible, the original card terrain from the first edition of Necromunda:

Any thoughts on this?
21358
Post by: Dysartes
That could be cool, HBMC.
3309
Post by: Flinty
Seconded. Just remember the walking platforms
18980
Post by: Arakasi
Absolutely!
10667
Post by: Fifty
It is always good to incorporate nostalgia elements.
686
Post by: aka_mythos
H.B.M.C. wrote:I have a question for y'all.
I've been thinking on and off about what other things I can do with my as-yet untouched mountains of Sector Mechanicus terrain. I've got a few interesting ideas floating around for some more Necromunda-y pieces, but then I thought to myself:
What if I remade the original Necromunda terrain using the Sector Mechanicus kits?
Rather than being, at most, 9" tall they'd be about 15" tall at the highest. I am building a building that is taller than that now ('The Monster', or 'Rita Tower' to use its official name), but I'm wondering if it would be interesting to put together a set of Sector Mechanicus stuff that mimics, as much as possible, the original card terrain from the first edition of Necromunda:
Any thoughts on this?
I thought about doing this, there are some shapes the old one has that are gonna be a little more challenging. 5 sided double decker with a hole for example. You'll start thinking about the shapes and realizing that there were certain sorts of small parts to make connecting the bigger tiles in atypical angles easier.
60720
Post by: OrlandotheTechnicoloured
Epic stuff indeed
494
Post by: H.B.M.C.
Ok, so I did some preliminary layouts. We'll call the three story building in the pic above the "Square Building". We'll call the two story building with the hole through it the "Pointy Building". And we'll call the two-story building with the tower runing through it the "Tower Building".
So, with basic layouts to get approximate shapes we have, as follows...
Pointy Building:
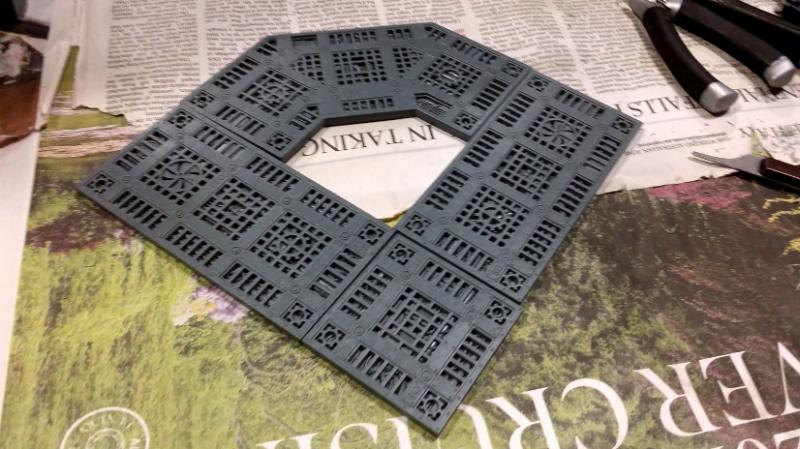
Square Building:
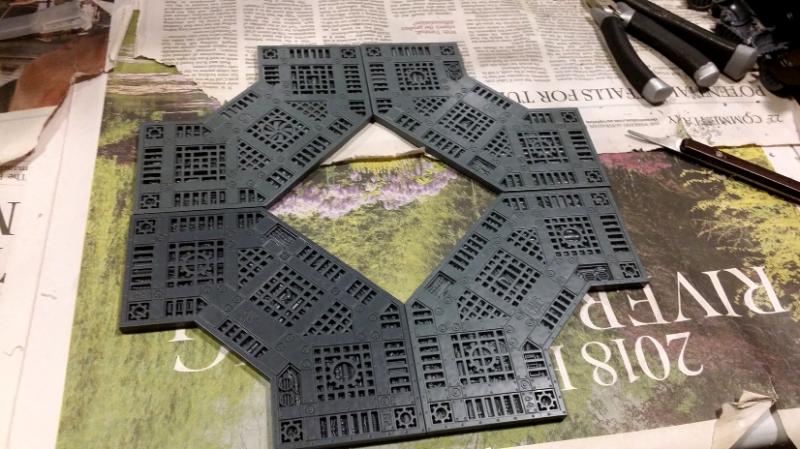
Tower Building Upper Level:
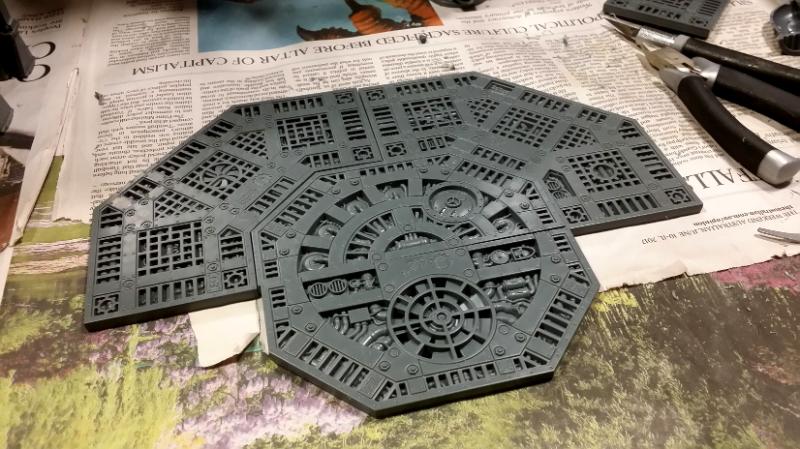
Tower Building Lower Level (with tower for reference):
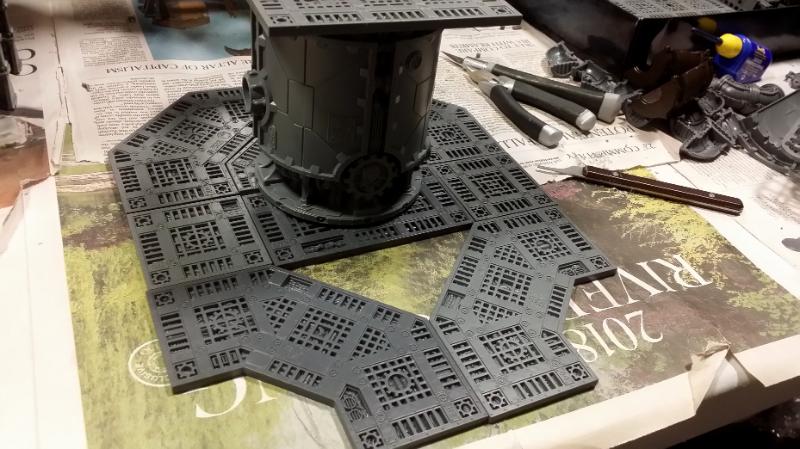
There's no perfect way to make the Tower Building 's shape without using tons of single and double straight pieces, and they remain the most valuable/least accessible pieces to buy of all the Sector Mechanicus bits. I also like the hole in the middle of this version of the Square building. Could make it more interesting.
Anyway, those are the preliminary ideas.
686
Post by: aka_mythos
For the square tower have you considered using the newer (Manufactorum) kits?
494
Post by: H.B.M.C.
New Munitorum kits?
494
Post by: H.B.M.C.
Not sure how that'd help. Those a walls, of which these buildings have none, and all the floor pieces are the same size of smaller (and are ruined pieces).
686
Post by: aka_mythos
H.B.M.C. wrote:Not sure how that'd help. Those a walls, of which these buildings have none, and all the floor pieces are the same size of smaller (and are ruined pieces).
I was thinking of the square tower in the top left corner:
Instead of using the round tanks: Tower Building Lower Level (with tower for reference):
Or are you talking about making the lowest level shorter?
494
Post by: H.B.M.C.
Oh, right, I see what you mean. Sorry. You mean actually making a square tower out of the Derelict Manufactorum walls.
It would require 24 panels to do a 2x2 tower three stories high. That is a considerable amount of resources. I only have 18, and I've already assigned those panels to a very different building.
686
Post by: aka_mythos
Does it really need to be that big? What if you went 1x1 and don't build it quite as tall as one large wall panel per building floor? Being 1x1x2, still with 3 floors, I think it captures the feel and ends up close to the original's size.
494
Post by: H.B.M.C.
1x1 is very thin though, and won't quite do justice of the tower.
Plus I've got like 6 spare stacks, might as well use 'em.
494
Post by: H.B.M.C.
Last weekend I finally put together something I've been teasing for many posts. There have been shots of its test layout, but the size and scope of The Monster, or Rita Tower to use it's proper name was not quite apparent. Suffice to say it is the tallest structure I've built yet, with a few complex new building ideas that I was testing out for the first time. I still have to add cables/pipes and ladders, but from this you will see how it looks when joined with the Lift Tower and the Underpipe bridge.
So let's get started and test out what the Dakka picture limit per post is at the same time!
The Monster/Rita Tower
When I created the Underpipe Bridge (and when I make the Mk.II Underpipe Bridge this weekend) I ended up with a double straight piece with two of those flat connectors on each end on it to give it extra strength and to allow it to "hang" between two tall buildings without the need for supports. It means it can hang at any level. Up until now though I've only had one tall building to connect it to, the Lift Tower, but I always intended to have it connect to an even larger building. In a lot of ways it's like the Armoured Walkway from the Outlanders Necromunda expansion, in that it is unique compared to all the other standard bridge types.
So this building needed to be big, so have a look at each floor, starting with the ground floor:

I was trying to be resource conscious here, after the Three Towers and second U-Shaped Platform used a good chunk of my circular floors, but in the end I had to stretch the floor out by one square (that's why there's that extra single-space square on the left). Why this is important will become apparent at the end.
Now the second floor, which has a lot of negative space. Originally the two single-square "wings" were not there, but a combination of stability concerns and the fact that it would require lots of end caps to position correctly with the pipes holding this level up convinced me to add them:
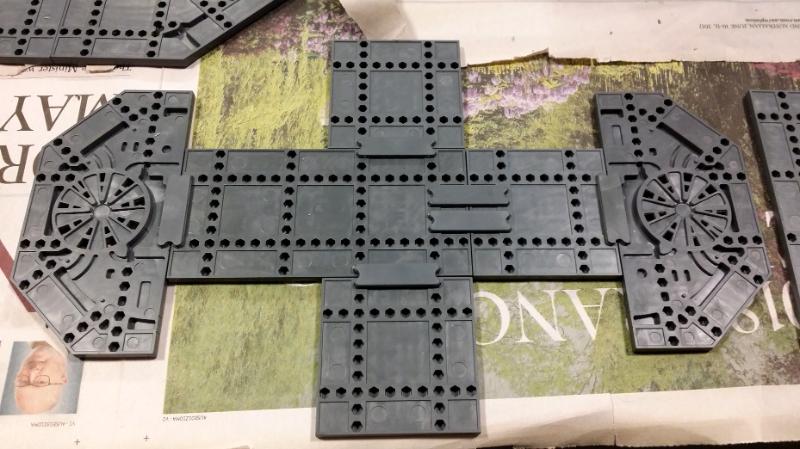
Third floor is a LOT bigger than the two underneath. This is an interesting challenge as it means the tower gets wider at the second to highest level. This is also the floor where the Underpipe Bridge is designed to connect:
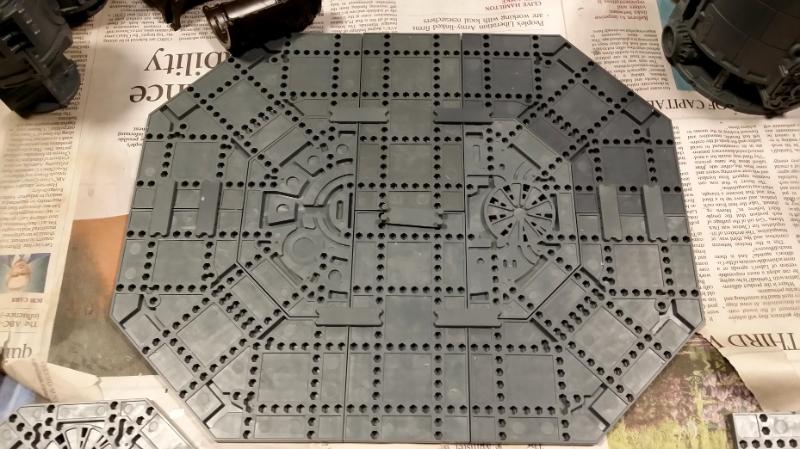
Fourth floor is considerably smaller, and will sit atop a regular stack. This isn't so much a sniper's nest as the third floor is so wide in all directions.

The problem with the circular platforms is that they do not have as many clip connector points as the other platform types. To add extra stability I needed to have three clips here, but there's no room for the pegs on each clip, so some creative cutting had to be attempted:
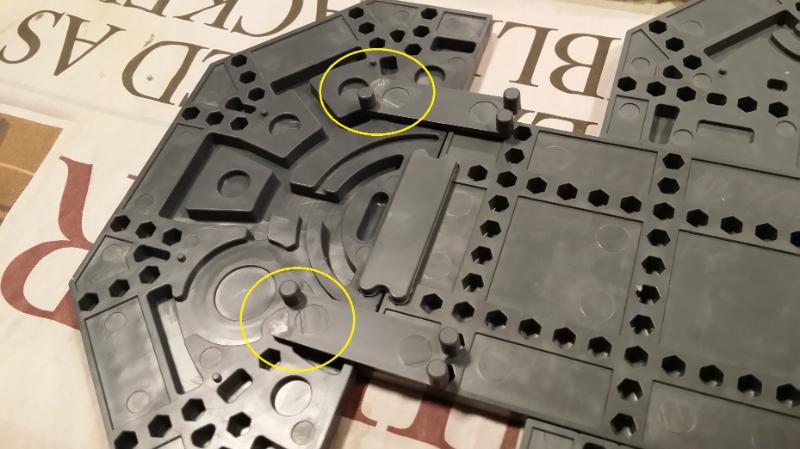
Now they fit and are safely hidden underneath:
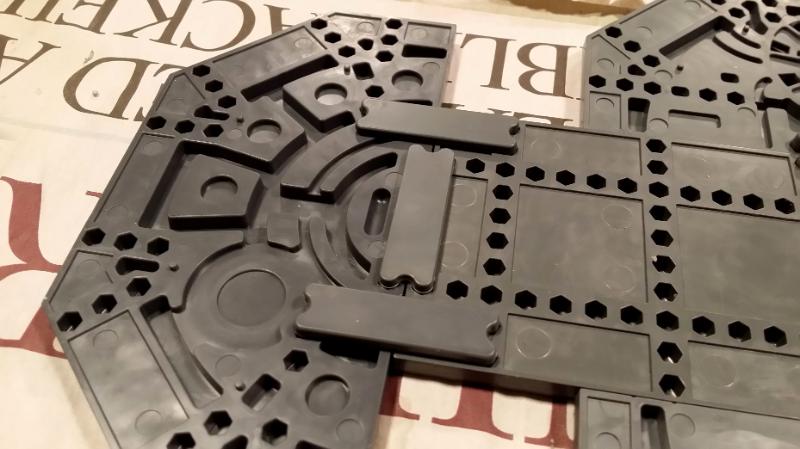
The Plasma Conduits are the perfect height to go between levels but they're too wide at either end to fit inside the square on the underside of the platforms, as you can see here:
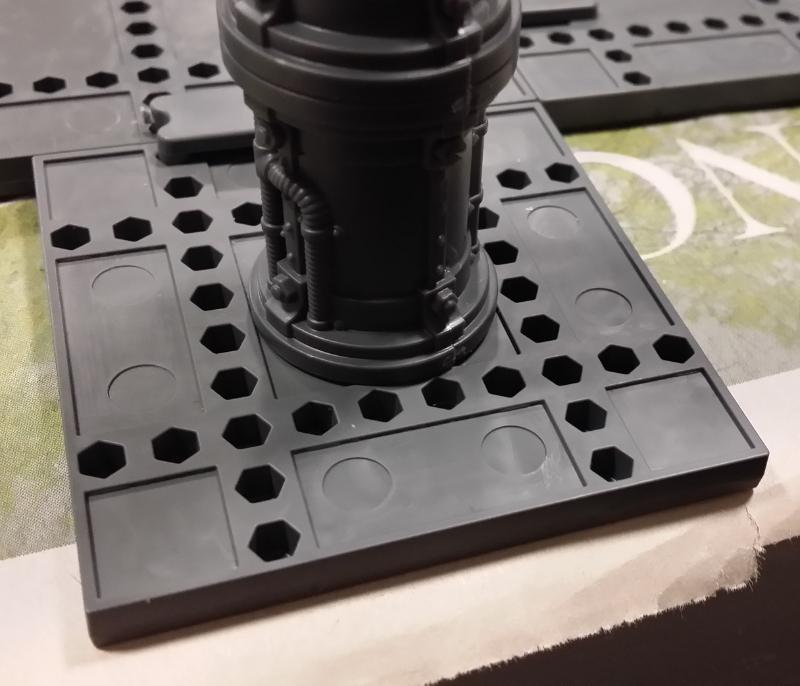
So after trimming away two sides on both the pipes I'd be using...:
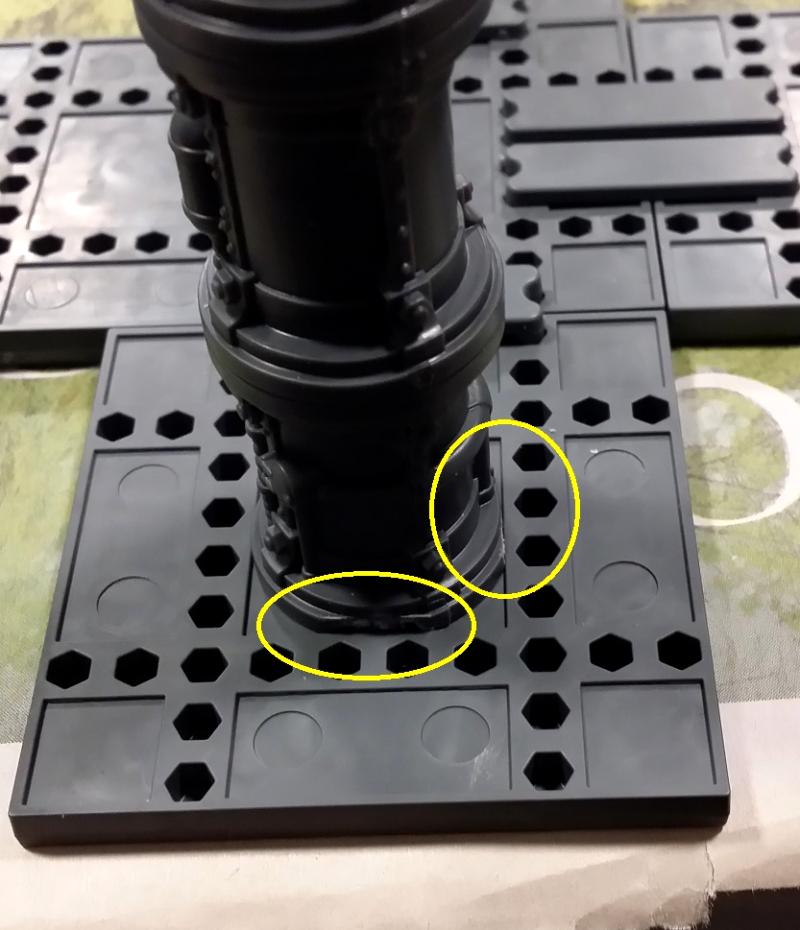
... they fit flush. The Plasma Conduits are a good looking kit, and seem very practical at first, but the actual pipe lengths are tough things to use, with certain sides only fitting with other sides. Not as modular as you might think:
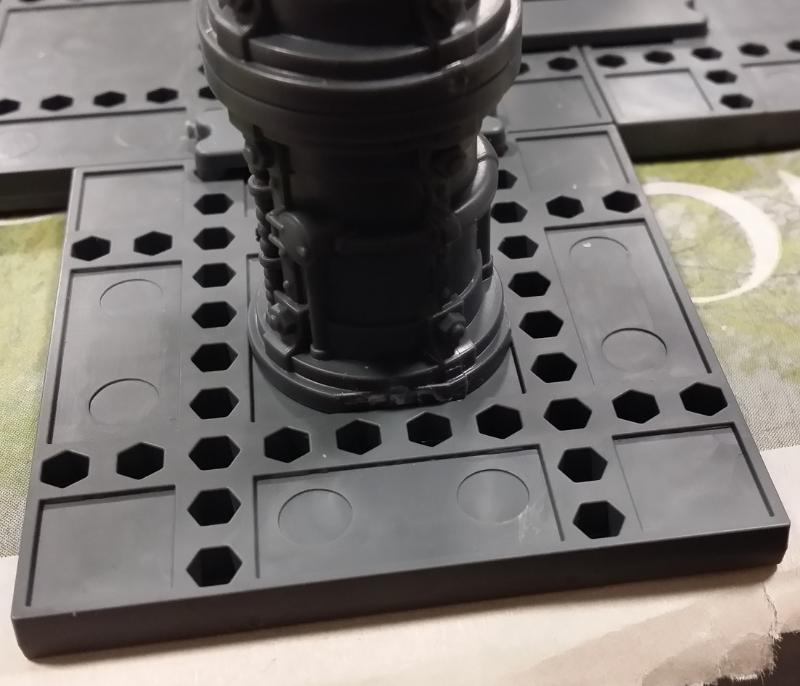
Holding up the third floor was going to be an upside-down dome, which in turn would be connected to the level below via a kiln that was using two sides from two different sprues. They were designed to fit together in either configuration so if you have spare ones you can have no pipe ends, or a pipe end on either side as you see here:
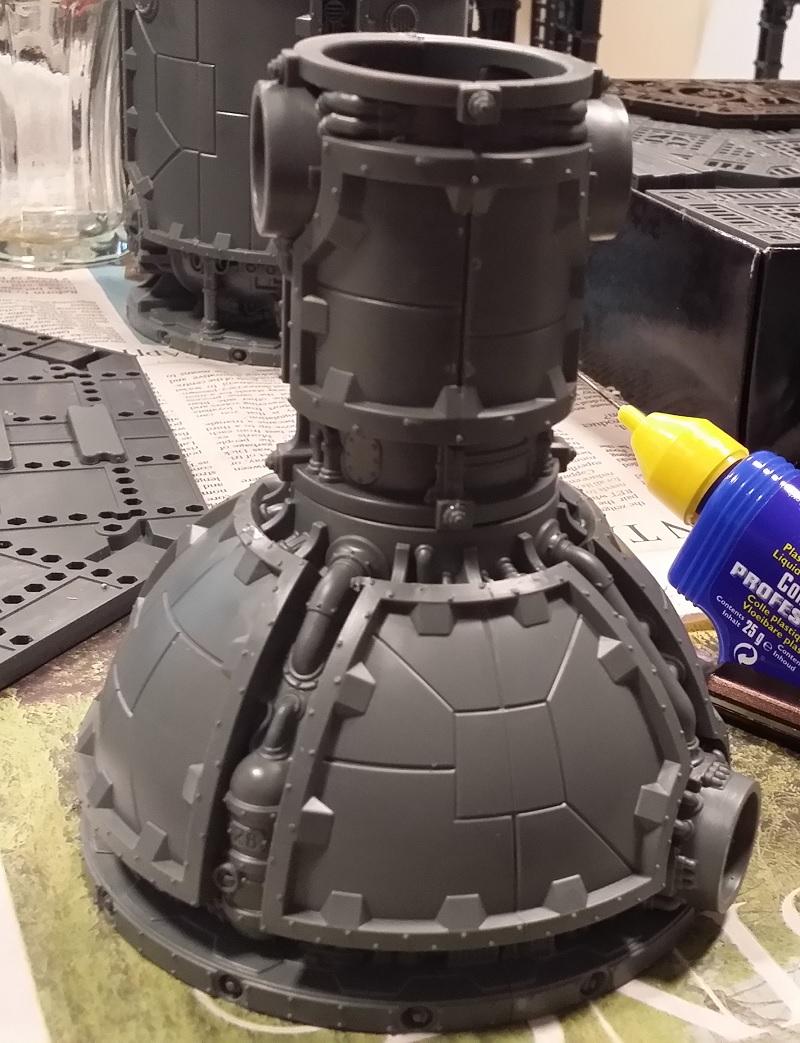
This is a slightly older shot when I was considering using more flooring on this level, but it shows you how I intend to connect the kiln/dome to the pipes that will be coming up from the level beneath:
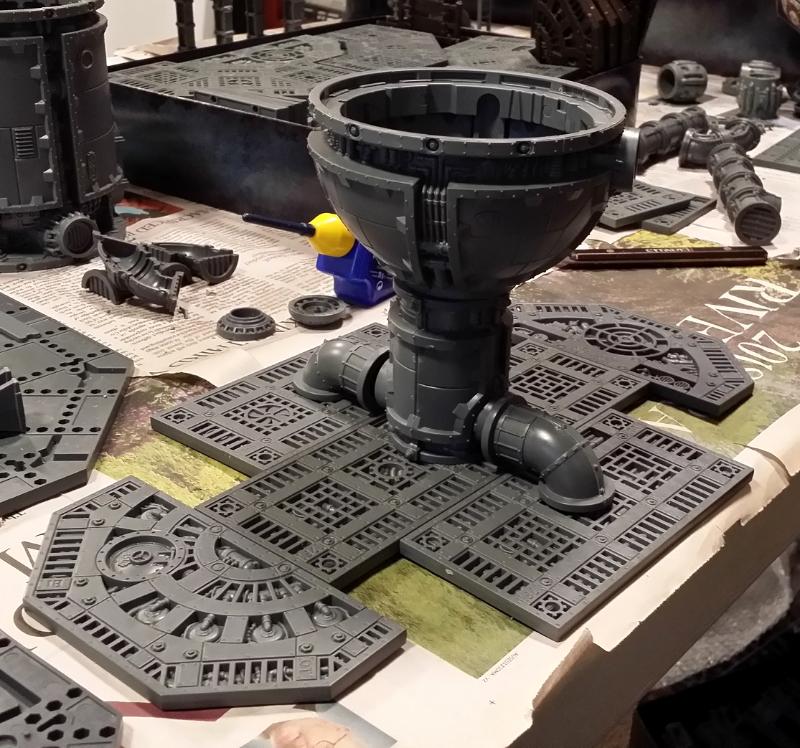
After working out the spacing I started putting on the curved pipes:
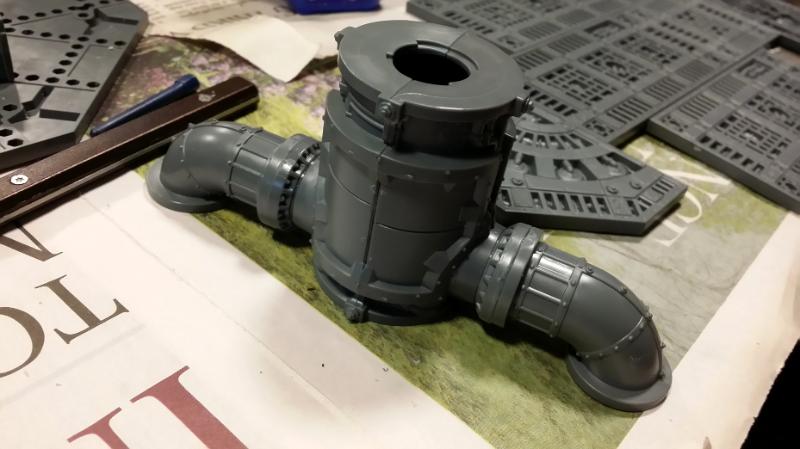
I also discovered that you can use the straight pipe between two furnaces and the spacing works perfectly. These two would be holding up the entire structure:
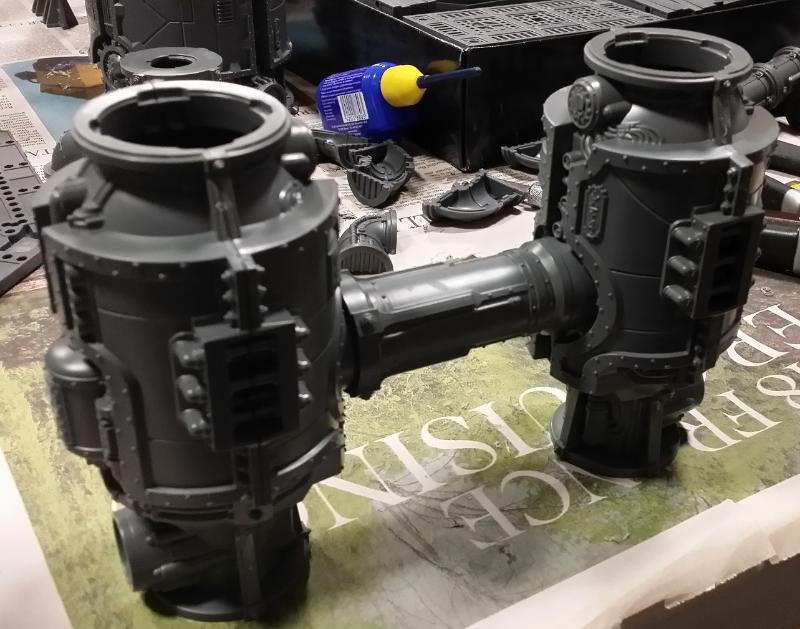
Captain Short-Sword is here to demonstrate how the first floor looks:
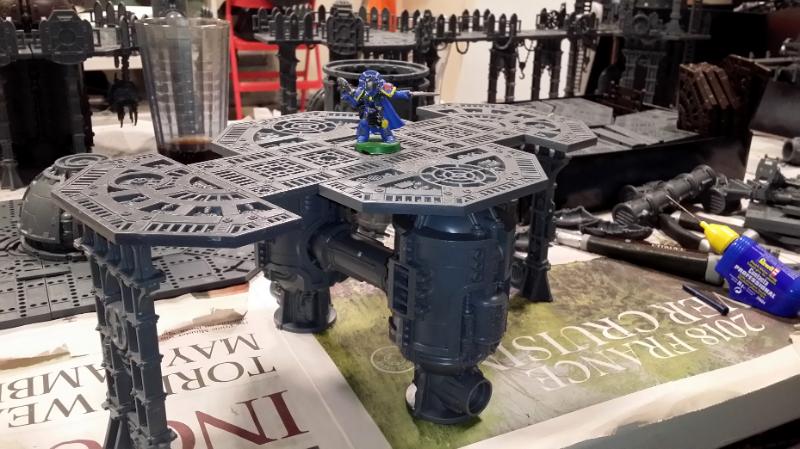
And here he is again to show off how the second floor works, and now you can see how the pipes will come up from below to hold this level up:
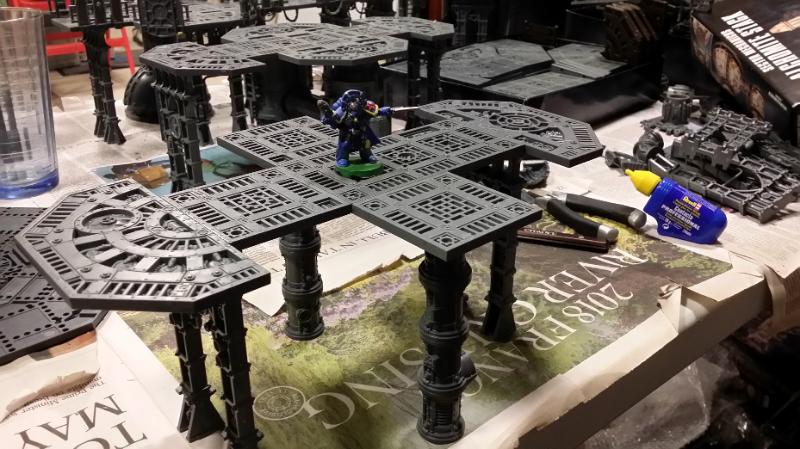
The third floor has 4 struts holding it up, just two very close to one another on either side. These proved to be quite a problem. The upside-down dome will hold up the middle of this platform.
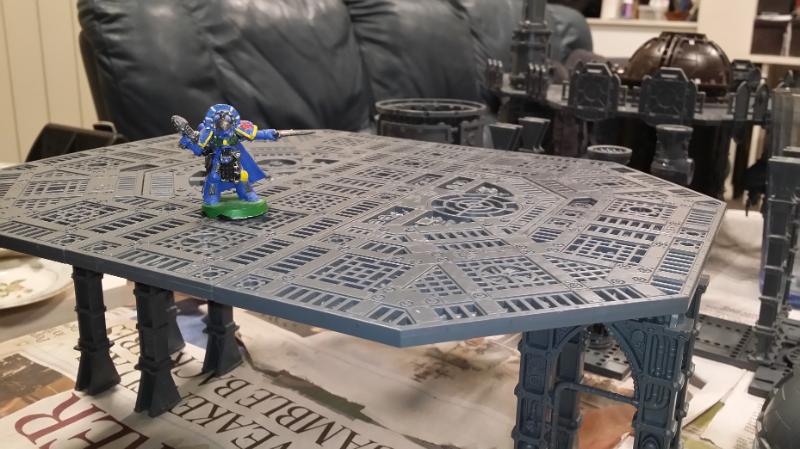
I have now added the upside-down dome, and you can now see how the curves pipes fit with the pipes from below:
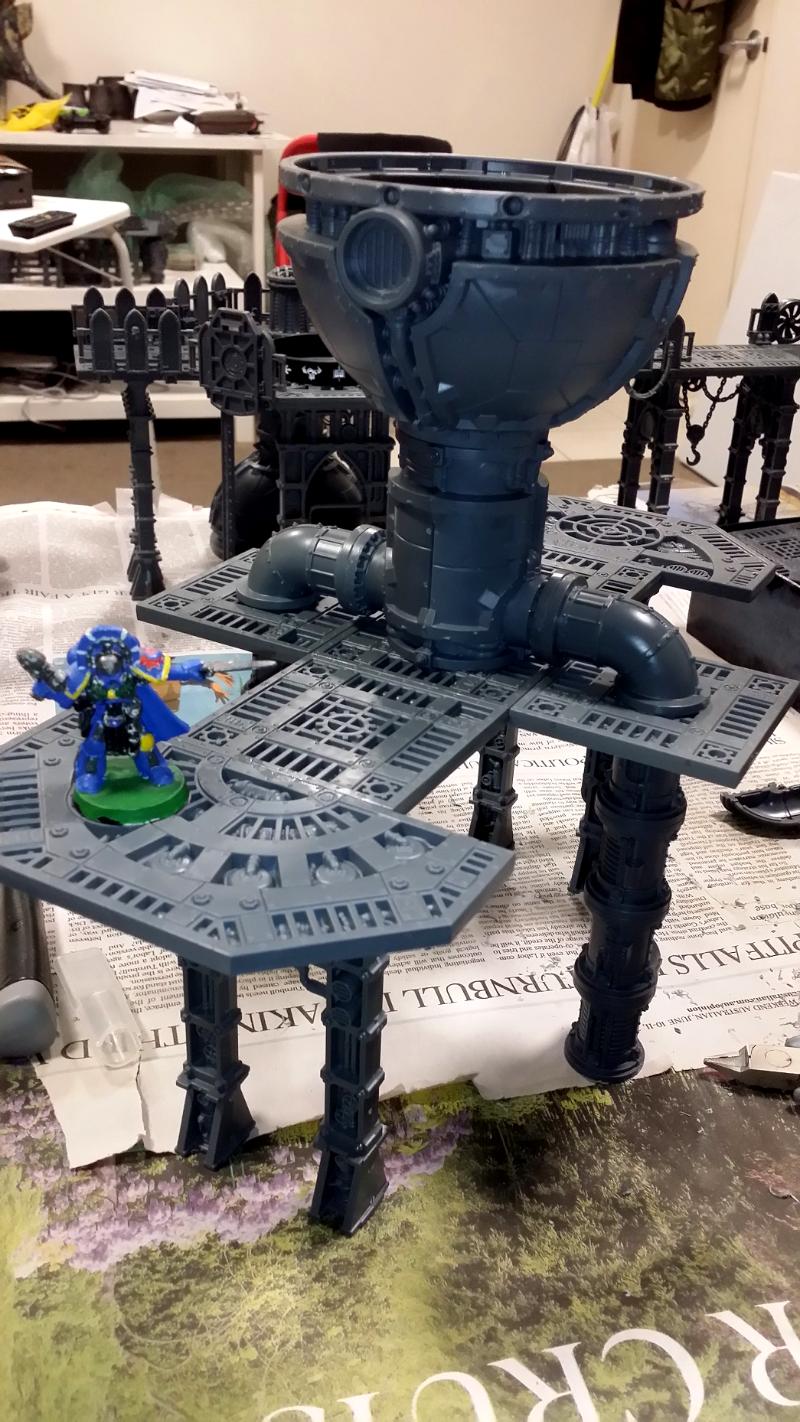
An upside-down balance test to see how it works before I glue the struts into the third floor's underside:
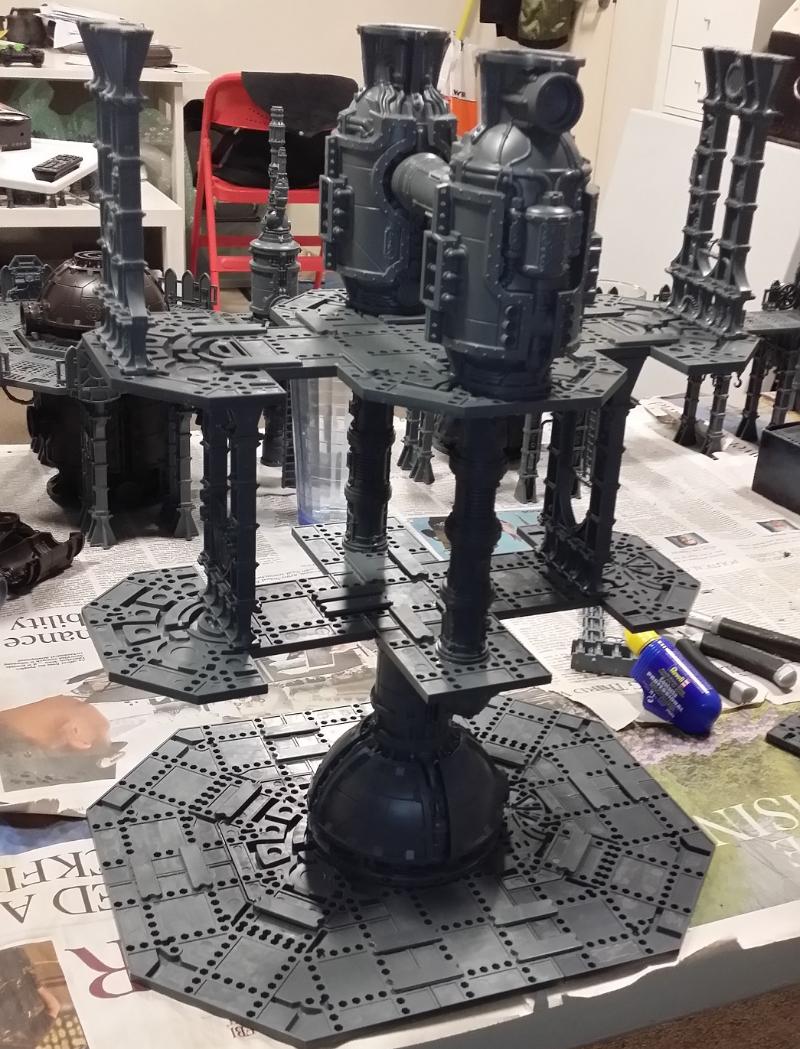
A right-side up test that includes the fourth floor (no dome in this pic yet):
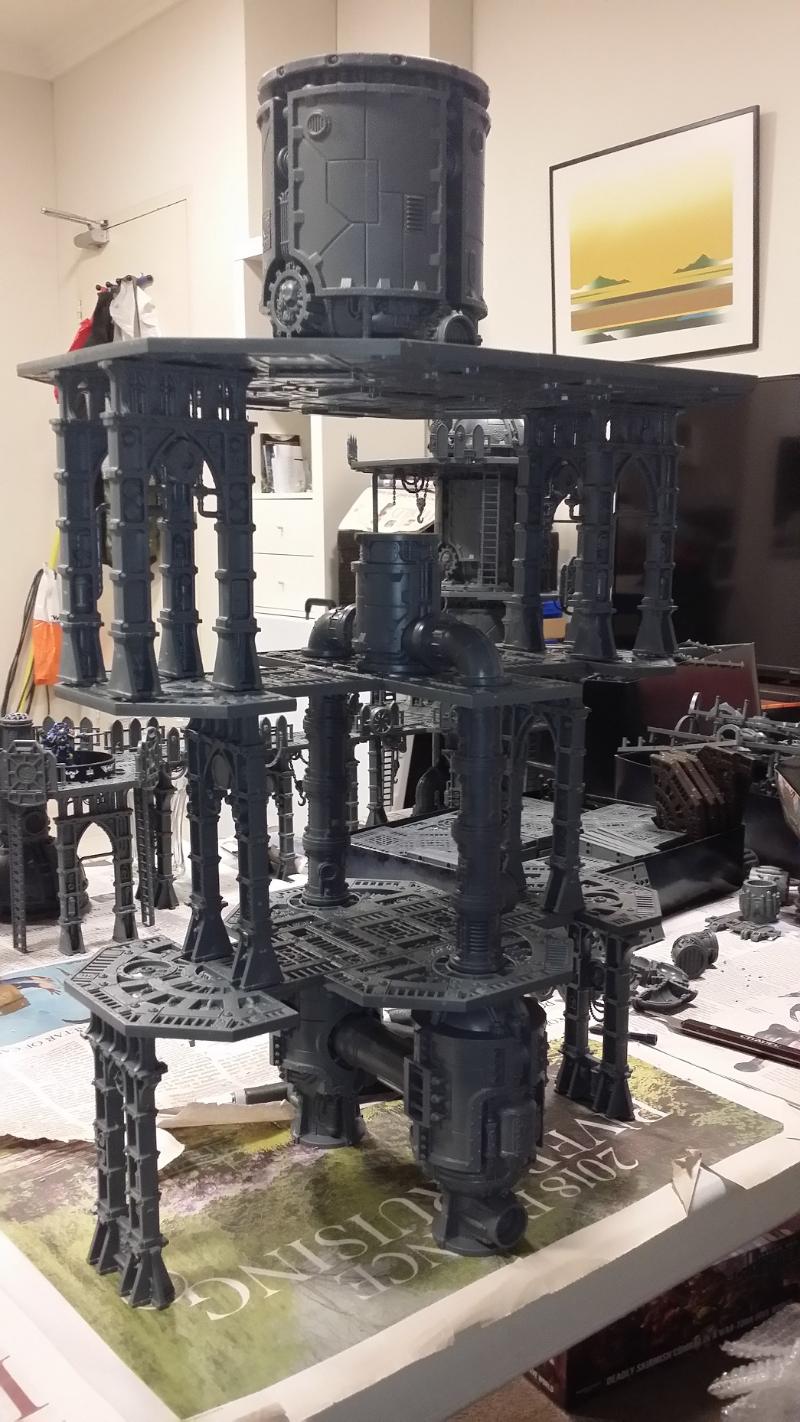
Here we have the other two non-pipe ends of the kiln put together along with a short pipe/covering to give the whole thing a chimney so it isn't completely flat on the fourth floor:
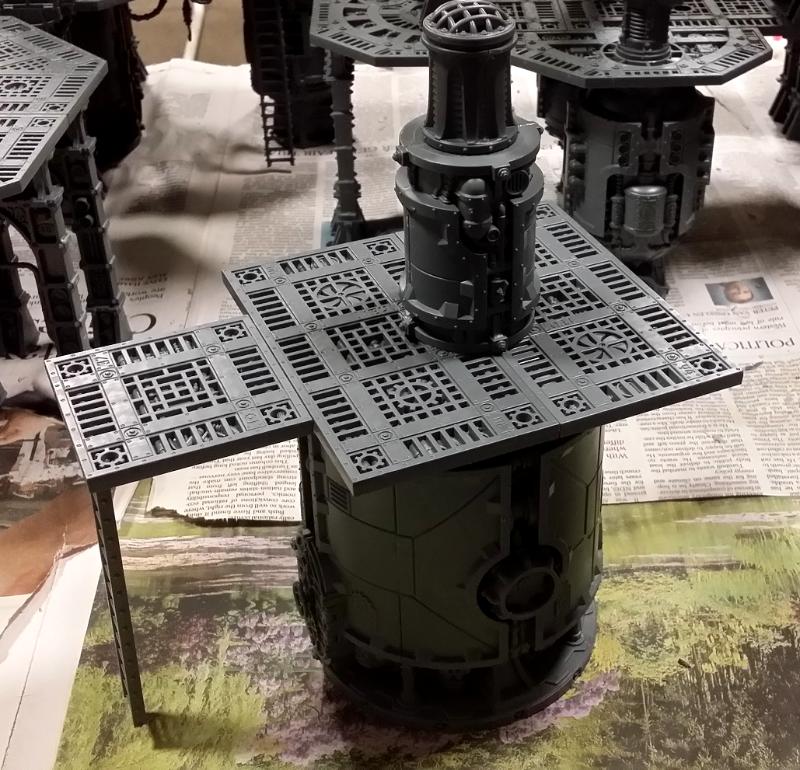
I added the fourth floor to the third floor first. I was going to need a lot more effort to join the 2nd to the 3rd, so wanted the 4th already in place before that:
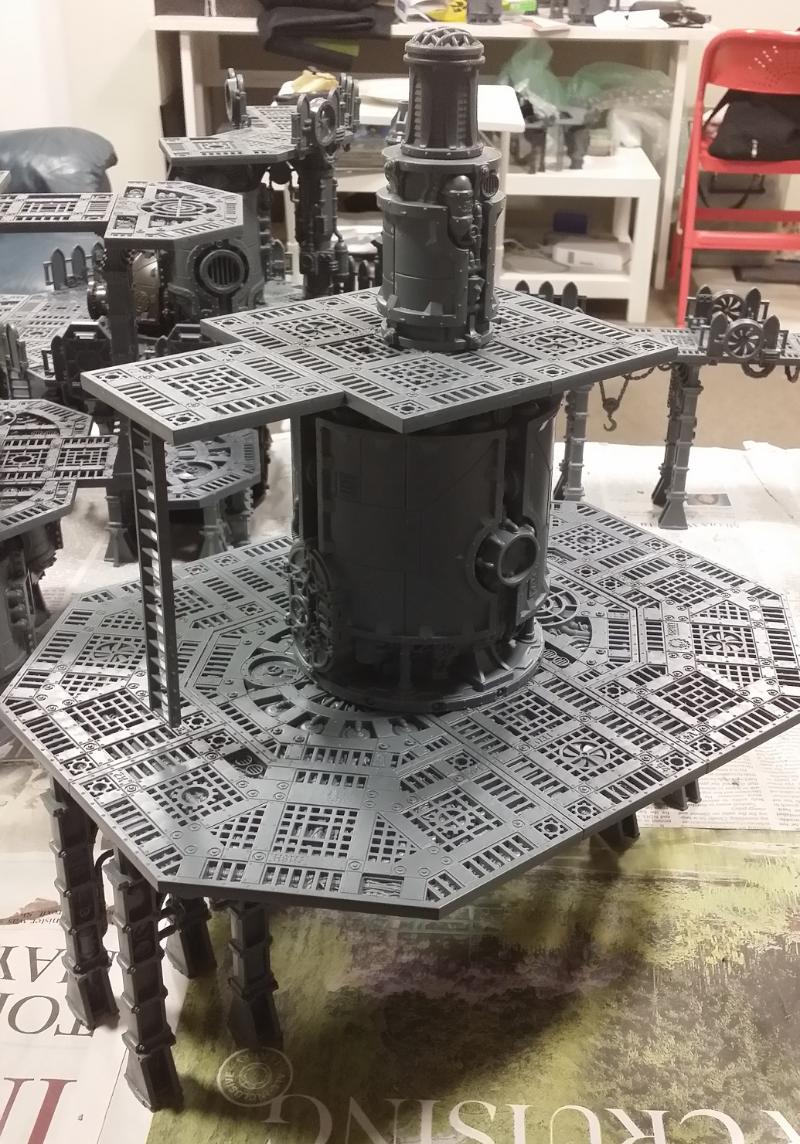
Also, due to the size of the tower, I knew adding the shields around the platform ridges would be a nightmare when the whole thing was in one piece, so I started to do them first... but I had to clean them first:
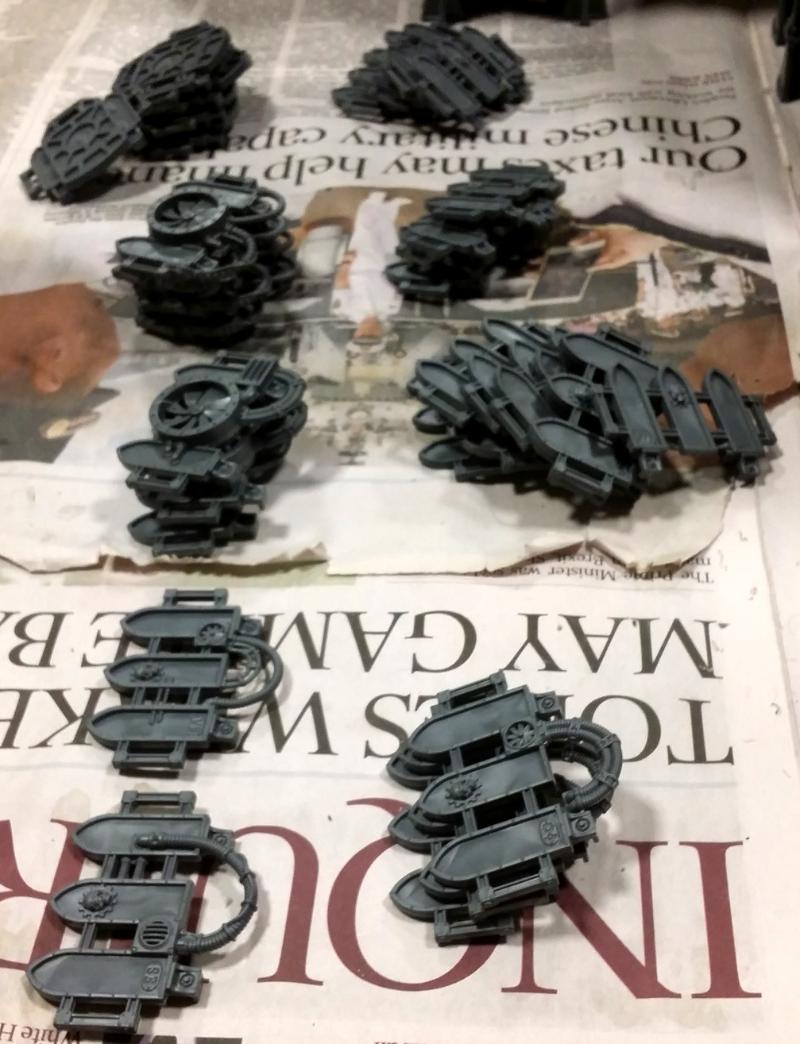
Now the shields on the 3rd and 4th floors are complete:

First and second floors complete, with shields:
 "Make my monster grow!!!"
, the completed Rita Tower:
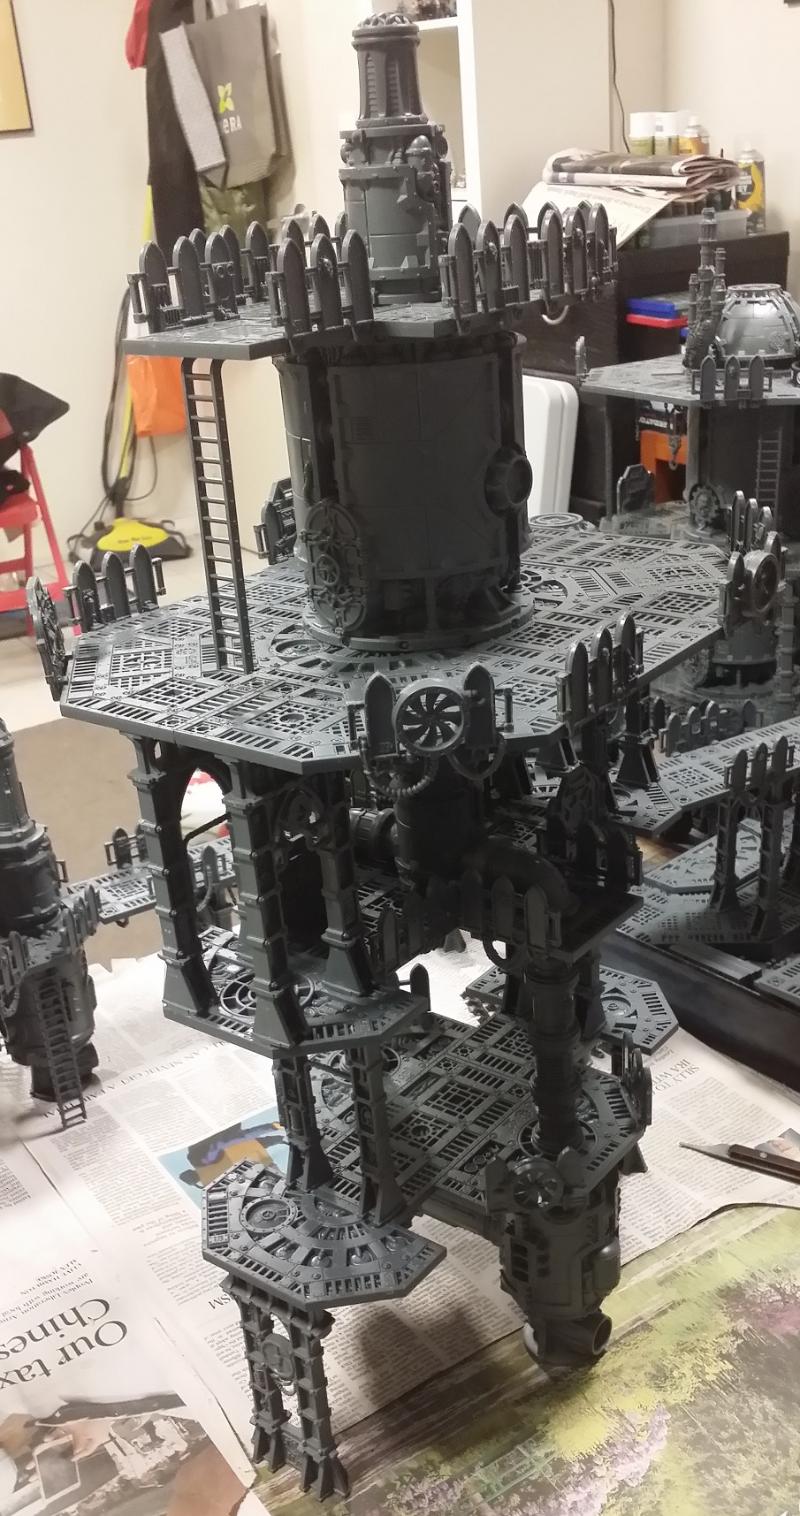
Connecting the third floor to the second floor was awful. After holding in place for a good 5m I realised that it wasn't really gluing down because of the rivets on the platforms on the second floor. So I ripped it in half, clipped away the rivets, and glued it back down. Must've sat there pinching the two levels between my hands for a good 20-25 minutes until they no longer came apart when I put them down. My arms hurt the next day.
And from another angle:
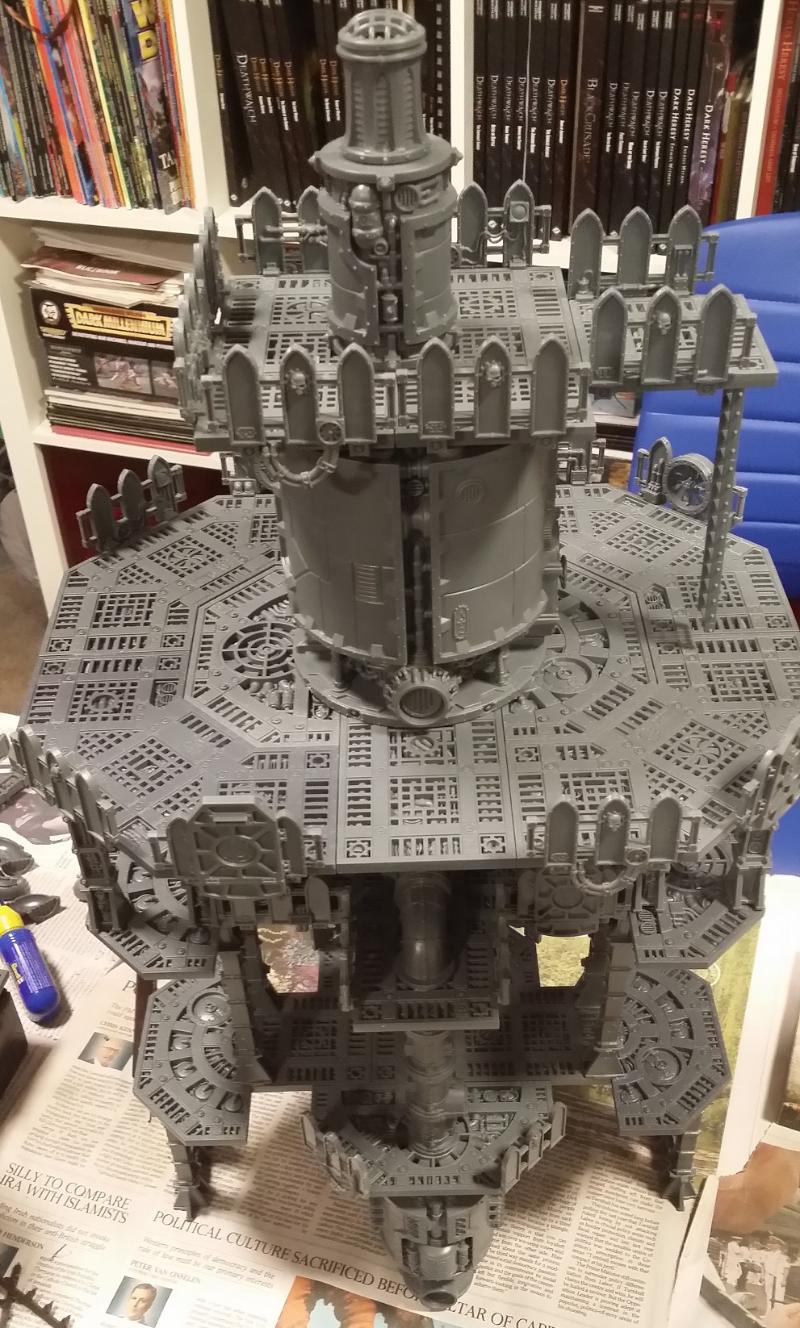
With the Underpipe Bridge connecting Rita Tower to the Lift Tower:
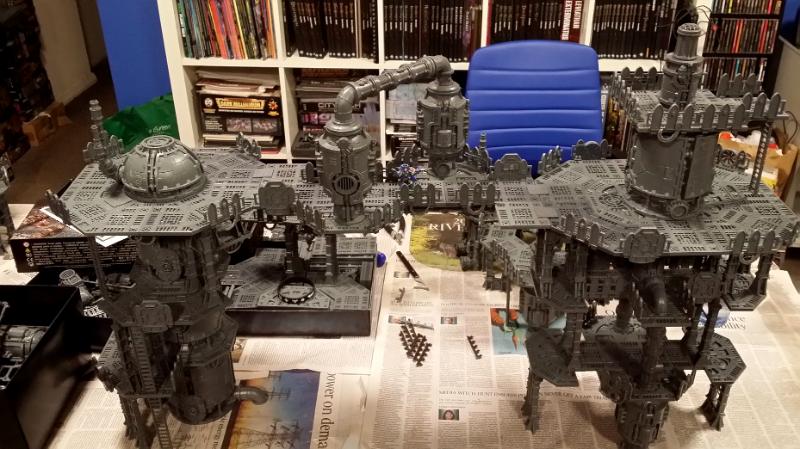
And finally, how it slots into the Outer Ring, because of course I did!:
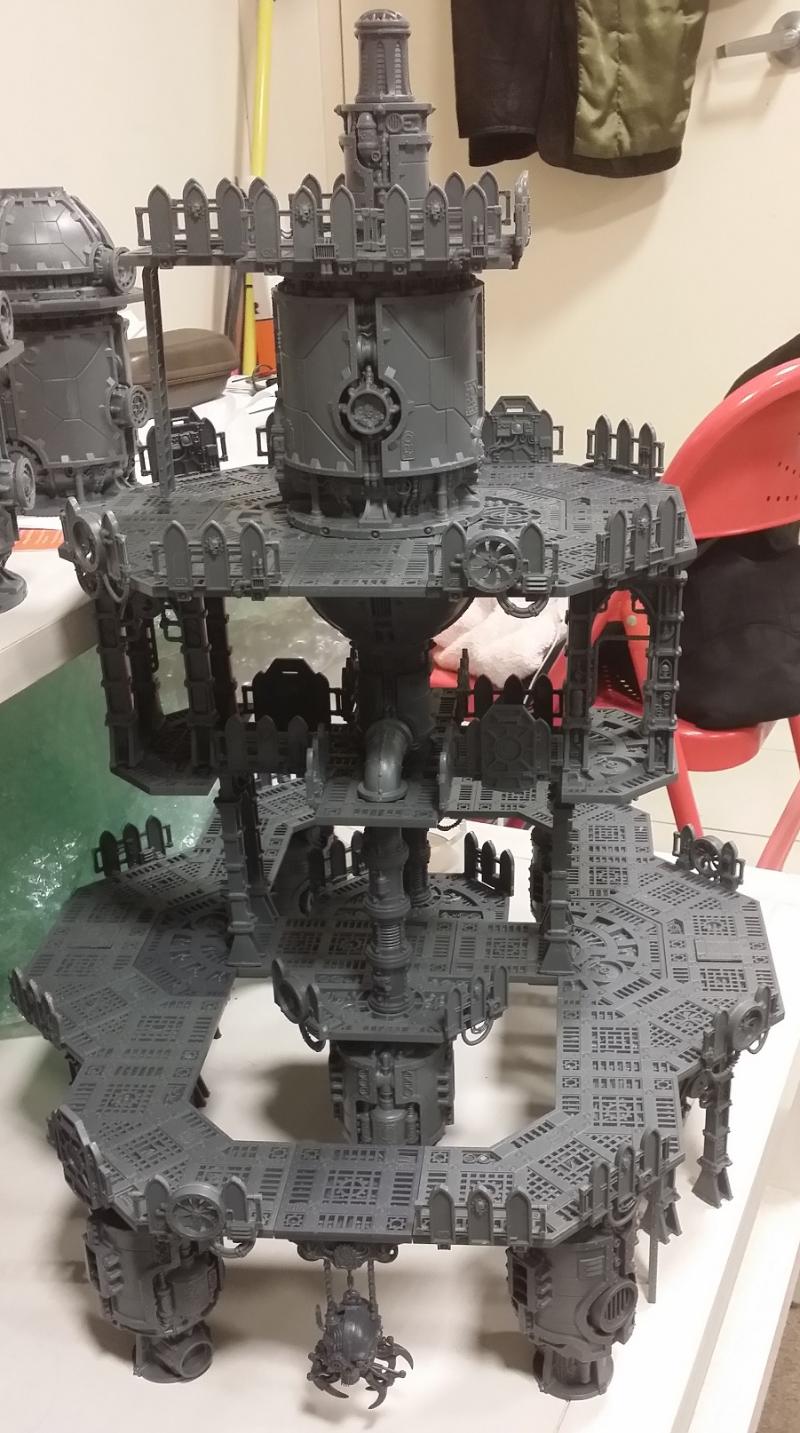
As I said, there are still some final touches to go - ladders are tough on this one, I want to find some good places for wires/cables, and might add something underneath the second level to to be under the dome/kiln. But that's my biggest (and probably it will remain the biggest) tower I've made.
Hope you like it!
BYE
21358
Post by: Dysartes
That is one crazy building, HBMC - it's going to be interesting to see where you add the ladders, as I'm not sure how you get between floors on this one...
119098
Post by: hvg3akaek
Wow, very impressive!
How heavy is the "Underpipe Bridge", and how stable is it sitting there? (I would have fears of accidentally knocking it loose when reaching for a mini).
86442
Post by: bobbuilder
thats a cool latest build, might use some of those ideas on the rig
494
Post by: H.B.M.C.
Ever since the overly-elaborate Underpipe Bridge that ended up being off-centre and far too big for it's own good I've been wanting to create a new version that, apart from having the pipe centred would be far more stripped down and simple - just a bridge, nothing fancy.
The other feature of the Underpipe bridge is in the name - the pipe running underneath it. The entire point was to create a pipe that ran between the Lift Tower and Rita Tower, but using the ruined/broken pipe parts from the Plasma Conduit kit. Not possible with the Mk.I Underpipe bridge due to it being off-centre, but now knowing what I'm doing this time it would be easier.
The Underpipe Bridge Mk.II
As always we start at the beginning with the base layout. I wanted to limit the usage of the double length straight pieces as they are still the hardest to come by and the most useful pieces overall. After this construction I have exactly 10 left, so I have to ration them:
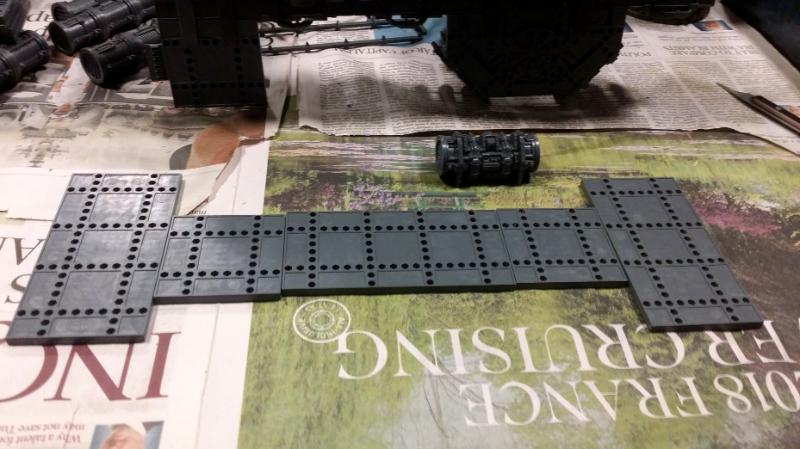
With the layout set I built the the pipes with the part in the middle that gives it a bit more flavour (rather than just pipes!) and also helps to space them out a bit more. The other thing to consider is where the feet that attach to the underside of the walkway would go. This is important as I have to be able to connect the various platforms together in a way that gives them strength (ie. two clips rather than one) and doesn't get in the way. In the end I went for two feet, which meant quite a bit of it was 'hanging' and not attached to the bridge. It worked out though:
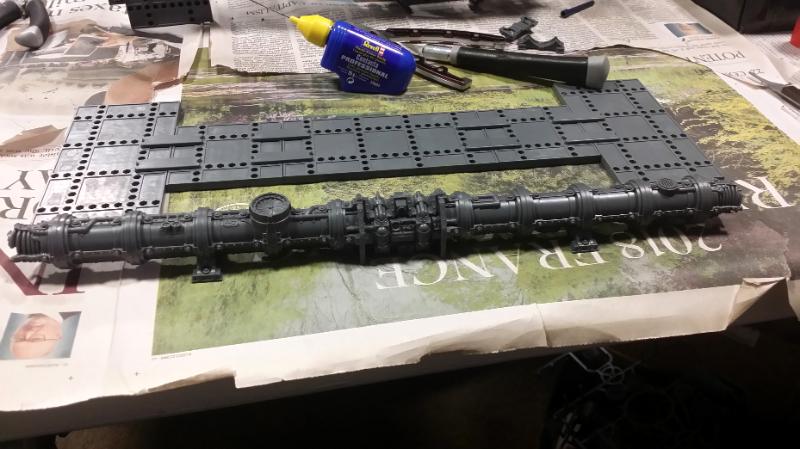
10 shields and 4 plates later (and a bout 5 mins holding the plates so they dried flat, rather than tilted slightly, so as to give a better hold when it put in place) and the far-less-ostentatious Underbridge Mk.II is complete:
But we're not done, as we have to make the other bits of the pipe network that leads, to the Underpipe Bridge from either side, starting with Rita Tower. In one of Ray Dranfield's tips he talks about how the plasma conduits are built with a grove on the inside at several places that lets you cut them into shorter lengths. Turns out that this is a bit of a bitch to do, even with an oiled blade, but after a lot of back and forth (literally) I got the section off that I needed. The best part though is that when you cut something like that, the two halves then fit together perfectly so you don't need to cut the other half to match. Instead you're just left with... half a pipe... hmm...
Anyway, the upside-down dome that sits under the third floor of Rita tower has a pipe end facing outwards. I did that so I could eventually add this pipe sticking out, and then add the damaged bit of pipe from the plasma conduit kit. Ends up looking like this:
And here's a slightly different angle:
Then over to the Lift Tower, where the middle elevator area has another outward facing pipe end that I wanted to snake upwards to join the piped on the Underpipe Bridge, and it ends up looking like this (bonus points for finding another use for that chunky turbine bit I have thousands of):
And a more fuller shot of the entire building now that it's actually complete:
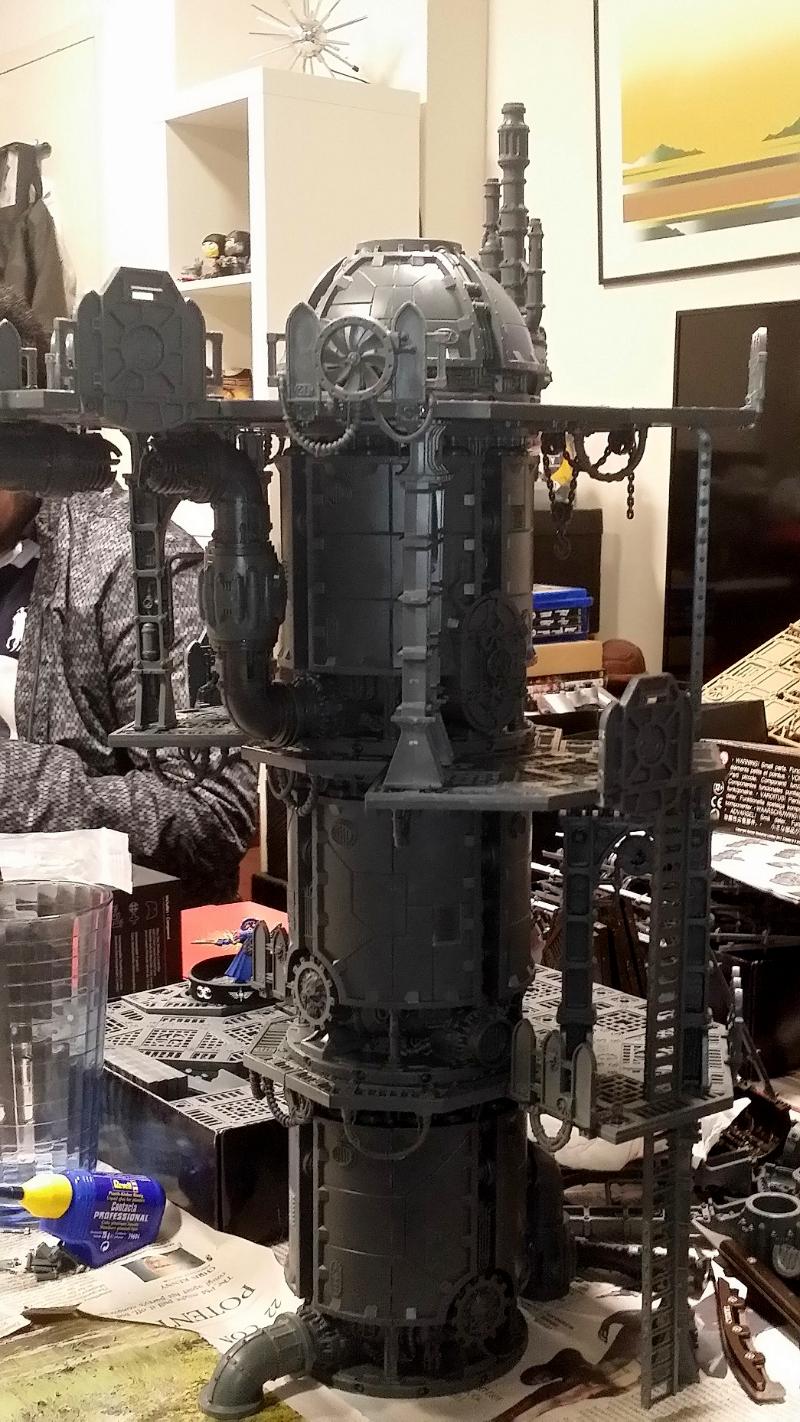
And lastly I put hanging wires, pulleys and hooks as well as lots of ladders onto Rita Tower to finish that off completely:
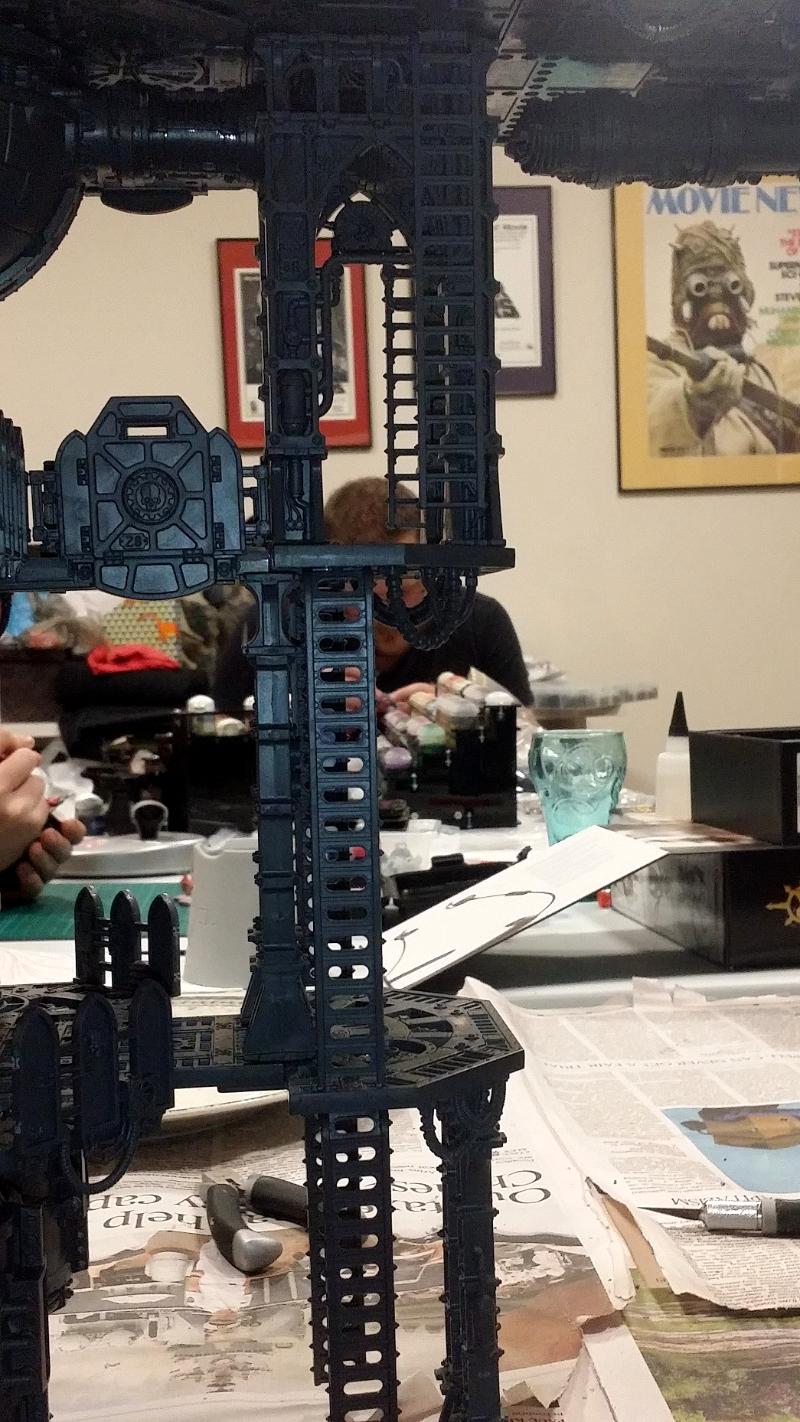
Coming up next: Bridgeapalooza 2 - Electric Bridgaloo!
BYE
1124
Post by: Captain Brown
H.B.M.C.
That is most ambitious and quite the custom build.
Cheers,
CB
120500
Post by: Gael Knight
I love how high that bridge is. What's the distance?
62565
Post by: Haighus
Agreed. What class of Titan could comfortably walk under it? I reckon Warhound for sure, with a Reaver being just a smidge too tall.
494
Post by: H.B.M.C.
Each level of the Sector Mechanicus terrain is 5", so what you see there is 15" off the surface of the table. Of course it doesn't have to be set at that level, it can span any height as long as there are slots for the square plates on either side.
The bridge itself is about 14.5" long.
21358
Post by: Dysartes
H.B.M.C. wrote:Each level of the Sector Mechanicus terrain is 5", so what you see there is 15" off the surface of the table. Of course it doesn't have to be set at that level, it can span any height as long as there are slots for the square plates on either side.
The bridge itself is about 14.5" long.
So you're saying it's more than a footbridge?
494
Post by: H.B.M.C.
Just before the first time we used all this terrain in a big day of Necromunda, I was up late (and then early) putting together a selection of walkways to connect all the various buildings. I made two straight, two curved, two wiggly S-shaped ones, the original U-Shaped walkway, and this fun thing. This was good enough for one table, but somewhat limited. Also, the walkways were all at ground level. The straight ones balance pretty well on higher levels, but for the most part they're restricted to the floor. As the second phase of this Industrial Insanity project is "the only way is up", I figured some higher walkways would be good, plus I wanted to double up on some of the other walkways I had already made.
That brings us to yesterday, and...
Bridgeapalooza 2 - Electric Bridgaloo!
The first step was another set of curved walkways. The two I have already are nice, but if two are good, then surely four would be more useful? They start with a very simple layout, each one bending the opposite direction:
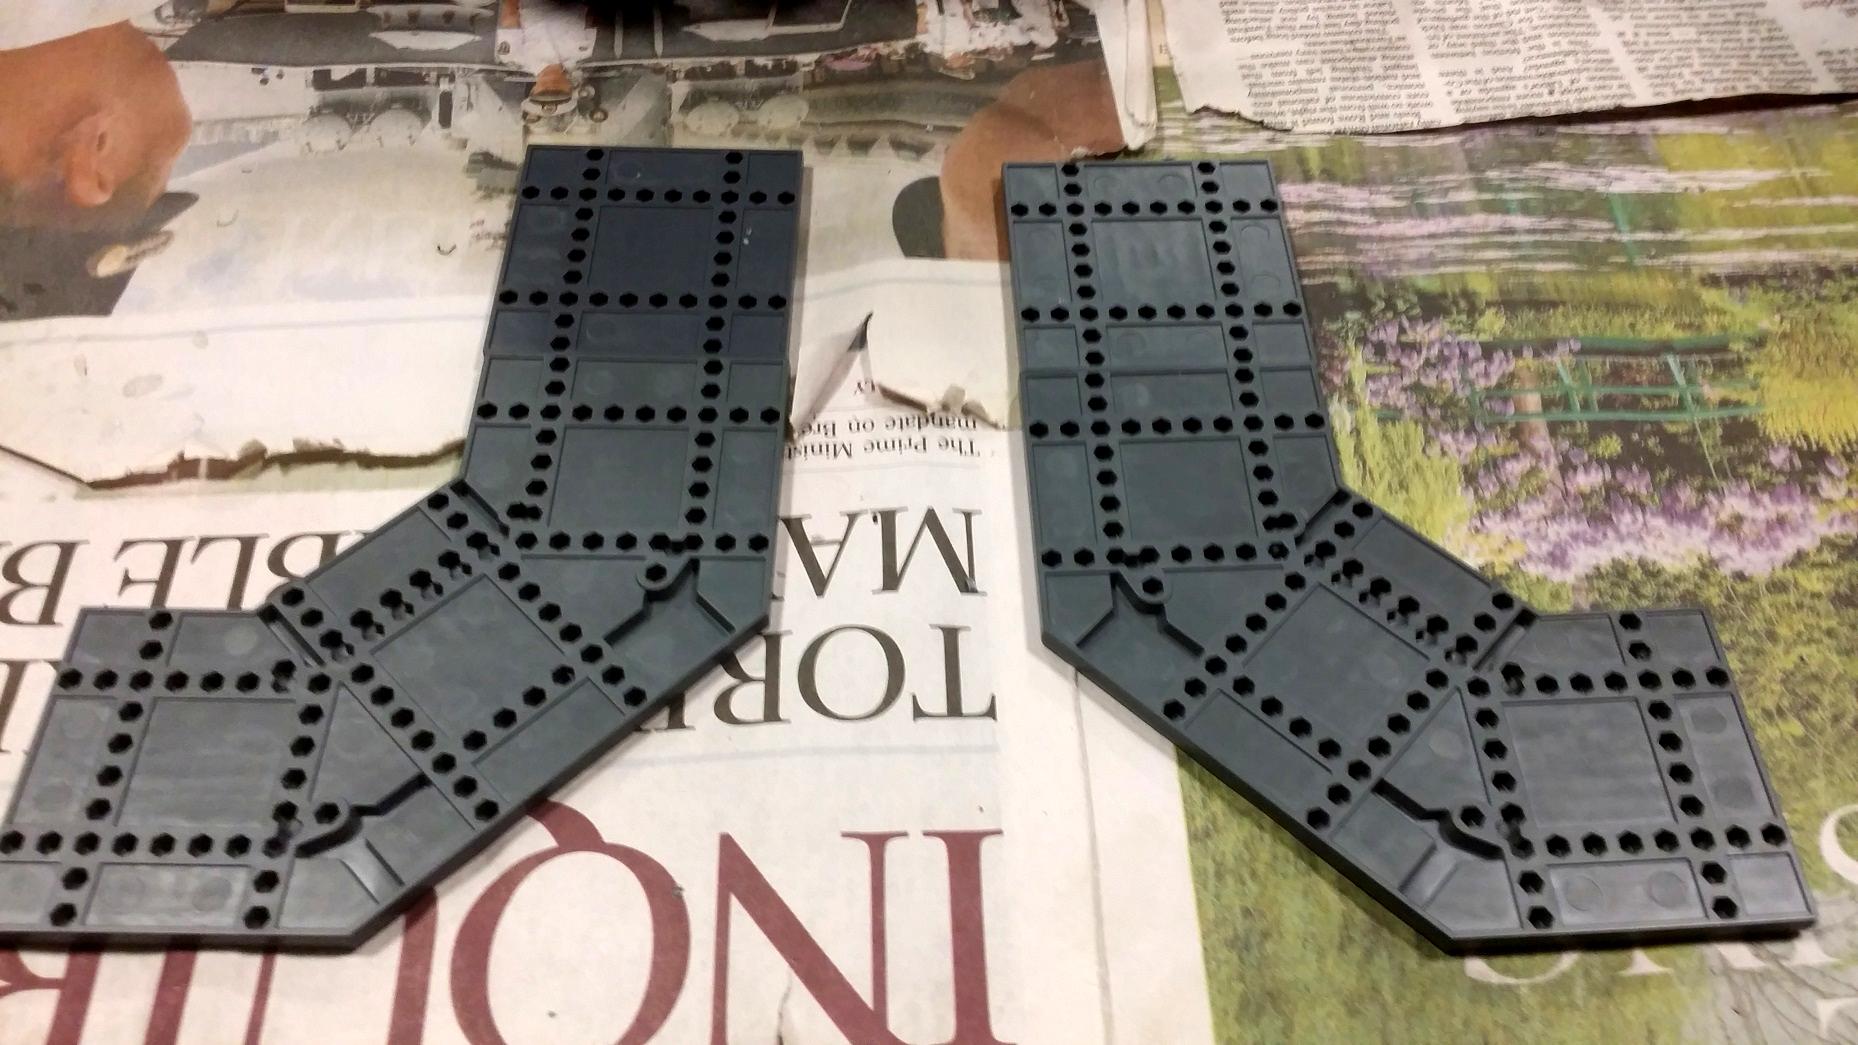
I wanted to make one of them a bit more industrial than normal, so rather than going for the usual struts to support it, I went with a pair of furnaces (remember, I have like 15 of the damned things spare, so might as well use 'em!):
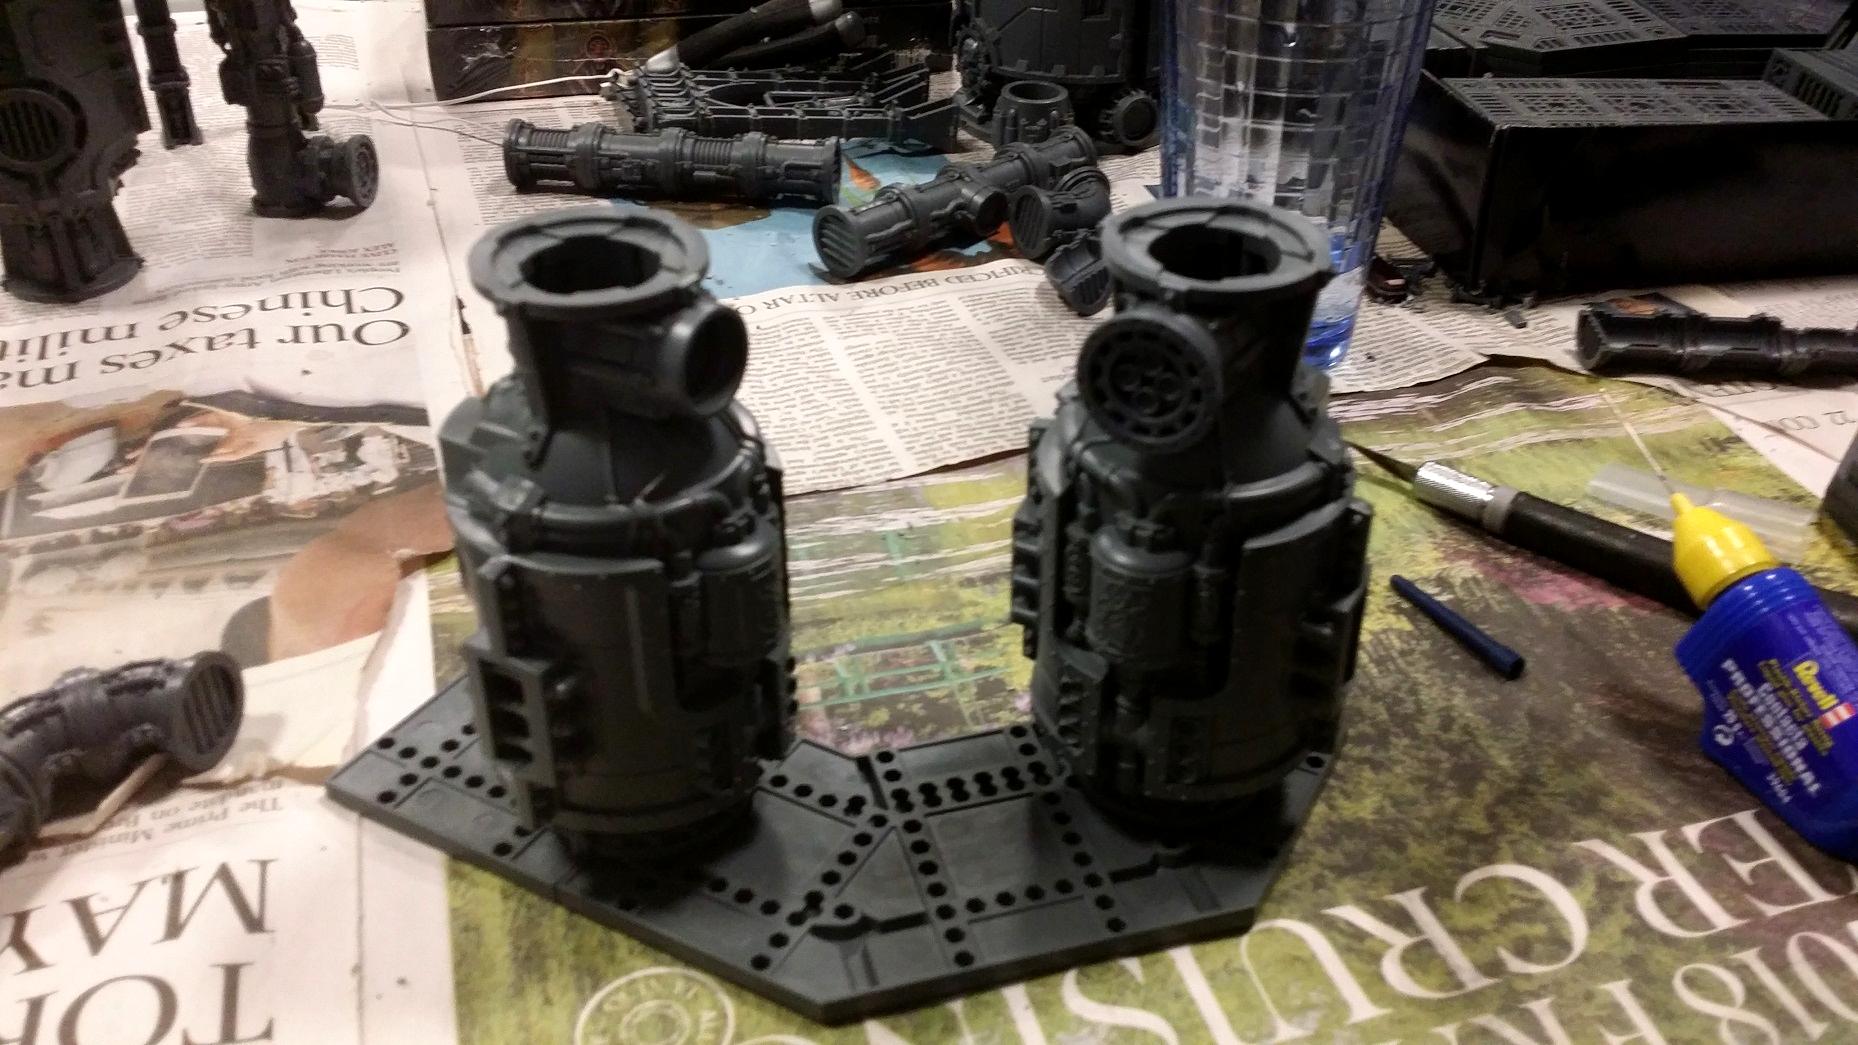
I also wanted them to be linked in some way, rather than both being freestanding, so after a bit of fiddling I found the right parts to have a pipe connecting them:
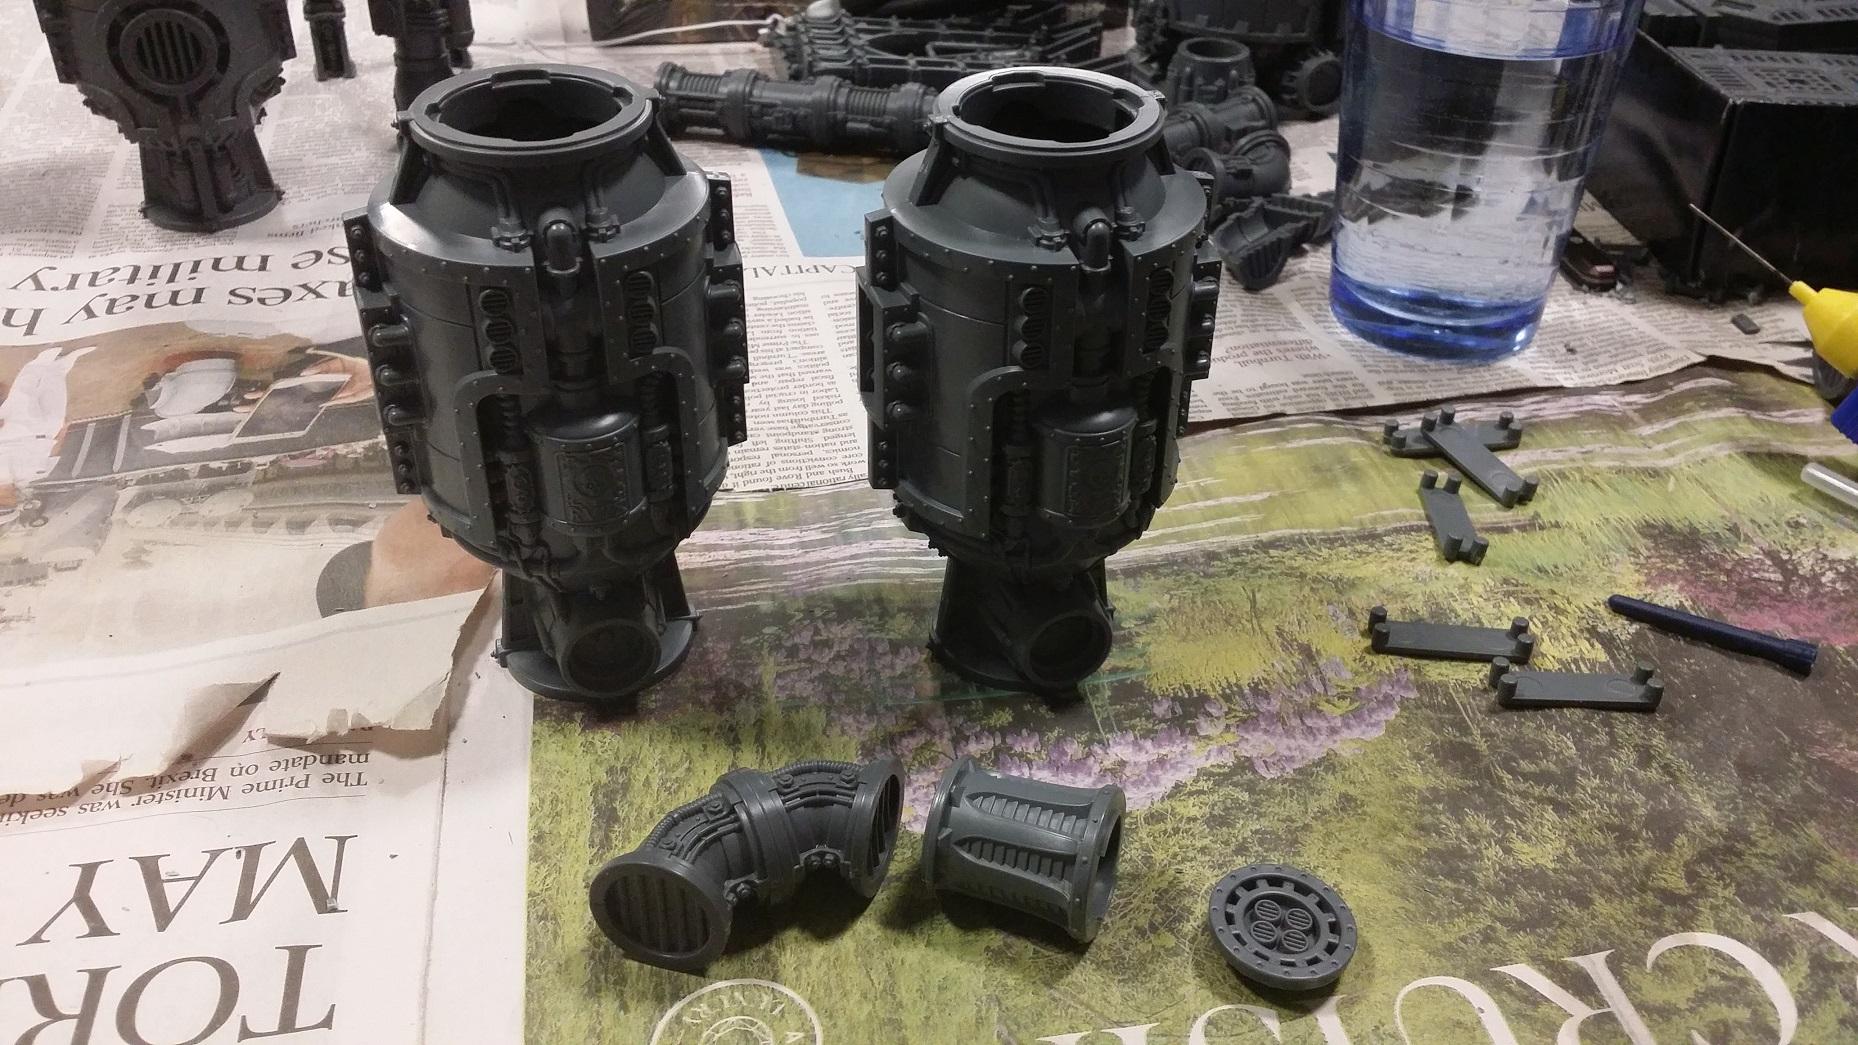
Then I added even more industrial nonsense to one side once everything was done:
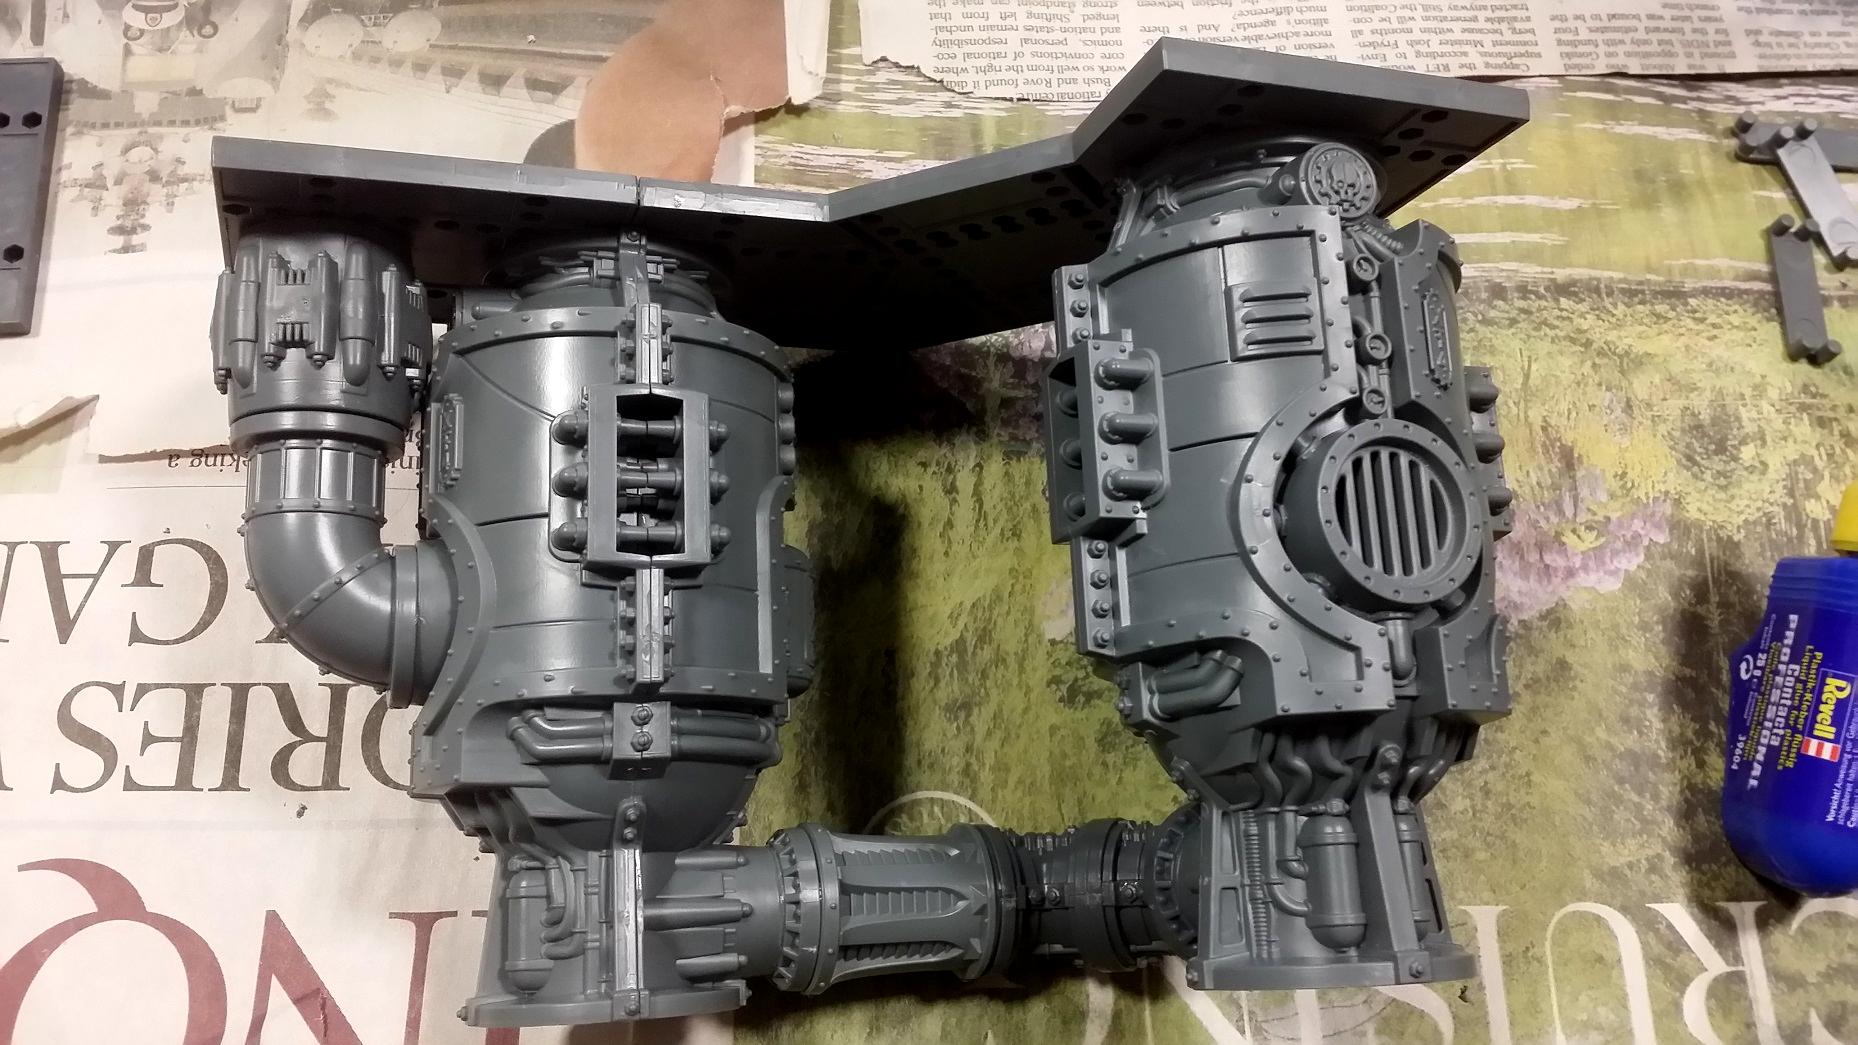
The other curved walkway is fairly normal one, and with that they were both complete:
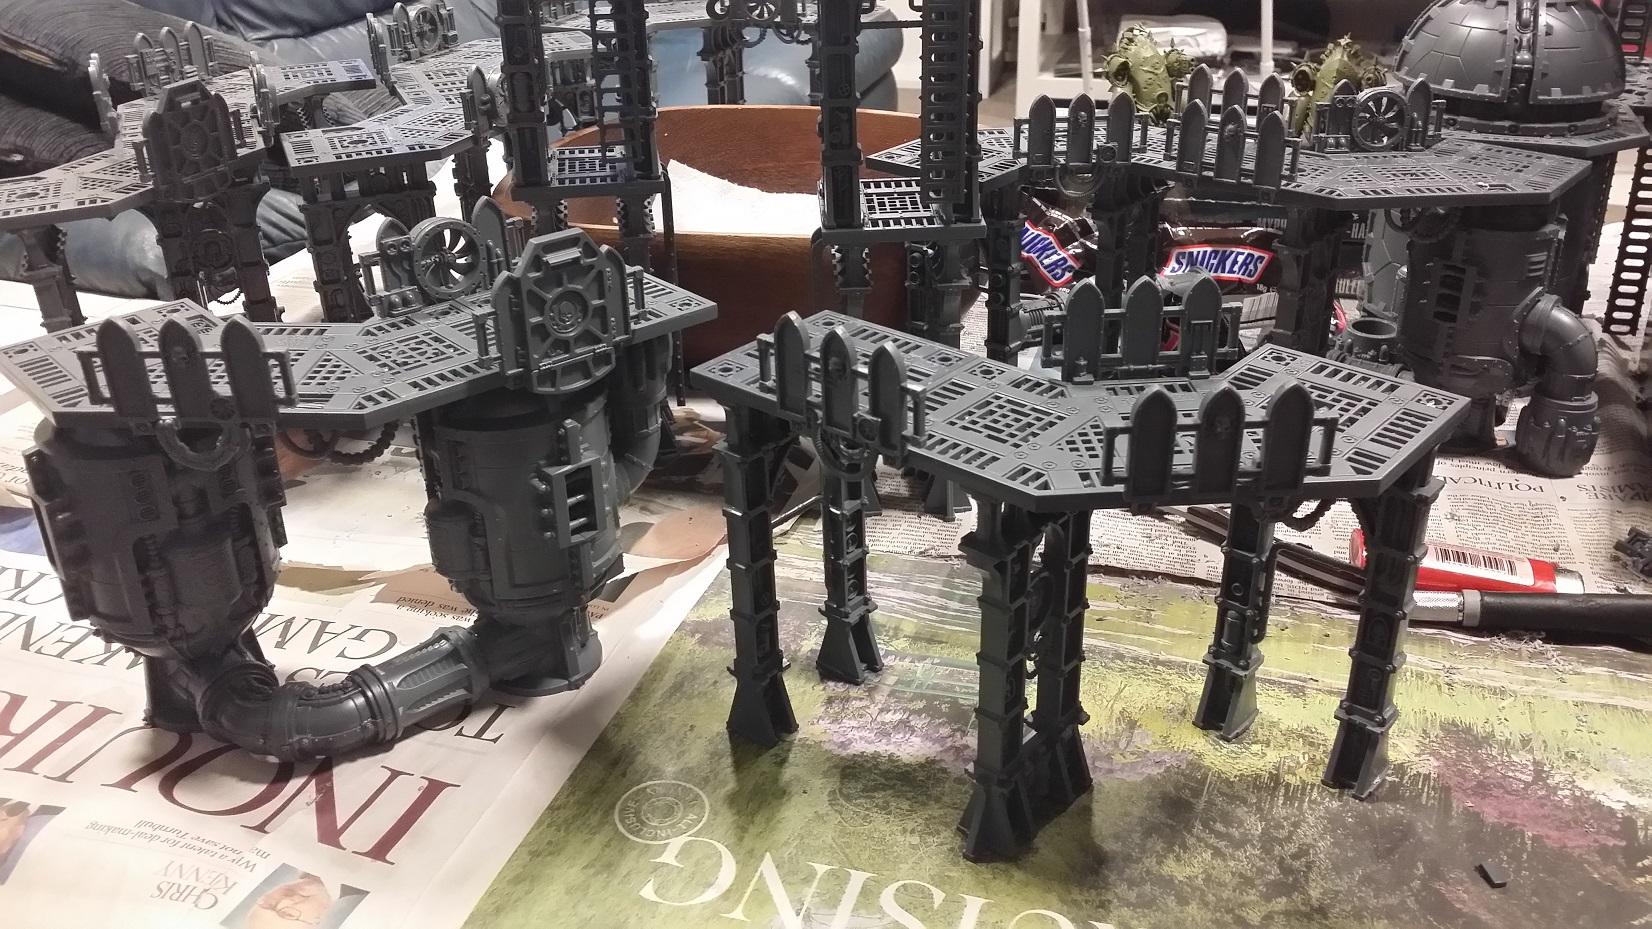
Next up was another pair of wiggly walkways, each one curving away in a different way. My two originals are useful, but having each one curve in one direction did limit how I could use them somewhat. You can see them both towards the right-hand side of this picture, and it took a while to figure out how to use both and there were times I wished they were identical. With an extra pair, now I'll have two of each.
Again, a simple layout:
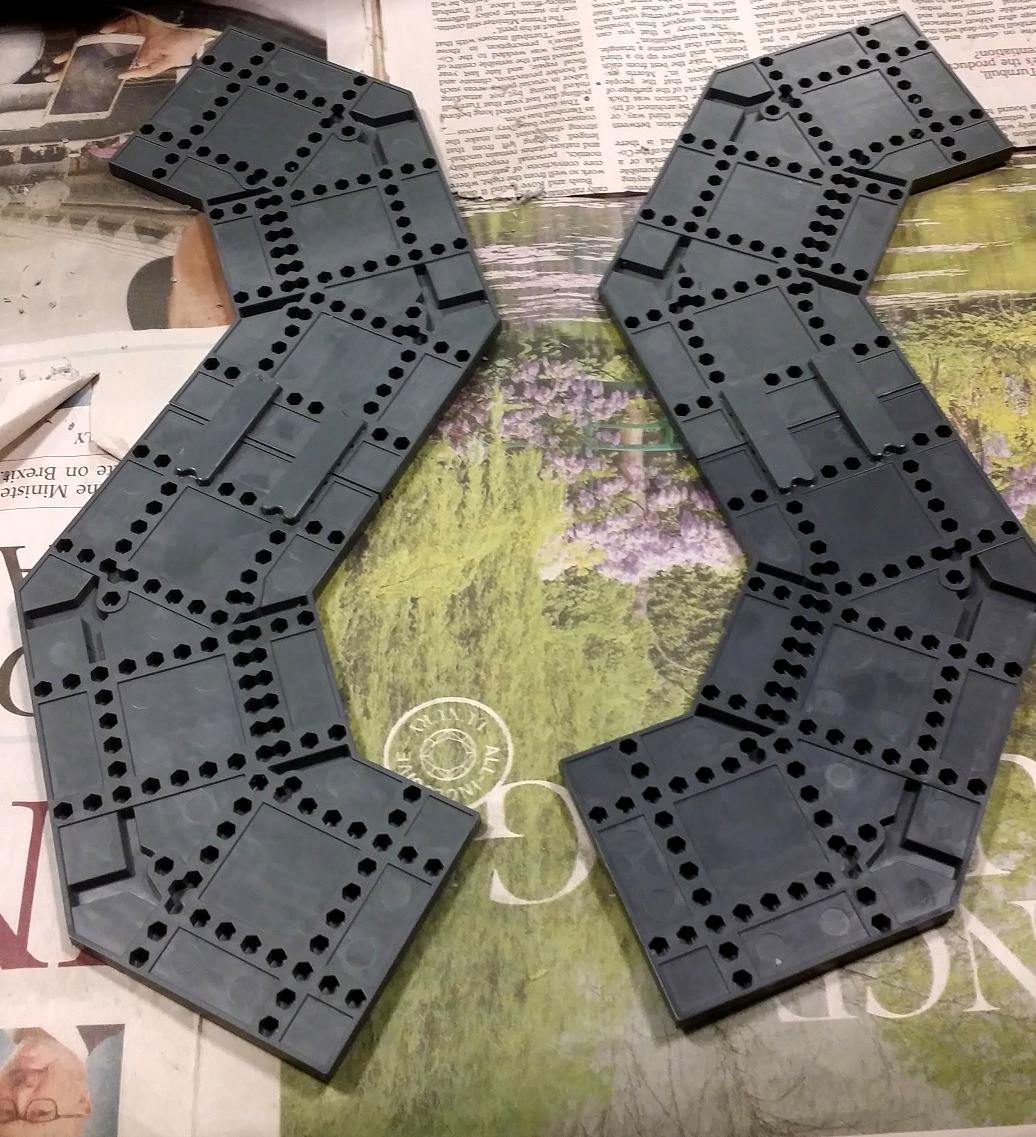
I learnt from the last set that you need a bit more than 3 sets of supports, so went with an extra strut in the middle:
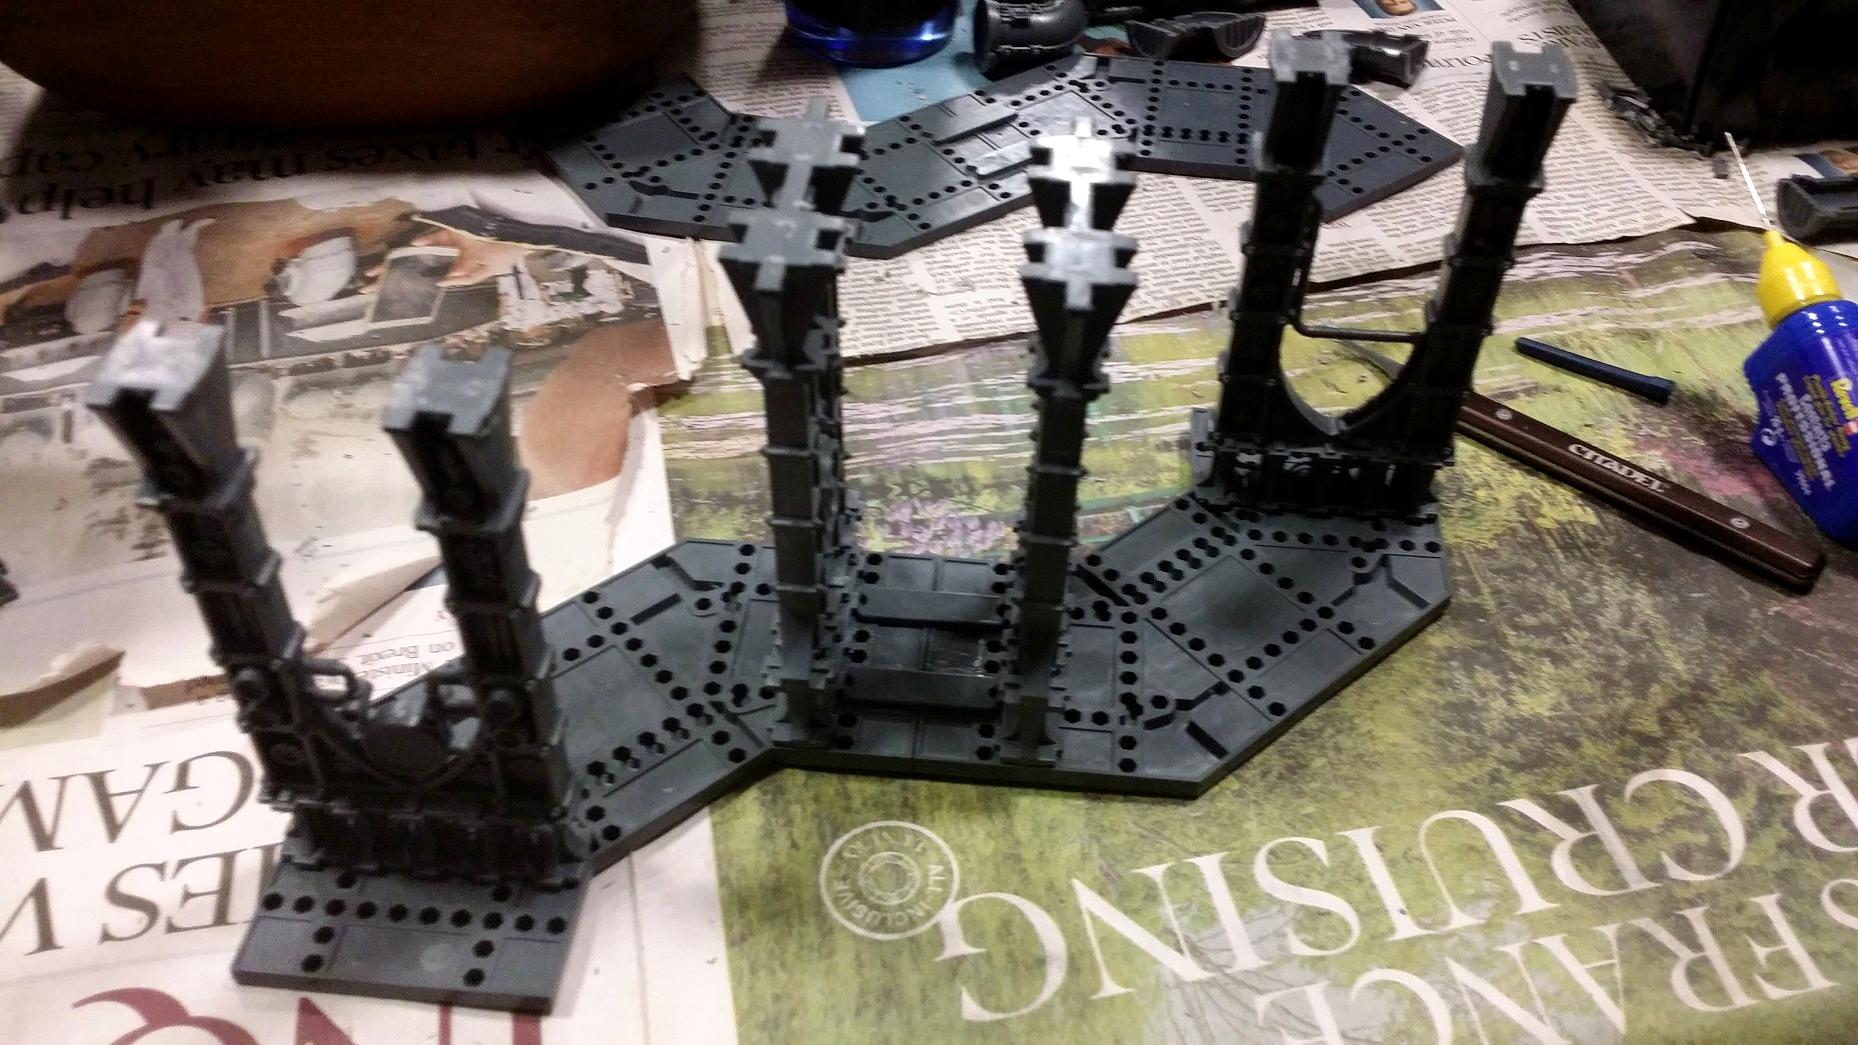
And another bit of industrial nonsense just to add some variety (and to find more uses for this weird part):
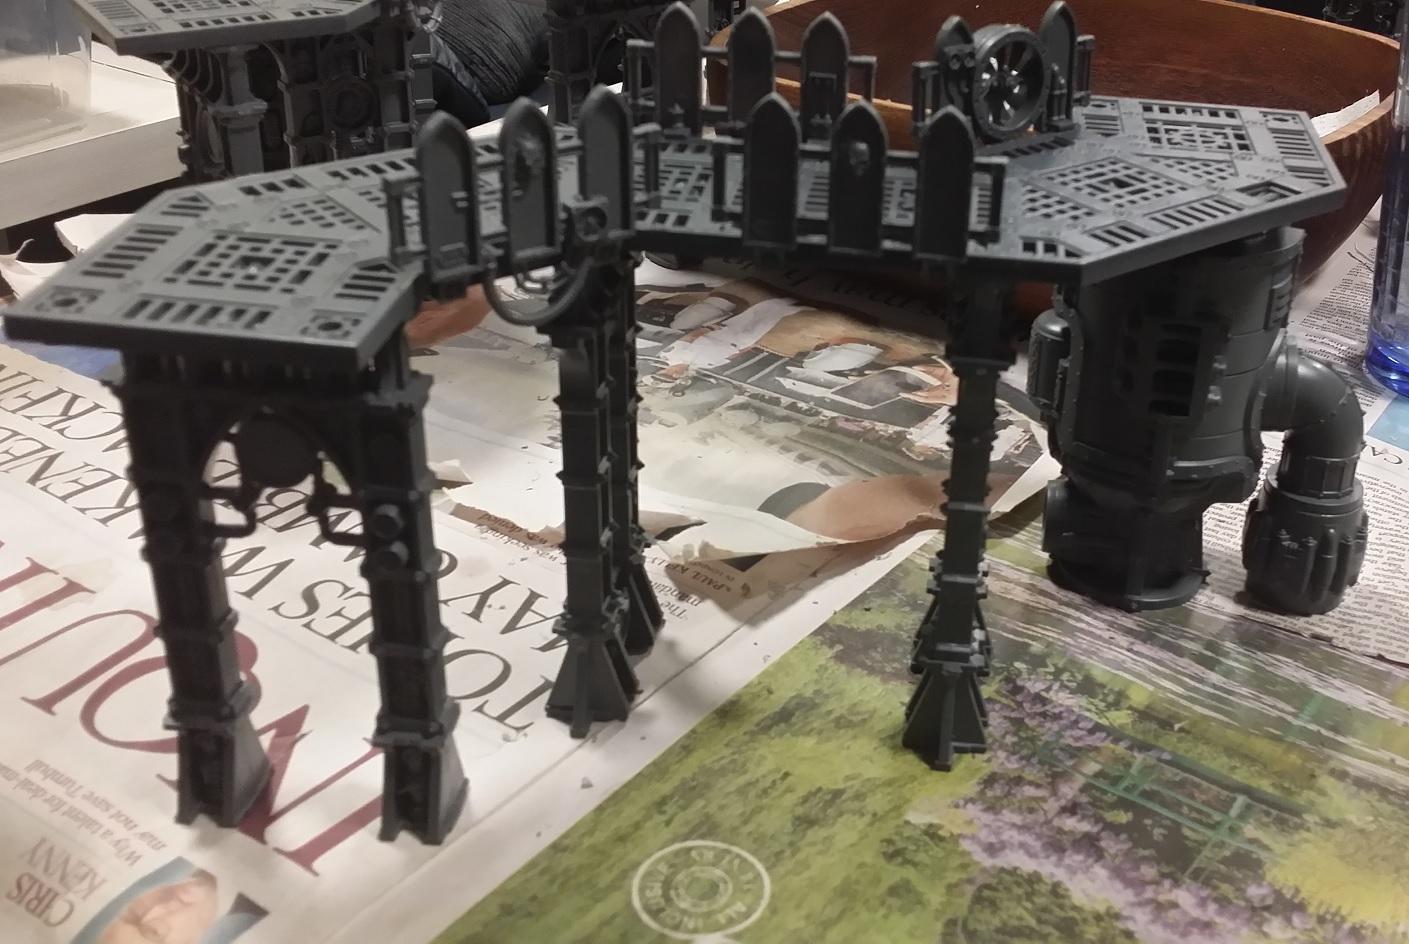
And here's the whole collection of wiggly walkways:
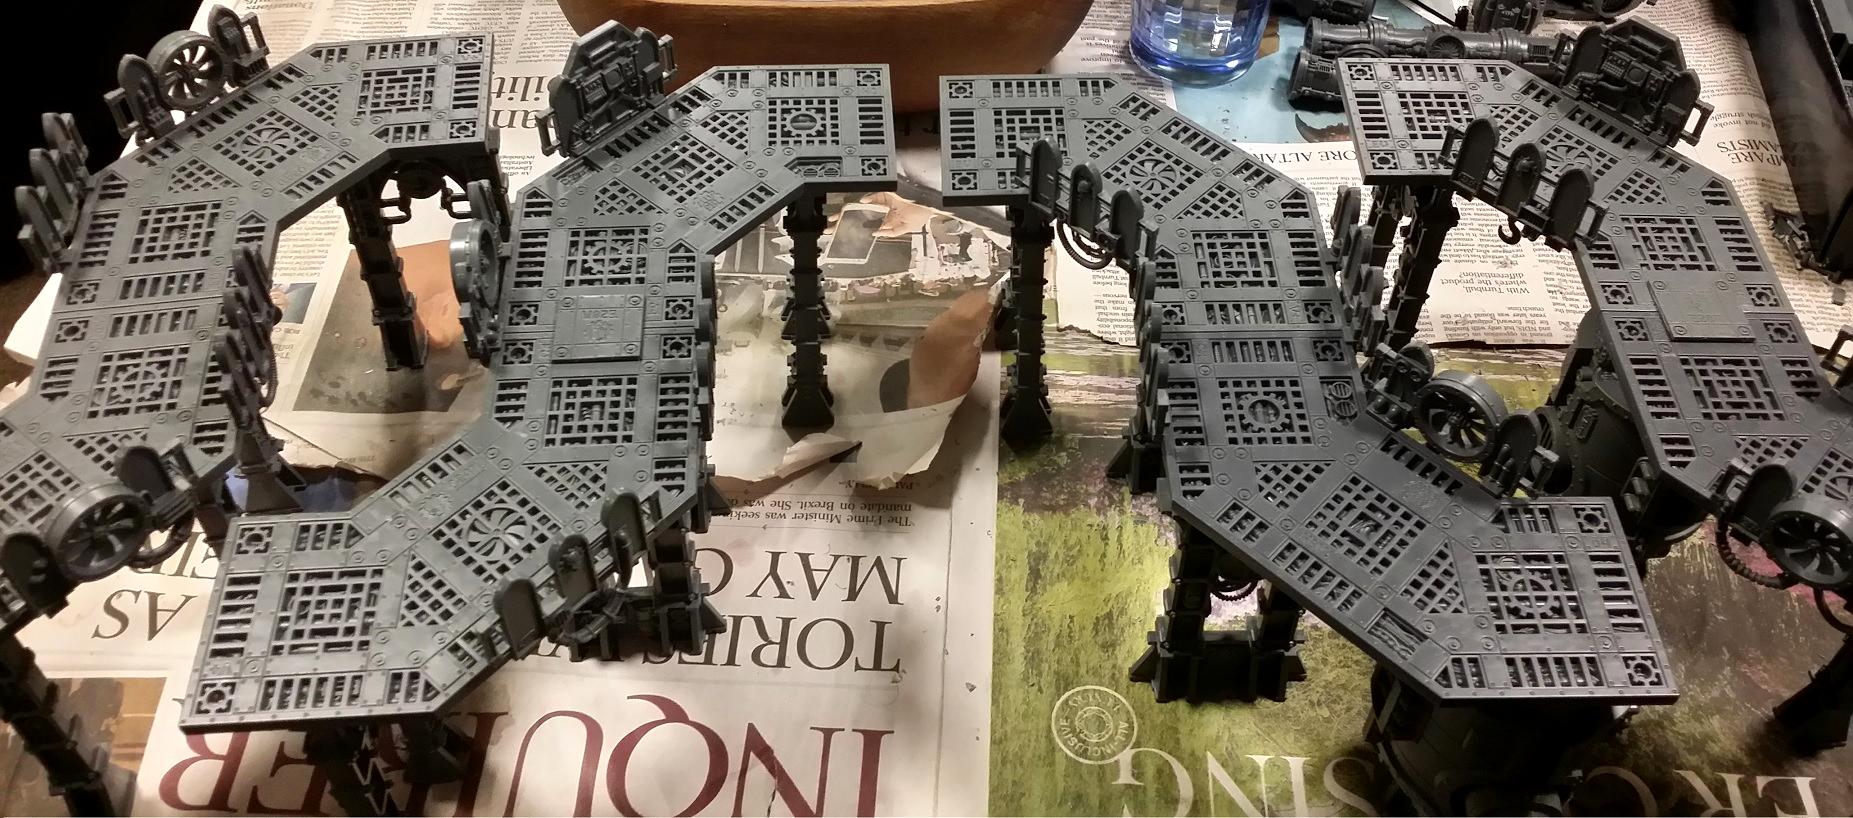
Now we come to what I'm calling the "Double High" bridges. Originally I was just going to stick one strut right in the middle, and then stick that to another one, and that'd be that. The piece would never be free-standing, but it didn't need to be as the square plates at each end would hold the piece in place. Apart from not being tall enough in practice, I went against this idea in the end because I came up with something better and far, far more modular.
To start with, a not-so-simple layout. I know, it's two straight pieces and one clip to connect them, but that's significant because normally I'd use two for added strength. One is kinda risky, but as you'll see how the struts work it will be quite secure in the end:
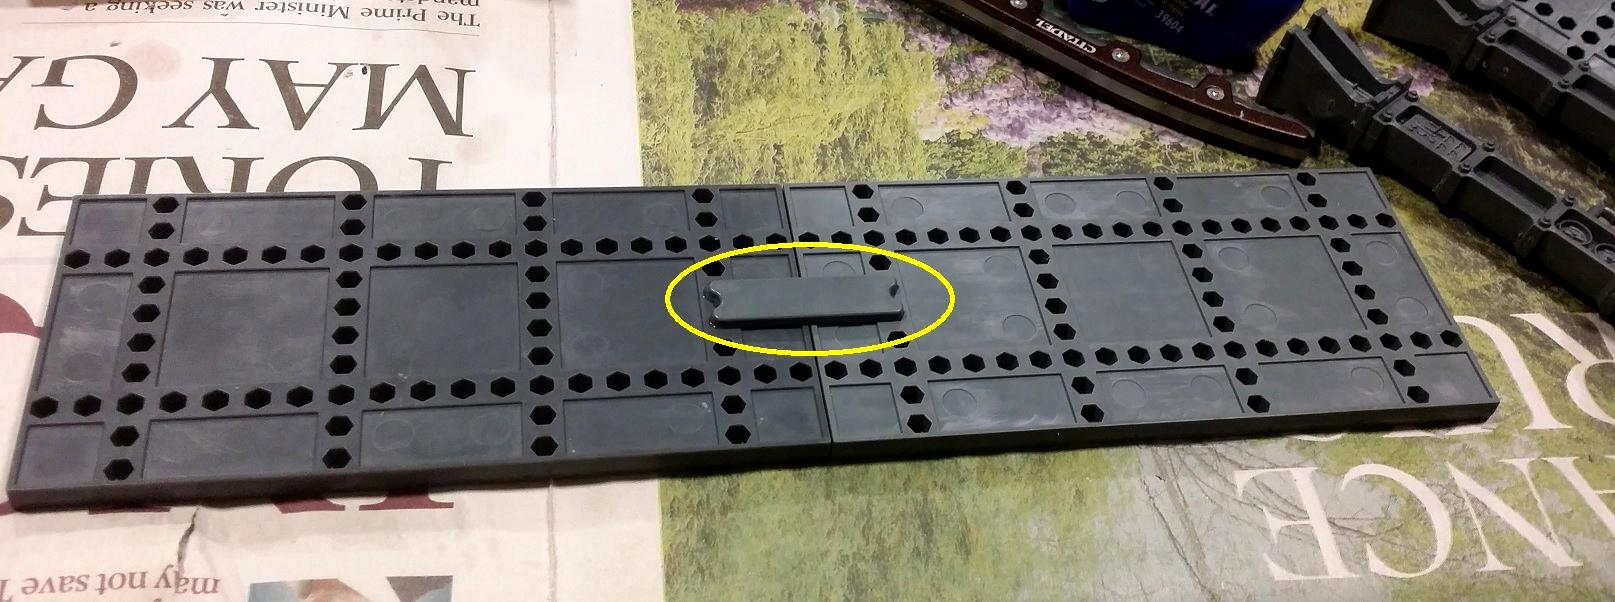
The trick with this building is actually the single square platform on the first level. Not only does this provide greater stability and the height needed to make this all work, it also adds the modular part of this (which you'll see in a bit). And, as you might be able to tell from that single square piece, I've shaved down the four rivets. The lessons I learnt from having to pull Rita Tower apart to get rid of those things so the feet of all the struts would glue properly are being applied here:
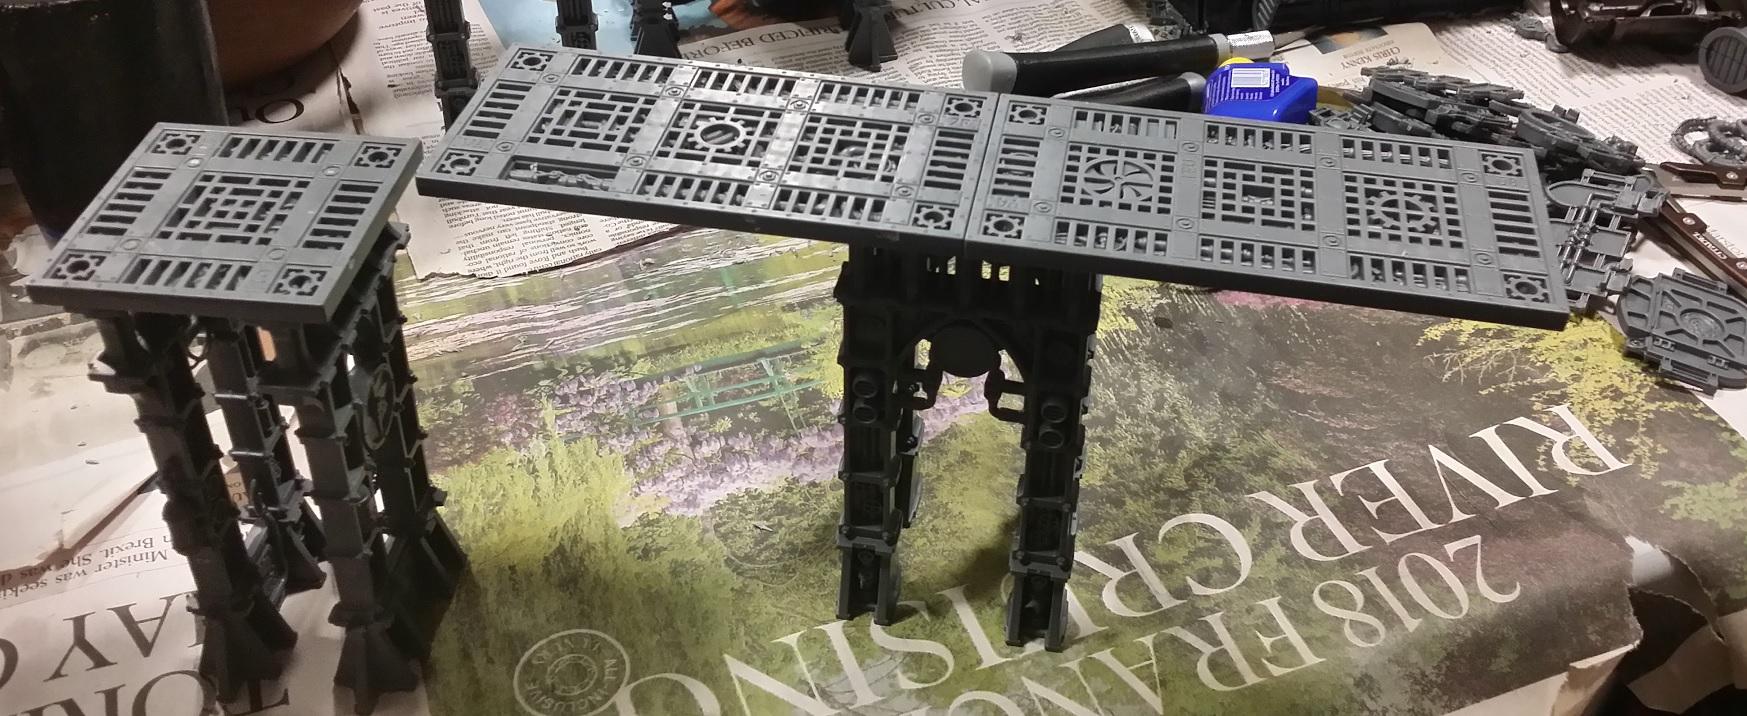
This is the test fit pre-glue, and now you can see where this is going:
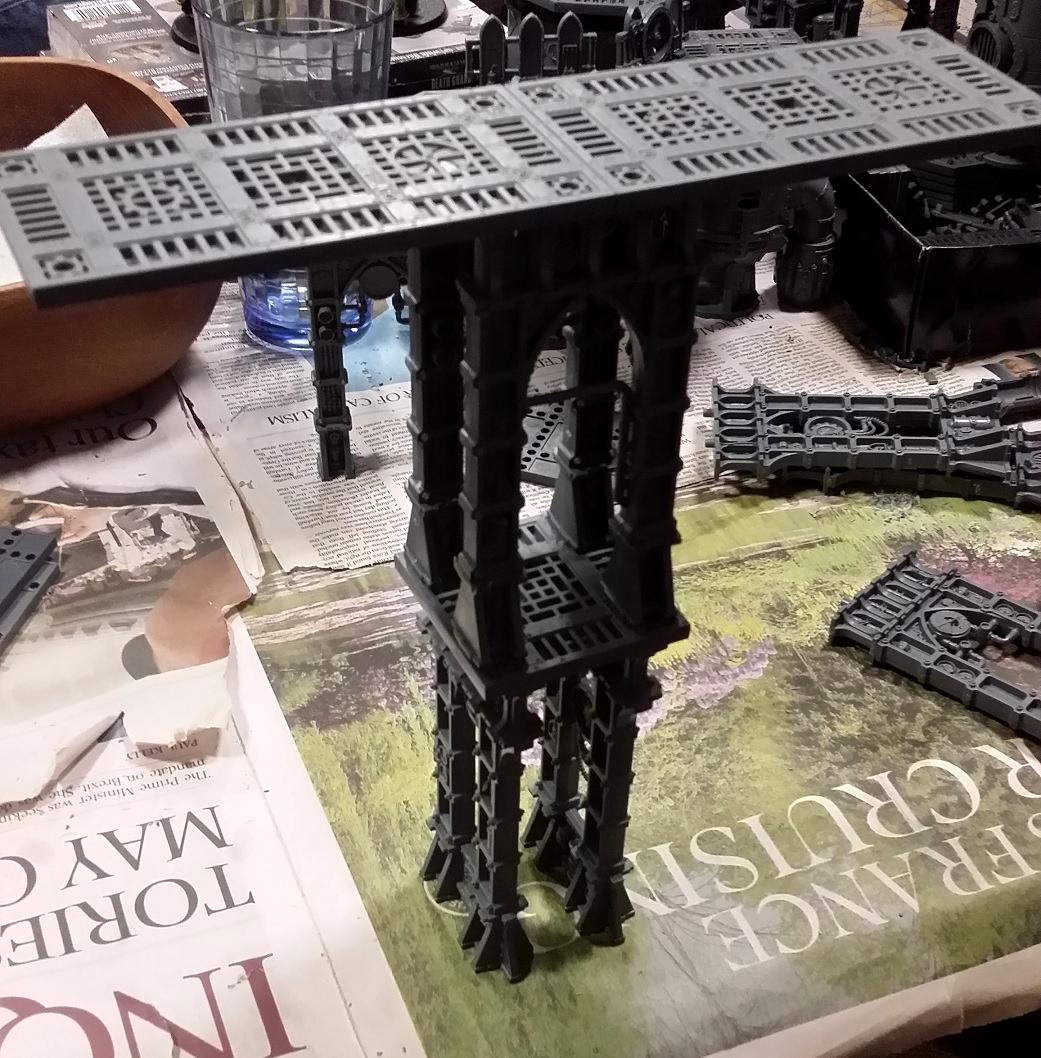
Some shields, ladders and square plates later, and the pair of double high walkways are complete:

I was being more careful with shield placement this time, intentionally leaving walk-way sized gaps so that you can do things like this:
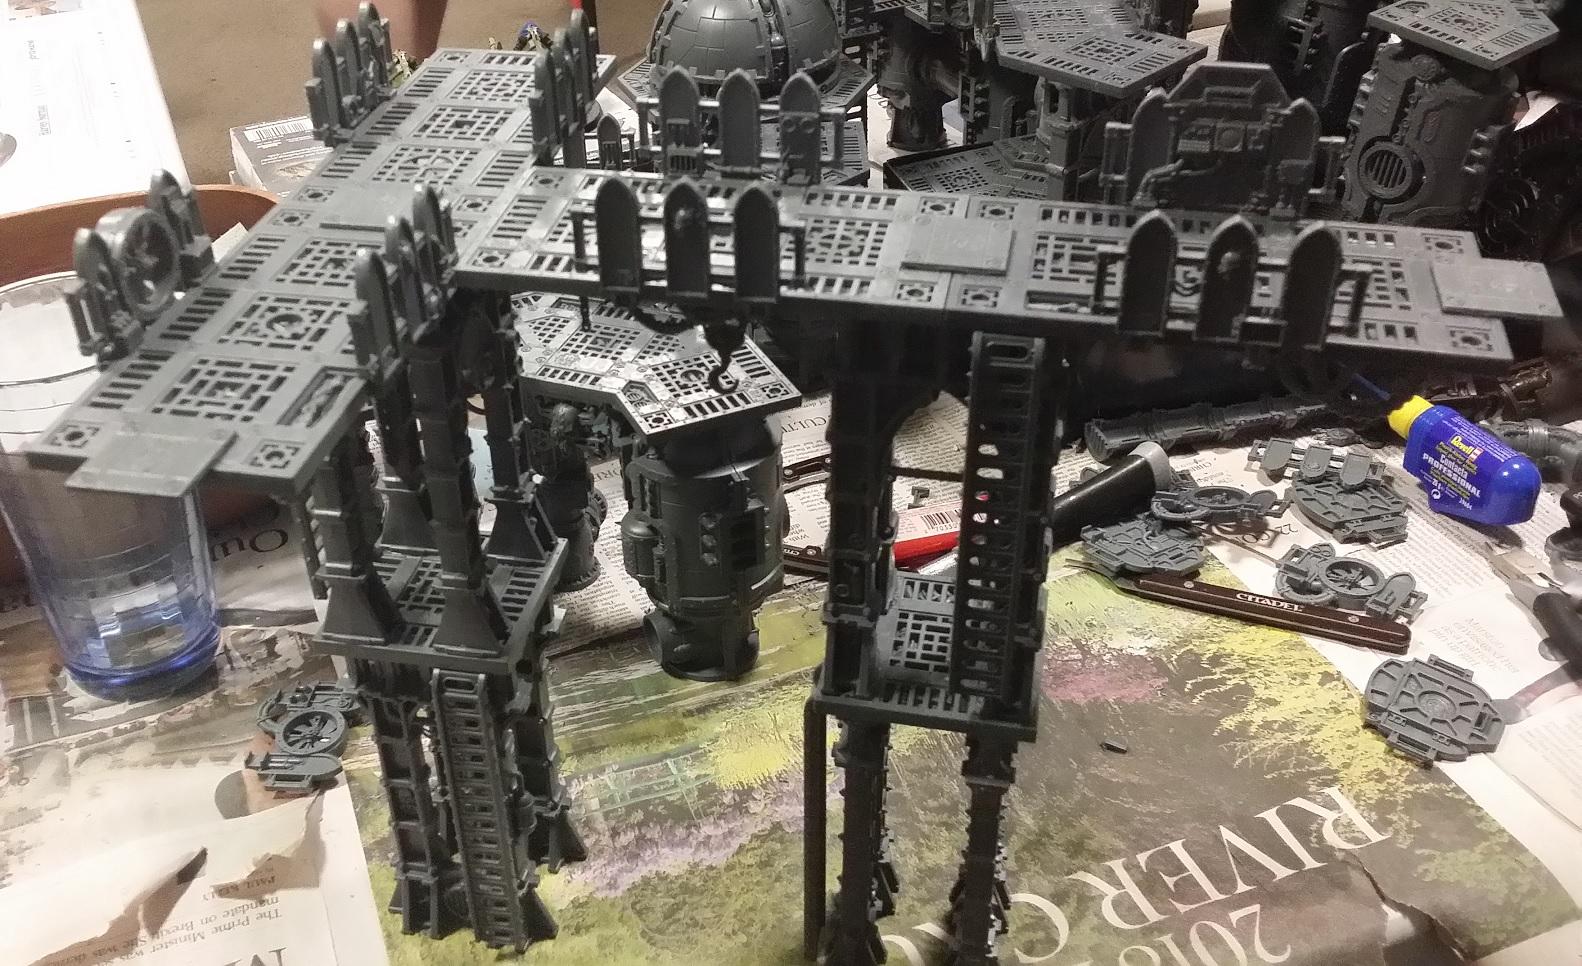
Now I said the key to this walkways was the small lower square, well this is why:
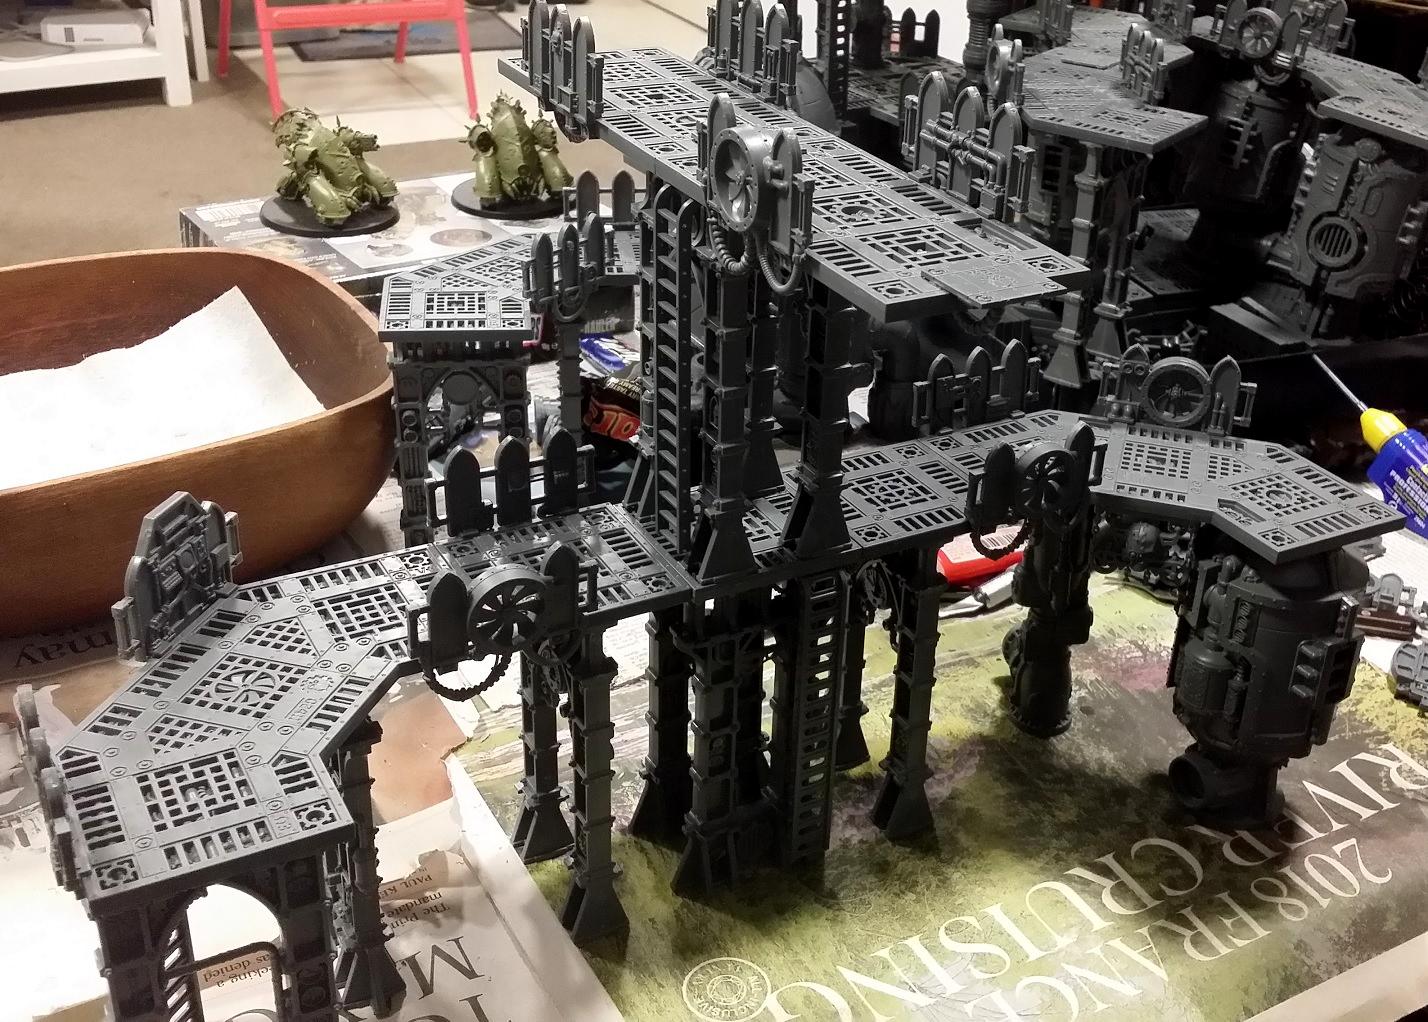
I intentionally chose the struts with the separate legs so that there would be gaps to walk through on that first level square, and it means that when you start to combine them with other walkways you get results like this:
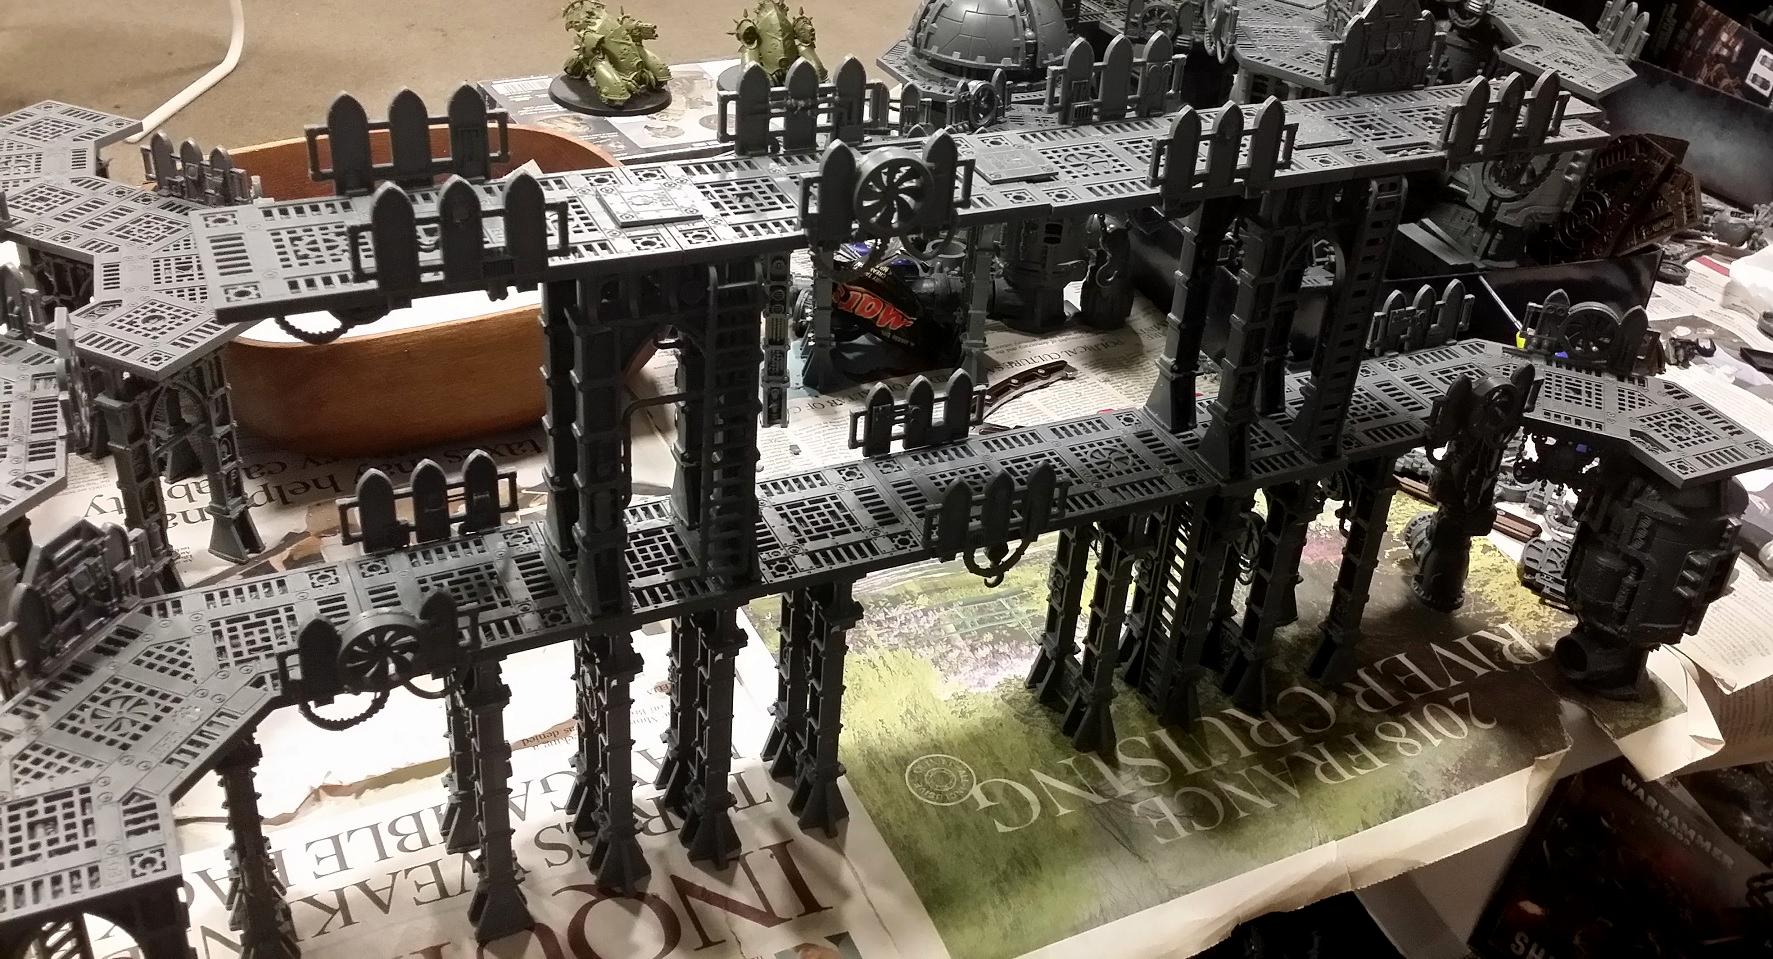
I'm not sure if I'll build any more walkways, of this height or otherwise, as I am running seriously low on the double-length straight platforms. Need to find a new source of those. And if you're wondering why I didn't make a second set of standard straight walkways to go with the pair I already had, it's because I already did as part of the Three Towers/Modular Walkways build. They're slightly longer than the original straight walkways, but that's fine.
Next up? We get a little more industrial with some non-platform buildings.
BYE
17738
Post by: Briancj
But I love that part. It is glorious for making jet engines out of.
494
Post by: H.B.M.C.
Very small update - I haven't built anything new - but I finally, after a long time looking, managed to find a place selling both of the Killzone: Deathworld Forest boxes that I've been after for a while. Not cheap, but it's two of them, and when combined with a couple of of Derelict Factorums, some old CoD stuff, and GW's vines and bracken, and I can make a proper death world table. If this is Industrial Insanity, then it'd be... Deathworld Delirium.
62565
Post by: Haighus
H.B.M.C. wrote:Very small update - I haven't built anything new - but I finally, after a long time looking, managed to find a place selling both of the Killzone: Deathworld Forest boxes that I've been after for a while.
Not cheap, but it's two of them, and when combined with a couple of of Derelict Factorums, some old CoD stuff, and GW's vines and bracken, and I can make a proper death world table.
If this is Industrial Insanity, then it'd be... Deathworld Delirium.
Excellent! Will that be in its own thread? Please post a link here if you do start one
51769
Post by: Snrub
Well that is a magnificent table there, H. Really can't wait to see it finished.
Massive amount of work you've put into it so far. Any chance you could write up a Dakka article or something of all tips and tricks for working with these kits?
494
Post by: H.B.M.C.
So... a random link on the Necromunda Terrain facebook group led me to discover an interesting selection of very useful pieces, specifically:
Freestanding industrial walkways ( Type A, Type B).
Half-Size Struts ( Type A, Type B).
Stairs ( OMG!).
The freestanding walkways are a good way of connecting higher levels of buildings with something a little more secure plus they save me from having to use up my dwindling amounts of double-length straight walkways. The half-size struts solve the immediate problem of trying to integrate the Thermic Plasma Regulators with everything else, as now I can support the walkways between them without having to use the regulators as the supports.
And the stairs... wow. I've wanted stairs for the Sector Mechanicus stuff since they came about. These are 5" high one-level stairs. They're basically perfect. And they are designed to clip snugly around Sector Mechanicus walkways. Great!
Thank you.
Neither can I.
 Snrub wrote: Snrub wrote:Any chance you could write up a Dakka article or something of all tips and tricks for working with these kits?
That's actually not a bad idea. One of the aims of this blog was to mention all the various tricks and techniques that go with these kits, so I could collate them into a single article.
17738
Post by: Briancj
Digital Fabrication, filling the gaps.
16769
Post by: Kinetochore
Cheers for the terrain plug!
looking forward to seeing what you can conjour up with the bits!
If you need any other parts or shapes let me know
90488
Post by: The Riddle of Steel
So many cool and creative ideas here. Thanks for the inspiration. Now when are you going to start painting this insane collection?
686
Post by: aka_mythos
Have you considered using any of the Sector Fronteris/Moonbase terrain, since those visually blend with the Sector Mechanicus kits?
494
Post by: H.B.M.C.
So I picked up one of these on the cheap (and another Fragdrill - the Blast Pit will soon be realised!) and I'm not sure what to do with it.
"Just build it, dummy!"
Well, yes, but I already have two freestanding Skyshields and another that I have build into a large complex made up of 4-ish Bastion kits (I'll post pics of my fortification collection eventually). So I'd rather incorporate it into the Sector Mechanicus stuff, but I'm wondering how.
I've seen a few examples:
... and if I'm being honest that third pic makes me want to get another so I can build that, but I'm wondering if there are perhaps better ways to do this.
Any thoughts/ideas from anyone??
aka_mythos wrote:Have you considered using any of the Sector Fronteris/Moonbase terrain, since those visually blend with the Sector Mechanicus kits?
Got two full sets of that. Haven't put it together yet.
17738
Post by: Briancj
Mail the stuff to me, and I'll take care of it.
90488
Post by: The Riddle of Steel
I agree, the third picture looks excellent: it looks good, fits naturally and is very practical by giving a large usable space. This could be for bigger units in 40k-scale games or for some epic face-offs in the skirmish games.
-Rids
494
Post by: H.B.M.C.
Just a quick note to say that the Deathworld Kill Zones showed up today! Very happy with my reinforcements:
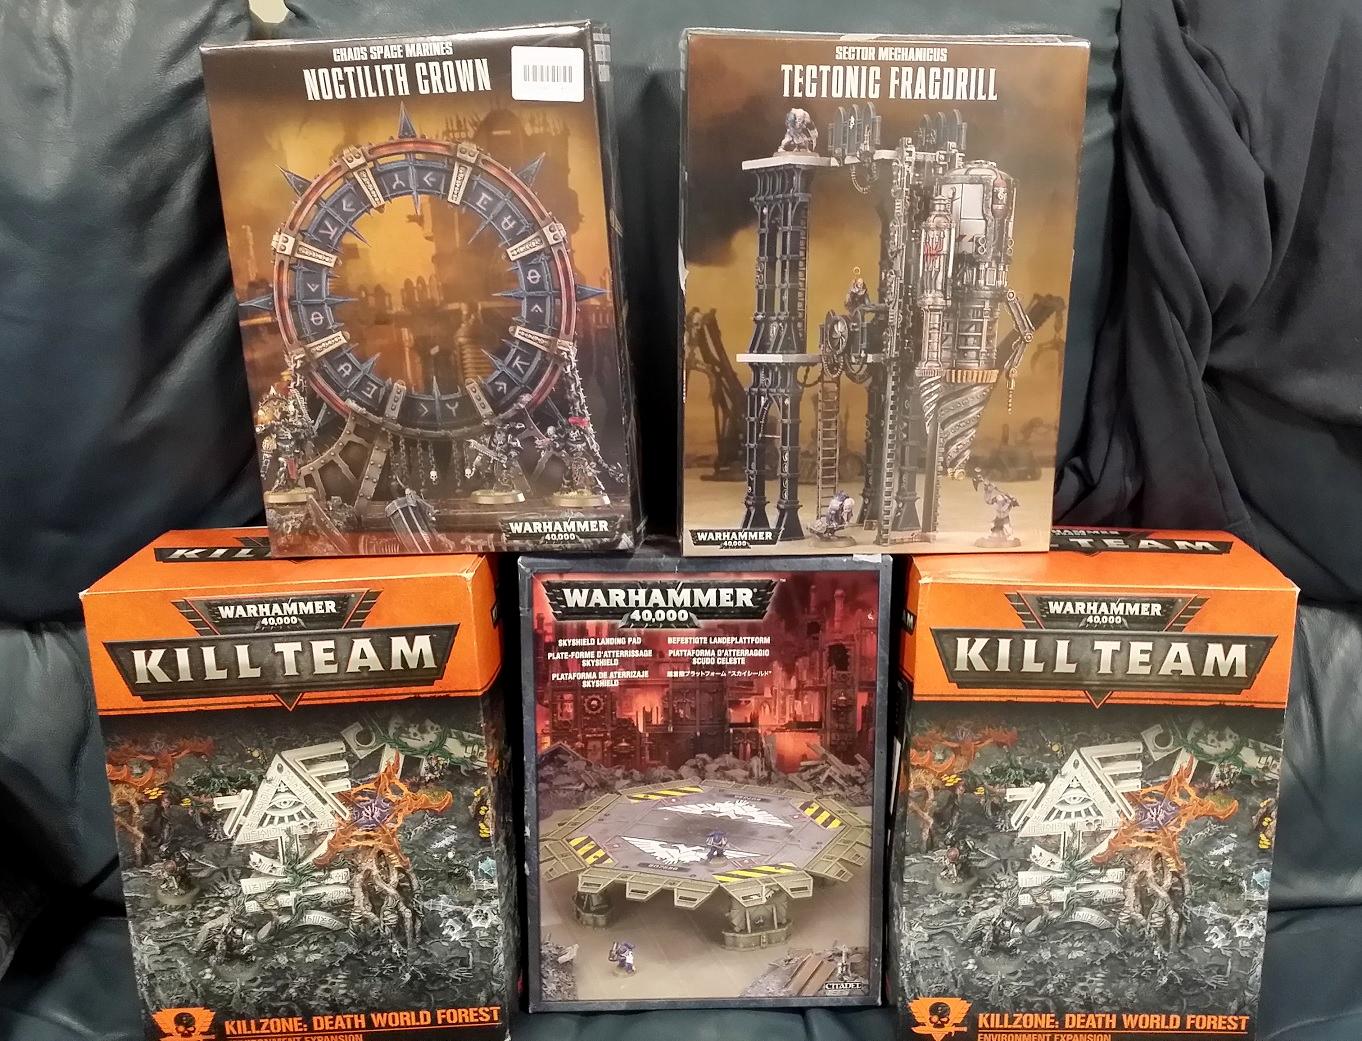
75338
Post by: Inquisitor Kallus
Awesome thread, have you done any more to it recently?
105865
Post by: Rolsheen
Do you have any spare ladders? I'm in need of some to make into railings
494
Post by: H.B.M.C.
I have a couple of small things I've done (a generator using two of the Haemotrope Reactors, and the Chaos Gate thing), but I'm awaiting one last surge of kits so that I can make some truly tall Necro pieces but still have enough odds and ends to do some more general 40K things.
I've also found that there are some people doing some wonderful stuff on thingiverse, such as this and this. I may invest in some of that as well.
9910
Post by: CommissarKhaine
Loving it all! For the the skyshied: if you turned it 90 degrees, wouldn't it make a really nice gate or something?
494
Post by: H.B.M.C.
The smallest things in the world can stall a project. You don't need a giant shift in your life to find you incapable of moving forward. Sometimes it can just be something simple as missing a vital piece of a kit because you bought it off eBay and that part broke off before the guy put it in its box. Such is the case with me, when I found that I had a dome but was missing the vital centre piece to complete it. See the large circular piece right at the centre of sprue? That's what I'm talking about. It's the only part that fits there. It makes the dome the right height (2.5"+/-) to act as either a half-level or the top of something else. Without it the piece would require alteration and would generally render the dome useless in its primary function. Even in the finished Boarding Torpedo, with its slight gap due to the platforms separating the two halves of the stacks, that piece was still vital to cover the ends. So I have 6 domes, but only 5 circular middle sections. Or rather, had. I found a place on eBay selling that exact part for next to nothing. So I bought two. I think we're back in business...
1124
Post by: Captain Brown
Lucking break you found them on eBay for cheap.
Cheers,
CB
494
Post by: H.B.M.C.
And look at all these wonderful new possibilities:
494
Post by: H.B.M.C.
Let the red flow...
So much red... will I ever make the spraying screaming stop?
3309
Post by: Flinty
Out damned spot
Looking forward to.seeing some painted stuffs now.
494
Post by: H.B.M.C.
So I decided to paint some terrain. This took from about 2:30pm to just past midnight to prep, build and paint all of what you see. I will post more flattering pics when I have a chance to clean up, including some on-table shots with terrain that I should be using for some games on the 30th. Red Right Hand As it happens, it's none of the terrain I've built so far during this Terrain Blog. It's terrain I've mentioned - the Ryza Ruins/Sector Fronteris stuff - as I want it to all match a theme. It's not 100% done yet, as some fits are just base red and very little's been done to them, but generally it's a lot of red (damn near used an entire can of Mephiston Red spray), a lot of Necron Compound (odd paint), some fantastic Balthazar Gold, and then a mix of Nuln Gloss and Seraphim Sepia. The end results are as follows. Some Ruins. 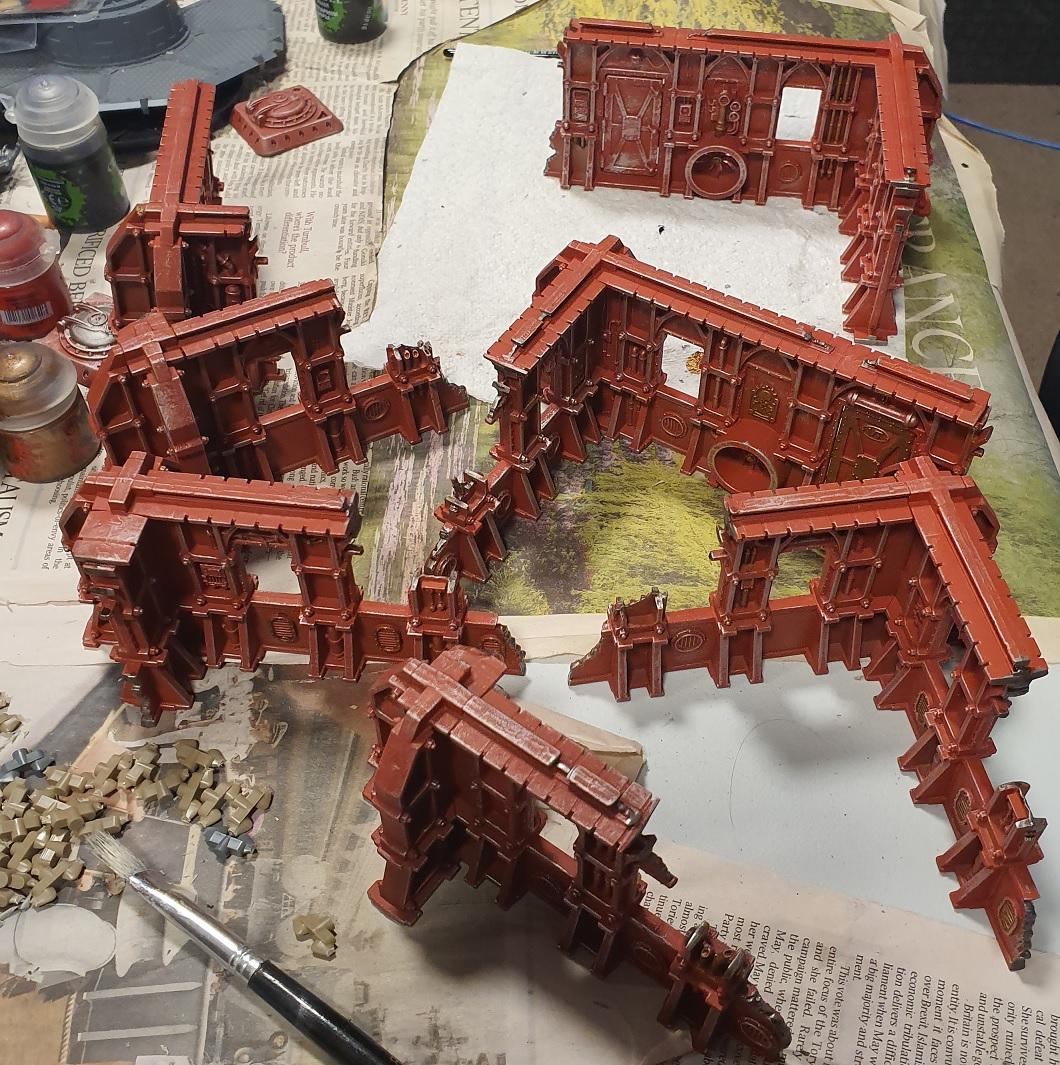 After painting the scatter terrain that's part of these Ryza kits, I painted up the rest of the ruins. Pics don't show off the gold that's there. Two Buildings.  Rather than each building having a single shield, I gave two to one and none to the other. Makes 'em easier to stack. AdMech Building: A while ago I showed some pics of something I built ages ago, a rather complex single-story CoD building using the Manufactorum pieces: Well I wanted this building to fit with the rest of the Ryza stuff, so I did it in the same style. 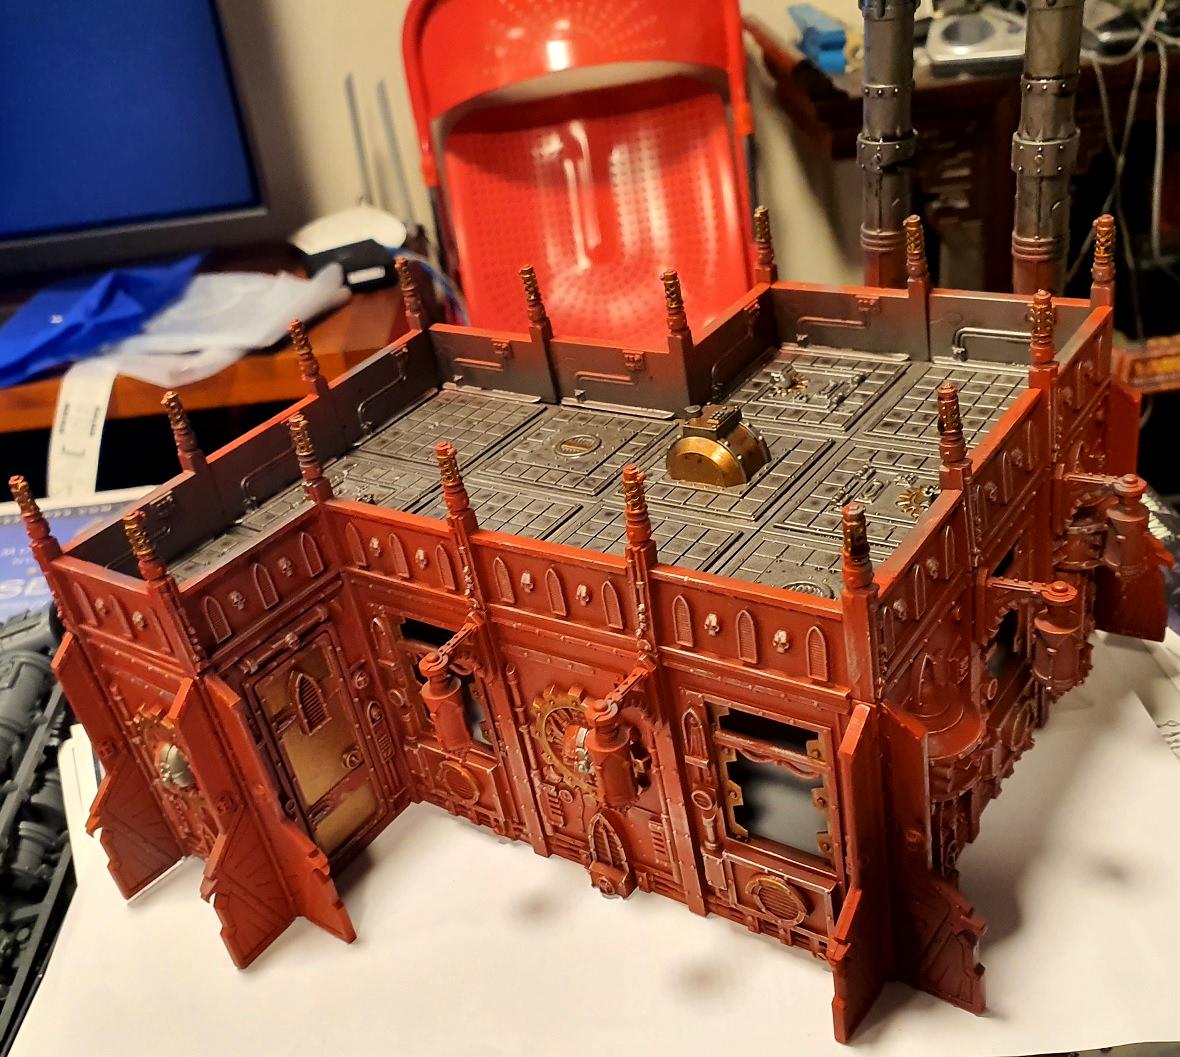 I plan to dirty them up with some Typhus Corrosion and do some more work on the details of the AdMech building, but for now they'll do.
90488
Post by: The Riddle of Steel
YES! Congrats on getting the painting going. This terrain looks so good once its painted and on a nice table.
518
Post by: Kid_Kyoto
Looking real good!
Is that a mat under them?
494
Post by: H.B.M.C.
It is. It is this mat here.
112558
Post by: Viterbi
Ryza buildings look nice. But be careful with applying Typhus Corrosion. I did that quite liberally to some of my Kill Team buildings (funnily they are also painted red with silver) and it does not look like corrosion
26800
Post by: Commander Cain
Never thought I would get to see paint on this blog, consider me impressed! The red and gold are a really nice and simple combo that looks great on that board.
When do we get to see your crazy creations with the new zone mortalis stuff?
1124
Post by: Captain Brown
Very nice looking board you have made there H.B.M.C.
Cheers,
CB
122359
Post by: tzurk
Fantastic terrain mate, they look aces on all painted up on the table - the sort of board that gets you itching to play!
494
Post by: H.B.M.C.
The Great Expansion is upon us; our first footfalls on the road to completion. Soon the plastic will be cut, the glue will flow, and the industrial insanity will reach its peak.  Then, once that's done, we move onto the Deathworld board. I have all the pieces... it just requires the will to get started. And I got a couple extra bits of Ryza ruins (thanks Moon Base Klaisus) to give us a bit of extra spread with the red ruins I've done already.
494
Post by: H.B.M.C.
Full terrain order has been made. Within the next few weeks the following will arrive:
2x Derelict Factorums
2x Alchomite Stacks
1x Tectonic Frag Drill
4x Ferratonic Incinerators
1x Webway Gate
1x Bone-Tithe Nexus (going webstore exclusive soon, apparently)
1x Herdstone
2x Awakened Wyldwood
1x Moonbase Klaisus
2x Creeping Vines
1x Barbed Bracken
I will of course photo this magnificent expansion as we move into the final phases of Sector Mechanicus construction and then work out how we're going to tackle the Death World table...
51769
Post by: Snrub
That Sector Fronteris board is hot!
What plans have you for this latest order of terrain?
494
Post by: H.B.M.C.
Thanks!
I've got a few different things in the works.
The Derelict Factorums serve three purposes:
The intact Stack and Furnace sprues from those kits are going to be used with regular sector Mechanicus stuff. I have, I believe 10-12 spare Stacks now, and Emperor knows how many Furnaces (I think I have three Promethium Refinery sized boxes filled with that particular sprue, untouched... somewhere), and my aim now is height. So, I'm going up. And I have the plans for a few buildings with names like the Central Processing Unit and the Fuel Processing Hub. It's just a matter of working out the floor layers and how well it will go together.
The ruined furnaces from that kit are going to the Death World table. I've got three boxes of vines and two of the bracken, plus two of these boxes awaiting attention. The vines/bracken are going to use to tie a few industrial style buildings (including some old Cities of Death terrain - yes, I have tons of that left over - you've not seen even a fraction of the terrain I own, I'm not even kidding) so that it can be pure Deathworld (also why I picked up a pair of Awakened Wyldwoods), or an overgrown Imperial city/town (might even use a few of the dozens of spare infestation markers I have from numerous Genestealer kits). However, the Deathworld terrain has Eldar ruins, so I also just got a Webway Portal which I am going to infest with vines and whatnot. I even have the Battlefield in a Box Elven tower/ pillars & ruins that I could dirty up with some Agrax and Typhus Corrosion and then cover with vines and whatnot to tie the whole lot together.
And then there's the generic Mechanicus walls that you get are quite nice (no joke, the Derelict Factorum kit is amazing - damned shame it's direct only now). I want to build a few taller buildings to match my existing Sector Fronteris/desert theme. I've got a few more Ryza ruins coming in the Moonbase Klaisus box I ordered, and those I'm going to do a bit more work on, using all the ruined floor bits from the Sector Fronteris kits, and a few random pipes and whatnot to buik them out into slightly bigger pieces, then I'll paint 'em red like the other pieces.
I also have a spare missile launcher from a Fortress of Redemption (the big part in the lower corner) that I want to see if it's possible to combine with the generic Mechanicus walls and turn into a free-standing missile platform, a bit like one of these (which I also have unbuilt. somewhere...) but taller and more contained. Might make for an interesting objective, or something good for the 40K RPGs which I adore.
Which brings me to the Bone-Tithe Nexus, and the Herdstone, and two other things I got before the end of last year, the mighty Khorne Skull Altar and the Judgements of Khorne. I'm not gonna lie: I bought these four things because I had a cool idea for a single encounter for a game of Black Crusade, essentially a Khorne held world where there is a massive Khornate Kathedral at its centre (made of my Pegasus Gothic Terrain), where the four "tribes" that inhabit this world keep their respective shrines (the Nexus for those that gather the skulls, the Herdstone for those that are a bit more primitive than the others, the icon from the Judgements for those that keep Khorne's warp presence active among the "faithful", and the old Arcane Ruins for another tribe) and so on. The players would need to infiltrate this unholy communion (READ: where the various tribes gather to execute the one who has been deemed weakest among them - sacrificed on the Skull Altar, naturally!) and then if things went badly they'd find themselves fighting off primitive Khorne worshippers, Beastmen and all sorts of horrible things.
So yes, I bought 4 or so pieces of terrain just 'cause I had a cool sounding idea for a single bit in an RPG campaign.
I will find other uses for them of course - the Herdstone is great for all sorts of things, and the Bone-Tithe could fit just as well in a Dark Eldar setting, or as a relic to fight over. AoS terrain needn't just for for AoS, that's what I'm getting at. Well, except maybe that Fyrslyr Byttly Foyrge or whatever that silly thing is.
What else... well, there are the drills. The drills are mostly just another way of getting more straight walkways. I have 4 drills now. I'm going to build a big 2-3 story "Drilling Complex" that will have a ring with two drills in it. Not sure what to do with the others. One will end up on a sled from the Galvanic Servohaulers kit (a Munitorum Container will end up on the other, given that both Klawz are already mounted on terrain).
I also plan to rebuild the original Necromunda terrain as closely as possible using the Sector Mechanicus stuff, just 'cause it's fun.
But yeah, keep making them taller and more elaborate, and maybe some more interesting modular bits. We'll see as we go. First step is to get everything together, de-sprue all the walkways I will have, and work out new layouts.
Once I have pics, I'll be posting them here!
17738
Post by: Briancj
The drill kits come with their own carriages that are compatible with the Servohaulers. Even comes with an undocumented 'coupler' piece.
--Brian, who built a train out of these things.
494
Post by: H.B.M.C.
I am literally waiting for one more terrain kit to come in before The Great Expansion can begin.
51769
Post by: Snrub
How much of what you build is/has been/will be used and how much of it is just for funsies?
Because you have some absolutely cracking ideas and you buy A LOT, hell you even build most of it as far as I can tell.
But considering how much you (must) have, at what point does it get used? Unless you're throwing down Apoc games every weekend or super sized necromunda games (Apocromunda?) where you can just slam it all down.
If not, you must be having the densest city fight games going!
494
Post by: H.B.M.C.
Snrub wrote:How much of what you build is/has been/will be used and how much of it is just for funsies?
All and nothing and nothing and all.
I genuinely love building terrain more than just about every other aspect of the hobby, and as someone who loves modularity and experimentation the Sector Mechanicus stuff has been an absolute God-send (and why I loved GW's "Lost & The Damned Mutants" kit-bash sets they put out during the Eye of Terror campaign, and also why I utterly loathe GW's current "No model = no rule" mentality that has dominated their that miniature design for so many recent years).
At the same time it all has a purpose. I want to make really cool looking 40K boards, great centre-pieces for the 40K RPGs (which we have played on 6x4 maps before with full terrain/miniatures) as well as have a set of terrain that is practical for Necromunda but isn't limited to being the same set up over and over again (the cardboard stuff was great for that, but, it's 25 years old now, and not as robust as it once was). In a way I approach terrain in the same way I approach building army lists - I never like to do the same thing twice, so will build a new list for every game I play, even if lists incorporate similar elements. I prefer variety to cut-throat effectiveness, and I take the same approach to terrain. I want all sorts of different things in all manner of configurations so that I can play out any scenario or idea that comes to mind.
Snrub wrote:Because you have some absolutely cracking ideas and you buy A LOT, hell you even build most of it as far as I can tell.
Well...
See you say that, but.... I may have got a few things delivered this past week and a bit...
Snrub wrote:But considering how much you (must) have, at what point does it get used? Unless you're throwing down Apoc games every weekend or super sized necromunda games (Apocromunda?) where you can just slam it all down.
If not, you must be having the densest city fight games going!
I'll be honest, a lot of it hasn't been used in quite a while, or has never been used.
Take the desert table I did a few weeks ago. I am immensely proud of how that turned out - pretty much exactly as I envisioned - but that's the first time anything on that table has ever been used (except the Cities of Death Mechanicus building). I bought the Gamemat.eu desert mat and badlands terrain in March of 2018, and first used it in January of 2020. Then there's some stuff, like my green hills, my original trees, and tons of Cities of Death stuff that I've been using for years, but hasn't seen much use in recent years.
One of the main reasons I've decided to get back into 40k proper despite my considerable issues with 8th Ed in general and especially GW's continued inability to write a Codex worth a damn is that I want to get some use out of my terrain and my miniatures. I've had more fun rediscovering Tyranids and Chaos (hence that new Pile O'Shame pic I linked to above) in recent weeks than I've had with 40K since 5th Ed came out. I've got a list of priority builds for tomorrow and Sunday to have minis ready for my friends coming over on Monday to play games (first, Broodlord, second, Hive Tyrant, third, Lord Discordant, and so on), and my mind is already racing with what sort of terrain I'm going to do for that day (let's just say I own this as well, and it has not yet been used... yet... ).
As I mentioned above briefly, my approach to terrain is how I used to approach collecting armies. My Guard is a great example of this (although my Chaos, Ultras and 'Nids are similar in this regard). I used to ensure that I owned enough to fill a Force Org chart with any particular choice. So I didn't just have 3 Leman Russes, oh no. I had 3 Leman Russes with hull HBs, three with hull Lascannons, three with hull HBs and sponson HBs, three with hull Lascannons and Sponson Lascannons, and so on. And then three Exterminators. 6 Demolishers. One Annihilator, one Executioner, 4 Vanquishers, 3 Baneblades, 6 of every Sentinel variety, over 300 infantry in every configuration, 12 Chimeras, 4 Basilisks, 3 Manticores, and on and on and on. When GW added plasma cannon/multi-melta sponsons and all those new turret types into the mix it totally threw me off.
I don't do that these days simply because of the room it takes up, but when it comes to terrain I like to be able to do at least 2 table's worth of any given "biome". I have tables and tables of ruined cities, but I want to be able to do things other than cities. I'm stick of ruined cities! I've always wanted to do what I call a "fully organic" table, that being one that is hills, rocks, trees, rivers and lakes - nothing man (or alien) made. I think I can do that now, and also have enough of said terrain that I can do it in more than just one configuration. It's why the Death World table I want to do with have overgrown Imperium stuff and overgrown Eldar stuff - allows for variety and even for more interesting scenarios. My conundrum right now is martian terrain, although Gale Force 9 might have me covered there.
And then there's the tournament a friend of mine keeps threatening to put on. I pay a lot of attention to tournament terrain when people post reports, and I am almost always left disgusted, either by the quality of the terrain, the lack of the terrain, or by the mentality of the terrain (the standard ITC-pattern terrain set up repulses me). I told him that if he wants to run a tournament then all he need do is provide the venue and the tables, and I will provide everything that goes on the tables. I reckon I can make about 12 6x4 tables worth of stuff given what I have. I'd love to do that and show off.
Finally, there's the painting aspect. I have never been good at nor do I like painting, but terrain often does not require the intricacies of regular miniatures. Terrain isn't supposed to steal the show when it comes to painting, so that takes some of the pressure of being incredibly detailed. I painted all of my red Ryza ruins in the space of a day. There's nothing to them: red spray, Necron Compound drybrush, pick out some areas in Leadbelcher and Balthazar Gold, wash metal with Nuln Gloss and gold with Seraphim Sepia... done! And in the end I was left with simple looking terrain that pops on the table but doesn't detract from anything else. Also went great with the desert mat/terrain. The contrast paints make me think that I can finally do some more painting, and is one of the reasons I went out and got so much stuff for this Death World board. The idea of painting trees and whatnot prior to contrast? No thanks. But now, given it's meant to be simple, and won't take me eons to do, it seems like an obtainable goal.
Anyway, I hope you enjoyed that wild ramble.
I'm going to go back to waiting for the single solitary Derelict Manufactorum that I'm waiting on to arrive, and then The Great Expansion can begin.
103099
Post by: Sherrypie
There's PAINT in this blog? What (most laudable) sorcery is this?
51769
Post by: Snrub
I did enjoy that little ramble, it was an interesting read. I always like seeing what makes people tick when it comes to this hobby.
I hope you do get a chance to kit out a tourney's worth of tables one day as that would be awesome and not a little bit impressive.
The big rock columns on the desert table (which is excellent in it's own right), did you make them yourself or are they prefab ones?
Oh mate.... C'mon.
You're a one man Terrain Addicts Anonymous group.
494
Post by: H.B.M.C.
Snrub wrote:The big rock columns on the desert table (which is excellent in it's own right), did you make them yourself or are they prefab ones?
Those are these wonderful things from Gamemat.eu.
Snrub wrote:Oh mate.... C'mon.
You're a one man Terrain Addicts Anonymous group.
Hey, look, I'm getting through it. Some of the things in that picture are already built!
21358
Post by: Dysartes
I hadn't realised the Plague Marine Heroes set was available outside of Japan yet.
494
Post by: H.B.M.C.
Oh they're the ones from Japan. Can't read a word of the text on any of the boxes/instructions. Seems some places can get them in despite being a Japan thing.
Anyway, more terrain. Today we played a bunch of 8th games, and this was the nice table we used:
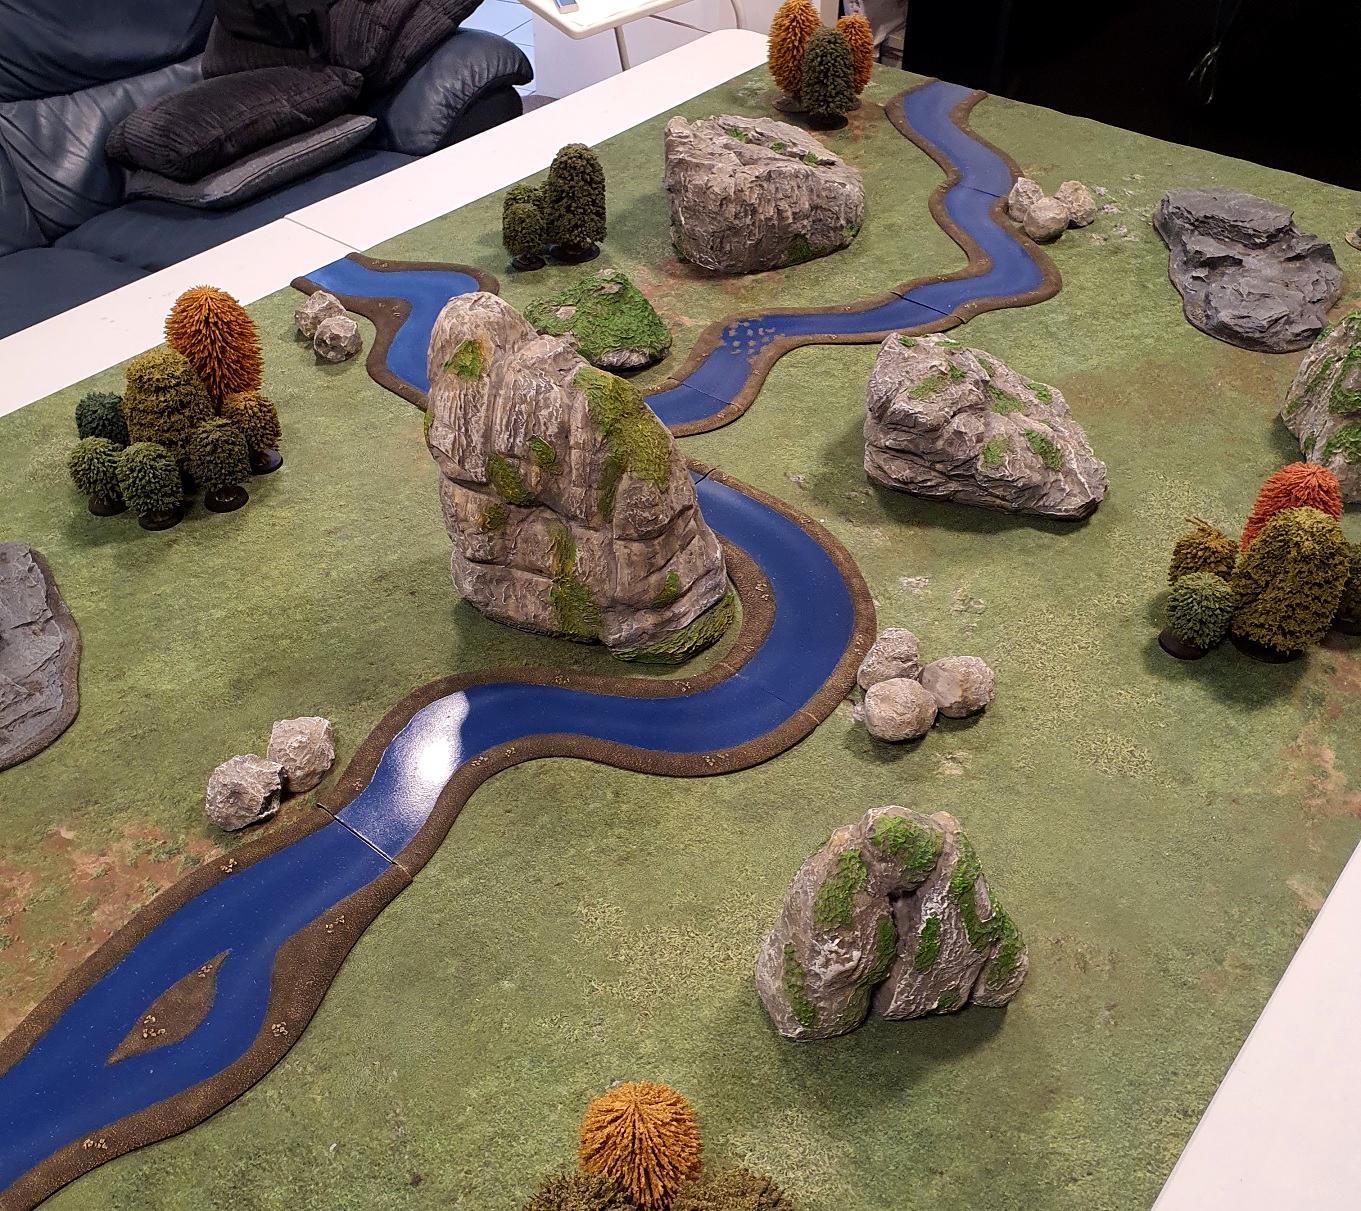
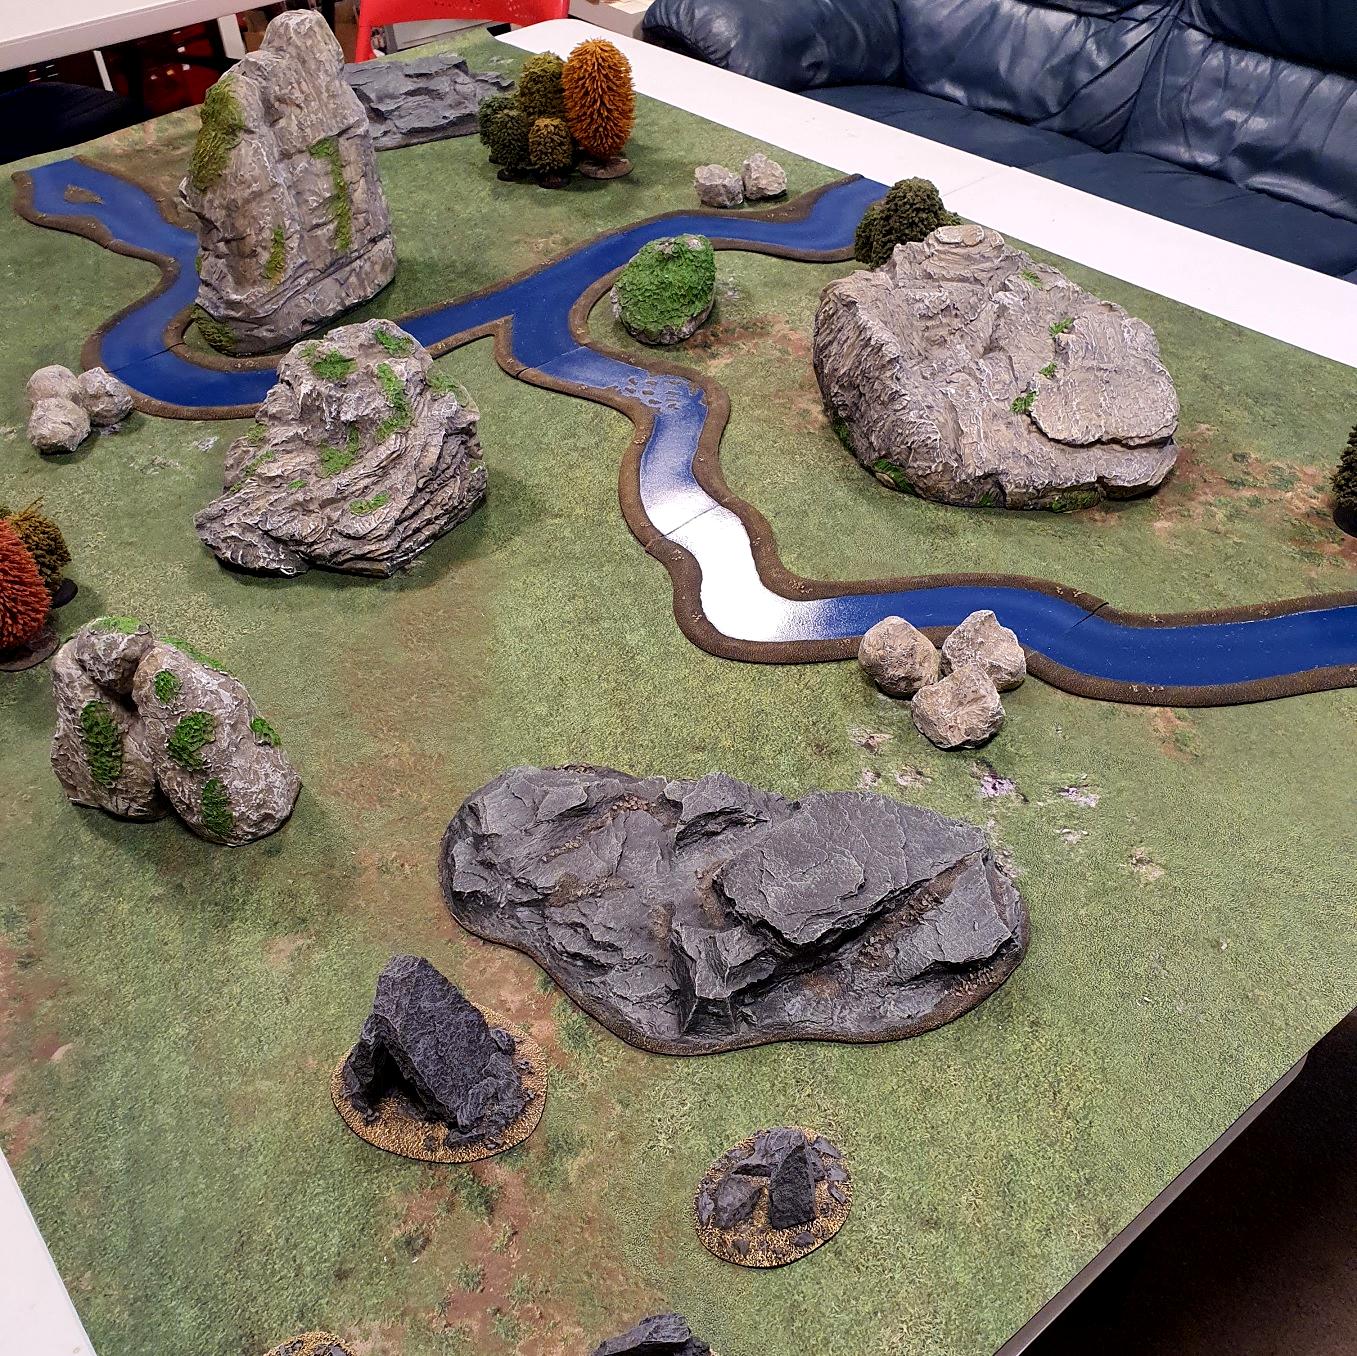
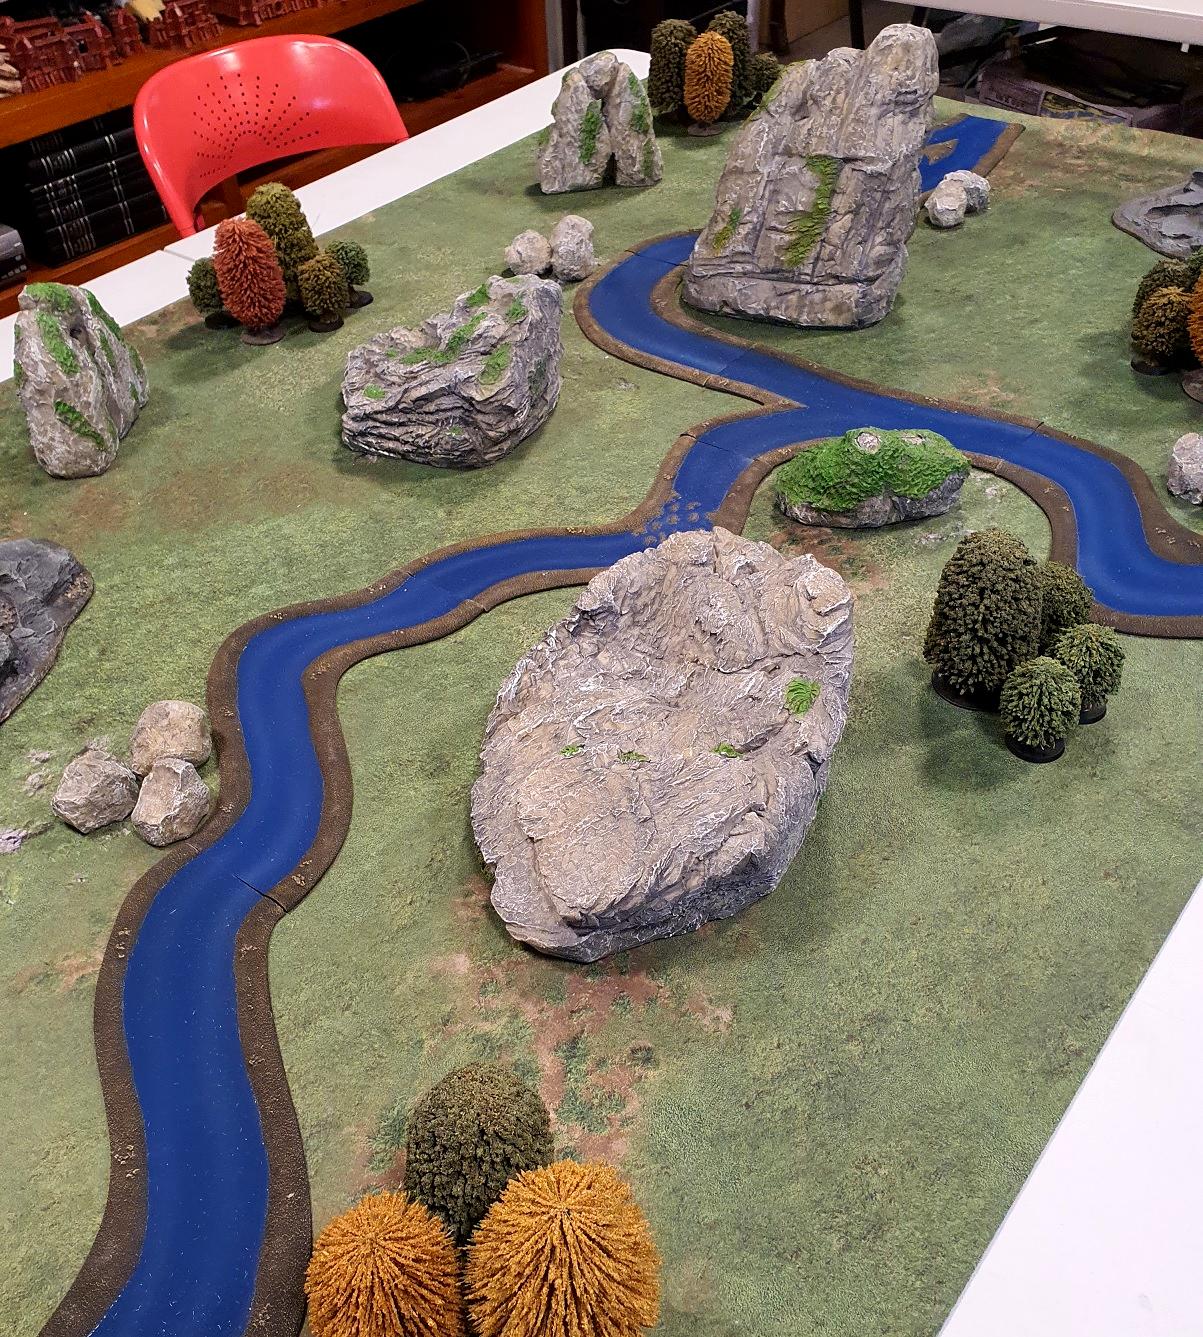
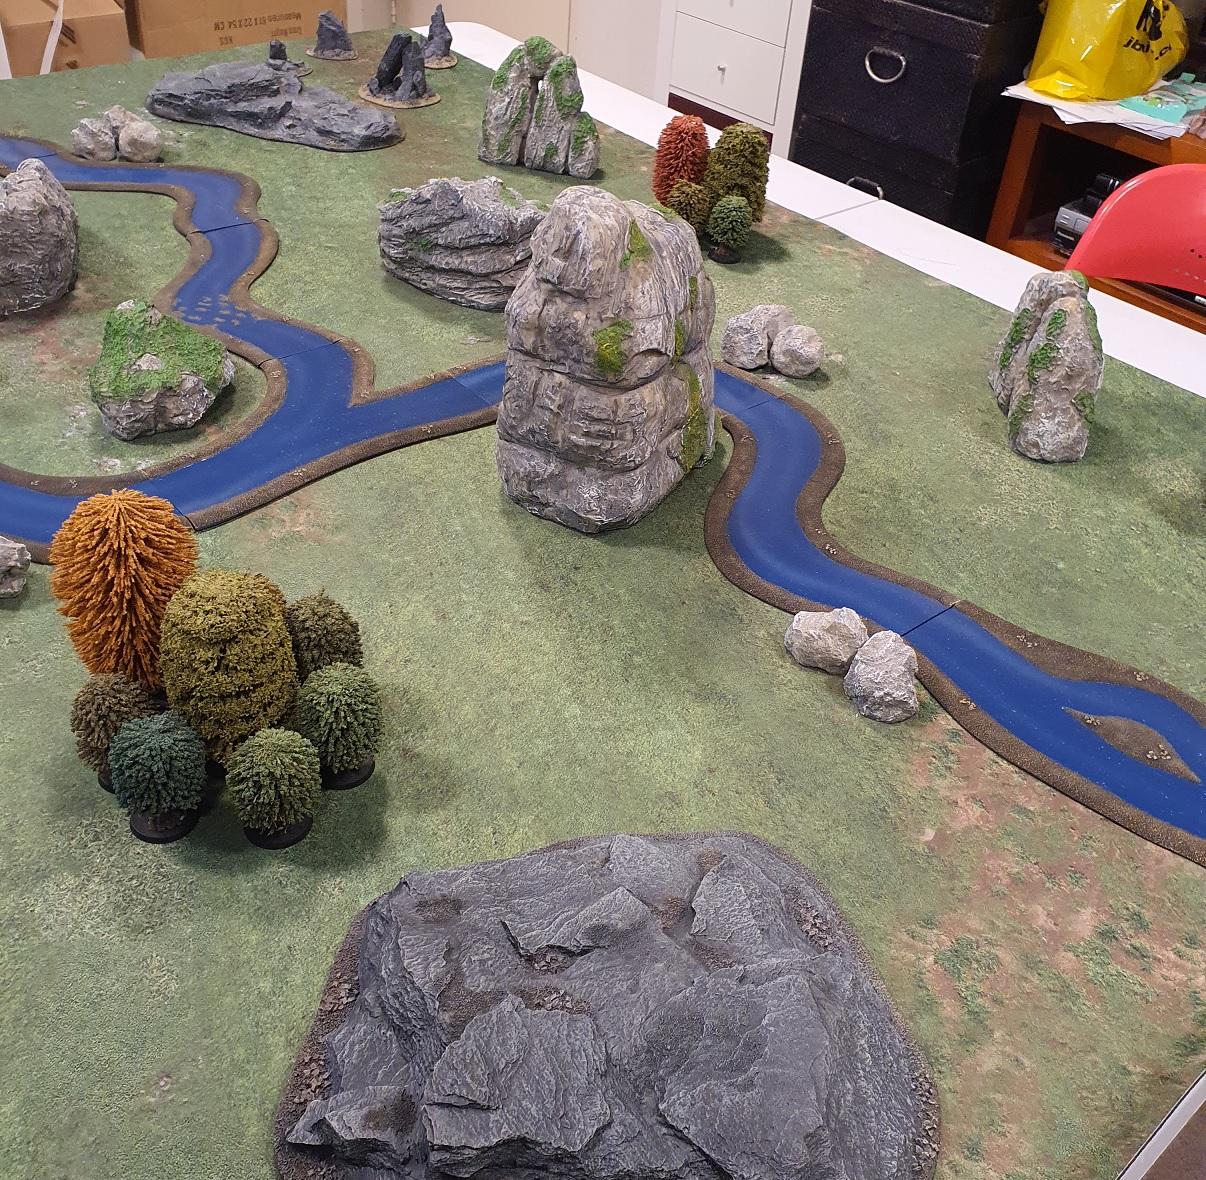
We had Sisters vs Deathwatch ( DW wiped the Sisters off the board), and Tau vs Chaos (Tau wiped Chaos off the board) and my 'Nids vs the same Tau (very tough and go, and Genestealers rumbled around his back line, and by the top of Turn 4 the score was 12 v 1 my way!).
My first win in 8th!
21358
Post by: Dysartes
Them's some serious rock formations, HBMC - GF9 pieces, or homemade?
Regarding the DG Heroes, is that box expected to give you a complete set?
494
Post by: H.B.M.C.
Some of them are GF9 stuff (like the rivers and some of the trees), but the rest are this set from Gamemat.eu.
17738
Post by: Briancj
THIS is the kind of board people who always be playing 40K on. Bravo!
494
Post by: H.B.M.C.
The final piece I've been waiting for has arrived...
I shall show you all what is to come soon.
10667
Post by: Fifty
Just looking at this blog makes me dream of the terrain I might one day build. Y'know, in a million years time.
51769
Post by: Snrub
H.B.M.C. wrote:The final piece I've been waiting for has arrived...
I shall show you all what is to come soon.
Oh don't do that to us, you tease.
21358
Post by: Dysartes
Snrub wrote: H.B.M.C. wrote:The final piece I've been waiting for has arrived...
I shall show you all what is to come soon.
Oh don't do that to us, you tease.
Who knew a 2nd edition Makari was so pivotal to his plans?
Obviously the challenge will be to keep that metal banner pole straight long term, but...
494
Post by: H.B.M.C.
I have the 2nd Ed Makari... somewhere... Anyway, I got everything together, and here are the final pieces of the last great expansion (probably... ):  There are also some Tyranids that need seeing too as well...
26800
Post by: Commander Cain
Pretty sure you are single-handedly keeping GW in business HBMC, that is an impressive haul! Is this all going to be for 40k terrain? Curious to see what you are planning with the herdstone, bonereaper thing and webway portal (which I had no idea was even a thing).
494
Post by: H.B.M.C.
Some of it will end up specifically as Necromunda terrain, the rest as regular 40K terrain.
The Webway gate is going to find itself covered in vines and become part of the Deathworld board I'm working on. Ditto for those Wyldwoods, as they'll make up the "big" elements of that table compared to all the usual Deathworld stuff, which tends to be smaller and more spindly. The Derelict Factorums will be done up as part of that table as well, so I can swap in/out the Imperial or Eldar stuff depending on what type of Deathworld table I want to do.
The Moonbase Klaisus will be painted up to match the stuff I've done already.
The Herstone and the Bonetithe Nexus are mainly because I think they look cool, and they'll make for interesting pieces/objectives as well as stuff for the 40k RPGs.
494
Post by: H.B.M.C.
Does anyone remember this guy:  It's a fairly old piece of GW terrain, from their old Cities of Death line. I have often spoke of how I have tables of this stuff, and if all goes well tomorrow you'll get to see some basically finished pieces. I've also built the last few Ryza Ruins from the Moon Base Klaisus that you can see nestled in here, and they'll get seen to at the same time so they can match the others. Whilst delving deeply into my spare bits to find that CoD panel (one of the buildings I'll be dealing with tomorrow had a broken part that needed replacing), I came across these two things (one still in the shrink-wrap, removed to reduce glare):  God I have a lot of terrain... I shall report back one the red tide has fallen once again. And then after that... martian craters! Yes, all of this is in service of having a completely new board to play on when everyone comes around for another 40K day in a fortnight's time. (Thanks to Bits & Kits for the CoD panel pic!)
518
Post by: Kid_Kyoto
I really to show Mrs Kyoto this blog.
See! I'm not weird! I'm not even in the upper 50% of collectors!
1124
Post by: Captain Brown
H.B.M.C.
Where do you store it man?
If I had that much Mrs. Captain Brown would kick me out of the house.
CB
494
Post by: H.B.M.C.
Red spray paint does not taste good, kids. Never inhale it.
Ick.
21358
Post by: Dysartes
I'm fairly sure inhaling any spray paint isn't recommended, dude - that's why they say to use it in a well-ventilated area, ideally outdoors...
62565
Post by: Haighus
H.B.M.C. wrote:Whilst delving deeply into my spare bits to find that CoD panel (one of the buildings I'll be dealing with tomorrow had a broken part that needed replacing), I came across these two things (one still in the shrink-wrap, removed to reduce glare):
I have one of these- single worst kit I have ever tried to put together. Looks lovely once finished, but I think I had about 5 rubber bands on it at one point to stop the whole thing springing apart before the glue cured!
1124
Post by: Captain Brown
H.B.M.C. wrote:Does anyone remember this guy:
It's a fairly old piece of GW terrain, from their old Cities of Death line. I have often spoke of how I have tables of this stuff, and if all goes well tomorrow you'll get to see some basically finished pieces. I've also built the last few Ryza Ruins from the Moon Base Klaisus that you can see
So do you have some spares of that piece? The large damaged wall section.
CB
494
Post by: H.B.M.C.
I have a whole bag full of them. Back when GW still let you order bits, including sprues, I once ordered 10 Manafactorum sprues because it I thought they looked cool.
1124
Post by: Captain Brown
I am so jealous. There isn't anything you might be willing to trade some of the 10 Manufactorum sprues is there?
Cheers,
CB
494
Post by: H.B.M.C.
Well... as you'll soon see (just got to finish the gold, then the shading, then some weathering here and there), they've pretty much been used. Made a few large buildings.
494
Post by: H.B.M.C.
The real reveal of all this stuff will take place once the whole table is ready to go, but for now I'm just going to preview the smallest of the buildings in this set I constructed way back in, like 2007, I think. 2008? I can't remember. In any case, this is just (a lot) of red spray, silver spray for the floors, heavy silver dry-brush, picking out various details in gold, and then gloss nuln oil wash over the silver floors. It's meant to look patchy and worn, and it's a super simple way of getting a lot of terrain (especially big pieces) done:

But that's not all! I painted one of my Sector Mechanicus towers. Thanks to a very handy and simple tutorial from Sonic Sledgehammer Studios I tried out the spray black/heavy brown drybrush/silver drybrush/blotchy faded colour panels technique, and it turned out exactly as I'd hoped. Normally I'd do all one colour, but I wanted to do a set of blue panels. Other ones will have a mix of reds, greens, blues, purples and whatever else takes my fancy:
More to come.
[EDIT]: My Battlefield-In-A-Box Badlands terrain arrived with almost everything damaged, some quite badly (either split into 3 pieces, or with the base torn away). Not happy. 
90488
Post by: The Riddle of Steel
It’s so good to see all this beautiful terrain finally get some paint. Your quick techniques look really good, and I’m sure they will look amazing when they have models on them during a game.
494
Post by: H.B.M.C.
Not ready to show everything off yet, but I just finished sticking together the last part of the Ryza ruins. Combined them with a couple of Sector Mechanicus elements (painter's tape kept the joins free of paint whilst I sprayed and finished everything).
They're near some of my new Martian/badlands rock formations from GF9 (a few of which are quite broken... :( ).
Anyway, far more to come soon!
51769
Post by: Snrub
Looking good H.
The silver drybrushed over red is a simple and very effective look for the Sec-Mech buildings. I plan on doing something similar for my own Ryza ruins.
The yellow/blue panels are an interesting effect too.
494
Post by: H.B.M.C.
Simple, effective, and by the end of it your wrist will be sore. In other news, the fine feathered finks over at Battlefront Miniatures (makers of Flames of War, and owners of Gale Force 9) have graciously offered to replace my busted batch of broken Battlefield-in-a-Box Badlands terrain. It probably won't be here in time for the game next weekend ( ) but I'll make do with what I have (I mean, it's not like they can get any more broken... right). I did also do up a couple of extra Manufactorum buildings for exactly this reason; was never sure if Noble Knight would get me the stuff in time.
1124
Post by: Captain Brown
Good work H.B.M.C.
Cheers,
CB
494
Post by: H.B.M.C.
I've teased you for long enough... proper update this time! “Mars tugs at the human imagination like no other planet." - John Noble Wilford Hello again, It may not come as a shock to any of you, but I have a big fondness for terrain. I once began making cities out of the boxes the games came in piling little unit boxes, on top of tank boxes on top of game boxes to make towering sky multi-coloured sky-scrapers. Later came the much-vaunted Necromunda card terrain*, and then later the 40K expansion of that, including the Firebase, the Bastion, the Bunker and, sadly, the one I never managed to get, the Command Tower. These were all excellent replacements for my tank box towers, but even they could be considered limited, especially the Necromunda terrain which, whilst impressive, didn't really look like buildings. After all, they were all mostly flat open platforms stacked on top of one another. [*That appears to be 3 sets of Necromunda terrain, and it already looks like too much. I have 5 sets. Imagine what that looks like all at once... ] Then GW went and released Cities of Death, an expansion for Warhammer 40k that built upon the Cityfight rules from ages ago. With this book came the release of plastic modular multi-part buildings - GW's first real foray into this sort of thing. Part of that release was the massive Imperial City box, which was more than twice the size of the later Imperial Sector box. I bought two. These kits were, by today's comparisons, quite crude (and we'll see an example of this a bit later). The sprues were heavy as hell, especially the sprue with all the ultra-thick floor pieces. Everything had mould-lines up the wazoo and you spend as much time cleaning them as you did building them. They were difficult to work with, requiring a lot of shaving and cutting to make things fit correctly, and you always had too many ruined bits when all I wanted to make was intact buildings. Cities of Death kits were all based around 3" high panels like this one. More specifically, the entire CoD system was actually built around this singular strut, and it didn't matter which wall panel you chose, they all had one of those struts as part of their make-up. Even the ruined pieces had partial struts as part of their design. It helped to space everything out, and if you look at the various wall panels you'll see that they had two little nubs, one about a 3rd of the way down, and another right at the bottom. These were the only guides when it came to sticking walls together. You lathered them with glue, held them together and hoped for the best. Most of the time what it meant is that you had to start with all the corners, as it made for a more solid starting point. From there you could add things on. Inside corners were very difficult, as you'd have to shave off the rivets that were on the struts to get a flush connection, and it never lined up perfectly as it wasn't designed in the same way as the modern stuff. Then there were the floors. The floors were a whole other story. Making larger floors was tough, but thankfully those single strut pieces slotted between two sets of floors perfectly, allowing you to create larger floors that were braced quite well. I can point out a lot of the flaws this building system had, but the truth is they were fantastic, however frustrating and time-consuming they were to put together. You could do all sorts of wonderful things, and the creative freedom they allowed made for a far more varied table than what we were used to. Plus actual walls! That was a nice change. So many'a moon ago, before the first version of Apocalypse came out, our group wanted to do a big battle. I spent about a week making a city out of cardboard. It was glorious. The game was enormous, unwieldy and played on a giant 6x8 table that my friend built, textured and painted. When we decided to do it again, this time we had the Cities of Death buildings, so I went wild. One of the pieces I did was designed as a manufactorum that had been hit by shelling, or blown up from the inside. It was an enormous building that was split into several pieces, and when properly laid out it takes up a fair amount of space (as you'll see once my Mars board is complete). I am painting it now because we have just gotten back into 40K and each time my group has come over so far I have presented them with a completely new and finished board. Sure, the armies might not be painted, but the terrain is either professionally made or completed by me, so that it looks good and complete. My next board is a Martian board, and this requires the painting of my largest CoD building, the aforementioned exploded multi-piece manufactorum. So with that preamble out of the way, let's get into it! Small Ruin This is just a basic piece that isn't part of the larger building. Put a couple of the manafactorum's pipes onto this. How the piles stayed there when the wall collapsed I guess we'll never know.   Sorry for the blurry photo on that one...  The Red Wall The Red Wall Wanted this one to be a big flat ruin that blocked a lot of LOS.    And who is that hiding in the window? And he brought a big lizardy friend with him. Preacher's Tower Now you already saw the smaller more ruined version of this piece in my sneak peek. This one goes on the other side of the big building, and I imagined it as a place where a Tech-Priest would recite messages who his adoring non-Servitor workforce. Or even his Servitor workforce. Or whomever. Tech-Priests are weird and do what they want. 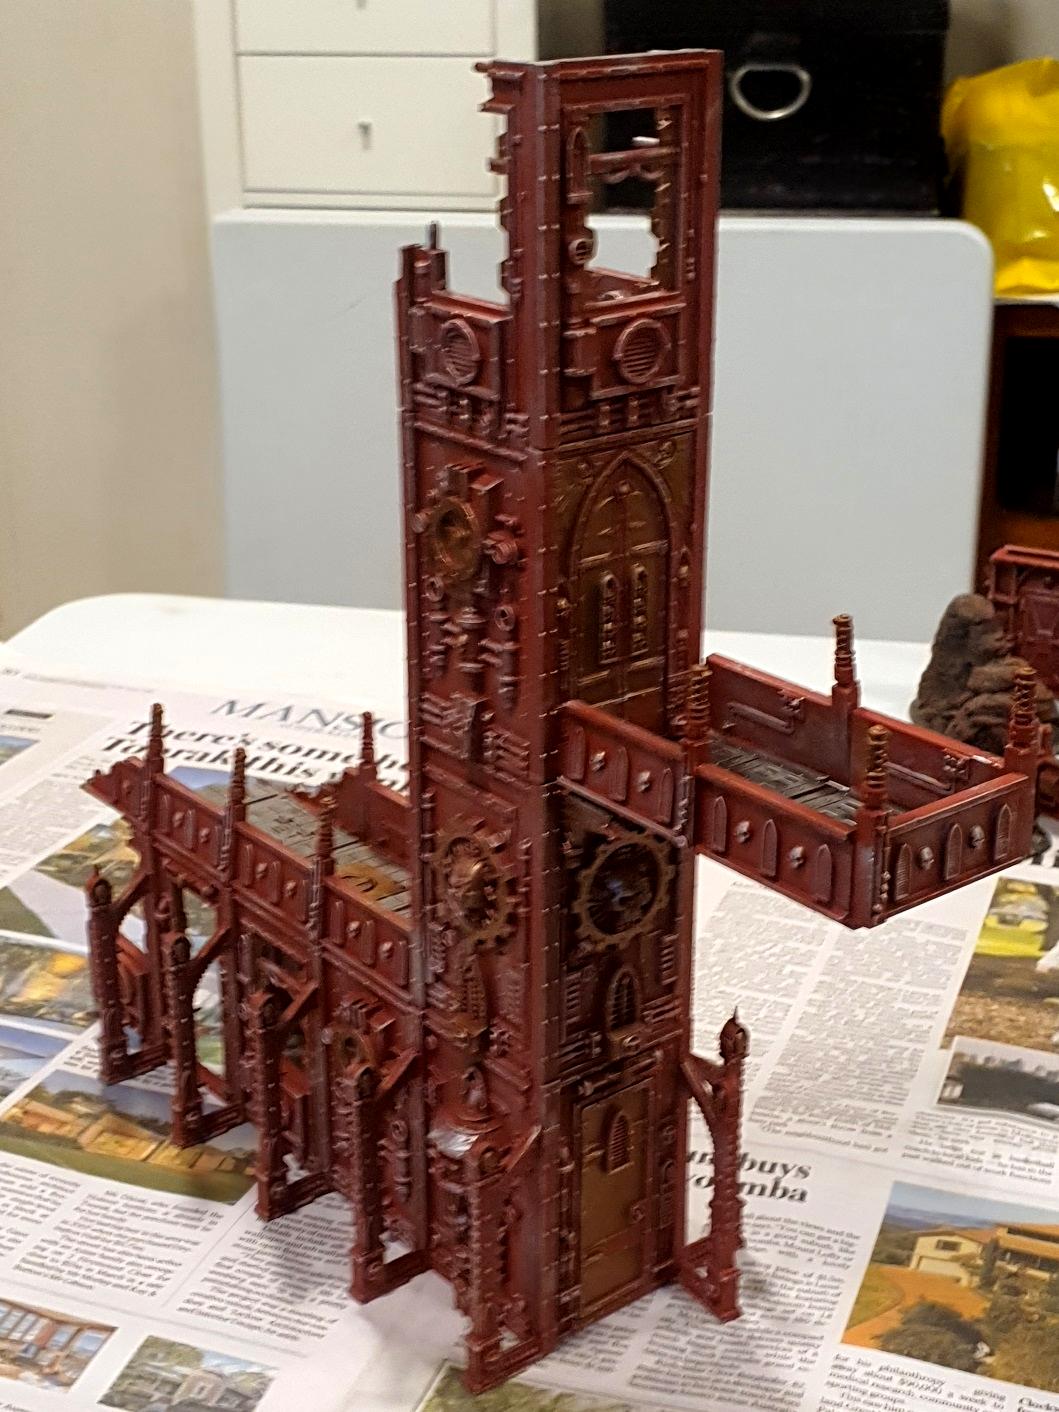 Again, sorry for the blur... 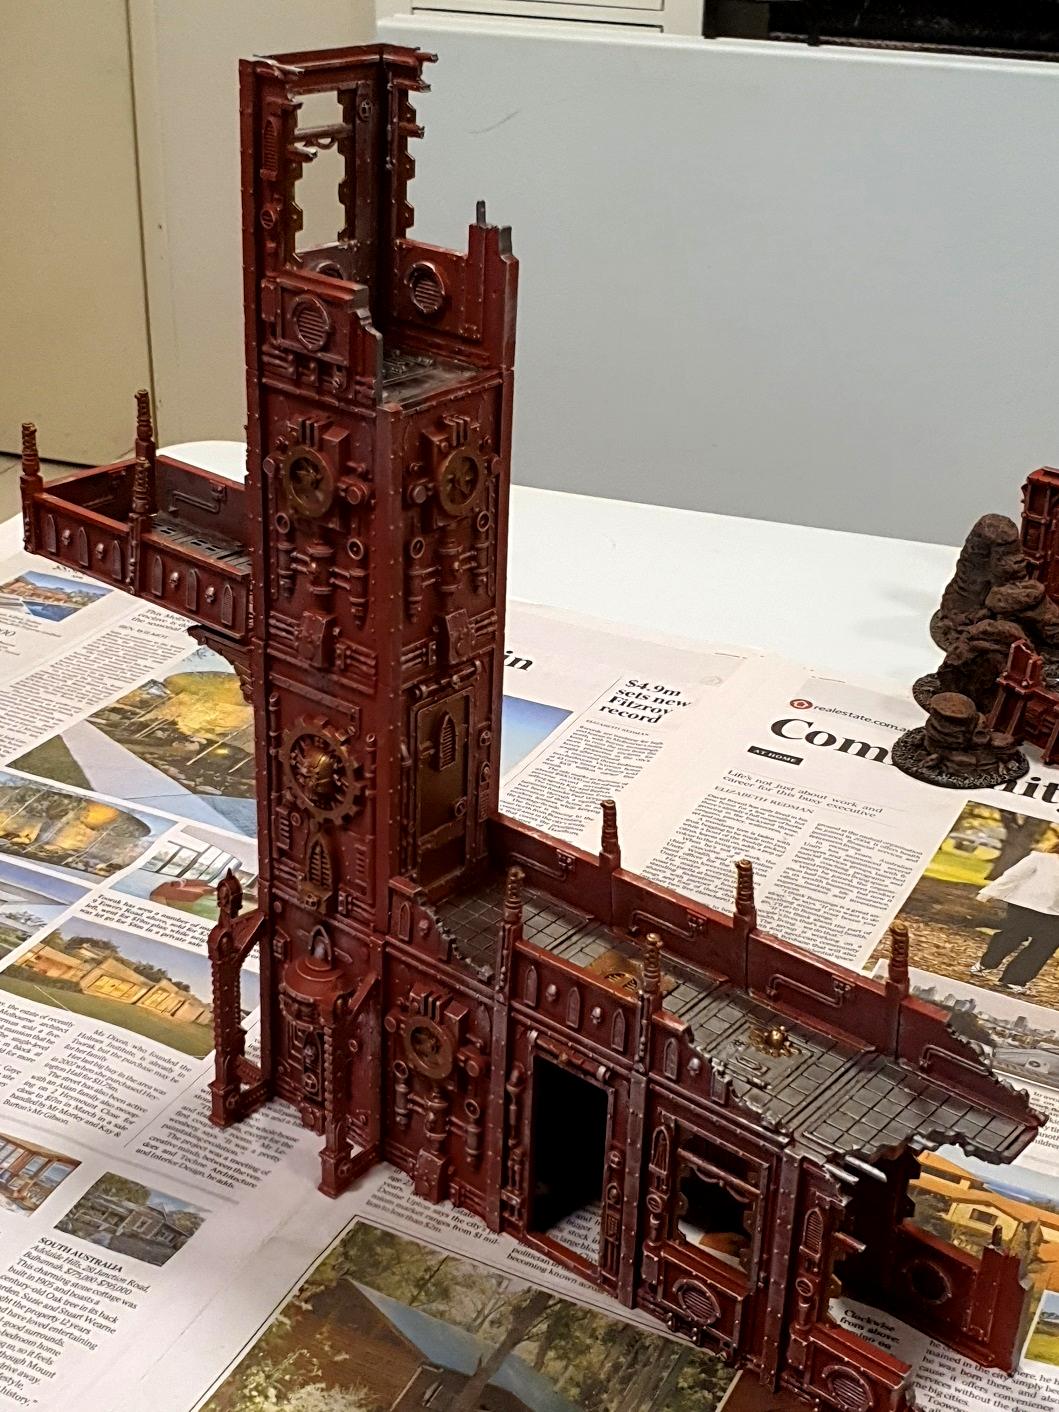  Captain Shortsword is seeing if public speaking is something he's good at. Manufactorum Rear Entrance Alright enough teasing. Here is one of the two big ones, the rear end of this massive building. 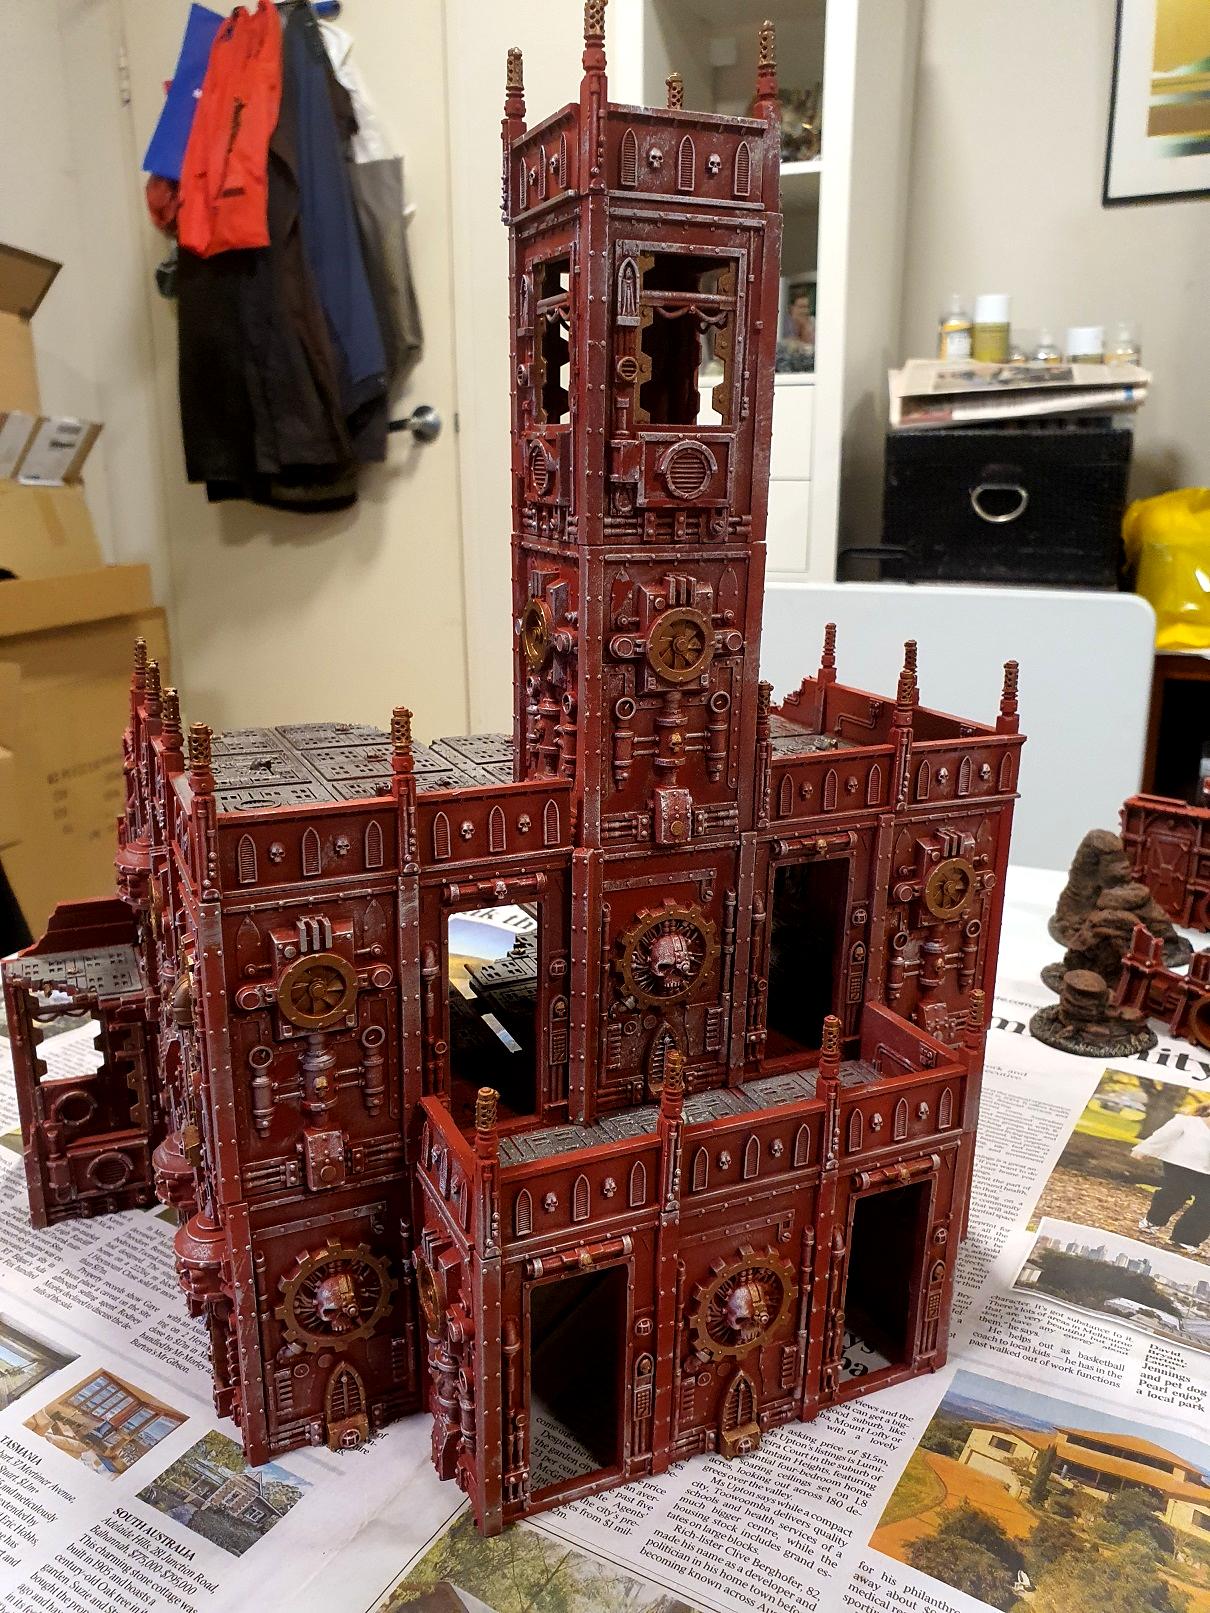 The small off-shoot towards the bottom left is the ruined corridor that would have led to the Preacher's Tower. There is another similar off-shoot on the other side that leads to the other more-ruined Preacher's Tower. 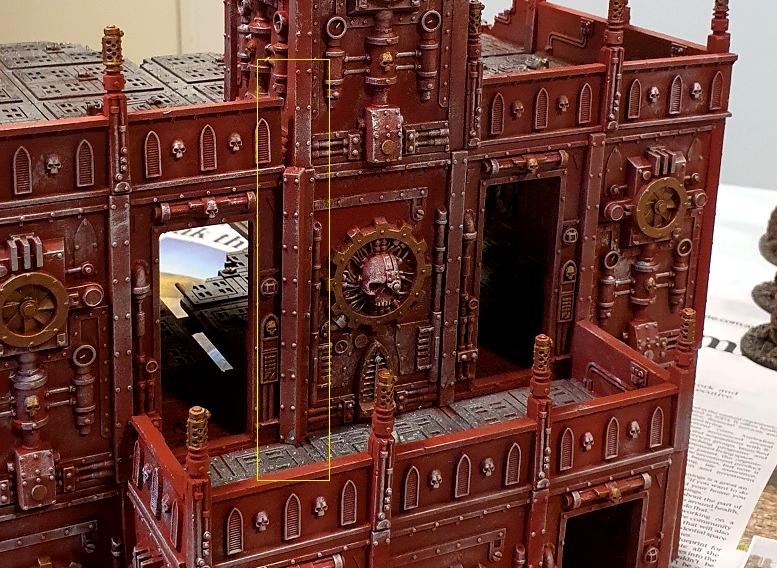 Unlike the new Sector Imperialis and Sector Mechanicus stuff, the old Cities of Death stuff wasn't engineered to be basically perfect. This means that once you go beyond a certain size the floors don't quite match up with the walls, and you can end up with odd gaps. I have filled these gaps as best as possible, but it's not always perfect, hence this odd-angled beam that is filling a gap between two panels. 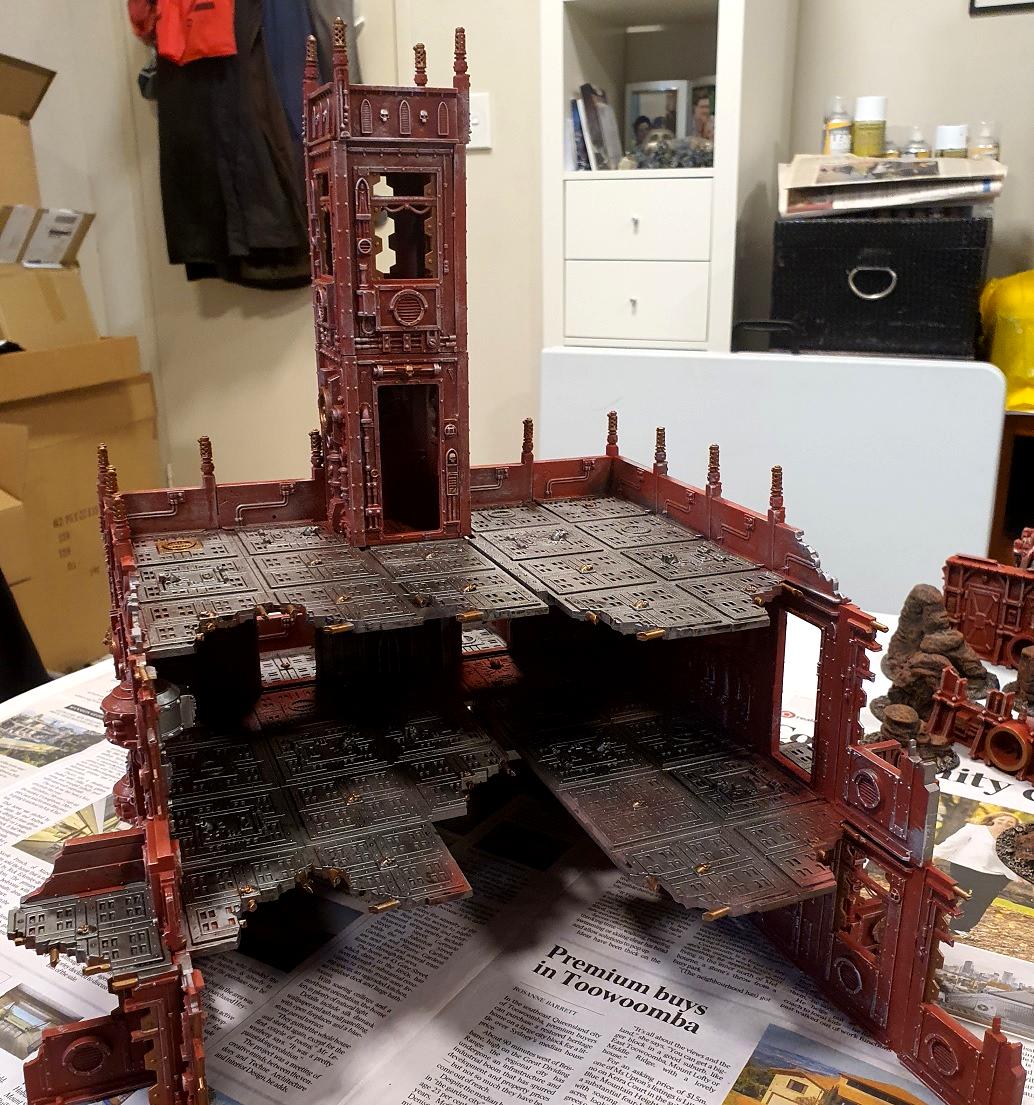 You have no idea how long it took to make floors for a piece this size. You can see the strut I've placed on the top floor to fill a gap. Those floors are not the same size as the walls are wide. This would never happen with the newer kits. 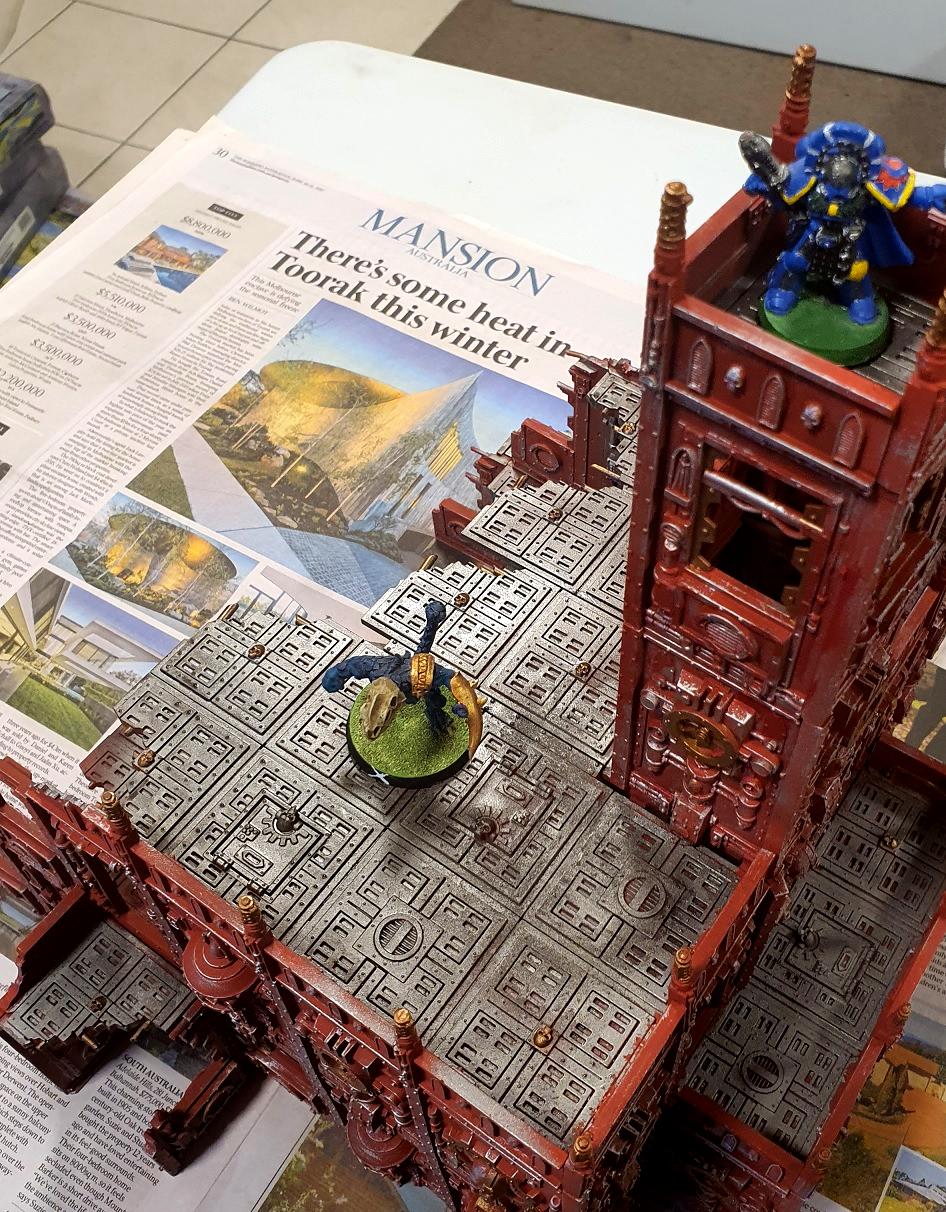 And from above. 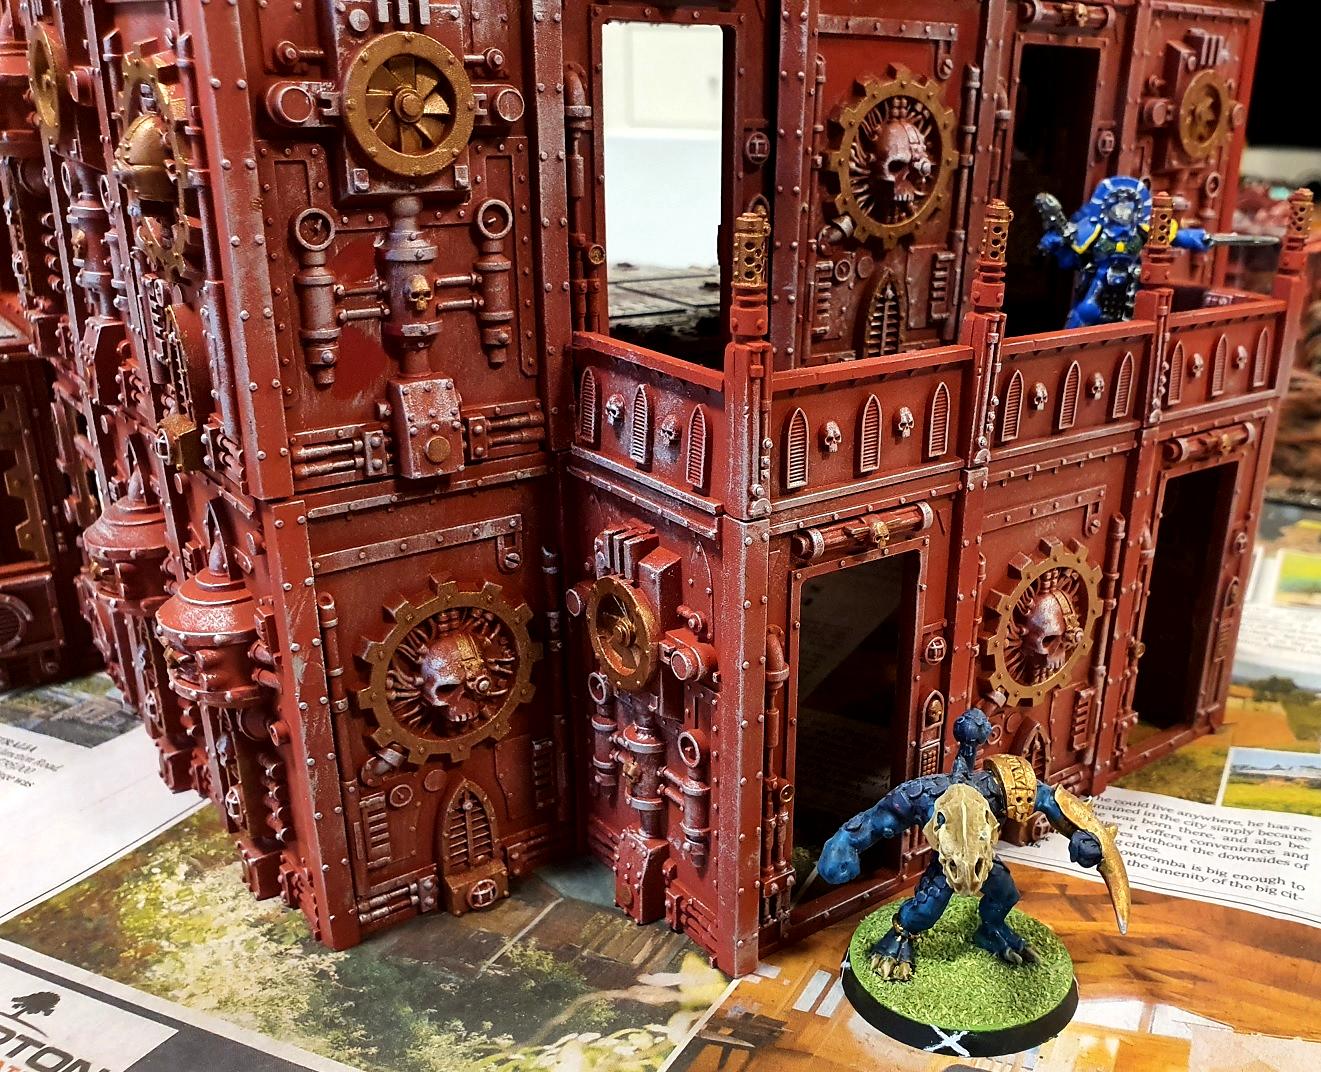 Close up from the front. Manufactorum Grand Entrance And now the Big One™. This might still be one of the biggest pieces of terrain I've ever built. And to think it's all from those little 3" panels. 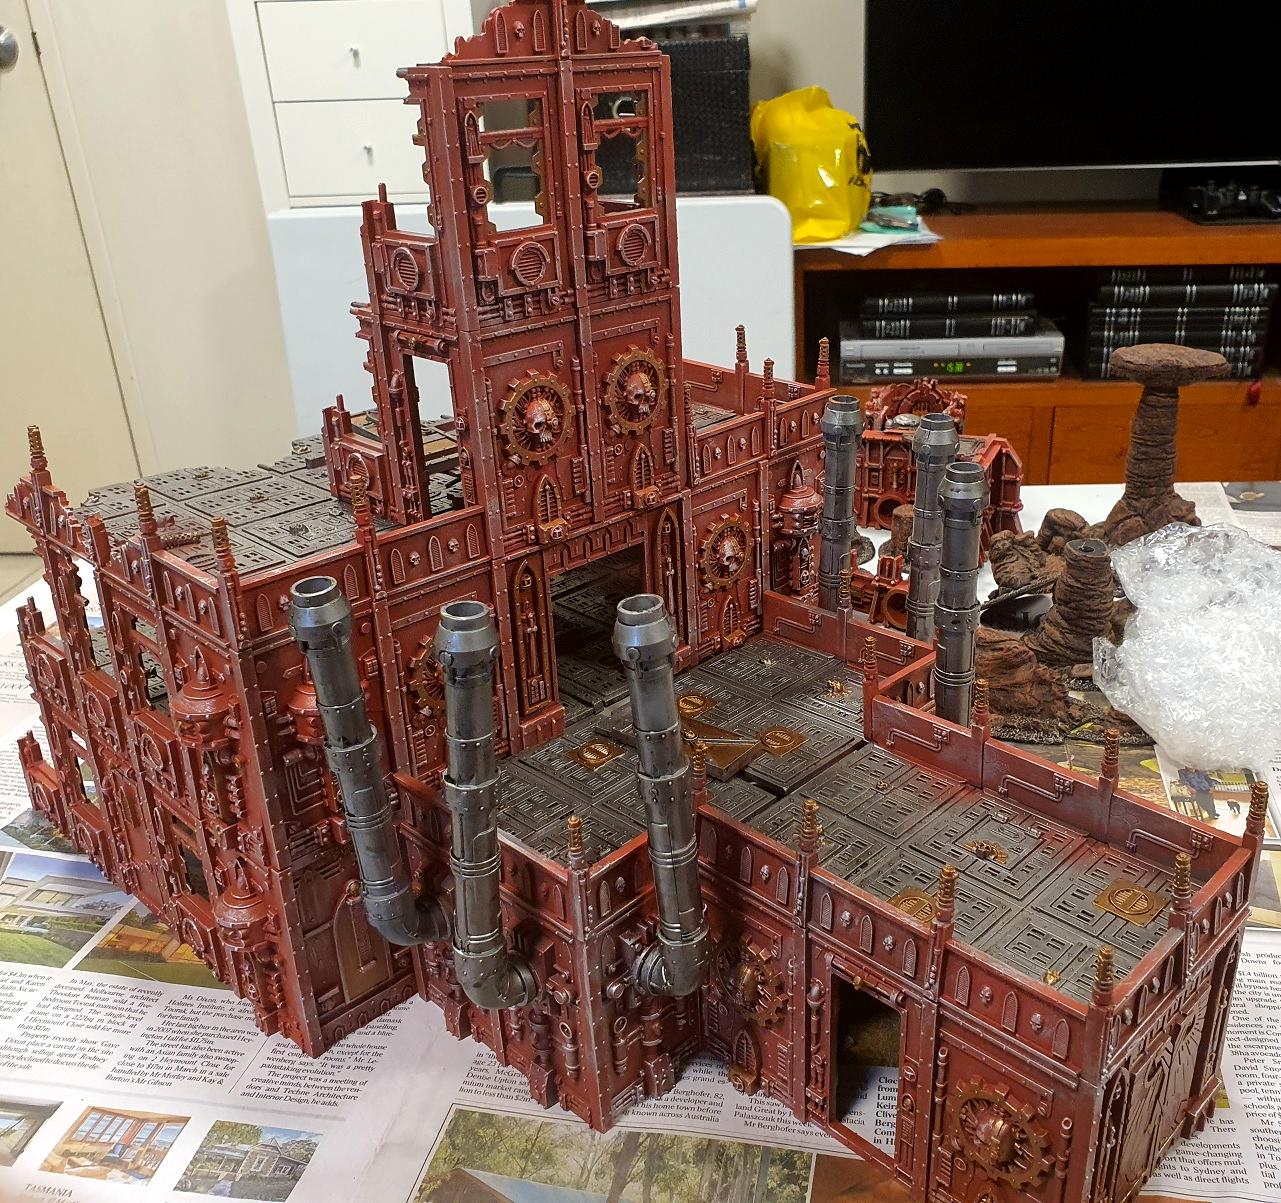 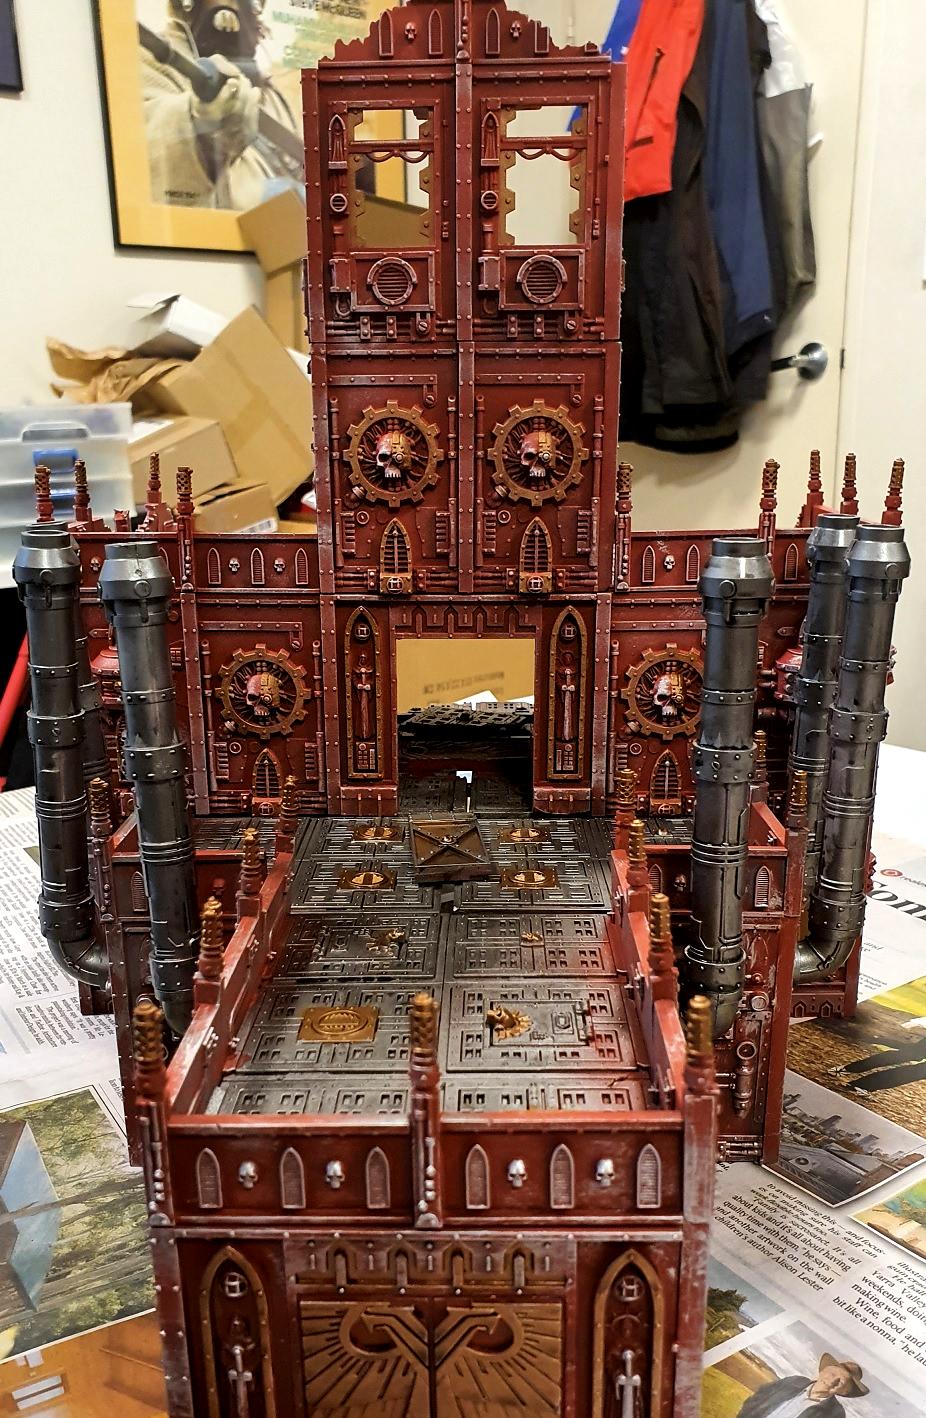 I've used busted doors and floor pieces to break up the gap that runs through the floors on the wider section. 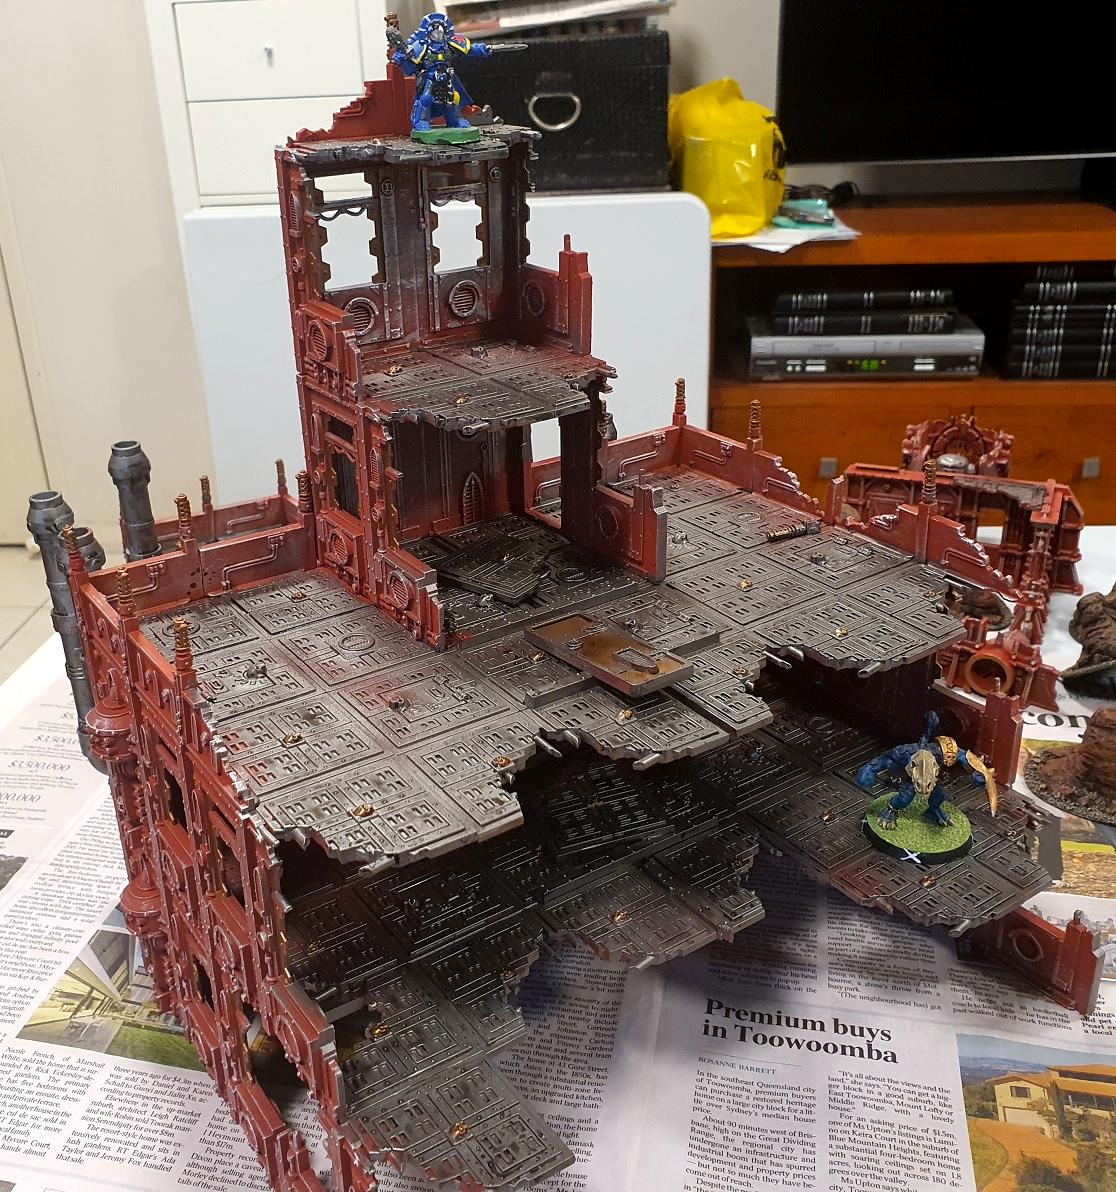 Told you it was big. 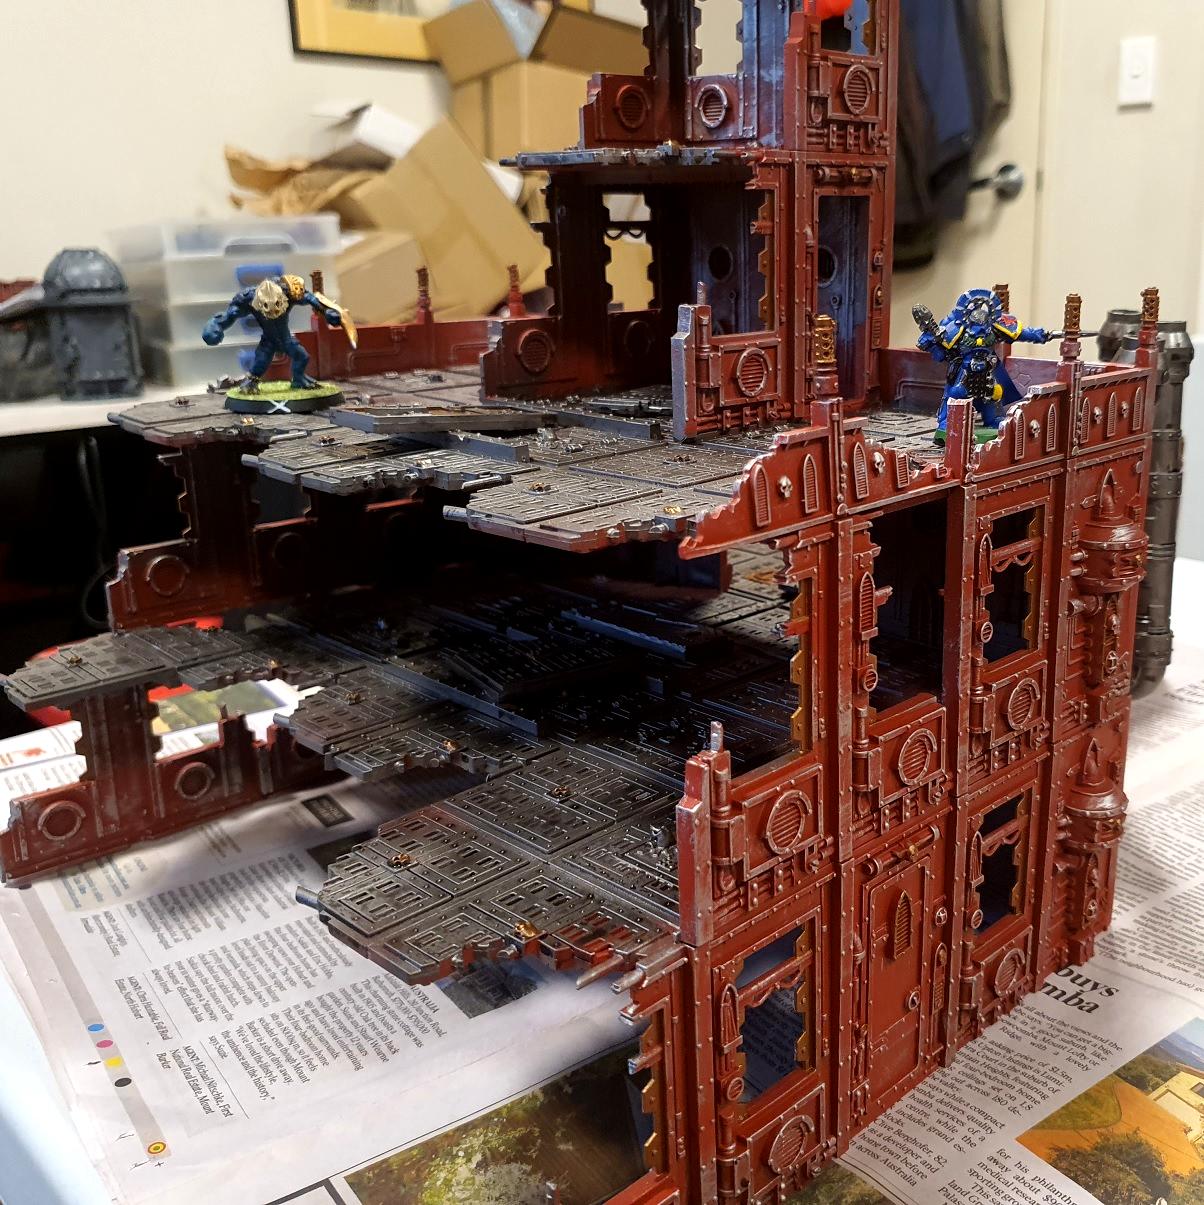 The gold details took forever to do on these pieces. I have remained consistent with each one, so the one with the Mechanicus symbol has the rim done gold, the bionic side of the head is gold, as is the rim of the venting down the bottom. The windows have the "teeth" painted gold - inside and out on most pieces - and the exposed fanblade piece has the fans painted gold, and so on. About half the doors are painted gold. The skulls on the flooring are painted gold. I almost painted all the divots in the flooring gold but that would have taken me a month and drive me crazy. 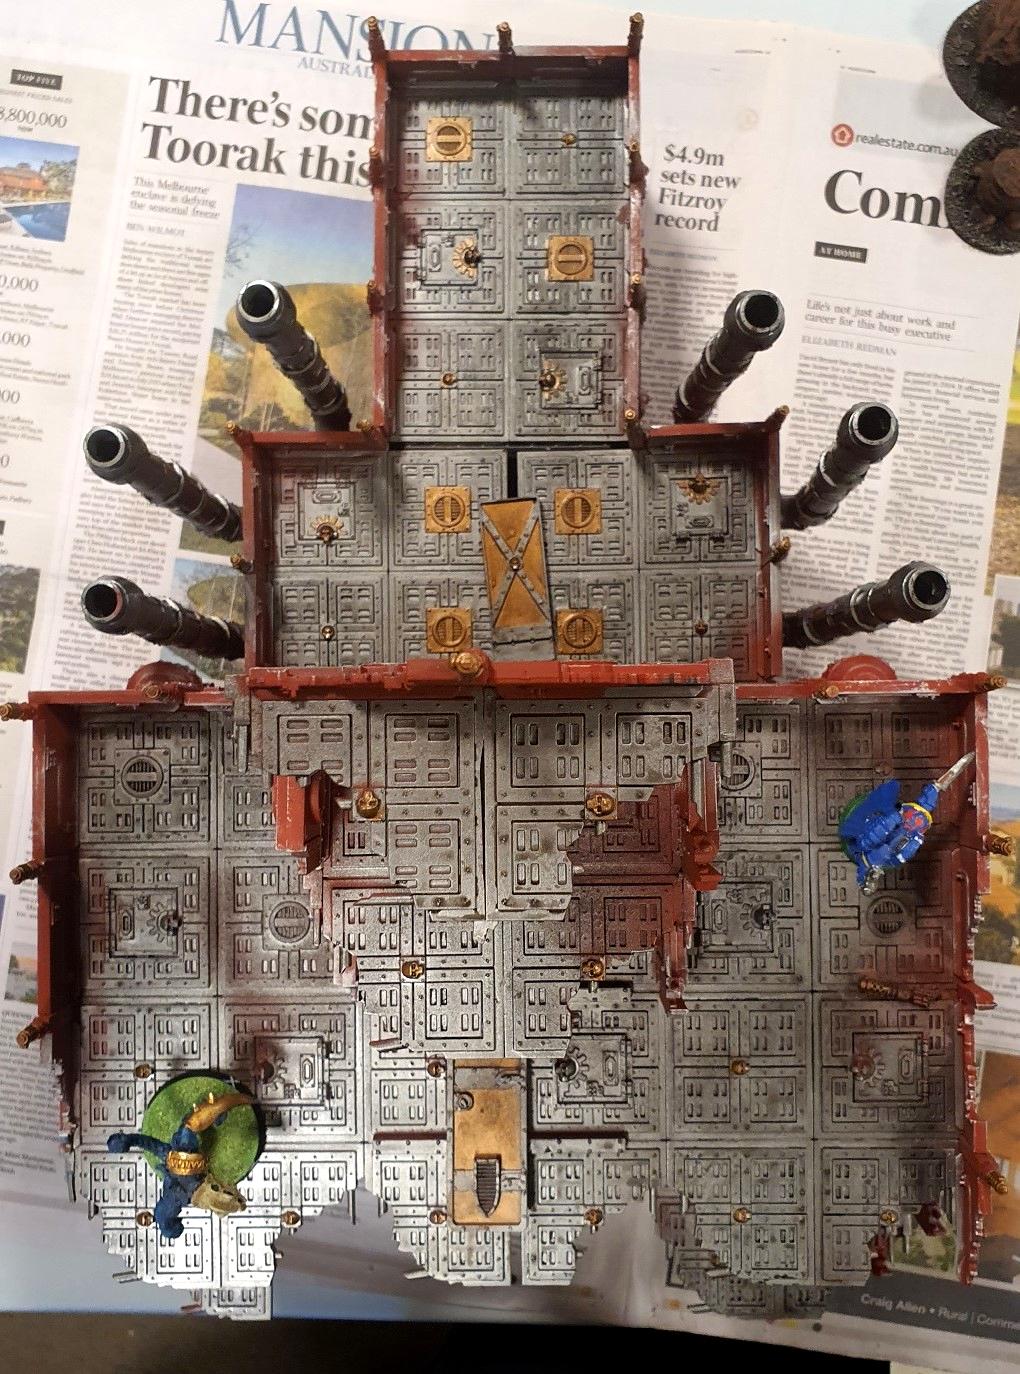 And a shot from above. The Grande Entrance is actually too big, so much so that when I designed it I had to make sure that the lower entryway with the pipes was a separate piece. Here are some pics of it separated from the rest of the main structure. 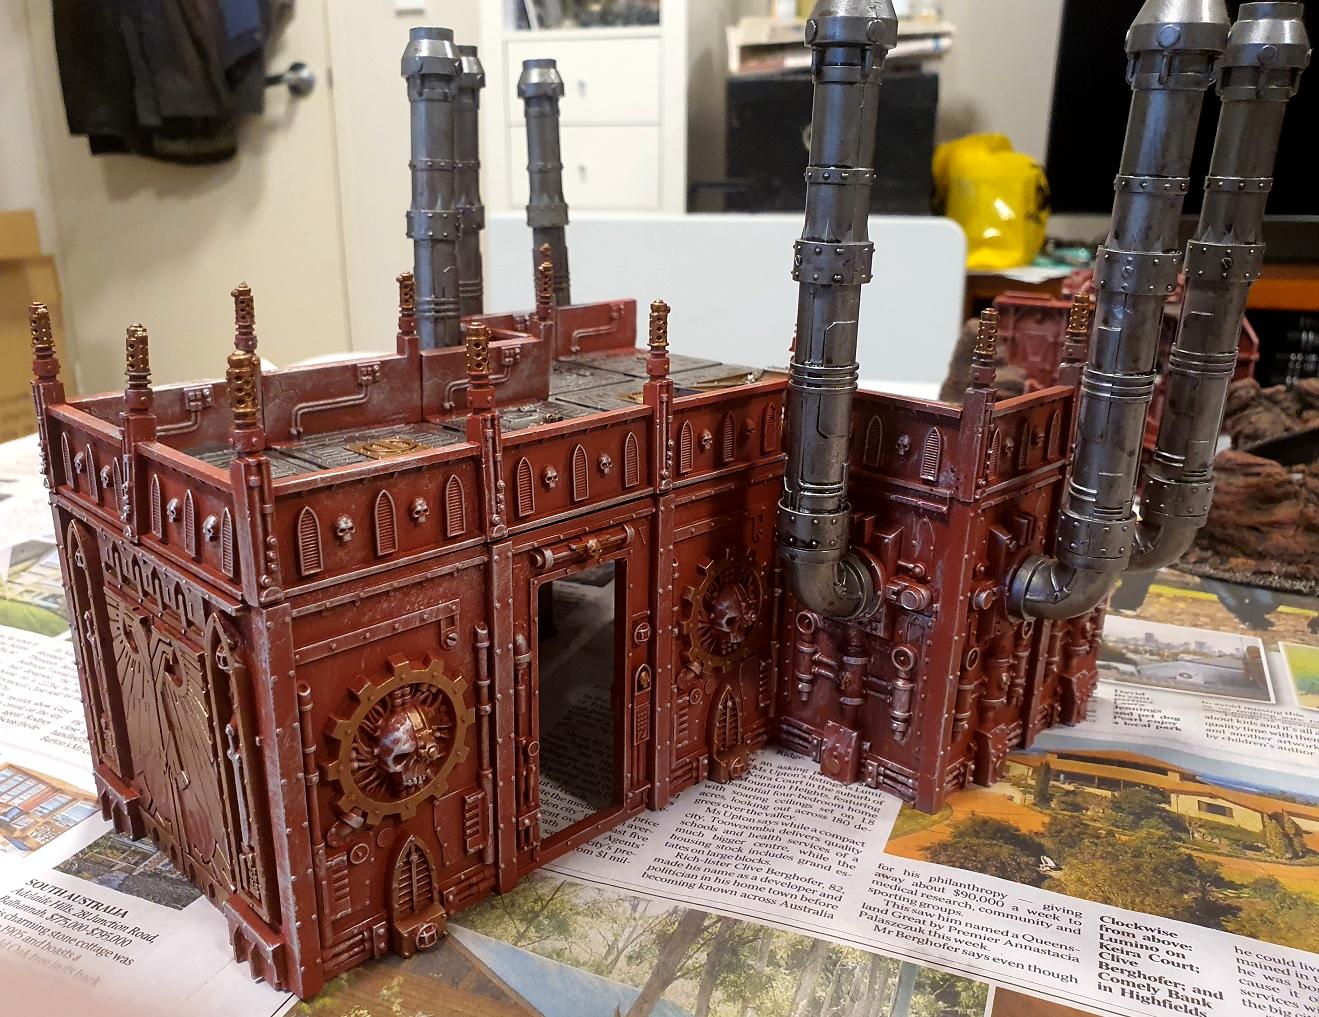 Pipes with the newer Sector Mechanicus kits fit perfectly first try. They're wonderful. These... are kind of an afterthought from a design perspective. Getting them to line up was never going to happen given the very shall slot they fit into. 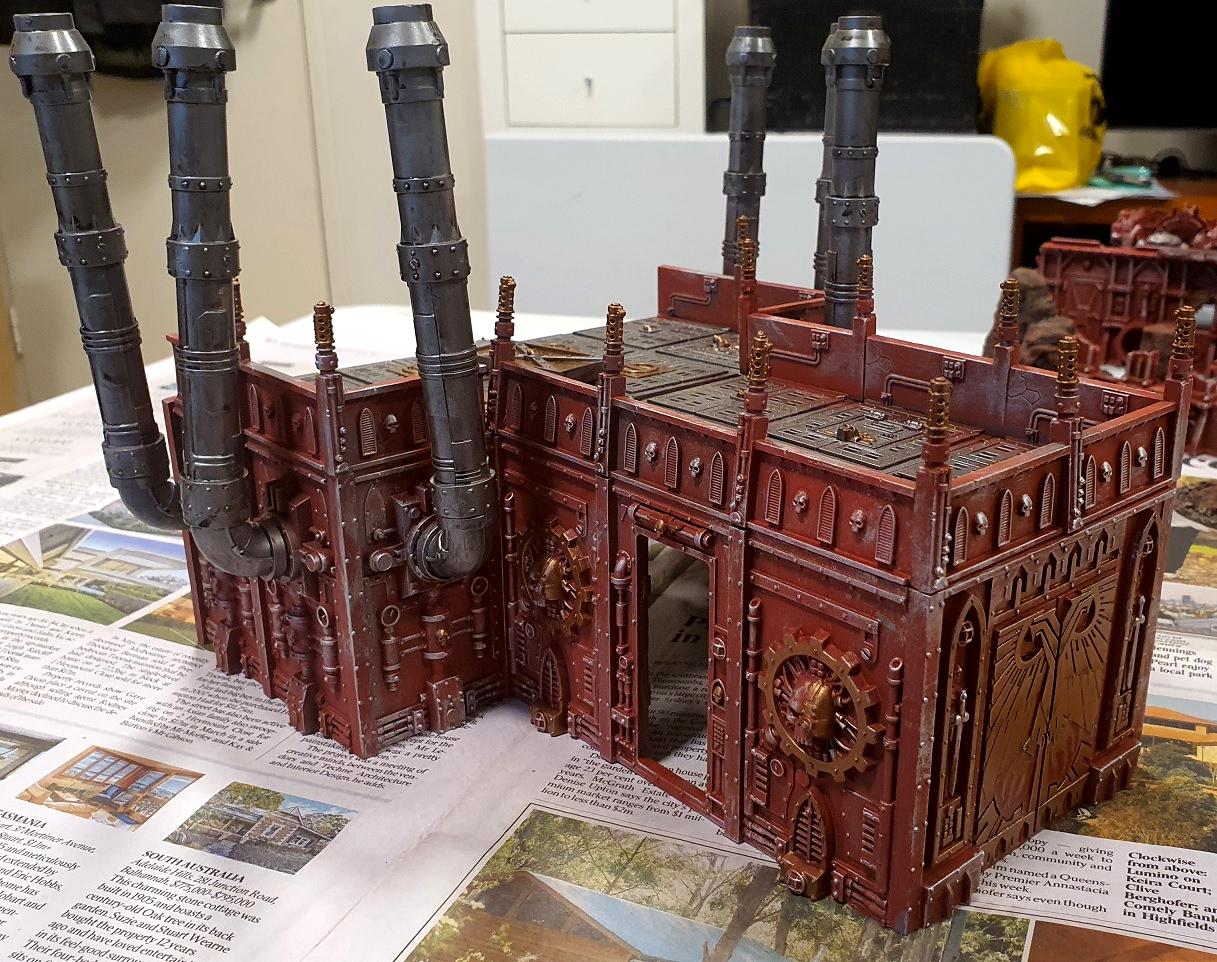 Inside corners are such a pain in the neck. 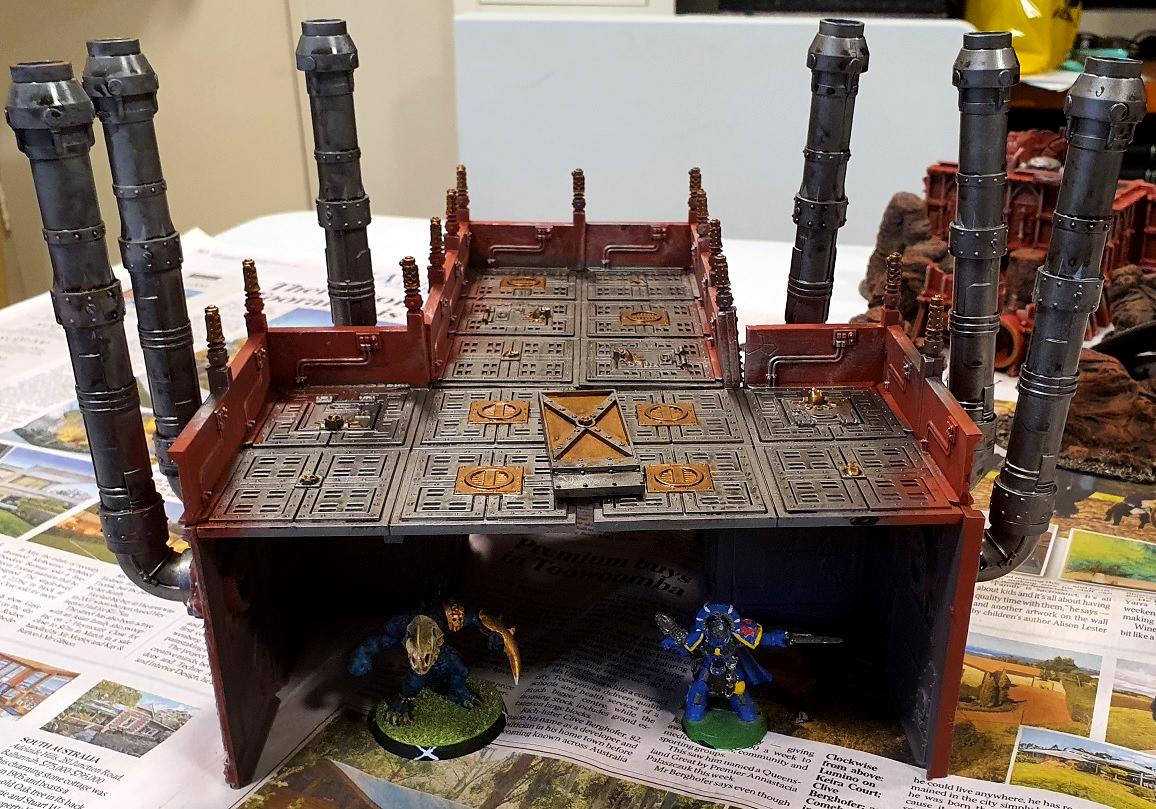 Apparently there's enough room to swing a Squig in there. So this board is coming together nicely, but it is not yet finished. I have to paint up some martian craters, a prospect made harder because my PVA glue has gone bad. More has been ordered, so next week will be all about getting those done (and hoping my replacement Battlefield-In-A-Box stuff arrives). I will post pictures of the completed table once I have everything down on the martian mat. Then Hive Fleet Greysprue will take to the table and probably get stomped as I am purposely bringing an army that just has a bunch of big bugs that I've never used before. Hope you all enjoyed this, and for anyone wondering the method is super simple: 1. Spray red (lots and lots and lots of red). 2. Tape off the red edges and spray silver onto the floors. Paint some of them, plus the pipes. 3. Remove tape! 4. Paint details gold. 5. Stick the same piece that has broken off 3 times on for the 4th time. 6. Nuln-Oil gloss all the floors to make them less flat, give them some definition, and a distinct wet/oily sheen. Until next time! BYE
105865
Post by: Rolsheen
The floors not fitting is because you put them together wrong. You would only get a slight gap on a building 8 tiles wide normally.
21358
Post by: Dysartes
That's looking good, HBMC - looking forwards to seeing the full table layout.
494
Post by: H.B.M.C.
Small update this time...
"I don't like sand. It's coarse and rough and irritating and it gets everywhere." - Anakin Skywalker
Hello all,
I have no WiP pictures of this because by the end of it my neck and back were threatening to form a union and demand better working conditions.
Suffice to say it my PVA arrived today (as did the second bottle of PVA I didn't realise I had ordered... ), and so I got to work on my craters.
I have two sets of the fantastic old vacuformed GW craters, but I made the decision to split them up so that one set could be standard blasted rock/tarmack, and the others could be blasted Martian surface. But they have this flat plastic lip around the edges that isn't a great look and I didn't want to cut away. Simple (?) solution? Texture it, specifically with sand. Finding sand proved more difficult than I first thought, but then I came across something incredible: Mars sand, and Mars Earth basing material. And then I found out he doesn't ship to Oz and that there are no stockists that have it. Awesome! 
Eventually I ended up buying some basic coloured talus from woodland scenics, and with the arrival of my PVA glue(s), I got to work.

I've never done anything like this before, other than basing my Blood Bowl lizardmen with some basic green flock, so this was a learning experience. I have no idea if I used too much glue, or too much water. I just kept putting a bit more glue into the water each time I moved onto the next crater, mixing it up with a gakky brush that has no bristles and hoping for the best. Then I poured a bit over half the bag of talus over all the edges, and dotted some parts inside just to give a bit of extra texture to everything.
And so begins the waiting game. I'll leave this for 24 hours, then come back at it with some PVA loaded water in a spray bottle, and then I'll see if it has worked. Then it's onto spraying and turning into sandy martian craters!
BYE
494
Post by: H.B.M.C.
Two more towers and the craters are now done!
The wash is still drying a bit on all of them, but here are some quick and dirty photos.
I like the brighter yellow more than the previous yellow I used (which was Averland Sunset).
The craters are basically spray black (Army Painter - not the best tasting spray I've accidentally breathed in), heavy drybrush with Mournfang brown, and then dry brush with a red ochre colour, and then a light drybrush with yellow ochre, and then Reikland Fleshshade over everything.
Battlefront Miniatures also got my replacement Battlefield-In-A-Box badlands stuff to me super quick. Didn't think I'd have it in time for the game on Sat, but it arrived, and they actually sent me more than I was expecting as well, so the Mars table should have even more natural terrain on it.
I'll have pictures of that once the table is ready to go tomorrow evening.
1823
Post by: MegaDave
Craters turned out great! I like your towers, they're certainly the most colorful sector mechanicus stuff I've seen.
494
Post by: H.B.M.C.
Something fun is about to happen...
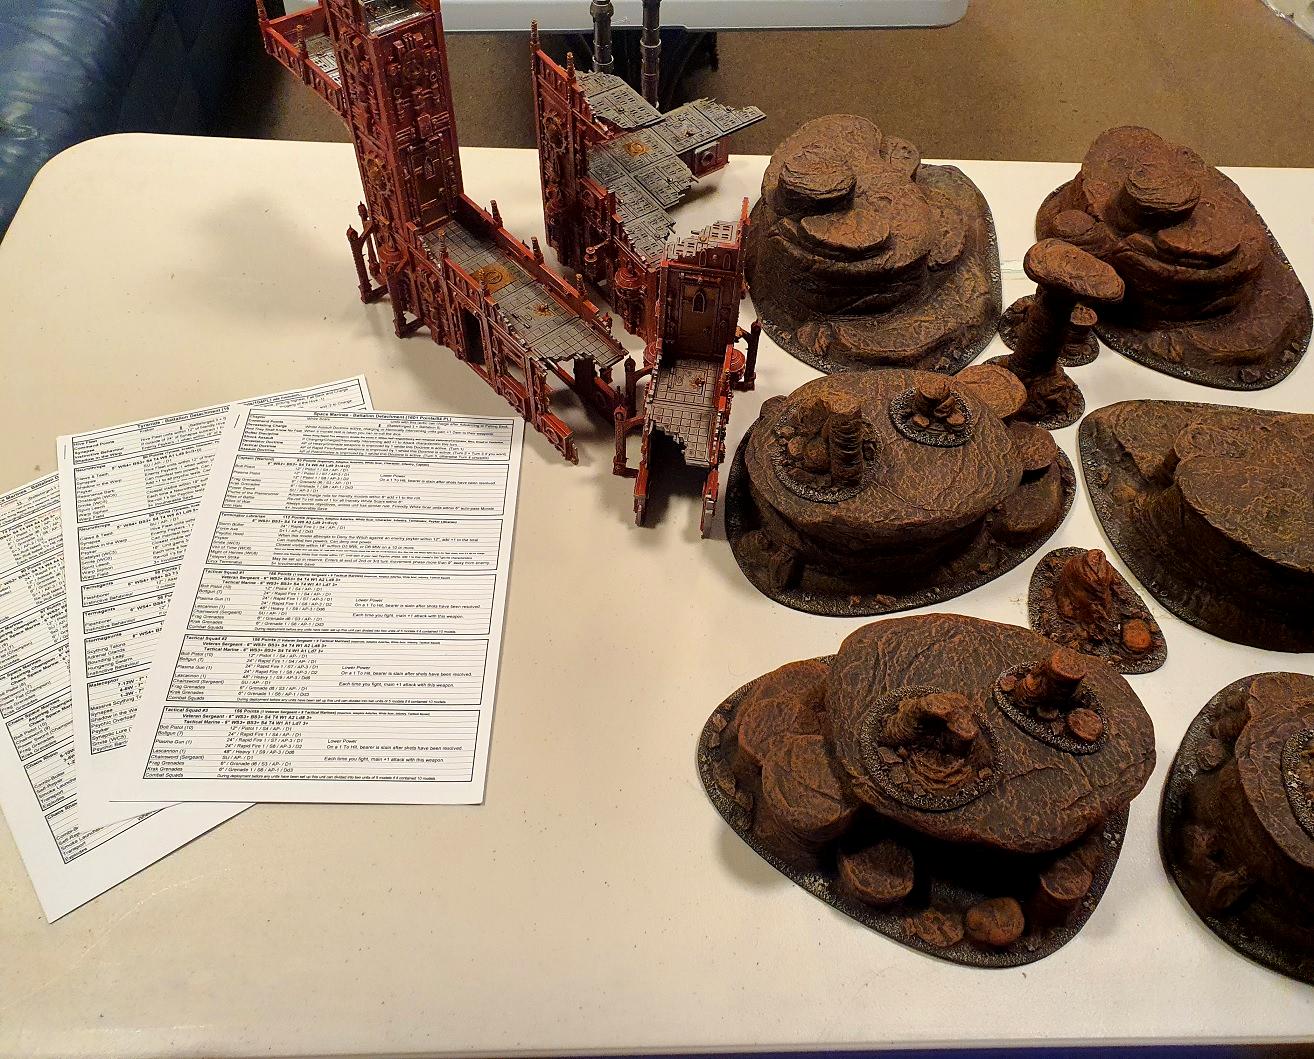
17738
Post by: Briancj
Enjoy the battle!
What army list program are you using?
--Brian
21358
Post by: Dysartes
Have fun, HBMC - looking forwards to some shots of the tables in use.
494
Post by: H.B.M.C.
Took these just before we got started, with the whole table set up. 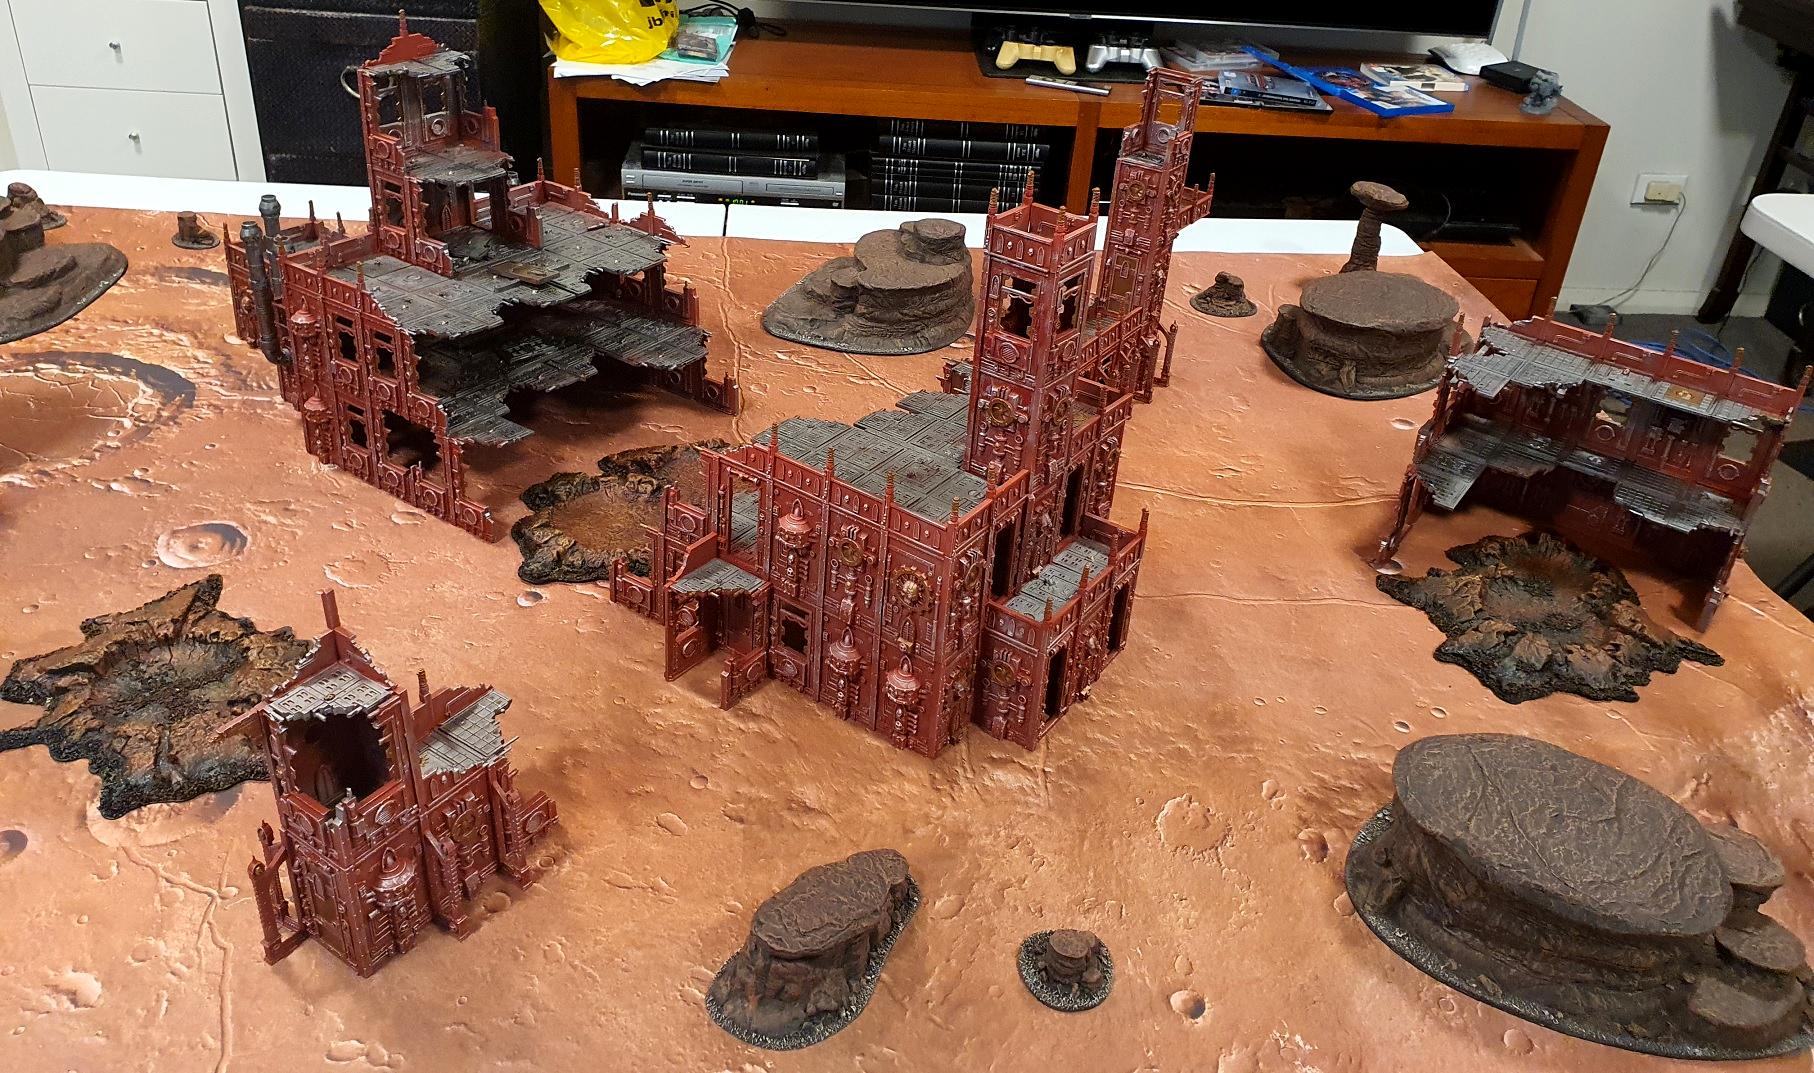 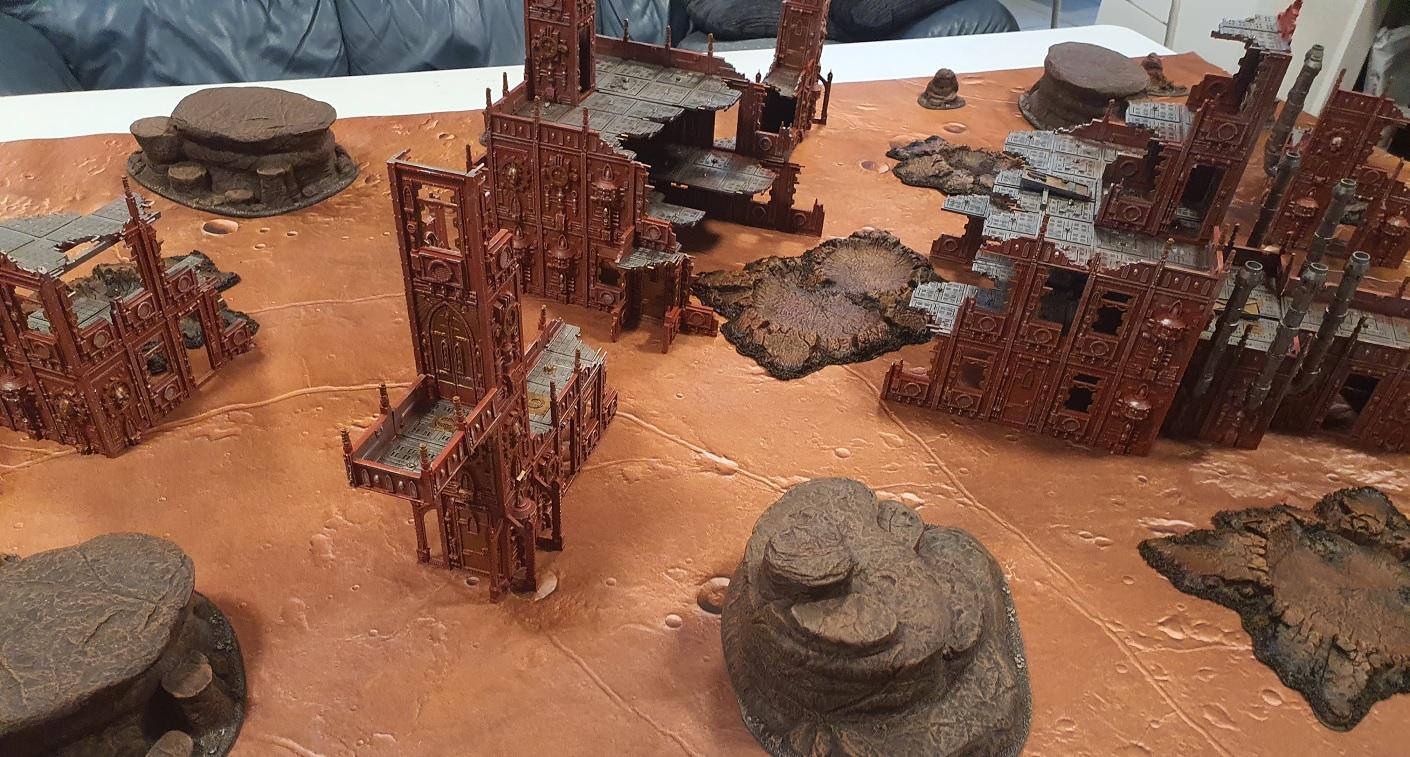 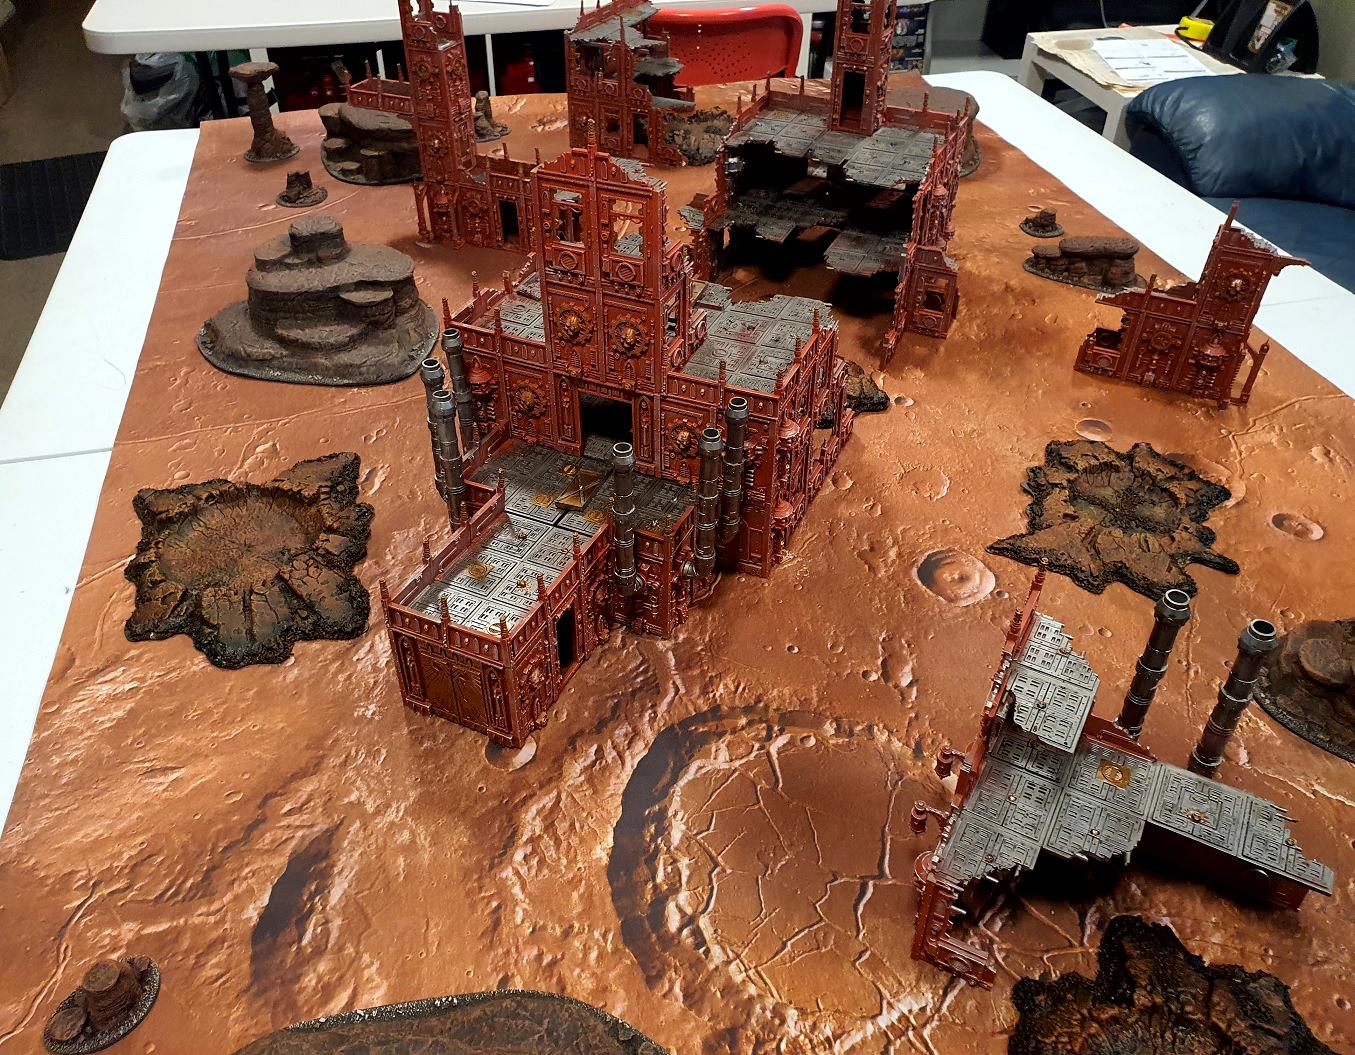 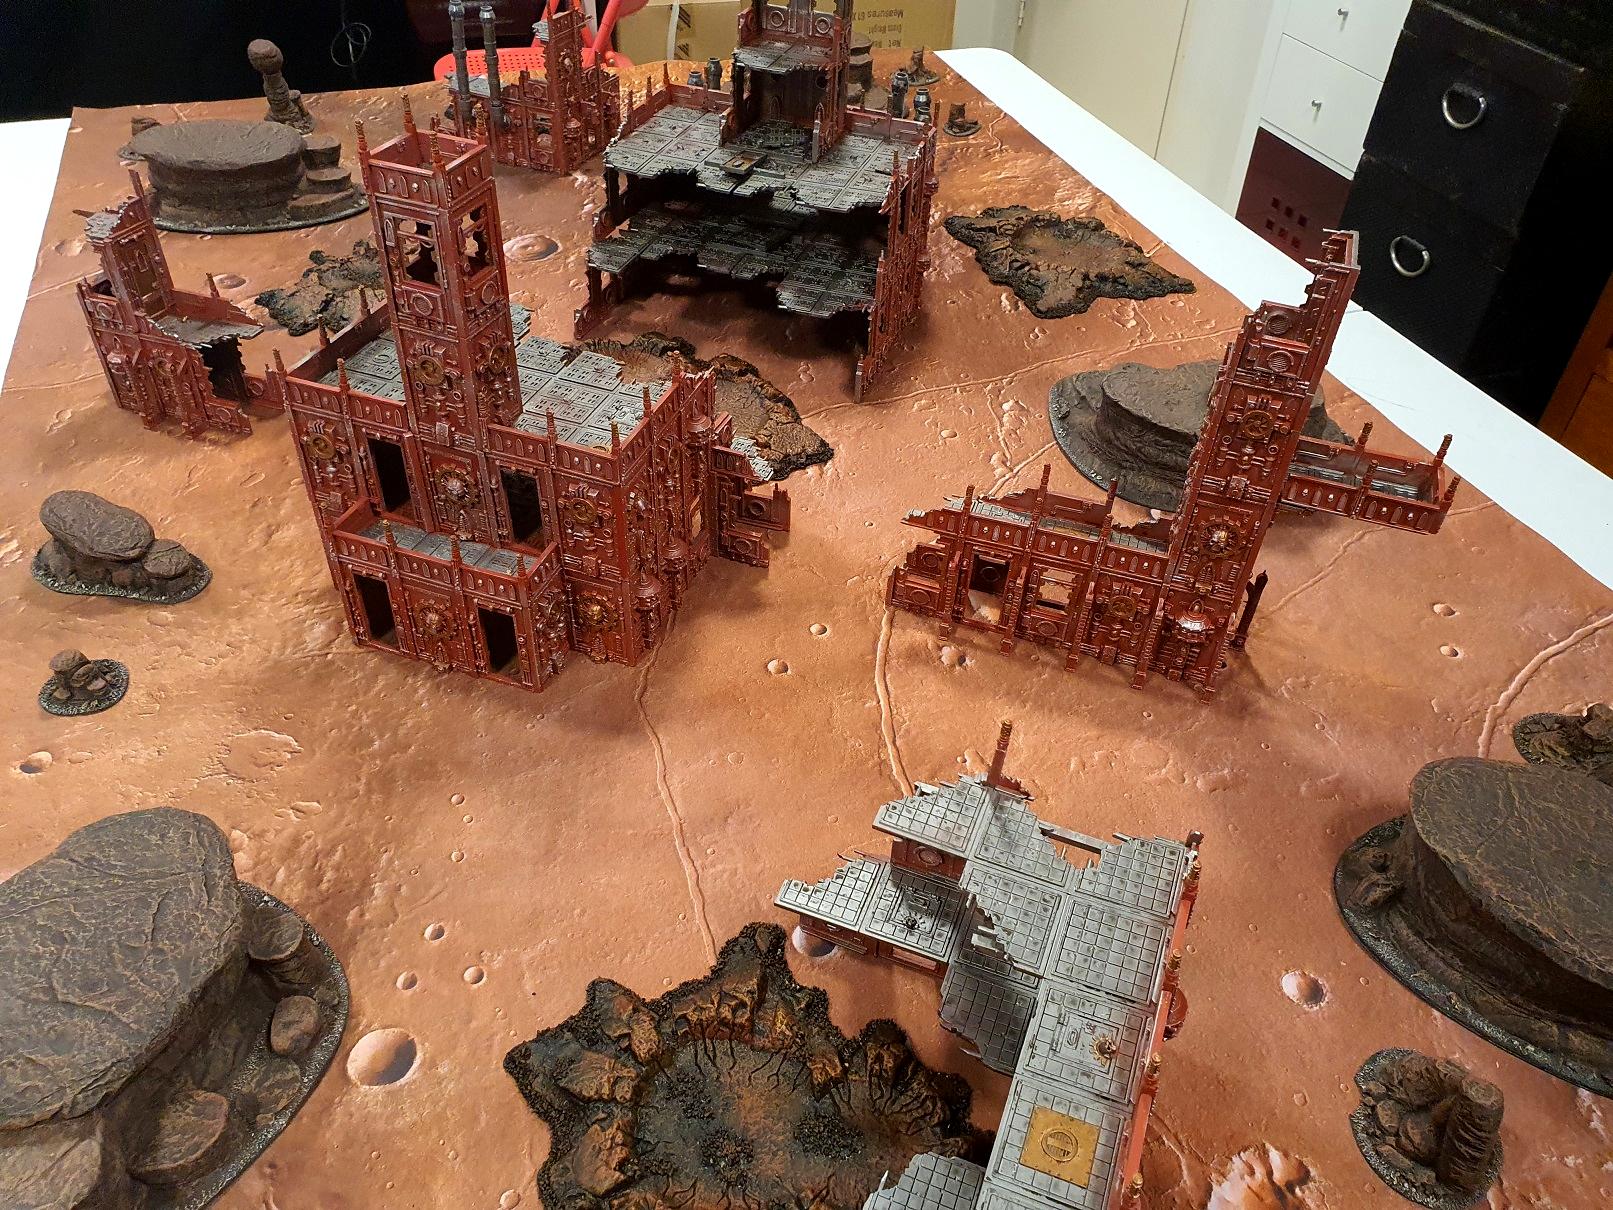 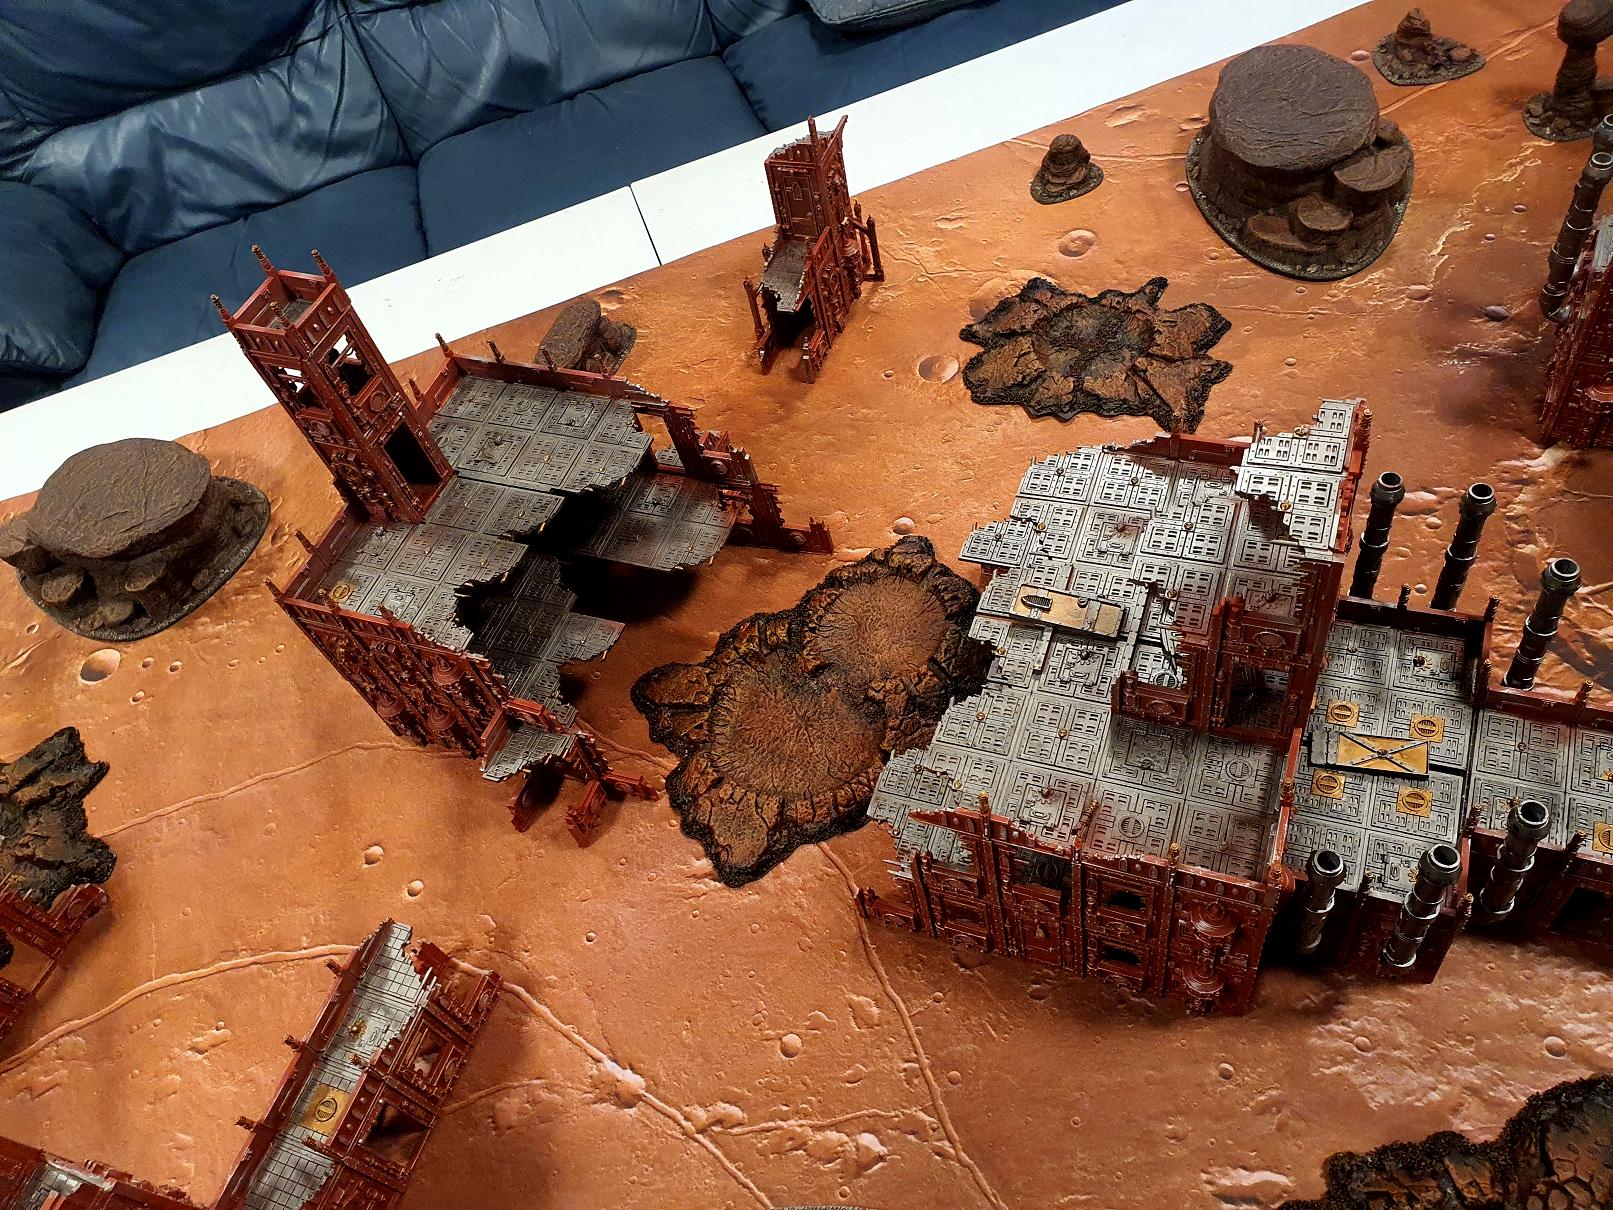 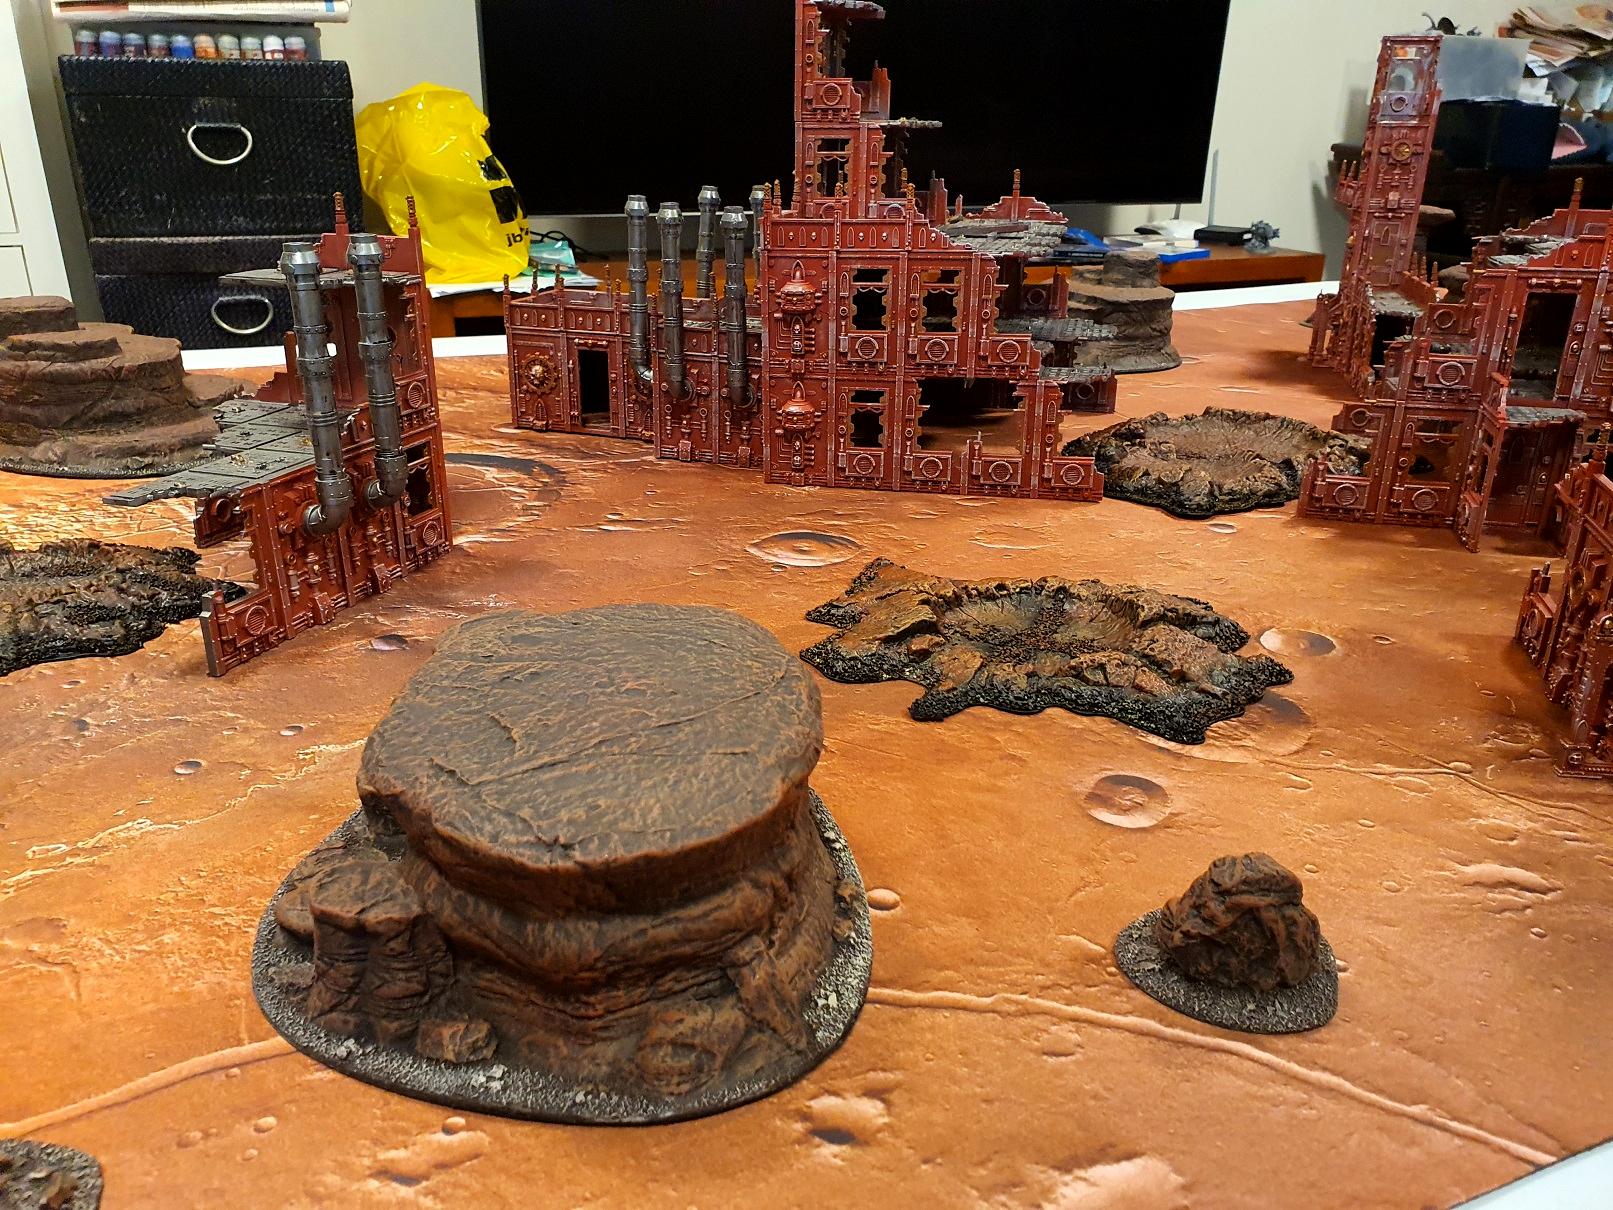 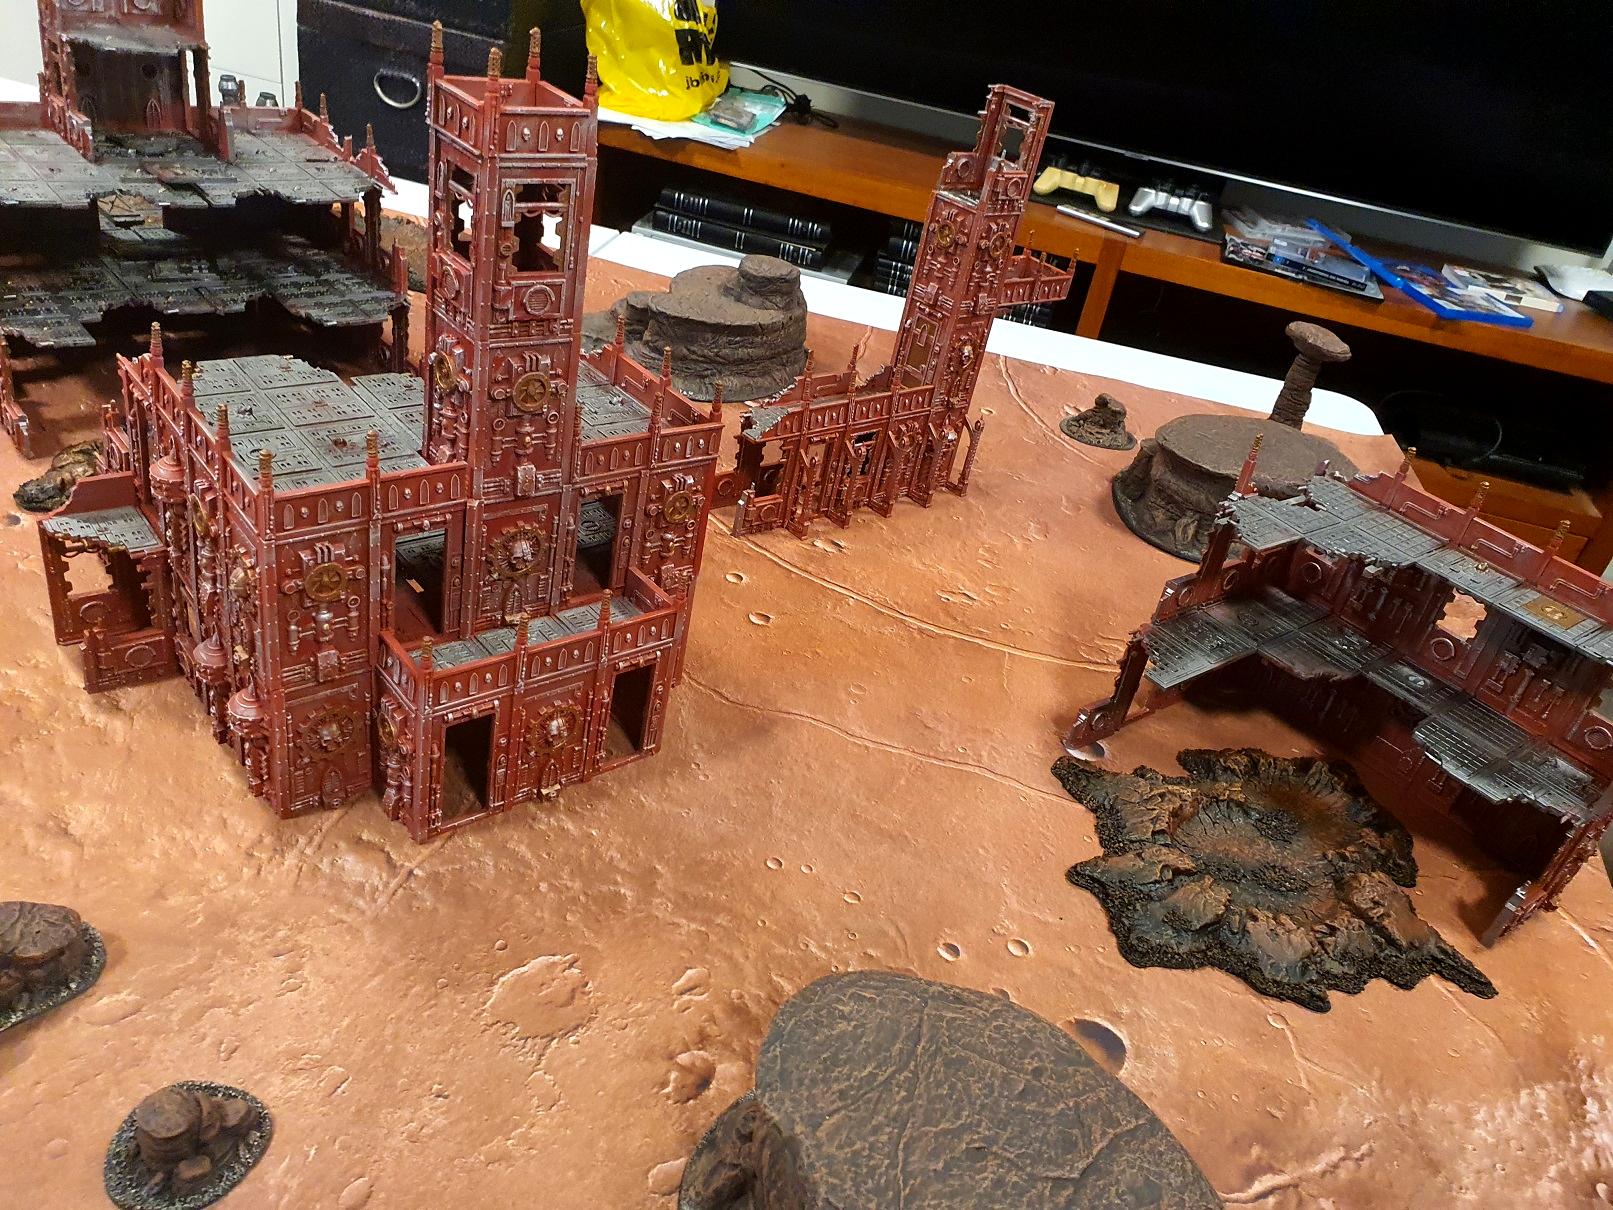 Two games were played: Chaos vs Sisters of Battle The Chaos player deployed really bad vs a big Rhino Rush sisters army. Except they weren't Rhinos. They were Repressors. Repressors are frickin' mean. Chaos got picked apart, setting up 3 unsupported Havoc units nowhere near the Noctilith Crown, walking Forgefiends onto the table where Repressors immediately locked them in combat. The incoming Chaos HTH forces eventually did quite a bit of work, but it wasn't enough Tau/Tyranids vs White Scarps/Deathwatch Knight Soup Over from the word go. The Castellan removed 2 units a turn, and my allied Stormsurge faced several 6 damage Krak Missile hits before it even got to our first turn. It never got to do anything. My Toxicrene died before it could move. My Maleceptor moved once before it died. One of my Tyrannofexes got one shooting phase. We didn't bother with turn 3 as we had thrown everything we had at the Castellan and it hadn't taken a single wound. Complete waste of time that game. Fairly old program called Microsoft Excel. I do the list in Battlescribe and then I transcribe everything to Excel. This includes any stratagem I don't have a physical card for. I do a similar thing with my home made 40k RPG sheets; the idea is to have a sheet that allows you to avoid looking through several different rulebooks. If everything is on the sheet, then you wouldn't need to rush for the Codex, or a PA supplement, or whatever. Takes a while, but it's worth it.
1823
Post by: MegaDave
Table looks great, looks like it would be a blast to play on. You should be proud of all your hard work!
17738
Post by: Briancj
I'm sorry game 2 was a waste of time. :(
21358
Post by: Dysartes
Tables looks great, HBMC - and as Braincj said, I'm sorry to hear your second game was a waste of time.
96209
Post by: MacPhail
Really nice looking table... I know one game let you down, but are there any good action shots? Regardless, really nice painting on that terrain, and on the mega-project too! It all seems a bit bold in terms of color, but I know what a forest of girders and gantries it will be up against... I bet it will all blend just fine.
494
Post by: H.B.M.C.
Everyone said that the craters looked fantastic, so at least that went well. Thanks to that random reddit post I saw explaining red ochre/yellow ochre/Reikland Fleshshade as the way to do that. I added a black base spray and a Mounfang brown drybrush into the mix as the first two steps, but otherwise it works well. The yellow ochre matches with the red, but the Reikland wash really gets rid of the high-yellow peaks and blends everything back together. My friend said he was going to retire the Castellan from regular play. There are some things that just aren't fund to play against. That was one of them. One of these days I'm going to get to play my Tyranids in a game where we're playing long edges and not short.
494
Post by: H.B.M.C.
Well I'll be damned...
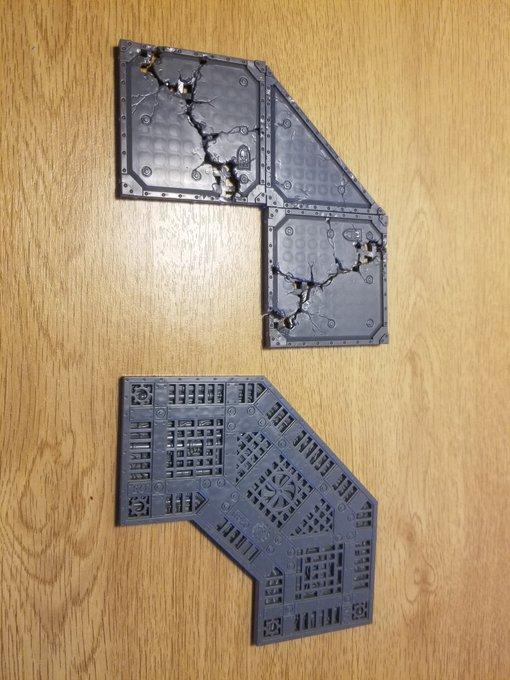
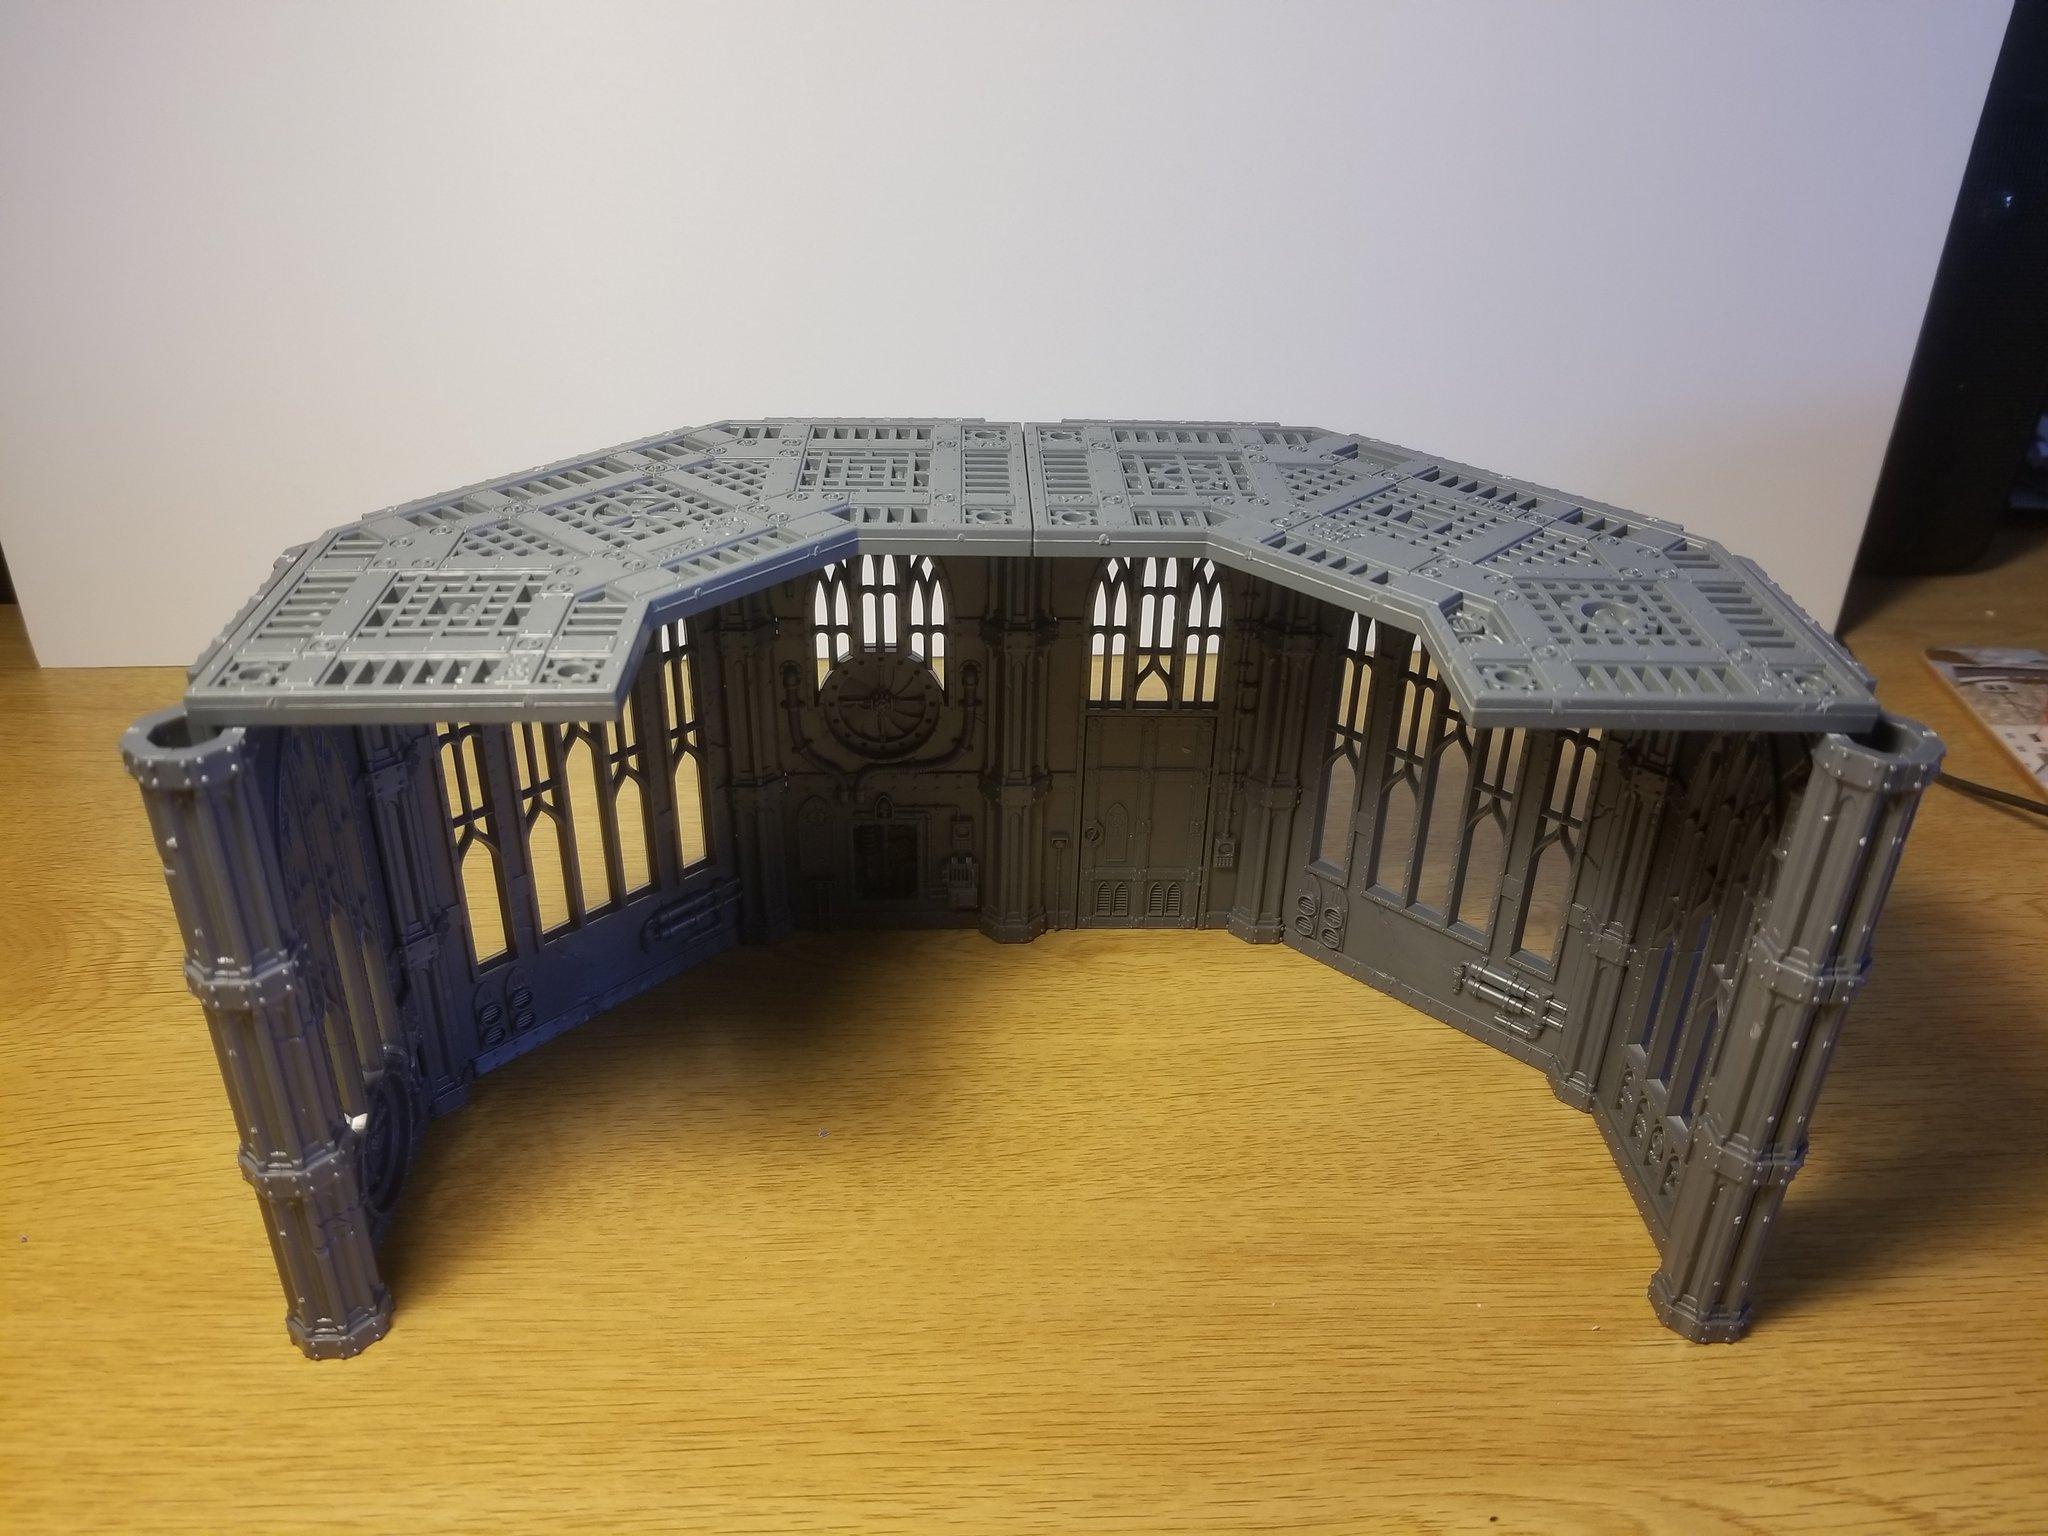
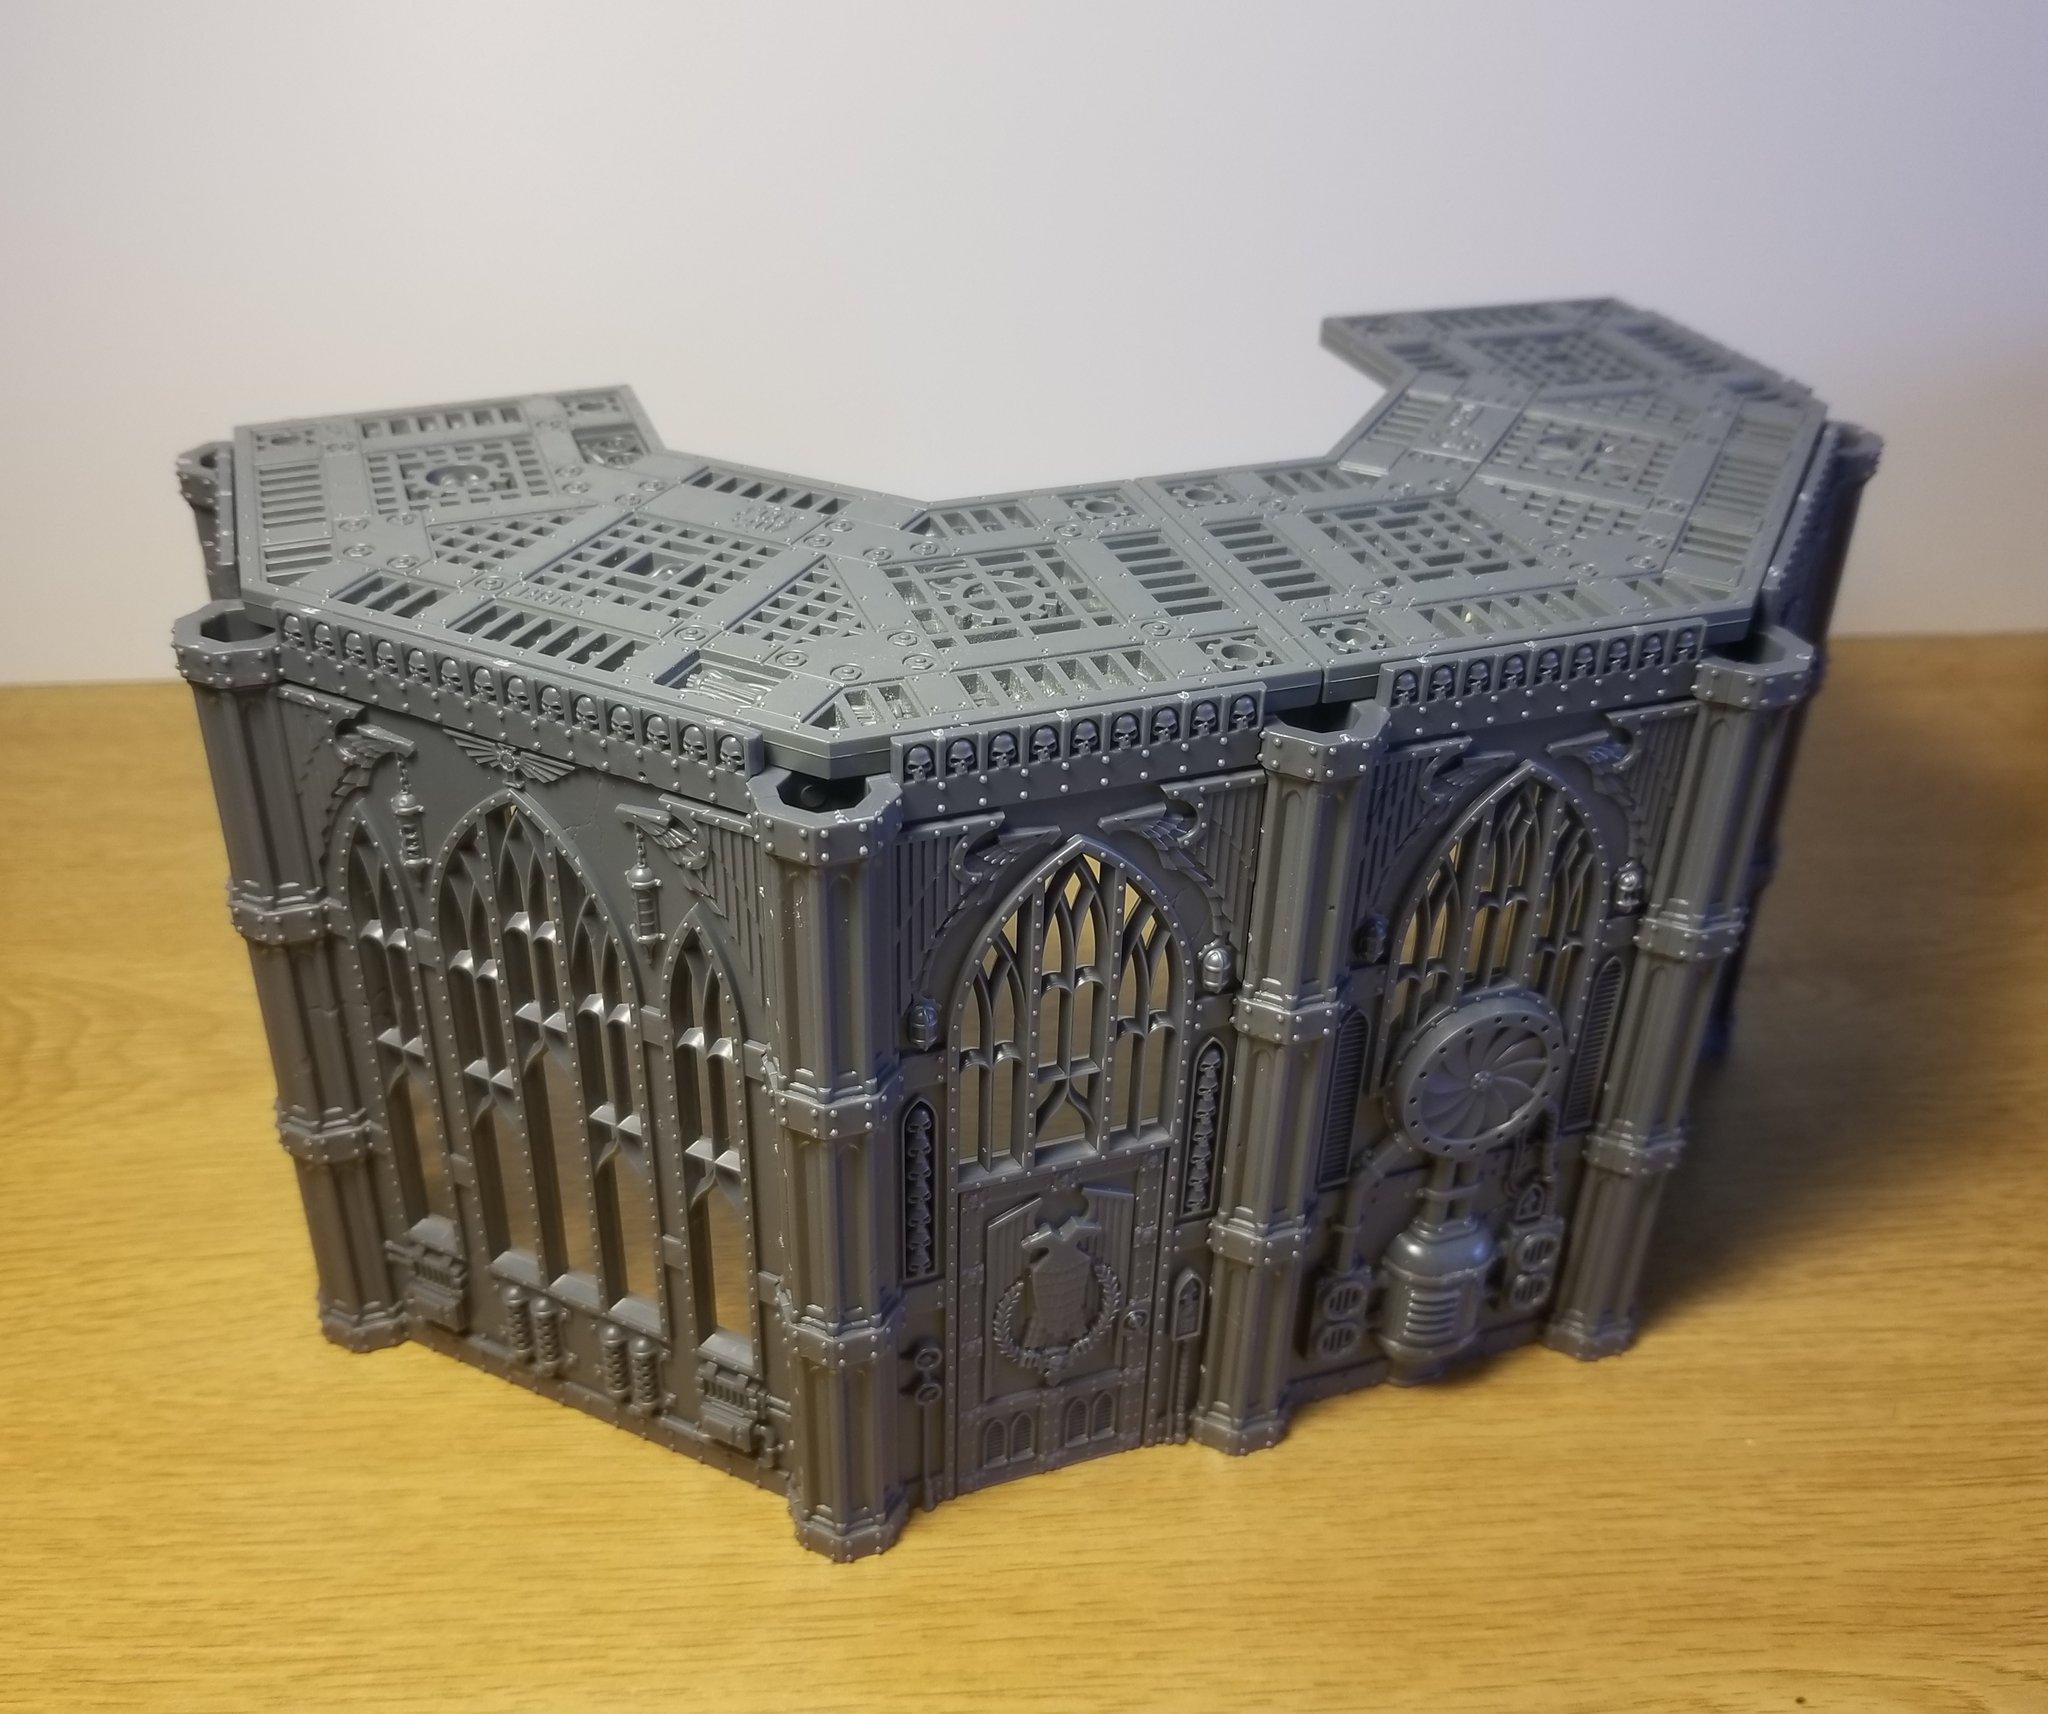
Good to know.
That and many more secrets can be found at his Twitter.
62565
Post by: Haighus
The Mechanicus-style gantry looks really good on those diagonal walls!
Hopefully they release some diagonal Mechanicus wall segments to complete the existing range.
494
Post by: H.B.M.C.
Now it just becomes a question of how many to get: 2 or 4?
Hopefully bits sites start getting them soon. It'll save me from having to have 4 statues.
21358
Post by: Dysartes
8, obviously.
Could do a street section with statues down either side...
7075
Post by: chaos0xomega
Are those battlefield in a box plateaus/mesas stock out of the box or did you retouch them with some paint? Mine look darker and redder than yours do.
494
Post by: H.B.M.C.
chaos0xomega wrote:Are those battlefield in a box plateaus/mesas stock out of the box or did you retouch them with some paint? Mine look darker and redder than yours do.
Straight out of the box.
126376
Post by: jovianArchiver
My experience with battlefield in a box is that their stuff is very good quailty, but also very expensive. Also, I've been told by someone that lives in southern Spain that during the summer their buildings can lose consistency or even melt a bit.
494
Post by: H.B.M.C.
I've got heaps of their stuff. Never had a problem with it, other than the stuff that arrived damaged.
21358
Post by: Dysartes
Southern Spain or Australia... I'm honestly not sure which would be rougher on them.
75338
Post by: Inquisitor Kallus
Awesome stuff, love the AM scenery, very nice. I wish they still made the old CoD builsing sets
494
Post by: H.B.M.C.
Came across these yesterday. They seem interesting.
They have some very interesting pieces.
Gets my mind thinking...
124896
Post by: DalekCheese
Just read through this- brilliant work!
122359
Post by: tzurk
Martian battlefield looks amazing. Always a good time turning up to a game and seeing the table set up like that!
494
Post by: H.B.M.C.
So... today we got the news that GW is raising their prices.
More specifically, they appear to be raising the prices on virtually every single terrain kit they make.
This... does not sit well with me. I may be doing a "last blast" order prior to the June hike to get some of the things I've been holding off on.
How very frustrating...
68152
Post by: JoeRugby
table pics look amazing dude
76303
Post by: Warboss_Waaazag
2 or 4? What kind of auestion is that? Clearly the answer is 4. I'm happy this mixing of two sets works so well, as now that I know this, I will definitely use it.
494
Post by: H.B.M.C.
Only a small update. I mentioned above that GW was putting the prices up on all their terrain. Before that happened I snagged a few pieces that I had been meaning to get for a while:
Should be fun to add to everything else.
518
Post by: Kid_Kyoto
Let me know what you think of the step pyramid, it's tempted me.
21358
Post by: Dysartes
Any word on any more building building, HBMC, or painting?
494
Post by: H.B.M.C.
Nothing recently, sadly. Honestly haven't had the time to sit down and build anything.
I do want to get to work on my Primaris Marines once the last few eBay orders come in (I bought some Intercessors and Hellblasters) and combine them with Indomitus for my custom Marine Chapter (the Iron Paladins). They're a pretty simple scheme - black armour.
494
Post by: H.B.M.C.
It's been a year... hmm... Anyway, I've mentioned in the past that I talk a good game about having lots of terrain - tables and tables worth - but haven't really shown much of that off. You've seen (some) of the Gale Force 9 and Gamemat.eu stuff that I have, and in the last few posts a small scattering of my Cities of Death stuff (painted, no less!), but what about the rest? I mean, I showed you this, but what came of that? For the past two weeks I've been clearing out and organising my second bedroom. Due to the substantial/insane levels of terrain I have, it had reached a point where it was all scattered across multiple boxes. And I do mean multiple - to the point where you couldn't see the floor in there any more, and moving anywhere except into the doorway was basically impossible. This was't all terrain mind you - we're talking oodles of unbuilt minis as well. People measure their Piles of Shame in the amount of unbuilt miniatures they have. I measure it in unbuilt armies. And just off the top of my head I know I have between 7 and 8 unbuilt armies - everything from Pre-Heresy World Eaters to Imperial Knights. From AdMech to Mechanicum (yes, separate armies!). During this process I kept finding full untouched sprues of 5 Adeptus Custodes. It happened more than three times. I think I have 40 of the things. And I discovered an ungodly amount of Space Marine Scouts. I honestly don't know how I ended up with so many! So I had to make a change. I needed to make the other room usable, or, at the very least organised in a way that would allow easy access to everything that was there. So commenced the massive undertaking of dragging everything out of there, working out what I had, and then putting it back into much larger tubs with proper labelling. Sadly I was down 4 tubs by the end, as the order had not come in, so some of it (namely all my unbuilt Tyranid stuff) had to go back into repurposed boxes (like those wonderful large Necromunda Dark Uprising boxes). I've posted some of these elsewhere, so I'll put this in spoilers as it's a slight tangent to the purpose of this thread: That was at the start of the process. I'd say that this is roughly... 1/3rd of everything I organised? Maybe a bit less. It resulted in a lot of empty boxes. This pile of emptiness was collapsed into smaller boxes. I had to deal with about this volume of empty boxes roughly 5 times: Along the way I found my AdMech army: Gathered together all my as-yet-unbuilt Limited Edition minis (NB: This isn't actually all of them, as I later discovered - not pictured are Ixion Hale, Inquisitor Eisenhorn and a couple of others): Got a nice group shot of about 75% of my built Sector Mechanicus terrain: And some shots of my unbuilt Sector Mechanicus terrain: (There's actually another tub with unbuilt Sector Mechanicus and Sector Imperialist stuff as well!) And made great progress on getting everything squared away (the large carboard boxes are filled with Deathguard, a full ring of Dreadhold terrain, all the other terrain that didn't bit the above boxes - Death World, Webway Gate, lots of Fantasy/ AOS terrain, etc.): But what about the damned terrain? Oh! Right! Well, here's some of it:   I'm a big fan of the Quad-Bastion + Landing Pad thing at the top of that shelf in the second pic. There's two an a half Bastions and a Skyshield in that thing. Plus some CoD terrain.
|
|