| Author |
Message |
 |
|
|
|
|
Advert
|
Forum adverts like this one are shown to any user who is not logged in. Join us by filling out a tiny 3 field form and you will get your own, free, dakka user account which gives a good range of benefits to you:
- No adverts like this in the forums anymore.
- Times and dates in your local timezone.
- Full tracking of what you have read so you can skip to your first unread post, easily see what has changed since you last logged in, and easily see what is new at a glance.
- Email notifications for threads you want to watch closely.
- Being a part of the oldest wargaming community on the net.
If you are already a member then feel free to login now. |
|
 |
2022/10/05 22:41:22
Subject: Re:sCratchbuilding Customizing & Citbashing: 04OCT Unobtanium Extraction Facility
|
|

[DCM]
Boom! Leman Russ Commander
|
Some progress tonight:
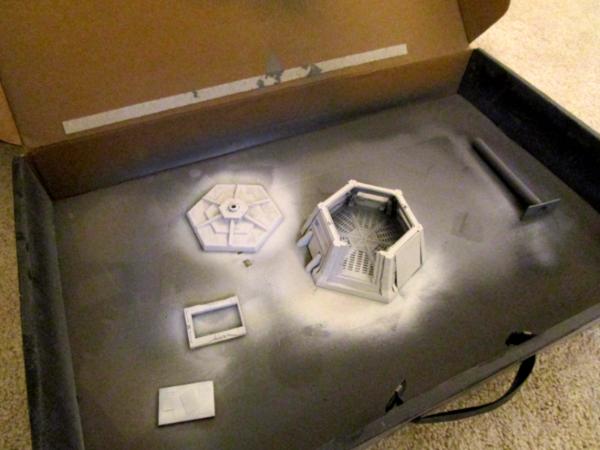
I spray basecoated the fluorescent light ballast- which I have decided is some sort of generator for the control building/bunker. Good old Dubya Dubya Eye Eye (WWII) USAAF bomber green. All this needs before gluing down is some rivets (this is the 41st Millenium, after all), some Nuln Oil wash and some rust spray painted on. Maybe some dusty pigment powder.

On the subject of spray painting, I've replaced my good and faithful airbrush that held up for nearly six years of on again/off again use. Air still flows all the way through from hose attaching point to needle cup, but it won't draw paint. I've disassembled it several times and can't find a blockage. Oh well. The new one doesn't want to be disassembled for cleaning- run cleaner through the cup, block the needle cup recess and backflow cleaner through that, repeat until no more paint. Marvelous. I used Rustoleum 2x (primer and paint) white to base coat the control building and then hit it with Thrash Metal white to dull it down. It will need some yellow ochre airbrushing to weather it and a little bit of detail painting. When complete, this building will fit in with the several other 'mining/desert planet' projects I've done- I'll post a pic of them all when finished, I really think it's enough for a decent board.
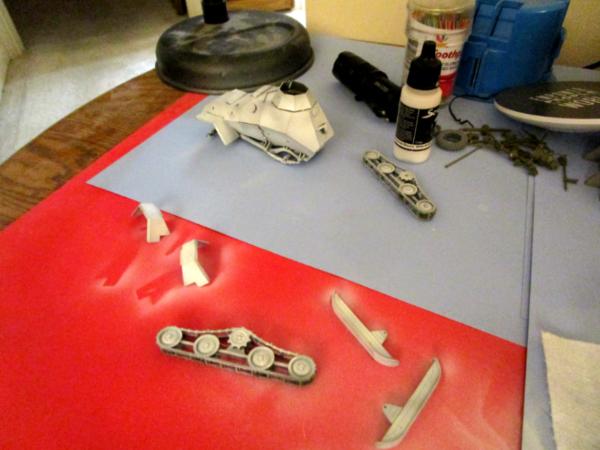
And whilst the airbrush and Thrash Metal White were out, I finally basecoated the little BA-64 treads and skis variant I built awhile back. It needs a lot of detail paint (there's a lot of non-white details), some dirt/grub and a bunch of rust- especially the muffler. Ad a couple of wannabe Valhallans and it's done also.
I'm hoping to maybe get the wire leads soldered onto the last two LEDs that will be on this project, but we'll see. I'm at the farm as of tomorrow so, while work will continue, I won't be able to post pics probably until Monday.
More follows soonest.
|
"He fears his fate too much, or his desserts are small, who will not put it to a single touch; to win- or lose- it all."
Montrose Toast

|
|
|
 |
|
2022/10/08 04:20:34
Subject: sCratchbuilding Customizing & Citbashing: 05OCT UEF basecoating nearly complete
|
|

Gargantuan Great Squiggoth
|
Nice work. Airbrushes are the devil's own bloody things. All looking good, love the BA whacky racers meats war! Love all those old crazy truck tanks.
|
|
|
|
|
|
2022/10/09 19:41:48
Subject: Re:sCratchbuilding Customizing & Citbashing: 05OCT UEF basecoating nearly complete
|
|
[DCM]
Boom! Leman Russ Commander
|
I hadn't thought about the Wacky Races in years- and yes, that Artic Cat/ BA-64 hybrid looks like it came right out of the cartoon. Truth is stranger than fiction! 
|
"He fears his fate too much, or his desserts are small, who will not put it to a single touch; to win- or lose- it all."
Montrose Toast
|
|
|
|
|
2022/10/10 08:37:22
Subject: Re:sCratchbuilding Customizing & Citbashing: 05OCT UEF basecoating nearly complete
|
|

Longtime Dakkanaut
|
That shadowbox is amazing and the accompanying explanation is beautiful. So glad the horse had some good years with you and the neighbor's Christmas tree.
|
|
|
|
|
2022/10/11 21:29:04
Subject: Re:sCratchbuilding Customizing & Citbashing: 05OCT UEF basecoating nearly complete
|
|
[DCM]
Boom! Leman Russ Commander
|
Thanks very much, Viterbi. 
|
"He fears his fate too much, or his desserts are small, who will not put it to a single touch; to win- or lose- it all."
Montrose Toast
|
|
|
|
|
2022/10/18 23:43:59
Subject: Re:sCratchbuilding Customizing & Citbashing: 05OCT UEF basecoating nearly complete
|
|
[DCM]
Boom! Leman Russ Commander
|
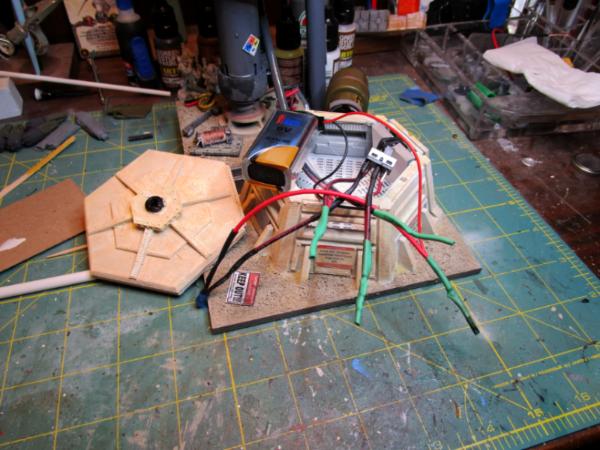
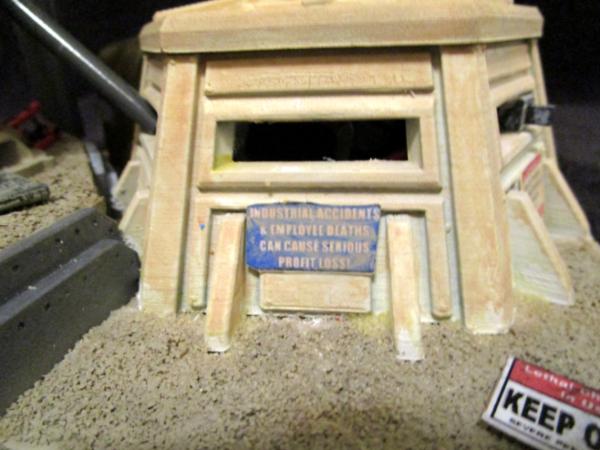
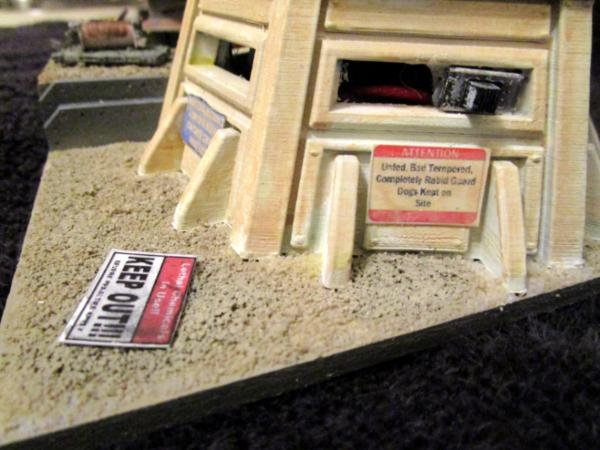
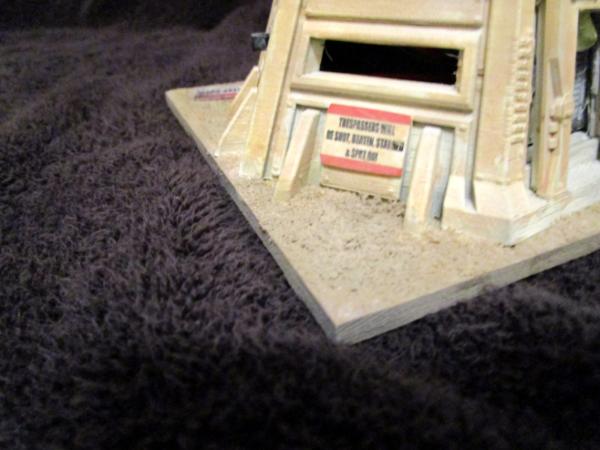
Some progress: a couple of WIP shots showing things roughly/loosely positioned and with colors other than primer. Also, a few of the several placards, warning signs, postage and graffiti that I want to put on:


Hopefully more work gets done tomorrow, too. In any event, more follows soonest.
|
"He fears his fate too much, or his desserts are small, who will not put it to a single touch; to win- or lose- it all."
Montrose Toast
|
|
|
|
|
2022/10/20 00:12:44
Subject: Re:sCratchbuilding Customizing & Citbashing: 05OCT UEF basecoating nearly complete
|
|
[DCM]
Boom! Leman Russ Commander
|
As they say: "stuff got done, tonight".
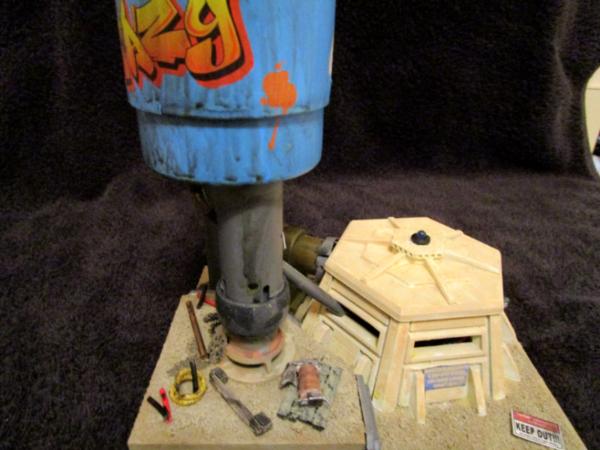
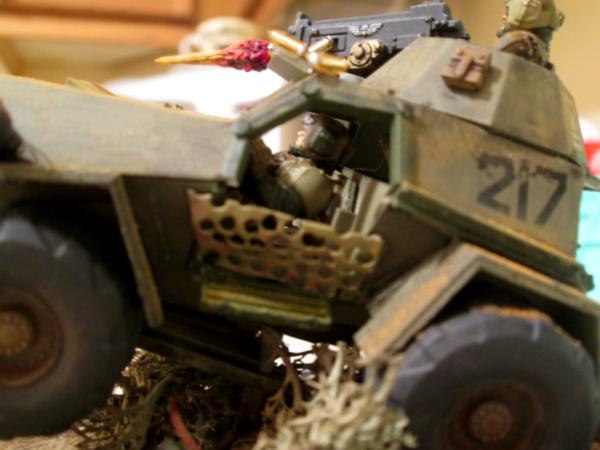
Applied the last thin coat of bright, base color to the extraction centrifuge tank, and stenciled on the mining unit number- used the airbrush for tighter control than a rattle can and it seems to have worked out nicely; you can see the start of basing material on the shaft platform:

Also added some graffiti, because what remote, automated mining facility wouldn't have some?
I used the airbrush to apply Vallejo Rust Wash to the generator housing:

And soldered leads onto the last two LED bulbs and soldered in the switch to turn everything on and off:

I actually remembered to position the shrink tubing before soldering on the lead or the switch, so all the connections should be nicely isolated from each other when everything gets stuffed into the control bunker. All that's left wiring-wise is to start gluing major diorama components down so I can see where/how to run the leads from the aircraft warning light on top of the drill rig and the yard light underneath the centrifuge tank.
Then the real weathering and detailing can begin, for as long as I have time. Frankly, for me, this is where I add the most 'rivets' towards showing that attention to detail that might make my piece worthy of consideration for the LOER. Everything gets a two thin sprays of flat matte varnish, then some 'dusting' with yellow ochre from the airbrush, then homemade Nuln Oil wash for all the moving parts. And a ton of litter in the form of pipe sections, coils of cable, shipping packing , etc.
I may get some work in tomorrow, we'll see. More follows soonest.
|
"He fears his fate too much, or his desserts are small, who will not put it to a single touch; to win- or lose- it all."
Montrose Toast
|
|
|
|
|
2022/10/26 22:23:32
Subject: Re:sCratchbuilding Customizing & Citbashing: 19OCT: numbering, graffiti and more
|
|
[DCM]
Boom! Leman Russ Commander
|
Last update for the Unobtainium Automated Extraction Facility #4, as I just need to splash some more weathering goop on and I'm ready to take final photos for the League of Extraordinary Riveters competition. This one deliberately doesn't show much of the whole she-bang, just the last soldering and what I had to stuff into the bunker looked like.
I cheated a little, in that I didn't do 'linear' soldering of wire connections, but pig-tailed the ends together, soldered them and then applied shrink tubing over top to isolate the join. Is it professional? Feth no! Is it pretty? Double feth no! Does it work! Heck yes! And I had the space to store all the extra wire and somewhat bulky soldered joins, so no problem:
I'm giving myself the rest of tonight to put away all the tools and materials from this project and clean up my little desk to get ready for the next- and man, I've got a ton of things I want to do! Tomorrow will be reserved for just photographing the diorama and getting the pics sent off to the LOER and then posting them also here.
More follows soonest.
|
"He fears his fate too much, or his desserts are small, who will not put it to a single touch; to win- or lose- it all."
Montrose Toast
|
|
|
|
|
2022/10/27 21:54:32
Subject: Re:sCratchbuilding Customizing & Citbashing: 26OCT: last update pic before LOER submission
|
|
[DCM]
Boom! Leman Russ Commander
|
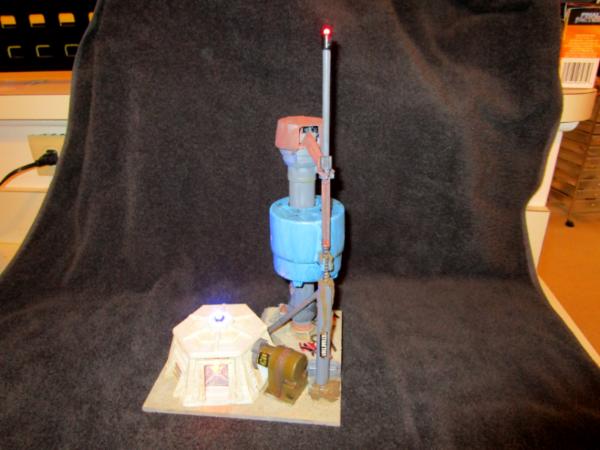
Here are final pictures of my entry for the LOER competition. This is Automated Extraction Facility #4; its programed mission is to extract ore containing the rare element Unobtainium (which cancels the negative effects of governmentium- atomic weight 1,867), centrifuge the ore to separate the element and store the refined element until remotely piloted drones carry it away. Field mechanical teams visit once per year for routine maintenance or more frequently when something breaks down.
This unit is located on the desert moon #4 of the planet Sturgeon (thank you for everything, Theodore!).
The theme of this LOER comp was 'elements'. I believe my entry meets this theme in two ways: it has as the subject of the vignette extracting an element (albeit an imaginary one) and it has itself been weathered by the harsh elements of its environment.
The main part of the rig- the extraction bore, tower, centrifuge and storage tank, are the unused float stand for a toilet repair kit (I needed to replace the float arm and chain, but never needed the stand. It is wired with three LED lights (the red aircraft warning beacon, amber door entry illuminator and the blue recall beacon set in the roof of the bunker) powered by one 9v battery all hidden in the bunker. The switch is set in one of the vision slits for convenience.
The wiring for the red aircraft warning beacon runs down through a piece of PVC tubing, through the storage tank and out through a flexible drinking straw and into the bunker through a vision slit. The green generator unit is the ballast from an old fluorescent light. The vertical bore drill guide is the cut off barrel of a Strongium Paste syringe (a medication for our rescue horses). The junk around the base of the centrifuge tower is everything from the windings from an old electric motor I took apart (its pallet is actually a 3d printed 'birch' door from a Celtic house model) to off-cuts from the wire I used for the LEDs to Nuln Oil stains to some gear-looking bits and bobs from a bag of 50 I got at Michaels, once.
Things I learned/practiced:
* Got better at soldering through adding the lights, need to plan out better running my wiring harness
* Started off using my airbrush quite a lot until it died, then had to find a way to duplicate the appearance with brushes and washes
* Made great use of Greenstuff as a fixing agent, as opposed to relying on 2-part epoxy
* 3d printed the bunker and improved my print settings a bit, but need to go a bit finer, I think
* I tried some new weathering techniques- liquid pigments especially- and like how some came out (the storage tank really needed the salt method- a missed chance, there)
Biggest thing I learned: Get it done! Don't let the perfect (or different) be the enemy of the good.
Thanks very much for looking in.


|
|
This message was edited 1 time. Last update was at 2022/10/27 21:59:49
"He fears his fate too much, or his desserts are small, who will not put it to a single touch; to win- or lose- it all."
Montrose Toast
|
|
|
|
|
2022/10/28 05:27:38
Subject: sCratchbuilding Customizing & Citbashing: 27OCT: Unobtanium Extraction Facility #4 complete
|
|
Dakka Veteran
|
I love it, looks good and I would be proud to have that on my table.
|
|
|
|
|
2022/10/28 22:04:54
Subject: Re:sCratchbuilding Customizing & Citbashing: 27OCT: Unobtanium Extraction Facility #4 complete
|
|
[DCM]
Boom! Leman Russ Commander
|
Thank you very much, Meat Shield! I obviously don't paint/build for realism, but do try to make a good, interesting piece that someone might want to game with. That you so so, means a lot.
|
"He fears his fate too much, or his desserts are small, who will not put it to a single touch; to win- or lose- it all."
Montrose Toast
|
|
|
|
|
2022/11/02 00:15:46
Subject: Re:sCratchbuilding Customizing & Citbashing: 27OCT: Unobtanium Extraction Facility #4 complete
|
|
[DCM]
Boom! Leman Russ Commander
|
Excelsior- ever upward, ever onward.
Next on the bench:
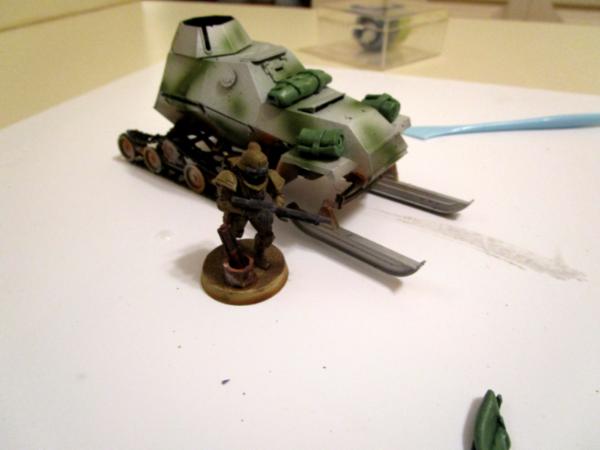
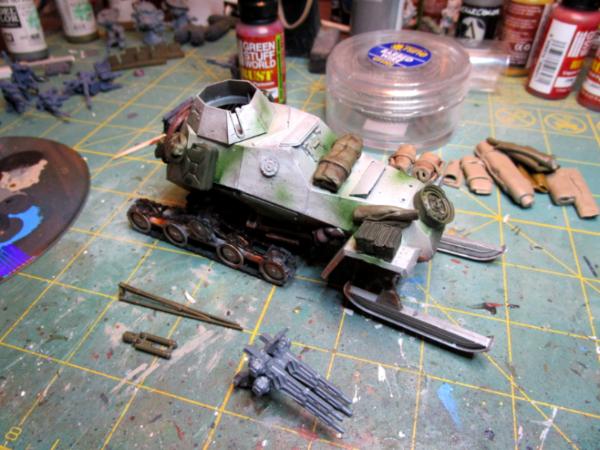
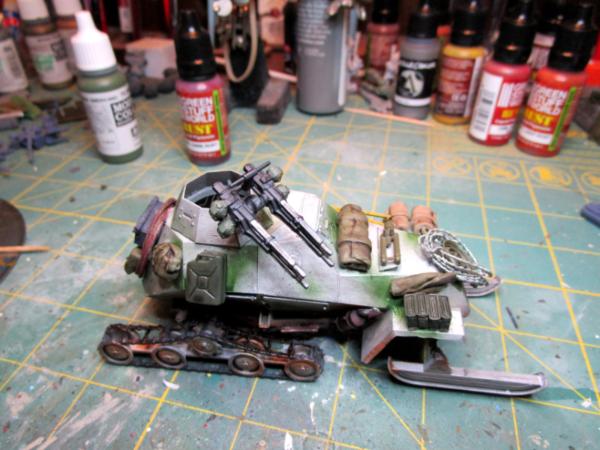
This BA-64 variant rigged for snow/winter ops seemed like it would be a fairly quick finish: I've got my new (extremely inexpensive- so naturally it's working like champ, at the moment) airbrush, I hadn't planned to 'base' it and it seemed to only want a few licks of brush paint here and there.
Out the window with that plan: now it needs a base, it's had a new base coat of off-white, camo green splotches per the Red Army 1942, and a dulling coat of 'Oily Discharge' (per the label on the paint- frankly, that sounds like some sort of venereal disease) all from the airbrush. I've got a few store-bought bits to put on- ammo and fuel cans mostly, but had no good tarps and packs so had to try my hand at carving and sculpting greenstuff.
Note: my hat is off to you cats that have made amazing things with greenstuff; my kindergarten attempts still called for the patience of a saint (which I ain't) and I still stabbed at it with my X-acto knife before all was through. I want to try some more though; previously I'd done the simple 'roll a flat piece up and drop a couple of straps on it'. This time I tried carving pocket edges, flaps, adding straps and pockets and squishing the packs the direction they need to go to hang naturally when glued in place on the SnowCat.
WIP Photo (Eisenkern trooper for scale):
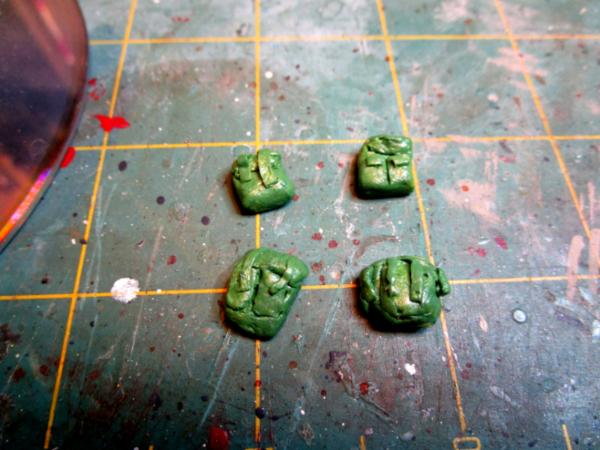
Here's my modest packs:
More follows soonest.
|
"He fears his fate too much, or his desserts are small, who will not put it to a single touch; to win- or lose- it all."
Montrose Toast
|
|
|
|
|
2022/11/04 22:19:15
Subject: Re:sCratchbuilding Customizing & Citbashing: 01NOV: Let's finish the SnowCat!
|
|
Krazed Killa Kan
|
Very cool Meer! I can't get over how you made a toilet float into such a convincing sci-fi structure
|
|
|
|
|
|
2022/11/05 17:14:29
Subject: Re:sCratchbuilding Customizing & Citbashing: 01NOV: Let's finish the SnowCat!
|
|
[DCM]
Boom! Leman Russ Commander
|
Thanks very much, Syro! When I bought the repair kit and used only the couple pieces, I saved the float and stand because 'you never know when you'll need it'. It kept getting in the way and was going under the other debris in the workshop for the third time when I reminded myself that I have never had to replace a float and float stand in a toilet tank in my life (past 60 years now).
That's when the Dakka Demon popped up on my shoulder and whispered in my ear "you know you can make something out of that".
The rest is history!
|
"He fears his fate too much, or his desserts are small, who will not put it to a single touch; to win- or lose- it all."
Montrose Toast
|
|
|
|
|
2022/11/09 23:41:31
Subject: Re:sCratchbuilding Customizing & Citbashing: 01NOV: Let's finish the SnowCat!
|
|
[DCM]
Boom! Leman Russ Commander
|
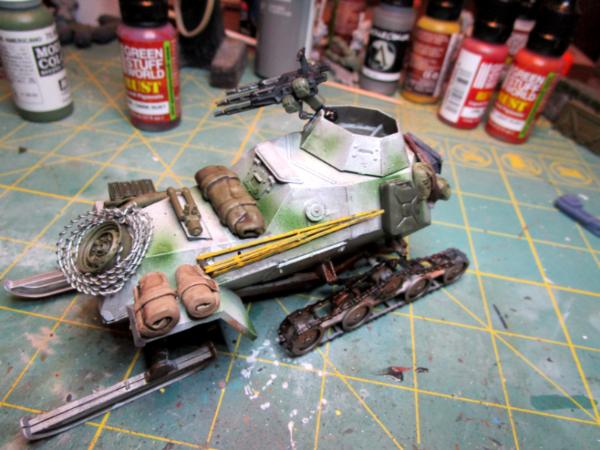
Busy week, but some progress.
I have painted and attached most of the stowage for the vehicle itself- the last couple of bits are the Eisenkern Quad 20mm anti-aircraft gun (and anti-infantry, Orks, small yappy dogs, tax collectors......) and the Wehrmacht WWII artillery range finder, because why not? I also was thinking how to dull down the hull paint job and what finally worked was just a thin wash of Nuln Oil.
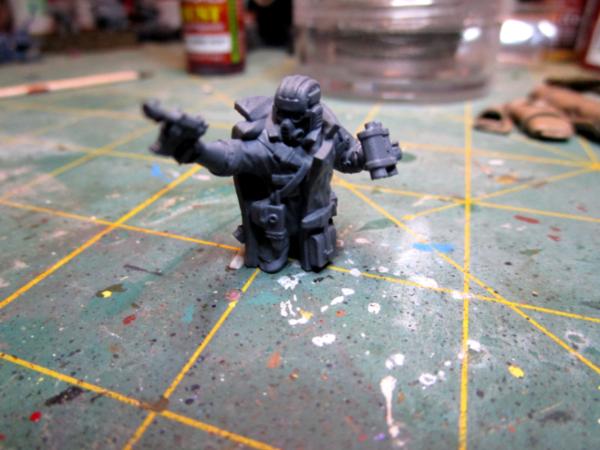
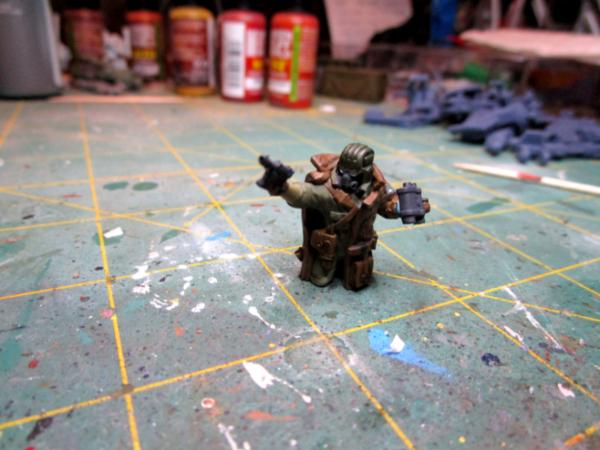
And the next phase of the project is the commander, by Grim Skull:
I also have done my research on making fake snow, so I can commence basing operations 'concurrently'.
More follows soonest.
|
"He fears his fate too much, or his desserts are small, who will not put it to a single touch; to win- or lose- it all."
Montrose Toast
|
|
|
|
|
2022/11/12 04:35:43
Subject: sCratchbuilding Customizing & Citbashing: 09NOV: SnowCat wrapped, time for CDR
|
|
Gargantuan Great Squiggoth
|
Love the vehicle and commander. Also love that entry for the LoER contest. Going to have to have a look at the comp myself. Been a while.
|
|
|
|
|
|
2022/11/12 11:43:47
Subject: Re:sCratchbuilding Customizing & Citbashing: 09NOV: SnowCat wrapped, time for CDR
|
|
[DCM]
Boom! Leman Russ Commander
|
Thanks Cam!
Frankly, you cranked out an entire village worth of buildings- all of which had been weathered (subjected to the 'elements') and documented their progress photographically during the SEP-OCT window: you could enter any or all of 'em! 
|
"He fears his fate too much, or his desserts are small, who will not put it to a single touch; to win- or lose- it all."
Montrose Toast
|
|
|
|
|
2022/11/15 01:09:42
Subject: Re:sCratchbuilding Customizing & Citbashing: 09NOV: SnowCat wrapped, time for CDR
|
|
[DCM]
Boom! Leman Russ Commander
|
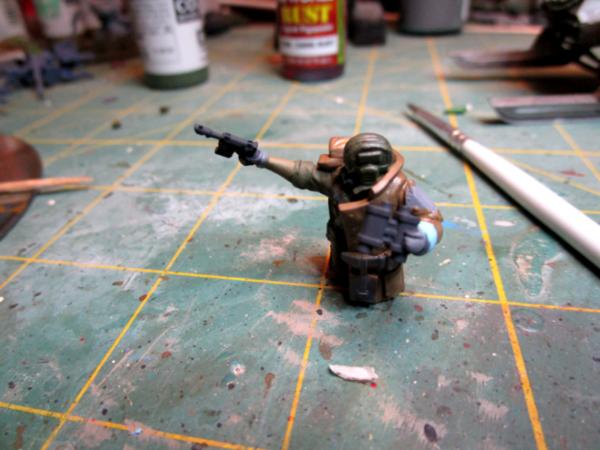
Some progress tonight:
Base colors on the vehicle commander:
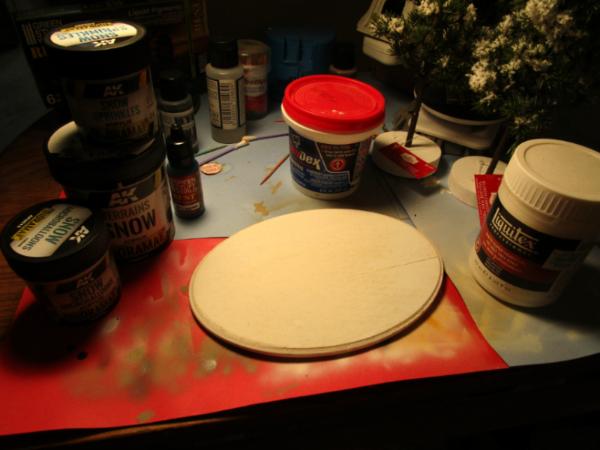
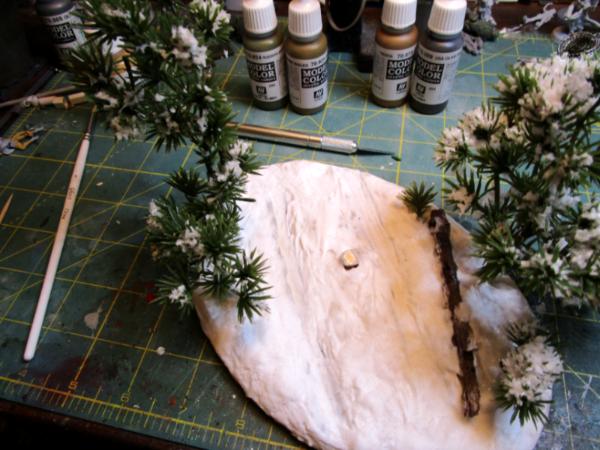
Assembling the materials to make the base- I'm testing out AK Interactive's Snow, Snow Sprinkles and Snow Microballoons to see how they do making a very cold looking environment, from the YouTube vids they'll do pretty well:
And the BA-64 SnowCat is finished (except for maybe some Nuln Oil on the range finder); I needed a lot of stowage because the kit sat around half-finished for so long I can't find the headlamps and other hull pieces that otherwise would have taken up a lot of the space I've covered with packs and things. Vehicle crewman are always looking for new and interesting ways to carry more things, but there are a couple of rules of thumb that always govern what goes where:
1) Personal gear is always inside if possible and if not, where it is easy to get at and sheltered as much as possible from the weather and road splash
2) Access to things that break frequently- especially the engine compartment- is impeded as little as possible; it saves having to move a bunch of crap to get at whatever needs fixing, oiling, adjusting, cursing, praying over, etc.
Looking at the photos, I don't like where the range finder is- it would never be carried in an exposed position like that anyway- but I wanted to use it since I used the tripod legs for it. I believe I'll move it up and add it to the anti-aircraft quad guns as some sort of crazy aerial engagement aiming device. Hey- my 41st Millenium vehicles have rivets, my anti-air can have WWI aiming devices!
More follows soonest. And thank you to so many who have dropped in to take a look, it's what makes posting here worth the effort to try and share what I'm working on.
|
"He fears his fate too much, or his desserts are small, who will not put it to a single touch; to win- or lose- it all."
Montrose Toast
|
|
|
|
|
2022/11/16 01:26:49
Subject: Re:sCratchbuilding Customizing & Citbashing: 14NOV: Sun's out, guns out!
|
|
[DCM]
Boom! Leman Russ Commander
|
For tonight:
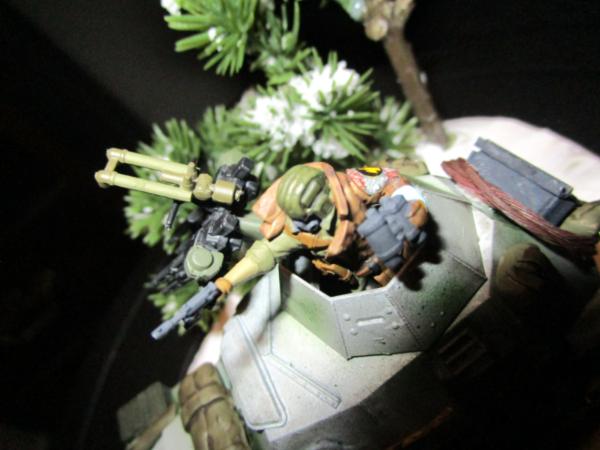
Vehicle commander is done- lighting is poor in these pics, I hope to get better coverage when I do the final shots:
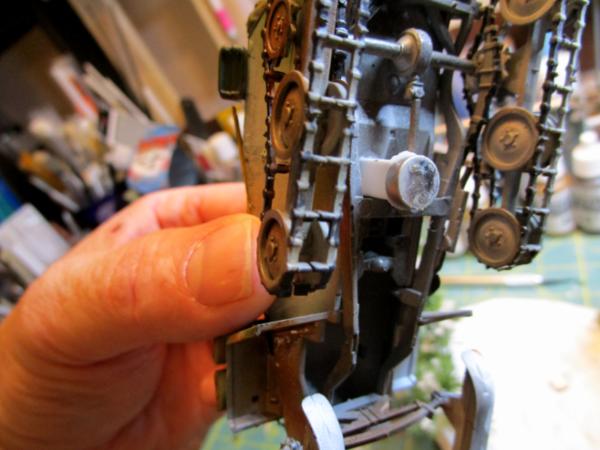
Got a good start in on the base; using Artists Matte Super Heavy Gel and will build up at least three coats- I want deep snow before adding the AK pastes. Also glued a magnet underneath the SnowCat and another to the mini-diorama base so that the vehicle can be separated and gamed (hey, it could happen!) as possibly a counts-as Sentinel or maybe a Salamander:
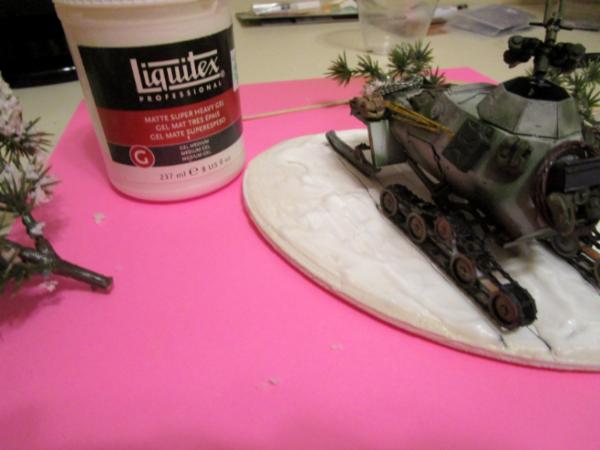
I hope to finish the base this week and get good, final photos Thursday or next Monday, but life can happen. It partly depends on drying times for all the Gel and snow pastes.
More follows soonest.
|
"He fears his fate too much, or his desserts are small, who will not put it to a single touch; to win- or lose- it all."
Montrose Toast
|
|
|
|
|
2022/11/16 10:55:37
Subject: sCratchbuilding Customizing & Citbashing: 15NOV: SnowCat CDR finished, base started
|
|
Dakka Veteran
|
It's looking really good, looking forward to the finished product!
|
|
|
|
|
2022/11/16 22:40:05
Subject: sCratchbuilding Customizing & Citbashing: 15NOV: SnowCat CDR finished, base started
|
|

Moldy Mushroom
|
Excellent this BA-64 ! The stuff added add live and doesn't desequilibrate the model, perfect !
I'm going to take inspiration, I wanted to use the same model for my soviet orks.
Did you use an 1/35 model ? Or an 1/48 ?
|
|
|
|
|
|
2022/11/17 01:04:12
Subject: Re:sCratchbuilding Customizing & Citbashing: 15NOV: SnowCat CDR finished, base started
|
|
[DCM]
Boom! Leman Russ Commander
|
Thanks very much for looking in, Meatshield, and the kind words. I hope to wrap the diorama base up tomorrow and get some decent pics posted before I bug out for the weekend.
Hello, RaoulDuke- thank you also for looking in and the kind words! This is the Vision Models BA-64-3SKh 1/35 kit. I actually tried a 1/48 kit first, but it is much too small- I'm saving it for a comic Gretchen piece to go chasing after an Ork Battlewagon, one day. I look forward to seeing your project here on Dakkadakka soon!
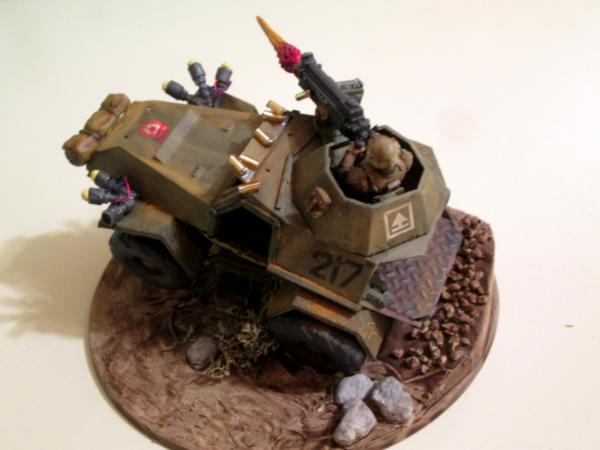
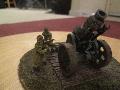
Here's the other (wheeled) BA-64 I did some time ago:

So, done with the vehicle, done with the commander, almost finished with the base, I'll hold off pics until the finals, perhaps as early as tomorrow. I've applied the second (and final) layer of Matte Heavy Gel and frankly, I probably didn't need to invest in snow pastes and textures- with a bit of paint I think the gel will harden fine into the fluffy, settled snow I want. I'll use them, to see what they bring to the table and will have a better idea how to employ them in future. I drilled holes into the wooden oval plaque base and through the first layer of gel, used dollar store two-part epoxy to fix the evergreen trees in place and added the second gel coat. I'm really excited because this project is actually coming out mostly like I was planning.
And on to the next:
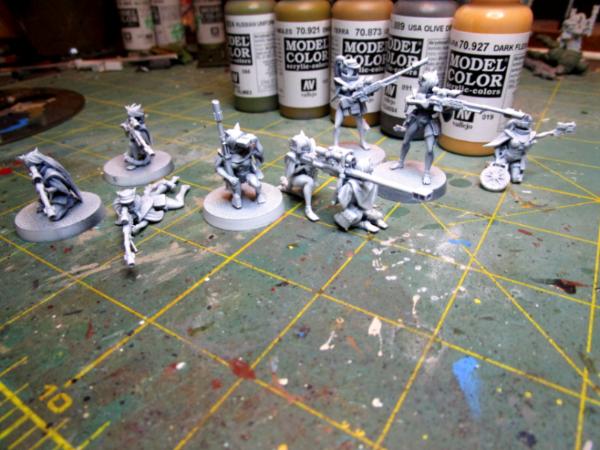
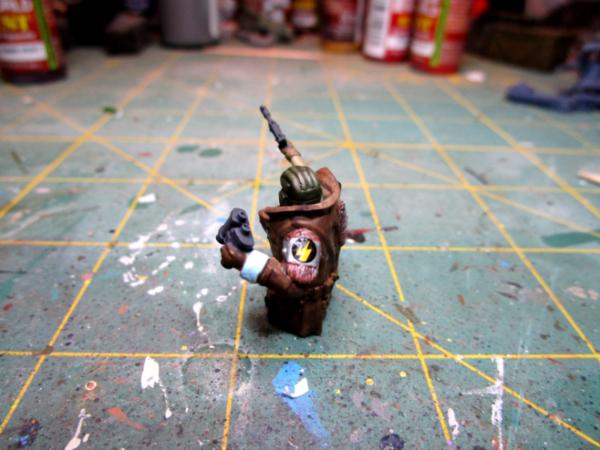
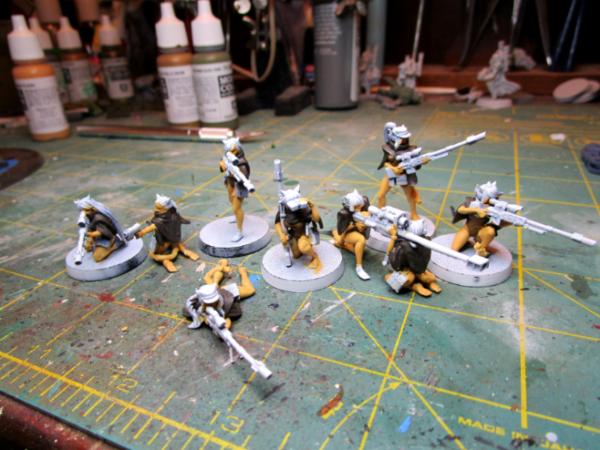
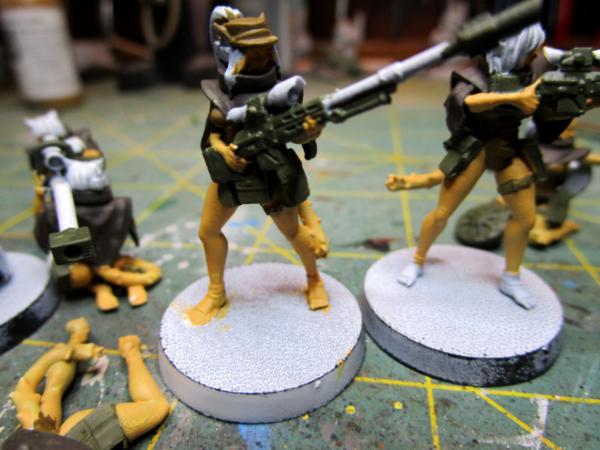
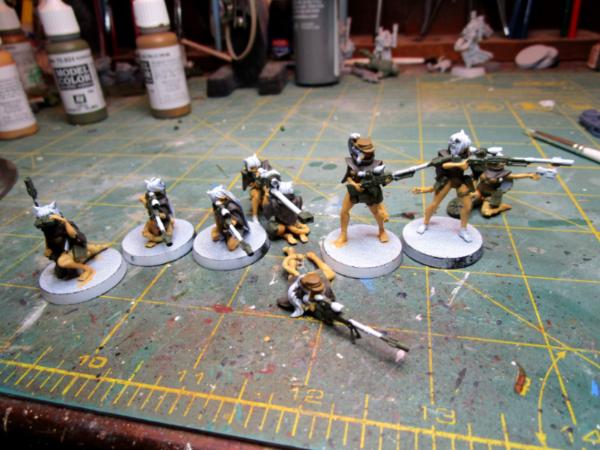
These are resin-cast Winterguard I picked up from Resin Munitorum on Etsy. They are at a very affordable price (especially compared to some other castings), there is zero clean up required and the details are extremely fine. I got a whole (small) army worth of the different units. This one is the Ranger/Sniper/Anti-tank (the one with the large mine) squad and I absolutely love the two-critter heavy sniper team, definitely my favorite out of a unit full of great poses. All the other Winterguard (close combat specialists, regular infantry, stormguard, mounted) have more or less standard looking uniforms, but these are wearing some kind of aerobics unitard. So I'm going to do them as stripped-down Scout-Snipers- extremely light infantry that rely on their ability to blend into the terrain rather than bulkier uniforms, weapons and armor to sustain action. Read Robert Heinlein's Tunnel in the Sky where he describes the hero's big sister, who is a captain in the Corps of the Amazons, describe how she selects and equips a scout to go out on a sneak. Even in my own experience, we ditched everything we could before going out patrolling, and wore soft caps rather than helmets. That was forty years ago, though- times seem to have changed.
Here's the squad with the base coat of skin tone applied:

Oh yes: if you hadn't noticed before, they have tails. I don't like the look of them with the same color as the skin, so they're going to get a cheetah-like buff/tan color, same as what the ears will be.
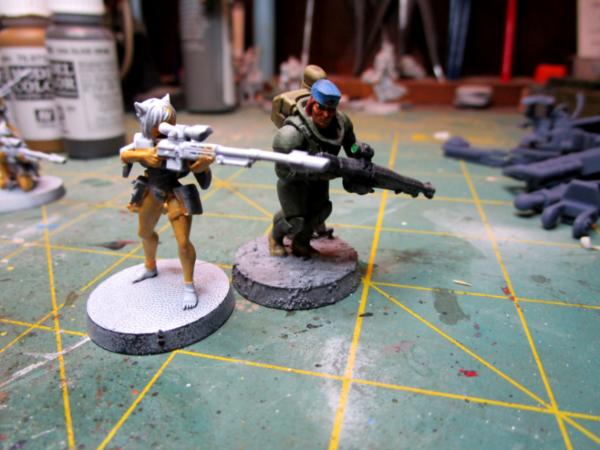
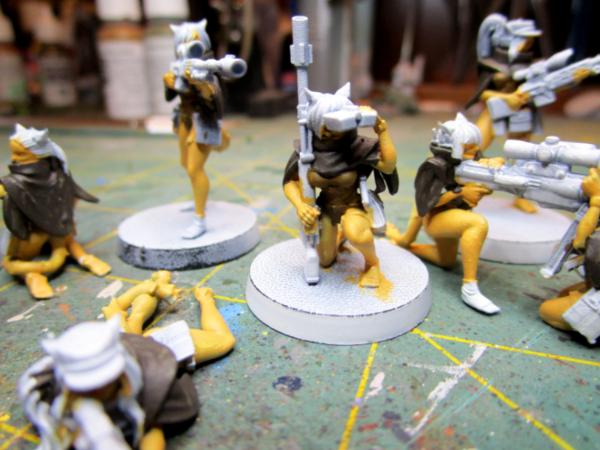
Here's one (I ordered mine at 105% size, the seller offers both 100% and 105%) compared to an Eisenkern Panzerjaeger. Even despite the armor the Jaeger is wearing, she's much bigger. I figure- I'm 5'6" and served with a bunch of 6 foot plus guys, the universe is a big place and these Winterguard are just smaller and more delicate than some others. Hence their being so good at sneaking.
I hope to get a little more painting in tonight, we'll see. Thank you all for looking in.
More follows soonest.
|
"He fears his fate too much, or his desserts are small, who will not put it to a single touch; to win- or lose- it all."
Montrose Toast
|
|
|
|
|
2022/11/17 23:19:31
Subject: Re:sCratchbuilding Customizing & Citbashing: 16NOV: SnowCat dio almost done; Winterguard started
|
|
[DCM]
Boom! Leman Russ Commander
|
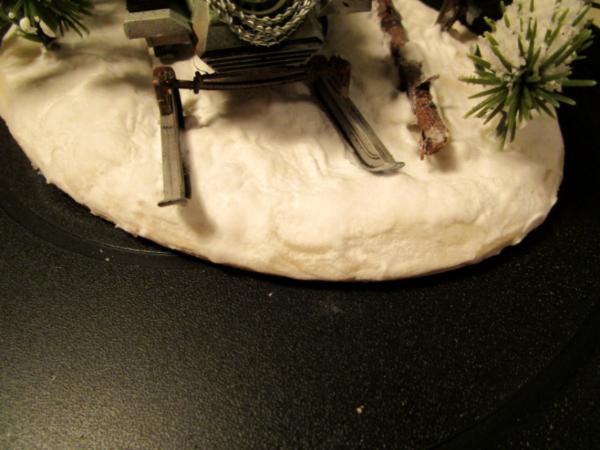
I've wrapped up what I'm going to do with the base, so without further ado here is the completed BA-64 SnowCat variant completed:
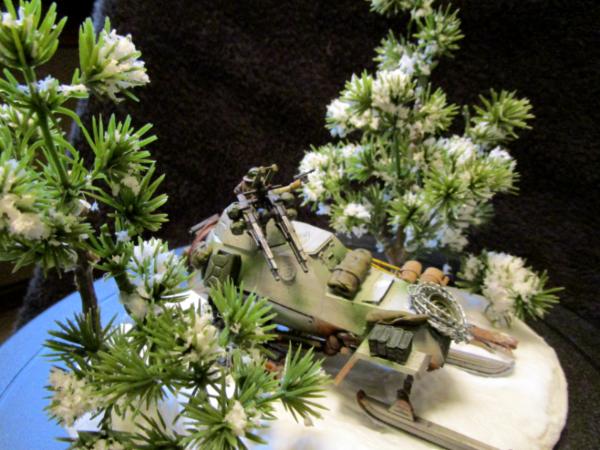
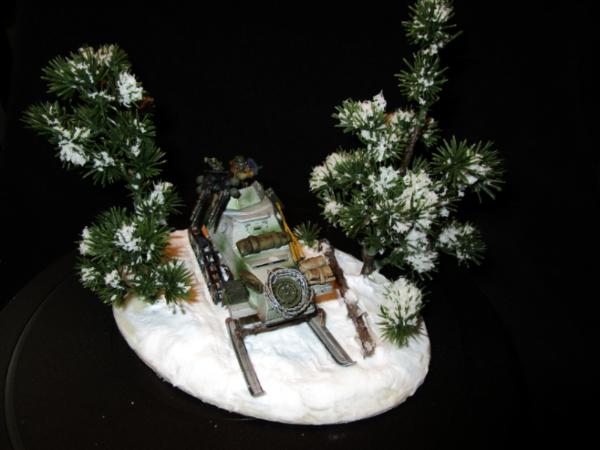
I used a $1 wooden plaque from Walmart for the base itself, covered that with the Artist's Matte Heavy Gel and used AK Interactive's AK8011 Snow and AK8010 Snow Microballoons on top of that. The Snow spreads very nicely with a wet stippling brush (5 for a dollar at the local dollar store) and the Microballoons give that powdery/crusty/cold look to the fresh top layer of snow that hasn't been driven over yet (better photo below).
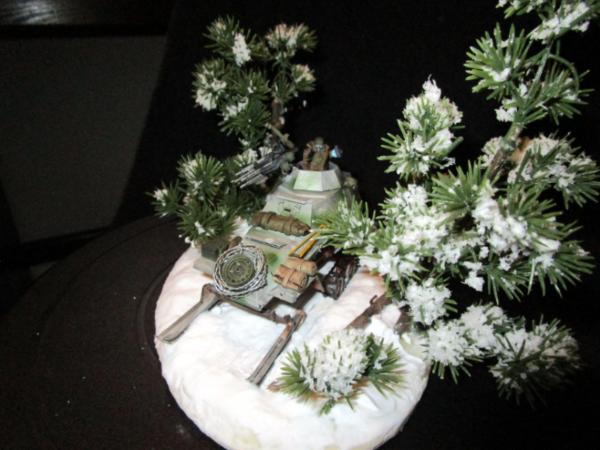
Side views:
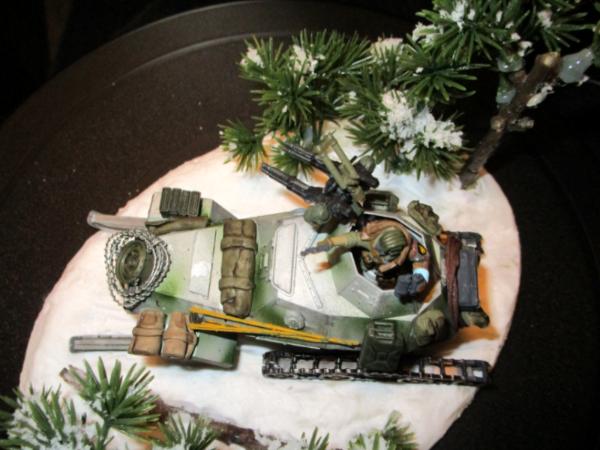
I used one Christmas Village tree from Walmart cut up into the pieces you see on the base- any extra tufts of needles I glued onto the other trunks/branches.
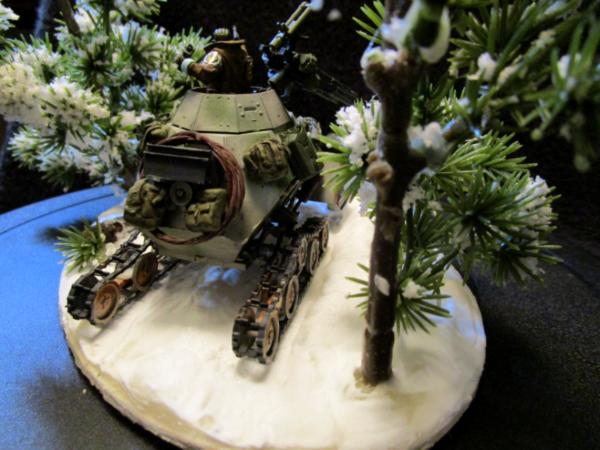
I mentioned gluing a magnet to the underside of the vehicle and to the base so that the SnowCat can be removed and gamed if wanted (these are strong enough that I can turn the whole thing upside down and the vehicle won't fall off):
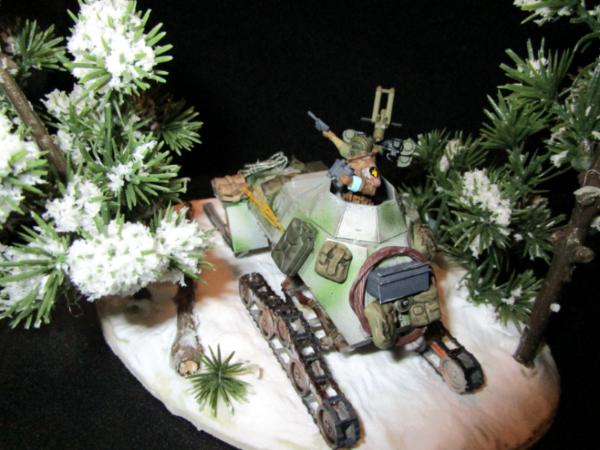
And the commander close up:
And an attempt to show the snow in a bit closer detail:
The log is a twig from the holly bush outside my apartment.
So that's it. My first really 'winter' project with snow, so got to try a bunch of new things:
- Used the airbrush to try a Soviet Winter camo pattern
- Used Artist's Matte Heavy Gel as a base cover- and will use again with mixing the color I want into the Gel itself
- Used snow pastes for the first time- and like the different shades of white that the Gel, Snow and Microballoons present
- Used the magnet trick from the Robogear armored walker to make the vehicle easily detached from the base
- Used greenstuff extensively to make the gubbins and packs and such that I needed to fill out the stowage
Thank you for looking in and for your constructive criticism. More follows soonest.
|
"He fears his fate too much, or his desserts are small, who will not put it to a single touch; to win- or lose- it all."
Montrose Toast
|
|
|
|
|
2022/11/19 12:35:31
Subject: sCratchbuilding Customizing & Citbashing: 17NOV: BA-64 SnowCat done- pic heavy
|
|
Gargantuan Great Squiggoth
|
Very interested in the Winterguard, they look awesome, though I think I would go with Puma colouring ( mountain lion to you I guess) or maybe bobcat. Something snowy looking rather than a cheetah.
As to scale, it always gets me how people get hung up on scale. All the figures being the same height exactly. We are not bloody clones. I am looking into using 1/35 scale humans as ogryn stand in for an army idea I have. Now I suppose they have to look big and dumb, but do they. Supposedly gravity affected their size, not necessarily their intelligence. Billions of humans spread across hundreds if not thousands of planets, bound to be a mixture of things.
Anyways all looking great bud.
|
|
|
|
|
|
2022/11/19 14:44:08
Subject: sCratchbuilding Customizing & Citbashing: 17NOV: BA-64 SnowCat done- pic heavy
|
|

Mad Gyrocopter Pilot
|
Really nice project. The end result is excellent and I love the detail in the base. The snow is dead realistic. Great work!
|
|
|
|
|
|
2022/11/19 22:28:55
Subject: Re:sCratchbuilding Customizing & Citbashing: 17NOV: BA-64 SnowCat done- pic heavy
|
|
[DCM]
Boom! Leman Russ Commander
|
Thank you Cam! I think you are right about Puma/greys for the Winterguard- the tan/buffs would still blend in a bit too much and leave them looking flat, whilst the grey will contrast a bit. Something for me to remember also, their hair in what pictures I can find on the innerwebz is all kinds of bright colors- pink, purple, blues, etc. The hair will present a natural focal and contrast point, so having the grey tail and ears will help tone that down, while still pointing up the green/khaki uniforms and cloaks that I figure to do.
Thank you also, Olthannon! First time for me trying to do winter at all, let alone snow, so I'm glad it worked out. A very fun project that went 'way out of the original scope I had imagined (this is typical behavior for me- someone once accused me of finding a brick on the walk home and having planned the Taj Majal by the time I got there. I'm still trying to see how that is a bad thing.... )
More follows soonest.
|
"He fears his fate too much, or his desserts are small, who will not put it to a single touch; to win- or lose- it all."
Montrose Toast
|
|
|
|
|
2022/11/21 23:50:42
Subject: Re:sCratchbuilding Customizing & Citbashing: 17NOV: BA-64 SnowCat done- pic heavy
|
|
[DCM]
Boom! Leman Russ Commander
|
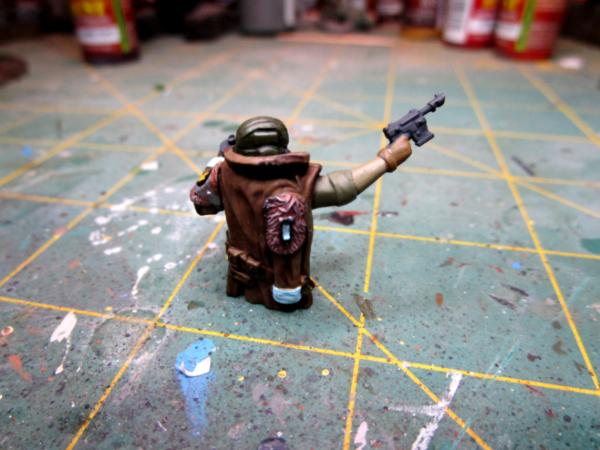
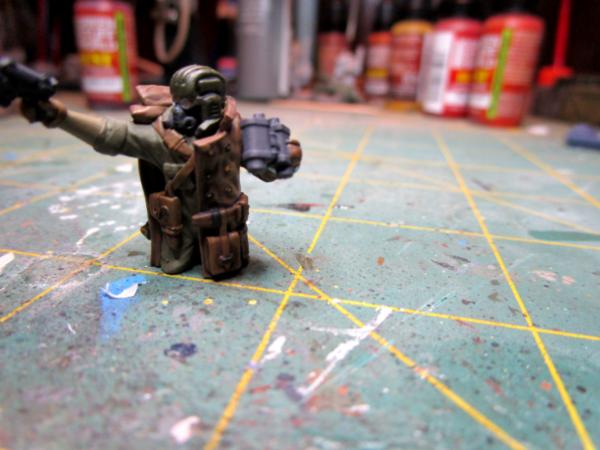
A little progress on the Winterguard Scout-Snipers tonight, it doesn't go easily because the detail is so fine on these figures that sections can be very painstaking. As it is, I'll have to do several 'go-backs' to fix "oops'es", But base colors for the singlet and cloak are on. In some ways, these figures could be Aiel from the Wheel of Time books, what with their shemagh face veils (if the Aiel had .50 calibre sniper rifles).
More follows soonest.
|
"He fears his fate too much, or his desserts are small, who will not put it to a single touch; to win- or lose- it all."
Montrose Toast
|
|
|
|
|
2022/11/22 01:14:29
Subject: Re:sCratchbuilding Customizing & Citbashing: 17NOV: BA-64 SnowCat done- pic heavy
|
|

[DCM]
Incorporating Wet-Blending
|
 Meer_Cat wrote: Meer_Cat wrote:A little progress on the Winterguard Scout-Snipers tonight, it doesn't go easily because the detail is so fine on these figures that sections can be very painstaking. As it is, I'll have to do several 'go-backs' to fix "oops'es",
This is why I always prime in black rather than white. If I miss any little details, no one can tell.
|
|
|
|
|
|
2022/11/22 02:47:47
Subject: Re:sCratchbuilding Customizing & Citbashing: 21NOV: progress on the Aiel Snipers
|
|
[DCM]
Boom! Leman Russ Commander
|
Too true, Josh! I thought about primering in black, but it does make the base colors darker, and I wanted to lighten things up a bit with all the browns, drabs and greens I planned to use.
I may try black primer for the close assault troops- and give them a lighter base color green to help balance.
|
"He fears his fate too much, or his desserts are small, who will not put it to a single touch; to win- or lose- it all."
Montrose Toast
|
|
|
|
|
2022/11/22 23:29:51
Subject: Re:sCratchbuilding Customizing & Citbashing: 21NOV: progress on the Aiel Snipers
|
|
[DCM]
Boom! Leman Russ Commander
|
A little bit of get ahead tonight- load-bearing equipment (LBE) and rifles base colored:
That's two different greens between the belts/pouches and the rifles, and they look a fair bit different to the Mark I Eyeball, but not to the camera, so I may re-do the LBE in a different green or brown.
I've been using a different figure each time as a focal point to show them off; they really are exquisite figures and deserve a better modeler than me- but I'll give it my best shot. Getting base colors on is always tough, messy and fiddly- moving on to dry-brushing highlights and adding inks and washes for lowlights is what seems to really bring the piece together for me.
More follows soonest.
|
"He fears his fate too much, or his desserts are small, who will not put it to a single touch; to win- or lose- it all."
Montrose Toast
|
|
|
|
|
|
|


