| Author |
Message |
 |
|
|
|
|
Advert
|
Forum adverts like this one are shown to any user who is not logged in. Join us by filling out a tiny 3 field form and you will get your own, free, dakka user account which gives a good range of benefits to you:
- No adverts like this in the forums anymore.
- Times and dates in your local timezone.
- Full tracking of what you have read so you can skip to your first unread post, easily see what has changed since you last logged in, and easily see what is new at a glance.
- Email notifications for threads you want to watch closely.
- Being a part of the oldest wargaming community on the net.
If you are already a member then feel free to login now. |
|
 |
2008/01/19 17:51:42
Subject: Imperial Fists
|
|

Crazed Witch Elf
Albuquerque, NM
|
I got a Company box and would like to paint them in the Imperial Fists scheme. Unfortunately though I can't really find a good painting guide for them. I've also never worked with yellow and from what I've read here it seems to be quite a pain in the ass, especially the GW version. Any tips or pics of anyone's Imperial Fists I might be able to use as a guide?
|
Imperial Guard 
40k - 6-12-0
City Fight - 0-0-0
Planetstrike - 0-0-1
Apocolypse - 4-2-1 |
|
|
 |
|
2008/01/19 18:26:05
Subject: Re:Imperial Fists
|
|

Hardened Veteran Guardsman
|
I have no idea how good it is, having never worked with yellow myself. But my google-fu turned up this
quite easily:
http://www.stevestiles.co.uk/imperialfists/imperialfists.htm
Also, there's someone working at GW Oslo that's got close to a company's worth of these yellow fellows (pun intended)
I'll ask him about it next time I'm in the area
al-Majid Agandhjin bin Ahfal al-Rashid
|
|
|
|
|
|
2008/01/19 20:17:42
Subject: Re:Imperial Fists
|
|
Crazed Witch Elf
Albuquerque, NM
|
I'd appreciate that. I've seen this guys walkthrough and I'm wondering if the Fists that GW paints have red outlines like this. Also, is this a scheme that you should edge or highlight with?
|
Imperial Guard
40k - 6-12-0
City Fight - 0-0-0
Planetstrike - 0-0-1
Apocolypse - 4-2-1 |
|
|
|
|
2008/01/19 20:40:08
Subject: Re:Imperial Fists
|
|

Plastictrees
|
I´ve seen some rather well painted armies over at the B&C
For some Imperial Fists, head here:
http://www.bolterandchainsword.com/index.php?showtopic=125104
or
http://www.bolterandchainsword.com/index.php?showtopic=127752
And then there is this fellow german guy that has a seriously nice Marines Malevolent Army
http://www.bolterandchainsword.com/index.php?showtopic=127421
Hope it helps.
|
|
This message was edited 1 time. Last update was at 2008/01/19 20:40:55
|
|
|
|
|
2008/01/19 22:12:58
Subject: Imperial Fists
|
|

Rotting Sorcerer of Nurgle
|
i find an easy way to paint yellow is to paint the mini with bleached bone, which has good coverage, and then put a glaze of yellow ink over it.
|
Check out my gallery here
Also I've started taking photos to use as reference for weathering which can be found here. Please send me your photos so they can be found all in one place!! |
|
|
|
|
2008/01/20 00:12:43
Subject: Imperial Fists
|
|
Dakka Veteran
|
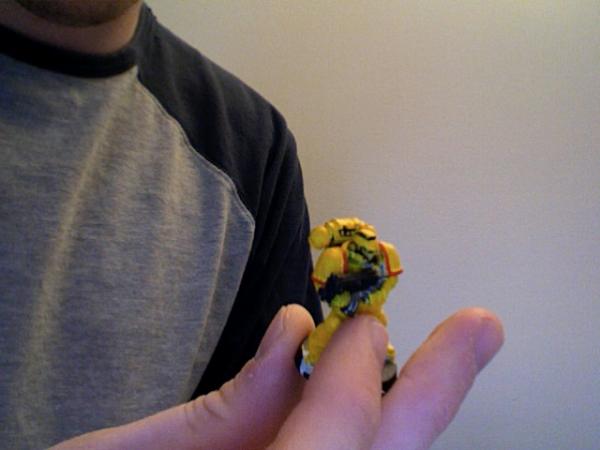
I'm currently painting an imperial fist army myself. First, I primed white, then I put on a coat of Valejo Sunblast Yellow. Then another coat. Then another coat. Around the 3'rd and 4th coat it really starts to get a nice, rich yellow. I don't have a camera's that really capable of taking good pictures of minis, but I'll put some pictures of my army as it comes along.
As far as paint schemes: Aside from yellow armor, I painted the joints Black. I painted the body of the bolters black with metal barrels, clips, and stocks. What I've found that looks really well is that I use a black ink wash on the helmets. This creates a really nice shadowing effect that just looked more realistic to me than the sepia wash did. It does require you to paint the helmets again, but if you're careful and precise you can paint the dirty areas yellow and leave the dark ones black and you'll get a really nice shadow effect. If they had straps on their chests, I painted them black. I left aguilas yellow. Some people paint theirs reds, but I didn't have the patience for it. I guess this is where I cut corners. Some also paint their eyes green, but again this isn't something I've done.
If you want to see pictures of my army, you can look at my work in my photo dump.
|
|
|
|
|
|
2008/01/20 06:35:58
Subject: Imperial Fists
|
|
Crazed Witch Elf
Albuquerque, NM
|
Wow, those are absolutely gorgeous. How does one get the black recess like that? Prime it black? Doesn't seem to me that that's how you would do it. Thank you for the links though.
bubber wrote:i find an easy way to paint yellow is to paint the mini with bleached bone, which has good coverage, and then put a glaze of yellow ink over it.
Is glazing just a thick wash or do you need to add something to it? Also, do you put a darker color in the recess like the ones in the link?
lifeafter wrote:I'm currently painting an imperial fist army myself. First, I primed white, then I put on a coat of Valejo Sunblast Yellow. Then another coat. Then another coat. Around the 3'rd and 4th coat it really starts to get a nice, rich yellow. I don't have a camera's that really capable of taking good pictures of minis, but I'll put some pictures of my army as it comes along.
As far as paint schemes: Aside from yellow armor, I painted the joints Black. I painted the body of the bolters black with metal barrels, clips, and stocks. What I've found that looks really well is that I use a black ink wash on the helmets. This creates a really nice shadowing effect that just looked more realistic to me than the sepia wash did. It does require you to paint the helmets again, but if you're careful and precise you can paint the dirty areas yellow and leave the dark ones black and you'll get a really nice shadow effect. If they had straps on their chests, I painted them black. I left aguilas yellow. Some people paint theirs reds, but I didn't have the patience for it. I guess this is where I cut corners. Some also paint their eyes green, but again this isn't something I've done.
If you want to see pictures of my army, you can look at my work in my photo dump.
I looked at your pics in the Photo Dump and from what I can make out it does look nice. One thing I was kind of undecided on was how to paint the bolter. Most people just kind of dry brush a metallic over it and let it be, but I wanted to give it a bit more detail. Is there a way to get a slightly clearer pic of their helmets that you are talking about?
Thank you guys for the feedback and tips, it makes going into this project a lot easier. 
|
Imperial Guard
40k - 6-12-0
City Fight - 0-0-0
Planetstrike - 0-0-1
Apocolypse - 4-2-1 |
|
|
|
|
2008/01/21 04:59:52
Subject: Imperial Fists
|
|

Strider
|
I wanted to get these guys done for a while, until I moved away from marines. I think that painting on a yellow coat over a white prime job is actually fairly easy, the most important part is to monitor the consistency of your paint very carefully. I used GW's sunburst yellow, although the new foundation paints and Vallejo's game colour are worth checking out. You want to keep your paint a tad thinner than just out of the pot, this'll keep your models from getting chunky but will also allow your paint to flow evenly, distributing the pigment better and keeping your models from looking blotchy even after the first or second coat.
The lining's a matter of choice, I prefer the sepia tint but black works too. The important part is just to keep a fine point on your brush and work slowly and methodically, either a dark brown watered down or black ink should provide you with a decent effect. I my stages were prime white, coat yellow, coat yellow, coat yellow, line w/ bestial brown, highlight.
There isn't really an easy way out to paint these guys, it's a hell of a scheme  . But if you just work carefully you can have a really eye-popping force with just a little bit of time and effort.
Personally I'd stay away from using yellow ink to colour an entire army, it really is meant for recesses and can often be inconsistent, especially on flat areas or wide surfaces.
|
|
|
|
|
2008/01/21 14:26:17
Subject: Re:Imperial Fists
|
|
Dakka Veteran
|
Basically the ink wash accomplishes the same effect as the lining Turtle talked about, but is a bit easier to do. My hand simply shakes to much to do the lining, so I do an ink wash and the edges and recesses get black lines in them. I then have to go and paint yellow over the flat surfaces, because even though the ink collects at the edges and recesses, it still leaves flat surfaces a bit dirty. To me, it's easier to paint the bigger flat surfaces yellow, then it is to paint the edges and recesses black. Here are some pictures of my ink washes. Again, to save time, I only applied the wash to their helmets and some times to their backpacks.

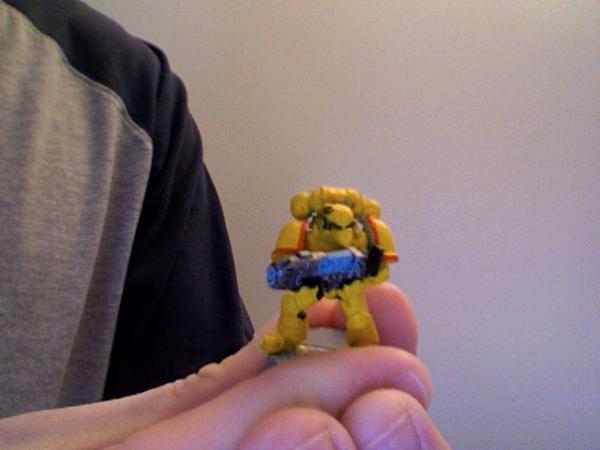
I preferred the black ink to the sepia for two reasons. 1st, the black ink looked like shadows, the brown seemed to look more rustic, or discolored. 2nd, the paint scheme is already black and yellow, so the black ink wash fit the scheme better. There are definitely times I prefer the sepia ink, like when I'm adding detail to faces or cloth, but for my Imperial Fists, I really liked the black. I've also heard of people using orange ink washes on Imperial Fists, but I've never done this.
|
|
|
|
|
|
2008/01/21 17:42:43
Subject: Imperial Fists
|
|
Longtime Dakkanaut
|
Its been a good while since I last tried, but I got fairly good effects fairly quickly with a good white undercoat, followed by a slightly thinned chestnut ink - this stains the white a yellowish color whilst giving a chestnut shade in the crevases etc. Then a quick coat of (whatever) yellow and drybrush with a pale yellow. You won't win golden demons but after a couple of test models to get it how I wanted I had what I consider a good 'table top' paint job and its pretty quick.
I found the chestnut ink to be what made it, yellow ink doesn't really shade very well, whereas the chestnut gives a shade in the crevases and the yellow stain elsewhere.
As note above inks can be a bit inconsistent - I had a post the other week about that, but if you find that post and follow the link to an article on matt medium and follow what is says then you are set. I can't sing the praises of that article and matt medium high enough, the nice inking that I've had since then is amazing, I just wish I'd known that a couple of years ago.
|
|
This message was edited 1 time. Last update was at 2008/01/21 17:44:03
|
|
|
|
|
2008/01/21 19:49:03
Subject: Re:Imperial Fists
|
|
Crazed Witch Elf
Albuquerque, NM
|
Turtle - What do you mean by the sepia thing? Is it like an ink or a regular paint?
lifeafter - Did you just do the ink on the helmets and backpack area? I like the result, but I don't see anything on the leg area. My friend was also talking about using orange. Just doesn't really seem like it would work as well to me.
puree - How dark does the chestnut leave the recesses? Is it a significant difference like black or is it just a slight darkening?
Also, how would you highlight yellow? It seems so bright already. Just a white or white/yellow mix?
|
Imperial Guard
40k - 6-12-0
City Fight - 0-0-0
Planetstrike - 0-0-1
Apocolypse - 4-2-1 |
|
|
|
|
2008/01/21 21:27:36
Subject: Imperial Fists
|
|
Dakka Veteran
|
I only did the helmet and backpacks because when you play people are mostly only looking at those and the shoulder pads. Obviously inking all the indentations in the armor will also produce the same effect, but to save time I only focused my efforts on what most people will see. My army's not going to win any awards, but it's a great table top standard and people seem to react pretty positively to it.
I only highlighted one or two of my test models before I reached the same conclusion you did, "it seems so bright already." I used a white/yellow mix and wasn't super impressed by the results.
|
|
|
|
|
|
2008/01/21 22:37:36
Subject: Imperial Fists
|
|
Strider
|
By sepia I was just referring to the brown colour you'd use to line yellow plating instead of black.
As for the highlights, depending on what you want out of your army you can do a couple things, you can either highlight up to straight white, or you can start out with a darker basecoat in order to get your highlights in (kinda like how people were using a ghostly grey/white mix to paint white armies, so they could add white highlights). Starting with a darker basecoat can also improve initial coverage of your models and save you some steps.
One tip that certain painters have used is to add inks to their base colour to enrich the pigment, it'll give you a more vivid colour and make em just a tad shiny. I'd say try adding about one part yellow ink to two parts yellow paint and see how that does you. For easier coverage you might even want to add just a bit of bronzed flesh, snakebite leather, any other yellowy-brown pigment. From there you can use basic yellow as a highlight, then yellow/white. Experiment, it may just help your models out.
|
|
|
|
|
2008/01/21 23:23:00
Subject: Imperial Fists
|
|
Rotting Sorcerer of Nurgle
|
Stormtrooper X wrote:bubber wrote:i find an easy way to paint yellow is to paint the mini with bleached bone, which has good coverage, and then put a glaze of yellow ink over it.
Is glazing just a thick wash or do you need to add something to it? Also, do you put a darker color in the recess like the ones in the link?
actually my gw glazes are thinner so they don't shade the model, just tint the colour underneath. a normal yellow ink wash should do the trick as yellow is a naturally weak colour. Blue glazes are a bit trickier because even the GW blue glaze (as opposed to wash) is still quite powerful. for yellow i often use fleshwash as a shading colour aka

or to get a more intense result, while the flesh wash is still wet, bleed in some brown ink, aka -

|
Check out my gallery here
Also I've started taking photos to use as reference for weathering which can be found here. Please send me your photos so they can be found all in one place!! |
|
|
|
|
2008/01/22 18:37:16
Subject: Re:Imperial Fists
|
|
Fresh-Faced New User
|
Two qusetions:
1: The decals. In my experience I have had trouble with round decals on shoulder pads. I even use micro sol, and I still have trouble. Who finds the Fists decals hard to work with? Or are they small enough that they are not such a problem.
2: The color around the should pads. I have seen red and black. Is this 2nd and 5th company? I am making this guess from memory. Does anyone know what that color is suppossed to mean for all of the companies. I remember thinking that there was a white, a green, and maybe an orange. I was thinking nobody would ever paint green trim, and so that company would never be played. I was thinking of using red or black for the trim, but maybe using a little green on one of the knee pads to represent one of the underused companies.
|
|
|
|
|
2008/01/22 19:20:37
Subject: Re:Imperial Fists
|
|
Dakka Veteran
|
pheobus290 wrote:The color around the should pads. I have seen red and black. Is this 2nd and 5th company? I am making this guess from memory. Does anyone know what that color is suppossed to mean for all of the companies. I remember thinking that there was a white, a green, and maybe an orange. I was thinking nobody would ever paint green trim, and so that company would never be played. I was thinking of using red or black for the trim, but maybe using a little green on one of the knee pads to represent one of the underused companies.
Green trim is 4th company, which is how I'm currently painting... Dark Angels green with a very thin line of snot green on the edge. I think it looks good, but you might get a couple of John Deere comments.
I'm priming black, with a base coat of vomit brown followed by golden yellow. Takes a couple of layers but is worth it.
|
|
|
|
|
2008/01/22 19:25:48
Subject: Imperial Fists
|
|
Regular Dakkanaut
|
The decals for the fists are a pain to put on. I've had to hand paint all of mine.
|
|
|
|
|
2008/01/22 19:29:12
Subject: Re:Imperial Fists
|
|
Veteran Wolf Guard Squad Leader
|
Ive never been a fan of the decals, always a pain to apply and it bugs me that they are shinier than the rest of the mini.
|
|
|
|
|
|
2008/01/22 19:38:47
Subject: Imperial Fists
|
|
Regular Dakkanaut
|
I can´t speak from personal experience but supposedly both of these problems can be solved or at least alleviated by applying decals only on surfaces which have been gloss coated. Once the decal has set you can cover the whole area with matt coat again.
|
As I stride knee deep through the dead, all is clear. I know what must be done... |
|
|
|
|
2008/01/22 19:46:54
Subject: Re:Imperial Fists
|
|
Veteran Wolf Guard Squad Leader
|
Interesting, good to know.
|
|
|
|
|
|
2008/01/25 02:01:55
Subject: Imperial Fists
|
|
Fresh-Faced New User
Purging the unclean In the name Of the Emperor!
|
what paaint line do you use? if Vallejo i would use like terracota underocoat with a second layer of dark sand then a yello drybrush over that.
|
" People Say ideas are far more powerful then guns, if we do not allow our enemies to have guns, then why shall we allow them to have ideas? " - josef stalin
" Everything degenerates, in the Hands of men "- Ignance Karkasy |
|
|
|
|
2008/01/25 02:22:45
Subject: Imperial Fists
|
|
Fresh-Faced New User
Purging the unclean In the name Of the Emperor!
|
ok i did some tests with yellows i used If you used Vallejo which i recomend highly. dark fleshtone drybrushed undercoat over black then a Plauge brown drybrush then multiple coats of drybrushed bald moon yellow with then a final highligh of deep yellow then in crevices cracks and depressions use smokey inki think it turns out very nice.
|
" People Say ideas are far more powerful then guns, if we do not allow our enemies to have guns, then why shall we allow them to have ideas? " - josef stalin
" Everything degenerates, in the Hands of men "- Ignance Karkasy |
|
|
|
|
2008/01/25 06:37:13
Subject: Imperial Fists
|
|
Regular Dakkanaut
|
Like everybody else said, sequencing is critical for yellow. Get it right, and you have a good, bright, even color. But it's real easy to get a streaky, dark mess. Try doing enough Pre-WWII US Navy Biplanes and you get to know the color.
Personally, whenever I paint the color I start with a white primer, followed by a sandy earth tone. Bleached Bone is a great example. Then I spray the yellow.
But don't try to force a single coat, you must do multiple coats. If you have an airbrush, thin it down pretty watery. Make sure to actually let it cure a bit between coats too, not just dry to the touch but actually cured to a hard surface. Minimum 3-4 hours between coats if spraying, if brushing you need to go longer between coats.... possibly a day or two if you put it on to thick.
As to the decals, yeah you really need a glosscoat on top of the paint for GW decals. What about Gryphon Models, don't they have Fist style decals? How is their quality?
-Hans
|
I hate making signatures:
Mainly because my sense of humor is as bad as my skill at this game. |
|
|
|
|
2008/01/25 15:09:57
Subject: Re:Imperial Fists
|
|
Thunderhawk Pilot Dropping From Orbit
The wilds of Pennsyltucky
|
Glad to hear that others are painting imperial fists as well.
Some suggestions.....
The most important thing about painting yellow is "tone agreement." What's that? If you look at the yellows on a color wheel you will notice different "tones" depending on what egment of the yellow band you are looking at. To one side everything is more "red" in tone (because it is closer to the red band) and on another it is more "blue." Yes, I know that yelow and blue make green when dealing with pigments. Forget about that for now. We are talking tone and not pigments.
Why is this important? The piping. Imperial fists follow the codex astartes religiously. They use color coded piping to denote what cmpany they are with. GW's studio fists are the third company and hence have red piping.
So what do "red piping" and "tone" have to do with each other? Well, if you are going to have red on the model then you will geta better results using yellows and washes that are closer to red in tone than blue in tone.
So, depending on the piping you may want to use different washes.
My fists are the fifth company and have black piping. They are closer to blue than red. Hee is how I paint mine.
white base coat
Golden yellow
Black wonder wash over the entire model
Heavy drybrush of golden yellow AFTER the wash has dried
medium drybrush of 50/50 golden yellow and skull white
VERY light drybrush of white on only the raised portions of armor (knees, face, etc...)
For the black area I use chaos black
and then 2 light drybrushes of progressively lighter grey.
That's my two cents.
Also, dr. fausts painting clinic has agood article on painting yellow.
ender502
|
"Burning the aquila into the retinas of heretics is the new black." - Savnock
"The ignore button is for pansees who can't deal with their own problems. " - H.B.M.C. |
|
|
|
|
2008/01/25 22:16:22
Subject: Imperial Fists
|
|
Death-Dealing Devastator
|
I have IF. Being a first founding Chapter whose homeworld ,Ibelieve was Terra, I copied all the Primarchs and gave my boys GOLD armor with a yellow wash. We built the palace yes, but we aint no Caterpillar/Tonka yellow for Emperors sake!
|
|
|
|
|
2008/01/26 01:49:29
Subject: Imperial Fists
|
|
Fresh-Faced New User
Purging the unclean In the name Of the Emperor!
|
the imperial fists werent the first chapter atall not even the first legion. the dark angels were the first founding legion the imperial fists were the seventh legion found by the emperor
|
" People Say ideas are far more powerful then guns, if we do not allow our enemies to have guns, then why shall we allow them to have ideas? " - josef stalin
" Everything degenerates, in the Hands of men "- Ignance Karkasy |
|
|
|
|
2008/01/30 12:26:22
Subject: Imperial Fists
|
|

Battle-tested Knight Castellan Pilot
|
The guy said First -Founding-, as in First, Second, Twentysixth.
That´s not about chapters, it´s not about legions (all first founding chapters were originally legions btw), it´s about a group of chapters being founded at the approximately same time.
Truly, the IF weren´t the first legion of the first founding, but they were very much a part of the first founding group, which is what Paen is talking about.
|
 Back on the path of the Imperial Citizen Back on the path of the Imperial Citizen
Still rolling ones... 
 Krieg: More wins than Losses. Krieg: More wins than Losses. |
|
|
|
|
2008/01/30 12:28:44
Subject: Imperial Fists
|
|
Battle-tested Knight Castellan Pilot
|
Oh, and yes, originally their homeworld was Terra, however after the Emperor found their primarch, they started using a huuuuge mobile starfortress as their base.
Are there any pictures available of those Golden armored IF´s btw? Mine are yellow/yellow (2nd company) but i´d like to see more differnet ones.
|
Back on the path of the Imperial Citizen
Still rolling ones...
Krieg: More wins than Losses. |
|
|
|
|
2008/01/30 14:40:46
Subject: Imperial Fists
|
|

Long-Range Land Speeder Pilot
Bay Area
|
Xanthos, every legion originally came from Terra. That's where the Emperor had his gene facilities. The mobile starfortress was presented to the Emperor by Dorn himself. He was the only Primarch to find the Emperor instead of vice-versa.
|
|
|
|
|
|
2008/01/30 17:10:09
Subject: Imperial Fists
|
|
Battle-tested Knight Castellan Pilot
|
Hmm.... Pretty sure that the fluff says something about them being The Emperors praetorians, and therefore having earth as their homeworld??
I guess I´ll have to dig up that old WD issue that had their fluff. 
|
Back on the path of the Imperial Citizen
Still rolling ones...
Krieg: More wins than Losses. |
|
|
|
|
|
|
 'VIVA LA REVOLUTION!' - My Rebel Grotz (not recieving any attention atm)