| Author |
Message |
 |
|
|
|
|
Advert
|
Forum adverts like this one are shown to any user who is not logged in. Join us by filling out a tiny 3 field form and you will get your own, free, dakka user account which gives a good range of benefits to you:
- No adverts like this in the forums anymore.
- Times and dates in your local timezone.
- Full tracking of what you have read so you can skip to your first unread post, easily see what has changed since you last logged in, and easily see what is new at a glance.
- Email notifications for threads you want to watch closely.
- Being a part of the oldest wargaming community on the net.
If you are already a member then feel free to login now. |
|
 |
2016/05/05 22:56:04
Subject: Re:Legion Rising - Projects from The Dark Works
|
|

Strategizing Grey Knight Chapter Master
|
Great teaser!
|
IceAngel wrote:I must say Knightley, I am very envious of your squiggle ability. I mean, if squiggles were a tactical squad, you'd be the sergeant. If squiggles were an HQ, you'd be the special character. If squiggles were a way of life, you'd be Doctor Phil...
The Cleanest Painting blog ever!
Gitsplitta wrote:I am but a pretender... you are... the father of all squiggles. .
|
|
|
 |
|
2016/05/05 23:04:43
Subject: Re:Legion Rising - Projects from The Dark Works
|
|

Sagitarius with a Big F'in Gun
|
... I smell the blood of an Englishmun.

... ... ... Automatically Appended Next Post: ... Be he alive, or be he dead.

... ... ... Automatically Appended Next Post: ... I'll grind his bones to make my bread.

More pictures and many more words to come, when I have more time. All these photos obscure how much other crap I need to get done, but I needed some bench time, or I was going to lose my mind.
Smoke me a kipper, I'll be back for breakfast.
~ Ace Rimmer
|
|
This message was edited 2 times. Last update was at 2016/05/06 09:15:17
"The old galaxy is dying, and the new galaxy struggles to be born; now is the time of monsters."

 |
|
|
|
|
2016/05/06 17:25:58
Subject: Legion Rising - Projects from The Dark Works
|
|

Jinking Ravenwing Land Speeder Pilot
|
Looks fantastic! Can't wait to see what you do!
|
|
|
|
|
|
2016/05/18 21:11:55
Subject: Re:Legion Rising - Projects from The Dark Works
|
|
Sagitarius with a Big F'in Gun
|
In the immortal words of professor Hubert J. Farnsworth, "Good news, everyone!"
But as with this signature phrase, it comes with a bit of a catch; thankfully nothing as suicidal as most 'Good news' Planet Express delivery missions. I shall elaborate...
So, I was able to poke my nose out from under the rock of higher learning, take a little time to do some building, and take a few teaser photos of some of things brewing in the background. But, as much as I want to get the studio back up-and-running I've been a bit stuck because of a school obligation. Between 3rd and 4th year (my current position) students are required to do an internship that ties into the Industrial Design field. So, as much as the studio is calling, for several weeks I've been looking, quite unsuccessfully, for summer employment.
I'd tried twice already to see if my studio could qualify considering what I'm doing and what I have planned for the future, but the program has somewhat specific (and dated) requirements, and I wasn't fully explaining just how developed my small studio is. So finally, after explaining with a little more depth (ok I rambled... a little... emphatically) a third time yesterday I was given tentative permission to use hours in my studio towards the obligation for the program. Details still need to be clarified and verified, and I will still need to try and find some other work to add additional hours if I can, but a massive barrier to spending any time in my studio should now be lifted. "And there was much rejoicing! ... Yay!" ~ Monty Python
As I said, this is a bit of a mixed blessing; while I get what I wanted and can work in my studio, it also means I'll need to stay motivated and avoid any wasted time. It's still not clear exactly what will be expected as proof of progress and development, as it were, so I'm still careful not to celebrate too much. Deep down I know I have a ton of work cut out for me no matter what, so at least I think I have a realistic grasp of what I'm getting into. Odds are I'm overthinking things as usual, but I'll have a better idea by next week when things are clarified by my program coordinators.
So, put simply, expect some long overdue updates very soon; I have several articles that have photos done, I just need to finish the copy for them, so expect to see those soon. For anyone waiting on a restock for the shop; I can now invest serious time without it being counter productive so I'll be on this over then next week or more. For those who are interested in some of my new designs; as with casting, studio time is now 'official' and I can invest resources in getting them into production. And finally, I think I can find a way to squeeze some army build/paint time into all of this so expect some progress on that as well.
Lots more to come. So much so, I'm having a bit of a hard time figuring out where to start, now that I'm actually allowed to start. I think this might require a bit of a reorganization of the studio space. Some new equipment I got this winter (another story for another time) has really thrown a cramp into how the shop is arranged. It's harder to function in a dysfunctional space, after all.
Please, stand by...
|
|
This message was edited 1 time. Last update was at 2016/05/22 17:11:26
"The old galaxy is dying, and the new galaxy struggles to be born; now is the time of monsters."
|
|
|
|
|
2016/05/18 23:31:06
Subject: Re:Legion Rising - Projects from The Dark Works
|
|
Utilizing Careful Highlighting
|
That will be awesome! Really hope it works out for you
Good luck!
|
|
|
|
|
|
2016/05/19 04:59:22
Subject: Re:Legion Rising - Projects from The Dark Works
|
|
Strategizing Grey Knight Chapter Master
|
Oh you tease. Go on then, show me a little more 
|
IceAngel wrote:I must say Knightley, I am very envious of your squiggle ability. I mean, if squiggles were a tactical squad, you'd be the sergeant. If squiggles were an HQ, you'd be the special character. If squiggles were a way of life, you'd be Doctor Phil...
The Cleanest Painting blog ever!
Gitsplitta wrote:I am but a pretender... you are... the father of all squiggles. .
|
|
|
|
|
2016/05/19 05:38:49
Subject: Legion Rising - Projects from The Dark Works
|
|

Pious Palatine
|
Many shinies you have to work on.
EDC
|
|
|
|
|
2016/05/19 05:51:18
Subject: Legion Rising - Projects from The Dark Works
|
|
Jinking Ravenwing Land Speeder Pilot
|
Do you plan on making any turret-mounted weaponry that isn't based on CSMs? I'm thinking of Razorback and Land Raider weapons like TL ACs,TL HBs, and TL LCs.
|
 6000 pts 6000 pts
 2000 pts 2000 pts
 2500 pts 2500 pts
 3000 pts 3000 pts
"We're on an express elevator to hell - goin' down!"
"Depends on the service being refused. It should be fine to refuse to make a porn star a dildo shaped cake that they wanted to use in a wedding themed porn..." |
|
|
|
|
2016/05/22 03:26:37
Subject: Legion Rising - Projects from The Dark Works
|
|
Liche Priest Hierophant
|
Quick note- you want to use the word "Allowed" when referencing permissions- "I was finally allowed to do that thing in that place."- it's similar to the word "Allowance".
"Aloud" is in reference to sound.
Also, yeah, I totally feel you with the "You need to get an internship to gain experience in a business setting!" "But I run my own business!" "But that's not an internship, you need an internship." thing.
|
GENERATION 8: The first time you see this, copy and paste it into your sig and add 1 to the number after generation. Consider it a social experiment.
If yer an Ork, why dont ya WAAAGH!!
M.A.V.- if you liked ChromeHounds, drop by the site and give it a go. Or check out my M.A.V. Oneshots videos on YouTube! |
|
|
|
|
2016/05/22 06:50:18
Subject: Re:Legion Rising - Projects from The Dark Works
|
|
Pestilent Plague Marine with Blight Grenade
|
 Subtle Discord wrote: I was given tentative permission to use hours in my studio towards the obligation for the program. Details still need to be clarified and verified, and I will still need to try and find some other work to add additional hours if I can, but a massive barrier to spending any time in my studio should now be lifted. "And there was much rejoicing! ... Yay!" ~ Monty Python Subtle Discord wrote: I was given tentative permission to use hours in my studio towards the obligation for the program. Details still need to be clarified and verified, and I will still need to try and find some other work to add additional hours if I can, but a massive barrier to spending any time in my studio should now be lifted. "And there was much rejoicing! ... Yay!" ~ Monty Python
Get. Everything. In. Writing.
Before you even think about anything else, you need written evidence that this arrangement has been agreed, otherwise you'll pour tons of work into TDW only for them to turn round and say "This doesn't qualify" and you fail the course for not doing the required internship hours.
Passing your course is more important than us getting our fix of Chaos goodies
|
|
|
|
|
|
2016/05/23 17:02:08
Subject: Re:Legion Rising - Projects from The Dark Works
|
|
Liche Priest Hierophant
|
Charax wrote: Subtle Discord wrote: I was given tentative permission to use hours in my studio towards the obligation for the program. Details still need to be clarified and verified, and I will still need to try and find some other work to add additional hours if I can, but a massive barrier to spending any time in my studio should now be lifted. "And there was much rejoicing! ... Yay!" ~ Monty Python
Get. Everything. In. Writing.
Before you even think about anything else, you need written evidence that this arrangement has been agreed, otherwise you'll pour tons of work into TDW only for them to turn round and say "This doesn't qualify" and you fail the course for not doing the required internship hours.
Passing your course is more important than us getting our fix of Chaos goodies
This- all of this.
Accountability is the greatest thing ever in business- get it in writing, signed by whoever is in charge of these decisions- if possible, even signed by the Dean of whichever department you're in (easier than you'd think)- in fact, if you haven't talked to them yet, and your advisors or whoever are still being obstinant, see if you can schedule a meeting with the Dean- not necessarily to 'go over the heads' of the others, but if you can get the Dean on your side, you'll have a lot more weight behind your position.
|
GENERATION 8: The first time you see this, copy and paste it into your sig and add 1 to the number after generation. Consider it a social experiment.
If yer an Ork, why dont ya WAAAGH!!
M.A.V.- if you liked ChromeHounds, drop by the site and give it a go. Or check out my M.A.V. Oneshots videos on YouTube! |
|
|
|
|
2016/05/30 23:12:36
Subject: The Dark Mechanicus Arrive
|
|
Sagitarius with a Big F'in Gun
|
With a bit of hobby time to scratch a deep itch (more on that in a bit, and across future articles to come) and my studio finally in a state of almost respectable organization, it’s time to get The Dark Works going again. First up, some of my usual ramble to answer some questions and make some comments based on replies taken from all of my Legion Rising threads.
First, it’s been mentioned, quite wisely, that I should be sure to get my recent agreement with my college in writing to make sure any time spent isn’t wasted. Since, as far as I know, I’ll be the first to do their own studio/company for the required hours I’ve been sure to take this sage advice and I’ve already got things written up, signed, and sent off. I’ll know more this week. I’ve been at my college long enough to have a bit of an idea how things can be, and I’ll work hard to make sure things work out in the end. And trust that after consideration I’ve concluded that the studio wins regardless, (more on this at the end of the summer) so I’m happy with how things are headed, no matter the outcome. Thanks as always, to everyone who is offering suggestions and support for my progress. It’s always useful and appreciated.
It’s also been asked if I have any plans on doing non-Chaos weapon systems (sponsons and turrets, for example) and I can say it’s not out of the question. Some specialized/unique weapons seem like good places to start, but time will tell just what I will tackle. It does touch on the fact that most future kits will have Chaos and Loyalist versions; it won’t be for every kit, some will be faction exclusive, but many will get both versions. While my corruption is complete, and Chaos will always be my first calling, I’ll be doing much more Loyalist work in the future; hopefully starting this summer.
Unfortunately, most of the builds I have shown in my recent photos won’t be getting painted any time soon. It’s a bitter sweet necessity however, because it means that the models can be used in the studio to produce kits for the Works, so that’s worth the sacrifice of needing to wait to paint them. On a related point, I now have a new Land Raider kit, so I’ll finally be able to assemble and paint my current Land Raider that’s been in my collection for far too many years. I suspect that I’ll need to do a squad of Terminators that are also looong overdue to ride inside, when the time comes to get some paint on it, so stay tuned for that at some point. I’m still trying to decide if I want to give the ‘Raider some significant, but not crippling, battle damage for some variety; maybe even magnetize a section of the armour so it can swap out the damaged part for a intact one. Humm… might be on to something…
So yes, as the photos allude, the Sicaran, Spartan, and Fire Raptor are all in various stages of completion and will soon be ready for use for developing studio kits. I can’t say they will all get kits this summer, but given how tricky some of them are to build… *Subtle glares at the near-finished Fire Raptor with mix of malice, contempt, and pride* getting them assembled cleanly is a critical first step. But first up, one small diversion before a new personal project.
After a hobbyist was nice enough to post a picture of a formation of my Mor’ses weapon platforms, a request was made for a photo of the platforms beside some models for scale. They were nice enough to provide the requested photo, but it got me thinking it couldn’t hurt to do a nice studio photo for some scale reference.
 Unfortunately, I still haven’t had time to do more then give it one coat of black paint. The Marines are on 25mm bases.
This also brings up a point that I’ve been considering recently; going forward I’m going to try to produce accompanying body components to match kits that warrant them. Most of the time this will mean a set of legs in an appropriate pose and/or hands (maybe a complete arm) gripping and/or operating the equipment. In this case, while I’ve created an ample standing platform and was very careful in trying to create a good height for the control panel, trying to build a model to fit with the existing kit is more work than it needs to be; a few made-to-fit body parts would make it much more straight forward to build.
Unfortunately, I still haven’t had time to do more then give it one coat of black paint. The Marines are on 25mm bases.
This also brings up a point that I’ve been considering recently; going forward I’m going to try to produce accompanying body components to match kits that warrant them. Most of the time this will mean a set of legs in an appropriate pose and/or hands (maybe a complete arm) gripping and/or operating the equipment. In this case, while I’ve created an ample standing platform and was very careful in trying to create a good height for the control panel, trying to build a model to fit with the existing kit is more work than it needs to be; a few made-to-fit body parts would make it much more straight forward to build.
So, that’s something old, so now on to something new; a kit bashing, converting, and casting project, presented by Subtle Discord…
 My first major purchases outside of the Chaos faction since I started collecting/building/painting Chaos over twenty years ago. Naturally, they will be turned to chaotic purposes.
Since their release, I’ve always been frustrated that GW choose to only produce Chaos Cultists as a limited selection of snap-fit models with static poses. If you like the look, the starter set models are great, but I’ve always thought a multi-part kit would sell exceptionally well for GW (considering the number of Cultists you generally need/want to field) and I wondered why they never created a multi-part kit.
My first major purchases outside of the Chaos faction since I started collecting/building/painting Chaos over twenty years ago. Naturally, they will be turned to chaotic purposes.
Since their release, I’ve always been frustrated that GW choose to only produce Chaos Cultists as a limited selection of snap-fit models with static poses. If you like the look, the starter set models are great, but I’ve always thought a multi-part kit would sell exceptionally well for GW (considering the number of Cultists you generally need/want to field) and I wondered why they never created a multi-part kit.
I dislike glaring repetition in a collection in general; in a very structured and maintained army it makes more sense, but at the very least I still want the option to have some control over pose to add variety. In an army like Chaos, where less structure is to be expected, blatant repetition is a real detracting factor to me. I don’t need huge changes for each model, but a little flexibility and some interchangeable options is much preferred, and the more the better. Being able to change poses and mix-and-match interchangeable parts for variety… “It’s a good thing!” ~ M. Stewart.
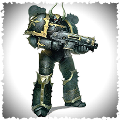
Originally my list included standard Chaos Cultists from the CSM Codex, but once I had a copy of IA:13 I have since changed that to an allied detachment of Chaos Renegades; slightly more expensive, but they bring many more useful options to the table. Since I’ve long wanted to add some kind of representation for the Dark Mechanicus who are in service to my Warband, this seemed like a good opportunity. Pictured above is the Renegade Mechanicus Command Squad with a Command Net Vox, built from the stock Skitarii Ranger/Vanguard kit; being some of GWs newer work they stand very well on their own without modification.
The Demagogue will be given the Bloody-handed Reaver devotion to represent the improved equipment and training this force has access to; this devotion gives the Demagogue a Refractor Field, the option to equip certain squads with proper Flak Armour, forces you to buy Militia Training (+1 WS & BS) on any squads that can take it, and provides the option to upgrade certain squads with Hot-shot Las weapons. For me, this will do a good job of representing a Mechanicus Militia, and the ‘tax elements’ aren’t too steep for what you get.
 With some kit bashing and a little conversion work I was able to get a nice selection of posable bits to mix-and-match for variety.
The torso of the Astra Militarum required some simple but key changes to make this project work. With all of the extra heads provided by the Skitarii box, it’s an obvious place to start. To me, the head of a model being placed on a proper ball-joint is key to giving the builder a lot of freedom in the pose of a miniature; just a simple turn and tilt of the head can completely change the intent and look of a model, even with no other changes. With some careful shaving, drilling, and filing, I was able to create a seat that fit the Skitarii heads quite nicely.
With some kit bashing and a little conversion work I was able to get a nice selection of posable bits to mix-and-match for variety.
The torso of the Astra Militarum required some simple but key changes to make this project work. With all of the extra heads provided by the Skitarii box, it’s an obvious place to start. To me, the head of a model being placed on a proper ball-joint is key to giving the builder a lot of freedom in the pose of a miniature; just a simple turn and tilt of the head can completely change the intent and look of a model, even with no other changes. With some careful shaving, drilling, and filing, I was able to create a seat that fit the Skitarii heads quite nicely.
Originally I didn’t have plans to add backpacks to the models, but looking at the packs in the Skitarii box got me thinking, and after some test fits I quickly came around to the idea of adding them. A little styrene work produced some suitable mounting points for the backpacks and finished the torsos.
Every single Autopistol I could harvest from a Dark Vengeance set, plus a few more, were attached to the AM arms to provide some variety while still being consistent. Also, I wanted them to carry gladius’ or some kind of short swords over a smaller knives, so I used Chaos Marine combat weapons for their larger size. The hands intended for the special weapons in the AM kit proved especially suited for making a convincing combat weapon hand; once chopped off at the wrist I could add them to arms in different poses to add more variety.
 I’m very pleased with the outcome of these changes; particularly the addition of the backpacks. I think they complete the model nicely while reinforcing the Mechanicus theme.
In the final models I’ve removed the tops of the antennas and the dangling bits from the packs to have them appear more subordinate and make them easier to work with. Combined with the added helmet I think they provide a much needed dose of detail to the older Cadian models.
I’m very pleased with the outcome of these changes; particularly the addition of the backpacks. I think they complete the model nicely while reinforcing the Mechanicus theme.
In the final models I’ve removed the tops of the antennas and the dangling bits from the packs to have them appear more subordinate and make them easier to work with. Combined with the added helmet I think they provide a much needed dose of detail to the older Cadian models.
 But the star of the project has to be the variety that results from the combination of the final components.
With a combination of bits sourced online, leftover bits, and select parts I can cast for myself, I can put together 20-30 of these Dark Mechanicus Militia with an acceptable level of variety for reasonable amount of effort and expense.
But the star of the project has to be the variety that results from the combination of the final components.
With a combination of bits sourced online, leftover bits, and select parts I can cast for myself, I can put together 20-30 of these Dark Mechanicus Militia with an acceptable level of variety for reasonable amount of effort and expense.
From a fluff perspective, I see it as a lesser Mechanicus force that enjoys the reasonably standardized and maintained equipment their faction can provide. I picture them being selected only from manufactorum workers who are particularly capable (or perhaps violent) and those who are born into service, never slave workers; having never known anything but service in the factories they would have a slightly higher standing and likely be loyal. Being internal workers does well to explain the lack of cybernetics too. And, not that they’d have much choice, but I think most would welcome the chance at Militia service if only to leave the factory and see the actual sky, if only once, before they die.
However, even with the added Militia training, having been sheltered in the factories will make them somewhat unpredictable on the real battlefield; for me, this ties in well with the random Leadership value that Chaos Renegade squads need to contend with.
 Eager to see the final look, I’ve done a little test painting. I’m try to keep the scheme simple so I don’t lose my mind painting 30+ of these at a time.
By keeping the scheme to Black, Blue, and Silver, I can use a simple single Black Wash to get the desired depth. A quick overall wash does most of the work, and then some selective application in select spots finishes that step quickly. While I want the cloth to keep the dark Blue-Black tone I achieved, I think I’m going to add just a bit more highlight to bring out a little more punch to the Blue. It still has one more layer if detailing and highlighting to go, but I’m completely happy with the result so far. This scheme should preserve my sanity when it comes time to paint it in bulk.
Eager to see the final look, I’ve done a little test painting. I’m try to keep the scheme simple so I don’t lose my mind painting 30+ of these at a time.
By keeping the scheme to Black, Blue, and Silver, I can use a simple single Black Wash to get the desired depth. A quick overall wash does most of the work, and then some selective application in select spots finishes that step quickly. While I want the cloth to keep the dark Blue-Black tone I achieved, I think I’m going to add just a bit more highlight to bring out a little more punch to the Blue. It still has one more layer if detailing and highlighting to go, but I’m completely happy with the result so far. This scheme should preserve my sanity when it comes time to paint it in bulk.
Ok, that’s it for this wall-o’-text-and-photos. I’ve been trying my best to remember to photograph my progress as I’ve been building my most recent kits, so I have build articles for (In no particular order) the Raptor, Spartan, and Sicaran coming up in the near future. Along with perhaps some other projects that may crop up if I’m so inspired.
I find myself forever caught between the four forces that pull me in opposite directions; designing and creating new prototypes for kits, mould making and casting, building and painting, and writing articles about all of it. I enjoy each aspect so it can be hard to change focus when one of them in particular is calling. So, for now I shift my focus to production and I’ll start casting some much needed stock so I can generate some more capitol to make some of my many future plans possible.
Summer is finally here! More to come over the coming weeks and months. And as always, comments, questions, input, and critic, are always welcome. Thanks for reading.
|
"The old galaxy is dying, and the new galaxy struggles to be born; now is the time of monsters."
|
|
|
|
|
2016/07/10 08:43:17
Subject: Re:Legion Rising - Projects from The Dark Works
|
|
Sagitarius with a Big F'in Gun
|
And now, for another instalment of… Tales of Interest!
Along with other projects that I have eluded to in earlier posts (more on those, and others, when time permits in the future) I mentioned that I might get distracted with some other ideas I’ve had bouncing around inside my brain. Unfortunately I suffer from a bit of self-diagnosed O.C.D. (Shocker! I know…) when it comes to the act of creation; sometimes an inspiration will take hold, and I’m virtually powerless to stop myself from working on the idea, even if it’s not necessarily what I had planned. I’ve learned that it’s usually best not to fight it unless there is something critical that needs to be dealt with instead. It’s that uncontrollable need to make and create that defines an artist or designer in my opinion; it’s one thing to like to be creative and enjoying making things, but it’s another when there’s something in your psyche that completely compels you to do so.
Most, dare I say all, ideas evolve. Some more than others, but I learned long ago that it’s almost always better to give ideas some time to explore and mature; and school had helped to reinforce and hone this process. I can’t think of a single time that giving a project a few days/weeks/months of reflection didn’t improve the final outcome. Sometimes it’s through necessity, because something needs to fit, function, or a specific form, and sometimes it’s more cosmetic where certain visual elements need to be looked at with fresh eyes and tweaked to get the best looking results. There’s a healthy dose of each in these new projects.
In turn, it’s also possible for it to go the other way, and you need to be careful that you don’t overthink an idea and spend too much time contemplating. Having creativity turn to procrastination for one reason or another is still a trap I struggle with from time-to-time. Being more aware of how/when it’s being helpful or hindering the process has been an interesting learning experience. I don’t guilt myself when I put something aside as I may have in the past, but I also don’t let myself off and have too many things lost in limbo as I refine them. These were a couple of ideas I finally chose to resurrect and hammer home reasonably quickly.
 I while back I had shown a proof-of-concept for some tea-lights being used to create glowing Objective Markers.
While the idea worked well to get the stones to glow, there were several technical issues, not the least of which was the size. It’s just too tall. And while there’s a fair bit of wasted space in these lights there is an issue with trying to stack a shell, the battery, connectors, a switch, and the LED and keep it low profile. I discovered an interesting alternative LED light that simplified the switch into a screw mechanism and this helped make the unit smaller, but the height was an issue that needed to be dealt with.
I while back I had shown a proof-of-concept for some tea-lights being used to create glowing Objective Markers.
While the idea worked well to get the stones to glow, there were several technical issues, not the least of which was the size. It’s just too tall. And while there’s a fair bit of wasted space in these lights there is an issue with trying to stack a shell, the battery, connectors, a switch, and the LED and keep it low profile. I discovered an interesting alternative LED light that simplified the switch into a screw mechanism and this helped make the unit smaller, but the height was an issue that needed to be dealt with.
After modifying one of the lights to remove as much height as I could possible manage, I fused the top part into a plastic component that gave the assembly a slope. Having no trademark or copyright to worry about, I have no problem using them as the base mechanics this kit will need to make my life easier.
 I kept the final diameter to 2” so I could get as gradual a slope as possible while keeping the size official.
With a little research I found that these twist-on style lights are prolific and come in many colours and varieties. This makes it easy to replace parts and to change the effect to something different. Simple, modular, and customizable. Nothing wrong with that combination at all.
I kept the final diameter to 2” so I could get as gradual a slope as possible while keeping the size official.
With a little research I found that these twist-on style lights are prolific and come in many colours and varieties. This makes it easy to replace parts and to change the effect to something different. Simple, modular, and customizable. Nothing wrong with that combination at all.
 Happy with the solution for the base, now it needed something to take advantage of that light.
As an added bonus, these little lights work with 1 or 2 batteries. All of these pictures are taken with 1 battery under reasonably bright conditions and the glow is very pronounced. Naturally, with a second battery the effect is considerably brighter. While not necessary, nothing wrong with more options.
Happy with the solution for the base, now it needed something to take advantage of that light.
As an added bonus, these little lights work with 1 or 2 batteries. All of these pictures are taken with 1 battery under reasonably bright conditions and the glow is very pronounced. Naturally, with a second battery the effect is considerably brighter. While not necessary, nothing wrong with more options.
The other issue I had with my earlier prototypes was the clear plastic used to cast the glowing stones; the first plastic I used took over 24 hours to cure enough to de-mould, and several more days to become completely hard. A school project earlier this year gave me the opportunity to pick up some Smooth Cast 326, a virtually clear casting resin that colours very well and only takes 1 hour to cure enough to de-mould. While still not very fast, it’s a vast improvement.
 As before, I first primed the stones in white to capture and reflect as much light as possible, then finished with a layer of black.
Much more care was taken to carve the symbols into the stones this time and this helps considerably during the painting. The lines are sharper and much deeper than the first prototypes, so if you spray the primer over them at a sharp angle to the surface, the paint will naturally avoid going into the carved lines. The surfaces get a nice even coat while the lines stay reasonably clean. And once it’s dry the plastic is so hard a dull pin can easily remove any primer that may find its way into the lines, so no real special care is needed to get these primed and ready for basing and paint.
As before, I first primed the stones in white to capture and reflect as much light as possible, then finished with a layer of black.
Much more care was taken to carve the symbols into the stones this time and this helps considerably during the painting. The lines are sharper and much deeper than the first prototypes, so if you spray the primer over them at a sharp angle to the surface, the paint will naturally avoid going into the carved lines. The surfaces get a nice even coat while the lines stay reasonably clean. And once it’s dry the plastic is so hard a dull pin can easily remove any primer that may find its way into the lines, so no real special care is needed to get these primed and ready for basing and paint.
 Here’s a size and height comparison beside some models. While still a little tall, these feel much more plausible as a mound of soil.
I wanted to get some paint, and not just primer, on these but the next project has distracted me too much the last while so I didn’t have a chance yet. Even with just primer I’m completely happy with the new base solution and improved stones. The supplied LEDs slowly shift through a rainbow of colours giving them a very hypnotic ever-changing effect that I’m equally pleased with; I think it lends to the Chaos vibe of the stones, but as I mentioned, with the modular parts the LED hardware can easily be replaced at a reasonable cost if I or the customer chooses to change them.
Here’s a size and height comparison beside some models. While still a little tall, these feel much more plausible as a mound of soil.
I wanted to get some paint, and not just primer, on these but the next project has distracted me too much the last while so I didn’t have a chance yet. Even with just primer I’m completely happy with the new base solution and improved stones. The supplied LEDs slowly shift through a rainbow of colours giving them a very hypnotic ever-changing effect that I’m equally pleased with; I think it lends to the Chaos vibe of the stones, but as I mentioned, with the modular parts the LED hardware can easily be replaced at a reasonable cost if I or the customer chooses to change them.
A future plan for this idea is to create a series of small objects that look like arcane and/or xeno technology; an outer shell that’s just a normal resin cast model surrounding a translucent core component that can transmit the light. Just give the marker a twist and it lights up and glows with some internal power source.
 Considered a while back, I’m not totally sure what compelled me to return to this project now, but it wouldn’t let me go.
While I always like it, the original design I came up with was just too large and complex. The parts would either be too big for me to handle reasonably with my current equipment, or I would need to split everything into too many smaller parts for my liking. Given its shape, I had always wondered if the Vengeance Weapon Battery base could work as a starting point, and I finally gave in and got a kit to try it with.
Considered a while back, I’m not totally sure what compelled me to return to this project now, but it wouldn’t let me go.
While I always like it, the original design I came up with was just too large and complex. The parts would either be too big for me to handle reasonably with my current equipment, or I would need to split everything into too many smaller parts for my liking. Given its shape, I had always wondered if the Vengeance Weapon Battery base could work as a starting point, and I finally gave in and got a kit to try it with.
By refining the design down to save on bulk, minimize parts, and take advantage of a repeating pattern, I’ve brought the idea into the realm of reasonable; but, it’s still going to be the largest kit my studio has produced to date. In this, I’m using it as a testing ground for casting parts of this size; I don’t foresee any serious difficulties, but I still haven’t cast components this large yet, so it’s an excellent project to make sure everything will go as I’m hoping it will.
Being a breakable part that could need replacing, and because of the simple fact that not all Plasma Globes are created equal (cheaper ones will slowly fade over time) I’ve designed the model with a removable top to permit the globe to be replace.
 As before, by integrating only the needed part of the generic globe base, I can seamlessly add the hardware into the model.
By building my form as a tight skin around the required piece of the original base and then filling the void with liquid resin before capping it all in to finish it, any 3” plasma globe with the generic black stair-step style base should have no problem fitting in this base. From there the rest of the parts attach to the Vengeance Battery base to finish the build.
As before, by integrating only the needed part of the generic globe base, I can seamlessly add the hardware into the model.
By building my form as a tight skin around the required piece of the original base and then filling the void with liquid resin before capping it all in to finish it, any 3” plasma globe with the generic black stair-step style base should have no problem fitting in this base. From there the rest of the parts attach to the Vengeance Battery base to finish the build.
3D modeling is great for designing with the intent of rapid prototyping the model, but college really forced me to scratch build from a 3D model, and it showed me how realistic it is. It takes some extra time to build thin 3D model, but it takes most of the guesswork out of the final model. If an issue does come up, it’s simple to tweak the model to find the solution. Next step is to blend the processes and merge rapid prototyped components into a larger build.
 I’ve also invested in some round rivets cast in styrene, so this seemed a perfect project to try them.
While everything is looking good so far, I’m still a bit nervous. Until I can cast copies of the parts I can’t be 100% sure about the fit. I’m pretty certain I’ve got my build right, but it seems that the Vengeance Battery kit is one that is produced in China for GW, (shame on you GW *shakes head in disappointment*) and I have to say it has an effect on the quality of the model. Visually overall, it’s not bad. Some details are lacking and there are a few surface quality issues, but nothing really bad. But when you get in closer I’ve found that there’s a lack of many tolerances in the model; lines that should be straight are a little off, things that should be symmetrical aren’t quite, and a few other small idiosyncrasies that didn’t show themselves until well into the build.
I’ve also invested in some round rivets cast in styrene, so this seemed a perfect project to try them.
While everything is looking good so far, I’m still a bit nervous. Until I can cast copies of the parts I can’t be 100% sure about the fit. I’m pretty certain I’ve got my build right, but it seems that the Vengeance Battery kit is one that is produced in China for GW, (shame on you GW *shakes head in disappointment*) and I have to say it has an effect on the quality of the model. Visually overall, it’s not bad. Some details are lacking and there are a few surface quality issues, but nothing really bad. But when you get in closer I’ve found that there’s a lack of many tolerances in the model; lines that should be straight are a little off, things that should be symmetrical aren’t quite, and a few other small idiosyncrasies that didn’t show themselves until well into the build.
There’s still a final layer of detail (so… many… rivets…) to go, but it’s in the home stretch. It won’t be long before I can test the fit and put it to rest. I haven’t wasted time detailing the 3D model with anything that isn’t critical to the overall build, so there’s still several other little things that need to be finished. I’ll be out of the studio for a week for a family vacation, so this will be on track once I’m back, and followed, as always, by other projects waiting in the wings.
You read it! You can't unread it!
|
"The old galaxy is dying, and the new galaxy struggles to be born; now is the time of monsters."
|
|
|
|
|
2016/07/11 14:46:54
Subject: Legion Rising - Projects from The Dark Works
|
|
Moustache-twirling Princeps
|
My god... the skill. Just unreal!
|
|
|
|
|
|
2016/07/18 19:39:22
Subject: Re:Legion Rising - Projects from The Dark Works
|
|
Sagitarius with a Big F'in Gun
|
++++...
++++++...
++++++++++Re-establishing Connection...
++++++++++Processing...
+++++++...
++++++++++Interference Level Shift: 0.895 – 0.727 – 0.665
++++...
++++++++++Communications Protocol Validate.
++++++++++Signal Lock...
+++++...
++++++++++Connection Established...
++++++++++Transferring...
++++++++++...
++...
++++++++++Processing: Decrypt...
+++++++...
++++++++++Opening Image Files...
++++++++++Opening Transcribe Files...
++++...
++++++++++Minor Data Corruption...
+++++++...
++++++++++Recompiling...
+++++...
++...
++++++++++Data Loss Minimal...
++++++++++Displaying...
++++++++...

[Repair Recompile Failure]...d Warmaster. While suffering casualties higher than expected, our final raiding force has returned having secured the targeted tools, construction materials, and Shield Generation Cores. While I hope the success of our primary goals satisfies you and the needs of our current production, I am positive you will be most pleased with the additional find that the Shadowed Hand has seen fit to guide us... [Repair Recompile Failure]...e raids initial defensive resistance was much higher than expected despite the success of our planned distraction. [Repair Recompile Failure]...s unfortunate that we were forced to employ wide-field sonic residence to speed the securing of target vessels thus rendering most of the potential additional labour spoils to only water and protein reclamation. However, in return transit it became apparent why the defensive actions had been so resolute; strange anomalies in the cargo manifests pointed to something out of the ordinary, and deeper investigation quickly confirmed suspicions. Initially thought to be a single prize, it is my deepest pleasure to inform my Warmaster that we have in fact secured two sacred war engines of the Knight classification. While the encrypted data-wards and failsafe barriers are extremely formidable, and progress in gaining complete access to all subsystems will take some time, merely having the chassis and weapon systems secure in our forges should be worthy of high praise to the Dark Lords who are forever guiding our p... [Repair Recompile Failure]...t appears after initial inspection that the war engines have been partially dismantled to facilitate their transport, leading us to believe that this was an unsanctioned operation. Further decryption of the data recovered will likely revealed a better understanding in the future, and the dismantled state should prove useful during our initial reverse engineering operations.
Further positive reports returned from our other raiding and recovery operations are to follow shortly. While the addition of these glorious engines of war to our armoury has overshadowed other actions, their success should not be overlooked and more comprehensive updates of these efforts will be compiled with haste. Praise to you my Lord Warmaster and the honour of bringing this news to you. +++ ... Mechanicus Crimmins'Thoth - Disciple of the Black Hand - Taker of Names - Scribe to the Book of Thoth: Lost and Dead Returned
+++++++...
++++++++++Connection Standby...
++++++++++Transferring...
++++++++...
++++...
++++++...
++++++++++Standby... Automatically Appended Next Post: +++++++++...
++++++++++Transferring...
++++++++...
+++...
++++++++++Processing: Decrypt...
+++++++...
++++++++++Opening Image Files...
++++++++++Opening Transcribe Files...
++++...
Efforts to recover the Relic Sicaran battle tank Obduro Risum - ‘The Last Laugh’ have met with, dare I say… humorous success. After confirmation was made that the chassis was indeed mostly intact, including the primary weapon systems, the extraction force assembled quickly to make what was meant to be a rapid retrieval operation. Shortly after planet fall, upon scouting the resting place of our Relic, it was discovered that Imperial forces were also moving on to the site; while they were ahead of our own force they obviously had also only just arrived. Further reconnaissance quickly confirmed that the Loyalists were there to ensure the destruction of this, our deeply venerated relic of our Long War. Before a more risky frontal assault was considered, council was given by the accompanying Mechanicus and a unique diversionary plan was quickly formulated.
While the war engine had be thoroughly disabled, having thrown both of its track assemblies, and despite the main power subsystems being compromised, rendering the Las’-Cannons inoperable, the communications, control subsystems, and secondary power subsystems were all still functioning. The Mechanicus went about creating a remote access link to the vehicle and silently took control of the dormant war machine. Damage and power limitations meant that the ammunition feeders to the Auto-Cannons were likely non-functional, but the Obduro Risum still had two rounds chambered and ready to fire.
There can be no doubt that the Imperials were stunned when the targeting and tracking systems of the Sicaran main turret sprang to life, just as they moved in to butcher our cherished Relic, and with a smooth turn locked on to the transport hauling their demolition ordinance. To be true to its name the Mechanicus controlling Obduro Risum activated the engine’s external vox, maximized the volume, and gave a satisfying bark of laughter to assail Loyalists before opening fire. Two shells were more than enough to set off the cache in a most spectacular primary explosion that in turn resulted in a series of all-but annihilating secondary detonations. Our recovery forces were met with little resistance as they moved in on the shell-shocked remnants, and quickly secured the site. Some additional damage was suffered by the Obduro Risum in the blast, but the results of the quickly devised plan were more than worth the additional repairs that were required.
Repair and reassembly transcription logs to follow.
+++ Mechanicus Crimmins'Thoth - Disciple of the Black Hand - Taker of Names - Scribe to the Book of Thoth: Lost and Dead Returned +++
++++++++...
++...
++++++++++Processing: Decrypt...
+++++++...
++++++++++Opening Image Files...
++++++++++Opening Transcribe Files...
+++++++...
+++++...
++++++++++Standby...
++++++...
|
|
This message was edited 1 time. Last update was at 2016/07/19 00:43:55
"The old galaxy is dying, and the new galaxy struggles to be born; now is the time of monsters."
|
|
|
|
|
2016/07/19 17:14:15
Subject: Re:Legion Rising - Projects from The Dark Works
|
|
Sagitarius with a Big F'in Gun
|
The Good: The FW Sicaran Kit proved to be a reasonable build for the most part, except for a few issues in the fit in a few places. The ‘box’ that makes up the main hull went together cleanly, and as always I pinned the assembly as much as possible for added strength and… completely forgot to photograph the progress and results before getting on with adding the side hull components.
 While the side hull components seem straight and true enough, they don’t quite fit the hull as cleanly as you might expect.
Being what seems to be a straight forward, mostly flat-surface-on-flat-surface connection, it’s very odd that these parts should have a strange ‘rock’ that creates an odd gap. Close these gaps at the back of the model (which never really aligns as straight as I personally would like) and they become wider in the front; close the gap in the front and the space widens at the back.
I considered adding shims of plastic to build up areas and attempt to compensate for the gaps with some finesse, as it were, but in the name of a my new found effort to avoid being too perfectionist about every detail of my builds, I chose a brute force method instead. After drilling several large pins into specific locations I secured the pins (treated with my texturing technique shown earlier in Legion Rising), applied liberal amounts of Super Glue, and used several clamps that I’ve modified with soft pads for just his kind of job, to squeeze the parts into submission while the glue set. As mentioned, because of the odd fit in the back a few of the gaps are not as narrow as I would ultimately have liked, but they’re not bad enough for me to feel compelled to repair them. I can add some greenstuff to fill the gaps if I’m feeling up to it, but they’re hidden well enough I can also just ignore them. Good enough.
 During test fits I was not happy with how closely the turret sat on the hull; the lack of clearance caused the turret to conflict with the hull during rotation.
So, using my handy-dandy circle cutting technique, I went about adding a simple shim of 1.5mm styrene to the turret post. Happy with the results, I found it did… nothing to add any height of the turret; it was now flush with the inside surface of the hull that the post sits in.
 So, I went about modifying the hull component a bit to add the desired height.
Adding a second 1.5mm shim to the hull inside the turret post hole, before adding a rectangular plate on the inside finally got the height I was looking for. Naturally, the center points left from the circle cutting process are also perfect for getting magnets mounted perfectly centered.
 It’s a small change really, but the turret now avoids any snags so it can now rotate 360⁰ cleanly.
The clearance is still a little tight at points, but it’s a noticeable improvement. The broad smooth plastic plates also give a pleasant amount of friction and make sure the turret is nice and stable, so it doesn’t rock or shift at all. Simple, clean, and effective.
 With the main turret and the hull assembled, I turned my attention to the sponsons.
I contemplated for quite a while on a way to make the Las’-Cannons and Heavy Bolter sponsons swappable with magnets using only the supplied parts. But I just couldn’t come up with a solution that wasn’t going to create more work while also creating a weaker attachment because of the smaller magnets that would be necessary. Despite the lack of common sense of having exposed power cabling, I like the visual interest they add and they were just too fiddley to consider a way to make them work with swappable weapons.
My final more straightforward solution works well in my opinion; the sponsons can be cleanly omitted from the model if I want to go without, and when they are added the armor plate can rotate with the movement of the weapon system, which also seems most plausible to me. It’s all but certain that I’ll be adding a second Sicaran to my collection at some point (there’s something about the lines of this chassis that I really like), so I’ll consider then how I can make the sponsons completely swappable when that time comes.
 I’m pleased to present the Obduro Risum – ‘The Last Laugh’ in its near-complete built state.
For now, this is a studio asset that will need to do some design work before I can paint it and add it to my personal collection. I have three main studio kits in mind to start; armour plating sets (Loyalist and Chaos) to represent Ceramite Plating and/or Extra Armour, a ‘Dozer Blade and/or Destroyer Blade in the spirit of my Land Raider Siege Ram kit, and some kind of simple Tread Plate kit to add some interest to those bland tracks. All of these kits, and all kits in general, will be designed with Chaos and Loyalist versions, and both 40k and 30k settings in mind, when it makes sense to do so. That’s not to say there won’t be some exclusively Chaos or Loyalist kits, but that will only be in certain circumstances.
As always, the order and timing of these kits is still uncertain. For now I’m focusing on getting key official kits in to my modest studio, assembled to a point that I can use them for accurate measuring, test fitting, and scale comparison, for the kits I plan to produce in the future. With that heavy lifting done I will have the ‘scaffolds’ I need to produce a wide range of kits for The Dark Works.
With that, we come to the end of this, The Good chapter of my exploits in building Forge World models. Next up, The Bad chapter chronicling my efforts to assemble the Spartan Assault Tank. Followed by, The Ugly chapter where I descend into the emotional turmoil that is trying to properly assemble the Fire Raptor Gunship.
Thank you, as always, for your interest (silent or not), feedback, input, critique, and all general musings about what I’m doing. Community support really has been key to me building the confidence to even consider the possibilities that I have before me, and I can’t see that ever changing. Much more to come, and I hope you enjoy hitching long for the ride; I’m glad to have you along!
|
"The old galaxy is dying, and the new galaxy struggles to be born; now is the time of monsters."
|
|
|
|
|
2016/07/25 17:40:08
Subject: Re:Legion Rising - Projects from The Dark Works
|
|
Sagitarius with a Big F'in Gun
|
In a dark corner of southern Canada. The sound of crickets in the night?
*Rivet... rivet... rivet... rivet... rivet... rivet... rivet... rivet... rivet... rivet...*

*Rivet... rivet...rivet...rivet...rivet...rivet...rivet...rivet...* Oh, nope. Subtle is just finishing his detailing.
Almost... finished... the... Shield... Generator... *Rivet... rivet... rivet... rivet... rivet... rivet...*
|
"The old galaxy is dying, and the new galaxy struggles to be born; now is the time of monsters."
|
|
|
|
|
2016/07/25 18:26:16
Subject: Legion Rising - Projects from The Dark Works
|
|
Legendary Master of the Chapter
|
How riviting
|
 Unit1126PLL wrote: Unit1126PLL wrote: Scott-S6 wrote: Scott-S6 wrote:And yet another thread is hijacked for Unit to ask for the same advice, receive the same answers and make the same excuses.
Oh my god I'm becoming martel.
Send help!
|
|
|
|
|
2016/07/30 04:22:54
Subject: Re:Legion Rising - Projects from The Dark Works
|
|
Sagitarius with a Big F'in Gun
|
Since first showing it, I've had quite a few people show interest in the Shield Generator and its progress. I'm happy to say that all of the prototype components have been completed and mould making has begun. For production it will need several moulds, so it'll take several days to get them all completed; but I should be able to have an assembly update once I have the first set of moulds for repeating parts finished. I'm very eager to see it in-the-round, as it were. I'm feeling very good about the fit, but I won't know for sure until the parts are in hand and test fit together. *Crosses his fingers, legs, toes... and eyes*
Now, over the years I've been asked on more than one occasion how I manage to get such clean lines, sharp corners, and smooth corners on my builds. I've talked about my technique here-and-there but college has forced me to become much more practiced in my building technique, and it seemed like this build would be a good place to show off my three main methods for dealing with corners when scratch building with styrene.
 How you deal with a corner really depends on just how much material and/or structure you have to work with.
When you have a single piece of plastic with a few bends, or a delicate structure, most times its best to add some strength to the corner/s. The great thing about styrene is how well it snaps along a cut line, even if it’s not deep, and if you’re careful it will break while keeping a thin ‘hinge’ of plastic that holds the parts together, if so desired. The simplest solution to easily strengthen a corner like this is to add a rod of plastic and then lock it in place with some extra thin solvent glue. Once the plastic finishes fusing the structure becomes much stronger and can handle the stress of the next steps.
With this method I want to achieve a clean single edge that’s as seamless as possible, so I’ll add extra greenstuff (greenstuff + brownstuff mix in this case) to the corner so I have extra material for the next step.
 Once the material added to the corners has cured, it’s a simple matter of sanding it down until it becomes flush with the parent material surface.
Depending on how much material I’m trying to remove, I’ll start with a 220-to-320 grit sandpaper and use that until I get very close to the surface; from there switch to 400-to-600 grit to remove the last of the corner material. Take a little care as you reach the surface and it will become seamless and smooth and you sand it down; as long as it’s even, on a broad flat surface the sand paper will remove virtually no material and just buff the surface to perfect smoothness and give you a crisp corner.
 Now that I have more structure there’s enough strength to handle creating a clean single edge corner with nothing but styrene.
With this next layer I start by gluing the side pieces into place and sanding the edges down so they are flush with the center surface. Then I close that gap with strips of plastic that also extend further then needed, so they can be sanded back flush with the sides surfaces. When gluing these parts I’m careful to be liberal with the solvent along the seams and add a bit of extra pressure so that there is just a little extra material to be sanded flush. Before I start standing I use a razor to remove as possible to speed the process and minimize the dust made during sanding.
 As with the first method, now it’s just a matter of sanding down the extra material until it’s flush and a clean corner if formed.
One key thing you need to do with corners like this is to wait until the solvent is completely evaporated and the plastic is completely hardened. If you rush the process you’ll sand down to a nice smooth surface, but the slightly softer seam of uncured plastic will leave a faint-but-noticeable seam on the surface; if the plastic is totally cured you may be able to see some faint colour variations, but the surface will be completely smooth and true.
Again, as with the first method, start with a heavier grit sandpaper and as you get close to the surface you’re aiming for switch to something lighter. This simple ‘build over the edge and sand it back’ method can be used to create super clean forms out of styrene as long as your patient enough to let the solvents evaporate before you start sanding.
 This is my preferred method to produce really clean and even beveled edges that wrap nicely around corners.
The simple trick of this method is to use the corner of the parent material to help get the shape you’re after. Simply roll out a nice thin rod of greenstuff and lay it in the ‘crook’ created by the two layers of plastic. Then use a simple flat tool (a few of different sizes/shapes are usually helpful in different locations) to force the greenstuff into edge and let the styrene do the work for you; as you press it down and rock the tool over the greenstuff the corner of the styrene will ‘cut’ its way through the material. Once you can see an obvious line through the greenstuff caused by the styrene corner and the surface is reasonably close to how you want it, stop right there and let the greenstuff cure. It wastes a bit of material, but I find it much easier to clean up the excess once it’s cured rather than trying to scrape it away while it’s still soft. Once the greenstuff is cured you can simple scrape the excess away with a fingernail with no worry of harming the material you want to keep.
I find the greenstuff will bulge on corners and across some stubborn areas; again, this is fine and exactly why you get the greenstuff filler close to the final shape and then you do the last refining work once it’s hardened. Here, I find using sanding sticks very useful for removing any offending bulges while still giving me control to keep the surfaces smooth and the edges clean, sharp, and true. It is possible to make your own sanding sticks with some double-sided foam tape and strips of styrene, but when you use as many as I can when I’m doing a lot of building, it’s nice to have a good pre-made product.
Alpha Abrasives has been a favorite of mine for many years, (shameless plug for a local Canadian company) not only for their abrasive products, but also for the Abrasive Cleaning Disc you can see pictured to the right of the sanding sticks. It costs $6 CAD, but mine has lasted me for about 10 years now, is still going strong, and it’s saved me a fair amount of time and money. Simply put, greenstuff is a great modeling material, but it quickly clogs sandpaper and files when you’re try to shape it. Using the cleaning disk, with its strange rubbery and slightly sticky nature, you can rub clogged sandpaper and files clean of greenstuff residue with relative ease. Sandpaper and sanding sticks that would normally be garbage can be reused several more times after a cleaning with this simple tool.
 So, there you have it, all of the necessary components for the Shield Generator are complete and mould making has commenced.
I’m particularly happy with how close to invisible the join is for the removable top of the structure; buy taking advantage of the form I created and using some detailing to further hide the seam, the join all but vanishes when the parts come together. Six reasonably large magnets (two per pillar) will be provided in the final kit to secure the top battlements to the base and I suspect it strong enough to only come apart with deliberate intent. This will help with transport and make it easy to replace the plasma globe should it be necessary.
Stay tuned for more updates on this project as it progresses; it’s the largest model my little studio has produced to date, and while I’m confident that it’s going to be great, it’s still somewhat new territory for me and I’m eager to see this proof of concept prove itself.
Other musing about other topics are also on their way; I have another articles worth of pictures, (on a few different subjects) already finished and just waiting for the copy to get written. That article will shed some light on the projects I have coming up over the next several weeks and how they’ll impact what’s coming up beyond that.
Thanks for reading. As always, more to come!
|
|
This message was edited 1 time. Last update was at 2016/07/30 04:28:08
"The old galaxy is dying, and the new galaxy struggles to be born; now is the time of monsters."
|
|
|
|
|
2016/07/30 06:58:22
Subject: Legion Rising - Projects from The Dark Works
|
|

Pious Palatine
|
Words escape me. Fantastic stuff.
EDC
|
|
|
|
|
2016/07/30 14:37:38
Subject: Legion Rising - Projects from The Dark Works
|
|

Crazed Spirit of the Defiler
|
Now that is all just true majesty.
Will you be adding the plasma ball pieces to your webstore? I'd love to get my hands on a terrain piece like that 
Keep the wonderful work coming, it's always a pleasure to see your updates
|
|
|
|
|
|
2016/07/31 22:11:18
Subject: Re:Legion Rising - Projects from The Dark Works
|
|
Sagitarius with a Big F'in Gun
|
Thanks, as always, for the kind words and interest in my work.
As with all my kits, all the needed magnets, extra bits, and in this case electronics will be provided in the final kit. The only exception to this is any parts produced by GW or FW; they will need to be supplied by the builder.
With the Shield Generator I'll be providing the 3.25" Plasma Globe new in-box; I've sourced what I hope to be a reliable supply that will cost me roughly $18 CAD per Globe and they will be provided at-cost in the kit. Cheaper Globes can be found, but they are lower quality and tend to slowly leak out the gasses trapped in the globe to produce the plasma effect. I should also have no problem proving the kits without the Plasma Globe, at a reduced cost, if someone prefers to source their own.
The builder will be required to dismantle the provided Globe (very simple) and install the parts during the build. I've chosen this route for very specific reasons:
1) As mentioned, I like to provide all of the required parts necessary to the build.
2) The original packaging for the Globes is good for shipping them safely.
3) The builder can safely paint the model before adding the electronics when they see fit.
4) The customer is guaranteed to get a Globe that will properly fit, and will have the original hardware as a a visual reference should they need to replace it in future.
5) Even if a mistake is made and a replacement Plasma Globe is purchased that has a different base, as long as it's using a standard 3.25" globe, it should fit no problem. Odds are more likely that the Globe itself will need to be replace due to breakage or fading/leaking, leaving the originally provided electronics perfectly functional.
|
"The old galaxy is dying, and the new galaxy struggles to be born; now is the time of monsters."
|
|
|
|
|
2016/08/01 06:34:48
Subject: Legion Rising - Projects from The Dark Works
|
|
Battle-tested Knight Castellan Pilot
|
Might be a bit late to suggest this but it would probably be easier for the consumer if the kit didn't use parts from GW. Let's face it your more than skilled enough to create your own version. That's way the kit is complete on sale.
|
|
|
|
|
|
2016/08/01 16:42:08
Subject: Legion Rising - Projects from The Dark Works
|
|
Liche Priest Hierophant
|
While I do agree with you that Legio could/should start doing his own full kits, I think part of the reason they're 'conversion' is because it makes them a lot cheaper. His stuff is Resin-cast, remember, which makes what he does more like Forgeworld than GW central- which means solid parts, and heavy parts. If he were, for example, to make the entirety of this platform, it would be a massive expenditure of resin on his part, cost a ton more to ship, and be, well, more expensive due to those factors. This way, he (and the customer) takes advantage of GW's plastics molding capabilities to provide a lighter and overall less expensive product.
Doing conversion kits also allows him to use the GW kit as a 'leaping off point' for design- he couldn't just copy the design aesthetics for a unique model (remember the Chapterhouse debacle?) but 'conversion kits' or aftermarket addons are completely legal.
But yeah, you should do some of your own stuff..
|
GENERATION 8: The first time you see this, copy and paste it into your sig and add 1 to the number after generation. Consider it a social experiment.
If yer an Ork, why dont ya WAAAGH!!
M.A.V.- if you liked ChromeHounds, drop by the site and give it a go. Or check out my M.A.V. Oneshots videos on YouTube! |
|
|
|
|
2016/08/01 19:54:27
Subject: Re:Legion Rising - Projects from The Dark Works
|
|
Sagitarius with a Big F'in Gun
|
Seriously, thank you very much for having this kind of conversation. I'm always interested in hearing opinions and feedback that fosters a dialogue beyond the look/quality of the work I'm doing; talk that will help steer my studio's deeper design philosophy will always get serious consideration.
It's absolutely true that I'm playing a balancing act, in many ways, with how I'm currently running my studio. For the most part, Anvildude has it right in that I need to follow the path of least resistance with what I'm doing for now, and 'conversion kits' that work with an existing model are prime examples. Not only do they provide some heavy lifting in creating the finished product, they also give the final model at least some legitimate claim that they can be used as official pieces. I'm the first to admit that in this case I've taken it very far and have added a ton of resin to accommodate all of the elements I wanted in the design, but at its core there is an official GW kit to add some legitimacy. For now I am designing specifically for the Warhammer 40/30k universe very intentionally for a few reasons (more on that in a moment) but with that said, I will say that in future I have every plan to produce more stand-alone models that are made completely in-house.
From a production standpoint I'll 'pull back the curtain' a bit to give you an idea where this kit stands, because it really is a different animal compared to everything I've produced so far. Truth be told, I could likely create my own version of the center piece and do it for a little cheaper then what it'll cost to get the pieces you'll need from GW; that said, the parts would be rather tricky to make (due to the slope combined with round and flat elements) and would add much more time to the build that I simply do not have right now. Add to that the fact that this kit is currently sitting at 12-14 moulds to produce (double the count of the largest kits I make now) adding another 4-6 moulds (at least two of them quite large) for the center column plus extra detail bits would be almost prohibitive for this kit. This is an ambitious kit for my modest studio, it doesn't need more.
As for cost, producing the whole thing in-house might trim about $10 CAD off the final price I would charge, at most. Given the amount of resin and labour this kit will demand (resin is actually a very reasonably cost material, but this kit is going to use lots of it) I will likely need to charge $75-to-$80 CAD for my kit, with the $18 CAD Plasma Globe included. In Canada the Vengeance Weapon Battery kit costs $60 CAD at full price from GW, adding $30 CAD to the cost of building one of these towers, but I'm sure they can be found for cheaper from other sources, new or used. I do apologize to those who have to suffer with extra-absurd GW pricing, nothing I can do there. Adding another 4-6 moulds would easily add $20+ CAD to the price. Yes, this will be a $110 CAD kit to complete, maybe even a bit more; but trust me when I say I feel confident it's a fair price for the size, quality, novelty, and exclusivity, of this kit. I'm what I consider a renaissance manufacturer who is not interested in mass producing at the lowest possible cost to keep profit margins as large a possible. I want to produce absolute top quality, unique designs, at a smaller production scale, permitting the time and care necessary to give the attention to detail that is lost when manufacturing is too much about mass production.
Finally, one of the other main reasons why I make kits that incorporate GW/ FW models ties into a longer agenda that I have planned; I'm trying to build a portfolio of work that shows just how good I am at creating kits that blend seamlessly and compliment the parent GW/ FW model. At worst, I wan't to make kits so amazing that I get a reputation for being the 'unofficial official' other Forge World; that independent producer who's making stuff so good, it may as well be FW. Best case scenario, I make a portfolio of work so strong that when I present it to GW I can convince them to consider some kind of 'affiliate studio' program so I can become official and gain a little more freedom in my designs; it might sound a bit crazy (trust me, I'm intimidated even considering it) but nothing ventured, nothing gained, so they say. I'm very cautiously optimistic, but also being careful not to be surprised by a letdown.
All that said, I will be producing kits that are completely my own design and manufacture (the Mor'ses Weapon Platform, is a first test in that direction) along side more conversion kits, when it makes sense. They'll start arriving when I can get working in the studio full-time once I've complete college. But, enough rambling for now, I've got another article almost finished that I'll be posting up shortly, and It'll talk some about future plans and what I'm doing today to get the groundwork for future projects. Thanks for reading, and thanks for the input, it's always appreciated.
|
"The old galaxy is dying, and the new galaxy struggles to be born; now is the time of monsters."
|
|
|
|
|
2016/08/02 01:04:54
Subject: Legion Rising - Projects from The Dark Works
|
|
Liche Priest Hierophant
|
I would like to warn you that GW does not play nice. As far as I know, they've NEVER done any sort of licensing for models; even Forgeworld has always been just a subsidiary. And you can look at the Games Workshop vs. Chapterhouse Studios lawsuit case to see that if you became a big enough name that they take notice of you (like, official notice, not some sculptors browsing Dakka). Chapterhouse was doing almost exactly what you're doing now- making 'addon' kits for things that GW wasn't producing (tyrranid kits especially, as well as some vehicle conversions much like what you have) that required GW parts and were actually pushing sales for GW, and they got sued hard. They almost won due to pro-bono representation from one of the largest Copyright firms in the world, but even then they ended up having to do an out-of-court settlement (that is, they were forced into it) due to GW almost seizing the owner's house (rumoured, but likely- by the way, this is why you don't write off any of your personal assets as business expenses, or have them connected to your business in any way- if your business gets sued, those are 'company assets' that can then get frozen- i.e. you can't use them any more, and they might not belong to you for long).
In other words, I'd suggest trying to get known as someone who has high-quality original kits rather than making conversions. Even stuff that's compatible in scale and works well as a proxy is better. Your armour kits should be fine, considering they're nothing like anything that GW makes, but this tower is just about as close to GW stuff as I think you should aim.
|
GENERATION 8: The first time you see this, copy and paste it into your sig and add 1 to the number after generation. Consider it a social experiment.
If yer an Ork, why dont ya WAAAGH!!
M.A.V.- if you liked ChromeHounds, drop by the site and give it a go. Or check out my M.A.V. Oneshots videos on YouTube! |
|
|
|
|
2016/08/02 09:32:42
Subject: Re:Legion Rising - Projects from The Dark Works
|
|
Sagitarius with a Big F'in Gun
|
Deep down, I know you're likely right and it's a long shot... at best. It's just, while I do plan on doing plenty of my own complete kits, GW is the only company producing a game universe that has an aesthetic that I like. My 'generic' will always have a grim-dark industrial-gothic vibe, a la Warhammer 30/40k. No other system has a style that I would want to cater to, so for the time being at least, Warhammer is my main muse. It's not like I would want a 'deep' licencing agreement, I just wish I could have a little more freedom in my designs, or even just a 'GW Sanctioned' stamp.
While not really extensively, I have spoken with an IP lawyer and feel quite comfortable doing the kits I'm producing. With respect, I don't think it was the scale of Chapterhouse that drew attention; they were big enough, but they weren't that large when they got in themselves in trouble. Certainly there appears to be larger producers today that have no problem making all manner of compatible conversion kits, some even openly calling them compatible with various GW products, and that includes Chapterhouse. From what I learned through research, rumor, and personally following the lawsuit, CH painted a target on their back and showed a considerable a lack of tact; if you try to make very similar copies and/or your own versions of an existing IP concept and go so far as to use the exact name created by the IP holder, 'borrow' distinct icons and art elements created by the IP holder, produce a lower quality product, and be practically arrogant about it, while not making a blatant disclaimer saying your unofficial and distancing you from the IP holding company, then yes, you'll likely draw legal action in defense of the IP. I'm not saying GW wasn't heavy handed, but IP only has value if you're willing to defend; if someone challenges your IP and you don't defend it, you lose it; and CH really did push GWs hand, at least somewhat, in that respect. If you look at which complaints were found in GWs favor and which were found in CHs, the line in the sand is pretty obvious; CH did cross the line with several products, but GW was equally arrogant trying to make some very broad and over-reaching IP legal claims. So, don't flat-out copy an existing design, design it yourself, make it yourself, name it yourself, make good quality, be clear that it is not affiliated with GW, have some tact, and show some professional courtesy for the product/company you're relying on to produce your own product. After market kits that are compatible, even if they are elaborate, are perfectly fine as long as they are original and follow the aforementioned rules.
As for the assets of my still very modest studio, I've boot-strapped the entire operation so far, and would never link anything personal to the business, only genuine business expenses. While the studio is in my basement I currently don't claim any tax credits or link it in any other meaningful way to the house. Any income earned is declared as personal income if it's ever used for any personal expenses. Again, I feel confident that I am, so far, walking a safe path with my designs by making very deliberate considerations and being careful to educate myself. I know I still have much to learn, but I think I've got a good footing so far. Thanks as always, for the input. It's not a bad thing to very carefully consider some subjects, and this is one that I've done plenty of thinking on.
Edit: And while GW has never done any licencing for models, it makes me wonder how many, if anyone, has ever tried, and what was the quality of their portfolio when they tried it. The world is evolving fast around GW and recent choices by them as a company have me hopeful for the first time in quite awhile that they're starting to better understand that. I think they're going to have to continue to change their philosophy if they want to decisively turn the slump they've been in for several years.
|
|
This message was edited 1 time. Last update was at 2016/08/02 09:43:01
"The old galaxy is dying, and the new galaxy struggles to be born; now is the time of monsters."
|
|
|
|
|
2016/08/07 23:12:35
Subject: Re:Legion Rising - Projects from The Dark Works
|
|
Sagitarius with a Big F'in Gun
|
Being a bit of hodgepodge of subjects, it seems appropriate for another episode to chronicle my… Tales of Interest!
First up, I forgot that I never showed the final renders of the Chaos Marine helmet I did last year in college due to my hectic schedule. It turned out quite well, so it seems only fit to show it in its complete state. Better late than never.
 For added visual interest under the front grill I designed my take on a Vox speaker and a vent for breathing when atmosphere is available, and in the ear you can see my take on audio pickup device.
 Under the back panel you can see communications device with two antennas, and the module with the hazard stripes is mean to be the replaceable re-breather filter for less hospitable environments.
Time was a real consideration with this build, so for as much detail as there is, I wasn’t able to go too overboard getting down to smaller detailing. Given more time I would have hollowed/shelled the helmet properly and made the face plate removable, opening the door to the chance to detail the inside. I also wanted to add a collar component and would have liked to make the horns a little more organic, but the project just didn’t permit the time investment.
I changed the surface from my first rendering, from a gloss to a satin and I think it suits the helmet better. It was mentioned that the gloss finish seemed give it a Star Wars meets Warhammer 40K feel, and I had to agree. While I wasn’t able to do anything elaborate, I was able to add a bit of texture to the horns to make them feel a bit more organic. Solidworks really isn’t meant to create authentic renderings; in that I mean, rendering objects that have a bit of wear-and-tear and looked used, as one would likely expect of a Chaos Marine helmet. It’s very good at factory fresh objects that are right out of the box or sitting on a showroom floor, but I wanted to at least try to rough it up a bit. I was able to add some very convincing paint chipping with use of decals (normally used for branding and the like) that I was quite pleased with. With the limited time, I couldn’t find a technique to also add some scratches and weathering marks to the other metal components, however.
Next up in our planned public service announcements… The Bad. *Insert ominous Slaanesh-approved music here* Unfortunately, there’s no fictional blurb to accompany this one yet, but I will have one in future.
 There’s good news and bad news with the Spartan kit. The bad news, in a word… the tracks! Err… wait a second, that’s two words…
It’s my understanding that the track components have now been integrated onto the side-hull section on an updated version of this kit that is now shipping from FW. While that does solve the only real problem with this kit, I was not lucky enough to get one of the new kits and I can see exactly why these parts were such a hassle. Not only are they delicate, with the link edges and other small bits very prone to breaking during shipping and/or during assembly.
 Beyond being fragile, the tracks simply do not fit the model correctly. Even Forge World was unable to get the tracks to fit on their studio model pictured here.
Put simply, there is roughly half a link too much in the track set, and no matter how you try to adjust the fit you can’t get a convincing clean fit for the tracks all the way around. I consider this ‘The Bad’ because this is a design flaw pure-and-simple, and I think it could/should have been corrected before they put this model into production. Given the obvious nature of the problem, the reasonably small size of the parts involved, and the capabilities of the FW studio, I can’t see how it could have been too hard to rectify. Add in the cost they ask for the kit and the fact that I’m sure they’ve sold many of them, correcting something like this before going to production seems fair to me.
I’m still not sure how I’ll handle the problem, and I’m not really sweating it too much (it’s a small detail after all) but I’m likely going to follow FW’s example and simply shave it down. I think I can do it in such a way that it can look like a narrow ‘master link’ that should be reasonably seamless, but I’m not too worried either way; I’m trying to tame my modeling OCD just a wee bit, and aim for ‘really good’ instead of ‘near flawless’ and it’s working. I’ve done more actual productive assembly in the last year then I have in several before it. I won’t be able to really dig in and finish anything significant until college is done (two… final… semesters…) but when the time comes I should be able to bring several projects to completion in short order. I can’t wait! *Wipes away the froth forming at his mouth* Must… finish… more… projects!
 Beyond the tracks, the Spartan assembles very nicely with no real surprises; the main hull fits together with the kind of work you’d expect.
The top front door is a bit thin, especially after I shaved off the eagle on the outside, so I reinforced it with some styrene. I prefer to button-up my vehicles, so it’s no bother to me. I’ve got enough to worry about with the outside of vehicles.
It did require a bit of clamping to get a really nice tight fit on the final assembly, but after that the main hull was as solid as rock. With a bit of sanding to even up the edges everything was ready. I’ve attached some 80 grit sandpaper from a belt sander (virtually indestructible) to a thin strip of oak to create a sanding tool that can really remove material very fast. Great for quick leveling job just like this.
 This is how a model should come together. After some straight forward subassembly the build is stress free.
Thanks to the properly fitting keys that lock the side hulls to the main hull assembly, from here it’s simple to finish the largest part of the build. Unlike the Sicaran kit, the fit for these parts on the Spartan is near prefect all the way around the vehicle, top and bottom with no modification or forcing.
 So there you have it, the Spartan is well on its way to being assembled and now ready to be fit for future studio kits.
Beyond the issues with the tracks this is a really nice model. Where some FW kits will exhibit some slight bowing of surfaces and other minor idiosyncrasies the Spartan’s lines and surfaces are nice and true. To me, it shows that FW is really starting to hone in on how they’re producing their kits and I’ll be interested to see if this trend continues with any future kits I purchase that have been produced after the Spartan.
The Spartan is also a perfect illustration of something I’ve meant to bring up from time-to-time. With the popularity of my ‘trim kits’ I’ve been asked on more than one occasion if I’ll be doing a trim kit for ‘insert model name here’. Put simply, some hulls lend themselves very well to something like my trim; lots of clean straight lines that I can follow, with enough surface area that can reasonably accommodate the width that the trim will be. The Rhino hull is excellent for these reasons and the Spartan is a good example of a hull that would be a real pain to make a good trim kit for. With all the surfaces and detailing, there would be so many small bits that it would be a real pain to design a custom fitting kit. The Spartan will get The Dark Works treatment, but not a proper trim kit, more than likely.
I’m also mentioning trim kits for a specific reason because they have been something I’ve been keen on improving for quite some time. For those who take some interest in how I make my kits and the process involved, I’ll give you a look at my love-hate relationship with these kits. The skinny on the trims, as it were…
 These rather unglamorous looking four moulds are what it takes to create just one reasonably simple trim kit for a Rhino hull.
When you cast with resin you generally need to work very quickly. If you want it to fully harden in a reasonable amount of time, the plastic you use will begin curing (AKA: kicking) very quickly, getting thicker-and-thicker by the second. The delicate nature of my trim kits makes this a problem; if you inject the resin into the moulds quickly (and you have no choice, as the seconds slip by when the resin start to kick in) it will cause the mould to bulge and expand, overflowing from the voids that create the parts. This will cause some tissue-paper-like flash at best, and that’s acceptable; or the flash is far too thick and it completely ruins the part, costing both labour and materials. Up to this point I have made due with simple but effective mould clamps/boxes locked in place with wingnuts that apply even pressure over the mould to fix this issue. While this solution works very well, with four moulds per kit that adds up to sixteen wingnuts that need to be unfastened and refastened each time the parts are removed from the mould. Along with carefully de-moulding these delicate parts, it’s simply too much labour for a product that needs a reasonable price point because of what it is.
Now I learned a lot about my materials and process since I first started producing these trim kits, and I’ve got some ideas on how I think I can improve the process to reduce the mould count and make them easier to de-mould to improve on labour. For these kits to remain viable going forward, these improvements must be made. I really do like the trim kits as a product, and they are popular in my shop, but I really do hate the labour involved to produce them, and I somewhat dread having to do any significant casting run of them.
So, with these plans to improve the manufacturing process I wanted to also do new sets of trim prototypes for the endeavour. Having used my Zing successfully in the past for both studio and college, I set to work on my new designs.
 While Zing is a capable little cutter that can really do amazing things, it’s just not up to the task of cutting arrows and points that are 2mm wide in styrene.
The cutting blade on the Zing needs to pivot to turn corners, and while it’s an extremely tiny pivot, it just isn’t responsive enough in the dense styrene plastic. In lighter vinyl, for example, the Zing would actually be able to achieve these shapes with some adjustment of the settings and the blade height, but in styrene it’s just not possible. I tried to ‘dial in’ the settings, and this did improve the results, but not enough to make it acceptable; the extra density of the styrene simply forces the blade to take longer to pivot around to the new cutting direction. Note how the simple shapes cut well enough, (adding small ‘swing around loops’ at corners will create very sharp corners) and it can almost get acceptable results of the simpler endpoints, but when it comes down to actual arrows it just can’t handle it.
A test with a pen shows that the Zing has the accuracy required, but with the pivoting cutting blade, it just can’t get the same results at this scale. And the scale in this case is worth noting; these bands are just 2mm wide and the arrows are roughly 4mm tall, so these are very small details to be asking Zing to cut. If the pattern was simper (like the Mk.II Land Raider kit I made with Zing) and/or a little larger in scale (like the Shield Generator I just finished building) Zing would have a much better time cutting the parts out. So, while Zing isn’t up to the task of cutting parts for my trim kits, it has still been invaluable for building models for college, and it still has plenty of potential for larger scale cutting jobs.
The silver lining to this outcome is that the designs are all digital and now created in Solidworks, so changing these into models that can be rapid prototyped ( RP) is all but done. The plan was to do these at the beginning of the summer but the complications forced me to put them off. And then I got a little… distracted… *looks sheepish* by the Shield Generator project; it’s turned out as good as I had hoped, but took a little longer then I wanted it to. But that’s a subject for another wall-o’-text.


 Shown large so you can get a good feel for the lines of each design, I’m not making massive changes to these first kits, just refining the concept.
A direct evolution of the Mk.I (a personal favorite) The Mk.III is obviously intended to be a straight-up Chaos/Renegade version. The Mk.IV tones down the overt arrows to more decorative points letting it work well with either Chaos or Loyalist, and 40k or 30k. Finally, the Mk.V can be used for Chaos, but is really intended more as a Loyalist design, again for both 40k and 30k.
With a change to RP to make the prototypes, the two main hurdles for these kits and any other trim kits that I design (be it a kit for a specific hull or a bulk trim kit for a builder to use how they see fit) are surface quality and the very thin nature of these parts. The first, surface quality, (which effects every RP I plan to make, really) will simply come down to the RP method used to create the parts; there are methods that can produce extremely good surface quality but they are not cheap and there might be a problem trying to find it locally due to how specialized (read: Expensive!) the prototypers are that can produce the results I’ll be looking for. While cost is a major consideration I can appreciate the value of a good prototype and have no problem carefully investing in them when it makes sense. Being such low volume objects should also make the trims in particular a good early RP candidate; they should be reasonably cheap to have RP’ed.
My main worry is the delicate nature of the parts, and if they might be a little too thin to safely RP. Or more accurately, to remove from the build tray after the part has been created. Not including the rivets the parts are less than 1mm tall, and 0.5mm at the thinnest points. I’ve made the sprue a thickness I’m sure will be safe, but I’m still worried the parts may be too thin and brittle, breaking apart before they can be moulded. Conversely, they might be so thin that they are prone to curling and/or warping and staying 100% flat and true is key to these kits being successful kits. All said, I will find a way to make my trim designs work. I like how these kits produce a subtle-yet-striking result to the parent model and I can see them evolving considerably once I smooth out any production kinks; expect to see some with delicate filigree and more much unique/ornate lines, bands adorned with spikes, hooks, and chains suitable for attaching trophies (Read: Spikes done right!), trims with runes and symbols of power etched along their length, and those are just what comes off the top pf my head. 3D modeling opens a door to a level of detail that will be very interesting to my design process, to say the least. Stay tuned!
These, along with a few other 3D models that I have lurking in the shadows will be the first components I’ll be having RP’ed locally and they’ll be used to test a few different methods to find the one/s that will work for my future studio projects. The wonderful advantage of working locally is that the turn-around time for prints will go from 2-3 weeks down to as little as 2-3 days if I choose. Faster turn-around costs more, but when it’s a difference of weeks, and it’s with a supplier that I can directly communicate with to get the best results in the time frame I want, that’s worth the extra investment.
So here ends this, my most recent Tale of Interest *the words echo slightly*, and the accompanying chapter dedicated to ‘The Bad’ Spartan build. Coming soon, ‘The Ugly’ Fire Raptor build, complete with emoticons to illustrate the swings in mood that kit has forced me to endure. Don’t get me wrong, the final model is absolutely gorgeous, but the build is ‘advanced’ at best and maddening at worst, especially if you’re a bit particular about fit-and-finish, like myself. I’ve successfully learned to tone down my perfectionist ideals in the name actually getting some projects done, but the Raptor holds a special honour for very nearly giving me a mild brain aneurysm. But all is behind me now… *stares blissfully into space*
But before that, expect a small’ish update on the Shield Generator project; as mentioned, while it did take a little more work than planned, I’m more then pleased with the final outcome and can’t wait to see one completely assembled. It really has pushed my production methods to their limits, and it’s been very valuable in teaching me some lessons in casting large components; something I absolutely plan to do more of in the future.
Ok… I’ll stop rambling now… *Subtle wanders off to do something else productive*
|
"The old galaxy is dying, and the new galaxy struggles to be born; now is the time of monsters."
|
|
|
|
|
2016/08/08 22:52:56
Subject: Re:Legion Rising - Projects from The Dark Works
|
|
Sagitarius with a Big F'in Gun
|
“We have attained the plans. Now build it! Build it… to the sky!”
*tap tap tap*
“Actually my Lord, it’s uhh… only about 35 units vertical; but it does generate a protective shield!”
*glowering*
“Oh… well, I see then. I suppose that will do.”

 Held together with fit, friction, poster tack, hope, and some prayers to the Dark Gods, I present the first, mostly complete, test fit for the Shield Generator.
This test fitting reviled that the main ‘pillar’ component could actually benefit from a little tweaking and adjustment, so that was done. As of taking these pictures the rest of the parts have been moulded and the final moulds (for the main base and the revised pillar component) will be finished tonight. First finalized casts and fitting will start tomorrow and I should have a 100% complete model ready for photos in the next few days. For efficient sustainable production I will need to create some more moulds of the repeating parts, but I’ll have just enough to start limited production. For now, I only have 4 Plasma Globes to make a complete kit (with more on the way) so limited production for a little longer is not really a problem. These will be offered without the Plasma Globe, minus the cost of the globe, for those who may have one or want to source their own, but I can’t make any promises about the final fit of the internal hardware.
 As an added hidden bonus for the Door component, I’ve provided room for the power switch and added seats so it can be magnetized.
Naturally the builder can simply glue the door component in place and leave the switch exposed. It’s not a really that distracting to the model and it leaves easy access to turn the Plasma Globe off during the game to represent when the shield has been knocked down. But, if you want to hide the switch behind the door, simply drill a few holes to each side of the switch and mount a few magnets to secure the door in place. I’ve made the seats for very broad flat magnets (that will be included) so they won’t need to align perfectly with the magnets in the base, but the part should still attach to the model cleanly due to the fit.

 The finish is just what I would expect, and the fit… the fit is… good!
Have I mentioned yet that I’m in love with these round rivets and hex bolts that I picked up from Tichy Train Group? Well I am! Just look at how well they’ve turned out in the final casts. Soooo nice… *drools just a tiny bit* Since they’re made from HIPS (High Impact Polystyrene) they glue perfectly with the extra thin solvent glues that I prefer; but HIPS (as the name suggest) really is a harder version of the styrene family of plastics, so they’ll be tougher and resist melting too much during gluing despite their tiny size.
I was a little worried that the ‘deck plate’ for the battements on the top of the model might not come together as tightly as I’d hoped, but they’ve turned out very well. The added benefit of the overall shape being a hexagon will make the battlement components ‘snap fit’ together, actually locking the assembly tight; you shouldn’t need very much glue to get a very strong final build. Finally, you can see how the top will look from the bottom up, to give an idea how the larger dish is intended to attach.
 Also, if I hadn’t been clear earlier, the glowing Chaos Objective Markers are a studio project that will be available very soon in my shop.
The kit will come complete with six bases, six unique stones (each double-sided), and six colour-changing LED tea lights that will provide the hardware and batteries. Simply attach the stones to the provided bases, apply whatever basing treatment suits your army, and paint as you see fit. Insert the hardware and battery provided, and it’ll be good-to-go. Ominous glowing stones of pow’ah!
Ok, now I need to make something. Time to scratch that itch! *Runs off with a manic look in his eyes*
|
"The old galaxy is dying, and the new galaxy struggles to be born; now is the time of monsters."
|
|
|
|
|
2016/08/08 22:59:54
Subject: Legion Rising - Projects from The Dark Works
|
|
Legendary Master of the Chapter
|
What even the what.
that VSG looks infinity better than the gw one
|
Unit1126PLL wrote: Scott-S6 wrote:And yet another thread is hijacked for Unit to ask for the same advice, receive the same answers and make the same excuses.
Oh my god I'm becoming martel.
Send help!
|
|
|
|
|
|
|
|


