I was asked how I magnetically base my
undead army (shameless self promotion) and what started out as a quick reply became a tutorial!
I'm no pro at this, I just went with what made sense but hopefully this will help someone that is stuck or just wondering how its done!
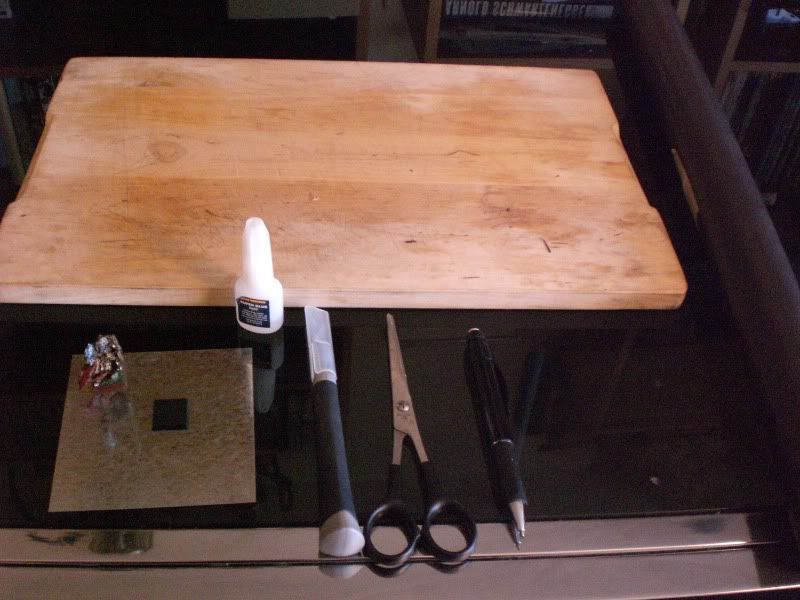 Material list:
-
Flexible magnetic film
I traced the kind I have back to its
manufacturer. But I purchased mine from a company that makes signs for businesses, cars, street signs etc. I even got the technical specs for the film, stats for those that want to be specific. It's 0,75
mm thick and has a pulling force of about 46 grams! It's best to keep it rolled up to preserve its magnetic properties, or if your piece is small enough, just slap it on your fridge! Take care to note the thickness of the film you purchase. you can get magnetic film that is half this thickness but only has 21 grams of pulling force. The thinner film is cheaper, but yeah...half the magnetic strength. Just a heads up!
-Super Glue
I just used the regular
GW super glue for this.
-Hobby knife
GW issue gear once again, any sharp exacto style knife will do.
-Scissors
Just your basic scissor
-Pencil
Not really needed, but nice for when you're starting out.
-Cutting board
Since you're going to be doing a fair bit of cutting I suggest a even and sturdy cutting board.
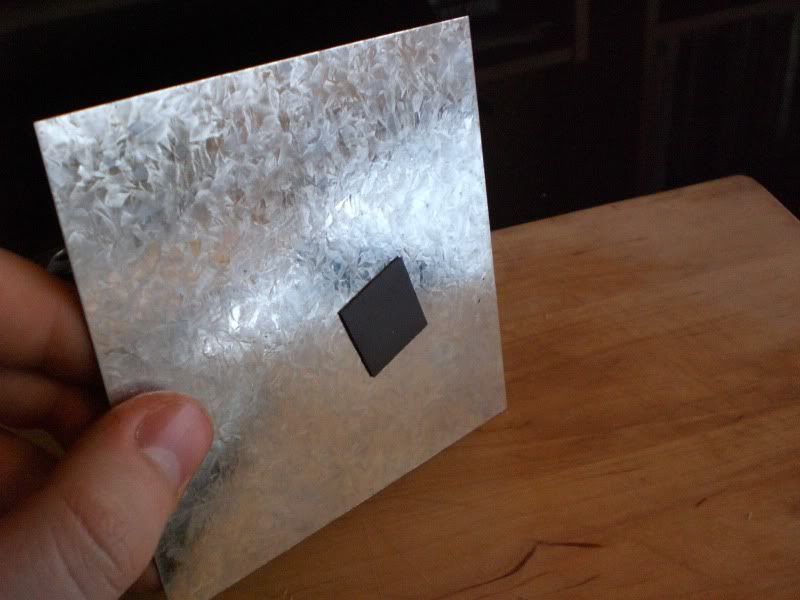
-Metal movement tray
These may be the most trouble for people to get, but around here they're not that hard to find. I can't speak for other countries but here we have loads of independent tinsmiths and smithies that have lots of metal and metalworking facilities. Look for places that make and install ventilation systems or do roofing, those will have this kind of stuff. It just so happens that my friendly local gaming store actually carries these metal pieces for standard regimental sizes so I got lucky there. But looking at the metal it's the exact kind of stuff you'll see ventilation shafts made out of! Take care to clean your metal tray well with soap and perhaps even something like car degreaser. They use a type of grease to keep the metal plates from sticking, this plays havoc on modelling glue and primer, heads up!
-Emtpy model base
This should be the same size the models you are magnetizing, you'll be using this to check the size of your magnets.
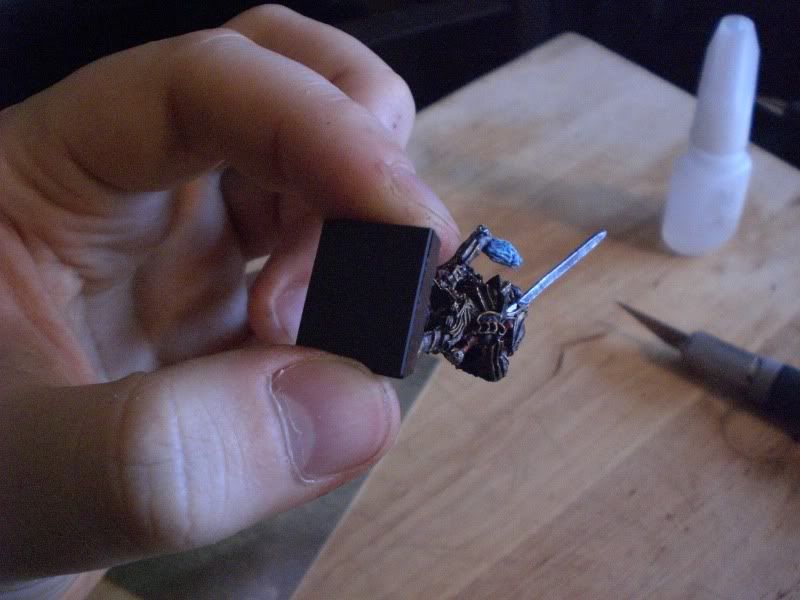
-Models to be magnetized
Kinda makes sense, right? Here I'm magnetizing my Vlad von Carstein conversion.
Total price:62 x 100
cm magnetic film + metal movement tray ~$23
(Mind you, this much magnetic film is enough for several armies. I used a total of 3 strips to base my entire army, which was about 8 cm of film, meaning I could do 10 times as many and still have some left. The magnetic film isn't expensive so I just got plenty. The trays are really cheap too, especially if you find a decent place that won't mind if you go through their scrap metal bits and then pay them some nominal fee for them to cut it for you. ^^)
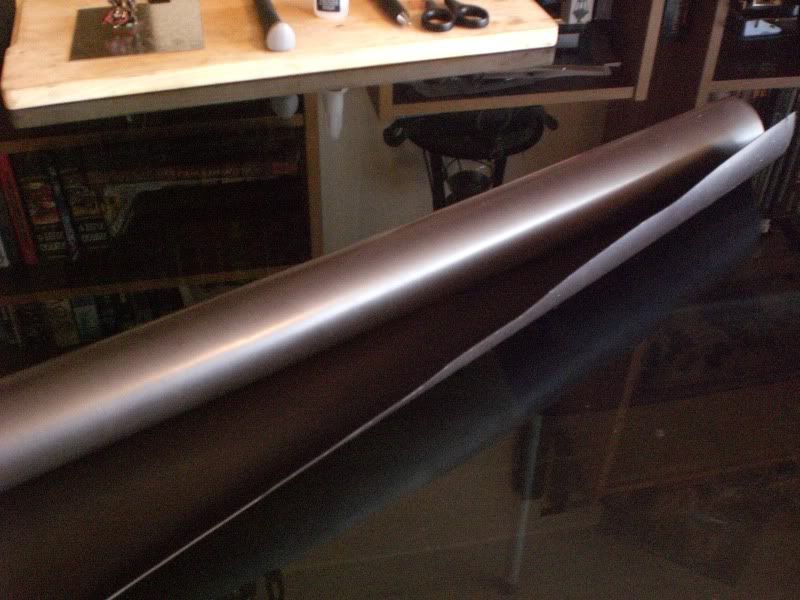
So we start by rolling out our magnetic film. This thing is really thin as you can see
here and it feels kinda rubbery. Only one side is magnetic, this will be important later.
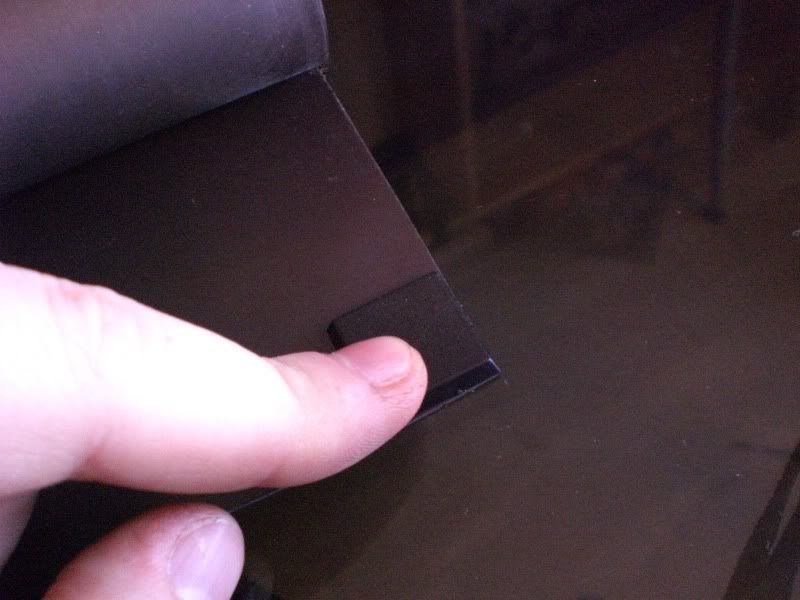
Take the empty base and check it against the film. At this point you can mark the film with the pencil if you want to be very accurate. I did this all the way first, until I could just start eyeballing the width. Do it the way you feel is best. Then take your scissor and cut the strip all the way across. The reason why I'd recommend doing the entire strip is to be as efficient as possible with the magnetic film as possible. Continously stop/starting a new strip will leave alot of useless tiny magnet strips, it's not alot really, but it all adds up! You'll find that the film cuts very easily, just make your cut as straight as you can.
Now we have our magnet strip!
You can see that my cut wasn't entirely straight, but that's ok as long as no part of it is smaller than the base size.
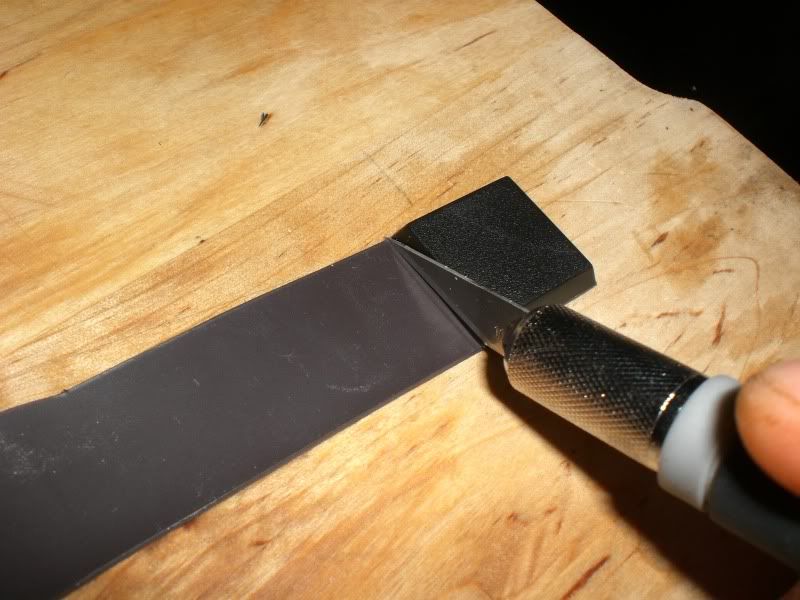
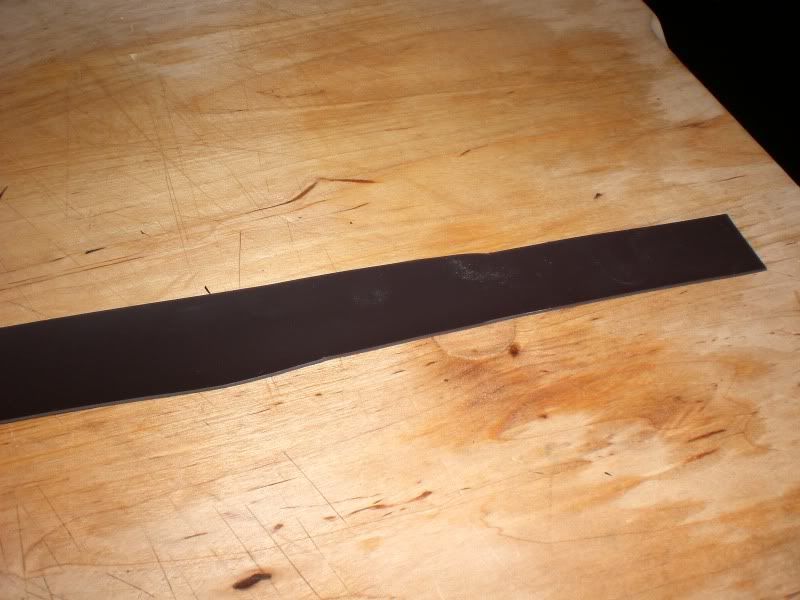
Here we just cut the magnet using our empty base to check the width. I find that being exact here helps alot since then you'll generally need to tidy the magnet alot less later.
And there it is! When doing multiple models I'll just slap 'em all on there! This is very handy. Since only one side is magnetic it's a nice reminder which is which. When you'll start gluing later you'll want to avoid gluing the non magnetic side down, otherwise the model won't stick. I had that happen twice, and it's a pain getting the magnets off again
(which I guess is a good indicator =D)
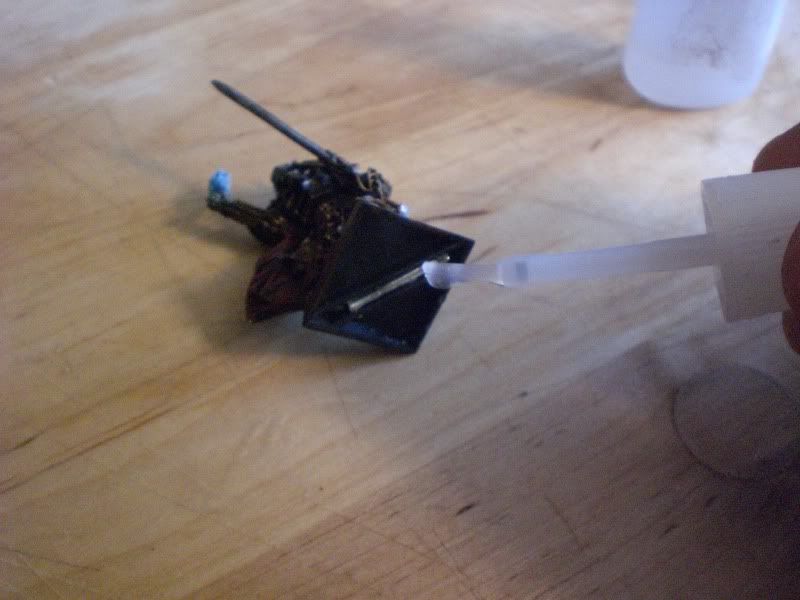
Take the model and apply superglue to the rim and in case of slotta bases, the diagonal slot as well. If you have superglue with a little brush like this, a handy tip is to do your strokes from inside the base and out. That way you avoid glue settling on the outside of the base and warping any base painting you may have done.

Fit the magnetic film underneath the model. If you were exact when cutting the strip you'll find that the film will fit really nicely against three sides, with abit poking out on another. This is the best way I've found, since that means you'll just need to do one cut to tidy the magnet. Once you've placed the film under the model, place it back down and press down onto the base to make sure it has full contact on all the glued points. When I did large regiments I'd do all the models to this stage and then tidy them all at once. Saved some back and forth with the knife.
Once you've let the glue set for abit
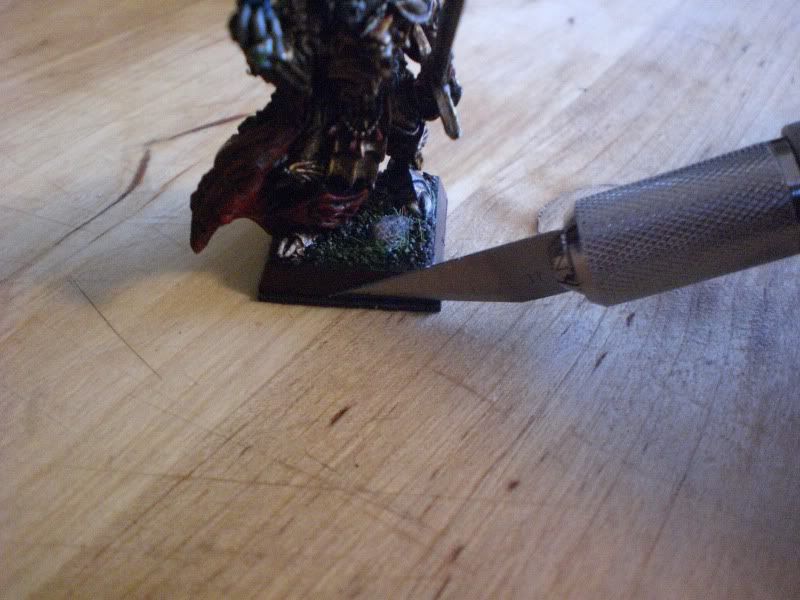
(a few seconds seemed to be enough in my case, but take care to note the settling time for your particular glue type) take your hobby knife and locate your untidy edge. Then just cut across, taking care not to damage the base. Tidy around the base if there are any bits of magnet that stick out.
Model magnetized and looking nice and tidy!
Final effect:
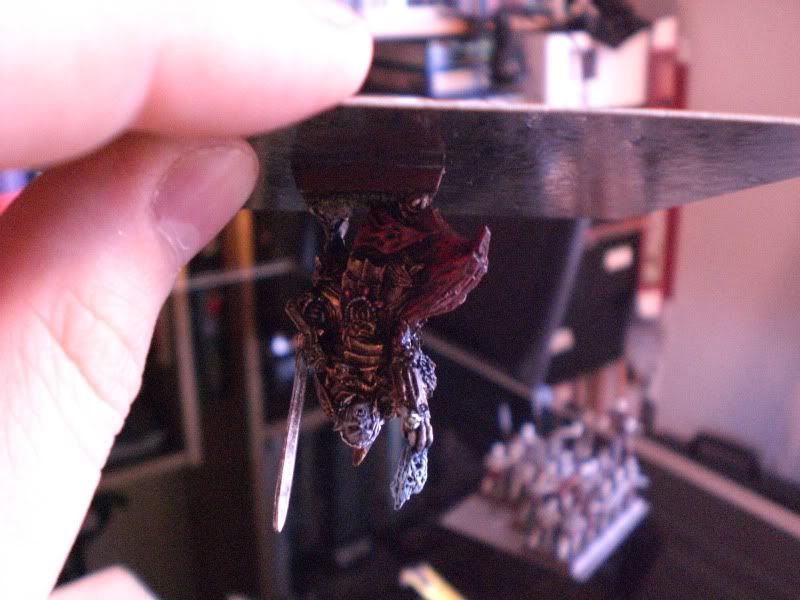
As you can see, the magnet is quite strong and holds the model!
Total time: About 3 min, with the picture taking ^^
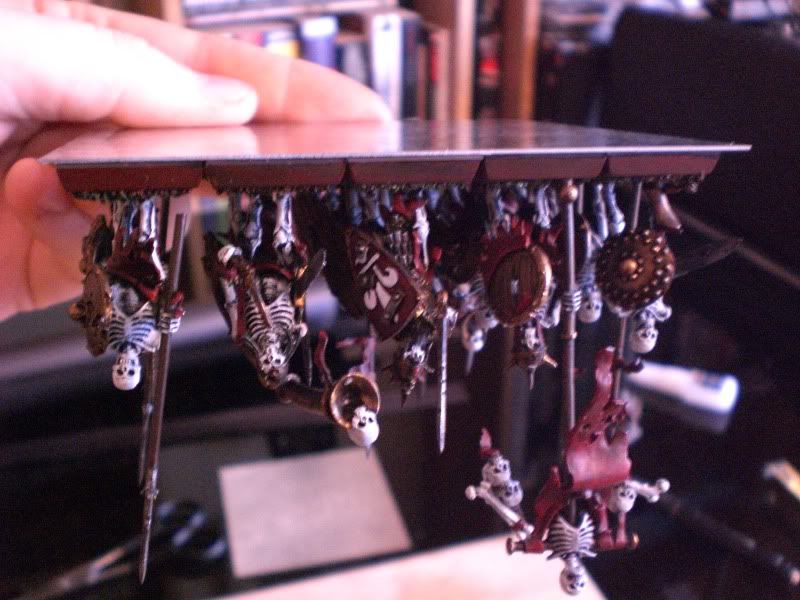
I did my entire
VC army, about 100 models, in an evening.
Here's also a picture of a skeleton regiment I magnetized.
I just love doing that! xD
If you have any questions I'd be happy to hear them!
Hope this helps!
Thanks to King Ulrik Flamebeard from Librarium Online for the inspiration to make this tutorial ^^
Note: This will work for
40K, or round bases too, it's just takes abit more fenagling to cut the magnet to the right shape.