Forum adverts like this one are shown to any user who is not logged in. Join us by filling out a tiny 3 field form and you will get your own, free, dakka user account which gives a good range of benefits to you:
No adverts like this in the forums anymore.
Times and dates in your local timezone.
Full tracking of what you have read so you can skip to your first unread post, easily see what has changed since you last logged in, and easily see what is new at a glance.
Email notifications for threads you want to watch closely.
Being a part of the oldest wargaming community on the net.
If you are already a member then feel free to login now.
2019/03/24 15:15:29
Subject: Re:Dungeons and Dragons Blog - More Evil Byzantines
Thank you very much! I have been away from Dakka due to the usual springtime pile up of work, but I haven't stopped working.
I got distracted when I saw these two videos on Youtube. One is for making resin dungeon tiles, and the other is for 3D printing tiles that magnetically clip together:
I have always wanted my own 3D tile set, but all the options had flaws. The Dwarvenforge ones are lovely, but very expensive and have integrated walls. I would prefer optional walls that I can easily remove. Flat tiles made from cardboard like from games like Dungeon Saga or the D&D official ones are practical and look nice, but layouts slip and slide too much and are not flexible. A 50mm tile is optimal for flexibility, because most maps are done in 10 foot squares and 25mm corresponds to 5 feet. Magnets always seemed like a no go to me because you would have to align the poles properly which would reduce the utlity of the tiles because you have to fiddle with them. Using the spherical magnets in the base meant that the tiles would magnetically snap together without moving around too much, and the spherical magnets can rotate inside the base to always find their polarity, meaning the set is easy to use. Making my own tiles means I can design them to be exactly as I want them to be. I imagine mostly using the 50mm tiles, but I plan on making some 10mm x 50mm spacers and 50mm high walls to sit on top of them.
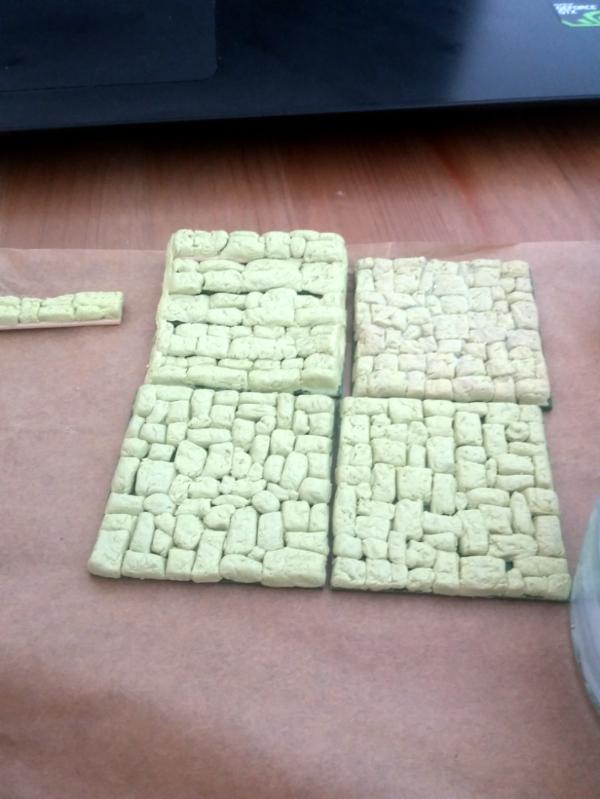
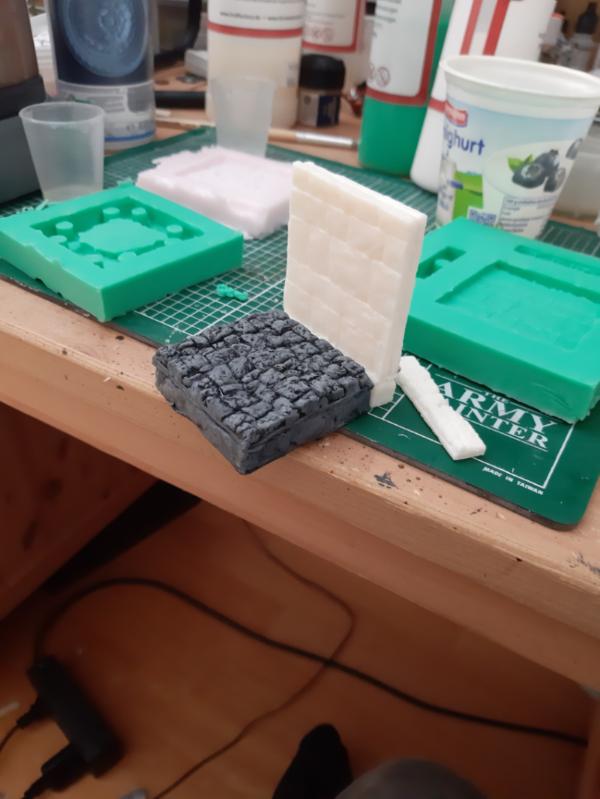
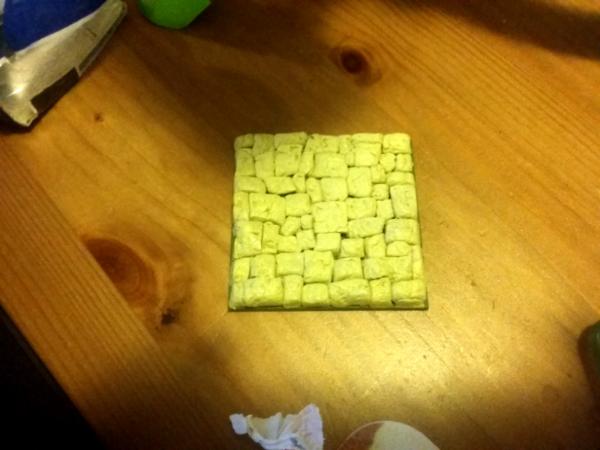
I am a novice crafter, and I am not good at making precise cuts, so I decided to make this as idiot proof as possible. I ordered some Renedra 50mm, 40mm and 30mm square bases. This meant my masters were all of the right size. I used the technique shown in the first video to texture some milliput with tinfoil for a stone texture and then cut it into strips and stuck them on as bricks. I think the result looks pretty nice!
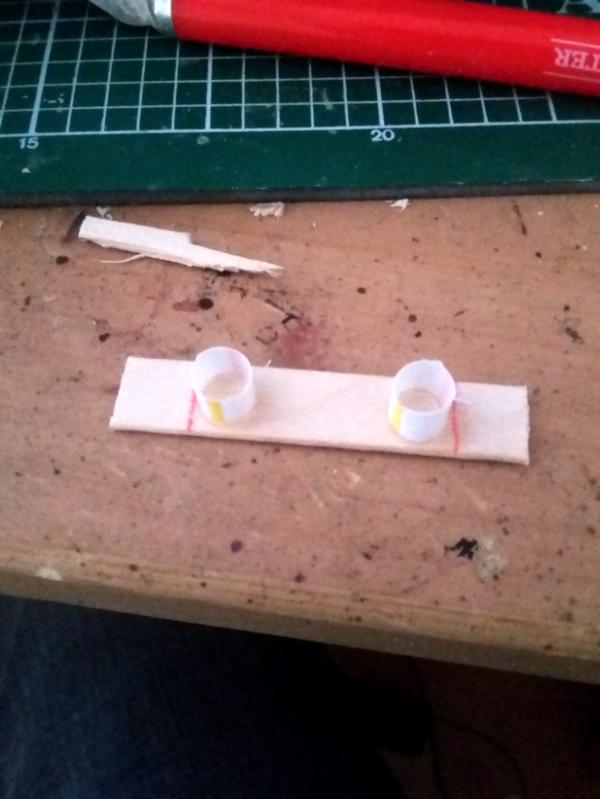
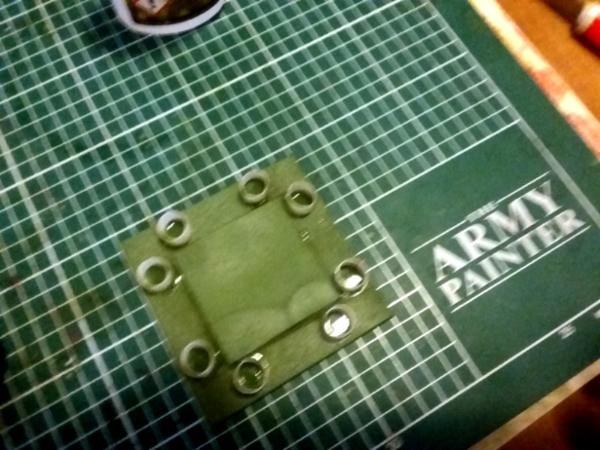
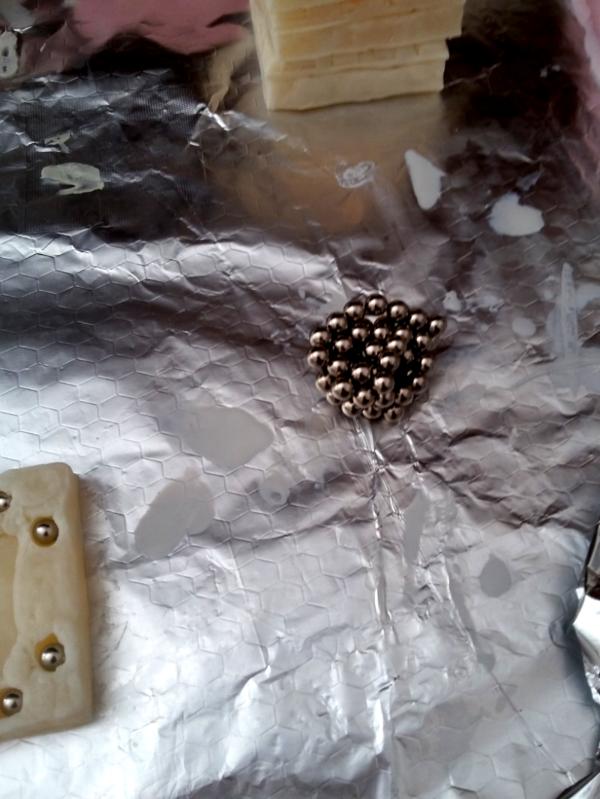
The magnetic base uses 5mm magnetic balls, which is the diameter of a McDonalds straw. So I cut some straws to 5mm and used the 40mm base to help me make a 10mm border, and then stuck a 30mm base in the middle to make it thicker.
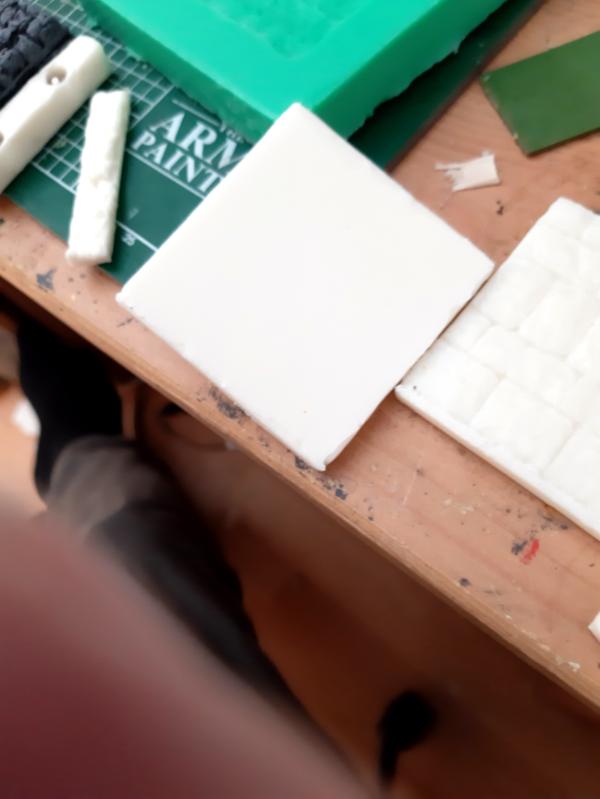
Here is the outline without the milliput:
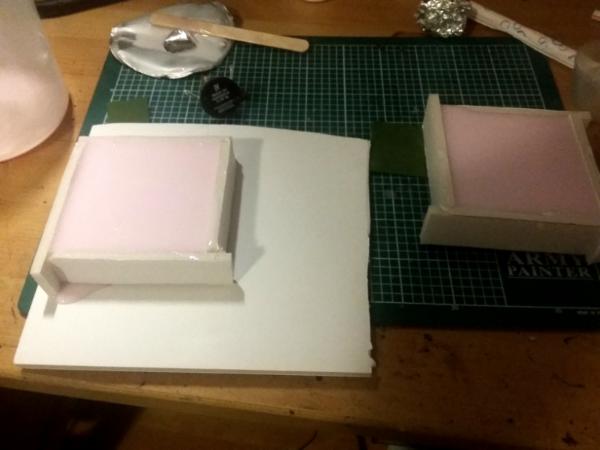
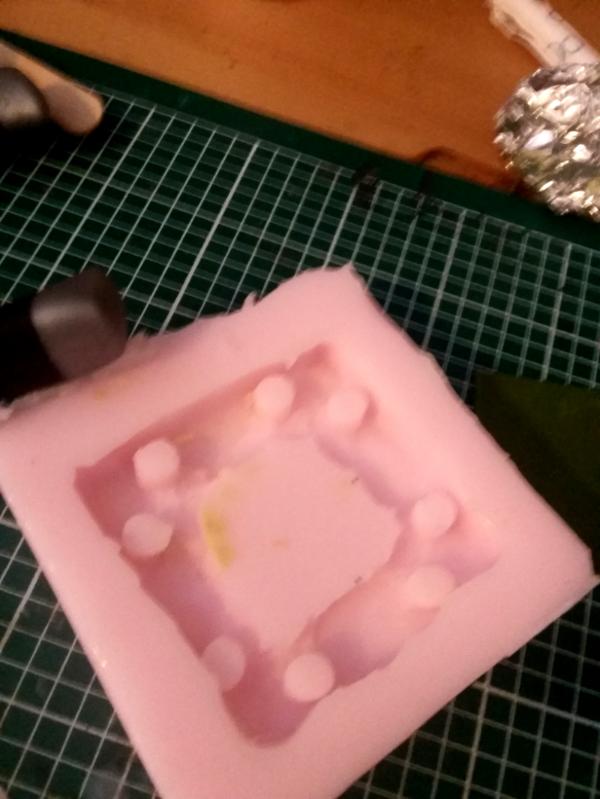
Here it is in the form for the silicone mold, with the milliput on it. The two tiles stacked are 1cm tall, 4mm for the textured part and 6mm for the base. The milliput form is a bit messy and if I was a better crafter it would look better. I could definitely improve this part of the build. But the magnet slots are the right size and the magnets can freely rotate inside, so that worked out alright. There are some gaps between the two tiles but nothing major. The forms are made of foamboard glued with hot glue.
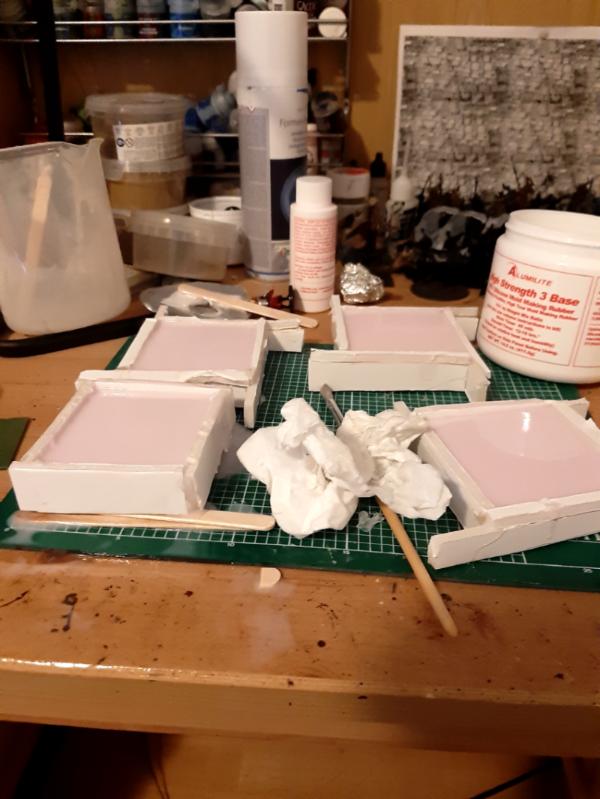
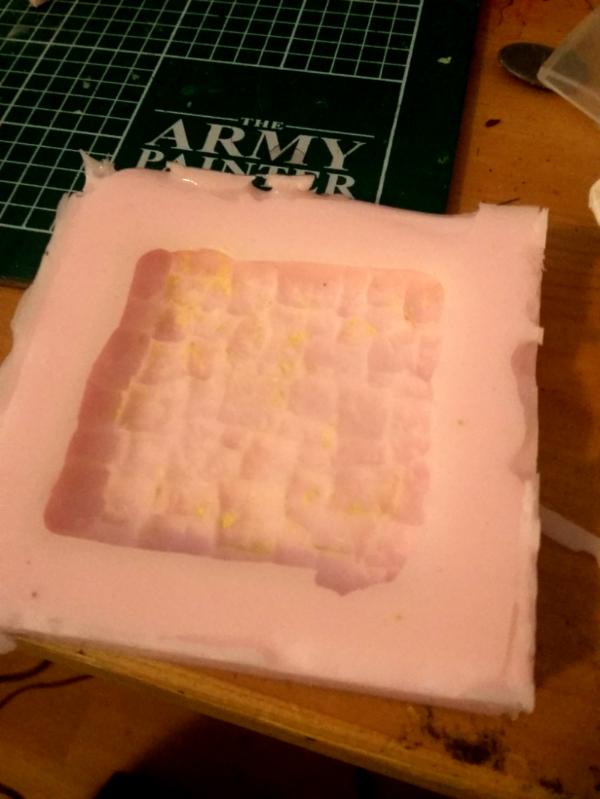
Then I mixed up some silicone and poured it in. This was my first time working with this stuff, so I was pretty nervous!
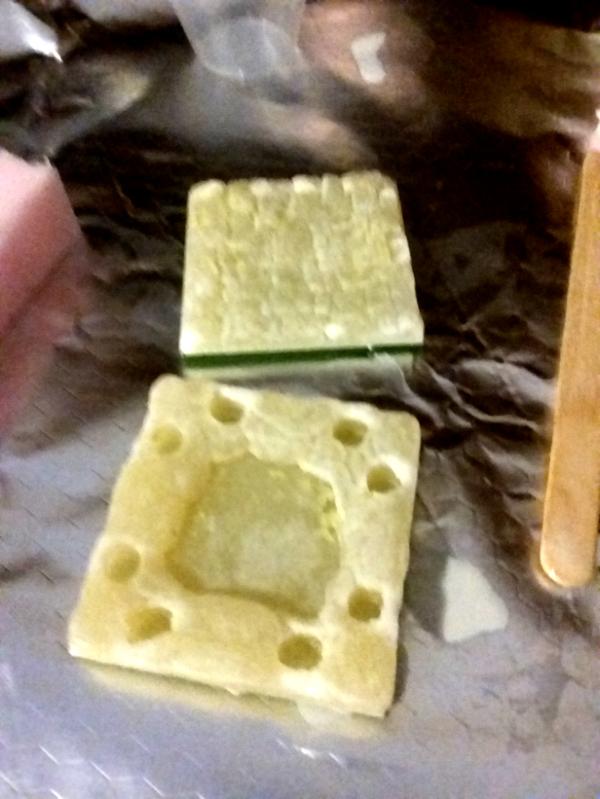
The molds came out fine in the end. There is some milliput in there, but it came out with the first resin pour.
I spent some time calculating how much resin I would need. This was also my first time pouring resin, but it was pretty easy and I didn't have any problems with bubbles despite not using a degassing chamber.
Here is the first resin tile. I think the millput interfered a little with the curing as it took longer than expected, but a day later it was totally cured. Most of the pours take about an hour and a half to cure enough to remove and about 3 hours to fully harden. I take them out and press them on to a spare 50mm base to make sure they are nice and flat. The resin is nice and flexible when you pull it so it is pretty easy.
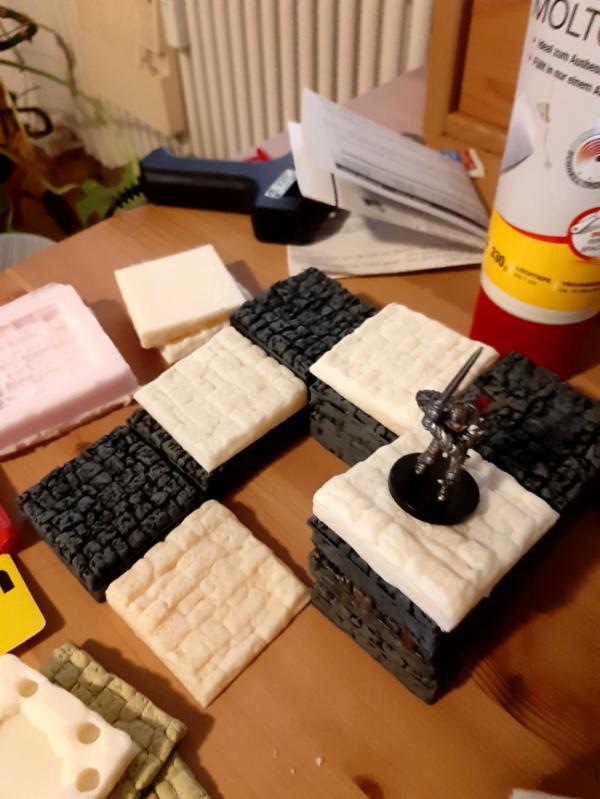
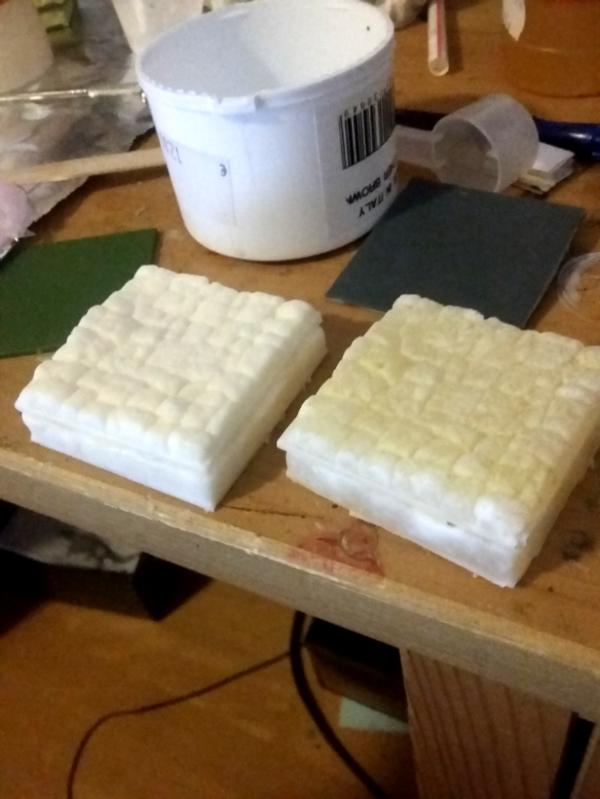
Here are the first two done. I wanted to check that the magnets worked before going on. They worked out pretty well, sometimes you need to shake them a bit to make the magnets align but it is really fast. The hold is not super strong, but it is enough to allow you to move the tiles together as one block, and it definitely prevents slipping and sliding. Super satisfying to click together.
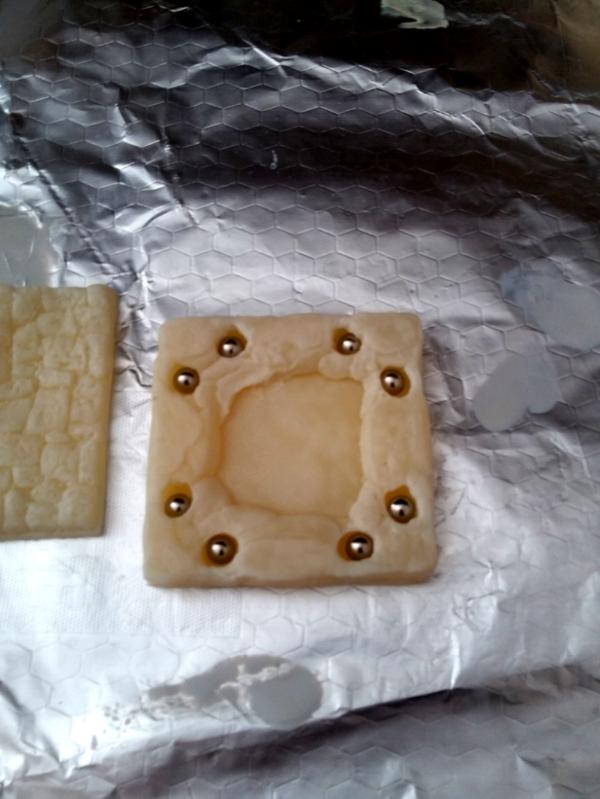
Over the course of the week I cast 12 tiles total, one or two a day after work. Here are the magnets sitting in their little base. I bought these on Amazon, about 12 euro for 100. They are currently the most pricey part of the build, if I can get them cheaper I can get the cost of these down to less than a euro a tile.
Here are the finished tiles glued together. Gonna spray them and then paint them.
The next step is making three other textured tiles for variety, and then making some diagonal corner tiles. I plan on making enough to cover a 2 foot square area, so 144 tiles total. Also planning some special tiles like sewer tiles, cave tiles, stairs and so on. Really happy with them, I think they look good and they click together pretty much exactly as I want them to.
Edit: If anyone wants the materials, I can provide the Amazon.de links I used to purchase the materials and the Renedra links for the bases.
This message was edited 2 times. Last update was at 2019/04/20 20:33:56
Amazon work and dedication on the tiles , nice texture to them as well. This will be a great dungeon for you all to explore over and over.
LOL, Theo your mind is an amazing place, never change.-camkierhi 9/19/13
I cant believe theo is right.. damn. -comradepanda 9/26/13
None of the strange ideas we had about you involved your sexual orientation..........-Monkeytroll 12/10/13
I'd put you on ignore for that comment, if I could...Alpharius 2/11/14
2019/03/24 15:45:47
Subject: Dungeons and Dragons Blog - DIY Resin magnetic dungeon tiles tutorial!
Wow, that is quite an undertaking. Looking good so far, and good luck with completing it. I watched that Black Magic Craft video and felt some temptation, but didn't do anything. The magnets are interesting, they work well for the tiles attaching and holding together?
Yeah the idea is to hold the shapes of rooms and stuff together even if you want to move the whole room at once, and also to stop the rooms from slipping and sliding around in play. Plus they are just satisfying to use as the snap together.
When I have used tiles in my games before the biggest downside was always the slipping and sliding, some people put velvet or something on the underside but I really like this approach.
They work pretty well - pushing on one tile of a 3x3 moves the entire room without effort. Pulling will just remove the tile, but tiles easily snap back into place. I plan on making walls with two of the magnets in the base that will snap onto the sides, but will be easy to remove if they become annoying (blocking line of sight and so on.)
I have had some success with iron powder in the resin or failing that just a strip of metal sunk into the resin during the cast, would save on valuable magnets. When I have cast with the iron filings/powder it worked a treat with magnetic parts.
All looking great though like the concept and the moldings are spot on.
2019/03/31 18:51:16
Subject: Dungeons and Dragons Blog - DIY Resin magnetic dungeon tiles tutorial!
Camkierhi: I did think about using iron in the resin in some way, and then using a magnetic backing. I decided against it because this way the tiles themselves are all you need. It would be a good system for a home set up, where you could set up the table with a magnetic backing or something, I think. But I travel with my stuff to play rather than playing at home, so I wanted to maximise portability. It is gonna double the cost of the tiles though, to be fair...
Red Harvest: Yeah, I think those tiles clip together nicely, but I would be crap at making something like that myself. The Dungeon Saga tiles rely on these connectors which are really fiddly, I am trying for maximum utility at the table so that I actually use them rather than reverting to scribbling on my battle mat. We shall see!
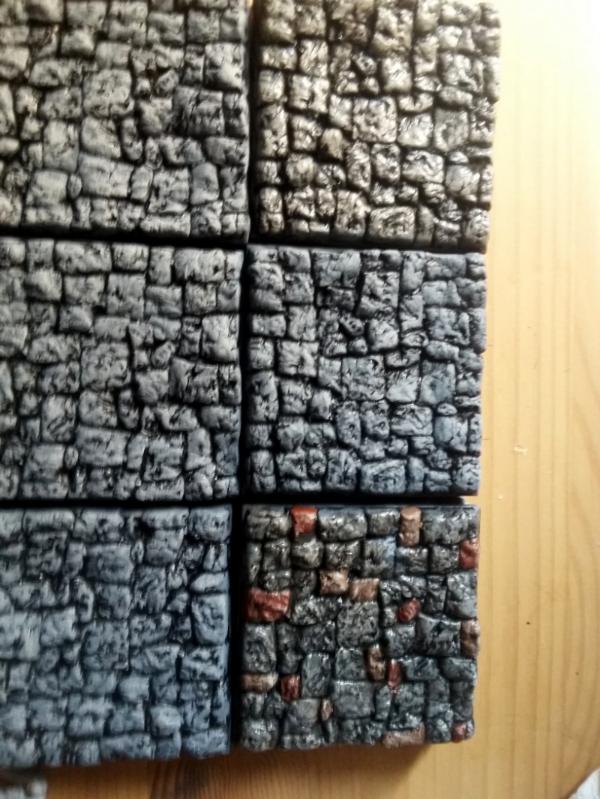
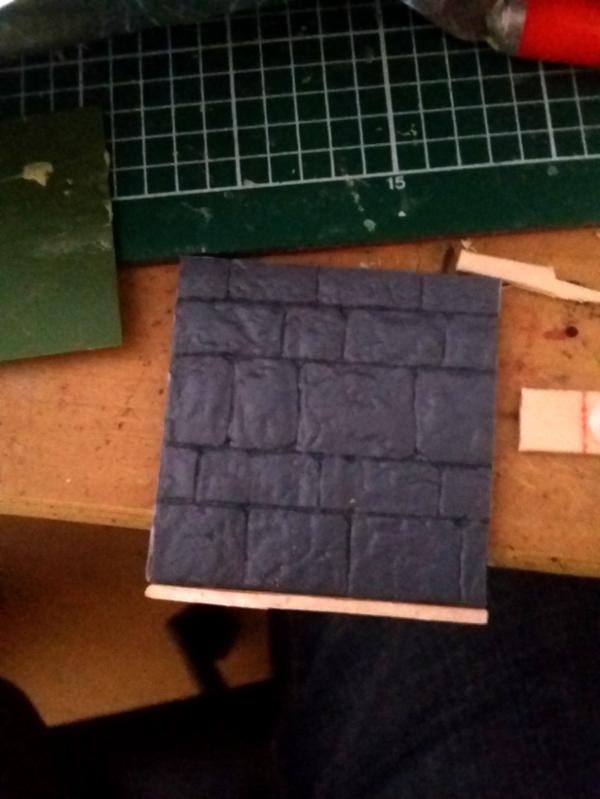
Here are some painted ones:
The top and bottom tiles both have an extra highlight of bone colour and then an earthshade wash. The middle one is just two tone grey over black. I picked out some flagstones in slightly different colours to add some visual interest on one of them, and I like how it looks so I might do that for all of them. I may regret this choice 72 tiles in...
One thing I haven't come up with a good solution for is circular tiles. A lot of my favourite dungeons make use of circular rooms, but it is a bit of a mess integrating that with a square tile system.
I think I might cut some 10mm, 15mm, 20mm and 30mm radius circles out of foamboard, cut them into quarters and texture them with a pencil and tinfoil. Probably just stick some metal round the rim to attack them to the other tiles, but it might work out well.
It took me a really long time to figure out that the magnets attract side to side rather than top to bottom. This is officially a really cool project now.
Looking great , only way I’d know how to do a rounded wall would be just make a half wall to sit on top of the tile using the magnets to hold it in place. So the tile would still be square, but the wall would give you your shape.
LOL, Theo your mind is an amazing place, never change.-camkierhi 9/19/13
I cant believe theo is right.. damn. -comradepanda 9/26/13
None of the strange ideas we had about you involved your sexual orientation..........-Monkeytroll 12/10/13
I'd put you on ignore for that comment, if I could...Alpharius 2/11/14
2019/04/02 16:03:32
Subject: Dungeons and Dragons Blog - DIY Resin magnetic dungeon tiles tutorial!
Josh: thanks! Yeah, a lot of people I showed them to before they were finished were not sure what I am trying to achieve but I basically want each tile to stick laterally to each other tile, therefore holding the shape of the map layout with minimum fuss and maximum utility. That makes it worth the effort of the resin casting and so on, because the tiles are doing exactly what I want them to do. This come after trying a bunch of other tile solutions that I felt were nearly there but not quite. These might end up being the same way, but feck it, I feel pretty confident I will get some use out of them.
Theo: Yeah that is a good way around it. I was thinking about doing that using foam blocks or something, then the walls have extra utility as terrain for skirmish games or ruined towers or something in Dungeons and Dragons. The only reason I am against it (I might make these walls anyway) is that the footprint of the floor would overhang to an extent that some map set ups I would like to do would not work, and at present I am trying pretty hard to be able use my set to faithfully adapt written adventures.
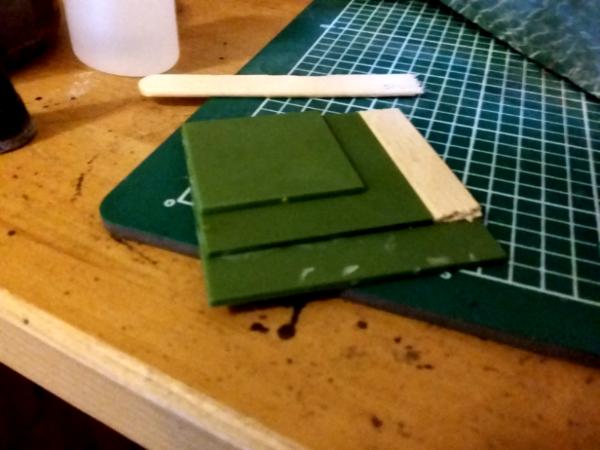
Today I got some work done on some new basic tile masters for variety, as well as a "stairs" tile which is designed to be left on top of the normal tiles or dropped into the middle of a bunch of them to represent stairs up or down, and is not magnetised.
I wanted 1cm steps, so I stacked up some bases from 50mm ->40mm ->30mm and 40x20mm. I filled in the gaps with chopped up lollypop sticks.
I do it this way to make up for my lack of precision - I am sure a more talented crafter could manage this without having to use all these different base sizes, but this was convenient for me!
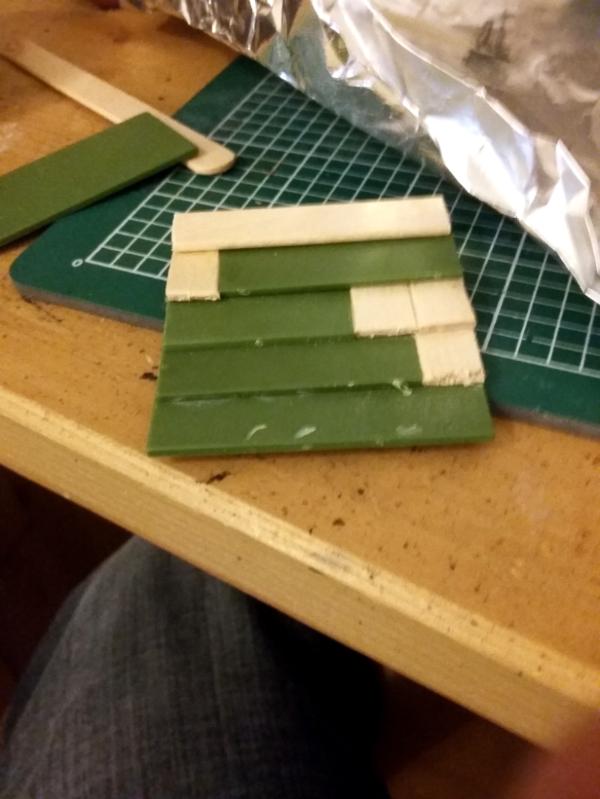
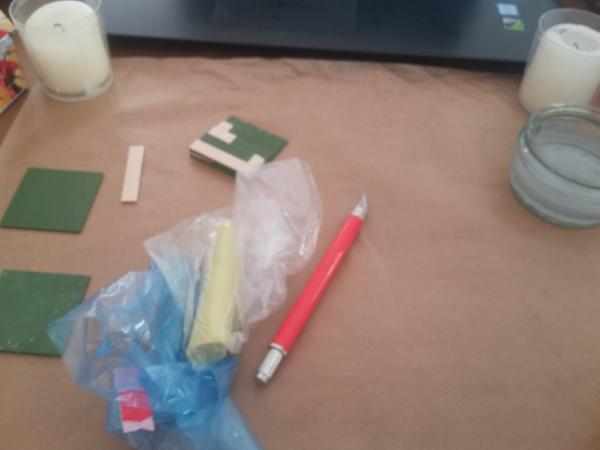
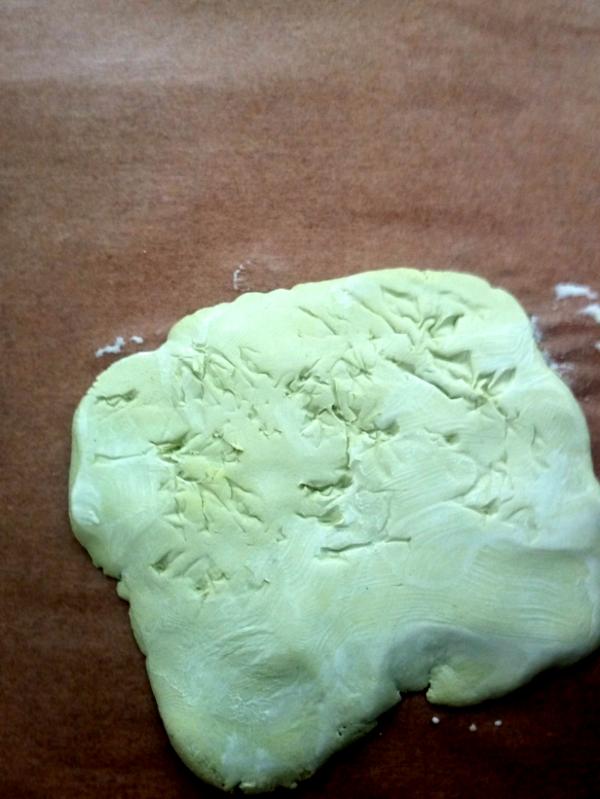
Then, I sculpted the flagstones. First, set up the area with greaseproof paper:
Then roll out some milliput and texture it with tinfoil, before cutting it into strips:
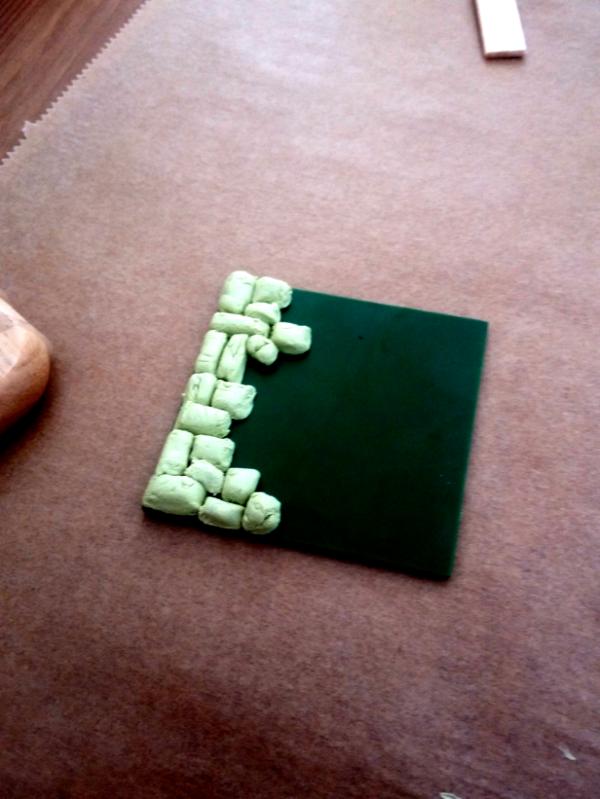
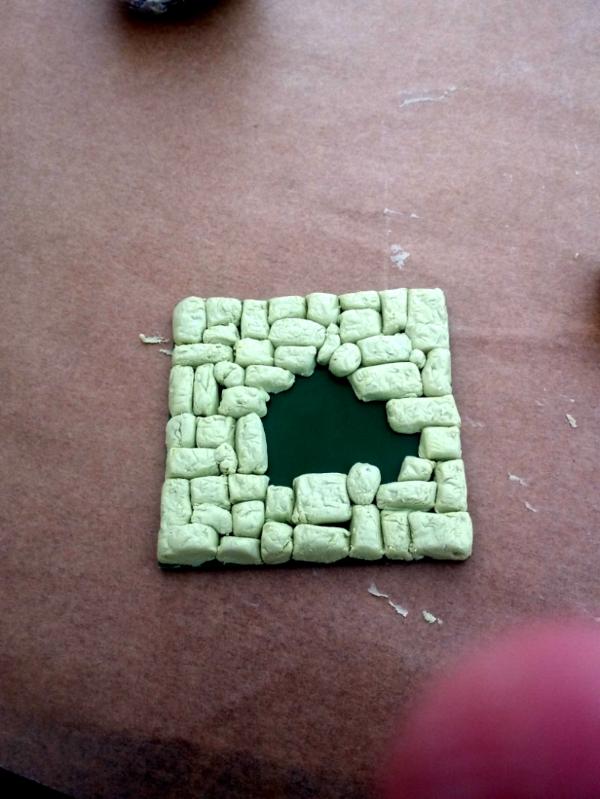
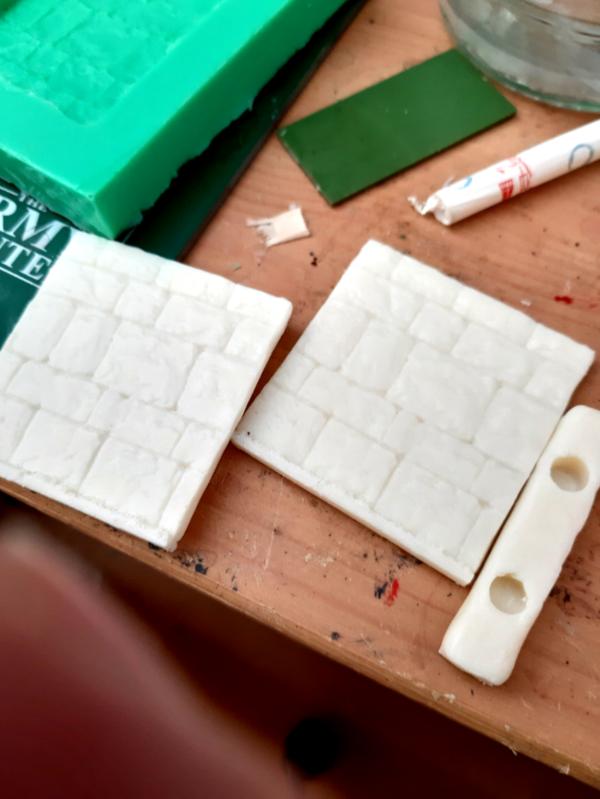
Then, start cutting your strips up and sticking them to the 50mm base. I usually retexture after sticking to get rid of fingerprints and so on. I also tidy up the shapes with my sculpting tools.
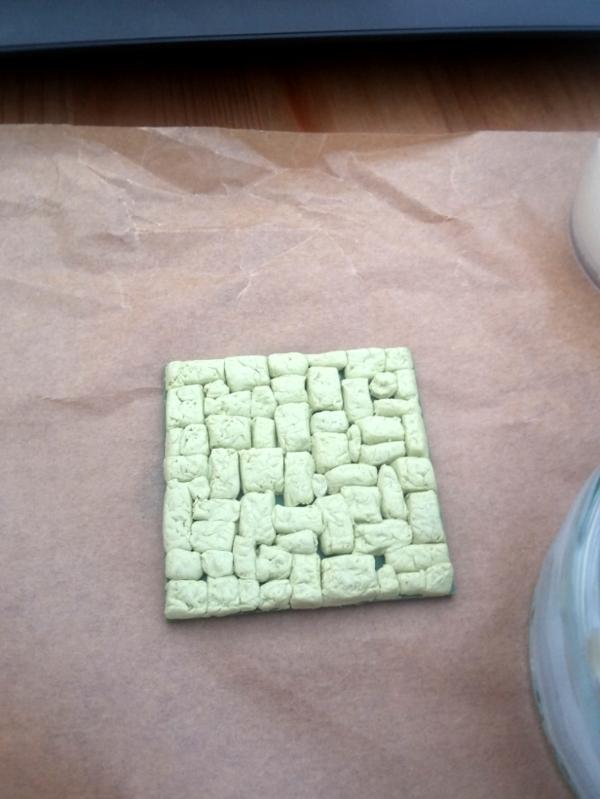
This is tedious, but once you are done you have a pretty nice master:
I churned out two more masters, so now I have three for basic floor tiles, which I think is enough for variety. Same technique was used for the stairs. Not 100% happy with how they came out, the steps are not as clear as I would like, but I reckon it will paint up okay.
You can see as well, a flagstone textured lollypop stick in that photo. That is my "spacer" tile, which I am making a master for as well. I cut a stick to 50mm length and textured it. The idea is that these will act as the "doorway" of rooms, allowing 10mm of negative space to either slot wall pieces into, or leave empty as negative space to represent walls. If that is difficult to imagine, I will show what I mean once I get one finished with magnets.
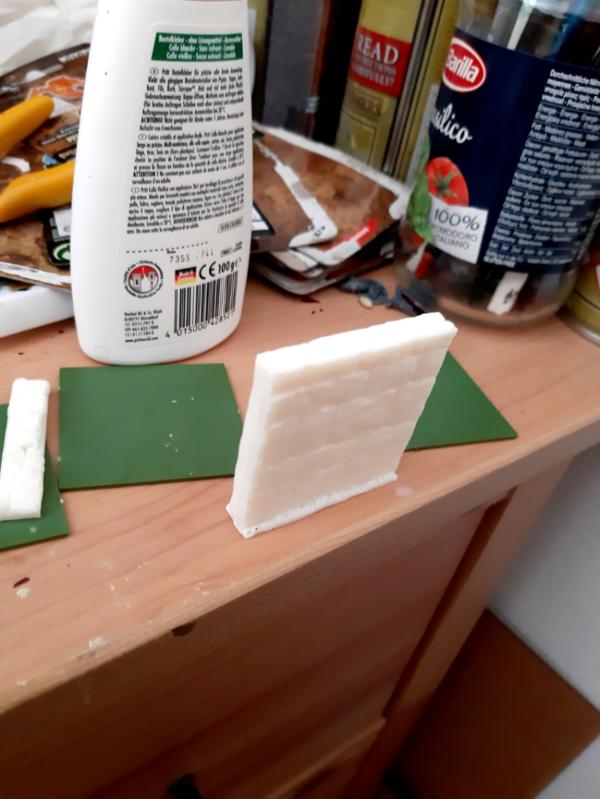
Here is the outline of the magnet base for the spacers:
For the walls, (which are designed to sit on top of the same magnetic base the "spacer" tiles sit on) I glued a 50x50mm section of leftover wall from my Renedra castle sprue to a 50mm base and then attached a 5mm lip of stick to the bottom. The idea is that I will cast two of these, glue them together making a double sided 50mmx50mmx10mm wall tile which I can stick to a 10mmx50mm magnetic spacer and stick to the side of any tile. The magnets should help to hold them up, and if I get annoyed at having walls in play they can be removed easily without messing with the set up at all.
I am happy with how things are coming along. One problem I forsee is that the corners of my walls are not going to fit together perfectly the way I have designed them. I am not sure there is a way around this without making corner pieces with the same system, which I am not too interested in doing, but it might be worth it.
I probably don't have time to set up the molds tonight, and if I do them tomorrow after work I will not be able to demold for over 18 hours due to how long my workday on tuesday is. Anyone who works with resin a lot know if that will create problems? The demold time on my silicone is between 12 and 18 hours.
Great looking masters you have made there Da Boss. Tedious work, but it will be so well rewarded in the end. Drawing a blank on the corners as well, but it’s 1a.m. here, so I’ll sleep on it and get back to you.
LOL, Theo your mind is an amazing place, never change.-camkierhi 9/19/13
I cant believe theo is right.. damn. -comradepanda 9/26/13
None of the strange ideas we had about you involved your sexual orientation..........-Monkeytroll 12/10/13
I'd put you on ignore for that comment, if I could...Alpharius 2/11/14
2019/04/08 20:41:46
Subject: Re:Dungeons and Dragons Blog - DIY Resin magnetic dungeon tiles - more basic tiles, stairs and walls
Wirecat: Thank you! Honestly it is a bit soothing as well. And satisfying, in the end.
Camkierhi: Thanks for the advice on demolding. As it happened work was a bollocks today so I didn't get the rubber poured, maybe tomorrow. Good to know for the future when my molds wear out though!
Theo: Yeah not sure about those corners. Could just leave 'em, or make pillars to stand in the gap and fill them in, or make corner pieces. Corner pieces will look the best, but it is a lot of faff for something I probably will not use much in actual play.
Cheers! Got loads of work done over the last few days as I have had some holidays. Got another 24 tiles made, for a 6x6 grid of 36. 4 more of those and I think I have all I will need!
I also did a lot of work on speeding up the process, making some extra molds so I can do two pours at once and replacing my "magnetic base" mold as the little cylindrical bits ripped off after 14 pours. I reckon they will need replacing more often than any other part.
That used up the last of my pink silicone, and I bought a new brand for future work as it was cheaper and German made so a bit easier delivery wise.
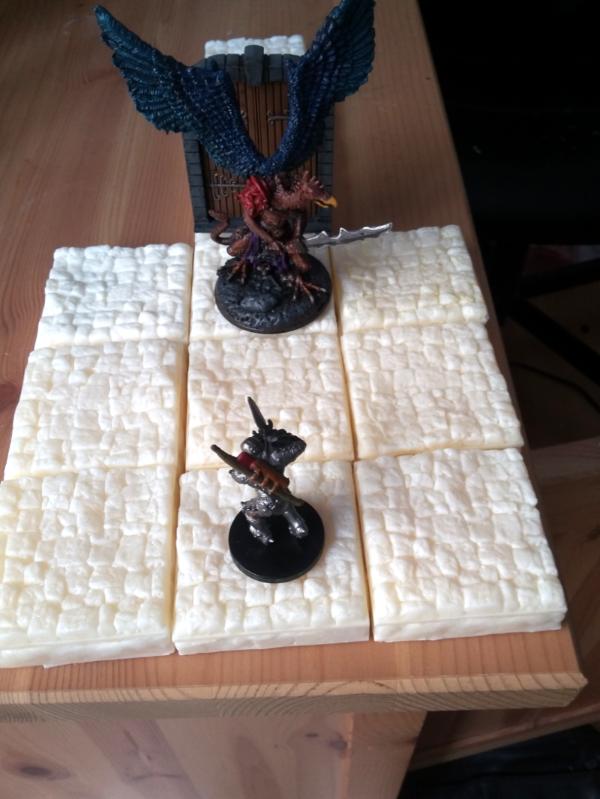
One of these was a stair tile mold. I cast up 6 of these while casting my basic tiles, and I am pretty happy with them. Because of the magnets, my tiles stack really well and hold together, so making multi level stuff is just a case of plopping them on top of each other. Here is a staircase I made, an underused location for random encounters!
The stair tiles are not magnetic as they are designed to sit on top of the other tiles or in the middle of a bunch of them to represent stairs down to the next level. They are also a very shallow slope on purpose so that minis can stand on them without issue. As you can see they work fine. I think if I was a better crafter I could have made them look a bit nicer, but they are good enough for what I want them for.
The next big part of this project is the wall and "spacer" tiles. Everyone wants some 3D walls for their dungeons, even though they are not practical. I wanted walls which were easily removable but not fiddly to position and that were pretty thin to allow for layouts to follow what is in printed adventures pretty closely. I made them 1cm wide, and I have also made "spacer" tiles which are the same dimensions with a flagstone patter. The idea is wherever there is a wall in the adventure you throw a spacer in to create the space for the walls. The walls can be represented by the gap left between the bigger tiles by the spacer or by the wall tiles if I am feeling fancy. If the wall tiles get annoying, blocking LOS and so on, they are designed to be easy to remove. This to me is better than the Dwarven Forge style of tiles with integrated wall, because if you remove the wall tile there you have to remove a chunk of floor as well which might have some minis on and lead to a lot of fiddling around. Whereas here, don't like the wall, just pull it out no problem. Both the spacer and the wall tile have their own 5x1cm magnetic base built on a popsicle stick with some milliput and 2 slices of McDonalds plastic straw.
Here is the mold layout, I will make two of these so I can pour the resin all at once and the idea is that the two wall halves glue together.
Here is the mold with my new green silicone from the same company I bought my resin from.
And here is the finished spacer and magnetic base, it sticks firmly onto the tiles I have already made.
One fiddly bit with these is that they bond near instantly with super glue and are near impossible to separate afterwards, so you have to line them up really carefully before gluing. You can see the top bit here is just slightly wonky. It will look okay in practice I hope.
And then the walls! These came out really cool looking. I textured the bottom with just some coarse sand and very small pebbles because there was no room for flagstones. I think it looks okay.
Here is front and back. The backs are lovely and smooth due to the resin finding level.
And two fronts:
And the base as well.
Glued together:
And then finally, mounted on their magnetic base and sticking to the side of one of the tiles. I think it looks awesome and it sticks and removes exactly as I wanted it to. It is a strong hold due to the light weight, but easily pulled off if you want to. Perfect!
Overall I think things are coming along really nicely. I have never done anything like this before, but it is really a lot easier than I expected, and I am very happy with the results. Definitely a better crafter could get even better results than me, but I am really pleased with how usable the set up is due to the magnetic bases and the modular nature. I reckon it is going to be really easy to use at the table, planning to stop my long running campaign for a short trip to Rappan Athuk to try them out.
Let me know what you guys think! At the moment it is working out about €1.50 per tile, which when you consider the utility with the magnets over Dwarven Forge is pretty decent.
Looking better than just good man, as Tony the Tiger says “They’re GRRRRRRRRREAT!” Have you looked in the resin casting section for color additives? I know they make them, and that could help with a base coat.
LOL, Theo your mind is an amazing place, never change.-camkierhi 9/19/13
I cant believe theo is right.. damn. -comradepanda 9/26/13
None of the strange ideas we had about you involved your sexual orientation..........-Monkeytroll 12/10/13
I'd put you on ignore for that comment, if I could...Alpharius 2/11/14
2019/04/18 19:54:38
Subject: Re:Dungeons and Dragons Blog - DIY Resin magnetic dungeon tiles - finished wall tiles and stairs
The spacer for the wall is a great idea, and it looks awesome. In fact, this whole project is awesome--it's hard to believe you're making it all from scratch.
Theo: Thank you! I really am a novice at this stuff, so it is really encouraging to have nice comments from you. I love your terrain pieces. As to the additives, I had heard about that but don't know much about it, this is my first ever time working with resin. There seems to be an additive in my resin already to make it white, at least if you leave it sitting the white separates out in the bottle and falls to the bottom, so it seems to have some pigment in suspension already.
Josh: Thank you! The spacers and walls are the part I am the most proud of because they are the only part which is entirely my own invention. The magnetic tiles with the spherical magnets are from the 3D printing video above from GamingGeek and the flagstone tile masters are from Black Magic Craft, but I think the spacers will be what makes this really practical at the table and easy to use on the fly to create map layouts from written adventures.
As to making it all from scratch, I am amazed myself at how easy it has been. I have not done anything like this before. I think I helped myself out by getting the Renedra bases to use as templates, because I definitely would have screwed up my masters if I had tried to measure and cut them myself, I am just not good at that sort of thing. And I cheated a bit with the walls by using a section cut out from leftovers from my Renedra Tower. But it would not be difficult to make a similar master out of foamboard or milliput either, and you could make it with textured sides and so on like the Dwarven Forge tiles.
I really think anyone could have a go at this, because I am very average when it comes to this sort of thing. My main motivation was feeling disatisfied with the other options available and wanting something that exactly fit what I wanted.
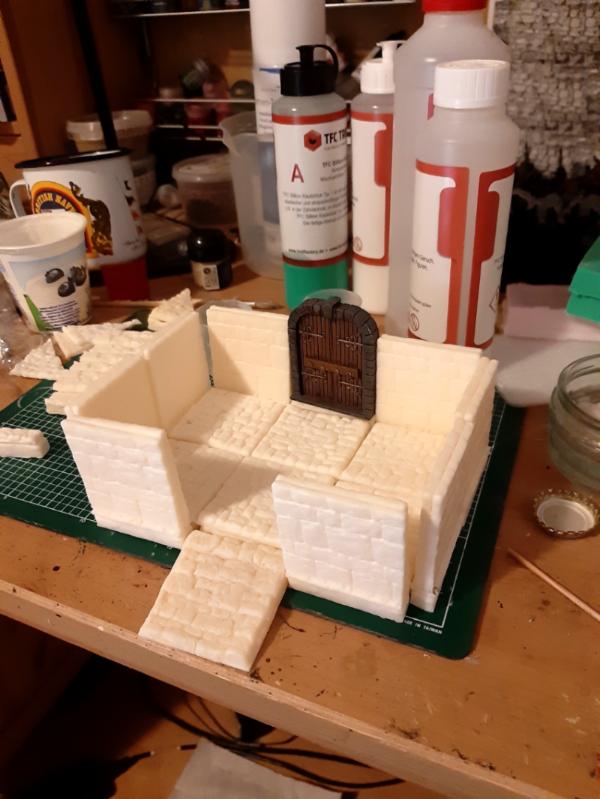
After cleaning the flash off everything and then washing it in soapy water, I glued my tiles, walls and spacers with the magnets inside them today. Very happy with the tiles and spacers, and here are the walls:
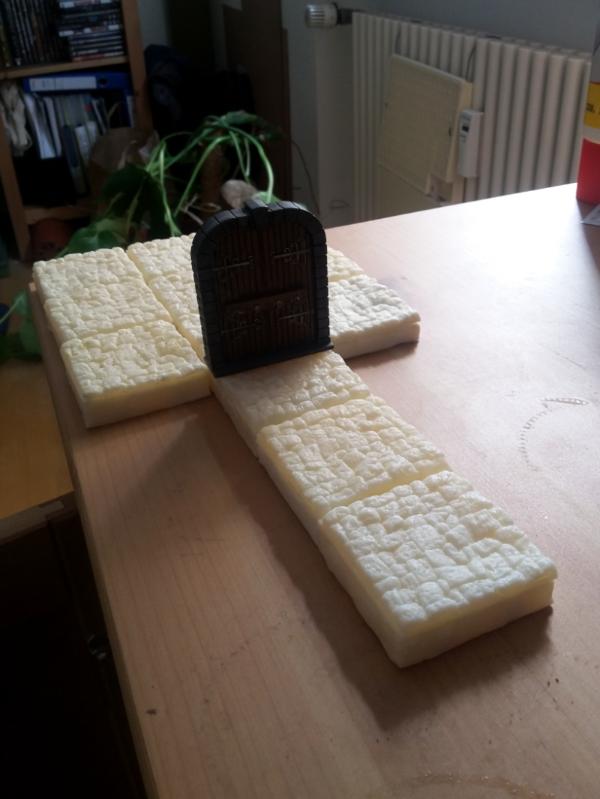
And here is a set up using a stair tile and a double door from Dungeon Saga.
I reckon they look okay. the gaps are a bit more obvious than I would like, particularly on the corners, but overall the effect is decent enough. I think when they are all painted it will look a bit better. I ran out of resin after making 24 more tiles, 6 stair tiles, 10 spacers and 8 walls. Reckon I will get another 500g of resin and make another 36 tiles at least along with some more spacers. Not sure how many walls I will make, it is tempting to make loads of them but I am not sure how often I will use them.
Gonna spray these tomorrow and get to painting the whole lot, to make them look consistent. I reckon 36 tiles and 10 spacers is enough to do a fair few encounters and dungeon based scenarios. Might do an example layout tomorrow from Barrowmaze or Caverns of Thracia to show how the set can be used to make maps from published adventures.
This message was edited 1 time. Last update was at 2019/04/20 21:11:25
Quite the epic set you're building up, Is it tiring doing so much casting, or are you kind of getting into a "zen" mindset as the time passes? I'm looking forward to seeing them as you paint them.
It isn't too bad with the casting, because you just mix up your batch of resin, pour it and leave it for an hour or so. It is pretty chill. Once you have a stack poured, cleaning them, washing them and then putting the magnets in place without them flying out of the little holes and sticking together is tedious, and gluing them is annoying because you have to line them up perfectly or they bond unbreakably for whatever reason and it is really difficult to undo. So I would say the step I just did putting the magnets in and gluing them is a lot more tiring even though it only took a couple of hours. You can bang out a few casts every evening after work with pretty minimal effort.
I am also eager to have them painted. I am a bit worried about consistency with the tiles so I am hoping that Earthshade will cover many sins with this set.
One aspect I did not consider initially was how stackable these tiles are. It is easy to make a dias or raised area just by stacking the tiles on top of each other, 3 tiles high is as high as a wall, so 3D set ups are very doable as long as you are only doing individual rooms rather than entire dungeon layouts.
Looking good , was it planned that three high was the same as the wall height, or just a happy coincidence?
LOL, Theo your mind is an amazing place, never change.-camkierhi 9/19/13
I cant believe theo is right.. damn. -comradepanda 9/26/13
None of the strange ideas we had about you involved your sexual orientation..........-Monkeytroll 12/10/13
I'd put you on ignore for that comment, if I could...Alpharius 2/11/14
2019/04/20 23:07:15
Subject: Re:Dungeons and Dragons Blog - DIY Resin magnetic dungeon tiles - full room with walls
I was worried about keeping a consistent color when painting my dungeons too. Maybe either buy a paint color that you can re-buy each time you need, to keep the color the same, or mix up a large enough batch of a custom color that you'll always have enough?
Well you have mastered this, they are all looking fantastic. Really great work bud.
Here is a link to the paint I buy for bulkier projects.here
Or get some Gesso here which you can paint on and it will prime and base coat and then just make a dark wash in a jam jar, do not use Angrax, it will cost a fortune. Look great but cost a fortune. A good drop of black paint into a lot of water in a jam jar will give you perfectly fine results.
Looking great bud, keep it coming.
PS be careful the whole casting and mold making thing can get out of hand. Been down that rabbit hole. And in the end yes it works and is great and fun, but in real terms not very cost effective.
This message was edited 2 times. Last update was at 2019/04/21 01:06:57
2019/04/21 09:59:51
Subject: Dungeons and Dragons Blog - DIY Resin magnetic dungeon tiles - full room with walls
Theophony: Definite coincidence! A happy one though. You end up using a lot of tiles but it could be worth it when doing a single room with elevations.
Syro: Absolutely. I bought some cheapo craft paint which works well for the basic coats. I just need to keep the drybrushing the same, especially in the last phase.
Camkierhi:Thanks! It is useful to have recommendations for paint for this stuff. I am probably going to make a bunch more terrain over the next while so I will need more colours than just grey, grey and beige.
I have seem this advice about making washes before. I probably should give it a go because Earthshade is pretty damn pricey.
And to your post script, yeah I can totally see that. You start thinking "Oh, I can make a specific mold for that..." about everything. But if I look at what I have made so far, it is a lot less cheap than I expected starting out. A lot of that is the fact that I wanted them to magnetise in a specific way that means I am spending €1.04 in magnets before any of the other costs of the tiles, so I am not actually THAT much cheaper than Dwarvenforge for example (I would estimate about €1.50-1.60 per tile, Dwarven Forge works out at 1.66 plus shipping for the basic set). If you factor in all the labour, it definitely is only "worth it" because I am enjoying the crafting and I have the set up exactly the way I want it and can make them in the ratios I want rather than buying premade kits and ending up with lots of parts I don't use.
I had been considering doing cavern tiles for example in the same system, but I think that might be overkill in the end and I am not sure such a modular system is appropriate for wiggly squiggly cavern levels. Might be just better to draw on my battlemat like always rather than trying to come up with a system that can handle irregular caverns, because I can tell it will be expensive in resin, magnets and time.
I have an absolutely massive number of molds that I've made, it's part of the fun for me too. I like the availability of bits it provides and the control of what is created, just like you.
I also agree about Earthshade being too pricey. Have you tried out the similar alternatives like Army Painter Strong Tone, and Lavado Game Color Umber Shade? I have both of those, since Earthshade got too hard to find and too pricey for me. They work well. For a whole dungeon, maybe still too pricey? Though they've lasted me a good while.
I thought about strong tone or something, because it acts as a sealant as well, but the colour is a bit too strong for what I want I think. I should experiment with some of that stuff.
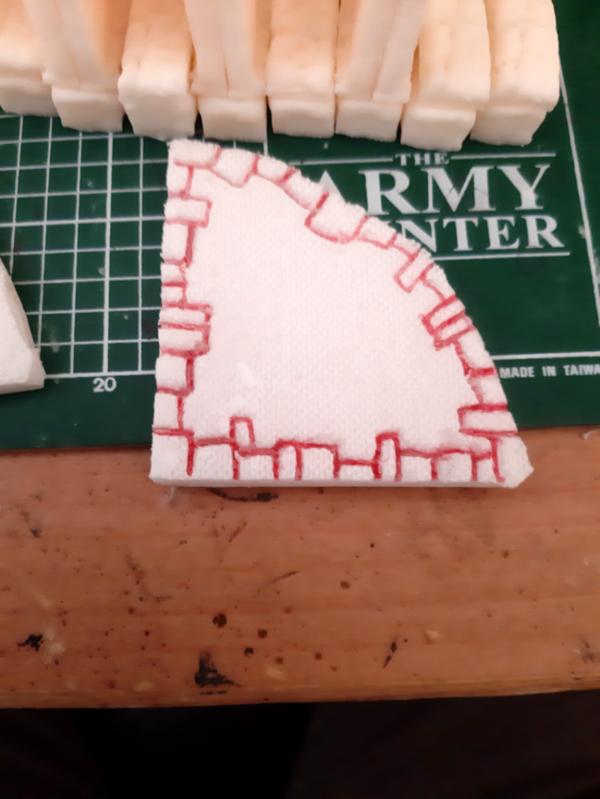
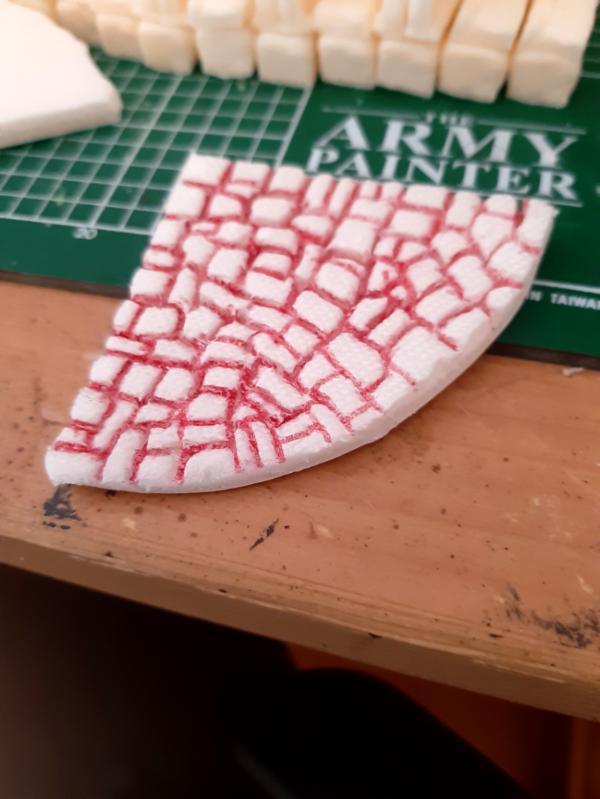
Spraying my stuff today, a bit tedious because they always want to jump together because of the magnets! While waiting I have been cutting out circular tiles from foamboard, tearing the paper off and drawing stone patterns on. Trying to texture with tinfoil as well but honestly not sure it is taking the texture super well.
These ones are 50mm radius, so they fit in pretty directly with my normal tiles. Planning to do 100mm radius quarter circle tiles as well, because 20ft radius rooms are reasonably common. I reckon if I want bigger, I will just bulk out the middle with a cross of 10mm tiles.
I was thinking to just do these on MDF and not put magnets in there, but the more I thought about it the more I thought it defeated the purpose of magnetising everything else. So I think I am going ot buy some double thickness foamboard and make a base for this with holes cut in for the magnets just like the resin tiles and put some magnets in there as well. The tiles will be super light, but since I don't really have the tools (or skills!) to make nice cuts in MDF I think this is the best route. Planning to prime them in Mod Podge mixed with black paint to avoid warping. I have heard PVA can cause foamboard to warp, so I might super glue the two paper coated sides together...not quite sure. I could hot glue them as well? What would you guys do?
This message was edited 1 time. Last update was at 2019/04/21 15:00:05


 , nice texture to them as well. This will be a great dungeon for you all to explore over and over.