Ok, so let me being with the obligatory thanks to whatwhat, without his award winning tutorial I wouldn't have ever though to attempt this conversion. This is also my first tutorial, so please excuse me if I have skimped on particulars.
Now, with all that aside let's get to the tutorial.
What you'll need.
1 kasrkin troop (grenade launcher preferrably)
Greenstuff (either
GW or Kneadatite) and Milliputt
Sculpting Tools:
wooden or metal clay shapers
bullet head silicon oil paint shaper
small woodworking nail
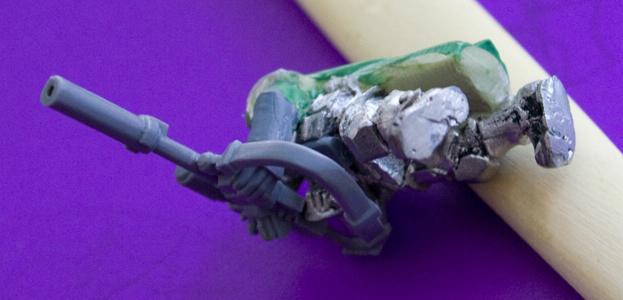
Stage One - Grievous bodily harm.
I found the best unit for this is the grenade launcher figure, as the barrel and forearm can be sawn straight off, which in trun allows for angled cuts to remove the vast majority of the grenade launcher left over. From here it's a simpe task of either filing, or in my case "dremeling" out all that remains of the weapon and bulk.

As you can see above you can be quite heavy on the filing as the left chest plate and shoulder can be rebuilt easily with greenstuff. Additionally, I cut of his index finger which will later be placed on the sniper rifle outside of the tripper guard, safety first and all that good stuff. Also, if you want to add any details to his belt now is the time, as it will become quite clustered very shortly.
Note: This figure will be joining my necromunda gang "hunde
des kriegs" so I ground his head down to fit a pig iron militia cast.
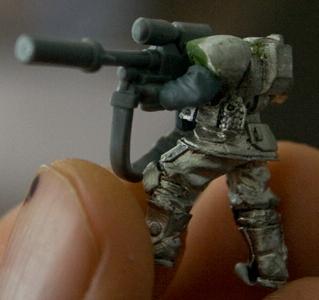
Mounting the weapon
To prepare the sniper rifle for mounting is the following needs to be done. Firstly, the right hand attached to the weapon will need to be cut out entirely. Secondly, to allow a snug fit the small panel on the grenadiers right hand will need to be shaved down. At this point you can choose to cut the butt off and reattach it once you've set the weapon in place (I chose not to as I chose the rifle with a strap, and rettaching that seemed uber hectic)
 The Cloak]
[b]The Offhand
Admittedly, this was a rather fiddly. But, once the gun was set and glued firmly I simply took a spare cadian left arm, then cut it at the shoulder pad. I began to shaving small sections off the top of the arm (the shoulder pad end) and would then hold in place with blu-tack to see if looked awkward, or inproportionate.
Finally, when I was happy with the dimensions I glued the arm in place, and filled any gaps with greenstuff.
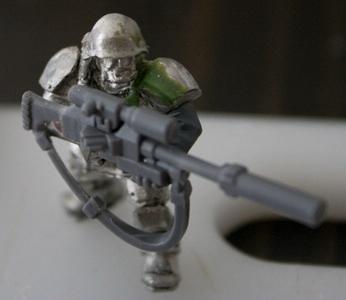
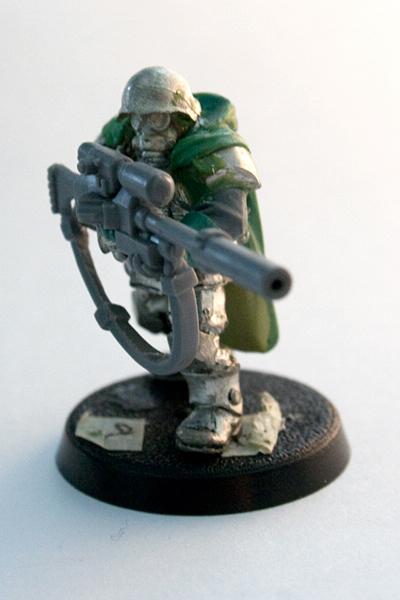
Mounting the Head
Now, as stated before I am mounting pig iron heads, but now you can see the figure looks a little more whole and less brutalised
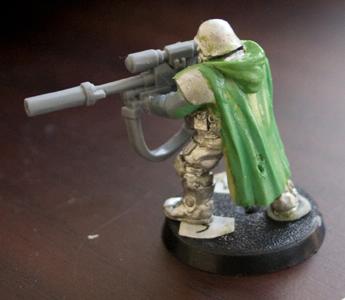
 The Cloak
Now, whatwhat's tutorial gave the pointer of using milliputt as a precursor for greenstuff, as it dries harder and provides a stable bedrock to build up from.
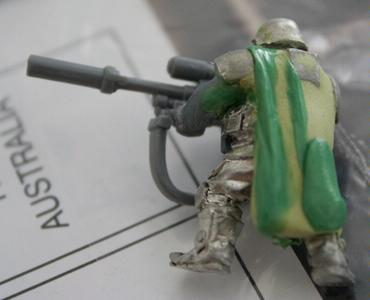
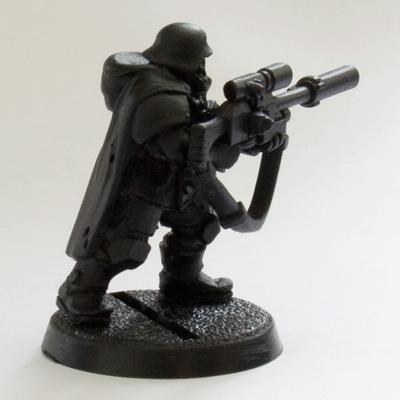
As you can see I scuplted the rough shape out of milliputt, then waited for it to cure before applying "ridges" of greenstuff. The Milliputt offers enough support to use some heavier handed sculpting tools such as metal and wooden clay shapers. You can be quite crude during this earlier stage.
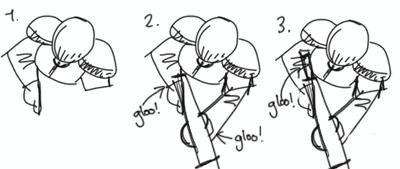
So, just keep applying more ridges. And remember to adhere to the basic of drapery, in that a heavier fabric hinged at to points (between two shoulders) will
sag in long "V" lines that will become softer as you move from the bottom to the top.
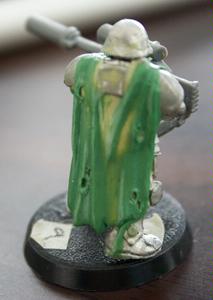
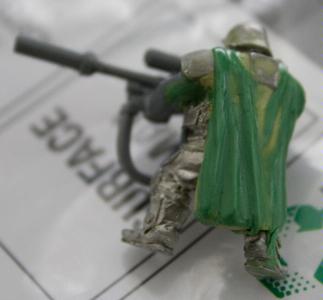
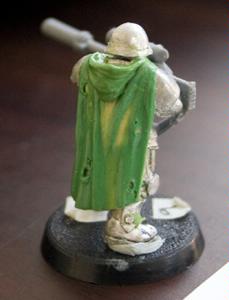
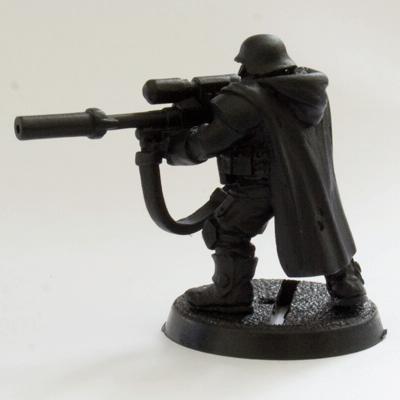
All the ridges are laid out, and using a wet bullet head silicon paint shaper simply soften the edges near to the top of the cloak, and define some lines near the bottom. This simulates the bulk of the fabric cleating up on itself. Don't be too concerned with greenstuff flowing over the milliputt shape, as we are going to shave this excess off later.
Once your happy with the the look of your sculpt, put the model aside for about a half hour. After the putty has semi cured it will be off a consistency to some damage and detail.
Conclusion of Part One
Now, with all those steps covered we should have a fairly fim bedrock for some further sculpting and converting. In part two we will cover how to create a hood for our cloak, a tactical holster for sidearm. As well as how to sand and smooth out and "bumps and nastys" in our green stuff in preparation for painting.

Thanks for reading.
Archibald Jack
Once again, hat tilt to whatwhat.


 Deff Gearz 2,000+pts. (50% painted),
  Retribution 57pt.(70% painted),
  FOW
FOW 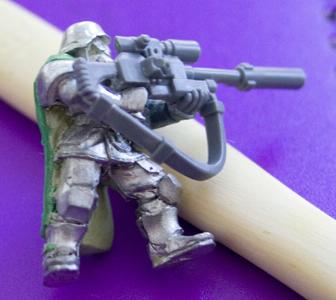


 Kreig - 2850 pts
 Skaven - 3450 pts

 "Whilst we stand, we fight. Whilst we fight, we prevail. Nothing shall stay our wrath"
  Guilliman and the Ultramarines are like Manchester United, everyone hates them because they are so awesome!