Hm. Thought I posted the second game already. Apparently not. Here goes:
Alright, second game of the night!
This had me using my list slightly tweaked from what I’ve been running:
Dwarf Lord,
GW, Shieldbearers, Runes of Stone, Steel, and Resistance,
MR of Challenge
Thane
BSB, Strollaz rune, Rune of Guarding
Runesmith, Rune of Stone,
GW, Shield, Rune of Spellbreaking
Dragonslayer
25 Warriors, shields, Standard, Musician
25 Warriors, shields, Standard, Musician
19 Longbeards, shields, full command, Rune of Courage
17 Hammerers, shields, full command
6 Miners
11 Slayers
Bolt thrower, engineer, rune of burning
Bolt thrower, engineer, rune of penetrating
Gyrocopter
Organ Gun
Geist had his Lonewolf list out to play. I guarantee I have some of this wrong, but it’s fairly close.
Dreadlord w/Executioner’s axe & Blood Armor (in black guard)
Master
BSB w/Soulrender & 2 null stones (in black guard)
Assassin w/Rune of Khaine, Manbane (in black guard)
Master w/deathpiercer, enchanted shield (in medium cav dark riders)
Hag w/cauldron, with brew
16 Black guard w/full command, ring of hotek, Banner of Hag Graef
4x5 Dark riders, crossbows, musician
11 Dark riders, shields, full command
2 War Hydras
Geist was planning on another game after mine, so in the interest of time, we kept the board the same. I won roll and stayed on the same edge for convenience.
Deployment went very poorly. The
DE had 4 drops of fast cav before anything important had to go down, and as fast as he was, I needed to not worry as much about where he was going. My blocks were arrayed left to right as Longbeards, Warriors, Hammerers, Warriors, Slayers. I made several errors-
1- I put my Dwarf Lord in the Longbeards, and they were separated from the hammerers by a warrior block
2- I used the hill poorly, placing the organ gun on top, and then feeling obliged to screen it with miners and support with a dragon slayer. This made a cluster of units very vulnerable to getting shredded off by shooting (or anything else) and created a very weak flank.
3- I deployed centrally, leaving both flanks available for the
DE to go through.
If I had it to do again, I’d deploy even further back, probably against the left table edge. This would have given him a little more protection for his hydras, but would have allowed me to hold the right flank with combat units on the hill for extra
CR. The organ gun would go between blocks to keep it from getting charged.
I was happy with the bolt throwers in the far back, as the only thing they were there for was shooting hydras, which they’d be able to see regardless.
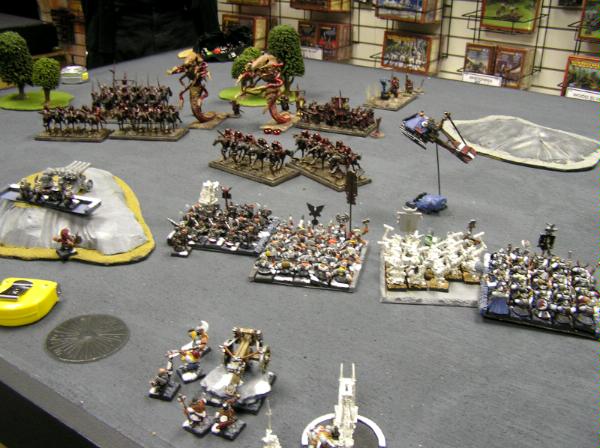
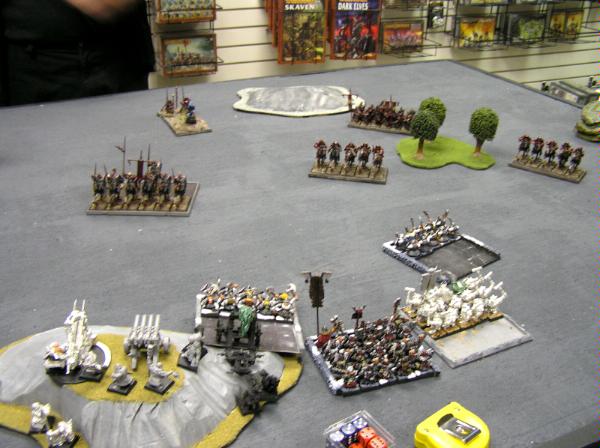
The Dark Elves were deployed with their bulk on my left. You can get a sense of this in the first picture, though it’s taken at the end of the first turn. I used Strollaz to swing my units at the furthest right around to have some chance of affecting things in the middle. The units in the middle held still, not wanting to get closer.
I had a +1 but missed the roll to go first
Turn 1
Dark Elves advance really, really fast. Dark rider shooting kills a couple miners who panic behind the organ gun. Organ gun loses two crewman to 20 shots, but without the miners in front, will be charged regardless next turn.
On to me. I don’t like the look of things, but don’t have much I can do. Miners rally right behind the organ gun. Dragonslayer sets up to counter charge whatever overruns the organ gun into the miners.
I make another mistake and advance the main line slightly. Given that my hill was guaranteed to fall, and turn the flank, I should have held back in anticipation. The gyro flies out to pick off some fast cav.
The organ gun tries to damage the medium cav, but misfires, and won’t be firing again. The flaming bolt thrower pops two wounds from a hydra, and the other hit is regenerated. Gyro fails to score any kills.
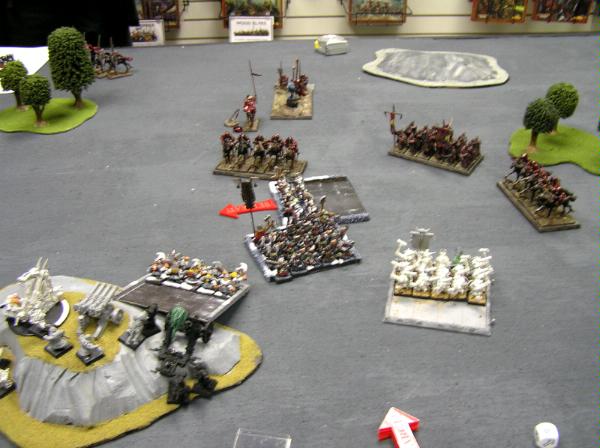
Here’s the situation:
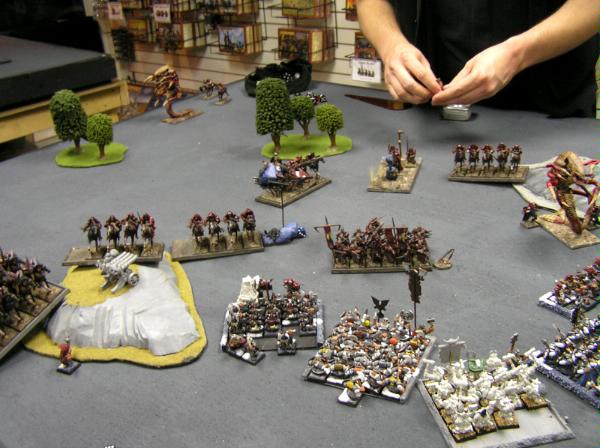
 Turn 2
Fast cav charges my organ gun, and the big medium cav unit swings around the side. 18” movement is rough! The healthy war hydra advances further, and I’ve conveniently moved closer to provide an ideal breath weapon shot on my longbeards. Terrible move on my part.
The rest of the army closes in. I’m realizing the only way I can handle the black guard is with the hammerers, and then only if the Dwarf Lord is in the combat to protect from characters, and even then only for a few turns, unless I’m fast in the challenges.
Shooting drops the miners to two, and a hydra burns 6 longbeards to death.
Combat results in the weird survival of the lone organ gun crewman. He would go on to fight it out for 4 or 5 combat phases, killing 3 dark riders in the process.
In my turn, I scare off a unit of dark riders with an ill-advised charge. I knew they’d flee and get away, but after the fact, realized it opened up
LOS for the black guard, and pinned my
BSB in a warrior unit he didn’t want to be in. The gyro heads out to steam off as much as it can from the black guard, barely fitting between the hydra and the unit. I angle a little more with the main line.
In the back, I’m trying to figure out how to stop or delay the medium cav. I set up the dragonslayer to hit them in the flank if they try to ride towards the bolt throwers.
In the shooting phase, I make another error. I let myself get rattled by the hydra’s strength 5 attack and decide I need to shave some wounds off, instead of dropping the other one. The flaming fails to wound, but the penetrating bolter knocks two wounds off. The issue here is that I intended to challenge in the hydra and chase it off with my lord, which meant the wounds weren’t necessary any way. I needed to do one or the other, not both.
The gyro hits tons of black guard, only wounds 2, and one makes his save for a disheartening shooting phase.
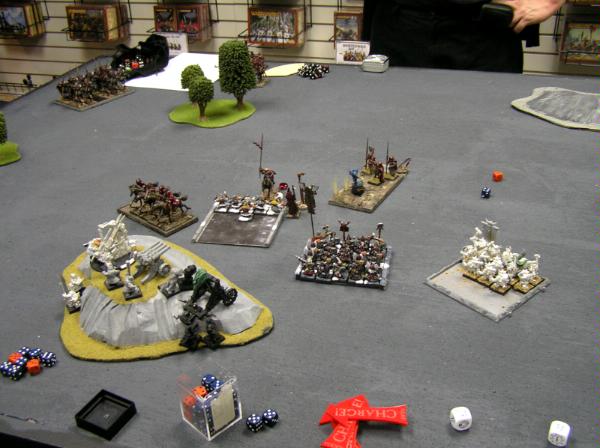
Here’s what things looked like:
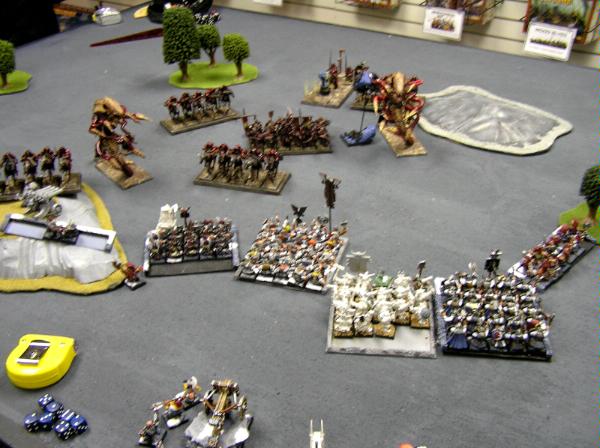 Turn 3
The turn started with a charge I didn’t see coming- the medium cav had a line on my two miners, who fled. It had become apparent that by moving forward, I’d opened up space in the back for his units to run through my artillery.
The hydra on the left was challenged in to my longbeards and lord, while the other maneuvered to breathe on the slayers. All the fast cav set up to shoot my gyro full of holes.
Shooting phase killed a couple slayers, and took two wounds from the gyro.
In combat, Geist made a mistake by putting all his hydra attacks on the Dwarf Lord. Despite 7 hits and 4 wounds, none made it through the armor. He regenerated everything that came back, and with no wounds either way, he was testing on a re-rollable 6 which he made. Bummer.
In my turn, options were limited. I threw the dragon slayer in front of the medium cav to buy one more turn of shooting for my bolt throwers. The
BSB rallied, and turned to face the black guard flank, planning to buy time for my Dwarf Lord to get over and help out.
The gyro also charged in to the flank of some dark riders, no longer feeling safe with only one wound left. A smarter move might have been to drop back behind my lines and get someone angled off the table in a later turn.
The shooting phase was quick, with the burning bolt thrower failing to wound and the penetrating one being regenerated. In combat, my lord managed to drop the war hydra, but the beastmasters held on a 3!
 Turn 4
The black guard charged my
BSB’s warriors which I had to flee from. With the Dreadlord, Assassin, Master, and cauldron boost, I would expect to lose 10-15 on the charge. Instead, the hammerers were contacted, who would at least hang on for a turn or two. Probably should have fled this one too.
The medium cav went in to my dragonslayer, and that wrapped up movement.
Combat had me kill the beastmsters, lose a relatively light 9-ish hammerers, my runesmith stabbed to death, and the dragonslayer killing-blowed several times. The overrun set the block up for a little plan I had going to try to salvage some points.
In my half, My warrior block on the right wanted to charge the flank of the black guard, but the slayers were in the way. I could contact, but not wheel in to align. If the black guard weren’t engaged to the front, then they would be forced to align to me. But since they couldn’t move, and I couldn’t wheel after contact, the charge would have failed. I thought there was something in the
FAQ about fudging things to make the combat work if you could contact but neither could align, but I couldn’t find it then or after (so, sorry Chris!). Instead the warriors reformed for a flank charge while the slayers set up to block off the hydra. This turned out to be another mistake. At best, the slayers would delay for one turn, but the warriors weren’t going to swing the combat in that little time. Still, I figured if I had to, I’d reform to face the hydra when it dropped the slayers.
The two reformed miners charged the large flank of the dark riders, planning to kill one, lose combat, and flee into my general’s unit, which reformed to take that charge. If this worked, I would at least save my artillery, and maybe even put my general in to the black guard if it still seemed worth it.
Unfortunately, the miners, killed one, then both died to a pair of strength 3 attacks, meaning no overrun, and leaving the cav facing the flank of my
BSB’s reformed unit. The hammerers were killed down to three, and my bolt throwers both bounced off the hydra again.
No picture here, as we were running out of time, but I think you know what’s coming.
The hydra goes into the slayers, rolls almost perfect and wipes out the unit, overrunning into the rear of the warriors. The medium cav do something similar to the
BSB’s unit, and hit the flaming bolt thrower. The hammerers are wiped out.
The only remaining high points are that the gyro did manage to finish off it’s unit of dark riders, and survive a rear charge from another pack. My general went into the back of the medium cav, but lost combat, held and eventually picked up half for the master. The penetrating bolt thrower also managed to drop the second hydra.
In the end, all I had left were the longbeards , my lord, a damaged gyro, and a bolt thrower, while he’d only lost half a character some dark riders and both hydras.
Result?
Massacre Loss
Post-game: I think I essentially lost the game in deployment. I didn’t present Chris with any difficult choices, and he really just had to push up into my face. I knew was I was placing that I was doing so without a plan. I tried to correct a weak flank by dropping my lord on the left, but it was no good. I spent the game trying different things to correct those initial mistakes, but to no avail. My other systematic error was to set up only in anticipation of what I thought was the most likely event. (i.e. When my miners were going to pull the large block of dark riders, it seemed likely, so I left my
BSB’s unit’s flank exposed. Essentially, I was looking at what was most likely to happen, but setting myself up for catastrophe if the dice dropped the wrong way.
I was happy with the list tweaks, and I certainly can’t imagine the previous list doing any better.
Anyhow, the short winning streak comes to an end. I’ll actually be running up against some other
DE later this weekend, so here’s hoping for a little vengeance…


 Good luck with the painting and hope it goes fast for you. I always enjoy your reports and can't wait to hear of more dwarf victories.
