Been meaning to write this one up for a while since I have had a few questions on it, but my first tutorial so be gentle

. This technique is usable on Wraithlords, Vypers, Warwalkers, etc.
Items Needed:
1/16th Drill bit
Modeling glue/Super Glue
Pointy poking tool
1/16 size rare earth magnets (
http://www.kjmagnetics.com/proddetail.asp?prod=D101-N52)
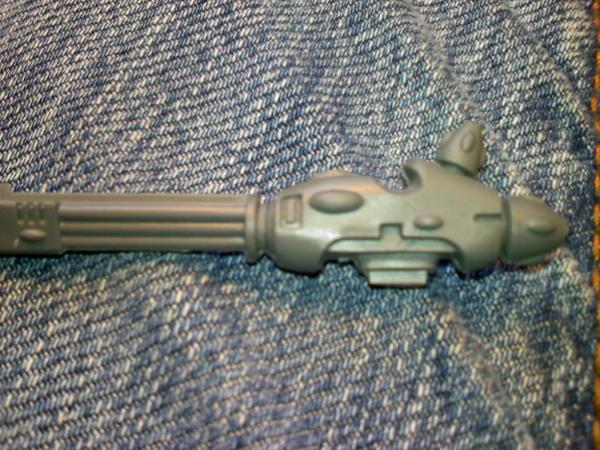
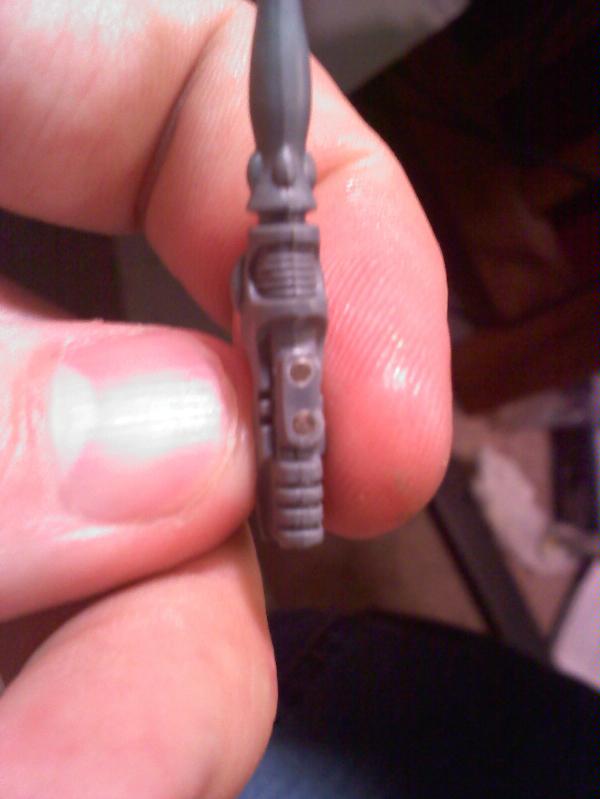
Step 1. Notice the "tab" at the bottom of the weapon, this is what fits in the slot on the other side.
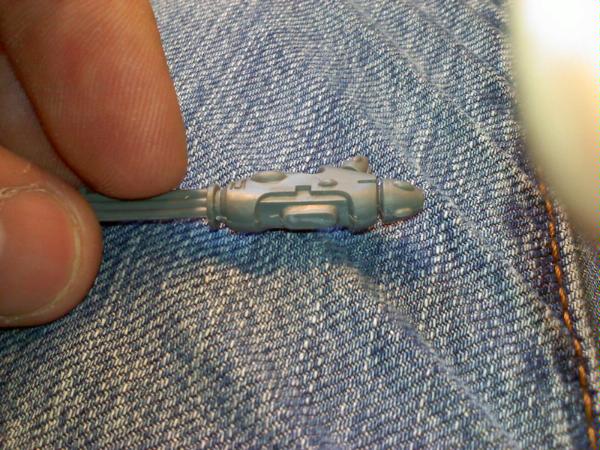
Step2. With an razorknife carefully cut off the tab leaving a nice level surface for our drilling.
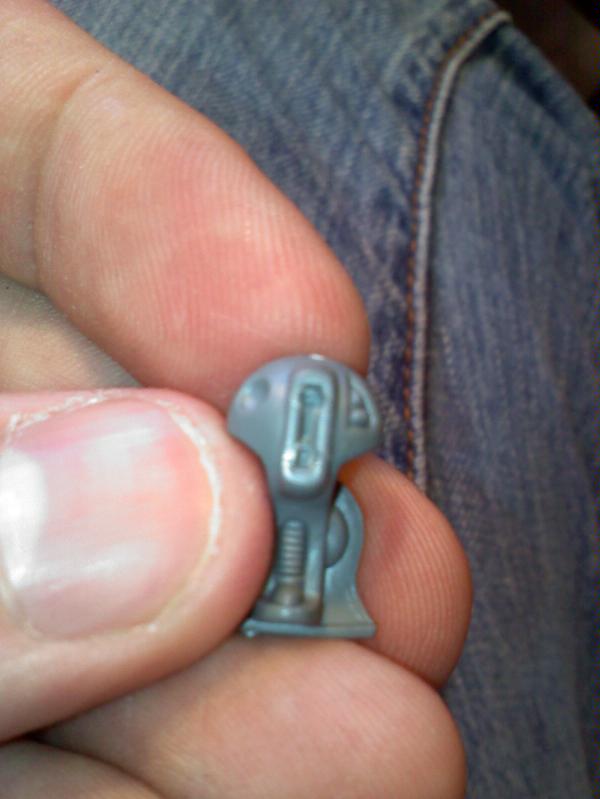
Step 3. With a pointy object carefully poke 2 or 3 starter holes depending on how many magnets you will be using. I find 2 is usually perfectly fine, but it is vial to make sure you place the in the same location on each weapon. Also, ensure they are in a perfectly straight line with each other or your weapon is point slightly diagonal.
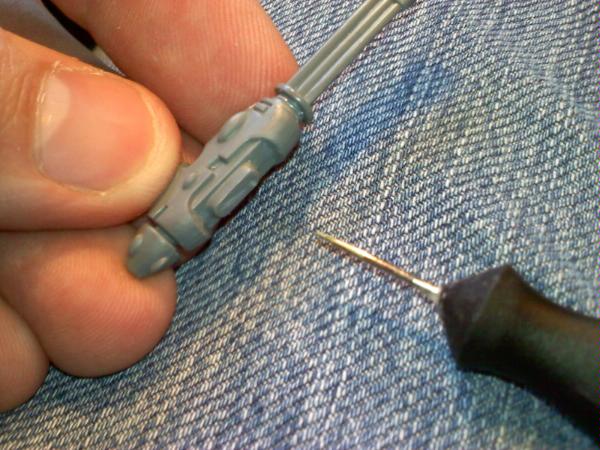
Step 4. Drill into the starting holes with a 1/16th drill bit. Use caution to only go in as deep as the magnet you are using. If using 1/16x1/32 you can drill a little deeper to put in multiple magnets for additional pull.

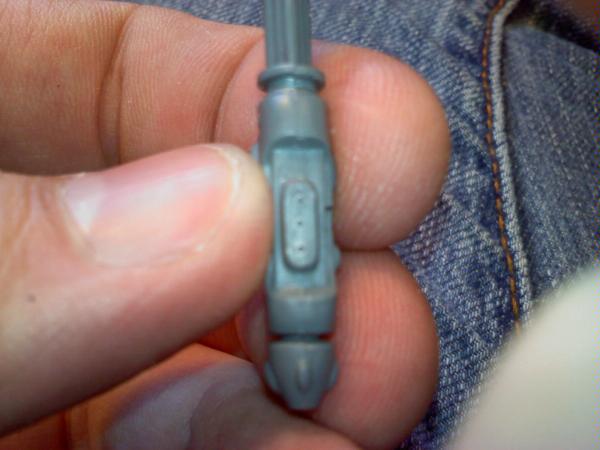
Step 5. Put a tiny tiny amount of glue in each hole, tiny being the key word. Push in your 1/16th Magnets in the hole making sure you have the same polarities facing out on each side. You want to make sure the magnet is flush with the edge of the hole so you get a nice clean edge.
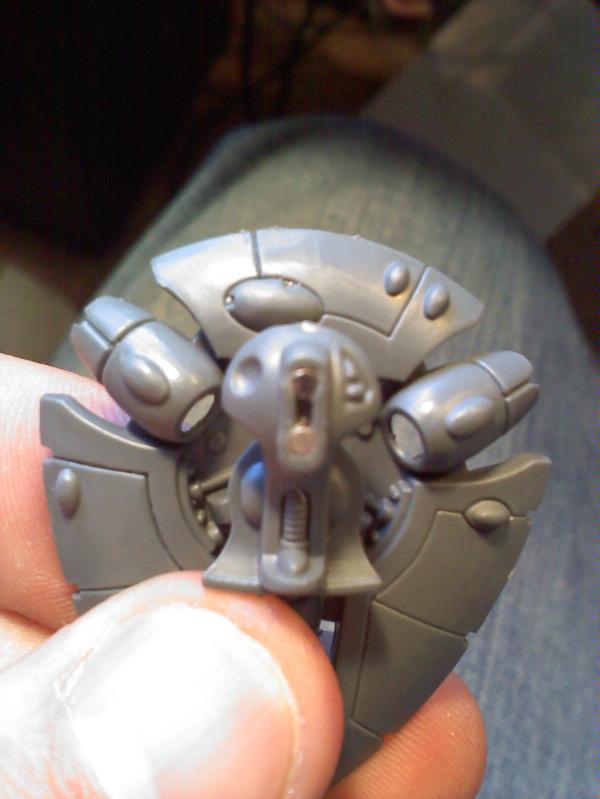
Step 6. Next move onto the "slot" side of the model and drill your two holes (three of your doing 3 mags) in the identical configuration you did with your weapons. Then use the tiny amount of glue and place the magnets in the other side. Make sure you get a nice flush edge and beware of polarity.
Hopefully you find this tutorial helpful
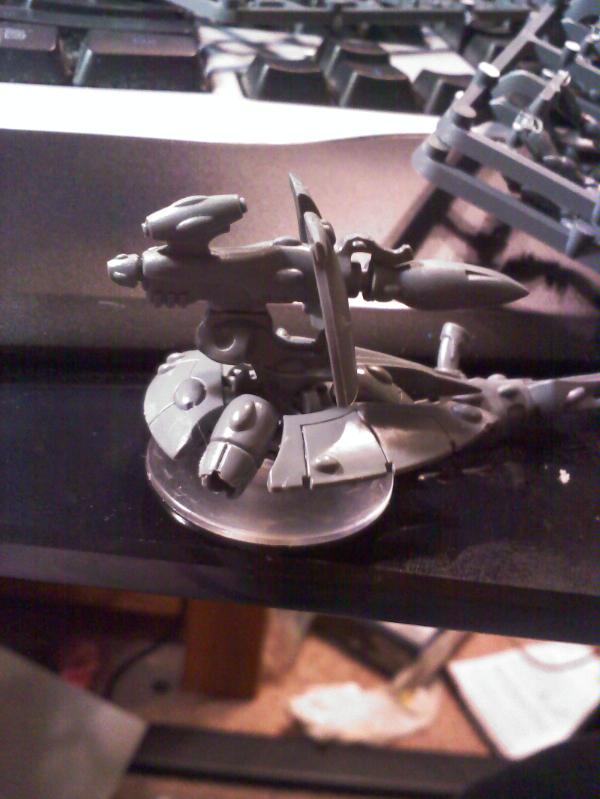
Here is what a finished product looks like...


 "Not all who wander are lost." -J.R.R. Tolkien
 5000+
5000+
 2000+
2000+
 1000+
1000+
 1000+
1000+
 2500+
2500+
 1000+
1000+ 
 SeiNaah craftworld
 Order of Her Sacred Remains
 Dark angels 2:nd company, the Ravenwing
  Tau (0-0-0)
 Deathwing (2-0-0)
 Death Guard (2-1-0)
 Eldar (0-0-0)