This is a fan translation of the meganob scratch-build technique developped by LuciusLeTroll, permission pending.
Original Author: LuciusLeTroll (
http://www.the-waaagh.com/forums/?showtopic=51276)
His blog 'Orks Forge', in french:
http://orksforge.blogspot.fr/
Original how-to on his blog:
http://orksforge.blogspot.fr/2012/04/tuto-...d-meganobz.html
Translation by Spacecat (
http://www.the-waaagh.com/forums/index.php?showuser=13070)
I took the liberty of adding small tips from my own experience building one of these.
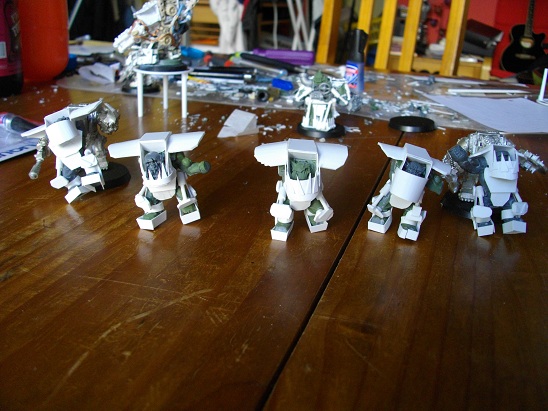
You too can create your Meganobz!
As planned, here is the tutorial to help and guide you in making your meganobz, to do so you will need a certain amount of tools and material. As always my goal is to save money, that is why I use Assault On Black Reach Nobs as a base. It is good to know that if you are motivated you can save the body and only use the arms and legs, but that is beyond the scope of this tutorial. For tools and plasticard, I am referring you to the tips on my blog. I myself do not use a precise plan, the tutorial is therefore more of a guide that will help you create your Meganobz, that is why I took lots of pictures, observing is often the best thing to do. Last advice before starting: Get yourself an official meganob, it will be useful inspiration.
Step 1: "Prepare da nob, boss!"
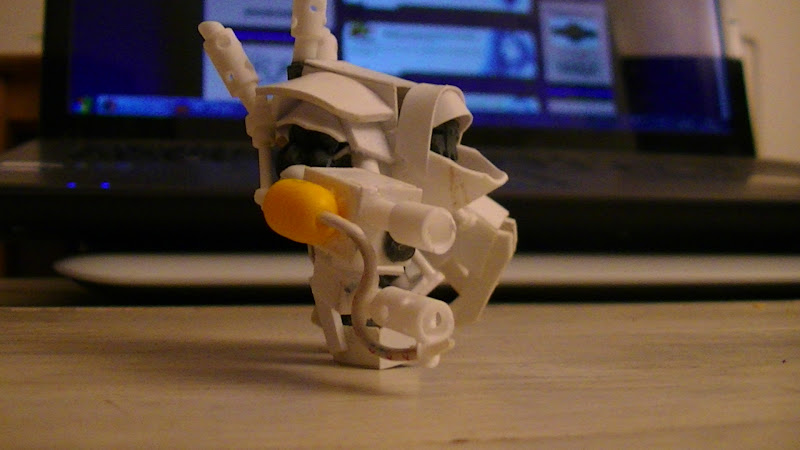
Picture 1
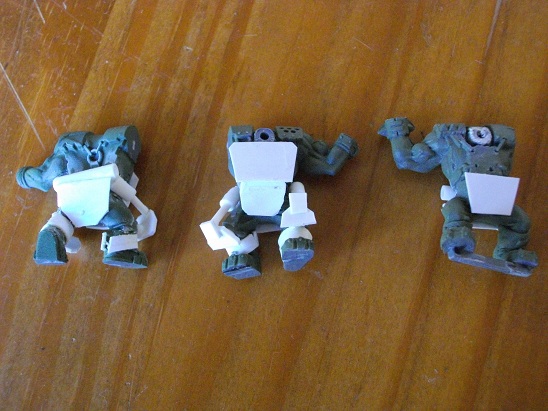
First thing to do is to remove the plastic bar below the feet, generally speaking it is best to cut everything that pokes away from the model and might interfere with the armor we'll build: Objects tied to waists, bit of belt poking out, etc... Do know that your Meganobz will be different depending on the arm stance, those will guide the final look of the figurine. you can cut them off if you have spare nob arms. (Because regular boy arms will not do, too small). At this step, you should also shave plastic off the front of the torso and the knees to help place plastic how you like.
(Spacecat tip: Go ahead and cut the fixed arm at the shoulder with a hobby saw. It's easy to alter the pose and glue it back later, that also gives you more room to work on the body and shoulders.)
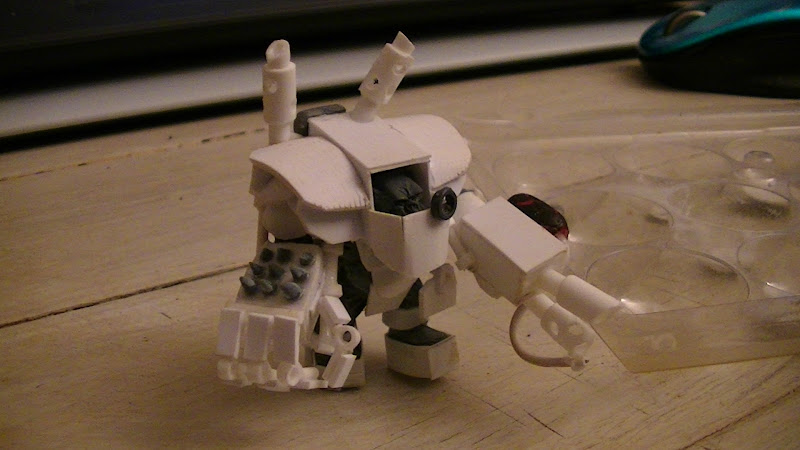
Picture 2
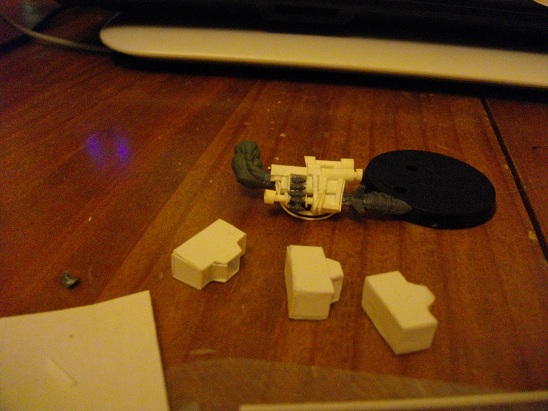
You must start to prepare the mega-armor structure:
-A chest piece (pic 1/2)
-A loin guard (pic 1/2)
-bands or tubing to surround the ankles (pic 1/2)
-Shoes: Careful! you must raise the nobz thanks to platform-style shoes, make it so the armored shoes are about twice the height of the original shoes, with the original shoes at the top.
-A small tube on each side of the hip, pointed along the thigh: They form the hydraulic cylinders that will link to the knee pads. Those are touchy to adjust, I recommend to set them against a horizontal tube in the back.
Do note that I often cut off loinguards and chestplates later, it's best to make things too big and take a cutter to it later, according to needs.
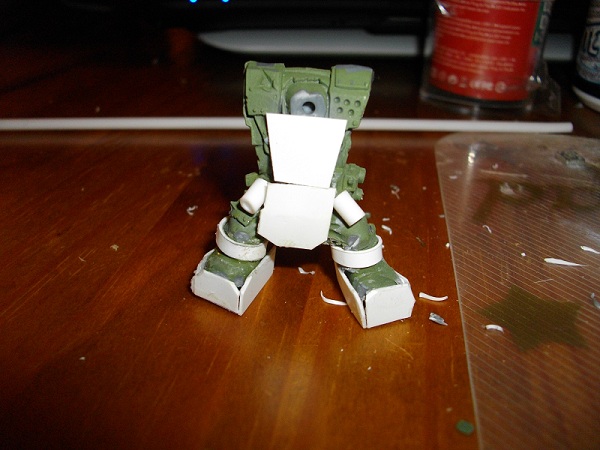
Picture 3
We then glue short tubes that will link to kneepads (pic 3). You need to cut them at angles so the kneepads don't bump against the shoes. The nobz have difficult poses around the legs, we must deal with it and plan to avoid bunching up the legs.
(Spacecat tip: The AOBR nobs have a really bent shoe, slicing off the top of the tip to change the angle of the boot can help.)
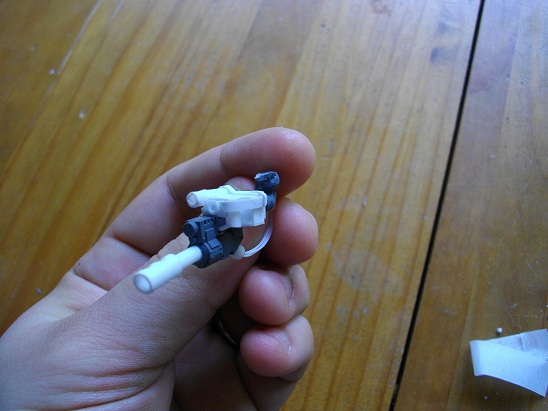
Picture 4
I make the kneepads in thicker plasticard (1mm thick I think). Make sure to insert the rods in the cylinders without gluing them (pic 4/5), it's easier. Those darn cylinders are a pain to set, don't hesitate to go light on glue at the start because you may have to adjust everything later. Sometimes I even 'dig' into the figurine to set the cylinders in a believable way (Thank you mini-tools!).
(Spacecat tip: You may find it simpler to build the kneepads first, then set the cylinders and finally the back tube. Instead of the other way around.)
Picture 5
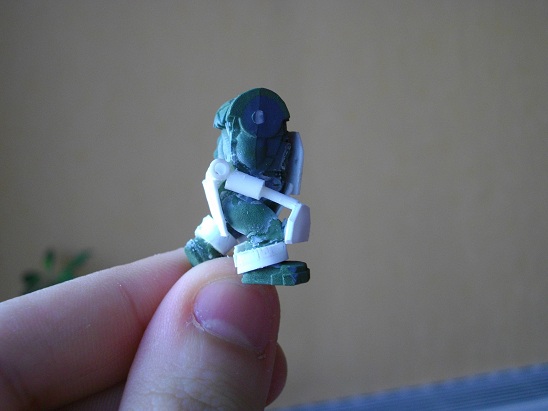
Picture 6
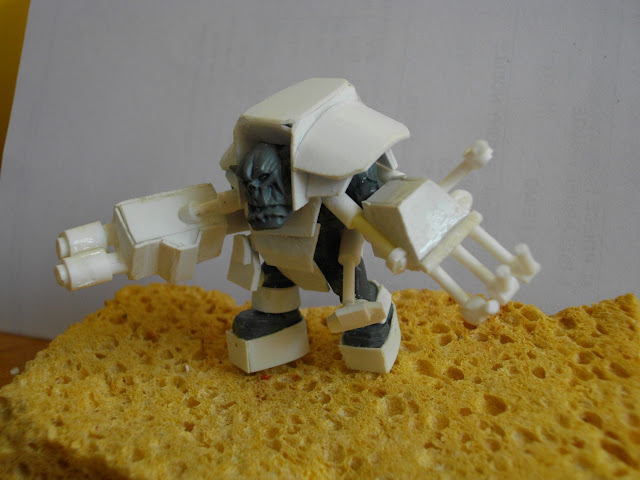
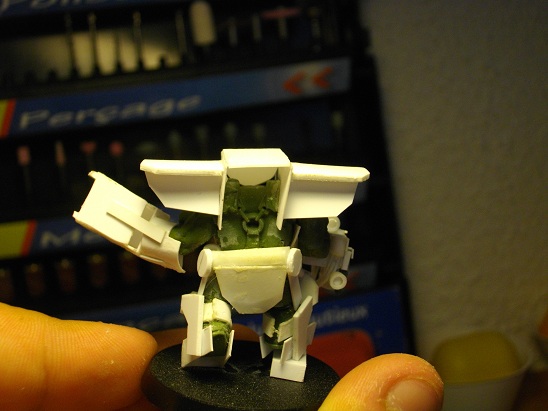
You can see on pictures 4 and 5 the basis for the meganobz legs. If we stopped here he would be very bunched up (like the first I built), so we must raise the shoes. You can use plastic cuttings to add detailing on the kneepads (extra plates, teeth, glyphs: pic 6/7)
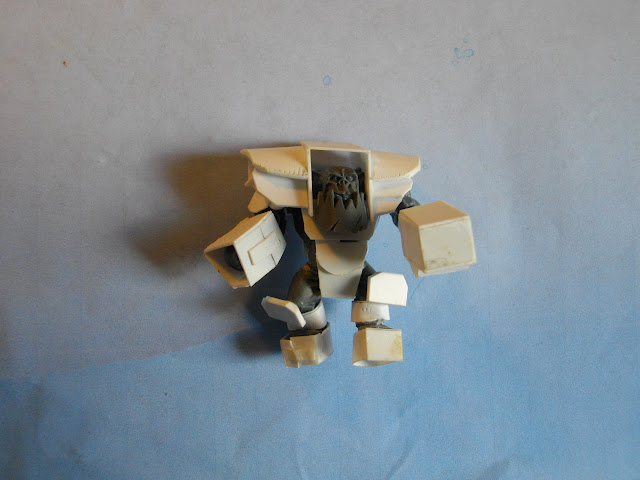
Step 2: "Add ded 'ard armor protekshun, boss!"
Picture 7
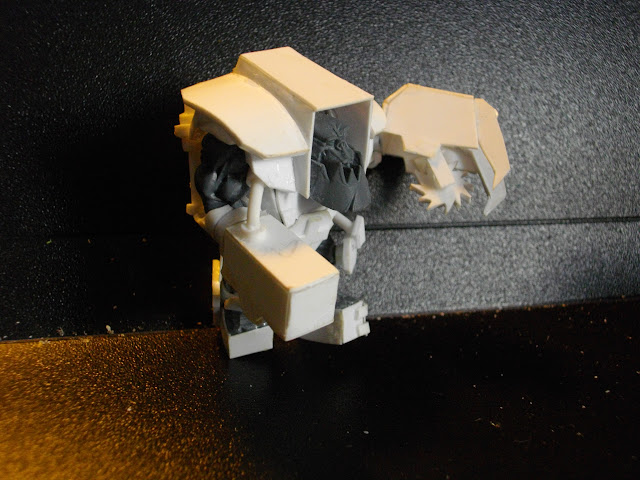
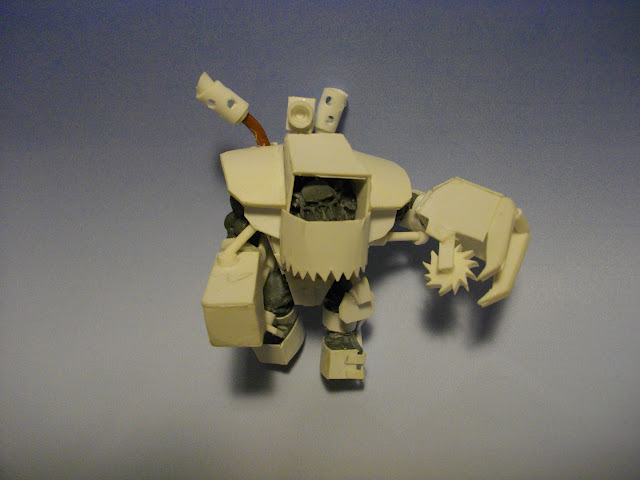
Now comes the painful moment to prepare the dorsal armor box. Between cutting into the figurine and trying to find an appropriate height (Too high: Giant Meganob. Too low: The head doesn't set right and the MN looks too flat), it can get frustrating. I begun this step by making vertical shoulder plates (pic 8)
Picture 8
This step will requirs tons of adjustments so the shoulder plates join against the model without too much empty space. Ideally those plates would set against the chestpiece to unify the whole thing. Once this is done, set a plate over the vertical shoulderplates (bigger than necessary, use cutter when the glue has set). Sometimes pieces will come apart when we rework a plate, do not give up!
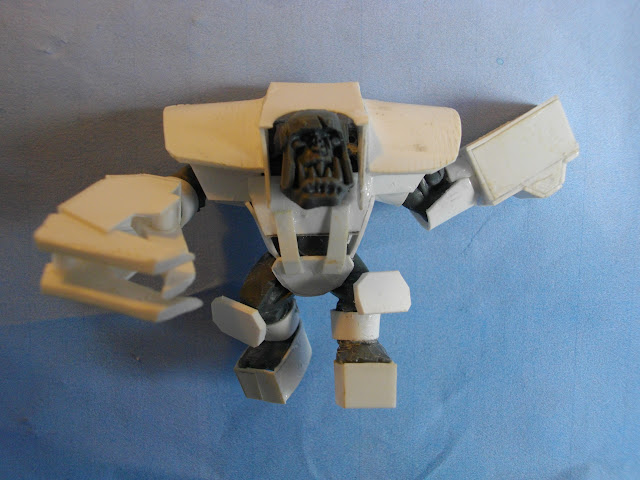
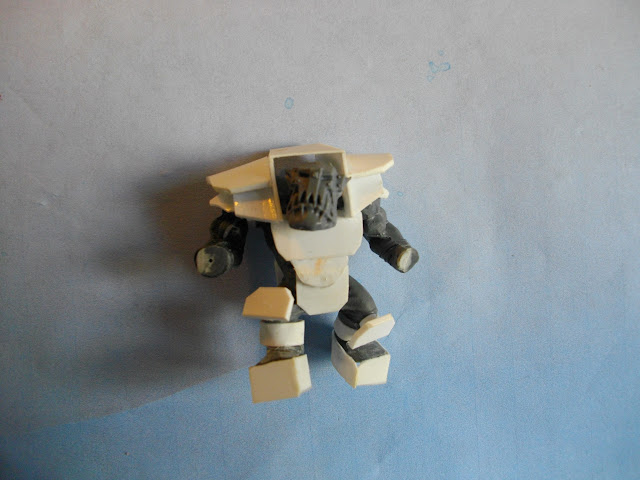
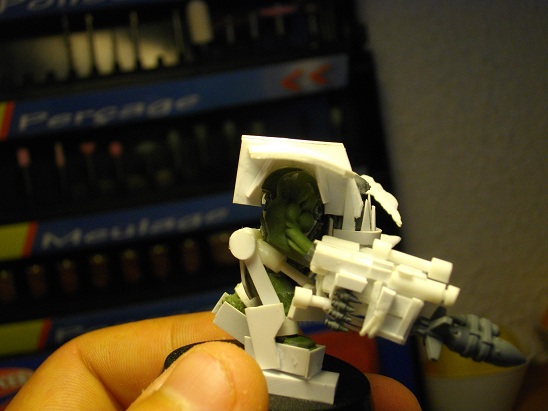
Picture 9
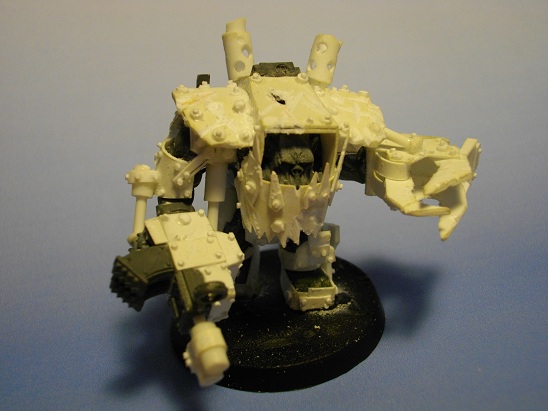
At this step it is advised to set a piece of plastic behind the head of each figurine, it hides the thinness of the plasticard and hides the depth (pic 9). Time to set the wings of our miniature airplanes! Some folks spoke out against these enormous shoulder-wings that they find ugly or not believable. For my part, I find it makes the charm of my meganobz, giving them a massive, 'knight of the scrapyard' look. You are free to not make these or make smaller ones, it's up to you.
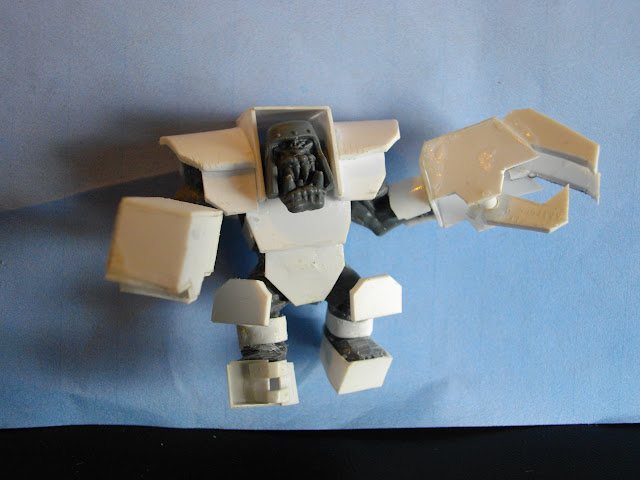
AT this step (pic 9) the meganobz look like planes on legs, don't worry, adding arms and big weapons will rebalance the model. Important tip: cut the shape in plasticard, give it a curve by giving multiple small bends with a pair of flat pliers, then file at an angle so the plate flues easily on the vertical shoulderplate. You will notice on pic 9 that I already, at this step, added the iron jaw. They can appear large, but once again we cut too large and use a cutter later on.
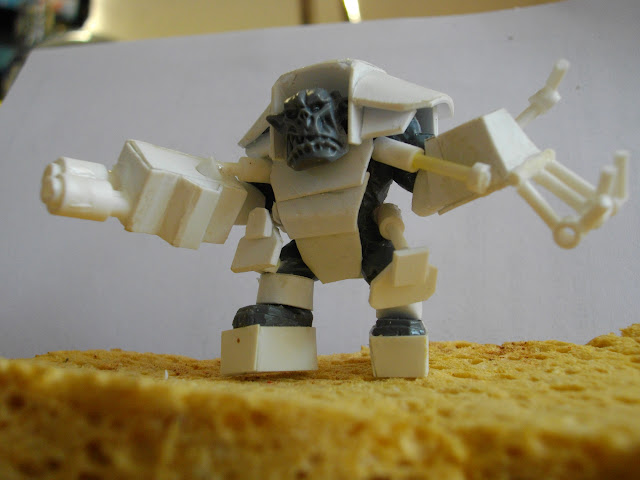
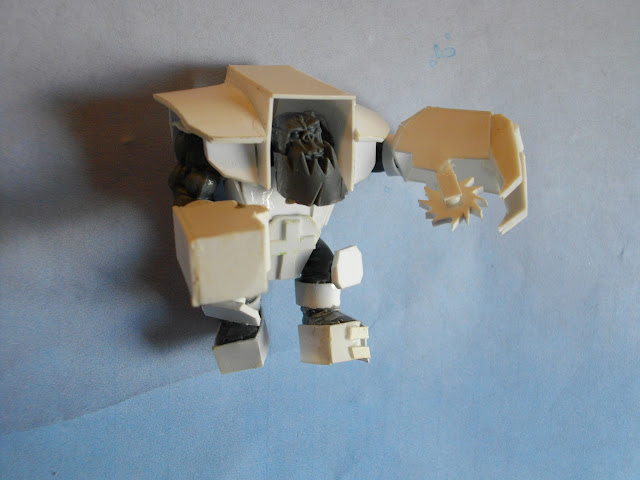
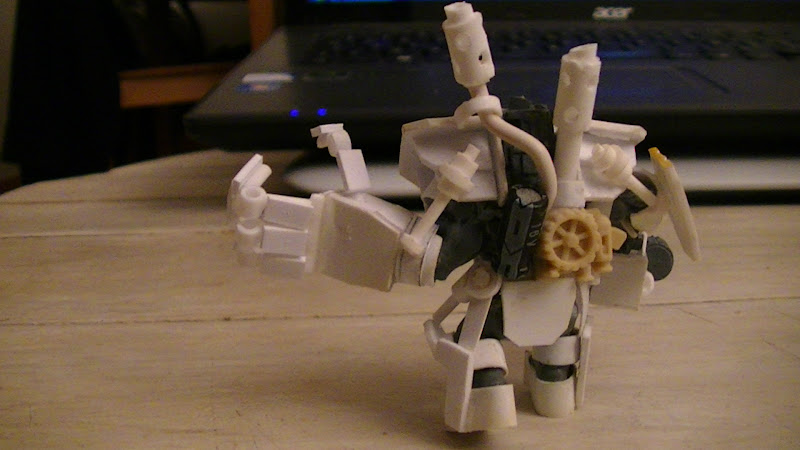
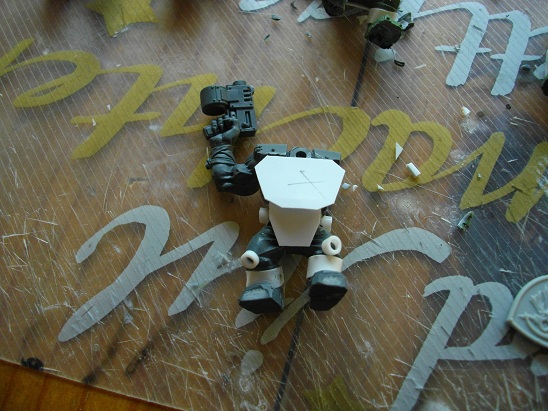
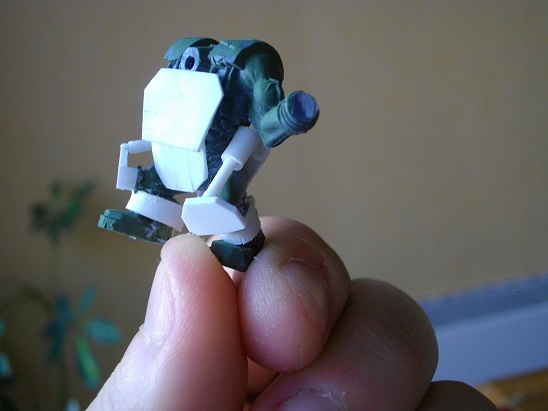
Picture 10
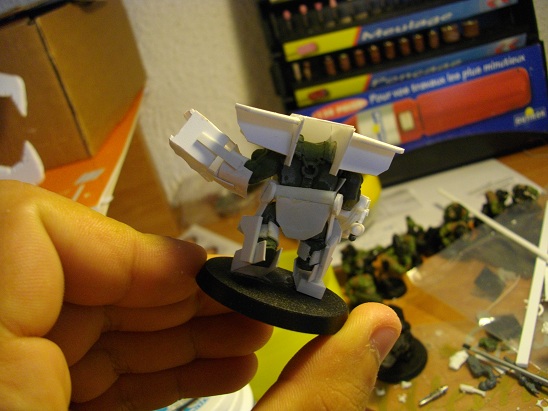
Now we start to give body and volume so our meganobz no longer look like airplanes. Glue the arms while considering the large size of the weapons that will go on them. You can cheat! Like adding a bit of tubing to set the arm further than the body, what matters is that we don't notice in the end. I even remember one arm cut over the elbow, glued to a tube that was glued directly under the shoulderguard! Also, besides the challenge of the tube holding on, it is a credible position as it'S easy to adjust the arm as we wish. However we need to improve the technique to have the arm hold on (small iron rod? I don't know). Glue extra armor plates under the shoulderguard, at an angle (pic 10). This has two uses: it gives volume to the model by hiding the relative thinness of the plastic, and it hides whatever mess we used to set the arm properly (if there is a mess).
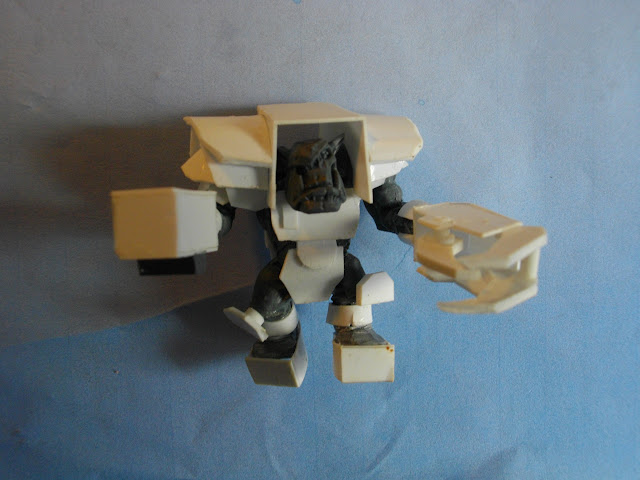
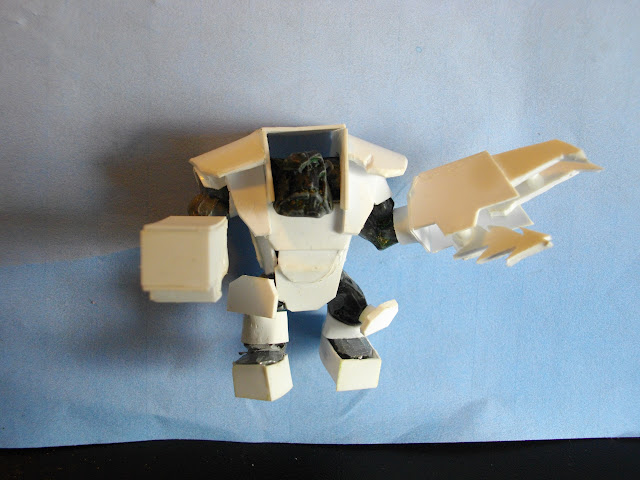
Picture 11
At least, attach the hips with the feet by creating these armor bits on the sides of the model. Keep in mind the higher part is like a thigh, the lower part follows the tibia. That will help you see how to set each part. Have a look at the official meganob, that will also help.
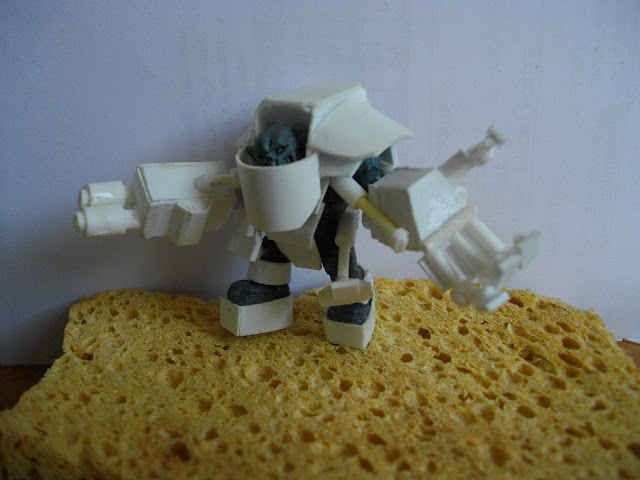
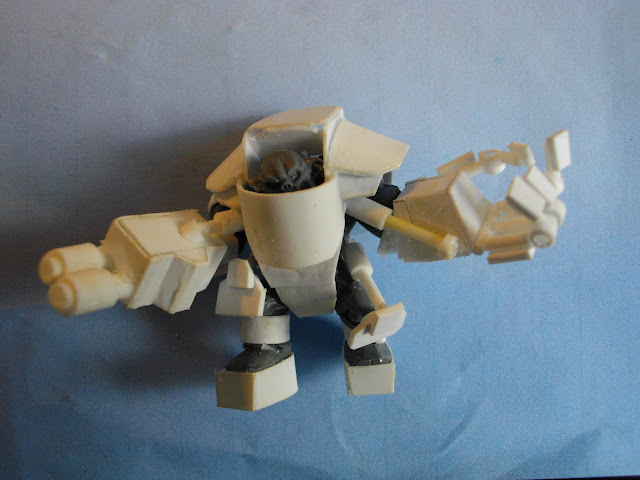
Step 3: "Dakka Dakka DAKKA Boss!"
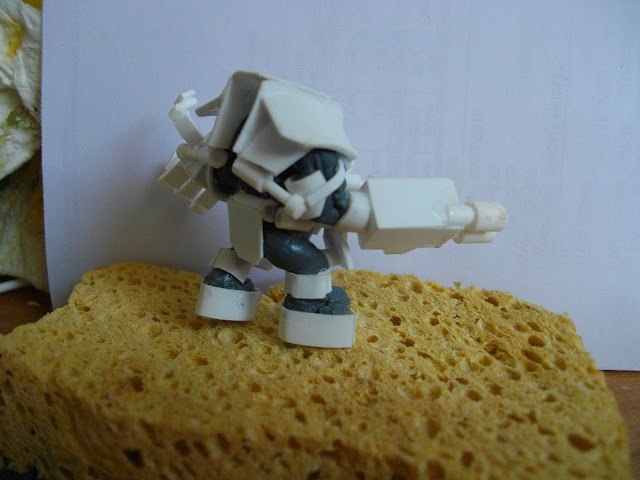
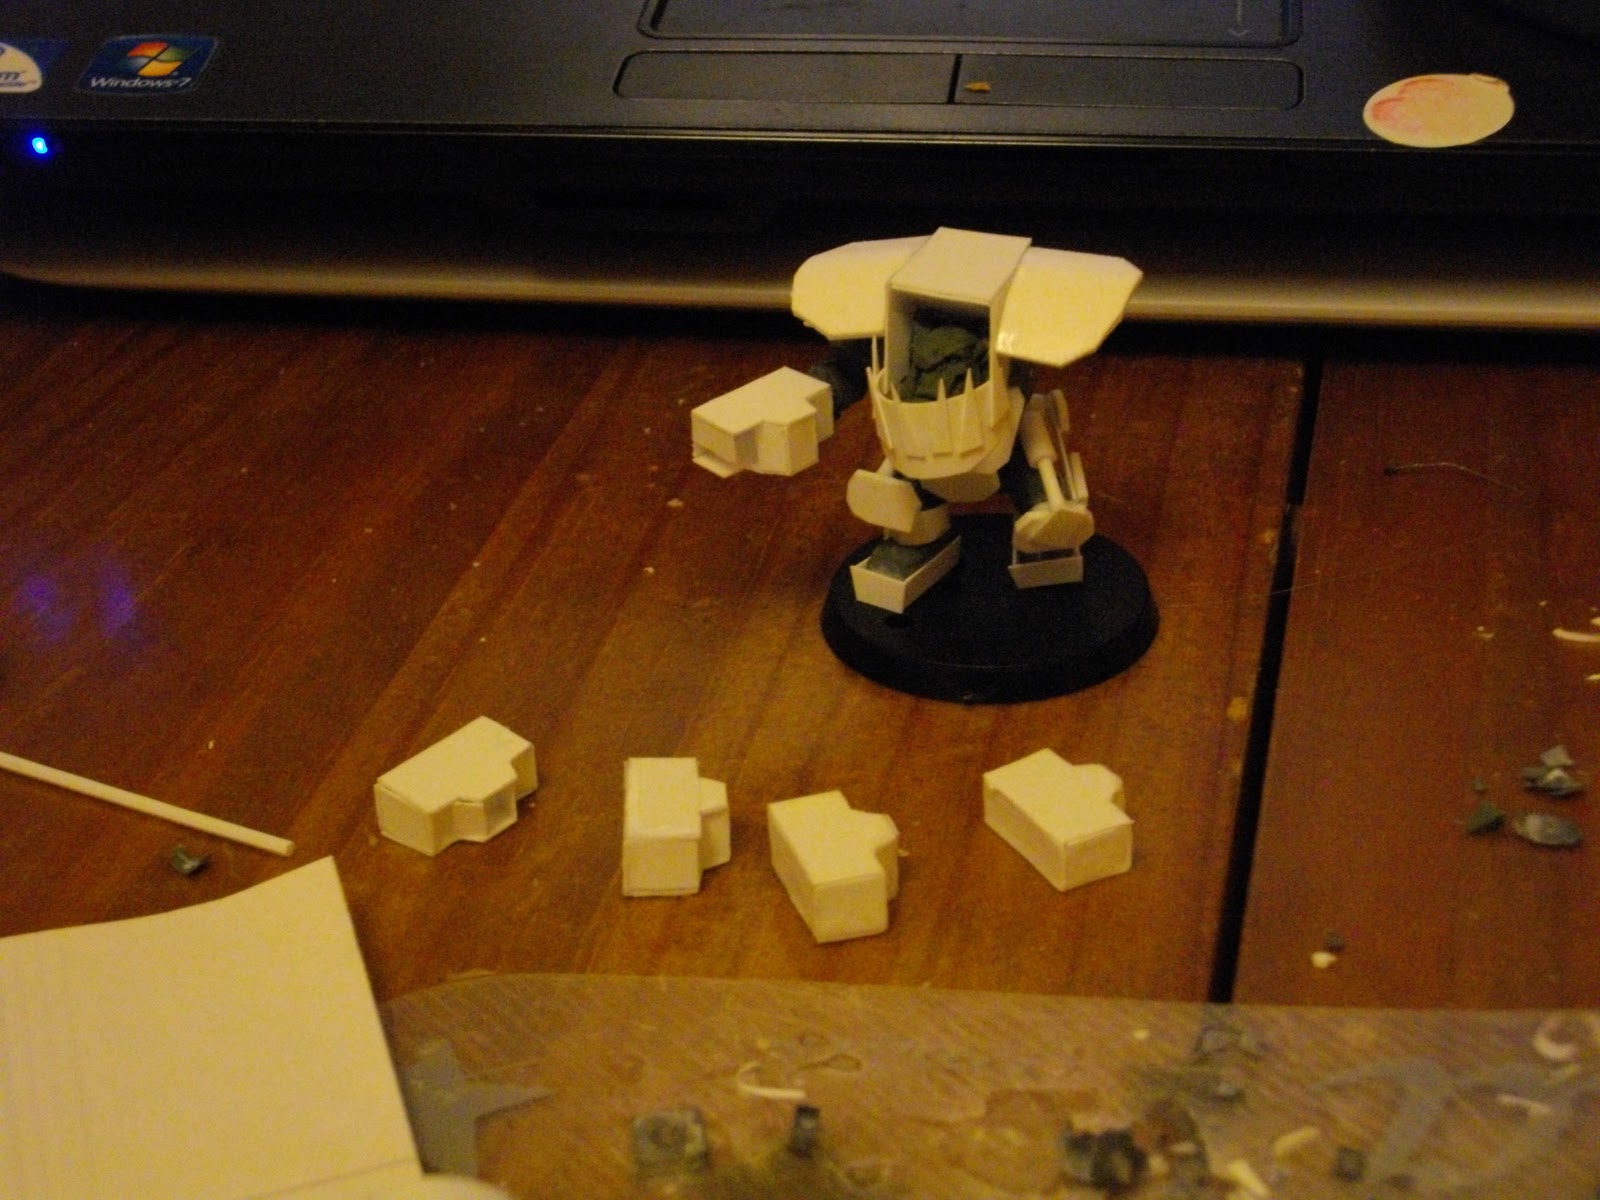
Now that we have a nicely protected meganob, we must arm it properly! Luckily (or not) the codex is a little thin on options, so we need power klaws and for the other arm a choice of twin-linked shootas, or kombi-weapons with rokkits or skorchas. The basis for each weapon or even klaws is similar: a box of plasticard (pic 12) on which we'll build the klaw or bits to make a gun (pic 13). I can't explain better than the pictures (pic 14/15). Keep in mind to look at the official meganob and check the net to make something believable. Don't forget also that we must 'appear' rather than 'be' in model-making, so even if in reality it couldn't work, as long as it looks believable when built, it's good.
Picture 12
Picture 13
Picture 14
Picture 15
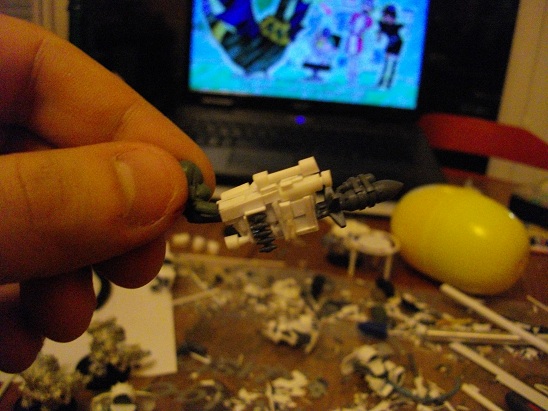
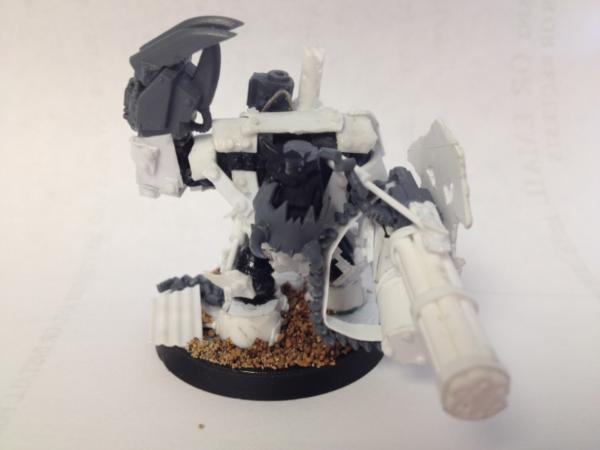
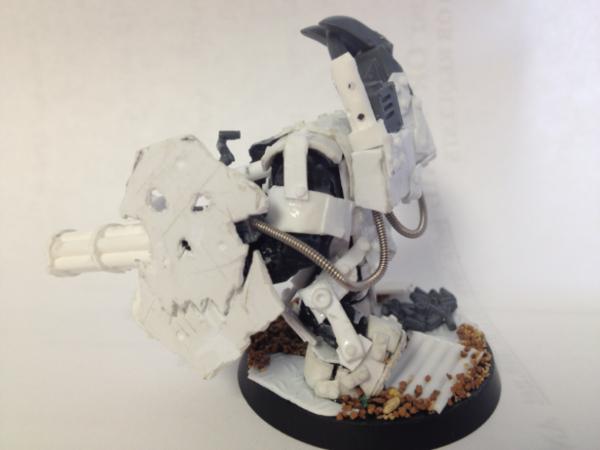
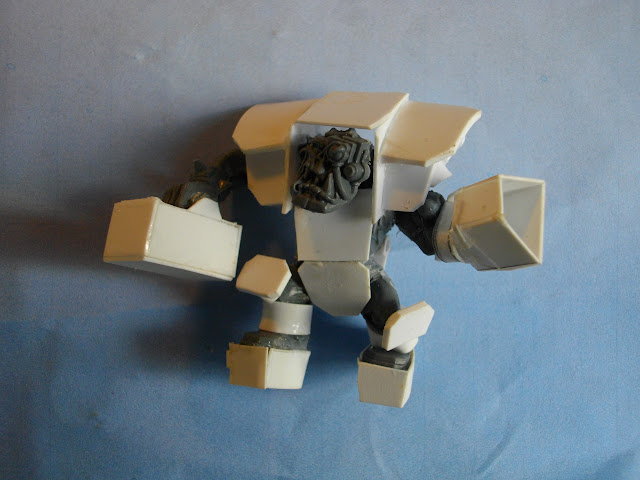
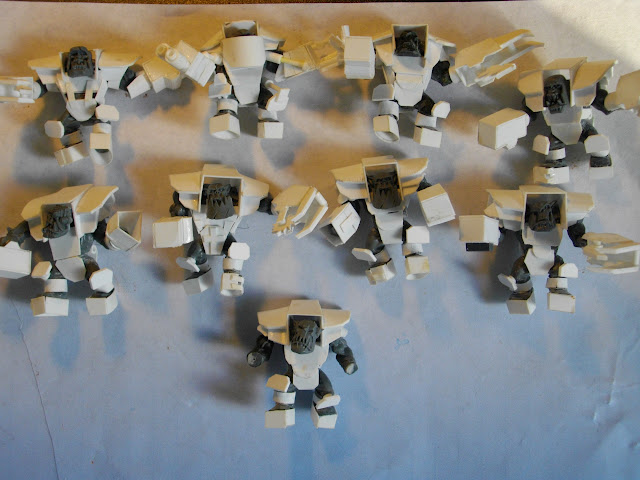
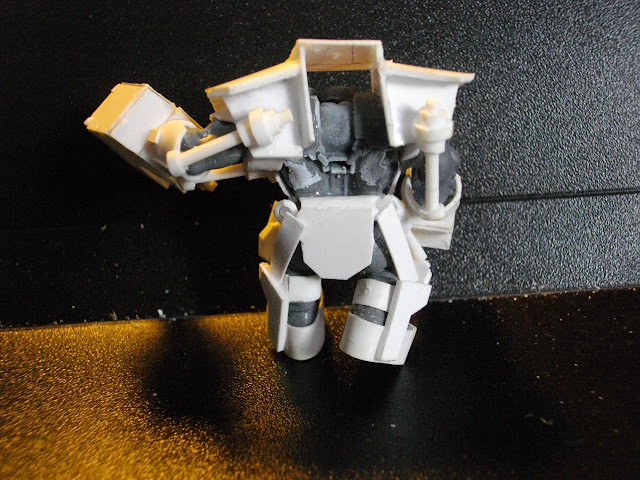
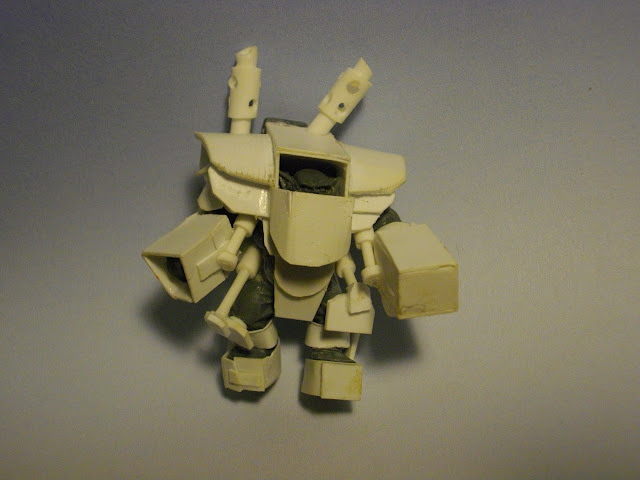
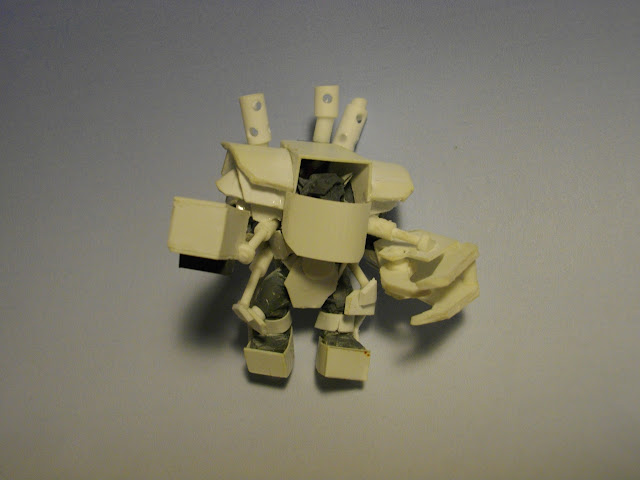
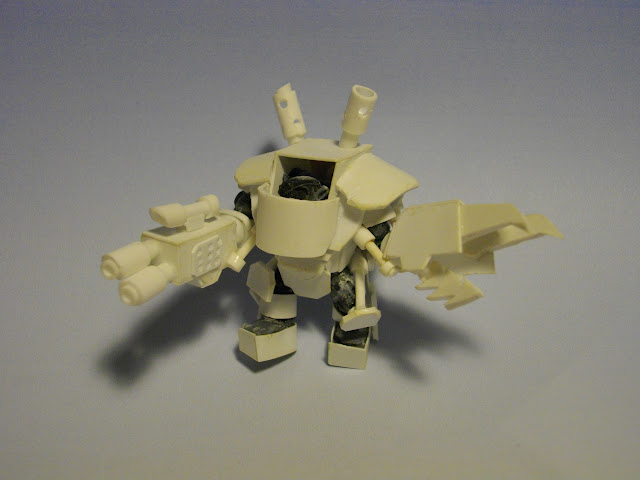
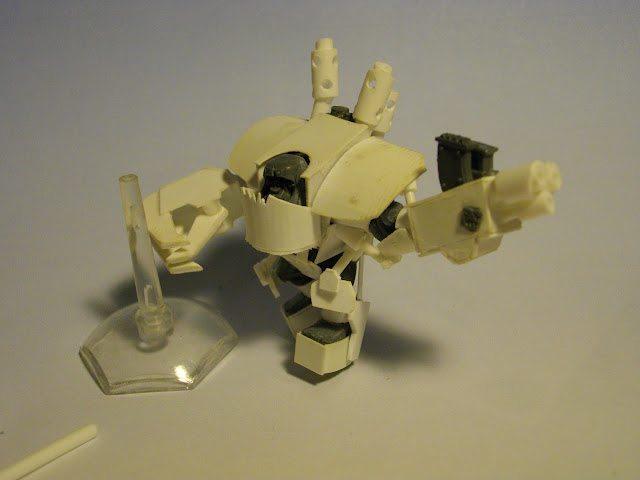
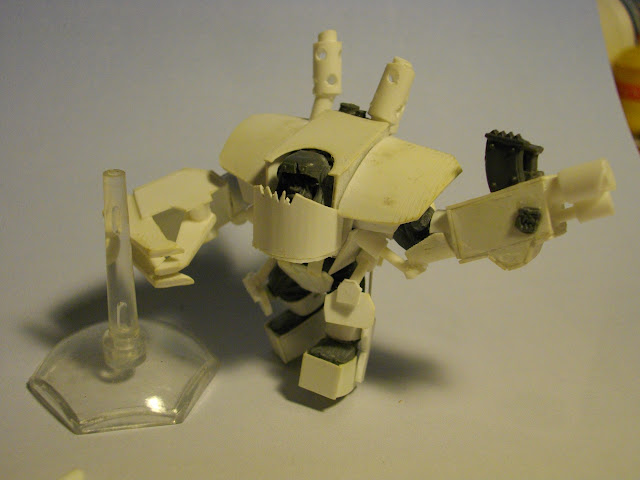
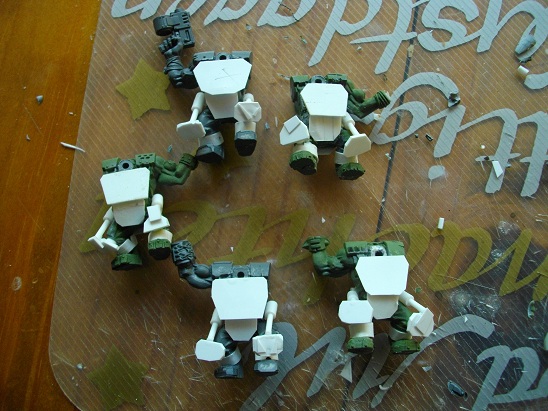
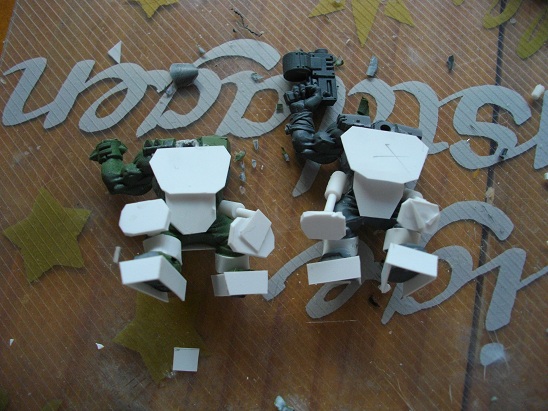
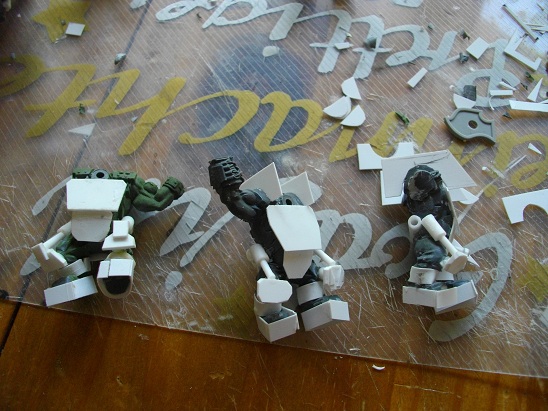
Once this is finished, you're done with most of the work! You should have something like pictures 16 and 17. We're still not finished! We will need to dress our model severely to give it its final volume and a unique charm.
Picture 16
Picture 17
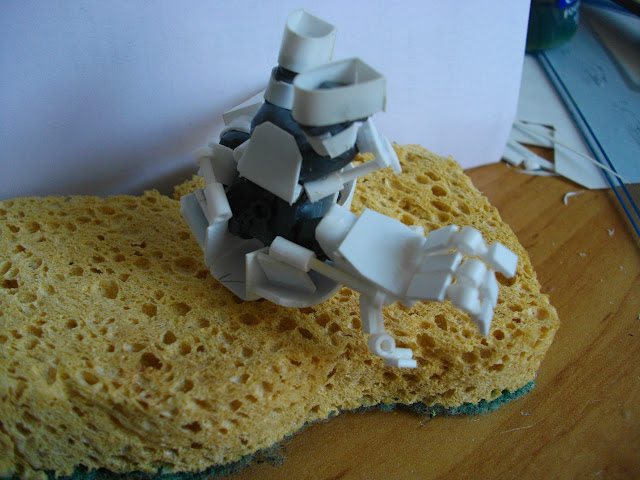
Step 4: "I'm da most proppa-lookin' boss, he he he!"
A meganob worth his teef is a meganob that leaves an impression, so the second objective (after killing and doing a lot of noise) is to make all boys around green(er) with envy. For that we need to hit the bits box and think a bit. Each builder can do what he wants, and there lies the advantage of playing ork: We can go wild and make almost anything! Though there are some important things, obviously:
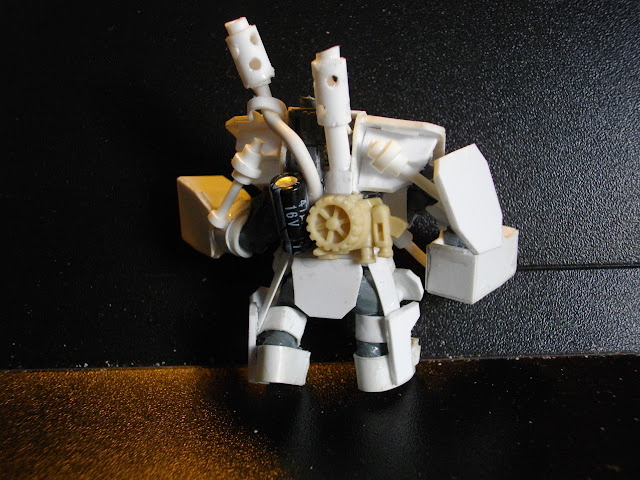
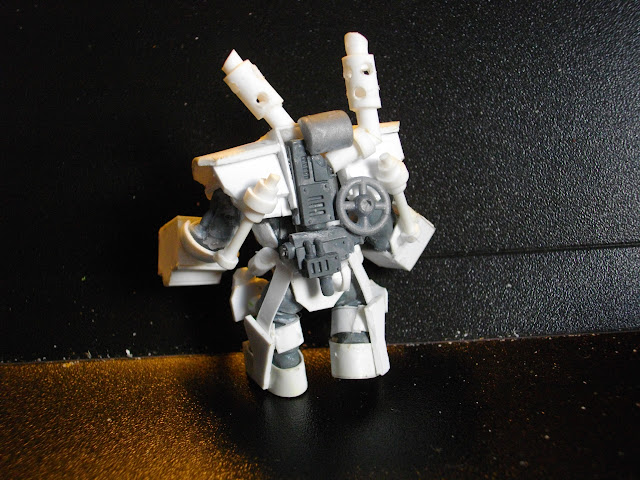
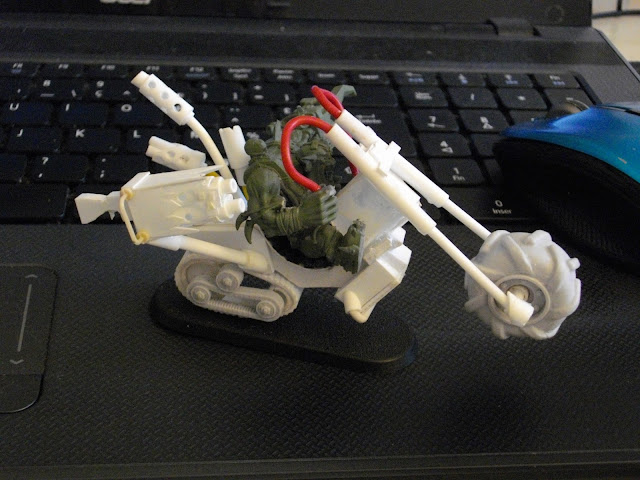
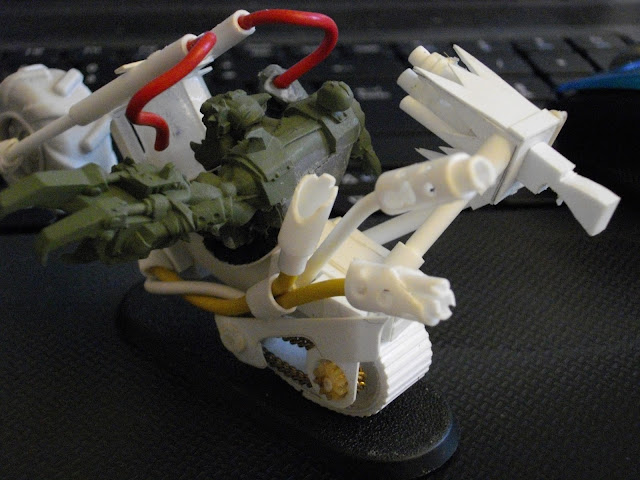
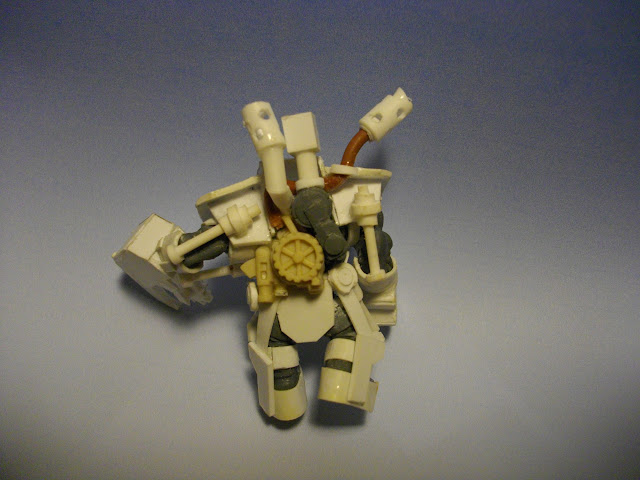
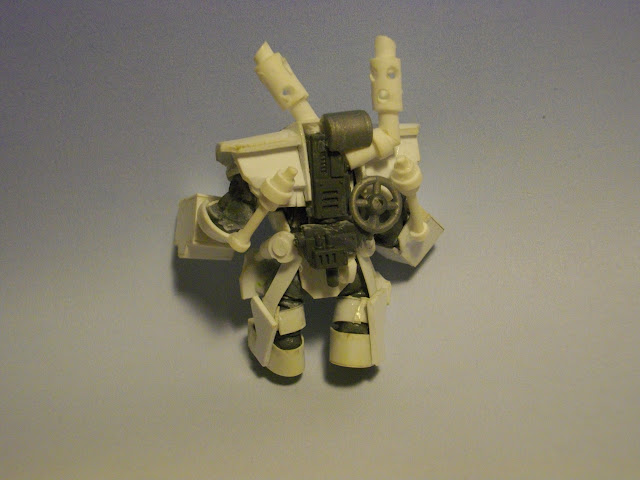
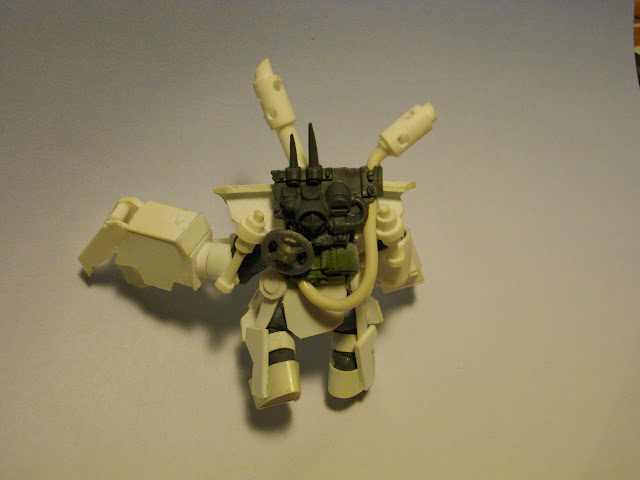
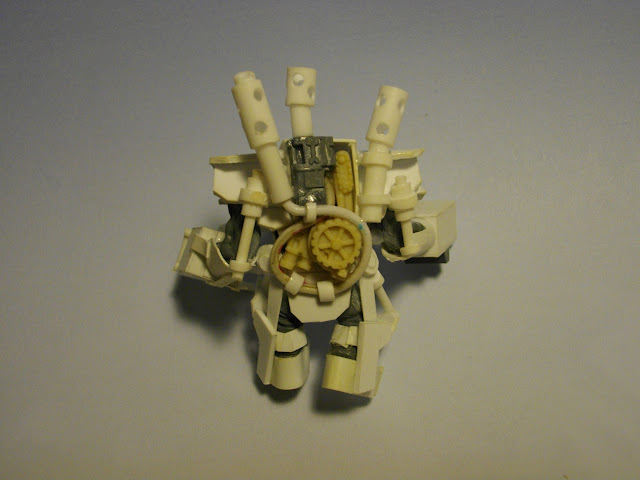
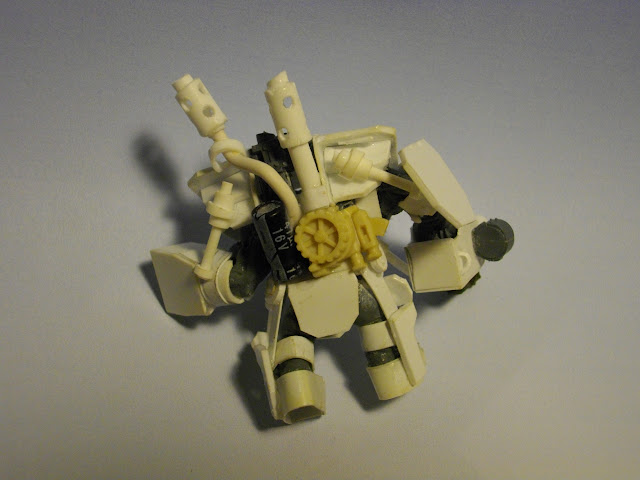
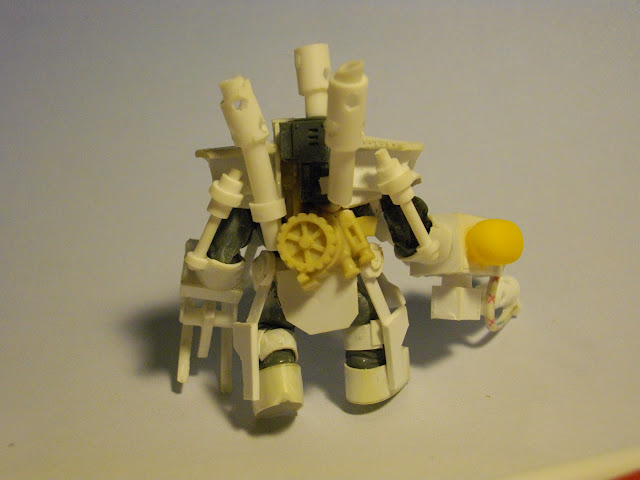
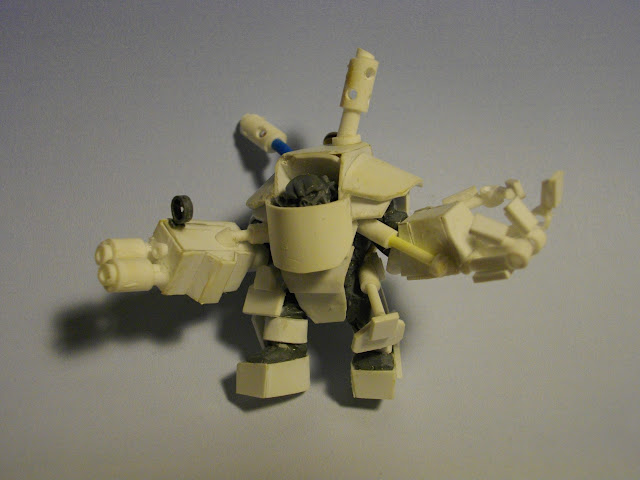
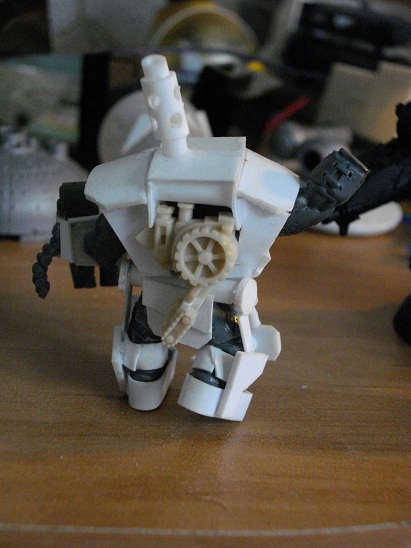
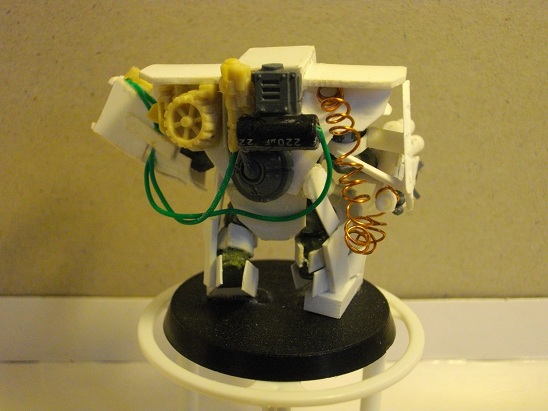
-Mechanical parts: Mega-armors are dubious-looking junkyard tech, but always flashy and noisy. Even on the 'softest' mega-armor I made (pic 18) I let some meganical bits visible. In this case half an epic Thud gun. You can see something more elaborate on pic 19: gubbins, something off a circuit board, electrical wiring, bailing wire... All these bits together, a bit messy, give a mechanical power source to the unit.
Picture 18
-Rivets: It is mandatory to add riveting. If I made the choice of larger rivets to make my meganobs more menacing, it is perfectly fine to use smaller ones. But in all cases we need them!
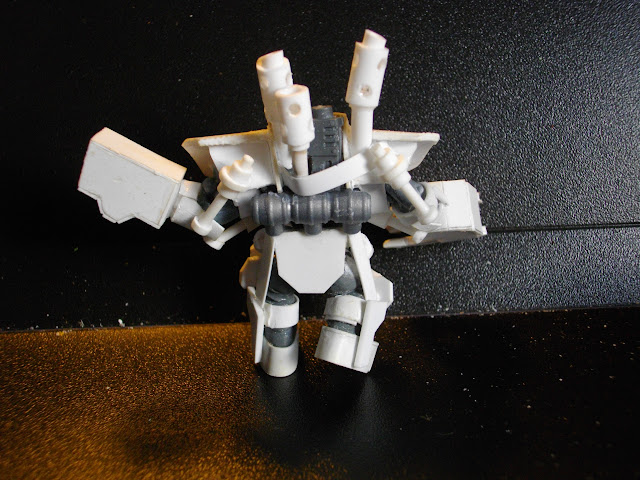
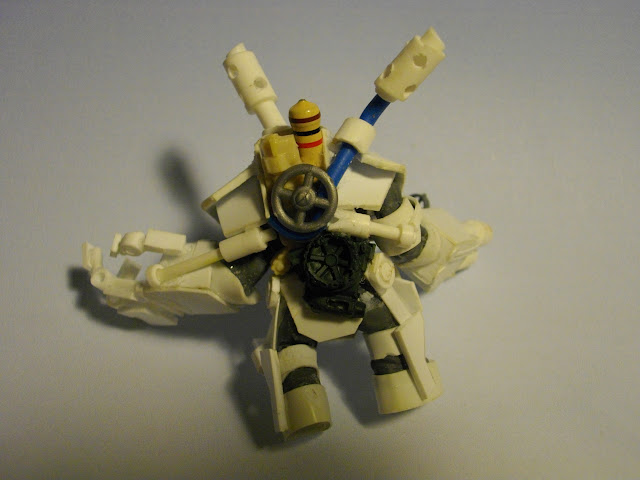
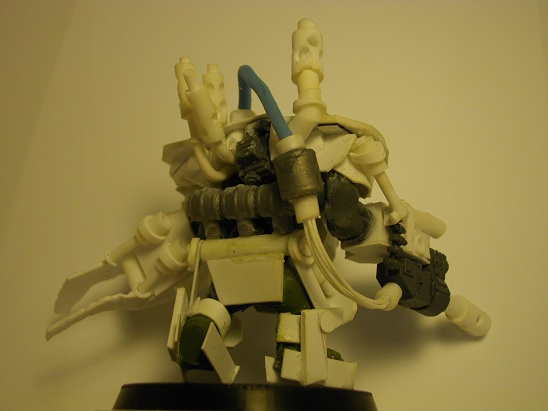
-Smokestacks and exhausts: As you can see on pic 20, it is easy to make believable exhausts with variously sized tubes. Again you can go wild, but if you want to stay tame, one well-set tube (pic 18) will do nicely.
Picture 19
Picture 20
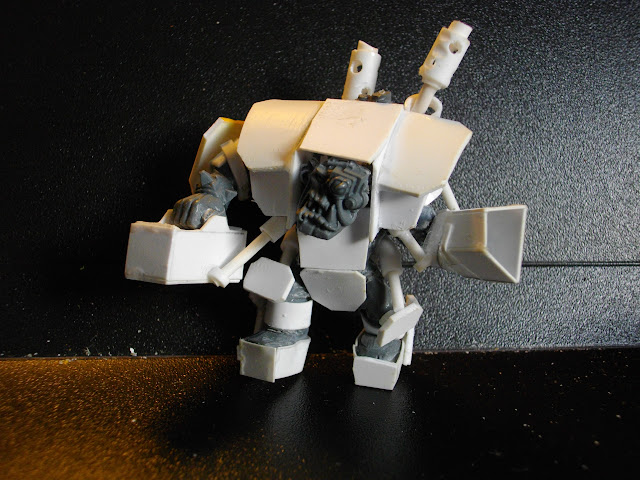
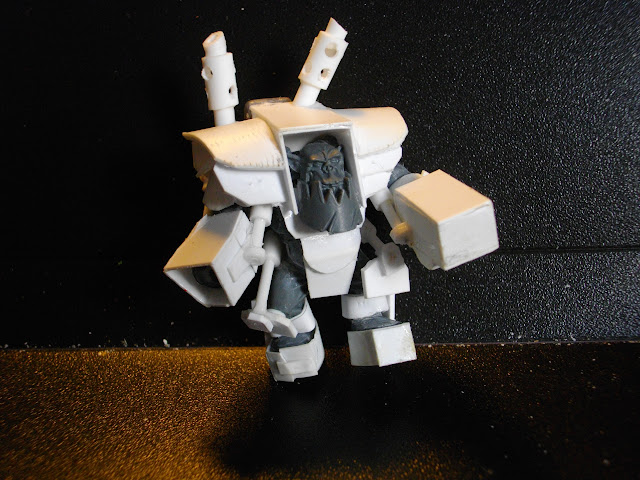
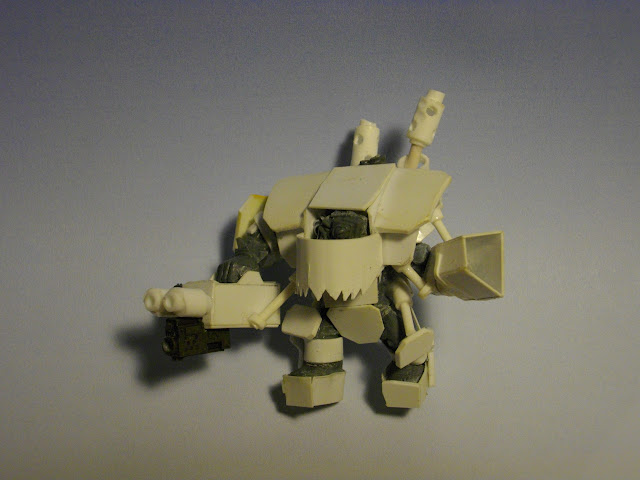
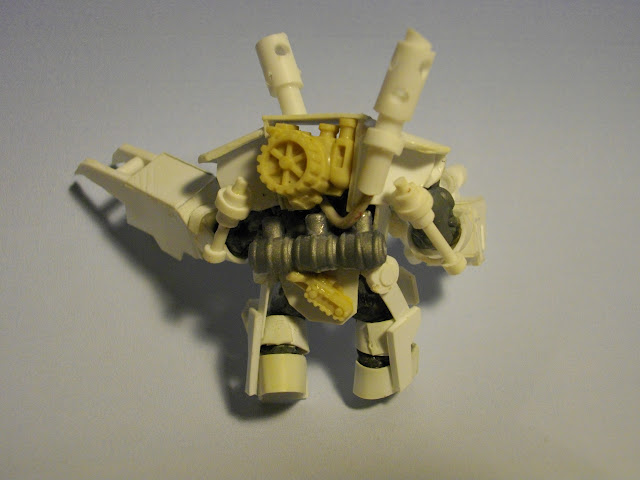
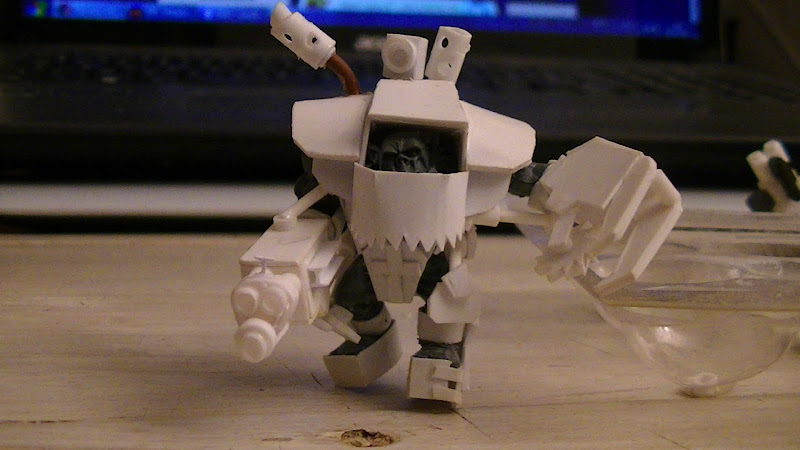
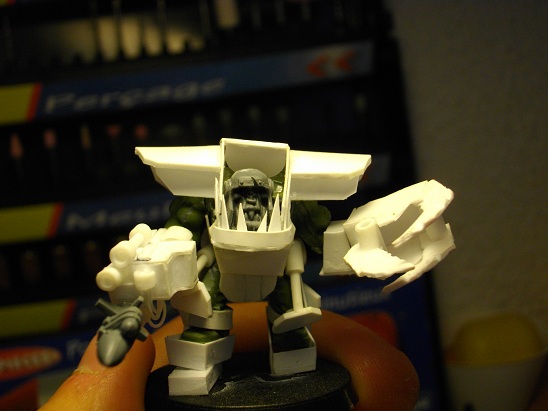
To conclude, here is a picture of a finished meganob, with battle damage:
final picture
You will notice the addition of a plate on the top of the arm as well as some hydraulic cylinders going from the shoulderguard to the arm (really useful all over, those shoulderguards). They are additions that I made on each meganob, they take a while to make but add a real visual impact. I also added extra armor plates under the shouldesr to give more volume and hide the base of each cylinder (which were in fact glued directly to the arm... it's all about appearance). Still, the model is imposing, believable and that's our main goal! (Besides of course you liking the model.)
I hope this tutorial will be helpful, thanks in advance for all C&C, don't hesitate to ask me more information or show me what you built thanks to this file.


 3500
3500
 If you have a thread, link me