Forum adverts like this one are shown to any user who is not logged in. Join us by filling out a tiny 3 field form and you will get your own, free, dakka user account which gives a good range of benefits to you:
No adverts like this in the forums anymore.
Times and dates in your local timezone.
Full tracking of what you have read so you can skip to your first unread post, easily see what has changed since you last logged in, and easily see what is new at a glance.
Email notifications for threads you want to watch closely.
Being a part of the oldest wargaming community on the net.
If you are already a member then feel free to login now.
2019/01/25 06:59:25
Subject: What's on insaniak's workbench 2 - The Empire Reloaded the Future Next GenerationS (The Sequel)
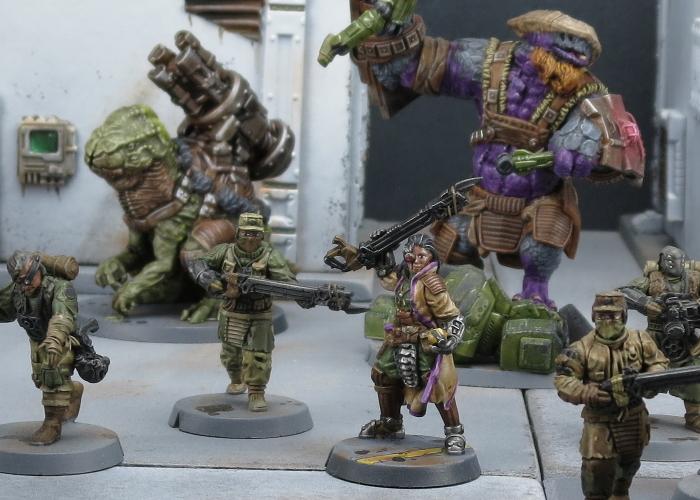
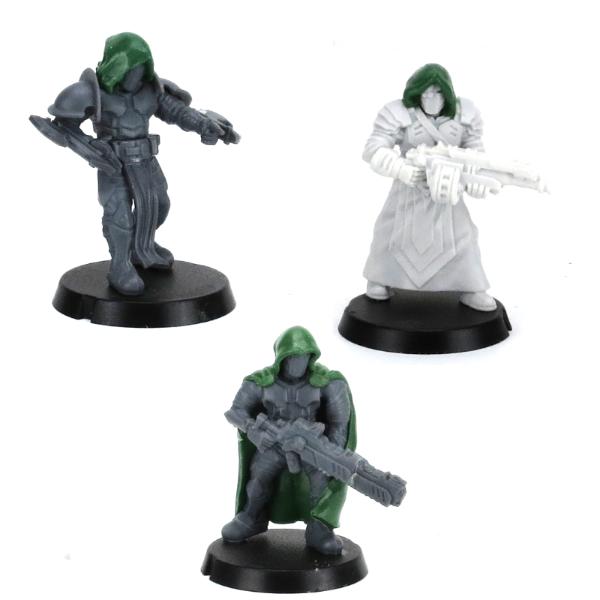
Slight break from other projects to whip up this week's modeling article for the Comm Guild - a quick and easy sculpting tutorial for making your cultists even more culty!
mcmattila wrote: The landing pad just keeps on getting better and better! Can't wait to see it finished.
Me too!
Btw, where do you get that grating that you use on the walkways?
The stuff I used here was found on Ali Express, but it's horrible - really hard and springy aluminium, and had a massive curve in it which I had to try to flatten out before I could use it. These guys were recommended by someone elsewhere, but I haven't tried them out yet: http://modelshop.co.uk/Shop/Raw-Materials/Mesh?orderby=1&top=120
2019/02/04 08:07:03
Subject: Re:What's on insaniak's workbench 2 - The Empire Reloaded the Future Next GenerationS (The Sequel)
Time to check back in on my landing pad display board build! (If you missed part one, you can find it here)
In the first instalment, I ran through the construction of the 'back' side of the display, so this time around I'm working on the landing pad area.
When I cut the foamed PVC for the floor, I left out a curved area that would form the main section of the actual landing pad itself. To fill this in, I cut a piece of 2mm thick cardboard.
On the top surface of the card, I painted a layer of superglue, and then laid a piece of fibreglass flyscreen flat over the card. Once the glue set, I trimmed the screen around the edges.
I wanted a section of the pad to have visible pipes under the mesh, and had cut a cavity into the cardboard for this purpose. Painting this with everything glued in place would be problematic, so I cut the screen neatly down one edge of the cavity so that it can be lifted up out of the way to paint the pipes. The pipes were made from sections of an assortment of plastic rods. Once the pipes and the rest of the pad are painted, I'll glue the screen back down and add a little trim over the top to disguise the joint.
As detailed last week, I built up the walls using foamed PVC. I left a recess around the top of the landing pad wall, along with the pad's retractable roof would slide.
I added support struts from the Maelstrom's Edge terrain sprue along the top and bottom of the walls, with an extra row of reinforcing
As I had pipes running into the wall from the back side of the board, I needed something on the pad side to match up to them. The first became a heat vent, using a trimmed down large pipe fitting from the terrain sprue and a pipe end from a 13mm drip irrigation setup. I shortened the pipe fitting by cutting across it with a razor saw.
For the second large pipe, I built a fuel storage tank using another drip irrigation piece, a piece of plastic packaging that I think came from a laser printer component, and a clear plastic cap - I don't recall exactly where this piece came from, but I think it was some piece of toddler-feeding paraphernalia. I added some connection ports to the front using the small pipe fitting from the terrain sprue and some plasticard.
For the smaller pipe, I ran a matching piece of pipe cut from the side of the terrain sprue, and fed this into an air conditioning unit built from foamed PVC and an assortment of gubbinz from the terrain sprue.
To the left of the pipe I had added a square hatch, just for a little detail, with the intention of this turning into a conveyor feeding into the pad area from elsewhere. For the conveyor belt, I glued in a bunch of plastic tubes to create rollers.
I broke up the vast expanse of flyscreen on the pad with a couple of strips of plasticard, and added a curved strip around the edges to conceal the join between the screen section and the solid floor.
The rectangle cut into the pad floor was intended to turn into a cargo lift. I built the lift platform using a piece of PVC, some support struts from the terrain sprue and a piece of chequer plate plasticard.
To allow for some variation in the display, I wanted to be able to reposition the lift. To this end, I built a hydraulic lift to go under the middle of the platform using some pieces of plastic tube and a couple of pipe fittings. Thanks to the magic of magnets, this all slots together when needed. Alternatively it can be left out, allowing the lift to sit on the floor.
Ships need to recharge as well as refuel. I built a charging port using a shutter window with most of the shutters cut out. Into the resultant opening, I glued a piece of plasticard and some assorted bits and pieces. The charging cable was made from a couple of pieces of plastic tube and the chain from a fob watch I had sitting in my bits box.
At the other end of the board, I wanted some stairs and decking platforms to create some vertical detail. I cut the shape of the platforms out of 1mm plasticard, and glued on some aluminium mesh cut to the same size.
On the bottom of the mesh, I glued matching pieces of plasticard, and then added some diagonal supports using I-beam plastic rod.
The supports for the platforms we made from foamed PVC, doubled-up to give it some extra thickness.
With the legs in place, I added some extra supports for staircases, cut from more PVC. I used strips of textured plasticard for the stair treads. For the moment, I left the platforms and the treads on the lower staircase unglued, to make it a little easier to paint underneath them.
I added some more support struts around the edges of the platforms and on the ends of the legs. I also glued on some posts for handrails, cut from the energy fence piece on the terrain sprue.
Some final small details:
- I added a spray gun (for vermin control) onto the wall using a chemtech sprayer from the Epirian Scarecrow kit with a pistol grip from a Guardian pistol added. For the mounting clips, I used a couple of leftover sections from the energy fence posts.
- I pillaged a clingfire sprayer and a leg from the Scarecrow kit, and a trimmed down Spider Drone head to create a security remote.
- And I made a billboard screen using sections cut from a garage door.
And with that, assembly is more or less complete!
The handrails are just a placeholder for the moment - I'm planning on using 1.6mm aluminium rods for these, so that they can be bent to shape to go down the stairs, but these won't be glued in until the platforms are painted.
Stay tuned for part three, where we get some paint on this little construction!
You can pick them up the Maelstrom's Edge terrain sprue, along with the rest of the Maelstrom's Edge model range from the webstore here.
As always, feel free to pop along and share your work, or ask any Maelstrom's Edge- or hobby-related questions on the Comm Guild Facebook page!
For other Maelstrom's Edge modeling articles, including tutorials and walkthroughs of a wide range of different building and miniature projects, check out the article roundup here.
2019/02/05 00:32:46
Subject: Re:What's on insaniak's workbench 2 - The Empire Reloaded the Future Next GenerationS (The Sequel)
Gamgee on Tau Players wrote:we all kill cats and sell our own families to the devil and eat live puppies.
Kanluwen wrote: This is, emphatically, why I will continue suggesting nuking Guard and starting over again. It's a legacy army that needs to be rebooted with a new focal point.
Confirmation of why no-one should listen to Kanluwen when it comes to the IG - he doesn't want the IG, he want's Kan's New Model Army...
tneva82 wrote: You aren't even trying ty pretend for honest arqument. Open bad faith trolling.
- No reason to keep this here, unless people want to use it for something...
2019/02/11 02:47:01
Subject: Re:What's on insaniak's workbench 2 - The Empire Reloaded the Future Next GenerationS (The Sequel)
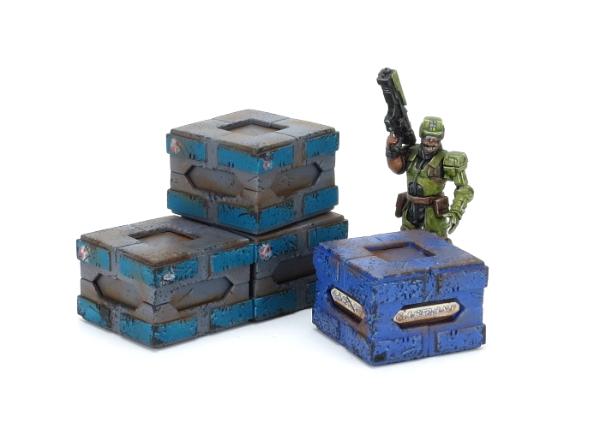
When you're waiting for that parcel, and then four come all at once... Some WIP shipping crates. Because every board needs some random stuff to hide behind.
The Maelstrom's Edge terrain sprue includes a nifty corner bracing piece, which would normally be used on the roof corners of flat-roof buildings to pretty them up a little. Because a lot of my buildings have angled buttresses or ballustraded roofs, I collect a lot of spares of this part. Looking for something easy and effective to do with them, I hit on the idea of turning them into shipping crates!
To replicate these, for each crate you will need some 1mm thick plasticard or cardboard - two pieces 21mm square, two pieces 21mm x 12mm, and two pieces 19mm by 12mm, and you will also need eight corner braces.
Start by placing the corner braces flat side down, and gluing them together in sets of four along the flat edges, as below:
Glue your large squares into the two resultant boxwork shapes. If you're using plasticard, you can use polystyrene cement for this. Use superglue if you have gone with cardboard.
Next, take the 21mm long strips, and glue them along the inside of one of the boxes, along opposite sides. It doesn't matter which two sides you go with, so long as they are opposite each other.
The 19mm strips should then fit neatly in on the other two sides. It's a good idea to check them for fit, and trim up if necessary before gluing them in. If you wind up with the corners of the strips not all meeting up exactly, it's not a problem, as they'll be hidden by the boxwork when you put the other side on.
Speaking of the other side, you can now glue this on by sliding it on over the strips, until it butts up neatly against the first side.
And that's it. They're really easy to put together, so (assuming you have enough corner braces knocking around) you can quickly assemble a few of them to stack up and scatter around the table for a bit of low cover.
They're fairly light, so while they sit neatly on top of each other, you may find it beneficial to glue the stacks together so that they don't get knocked awry mid-game. This also gives you less surface to paint, since you won't need to paint the faces that are touching other crates!
Keen to give it a go? You can pick up the Maelstrom's Edge terrain sprue, along with the rest of the Maelstrom's Edge model range from the webstore here.
As always, feel free to pop along and share your work, or ask any Maelstrom's Edge- or hobby-related questions on the Comm Guild Facebook page!
For other Maelstrom's Edge modeling articles, including tutorials and walkthroughs of a wide range of different building and miniature projects, check out the article roundup here.
2019/02/14 02:47:57
Subject: Re:What's on insaniak's workbench 2 - The Empire Reloaded the Future Next GenerationS (The Sequel)
The Maelstrom's Edge terrain sprue includes a nifty corner bracing piece, which would normally be used on the roof corners of flat-roof buildings to pretty them up a little. Because a lot of my buildings have angled buttresses or ballustraded roofs, I collect a lot of spares of this part. Looking for something easy and effective to do with them, I hit on the idea of turning them into shipping crates!
To replicate these, for each crate you will need some 1mm thick plasticard or cardboard - two pieces 21mm square, two pieces 21mm x 12mm, and two pieces 19mm by 12mm, and you will also need eight corner braces.
Start by placing the corner braces flat side down, and gluing them together in sets of four along the flat edges, as below:
Glue your large squares into the two resultant boxwork shapes. If you're using plasticard, you can use polystyrene cement for this. Use superglue if you have gone with cardboard.
Next, take the 21mm long strips, and glue them along the inside of one of the boxes, along opposite sides. It doesn't matter which two sides you go with, so long as they are opposite each other.
The 19mm strips should then fit neatly in on the other two sides. It's a good idea to check them for fit, and trim up if necessary before gluing them in. If you wind up with the corners of the strips not all meeting up exactly, it's not a problem, as they'll be hidden by the boxwork when you put the other side on.
Speaking of the other side, you can now glue this on by sliding it on over the strips, until it butts up neatly against the first side.
And that's it. They're really easy to put together, so (assuming you have enough corner braces knocking around) you can quickly assemble a few of them to stack up and scatter around the table for a bit of low cover.
They're fairly light, so while they sit neatly on top of each other, you may find it beneficial to glue the stacks together so that they don't get knocked awry mid-game. This also gives you less surface to paint, since you won't need to paint the faces that are touching other crates!
Keen to give it a go? You can pick up the Maelstrom's Edge terrain sprue, along with the rest of the Maelstrom's Edge model range from the webstore here.
As always, feel free to pop along and share your work, or ask any Maelstrom's Edge- or hobby-related questions on the Comm Guild Facebook page!
For other Maelstrom's Edge modeling articles, including tutorials and walkthroughs of a wide range of different building and miniature projects, check out the article roundup here.
You should print Kickstarter logos to put on those, maybe some of the old delayed ones will ship by that time in the ME timeline
LOL, Theo your mind is an amazing place, never change.-camkierhi 9/19/13
I cant believe theo is right.. damn. -comradepanda 9/26/13
None of the strange ideas we had about you involved your sexual orientation..........-Monkeytroll 12/10/13
I'd put you on ignore for that comment, if I could...Alpharius 2/11/14
2019/02/14 09:48:38
Subject: What's on insaniak's workbench 2 - The Empire Reloaded the Future Next GenerationS (The Sequel)
Thanks! Turns out I had to go back and modify the base, as the top wasn't flat enough for the dress to sit right. So now I need to repaint the top of it :(


 Cadre Coronal Afterglow w1;d0;l0