Switch Theme:

[Campaigns] Terrax 4 Campaign  [RSS] Share on facebook Share on Twitter Submit to Reddit
»
Author Message
Advert


Forum adverts like this one are shown to any user who is not logged in. Join us by filling out a tiny 3 field form and you will get your own, free, dakka user account which gives a good range of benefits to you:
  • No adverts like this in the forums anymore.
  • Times and dates in your local timezone.
  • Full tracking of what you have read so you can skip to your first unread post, easily see what has changed since you last logged in, and easily see what is new at a glance.
  • Email notifications for threads you want to watch closely.
  • Being a part of the oldest wargaming community on the net.
If you are already a member then feel free to login now.


Made in ca
Regular Dakkanaut


I’ve decided to implement a narrative campaign that I can run in the background of my 40k games. The campaign features an Ork invasion of an imperial world. The idea is that whenever I fight a battle where the Orks are fighting against any Imperial army I can use the outcome of the battle to drive the results and the narrative of the campaign.

Here is the map used for the campaign:


The campaign is very simple. Each unit on the map represents an army. Each turn each army has 6 movement points to spend. Each hex has a cost to move into it. (Road=1, Clear=2, Forest/Swamp/City=3, Rivers=+1). Each side takes turns moving their armies on the map and when two armies meet a battle is fought to determine the results. Depending on the outcome of the battle an army can be held in place, driven off or destroyed. New armies are added to map as reinforcements are brought in.


Automatically Appended Next Post:
Terrax is an Imperial Agri world nestled in the far reaches of the Ultima Segmentum, near the Hexos system. A relatively new colony, the planet has not yet advanced into a fully developed state. Several cities and settlements dot the surface each surrounded by farms and wilderness. The capitol city is Centor. Here the majority of administrative and logistical functions are tended to. The fledgling Imperial garrison is supplemented by units from the 51st Grayden Star Guard.

The great Ork space hulk had drifted for years. A victim of a long since forgotten space battle, the hulk had escaped destruction but remained crippled. Even the low cunning and Orky know what’s of the meks couldn’t restore her drive systems. As the hulk drifted on, the Orks waited for their opportunity. Since the hulk was drifting in a low power state Imperial sensors systems failed to detect her arrival in the Terrax system. The Orks moment had finally come. As the hulk neared the 4th planet every generator and battery was powered up to maximum level and at the precise time the entire Ork army was telly-ported instantly to the surface of the planet. The empty hulk, her last power reserves drained and her relays burned out drifted aimlessly out of the system.

There was no warning. The Orks appeared in and around the small community of Grayton. Panic and mayhem had ensued. The small defence force was immediately overrun and the town was captured in a single day. The Orks moved quickly to subjugate the stunned population. Mek shops and squig farms were quickly established and the Orks moved swiftly into the surrounding countryside.

The planetary defence garrison began to mobilize units in response to the Ork threat but it would be some time before they could come on line. Fortunately for the people of Terrax 4 more substantial help was near at hand.

Elements of the Nova Dragons Space Marine Chapter were conducting military exercises nearby and several formations quickly responded to the planet. Inserted by drop ships two separate forces were landed. One just on the outskirts of Centor began to prepare the defences of the capital. The other Space Marine force landed at the small community of Thorton. Thorton was strategically important because it straddled the main road between the Ork advance and the capital. If the Orks could be held up or stopped at Thorton then it would give the Imperial defenders time to gather their strength.

The Nova Dragon Marines grimly set about there task to defend Thorton. The main bridge in the center of the settlement was manned and Marines waited for the Orks to arrive. Huge clouds of dust and the roaring of vehicles heralded the arrival of the Orks and the Marines prepared to engage the enemy…

Campaign Start:


Automatically Appended Next Post:
Campaign Turn 1:

The Imperial garrison from Dysart embarks onboard a vast grav train and travels south west to join up with the main defences. The garrison in Centor and Freeport dig in and prepare defences. The Space Marines drop one army in front of Centor and another in the small town of Thorton.

While an Ork army remains behind to garrison the newly conquered Grayton the rest of the Orks quickly spread out. Two armies venture north into the swamps heading for Dysart. One Ork army veers south around the vast forest headed in an attempt to outflank Freeport. The main Ork advance consisting of three armies plus one flanking army advances towards Centor. The small settlement of Grayton lies in their path and as the lead elements move into the town they encounter the stiff defence of Nova Dragons Space Marines and battle ensues.

The Orks outnumber the Imperials by more than 4 to 1. If the Nova Dragons can buy enough time for the Imperial defences to be brought on line then Terrax 4 may yet survive.

This message was edited 2 times. Last update was at 2010/12/20 02:34:48


Made in ca
Regular Dakkanaut


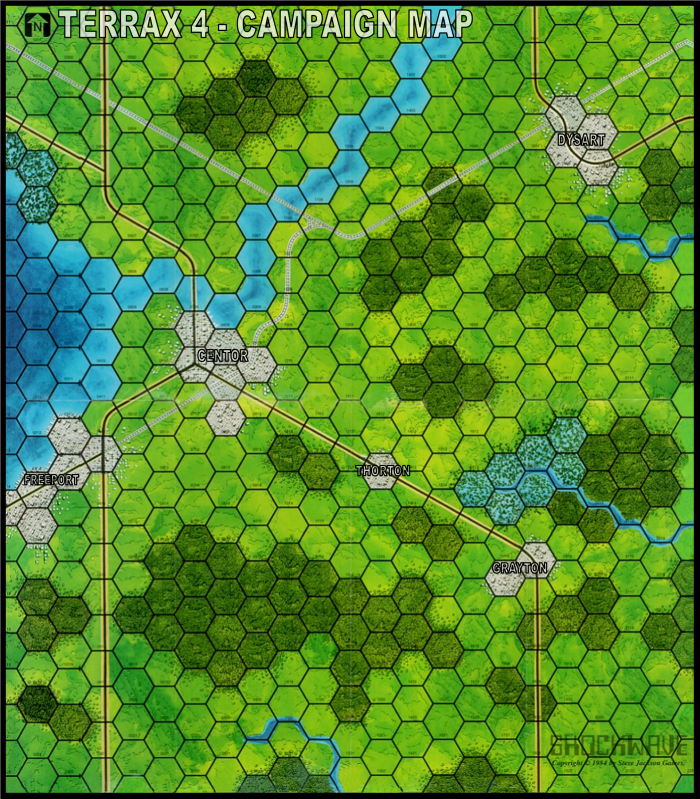
THE BATTLE FOR THE BRIDGE

Location: Thorton
Forces: Orks (Far_Traveller) vs Space Marines (holden88)
Mission: All Around Defence (from the Battle Missions book)
Points: 1750

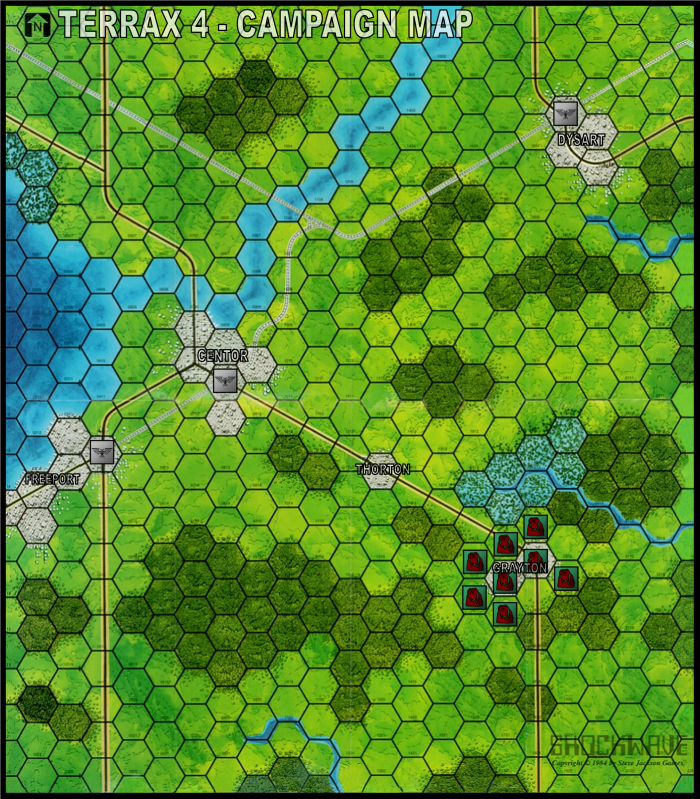
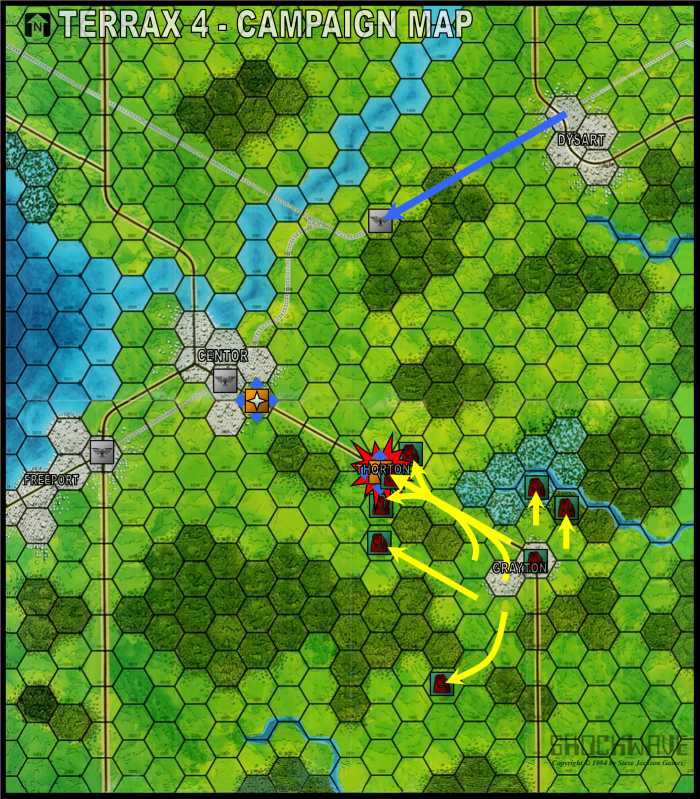
This would be a desperate defence to try and stop the Orks from gaining possession of a vital bridge in the small settlement of Thorton.

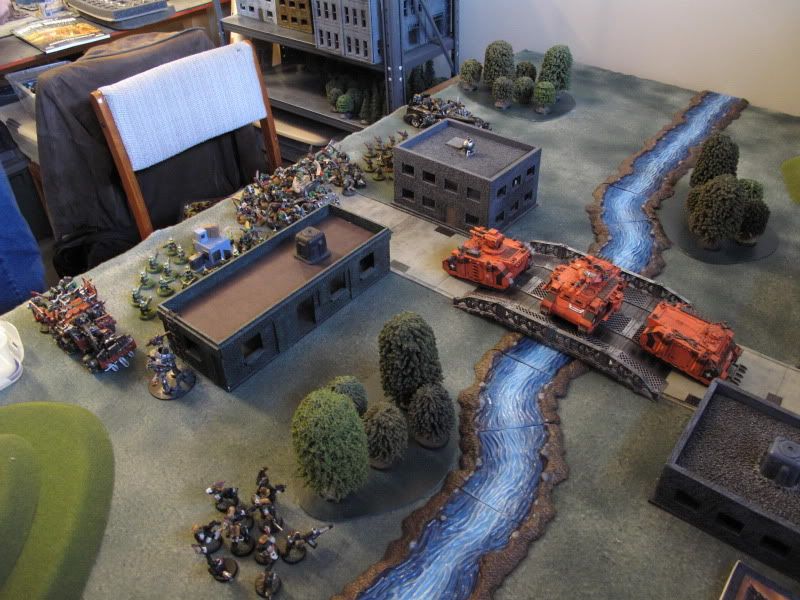
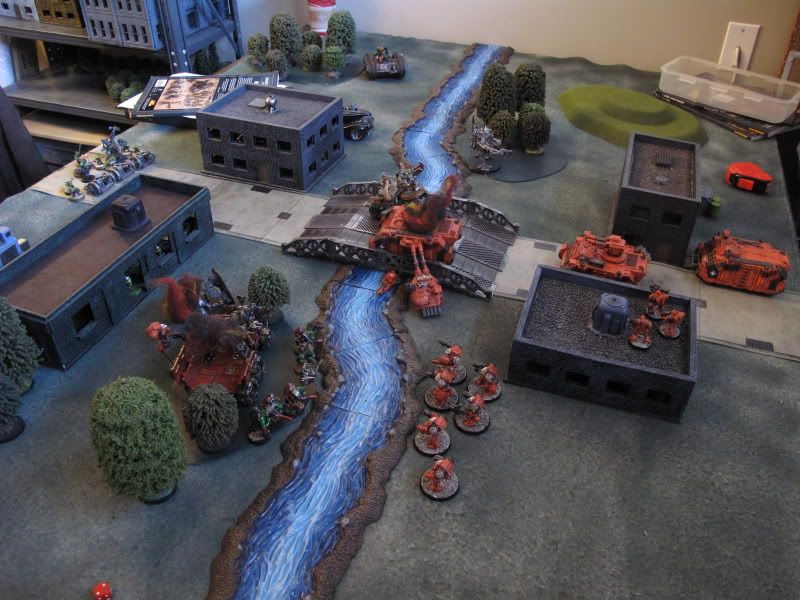
Here is the board set-up:


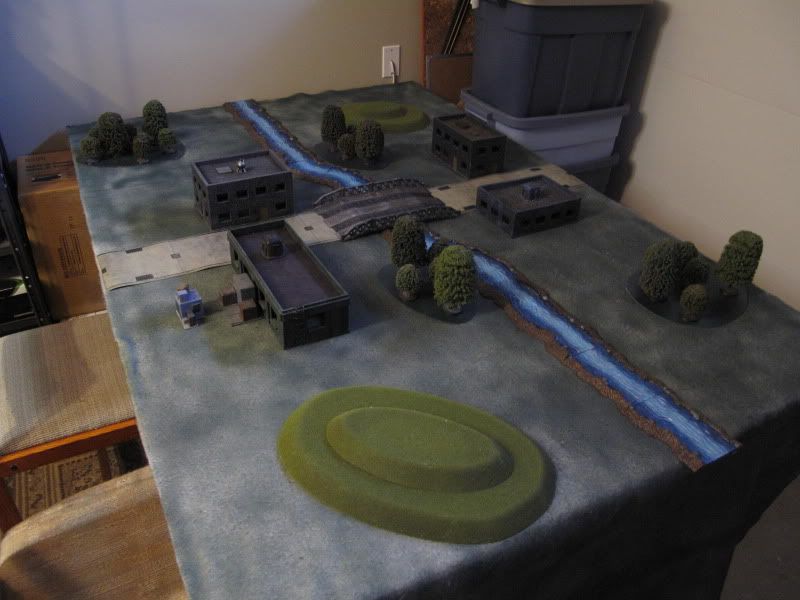
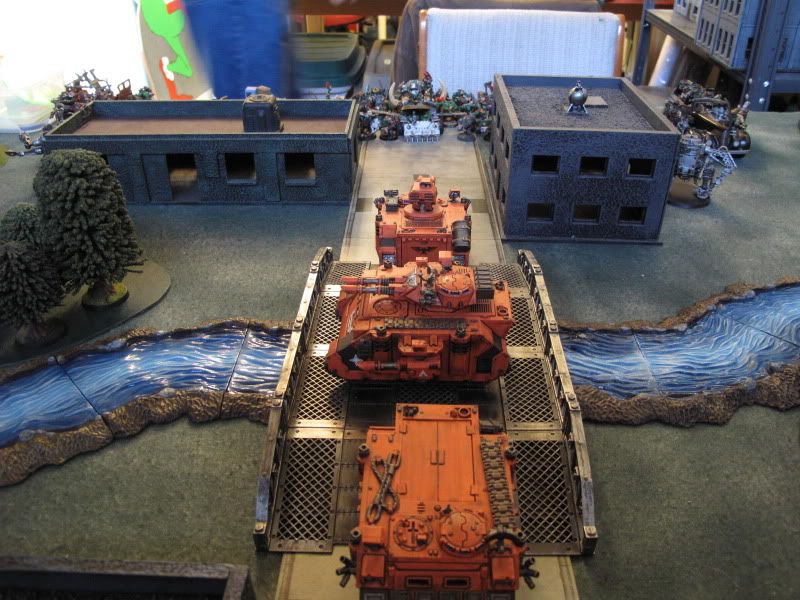
The marines deploy their armoured forces on the bridge including a Razorback (5 man squad and Force Commander inside), a Predator and a Rhino (10 man squad inside).

Starting from the Marines right flank the Orks deploy a unit of trukk boyz, a 30 man squad of Gretchin, a 30 man boyz mob, 6 Mega Armoured Nobz in a trukk, another 30 man squad of Gretchin, a Deff Dread, a unit of Burna’s in a trukk and finally a mob of infilitrating Kommando’s on the extreme left. The Orks are forced by the mission to leave their HQ and Heavy Support in reserve.


Right from the start the Orks threaten to overwealm the defenders with sheer numbers.

TURN 1
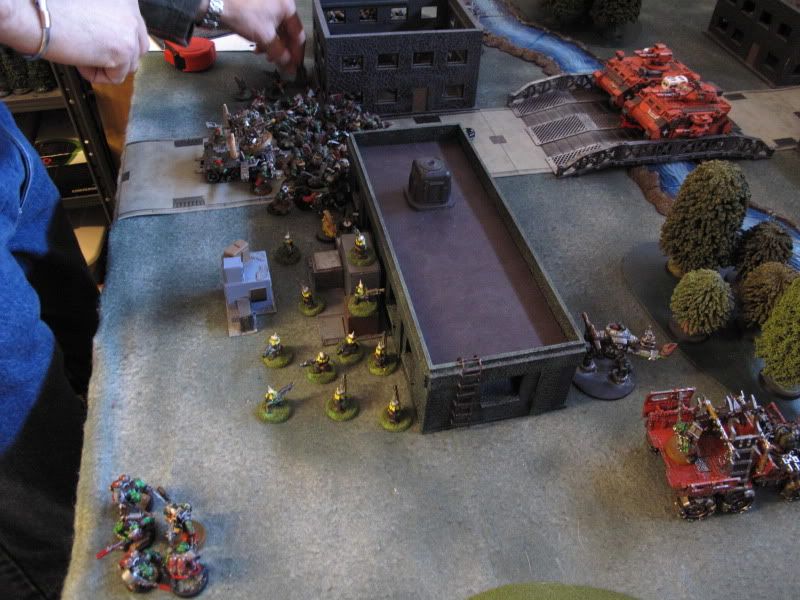
The Space Marines begin by moving the Rhino over to the left flank. The Tactical Squad inside disembarks and prepares to unload on the Kommando’s. The Razorback pulls back to the center of the bridge. The Tactical Squad peppers the Kommando’s with bolter fire and they lose half of their number. The surviving Kommando’s break and flee towards the left flank. The Predator blasts the Mega-Nob trukk with several Lascannon hits and destroys the trukk forcing the Nobs to walk. The Razorback shoots at a nearby Dread but fails to cause harm.

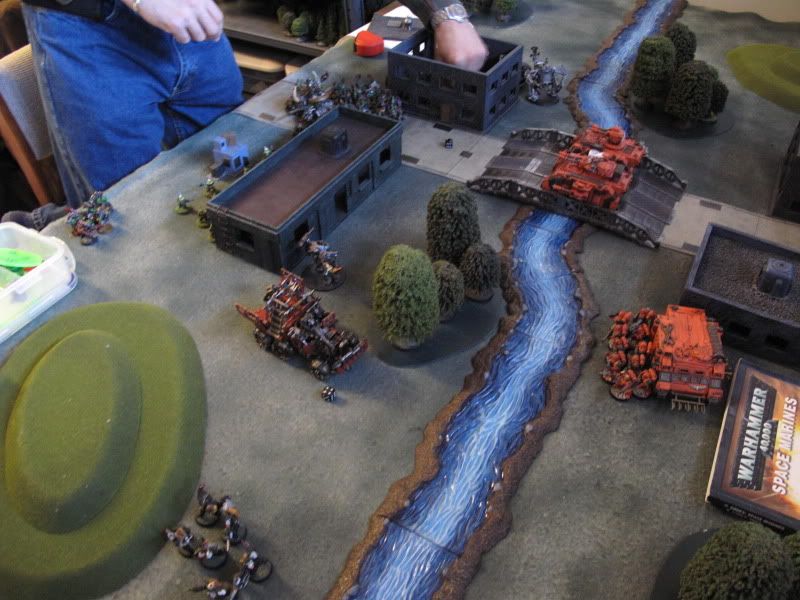
The Ork Kommando’s regroup while the rest of the army advances. The two Gretchin squads move into the buildings that flank each side of the bridge. The Dreads, Burna’s, Trukk Boyz and 30 man Boyz mob all advance towards the bridge. The Ork shooting is minimal but the Predator is shaken.


TURN 2
The Marines roll for their reserve arrivals and the deep striking Vanguard Veteran arrive. The Vanguard boldly attempt to deep strike right in front of the bridge and they arrive bang on target. The Tactical Marines, Razorback, and Rhino all re-deploy towards the rear in an effort to trade space for more time to shoot at the advancing Orks. The Razorback manages to destroy the Deff Dread on the left flank. In the assault phase the Vanguard Veterans charge the 30 Ork boyz squad and manage to wipe out over half of them. They do lose a few marines for their trouble though. The remaining Orks refuse to flee however.

The Orks roll for reserves and the Looted Wagon, the Kannon artillery battery and the Big Mek with shokk attack gun all arrive. The Gretchin consolidate their position in the buildings they area in while the Burna’s, Kommando’s, Dread and Mega-Nobz all advance. The Big Mek moves up to join the safety of a Gretching mob. The Ork shooting manages to kill a few Marines off of the Tactical Squad. In the assault phase the Vanguard Vets wipe out the remaining Orks while surviving with only half of their original number. They consolidate towards the Burna Boyz on the left.


TURN 3
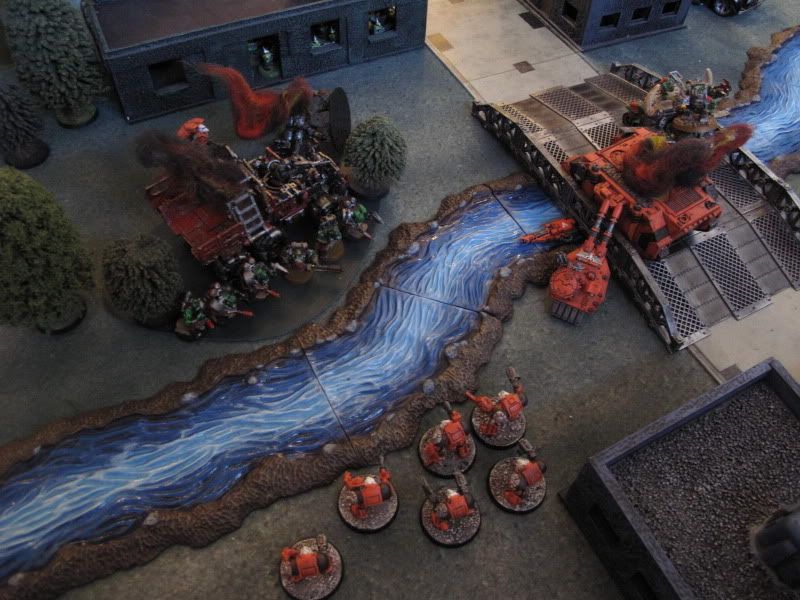
The Space Marine Terminators arrive and deep strike on the marine side of the river on the left side of the bridge. The Tactical Marines reposition themselves inside the building they are in. The Terminators fire at the Burna Boyz Trukk and destroy it. The Razorback manages to stun the Deff Dread. In the assault phase the Vanguard Veterans assault the Kommando’s and only the Nob survives. The Nob refuses to flee and they remain locked in combat.

The Burna Boyz move up in order to flame baste the Terminators. The Mega Nobz advance down the main road towards the bridge. The Looted Wagon repositions while the Ork Trukk Boyz lie back in wait. The Deff Dread crosses the river in an attempt to outflank the Marine position. The Kannon Krew moves their guns up. The shokk attack gun, Looted Wagon and Burna Boyz manage to kill a few Terminators. And the Predator is finally destroyed by Ork rokkit fire (after being shaken every turn so far). In the assault phase the Kommando Nob manages to avoid being killed while crushing another Vanguard. Once again they remain locked in combat.


TURN 4
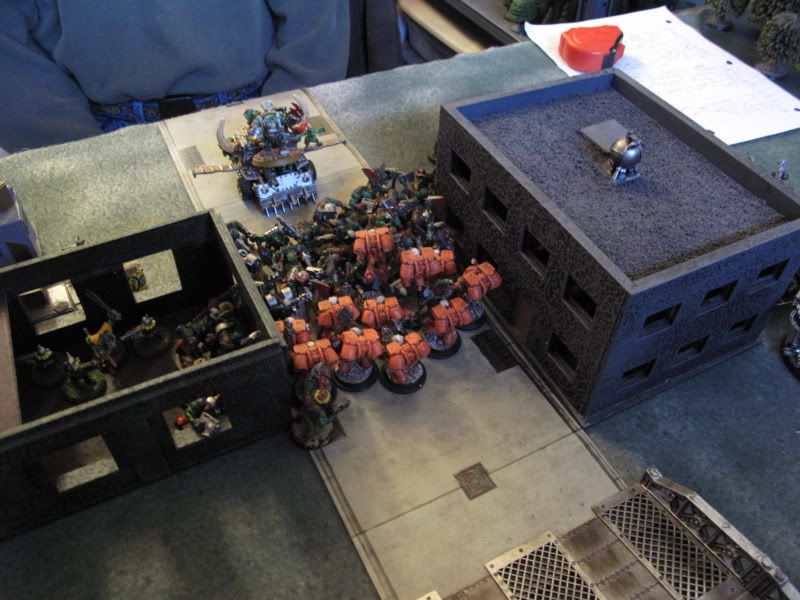
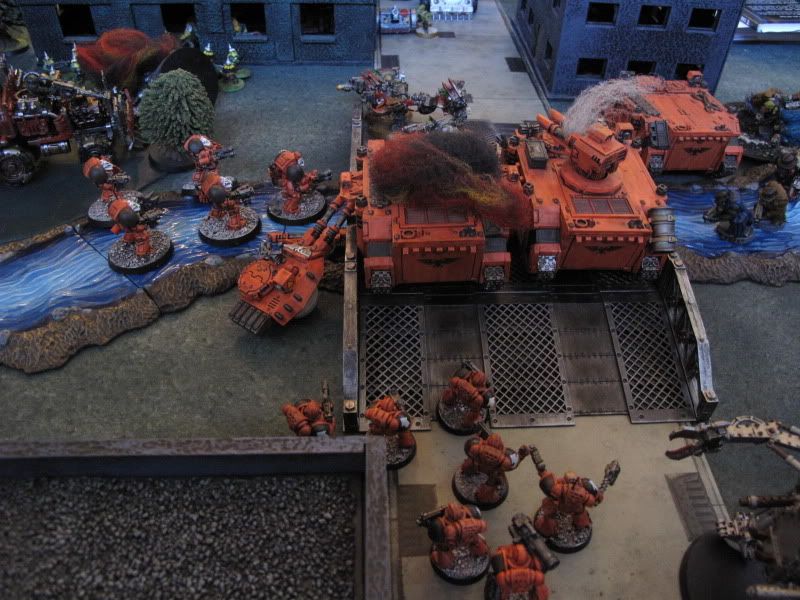
The Terminators advance across the river and prepare to unleash hell on the Burna Boyz. The Tactical Squad moves up and prepares to storm the bridge (and thus control it for scoring purposes) next turn. The Space Marine Commander decides that his time has come and his Razorback moves across the bridge and he and his squad disembark in front of the Mega-Nobz. The Terminators roast the Burna Boyz and kill them all. The Tactical Squad fires a krak missile at the last remaining Ork trukk and manages to destroy it. The Commander and his Combat Squad kill a single Mega Nob (while wounding a few others). In the assault phase the Vanguard Veterans finally take down the Kommando Nob but only one Veteran remains.

The Orks on the right flank moves towards the bridge while the Deff Dread continues its round about route into the Space Marine rear. The Gretchin on the left flank move up and prepare to blast the last remaining Vanguard Veteran. In the shooting phase the Veteran predictably falls to the fusillade of grot balsta’s. The Terminators are subjected to shock attack gun and boom gun fire again but their armour is proof against the Ork weapons. The Mega-Nobs assault the Combat Squad and the Space Marine Commander and in the end the Marines are all killed. The Mega-Nobz lose two more models however.

TURN 5
The Marines still have a desperate chance to win. If they can drive away the Mega Nobz, prevent the Ork Boyz from reaching the bridge and get their own depleted Tactical Squad onto the bridge they can still win. The Terminators move up into a position where they can attack the Mega Nobz. The Rhino rushes ahead and attempts to block the advance of the Ork Boyz. The Tactical Marines begin to move out of their building and onto the bridge. In the shooting phase the Terminators fire on the Mega Nobz and kill cause some wounding hits (which is readily absorbed by the tough unit).

The Orks prepare their final assault. The Ork Boyz try to move around the Space Marine Rhino but get held up in the river. The Deff Dread moves over in order to cut off the Tactical Marines. In the shooting phase the shock attack gun, the Mega Nobz, the Gretchin and the the looted wagon all fire on the Terminators and kill the last remaining marines. The Deff Dread fires at the Tactical Marines and kills a few of them then during the assault phase the Dread charges them and kills the remaining marines.


At this point the game ended. The Space Marine army now consists of a single Rhino while the Orks have several units left (including three scoring units). However since no unit from either army is within 3” of the bridge objective point...

GAME RESULT - DRAW
   
Made in us
Battlefield Tourist


MN (Currently in WY)

This is good stuff. I hope you have a ton of fun with this!

How do you "bring on Reinforcements"? Also, since the Marines were pretty much tabled, is that army "removed" from the map?

Support Blood and Spectacles Publishing:
https://www.patreon.com/Bloodandspectaclespublishing 
   
Made in ca
Regular Dakkanaut


We bring on reinforcement armies whenever we feel like it is the approriate time and place. We are running this as a co-operative narrative campaign. Since we both have Imperial and Ork armies either one of us could be playing either side at any time. We basically agree on where and when to introduce reinforcements. The Imperial Guard armies tend to arrive from off map and move towards the fighting. The Space Marine armies get dropped in where they will do the most good. Finally the Orks just spawn armies from their captured towns from time to time.

And yes, generally if an army gets tabled or otherwise severely beaten then that flag will most likely be removed. In this case however we didn't remove the Marine flag because we wanted to stage more fighting in and around Thorton. Specifically we wanted to see if a depleted and cut off small Marine force could break through the Orks and return to friendly lines (battle reports coming).
   
Made in gb
Willing Inquisitorial Excruciator


England

Nice ideas, hope you'll continue this for sometime...
   
Made in us
Fighter Pilot


Appleton

Sounds real fun, and I like that the campaign is co-operative, as it'll help drive the story.


"Whatever happens, you will not be missed."


Guard Tank Company: 3k
PHR for DZC: 4k 
   
 
Forum Index » 40K General Discussion
Go to: