This is an updated version of Kutzmon's amazing case tutorial seen here. It's a great article and I will refer to it, so go read it!
http://www.dakkadakka.com/dakkaforum/posts/list/241220.page However, there's enough difference that I felt this version deserved it's own thread.
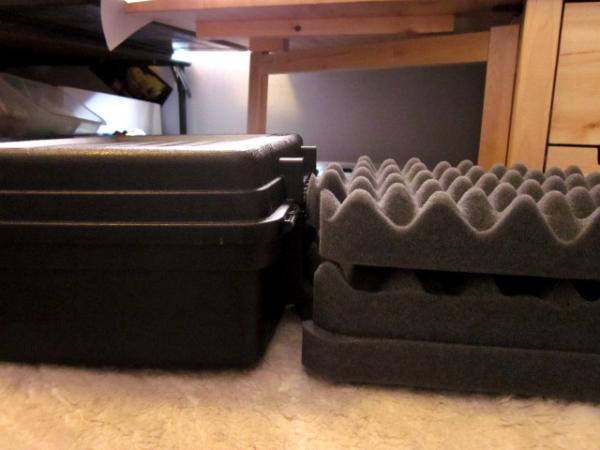
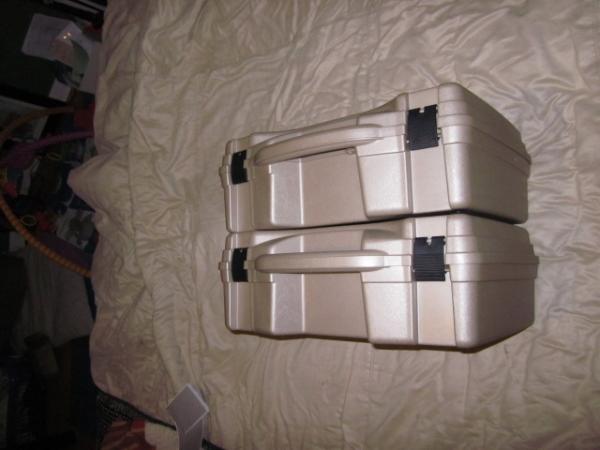
Both our articles use the Plano 1401. The largest difference in this case build is that I think I can take the Plano 1401 and turn it into a miniature storage and transportation solution without buying any additional figure foam! By eliminating either the cost of purchasing extra foam which usually costs more than the case itself, or having to hunt down bargain surplus options that not everyone will be able to find, this project comes much more within the reach of everyone who can acquire a case and get to a hardware store and a craft store.
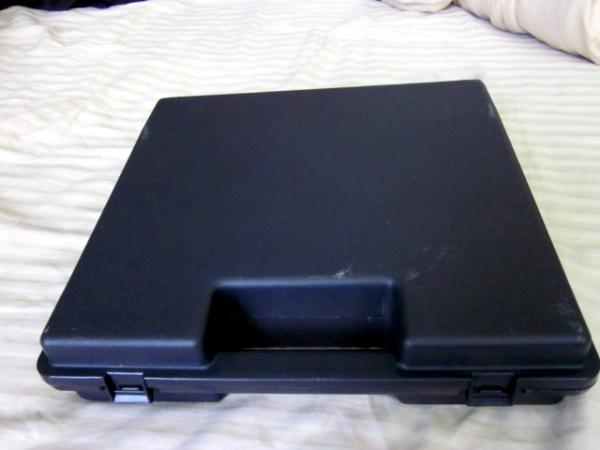
This project relies on the Plano 1404 case. The Plano 1404 is amazing in that it comes with 3 pieces of foam (two eggshell and one pluck and pull) that if purchased anywhere else would cost more than the case itself. It can be found from 10-20 dollars and depending where it is purchased, the sticker may call it any of the following:
Plano Protector series 4 pistol case
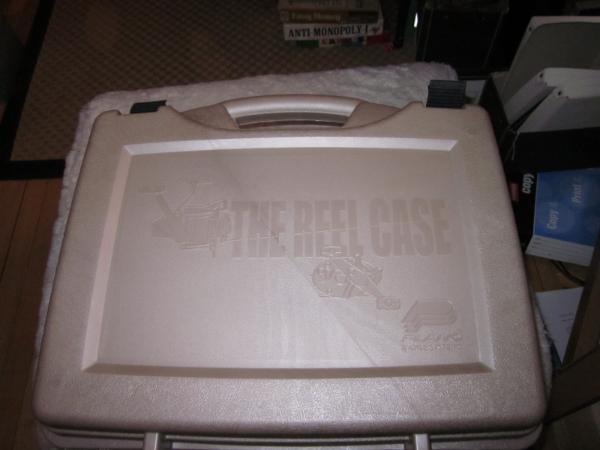
Plano Reel case
Plano XL Accessory case
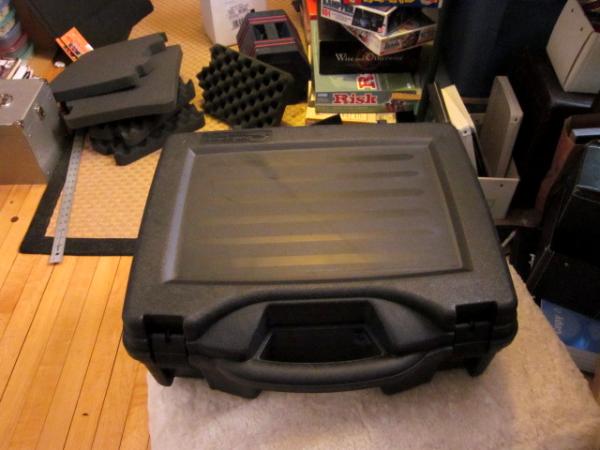
Regardless, they all seem to have the 1404 number (some times followed by a -02 or -05) on them and have the same foam inserts. I purchased mine for 15 dollars at Farm and Fleet.
http://www.farmandfleet.com/products/466298-protector_series_four_pistol_case.html?lref=%2foutdoor%2fhunting%2fstorage%2fgun%2f A google shopping search reveals some even cheaper.
The other supplies you will need to buy.
At the craft store:
Adhesive spray: 7 dollars
EDIT 5/7/2012: I no longer use Adhesive spray (it's weak) or Pliobond (it smells). I have switched to DAP Contact Cement (http://www.dap.com/product_details.aspx?product_id=35). See my post about it several posts down.
4 sheets of Funky foam: 99 cents each
At the Hardware store:
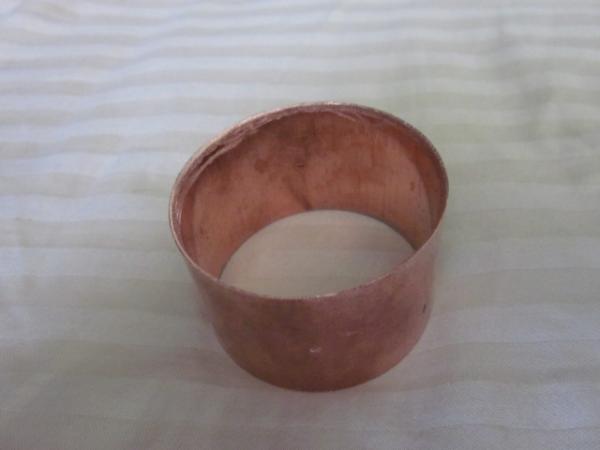
A 3/4" copper fitting and a 1" copper fitting : 1 dollar each
Tools you probably have but will need
-dremmel with grinding bit or Power drill with grinding bit for sharpening your copper fitting into a cutter Grinding bits are fairly inexpensive.
- Small slightly curved file for final sharpenign of the cutter
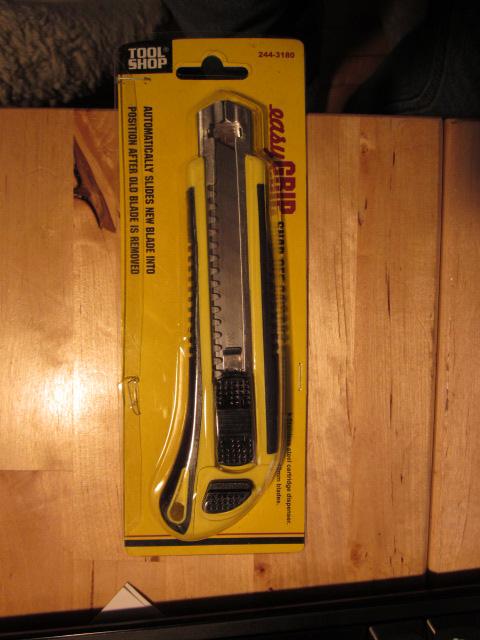
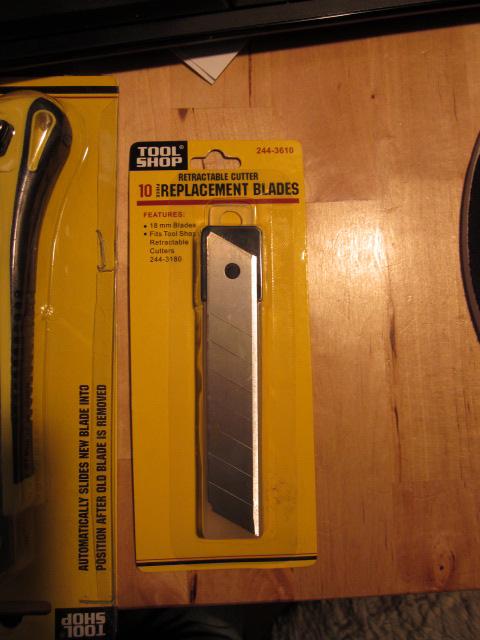
-Utility knife with lots of extra blades for foam cutting (I like the "break off blade" kind)
Addition 5/7/2012 If you have an electric carving knife, it will cut foam perfectly strait. For interior cuts, you will have to make a pilot how with a knife or foam cutter, but it slices though foam like butter and will make the sides of your trays very even!
Step one. Make your foam cutters.
I'm going to refer you to Kutmon's original thread for this one as there's nothing that I have to add to the process except the following:
-If you don't have a drum sander or a dremmel, but do have a power drill, you can get a griding bit for your drill.
-Kutzmon uses 1" and 1 1/2" fittings to cut into sold foam.
-Due the the fact that we are using eggshell foam for the trays which opens up a bit at the top, we can make smaller holes. Thus the smaller 3/4" and 1" fittings. You can use 1 ½ inch fittings to make holes for 40mm figs, but they don't evenly fit in between the rises in the eggshell foam.
-The sizes on the fittings do not exactly match the interior or exterior diameters of the fittings. Suffice to say that if you sharpen from the inside you will end up with cutters with the following dimensions:
3/4" fitting gives a hole 24mm in diameter which is just under 1” in diameter and snugly fits a 25mm standard slotta base.
1" fitting gives a hole 31mm in diameter which is approximately 1 1/4" in diameter and only 1mm larger than a privateer press 30mm base.
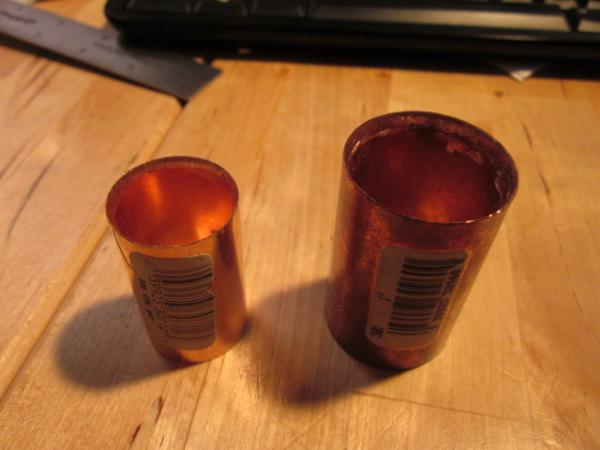
Hereafter, these will be referred to as the 24mm and 31mm cutters.
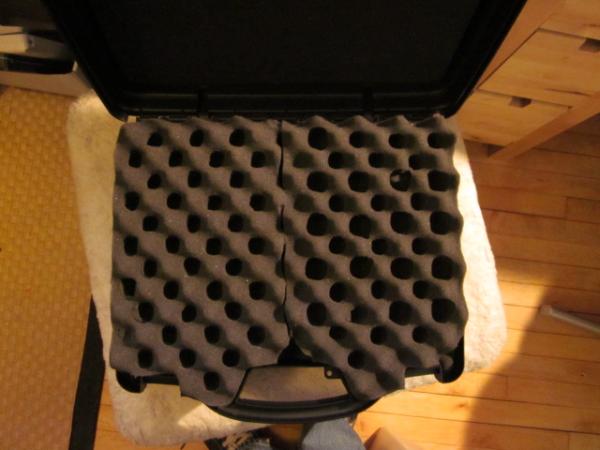
Step Two Tray division
Cut the trays in half. Don't just do one cut though. Measure out a strip ½ or ¼ wide down the middle and cut it out. This will give just a touch of space in between the foam sections which are very tightly fit to the case and become even more so when the stiff foam bottoms are applied.
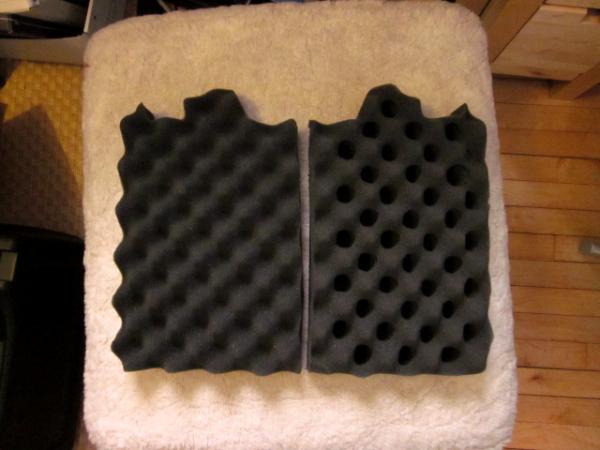
The smaller size will make for manageable trays, especially if you have alot of metal miniatures. I can't stress enough the necessity of cutting with a very sharp blade. If your blade has any resistance at all, get a new blade. Otherwise you will end up with very rough cuts. Foam dulls blades very quickly.
I'm using the knife shown below. It includes 3 extra blades and costs about 3 bucks. A pack of 10 replacement blades is less than 2 bucks! This project is about cheapness, but don't be cheap when it comes to replacing the blades. All right, enough about that...
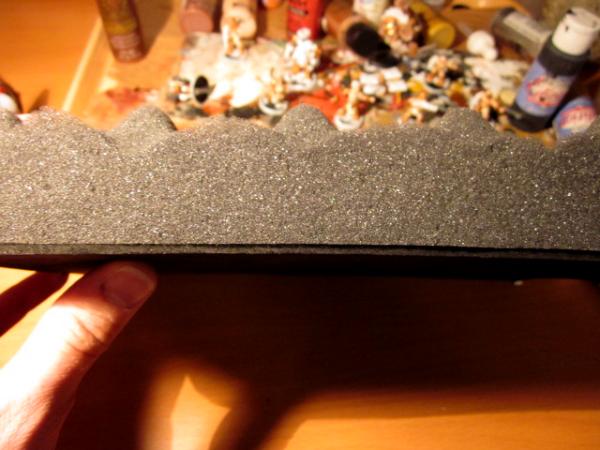
 Step 3 Make the figure cavities.
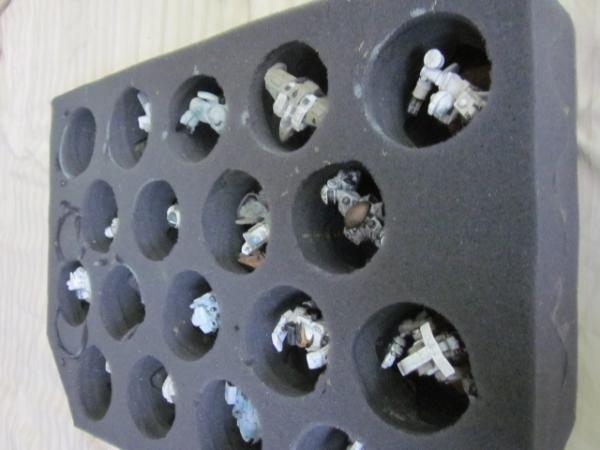
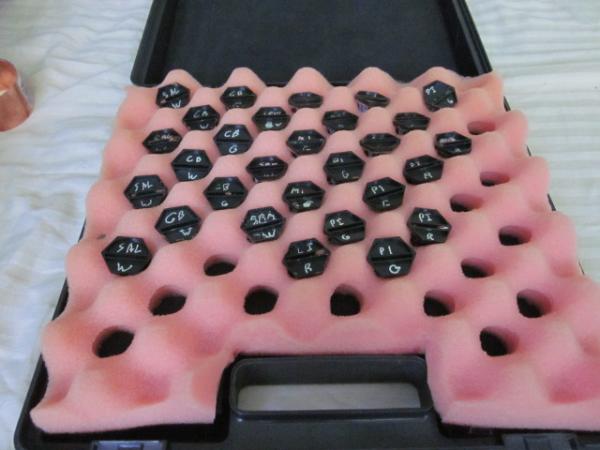
Use your foam cutters to cut out the indented sections of the eggshell foam tray. If you made them correctly, you just need to press gently and keep twisting to make the holes.
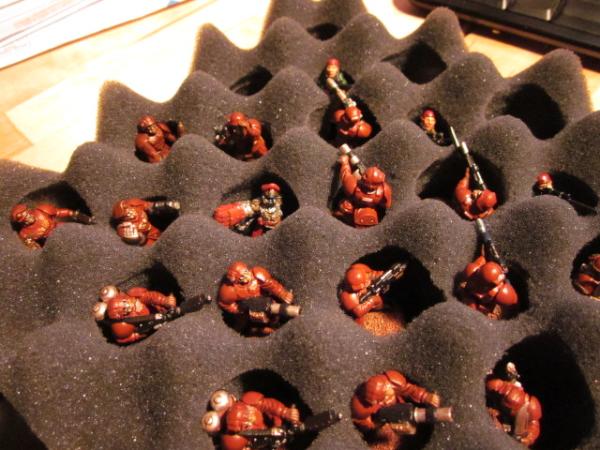
For the tray below I only used the 24mm cutter. The 24mm cutter may result in holes that are too small for larger models like terminators and such
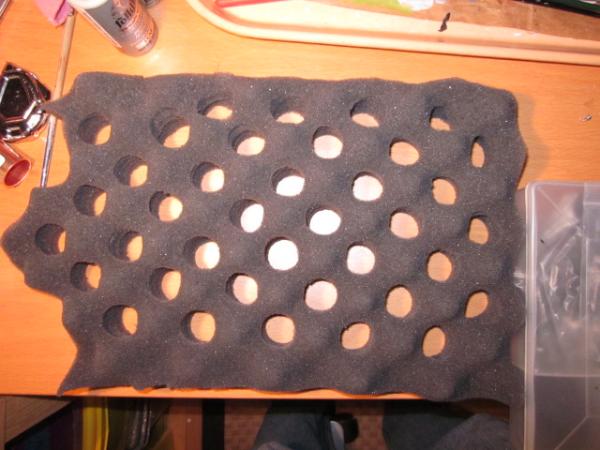
Using just the 31mm cutter may result in walls between cavities that are too small, so for the second tray, I used alternate rows of of 24mm and 31
mm with 24mm on the edges.
Use your own judgment about how close to the edge to cut. You will want to take a minute to sharpen your cutters a bit after every tray or every half a tray. Copper is a soft metal and foam dulls metal fast. Dull cutters will tear up the walls between the figure cavities.
After you've made the cavities, It's not a bad idea to trim off a bit of a corner or two to make it easier to lift the trays out.
 Step 4 Prepare the Funky foam Base.
Funky Foam is what Hobby Lobby calls thin sheets of EVA foam. It is the very dense foam that many miniatures tray companies put as the base of their trays. It may also be the same foam that some companies with more rigid trays make their entire trays from.
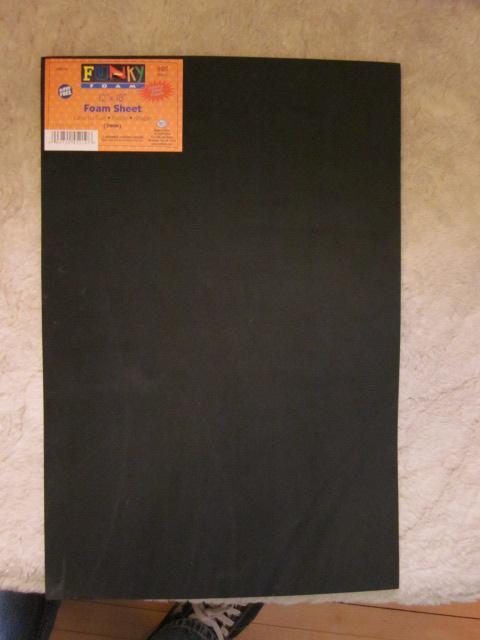
It can be bought at hobby lobby (and other craft stores I assume) in large 12x18" sheets that are 3mm thick and smaller sheets that are 2mm thick. We are using the larger 3mm thick sheets.
Miniatures trays with EVA bottoms tend to be 5mm thick. For now I'll go with one layer of 3mm. If it seems to flimsy I can always add another layer later.
One large piece of Funky Foam will provide the base for two trays. Cut The funky foam sheet in half
Step 5 Glue Funky Foam base to eggshell tray.
I use Elmers Spray adhesive because that is what Kutzmon recommends. I expect it will work just fine, but if it begins to separate, I can always supplement with my hot glue gun.
-Wipe dust off the Funky foam base. Funky foam is like a static dust collector.
-Spray the back of the eggshell section and the funky foam and press together well.
-Let it dry for a full hour. You want it to be as strong a bond as possible.
-Cut of the excess funky foam.
Your Tray is now done.
The dimensions are different, but it has roughly the same surface area and depth as a 2" Standard Sabol tray and holds almost exactly the same number of figures. Two more than Sabol in this case, but the number of figures depends on the arrangement of eggshell depressions.
Step 6 Other Eggshell Trays.Repeat the process for the other 3 eggshell trays.
Step 7 the Pluck and pull tray.
3 options:
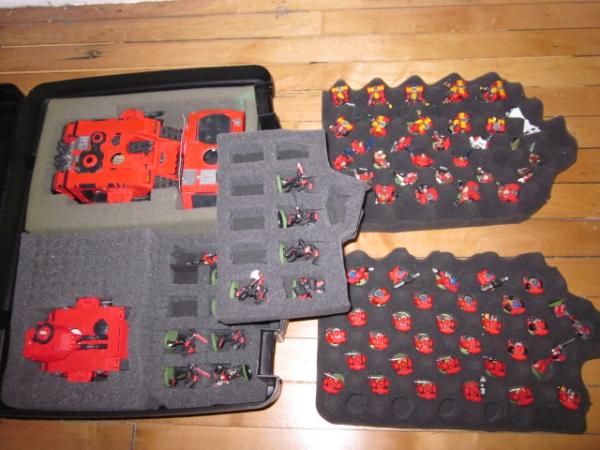
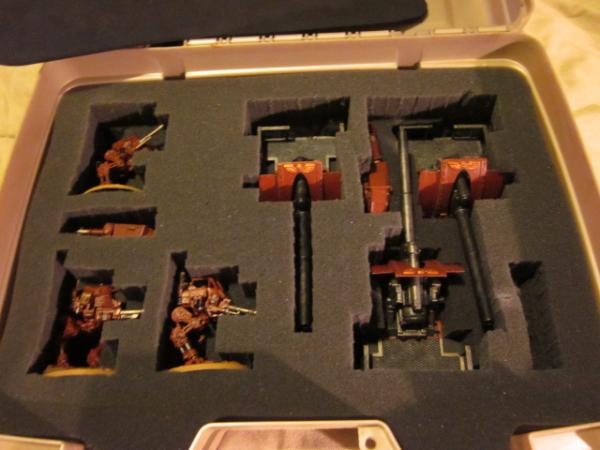
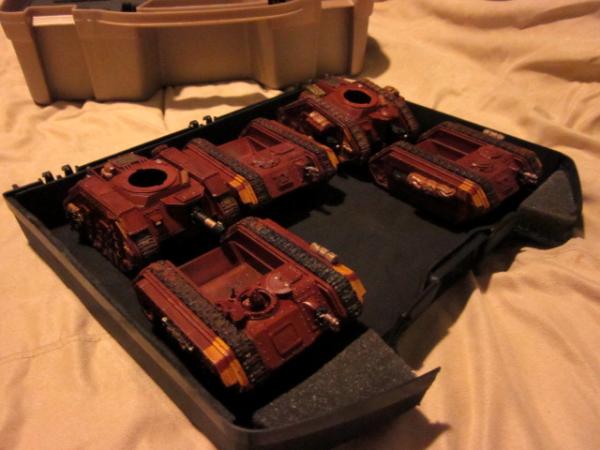
1. You may wish to make it the bottom tray. If you don't think you will be removing it often, leave it as one large tray and glue a full piece of funky foam. The Pluck and Pull layer is 1 1/4" thick and is great for oddly shaped models.
2. If you decide to split it in half you will end up with two trays that each have one side that is weak because it will be made of pluck pieces rather than a solid edge. I recommend either using elmers to glue all the pluck pieces on the cut side to each other, or cut piece of funky foam and glue it to the side for strength.
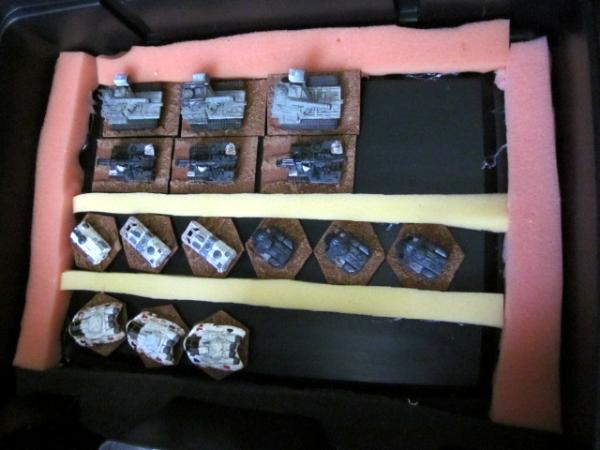
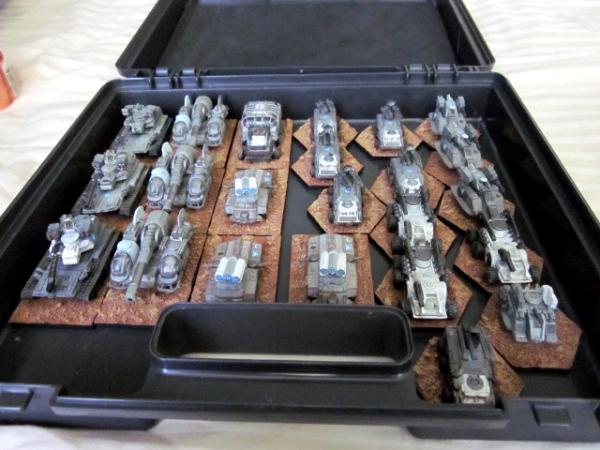
3.Lastly, if you have more than one case is to match two of the pluck and pull sections to make a vehicle tray. Two sections of pluck and pull end up being 2 ½ inches deep which is enough for most
40k vehicles without their turrets.
No pictures of this step as I haven't decided whether to do a vehicle tray or one or two figure trays yet.
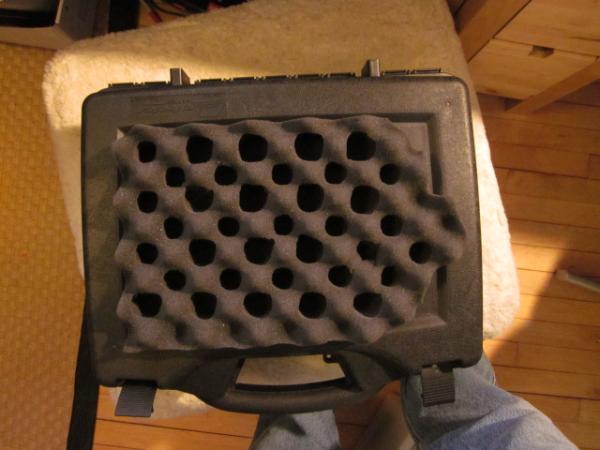
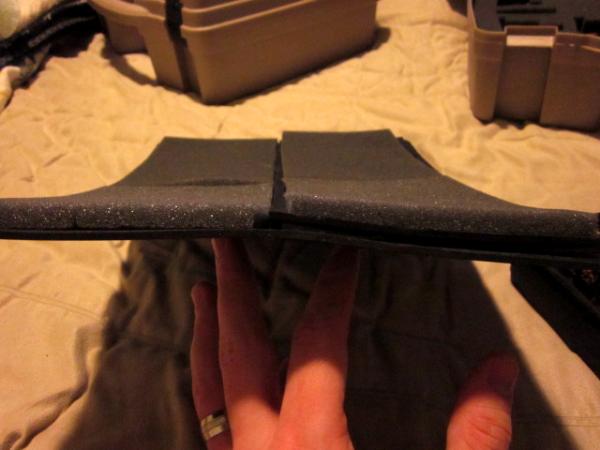
Step 8 Pad the top of the case.
Measure a piece of Funky foam the size of the top of the case and cut it. This will be the pad between your top tray and the top of the case. This may take a bit of fiddling as the top of the case is a touch smaller than the outline of the foam trays.
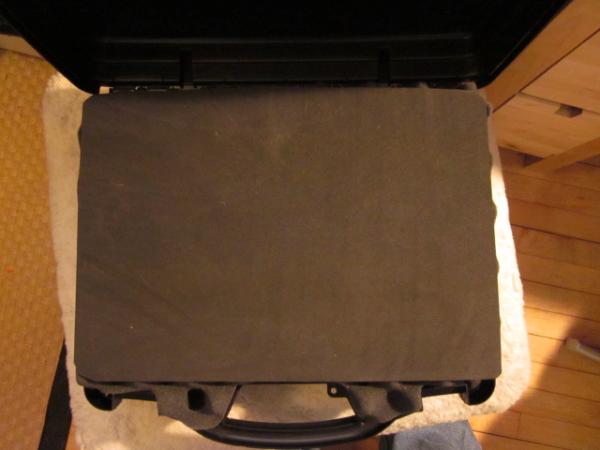
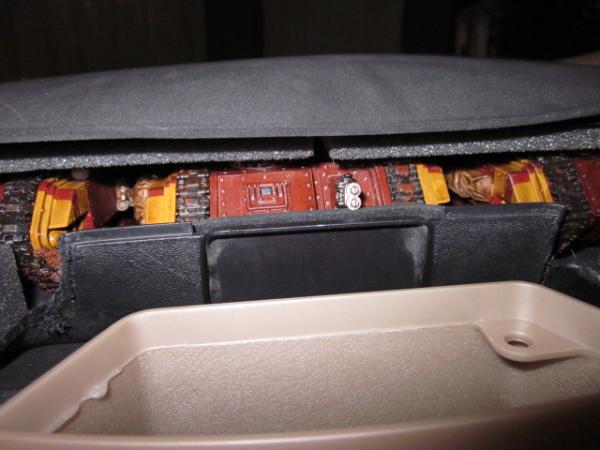
It just so happens that the two layers of Eggshell (not interlocking), the pluck and pull layer, and 4 layers (3 tray bottoms and a top cover) of 3mm funky foam fits nice and snugly in the Case with no room for shifting of models! Imagine the picture below plus 4 sheets of funky foam minus the indentions on the top and bottom of the case and you see what I mean.
 Final numbers.
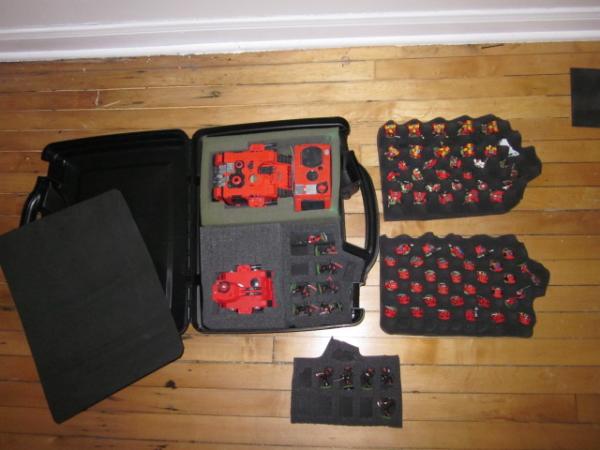
The case can hold about 180 standard size figures in it's 3 levels.
Using Sabol as a comparison, you now have a hard case with the equivalent of 6 sabol trays, totaling a total of 11 inches (of equivalent sabol) of trays. This is about 2 inches less space than a standard "Army Transport". However you have a hardshell case and you just spent:
-$15 Plano 4104
-$4 4 sheets of Funky Foam
For a total of 19 bucks, as compared to $65 for an Army Transport
Even the cost of project specific supplies:
$2 Fittings
$8 Adhseive
$4 Grinding bit for dremmel or Drill
Brings the cost to 29 bucks. I don't count the cost of Dremel/drill, files and knives as every hobbyist should have or find a way to have access to these things. I will be making at least 3 of these, so divvying the cost of the adhesive and fittings over 3 cases, I'm looking at about 22 bucks a case.
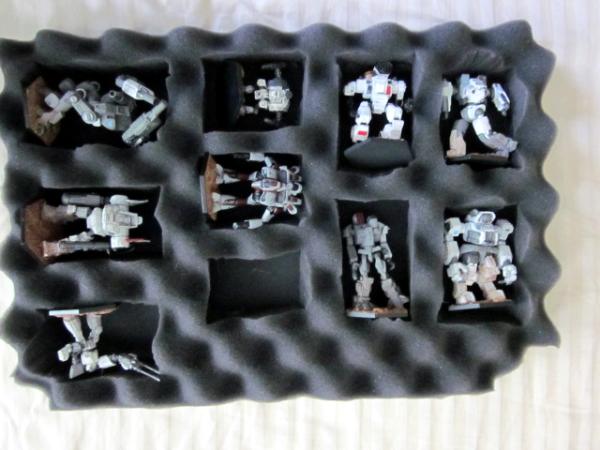
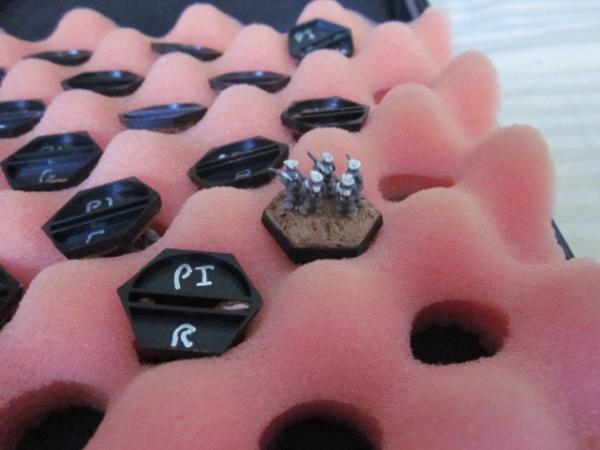
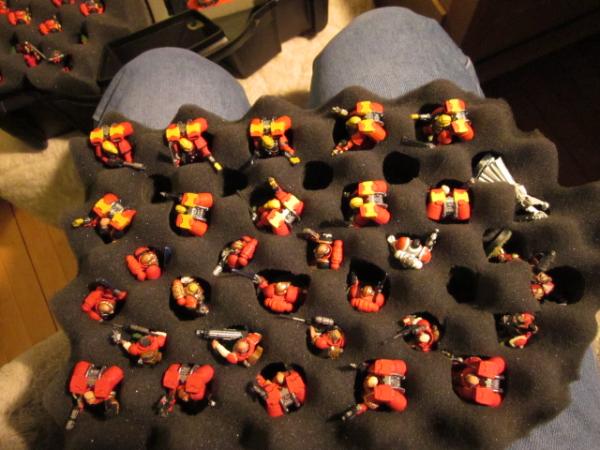
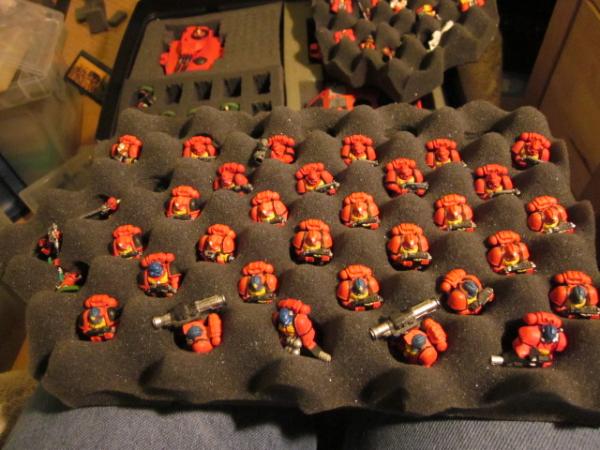
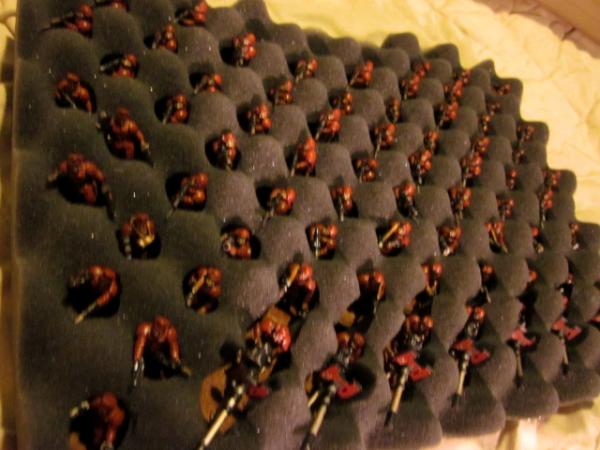
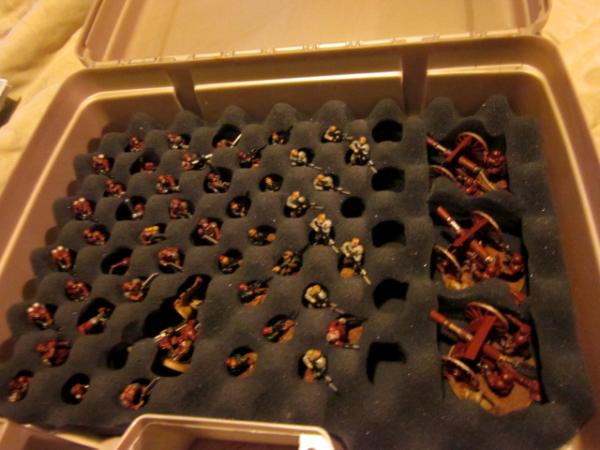
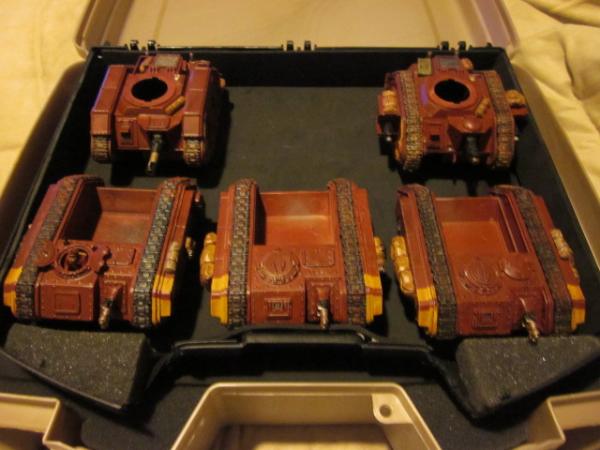
A few pics of my
IG in the trays.
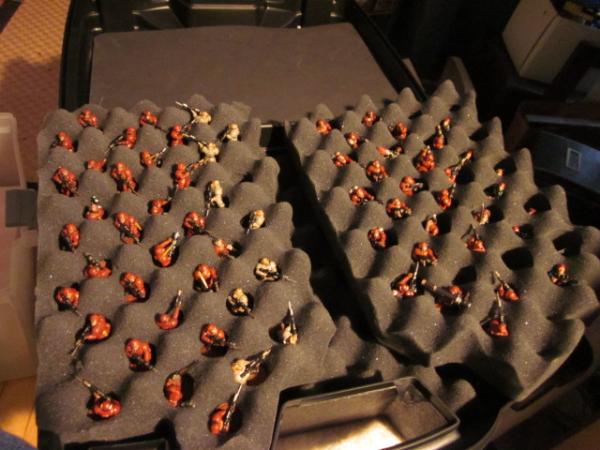
Note the difference between the 24mm and 31mm holes.
Now go make your own!


 It is easier to extinguish the light within, than to dispell the darkness that surrounds without
 38750 points before upgrades

 ~1200
~1200  3200 points
  > 5400 points
 2500 points