| Author |
Message |
 |
|
|
|
|
Advert
|
Forum adverts like this one are shown to any user who is not logged in. Join us by filling out a tiny 3 field form and you will get your own, free, dakka user account which gives a good range of benefits to you:
- No adverts like this in the forums anymore.
- Times and dates in your local timezone.
- Full tracking of what you have read so you can skip to your first unread post, easily see what has changed since you last logged in, and easily see what is new at a glance.
- Email notifications for threads you want to watch closely.
- Being a part of the oldest wargaming community on the net.
If you are already a member then feel free to login now. |
|
 |
2011/08/12 11:35:15
Subject: M0rdains Marines - Back from the dead, Scratch built thunderfire cannon
|
|

Thunderhawk Pilot Dropping From Orbit
|
I recently aquired a load of random bits and bobs from a friend who used to car boot. I finally got round to going through it all and cutting the bits off the sprue and seperating out into seperate containers. There were also a few metal models thick in paint.
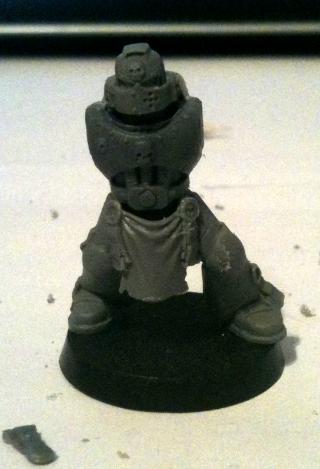
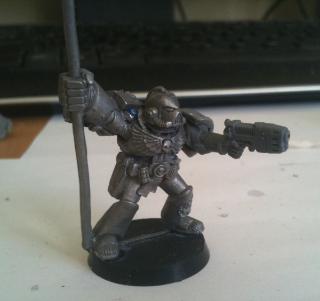
I had been thinking for a while of building a command squad, and decided that i might be able to kit bash something together with my new aquisistions. So i have decided to start off with an Apothecary as i found a redactor in some of the sprue.
First off i had to clean up the metal miniature, so i soaked it in Oven cleaner for 48 hours then went at it with a tooth brush, then finally picked out the stobborn bits with a craft blade.
I did not have any paper clips or brass rod, to pin this guy with, but i did happen to have some tooth picks, that also match the drill bit i have in my kit. Im not sure where the ' cod piece' is from or what it is meant to be fore but i thought it looked quite cool, and i neede to change the model so it was not just a normal Marine with a redactor.
Dry fitted the arms on to the pin, i think that i will either need to trim the pin a bit more or drill the hole a bit deeper in the arm, as ther eis quite a gap. Either that or i will use some green stuff to fillt he gap. I was plannin on painting the arms seperatly before i glued them on, so using green stuff would be out, also i need to attach the shoulder pads at some point, so i may need to glue it together and green stuf fit anyway (although one shoulder pad ends up very close to the helmet which would be aquward)
More to come once my Son is asleep tonight and after my D&D session has finished ... hopefully.
Automatically Appended Next Post:
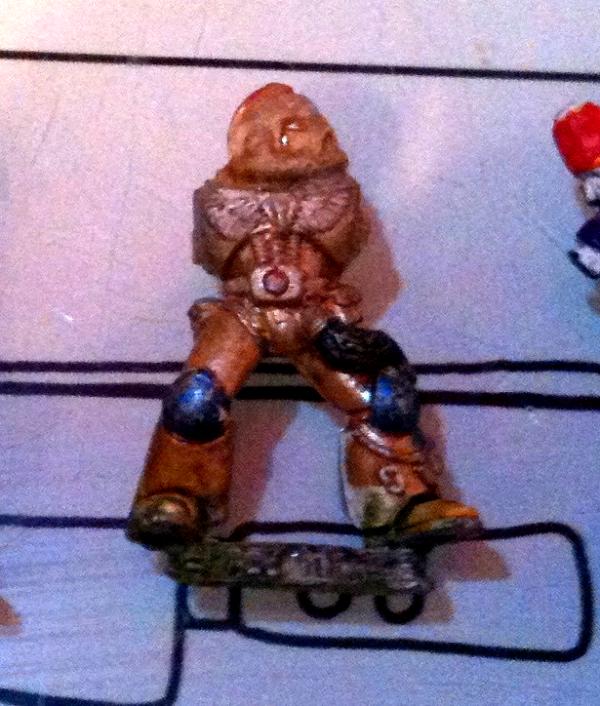
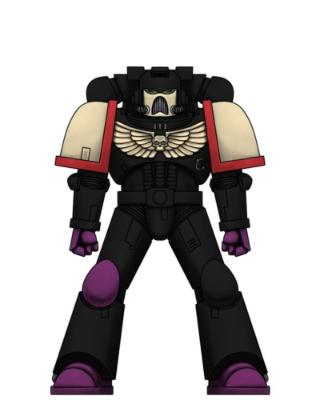
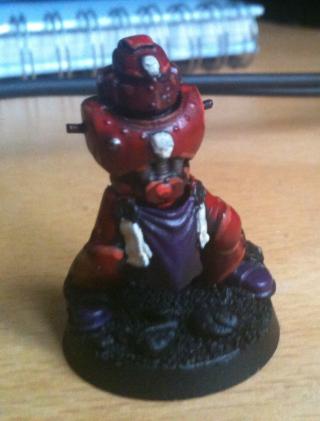
Had a fiddle with my normal colour scheme, and came up with this for the Apothecary.
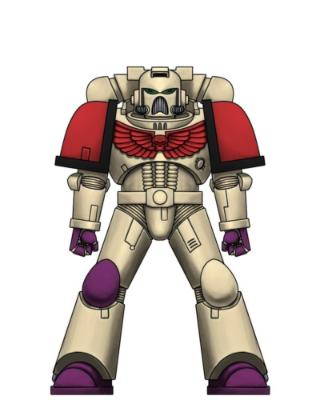
This is the standard scheme for my army.
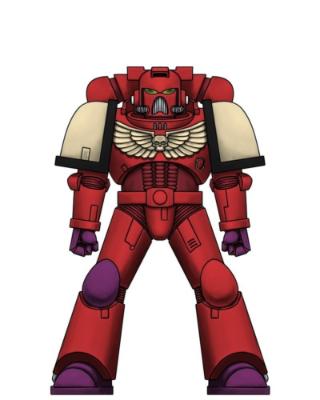
What do people think about the scheme for the Apothacary?
|
|
This message was edited 48 times. Last update was at 2018/04/23 15:29:36
|
|
|
 |
|
2011/08/16 22:17:38
Subject: Re:Space Marine Command Squad WIP
|
|
Thunderhawk Pilot Dropping From Orbit
|
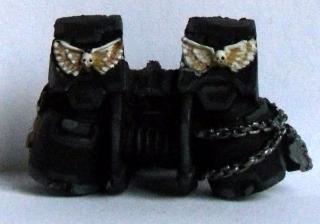
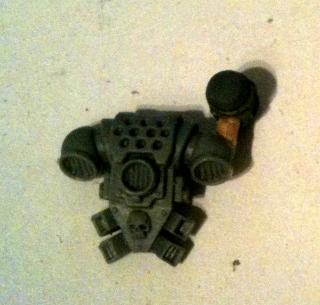
I have continued to fiddle, i have bashed up a back pack for my Apothacary using a melta grenade as a light and pined it onto the top.
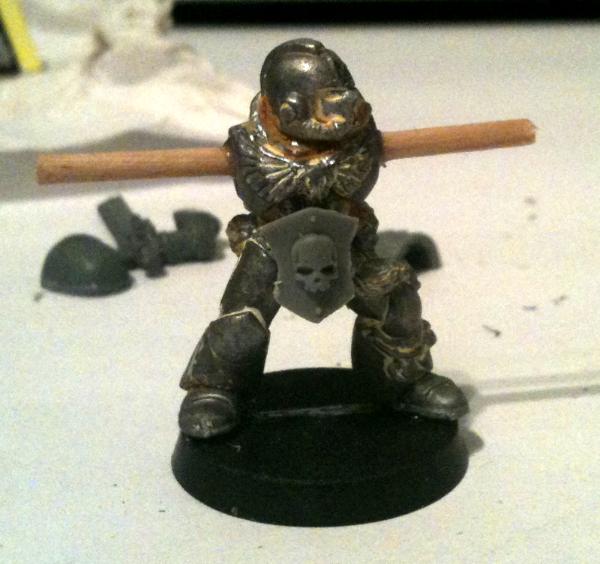
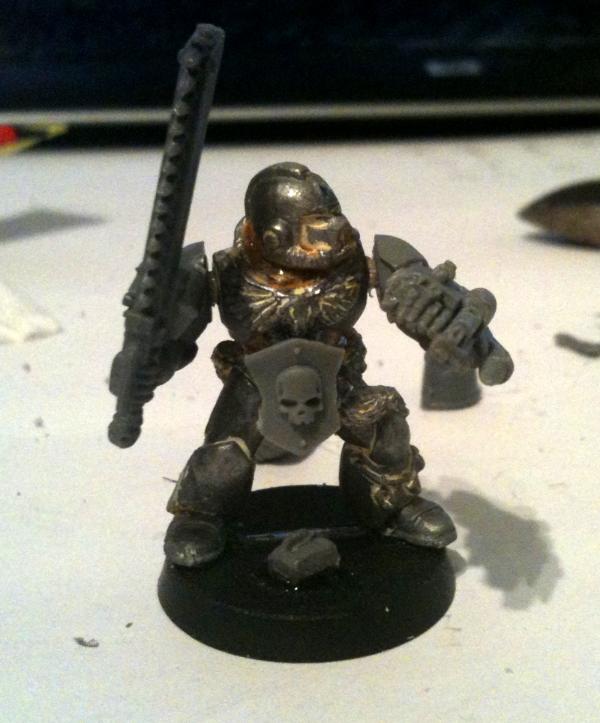
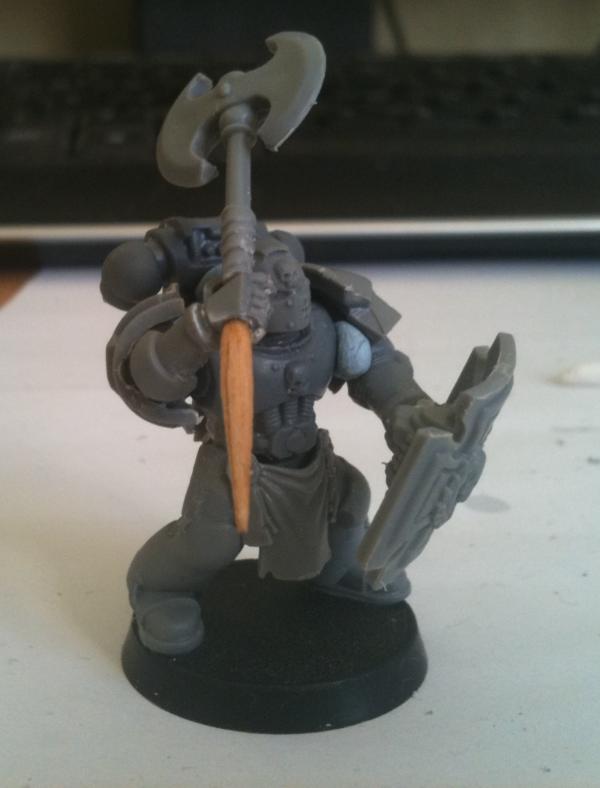
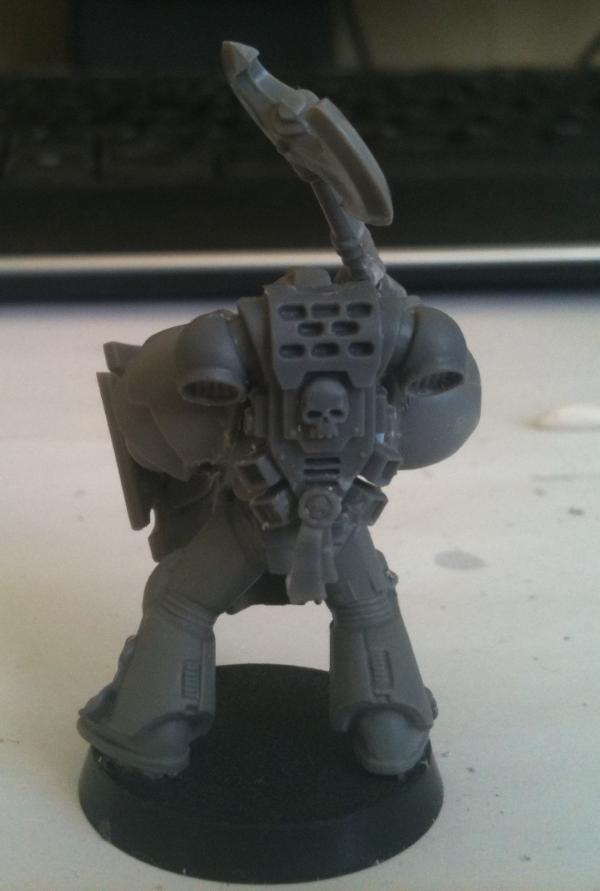
I then started working on a Company Champion. Looking through the bits i had aquired i was able to find a pair of legs and a chest peice that looked different to my standard marines, therefore allowing my champion to stand out.
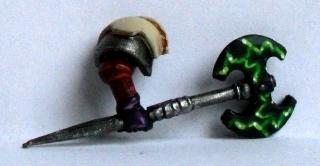
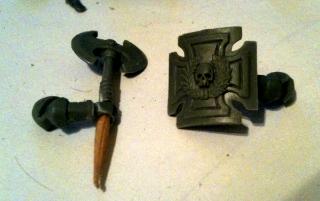
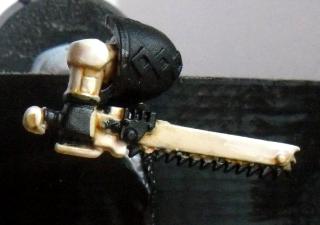
I was then used the terminator combat shield and pinned it to an arm that i had trimmed the hand off. For the power weapon i took an axe from a fantasy WH Dwarf, and clipped off the end, and drilled through my champions hand so i could run a paper clip right through. i then drilled into the shaft of the axe and into the cocktail stick i was using for the shaft extension. (still thinking about using some green stuff on the cocktail stick. Then glued it all together. (The plastic looks a bit dark in the picture, but thats from the auto adjust)
I then blue tacked them into position to check i was happy with the positioning.

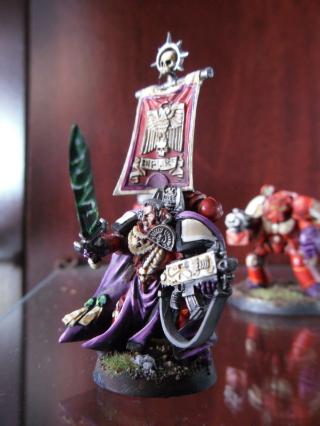
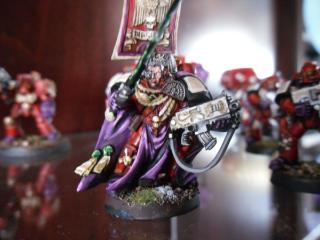
Decided on a plasma pistol for my Company standard bearer, was not much more to do to him at this time.
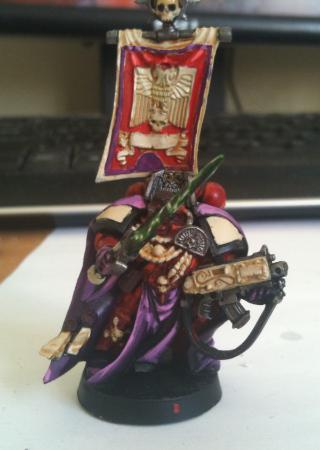
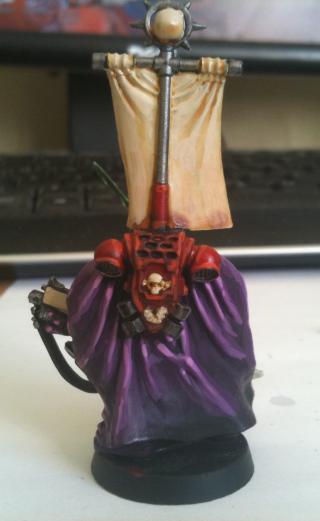
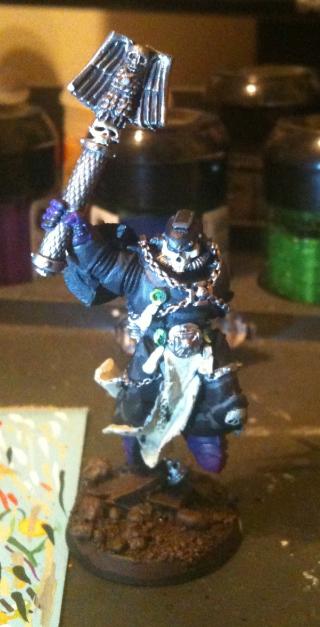
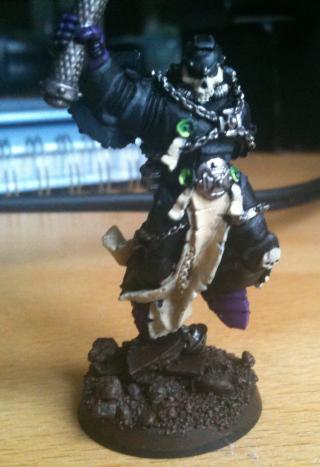
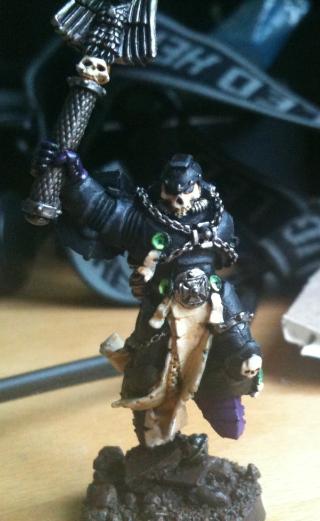
Decided to take a couple of photos of my Captain, hes mid paint, i still need to touch up the banner, and paint his face. I also want to do some highlights on the bleached bone parts and paint the wax seals.
|
|
This message was edited 2 times. Last update was at 2012/12/11 16:51:59
|
|
|
|
|
2011/08/16 22:21:41
Subject: Space Marine Command Squad WIP
|
|

Calculating Commissar
|
Painting looks great. Are they a Blood Ravens Successor?
|
|
|
|
|
|
2011/08/16 22:23:31
Subject: Re:Space Marine Command Squad WIP
|
|
Thunderhawk Pilot Dropping From Orbit
|
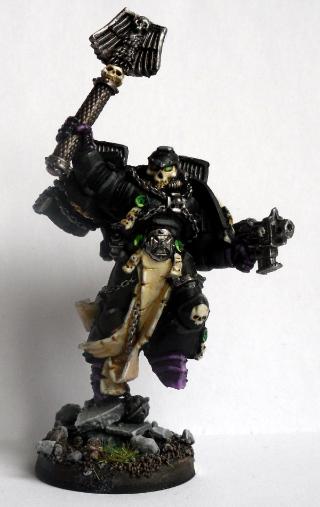
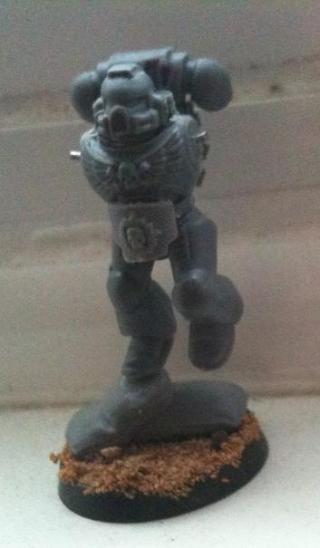
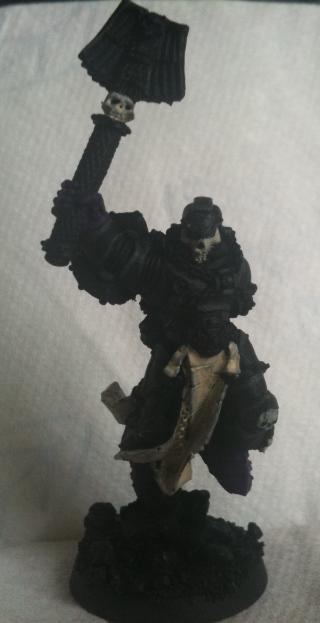
I got a Finecast Jump chaplin for my birthday, its my first time working with resin. I am amazed at the level of detail, and a little daunted about painting him. So as i have been making up other models, i thought i might as well get him prepped so that i can base coat them all at once.
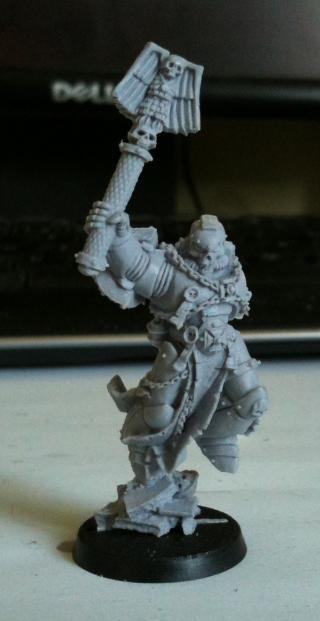
My plans for his paint scheme are as follows;
I am not sure if i will jsut use super glue to attach the jump pack and other arm, or whether i will pin him. I will probaably pin him. Which will be much easier now that i have bought a hobby drill. I was just uding the drill bit between my fingers before so was not supper aucrate or straight. But i was in the GW store and they were going for £8.20 so i thought about it and then saw one in a hard wear store for £3 so bought that instead.
|
|
|
|
|
|
2011/08/16 22:27:05
Subject: Space Marine Command Squad WIP
|
|

Stalwart Veteran Guard Sergeant
|
Man that cloak looks nice! Can't wait to see him all painted up!
Automatically Appended Next Post:
And re the super glue on resin, it doesn't need pinning, one of the best things about resin!
|
|
This message was edited 1 time. Last update was at 2011/08/16 22:28:40
"I have two hands, therefore, I can hold two shovels"
|
|
|
|
|
2011/08/16 22:53:32
Subject: Space Marine Command Squad WIP
|
|
Longtime Dakkanaut
|
The cloak on the AOBR captain is suh-wheat, really nicely done. I also like your improvisation on the conversions, being a bit of an improviser myself lol.
|
Mary Sue wrote: Perkustin is even more awesome than me!
|
|
|
|
|
2011/08/17 09:51:30
Subject: Space Marine Command Squad WIP
|
|
Thunderhawk Pilot Dropping From Orbit
|
Happygrunt wrote:Painting looks great. Are they a Blood Ravens Successor?
Yes they are a Blood Ravens Successor - Called the Striking Skulls. Not worked out the fluff yet really, just the paint scheme.
jirc wrote:And re the super glue on resin, it doesn't need pinning, one of the best things about resin!
Ahh thanks, that will save me a bit of time.
Perkustin wrote:The cloak on the AOBR captain is suh-wheat, really nicely done. I also like your improvisation on the conversions, being a bit of an improviser myself lol.
Thank you, i had fun painting the cloak. I really like the way it has come out. I had great fun putting the champion together as well. I am looking forward to painting them all.
My plan for tonight is to base them all, ready for under coating. That and work out a good way of spraying the smaller parts. I may use the pinning holes to put them up on a paper clip and then glue some paper clips into my spraying board. Sadly i forgot to base my captian before i started painting him, so i will have to be carefull when i do that.
|
|
|
|
|
|
2011/08/23 08:28:29
Subject: Re:Space Marine Command Squad WIP
|
|
Thunderhawk Pilot Dropping From Orbit
|
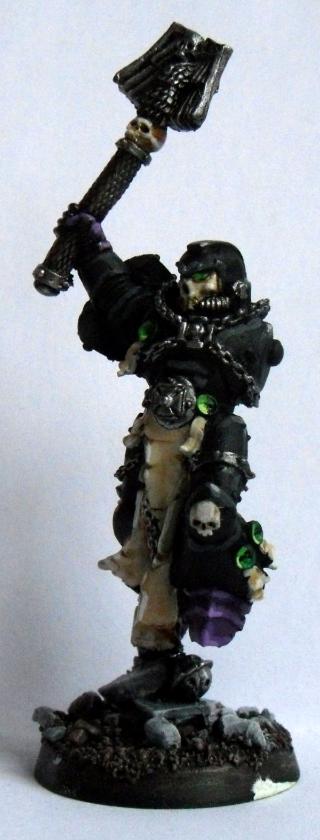
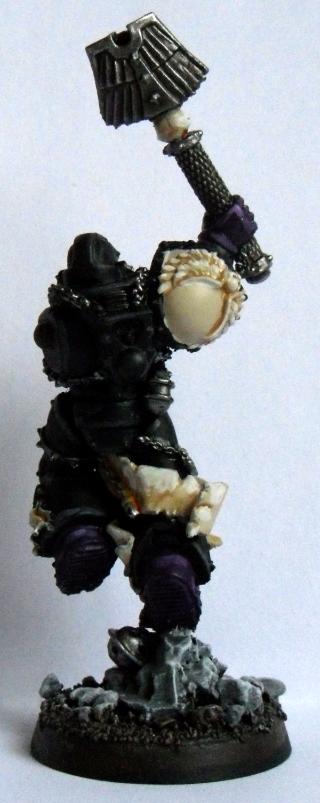
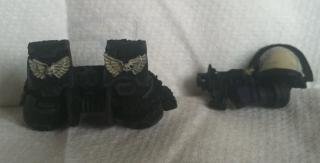
Well i have managed to give all the models a nice base coat of Chaos black and they are sat on my desk ready for me to start painting once i have finished my captain. But while they were drying i realised that i was a veteran short so i started bashing something up. I decided i wated him to use 2 power fists (from what i can read this is within the rules, someone please correct me if i am wrong ) and leaping into the air ready to smash a xeno.
On a side not, i hade stripped off an old terminator, and found a pair of lighting claws so had prepped him up ready for them. they all received a coat of chaos black over the weekend as well. But it was not untill i was looking at them again that i realised that they did not actailly have any shoulder pads on the arms  and all the pads i have are for normal marines. mmmm. I may have to try out my green stuff skills.
|
|
|
|
|
|
2011/08/23 23:35:27
Subject: Space Marine Command Squad WIP
|
|
Thunderhawk Pilot Dropping From Orbit
|
Spent this evening adding some more detail to my captain, and starting off my Chaplin. Will post some pictures tomorrow morning hopefully.
|
|
|
|
|
|
2011/08/23 23:48:43
Subject: Space Marine Command Squad WIP
|
|
Dakka Veteran
|
how do you get that template drawing so you can fiddle with color schemes?
|
|
|
|
|
2011/08/24 08:54:15
Subject: Re:Space Marine Command Squad WIP
|
|
Thunderhawk Pilot Dropping From Orbit
|
Here is the link for the Space Marine Painter its really handy for trying out schemes.
Automatically Appended Next Post:
Well I have uploaded the photos. But in the middle of updating my blog my PC mysteriously turned it's self off?! The only clue to what had happened was my 1 year old son staring up at me with his finger on the power button looking excited. I'll try and post them later at lunch. (posted from my mobile) Automatically Appended Next Post: Well I thought I would try this from my mobile while waiting for my wife in the car.
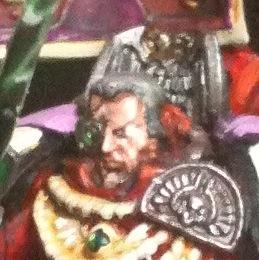
I used some skull White on the captains bolted to tie him in withthe flamed in my tactical squad.
I then did a base colour of talan flesh mixed with some gryphon sepia and devlon mud on his face, I also coloured his eyes in White. The excess White will be tidyed up as I highlight later. I then gave it a wash of devlon mud. (I normally use flesh wash but wanted to try something different)
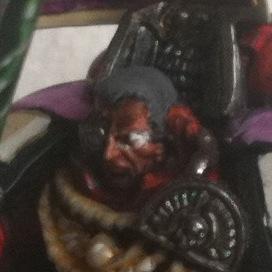
While the wash was drying I gave his hair a coat of codex grey and also the strap on the bolted got a coat.
As I had some grey on my pallets I mixed in some chaos black, to do some highlighting on my Chaplin. I then have his hands and feet a coat of liche purple and added some bleached bone (my favourite colour ATM) to the parchment and his shoulder pads and the odd skull.
|
|
This message was edited 3 times. Last update was at 2011/08/24 10:38:25
|
|
|
|
|
2011/08/25 08:06:04
Subject: Re:Space Marine Command Squad WIP
|
|
Thunderhawk Pilot Dropping From Orbit
|
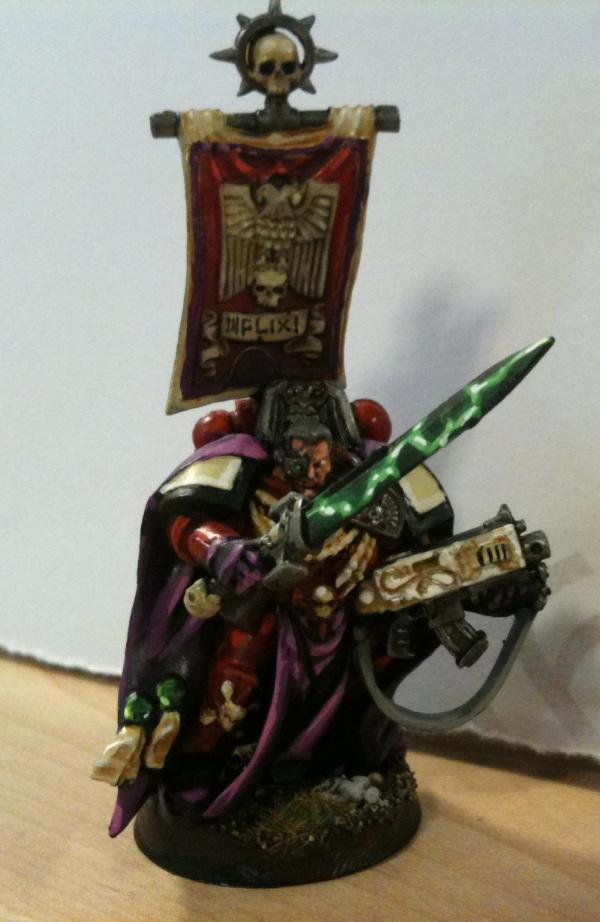
Well i got some more done last night, i managed to put some highlights on to the company standard, and i painted up the purity seals, as well as painting up the base. I also added some highlights to his face. All thats left to do is to paint up some hihghlights on the stone on the base and add some static grass, and add a pupil to his eye (i use a pen for this bit)
Sorry for the quality of the pics, i am only able to use my iphone as we have misplaced the charging lead for our camera and its non standar USB ;(
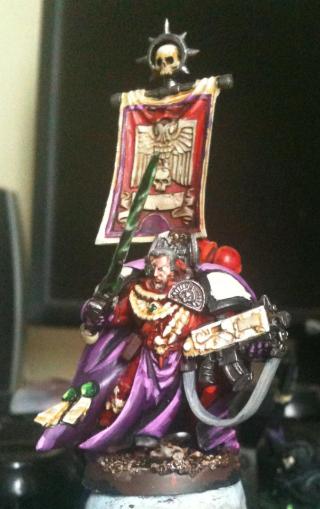
While i had the greens on my pallet i decided to paint up the purity seals on my chaplin as well, as he was out in my painting station as well. I also gave the bleached bone parts another thin coat. I also gave the base a coat of Brown, again as i had it on my pallet from paintign my captain.

|
|
|
|
|
|
2011/08/26 09:22:50
Subject: Re:Space Marine Command Squad WIP
|
|
Thunderhawk Pilot Dropping From Orbit
|
Well i finished off my Captin last night. But when i went to take photos this morning, the weather was horrible outside so there was not enough light. I tried using a little LED light i have, but the photos have come out all blurry :s i really need to sort out my propper camara and find the power lead ;(
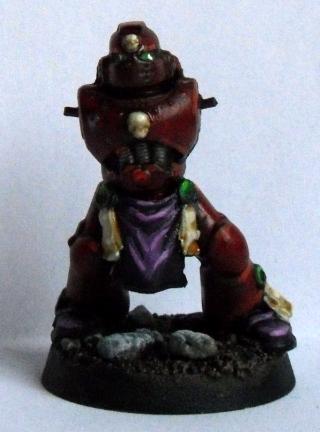
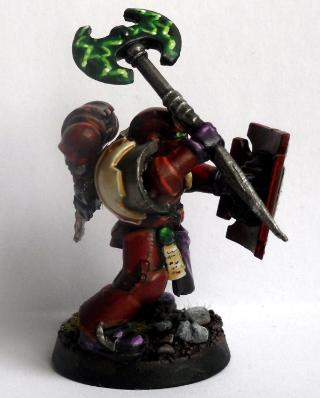
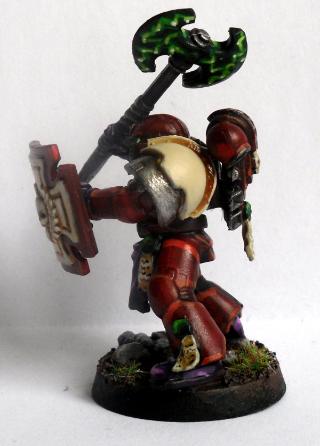
So as i had finished i decided to make a start on my Company Champion, as i am entering him into a competition here on Dakka. So i gave him a base coat of Red Gore, and then 2 coats of Blood Red. Followed by a couple of coats of Liche Purple on his hands, feet and loin cloth.
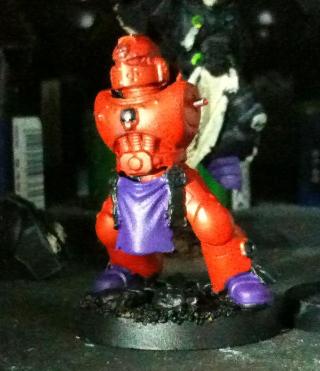
This morning before work, i thought about doing a wash. But i decided that i need to decided on what colour i am painting his power weapon. I will either do it with a lightning effect similar to my Captin, or will fade from Dark Angels Green up to Skull white on the edge. I think i will do a test peice on the second choice to see how it comes out. Automatically Appended Next Post: Well i managed to ge ta better photo at work of all palces  As i had taken him in to show him off. Sadly no one there plays WH40k But my boss used to do airfix models so likes the painting 

|
|
This message was edited 1 time. Last update was at 2011/08/26 09:52:24
|
|
|
|
|
2011/08/30 21:12:03
Subject: Re:Space Marine Command Squad WIP
|
|
Maniacal Gibbering Madboy
|
I love that power sword! The color is awesome. I also really like the bone color on the gun plate. Looking very nice! Congrats on finally getting a hand drill as well... I got one just last month finally. It sure beats holding the drill bit in my hands...  
I like your marines, makes me want to pick back up some of my marines and do a bit of work on them again. Also, lets see more of your Necrons!   Or is this thread purely for your SM's? Automatically Appended Next Post: Oh yeah, and I love all your small little tweaks/customizations! I really feel that enhances the models so much. You took off the mold lines of your Champion though, right?
|
|
This message was edited 1 time. Last update was at 2011/08/30 21:13:30
Check out my Project (B)log! I would love any suggestion or comments you may have. 
Orkz  |
|
|
|
|
2093/08/30 21:30:44
Subject: Space Marine Command Squad WIP
|
|

Grovelin' Grot
|
That's a really cool looking powersword! I'm not sure about the purple boots though, a little too much disco for a marine I think
|
|
|
|
|
2011/08/30 23:29:25
Subject: Space Marine Command Squad WIP
|
|
Stalwart Veteran Guard Sergeant
|
I'm glad I found this blog. There's some good stuff here.
Your painting style is pretty cool. I look forward to seeing more.
|
|
|
|
|
|
2011/08/31 10:32:25
Subject: Re:Space Marine Command Squad WIP
|
|
Thunderhawk Pilot Dropping From Orbit
|
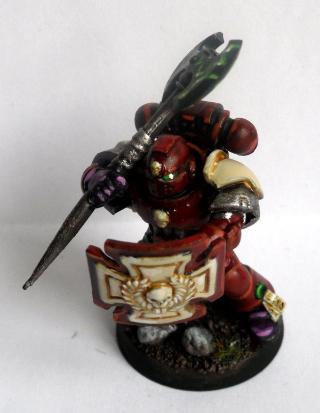
I managed to get some more painting done last night, in between my son screaming due to his teeth cutting :( Gave a blazing orange high light to my Company champion and also put on the first coat of bleached bone on the shoulder pads and to the seals. There is also some on the shield but I have not photographed that yet (sorry :( )
I took a photo last night in artificial light
And then I took a photo again this morning in the natural light.
I am a little annoyed at the moment, as I can not find the charging cable for my real camera :*( so my photos are having to be taken on my iPhone, and they are not coming out as clear as hoped. (or as clear as they look on the phone)
I also put a further coat of bleached bone onto my Chaplin, I think that should be enough ready for a wash tonight. Also I am considering doing a further highlight on the black as the one I have done is rather muted. I may do an even lighter one. BUT I think this is from looking at the photos rather than the actual model. I will see how it looks after the Gryphon sepia wash on the bleached bone bits
samwellfrm wrote:Your painting style is pretty cool. I look forward to seeing more
Thank you, i learnt a lot from reading the Tutorials on this site
Lord_J wrote:That's a really cool looking powersword! I'm not sure about the purple boots though, a little too much disco for a marine I think
Thanks ... but what is wrong with Disco? lol 
NakedBatBoy wrote:You took off the mold lines of your Champion though, right?
I love bleached bone and Grypon sepia, its my fav combo atm Yes i took off the mold lines Why have you spoted one i missed?
In regards to the Necorns, i will have to get some more photos, there are some in my gallery. But they were my first army and i am not so happy with the painting.
But here is a pic.
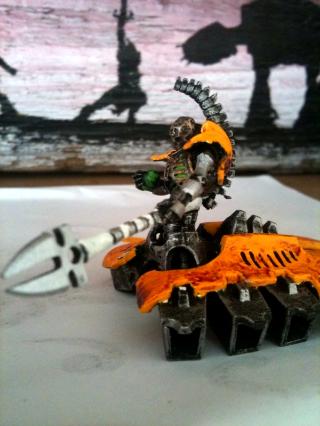
My plan was to dry brush over the black under coat, to give a worn and aged look. Which at the time i thought looked good. I have painted a squad of warriors since, and Painted them in boltgun, and then done a babadab black wash and a chesnut ink wash, then dry bruushed chainmail to pick out the highlights. I will ahve to take some phtos of them.
For the yellow i did a chestunt ink wash over the yellow. I wanted it to pool in places and not just the recess, to simulate oxidation and tarnishing. This is purposful rather than sloppy painting lol. ... well sort of
As always C&C always welcome
|
|
|
|
|
|
2011/08/31 12:59:41
Subject: Space Marine Command Squad WIP
|
|

Bounding Dark Angels Assault Marine
|
Really nice work mate, especially like the captains cloak and the power sword. Really striking.
|
|
|
|
|
|
2011/08/31 18:40:17
Subject: Re:Space Marine Command Squad WIP
|
|
Maniacal Gibbering Madboy
|
M0rdain wrote:NakedBatBoy wrote:You took off the mold lines of your Champion though, right?
Yes i took off the mold lines Why have you spoted one i missed?
In regards to the Necorns, i will have to get some more photos, there are some in my gallery. But they were my first army and i am not so happy with the painting.
My plan was to dry brush over the black under coat, to give a worn and aged look. Which at the time i thought looked good. I have painted a squad of warriors since, and Painted them in boltgun, and then done a babadab black wash and a chesnut ink wash, then dry bruushed chainmail to pick out the highlights. I will ahve to take some phtos of them.
For the yellow i did a chestunt ink wash over the yellow. I wanted it to pool in places and not just the recess, to simulate oxidation and tarnishing. This is purposful rather than sloppy painting lol. ... well sort of
I just saw the mold lines on your axe which was way back in WIP.
I haven't seen any since then. Champion's looking good! I'm looking forward to seeing it better once you find your camera cable.
I really like the different look with your necrons. I saw that picture in your gallery, but didn't see anymore! Although the orange/yellow/chestnut wash look seems a tad bright for rust, I still really am drawn to the color. It really pops and paired with the silver makes it all the better IMO.
|
Check out my Project (B)log! I would love any suggestion or comments you may have.
Orkz |
|
|
|
|
2011/09/02 08:06:00
Subject: Re:Space Marine Command Squad WIP
|
|
Thunderhawk Pilot Dropping From Orbit
|
NakedBatBoy wrote:I just saw the mold lines on your axe which was way back in WIP.
Hehe, yes i have removed the mould line although looking back at the axe now under coated, not perfectly :(
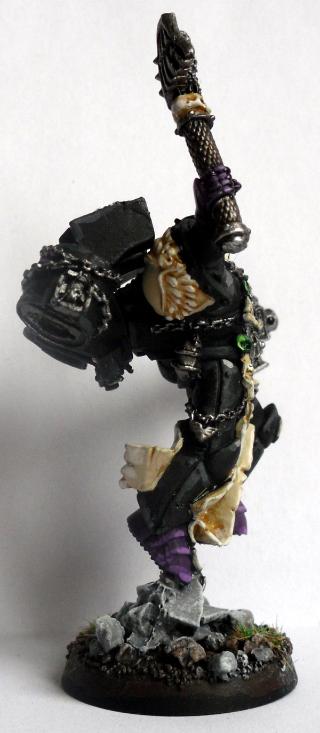
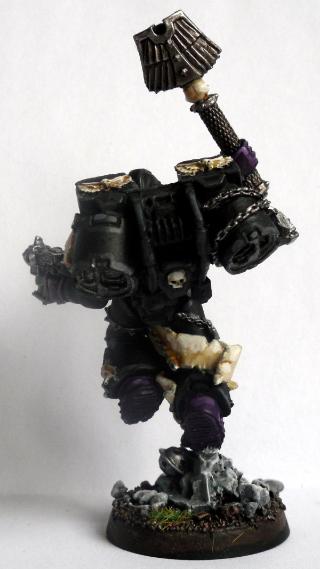
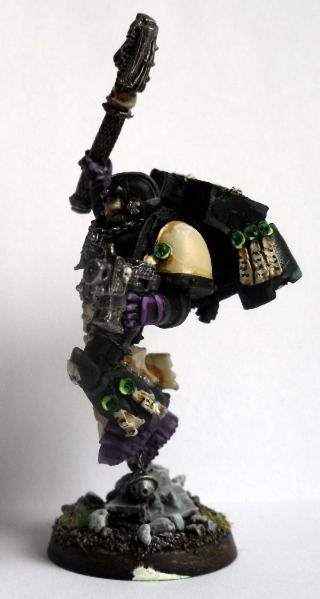
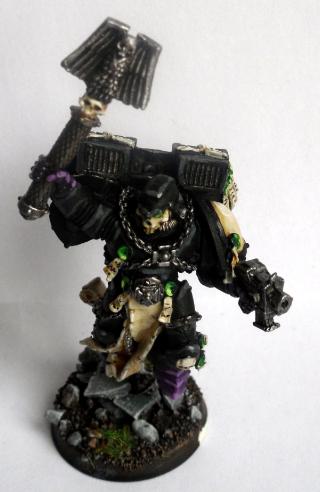
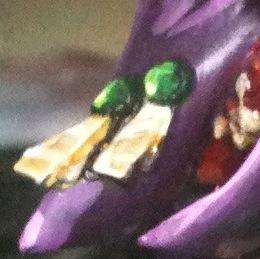
Well i added some Bleached Bone highlights over the grypon sepia wash, and then some 1:1 Bleached Bone:Skull White highlights in key areas. As i had them both on my palete i did the same to my Chaplin. I took photos of both but sadly the Champion one came out naff. So i will ahve to take that again. But the chaplin came out ok.
I still need to paint the chains over the cloth/tabard and do the highlights on the purple parts (hands and feet) urm ... and I need to do his eyes .. and do some highlights on his mace/other chains. and of course finish off the base. So very nearly done. But I am not sure if I should add a further highlight onto the black armour. Opinions?
But good news, i have ordered a new cable for my camera, so i will get some good photos up as soon as it arives. I will also try and convert an old cardboard box in to a nice light box. I just need a second lamp lol.
|
|
|
|
|
|
2011/09/04 16:25:32
Subject: Space Marine Command Squad WIP
|
|
Thunderhawk Pilot Dropping From Orbit
|
The Camera cable has arrived i will try and get some better photos taken today.
|
|
|
|
|
|
2011/09/06 08:45:21
Subject: Re:Space Marine Command Squad WIP
|
|
Thunderhawk Pilot Dropping From Orbit
|
|
|
|
|
|
|
2011/09/06 20:54:35
Subject: Space Marine Command Squad WIP
|
|
Maniacal Gibbering Madboy
|
I think a red rim for the shoulder pad could look good. And if it ends up looking bad, you xan easily paint it black again..
Champion looks nice! I especially like the shield.
|
Check out my Project (B)log! I would love any suggestion or comments you may have.
Orkz |
|
|
|
|
2011/09/07 10:34:46
Subject: Re:Space Marine Command Squad WIP
|
|
Thunderhawk Pilot Dropping From Orbit
|
|
|
|
|
|
|
2011/09/07 19:06:37
Subject: Re:Space Marine Command Squad WIP
|
|
Frenzied Berserker Terminator
|
Wow! I really love your paint jobs! Lots of detail and depth. Great job, keep it up! I'll be keeping an eye on this!
|
|
|
|
|
|
2011/09/07 23:52:12
Subject: Space Marine Command Squad WIP
|
|
Maniacal Gibbering Madboy
|
The models are looking good. No worries about wussing out.
|
Check out my Project (B)log! I would love any suggestion or comments you may have.
Orkz |
|
|
|
|
2011/09/09 08:08:46
Subject: Re:Space Marine Command Squad WIP
|
|
Thunderhawk Pilot Dropping From Orbit
|
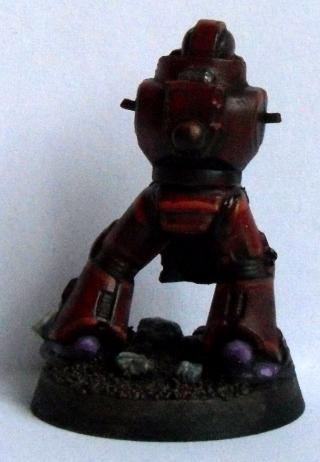
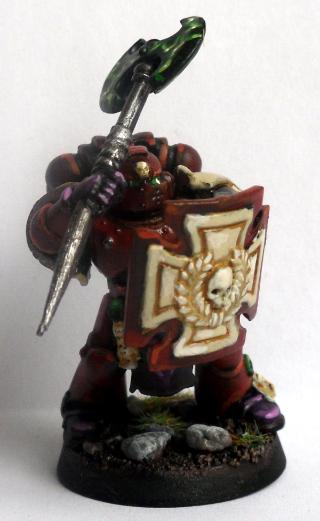
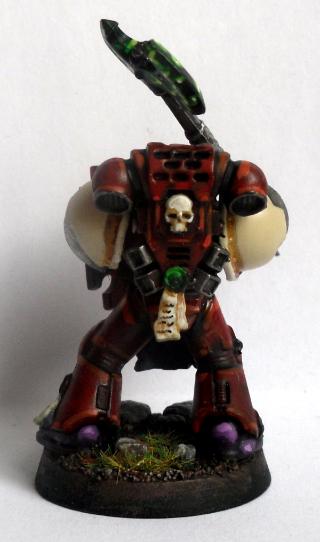
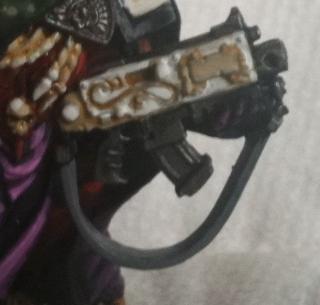
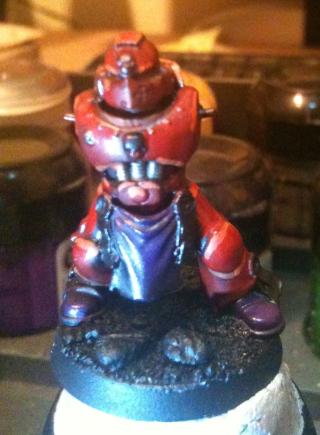
I decided to start on my Apothacary next, as i really enjoyed doing the shield on my Champion. I decided that he would be more of a bone colour rather than a white colour to fit in better with the scheme. So he started off with a base spray of chaos black the same as all of my models. He then got a coat of Bubonic Brown and then a thin coat of bleached bone.
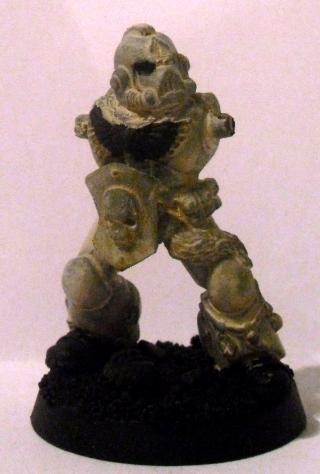
He then got another couple of think coats of bleached bone, before i gave him wash of Gryphon Sepia. I then painted over in bleaced bone avoiding the recesses, then highlighted with 1:1 Bleached bone:Skull White, i then mised in some more Skull white for the top highlights.
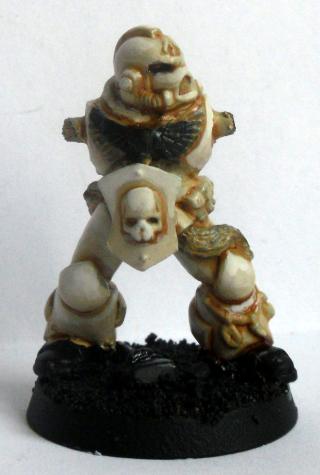
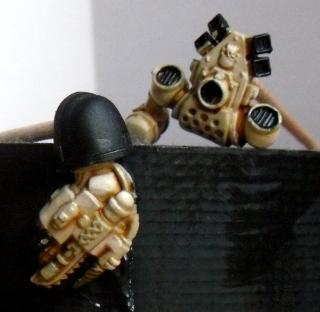
Looking at the close up photos, i have noticed a coupe of bits that need a bit more attention, but this is my first attempt at painting in this way rather than just doing an edge highlight after the wash. But for table top i am very pleased.
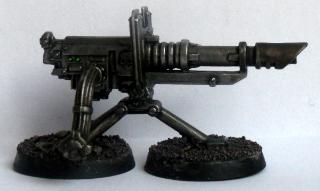
And a random shot of my Lascannon objective, i still need to add a bit more detail, and static grass.
 As always C&C welcome.
|
|
|
|
|
|
2011/09/09 10:32:46
Subject: Space Marine Command Squad WIP
|
|
Maniacal Gibbering Madboy
|
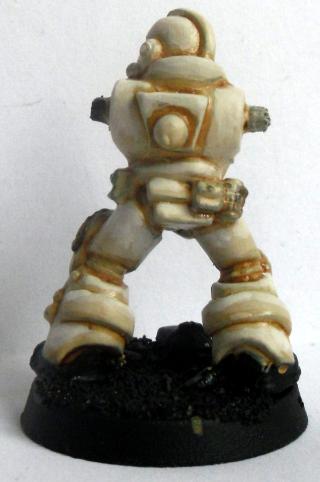
The armor looks good. I think it's funny you painted his back ball though, since you're going to glue the backpack over that.
|
Check out my Project (B)log! I would love any suggestion or comments you may have.
Orkz |
|
|
|
|
2011/09/09 11:39:05
Subject: Space Marine Command Squad WIP
|
|
Thunderhawk Pilot Dropping From Orbit
|
I was caught up in the flow of the moment
|
|
|
|
|
|
2011/09/09 21:11:08
Subject: Space Marine Command Squad WIP
|
|
Maniacal Gibbering Madboy
|
That's perfectly reasonable. I really like the bone look... makes me want to paint some bone...
|
Check out my Project (B)log! I would love any suggestion or comments you may have.
Orkz |
|
|
|
|
|
|


 KHADOR
  X-Wing (Empire Strong)