Hey folks,
I made a quick "how to" for edge highlighting to help out a few new painters. Edge highlighting is less then easy to apply well
tbh. In fact, it's one of those things that most often goes wrong when you are first starting out. But on the other hand, it's one of the best looking ways to accentuate details and the outlining of your mini. So it's worth getting to grips with this technique.
I'm trying to explain how you can get pretty decent, smooth highlights around the edges of armor plates, without any real need for super steady hands... To illustrate, I used an old DN body I had lying around. I didn't even bother priming it, because it's a quick how to guide. Note that you should always use primer if you plan on doing any real work!!
Oh... and it's purple/pink because I felt like it, and because I needed practice with these colors. Also, striking colors tend to show the techniques used better.
First off, you'll need a solid basecoat. Thing and multiple is the mantra here.
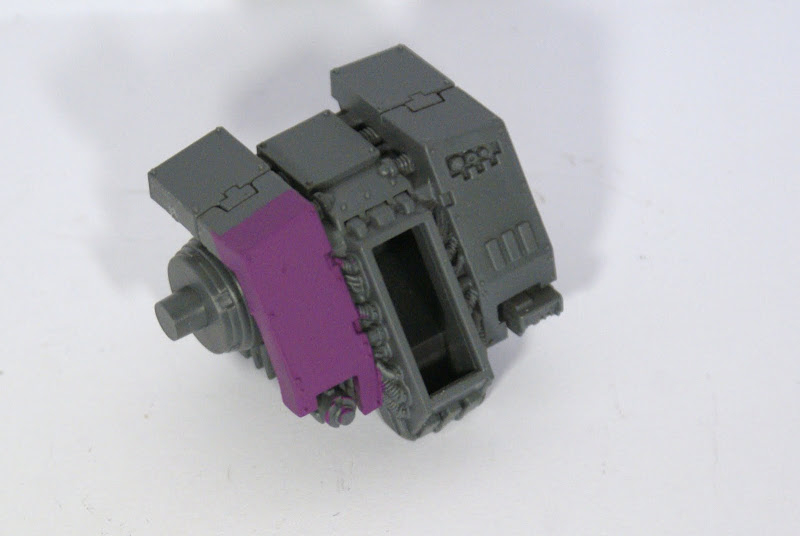
A good basecoat is always the best starting point, no matter what color you are doing, basecoat is the most important one, it determines all the shading and highlights as well. Since we are focusing on highlights, lets do so!
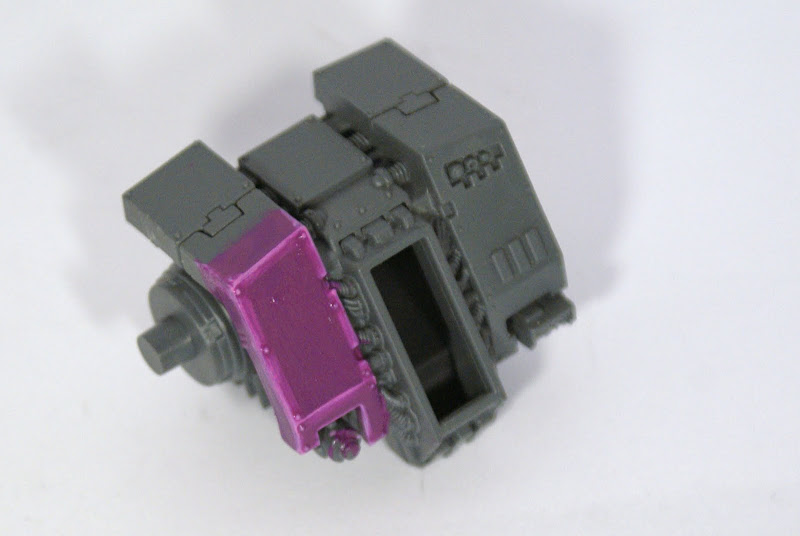
Holy f*ck I thought you said you could paint! Looks pretty crappy right? I tried to make it look as bad as possible. The color choice looks to be 2 shades too light, it's way too thick and uneven to boot! A fiasco!
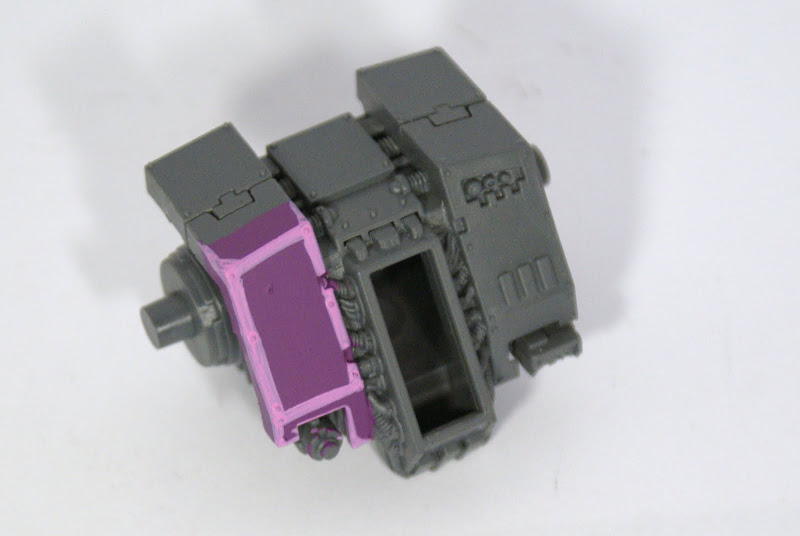
No... not really. It's what you do next, that will determine how good it'll end up looking: making a wash with your basecolor. For that you mix:
- 25% glaze medium
- 25% thinner (or windex)
- 40% water
- 10% paint.
These are just guidelines. You should end up with something that's about as thick as a
GW wash and that has about as much "covering" when you aply it to your miniature. You cannot just water it down. It needs to be rather thick so it'll "stick" to the surface, and pool rather easily around edges.
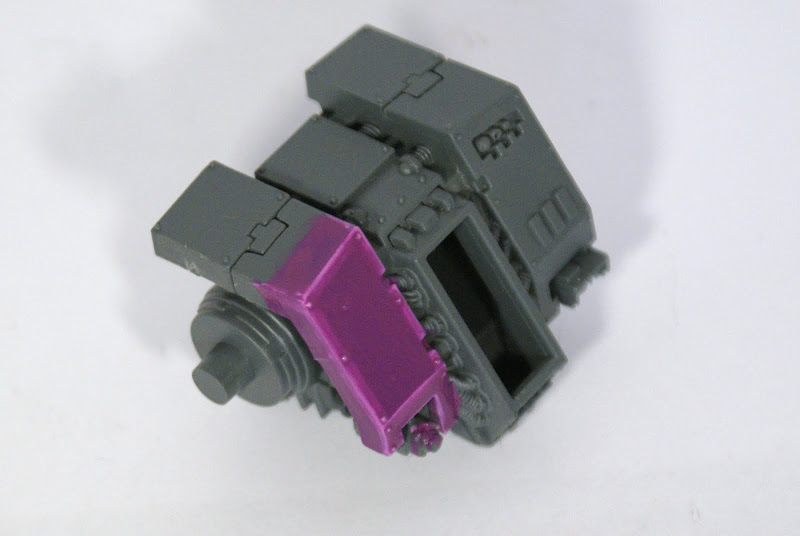
This is why it should stick and get semi good coverage. This is two coats applied of the wash, spread evenly on the base color. NOTE: A hairdryer is a nifty tool to speed this process up.
Next up, is adding more layers of this wash to your model, and to try to make it pool up around the edges. The next picture shows this, as I took it while the wash was still wet.
You can see me trying to force it to the sides. These kind of coats are rather easy to do, and don't require a steady hand
AT ALL! But it requires a bit of getting used to (manipulating the wash that is). It has a much less severe learning curve then straight hardline though!
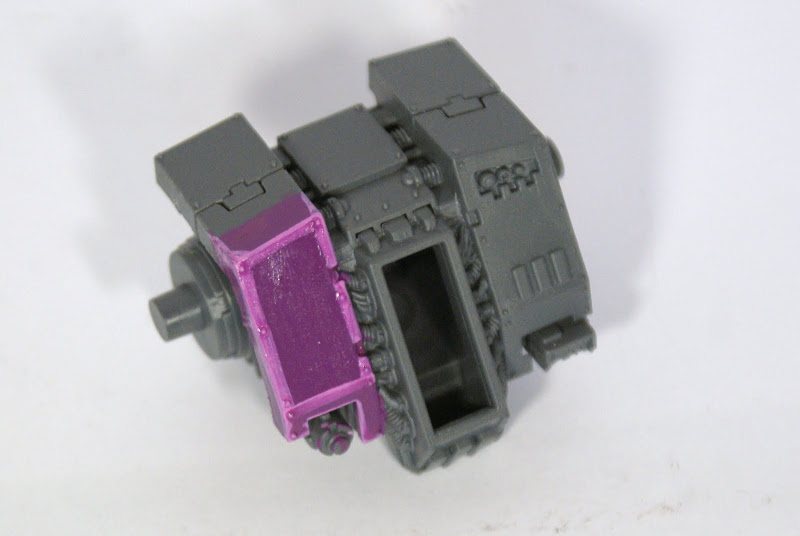
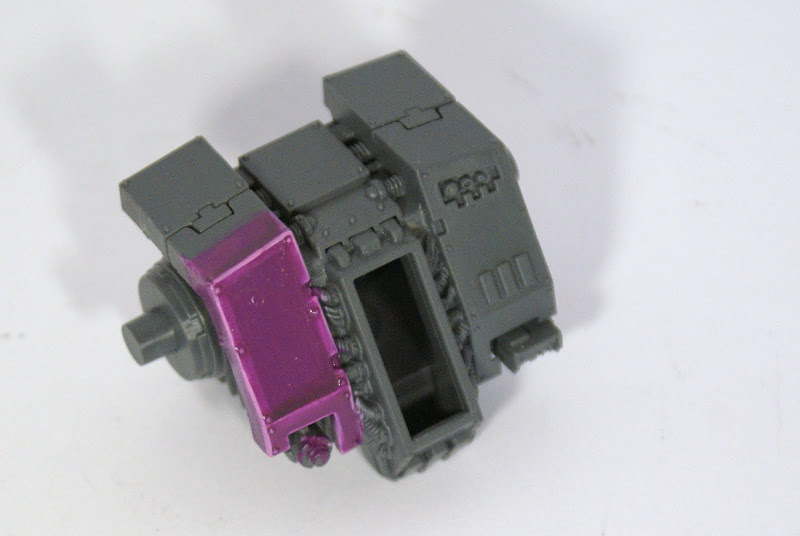
After a couple of wash coats, it'll start to look like this:
You could call it a day at this stage, if you want. Just seal the paint in with a matt varnish (the glaze medium tends to give it quite a bit of shine) and it's pretty decent looking.
In case you want to take it a bit further though, you can still add a fine line to some of the edges to create a few hard lines (takes more skill though, but as you just noticed, mistakes are easily covered with making the wash pool up).
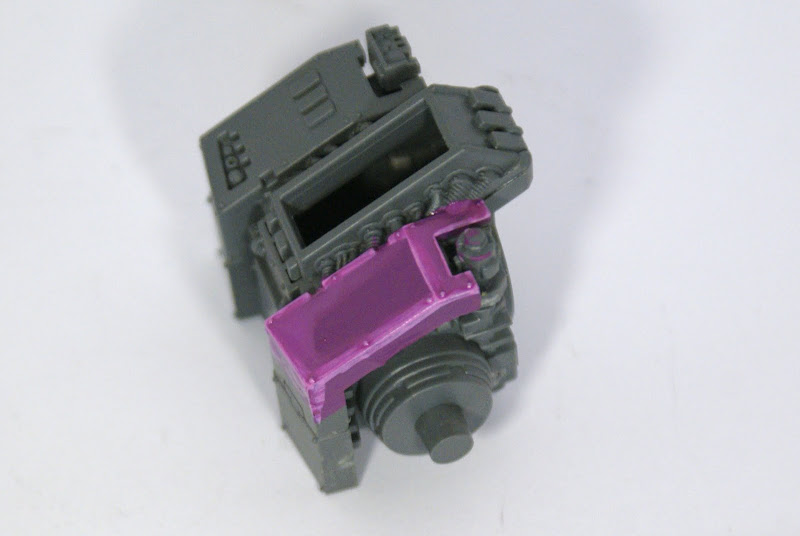
In this picture, the first highlight color was re-used to create a hard lining on the outer edges and the top edge. Some black paint was mixed in with the base color wash, and was used to create some shading effects to contrast with the highlights in the centre of the armor plates. This is also a good way to accentuate shapes, without having to resort to highlighting in the middle of the armor plates (by far the hardest place to get it right!).

The final stage is sealing the paint in, and you are done with it!
This method may take some practice as well, but I can guarantee you it's easier then hard highlighting, and it ends up looking pretty good
imo.
The same procedure can also be used to clear up any ghastly bad highlights you may have done in the past. All it takes, is a making a wash out of your basecoat and then blend it out a bit!
Happy painting


 Goldakka's Waaagh!!: 5000 pts


 Karyorhexxus' Sons of the Locust: 1000pts

