| Author |
Message |
 |
|
|
|
|
Advert
|
Forum adverts like this one are shown to any user who is not logged in. Join us by filling out a tiny 3 field form and you will get your own, free, dakka user account which gives a good range of benefits to you:
- No adverts like this in the forums anymore.
- Times and dates in your local timezone.
- Full tracking of what you have read so you can skip to your first unread post, easily see what has changed since you last logged in, and easily see what is new at a glance.
- Email notifications for threads you want to watch closely.
- Being a part of the oldest wargaming community on the net.
If you are already a member then feel free to login now. |
|
 |
2016/12/07 22:00:50
Subject: Re: multi-level city terrain, marine v nid bases (12/7: new stealer placement, VSG re-primered)
|
|

Dakka Veteran
|
|
|
|
|
 |
|
2016/12/08 21:33:47
Subject: Re: multi-level city terrain, marine v nid bases (12/8: VSG dark metal'd)
|
|
Dakka Veteran
|
|
|
|
|
|
|
2016/12/09 21:40:44
Subject: Re: multi-level city terrain, marine v nid bases (12/8: VSG dark metal with copper.)
|
|
Dakka Veteran
|
Just chugging away, showed the first couple of panels to my friend and he was a fan, so now its just finishing it off.
Its certainly nice and contrasty without blowing out, exactly how the knight turned out as well. I still think tho I like it for actual robots/mechanicals more than for buildings, so ill probably still cover up mine and chip instead. Still its useful to see how it would look more raw. The trick for me is I still really like that tin bit + creamy look, but I want some of the texture and colors that i get out of the dark metal. So Ill have to see what i get starting with a redder dark metal and how that works out.
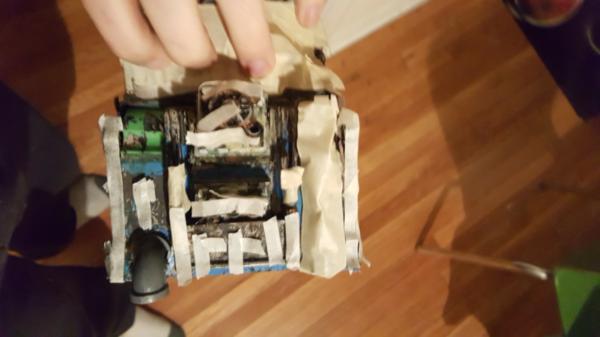
Also stripped the other one and am covering it up to prepare for primer
|
|
This message was edited 3 times. Last update was at 2016/12/09 21:42:56
|
|
|
|
|
2016/12/10 18:43:19
Subject: Re: multi-level city terrain, marine v nid bases (12/10: flanking genestealers done. )
|
|
Dakka Veteran
|
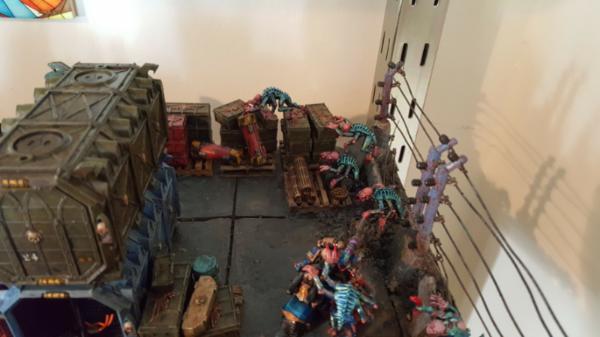
The stealers flanking around the side are done! overally im happy with them, really starting to reinforce the idea that the battle.. aint going so well, stuff is breaking through. Now the right side is basically done as well!
All tahts left is the UHU for my acid mine in the center (which just came in! time to experiment soon) and gaunts/warriors breaking into the left (ugh)

|
|
|
|
|
|
2016/12/21 01:41:33
Subject: Re: multi-level city terrain, marine v nid bases (12/12: first custom built VSG re-done)
|
|
Dakka Veteran
|
|
|
|
|
|
|
2017/01/03 23:54:27
Subject: Re: multi-level city terrain, marine v nid bases (1/3: second custom VSG WIP )
|
|
Dakka Veteran
|
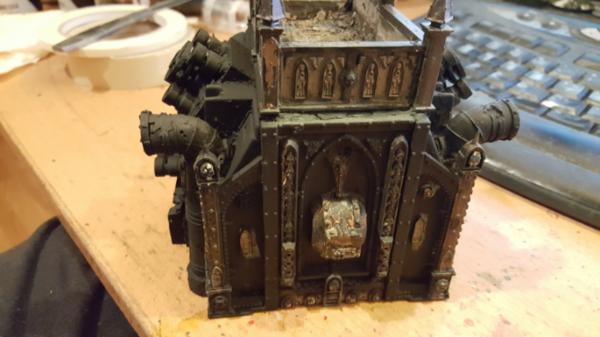
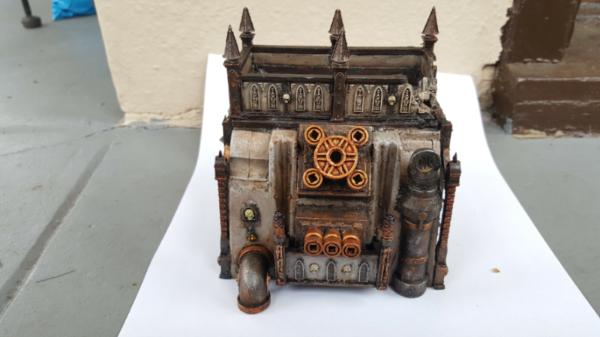
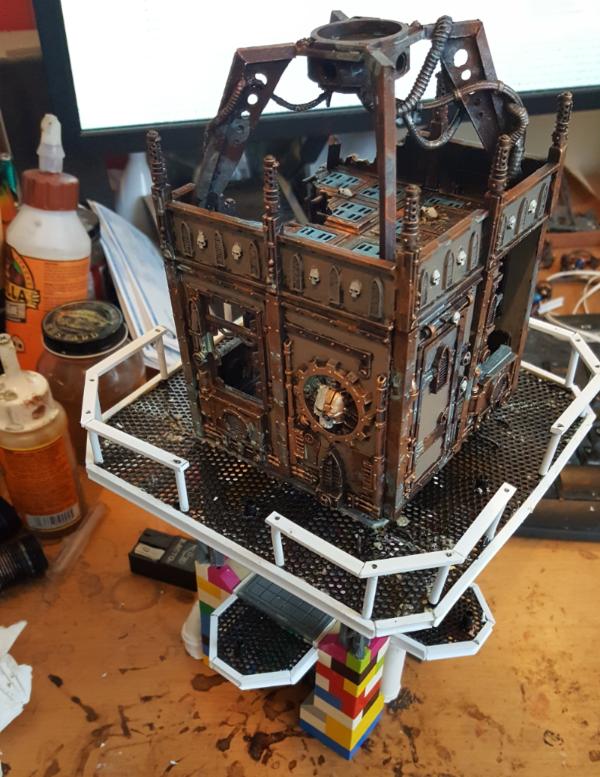
SO I didnt do much painting over the holidays, but I had a free day yesterday and decided to get as far on the second VSG as i could. There are still some finishing touches. THe blue is a bit strong, the fuses need to be repainted..etc, but I figured id show the WIP.
One thing I did was blended my dark metal technique into something redder for the pillars. One of the things I struggled with with the oriogina tin bitz + cream scheme is how smooth the tin bitz was, but adding the vidris effect and just that got TOO dirty. Switching to red dark metal (tin bitz + micaeus iron oxide and then instead of pearl for highlights I used bronze) seems to work a lot better for getting that high detail but low contrast look.
|
|
|
|
|
|
2017/02/13 19:17:22
Subject: Re: multi-level city terrain, marine v nid bases (2/13 painting buildings!)
|
|
Dakka Veteran
|
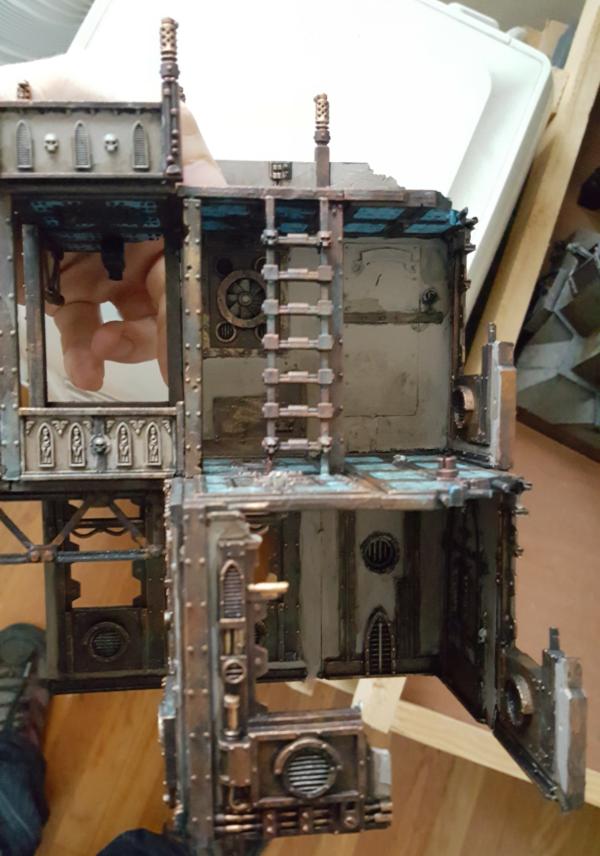
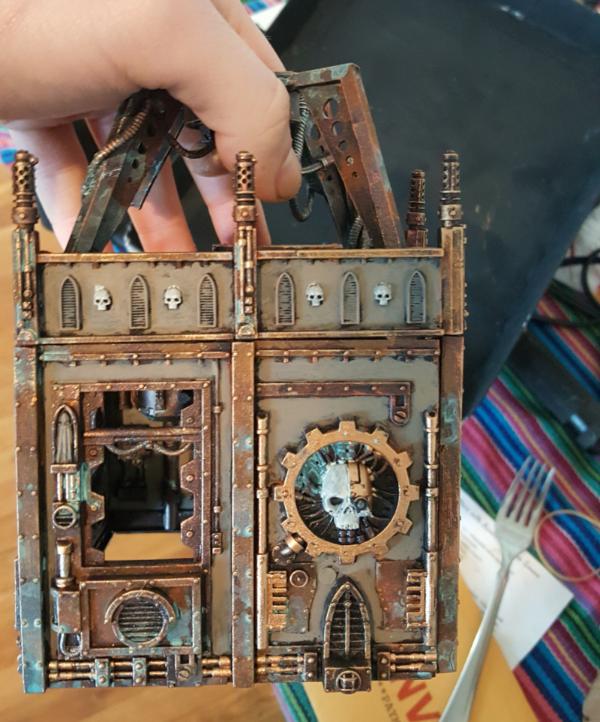
Hello! This is unexpected. For reasons that are complicated I managed to snag a few weeks of free time to work on stuff. The one caveat being that the work space isnt my normal one and so not really good for painting fine details (bike khan) or building stuff.
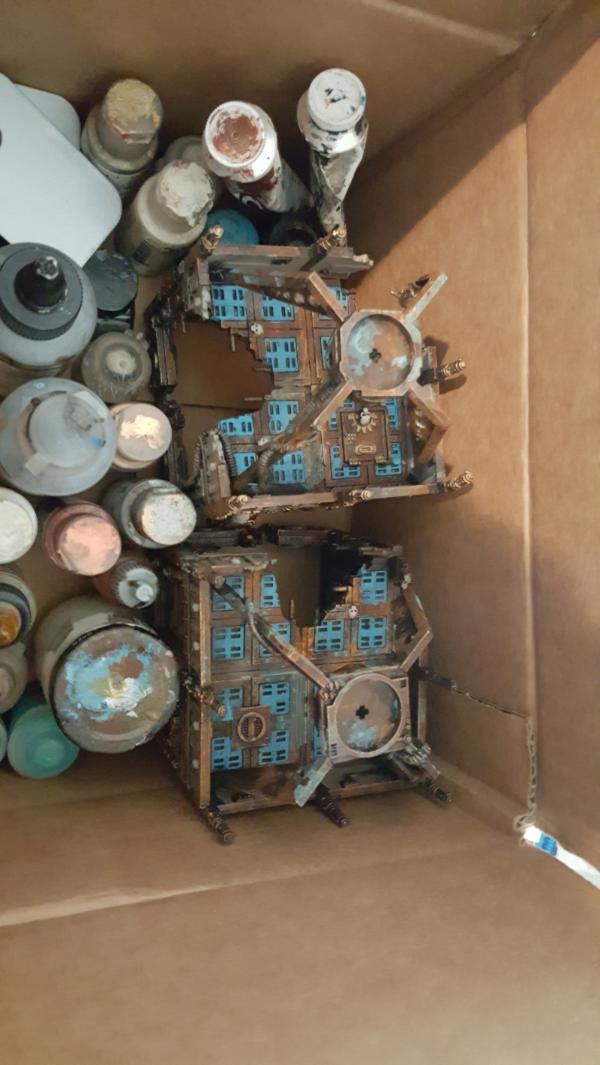
So, given that, I decided to paint the remainder of my buildings in my fully developed tin-bitz dark metal method and creamy stone. I never, ever thought I'd get around to actually painting these things for YEARS, so this is super exciting! Technically all this happened a few weeks ago so this will be int he past tense, but lately with the blog i've found it easier to build up a few weeks of content (and pictures) and then do my updates that way.
Now I'll have a general tutorial but here is broadly how each building goes down painting wise:
they take about.. 10-15 hours to get to.. 85% done. Thats the level im painting these at because I just dont have time to do any more. My goal is to get every building painted rather than have 3 of them REALLY finalized.
So that means no lights (they take forever, and im still not fully happy with how they turn out) and definitely still areas that could be cleaned up, but thats okay.
Most of the reason why it takes so long is due to the number of GW panels, so the actual time to paint was fairly consistent. My smaller buildings had more panels so took about as long as the bigger stuff. The only excpetion were the towers but we'll get to those later 
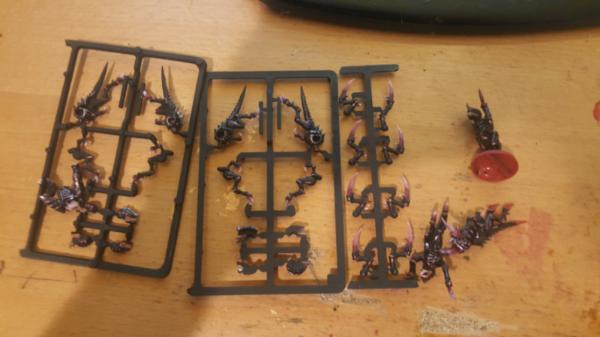
Anyhoo, first up was painting up the remaining hormagaunts on the sprue. Pretty straightfoward and boring, but I need them for my bursting out of the hole on the left side. One that i.. have not yet fully thought out (no good movie reference for that one I can think of, starship troopers hides it under other stuff).
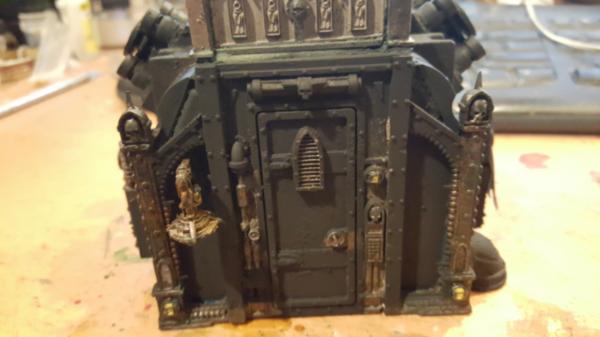
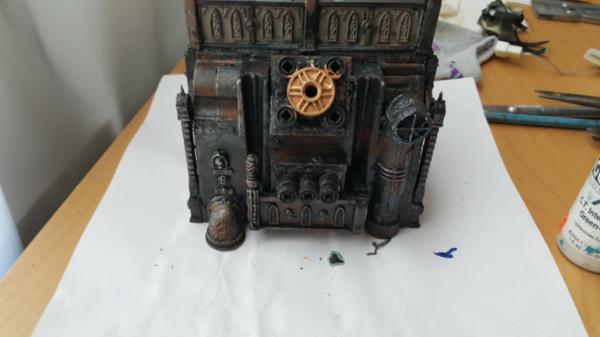
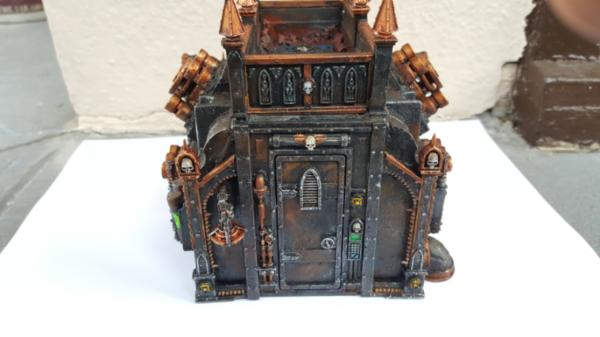
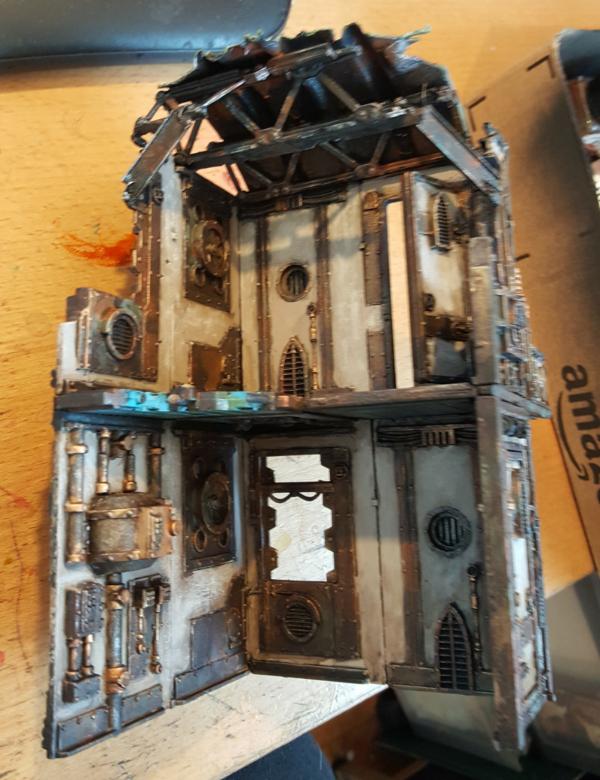
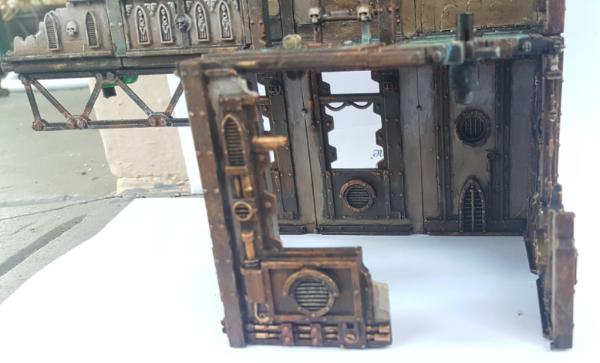
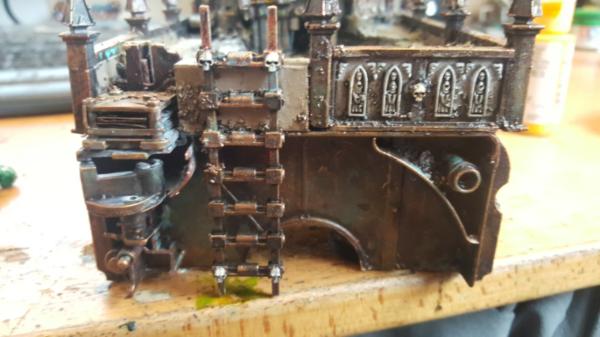
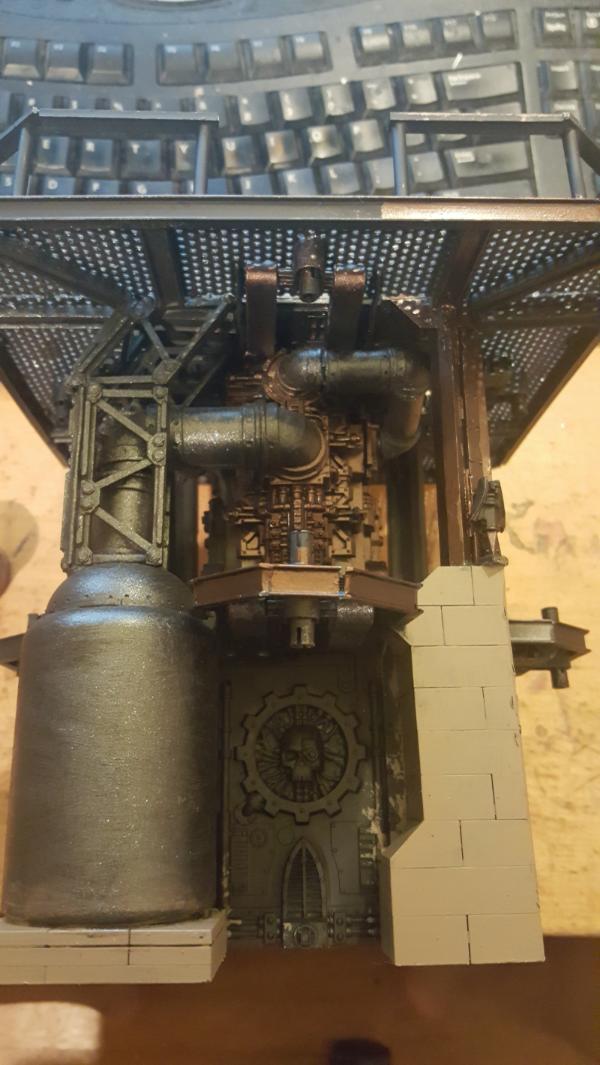
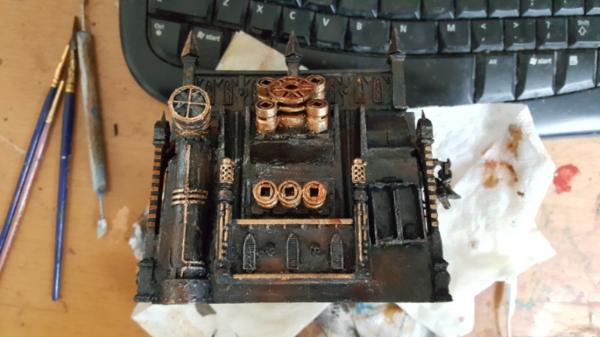
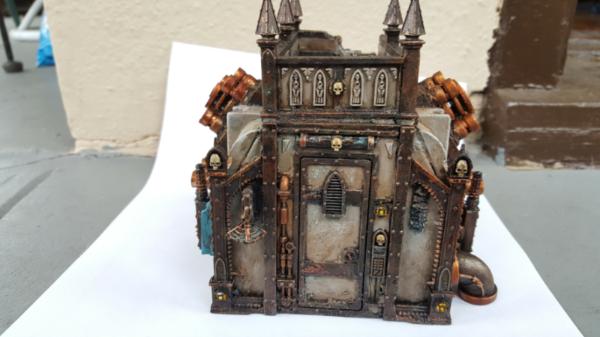
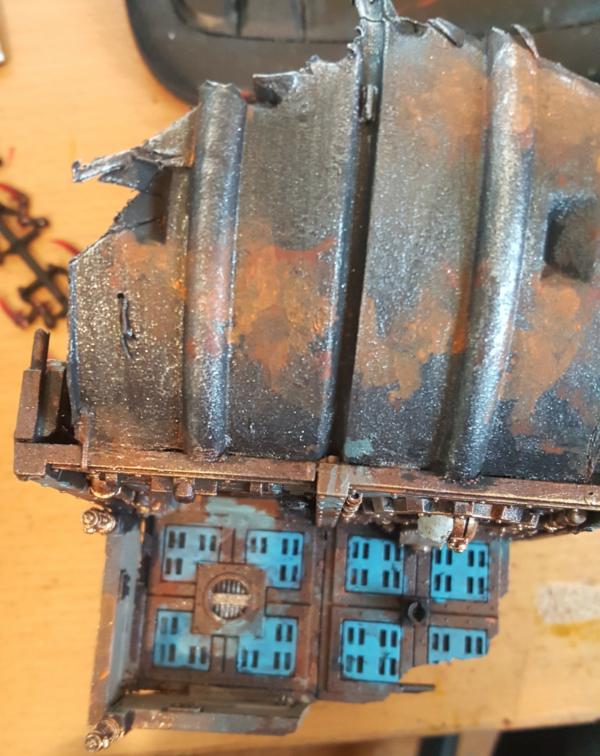
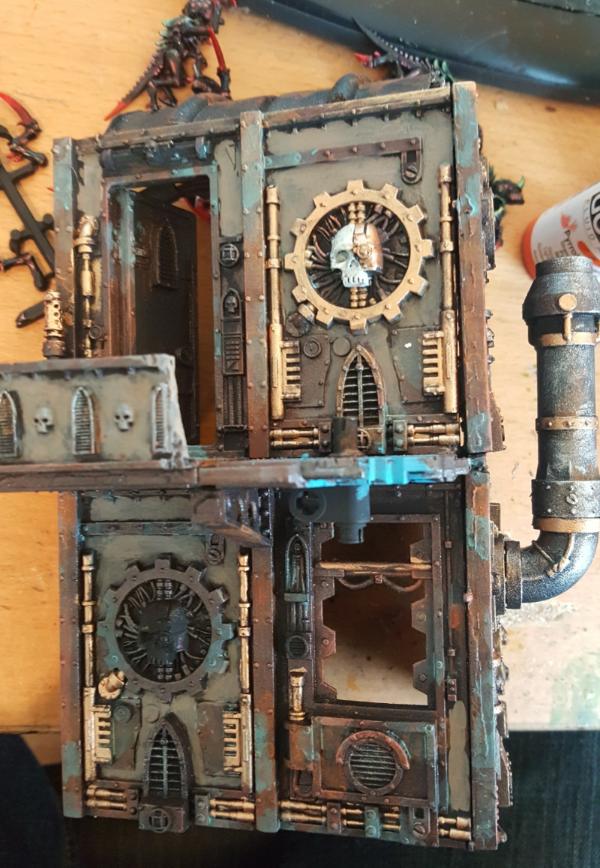
Next up is my first building, one of my smaller ones. This is post dark red coat and working/worked on the base coat to my creamy stone.

|
|
|
|
|
|
2017/02/14 00:53:19
Subject: multi-level city terrain, marine v nid bases (2/13 painting buildings!)
|
|
Stealthy Warhound Titan Princeps
|
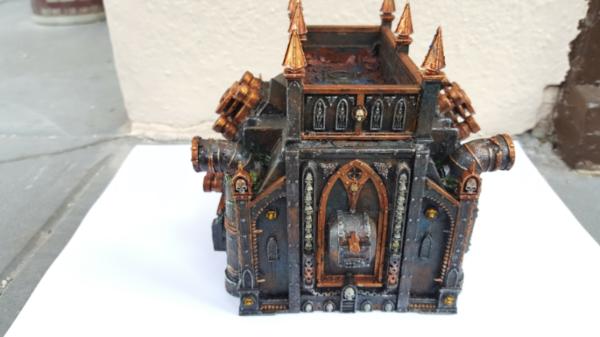
Nice use of blue!
|
|
|
|
|
2017/02/14 04:58:57
Subject: Re: multi-level city terrain, marine v nid bases (2/13 painting buildings!)
|
|
Dakka Veteran
|
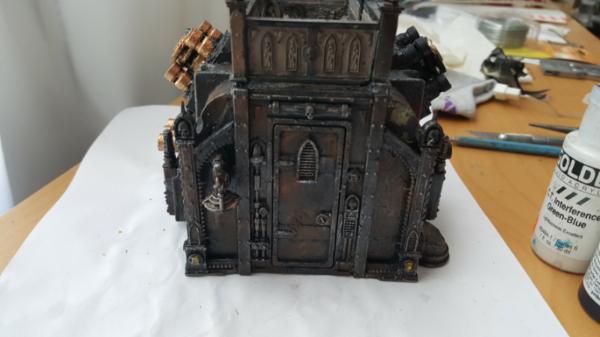
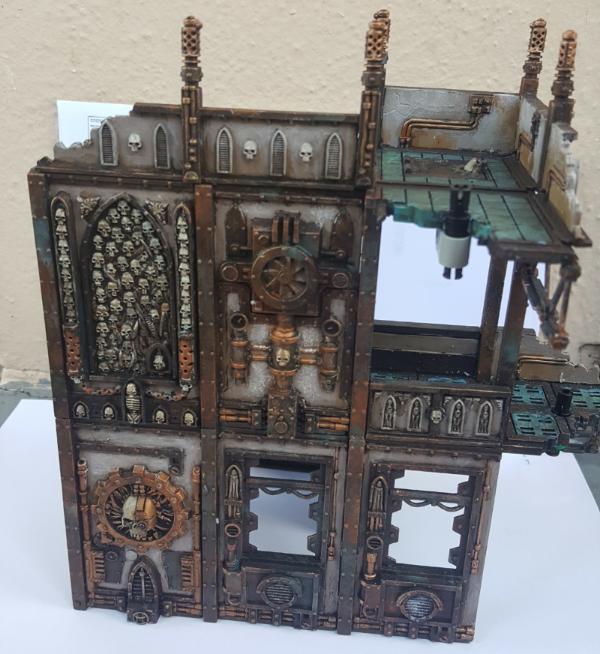
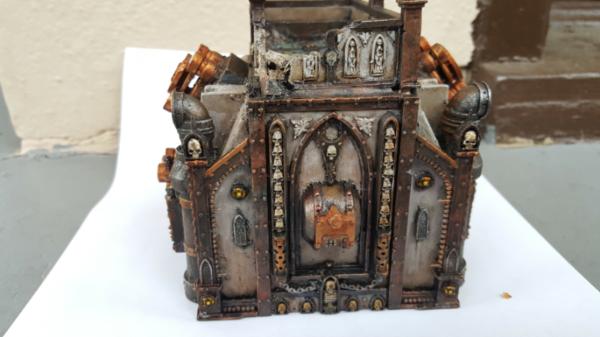
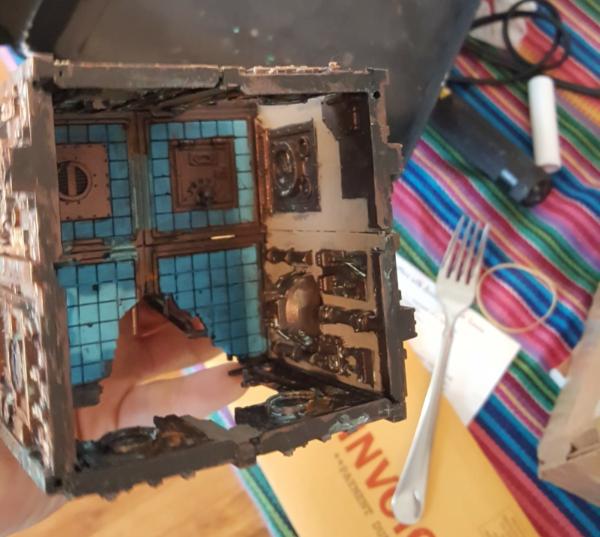
Thanks! It doesnt end up quite that bright in the end after the washes, but its a nice contrast to the cream/dark-bitz metal.
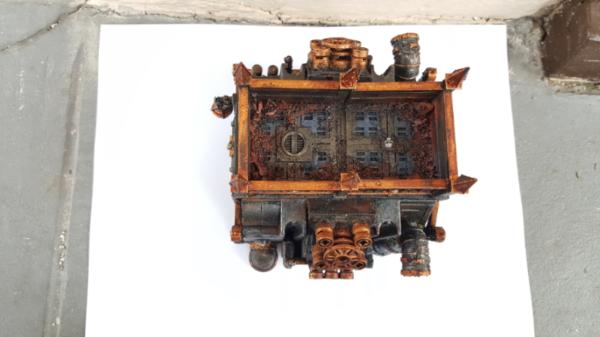
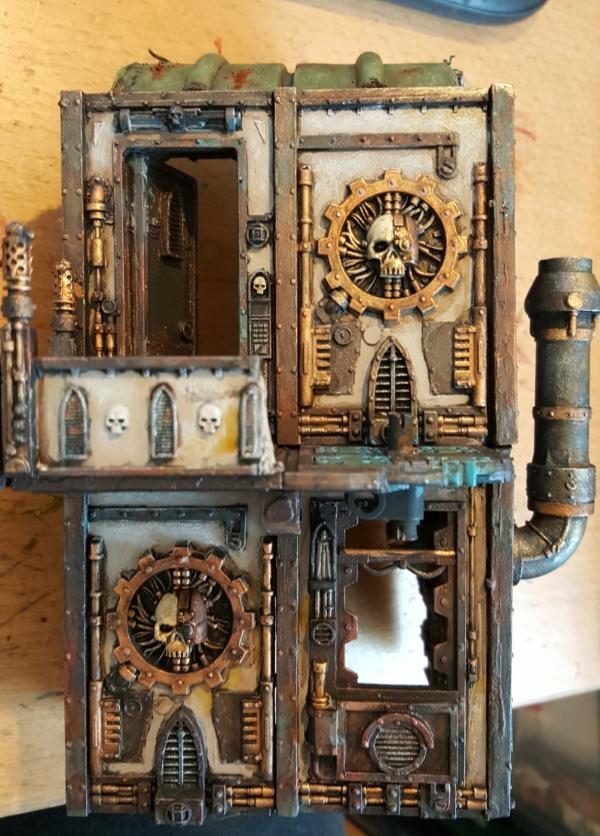
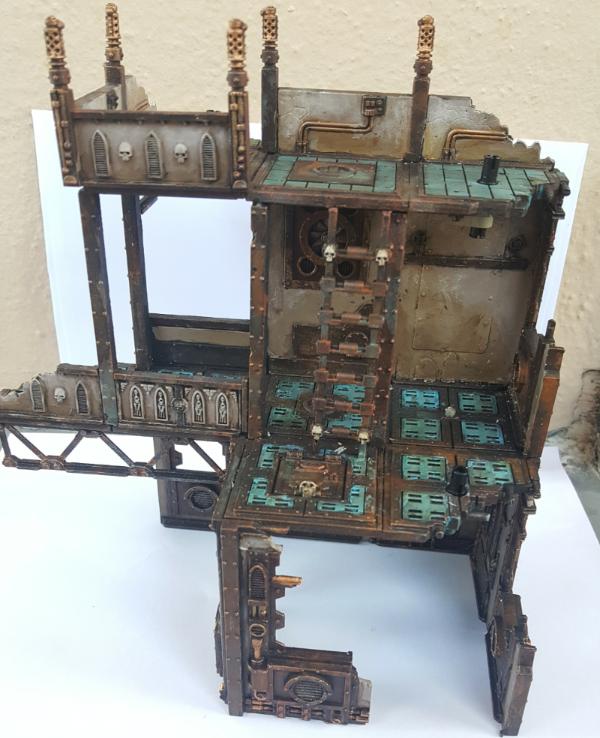
I also thought it was important to highlight all the walkable areas of the terrain. It's pretty detail rich so being able to see where models go seemed like a good idea.
|
|
|
|
|
|
2017/02/14 19:23:51
Subject: Re: multi-level city terrain, marine v nid bases (2/14 small building painted)
|
|
Dakka Veteran
|
|
|
|
|
|
|
2017/02/14 20:02:30
Subject: Re: multi-level city terrain, marine v nid bases (2/14 small building painted)
|
|
Poxed Plague Monk
|
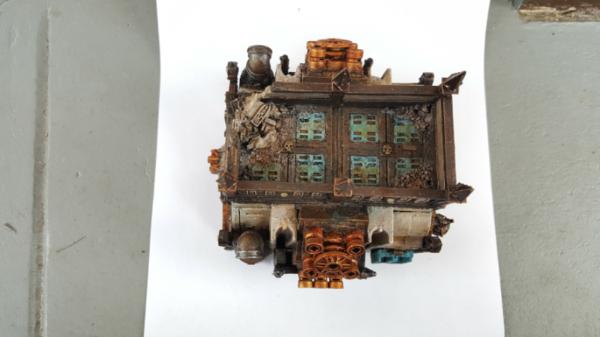
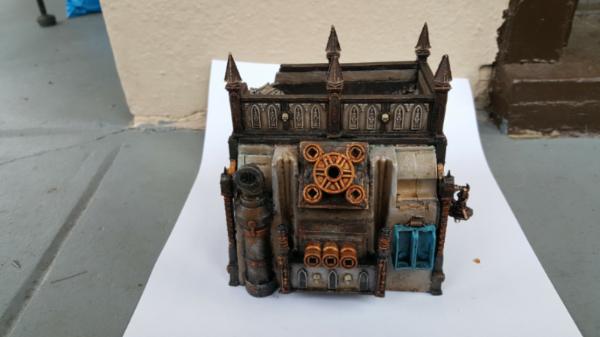
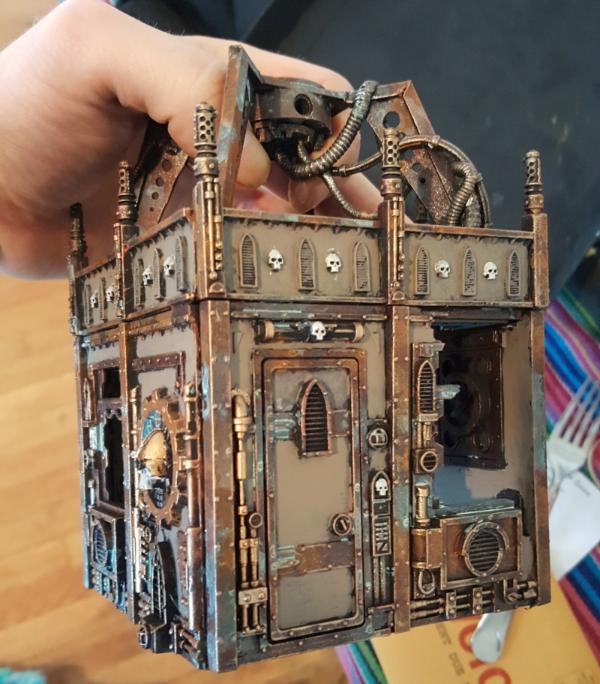
Looks great! I really like the little exhaust pipes on the balcony.
|
|
|
|
|
2017/02/15 17:53:16
Subject: Re: multi-level city terrain, marine v nid bases (2/15 med building pre-wash)
|
|
Dakka Veteran
|
|
|
|
|
|
|
2017/02/15 19:18:14
Subject: multi-level city terrain, marine v nid bases (2/15 med building pre-wash)
|
|

Crushing Black Templar Crusader Pilot
|
Love it. Your skills continue to inspire
|
  
Relapse wrote:
Baron, don't forget to talk about the SEALs and Marines you habitually beat up on 2 and 3 at a time, as you PM'd me about.
|
|
|
|
|
2017/02/16 18:54:49
Subject: Re: multi-level city terrain, marine v nid bases (2/15 med building done)
|
|
Dakka Veteran
|
|
|
|
|
|
|
3917/02/17 19:14:12
Subject: Re: multi-level city terrain, marine v nid bases (2/17 generator bldg first pass)
|
|
Dakka Veteran
|
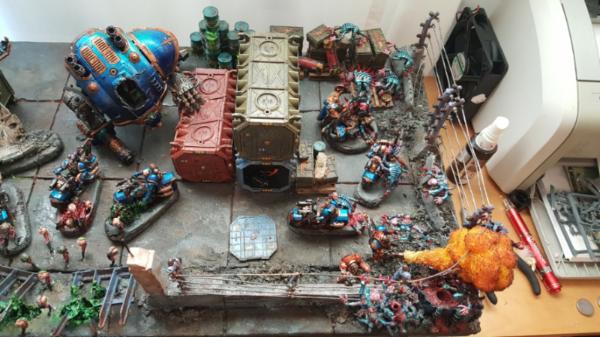
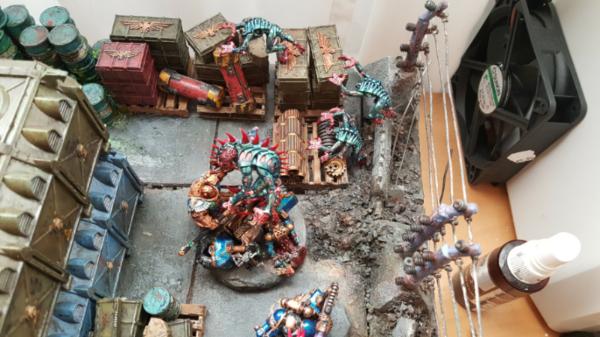
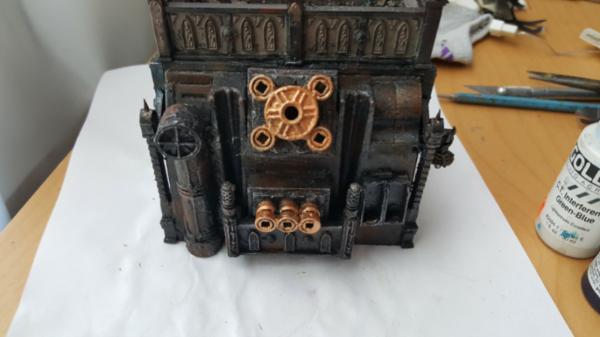
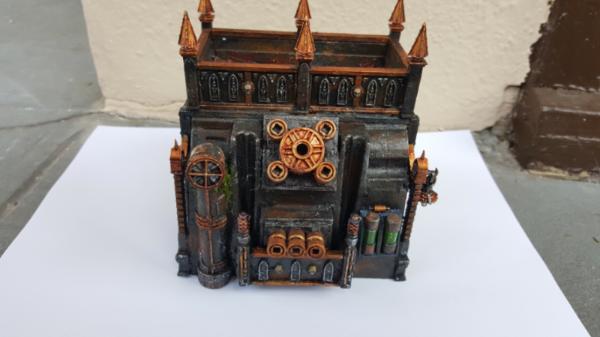
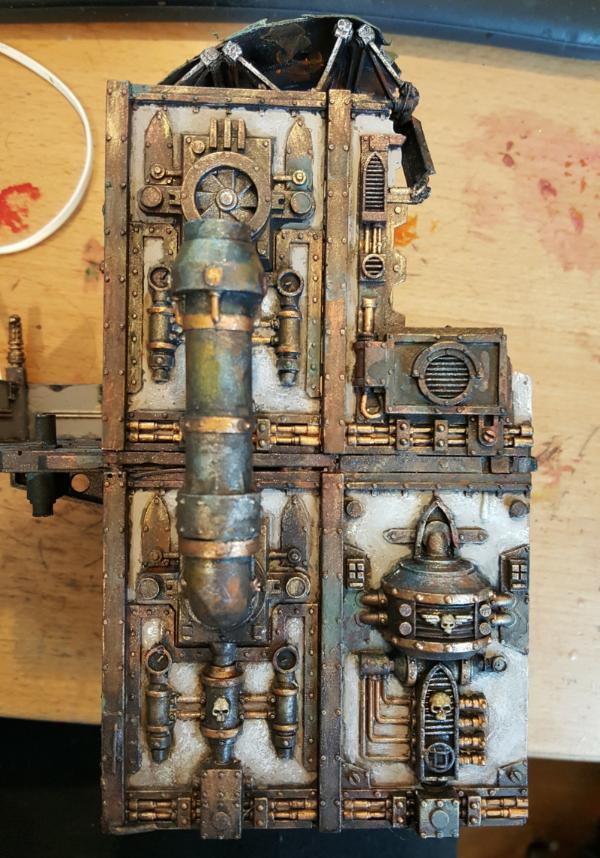
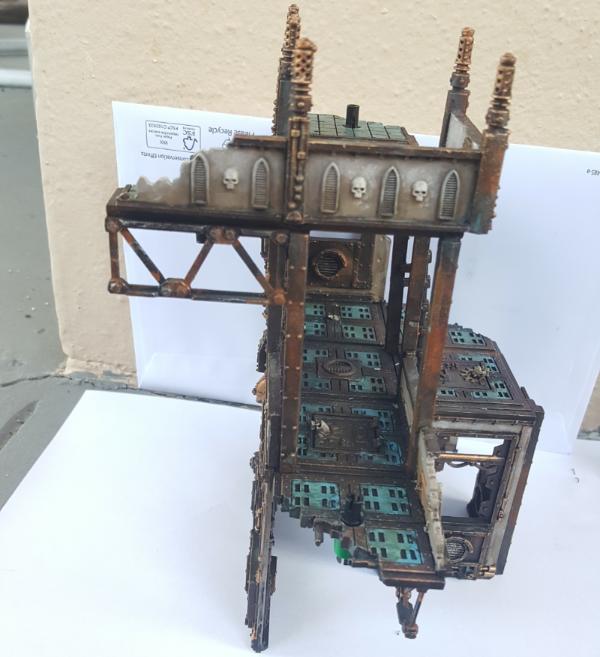
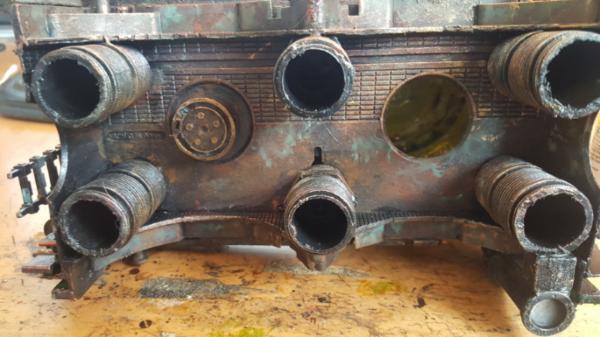
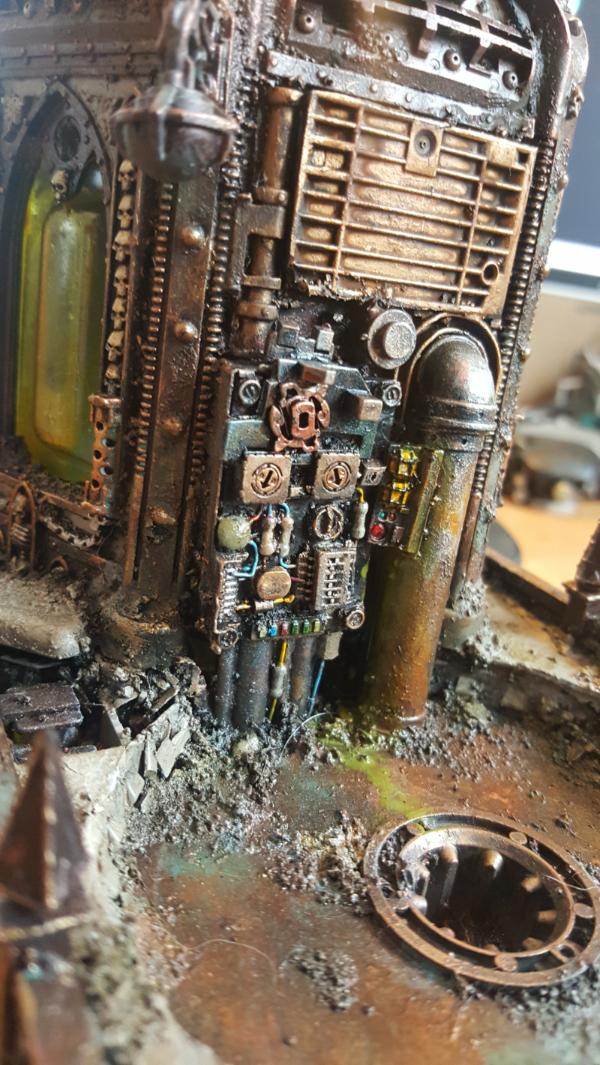
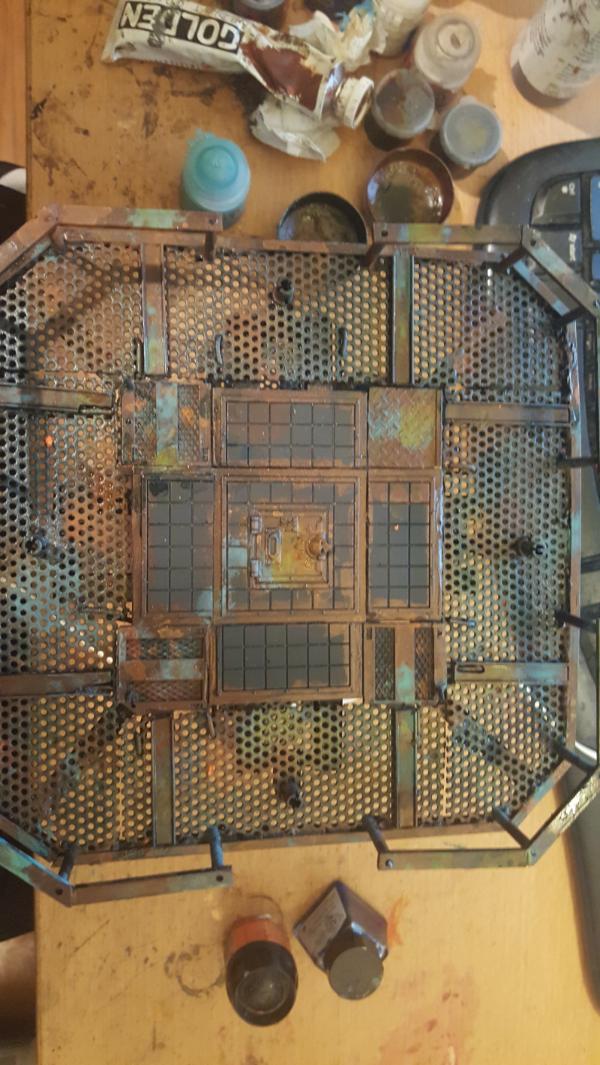
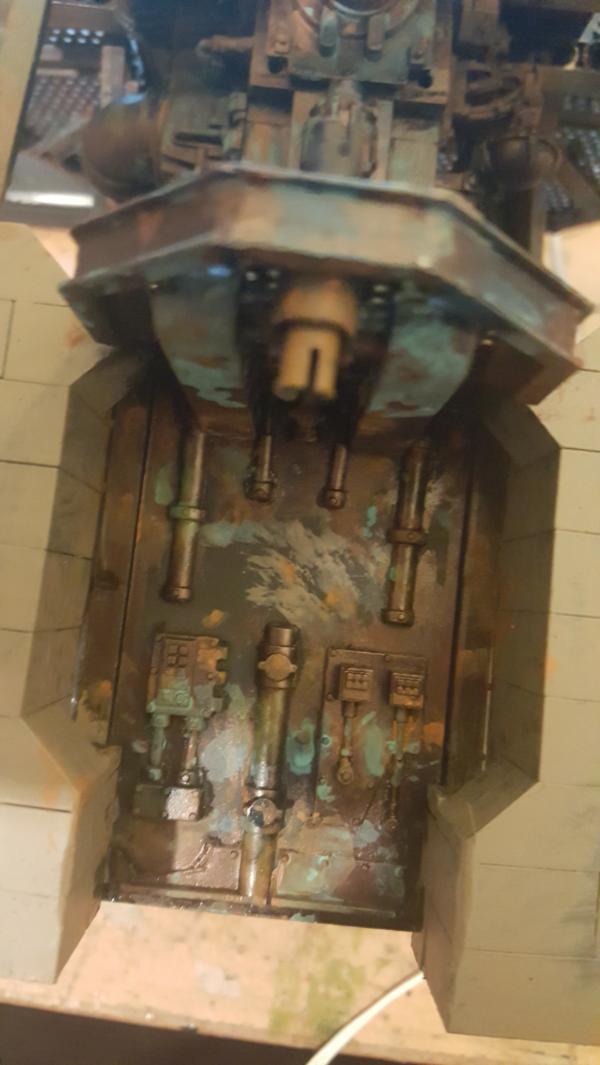
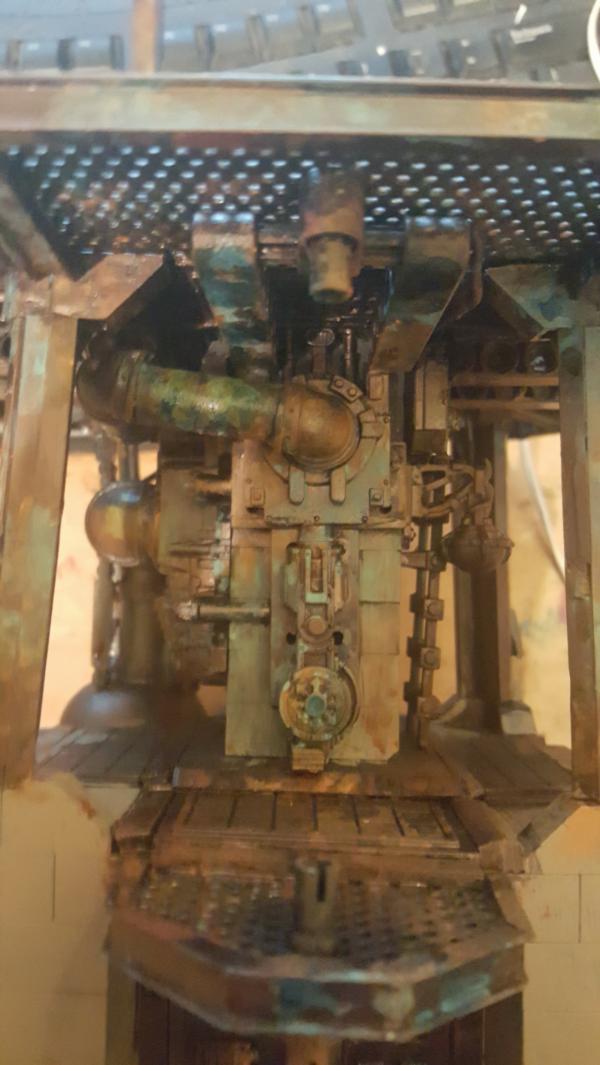
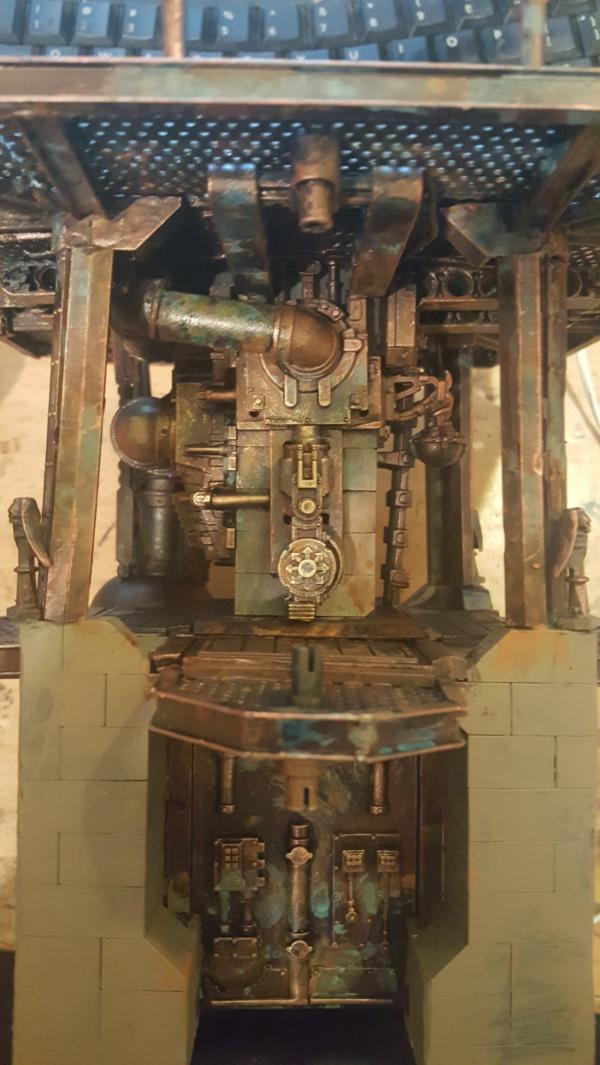
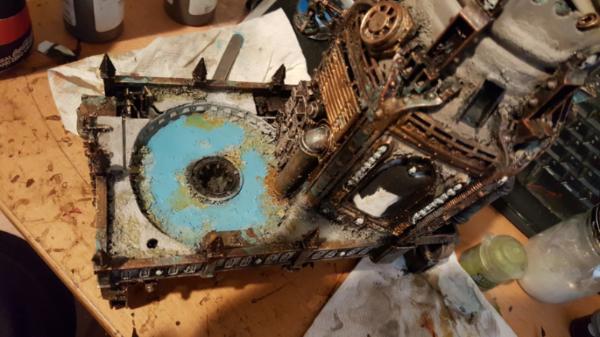
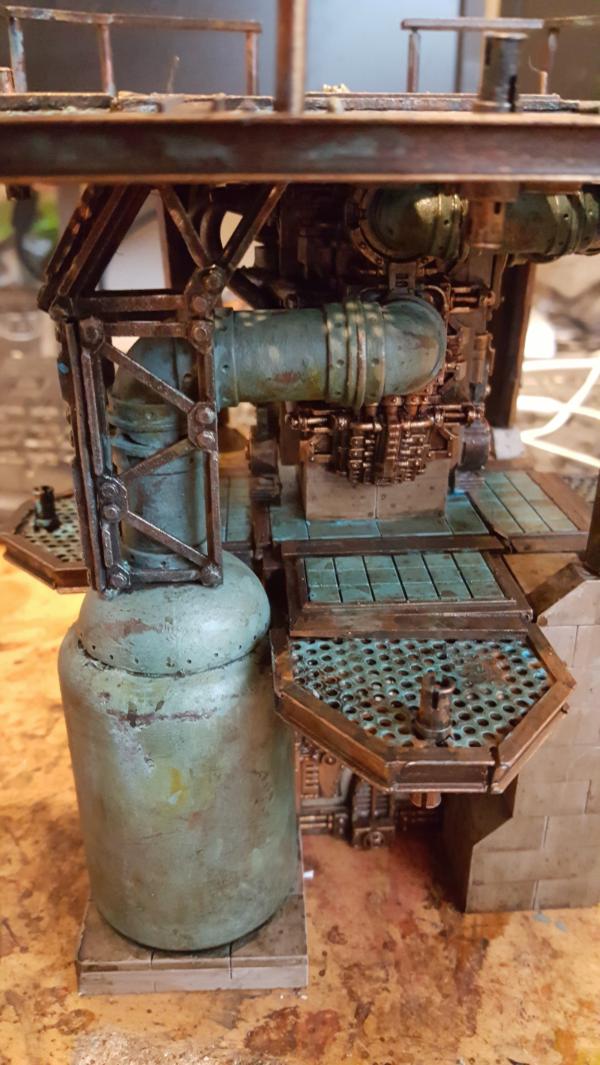
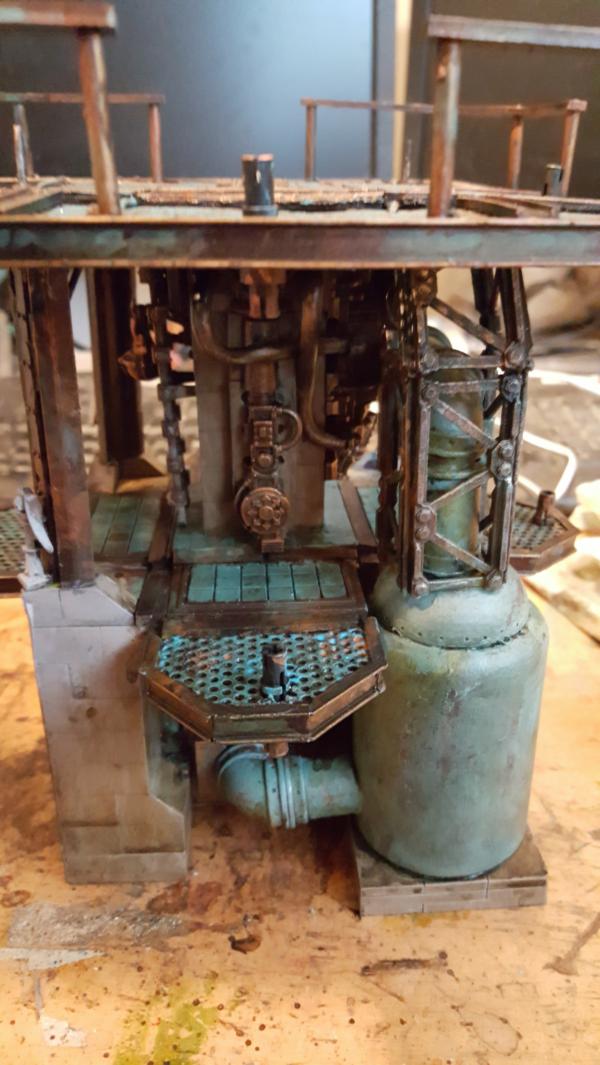
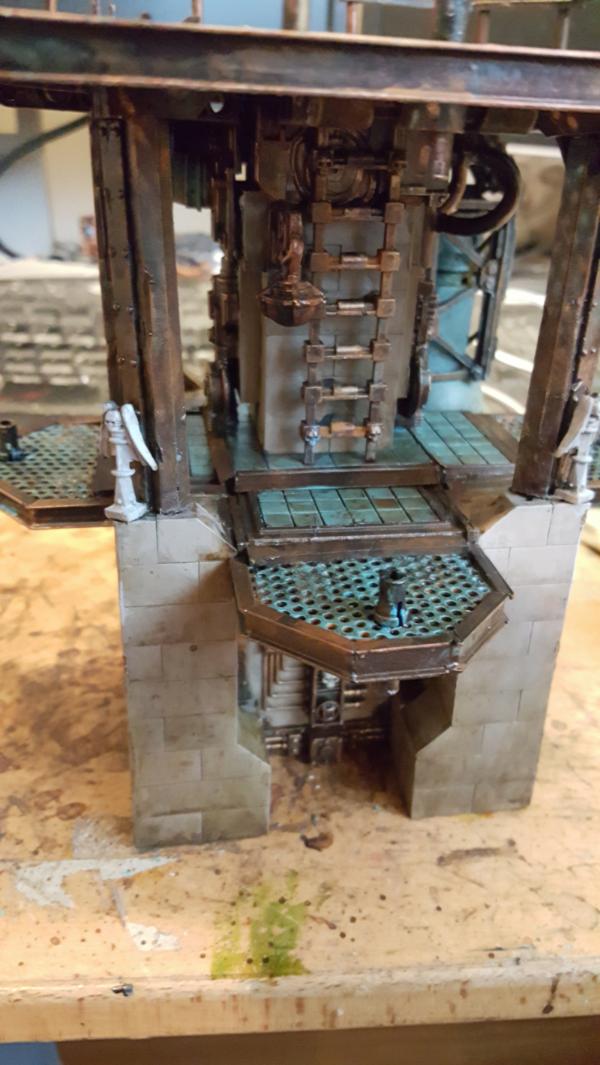
Next up is the generator bldg! This one is tricky because there is no real "floor", so nothing to clearly deliminate as being blue. Painting the narrow areas around circular depression blue seemed like it would look wierd. But the circle being blue just looks like I'm trying to do some wierd water thing, so I think i'll just make it dark and scratch having blue floors anywhere on this piece, it just doesnt really work.
|
|
|
|
|
|
2017/02/18 21:37:51
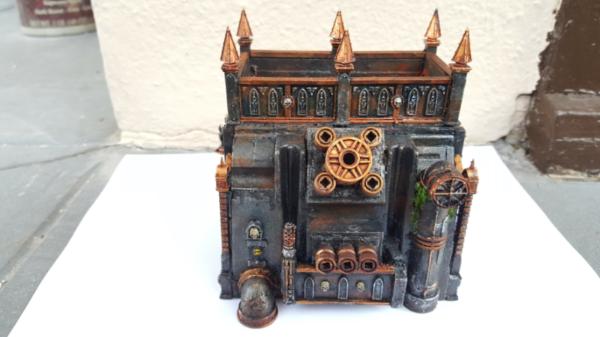
Subject: Re: multi-level city terrain, marine v nid bases (2/18 med generator bldg done)
|
|
Dakka Veteran
|
|
|
|
|
|
|
2017/02/19 22:22:47
Subject: Re: multi-level city terrain, marine v nid bases (2/19 adding bridge-points to my towers)
|
|
Dakka Veteran
|
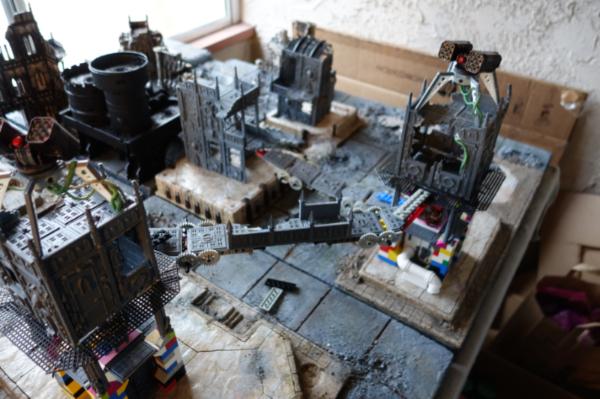
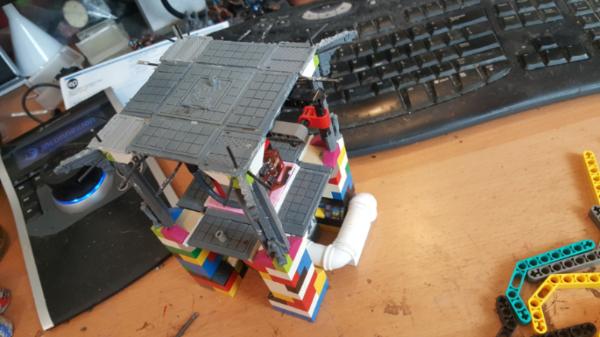
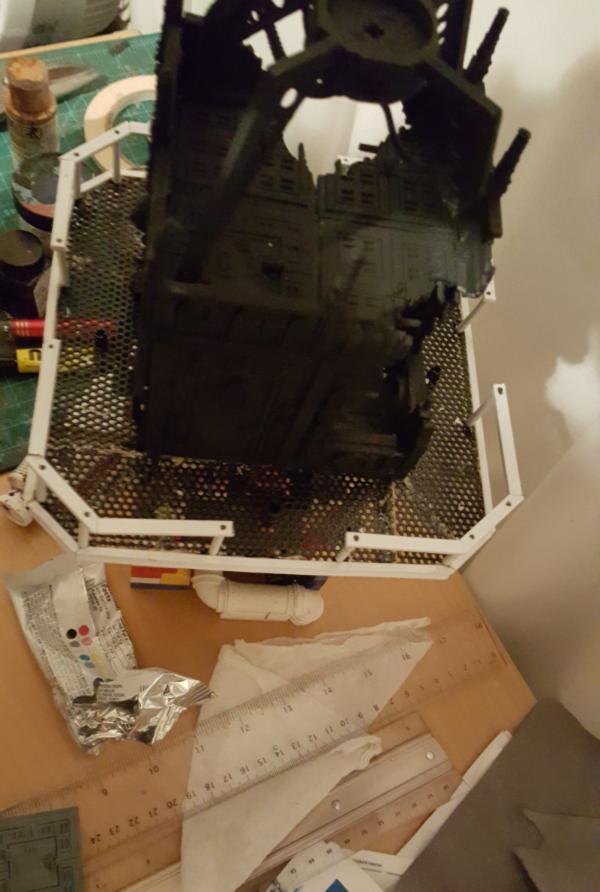
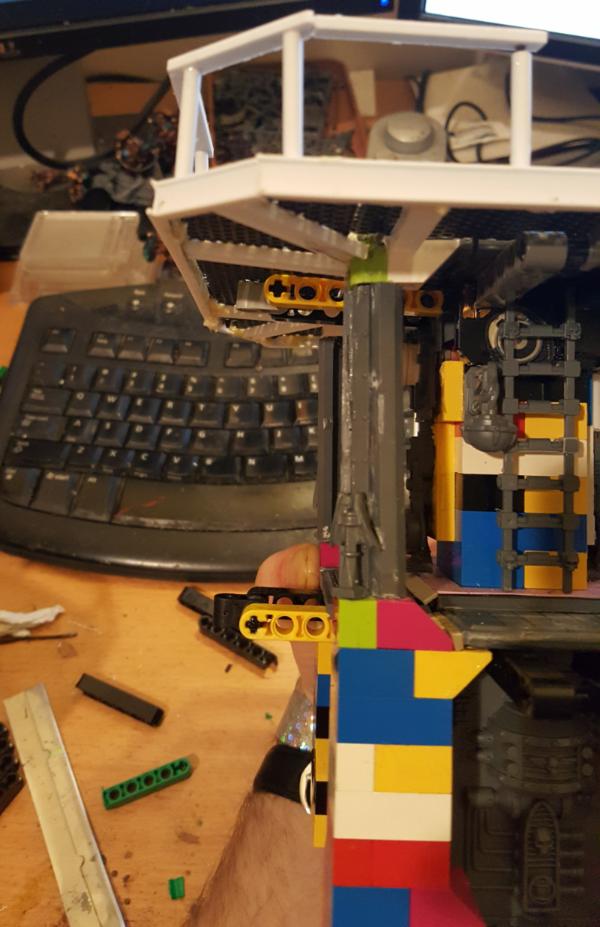
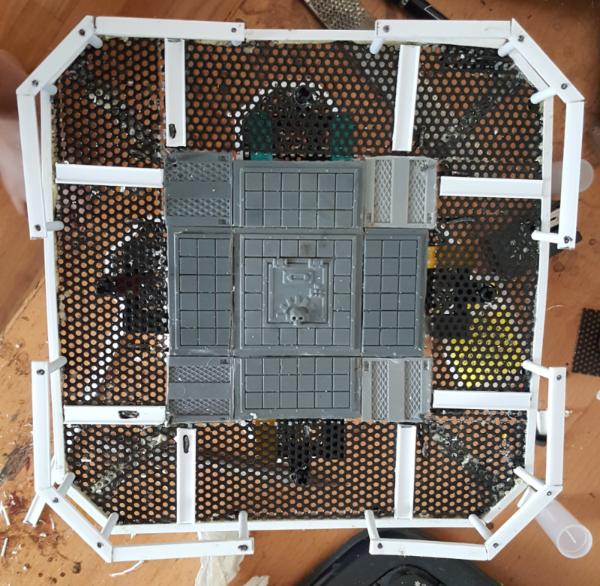
So, now I've covered all the small/buildings in paint, its time to move onto the big boys that needed more work, the water tower complex and the bridge towers. Remember these guys? And that whole bridge system I was working on? lets finish it.
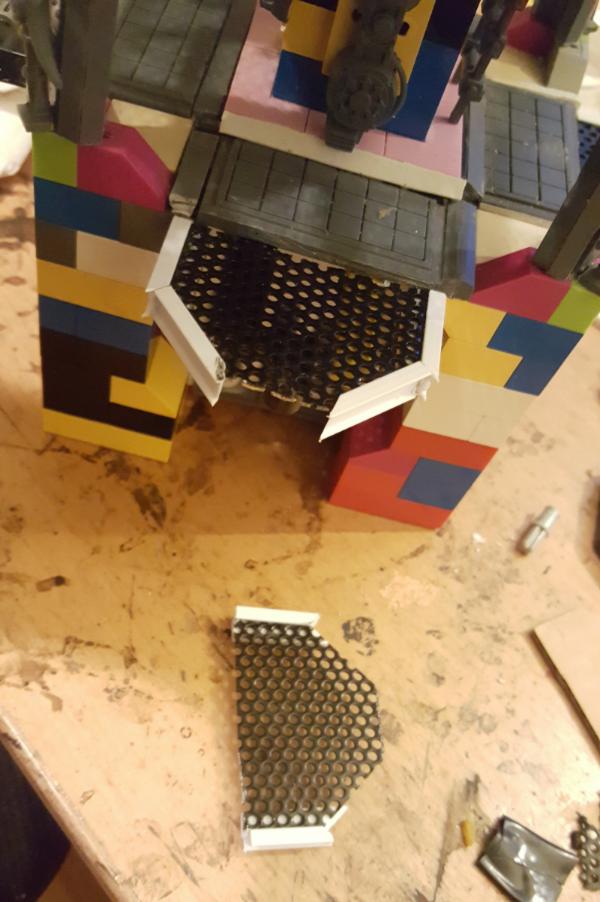
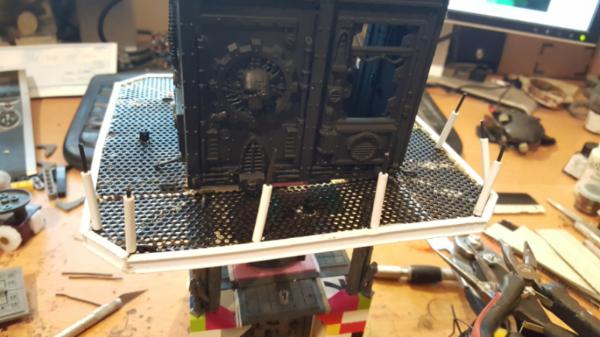
First up is the towers and their walkways. Basically the walkways suck, it was was made of this plastic mesh which didnt stick and was a total mess. Now that I've built metal mesh walkways for the garage..
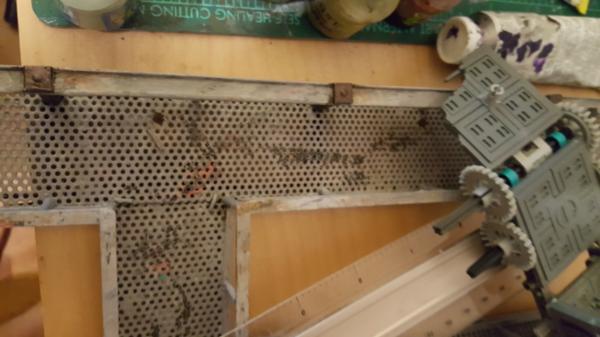
its time to do that instead. First up is removing the old mesh, which pretty much just meant pull gently
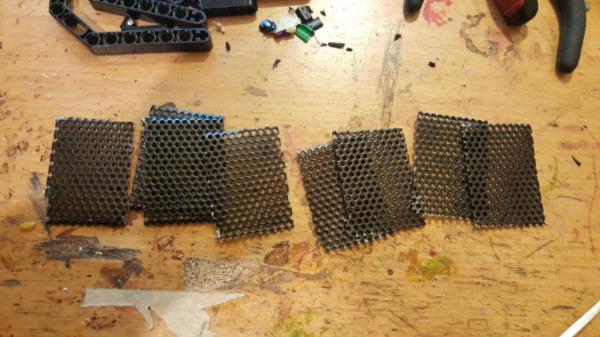
Key to the bridge system was having legos sticking out with the pin attach point all-ready to go. The idea being id drill a hole in the mesh and run the pin through it. There was 1 i did as a test but now i need 3 more for each tower. So time to cut up a lot of these to length:
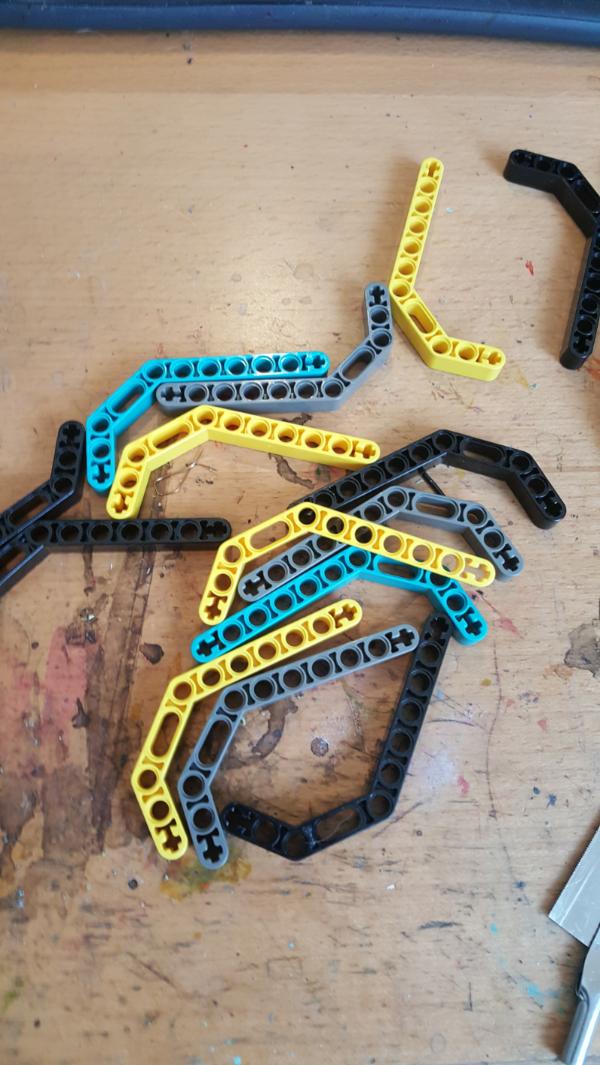
And glue them down. Now since these plastics dont react as well to superglue I decided to try out plastizap, theoretically zap-a-gaps superglue version more meant for plastics. It seems to work.. better? Im trying not to accelerate it so typically what I did was have the plastic-zap for the broad connection and then "spot weld" normal superglue with accelerator to hold it together while it drys. They are sturdy on there at least so something worked...
|
|
This message was edited 2 times. Last update was at 2017/02/19 22:23:43
|
|
|
|
|
2017/02/19 23:43:38
Subject: multi-level city terrain, marine v nid bases (2/19 adding bridge-points to my towers)
|
|
Ragin' Ork Dreadnought
Deep in the Outer Boroughs of NYC
|
You used needle point mesh i assume? They sell it mostly in squares at craft stores and it has a waxy feel to it, right? If you soak those in warm, soapy water overnight, it helps to cut down on the waxiness that prevents it from sticking to things. What you've got going on now looks promising and less complicated or time-consuming, though.
|
|
|
|
|
|
2017/02/19 23:49:08
Subject: Re: multi-level city terrain, marine v nid bases (2/19 adding bridge-points to my towers)
|
|
Dakka Veteran
|
Hmm, i didnt realize that about the needlepoint (I think I was using that), so thanks for the tip! I might use it for building gratings later on for other projects.
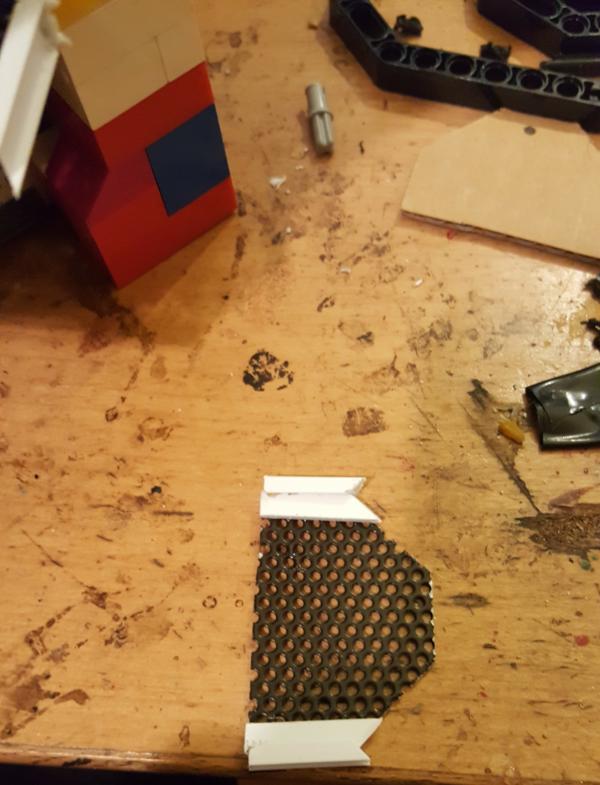
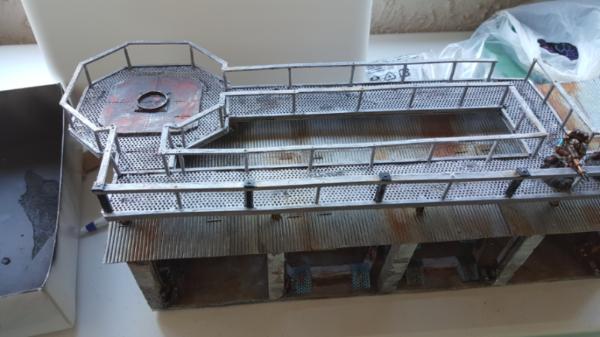
However the speaker mesh remains superior for walkways mostly because it looks better (circular holes) and is metal and this sturdier/stiffer. It's still very time consuming, mostly to get the ibeam edge all around it. You'll see soon!
These are the walkways I'm referring to:
|
|
This message was edited 1 time. Last update was at 2017/02/19 23:50:18
|
|
|
|
|
2017/02/20 20:47:37
Subject: Re: multi-level city terrain, marine v nid bases (2/19 adding bridge-points to my towers)
|
|
Dakka Veteran
|
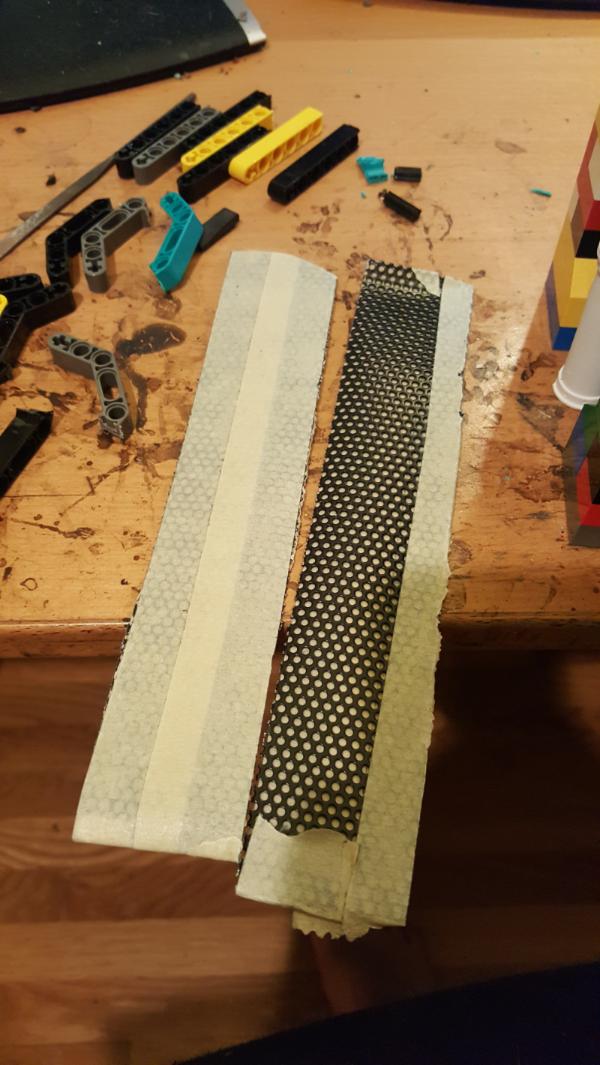
Do be do, work continues. One thing to note is that I didnt make these walkways QUITE as big as the ones for the garage, because I didnt need to have railings on both sides. Even still they end up at like 1.5 inches all the way around, these towers are getting a size upgrade!
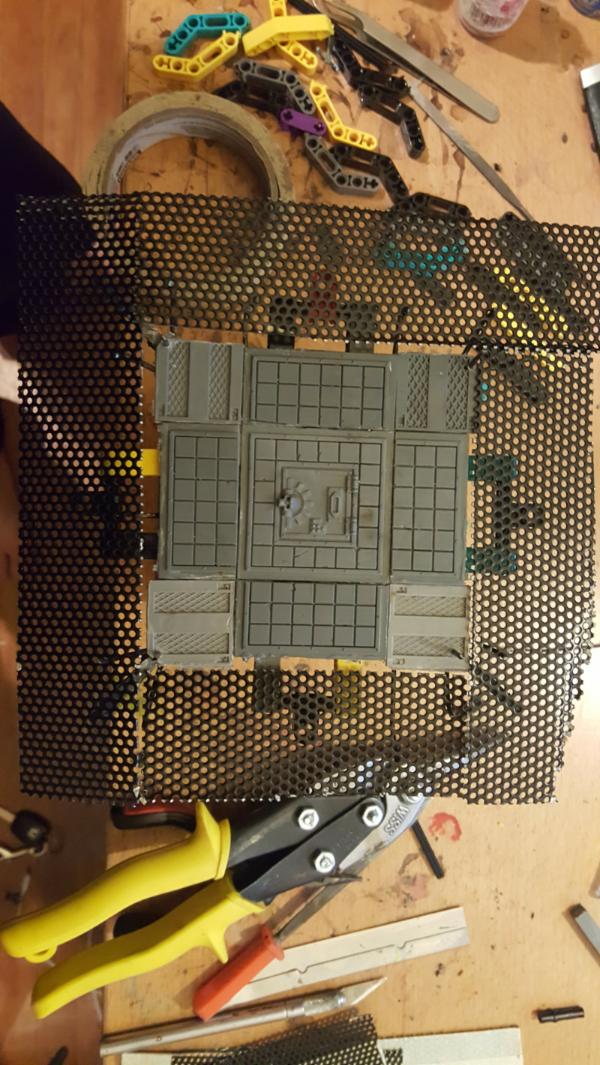
I always use tape now. Helps keep my cuts straighter and, more importantly, cuts down on metal shards from the shears as they get caught int he tape.
Putting in the posts. Its key to have the wire the same thickness as the perforation, makes the posts much more rigid. I also loop it back around through a second hole to really tie it down tot he mesh. It's visually messier but the sturdiness is worth it.
|
|
This message was edited 1 time. Last update was at 2017/02/20 20:48:17
|
|
|
|
|
2017/02/21 21:19:31
Subject: Re: multi-level city terrain, marine v nid bases (2/21 tower walkway done, now I need more)
|
|
Dakka Veteran
|
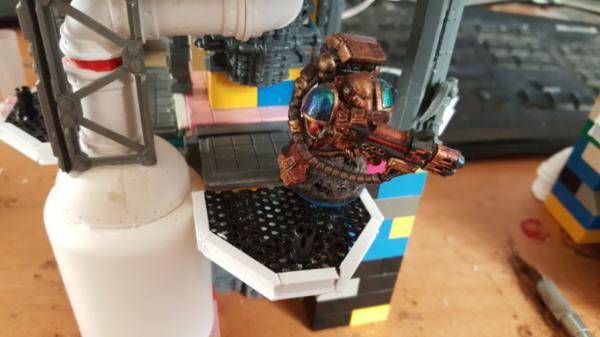
Yay my walkways are done! they look great, fit my 30mm+ base sizes for my dudes and so I'm very happy. Except...
The first level of platforms, which were ALSO supposed to be bridge-points now look.. really small.
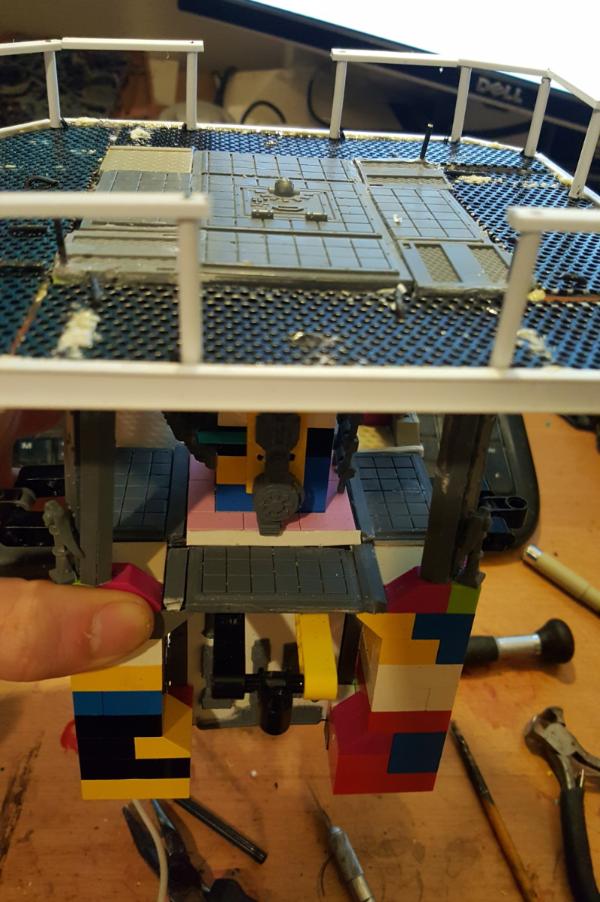
Which is confirmed when i try to squeeze dudes on it, for it to get blocked by the pin and not really look good or remotely be stable for game use:
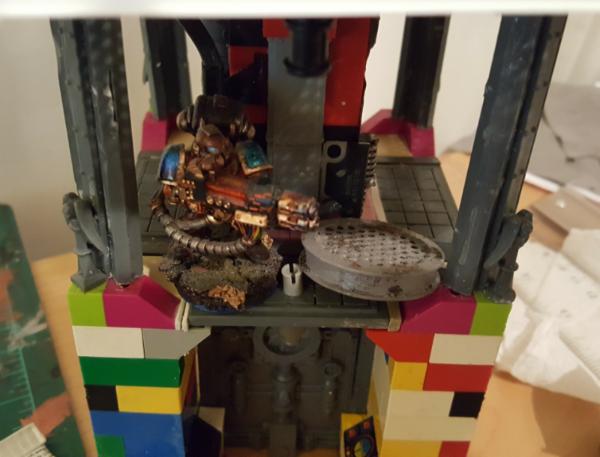
How on earth would I secure those pins? there is no angle for me to drill in a hole in the plastic to really secure the pin down, so it would just pop off at the first sign of a struggle. Ugh.. Im going to need more platforms somehow...
|
|
|
|
|
|
2017/02/22 19:10:47
Subject: Re: multi-level city terrain, marine v nid bases (2/22 designing trapezoidal platforms)
|
|
Dakka Veteran
|
So, with the unfortunate revelation that the lower levels of my towers needs work its.. time to figure it out.
I cant just make another walkway level, that would make this thing WAY too big and also (more importantly), too difficult to hold and move around. It cant be anything with a railing because that would just make it even more difficult to shove models down there.
So the solution is a small platform that juts out to be flush with the platform above. I figure if I make it trapezoidal then it'll naturally lend itself to off-angle bridge attachments which look good
(as in: bridges will probably only really attach to the walkway points either dead on or 90 degrees to it. Thus having trapezoidal platorms below means Ill have bridges attaching to those at 45 degrees instead, which should add some variety)
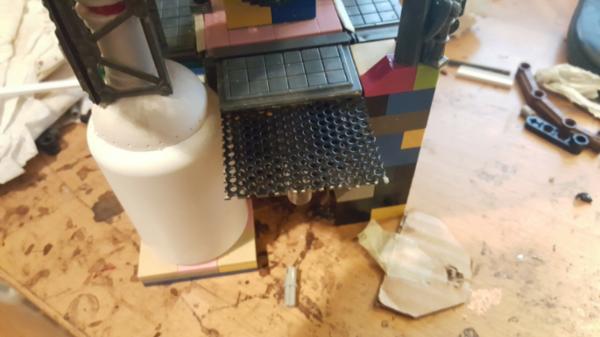
First up was extended out so I could test out the platforms at all:

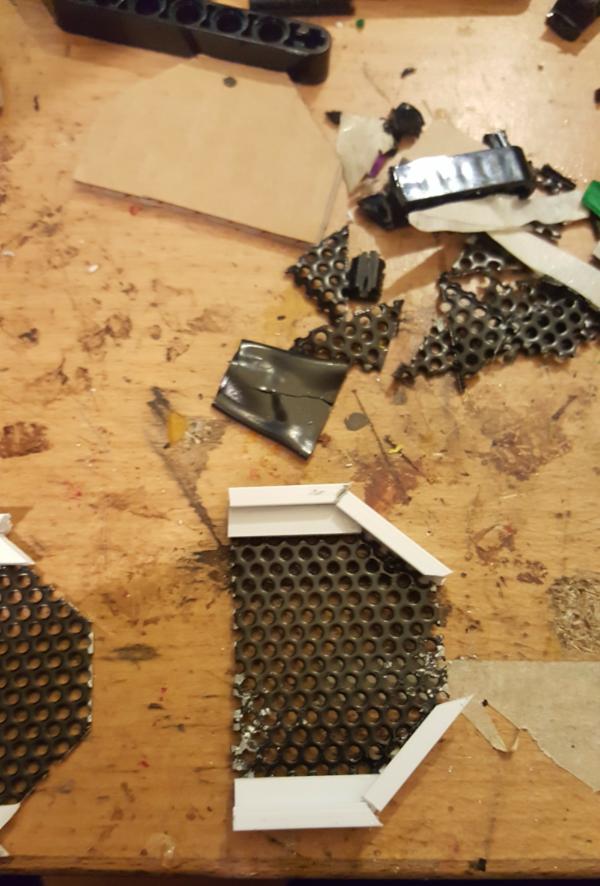
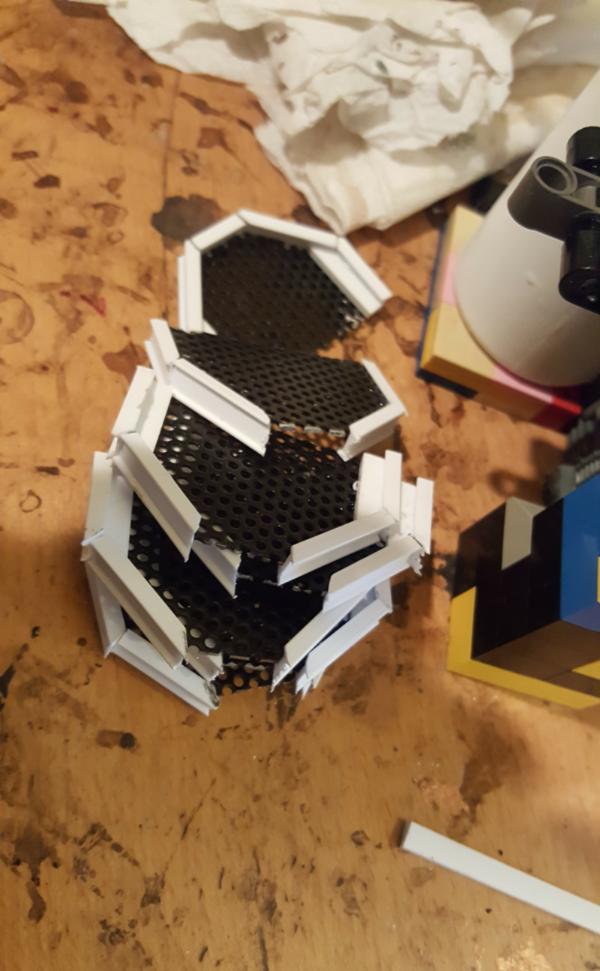
Then chopping up yet more mesh (IM RUNNING OUT?!?!??! HOW?!?!?!). I need 8, 4 per tower.
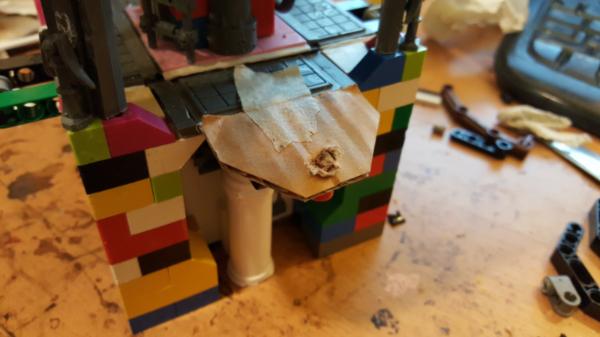
And a cardboard test of my trapezoid.
|
|
This message was edited 1 time. Last update was at 2017/02/22 19:11:04
|
|
|
|
|
2017/02/23 19:28:11
Subject: Re: multi-level city terrain, marine v nid bases (2/23 trapezoidal platform mass production)
|
|
Dakka Veteran
|
|
|
|
|
|
|
2017/02/24 22:49:40
Subject: Re: multi-level city terrain, marine v nid bases (2/23 platforms installed, tower tops paint WIP)
|
|
Dakka Veteran
|
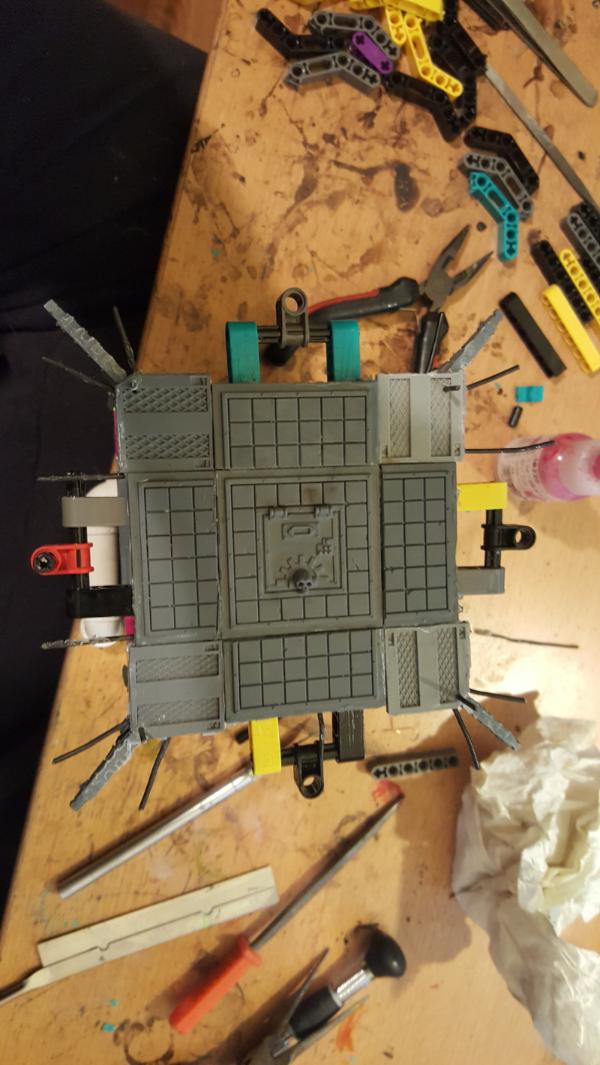
Seperately from the slog of making platforms
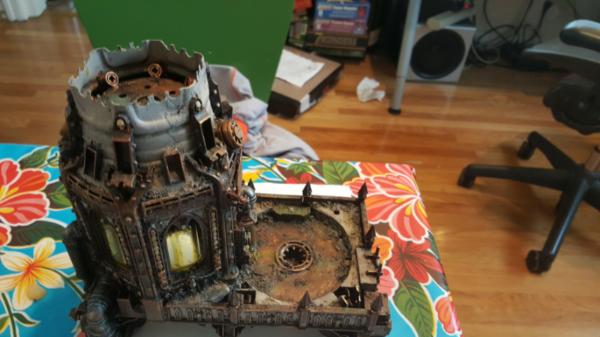
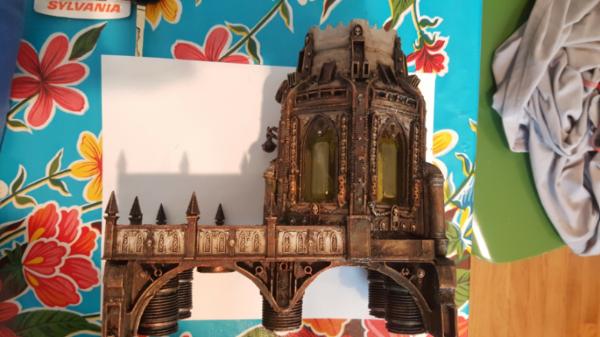
I started working on painting the tops of the towers. These being high detail density GW stuff I figure I work on them seperately while they are still unglued from the tower to make painting easier.
First up is the base layer:
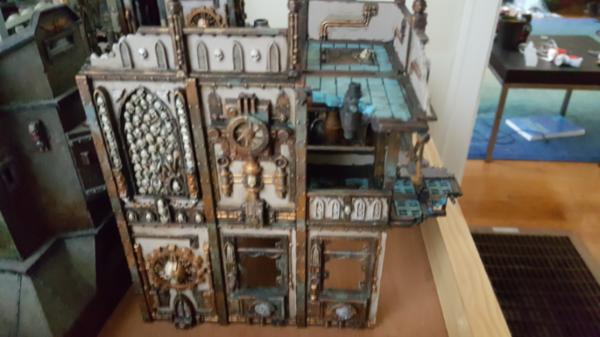
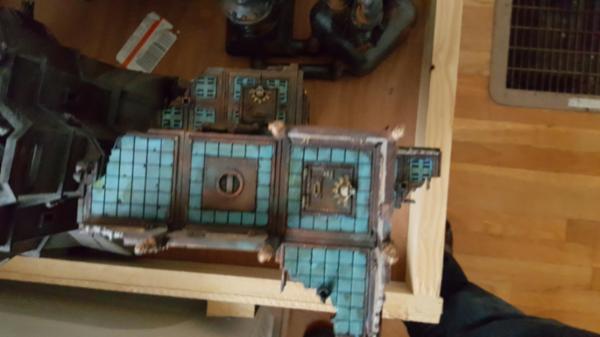
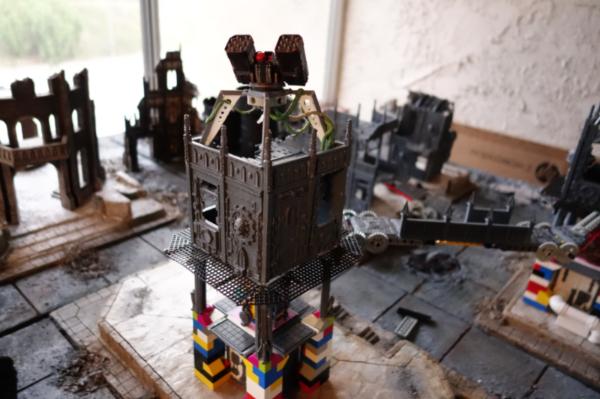
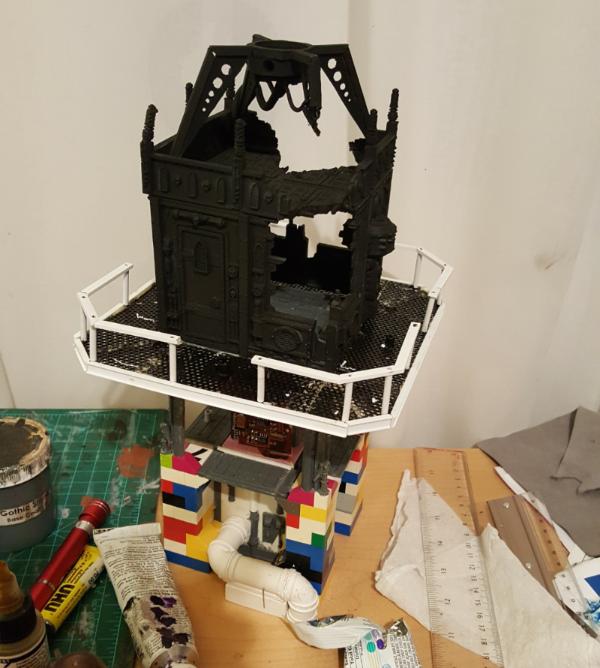
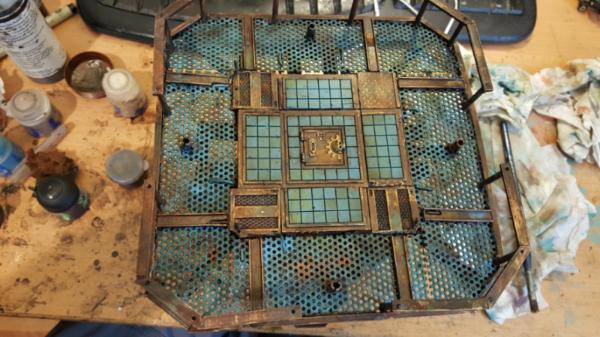
And the first "big picture" shot of it all together with the new platforms and walkways! Muh happier and all my models fit on it very nicely.
|
|
This message was edited 1 time. Last update was at 2017/02/24 22:51:32
|
|
|
|
|
2017/02/26 21:04:05
Subject: Re: multi-level city terrain, marine v nid bases (2/26 tower main body painted WIP)
|
|
Dakka Veteran
|
|
|
|
|
|
|
2017/02/26 22:04:20
Subject: multi-level city terrain, marine v nid bases (2/26 tower main body painted WIP)
|
|
Ragin' Ork Dreadnought
Deep in the Outer Boroughs of NYC
|
Nice paint job! It's great and grungy so far. Awesome.
|
|
|
|
|
|
2017/02/27 21:21:25
Subject: Re: multi-level city terrain, marine v nid bases (2/26 tower main body painted WIP)
|
|
Dakka Veteran
|
Thanks! Now some more work added and after a wash.
Note: I realize these pictures arnt neessarily contiguous between the towers, so dont be confused, these are pictures of my "stages" of painting on EITHER of the 2 towers. Sorry about that but I dont always remember to take the picture immediatly.
|
|
|
|
|
|
2017/02/28 19:53:54
Subject: Re: multi-level city terrain, marine v nid bases (2/27 tower main body paint WIP 2)
|
|
Dakka Veteran
|
Here's a fun one, a painting slideshow showing how i get the platforms done.
Pre-Blue, rust undercoat.
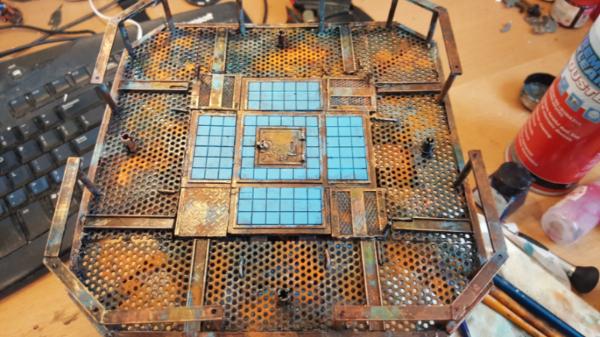
Heavy chipping fluid, then layering on blue.
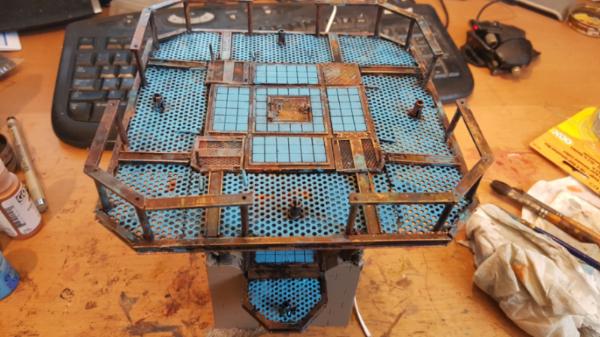
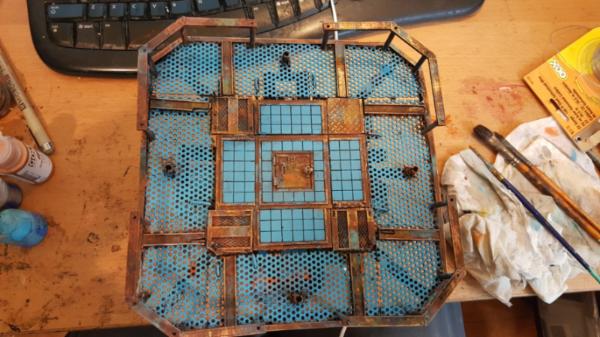
I wash it and while its damp chip the paint
|
|
|
|
|
|
2017/02/28 20:20:24
Subject: multi-level city terrain, marine v nid bases (2/28 painting platforms mini-tut)
|
|
Ragin' Ork Dreadnought
Deep in the Outer Boroughs of NYC
|
you know, I'm a little sad you covered up all that beautiful weathering work you did on the catwalk. The blue definitely ties the outside walkway together with the interior floor, but my personal preference would've been to only paint the catwalk in small patches of blue here and there. I feel like you lose that sense of weathering when you cover it in blue, even after the wash and chipping.
It's certainly your project and I don't mean to try to dictate what you "should" do, because frankly it's none of my business and ultimately not my call. I just really like your weathering techniques on the walkways and would love to see them take center stage. Maybe a wash to blend your weathering? Just to see how it looks on another piece before you cover it in another color.
Also, this is a really inspiring build and I'm likely to borrow the lego block idea on some upcoming projects. I'll add a link to your blog here when I do because I strongly believe in giving credit to an originator and cross-promoting.
Enjoy the rest of your day!
|
|
|
|
|
|
2017/02/28 20:58:39
Subject: Re: multi-level city terrain, marine v nid bases (2/28 painting platforms mini-tut)
|
|
Dakka Veteran
|
Its a fair point, and one I've struggled with, but, in the end I think the blue is worth it. Maybe i'll take a closeup just to show you but you see chips and flecks and things in it where it scrapped away, revealing the rust underneath.
I guess what ive learned over time is the level of contrast and detail needs to adapt to how far away you are looking at the piece. Remember the initial painting of the VSGs. Very rusty but.. kind of a blob when you looked at it from far away. So far away you see the blue vs the dark red metal, and up close you see within the blue oranges and rust and yellows. Remember that these weathering techniques ARE still on all the railings, i-beams, and any other exposed surface. Those will remain weathered rusty greeny bronze, just the walkways remain.. blue like all other walking surfaces. Easy to play on and spot. .
Yeah copy away! Everything I've built is totally copyable, I have no problem with that. Frankly of all my designs the towers, I think, are among the more functional pieces of terrain I've seen. One thing to remember is that I intend to use these pieces outside of 40k for shadowrun/dnd campaigns. So they need to be highly reusable for any situation.
As a result they are: Multi-Level, LOS blocking, Small footprint, hold a LOT of models (20+ pretty easily), and have 8 (!) total bridge points from where bridges can be attached. I have yet to think of any other terrain piece that I'll be able to use in more situations, so I hope the idea of it is copied so we all get such flexibility.
Compare them, for example, to the bastion. The bastion is roughly the same footprint and yet holds what, max 5 models? Realistically more like 4 with gun? The classic ruined building typically is a right angled shape (something which I actively tried to avoid but still have it for my small building with the curved roof) and pretty much can only ever go in the 4 corners of the table to be "fairly placed". So yes, please steal lego blocks! make your own towers! lets all shake up terrain and make it more modular and playable for a variety of game systems. These games really come alive when you have guys on different levels shooting across bridges and things and when models have to actually take a path to get from point A to B instead of a straight line.
|
|
This message was edited 2 times. Last update was at 2017/02/28 21:08:35
|
|
|
|
|
|
|