| Author |
Message |
 |
|
|
|
|
Advert
|
Forum adverts like this one are shown to any user who is not logged in. Join us by filling out a tiny 3 field form and you will get your own, free, dakka user account which gives a good range of benefits to you:
- No adverts like this in the forums anymore.
- Times and dates in your local timezone.
- Full tracking of what you have read so you can skip to your first unread post, easily see what has changed since you last logged in, and easily see what is new at a glance.
- Email notifications for threads you want to watch closely.
- Being a part of the oldest wargaming community on the net.
If you are already a member then feel free to login now. |
|
 |
2012/02/20 05:50:33
Subject: The Company of Dragons: A Salamanders Army (Updated 3-26-22)
|
|

Hellish Haemonculus
|
It's been nine years since I updated this, but...better late than never, I suppose. Better job and more time means I might be able to finally get everything painted, converted, and showcase ready!
Retroactive Addendum: This blog details my Salamanders army. I hope to one day field a full company, albeit with the Assault squads on bikes. My other blog, dealing with my Tau army, can be found here. I started off talking about some boring stuff, but I have some exciting pics a bit further down!
This is my first post in what will hopefully be a longer blog. I just finished an Eldar army for a friend, and hope to have pictures of that up soon.
This is going to be my grimoire, my arcanabulum if you will, of all the terrible things I do wrong as a painter. I don't like going the long way around. In point of fact, I prefer the cheap and dirty way of doing things. I want a pretty pretty toy soldier without having to spend a lot of time and effort in the process. The fact that my crappy diet means I am over caffeinated, and thus self-cursed with incredibly shaky hands, has nothing to do with it! But several of my friends, who consider themselves 'pro' painters, lament my corner-cutting. I thought I would detail the things that I learn through trial and error, so that other people like me may not have to go through the same crap.
Today I learned about BBs. When I first got into 40k, I bought a collection of paint pots (Citadel) off the net at a bargain price. Since then, a lot of them have gotten pretty thick, most to the point that I was ready to toss them. I was lamenting that I couldn't get them thinned, even by adding water and stirring them, when a friend said, "Why don't you just add BBs?" Now, I'd thought for a long time about sticking some kind of agitator into my paint pots to keep them stirred, but had always rejected the idea as too expensive, since I couldn't think of a cheap enough item to use.
BB's. 2400 for somewhere around five bucks, all at my friendly neighborhood Wal-Mart. Afforementioned amigo cautioned me against getting the copper coated ones, claiming they would oxidize with the paint. I dunno much about chemistry, so I bought the zinc plated kind (which has the same cost as the copper ones). If he's full of crap, they may very well ruin all my paints. But after an hour of adding water with an eye dropper and shaking it like a Polaroid picture, I brought most of them back to acceptability, and even a few goners back to almost factory-new. Admittedly, I lost a couple of pots. Even they were too far gone too be saved. (RiP Tentacle Pink, Graveyard Earth, and Warlock Purple.)
Now, my army is Salamanders. I'm only just now getting back to painting them, having spent the last year's worth of work on my friend's army. Having lacked both black and an appropriately browny metallic paint to do my army, I had to do a little shopping today, and thought I would conduct an experiment. I picked up two pots of paint (Chaos Black and Dwarven Bronze) from my gamestore, and two tubes of one dollar, bargain rack craft paint at Wal-Mart, in comparative colors. After tomorrow's experiment, let's see if I can post pictures and see how they stack up next to one another, shall we?
|
|
This message was edited 9 times. Last update was at 2022/03/26 06:53:41
|
|
|
 |
|
2012/02/20 19:12:53
Subject: Re:The Things I Wish I'd Known Sooner
|
|
Hellish Haemonculus
|
Well, while I wait on the paint on my experimental models to dry, I thought I'd post some pics of the Eldar army I've spent the last year working on.
|
|
|
|
|
|
2012/02/20 19:38:29
Subject: The Things I Wish I'd Known Sooner
|
|

Battlefortress Driver with Krusha Wheel
|
Adding BB pellets to your paint? Sounds a sensible idea!
|
|
|
|
|
|
2012/02/20 19:48:12
Subject: The Things I Wish I'd Known Sooner
|
|
Druid Warder
|
bb's are fine, but even the zinc coated ones will oxidize, i have been using jade stone for years in my vallejo pots with no problems what so ever. if your set on using metal balls, use stainless.. but even stainless till will rust seeing it has steel as a base metal in the alloy. depending on the alloy of stainless will determine how much it will rust.
|
|
|
|
|
|
2012/02/20 20:07:59
Subject: Re:The Things I Wish I'd Known Sooner
|
|
Hellish Haemonculus
|
Any idea where I can get stainless steel pellets at low low prices? I'm not opposed to using a more efficient solution, I'm just all about overall speed and effect. Jade stones sound very expensive. Thanks for the info, though. Like I said, totally not a chemist.
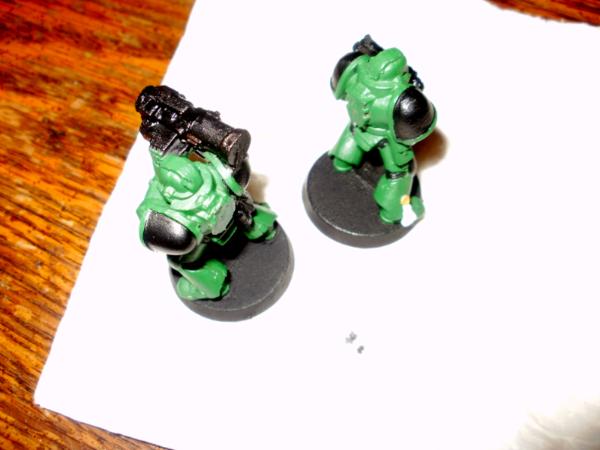
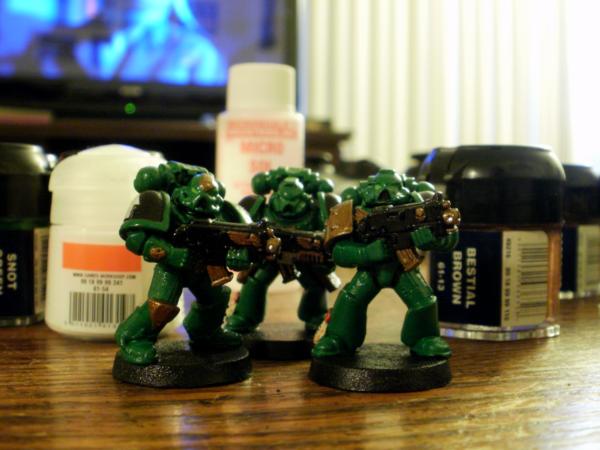
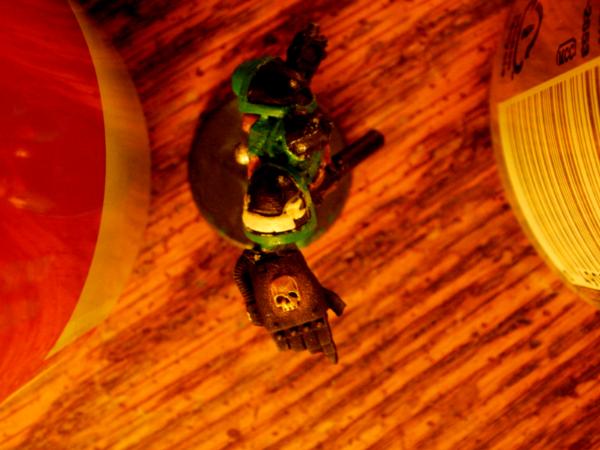
Here's the black bases. On the left (with the missle launcher) is the Wal-Mart brand black. It's not as tough as the Citadel black, but pretty much looks identical. I think once I put a coat of varnish on, it will be totally identical. For comparison purposes I put the Citadel painted base on the right.

The above image is the model I painted using just the Citadel brand Dwarven Bronze. It's a little runny, doesn't give as good of coverage as i would like, but there you have it.
This is the one I did using the Wal-Mart brand one dollar paint. It's even less effective at covering the underlying color than the Citadel paint. Then I remembered something a fellow Dakkanaut had told me, about a mid-metallic option, halfway between metallic paints and NMM.
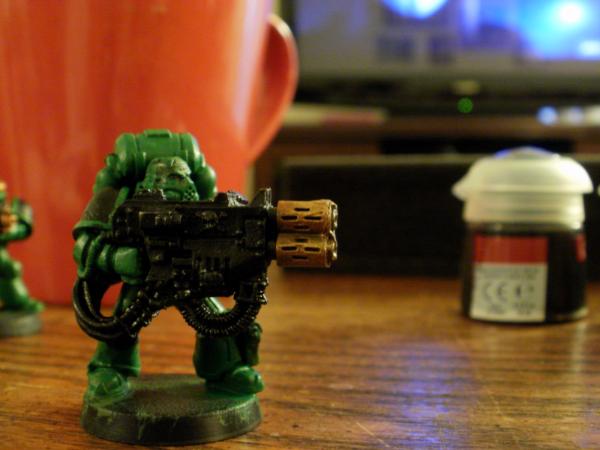
The melta gubbins here have been done with Bestial Brown, with a mere drybrushing of the Wal-Mart metallic paint. I think it looks awesome. The end result is a coppery color that I really enjoy.
Bottom line? For generic black results, I'm going to stick with Wal-Mart black when I need lots of paint where no one cares about it (like bases). I think Citadel Chaos Black still provides the best opacity, though. What do you all think?
|
|
This message was edited 5 times. Last update was at 2012/02/21 01:39:57
|
|
|
|
|
2012/02/26 04:32:45
Subject: Re:The Company of Dragons: A Salamanders Army (Updated 2-25-12)
|
|
Hellish Haemonculus
|
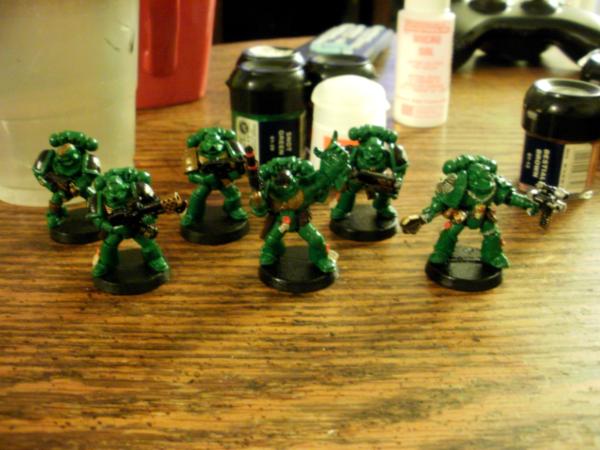
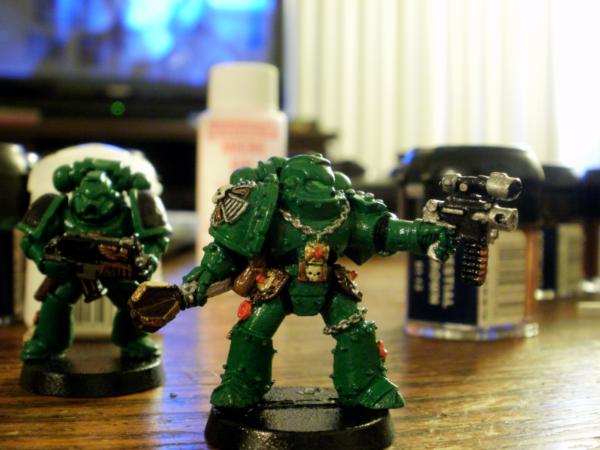
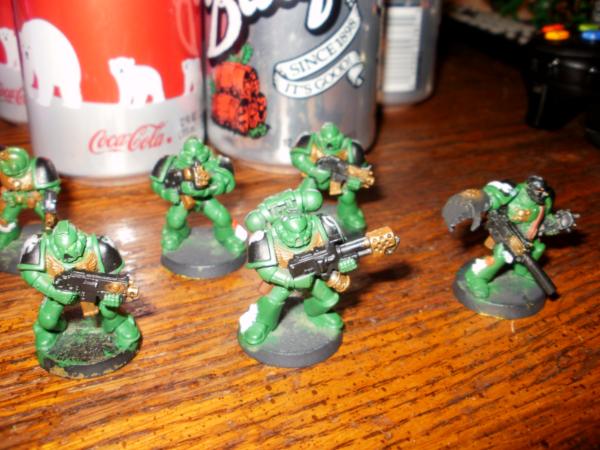
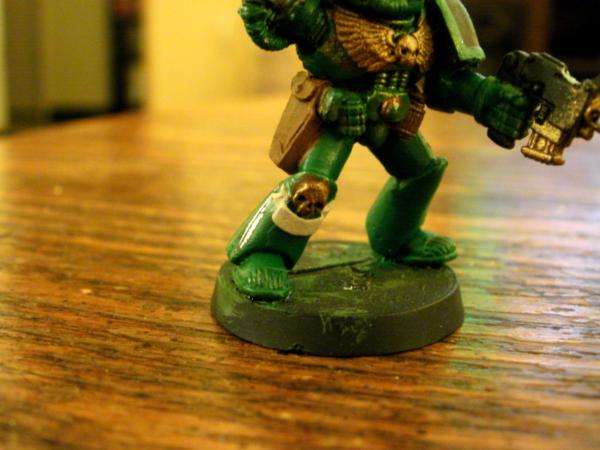
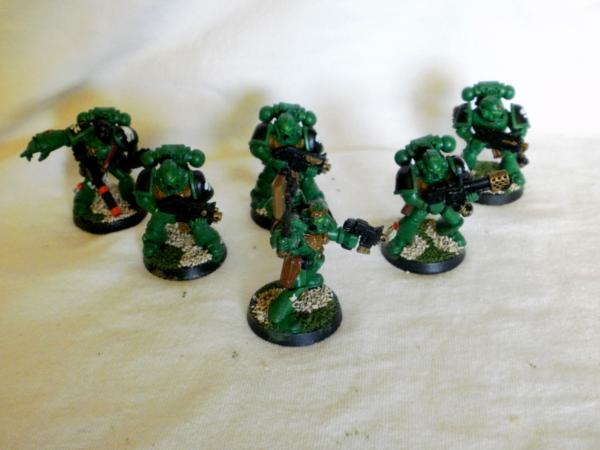
Okay, most of my Salamanders were already painted when I took my friend's commission nigh on a year ago. Of course, I wasn't about to stop playing with my Marines in that time, and while I was too busy to finish their paint jobs, they got banged around something fierce. So now I go back to fix them, and finish them. While I didn't get as much work done as I'd have liked, I did manage to get most of the work done on the first tactical squad, the Kaberoi (a name inspired by deities associated with an ancient group which worshipped Hephaestus, or Vulkan). This is the second half of that squad, or Combat Squad 2. You can clearly see that they all have their right kneepad painted black so I can pick them out at a glance when divvying them up. I've also include the alternate model for Brother Axiocersus (the heavy weapon bearer), for use depending on whether or not I've fielded Vulkan He'stan.
Basing hasn't been done yet, but I will. The paint job is finished, all that remains is to put the decals on the shoulder pads, a process requiring me to get access to some decal setting stuff. (My first attempts were disastrous.)
Here's some pics:

I hope to have the rest of the squad (including the two models for Sergeant Cadmilus) up by mid-week.
|
|
This message was edited 2 times. Last update was at 2012/02/26 07:01:20
|
|
|
|
|
2012/03/02 02:56:53
Subject: Re:The Company of Dragons: A Salamanders Army (Updated 2-25-12)
|
|
Hellish Haemonculus
|
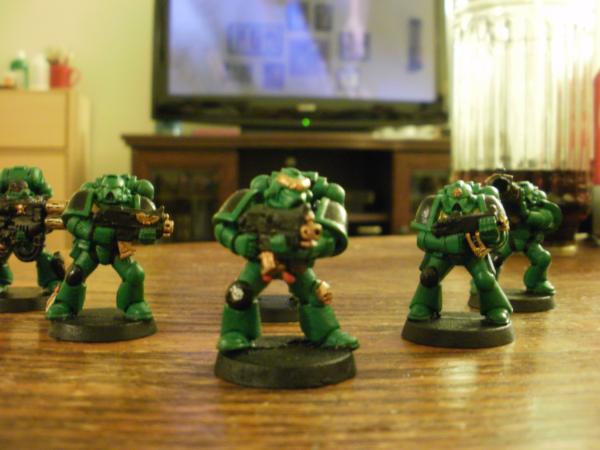
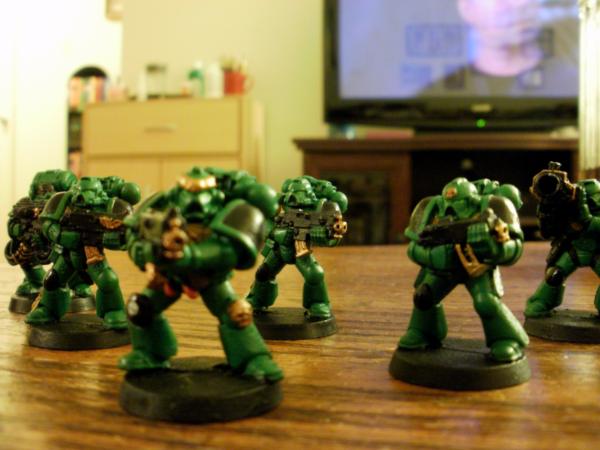
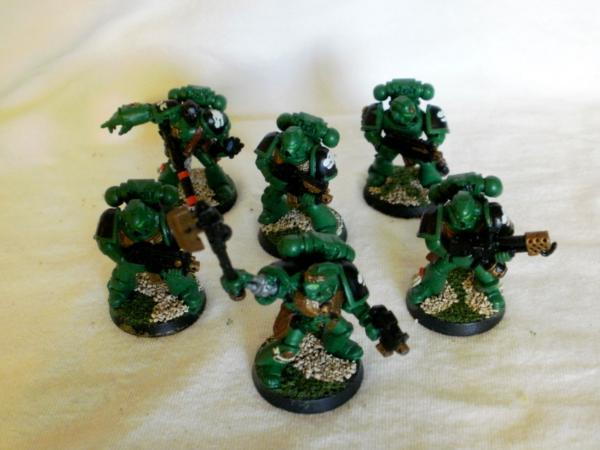
Howdy y’all. Today we finally get some pictures of the rest of the Kabiroi, under Sergeant Cadmilus. I already wrote out a longer post, but then my internet service dropped, and even though it had come back before I tried to post, the Dakka security features logged me out, meaning I lost the whole thing. So you’ll forgive the complete lack of wit today, since I don’t have the patience to type all those jokes and happy explanations again.
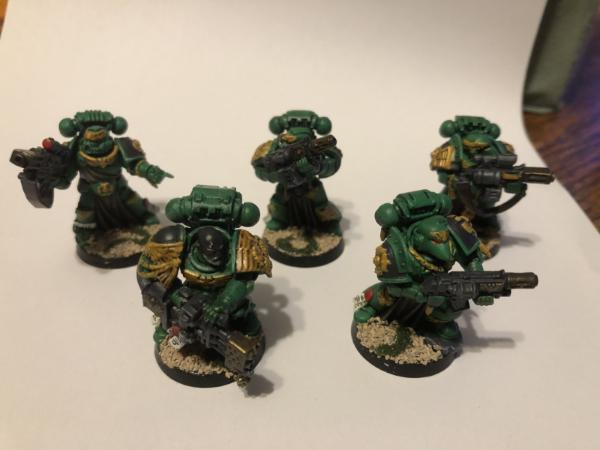
Here’s the Combat Squad I finished. It has the Sergeant, the special weapons bearer (a flamer) and three tactical marines in it.
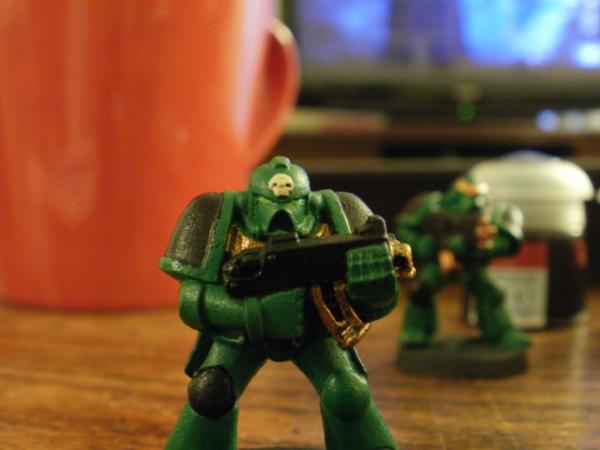
Here’s a group shot of the tactical marines:
Here’s two shots of Brother Sergeant Cadmilus, first with power weapon and bolt pistol, the second alternate model with power fist and combi-melta.
And finally, here is the two teams re-united for a squad group shot. (Alternate models excluded.)
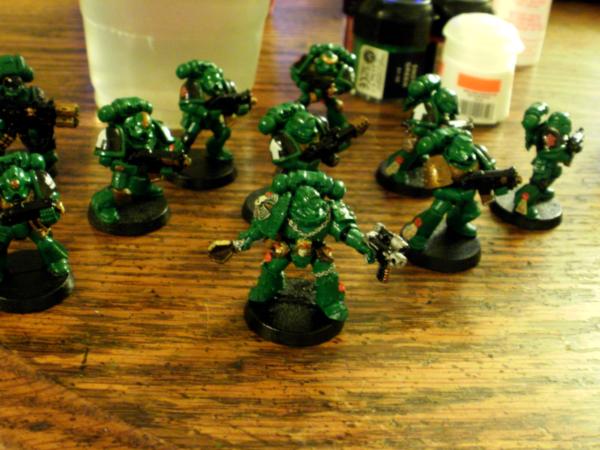
I realize they are a bit glossy, but I am satisfied with the way that the decals came out at least. You will notice that I’ve differentiated the squads in two distinct ways. The heavy weapons squad has black kneepads and red tactical symbols on their shoulders, while the close combat squad uses white tactical symbols, and does not have the black kneepad. Hopefully this will enable me to tell at a glance who is who when deploying.
Not quite finished though. I still need to matte varnish them. After that will come basing, which will depend on the advice I get from some people I’ve dropped lines to. But what do you guys think about basing? Should I go with grass (which is what I was kind of thinking) or some other sort of medium for the bases? Lava just seems kind of played out to me. All the other Salamanders players do it, and I want my guys to look a little different.
Oh well. Thanks for reading. Any advice? The next group will be my second combat squad: the Couretes, led by Sergeant Anytos.
|
|
This message was edited 1 time. Last update was at 2012/03/02 02:57:58
|
|
|
|
|
2012/03/03 01:03:12
Subject: Re:The Company of Dragons: A Salamanders Army (Updated 3-1-12)
|
|
Hellish Haemonculus
|
Hola amigos. Now some folks have queried yours truly wondering why I take so long to paint. The truth is that it is a daunting task. When they tell you to paint what you have before you buy more, they aren’t horsing around, children. I wound up with a great deal of Space Marines that I purchased as a single lot. Since then, a number of extremely reasonable deals have been offered to me by folks wishing to unload unwanted product, and I find that despite my self control, my army threatens to grow past my ability to paint it.
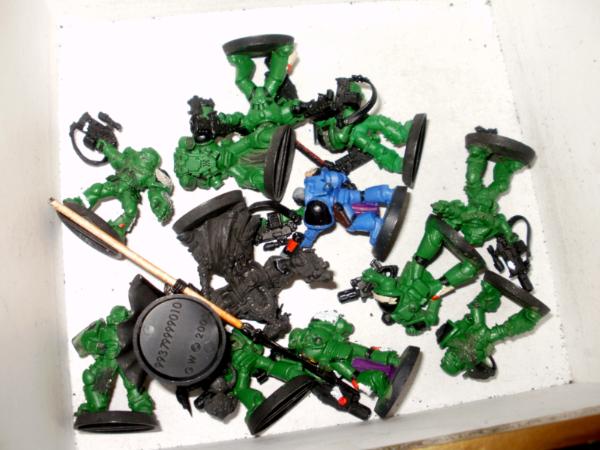
So I thought I would share with you the voluminous number of things I have as yet unpainted, the completion of which stands between me and the purchase of fancy, new models.
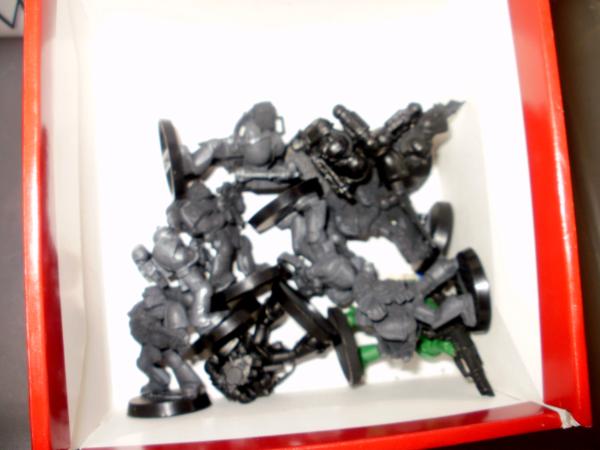
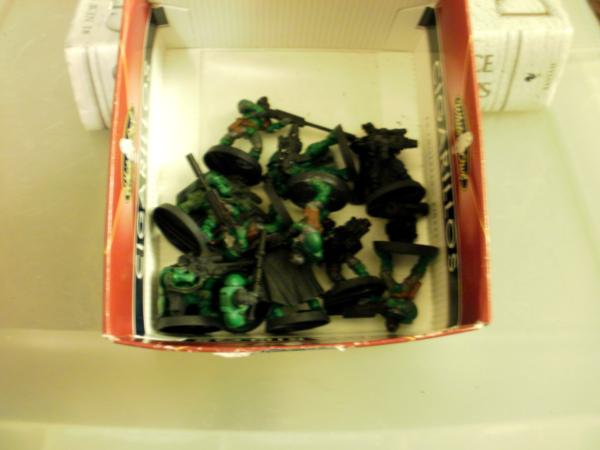
Let’s start off with the tactical squads, of which I have one finished, one underway, and these two still boxed up:
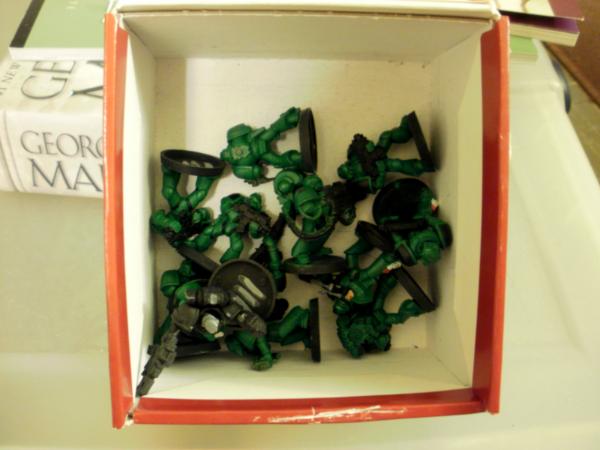
“Fie,” you say to me, (because you’re the kind of anachronistic fool who says things like ‘fie’) “is that all you have left of your troops?” Oh no, my friend that time forgot, oh no. I also have these, a total of thirty scouts, in the form of ten plastic snipers, ten metal snipers, and ten combat goons:
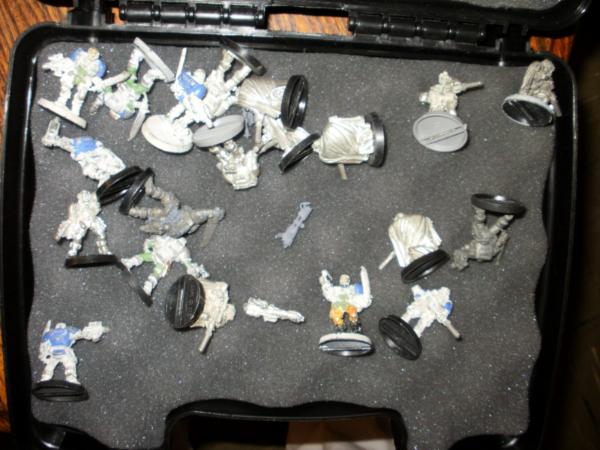
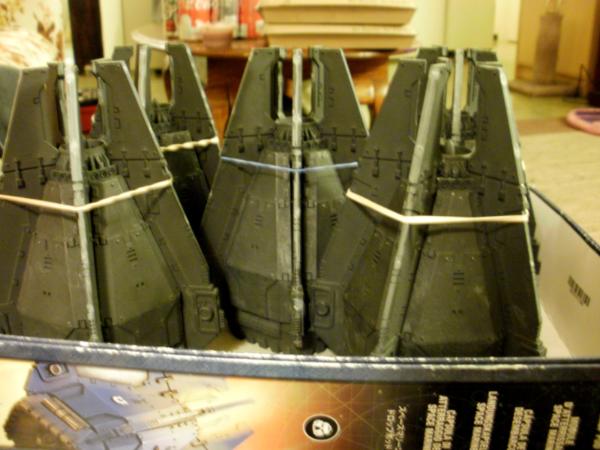
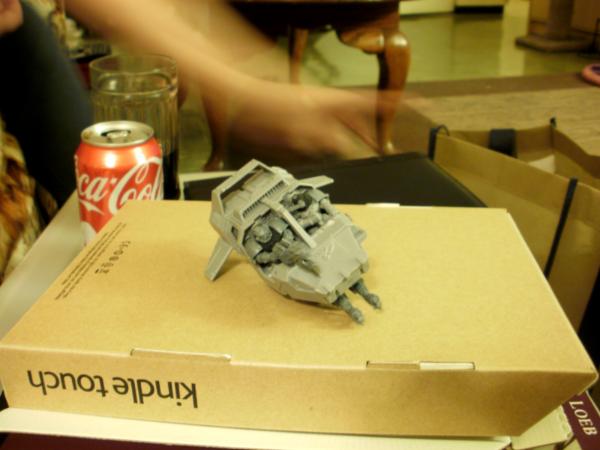
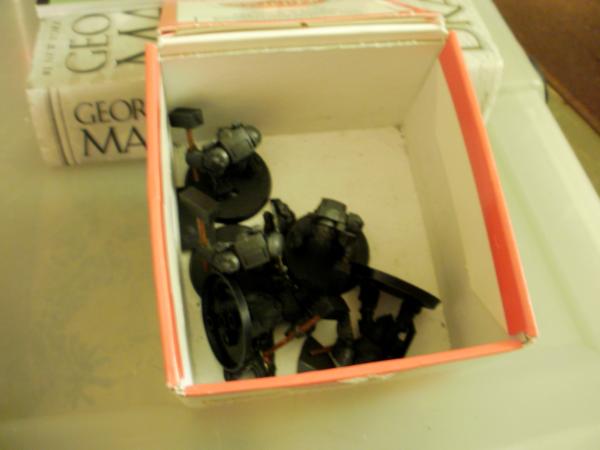
Not that I’m complaining, since those scouts were a sick deal. Although some conversion work is still in order (since the combat goon squad is going to need a Power Fist). However, the fun doesn’t stop there. I can’t just leave these guys to thumb it into battle like a bunch of penniless Rainbow Gathering hippies! No, no, they have to ride in style. Hence the five drop pods:
Or this tank.
Or this tank:
And, no, I didn’t do the paint jobs on those tanks. Although, for the record, both require extensive repairs before they are fit for combat again. (Which of course just adds to the hassle.) They don’t fly alone, though, they have to have support!
Thankfully, I’ve gotten most of the conversion work done on those two. I’m not so lucky when it comes to my Sternguard vets or my Terminators, however!
There’s a crap ton of conversion work required to be able to field those two units. If you look, you can see an upside down scratchbuilt Vulkan, as well as a generic Librarian, and an unpainted Tigurius. Those will have to be completed too, of course.
The rest of my stuff I’m not necessarily demanding that I finish, since it’s my box of “unfieldables.” The stuff in here isn’t really worth playing with, so I’m less concerned about making it play worthy.
As you can see, the task is pretty formidable! Anyone have any advice? Any comments? A funny limerick, perhaps?
There once was a scout from Kentucky…
|
|
|
|
|
|
2012/03/03 02:05:21
Subject: Re:The Company of Dragons: A Salamanders Army (Updated 3-2-12)
|
|
Battleship Captain
|
I like the smooth green!
|
|
|
|
|
|
2012/03/03 04:09:46
Subject: The Company of Dragons: A Salamanders Army (Updated 3-2-12)
|
|
Fully-charged Electropriest
|
Some nice solid work going on here! That NMM does look nice I must say!
|
|
|
|
|
|
2012/03/03 04:43:45
Subject: Re:The Company of Dragons: A Salamanders Army (Updated 3-2-12)
|
|
Hellish Haemonculus
|
Thanks for the positive feedback fellas!
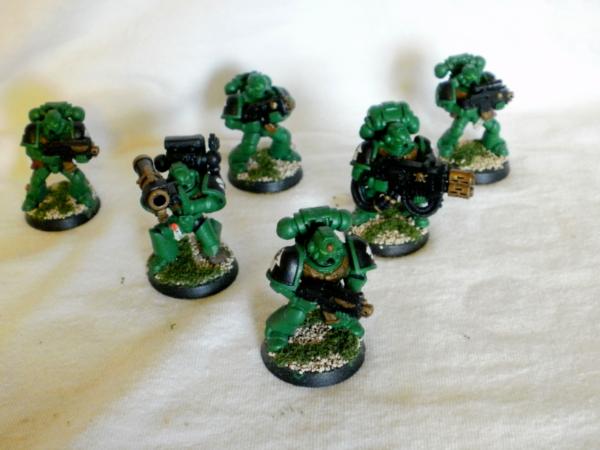
Today was a slow day, modelling/painting wise, due to an unforeseen dead-hooker-in-a-car-boot related incident. Nevertheless, in the interest of keeping everyone updated, here's what I got accomplished today:

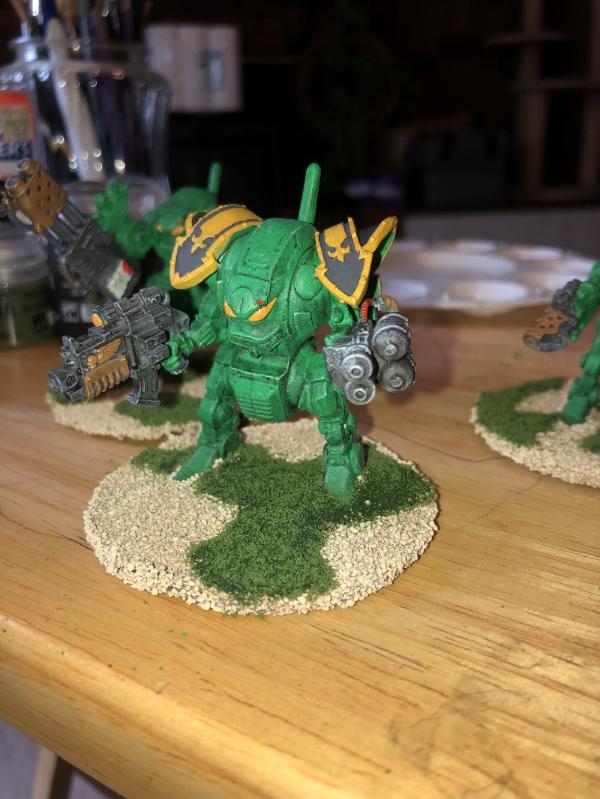
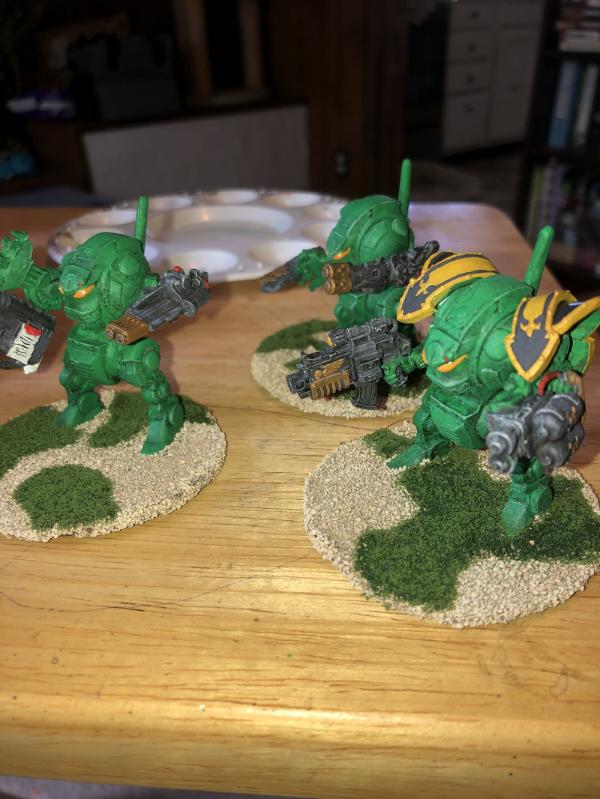
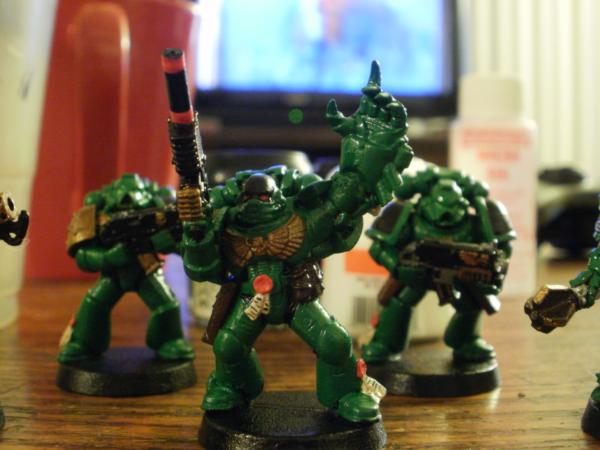
The Couretes, my second tactical squad, in their half-finished state. As before, I've gone to the trouble of giving myself alternate models, for use with differing deployments. This represents the first use of my QMM (or Quasi-Metallic Metallic) technique in any color other than bronze. I think the silver turned out great, and it's going to wind up making that arm augmetic pop really nice.
Which brings me to an issue. Both the models for Sergeant Anytos have little banners where I presume a name is supposed to go. (That's what I want to use it for, anyhow.) Does anyone have any idea how to letter these banners without it looking totally janky?
As you can see, they are pretty teeny-tiny. I've considered several options, but nothing seems to jump out in my mind as being a very good option. On my last squad, I tried to get the sergeant's name on his shoulder banner, but just couldn't swing it. I kept trying to write it as tiny as I could on a piece of paper, but I never got anything remotely close to small enough. Has anyone else done something like this? How would you guys go about it?
Tip of the Day: If a police officer asks you why you were driving so fast, do not respond "Because there's a dead hooker in my car boot." They do not have a sense of humor about that.
|
|
This message was edited 1 time. Last update was at 2012/03/03 04:44:44
|
|
|
|
|
2012/03/03 17:35:31
Subject: The Company of Dragons: A Salamanders Army (Updated 3-2-12)
|
|
Battleship Captain
|
Micron Pens!!!
I think people would be more interested in your blog if you could take better pics 
|
|
|
|
|
|
2012/03/03 21:19:25
Subject: Re:The Company of Dragons: A Salamanders Army (Updated 3-2-12)
|
|
Hellish Haemonculus
|
Tragically, these are some of the best pics I've ever been able to produce. I can never, it seems, get the camera to do what I want it to do. If you have any advice for camera tips, I'm all ears. The only time anyone has ever offered me an info, it was too far above my head for me to grasp.
|
|
This message was edited 1 time. Last update was at 2012/03/03 21:25:53
|
|
|
|
|
2012/03/03 21:30:31
Subject: The Company of Dragons: A Salamanders Army (Updated 3-2-12)
|
|
Battleship Captain
|
sure Jim, what kind of camera do you have?
|
|
|
|
|
|
2012/03/04 00:30:50
Subject: Re:The Company of Dragons: A Salamanders Army (Updated 3-2-12)
|
|
Hellish Haemonculus
|
An Olypmus X-42. I've already noticed that I get the best results in Macro mode with the Fill-in flash. Some things won't show up in that mode (like the first close up of the scroll work in my last post) so I have to use SuperMacro. In S-Macro mode, it won't use a flash, so it takes longer to process the image, which is why I get blurry images. Those are the best of the lot, since I usually take 5-10 pics and select the least blurry option.
|
|
|
|
|
|
2012/03/04 02:06:57
Subject: Re:The Company of Dragons: A Salamanders Army (Updated 3-2-12)
|
|
Battleship Captain
|
Jimsolo wrote:An Olypmus X-42. I've already noticed that I get the best results in Macro mode with the Fill-in flash. Some things won't show up in that mode (like the first close up of the scroll work in my last post) so I have to use SuperMacro. In S-Macro mode, it won't use a flash, so it takes longer to process the image, which is why I get blurry images. Those are the best of the lot, since I usually take 5-10 pics and select the least blurry option.
Ok
1. http://www.thepaintingshopworld.com/2010/09/25/how-i-photograph-my-miniatures/
2. http://www.dakkadakka.com/wiki/en/Photography:_It%27s_All_About_Light
3. http://www.dakkadakka.com/wiki/en/Photographing_your_models
4. http://www.dakkadakka.com/wiki/en/Debunking_the_Myths_of_Miniature_Photography
5. http://advancedtautactica.com/viewtopic.php?f=22&t=11709
6. http://cipher-studios.com/2009/09/photographing-miniatures-by-ryder-gaddis/
Remember, Light is key!
|
|
This message was edited 1 time. Last update was at 2012/03/04 02:07:13
|
|
|
|
|
2012/03/04 03:19:50
Subject: Re:The Company of Dragons: A Salamanders Army (Updated 3-2-12)
|
|
Hellish Haemonculus
|
Let's sum up, for those playing the home game and who don't like to follow external links:
A) Light boxes are how the pros do it. I don't have the money for one, nor do I have the space for one. You know that old PSA with the Indian by the side of the road shedding a single tear when the guy litters? That's what my wife does everytime I bring home a new box of Warhammer 40k stuff. And I just can't handle Indian-by-the-highway guilt. HOWEVER: I do have access to plain white paper, and I am physically capable of bending it into a parabola shape. So I can meet halfway.
B) Use your camera's white filter. I didn't even know such a thing existed, but I'll futz with my camera and see if I can figure it out.
C) Don't have the light directly on the mini. It gives a glare. This means a flash is probably a bad idea. Without a flash, it takes longer for the camera to capture a picture, so use a tripod to avoid blurs. I don't know that I have a tripod, but I can try and make one. There was an interesting note there that might help on the blurry-photo score: use the camera's timer. I hadn't thought of that.
I think, looking back on things, that one of the lamps in my apartment may be giving off that orange-y light in some of the photos. I'm going to try leaving that lamp off in the future. As far as diffuse light, I think I should be good, since I have opaque coverings on my other lights, which are all fluorescent. (Which is what one of those links even mentions, specifically.)
Thanks to Captain Solstice for digging up these links. I highly recommend the third, fifth, and sixth ones, as well as the fourth one (although skip the intro to it, it'll will just hack you off if you are a novice photographer). I appreciate the work it took to compile those for me. I'll try and get some better (or more consistent) quality with my photos.
|
|
|
|
|
|
2012/03/04 03:45:45
Subject: The Company of Dragons: A Salamanders Army (Updated 3-2-12)
|
|
Battleship Captain
|
Can't wait!
Yeah... Light boxes are unnessacary. I find my pictures to be decent without one
|
|
|
|
|
|
2012/03/04 04:07:21
Subject: Re:The Company of Dragons: A Salamanders Army (Updated 3-2-12)
|
|
Hellish Haemonculus
|
I JUST tried fiddling around with it. So far I've managed to break one of my models, and succeeded in making pictures of the poorest quality to date.
So...progress is slow...
|
|
|
|
|
|
2012/03/04 04:08:53
Subject: Re:The Company of Dragons: A Salamanders Army (Updated 3-2-12)
|
|
Doc Brown
|
Flash is a huge no-no for mini photography, get enough light on the model so that it looks how you want through the viewfinders.
Dispersing the light is necessary, but a light box isn't.
|
Director at Fool's Errand Films a San Diego Video Production and Live Streaming company.
https://foolserrandfilms.com/
|
|
|
|
|
2012/03/04 15:06:44
Subject: The Company of Dragons: A Salamanders Army (Updated 3-2-12)
|
|
Battleship Captain
|
You'll get it, maybe try taking pics by a window, that would help
|
|
|
|
|
|
2012/03/23 21:16:25
Subject: Re:The Company of Dragons: A Salamanders Army (Updated 3-2-12)
|
|
Hellish Haemonculus
|
Greetings, meat-creatures! You will forgive me my long absence. I was finishing a novel. Now that I’m good and done with that, I’ve got a little time to devote to my toy army men.
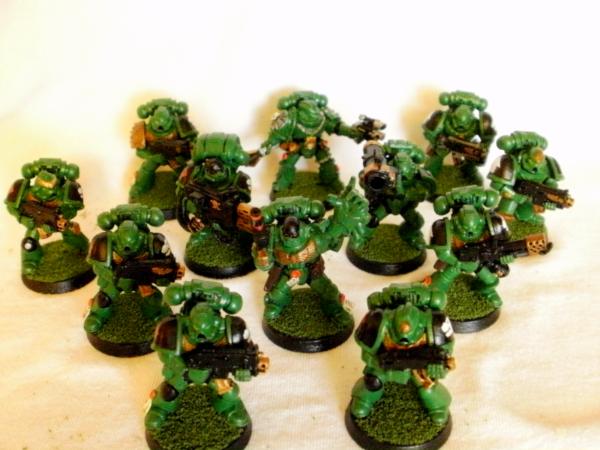
First, let’s talk about progress! The Couretes are finally finished, top to bottom.
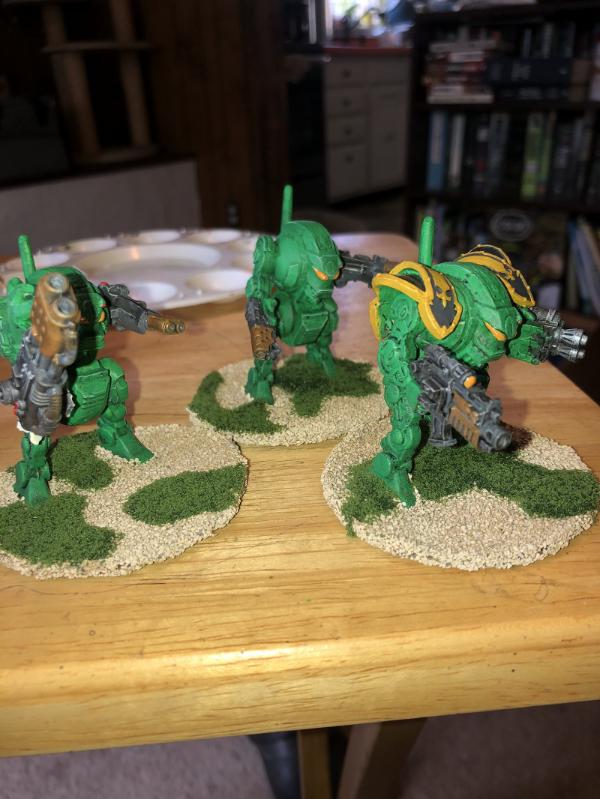
The first half of the squad, led by Sergeant Anytos (and his fake arm, which he lost while single handedly phasing out an entire Necron army). This represents the first time I used my QMM technique on silver. I really like the way it turned out. I also tried adding a layer of gloss after everything was said and done to Anytos’s belt buckle (on the model with the axe) and the screen of his auspex (on the model with the powerfist).
Here’s the other half of the squad, with weapon and alternate heavy weapon load-outs. I dislike the rock that the missile launcher guy is kneeling on, by the way. I just could not get it to look right.
As promised, a group shot of the Kaberoi, now that they’ve been based. (Albeit with minimal effort.)
You may have noticed an improvement in picture quality. I do not, unfortunately, have a great deal of natural light in my apartment, nor am I going to spend a fortune on photography equipment, but I did at least take a few steps to improving my business, including using a white backdrop, getting as much natural light in the room as I could, and utilizing the tripod and the self-timer feature.
I would like to modify one of the troopers in each of the above squads to bear a banner, that way I can give individual squad flags. What do you guys think about that? Good idea, or not so much?
Speaking of what everyone thinks, I finally managed to get the necessary equipment to do the tiny lettering on both of Sergeant Anytos’s name plates. I was unable to find a Maybelline eyeliner small enough to get the job done, but I did manage to find two different markers at my local craft shop: a Micron pen, like everyone else recommends, and a Faber Castell brand PITT artist pen. Here are the results I got:
Micron:
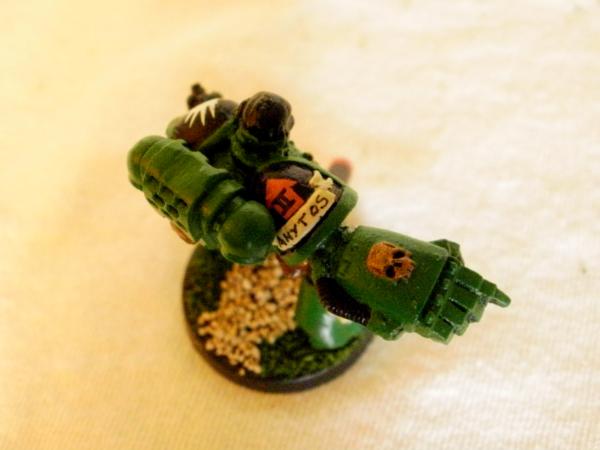
PITT:
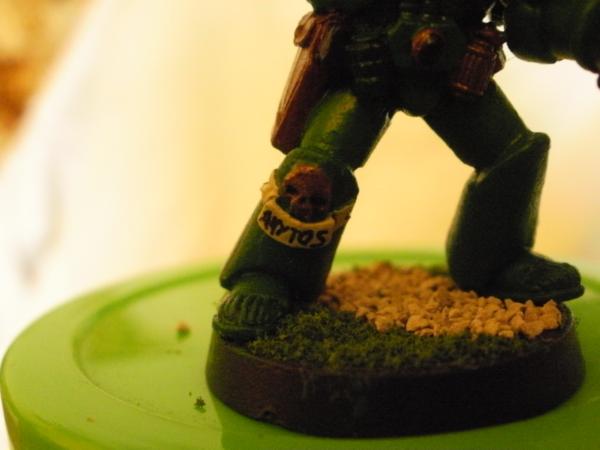
Before you pass judgment on the second photo, I’d like to point out that although it’s hard to tell, the one on the shoulder is almost twice as wide as the one on the knee. I think that had a lot to do with it. The PITT pen is a bit thicker, and uses India Ink. HOWEVER, I think it gave me very good ink flow, while still being small enough to be neat and legible. The Micron pen holds a superior position in the clarity department, but I had to redo a few of the lines because the Micron didn’t make them dark enough. In the future, I think I will use both, depending on how small and cramped the lettering has to be.
I also made my first foray into basing, you might have noticed. On the Kaberoi, I just slapped some flock grass on. On the Couretes, I did my best to vary it up a bit with some rocks and whatnot. Here’s a picture side-by-side of one with grass and rocks, and another with grass ON the rocks.
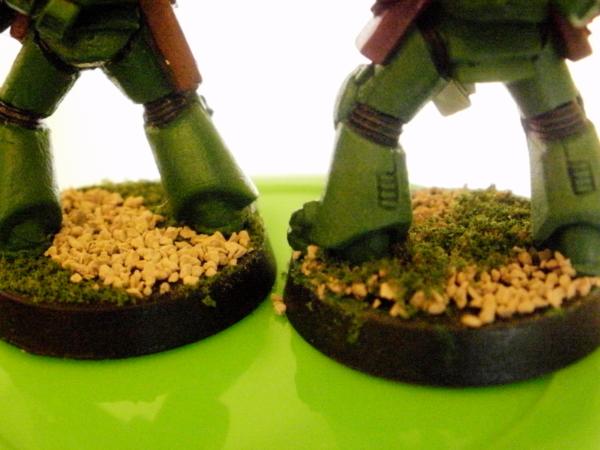
Anyone have any personal opinion on which one is better? I also tried experimenting with clear and white Elmer’s glue, but I didn’t get any noticeable difference between them. (I personally think the white glue held stuff better, but you can’t tell from the pics.)
|
|
|
|
|
|
2012/03/24 07:28:56
Subject: The Company of Dragons: A Salamanders Army (Updated 3-23-12)
|
|

Scarred Ultramarine Tyrannic War Veteran
|
looks great.. can't wait for the next post :thumbusp:
|
|
|
|
|
|
2012/03/25 22:20:28
Subject: Re:The Company of Dragons: A Salamanders Army (Updated 3-23-12)
|
|
Hellish Haemonculus
|
Unfortunately, I've run out of backpacks and Salamander decals. I'm going to have to club some folks over the head to get more...
|
|
|
|
|
|
2013/02/12 03:41:29
Subject: Re:The Company of Dragons: A Salamanders Army (Updated 3-23-12)
|
|
Hellish Haemonculus
|
So, first thing is first, way back when, ruff warned me that the stainless bb's would still rust. And he's right. Every last one of my paints now has a tiny rust spot in the bottom now. (Fortunately, they're small.)
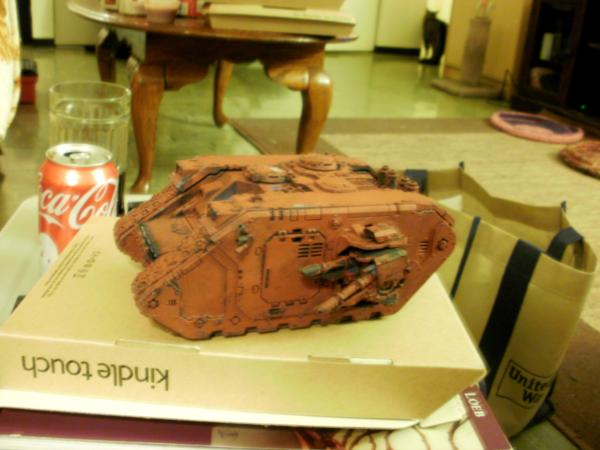
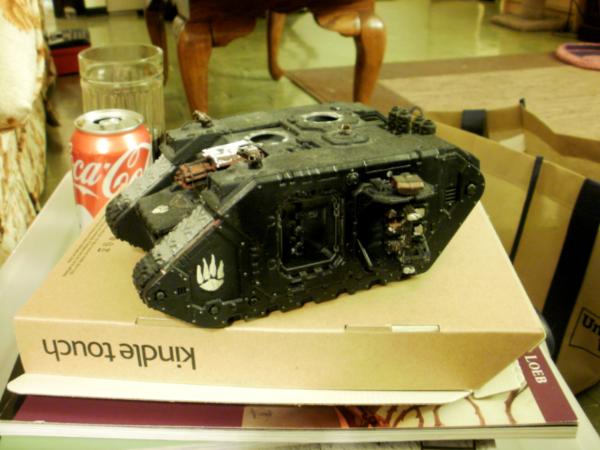
On to more fun stuff! I finally completed Pele's Command, my Land Raider. You might remember her in her original condition.
This was the hardest project I've ever undertaken. Nothing would get that paint off. Not a week in Simple Green, not the purple stuff, not brake fluid, nothing. I don't know what kind of sealant the guy used on it, but there's pretty much nothing I could do to remove it. So, I picked up some metallic green spray paint, taped off the parts I didn't want green, and just hit it with that.
I think she looks much better now.
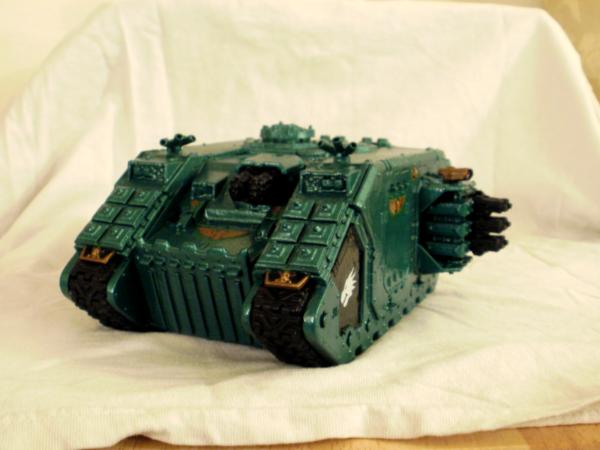
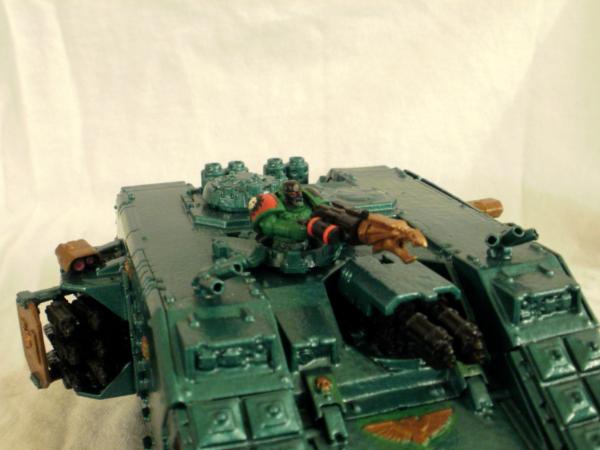
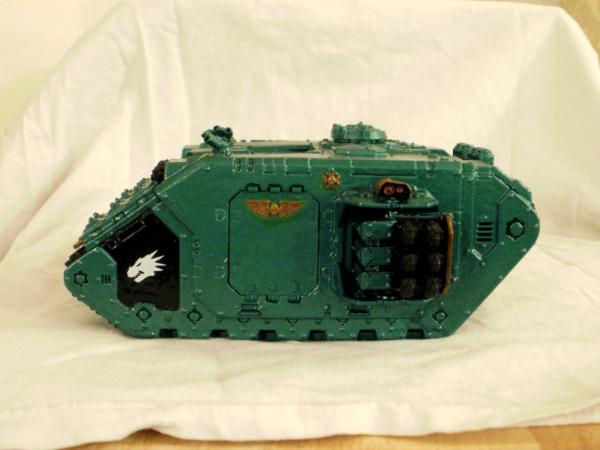
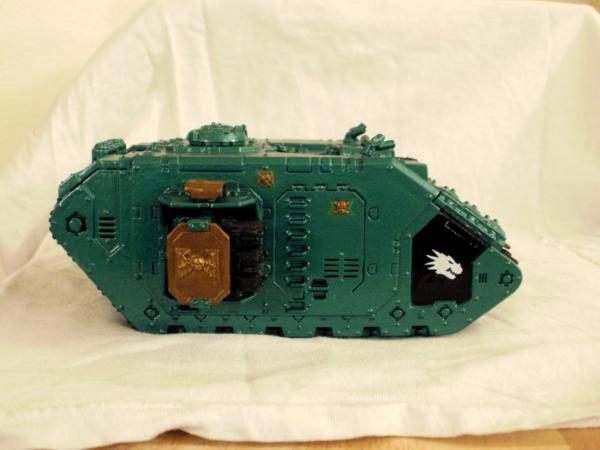
The green around the ornamentation isn't the same color as the rest, because I couldn't get it to match the spray paint. I just can't get it quite right.
|
|
|
|
|
|
2013/02/13 21:51:09
Subject: Re:The Company of Dragons: A Salamanders Army (Updated 2-11-13)
|
|
Hellish Haemonculus
|
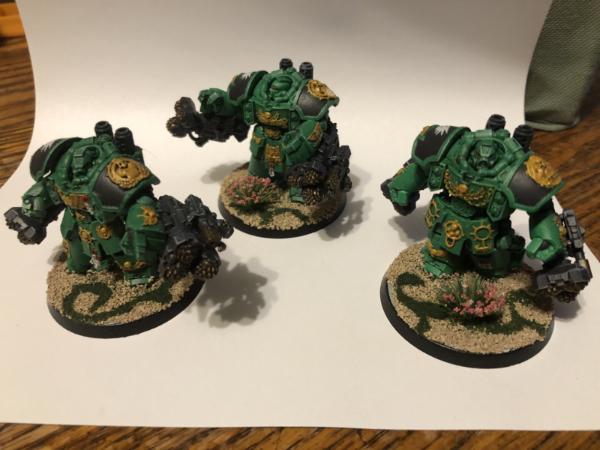
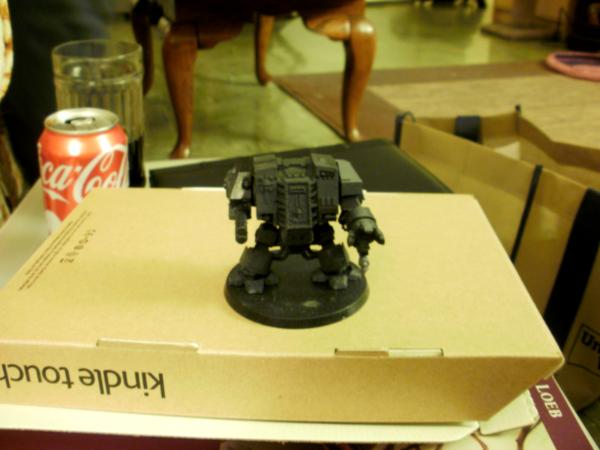
Here's brother Vico, my dreadnought. I'm really pleased with how he turned out.
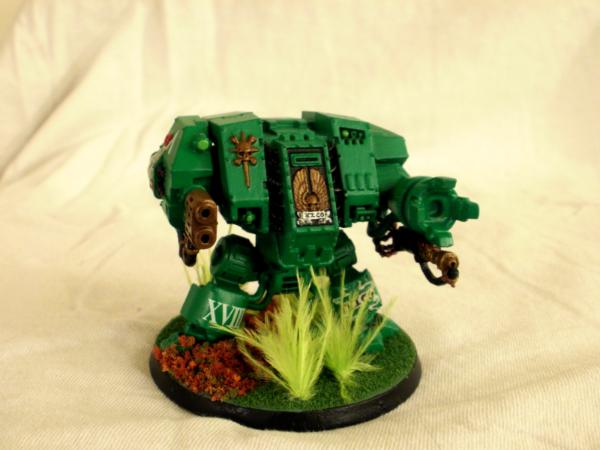

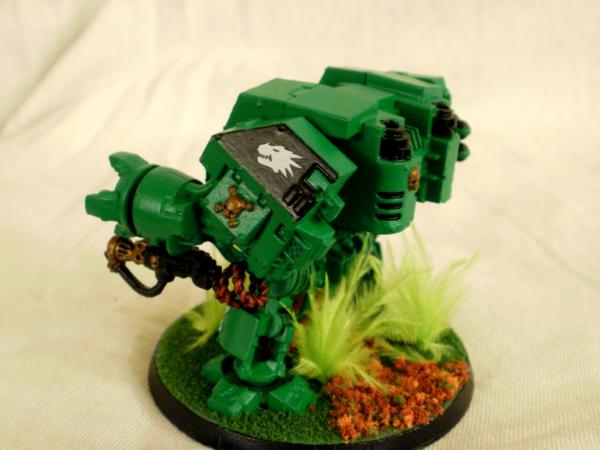
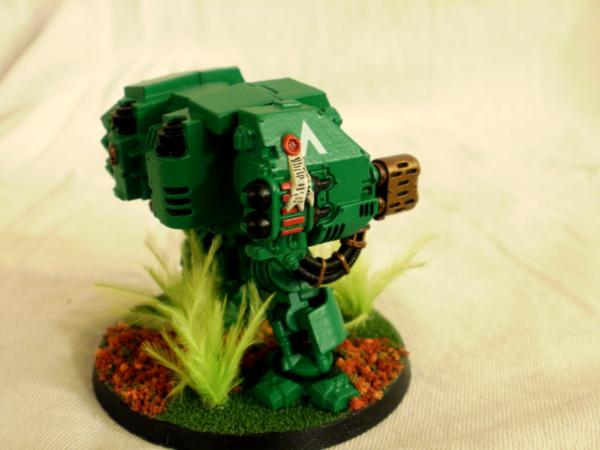
I had to combine two different Imperial Guard decals to get the XVIII on his left leg, (left as you look at him, not his left) and that went way better than I feared it would. I also chose to give him his old company markings (on his melta arm) since that arm looked a little sparse and because I like decals.
The mounded leaves over his left foot (as you look at him, again) were a pain in the butt but they came out pretty well. The ferns on him are the tallest I've done, although the front right one got a little buggered up during application. The ferns are of my own design, though, and I'm still working out all the bugs in getting them put on.
|
|
|
|
|
|
2013/02/16 20:26:59
Subject: Re:The Company of Dragons: A Salamanders Army (Updated 2-11-13)
|
|
Hellish Haemonculus
|
Since I run Salamanders, I figured I would be wasting Vulkan's points if I didn't have at least a couple of thunder hammers in the army.
Hence, Sergeant Arges and the Cyclopes, my assault terminators.
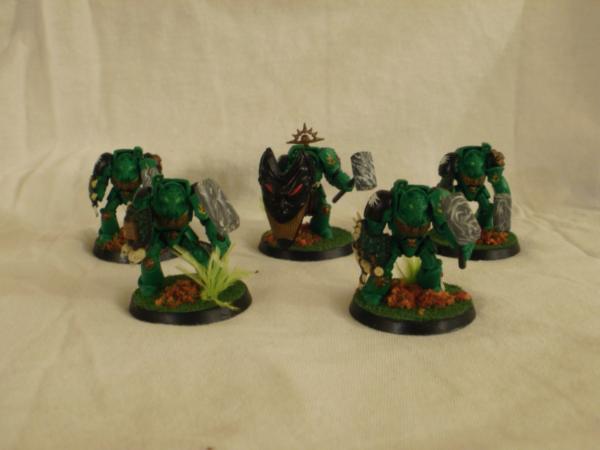
Here they are from the left, showing off their scratchbuilt thunder hammers:
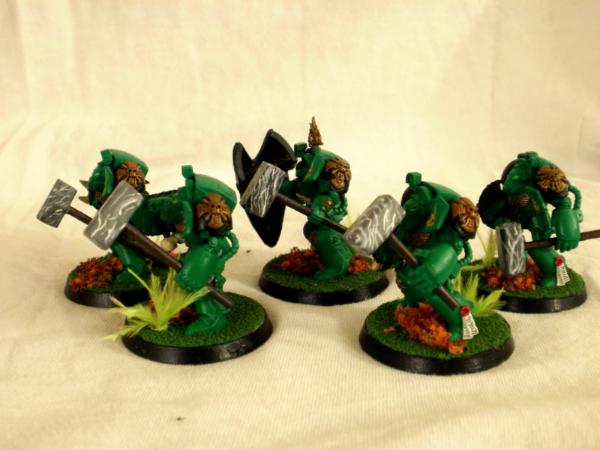
...aaaand now here they are from the right, showcasing their storm shields:
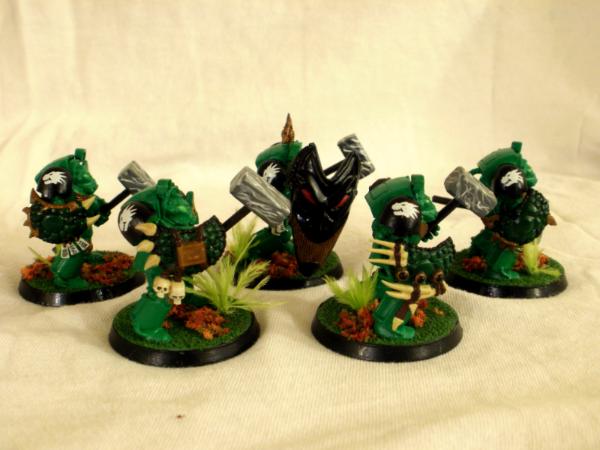
The hammers are made from balsa wood and lollipop sticks. The cooking section at Hobby Lobby has some neat wargaming applicable stuff. The shields are lizardmen shields, except for Sergeant Arges, whose shield is the front of a Harlequins jetbike painted up in mutant-Salamander colors. (If you noticed from the photos, the shield on Arges swivels in his hand.) I had a request to get close-up of the shield on Arges, which I will do as soon as I get my camera located.
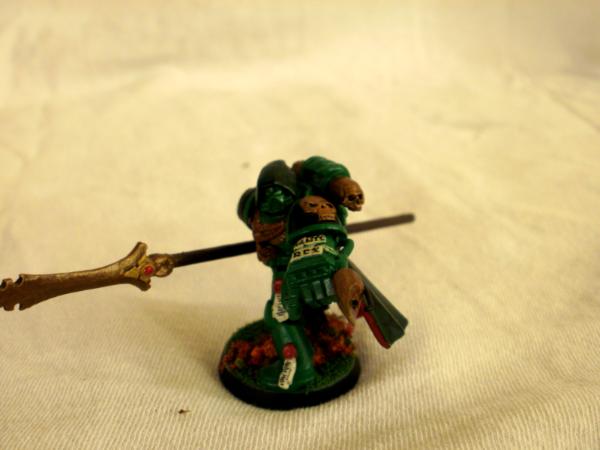
And, with that in mind, here's my Vulkan
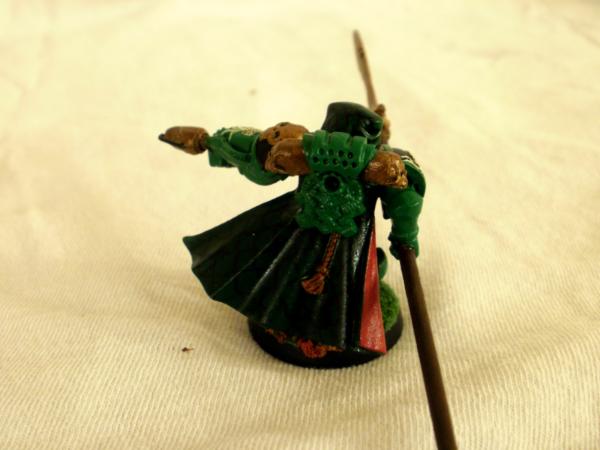
Next, we see him from behind, strutting his stuff to show off his stylish dragonskin cape.
Finally, here he is showing off that shoulderpad which gave me so much grief.
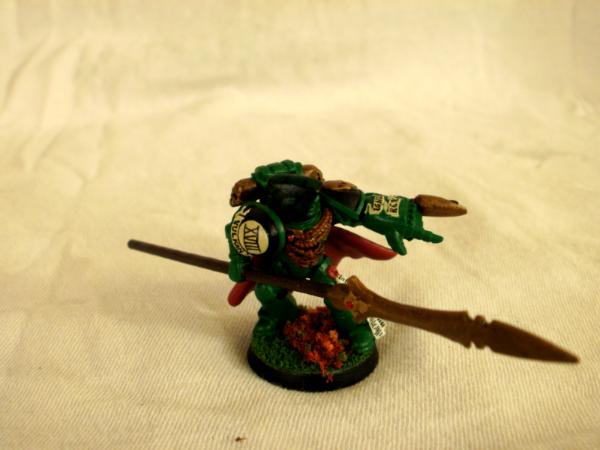
Reactions are generally positive, but if you've got some suggestion, by all means throw it at me. I'm definitely going to make another Vulkan eventually, so I'm always open to advice. (As long as it isn't just a complaint about the length of the spear.)
|
|
|
|
|
|
2013/06/21 02:46:31
Subject: The Company of Dragons: A Salamanders Army (Updated 2-16-13)
|
|
Angry Blood Angel Assault marine
Close to Maddness, Far from Safe
|
I'm loving that Vulkan! The shoulder pad is so cool looking so is worth the grief. I am working salamanders myself and the biggest problem for me is that gold is a bitch (pardon my cursing american). As I look at your paints I can't help but notice that your gold on your newer models looks rather sweet, what do you use?
|
Check out my little ork story I am working on here!
http://www.dakkadakka.com/dakkaforum/posts/list/632365.page
|
|
|
|
|
2013/06/27 01:45:32
Subject: Re:The Company of Dragons: A Salamanders Army (Updated 2-16-13)
|
|
Hellish Haemonculus
|
Thanks for noticing! I hope to get a squad of sternguard done in the coming months! I was really satisfied with the way that shoulder pad turned out. (Although almost no one gets the Legion number thing. Everyone's keeps asking me if the Salamanders have 18 companies or something.  )
I personally utilize the following technique (which I call semi-metallic metallic) for my metallic colors: Use a brown or yellow color (it varies depending on the shade of metal you want) and then drybrush a cheap (as in, Walmart art paint) acrylic paint over the top. Experiment first to get the right base color. (You can even use it on silver if you like.) Almost all the metallics on the Salamanders in my gallery use this technique, which gives a very subtle metallic sheen with no clumping or streaking.
Washes can be added to taste in order to provide shading and definition as needed.
Specifically, the dark bronze color I use on most of my models is Bestial Brown with Wal-Mart acrylic paint (bright gold) drybrushed over the brown.
Anyway, I hope this helps.
|
|
|
|
|
|
2022/03/26 06:51:46
Subject: Re:The Company of Dragons: A Salamanders Army (Updated 2-16-13)
|
|
Hellish Haemonculus
|
|
|
|
|
|
|
|
|


 5000pts