| Author |
Message |
 |
|
|
|
|
Advert
|
Forum adverts like this one are shown to any user who is not logged in. Join us by filling out a tiny 3 field form and you will get your own, free, dakka user account which gives a good range of benefits to you:
- No adverts like this in the forums anymore.
- Times and dates in your local timezone.
- Full tracking of what you have read so you can skip to your first unread post, easily see what has changed since you last logged in, and easily see what is new at a glance.
- Email notifications for threads you want to watch closely.
- Being a part of the oldest wargaming community on the net.
If you are already a member then feel free to login now. |
|
 |
2012/03/15 04:24:50
Subject: 214th Corsairs (IG) & Black Templars - 01/05/2017 Something Completely Different
|
|

Crushing Black Templar Crusader Pilot
|
First off a little about myself. I started playing 40k towards the end of 3rd edition. The first thing I ever put together was a Space Marine from the starter box (against the Dark Eldar!). Soon after I bought the Catachan battle force. 20 guys, 2 sentinels, and a Leman Russ Battletank. Those 20 guys, sentinels, and LR are still in my main army. Fast forward to last summer, and I decided to buy some models before the price hike. 3 Valkyries and 2 Cadian battleforces later I had unknowingly started my newest 40k army. Although I have IG already, I don’t consider these 2 forces the same army. Each is a separate 2500 point list (plus extras). They will see battle together, and against. Truthfully the army boxes were going to be used to make a conscript squad styled in the ways of the UN… oh how that changed.
Why call it the 214th Corsairs?
Growing up, the History Channel had a show I loved to watch, called the Baa Baa Black Sheep. It was centered on VMA-214, a Marine Corps fighter squadron. They flew the F4-U Corsair. It is my favorite plane by far. Naturally when I picked up the Valkyries I remembered the HOURS of the show I watched and I decided to name the three valks after them. The infantry soon followed. In honor of this great show (and squadron, they have a rich history), I will be naming some characters after some of the men who served.
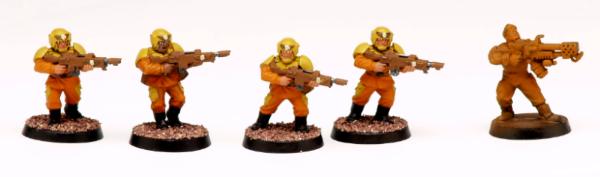
And the last thing before posting some pictures, before it gets asked, an explanation of why the colors are orange and yellow. Honestly it is because I love orange. After talking to a friend, I picked on orange, yellow, and brown. The colors used are Macharius Solar Orange, Iyanden Darksun, and Calthan Brown. I consider myself a “new” painter. It is my first time using foundations, good primer, and a wet palette. Also today I whipped out my mother’s airbrush and started to learn how to use it… on the biggest tank I could find. My friend John helped me a lot. His blog is www.flekkzo.blogspot.com He has been a mentor for my painting, and he is quiet modest and also learning along side of me. He is painting the Valkyries for me (he wanted to paint one, I told him to paint all three!).
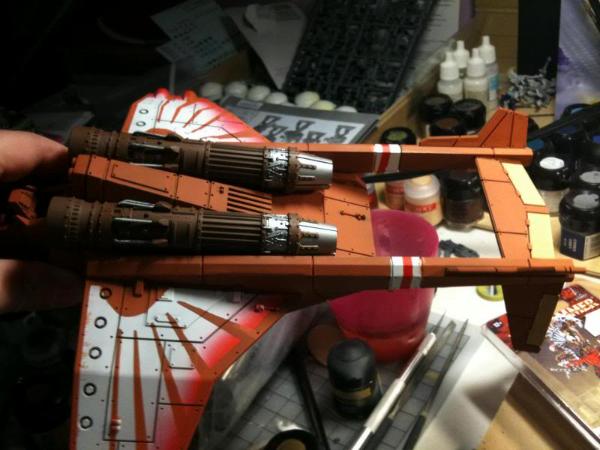
Finally a picture of the scheme I am probably going to go with. It needs washes, highlights, and some other weather. I did some minor dry brushing on some of the armor. The Baneblade needs another coat of orange before I go on with the other colors. The Valkyrie shown was a WIP shot, a few things have changed on it since that picture, but I haven’t gotten a good one taken since that shot. That will be my job for tomorrow!


And once again, the following picture is not mine. It is a picture my friend took of the Valkyrie (one of three) he is painting for me. I will take pictures of the finished Valkyrie soon.
Thanks for reading! How do you feel about the color scheme? Should I attempt to airbrush the base coat orange or stick to brush painting it? Advice on paints for airbrushing is welcome. Also, for basing, how do you get your stuff to stick down? I used elmers glue with Army Painter Battlefield Ground, but it comes off very easy.
|
|
This message was edited 16 times. Last update was at 2017/01/05 09:16:09
|
|
|
 |
|
2012/03/15 07:58:31
Subject: 214th Corsairs (Imperial Guard Blog)
|
|

Dakka Veteran
|
Wow, that Valkyrie looks awesome!
|
|
|
|
|
2012/03/15 17:08:04
Subject: 214th Corsairs (Imperial Guard Blog)
|
|
Crushing Black Templar Crusader Pilot
|
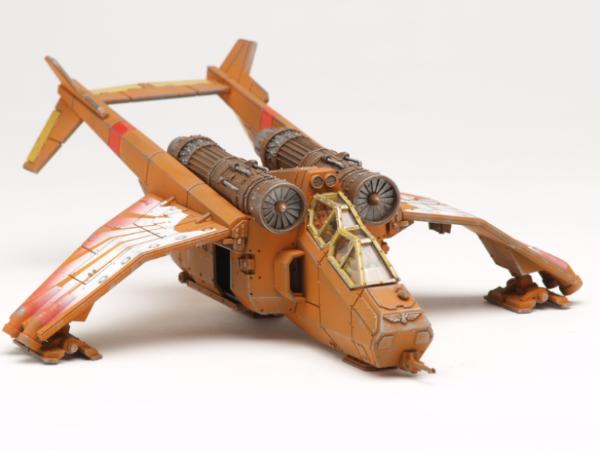
Thank you! I can't wait for all 3 to be done so I can start using them on the table. Should only be a couple more months at the rate my friend and I paint!
Here is a shot of the valkyrie taken with the nice camera and light setup. Only problem seems to be getting it all in focus. Very hard to get it all in focus sadly.
|
|
|
|
|
|
2012/03/15 17:15:05
Subject: 214th Corsairs (IG Blog) -3/15 Finished Valkyrie
|
|
Longtime Dakkanaut
|
Looks great! Well weathered and crisp paint job. Yellows are hard to pull offl and yours is top notch. look forward to seeing more. Keep up the awesome work and I'll keep my eye on your updates!
|
|
|
|
|
|
2012/03/15 18:57:22
Subject: 214th Corsairs (IG Blog) -3/15 Finished Valkyrie
|
|
Fully-charged Electropriest
|
Nice..... Very refreshing. They really are going for the ....."HEY, Look over here" scheme.
|
|
|
|
|
|
2012/03/15 20:15:49
Subject: 214th Corsairs (IG Blog) -3/15 Finished Valkyrie
|
|

Ragin' Ork Dreadnought
Ingelheim am Rhein, Germany
|
I'm a big fan of your sheme! Subscribed!
|
|
|
|
|
|
2012/03/15 20:25:57
Subject: 214th Corsairs (IG Blog) -3/15 Finished Valkyrie
|
|
Battleship Captain
|
I like the armor
|
|
|
|
|
|
2012/03/21 18:51:22
Subject: Re:214th Corsairs (IG Blog) -3/15 Finished Valkyrie
|
|
Storm Trooper with Maglight
|
I like what im seeing here a lot! As a history major aiming towards a speciliaztion in Military history, I can appericaite the fluff and really actually enjoyed the painting, fluff and background that has gone into this. Im more of a P-51D or P-47 fan myself but the F-4U was one of the best planes of WWII in the pacfic theather. 
Consider me subscribed  
|
|
|
|
|
|
2012/03/26 21:21:16
Subject: Re:214th Corsairs (IG Blog) -3/15 Finished Valkyrie
|
|
Crushing Black Templar Crusader Pilot
|
@madmartykmf: Thank you! I am really happy with the yellow. I really like the foundation paints. I hope they don't change too much with the new line.
@HONAW: Thanks! They are very bright, which hopefully I won't lose them. Nice change from the green I have on my huge chunk of my current IG army.
@MrMerlin: Thanks for the comment! I love your orks. Very inspirational
@Captainsolstice: Thanks! Just want for the armored column to go with it! (which at the current rate, will be next year  )
@swampyturtle: Thanks, now I have to actually research so I can get it right! The show was a lot of fun, and I like that element, but the actual people said they took a lot of... creative license. And the movie is full of shenanigans they never did.
Just a quick WIP picture of the Noncoms and the two company commanders of the 214th Corsairs.
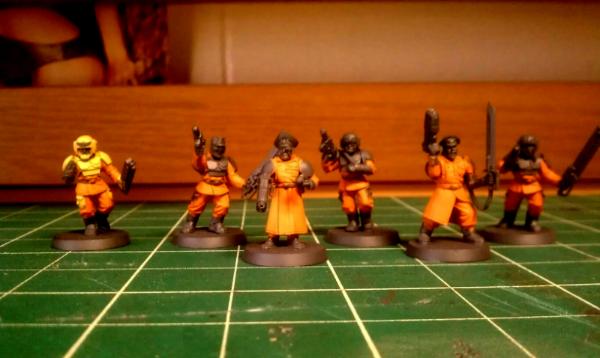
I tried to add some flavor to the guys and make them different form each other when I could. My favorite is the guy with the cast, counts as CCW (those things hurt!)
Also a picture of what I am working on currently. Spent part of my tax return on 4 razorbacks (condensed down the boxes and one of extra sprue pieces). The vindi box is my magnets. Order a bunch more last night, and have 2 predator kits from the manufactorum. It is all for my BT army, which I may just put in this blog also, saying they will be on the planet fighting against the enemy with the 214th.
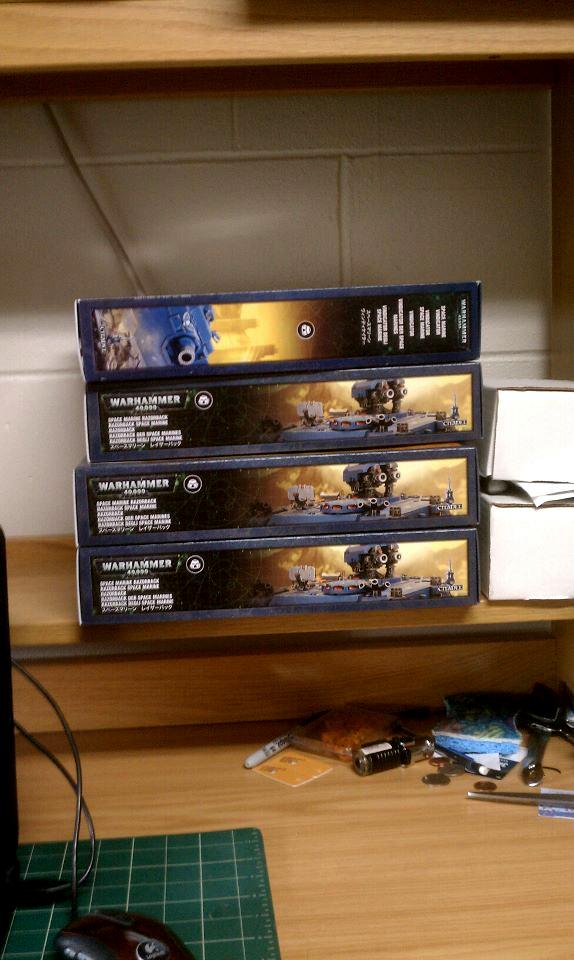
Stay tuned! Hopefully I will get some painting done and some modelling finished. Gonna be fun getting all the special weapons to work!
|
|
|
|
|
|
2012/03/26 21:29:40
Subject: 214th Corsairs (IG Blog) -3/26 Minor WIP update
|
|

Ragin' Ork Dreadnought
Ingelheim am Rhein, Germany
|
Edited because of stupidity.... I didnt read your post very carefully 
Well, then I'm looking forward to seeing these tanks painted up as templars!
|
|
This message was edited 1 time. Last update was at 2012/03/26 21:50:18
|
|
|
|
|
2012/03/26 21:43:09
Subject: Re:214th Corsairs (IG Blog) -3/26 Minor WIP update
|
|
Storm Trooper with Maglight
|
Black Templars you say  Well, you know how to keep your readers hooked.
the first army i ever played against was BT back in early 4th ed with my tau my buddy would pretty much always roll over me with his force. It was ok though cause i still had fun at it. Somewhere in 5th though i lost the love i had for the tau and went IG. Im hoping either 6th or a new tau codex will bring them back off the shelve. In the mean time, im a happy IG general.
|
|
This message was edited 1 time. Last update was at 2012/03/26 21:43:40
|
|
|
|
|
2012/03/26 22:57:35
Subject: 214th Corsairs (IG Blog) -3/26 Minor WIP update
|
|
Crushing Black Templar Crusader Pilot
|
@MrMerlin: You changed it after I read your post on my phone! Cheater :p. The tanks will be black, along with a landraider, 2 preds, and the vindi. However, I may purchase a few razorbacks to convert and paint up as Hydras for the IG.
@swampyturtle: The first army I collected (from the starter box) was Space Marines back in 3rd edition, when it was all about the boys in black. I decided when they updated the FAQ to make a 2500 point list. These razorbacks were the last pieces to buy. Hopefully by the end of April I will have all the BT painted (or close to it) and played at least once. Then they get to sit for a month when I am in Germany.
|
|
|
|
|
|
2012/03/30 23:07:49
Subject: Re:214th Corsairs (IG Blog) -3/26 Minor WIP update
|
|

Nervous Karist Novitiate
|
OK, I'm sold. My tanks will definately be orange too! 
That Valkyrie looks great.
|
|
|
|
|
2012/04/01 18:26:19
Subject: Re:214th Corsairs (IG Blog) -3/26 Minor WIP update
|
|
Crushing Black Templar Crusader Pilot
|
Thanks dicewar! I can't wait to see what your tanks look like with the orange and blue scheme you have going on!
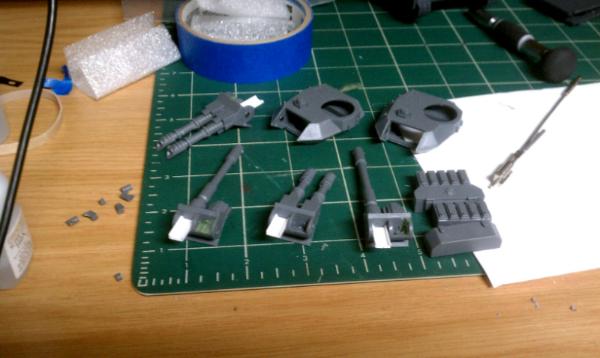
So, when I have time (which I should be using for homework but shhh), I have been working on my 2 predators and 4 razorbacks for my BT army. One predator was already built besides the turret and the side doors, so they aren't to the full level of magnetization as the others, but it will do. They are done per instructions of The Manufactorum. His helper tools are AMAZING.
That being said, I did give up on trying to add a pin to the weapon mounts on the predator... none of my saws seems to be able to cut through the damn paperclip. The lascannons just might sag a bit. If anything I will add a small magnet or a slice of metal on the side to help keep it where I want it.
I can't wait for Tuesday. My plan is to get all the insides primed so I can paint the insides and do final assembly. Then all I have left to do is scrap a ton of mold lines and all of my BT army will be ready for paint.
The Predator turrets:
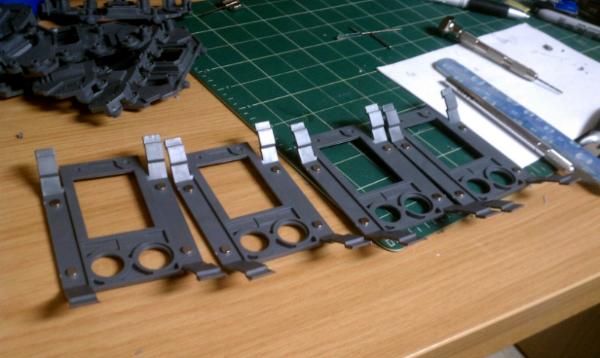
Tops of the razorbacks:
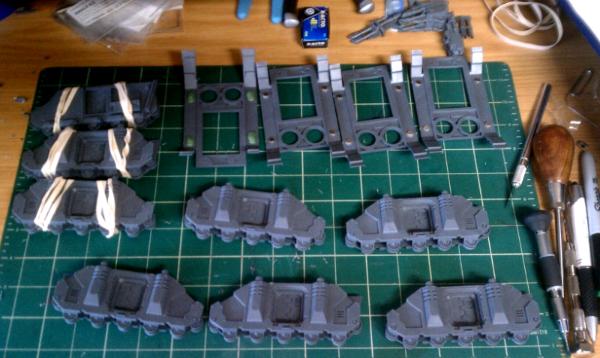
Current progress on the razorbacks. Magnets are in the 4 corners of the door:
|
|
|
|
|
|
2012/04/01 18:45:43
Subject: Re:214th Corsairs (IG Blog) -4/1 BT Reenforcements WIP
|
|
Storm Trooper with Maglight
|
Progress  its all coming together now. My buddy that plays BT actually got in contact with me again last night (been like 5 years?) and we talked 40k for a while.
Overall, still following as ever and cant wait to see them done up 
|
|
|
|
|
|
2012/04/01 19:10:36
Subject: 214th Corsairs (IG Blog) -4/1 BT Reenforcements WIP
|
|
Crushing Black Templar Crusader Pilot
|
Progress for sure. Although now I remember from the vindi and first predator about how much I HATE rhinos. I have been dry fitting them together so I can get the magnets placed right, and naturally they don't want to fit properly.
|
|
|
|
|
|
2012/04/26 08:26:13
Subject: Re:214th Corsairs (IG Blog) -4/1 BT Reenforcements WIP
|
|
Crushing Black Templar Crusader Pilot
|
So, I haven't done ANYTHING on warhammer stuff in the past month, but I feel like I have a great.... excuse.
A month ago I got a girlfriend... which takes up tons of free time it turns up. For a nice little one month gift I got her a Pegasus knight. I can't wait to give her tips on putting it together and having her paint it. She really is excited and can't wait to learn the games!
Also this last month I have had to do a scene design for a class. I decided to do the model for it instead of a perspective drawing since drawing was never my thing. So I give you some WIP pics of what I just finished. This is all do in 6 hours so I have to get going!

For the base, I painted it with snake bite leather. Coat is meant to be kinda see through so I don't have to weather it as much. Most of the platforms are made from 1/4 x 1/8 inch plastic bars(?). The front is done with HO scale box car roofing. Just happens to look like siding for 1/4" scale siding! The inside walls are plastic card I had laying around with paper glued to it for the color (as I didn't have paints to use for them, and they get done MUCH quicker this way)
One of the platforms is built wrong. The walls are a foot thick when they should be 6 inches. I have to make it work but it should all be good!

|
|
|
|
|
|
2012/06/03 17:00:09
Subject: Re:214th Corsairs (IG Blog) -4/26 school project model WIP
|
|
Crushing Black Templar Crusader Pilot
|
It has been a looooong time since I have worked on any models. I just got back from Germany and finished off the semester of class. I just started some summer classes too so I am keeping busy!
First thing I did when I got back was purchase a few items. Trying out the new paints, picked up some P3 things, and trying the army painter touch up colors, as I love the primer I got for my skeletons for WHFB

And on a whim I decided to pick up a really big box

Few hours spent this morning and here is where I am at so far.

Ultimately, the plan is to build up the two bastions for Planetstrike and some games for at school and such. The paint is gonna be themed for the 214th, but probably won't have it very orange, thinking of some other colors to mix it with. I may also paint them up for the Black Templars, but I feel that would be way to black and dark. I suppose I could even do one of each since I have two! The Aegis defense lines will be painted up for the 214th for sure, as I don't imagine the BT use too many defensive positions. The autocannons will be built up and used to make a few Hydras for the 214th. I haven't decided if I want to put them on Rhinos or Chimeras, or as a chimera without a top part and sitting on the actual base they come with.
Speaking of the BT, I got the first paint down on a test marine. No arms as I am debating magnetizing them right now for bolter and bolt pistol/ CCW combo. Used Abaddon Black for the base and Mephiston Red. I have Evil Sunz Scarlet as a highlight color for the red.
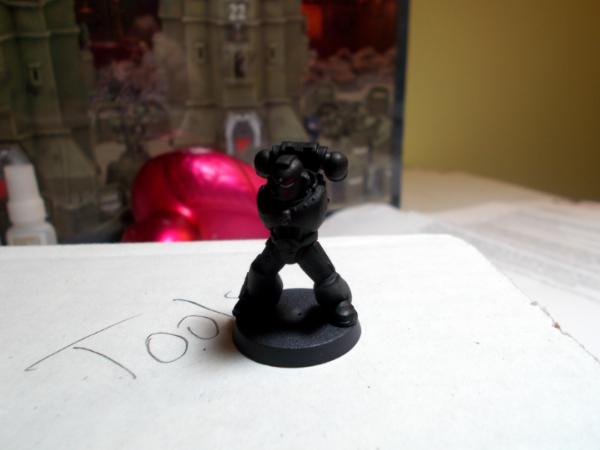
|
|
|
|
|
|
2012/06/12 02:27:01
Subject: Re:214th Corsairs (IG) + BT -03/06/12 New projects and BT update
|
|
Crushing Black Templar Crusader Pilot
|
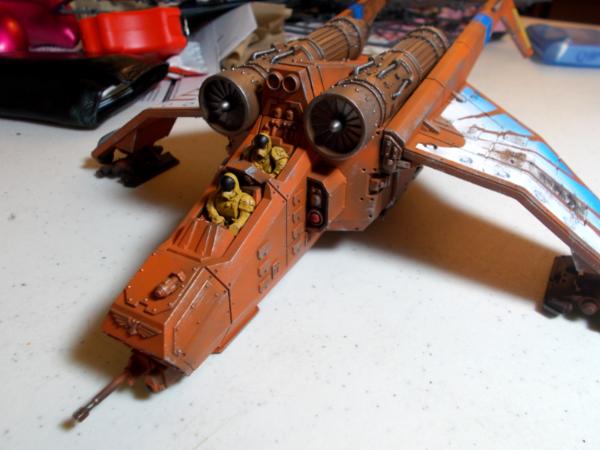
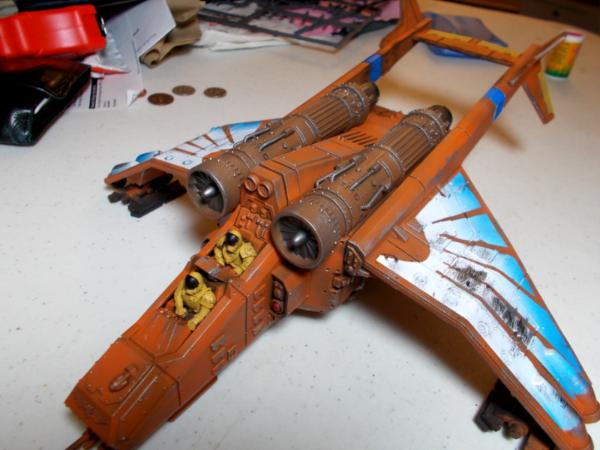
Got the second Valkyrie from my friend!
He managed to take time out of his own painting backlog of amazing Imperial Fists and Skaven to finish this for me.
The second in the Air Wing, it is more heavily weathered by all the sorties flown through the skies. But really it is covering up a mistake when the tape used for the wings ripped the primer right off the model! After seeing a WIP pic, it is amazing how you can't see the actual damage. I really like the weathering on it. Now to get some bases started for these things! Only one left to be painted, then they need weapons!
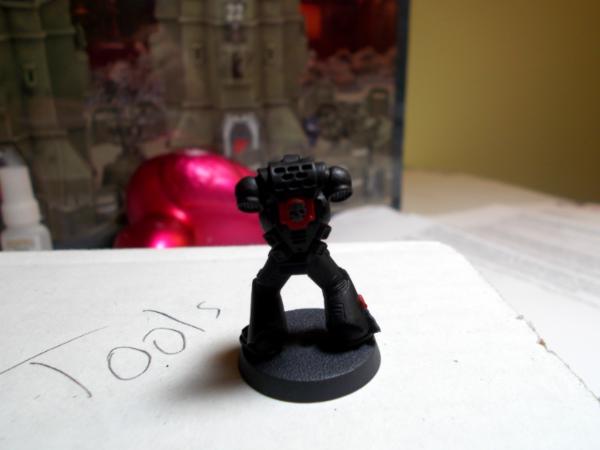
Also painted more of the test marine. Working on line highlighting. Boy do I SUUUCK at it. Practice makes perfect. I am not disheartened by my first attempt and I am ready and willing to keep painting! Just have to finish organizing the mess I left 2 months ago on the desk!
|
|
|
|
|
|
2012/06/13 03:32:50
Subject: 214th Corsairs (IG) & Black Templars - 6/11/12 2nd Valkyrie Finished
|
|
Secretive Dark Angels Veteran
|
Hahaha. I found your hiding place.  Loving your models so far. Keep them up. RE: the imperial stronghold box, you are lucky you picked it up before the price rise.
|
|
|
|
|
2012/06/13 03:34:57
Subject: 214th Corsairs (IG) & Black Templars - 6/11/12 2nd Valkyrie Finished
|
|
Crushing Black Templar Crusader Pilot
|
Haha the only reason I picked them up is because someone rumored they were discontinued, and I really needed the autocannons for the Cadians.
Turns out they just got a 45 dollar price raise (holy!). Glad I got it either way! Now I just need to paint it!
And the nice thing about the FLGS, he doesn't raise prices until new stock. So anything on the wall before the price raise is at the old price! I wish I had the spare cash to pick up one more land raider!
|
|
|
|
|
|
2012/06/13 03:45:54
Subject: 214th Corsairs (IG) & Black Templars - 6/11/12 2nd Valkyrie Finished
|
|
Secretive Dark Angels Veteran
|
I think I checked earlier today and FW sell a GW kit of Land Raider at 41 gbp which is less than $66 .
Well, if you buy your stuff from miniaturemarket.com then it is only at $56 even with the price increase.
|
|
|
|
|
2012/06/13 03:56:02
Subject: 214th Corsairs (IG) & Black Templars - 6/11/12 2nd Valkyrie Finished
|
|
Crushing Black Templar Crusader Pilot
|
If I decide to pick up another one, I will probably go that route depending on some other things. I hang out at the LGS a lot so I try to support him. He is my favorite store in the region (and there is like 4 in a 30 minute radius of me) and I would like to keep the doors open. And GW would make that silly mistake.
So, I decided to lay down some paint tonight. My buddy wants to get one last game of 5th edition in, and I want to play my BT at least once before 6th hits, so we set up a game for Tuesday of next week. Before I can play I have to assemble my tanks, which means painting the inside! I have never really done any sort of detail painting, so this is new to me! Just have most of the screens based and putting in a white base on the buttons to make them yellow.
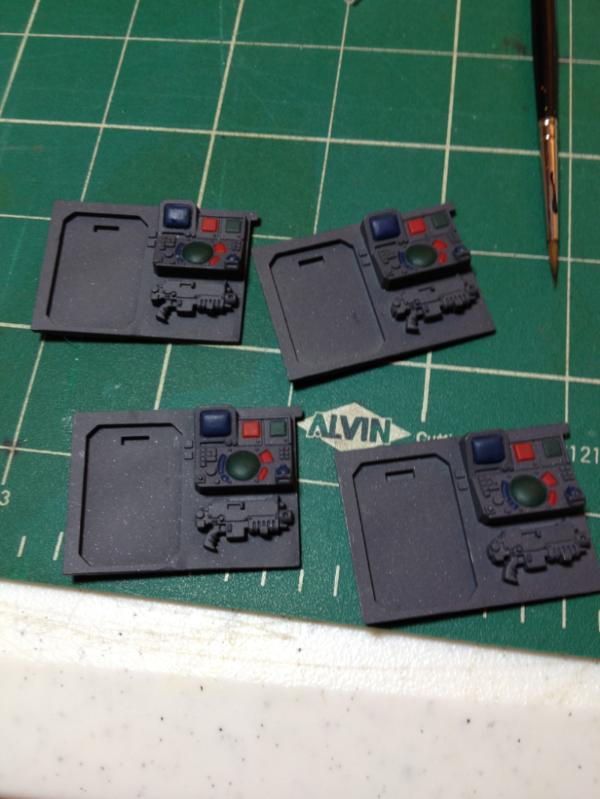
I must say, the mix of wet palette, the new GW line, and P3 paints has made painting enjoyable for me. I have never had paint so seamlessly go on a model. I just need some new brushes and I will be golden. My girlfriend is sending me some good ones, which was supposed to be a surprise but I ruined it last night by saying I was about to order some. As a repayment, I am painting up some old Brettonian models I have to give her when she visits soon.
|
|
|
|
|
|
2012/06/13 04:00:30
Subject: 214th Corsairs (IG) & Black Templars - 6/11/12 2nd Valkyrie Finished
|
|
Secretive Dark Angels Veteran
|
Aww, so cute of you two :-D. I agree regarding wet pallete and brushes. Ever since I started using the wet pallete and a better brush, I also experience a much higher enjoyment when painting.
I think your basecoat is looking good. Looking forward to more awesomeness.
|
|
|
|
|
2012/06/14 02:33:14
Subject: 214th Corsairs (IG) & Black Templars - 6/11/12 2nd Valkyrie Finished
|
|
Crushing Black Templar Crusader Pilot
|
So today work was slow so I moved forward on some painting. Also stopped in the FLGS for day 3-4 in a row and bought ANOTHER pot of paint. Then came back and painted in little spurts.
The different color buttons are to replicate the fun part on some control panels when hitting the button it glows brighter so you know what is active. I tried to change it up to keep it kinda dynamic hopefully. Also tried my first wet blending/highlighting on the blue and red screens.
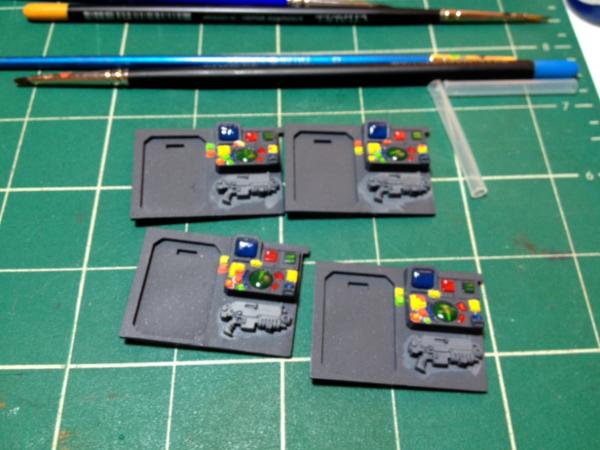
The reason the 214th aren't getting any love is because my buddy John (who is painting the valkyries) threw down a challenge last night. Tuesday evening we are playing Imperial Fists vs Black Templar. 1750 pts. Our last foray into 5th edition. I need to get my tanks together before they can see battle, which means painting the interiors. I don't except anything else to be painted, as I still have 2 summer classes, a job, and 6 papers to write. Hopefully they will see their first battle into 6th edition fully painted though!
|
|
|
|
|
|
2012/06/16 01:35:22
Subject: 214th Corsairs (IG) & Black Templars - 6/13/12 WIP Rhino Interior
|
|
Crushing Black Templar Crusader Pilot
|
Another quick update. Got one tank painted on the inside and assembled. I have to finish 2 more by Tuesday to play!
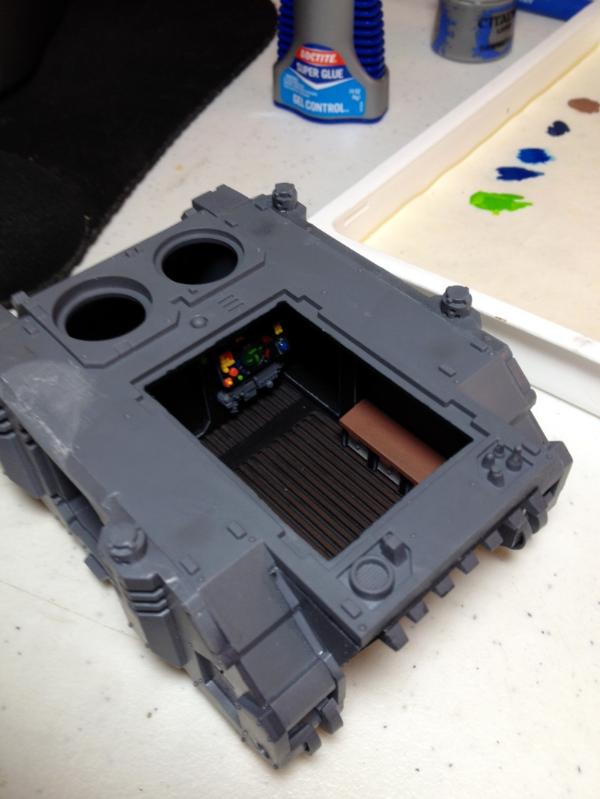
The line highlighting is very fine on it. I wish it looked that good on the marine I did!
|
|
|
|
|
|
2013/01/25 22:39:44
Subject: Re:214th Corsairs (IG) & Black Templars - 6/13/12 WIP Rhino Interior
|
|
Crushing Black Templar Crusader Pilot
|
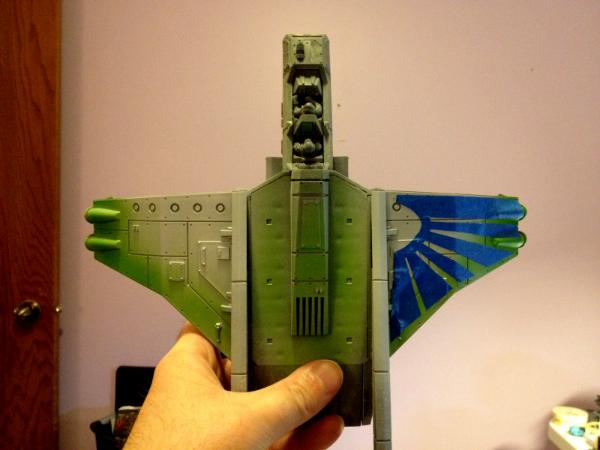
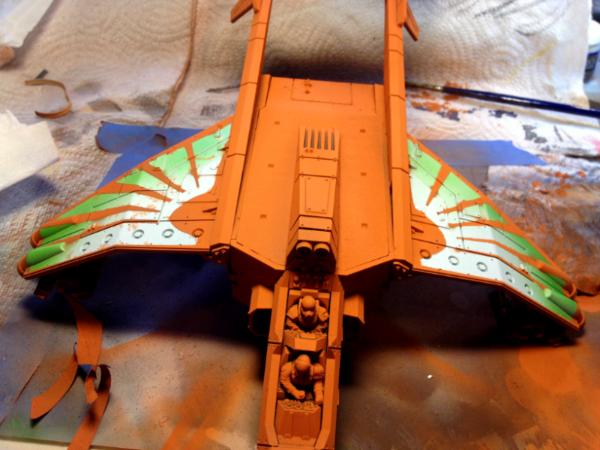
So there finally has been some paint thrown on to the final Valkyrie. My friend has been painting them for me and had a series of unfortunate health problems to deal with and was out of commission for a couple months. He finally got around to this last weekend.
The first coat is white, then green on the tips of the wings (which differentiates the valks and the squads in them). Then a blue tape mask is put over for the awesome wings. Then the whole thing is base coasted in orange. Glad it is almost done. Just need to work on their bases and get motivated in painting my IG again (and my BT once I get airbrushing again, too much black to paint by hand).
|
|
|
|
|
|
2013/01/26 02:28:59
Subject: 214th Corsairs (IG) & Black Templars - 1/25/13 3rd Valkryie WIP
|
|
Hurr! Ogryn Bone 'Ead!
|
Are you using a stencil to cut the wings from the painter's tape?
I like the gradient effect you've achieved with the airbrush. As for your question about if to continue doing base colors with the airbrush or by hand, stay with the airbrush. I find that with my work I use my airbrush over a regular brush almost any chance I can. The cleanup is more work but the result is far better.
It's hard to put a price on a perfectly even coat with zero brush marks.
Plus, you save ages basecoating vehicles and use less paint overall.
|
 - Assembling first army. - Assembling first army.
 Nowlan's IG Army in progress Nowlan's IG Army in progress
 Thin your paints, drill your gun barrels, remove all mold lines. The Emperor wills it. Thin your paints, drill your gun barrels, remove all mold lines. The Emperor wills it. |
|
|
|
|
2013/01/30 20:08:36
Subject: 214th Corsairs (IG) & Black Templars - 1/25/13 3rd Valkryie WIP
|
|
Crushing Black Templar Crusader Pilot
|
I love the finish you get from airbrushing. It is what is holding back my Black Templar painting. I haven't tried the new line in the airbrush and I should.
I am not sure if the tape is cut off a pattern or not. I will ask my friend who painted them.
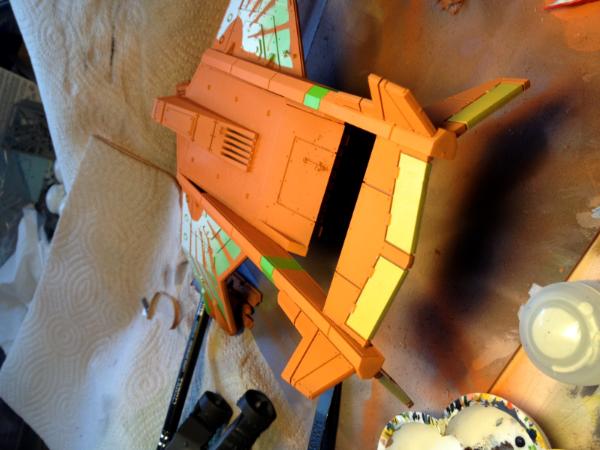
He has done some further work. The rear tail is done with basecoats. Just needs weathering.
The cockpit is also coming along. The first two valkyries will be going back in for some more painting and touch ups and repainting and some further detailing. Here is a pic from last night's progress.
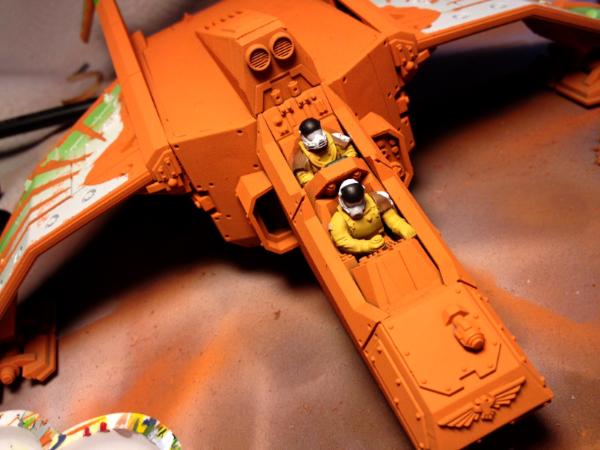
Probably going to get the gloves painted brown to break up the yellow a bit.
Also: Anyone have experience with making custom waterslide decals? I have access to a laser printer at work and such. We wanted to add some markings to the flyers but didn't want to freehand. We could do stencils but if I make a custom slide I can have them all for my ground troops too.
Also what process do you use? I read that if you start with a gloss coat (ard coat), then put on the slide, then put another of ard coat on it will make the transparent part disappear. Obviously the whole thing would get some dullcoat after to get rid of the unwanted gloss.
|
|
This message was edited 1 time. Last update was at 2013/01/30 20:13:26
|
|
|
|
|
2013/01/30 20:37:17
Subject: Re:214th Corsairs (IG) & Black Templars - 1/30/13 3rd Valkryie WIP again
|
|
Incorporating Wet-Blending
|
Heyas sparky! I can definitely give you a few pointers when it comes to DIY decals.
Recently I made a few for my Red Scorpions Razorbacks, and wrote up a little blurb on it on my project log HERE.
Primarily it deals with color decals using an inkjet printer on white paper, but the techniques are the same for laser printed decals.
As to applying them, you've got the idea. Gloss the area you want them applied to, then apply the decal and GENTLY work out all the air bubbles with a damp brush/paper towel. Wait till its dry, then gloss coat the area again (locking in the decal) then flat coat.
Now what kind of markings were you thinking of making? Its important to keep that in mind when selecting your decal paper and printer. In my experience, lasers and clear paper are really only good for black and white (clear) decals. The color ink is never really opaque enough to look good on clear decals.
|
|
|
|
|
|
|
|
 WIP
WIP


