| Author |
Message |
 |
|
|
|
|
Advert
|
Forum adverts like this one are shown to any user who is not logged in. Join us by filling out a tiny 3 field form and you will get your own, free, dakka user account which gives a good range of benefits to you:
- No adverts like this in the forums anymore.
- Times and dates in your local timezone.
- Full tracking of what you have read so you can skip to your first unread post, easily see what has changed since you last logged in, and easily see what is new at a glance.
- Email notifications for threads you want to watch closely.
- Being a part of the oldest wargaming community on the net.
If you are already a member then feel free to login now. |
|
 |
2017/02/28 21:05:08
Subject: multi-level city terrain, marine v nid bases (2/28 painting platforms mini-tut)
|
|

Ragin' Ork Dreadnought
Deep in the Outer Boroughs of NYC
|
Those are all good points.
|
|
|
|
 |
|
2017/03/01 21:33:59
Subject: Re: multi-level city terrain, marine v nid bases (2/28 tower tops finished and mini-tut)
|
|
Dakka Veteran
|
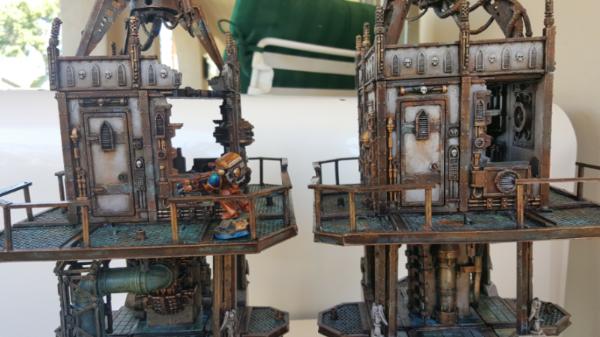
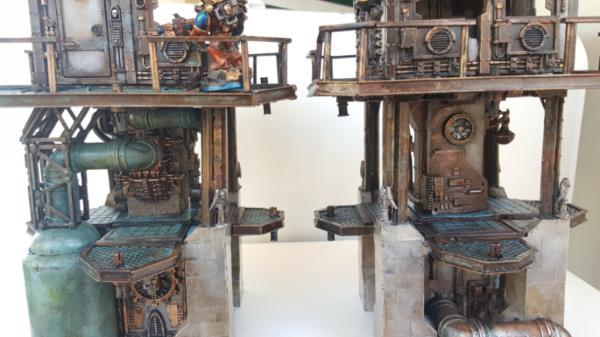
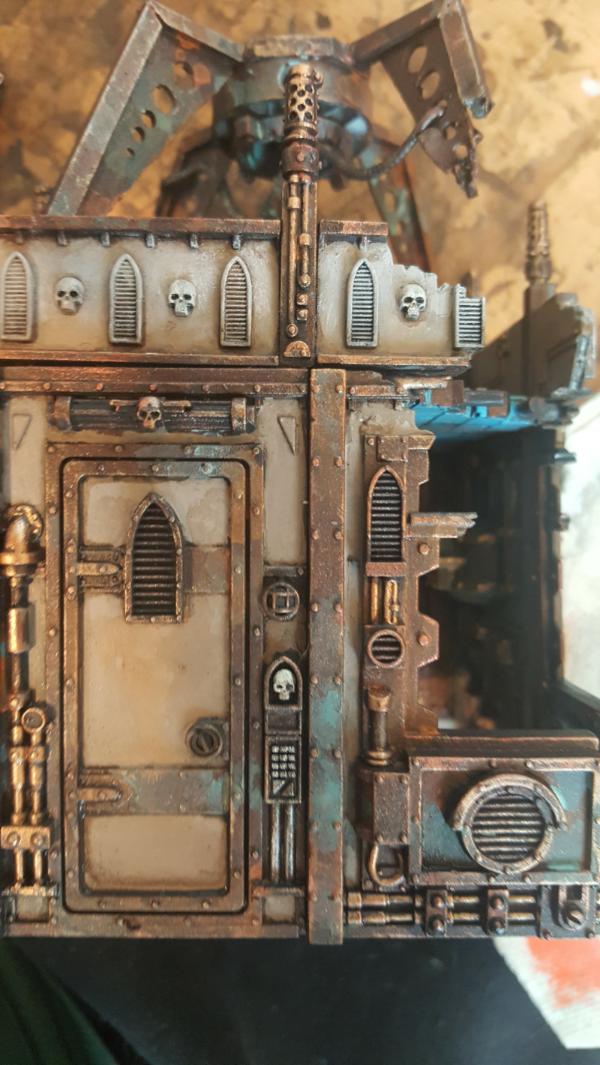
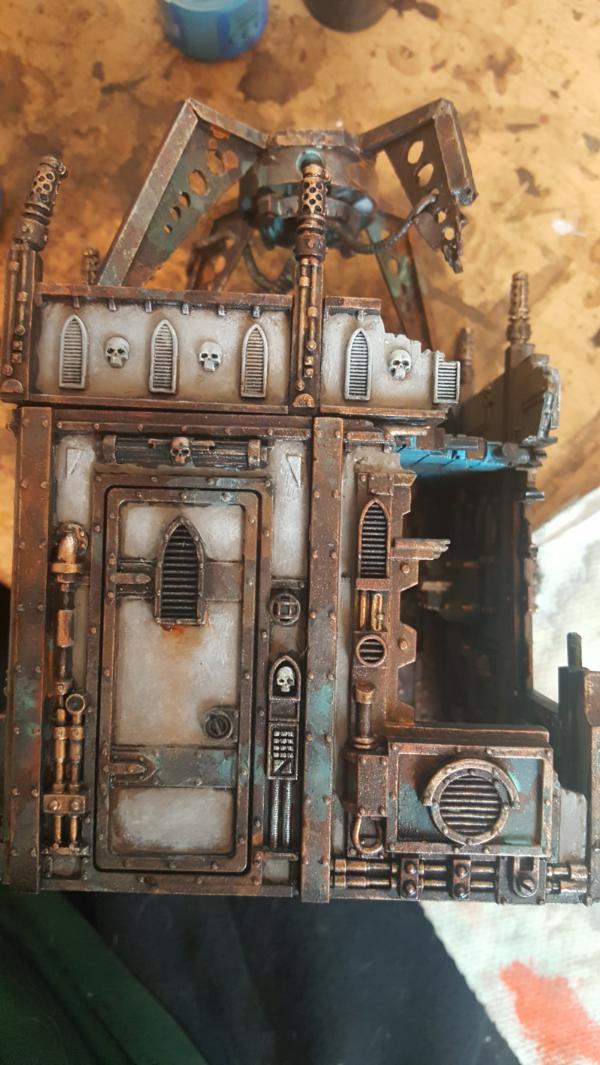
So work moves on and I finished off the tops of the towers! I remembered this time to take good before and afters so you can see what the final drybrush stage does for the stone. Next post ill show the paints I use.
A brief recap of my stages of building painting:
1. Tin Bitz + MIcaceous Iron Oxide (from Golden Acrylic) undercoat
2. Dabs of rust, rusty green, and golden yellow and blue ink all over the place. The goal is that "cold steel" look (just red tinted) where you get swirls of various colors subtly in the dark metal.
3, Drybrush of red copper and bronze over it all (and, in the case of the dark metal, a third dryrbush thats heavir of pearl paint, the brightest white metal you can find)
4, Stone base color in the stone parts
5. Stone layer color over the stone parts
6. Cleanup and re-applying tin bitz where I messed up (often)
7. Wash
8. drybrush stone highlights.
This is the result of going from step 7 to step 8
|
|
This message was edited 1 time. Last update was at 2017/03/01 21:35:33
|
|
|
|
|
2017/03/02 19:20:25
Subject: Re: multi-level city terrain, marine v nid bases (3/2 the paints for my bldgs)
|
|
Dakka Veteran
|
Now the paints I use! Using the steps in the previous post here are their paints.
When I say "get in fluid" that means that instead of a tube of paint golden has all the same paints in "fluid" form which is basically the exact same consistency as GW layer/base paints.
Its a bit more expensive than the raw tube but still cheaper than GW paints. I often get a goldden 1oz bottle for CHEAPER than a GW pot which is only half an ounce.
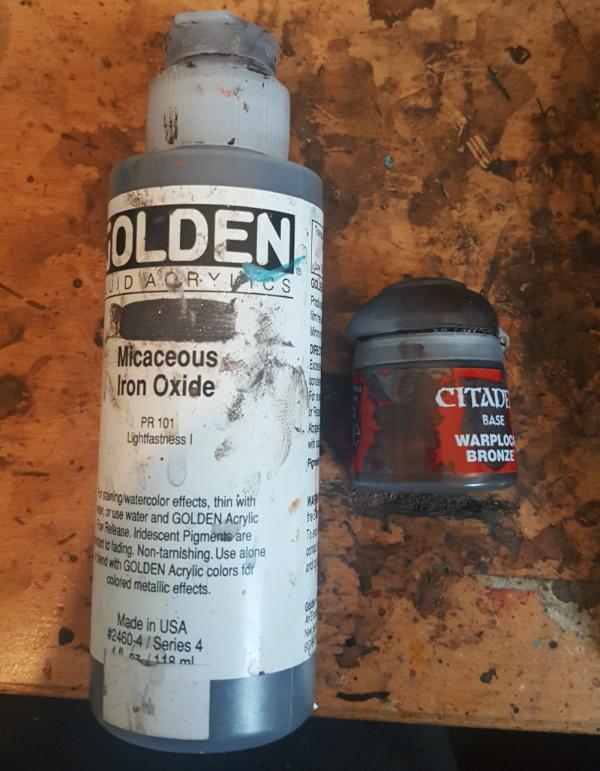
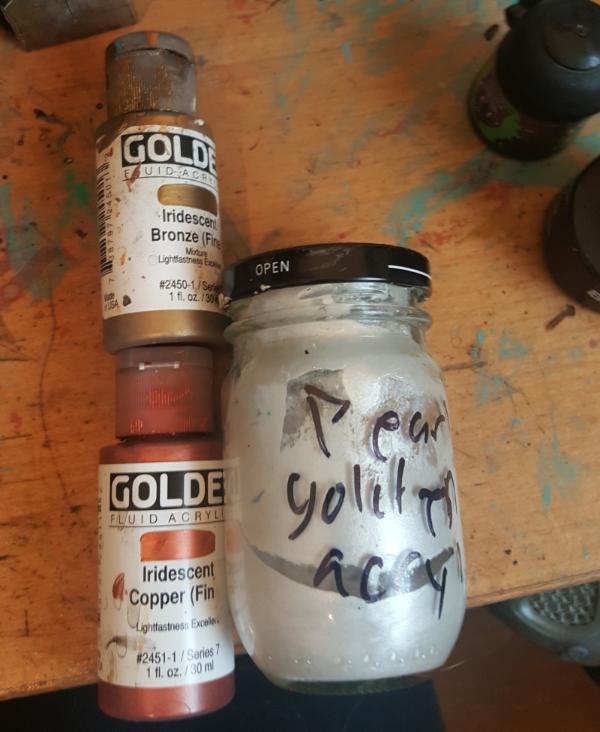
Step 1/6: Base/Cleanup
Left: (GET IN FLUID) http://www.goldenpaints.com/products/colors/iridescent-colors/heavy-body-iridescent-colors/micaceous-iron-oxide
Right: Citadel Warplock Bronze (Formerly Tin Bitz) https://www.games-workshop.com/en-US/Base-Warplock-Bronze
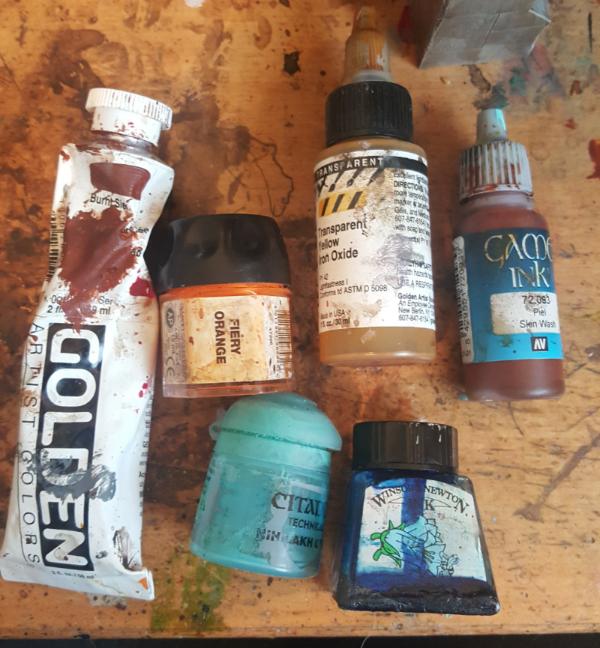
Step 2: Rust
Tube (GET IN FLUID): http://www.goldenpaints.com/products/colors/heavy-body/burnt-sienna
Orange: https://www.games-workshop.com/en-US/Layer-Fire-Dragon-Bright (Though any CRAZY bright orange will do, the brighter the better)
Green: https://www.games-workshop.com/en-US/Technical-Nihilakh-Oxide
Yellow Bottle (HIGH FLOW): http://www.goldenpaints.com/products/colors/high-flow/transparent-yellow-iron-oxide
Red Bottle: https://www.amazon.com/Vallejo-Game-Color-Skin-Paint/dp/B000PH9ILU
Step 3: Drybrush
Pearl: (GET IN FLUID) http://www.goldenpaints.com/products/colors/iridescent-colors/fluid-iridescent-colors/iridescent-pearl--fine
Bronze: (GET IN FLUID) http://www.goldenpaints.com/products/colors/iridescent-colors/open-iridescent-colors/iridescent-bronze--fine
Copper: (GET IN FLUID) http://www.goldenpaints.com/products/colors/iridescent-colors/heavy-body-iridescent-colors/iridescent-copper--fine
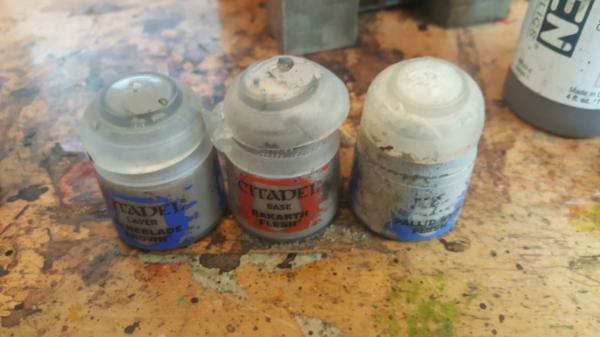
Step 4/5/8: Stone (left is the Base, middle is the Layer, right is the Drybrush)
Left: https://www.games-workshop.com/en-US/Layer-Baneblade-Brown
Middle: https://www.games-workshop.com/en-US/Base-Rakarth-Flesh
Right: https://www.games-workshop.com/en-US/Layer-Pallid-Wych-Flesh
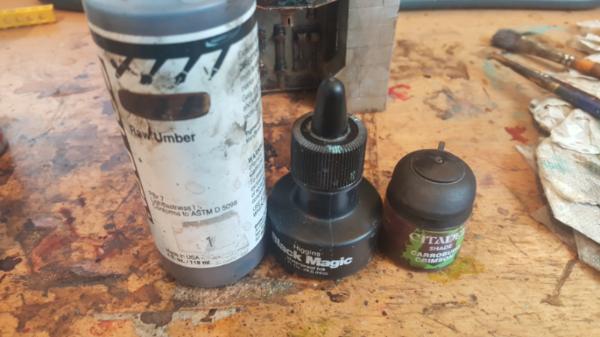
Step 7: Wash
Umber (HIGH FLOW): http://www.goldenpaints.com/products/colors/high-flow/raw-umber
Black Magic (Any black ink will do but this one is nice and dense so easy to get super dark if needed): https://www.michaels.com/higgins-black-magic-waterproof-ink/10015490.html
Crimson: https://www.games-workshop.com/en-US/Shade-Carroburg-Crimson
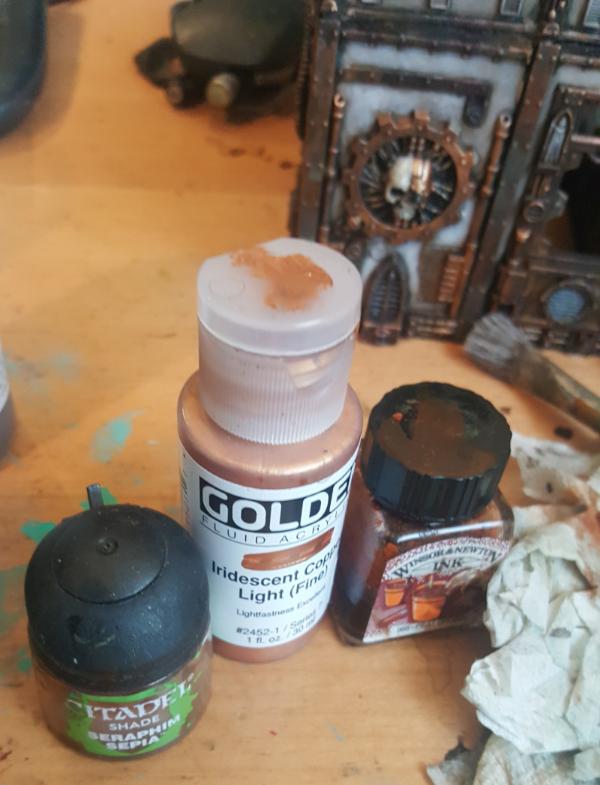
Also, when there are coppery bits these is the setup for copper. Basecoat of copper, then wash of the peat brown and sephia to dull it down
Sepia:https://www.games-workshop.com/en-US/Shade-Seraphim-Sepia
Copper (FLUID):http://www.goldenpaints.com/products/colors/iridescent-colors/heavy-body-iridescent-colors/iridescent-copper-light--fine
Brown: https://www.amazon.com/Winsor-Newton-Drawing-Bottle-Brown/dp/B000KNJ1J8
|
|
This message was edited 4 times. Last update was at 2017/03/02 20:01:55
|
|
|
|
|
2017/03/02 19:39:20
Subject: multi-level city terrain, marine v nid bases (3/2 the paints for my bldgs)
|
|
Ragin' Ork Dreadnought
Deep in the Outer Boroughs of NYC
|
What is in the JAR? Also, could you list with words what your colors and brands are? Because some of your pots are impossible to read.
|
|
|
|
|
|
2017/03/02 19:59:30
Subject: Re: multi-level city terrain, marine v nid bases (3/2 the paints for my bldgs)
|
|
Dakka Veteran
|
Good point and done!
|
|
|
|
|
|
2017/03/03 21:11:11
Subject: Re: multi-level city terrain, marine v nid bases (3/3 first tower finished)
|
|
Dakka Veteran
|
|
|
|
|
|
|
2017/03/04 06:58:55
Subject: multi-level city terrain, marine v nid bases (3/3 first tower finished)
|
|
Ragin' Ork Dreadnought
Deep in the Outer Boroughs of NYC
|
I'm really impressed with how well those lego blocks take paint. Tower looks awesome.
|
|
|
|
|
|
2017/03/05 18:26:21
Subject: Re: multi-level city terrain, marine v nid bases (3/5 second tower finished)
|
|
Dakka Veteran
|
|
|
|
|
|
|
2017/03/05 18:53:58
Subject: multi-level city terrain, marine v nid bases (3/5 second tower finished)
|
|
Ragin' Ork Dreadnought
Deep in the Outer Boroughs of NYC
|
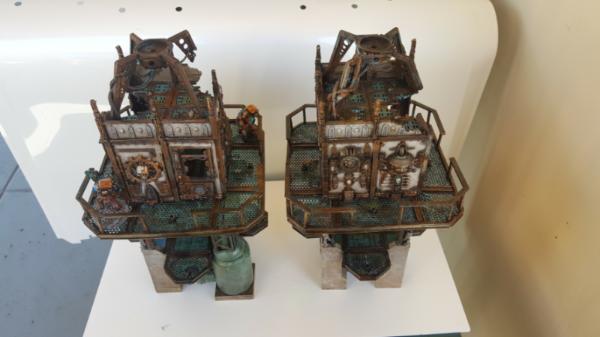
Beautiful work. Would love to see some photis of them together.
|
|
|
|
|
|
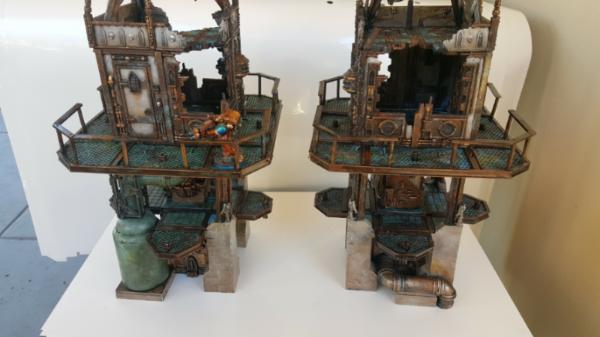
2017/03/06 22:21:58
Subject: Re: multi-level city terrain, marine v nid bases (3/6 the two towers)
|
|
Dakka Veteran
|
|
|
|
|
|
|
2017/03/07 23:02:12
Subject: Re: multi-level city terrain, marine v nid bases (3/7: making modular bridges)
|
|
Dakka Veteran
|
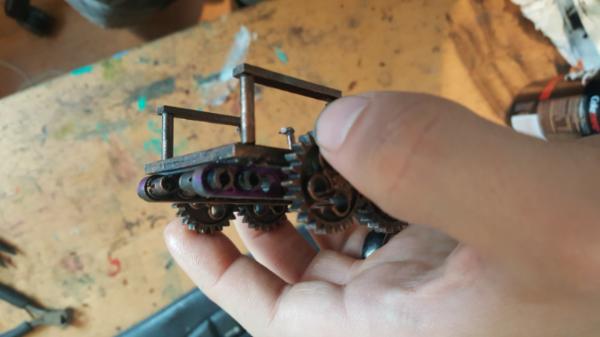
Time to make some bridges! Or, more specifically, finish some bridges.
Now, last time I worked on this stuff I had left off with this:
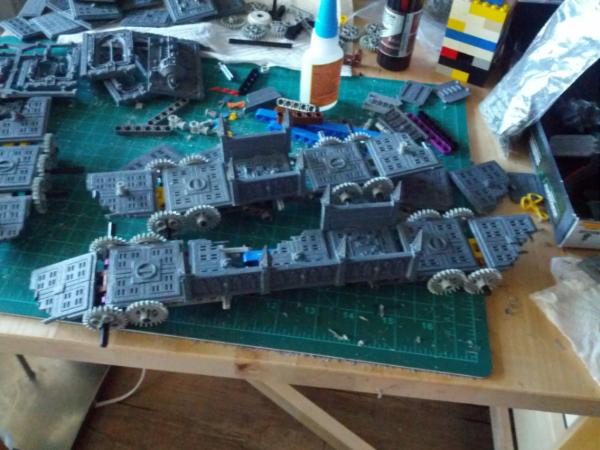
More a proof of concept than anything. The gears werent all the same, the axels stuck out a lot and, of course, I hadn't figured out how the railings would work when you tilted ends of each bridge to go up a level. But, now I know how all the pieces work having done this with the towers so I know what to do!
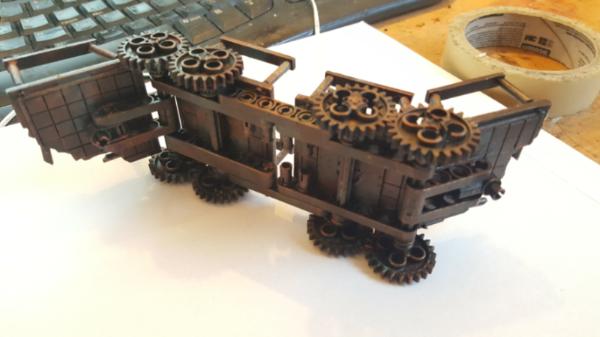
First up is finishing off the bottom technic side. Like with the towers I drilled out the hole to fit the longer lego pins. This makes them sturdier and, critically, more easily pulled out. The one problem I'm struggling with is the fact that the lego pin sticks out the top and cant really have a model placed on it. So If i ever, for example, wanted to make the top assembly snap together with magnets and the bottom with legos, by drilling otu the holes I am able to do that, since I can pop out the long lego pin and replace it with a shorter one for just the bottom.
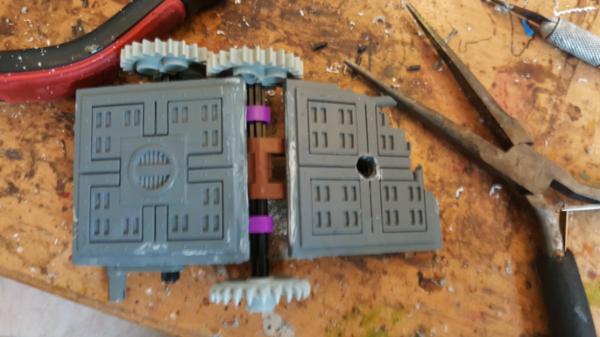
Next is more firmly gluing down the bottom lego attachments using my new plasti-zap. The act of drilling out these holes pretty much popped them all off so they needed MUCh more glue.

Long pin in place and going all the way through the piece! SO STURDY NOW ZOMG.
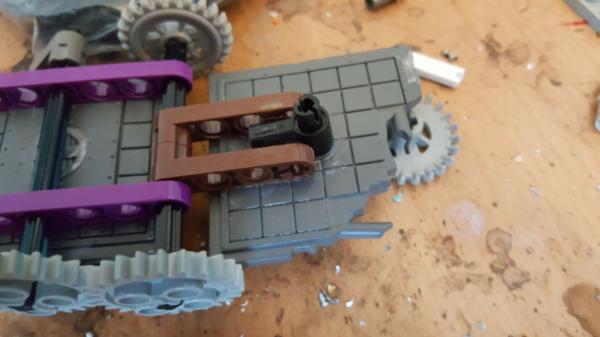
I also added spacers to fill in the gaps between the gears and the underbridge assembly, to reduce how loosey goosey it could get
And a little "fix" that engineers would weld down to fix the broken chunk of the long bridge
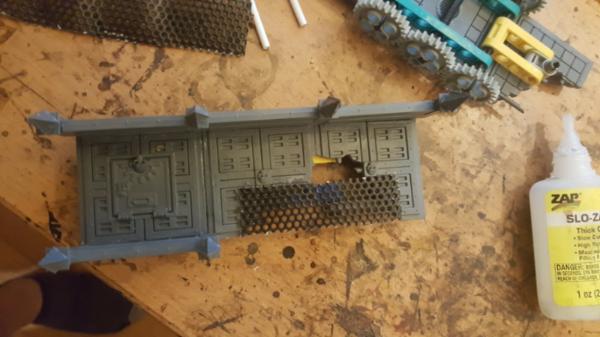
Downside is that at just about that point I realized i needed to go all railings, no more GW railing panels. Sad, but at least it'll be a lot less pointy.
Time for a lot of mass production...
|
|
|
|
|
|
2017/03/08 19:15:17
Subject: Re: multi-level city terrain, marine v nid bases (3/8: modular bridges built, tested)
|
|
Dakka Veteran
|
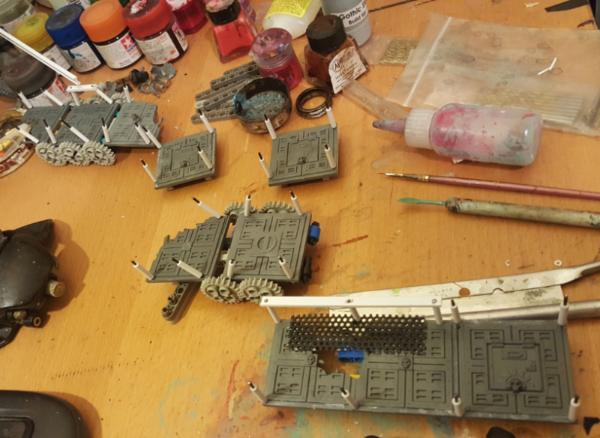
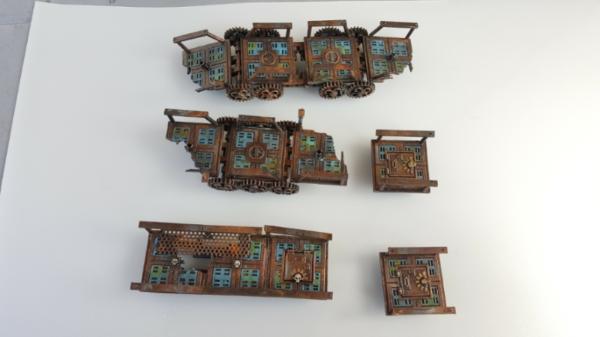
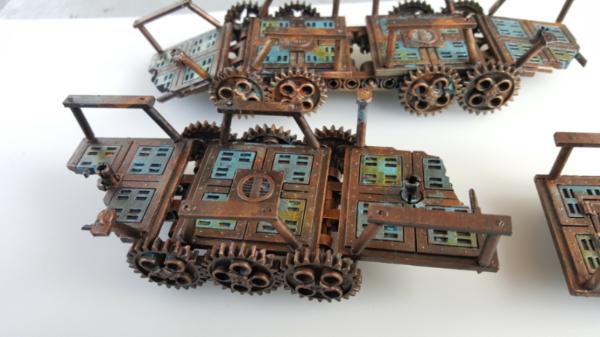
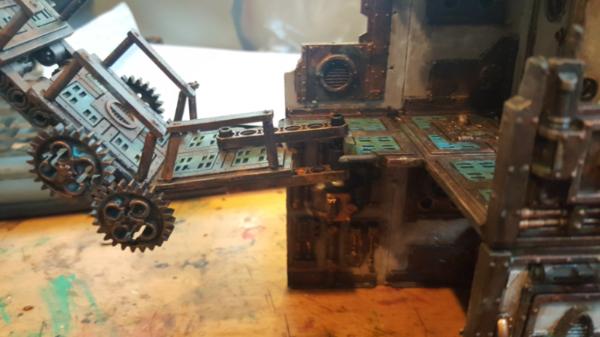
And the bridges built and tested:

you an see the problem of the center peg sticking out, BUT if i use wider lego platforms instead of the small sticks it might be alleviated. Dunno, have to experiment later, for now onto painting what i hasve!
Note that you only see about half of the bridges from the pictures, sadly the other half are.. gonna have to wait until i get more gears of the right type. All I'm left with are the gears that bend at 90 degrees. While more useful from a lego perspetive they dont look so good sadly.
|
|
|
|
|
|
2017/03/09 11:39:59
Subject: multi-level city terrain, marine v nid bases (3/8: modular bridges built, tested)
|
|

Growlin' Guntrukk Driver with Killacannon
|
Looking good, pity you cant put the bars linking the bridges to the towers under the bridge/walkway.
|
|
|
|
|
|
2017/03/09 17:53:07
Subject: Re: multi-level city terrain, marine v nid bases (3/8: modular bridges built, tested)
|
|
Dakka Veteran
|
So I can but.. they are a lot less stable. You really need it on both sides for it to really work. Ill post some side pictures soon to show the full setup.
In the future I might have the top side be magnetized but we'll see. Alternately I could use wider lego beams so its more of a gang-plank.
|
|
|
|
|
|
2017/03/13 17:44:01
Subject: Re: multi-level city terrain, marine v nid bases (3/13: set of bridges done, mechanics explaind)
|
|
Dakka Veteran
|
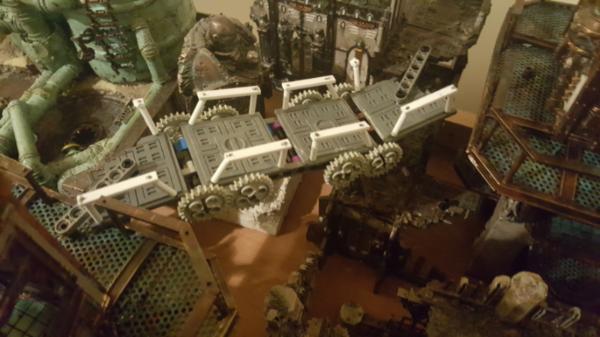
So, sorry abotu the delay but the first set of bridges are done! The remaining bridges are waiting on alternate lego gears.
I also wanted to be a bit more clear about the mechanics of how they all work and why stuff has been necessary.
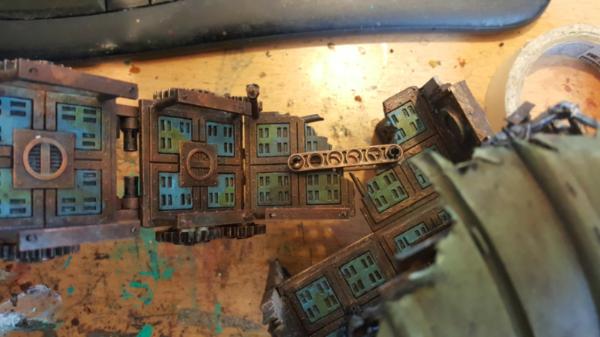
First up, the undersides, the goal is to easily make stuff wider, which I can! (when its not stuck from being painted together. Dont paint bridge pieces that are assembled! D'oh!
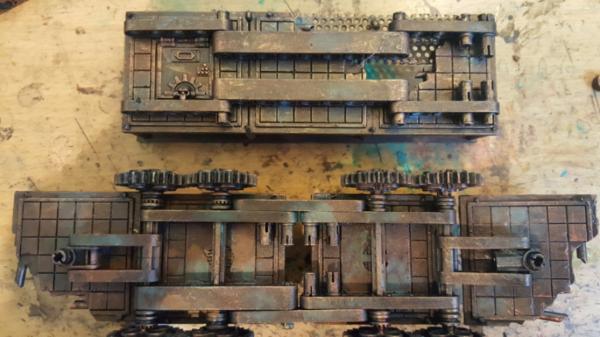
 Le
Le sigh, missed a spot there. Grrr, more to fix and repaint.
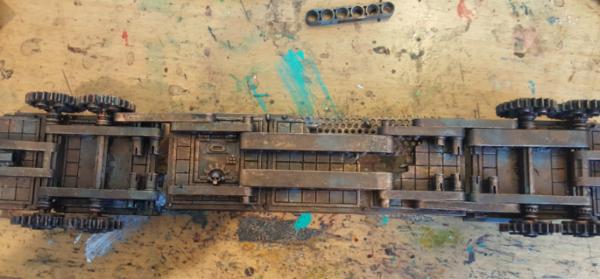
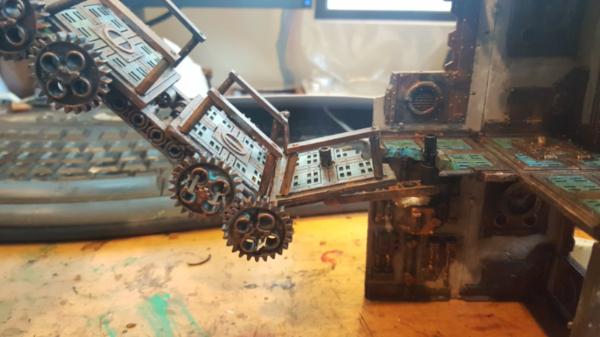
Next up is the gears, basically they are so I can do this to my bridge:

Obviously a very extreme angle but still useful to mark paths. The normal case is a much gentler slope but thats the point, I can do whatever!
Finally the attachments, here is how that works:
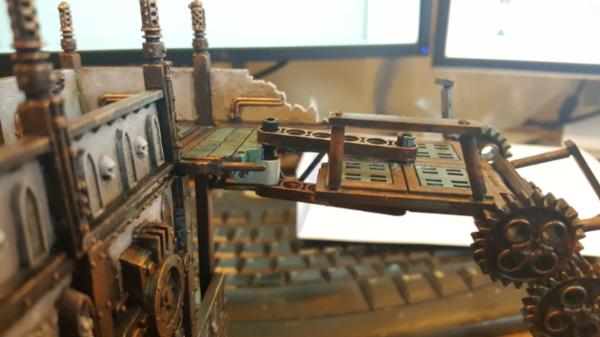
Without the top piece it uh.. sags a LOT more:
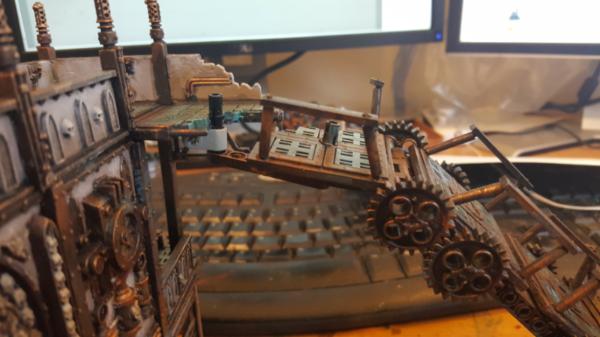
When I was suggesting using a wider block this is what I meant. Very easy to put models on but.. very obvious that it's lego

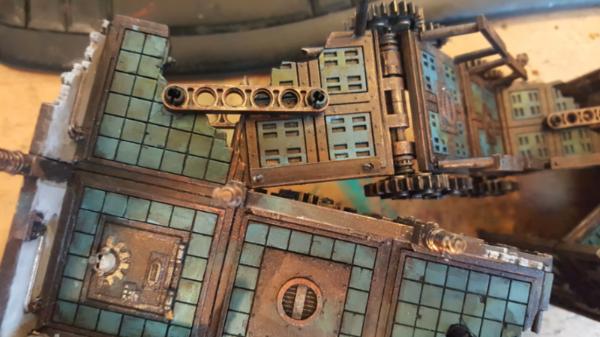
I can also rotate the bridges around with this setup:
|
|
This message was edited 1 time. Last update was at 2017/03/13 17:44:35
|
|
|
|
|
2017/03/14 22:43:21
Subject: Re: multi-level city terrain, marine v nid bases (3/14: repainting my first bldg, the before)
|
|
Dakka Veteran
|
So, few little things.
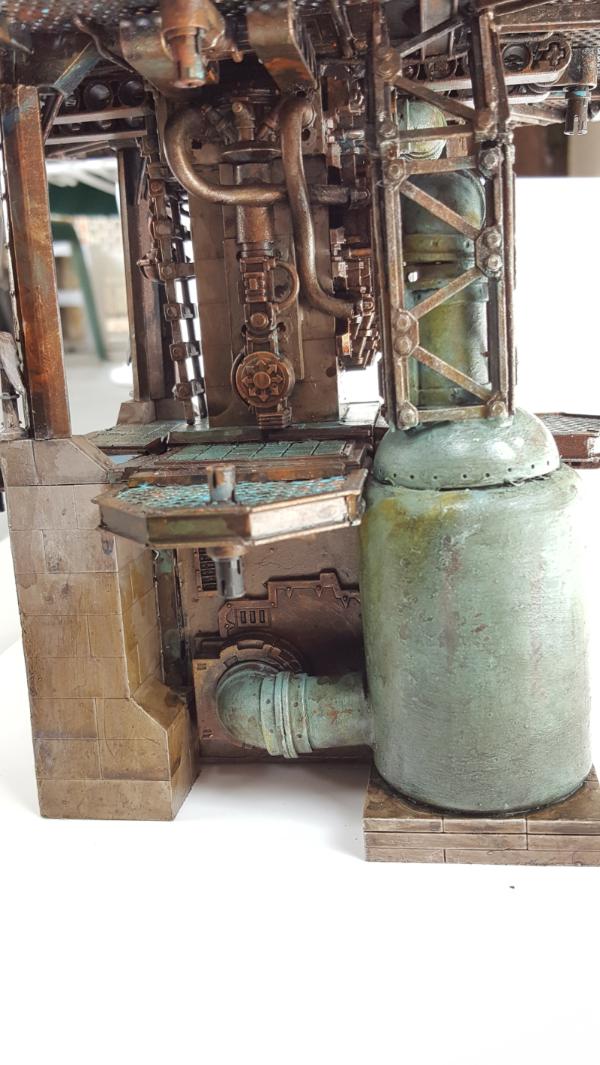
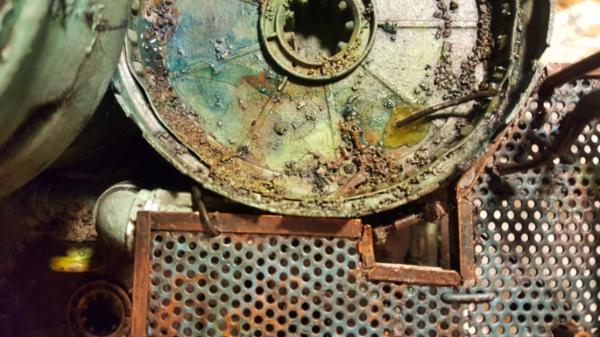
First up is the water tower, filling in cracks and crevices. I started painting it and realize it didnt actually have THAT much playable area. Most of the crannys were jagged with piles of sand and stuff in there. So I cleaned it out and started to fill them in, simplifying things:
The before:
Go away you wierd pit on the left!
I promise this wasnt dried, its a lot smoother now!
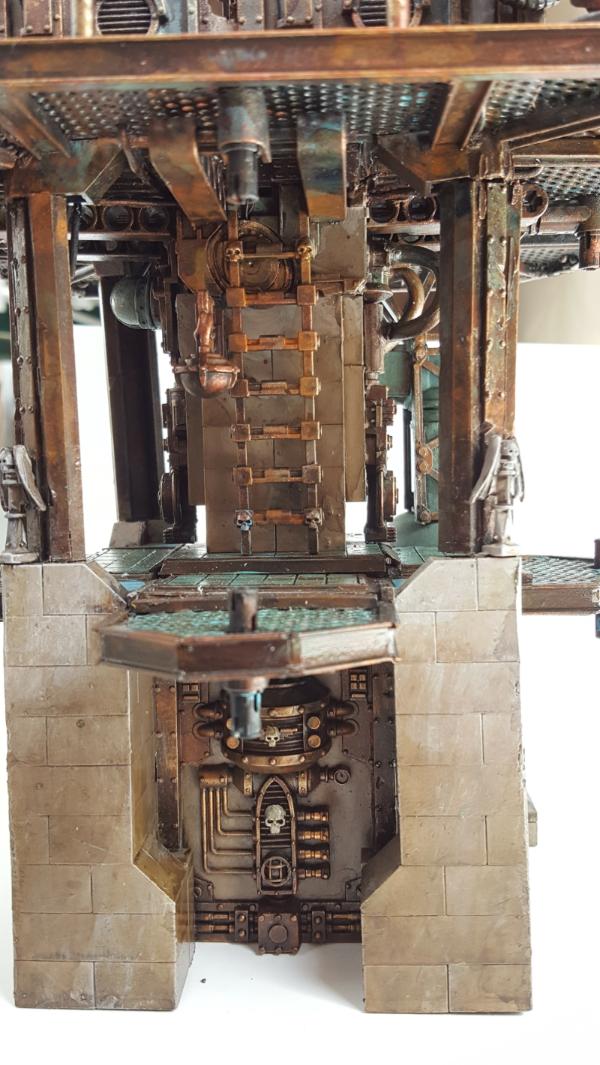
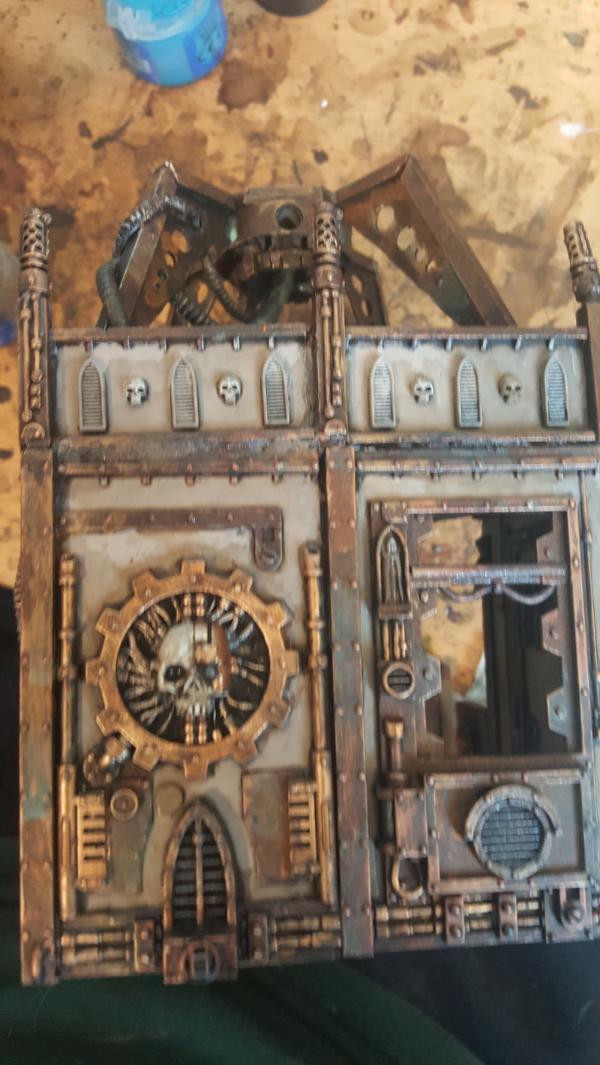
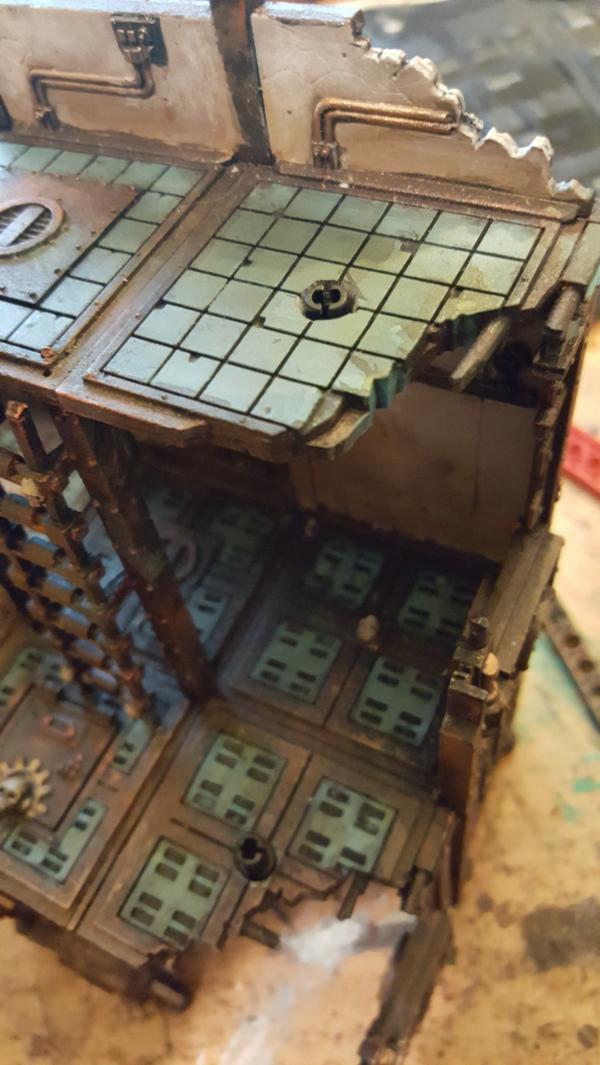
While waiting for all that to dry and be sanded I also started re-working my very first building in this scheme. Now that the floors are blue and we have the dark metal look it was time to revist and touch it up a bit. My goals were to reduce some of the sand covering it, add the texture of the dark metal look, and add the blue to the floors/ceilings.
First up is the before of where I started:


 Automatically Appended Next Post:
|
|
This message was edited 2 times. Last update was at 2017/03/14 22:49:04
|
|
|
|
|
2017/03/15 00:02:42
Subject: multi-level city terrain, marine v nid bases (3/14: repainting my first bldg, the before)
|
|
Agile Revenant Titan
|
Great work man  love the multi-use adaptable bridges.
Just a thought, if you don't like how it looks on the top, do you have any of the lego bits that are like a double thickness of the one you're using? Like the ones on the far left of this picture rather than the ones in the middle
[imghttp://images.brickset.com/sets/images/10072-1.jpg?200304210518[/img]
If you stick one of those on the underside then it might hold well enough not to sag but also be hidden from sight.
If that's an improvement, but not quite enough, then two of those per side would be more than sufficient
|
|
|
|
|
|
2017/03/15 04:27:55
Subject: Re: multi-level city terrain, marine v nid bases (3/14: repainting my first bldg, the before)
|
|
Dakka Veteran
|
So I can do that if I flip the peg around, but the problem there is if i do that it doesnt quiitteee stick out the top to lock.
Still, you are right in that using a double thickness lego beam on the bottom would be a lot sturdier, potentially enough to counteract that. I'll give it a try tomorrow and let you know!
|
|
|
|
|
|
2017/03/15 06:53:16
Subject: multi-level city terrain, marine v nid bases (3/14: repainting my first bldg, the before)
|
|
Pious Palatine
|
Excellent work on the terrain dude, really impressive and inspirational!
EDC
|
|
|
|
|
2017/03/15 20:44:33
Subject: Re: multi-level city terrain, marine v nid bases (3/15: repainting my first bldg, the after)
|
|
Dakka Veteran
|
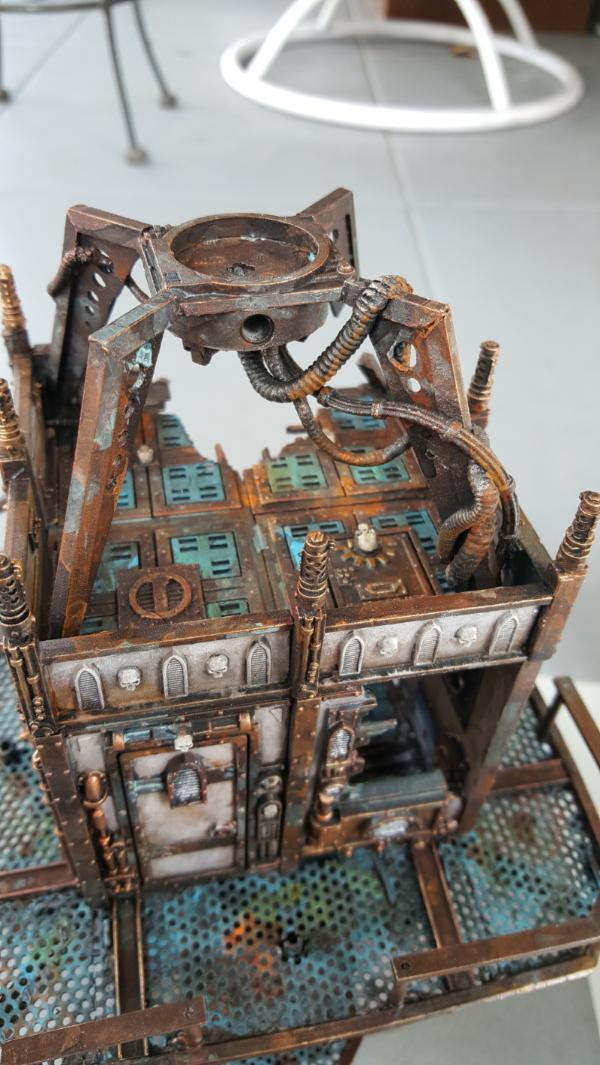
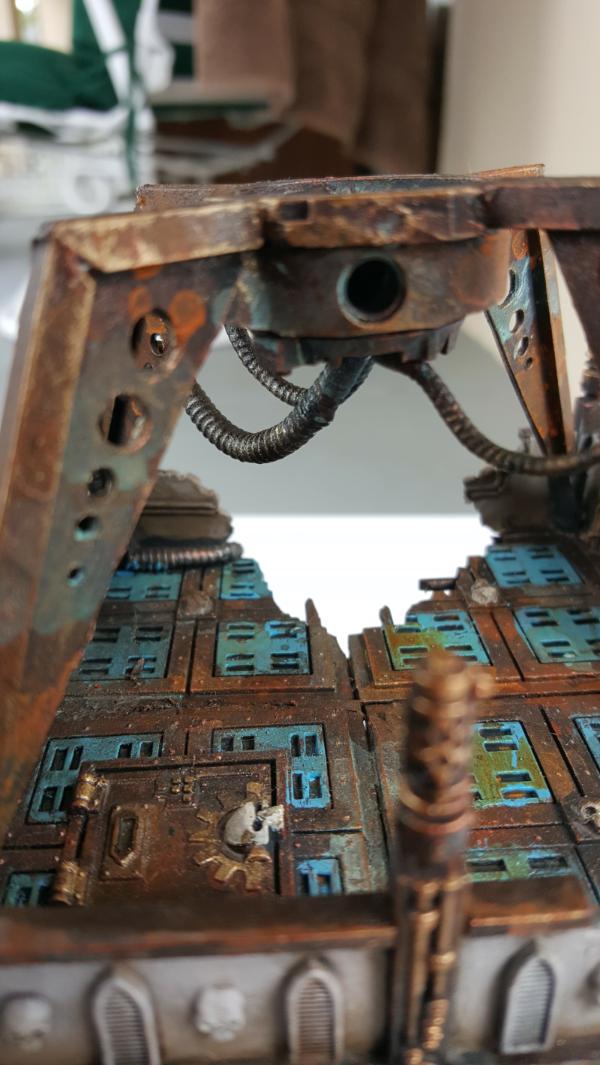
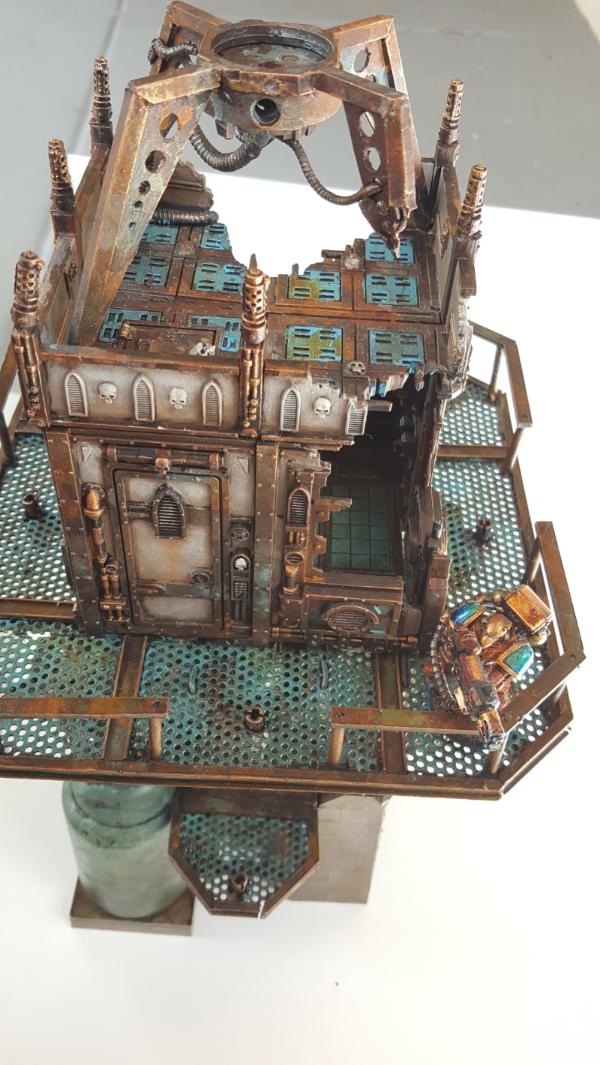
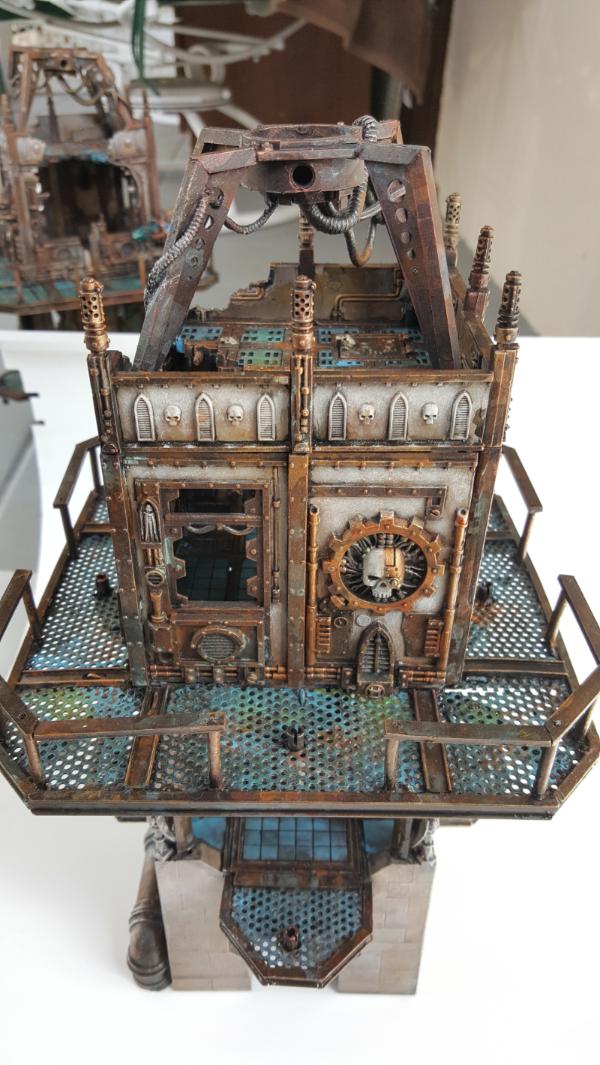
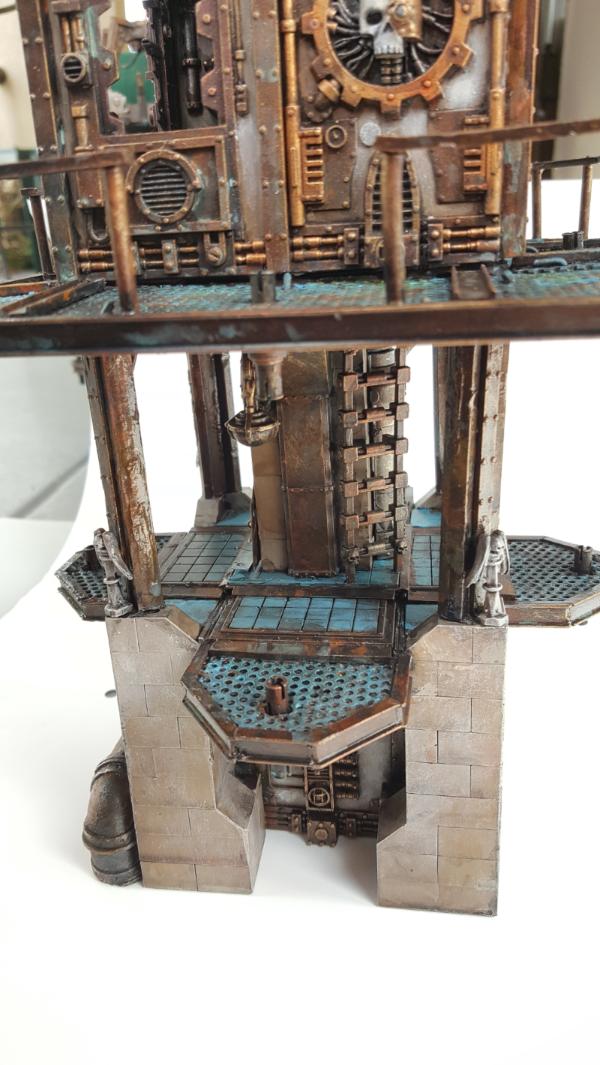
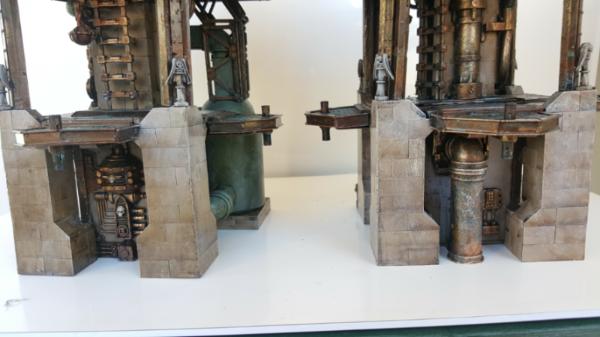
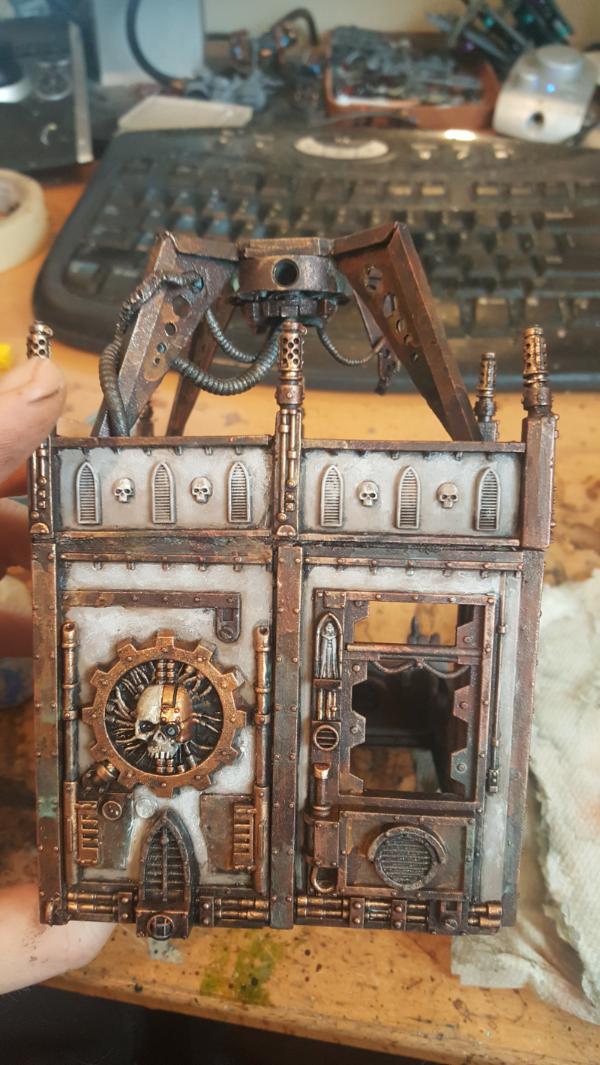
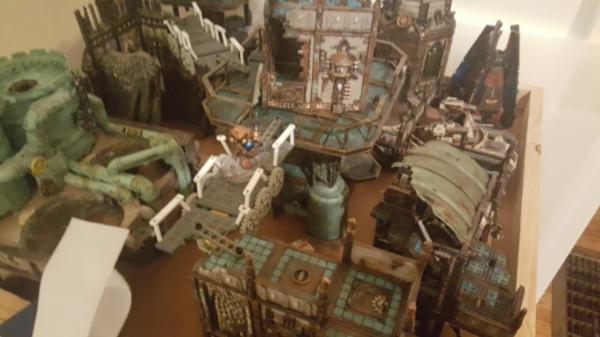
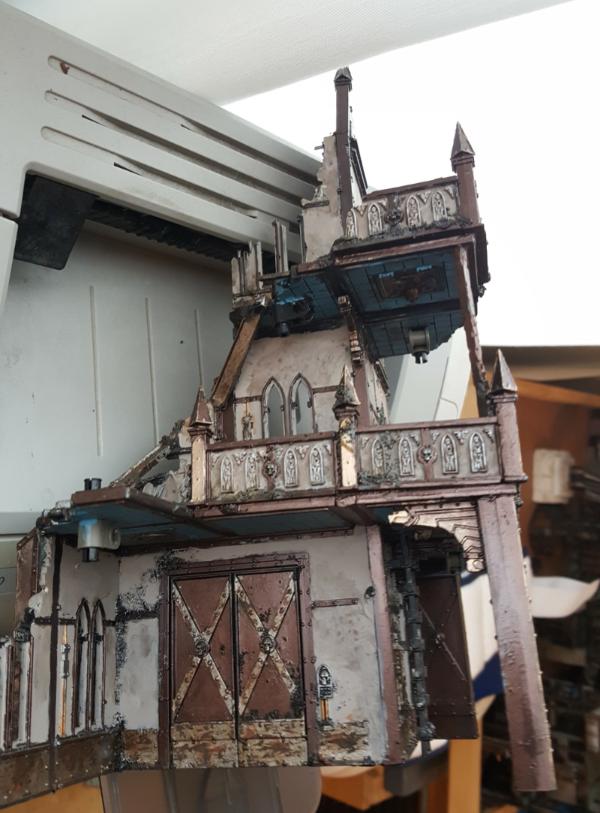
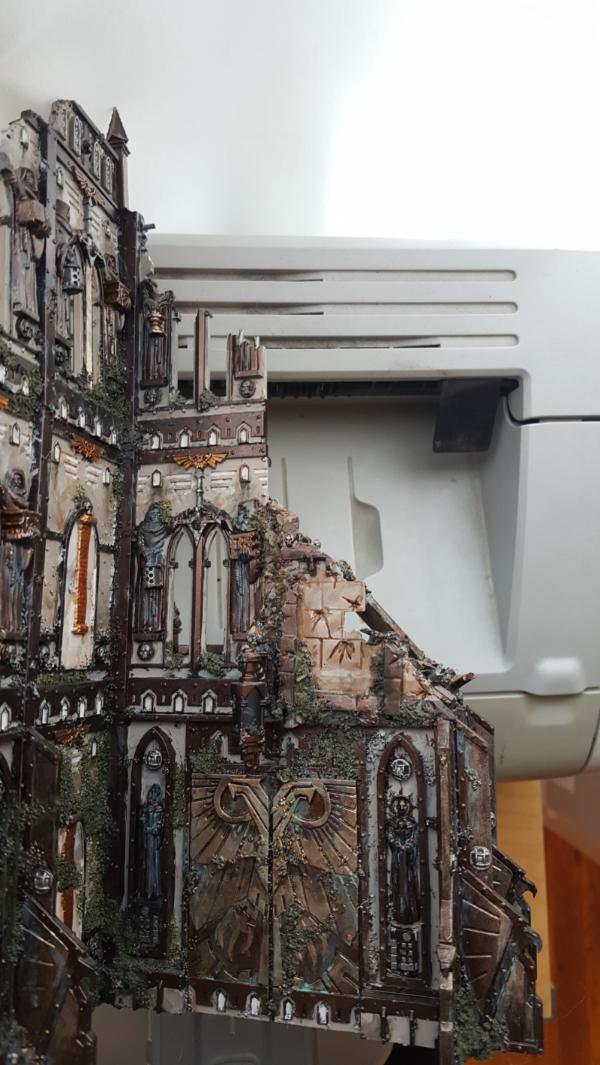
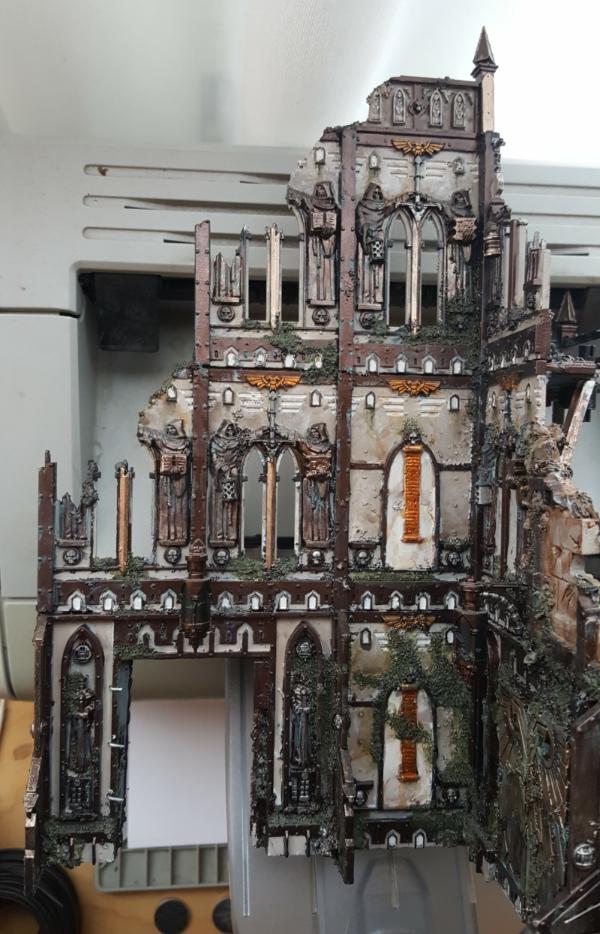
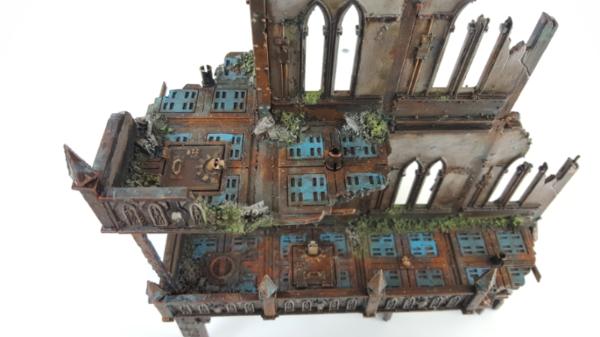
Thanks! and now the after!
SO MUCH CLEANER! I still like the vine idea, but I want the ability to actually get vines and put them on. Thus this is more about hints of vine and green before a potential vine layer.

The statues also now have the same dark metal effect so the bolts and highlights standout now too
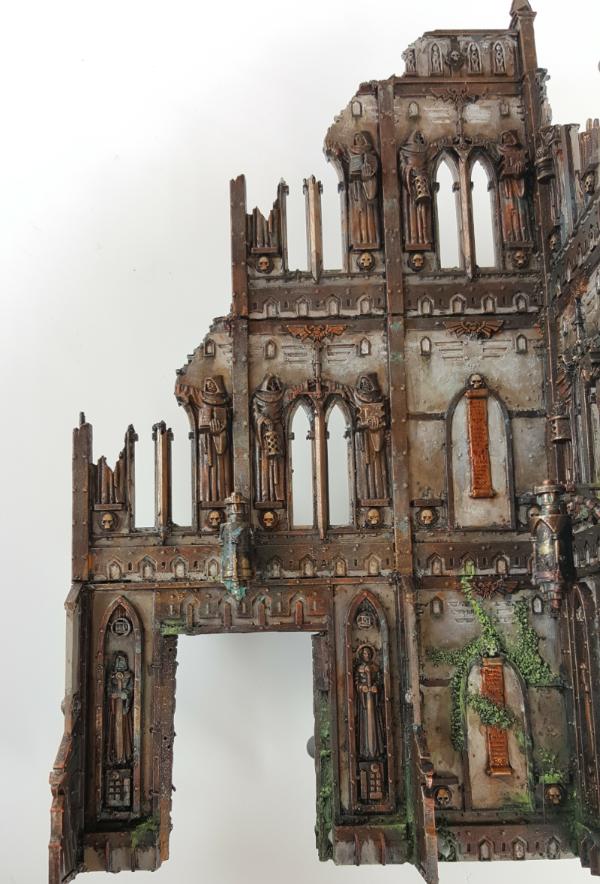
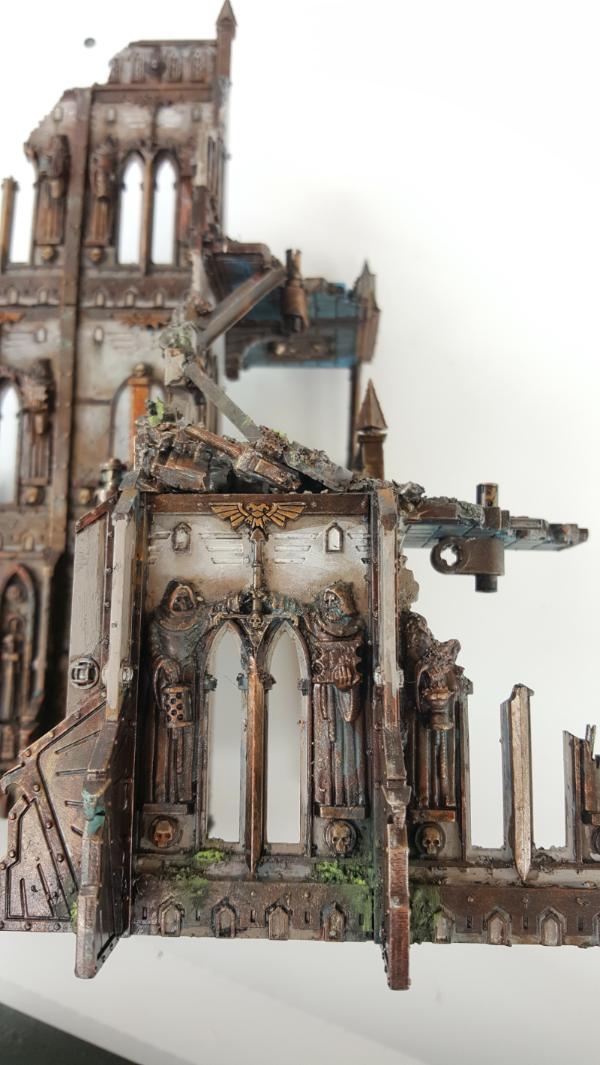
No more crazily scratched metal. Simpler here is better given all the detail
Still dig the blue floors. Some of the green is probably a bit much, almost looks like OSL, but again i eventually want plants so there will be a wash pass once i get around to them to tone it down.
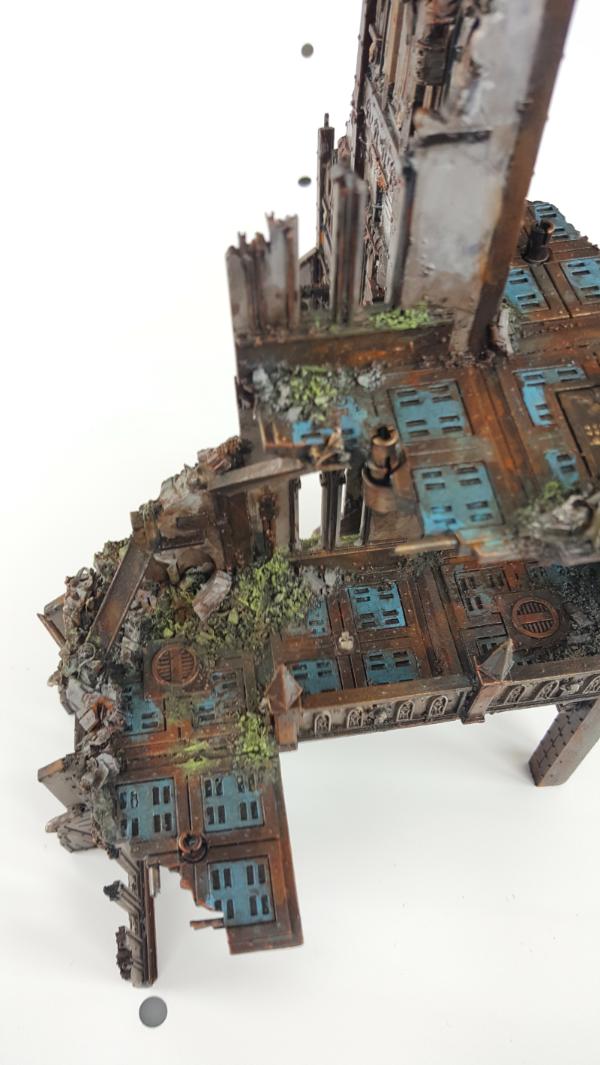
Its nice to be able to read the rubble piles:
|
|
|
|
|
|
2017/03/16 20:54:16
Subject: Re: multi-level city terrain, marine v nid bases (3/16: followup on Ynnead's bridge tweak)
|
|
Dakka Veteran
|
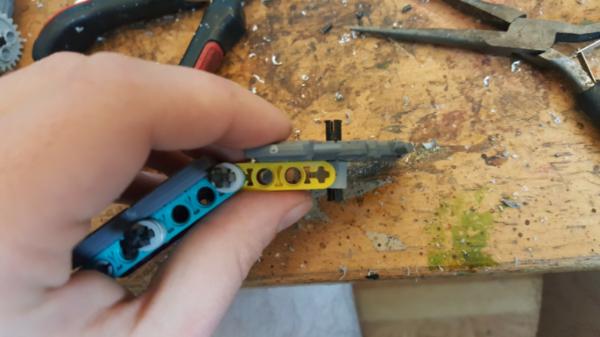
So! yesterday I did some tests of an alternate method of putting up the bridges. The first thing ot understand is that the lego piece I'm using for all this is this one:
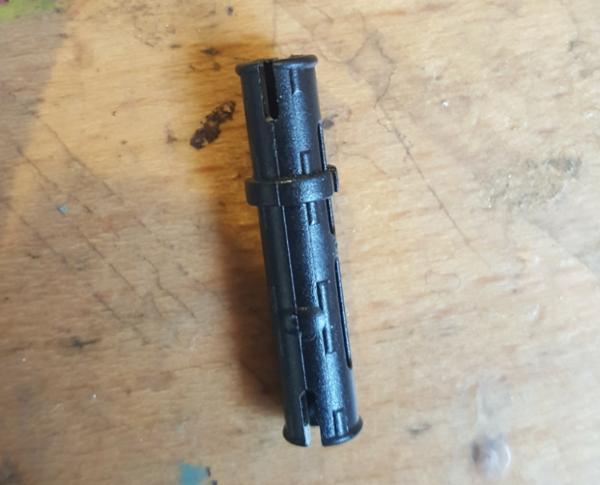
That band of plastic in the middle subdividing a 2 length peg from a 1 length peg is the core of the "problem". The thickness of my building + lego structure is a touch more than 1.5 pegs thick. Theoretically leaving me one full peg on one side, either the top or bottom, and half a peg on the other.
Unfortunately that "touch more" is basically the thickness of that band in the middle, thus depending on how I orient the peg I can run into situations where the lego pieces I use dont "click" into place. You can see that here:
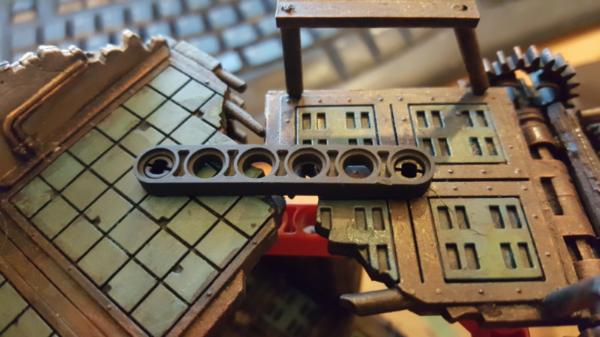
where the "lips" of the lego peg dont quiittee stick out far enough to expand out again and lock in.
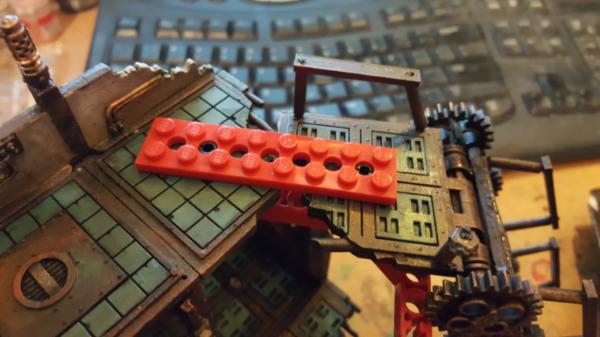
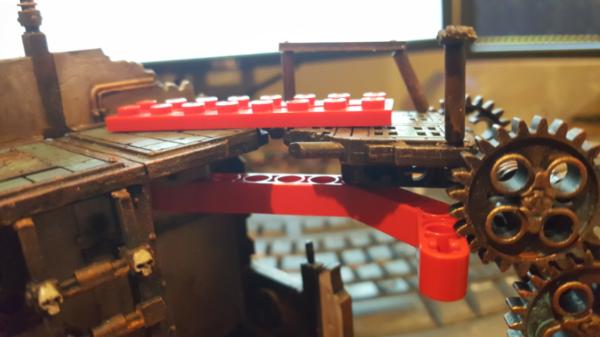
So what I started with was this., the full peg on top and the half peg on bottom:
The legos are secure but it sticks out the top a lot and is difficult to put a model on. What Ynnead suggested was instead flipping the orientation to be more like this:

With a double thickenss beam at bottom. As you can see there is sag BUT it does seem to be better, and it is easier to put on and take off than single thickness beams.
When I add the top piece, even though its looser than id like, we're no worse off than where we were before.
So thats very promising! Having the half thickness on top is so much easier for model placement:
Full thickness they unbalance
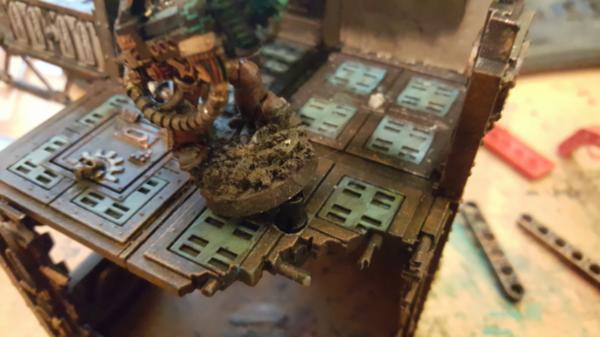
Half thickness its just fine:
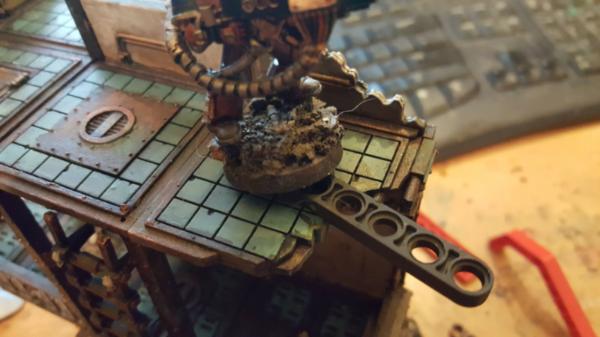
Also when its oriented that way and not in use I can just push it down to make it flat:
So I thinkkk all told this is better. Im worried about the ease at which the top piece can pop off, so this is something that only real world testing will figure out, BUT its worth having a set of thicker beam legos painted up anyways. I also did some testing making the thin platform legos better and seeing if i can thin them even more to just sneak it in there:
I didnt quite make it to "locked" but its still more resistant to popping off before, so that might just be enough to make it all the best solution.
Thanks for the idea Ynneadwrath!
|
|
|
|
|
|
2017/03/16 22:33:18
Subject: multi-level city terrain, marine v nid bases (3/16: followup on Ynnead's bridge tweak)
|
|
Agile Revenant Titan
|
Years I've been waiting. Years! But I knew that one day my childhood mucking about with lego would come in useful
Glad I could be of assistance
It's looking great dude I'm loving the creepers climbing up the side of the ruins. Never seen that before but it really just completes the whole look the lego strips look really natural with the stubs stripped off the top too
|
|
|
|
|
|
2017/03/16 23:39:51
Subject: Re: multi-level city terrain, marine v nid bases (3/16: followup on Ynnead's bridge tweak)
|
|
Dakka Veteran
|
Childhood mucking? Psh, now we're 40k WITH leogs! its all adulthood mucking now.
I give it a year tops before my next terrain piece involves motorized walkways, traps, and other such things that reconfigure themselves on a per-turn basis.
|
|
|
|
|
|
2017/03/17 18:13:12
Subject: Re: multi-level city terrain, marine v nid bases (3/17: back to the water tower. Pondering platforms.)
|
|
Dakka Veteran
|
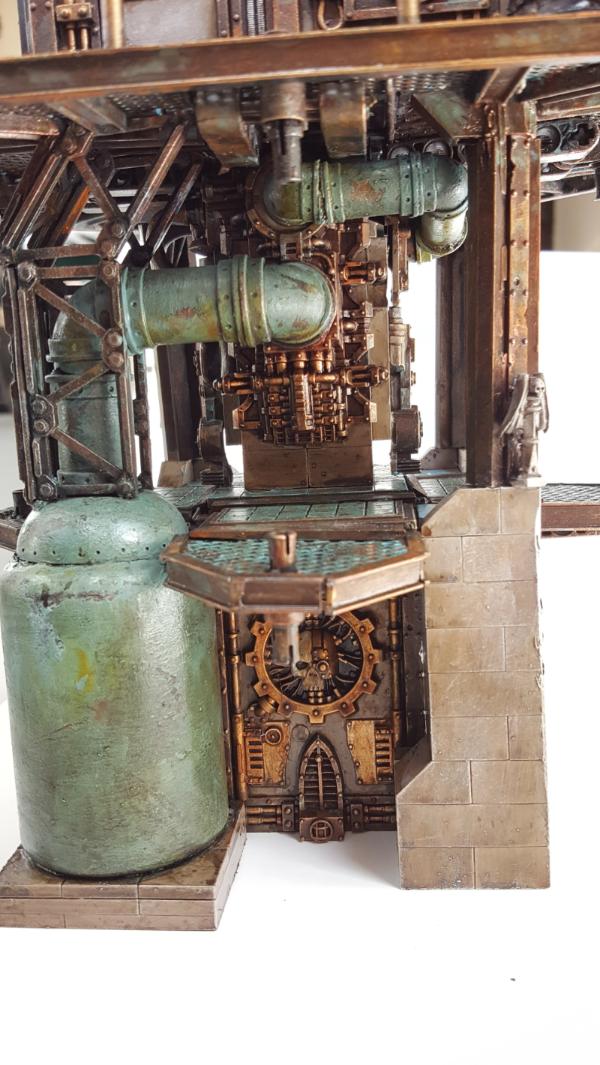
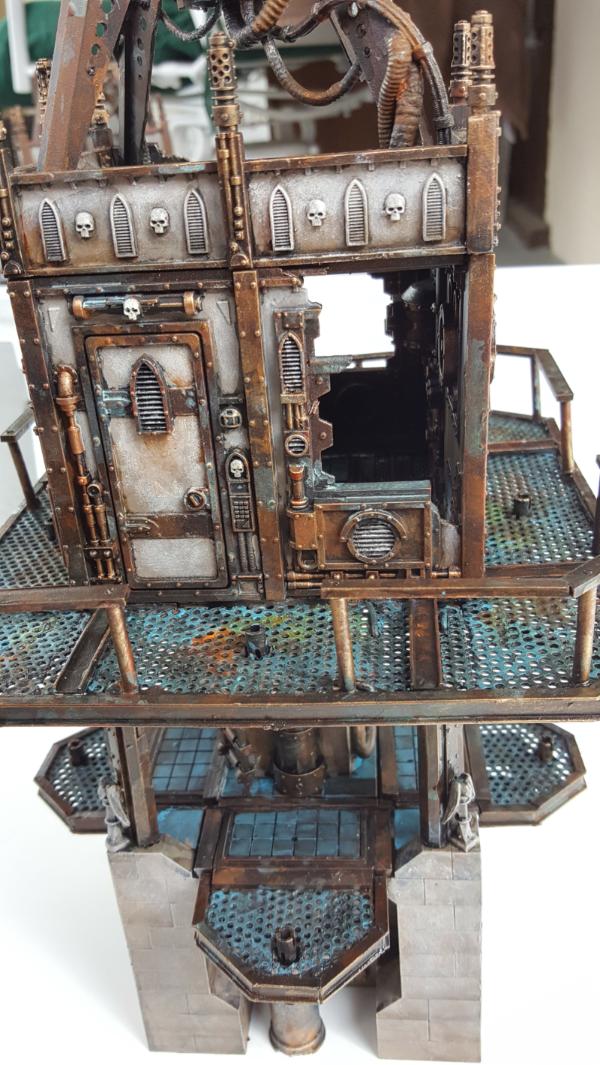
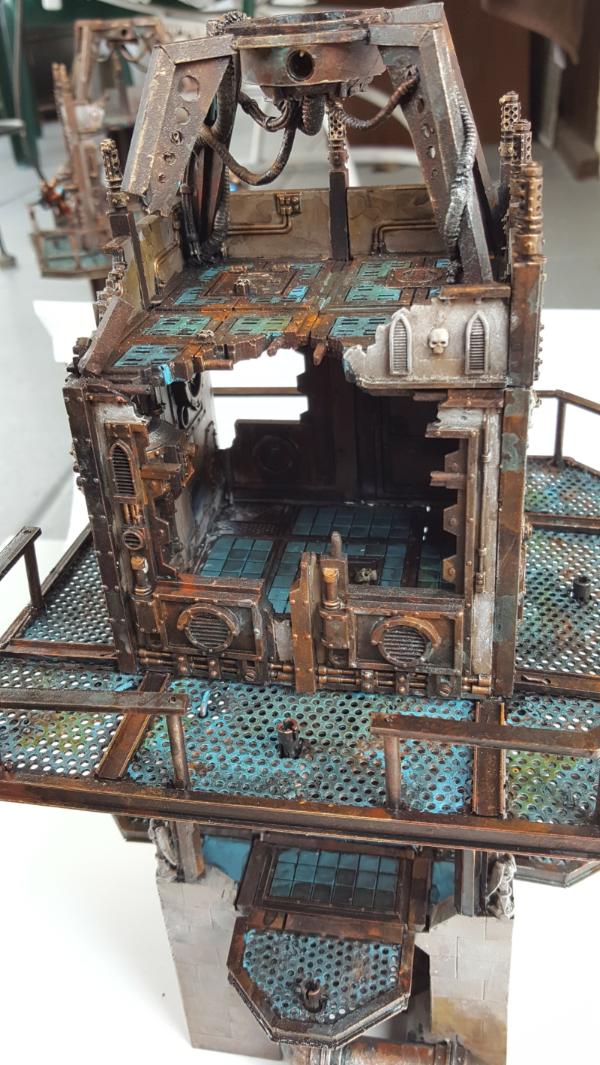
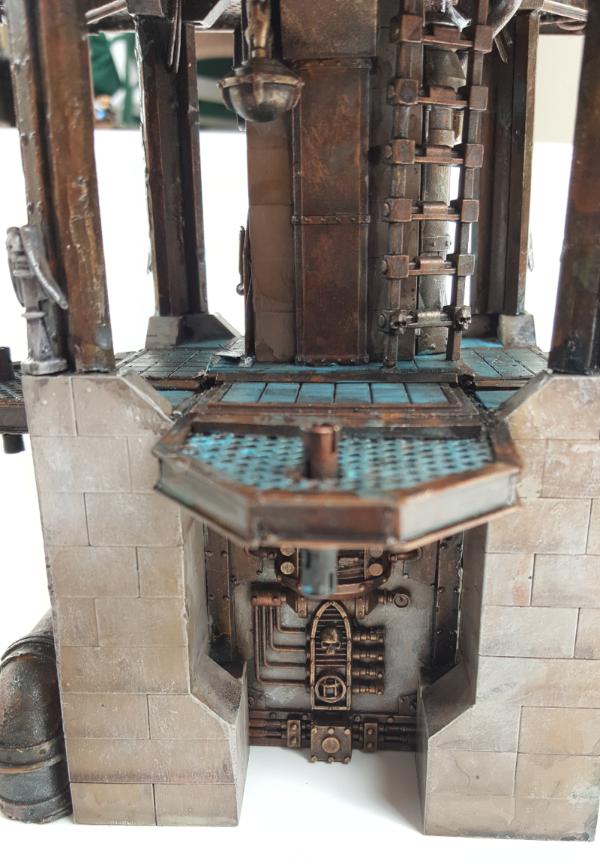
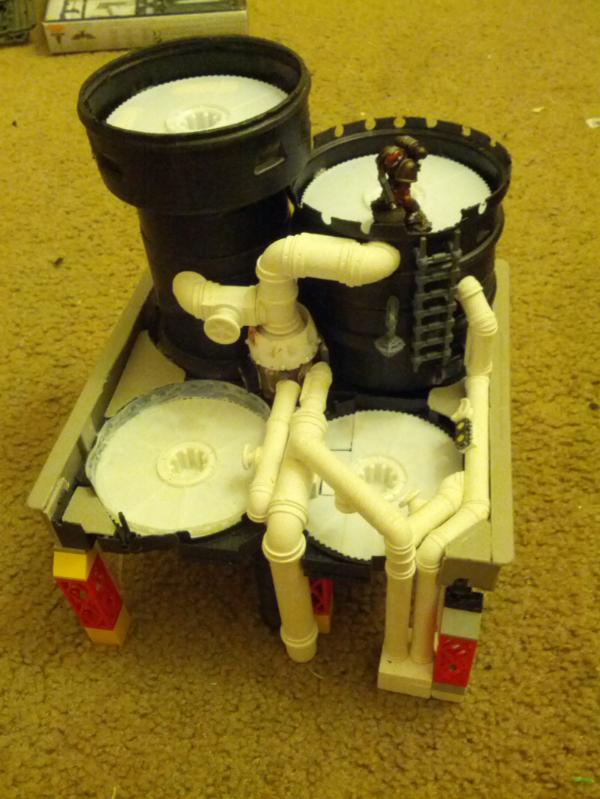
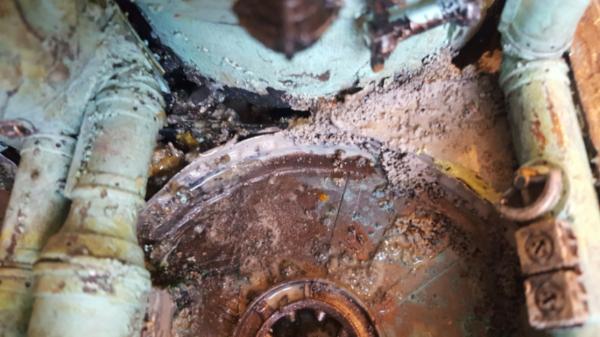
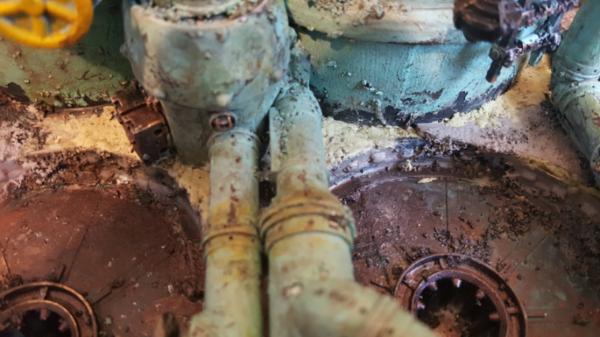
So we're back to the water tower, and after various patching and whatnot we're slowly getting to a cleaner/easier to read state on the bottom.
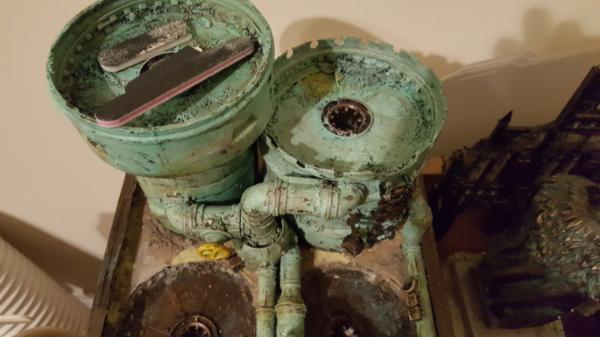
But there's still a problem. For such a big model (almost a foot square) there is still relatively little space to place models. Furthermore there is only a single bridgepoint in the front and nowhere else.
I hemmed, I hawed, I shed single tears for what I was about to do but.. I decided it needed platforms. To say Im tired of making platforms is an understatement but, it needed to be done. Furthermore it doesnt actualyl FEEL like a water tower unless there is, well, water. So i need to wet it up to boot, maybe add some water to the top of the cisterns. Then its more a water processing plant with the dirty water at the top and clean water at the end.
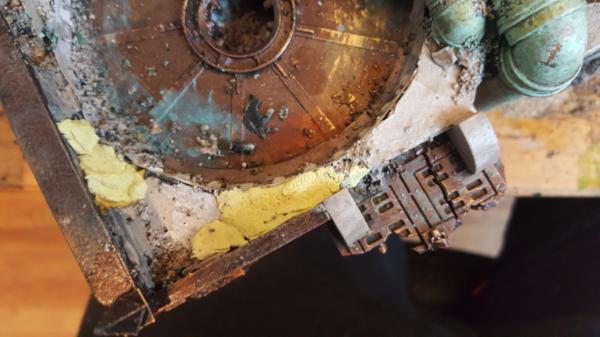
Now adding platforms is an interesting challenge because the water towers are totally hollow and the walls pretty thing. They were just thin plastic gardening tubes from home depot and the like. So there is no way to 'secure" them to something esasily. Still, thats another problem for another time. For now I can use some tape and work it all out. I wanted 2 levels to maximize the usable area and figured I'd want to have some kind of sensors feeding into the water, as justification for these platforms. I also didnt want them to extend any further out of the base of the tower because, well, its big enough! So this is strictly a forward only set of platforms.
I also figure I keep my ladder up and just cut out a hole for it so its relatively logical.
|
|
This message was edited 1 time. Last update was at 2017/03/17 18:53:34
|
|
|
|
|
2017/03/19 18:46:41
Subject: Re: multi-level city terrain, marine v nid bases (3/19 Water Tower, 1st platform made, semi in-place )
|
|
Dakka Veteran
|
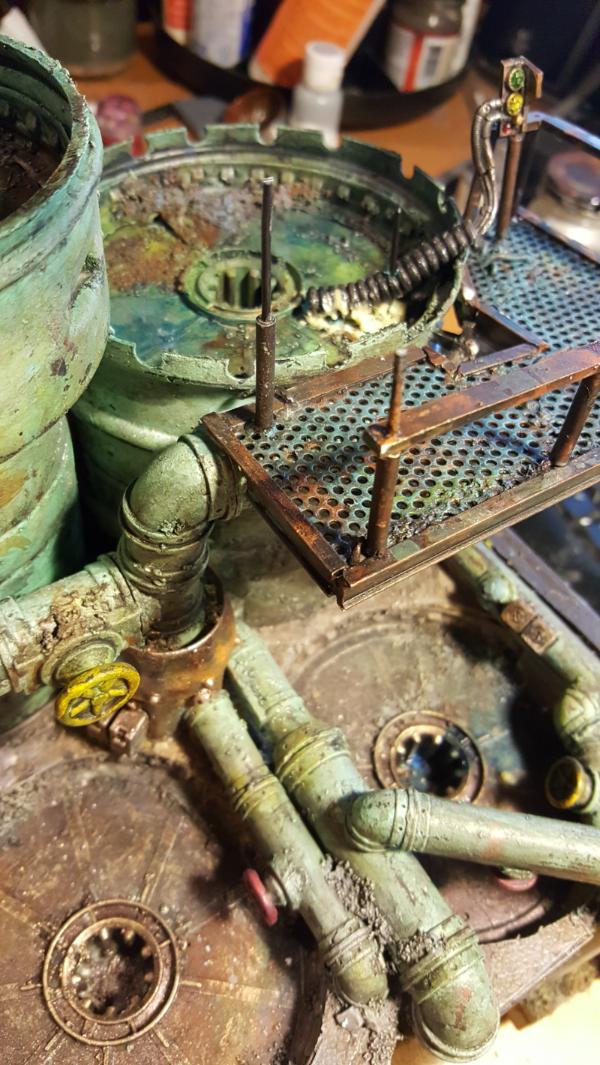
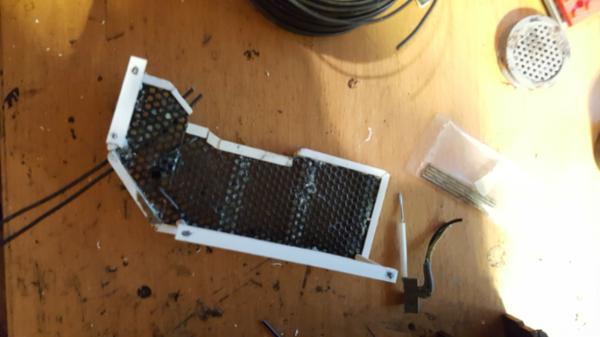
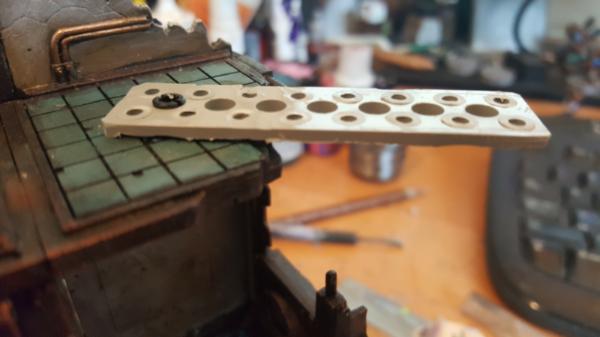
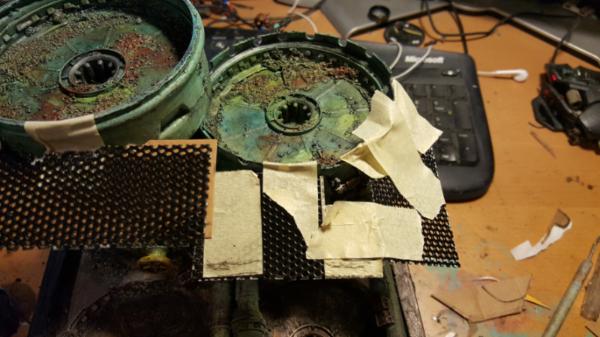
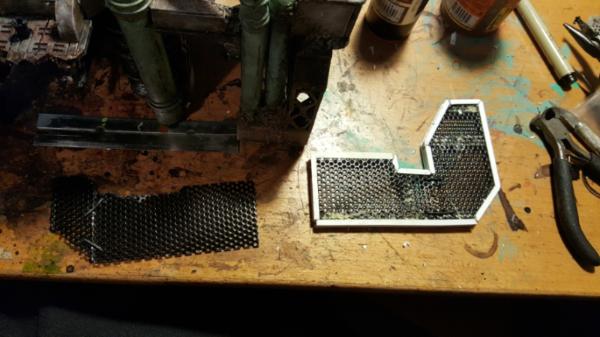
So we have the first platform made, see a construction process!
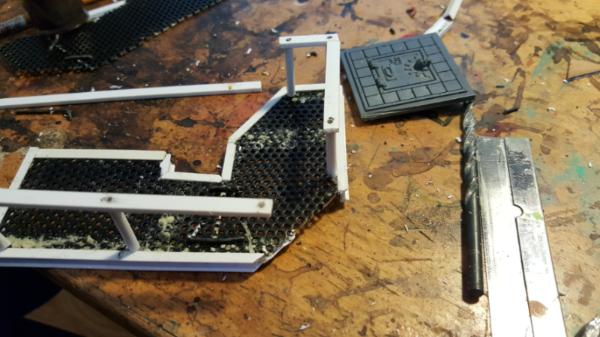
I also wanted to add some kind of small set of buttons/electronics so you could have a sensor pipe/cabling feeding into the wate.r Just a nice little detail to sell why these platforms exist.
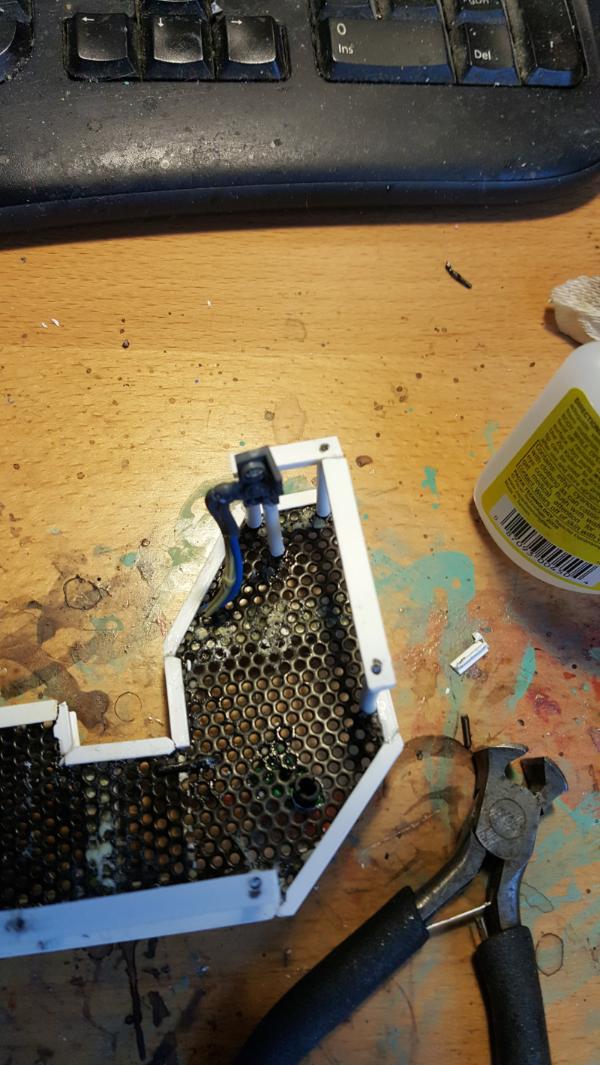
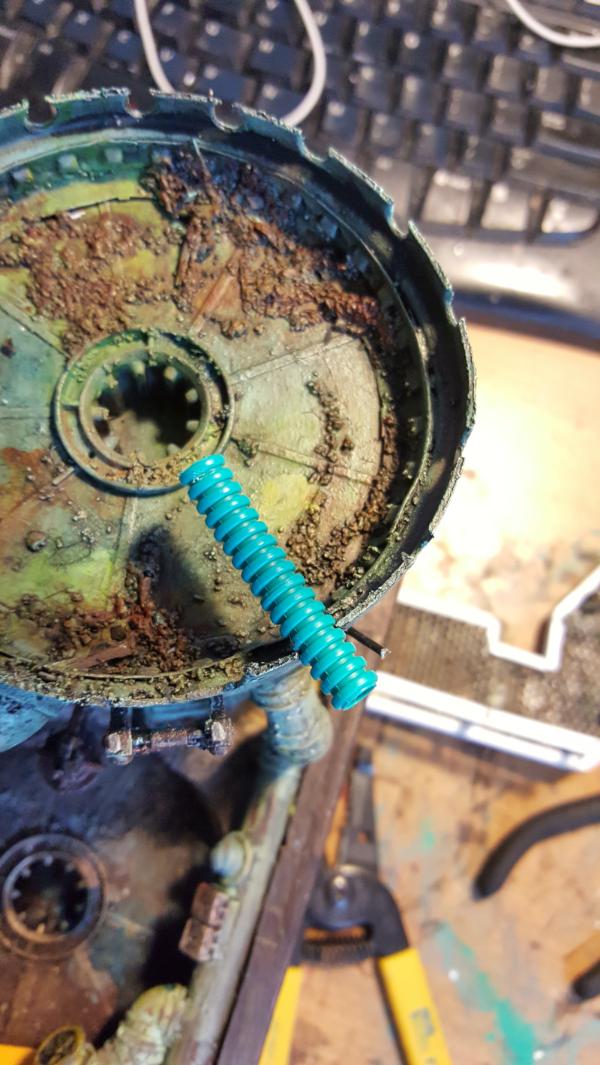
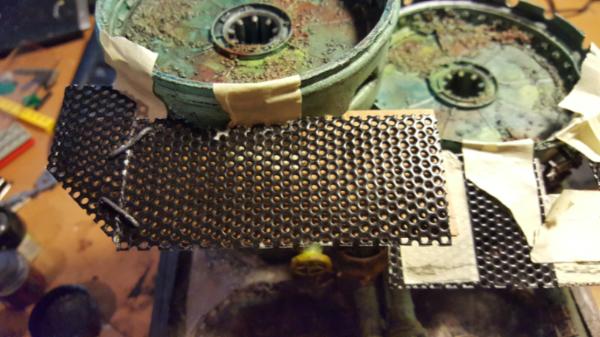
And now we're installing! With difficulty! So the first thing I did was feed a bundle of wires thruogh the platform and as far as it would go into the water tower. Downside is there was no way to ever find them on the other side of the water tower so I just coated all my wires in gorilla glue so it expanded and shoved it in there.
As you can see by the wire sticking out the right it wasnt quitteeee neough to make it no wobbly. Im hoping maybe the other platform strengthens it a bit so the wire stays for now:
|
|
This message was edited 1 time. Last update was at 2017/03/19 18:47:46
|
|
|
|
|
2017/03/20 18:50:59
Subject: Re: Multi-level city terrain, marine v nid bases (3/20 Water Tower, 2nd platform made, prep)
|
|
Dakka Veteran
|
|
|
|
|
|
|
2017/03/21 18:30:32
Subject: Re: Multi-level city terrain, marine v nid bases (3/21 Water Tower, 2nd platform installed)
|
|
Dakka Veteran
|
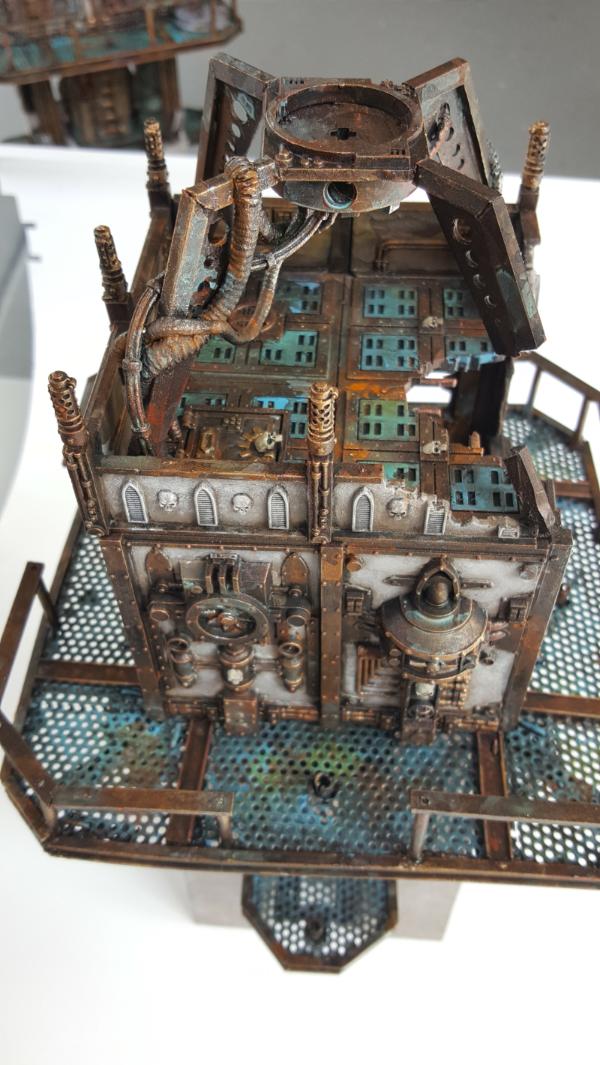
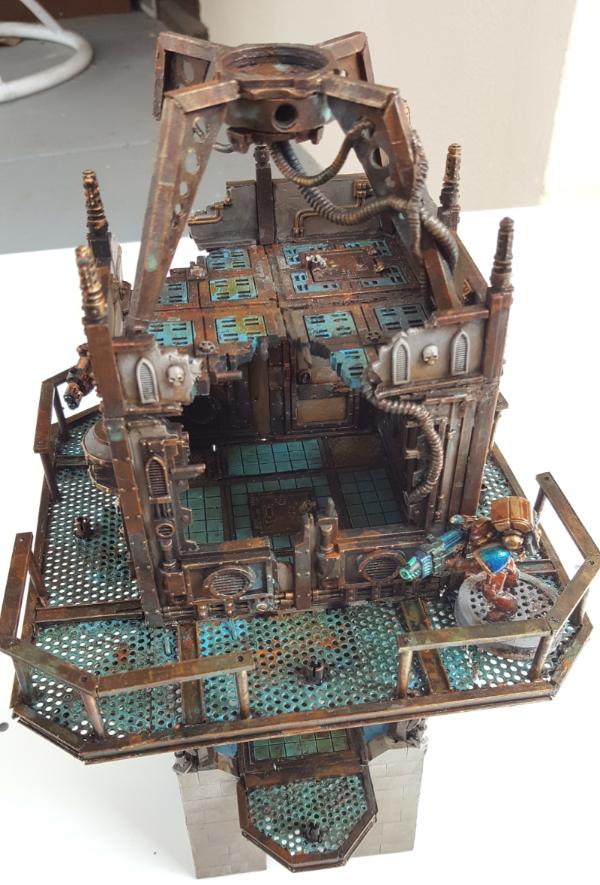
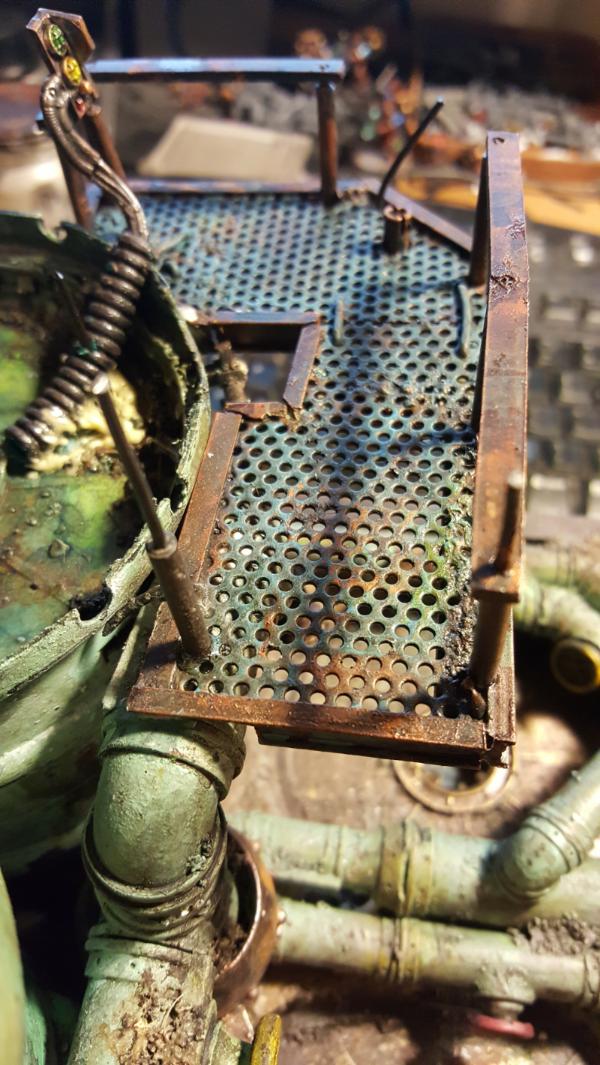
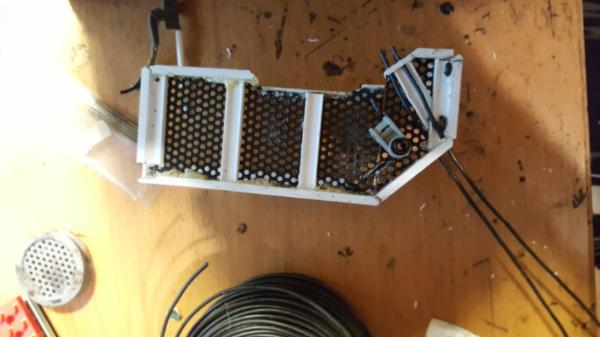
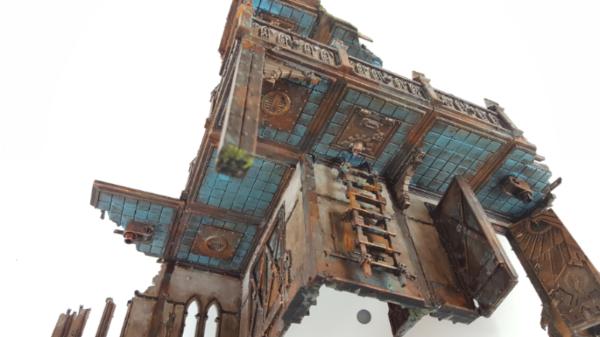
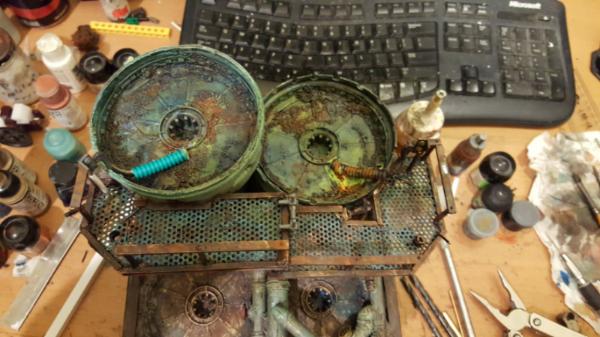
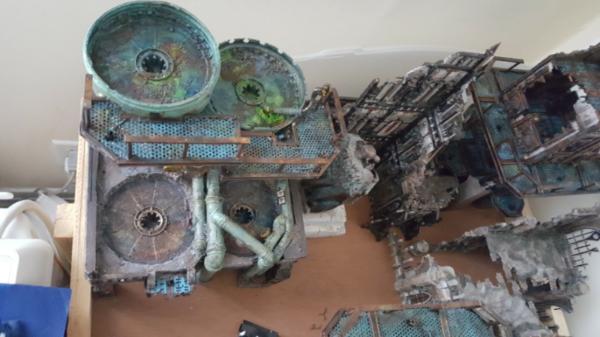
Second platform is installed! Downside is.. it didnt quite make the first platform as sturdy as id like, so I need to go back and reinforce it. Still, it looks great and the model surface area is huge now!
It's roughly (with my 32mm bases) a max of 4 models per platform and 4 models per circular area, so 24+ total.
Realistically it would be more cinematic with 3 per instead but your still looking at 18 or so, which is great.
|
|
|
|
|
|
2017/03/21 22:57:24
Subject: Re: Multi-level city terrain, marine v nid bases (3/21 Water Tower, 2nd platform installed)
|
|
Cackling Daemonic Dreadnought of Tzeentch
Ellenton, Florida
|
Magnificent.
|
|
|
|
|
|
2017/03/22 15:28:15
Subject: Multi-level city terrain, marine v nid bases (3/21 Water Tower, 2nd platform installed)
|
|
Agile Revenant Titan
|
Yeah that's immense you have a real talent for this!
|
|
|
|
|
|
2017/03/22 17:01:13
Subject: Re: Multi-level city terrain, marine v nid bases (3/21 Water Tower, 2nd platform installed)
|
|
Dakka Veteran
|
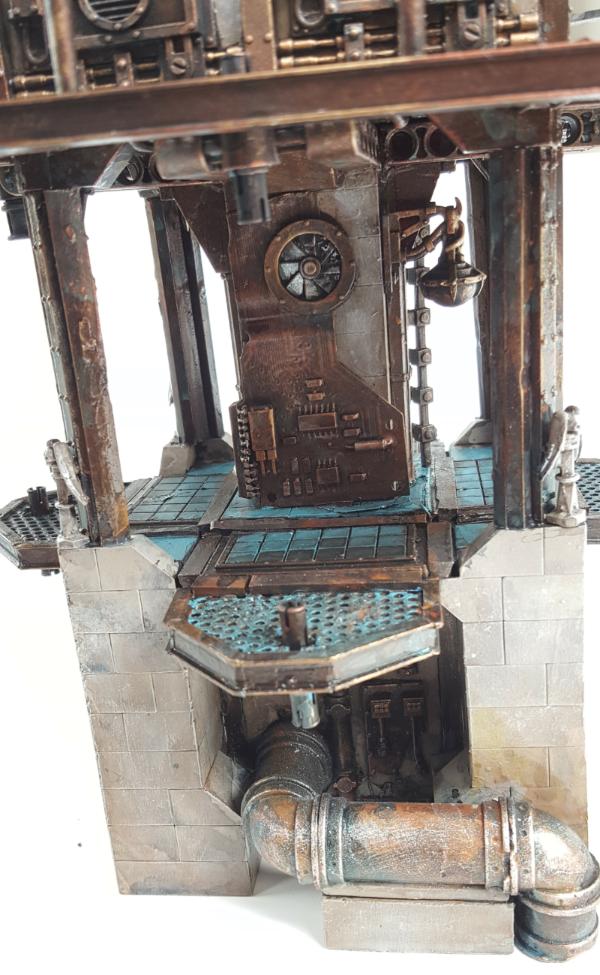
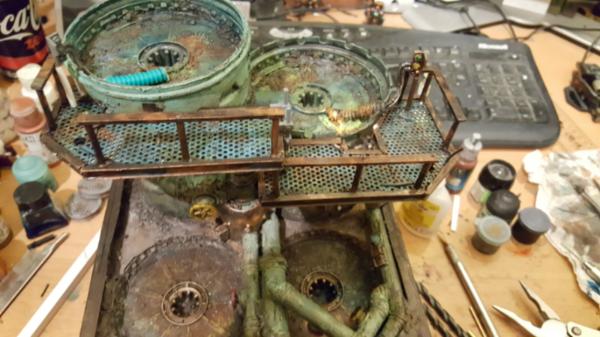
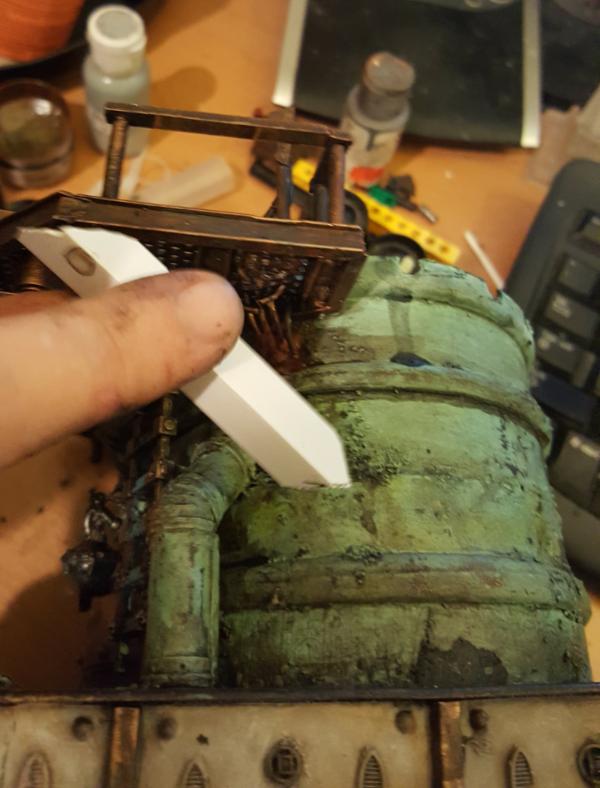
It's not done yet! Water is coming! First I have to figure out a support beam.... pics soon!
Automatically Appended Next Post:
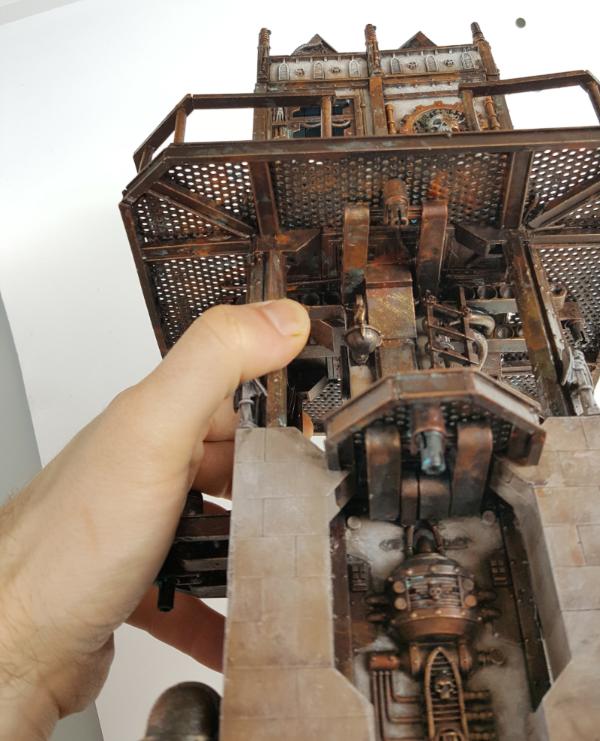
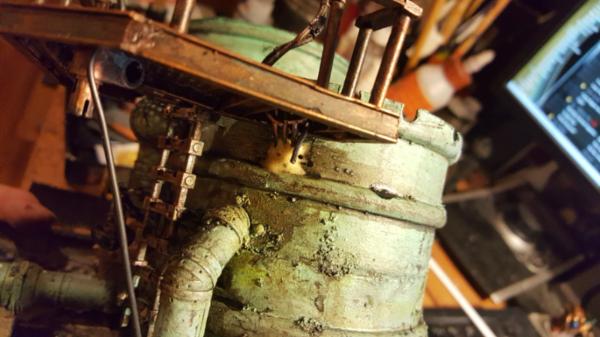
So with the initial connection point okay but not nearly strong enough for game use (i like to overbuild but hey, having models fall sucks. So, none of that) it was time to add a truss
First making a hole. It wasnt large enough, it ended up getting QUITE big to figure this all out.
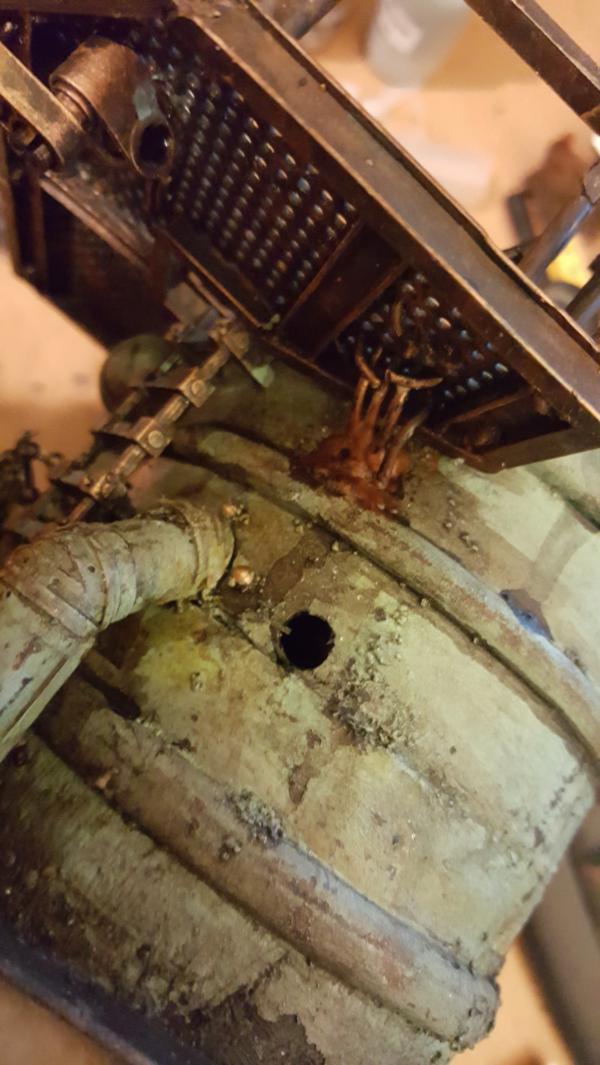
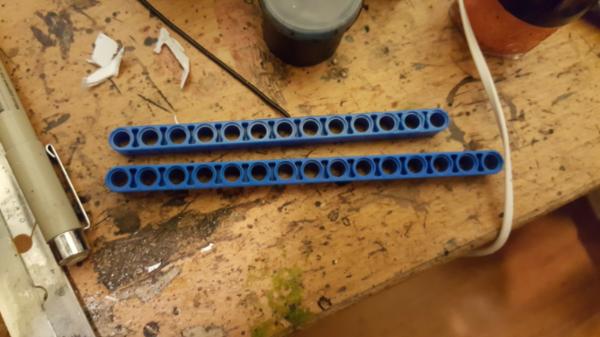
And then. yeah.. need something sturdy to run all the way through the hollow plastic. When in doubt now lego so lets figure out a beam!
My first option wasnt long enough! o.O
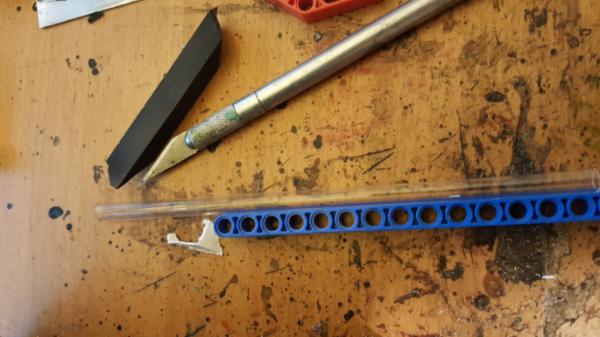
I also considered the plastic tubing but it wasnt nearly as sturdy... Finally I found a beam even longer that worked okay
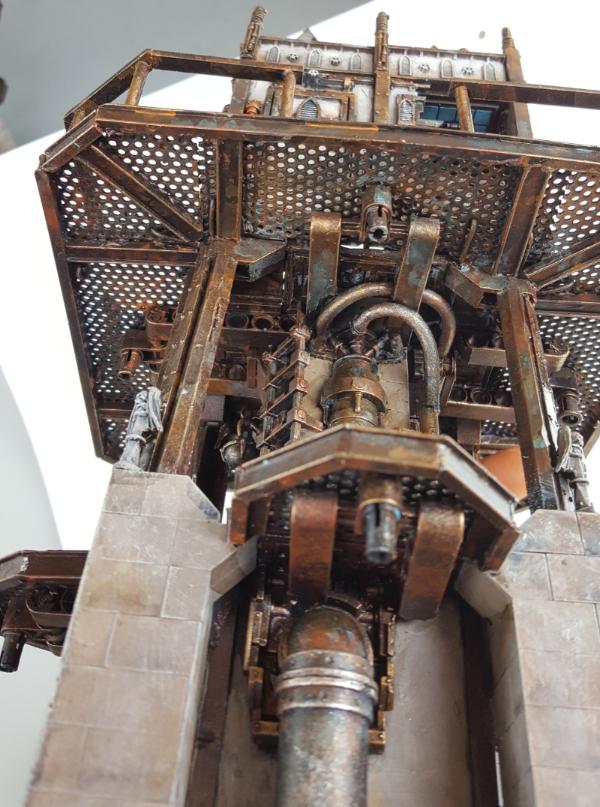
Now of course these are a LITTLE obvious that they are lego and there is no good way to attach the beam to the platform, so I needed a wrapper. Fortunately I have square plastic tubing just big enough:
So the final process:
1. poke some holes in my lego beam and run a single wire into it so I can attach the lego beam to the platform
2. . Cut up the beam and scratch it up so it clues better.
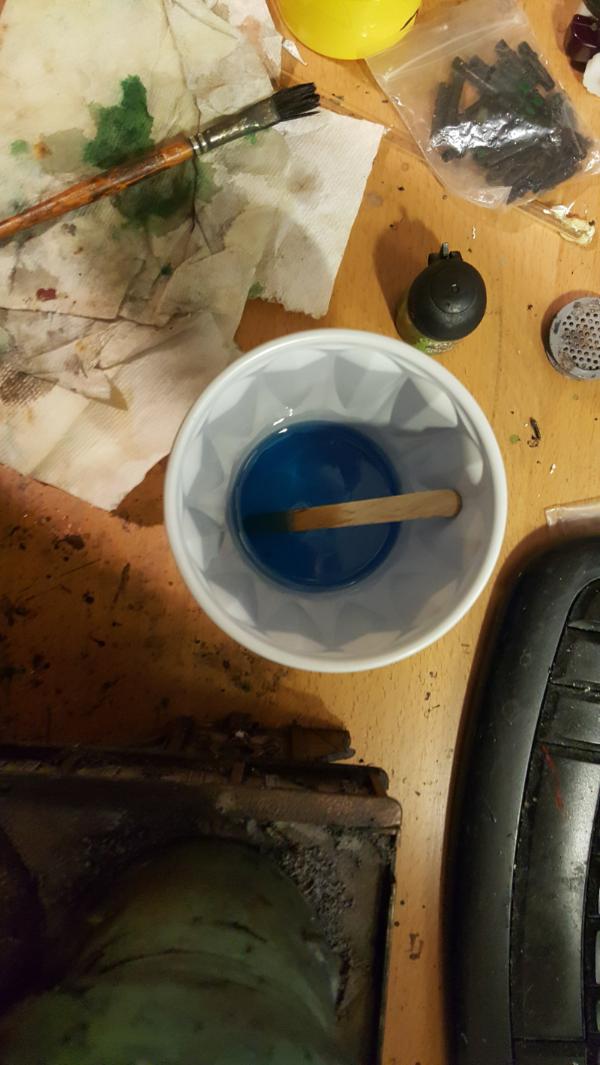
3. Drop some water into the hole and gobs of glue
4. Get the beam wet and coat it in gorilla glue
5. Feed the beam into the hole not quite in final position
6. Put the square plastic sleever over the beam and then finagle it all under the platform. The water tank walls are a big flexible so this worked okay and it mostly could "snap" in place
7. WIth everything in place, feed more wire down the platform mesh into the gaps between the square tube and the lego beam. Feed them as far as they will go into the water tank hollow if possible.
8. Wait for the gorilla glue to expand and deflate any obvious bubbles.
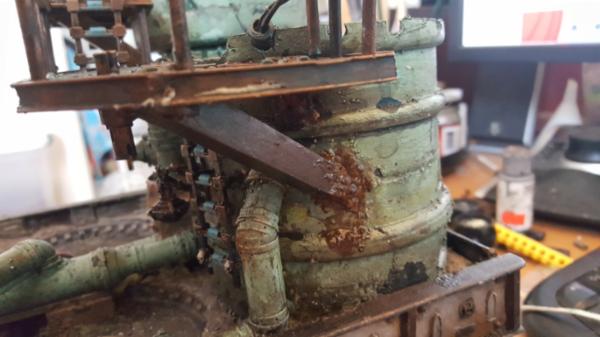
Ended up very sturdy! A little bubbly at the base but ill make that a slightly rusty spot and it'll be fine.
After an initial coat of paint covering up the gorilla glue
Next time.. WATER
|
|
This message was edited 2 times. Last update was at 2017/03/22 18:29:30
|
|
|
|
|
|
|