Hello boys and girls, today we are going to be learning a nice, quick and easy way to paint skeletons with an old, dusty effect to them; ideal for Tomb King armies and such.
Feel free to substitute any of the paints used for whatever equivalent you feel like, I've used a hodge-podge of old and new
GW paints because they are what I have available.
You will need:
A brush suitable for drybrushing and overbrushing
Dark brown paint (
GW Mournfang Brown used in example)
Yellow-Brown paint (
GW Bubonic Brown used in example)
Bone paint (
GW Bleached Bone used in example)
Brown Wash (
GW Agrax Earthshade used in example)
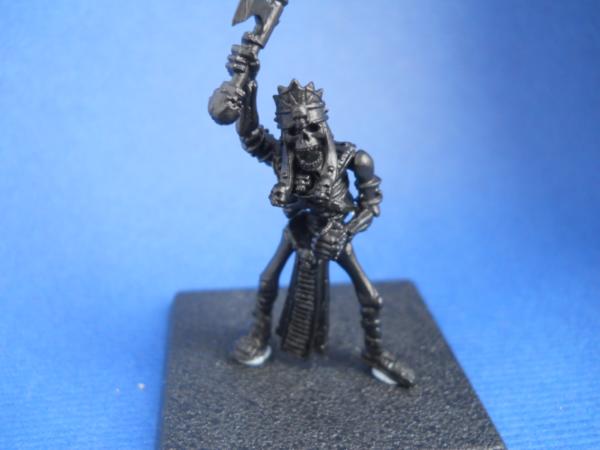
So here's our guinea pig, a Tomb King Chariot Crewman (temporarily affixed to a large base for ease of painting), sitting pretty in his black primer.
The first step is to coat all the areas that will be bone in your brown paint, making sure to leave the primer visible in the deepest recesses such as eye sockets or between the ribs.
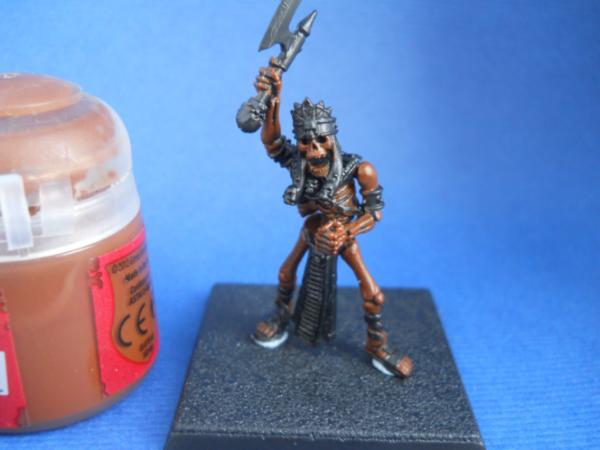
Next, apply an overbrush (like a drybrush, but with more paint) of the yellow-brown paint over all the bones, again taking care with the recesses.
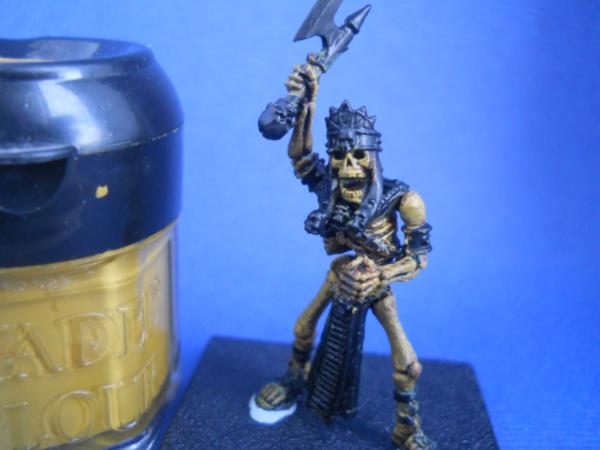
Then follow up with a drybrush of the bone coloured paint, the drier the better.
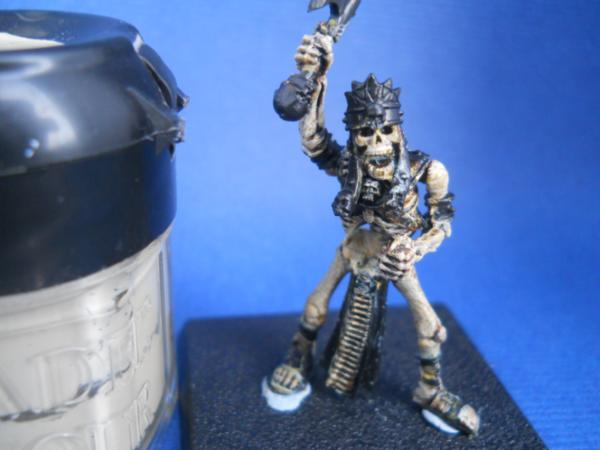
Now he's looking nice and boney, but the result is a little chalky, this can be easily remedied with a brown wash, which will also define details like joints.
(note: make sure that the drybrush layer is completely dry before washing or you will end up with the wash and paint mixing into a weird beige mush)

And there you have it! now you can go ahead and paint the other details like weapons, armour etc.
Note that you may want to leave the wash until after all the other details are finished, that way if you accidentally get paint on the bone areas it can be easily
touched up with some of the bone colour.
The advantage of this process is it's speed, because it largely relies on overbrushing and drybrushing, the various layers dry very quickly, the only stage that takes
any real time being the wash stage. This makes it ideal for batch painting as once you get the hang of it you can have a whole regiment done from primer to wash in
about 20 minutes and while they won't be winning any Golden Demons any time soon, they certainly look snappy on the tabletop!
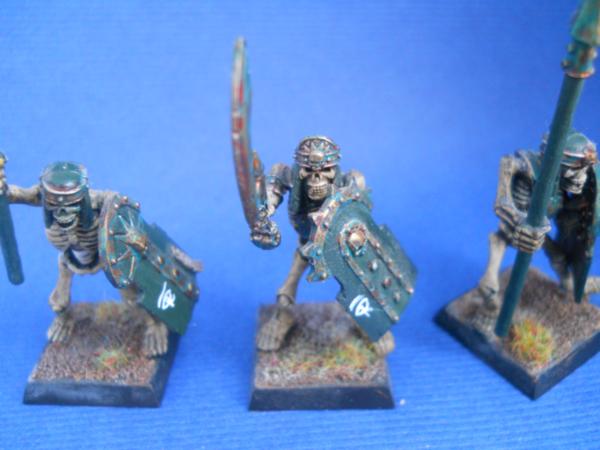
Example of some finished skeletons painted with this method.