Switch Theme:

Blood Ravens Space Marine & Tau Fire Warrior Cosplay  [RSS] Share on facebook Share on Twitter Submit to Reddit
»
Author Message
Advert


Forum adverts like this one are shown to any user who is not logged in. Join us by filling out a tiny 3 field form and you will get your own, free, dakka user account which gives a good range of benefits to you:
  • No adverts like this in the forums anymore.
  • Times and dates in your local timezone.
  • Full tracking of what you have read so you can skip to your first unread post, easily see what has changed since you last logged in, and easily see what is new at a glance.
  • Email notifications for threads you want to watch closely.
  • Being a part of the oldest wargaming community on the net.
If you are already a member then feel free to login now.


Made in us
Longtime Dakkanaut


Bay Area

On June 4, 2012, Shawn Thorsson posted a step by step instructions (link) on how to build a life size Space Marine custom using Pepakura Designer, a program developed by Tama Software, which allows creating paper craft models from 3-dimensional data. A member on the Obscurus Crusade had created PDO files based off 3D models from Relic Dawn of War game. Shawn loaded those PDO files into Pepakura and printed out 2D cut outs on card stick. He then glue them together and reinforce the card stock using resin fiber resin. The problem with a glued Pepakura model is that it's sharp and angular, which isn't good for a costumes that are supposed to be round and smooth. As a result, Shawn and anyone else going down this route will have to spend a considerable amount of time sanding, applying more resin, and sanding some more until the surface is smooth and round. Once Shawn was done, he went a step further and vacuum formed the fiber glass parts, creating a hard plastic shell. After cutting away excess plastic, a bit more sanding, and spray painting, his costume was complete.

Shawn's Full Scale Space Marine Costume Debut at Maker Faire 2012:


While Shawn's final costume is impressive, it's certainly not cheap. Working with resin fiber resin can be hazardous and not everyone has access to a vacuum form machine. The plastic shell combined with all the other parts adds considerable weight, which makes long distance walks uncomfortable.

Henrik Pilerud found an alternative method that doesn't involve fiber glass. Inspired by James Bruton on xrobots.co.uk, who uses Plastazote/Eva foam and heat gun to form round foam armor (explanation video). Each piece of foam is then super glued together like a 3D puzzle, forming a foam armor. Henrik set out to create his own fan made Space Marine costume using Pepakura Designer and foam. Unlike Shawn, Henrik made his costume slightly smaller scale just enough so that the costume's anatomy matches his. He kept track of his progress on facebook page. After 4 months, he finally finished building and painting his costume.

Henrik's 935 scale Blood Angels Space Marine Costume Debut at SSGFC Stockholm 2012:


After watching Henrik Pilerud's youtube videos and studying the files he graciously posted to Obscurus Crusade forum (link), I've decided to build my own Space Marine costume using Henrik's method. Furthermore, my Space Marine will be based off the Blood Ravens chapter, the same chapter my 8th Company all Assault Marines army is painted based off of.

Shawn took roughly 3 months to complete his costume. Henrik finished his in 4 months. I have 2 weeks to finish mine before Fanime! I'm also juggling finals and graduation. With such time constraints, my costume won't be as detailed as Henrik's. It won't have the fancy sound effects, battle damage, or modified bolter that shoots nerf bullets. I also won't have time to sculpt the center wings chest piece, a simple foam cut out will have to do.

I actually started working on my Space Marine costume a couple weeks ago.So far I have the helmet and one of the arms partially completed.

Here's pictures of my progress:

Building Helmet


Cut out helmet pieces.


Heat gun + hot glue gun helmet together.

FYI, initially I used rubber cement to temporarily glue the paper cut out onto the foam. Removing dry rubber cement from EVA foam is very frustrating!


Apply caulk to fill in gaps


Side View

Building Arms


Since the arms are symmetrical, I've stacked the paper template on top two sheets of EVA foam, which I'll use to create left and right arm simultaneously


Cut out the arms.


Glued together.


This part is a bit tricky. I must make sure the elbow joint articulate and both upperarm and lowerarm can bend without exposing open areas not covered by the elbow pad.

Sewing needles helps.


Picture of joint.
.
Testing Paint

One of the challenging aspects of working with EVA foam is painting it. EVA Foam is a porous material and spray painting it won't cover the small holes on its surface. It's also not very rigid. After browsing online, I learned a popular method to seal and provide a good surface to paint on is a coat of plastidip.


EVA foam piece softened and shaped using a heat gun.

Glued together using hot glue gun.


Here's a test piece after a layer of plastidip and red spray paint.


I created this test piece without filling the gaps with caulk. The suture joints are visible underneath the plastidip and paint.

I also didn't properly seal the entire surface with plastidip. Notice the small holes near the bottom edge?

This highlights the importance of using caulk to fill in gaps + sanding as seen on my WIP helmet above.

Update:

I also made a Tau Fire Warrior costume and posted pictures in this thread:

http://www.dakkadakka.com/dakkaforum/posts/list/526769.page#7022898

This message was edited 10 times. Last update was at 2014/07/14 17:55:22


Made in au
Stalwart Veteran Guard Sergeant


South Of The South Poll

Looks pretty good so far.

-ironhandstraken

   
Made in us
Longtime Dakkanaut


Bay Area

 ironhandstraken wrote:
Looks pretty good so far.

-ironhandstraken


Thanks!

As quick update, I recently purchased a pair of dry stilts for the height increase. Big mistake! The stilts have narrow base, which makes it difficult to balance. I'll stick with Henrik's method by creating custom platform shoes.

Second pair of arm is almost complete. The real challenge is providing enough inner padding so that they cushion my arms, allowing enough movement, without following off.

   
Made in us
Longtime Dakkanaut


Bay Area

Sorry for the lack of updates. I've been busy with personal matters, so I haven't had a lot of time to chronicalized my costume's progress.

I finished making my costume officially on July 4th and showcased at Anime Expo 2013. Here's a few pictures I took while making my costume:


I worked straight for 4 days prior to Fanime and finished everything except the bolter, belt, and backpack. Unfortunately I realized it will take a long time to fill the seams and applying PVA + spray paint. I couldn't complete my costume in time for Fanime.


After caulking my helmet, I sprayed a few layers of Plastidip. Unfortunately, the seams were still visible.


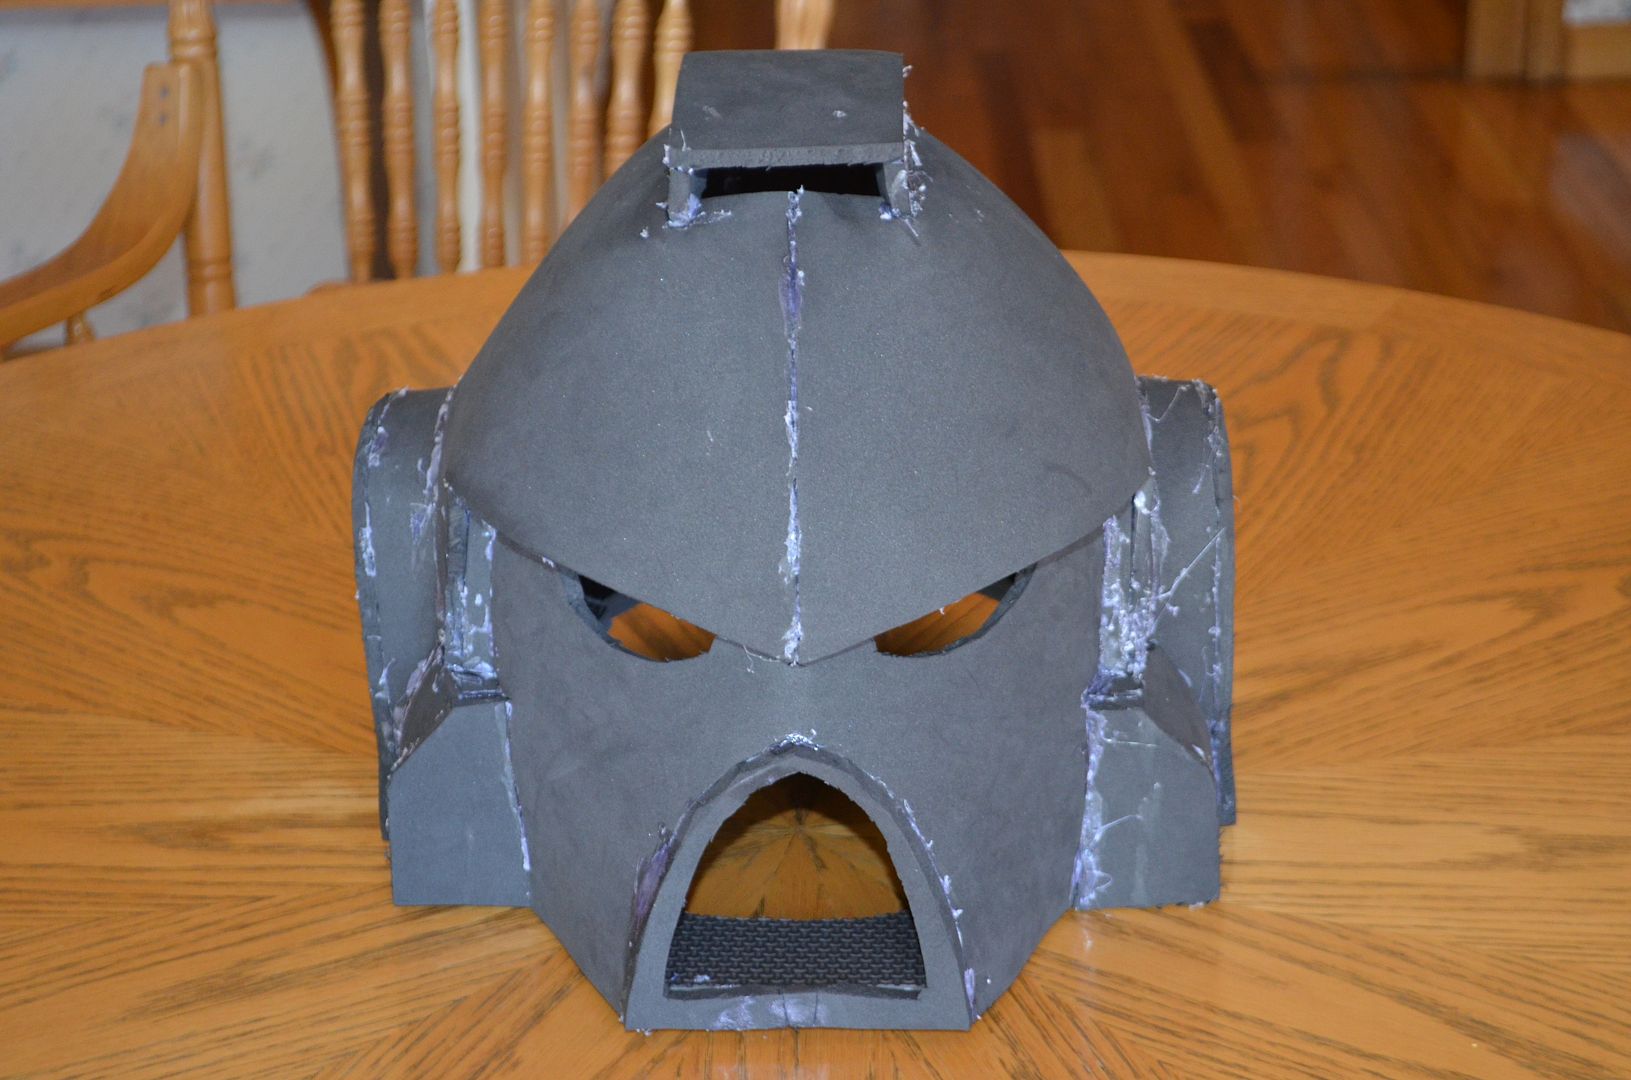
In mid-late June, Henrik posted pictures of his new helmet using heat forming technique. I remade my helmet and presto, minimal seams!


I purchased a construction helmet and used the head harness. I also have a DC blower to keep my cool and green LED lens for the vision slits. I later discovered the DC blowers were too loud and didn't bother using them.


I conducted a little experiment. I found gesso + multiple layers of PVA works really well for hiding seams.


After stress fitting my costume, I realize the legs didn't maintain their form. 6mm foam lacks structure and is too flimsy. I remade the legs using 1/2" foam, the same thickness used for the torso.


Legs have inner fillers that helps keep my legs in place.


I also remade the Pauldrons.


Pauldrons are attached to the torso using a bolt through an inner pauldron. The inner pauldron connects the arms.


Here's what the toros looks like. As you can see, there's two bolts on either side, which hooks the Pauldrons.


The torso has an inner harness to keep the torso on snug and fit. It also helps support the weight of the backpack.


For the torso chest emblem, I'm used the Imperial Eagle.


Being 5' 10", I'm not tall as a Space Marine (most humans aren't). I made 1' platform shoes,


The platform shoes was constructed using wooden planks, thick ethafoam cylinders, EVA foam, metal brackets, shoe, and various screws.


Arm pieces are connected using the elbow guard. They too have fillers.


Here's the abdomen with the belt attached.


Abdomen is worn using two straps that rest on my shoulders. There's also inner straps, which gets attached to the legs.


My bolter is hallow and doesn't shooting anything (shooting not allowed at conventions). I recycled an old hot glue gun and used it as the a grip.


Here's what the Bolter looks like after gluing.


I literally painted my costume over night.


During the convention, I had numerous costume malfunctions in the leg region. Apparently, rubber soles and screws don't hold well together. Fortunately I brought tools with me. I added a metal bracket over the front, hot glued the bottom of the shoe to the wooden board, and wrapped multiple layers of masking tape to keep the screws from sliding out. Presto, it worked!


I also had to alter the inner harness. Apparently the back pack was too heavy, causing the torso to slide back. I extended the front section and looped a belt, sandwiching me between the two metal V brackets.


Here's a picture of me on in costume on Day 2 of Anime Expo 2013. Picture taken by Hoa Jessie Cao Photography.


Another picture of me on Day 2. This one was taken by Cesar Vivid Photography.


On day 2, I met Spif Zaya who was dressed up as Adepta Arbite Shira Calpurnia from the 40k novels written by Matthew Farrer. Check out her facebook page for more pictures. She did a fantastic job!


On Day 3, I added a front grip to my Bolter, wore a ski mask to hide my neck, and turned on the green LED lens. Here's a picture taken by my friend Nate.


Close up picture of me taken by Davann Srey Photography

Here's a few pictures I took of other Warhammer 40k cosplayers.


Inquisitor and Imperial Guard Sergeant


Imperial Guardsmen, Commissar, and Inquisitor


Commissar


Saint Celestine and Tech Priest

Well that concludes my costume. I may add upgrades in the future or accessories. Please comment if you have questions or like my costume!

Also, a big shout out to Henrik Pilerud for giving me tips and advice while I was building my costume. Thanks!

This message was edited 1 time. Last update was at 2013/07/25 04:57:10


Made in us
Quick-fingered Warlord Moderatus


Hey, this is the guy who cosplayed as the Commissar in the second-to-last picture! Great cosplay work, there!

Lord Judicator Valdrakh of the Atun Dynasty (6th Ed: W:3, L:4, D:0)

 H.B.M.C. wrote:
Well GW were mostly responsible for the Berlin Wall, so it's natural for some people to harbour resentment towards them.
 
   
Made in us
Longtime Dakkanaut


Bay Area

 Dr. Temujin wrote:
Hey, this is the guy who cosplayed as the Commissar in the second-to-last picture! Great cosplay work, there!


Hi Dr. Temujin,

It was nice meeting you at AX.


Here's picture of you dual wielding.

Your costume and chains sword is awesome!

   
Made in us
Rough Rider with Boomstick


Looks great thanks for sharing!

GAME OVER MAN ! check out my blog http://mattrendar.blogspot.com/?m=1 
   
Made in us
Bounding Assault Marine


That bolter would weigh more than him.


Made in us
Longtime Dakkanaut


Bay Area

A while back, I made a Tau Fire Warrior costume based off the my very first army's color scheme.
https://www.facebook.com/SabrXCosplay

It took me a week to make. I use EVA foam floor mats, hot glue, and plastidip. Fire Warrior templates were found off of Obscurus Crusade's forum: http://obscuruscrusade.com/forum/

FYI, looking through a Fire Warrior helmet is a pain in the arse because one eye is covered!

Here's a few pictures:

Photo Credit: Minotaur Phtography
https://www.facebook.com/MinotaurPhotography


Photo Credit: BlizzardTerrak Photography
https://www.facebook.com/BlizzardTerrakPhotography


Photo Credit: Dani


Photo Credit: Spambots
https://www.facebook.com/thespambots?fref=photo


Photo Credit: Iron Cutter


Photo Credit: Donkey is a Dog
https://www.facebook.com/donkeyisjustadog

This message was edited 2 times. Last update was at 2014/07/14 18:08:31


Forum Index » Dakka P&M Blogs
Go to: