| Author |
Message |
 |
|
|
|
|
Advert
|
Forum adverts like this one are shown to any user who is not logged in. Join us by filling out a tiny 3 field form and you will get your own, free, dakka user account which gives a good range of benefits to you:
- No adverts like this in the forums anymore.
- Times and dates in your local timezone.
- Full tracking of what you have read so you can skip to your first unread post, easily see what has changed since you last logged in, and easily see what is new at a glance.
- Email notifications for threads you want to watch closely.
- Being a part of the oldest wargaming community on the net.
If you are already a member then feel free to login now. |
|
 |
2013/10/16 22:59:36
Subject: How to paint stubble on Human Faces
|
|

Mounted Kroot Tracker
|
OK SO HERES THE TUTORIAL ON STUBBLE (this is an excerpt from my PM blog that can be found here http://www.dakkadakka.com/dakkaforum/posts/list/395565.page)
Now i know there are lots of ways this is done, this is how i do it. It may or may not be the easiest or best, just illuminating a bit of what ive always thought was a bit of a mysterious technique. Hope it helps 
Step 1. Finish the Head including all details and highlighting etc etc
Step 2. Make four dots on your palette. Your flesh base (tallarn in this case) Black grey and brown
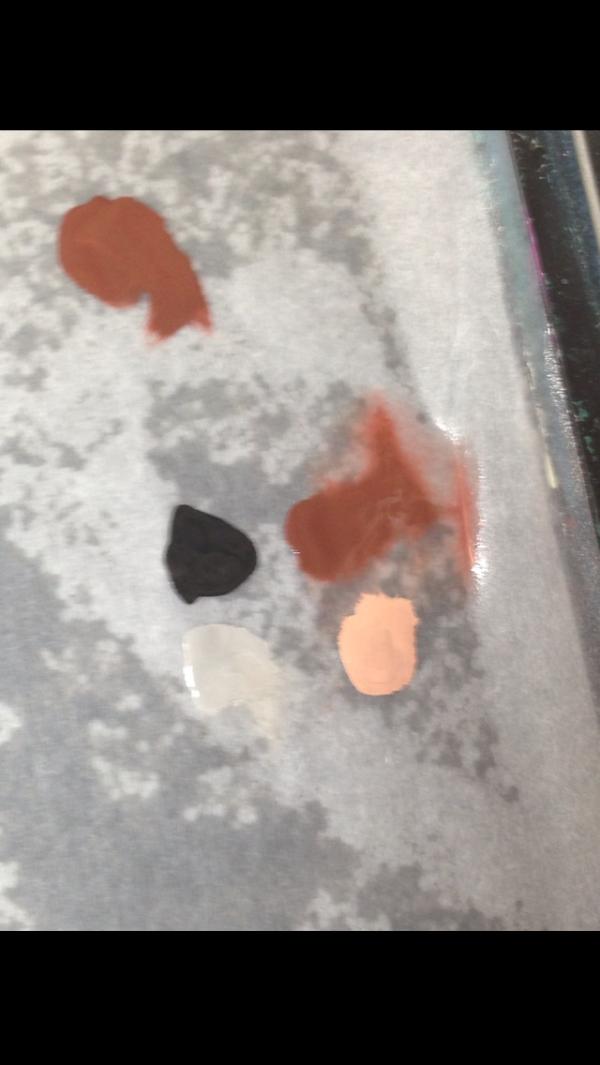
Step 3. Mix them and add water. Youll get this color...ish...
You Consistancy should be this...
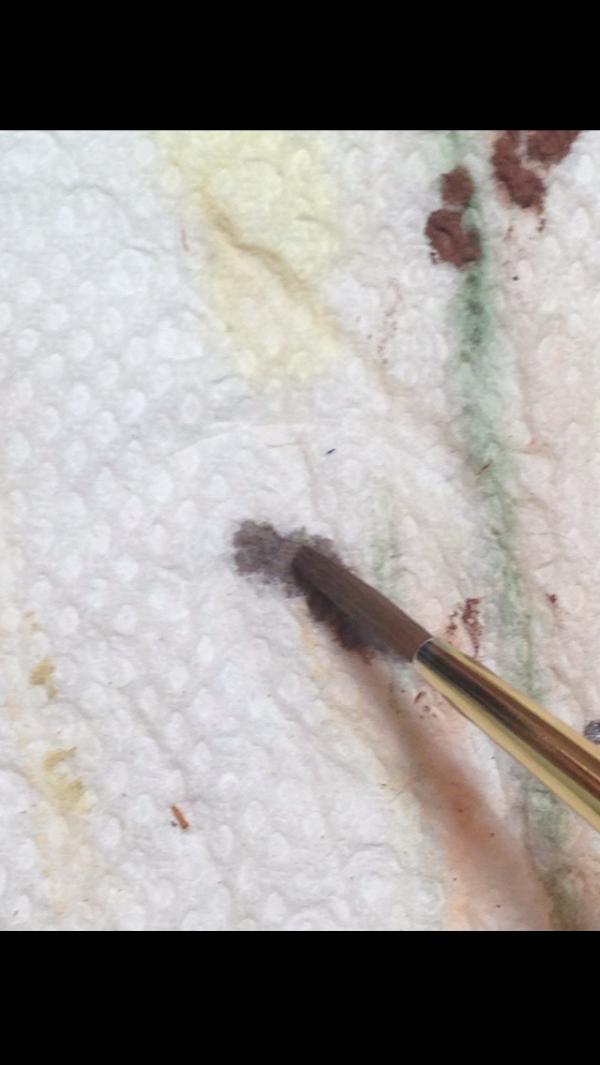
Step 4. Now, Slowly glaze on the wash to areas that naturally have hair. Be careful at this stage because you dont want him looking like the wolfman. If this isnt accurate the effect can be lost.
With just one or two glazes youll still have very sublte tint. Like So
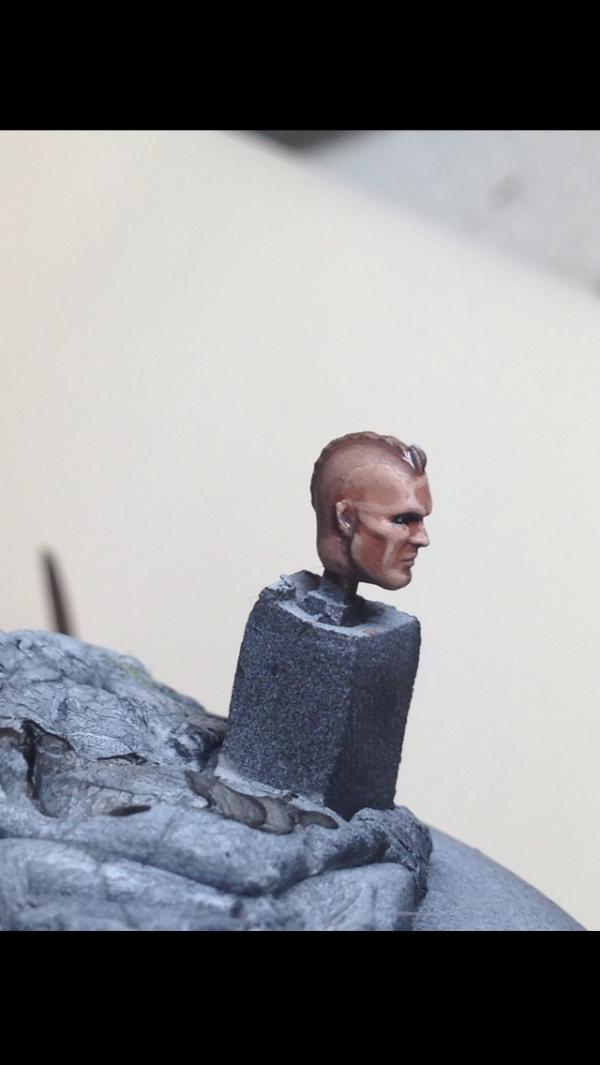

Notice the already painted tat. And also notice that my paints are always very wet and thin...in this case even more so as its a glaze
Now, heres something to expect. This glaze will act slightly different than an ink. Its milkier. The trick can be to find the right mix so its visible and doesnt look liight grey. Black is your helping hand here. I will generally pull the glaze to pull it into deep crevices where the stubble will be closer together, but because it isnt an ink sometimes things will dry a little bit hard edged like so:
Notice the hair line? Not terrible but we can go a step further.
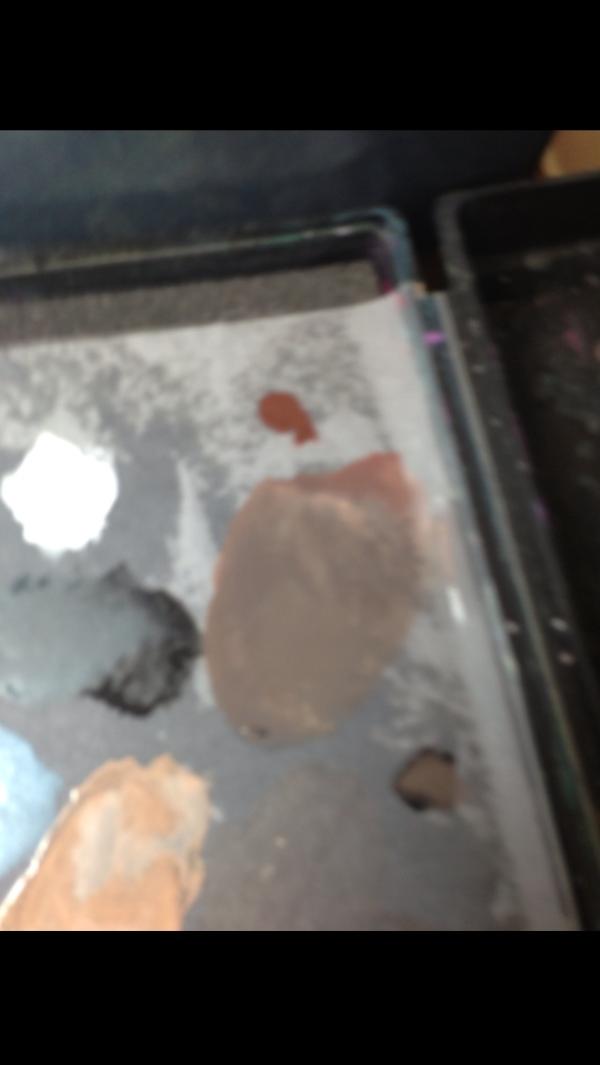
Step 6. Now Add your flesh base to your stubble glaze:

Step 7. Then we clean up the edges using the proper color in that mix. Also, that same color can be used to rehighlight areas that are now covered with stubble, like the chin and jawbones..Use your eye for color to determine this...the final effect is
See its subtle but blends the hair to your skin tone.
AND THATS IT!!!!
Hope You guys found this useful Thoughts are appreciated as usual 
Bebop
|
|
This message was edited 1 time. Last update was at 2013/10/16 23:18:20
|
|
|
 |
|
2013/10/16 23:05:39
Subject: Re:How to paint stubble on Human Faces
|
|
Fixture of Dakka
|
Neato! Great tut!
|
|
|
|
|
2013/11/10 17:10:23
Subject: Re:How to paint stubble on Human Faces
|
|

Gargantuan Great Squiggoth
|
Very Very helpful. Thank you.
|
|
|
|
|
|
2013/11/10 18:54:25
Subject: How to paint stubble on Human Faces
|
|
Stinky Spore
Elk Grove, CA
|
That is a great method and great results, thanks for the tutorial!
|
|
|
|
|
|
2013/11/17 07:29:23
Subject: How to paint stubble on Human Faces
|
|
Blood Angel Terminator with Lightning Claws
|
Thanks for this, I've attempted this many times and you have it perfected!
|
Crush your enemies, see them driven before you and to hear the lamentations of the women.
Twitter @Kelly502Inf |
|
|
|
|
2013/11/17 20:52:49
Subject: How to paint stubble on Human Faces
|
|
Mounted Kroot Tracker
|
Thanks guys, I'm so glad it's helped a few of you just FYI, the example head was done pretty subtly. This effect can be made more drastic depending on the amount of coats and the amount of black added to your mix.
|
|
|
|
|
|
2013/11/17 20:54:48
Subject: How to paint stubble on Human Faces
|
|

Basecoated Black
|
mmm nice.
Always useful head tutorials
|
|
|
|
|
|
2013/11/20 02:43:13
Subject: How to paint stubble on Human Faces
|
|

Painting Within the Lines
|
Looks suitably grizzled to be a space marine.
|
|
|
|
|
2013/11/20 12:58:27
Subject: How to paint stubble on Human Faces
|
|
Impassive Inquisitorial Interrogator
|
Oh man, this is an awesome tutorial. Thanks a bunch for this. This will aid me greatly as I make my Warriors of Chaos look more grizzled, also helpful for the space marine faces. I wonder what some stubble Eldar would look like. Thanks a bunch.
|
 You don't see da eyes of da Daemon, till him come callin' You don't see da eyes of da Daemon, till him come callin'
- King Willy - Predator 2 |
|
|
|
|
2013/11/25 13:15:31
Subject: How to paint stubble on Human Faces
|
|

Mindless Spore Mine
|
Thank you for this tutorial. I will use this for my Guardsmen.
|
|
This message was edited 1 time. Last update was at 2013/11/25 13:15:51
For the Greater Good! |
|
|
|
|
2013/11/28 01:35:42
Subject: How to paint stubble on Human Faces
|
|
Mounted Kroot Tracker
|
Thanks again fellows, so glad its coming up useful. What would be super cool is if you guys posted pics of your stubble faces here using the above technique so we can all see the results! We can make this the internets home for stubble faces 
Cheers
BB
|
|
|
|
|
|
2014/02/03 03:05:20
Subject: Re:How to paint stubble on Human Faces
|
|
Hardened Veteran Guardsman
UK
|
Nice tutorial mate, the results look so smooth
|
 ICH DIEN ICH DIEN |
|
|
|
|
2014/02/03 09:08:56
Subject: How to paint stubble on Human Faces
|
|

Longtime Dakkanaut
|
Thumbs up, very good tutorial.
|
 Waaagh an' a 'alf Waaagh an' a 'alf
 1500 Pts WIP 1500 Pts WIP |
|
|
|
|
2014/02/03 11:39:46
Subject: How to paint stubble on Human Faces
|
|

Boom! Leman Russ Commander
|
Thankyou for making my faces even better. Will definitely be using and suggesting.
|
|
|
|
|
|
2014/02/03 17:12:40
Subject: How to paint stubble on Human Faces
|
|
Using Inks and Washes
St. George, Utah
|
I was actually planning on painting up the face of my Legion Praetor model tonight, and had been curious for a long time how people got such great stubble and hair effects on their models.
So the true test of any tutorial is if people can easily replicate it, right?  I'll put it to the test for you!
Too bad I have to wait another 7 hours before I go home because I really want to try this.
Only question I've got is what "grey" and "brown" are you using? Those colors can wild differently depending on who you ask.
|
|
|
|
|
2014/02/03 17:26:12
Subject: How to paint stubble on Human Faces
|
|
Mounted Kroot Tracker
|
wow. resurrected from the annals of time. Thanks for enjoying...
SRS: Labels dont matter much to me. I use my eye for color and replicate. As a jazz musician, we have a saying...if you can sing it, you can play it.
I use this rule for mini painting as well....if you can see it (in your mind), you can paint it.
Truth be told the color of grey and brown should be mid tones id say, nothing with too much RGB to pull it away from neutral. And i dont believe it matters what hair color they have, if you try to alter the mix to suit blonde or red hair, it will look very strange,,,
Hope that helps, and would love to see your results!
Cheers
BB
|
|
|
|
|
|
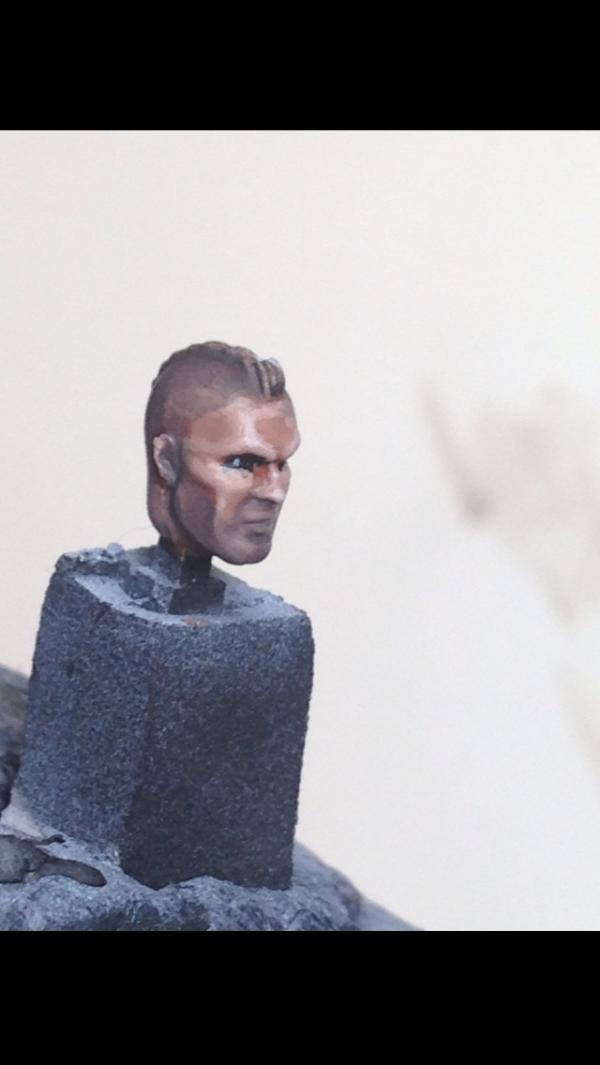
2014/02/04 01:53:10
Subject: How to paint stubble on Human Faces
|
|
Using Inks and Washes
St. George, Utah
|
Well. Easy, and effective. Thanks for the tip, Bebop! I'll definitely try this again in the future.
BTW, I went ahead and straight added the fleshtone into the glaze from the getgo because I wanted it to be lighter. I just added in a little more of the flesh tone after to then trim up a bit.

It's very Commander Shephard headbuzz. Love how it looks.
Addendum: For the record, that's one of the heads off the Chaos Lord/Sorcerer spruce. The face that came with the praetor model I got was horribly misshappen. Bought it on eBay figuring it was someone who bought the Legion Praetor set for the other mini in it, turns out it was a recast. Still got it really cheap, though, so I can't be too mad. That's why the head is already set in the figure, though. I had to shave off the neck part that normally is on that head to see if I could get it to fit in to use as a replacement to begin with and had to utilize some greenstuff to get it to face the direction I wanted, but I sort of had to set it in there like I did before painting it just to make sure it'd work.
|
|
This message was edited 1 time. Last update was at 2014/02/04 01:55:48
|
|
|
|
|
2014/03/08 18:08:58
Subject: How to paint stubble on Human Faces
|
|
Incorporating Wet-Blending
Wales: Where the Men are Men and the sheep are Scared.
|
Very nice. not sure I have the experience to pull this off yet but I look forward to trying it out one day.
|
|
|
|
|
|
|
|


