| Author |
Message |
 |
|
|
|
|
Advert
|
Forum adverts like this one are shown to any user who is not logged in. Join us by filling out a tiny 3 field form and you will get your own, free, dakka user account which gives a good range of benefits to you:
- No adverts like this in the forums anymore.
- Times and dates in your local timezone.
- Full tracking of what you have read so you can skip to your first unread post, easily see what has changed since you last logged in, and easily see what is new at a glance.
- Email notifications for threads you want to watch closely.
- Being a part of the oldest wargaming community on the net.
If you are already a member then feel free to login now. |
|
 |
2017/06/18 02:34:26
Subject: Re: Multi-level city terrain, marine v nid bases (6/17: garage tile, unwrecked quad turret )
|
|

Dakka Veteran
|
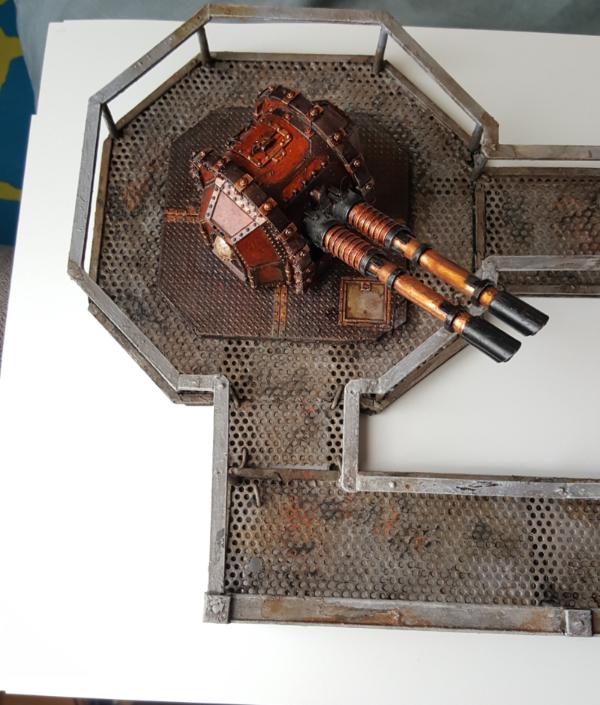
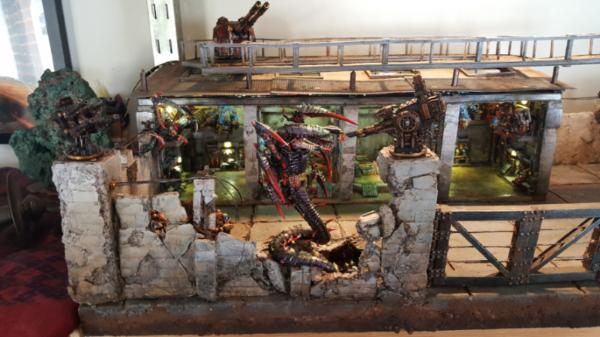
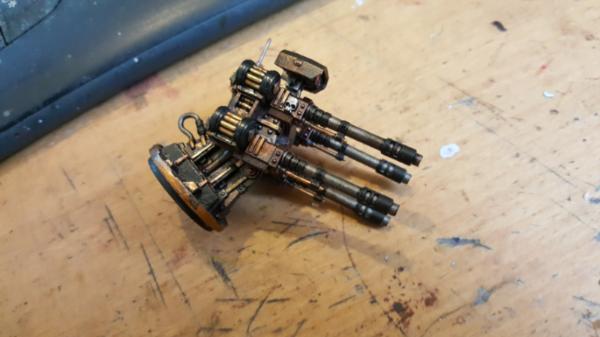
Light day today but here is the un-wrecked version of that turret:
|
|
|
|
 |
|
2017/06/18 17:42:43
Subject: Re: Multi-level city terrain, marine v nid bases (6/18: garage tile, wrecked lascannon turret)
|
|
Dakka Veteran
|
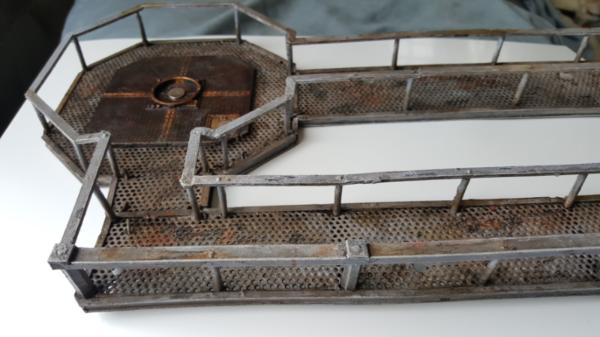
And now for the wrecked lascannon turret, finish out the main wall turrets! I forgot to make pictures of the back antannae turret so you'll see that tomm but yeah.
Basically for this I drilled holes, stuck in my soldering iron for a bit, and pulled it apart. Worked out pretty well though thats something where you kinda only get one shot at the best result?
As in when I initially pulled it apart the plastic made lovely stretched bands across the 2 halves. But since I wanted to put in cables too I had to reheat it in one spot which broke the bands. Unfortunate but it let me have the cables now be whats keeping it together so it kinda worked out, just not quite as cool.
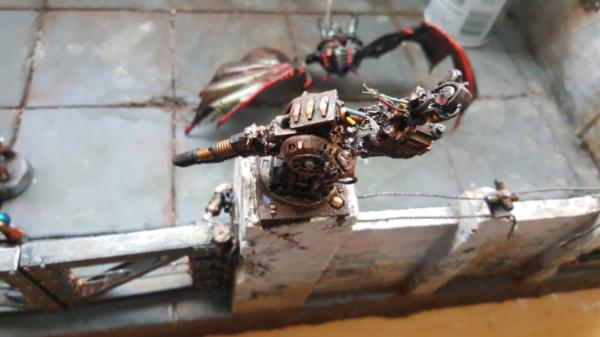

Turrets in place!
|
|
|
|
|
|
2017/06/19 17:18:55
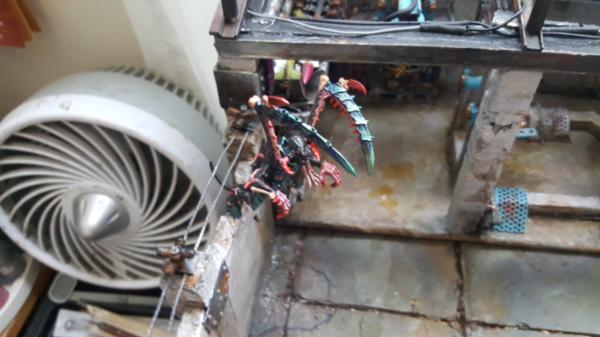
Subject: Re: Multi-level city terrain, marine v nid bases (6/19: garage tile, posing a lictor-a-leapin)
|
|
Dakka Veteran
|
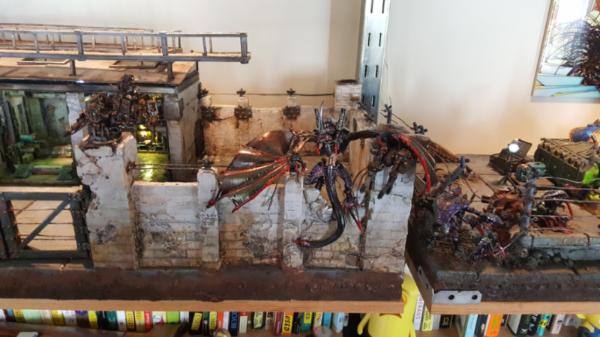
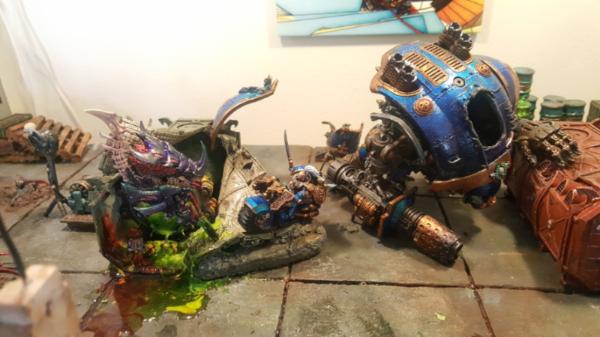
Because I forgot to take pictures here instead is work on the lictor! Now lictor is interesting because there is only finecast and metal versions, no plastic. I cant do finecast because (aside from being a pain to work with) its super brittle. Those long hook arms are one gently bump away from snapping and that's exactly where this guy will be, right on the edge of where people might bump the board.
So that means I had to do metal (which, conviently, i had), butttt the body of the metal lictor is awful. So I decided to make my own, keeping the metal head and metal hook arms and use a plastic warrior for the rest.
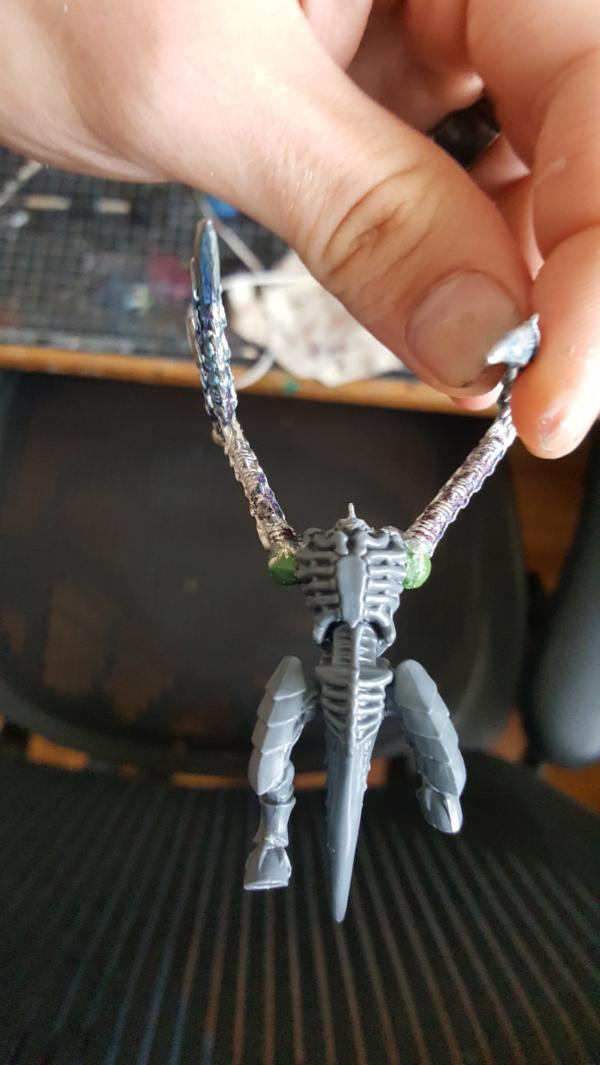
Surprisingly the pose turned out pretty well, he feels mid leap. Poor poor command squad, they didnt look up!

|
|
This message was edited 1 time. Last update was at 2017/06/19 17:19:28
|
|
|
|
|
2017/06/20 20:43:14
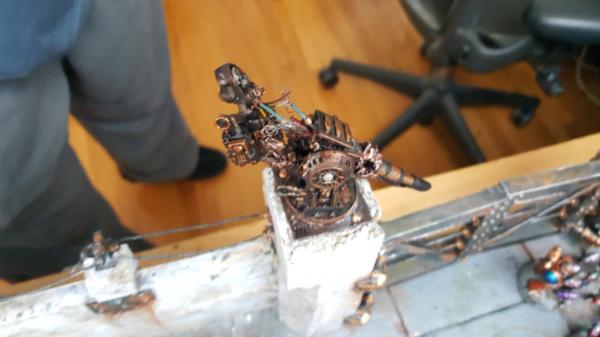
Subject: Re: Multi-level city terrain, marine v nid bases (6/20: antennae turret done)
|
|
Dakka Veteran
|
|
|
|
|
|
|
2017/06/21 18:13:00
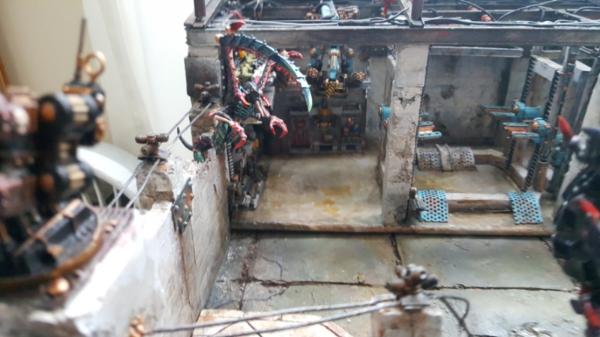
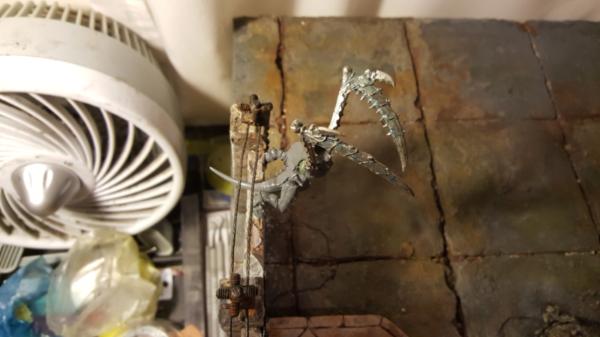
Subject: Re: Multi-level city terrain, marine v nid bases (6/21: garage tile, lictor attack done)
|
|
Dakka Veteran
|
|
|
|
|
|
|
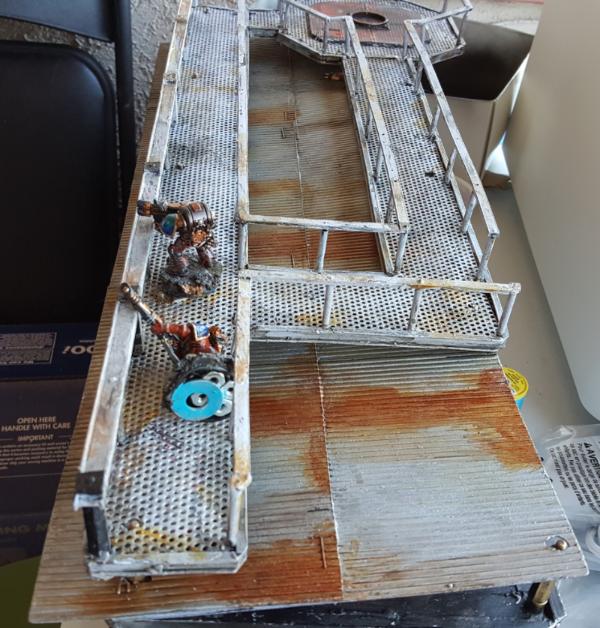
2017/06/22 18:52:51
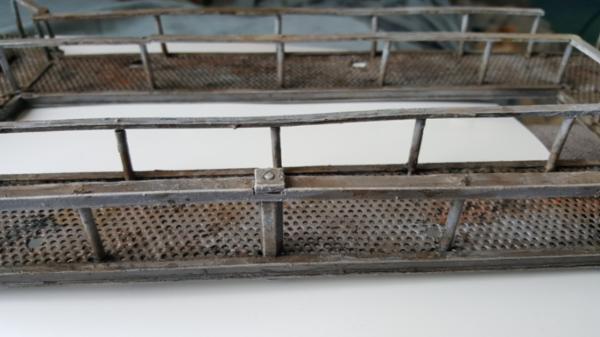
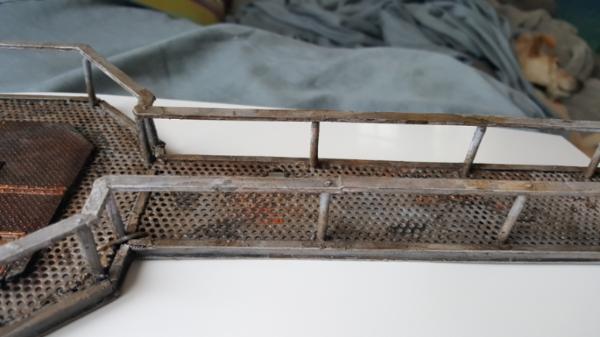
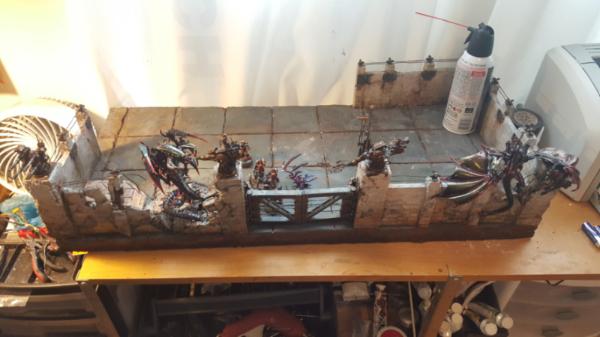
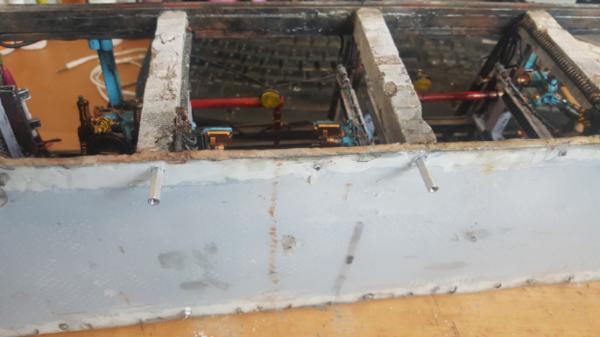
Subject: Re: Multi-level city terrain, marine v nid bases (6/22: garage tile, walkway improvements)
|
|
Dakka Veteran
|
|
|
This message was edited 2 times. Last update was at 2017/06/22 18:53:47
|
|
|
|
|
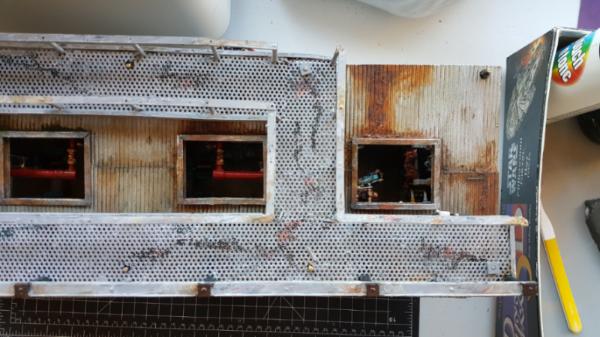
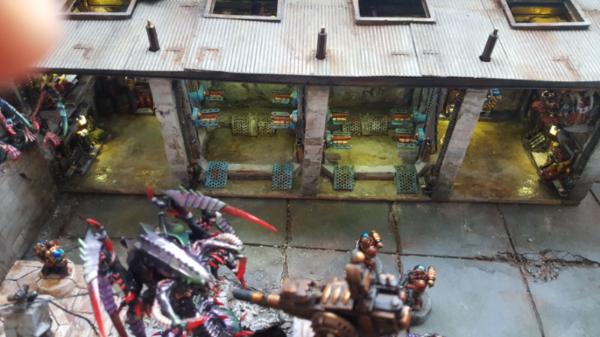
2017/06/23 22:31:09
Subject: Re: Multi-level city terrain, marine v nid bases (6/23: garage, laying some cable)
|
|
Dakka Veteran
|
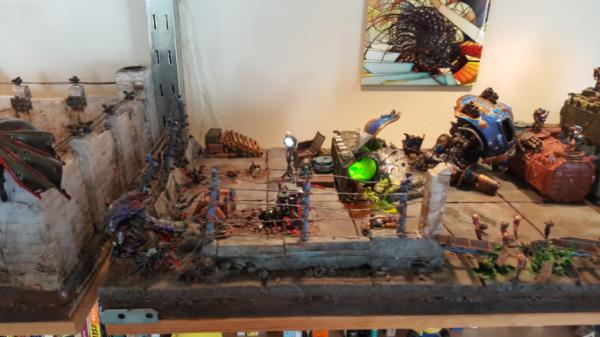
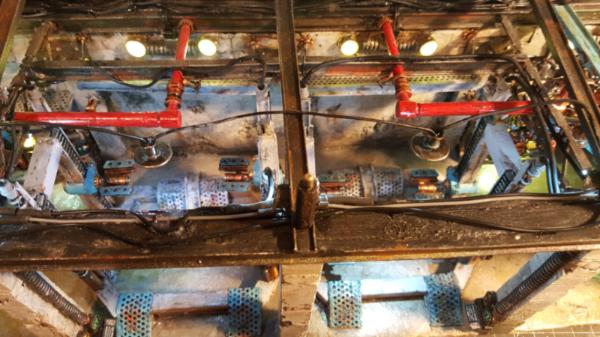
More tiny details time no one will notice!
So one thing I never did was actually hook up my computers to the cranes/lifts that they power. I just had this:
or this:
Where the cable ended at the top. Also, future note, never use the ribbed legos. they really dont paint well and it all just comes right off. I always have to repaint little chunks when i work with those things.
Anyways I wanted to add some cables to hook everything up. I didnt need all the copper bands and stuff because that would get distracting. Just big black cables on draped on the ceiling. Getting the right "cable" was interesting. You want it droopy but actual wire sometimes is.. sometimes isnt. The first wire I glued down was a nice thickness but tough to get the droop
so its a bit lamer but thats okay. This doesnt need to be symmetrical.
Next I found the perfect cable (i have a big bag of wires lol) which was much more flexible and had like 6-7 mini wires inside! It was great and was a much more fun effect:
Finally I hooked up my cranes:
and bob's your uncle! All hooked up. You can see that the ribbed cable wrap paint rubbed off AGAIN. Grr. Thankfully I no longer have to touch that area, but still. If only it werent pink underneath...
|
|
|
|
|
|
2017/06/25 18:16:26
Subject: Re: Multi-level city terrain, marine v nid bases (6/25: garage, making some overhead lights)
|
|
Dakka Veteran
|
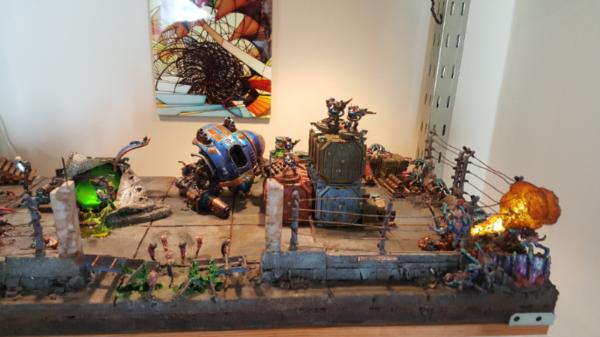
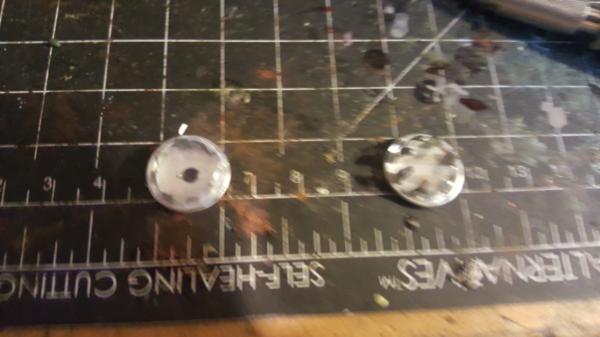
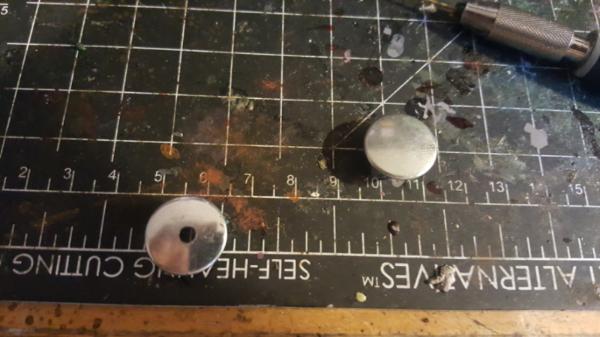
So, one of the last major pieces of the garage before I install it was some last LEDs. These are meant to be more overhead lights to counteract and warm up the light coming from my white "flood" lights.
For the clear light cover I used googly eyes btw, they are a good shape and come in multiple sizes.
First up was making the light itself. As before I wanted to line it with tinfoil to maximize output but then I realized I had these lovely metal.. whatevers sitting there that would do the job perfectly!
Next up was wiring the leds in there and together (remember 2 3v leds have to be in series to match the 6V output of my 4 AAs)
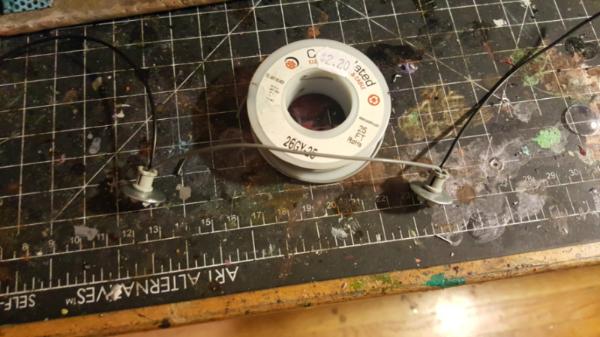
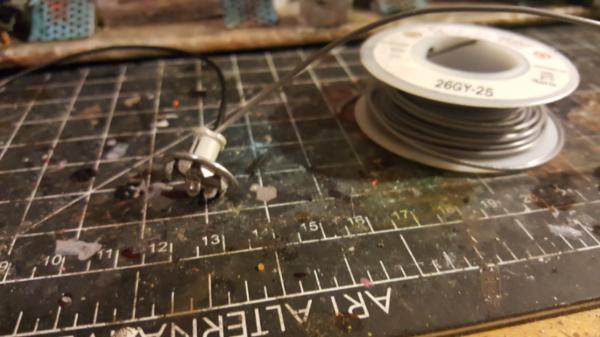
Then it was just a matter of installing. For now I just used the wire itself to hang them. Eventually I'd love to add chain but I cant figure out where to attach it well.
Before the tinted clear light cover:
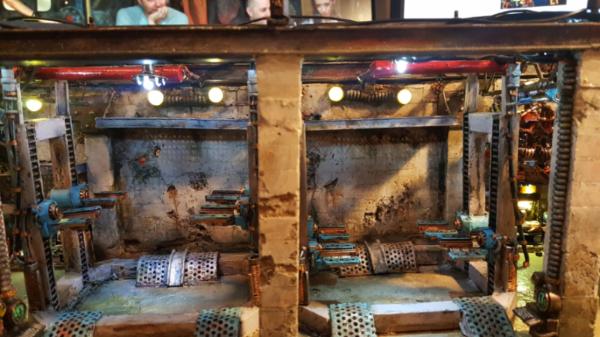
Finally with all of it lit together. Its so bright now!
|
|
|
|
|
|
2017/06/26 08:57:45
Subject: Multi-level city terrain, marine v nid bases (6/25: garage, making some overhead lights)
|
|
Veteran Knight Baron in a Crusader
Oakland, CA
|
Great work on the lighting!
|
|
|
|
|
2017/06/28 20:55:57
Subject: Re: Multi-level city terrain, marine v nid bases (6/25: garage, making some overhead lights)
|
|
Dakka Veteran
|
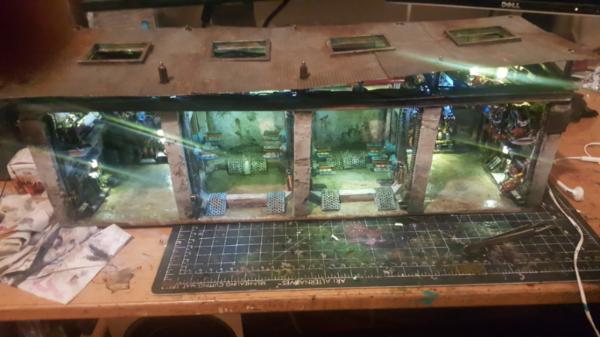
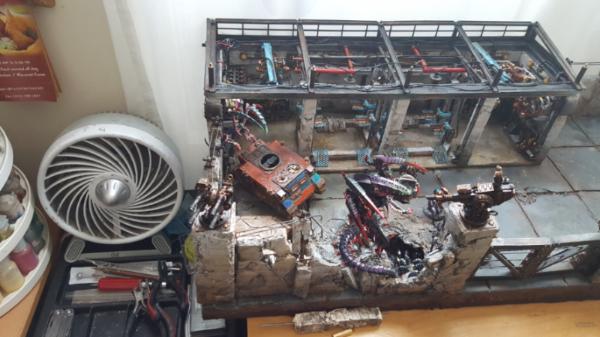
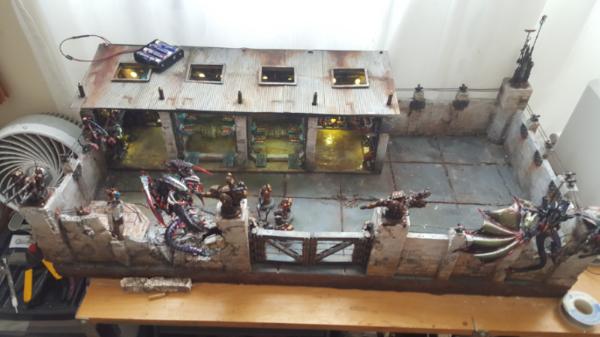
And now the finishing touches!
First up we did one final test:
it all works, I can put a tank underneath the lictor okay with no problems. So its good. Someday I may add a slight ramp off the garage but no rush.
then it was a matter of isntalling. Fortunately my original threaded rod in the garage was sticking out the bottom so I could use nuts to hold it together. So I could just take those off and thread in replacements. In this case, since the rod was so small (#4), I had to go to my electronics store to get some standoffs. However, just threading a standoff onto a #4 nut's amount of width is.. not alot of threading.
So I needed to drill a few holes in my acrylic underplate of the garage to add some depth and have more rod be available to attach my standoff too. I was afriad this would take forever (since you have to carve out of the acrylic a space big enough to handle the size of the hexagonal standoff) but I managed to find small enough standoffs that it went pretty quick. Just drill 6 holes and cut/pull away the remaining material with my cutters.
The main thing I had to worry about was when twisting on the standoffs to not twist hard enough to twist the rod right apart (which I did once, whoops! Tools sometimes can hurt you if they are too strong for your material)
After it was just like before, drill my holes in and make them big enough to handle a nut/washer on that side. There are.. many holes from mistakes/trying to get 12 of these to line up right but they are easily filled.
And all together!
|
|
|
|
|
|
2017/07/02 07:22:55
Subject: Re: Multi-level city terrain, marine v nid bases (6/25: garage, making some overhead lights)
|
|

Sadistic Inquisitorial Excruciator
Preston/England/United Kingdom
|
Your terrain is an inspiration. Its brilliant. The texture you've got on the stone work and the rust on the corrugated roofs looks so realistic.
Thanks for sharing
|
|
|
|
|
2017/07/02 09:32:22
Subject: Multi-level city terrain, marine v nid bases (6/25: garage, making some overhead lights)
|
|
Crushing Black Templar Crusader Pilot
|
Awesome as usual. Thanks for letting us all live vicariously through this!
|
  
Relapse wrote:
Baron, don't forget to talk about the SEALs and Marines you habitually beat up on 2 and 3 at a time, as you PM'd me about.
|
|
|
|
|
2017/07/02 18:20:11
Subject: Re: Multi-level city terrain, marine v nid bases (6/25: garage, making some overhead lights)
|
|
Dakka Veteran
|
|
|
|
|
|
|
2017/09/20 18:56:54
Subject: Re: Multi-level city terrain, marine v nid bases (I'm back! 9/17: Painting up khan bike)
|
|
Dakka Veteran
|
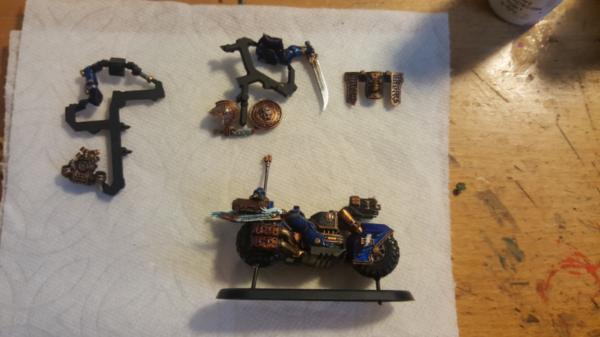
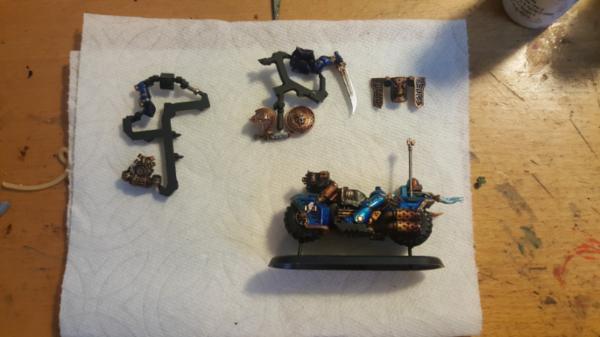
Aloha! So it's time for a new dump of progress! There shall be intrigue, plot twists, 3d modelling, laser cutting, and 3d printing! Some of which might be successful.. or not! I dont actually know yet haha. But you'll see it all!
The main project is finishing off my khan bike vs neurothrope model. Recall that my original idea was to have this faceoff involve the "shield" of Khan being struck by a lightning bolt by the neurothrope. But, before I get to any of that I have to paint up khan and, also, you know, pull the base off my board.
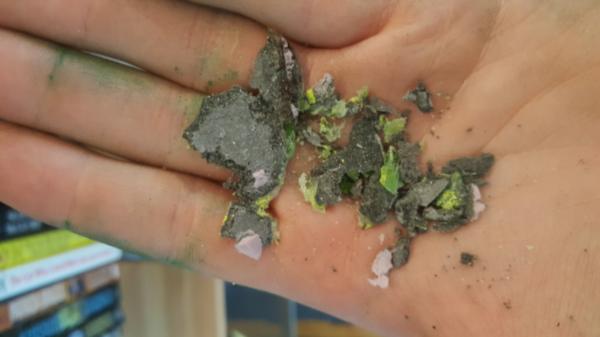
Since I had had the base on the board while I poured my spilling fluid and since I didnt think to.. add blu- tac to the bottom to prevent fluid from gluing the base TO the board. Yeah it took some doing.
Still, I was eventually successful and next up was starting to paint the bike itself.
|
|
|
|
|
|
2017/09/21 21:15:02
Subject: Re: Multi-level city terrain, marine v nid bases (I'm back! 9/21:ad-mech experiment)
|
|
Dakka Veteran
|
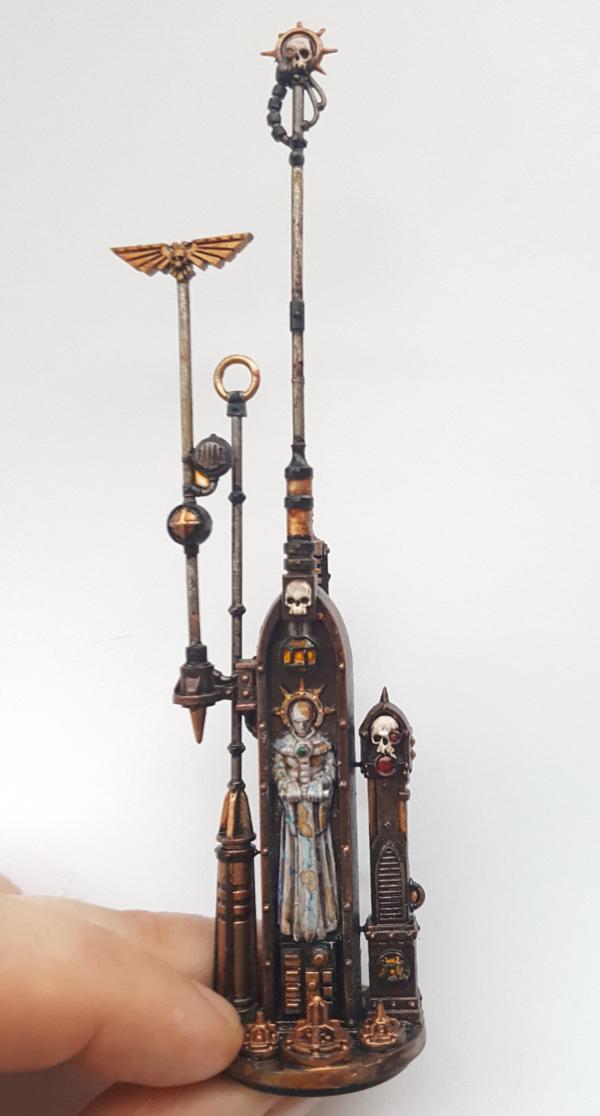
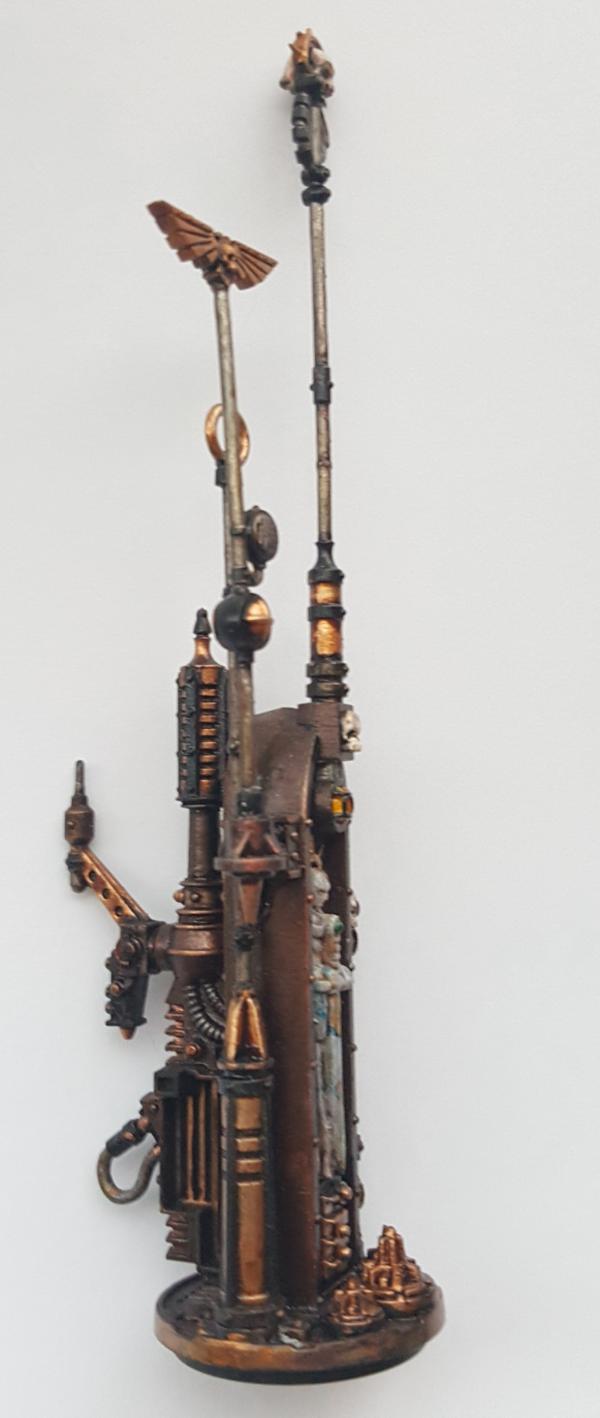
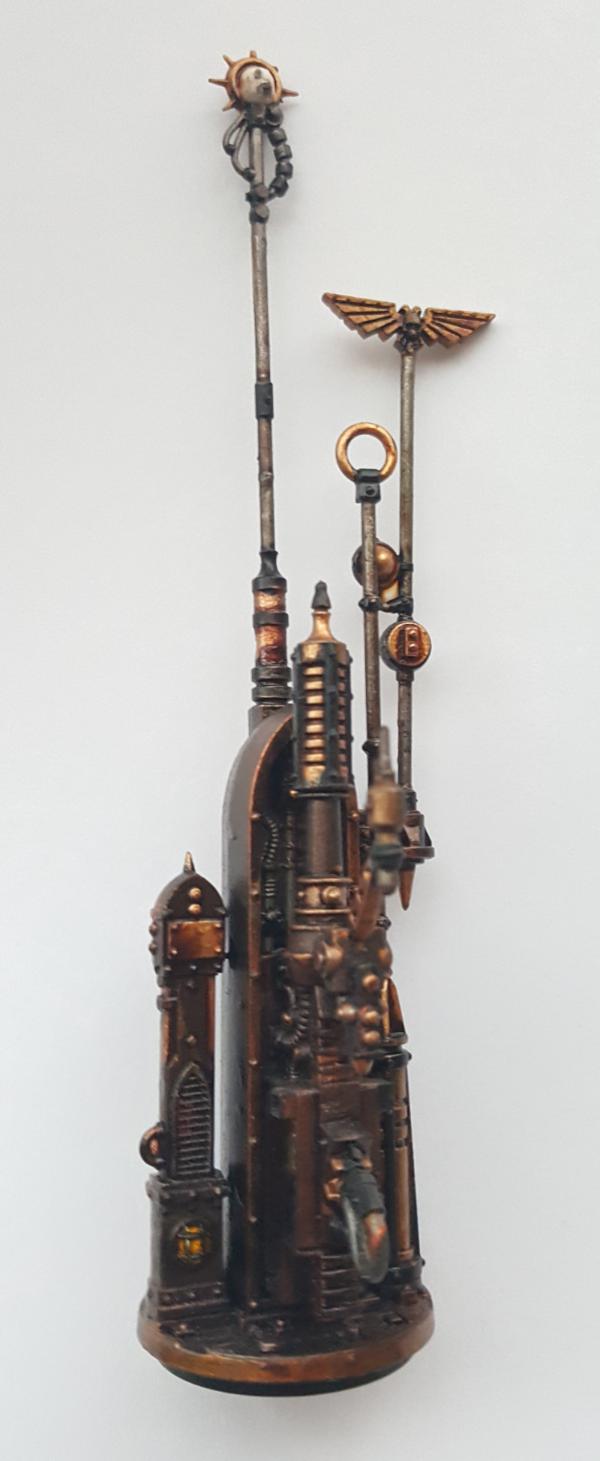
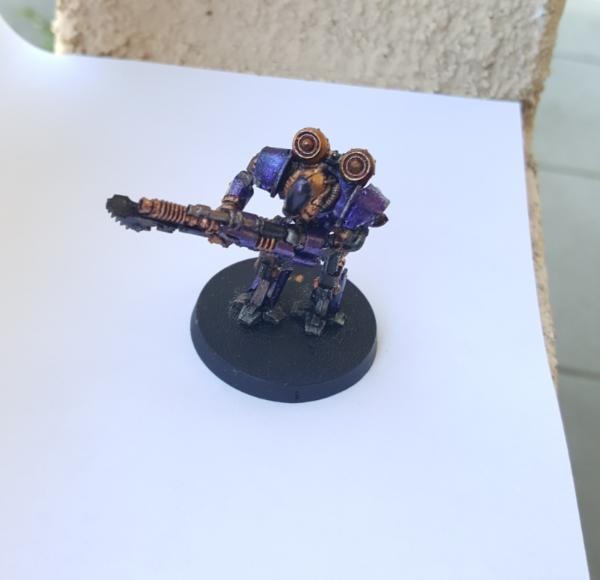
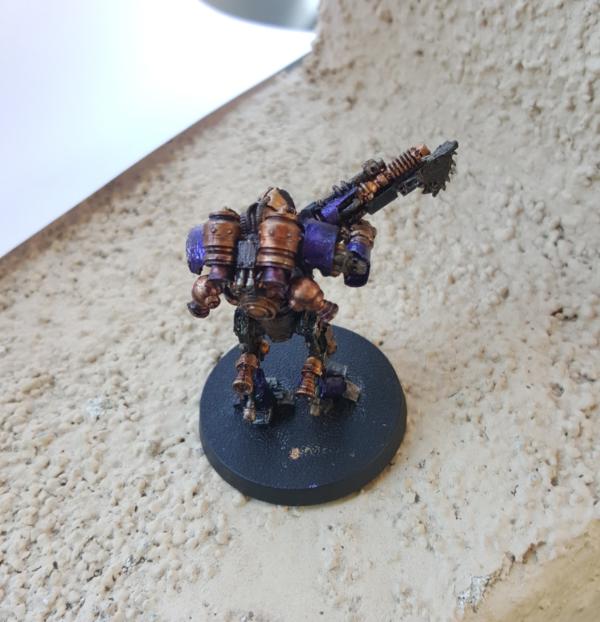
So, in between working on Khan I painted up a quick little ad-mech experiment.
I've really transitioned to the more dulled copper look, as it helps let other stuff pop and when you re-drybrush on my copper afterwords it looks like little scratches and flex, very cool.
Anyways I wanted to try out purple + copper to see how that looked, so I took a.. thallax? something? that I had spare that a friend gave me to see how it would look!
|
|
|
|
|
|
2017/09/22 18:00:17
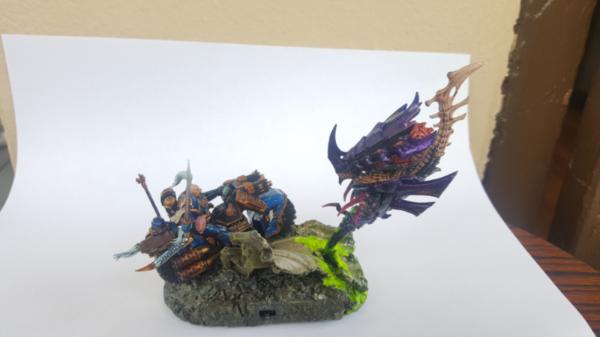
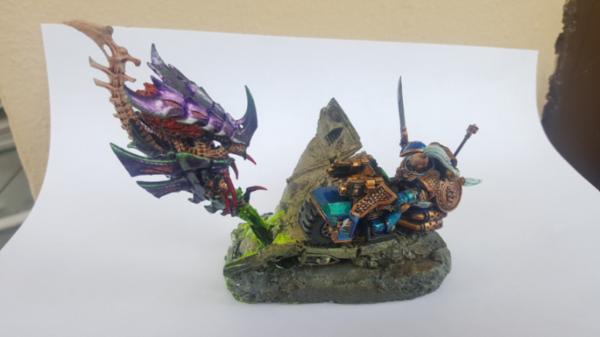
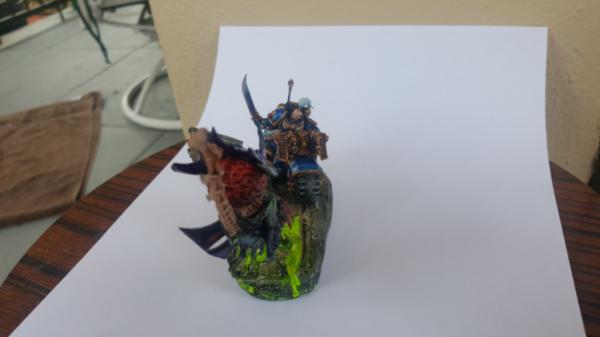
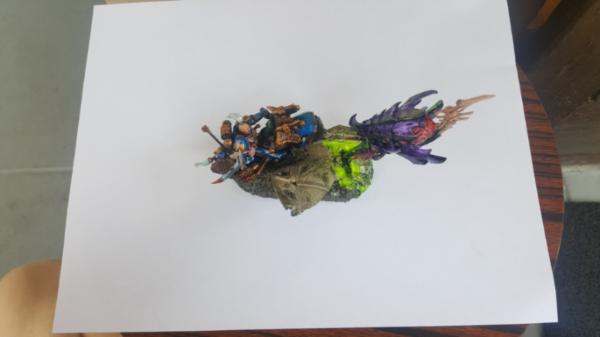
Subject: Re: Multi-level city terrain, marine v nid bases (9/22: khan bike done)
|
|
Dakka Veteran
|
|
|
|
|
|
|
2017/09/25 00:17:24
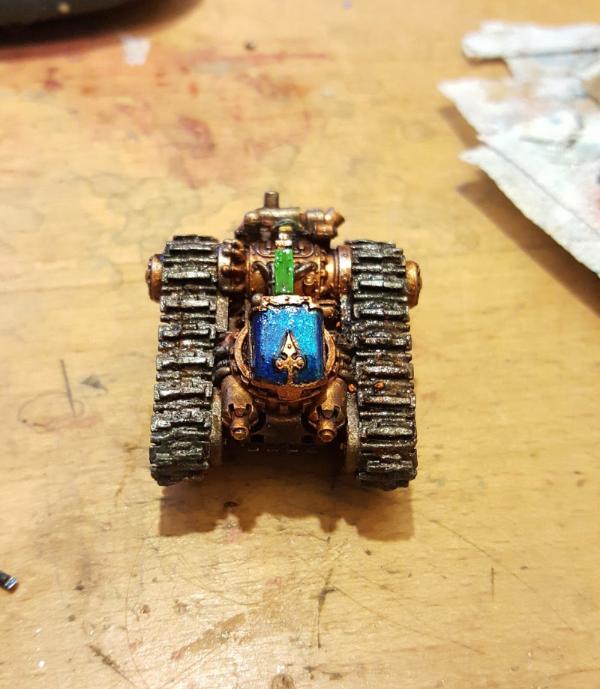
Subject: Re: Multi-level city terrain, marine v nid bases (9/24: making some scorpius turrets)
|
|
Dakka Veteran
|
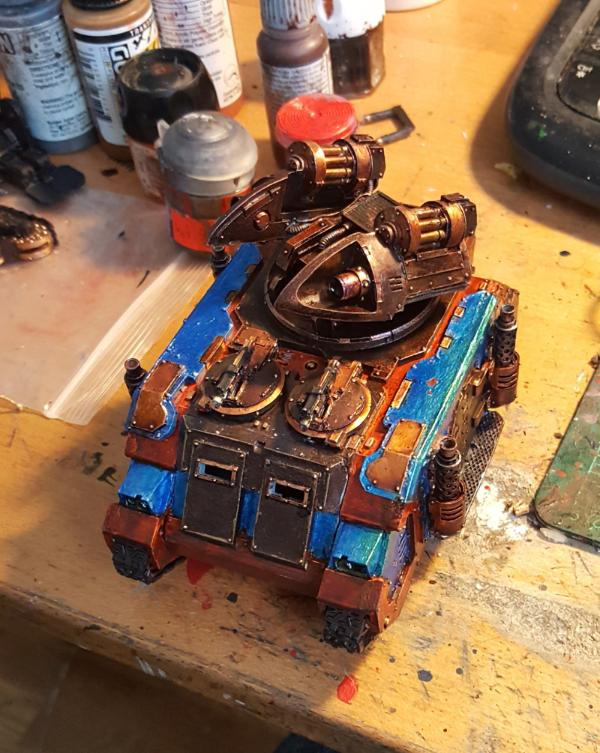
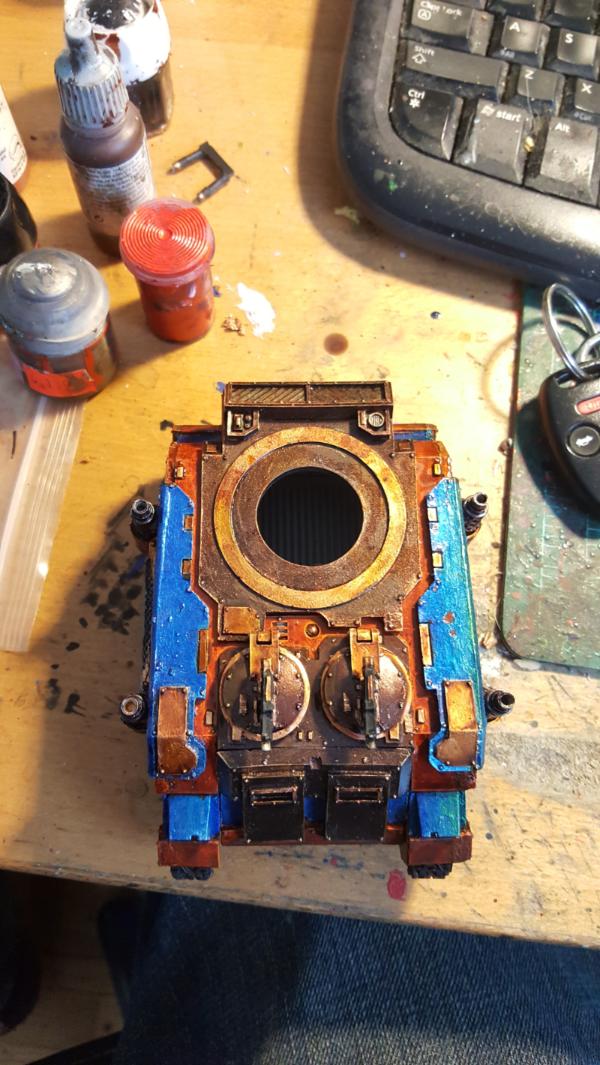
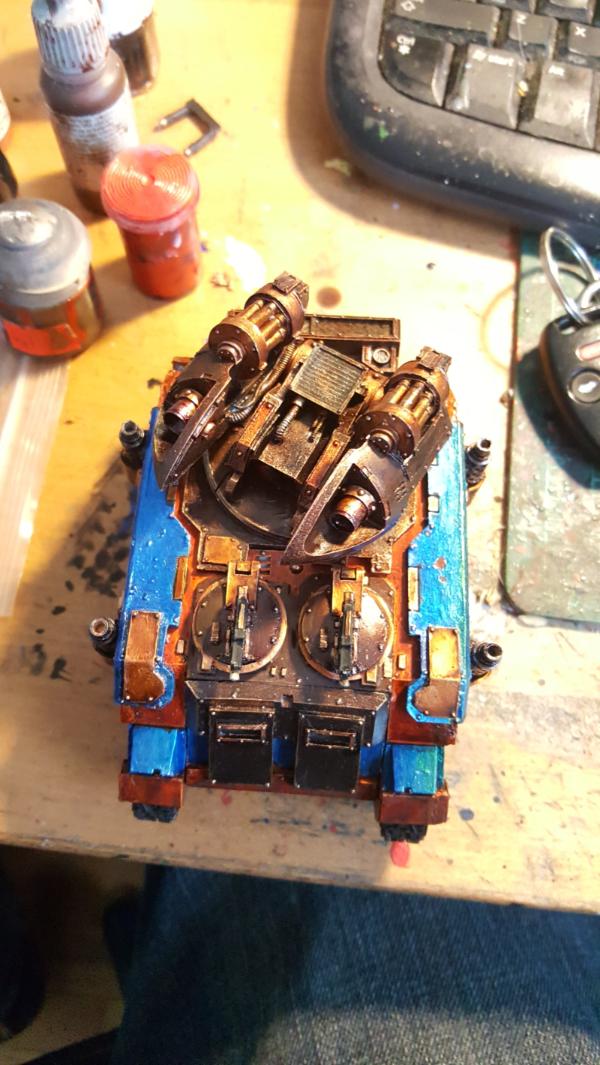
So i'm working on pondering my shield so while I do that lets paint up some scorpius turrets!
Sadly rhinos have broadly lost some favor in 8th, or, at least, 8 of them, so Im convering my prettiest into razorbacks to gain options, namely scorpius turrets! woo! such a fun model.
 \
|
|
|
|
|
|
2017/09/25 21:33:40
Subject: Re: Multi-level city terrain, marine v nid bases (9/25: Taking ortho-pics, also cyclops's)
|
|
Dakka Veteran
|
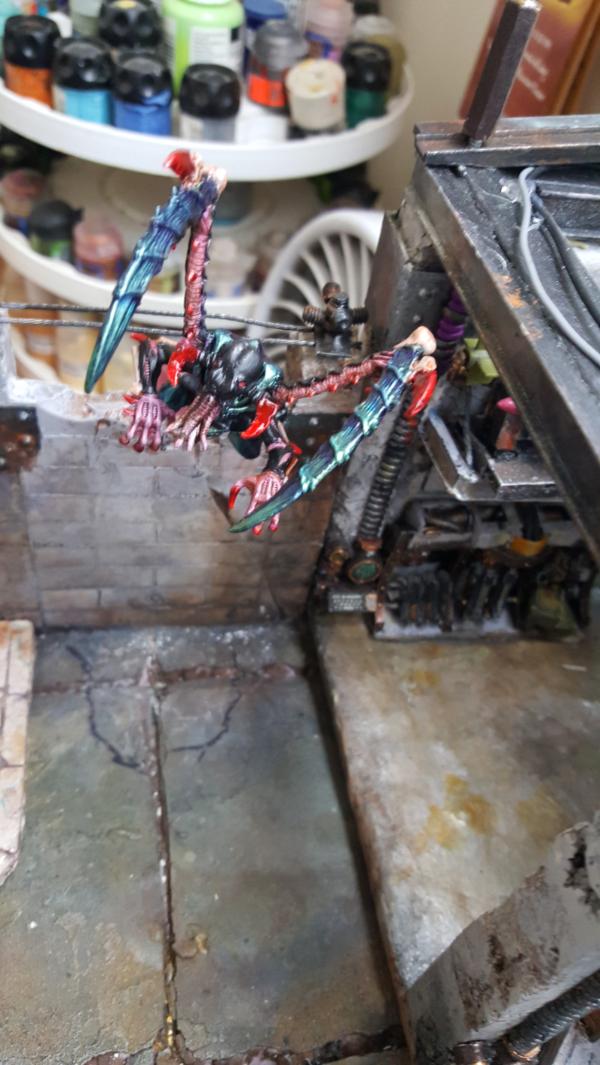
In continuing with painting things actually relevent to playing 8th edition we have a cyclops!
Aww, look at that, so cute.
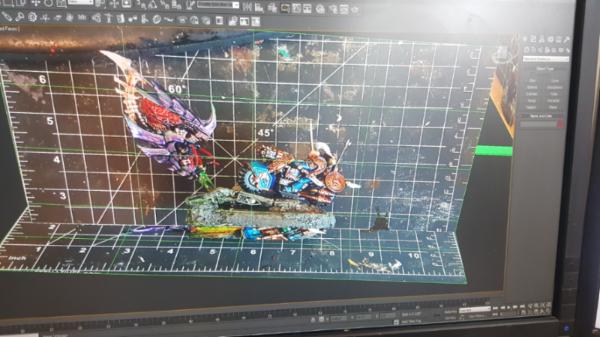
Anyways, next is actually doing a rough model of my bike/neurothrope. This is for 2 reasons. The first is to figure out just how big the shield will be, or, more specifically, how big the plates will be. Second is to model up the lightning bolt and figure that out. Thus, while the model can be crude it needs to be as accurate as possible so nothing is misjudged *too* badly.
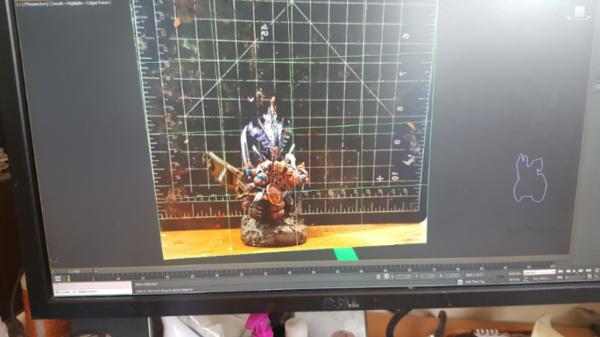
That means.. for starters taking halfway decent pictures! If i were'nt lazy that means getting a tripod out and (i think?) zooming in to reduce depth of field to get as flat and orthogonal as possible. In my instance i just got close enough. I figured having the grid would help more than anything else at keeping me in check size wise.
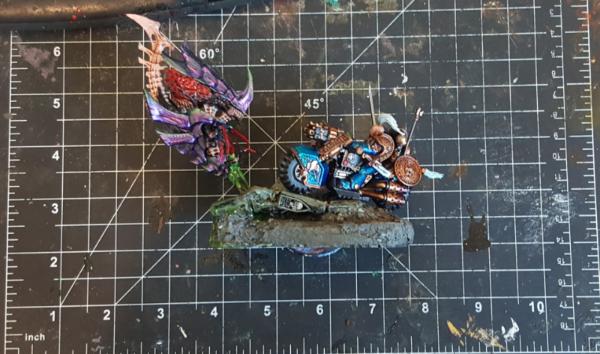
Then you just make some planes and stick it on!
Next up is modelling it all!
|
|
|
|
|
|
2017/09/27 22:26:35
Subject: Re: Multi-level city terrain, marine v nid bases (9/27: 3d modelling my bike vs neurothrope)
|
|
Dakka Veteran
|
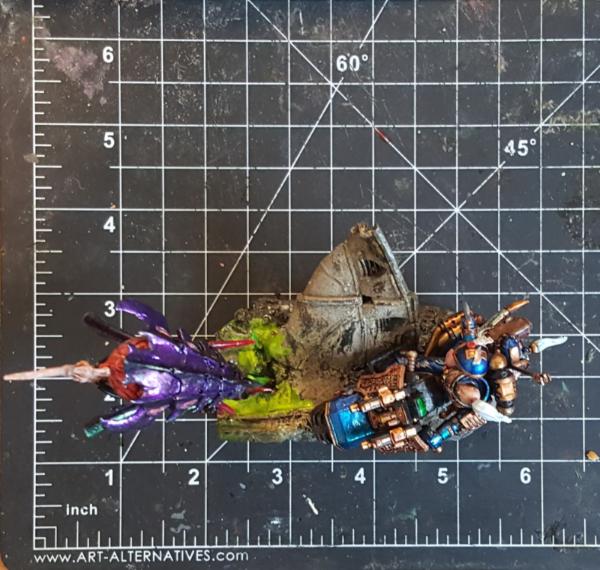
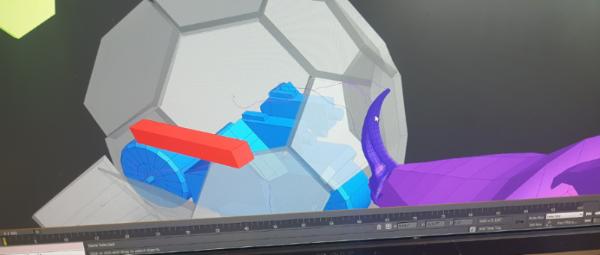
So, mostly just work on the 3d model representation of the figure. Started with the bike:
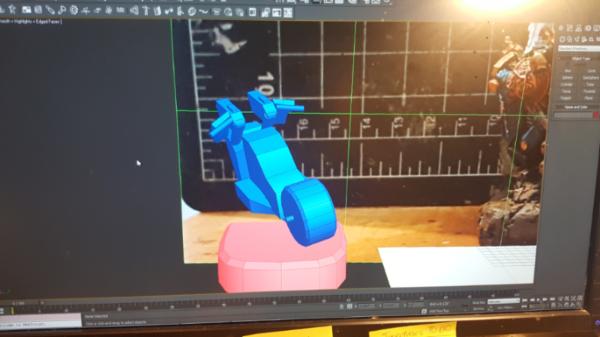
And added in the Neurothrope. one thing though that I kept running into was just putting it all together accurately. Id make the bike and it would seem right, but you put it next to the neurothrope and it still seemed off. Part of this is the fact that the bike is add an angle to everything in the pictures so it's not quite orthogonal.
So what I ended up doing to nail this all down was do "range tests" to subtly adjust the bike until it matched all the range points I would measure on the model. It took a while (propogation of error is a pain in the butt. Small things wrong in the model ended up making huge differences in where things went)
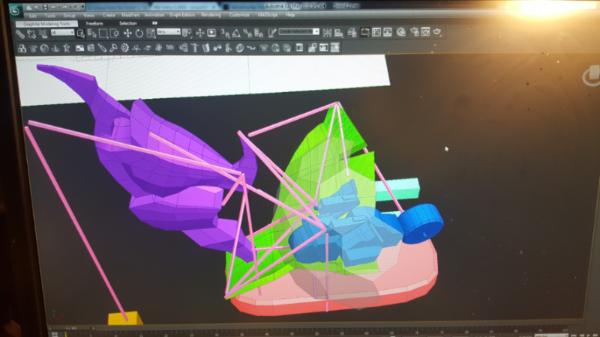
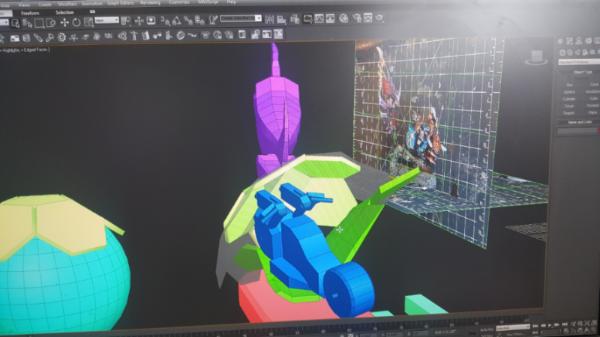
Once that got nailed down I could start figuring out how much shield I would need and how big the plates would be:
|
|
|
|
|
|
2017/09/29 17:38:52
Subject: Re: Multi-level city terrain, marine v nid bases (9/27: 3d modelling my bike vs neurothrope)
|
|
Dakka Veteran
|
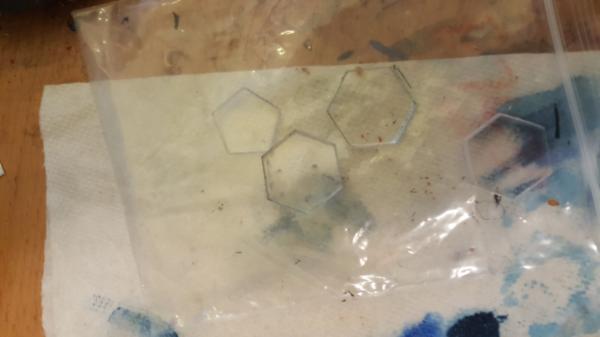
So with the first stage of my model complete I now have a size for my tiles! Which means... I can laser cut them out!
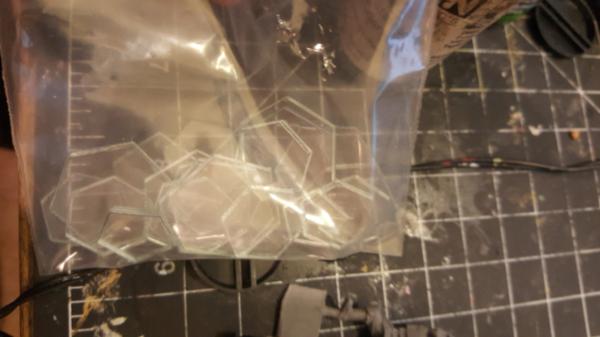
Huzzah big bag of hexagons and pentagons. Okay so now it's time to figure out how to glue them to each other. From a previous project with acrylic I know that there is a specific acrylic glue for this job which melts the acrylic together for a stronger bond:
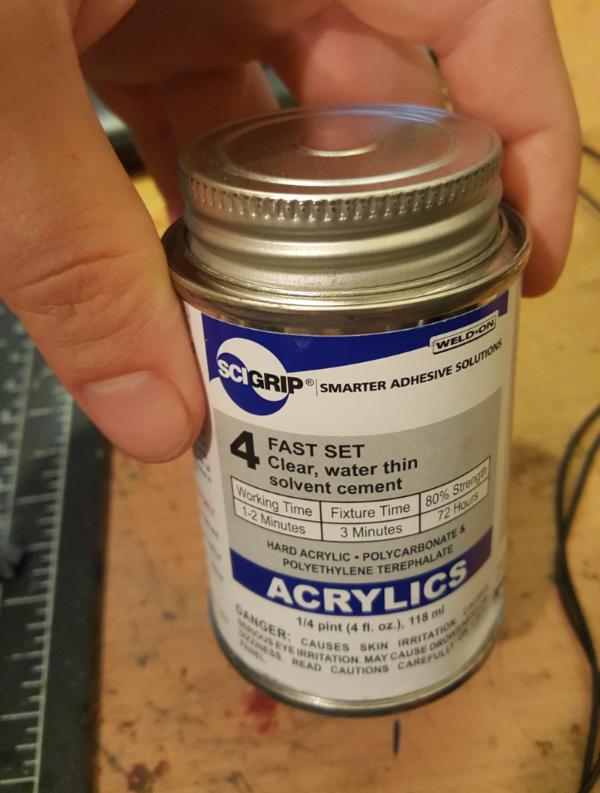
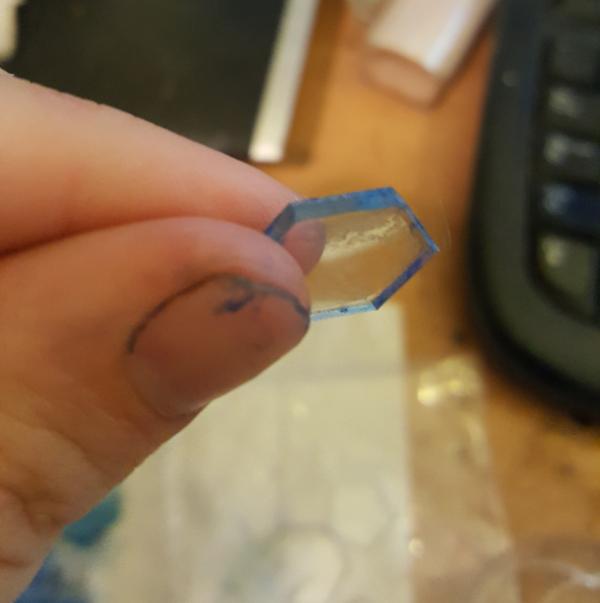
Now this glue is.. interesting. One the one hand it really means water thin, the applicator bottle has a hair thin tip that this stuff just sort of starts dripping out once you tilt it. Its the single hardest glue to control ever. On the flip side though if you have a teeny crack it will instantly fill it, so its great to really get in the crevices of a tight joint. However since it melts thea crylic it will nearly instantly scar acrylic as well so if it drips somewhere you DONT want you only have a few seconds to wipe it off or it'll mark the acrylic.
Very tough stuff to use for sure but strong.
First up was figuring out how to actually attach these plates to each other. I dont really have any helping hand type things and I need to put these things at angles pretty precise to each other to get the next plate on properly. Not helping is the fact that the edges are flat which means there isnt much surface contact between the plates.
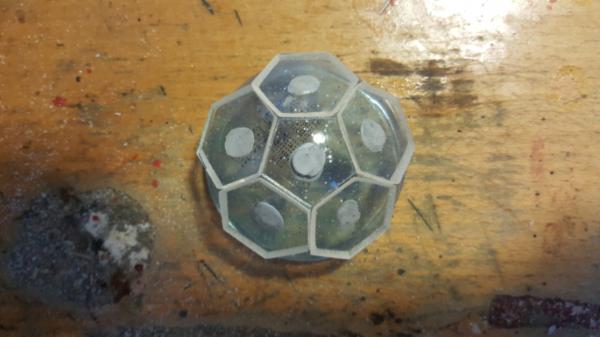
After a couple of hours of work, some helper tape, and a day in between to maximize strength (theoretically this stuff takes 24 hours to get 80% set strength) I managed to get this:
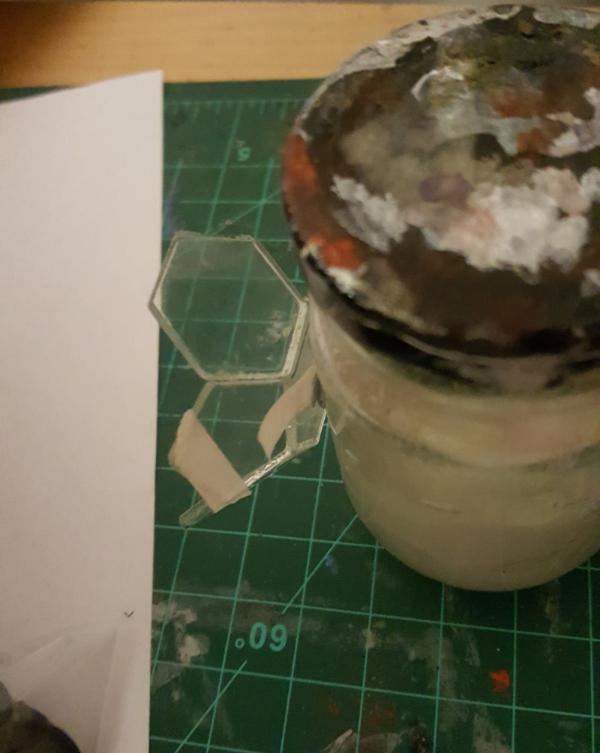
... which immediatly broke as soon as I breathed on it funny. there is just not enough surface contact between the plates. So I decided to start standing down the edges at an angle so i can more easily overlap them and get a good contact. Annoying but.. necessary.
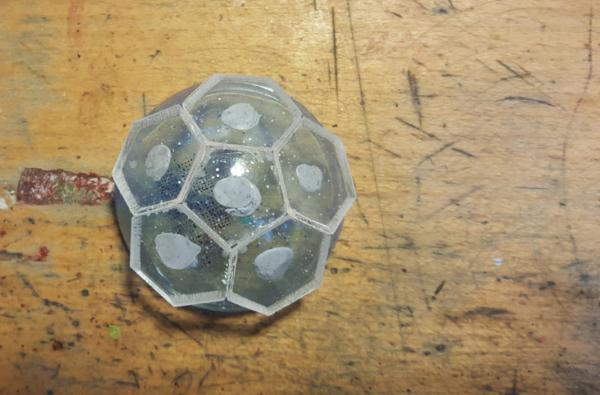
That picture is a bit hard to tell whats going on but you can see the edges are "thicker" and thats as a result of the sanding them at an angle to bevel them. Even with the sanding though I would need some other way to hold the plates together. I was trying it with one hand while the other fumbles at the glue trying to tilt it just so I only get a single drop and yeah.. not workable.
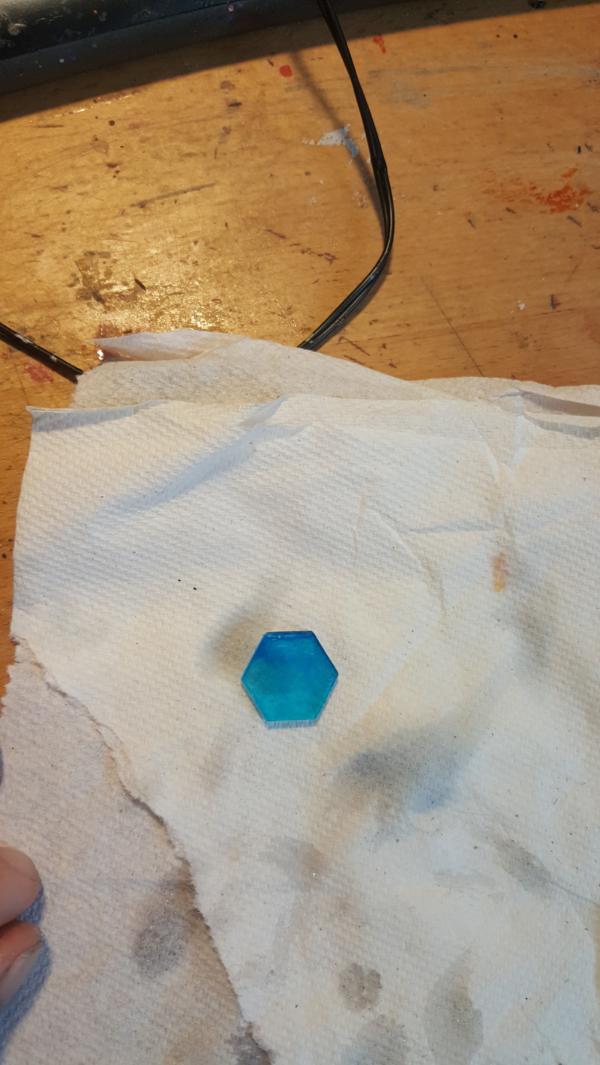
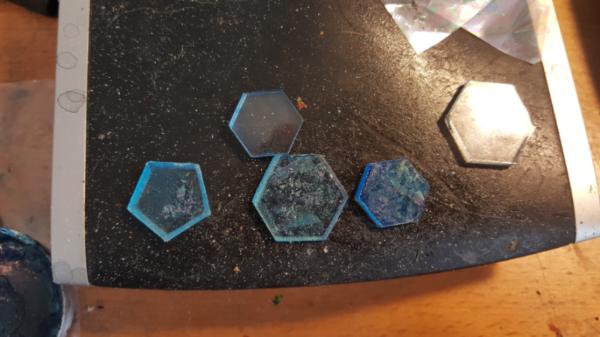
Meanwhile I also needed to figure out how to color these plates. My best contender so far was the tamiya clear blue I've been using for just about everything now. But.. well, yeah, on the smooth acrylic it just pools and condenses as soon as I paint it on, so it dries not so bueno.

Painting it on the edges is better but I really wanted some kind of smooth blue look on the tile itself.
|
|
This message was edited 1 time. Last update was at 2017/09/29 17:40:14
|
|
|
|
|
2017/09/29 17:47:40
Subject: Multi-level city terrain, marine v nid bases (9/27: 3d modelling my bike vs neurothrope)
|
|
Legendary Master of the Chapter
|
Yay some one finally started using the glue i use.
|
 Unit1126PLL wrote: Unit1126PLL wrote: Scott-S6 wrote: Scott-S6 wrote:And yet another thread is hijacked for Unit to ask for the same advice, receive the same answers and make the same excuses.
Oh my god I'm becoming martel.
Send help!
|
|
|
|
|
2017/10/01 18:57:14
Subject: Re: Multi-level city terrain, marine v nid bases (9/27: 3d modelling my bike vs neurothrope)
|
|
Dakka Veteran
|
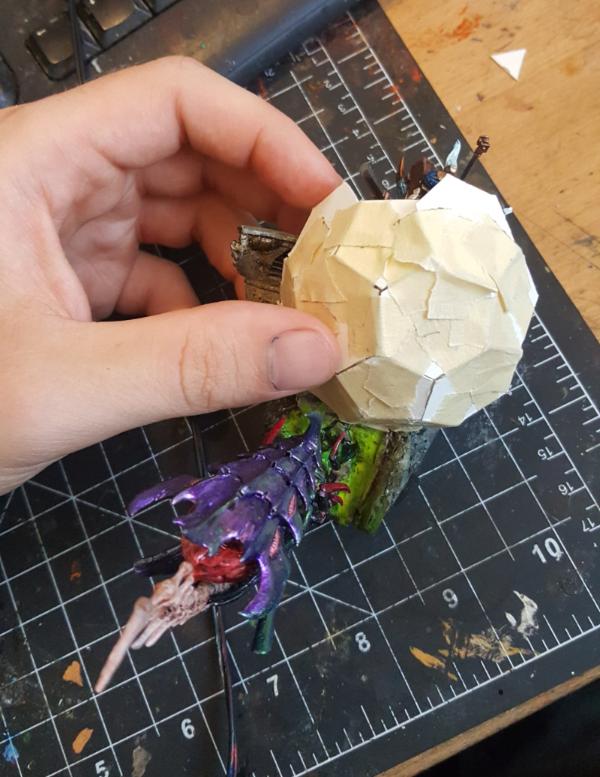
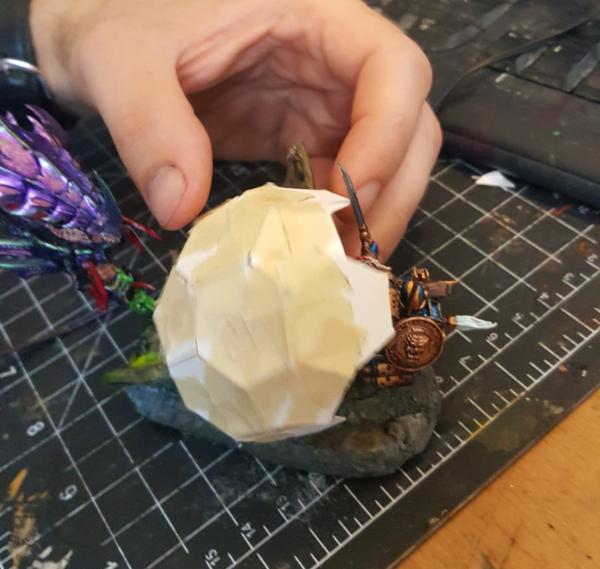
So.. figuring out how to make a half dome of plates. I had already figured out that I couldnt do it by hand, takes too long and too flimsy. The best way would be to lay it on top of a half dome so I could do it all at once. The problem is.. I needed to find something (not acrylic) that could be a half dome in the right size (about 2.4ish inches in diameter).
Art stores dont really carry that kind of thing, as they mostly have foam balls in set sizes. Ornaments *might* work but wrong season, and nothing in a hardware store either. A very vexing conundrum. But, luckily, one of my more local hardware stores (ie: not a home-depot) has a old toy section (you know those kinds of toys you pay quarters for and turn) and, voila, we had options again. Cheap round toys. In this case its those things you push down and they "pop" back up.
With liberal application of blu- tac we get this:
which I can then glue at once (with sanding for better joints) to get this:
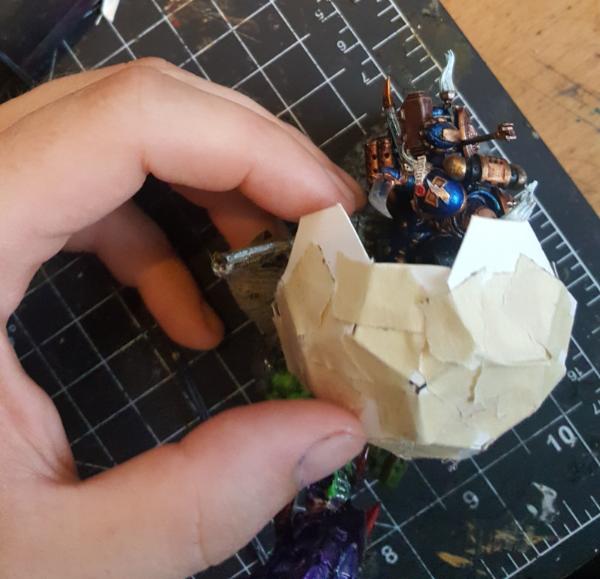
Seperatly I also figured out a method for the blue. Turns out that Tamiya also makes my clear blue in spray form, which works great. I have to be careful with how much I spray but otherwise it's perfect.
This, for example, is lovely but way too dark:
You can also see me begin gto figure out how to apply the foil. So far.. its very patchy:
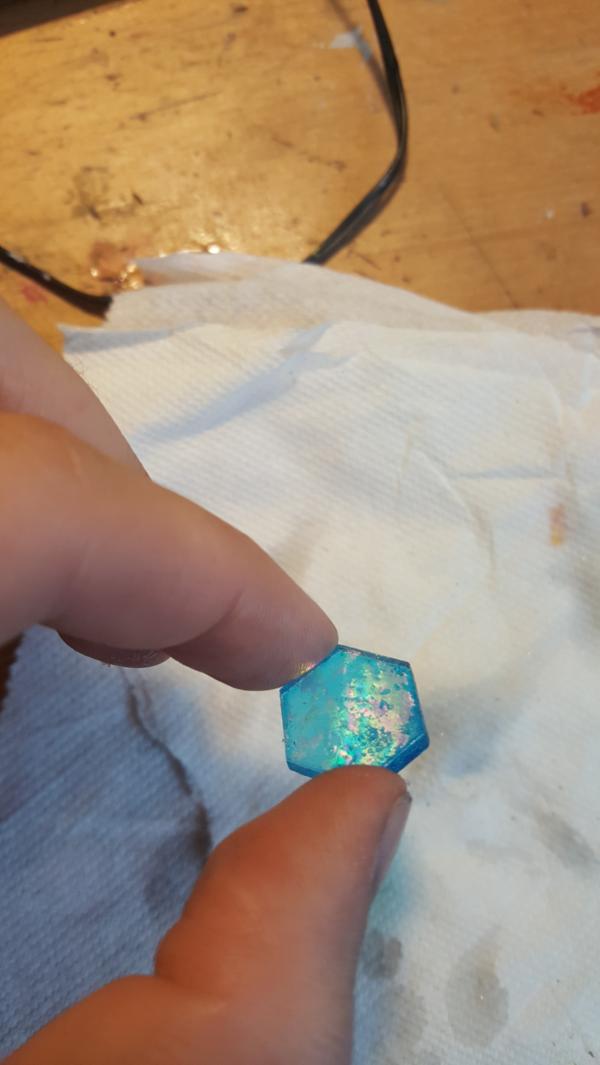
More experiments:
|
|
|
|
|
|
2017/10/03 21:15:47
Subject: Re: Multi-level city terrain, marine v nid bases (10/3: Acrylic shield dome mockup)
|
|
Dakka Veteran
|
So I've gotten the core of the dome done and much sturdier than before but now its time to figure out how *much* dome to do. Just the single pentagon and hexagon flowers feels a bit.. small. Also there is no easy way to really attach it to anything. So I cut out some card stock to size to test how going bigger would look.
Pretty happy actually, i think it'll work! Having more of a compelted dome will also sell the shimmer/oily effect better as well since you'll get more angles from a single viewpoint.
We're also moving onto the next thing which was the lightning effect. Now the goal here was to use EL wire from the horn of the neurothope striking the shield. This.. will be a tale of woe. But for now it'll just be me modelling and trying to figure this guy out. First up, the ortho views.
|
|
|
|
|
|
2017/10/03 22:34:25
Subject: Multi-level city terrain, marine v nid bases (10/3: Acrylic shield dome mockup)
|
|
Stone Bonkers Fabricator General
A garden grove on Citadel Station
|
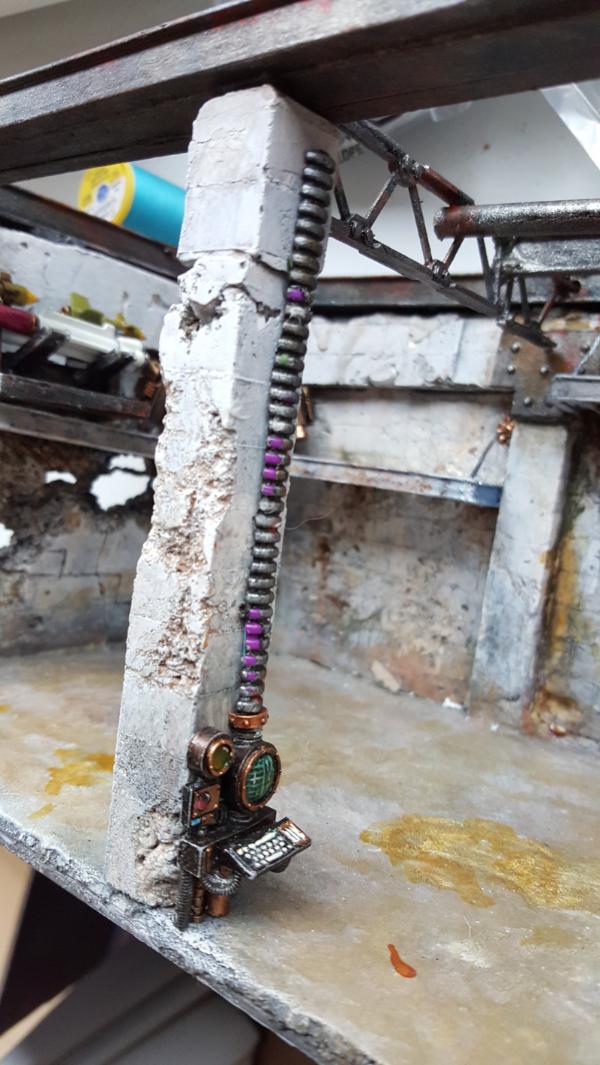
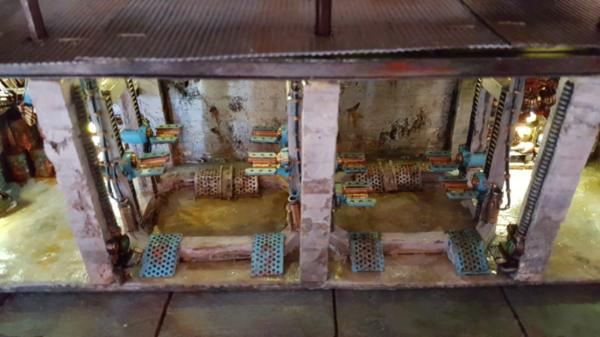
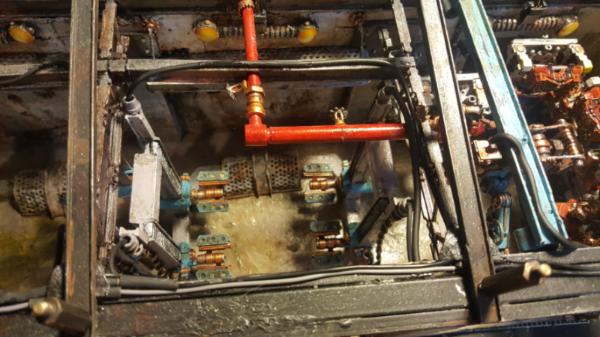
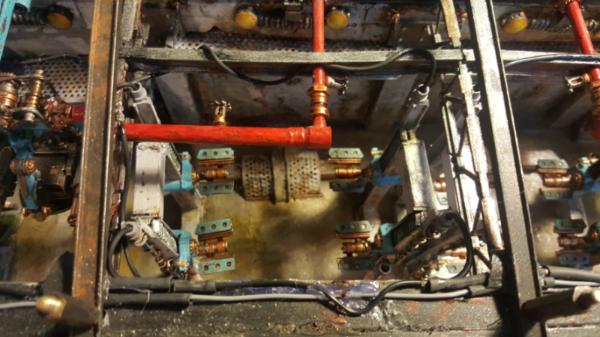
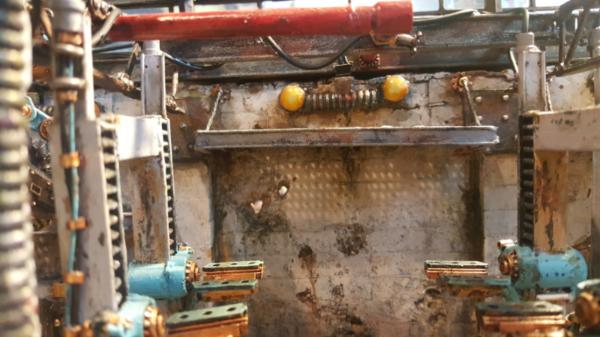
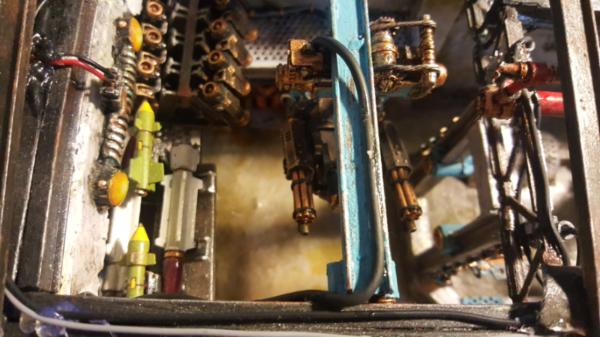
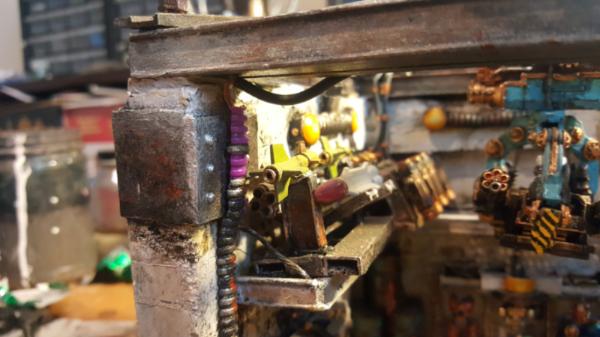
This is an amazing blog, and if I may ask, where does this computer console come from?
https://www.dakkadakka.com/gallery/768862-.html
|
ph34r's Forgeworld Phobos blog, current WIP: Iron Warriors and Skaven Tau
+From Iron Cometh Strength+ +From Strength Cometh Will+ +From Will Cometh Faith+ +From Faith Cometh Honor+ +From Honor Cometh Iron+
The Polito form is dead, insect. Are you afraid? What is it you fear? The end of your trivial existence?
When the history of my glory is written, your species shall only be a footnote to my magnificence. |
|
|
|
|
2017/10/03 23:05:21
Subject: Re: Multi-level city terrain, marine v nid bases (10/3: Acrylic shield dome mockup)
|
|
Dakka Veteran
|
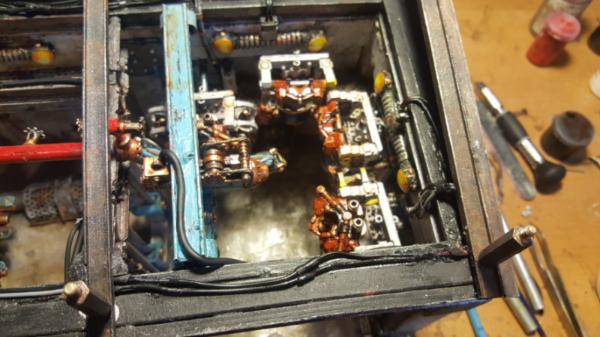
The reaver titan interior:
https://www.forgeworld.co.uk/en-ES/Mars-Pattern-Reaver-Titan-Body-Only
Note: I do not have a reaver titan, I just have a friend with a lot of bits. But yeah, the shelves I use for the lower level armour racks in the garage are also from the interior. There are a lot of goodies that FW would make a mint on if they sold individually. All that greebling :/
|
|
|
|
|
|
2017/10/04 21:37:02
Subject: Re: Multi-level city terrain, marine v nid bases (10/4: Foil Glue experiments)
|
|
Dakka Veteran
|
So, continuing on we have more attempts to glue this foil down in a clear way. So far I've been using glossy laquer/varnish coats to no real success.
The foil in question:
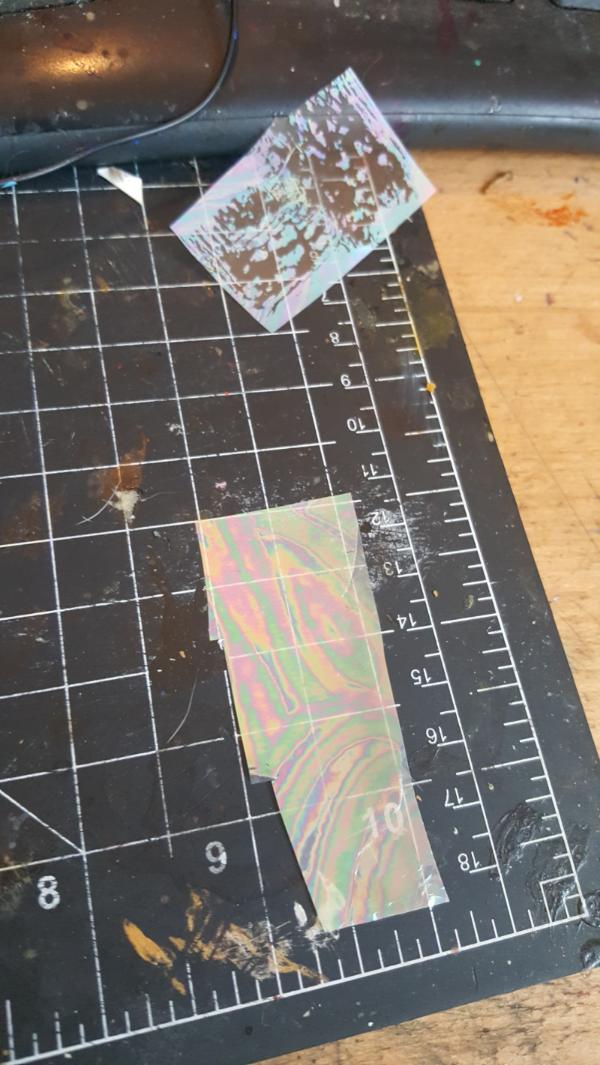
Then at my hobby shop I discovered this stuff and decided to try it out:
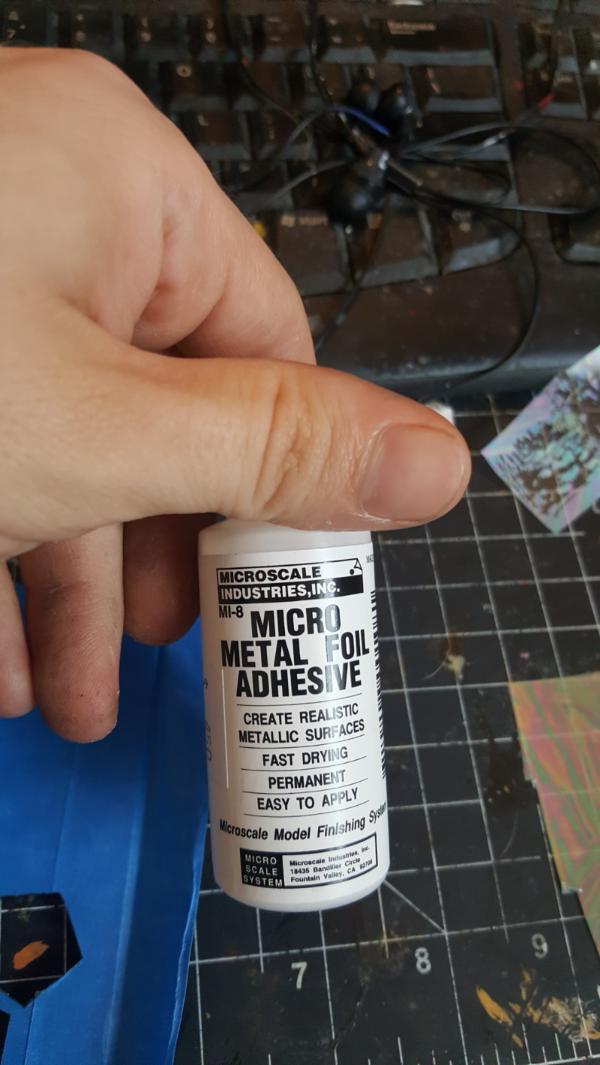
Basically you plunk it down, and as it gets clear it gets stickier so (theoretically) when its fully clear you are ready to foil up.
Initial experiments were good!
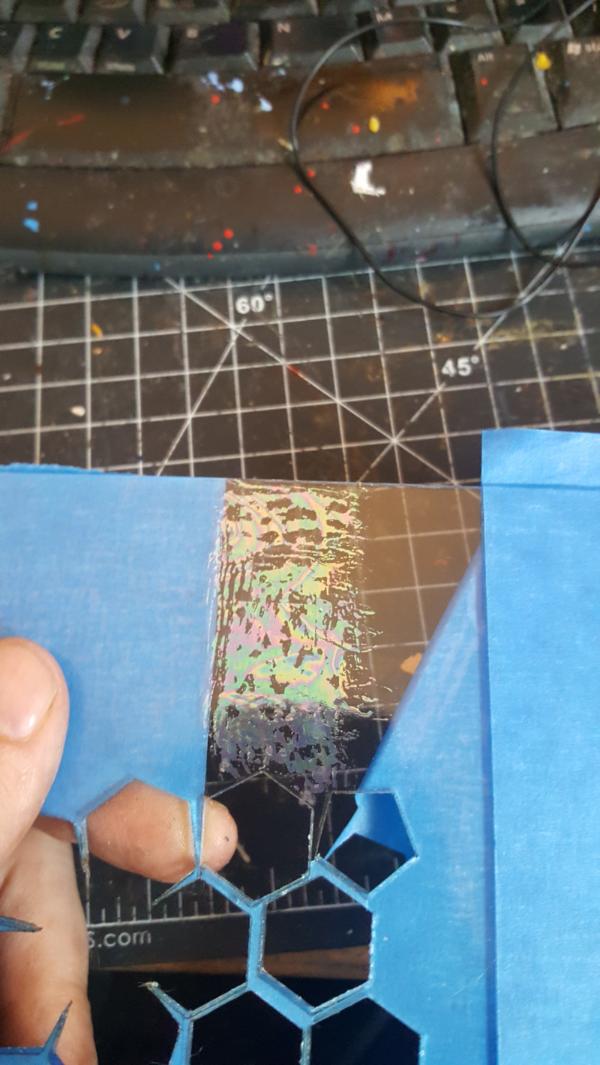
As you can see I got much, much more foil down. The main problem right now is the fact that as soon as you start putting it down it pools on itself, since the acrylic is so smooth. So the gaps where it didnt pool end up not being sticky enough.
I attempted to do an initial coat, let it get sticky, and then add more on top of it but this stuff is VERY sensitive to touch. If you touch it while in sticky mode it blisters and stops being clear, so that method doesnt really work. What im hoping is that it stays sticky for a while so I can start with just a TON of it on there to force the issue. (IE: I can put so much on there that it wont pool but there will be areas that are still clearing up 20 minutes later. So if the areas that clear faster also lose stickiness in that time I'm screwed)
|
|
This message was edited 1 time. Last update was at 2017/10/04 21:38:08
|
|
|
|
|
2017/10/06 21:33:35
Subject: Re: Multi-level city terrain, marine v nid bases (10/6: Modelling lightning)
|
|
Dakka Veteran
|
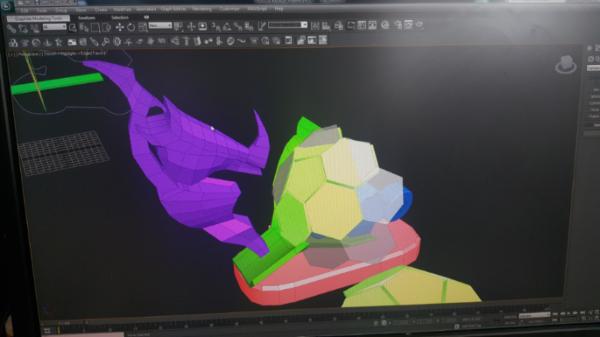
So in order to make it in time to 3d print this I had to switch gears away from shield work to modelling up the lightning bolt. I finished off the horn which looks fine but the next step is actually figuring out the bolts themselves. I started by making rough lines of where I wanted them to start/end and then added noise to it:
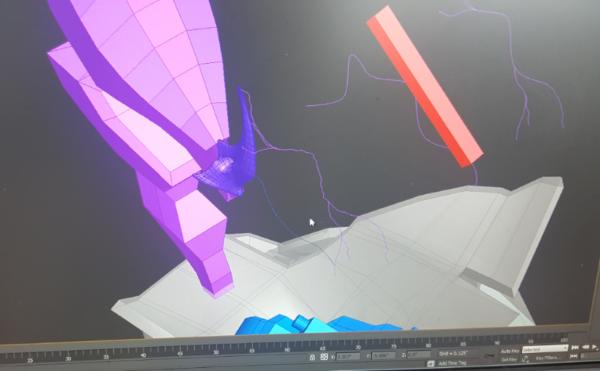
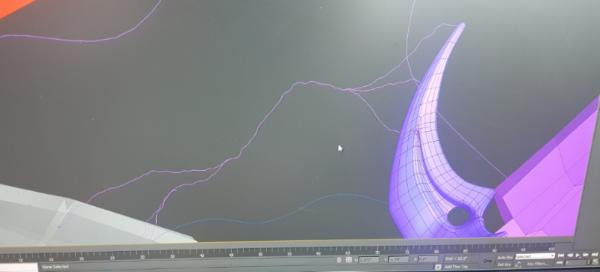
It was looking pretty good until I added thickness to those lines:
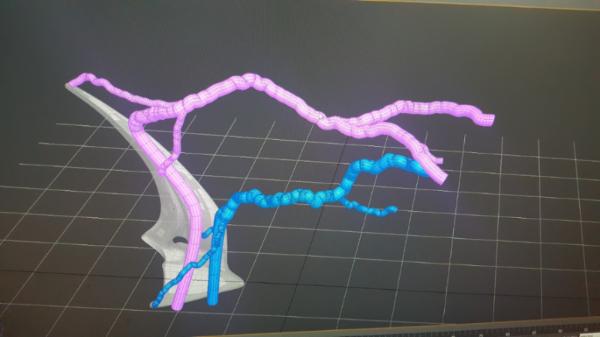
Introducing.. super knobby branches! Hmm, so, clearly I would need to drastically reduce the noise depending on the thickness of the line. Blergh.
|
|
|
|
|
|
2017/10/06 23:51:14
Subject: Multi-level city terrain, marine v nid bases (10/6: Modelling lightning)
|
|
Stealthy Warhound Titan Princeps
|
Amazing stuff! I look forward to reading the whole blog some day. You're really on the next level here!
|
|
|
|
|
2017/10/07 02:59:21
Subject: Re: Multi-level city terrain, marine v nid bases (10/6: Modelling lightning)
|
|
Dakka Veteran
|
Thanks! you could probably start on page 10 and be okay  its okay to skip some!
|
|
|
|
|
|
2017/10/07 03:01:01
Subject: Multi-level city terrain, marine v nid bases (10/6: Modelling lightning)
|
|

Fresh-Faced New User
|
Man the terrain and models you're doing are just kick ass!
|
|
|
|
|
|
|