| Author |
Message |
 |
|
|
|
|
Advert
|
Forum adverts like this one are shown to any user who is not logged in. Join us by filling out a tiny 3 field form and you will get your own, free, dakka user account which gives a good range of benefits to you:
- No adverts like this in the forums anymore.
- Times and dates in your local timezone.
- Full tracking of what you have read so you can skip to your first unread post, easily see what has changed since you last logged in, and easily see what is new at a glance.
- Email notifications for threads you want to watch closely.
- Being a part of the oldest wargaming community on the net.
If you are already a member then feel free to login now. |
|
 |
2018/06/18 12:42:33
Subject: The -=]_=- Terrain Competition Thread -=]_=- LoER Terrain Contest #26 "Hold the line!"
|
|

Gargantuan Great Squiggoth
|
Wonderful work everyone, you are certainly stirring my juices, brilliant stuff.
|
|
|
|
 |
|
2018/06/19 21:22:47
Subject: Re:The -=]_=- Terrain Competition Thread -=]_=- LoER Terrain Contest #26 "Hold the line!"
|
|
Mastering Non-Metallic Metal
|
Well, I suppose it's time to declare intentions... I'm in... for now. As I mentioned, I had a space to start a project, and a box of things that "needed" to be used for something. The thing that "needed" to be used was the mould from an old playset; the Terminator 2 bioflesh regenerator playset. I REALLY wanted this thing when I was a child, I don't know why... probably advertising. Still, it was laying about collecting dust, so now I'll put it to work. Chuck some plaster in it and remove pieces of what will become statues. Getting a whole one out is impossible, it's not designed for plaster. I do, however, have a whole one made of GS and milliput, but that's not for this piece... I want pieces.   I then wanted a rough-shaped base instead of the "neat" CD bases I've made before. So I broke up the CDs (place in a cloth or bag before snapping to avoid loss of pieces or eyesight). Then covered that with tissue/PVA. 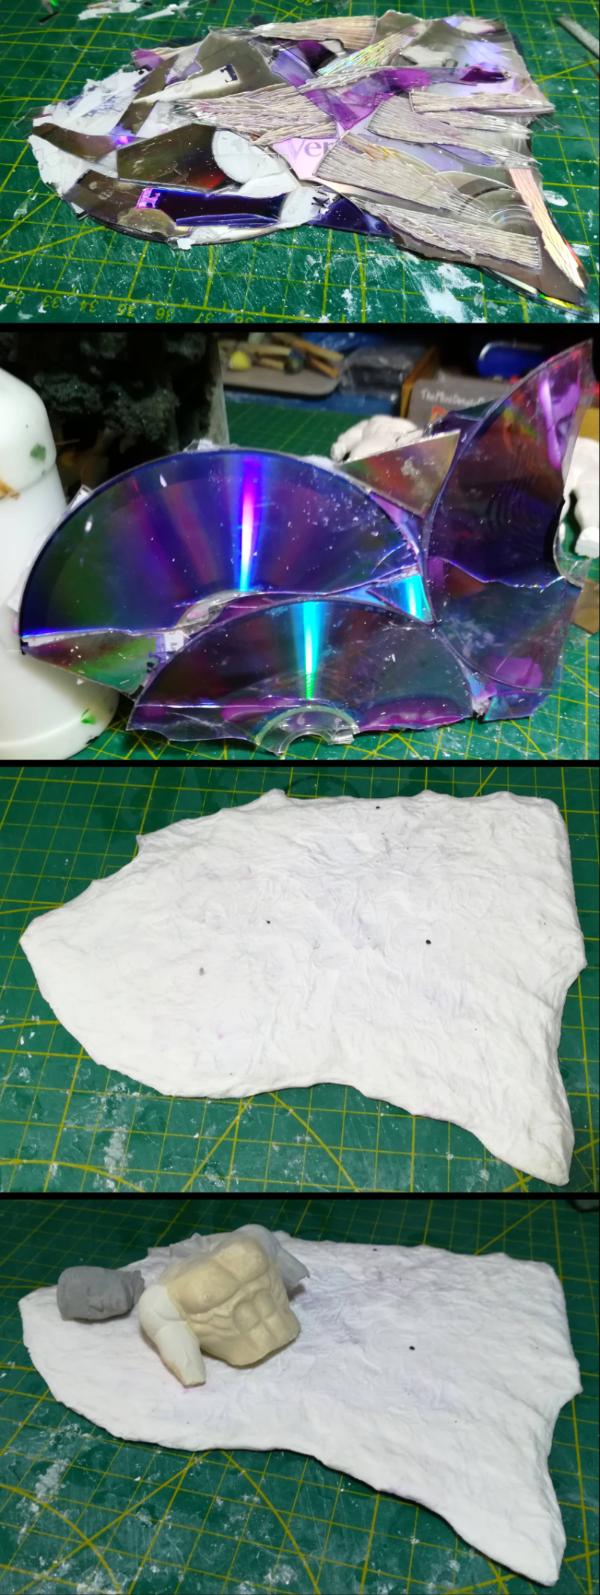 And now I have a plinth and the select statue pieces. The plinth is a foamcore box with tiles of card stuck over it. It will get some plaster smeared on to tie them together and give some more texture. The statue pieces will get added detail sculpted on in time. 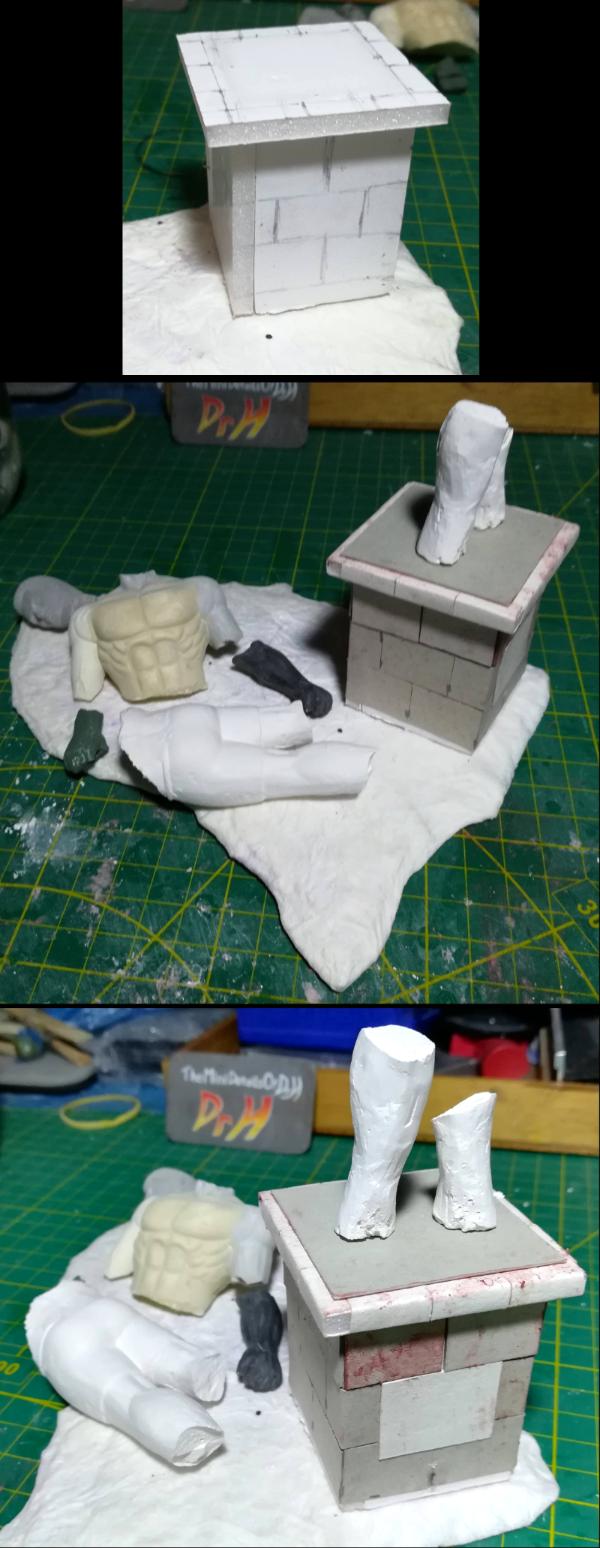 But this is just the basis of the eventual model. The "plan" is to build a barricade about the fallen statue as the defenders fight to retain control of this important landmark (the "hold the line" part). It'll be a small, story-driven model, with lots of details to hopefully tell the story of who was victorious... no clues from me, I want to tell the whole story through the model.
|
|
This message was edited 1 time. Last update was at 2018/06/19 21:25:15
     Mastodon: @DrH@warhammer.social Mastodon: @DrH@warhammer.social
The army-                   ~2295 points (built). ~2295 points (built).
 
* -=]_,=-eague Spruemeister General. * A (sprue) Hut tutorial *
Dsteingass - Dr. H..You are a role model for Internet Morality! // inmygravenimage - Dr H is a model to us all 
Theophony - Sprue for the spruemeister, plastic for his plastic throne! // Shasolenzabi - Toilets, more complex than folks take time to think about! |
|
|
|
|
2018/06/20 01:41:27
Subject: Re:The -=]_=- Terrain Competition Thread -=]_=- LoER Terrain Contest #26 "Hold the line!"
|
|

Krazed Killa Kan
|
Looking great Dr H!
Unfortunately, today was the day I had to get on a plane and fly about 2500 miles from home for schooling. There will be a little bit of time when I get back before the contest ends, so maybe I can hurry and finish when I get back. Good luck to everyone working on this contest.
|
|
|
|
|
|
2018/06/21 05:43:07
Subject: The -=]_=- Terrain Competition Thread -=]_=- LoER Terrain Contest #26 "Hold the line!"
|
|
Mysterious Techpriest
|
Interesting start Doc, I was wondering just what you were going to do with that statue thing. Sounds like a cool idea and you're off to a great start already.
Hope you can make it back in time Syro.
|
|
|
|
|
|
2018/06/27 04:07:08
Subject: Re:The -=]_=- Terrain Competition Thread -=]_=- LoER Terrain Contest #26 "Hold the line!"
|
|

Rookie Pilot
|
Nice work guys. So what about another progress on it?
I add something from me
|
|
|
|
|
|
2018/06/30 15:09:58
Subject: The -=]_=- Terrain Competition Thread -=]_=- LoER Terrain Contest #26 "Hold the line!"
|
|

Potent Possessed Daemonvessel
|
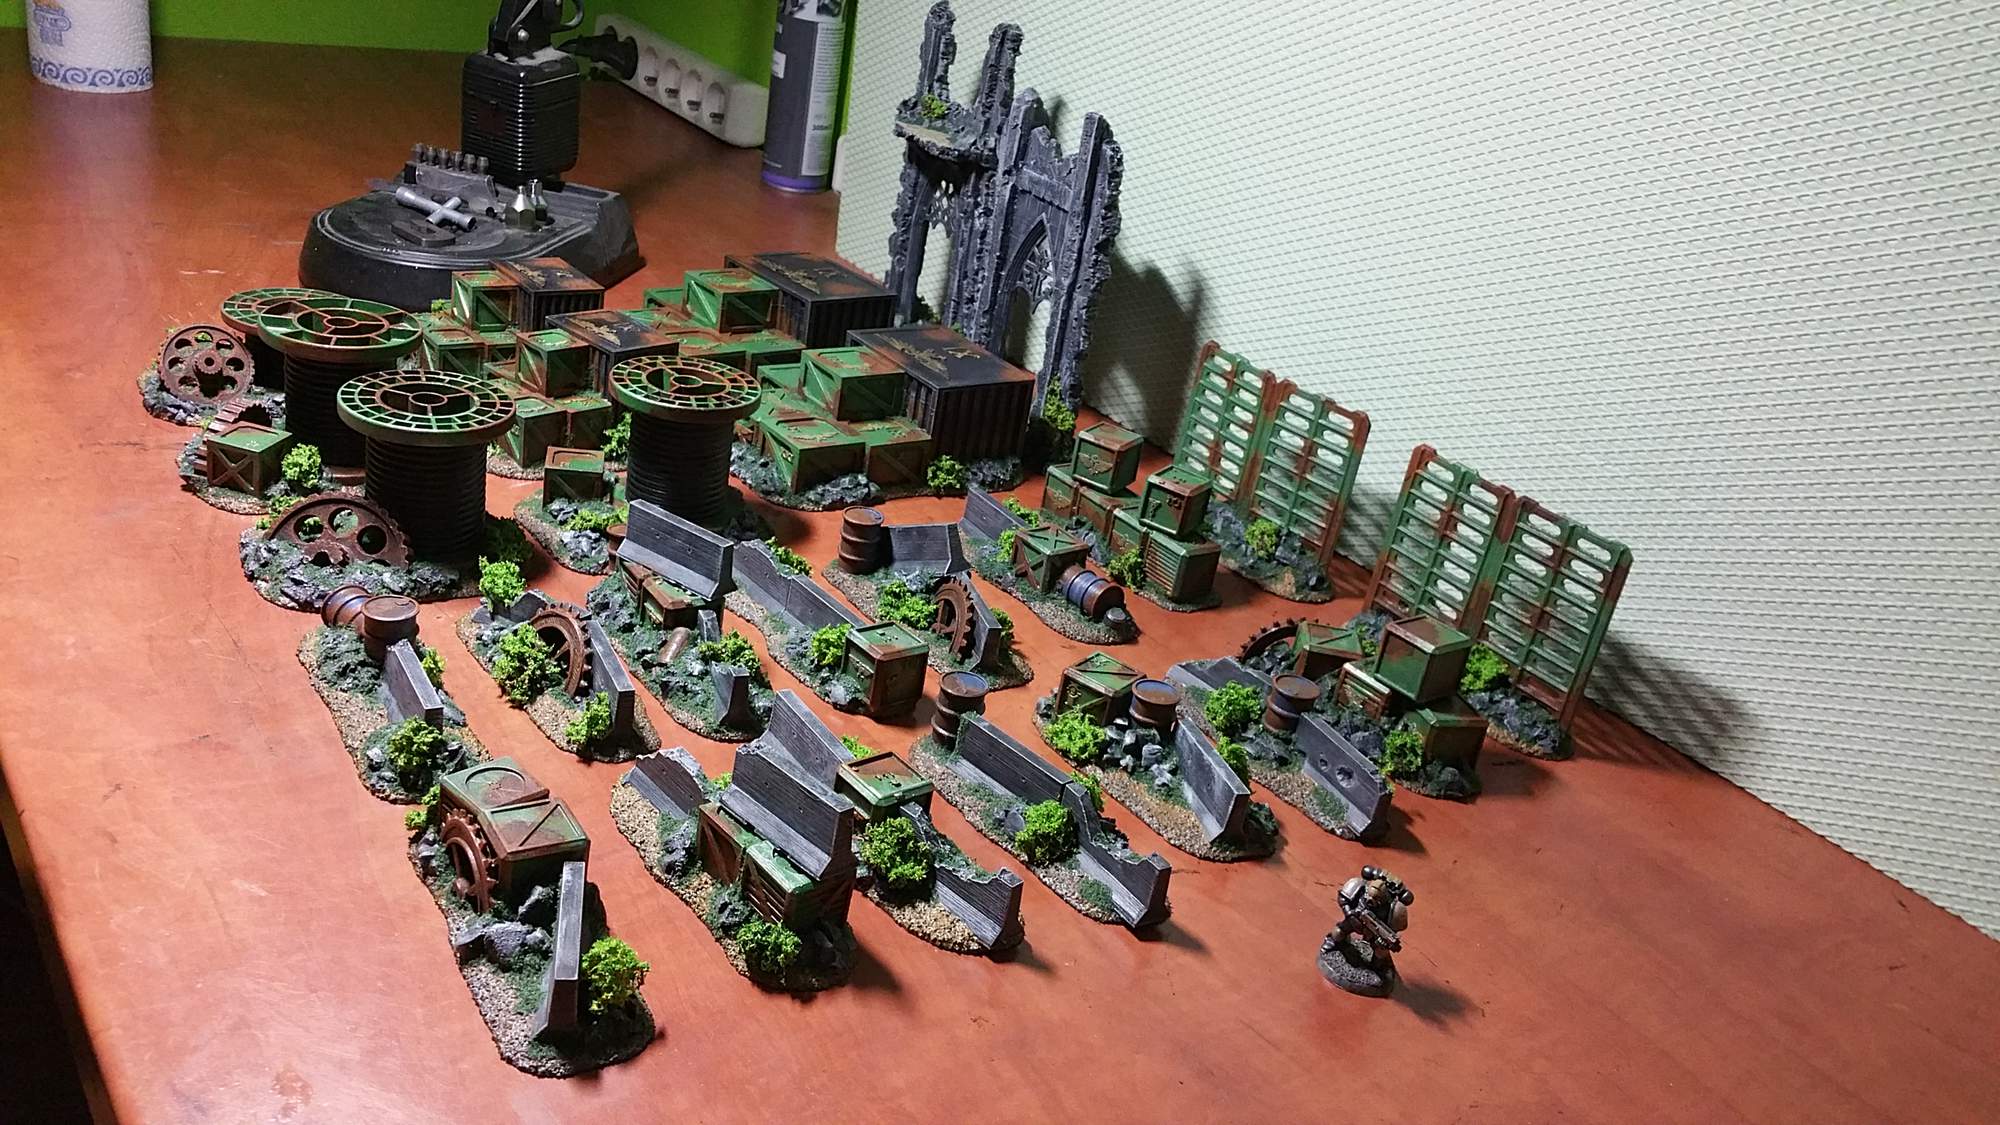
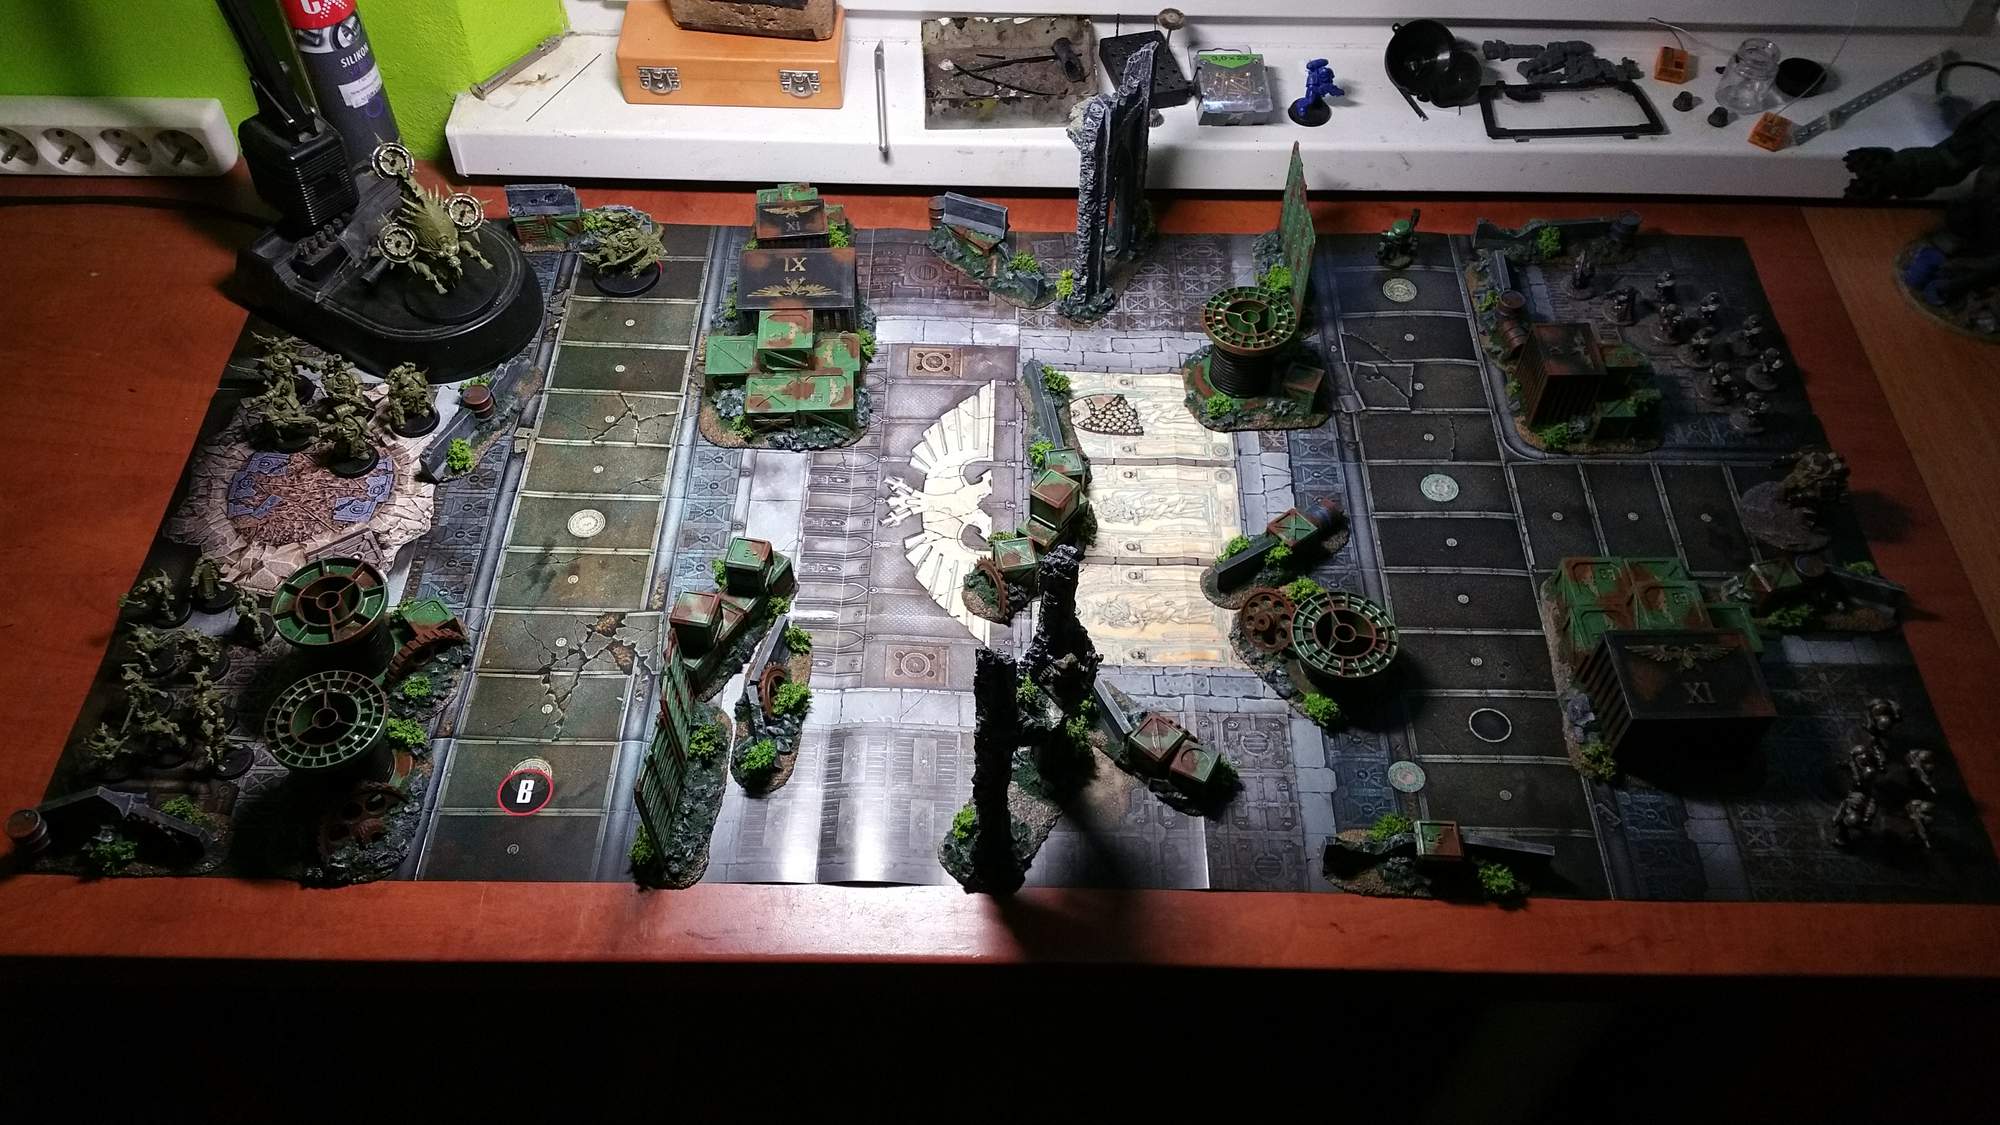
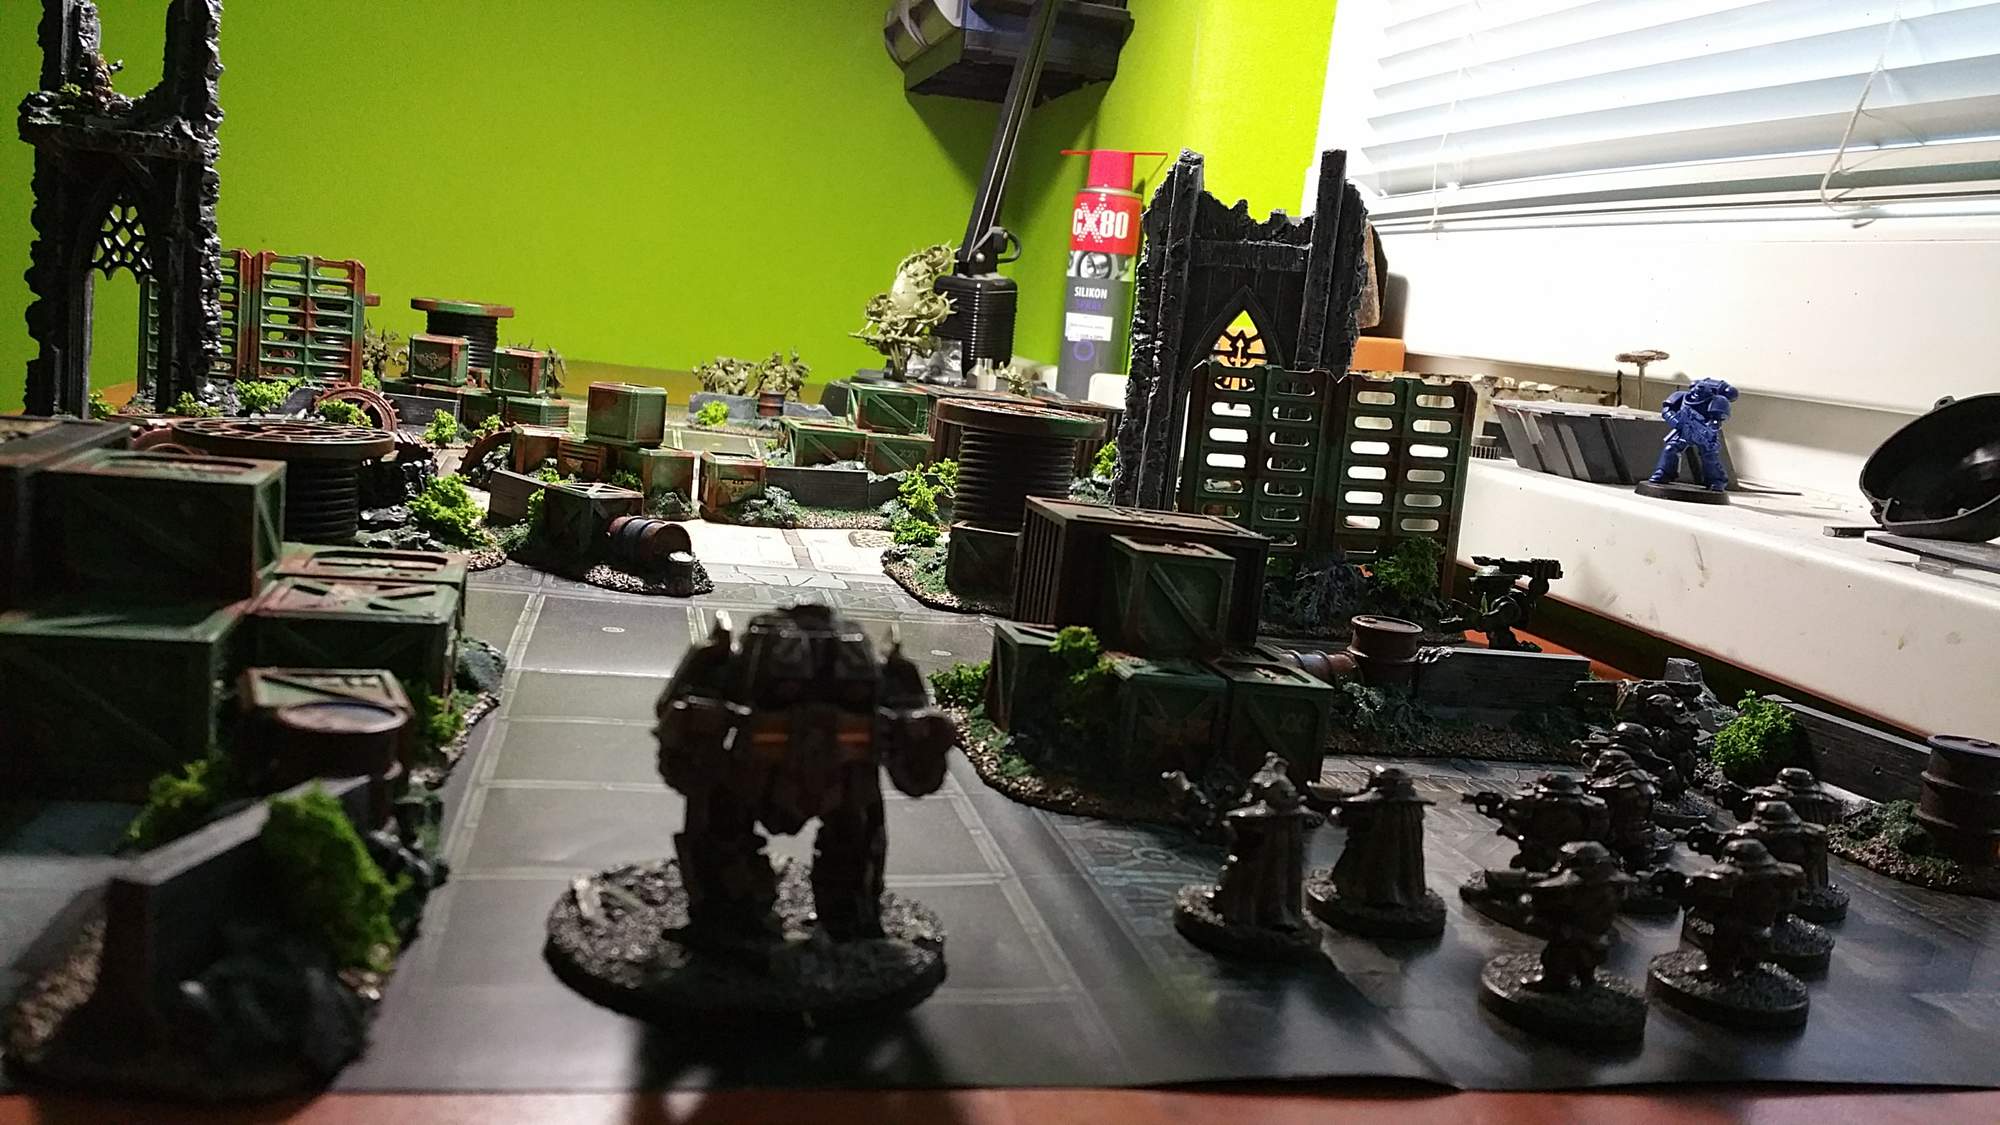
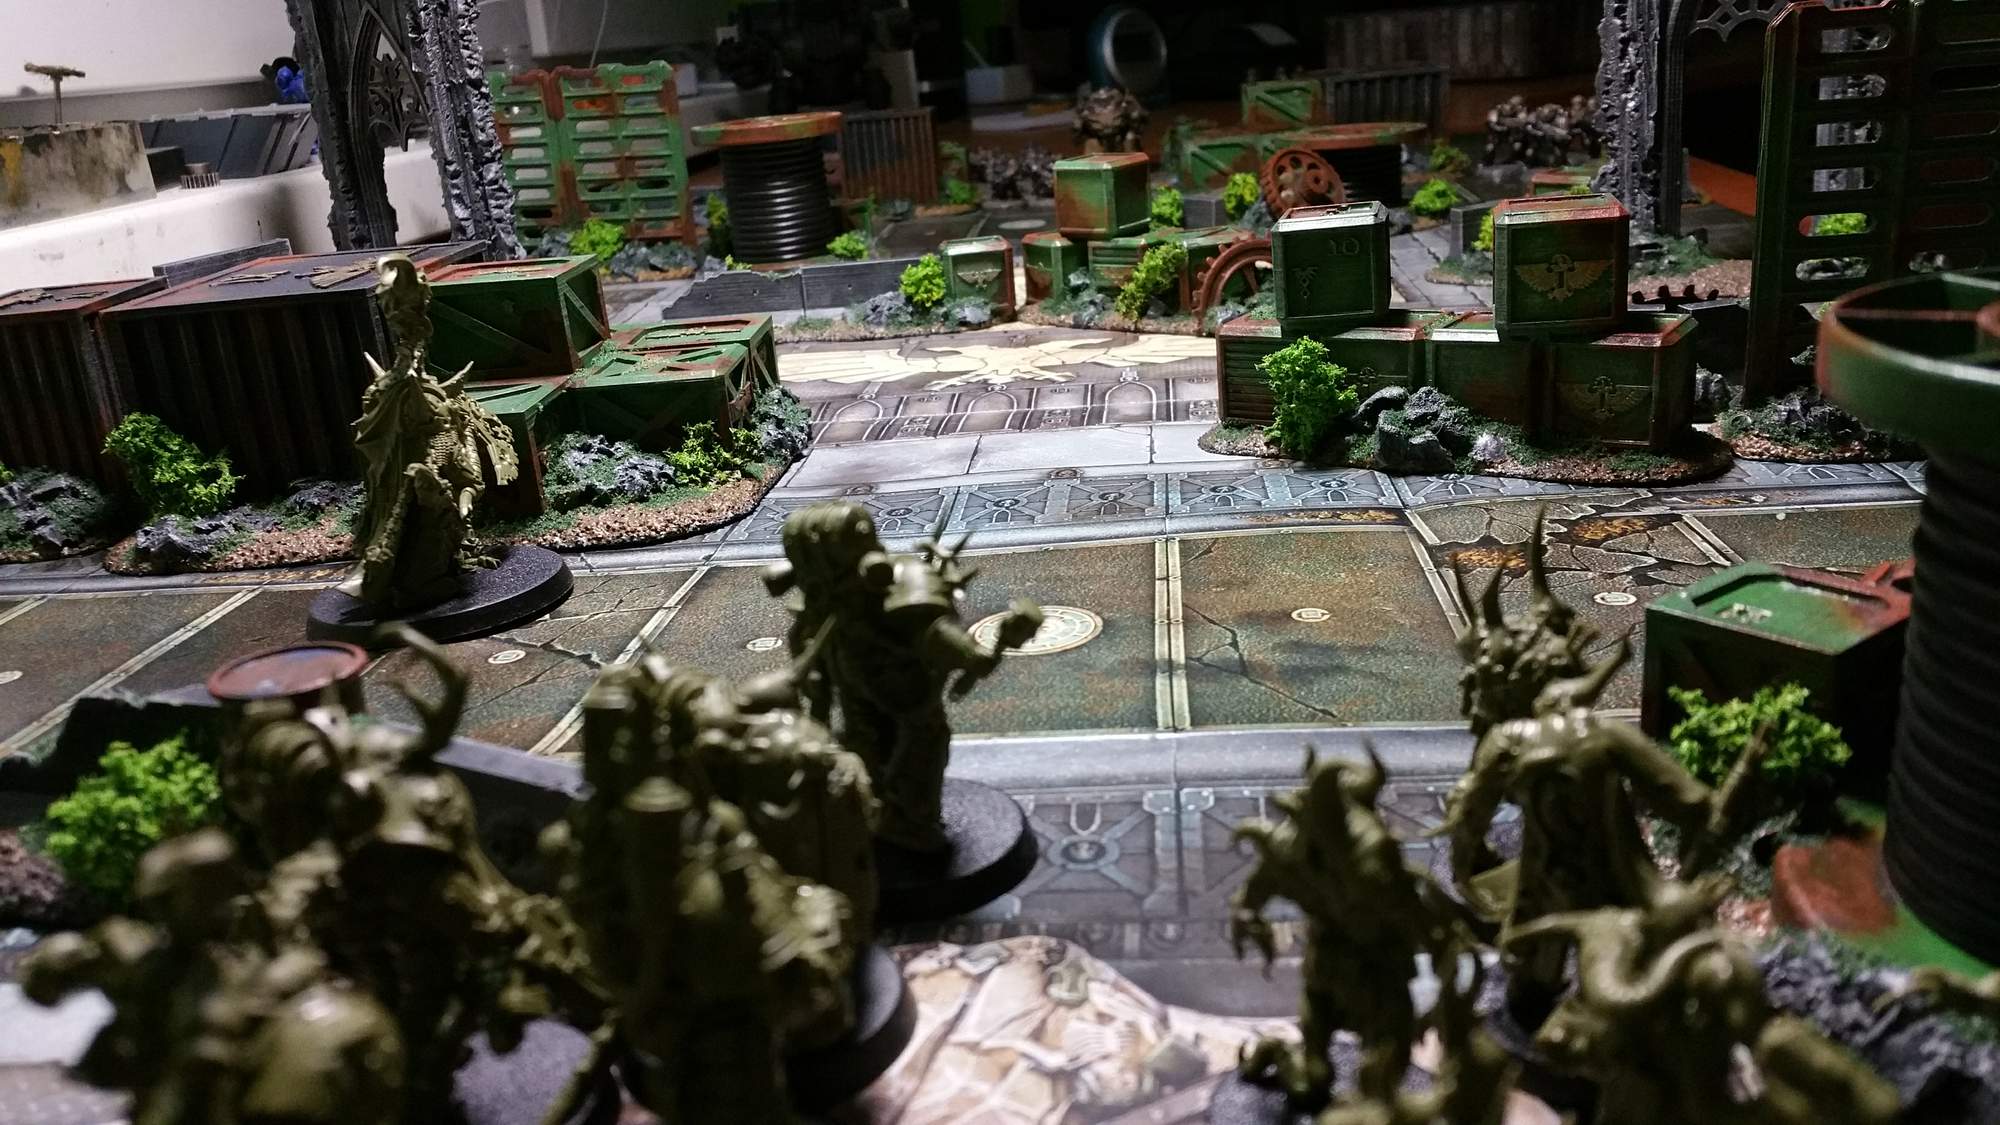
Amazing collection of elements Tek Thornison !
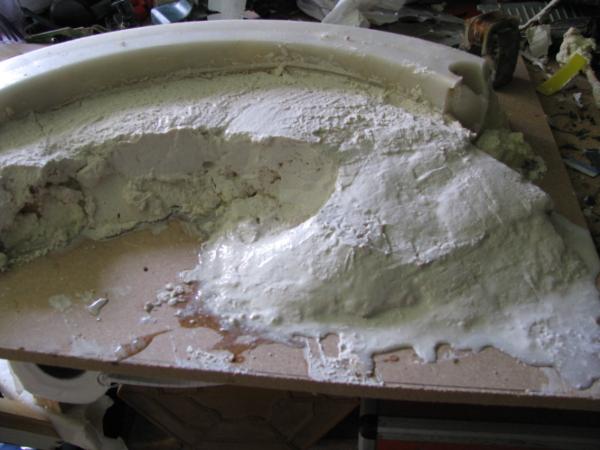
Made some progress on the bunker, now that both elements are dry :
In order to have the roof stand on its own, I screwed wooden structure at each extremity. Now the main window can be seen unobstructed :
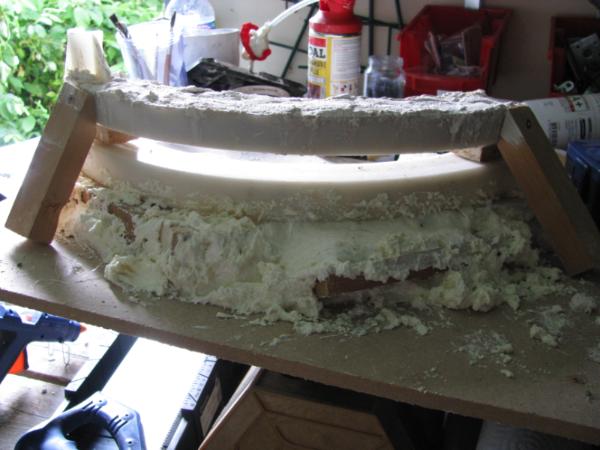
Also started building the ramp at the back of the bunker, to let a rhino sized tank access it :
|
|
|
|
|
|
2018/06/30 16:18:29
Subject: Re:The -=]_=- Terrain Competition Thread -=]_=- LoER Terrain Contest #26 "Hold the line!"
|
|
Krazed Killa Kan
|
@KernelTerror: Nice progress! You're making me anxious to get back to working on mine. Out of curiosity, are those wooden support you screwed in going to be a permanent part of your piece, or is it support while something dries?
|
|
|
|
|
|
2018/07/01 07:54:25
Subject: The -=]_=- Terrain Competition Thread -=]_=- LoER Terrain Contest #26 "Hold the line!"
|
|
Potent Possessed Daemonvessel
|
Thanks Syro_ ! I plan on leaving them, although they are just the skeleton part of future buttresses a the moment.
After the texture of the main part is done, I'll put plastic foil between it and the upper part, then add more plaster it order to tie them up with the upper plastic arc. By drying in place, it should take a shape that lets the whole roof hold on its own nicely.
|
|
|
|
|
|
2018/07/01 18:10:11
Subject: Re:The -=]_=- Terrain Competition Thread -=]_=- LoER Terrain Contest #26 "Hold the line!"
|
|
Krazed Killa Kan
|
^ Nice, those supports will look good as buttresses in the finished piece, I'm glad you're keeping them. Your piece also looks like it's getting pretty heavy, how much does it weigh?
|
|
|
|
|
|
2018/07/02 08:53:24
Subject: The -=]_=- Terrain Competition Thread -=]_=- LoER Terrain Contest #26 "Hold the line!"
|
|
Potent Possessed Daemonvessel
|
Glad you approve Syro_ !
I just weighed the whole piece, and it is a bit over 2Kg (4.4 lbs). Could have been much more, expanding foam and light wood under the plaster help limiting its weight.
|
|
|
|
|
|
2018/07/06 00:52:41
Subject: The -=]_=- Terrain Competition Thread -=]_=- LoER Terrain Contest #26 "Hold the line!"
|
|
Gargantuan Great Squiggoth
|
Excellent work here guys and dolls, well done. Great to see ideas flying about.
|
|
|
|
|
|
2018/07/10 21:55:15
Subject: Re:The -=]_=- Terrain Competition Thread -=]_=- LoER Terrain Contest #26 "Hold the line!"
|
|
Posts with Authority
Boston-area [Watertown] Massachusetts
|
I'm in.
|
Falling down is the same as being hit by a planet — "I paint to the 20 foot rule, it saves a lot of time." -- Me
ddogwood wrote:People who feel the need to cheat at Warhammer deserve pity, not anger. I mean, how pathetic does your life have to be to make you feel like you need to cheat at your toy army soldiers game?
 |
|
|
|
|
2018/07/12 12:12:27
Subject: Re:The -=]_=- Terrain Competition Thread -=]_=- LoER Terrain Contest #26 "Hold the line!"
|
|
Rookie Pilot
|
Come on guys, want see WIP photos 
|
|
|
|
|
|
2018/07/12 20:50:54
Subject: Re:The -=]_=- Terrain Competition Thread -=]_=- LoER Terrain Contest #26 "Hold the line!"
|
|
Mysterious Techpriest
|
Bit of progress.

Good to see you joining Brian 
|
|
|
|
|
|
2018/07/13 15:21:36
Subject: The -=]_=- Terrain Competition Thread -=]_=- LoER Terrain Contest #26 "Hold the line!"
|
|

Sureshot Kroot Hunter
|
Wow noodles! Those rivets are legit.
I've been lagging behind but the warden is off this weekend so I'm hoping to finish the build and prime over the next 2 days
|
|
|
|
|
|
2018/07/13 22:05:31
Subject: The -=]_=- Terrain Competition Thread -=]_=- LoER Terrain Contest #26 "Hold the line!"
|
|
Battle Tested Karist Trooper
Central Coast, California
|
Fantastic work everyone!
I am joining the party a little late...but I am currently working on some figures and some 4Ground lasercut MDF kits to use in Ash Barker's 'Last Days: Zombie Apocalypse' survival skirmish game, and I'd like to challenge myself to make something to use as scenery for the game.
I don't think I'll go too crazy, but I'd like to do some fencing and barricades at a farmhouse, used to keep the restless, wandering, ever-hungry undead masses at bay.
That's all I have as far as a concept so far, need to do a little planning and sketching first, then see what I can pull off in the remaining time allotted.
|
|
This message was edited 2 times. Last update was at 2018/07/15 01:51:33
|
|
|
|
|
2018/07/14 16:31:40
Subject: Re:The -=]_=- Terrain Competition Thread -=]_=- LoER Terrain Contest #26 "Hold the line!"
|
|
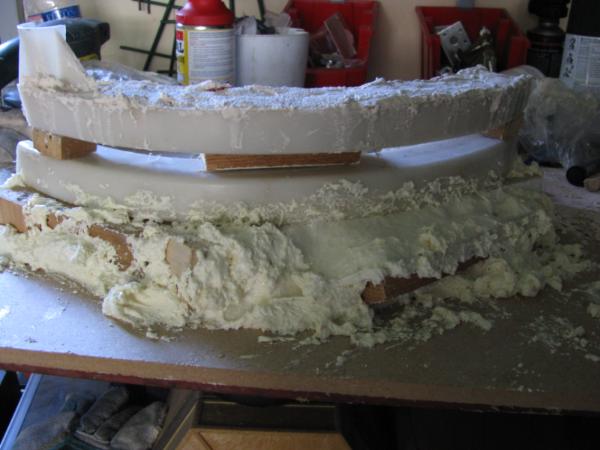
Mastering Non-Metallic Metal
|
Good work people. Good to see many familiar faces as well as new ones.
Finally can get back to my project.
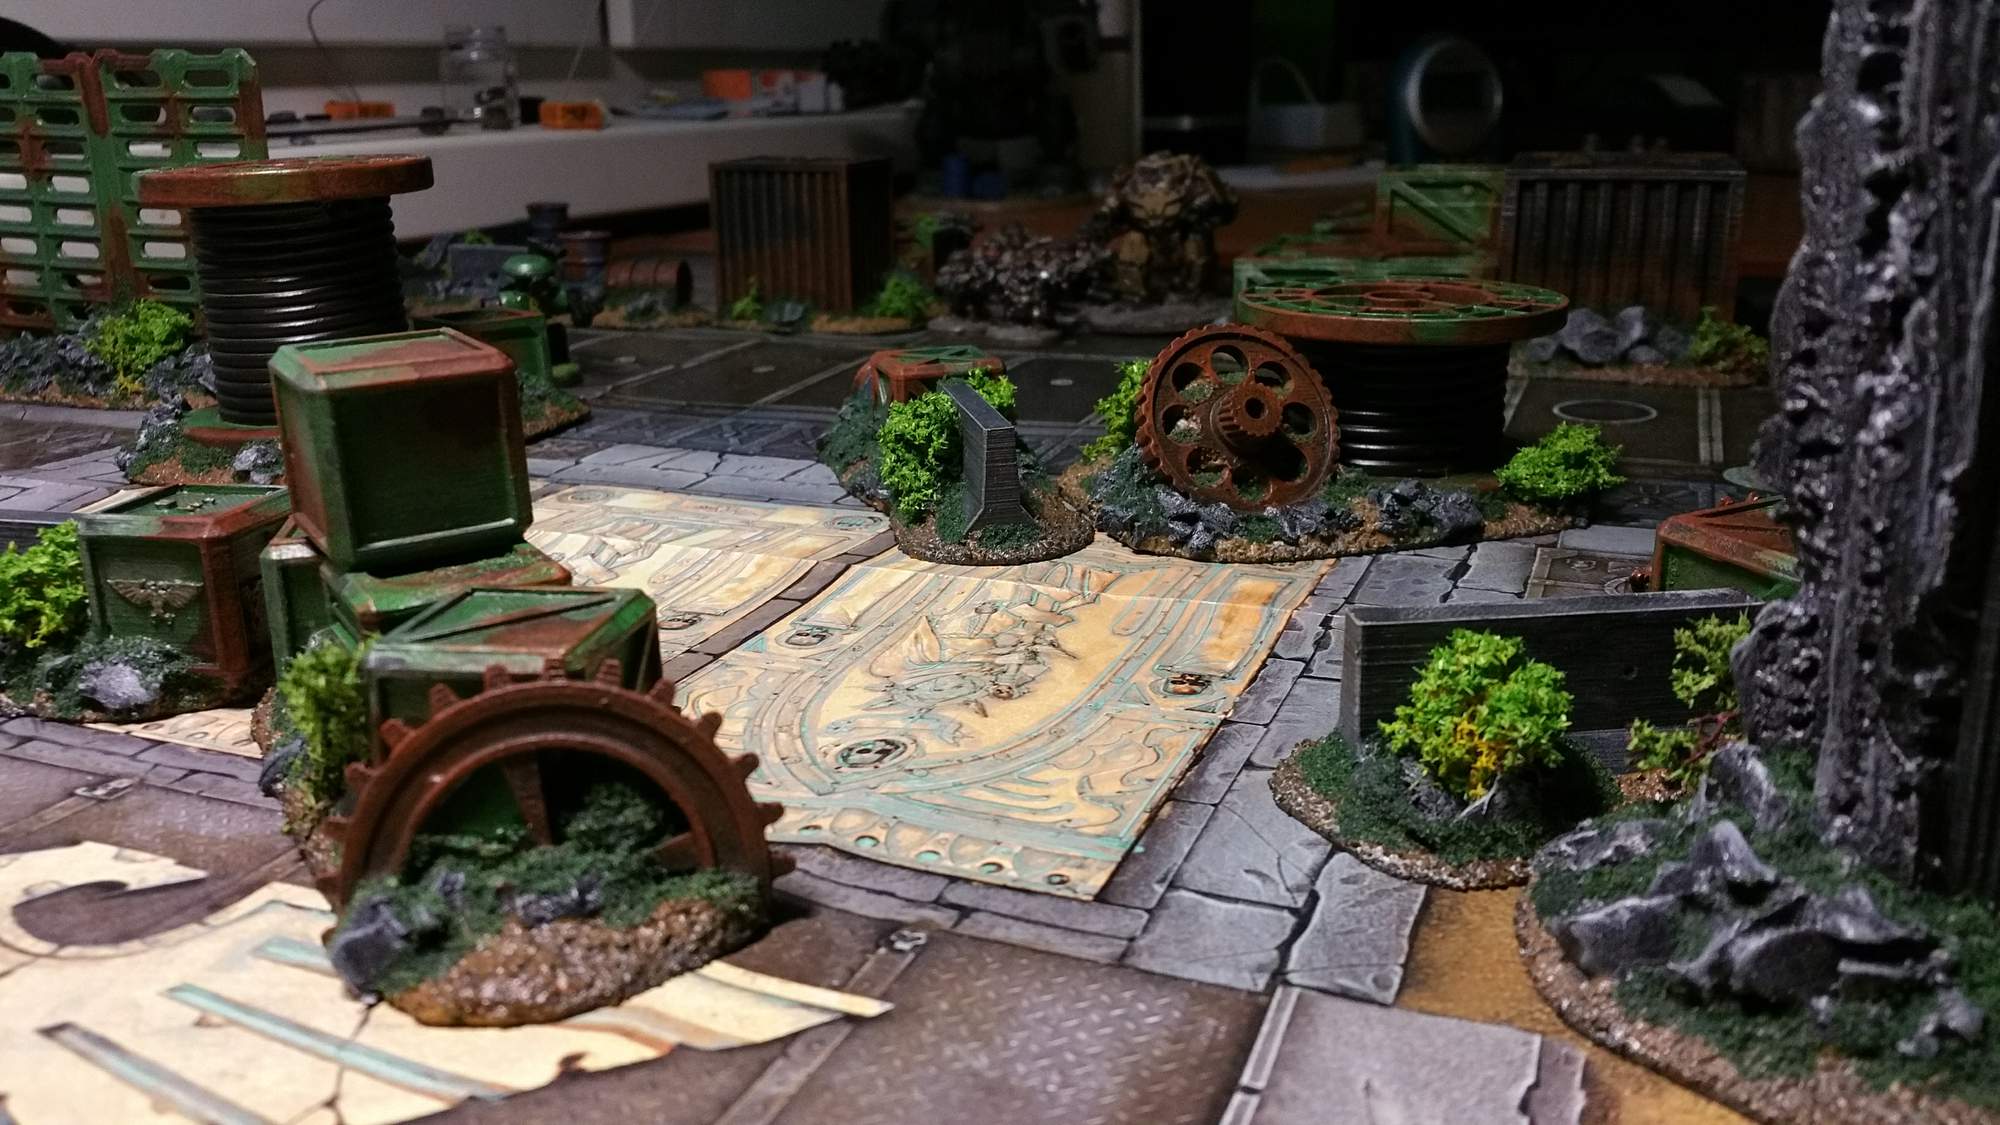
I've been sculpting on the details for the statue ready to build my actual idea around it.
Fixed the hand and added a tube for flag insertion.
Sculpted boots and started on trousers.
I made the boots high enough that one would span the break in the leg and I added the top of that boot to the leg on the base.
The child-friendly shorts are being turned into trousers, as you can see on one leg, and I'm next to add a cape to the torso and legs pieces.

Then I can get about building a barricade.
|
Mastodon: @DrH@warhammer.social
The army- ~2295 points (built).
* -=]_,=-eague Spruemeister General. * A (sprue) Hut tutorial *
Dsteingass - Dr. H..You are a role model for Internet Morality! // inmygravenimage - Dr H is a model to us all
Theophony - Sprue for the spruemeister, plastic for his plastic throne! // Shasolenzabi - Toilets, more complex than folks take time to think about! |
|
|
|
|
2018/07/18 16:51:08
Subject: Re:The -=]_=- Terrain Competition Thread -=]_=- LoER Terrain Contest #26 "Hold the line!"
|
|
Mastering Non-Metallic Metal
|
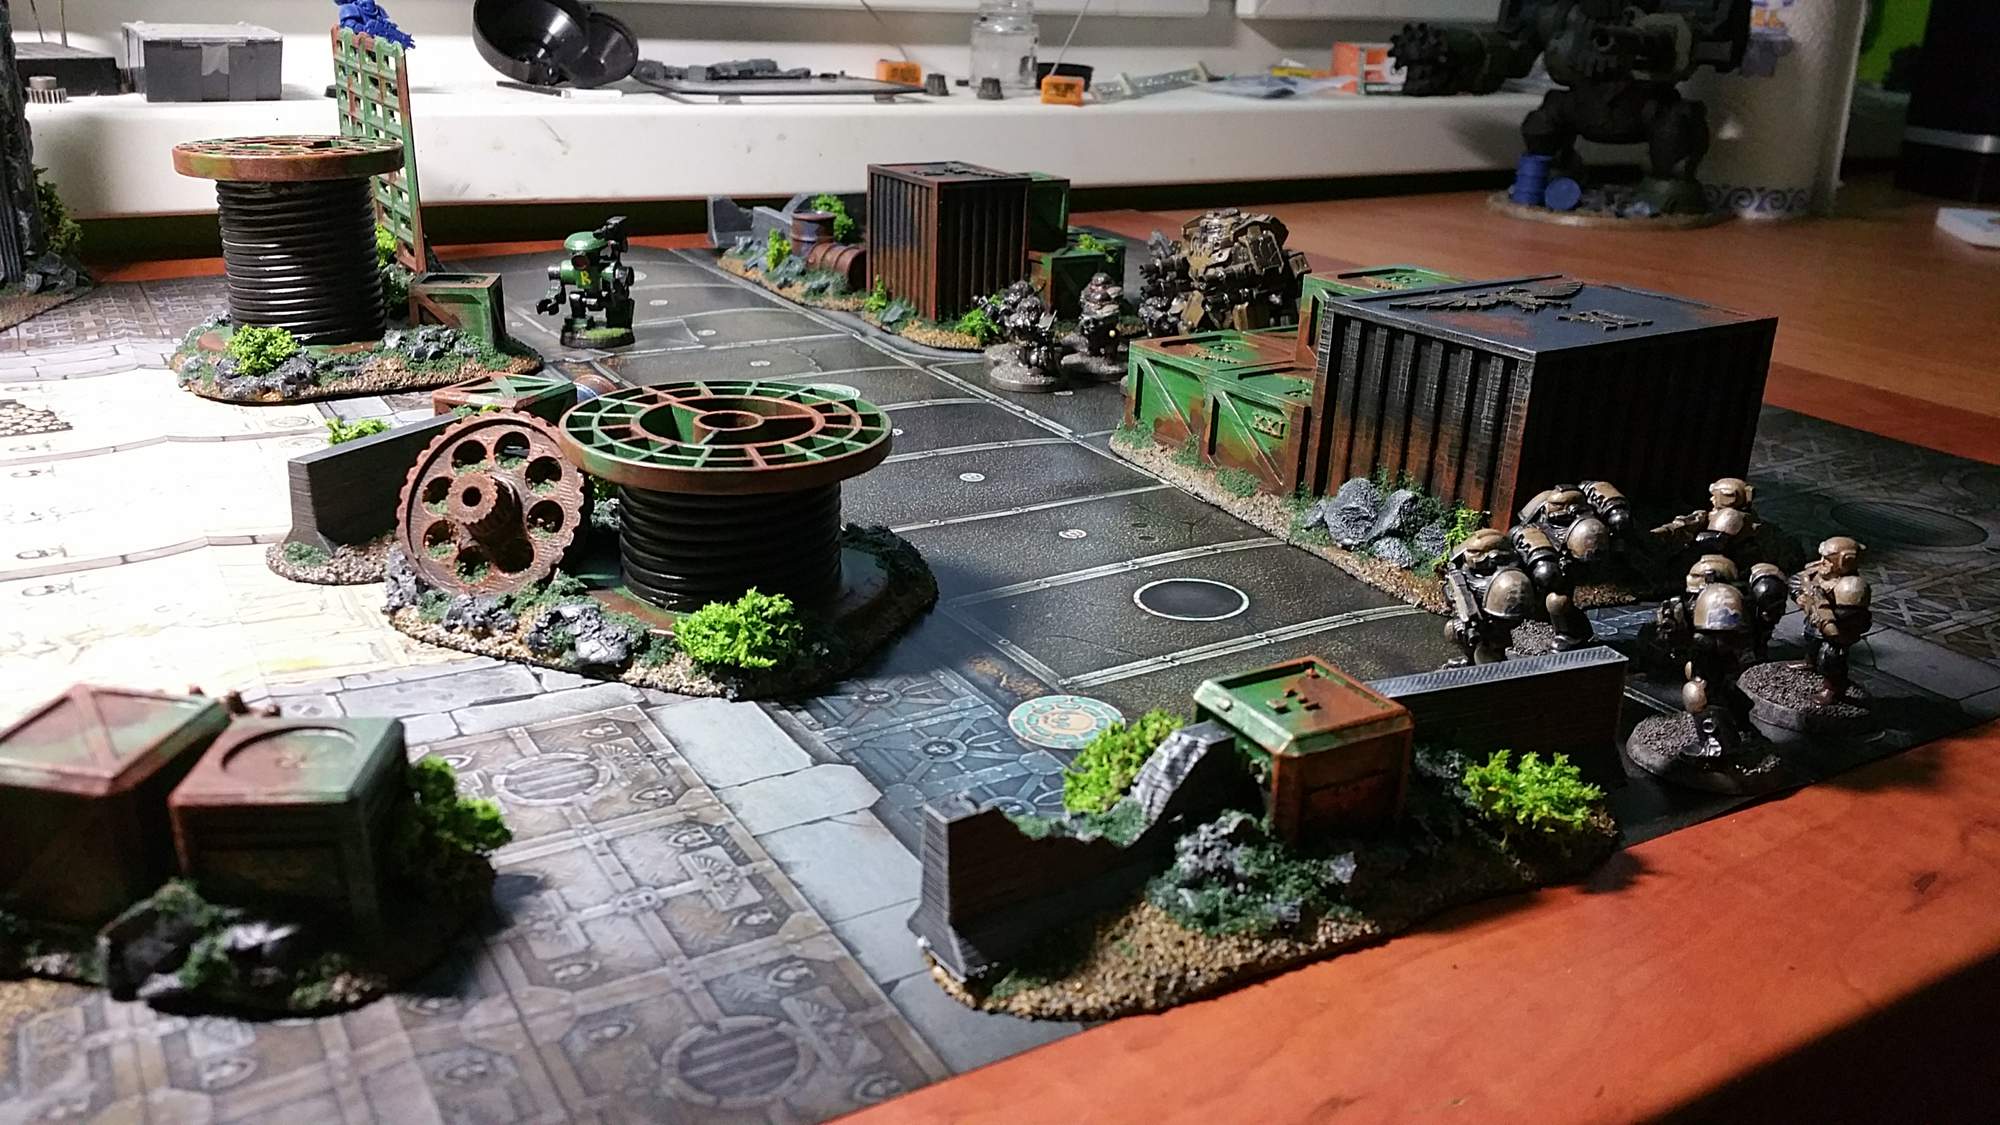
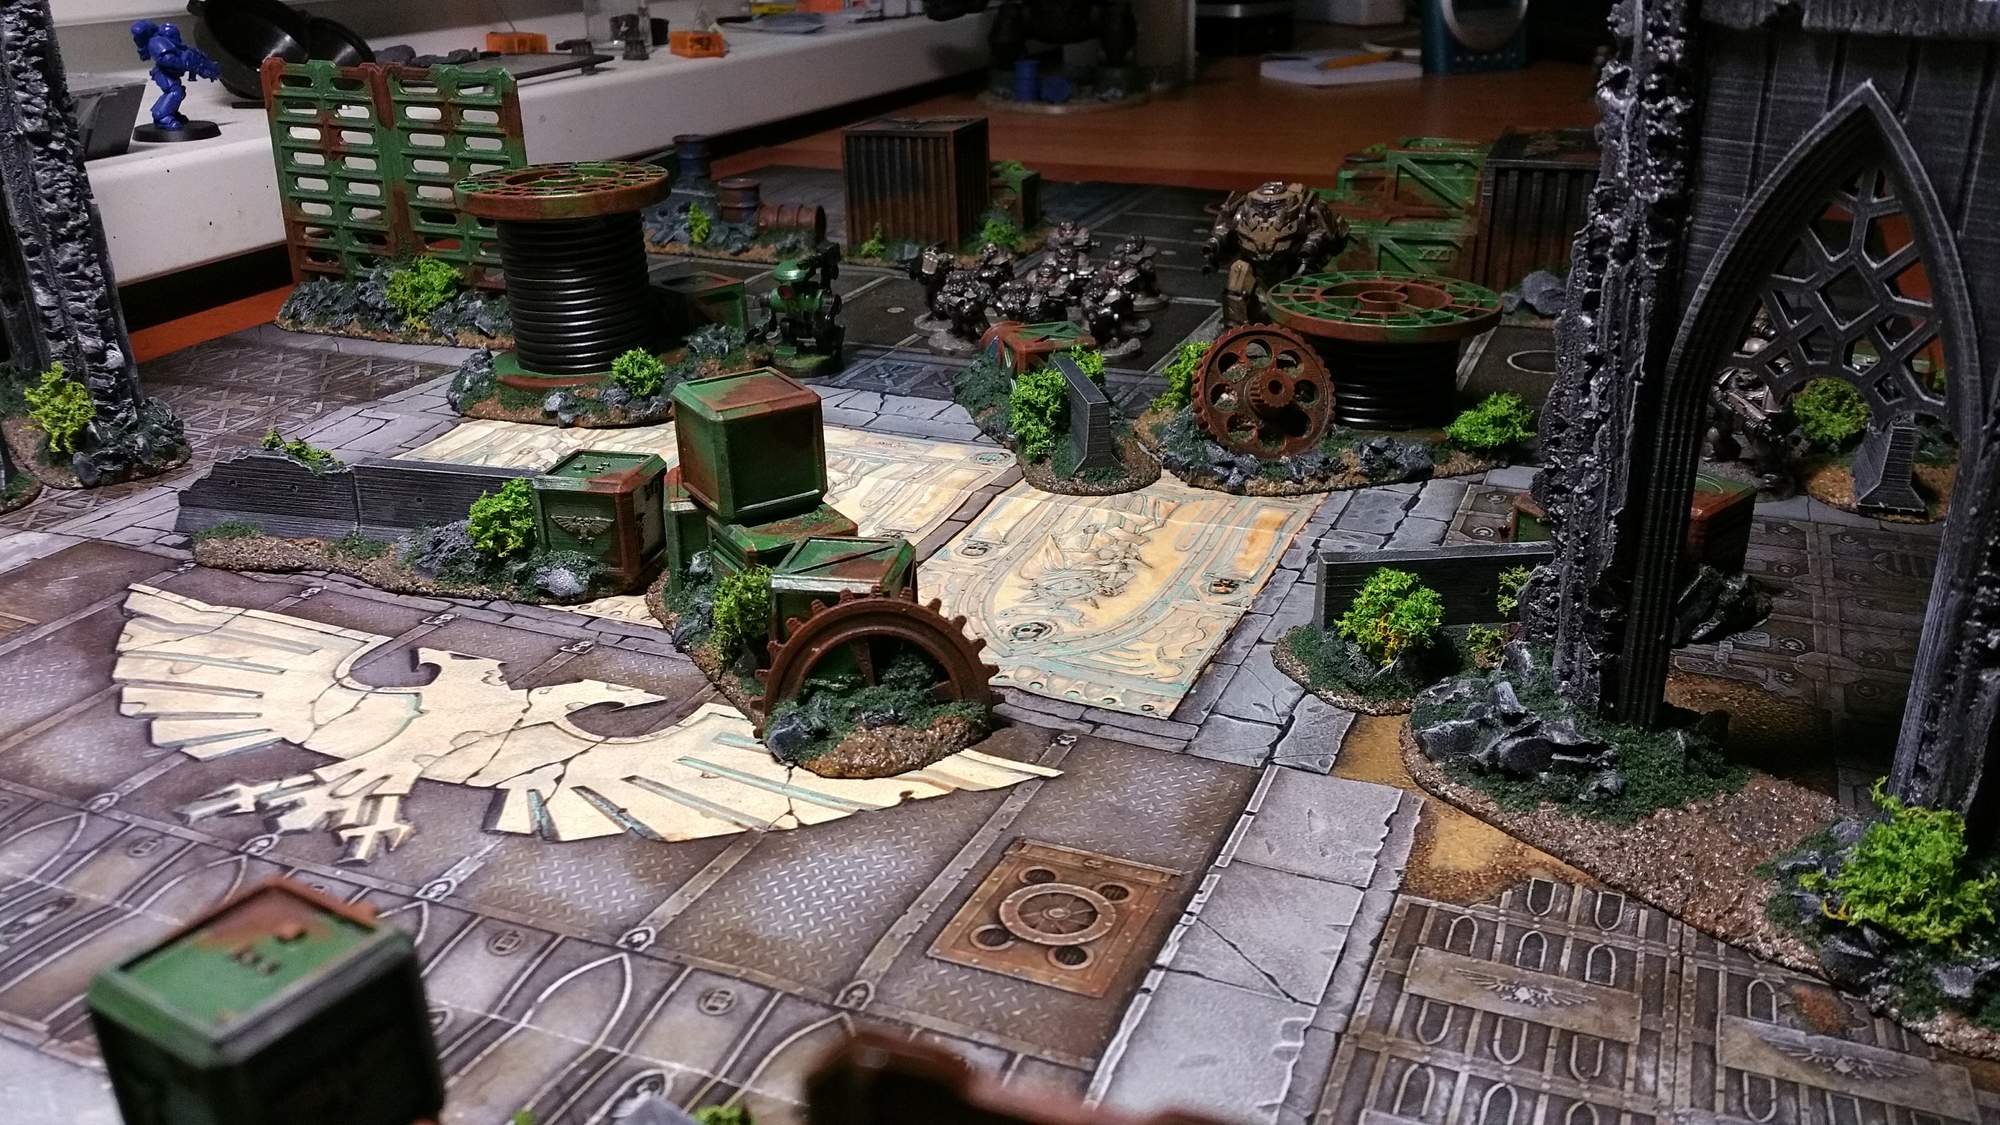
And now with added cape:
Starting from an old superglue tube (could not open the tube up for the life of me, only really needed one side for a scaffold) and covered with milliput.
I made it less cape-like (and therefore more statue-like) by giving it a flat bottom and a support piece between the near side and the statue's leg.
Continued it up and over the shoulders on the torso piece, and finished it with a length of chain.
While I was at it, I extended the hair on the head into a ponytail and continued that onto the torso over the cape.
And then finished the basing with my usual mix, but with added pathway.
the slabs were made from plaster that I squashed between a piece of glass (my putty palette) and a piece of plastic, to give a thin, flat piece that I then cut into squares...
...which were then placed and broken onto the base to form a broken path where the statue fell.

The head will end up on a shrine of sorts behind the barricade that I'm about to start on...
|
Mastodon: @DrH@warhammer.social
The army- ~2295 points (built).
* -=]_,=-eague Spruemeister General. * A (sprue) Hut tutorial *
Dsteingass - Dr. H..You are a role model for Internet Morality! // inmygravenimage - Dr H is a model to us all
Theophony - Sprue for the spruemeister, plastic for his plastic throne! // Shasolenzabi - Toilets, more complex than folks take time to think about! |
|
|
|
|
2018/07/18 21:49:02
Subject: The -=]_=- Terrain Competition Thread -=]_=- LoER Terrain Contest #26 "Hold the line!"
|
|

Decrepit Dakkanaut
|
That's going to look... Super. My kind of terrain
|
Theophony"... and there's strippers in terminator armor and lovecraftian shenanigans afoot."
Solar_Lion: "Man this sums up your blog nicely."
Anpu-adom: "being Geek is about Love. Some love broadly. Some love deeply. And then there are people like Graven. |
|
|
|
|
2018/07/19 00:06:38
Subject: Re:The -=]_=- Terrain Competition Thread -=]_=- LoER Terrain Contest #26 "Hold the line!"
|
|
[DCM]
Boom! Leman Russ Commander
|
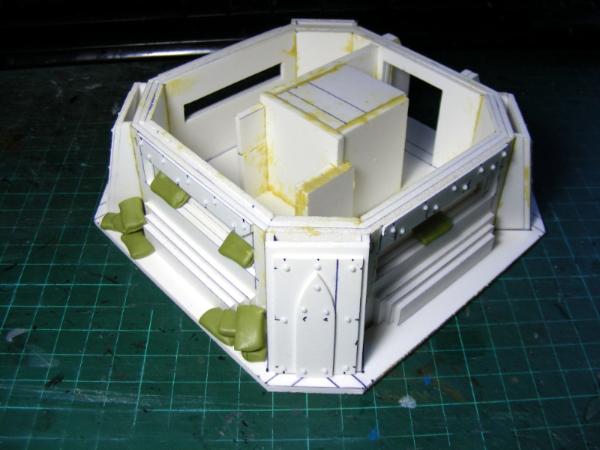
I'm in, or at least will try to meet the generous deadline- I'm not good at that, so working to a deadline is my learning point for myself on this project.
Here's the start of a Necromunda stronghold (I've never done Necromunda stuff before- and going to give 'graffiti' a try):
|
"He fears his fate too much, or his desserts are small, who will not put it to a single touch; to win- or lose- it all."
Montrose Toast

|
|
|
|
|
2018/07/19 02:59:48
Subject: The -=]_=- Terrain Competition Thread -=]_=- LoER Terrain Contest #26 "Hold the line!"
|
|
Gargantuan Great Squiggoth
|
So much awesome here guys, brilliant all round, keep it going.
|
|
|
|
|
|
2018/07/19 08:10:56
Subject: Re:The -=]_=- Terrain Competition Thread -=]_=- LoER Terrain Contest #26 "Hold the line!"
|
|

Fresh-Faced New User
|
Very nice work indeed. Would you mind sharing your method for these gorgeous rivets ?
Thanks
|
|
|
|
|
2018/07/19 18:40:41
Subject: The -=]_=- Terrain Competition Thread -=]_=- LoER Terrain Contest #26 "Hold the line!"
|
|
Mysterious Techpriest
|
The rivets are half round Acrylic nail beads.
I think they are 1.5mm; you can buy them in packs of 1000+, just glue them on to styrene using regular plastic glue. They may need a little trimming on the sides where they have stuck to neighbouring beads. I bought mine off ebay.
Hope that helps!
Good to see others progressing in all the way's that I am not atm, just as well there is a while left until the end of this competition, plenty of time for more to join the fun.
|
|
|
|
|
|
2018/07/19 21:55:30
Subject: Re:The -=]_=- Terrain Competition Thread -=]_=- LoER Terrain Contest #26 "Hold the line!"
|
|
Kinebrach-Knobbling Xeno Interrogator
|
Hello friends! It's been a while...
I've been working away at this between house moving & renovating, but keep forgetting to post here...
My project is a fortified island-harbour for the Mare Solum 40k setting (a community -created 'waterworld'), which will serve as a base for my Magos Oceanum warband.
These are a couple of earlier WIP pics, more progress since then but any C&C welcome.
Great to see so many strong entries on this thread! Well done folks.
|
|
|
|
|
|
2018/07/19 22:34:52
Subject: Re:The -=]_=- Terrain Competition Thread -=]_=- LoER Terrain Contest #26 "Hold the line!"
|
|
Fixture of Dakka
|
Failure to find any junk to inspire my build, I decided to just grab something and start chopping it...
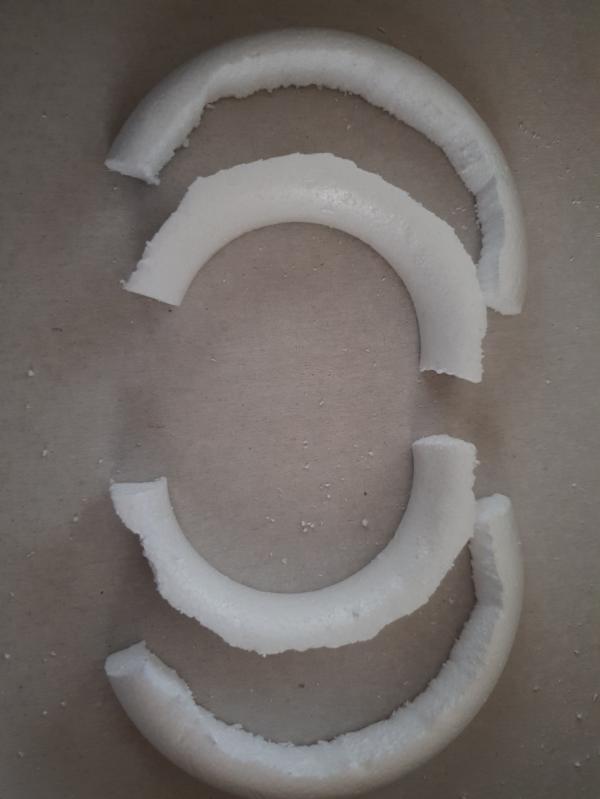
A circular bit of polystyrene will do. Let's roughly half it, then split each section again....that should provide some kind of basis for some kind of emplacement
Actually, we'll cut that up a bit more, just for variety
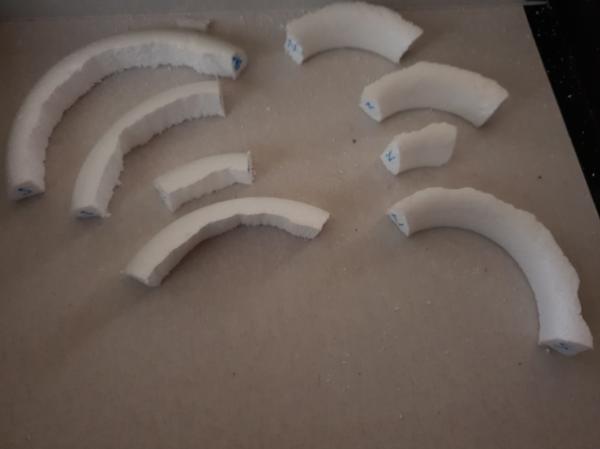
And hey, let's mark up North and South ends of each piece...why not?
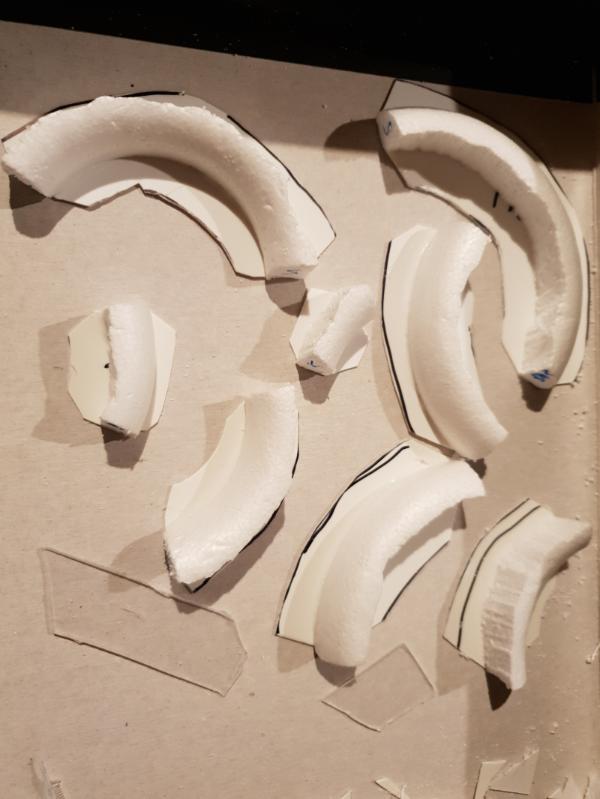
What about basing? My standard CD/ME type thing doesn't seem particularly suited to this project, maybe cut up a CD case instead?
Not bad, but as I felt a need to get the edges of each section lined up with the edge of the base I switched to some plasticard offcuts I had....too time consuming cutting that case plastic just right.....have to investigate that elsewhere
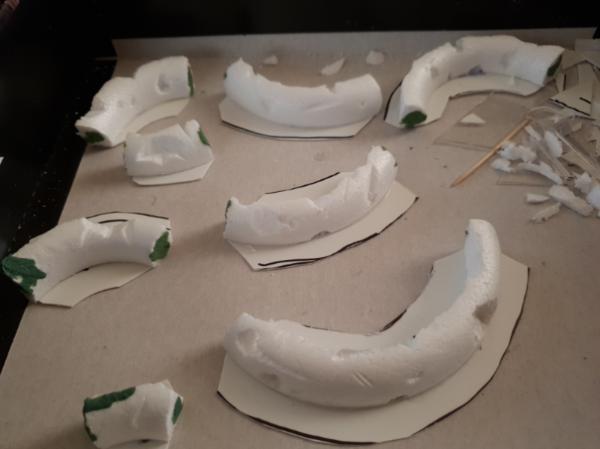
Make a few random chips and burns into the polystyrene, and cover those silly N's and S's with a bit of greenstuff.
Pretty sure it's a chaotic type of thing......But that's all I've got so far. It's not orky, I know that.
|
|
|
|
|
|
2018/07/20 17:39:37
Subject: Re:The -=]_=- Terrain Competition Thread -=]_=- LoER Terrain Contest #26 "Hold the line!"
|
|
Nasty Nob
|
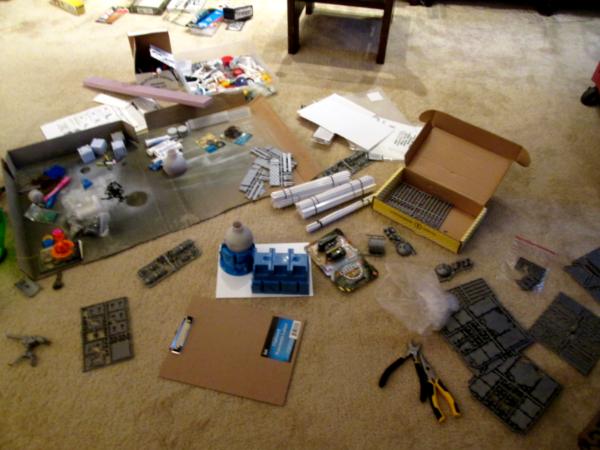
These images are inspiring me. I really need to get to work on my entry... TBH, I've had terrible hobby ADD lately. (start new terrain! where's that bit... I think it was in this box, or that box, or... oh, I should clean up this mess... but wait, I should finish up that last project I had been working on, it was almost done! Oh hey, look at all these unpainted Orks. well, I guess I could clean up some mold lines... vacation... what was I working on again?? Family time.... work work work... etc.)
Keep up the good work all. 
|
|
|
|
|
|
2018/07/21 21:58:37
Subject: The -=]_=- Terrain Competition Thread -=]_=- LoER Terrain Contest #26 "Hold the line!"
|
|
Fresh-Faced New User
|
 OneManNoodles wrote: OneManNoodles wrote:The rivets are half round Acrylic nail beads.
I think they are 1.5mm; you can buy them in packs of 1000+, just glue them on to styrene using regular plastic glue. They may need a little trimming on the sides where they have stuck to neighbouring beads. I bought mine off ebay.
Hope that helps!
Good to see others progressing in all the way's that I am not atm, just as well there is a while left until the end of this competition, plenty of time for more to join the fun.
Thx it helps a ton ! I’m currently building an industrial board and I was not very happy with my rivets so far (micro beads in a pin vice vole).
|
|
|
|
|
2018/07/21 23:44:19
Subject: Re:The -=]_=- Terrain Competition Thread -=]_=- LoER Terrain Contest #26 "Hold the line!"
|
|
Fresh-Faced New User
|
 Dr H wrote: Dr H wrote:And now with added cape:
Starting from an old superglue tube (could not open the tube up for the life of me, only really needed one side for a scaffold) and covered with milliput.
I made it less cape-like (and therefore more statue-like) by giving it a flat bottom and a support piece between the near side and the statue's leg.
Continued it up and over the shoulders on the torso piece, and finished it with a length of chain.
While I was at it, I extended the hair on the head into a ponytail and continued that onto the torso over the cape.
And then finished the basing with my usual mix, but with added pathway.
the slabs were made from plaster that I squashed between a piece of glass (my putty palette) and a piece of plastic, to give a thin, flat piece that I then cut into squares...
...which were then placed and broken onto the base to form a broken path where the statue fell.
The head will end up on a shrine of sorts behind the barricade that I'm about to start on...
Has anyone made an Ozymandias joke yet?
Great work, looking forward to seeing it painted.
|
|
|
|
|
2018/07/22 00:24:47
Subject: Re:The -=]_=- Terrain Competition Thread -=]_=- LoER Terrain Contest #26 "Hold the line!"
|
|
Fixture of Dakka
|
Realised that these did go back to one of my initial thoughts of a flesh-wall, so that's where I headed with it....
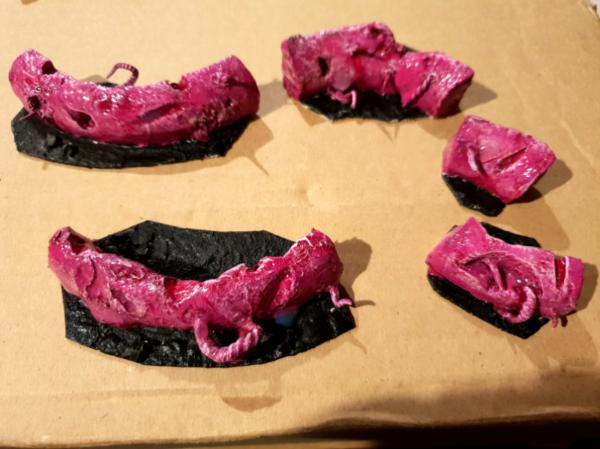
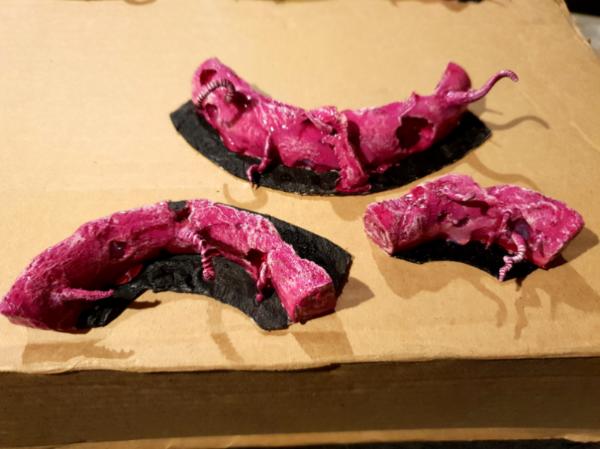
Trying to remember what I learnt doing the mobius strip all those moons ago, and have covered most of the area in clear crackle paint, to enable some lovely wash effects to get a 'nice' raw meat look to most of the flesh slabs.
In line with that idea I'm trying to figure out how to build some mobile flesh-vats to provide a source for these walls, and maybe some end pieces too. But if I can get these bits done then at least I have something.
|
|
|
|
|
|
2018/07/22 03:48:17
Subject: Re:The -=]_=- Terrain Competition Thread -=]_=- LoER Terrain Contest #26 "Hold the line!"
|
|
Krazed Killa Kan
|
Wow monkeytroll: those are effectively gribbly. Looking good, and I really enjoyed your mobius strip too
|
|
|
|
|
|
|
|