| Author |
Message |
 |
|
|
|
|
Advert
|
Forum adverts like this one are shown to any user who is not logged in. Join us by filling out a tiny 3 field form and you will get your own, free, dakka user account which gives a good range of benefits to you:
- No adverts like this in the forums anymore.
- Times and dates in your local timezone.
- Full tracking of what you have read so you can skip to your first unread post, easily see what has changed since you last logged in, and easily see what is new at a glance.
- Email notifications for threads you want to watch closely.
- Being a part of the oldest wargaming community on the net.
If you are already a member then feel free to login now. |
|
 |
2018/11/01 21:58:28
Subject: Re:Imperium vs Nids Diorama II: The Final Pieces (11/01: making a basement)
|
|

Dakka Veteran
|
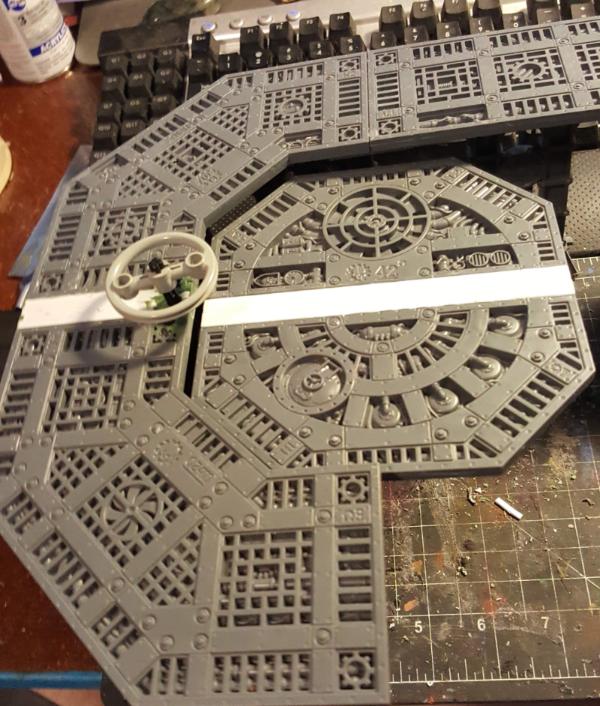
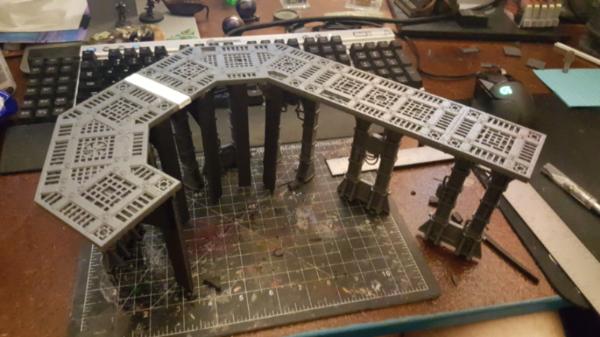
So with the sizing and placement of the forgeshrine done it was time to put it all together (minus the forge part, too much detail to do with the big lump)
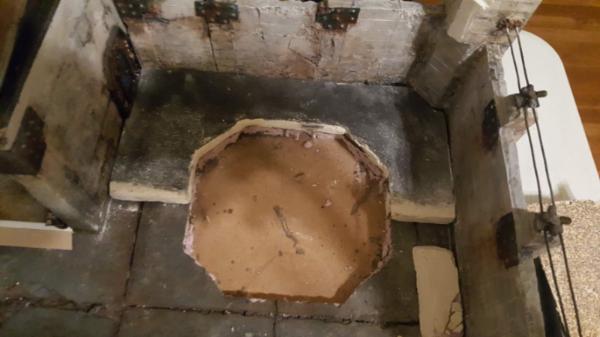
Next up was making a basement. The idea is to make the octagon center a giant lift so knights can go up and down as needed to fit (and look cool). Obviously that structure would be in my default of lego, which means there would some kind of "arm" carrying the octagonal platform. Since I want this to be as flush as possible with the ground that means I need to dig into my tile a place for that arm. It seemed to make the most sense if that hole would be the same shape as the octagon.
To line it up I cut and hotglued some straight foam lines down from my octagon cutout so I could (hopefully) line it up well.
dir away good sir!

next was elevating up the whole forgeshrine assembly a bit. in the forgeshrine main picture they show it "raised up" a bit to fit the knight better, and since the door to the garage is raised up anyways.. it seemed like a good idea to just add a half inch riser or so for everything.
Everything fits!
|
|
|
|
 |
|
2018/11/01 23:01:49
Subject: Imperium vs Nids Diorama II: The Final Pieces (11/01: making a basement)
|
|

Pulsating Possessed Chaos Marine
|
Not sure how this doesn't have more views...phenomenal stuff!
|
"And what are the achievements of your fragile Imperium? It is a corpse rotting slowly from within while maggots writhe in its belly. It was built with the toil of heroes and giants, and now it is inhabited by frightened weaklings to whom the glories of those times are half-forgotten legends." |
|
|
|
|
2018/11/02 06:24:54
Subject: Re:Imperium vs Nids Diorama II: The Final Pieces (11/01: making a basement)
|
|
Dakka Veteran
|
thanks! Honestly the views dont matter so much as the blog just helps me stay focused/motivated on the project. Still, tell others about it mostly because there are so many lessons (IE: mistakes) made that its a shame if anyone else made them too.
|
|
|
|
|
|
2018/11/02 17:12:35
Subject: Imperium vs Nids Diorama II: The Final Pieces (11/01: making a basement)
|
|
Executing Exarch
|
I don't know why I didn't spot this sooner, there's some really cool stuff going on in this thread.
Subbed!
|
|
|
|
|
|
2018/11/02 23:01:55
Subject: Re:Imperium vs Nids Diorama II: The Final Pieces (11/02: making a half floor)
|
|
Dakka Veteran
|
Thanks! It's been quite a journey, a lot of techniques explored.
Anyhoo back to an old favorite: foamcoat! just the best stuff annd.. im very nearly out of it. I also have very few uses of it left so i figured I would, instead of rebuying (and waiting) for a whole nother set of foamcoat/boost/sand I would just start cutting off pre-made stuff i had from testing and gluing it on. That would give me "thickness" and then I could on top of that do a single thin smoothing layer.

I also needed some lift blocks to put the "crane" part of my walkway on so there we go:

now one thing I've learned about foamcoat: it doesnt really corner well. In the end your corners can never really be super sharp. Instead of killing myself worrying about that for this I figured I would just add some i-beams and make a nice clean edge that way. Sort of like a giant "bumper" any errant knight pilots might kick instead of the concrete.
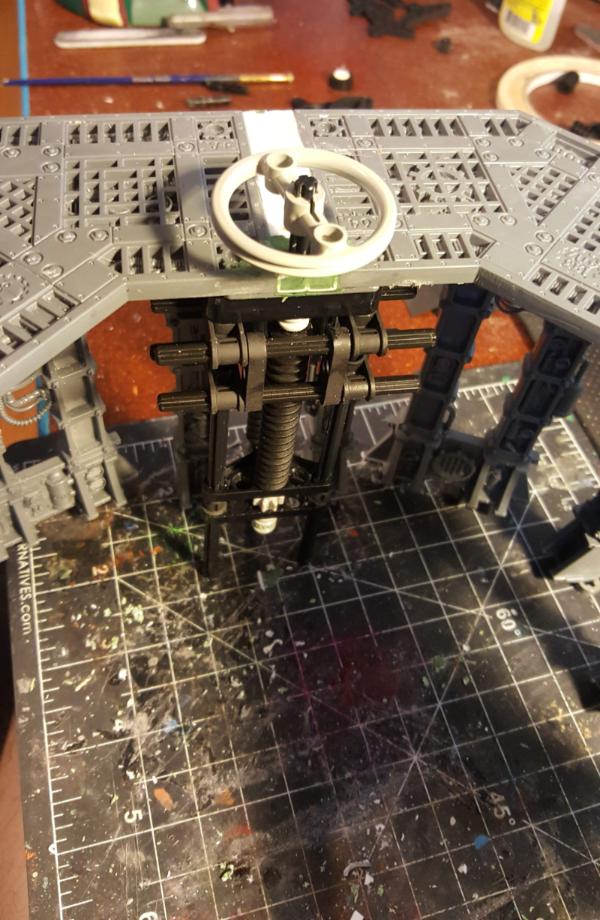
Finally I start working on figuring out the lego lift mechanism. Some progress but a lot to figure out:
|
|
|
|
|
|
2018/11/03 20:53:55
Subject: Re:Imperium vs Nids Diorama II: The Final Pieces (11/03: making a half floor p2)
|
|
Dakka Veteran
|
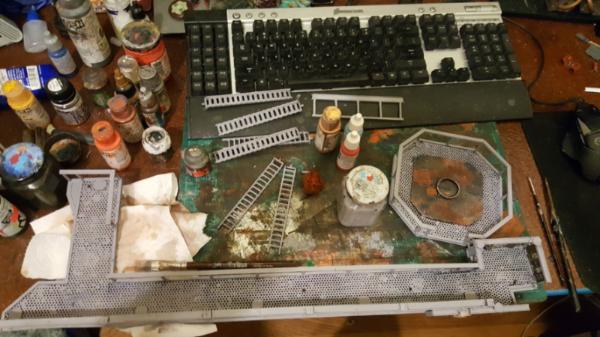
So work continues, first finishing up the foam coating of my stuff:
hey it fits! yay!
And now to actually add some ramps for the garage. This is hopefully thel ast push here for detail so I really want to clean up everything as neat as i can. I found some high resolution plasticard with metal texture and it makes for a great ramp/small platform.

|
|
|
|
|
|
2018/11/03 23:12:17
Subject: Re:Imperium vs Nids Diorama II: The Final Pieces (11/03: making a half floor p2)
|
|

Painlord Titan Princeps of Slaanesh
|
This is all just hugely inspirational stuff.
|
|
|
|
|
|
2018/11/05 22:35:55
Subject: Re:Imperium vs Nids Diorama II: The Final Pieces (11/05: lego lift prototype)
|
|
Dakka Veteran
|
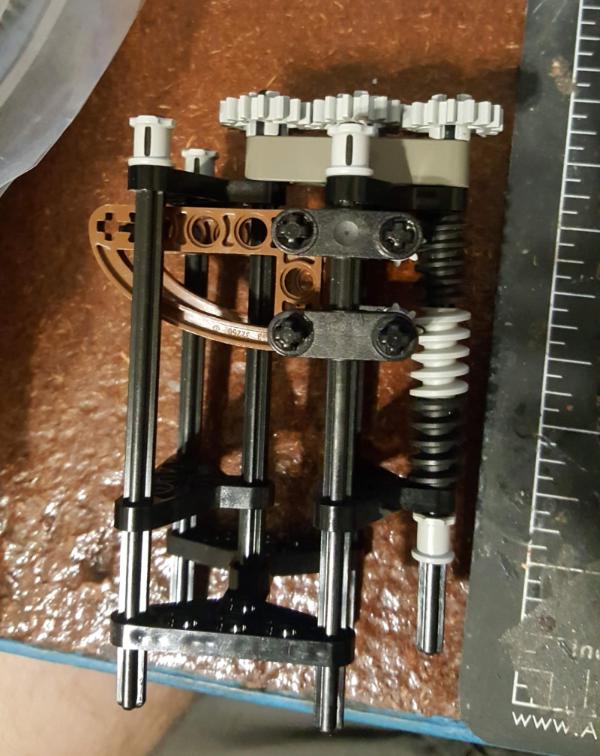
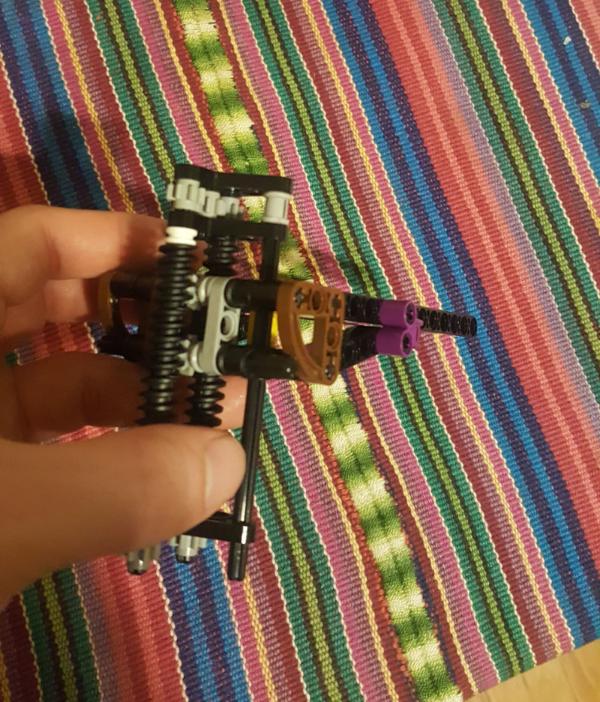
Time to figure out the lego lift!
This is something I had to figure out basically next in order to plan where and how everything goes. Key is that this one lift has to be able to hold up a knight AND not move when "idle". Thus the key to this are the worm gears which are great for both points. I oped for 2 sets of parallel gears for now. They.. mostly work? occasionally it seems to "bind" for reasons im not quite sure, but adding the spacers seems to have help at least for this test.
Next up is to buy longer axles and more worm gears (and i mean LONG axles, 10ish inches and then cut it down) and test it on the full height.

|
|
|
|
|
|
2018/11/06 22:11:42
Subject: Re:Imperium vs Nids Diorama II: The Final Pieces (11/06: lego lift extended, floor edge cleaned up)
|
|
Dakka Veteran
|
So, first up I got some longer axles (5 inch) thinking they would be long enough. Hint: they arnt! but its okay, because its still a good second test:
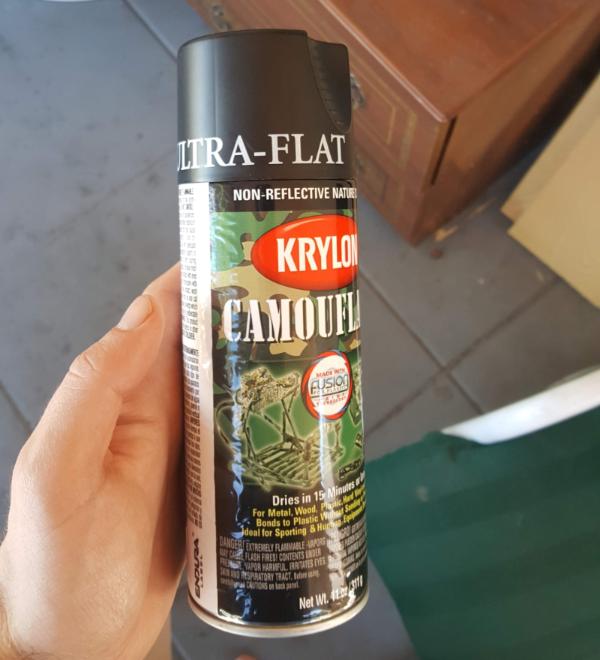
It still works though one thing I've noticed is that gets "stuck" occasionally and binds, especially if stuff gets pushed a bit tight. So we'll see how it handles weight but still so far so good. I also started priming some of my legos. I decided for this project to change primers because, well, I havent been happy with the one I use (some cheapo one from a car store). It comes off too easily, especially on legos where it doesnt really hold at all. I did some research and this stuff with the "fusion" technology seems like it might be better:
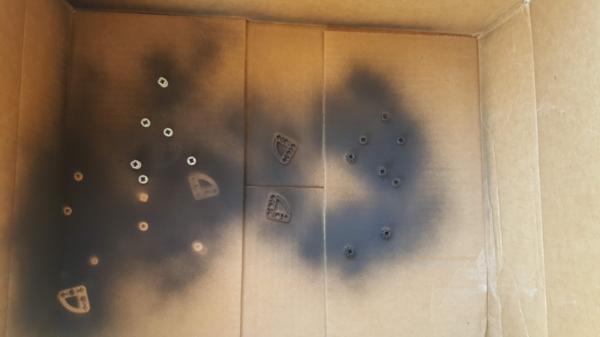
I tried it and.. it held a LOT better, and is super duper flat so paints well. Color me satisfied!
Next up is a bit more about glues, as previously mentioend I am using 2 new ones: a super thin one that melts the plastics together and a thicker one with a stronger bond. Both have their pros and cons.
The thin one a way of working is you pour some in a cup and literally brush it on. Since it only affects plastic/acrylic it doesnt kill your brush and you can get very neat joints. (this tip from Adam Savage's youtube link about modelling)
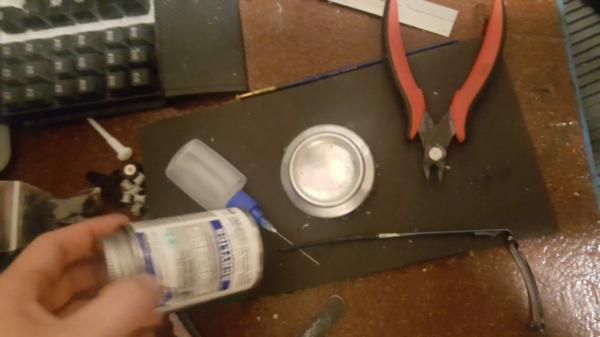
It works well but DAMN does it evaporate fast. A small puddle of the stuff will go in a few seconds so you either need a LOT of this or you know exactly where to brush on. So that kinda stinks. The dropper method also works but is also fiddly. The joint holds quickly but it can be a bit weaker in the end I've noticed. So it's great to "place" something and then later if it breaks off you use the stronger stuff on it afterwords.
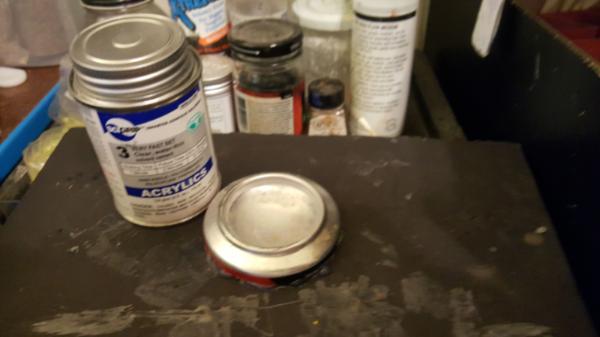
Speaking of which the stronger stuff is this (hey you get a sneak peek of the future!)
It works well, holds VERY well but also clouds up REALLY FAST. The opening to the liquid will block itself within a few seconds which.. sucks because you have to poke it out EVERY time. If you try squeeze the tube to burst it will basically explode with glue. Its very.. viscous and likes to flow into itself. kinda frustrating to just have mass spillage over and over.
Still, its strong and does bind the white plastic with GW plastic.
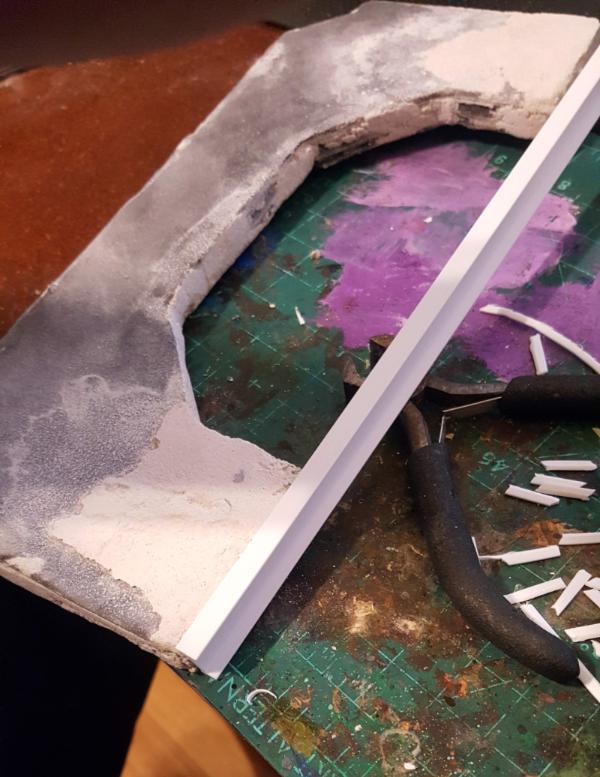
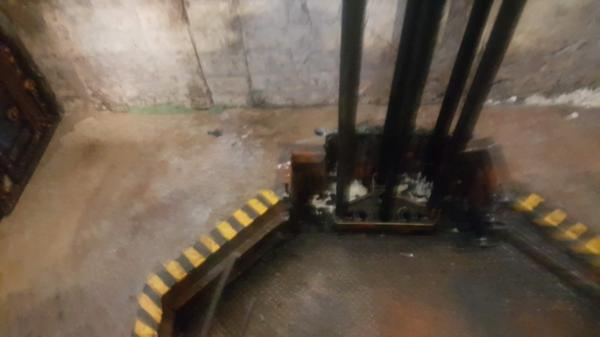
Anyhoo, moving on from glues I started working on the edge cleanup for my floor. The part near where the lift mechanism will be is a bit of an unknown but i wanted to get something down and I just may have to cut it out later.
blurry but you get the idea.
|
|
This message was edited 2 times. Last update was at 2018/11/07 22:44:51
|
|
|
|
|
2018/11/07 22:44:23
Subject: Re:Imperium vs Nids Diorama II: The Final Pieces (11/07: lift testing, danger zones painted)
|
|
Dakka Veteran
|
|
|
|
|
|
|
2018/11/08 22:29:09
Subject: Re:Imperium vs Nids Diorama II: The Final Pieces (11/07: lifting a knight)
|
|
Dakka Veteran
|
So I got in longer (10 inch) axles and cut them down and with that came full tests and a few revelations:
so to make this work i dug holes into the board as well so I had multiple anchor points. It gets a bit tricky to line up everything but it works and.... it didnt quite work.
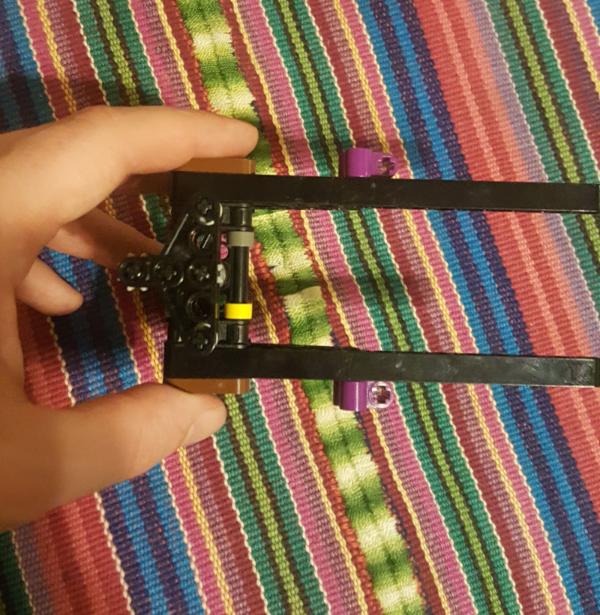
The first revelation was that my first platform prototype:
was too bendy. Just a single lego beam is not enough to support the weight. So i needed to double down and make it more rigid:

the second revelation was, of course, my "back" area was no longer big enough to go all the way down, which i wanted. So time to carve away:
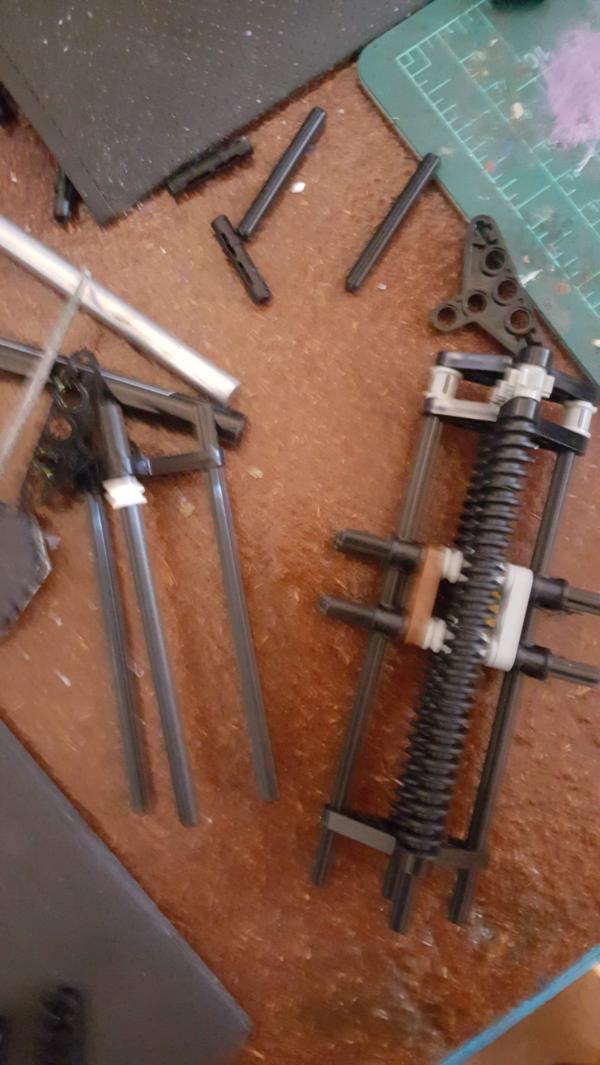
The final revelation was that, when i did it all together, it bound a LOT. basically the 2 shafts of worm gears arnt QUITE aligned with each other. So what would happen in my small scale tests is that they would shift ever so slightly to account fo reach other and thus work "fine". But once i removed that slack installing everything it would bind at about midway up or down.
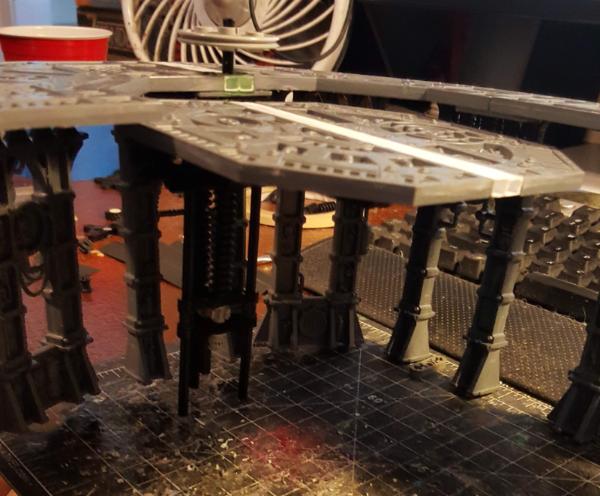
So.. I decided to just go with 1 worm gear shaft and add a few more supports in the back (the lego bits with holes where more axels will eventually go) to further keep everything sturdy:

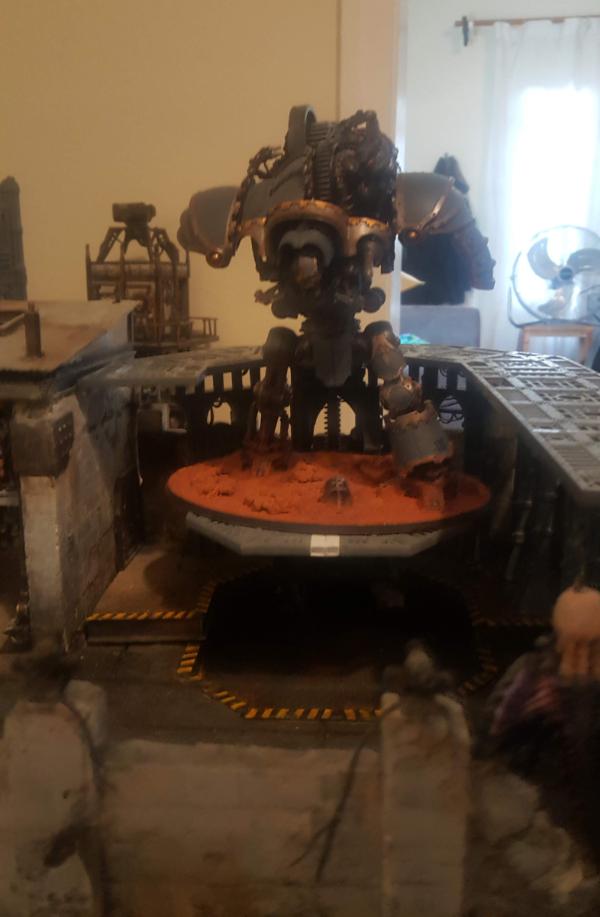
the end results, though it took a while, are well worth it!!
|
|
|
|
|
|
2018/11/09 09:09:59
Subject: Imperium vs Nids Diorama II: The Final Pieces (11/07: lifting a knight)
|
|

Stalwart Veteran Guard Sergeant
|
Drop your day job and keep building this for me until it's done.
I know, I am not asking much!
|
|
|
|
|
2018/11/09 22:45:33
Subject: Re:Imperium vs Nids Diorama II: The Final Pieces (11/09: starting to paint the lift)
|
|
Dakka Veteran
|
Another pic of the knight! It makes me so happy. It really works well and you can even lift it with the knight on it. I wouldnt.. suggest doing that, but its doable! Definitely couldnt hold a sicaran or a fire raptor (anything solid resin really) but knights are no problem.
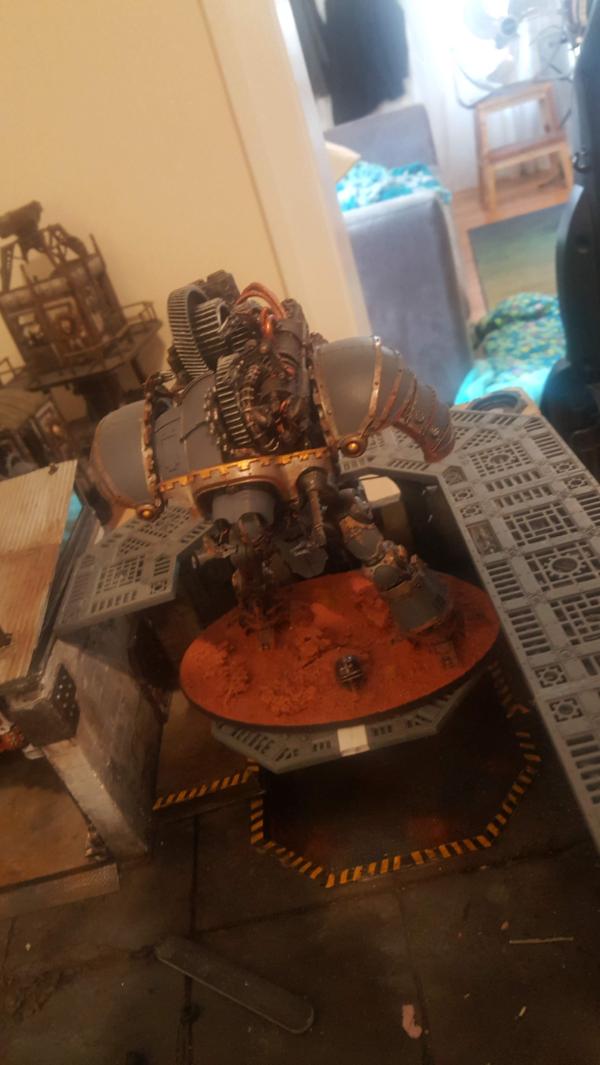
About the "max height" that it will go up:
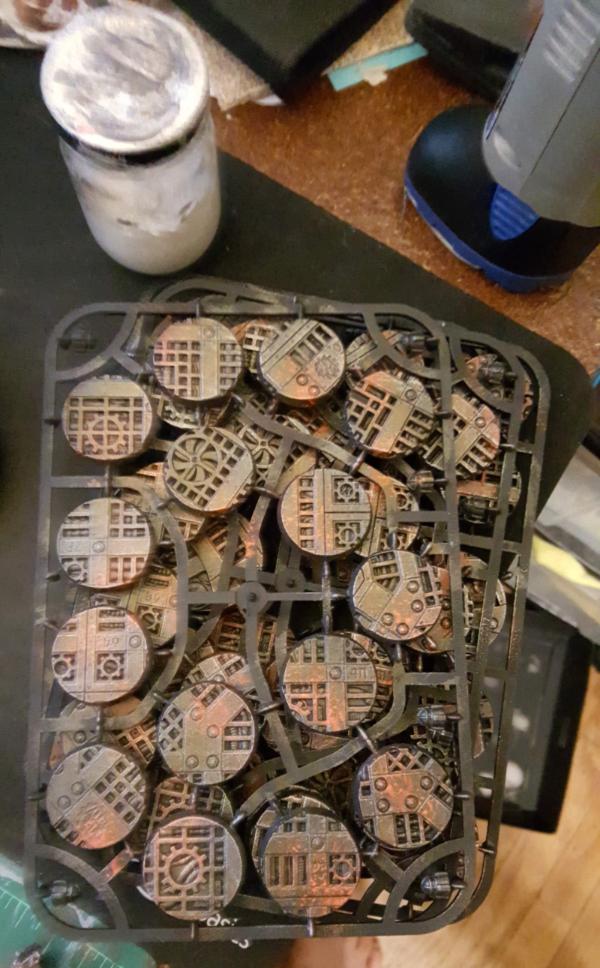
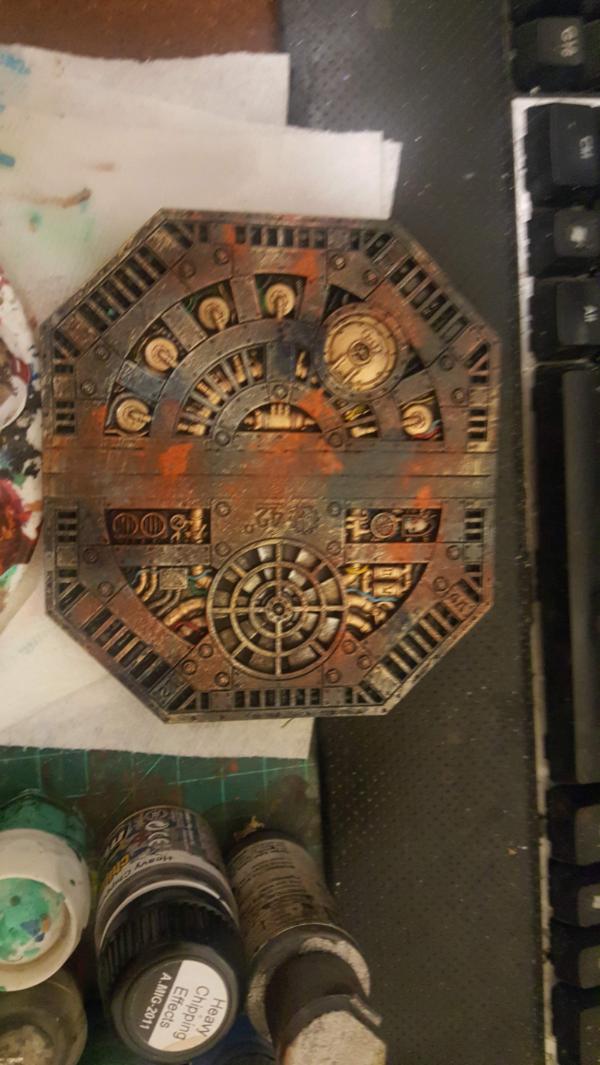
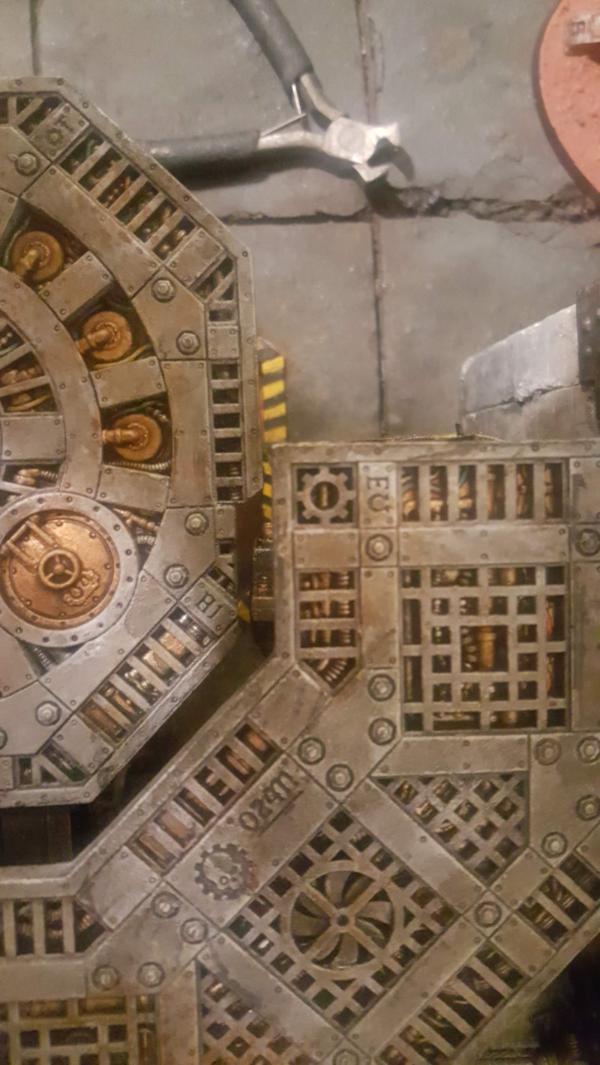
Next up is painting really. First up my dark metal basecoat with detailing. Soo.. many.. defails. Sigh.
|
|
|
|
|
|
2018/11/10 10:54:23
Subject: Imperium vs Nids Diorama II: The Final Pieces (11/09: starting to paint the lift)
|
|
Stealthy Grot Snipa
|
This is awesome
|
|
|
|
|
|
2018/11/11 17:14:29
Subject: Re:Imperium vs Nids Diorama II: The Final Pieces (11/10: painting a generator)
|
|
Dakka Veteran
|
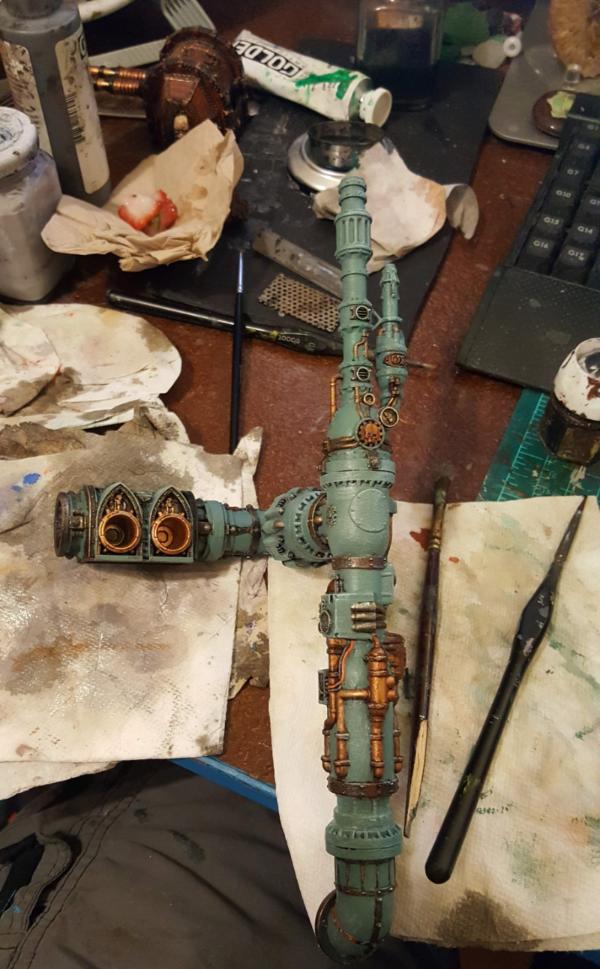
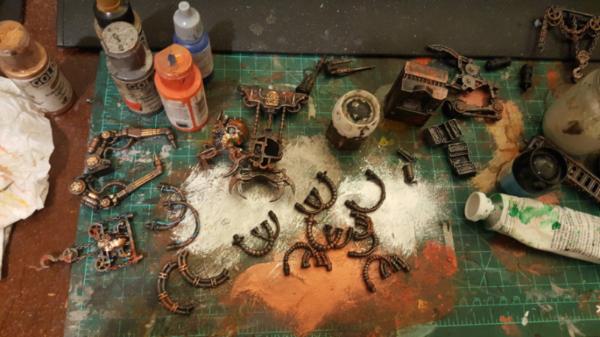
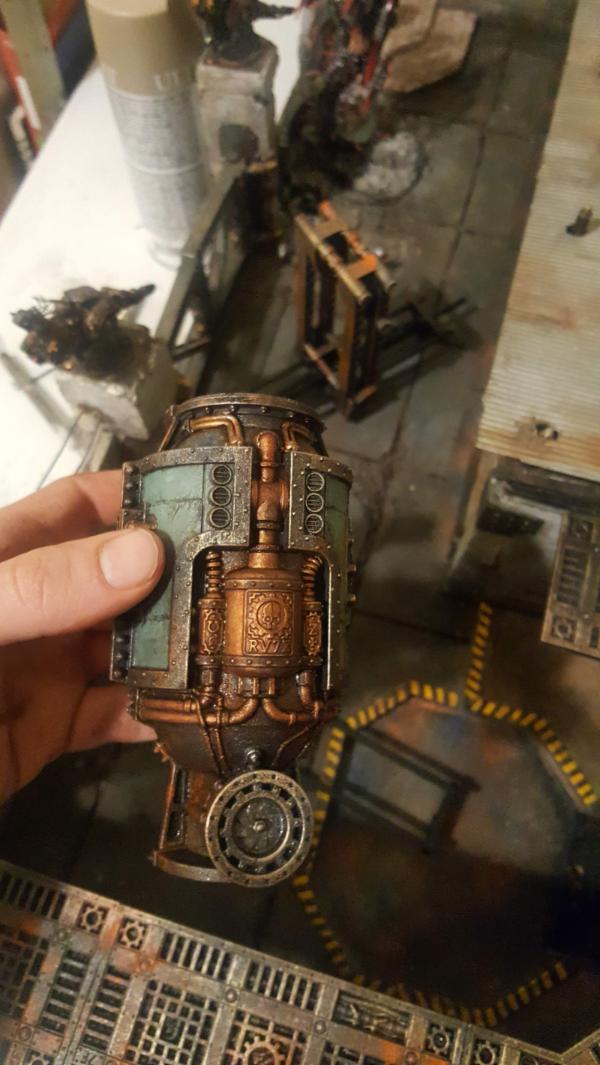
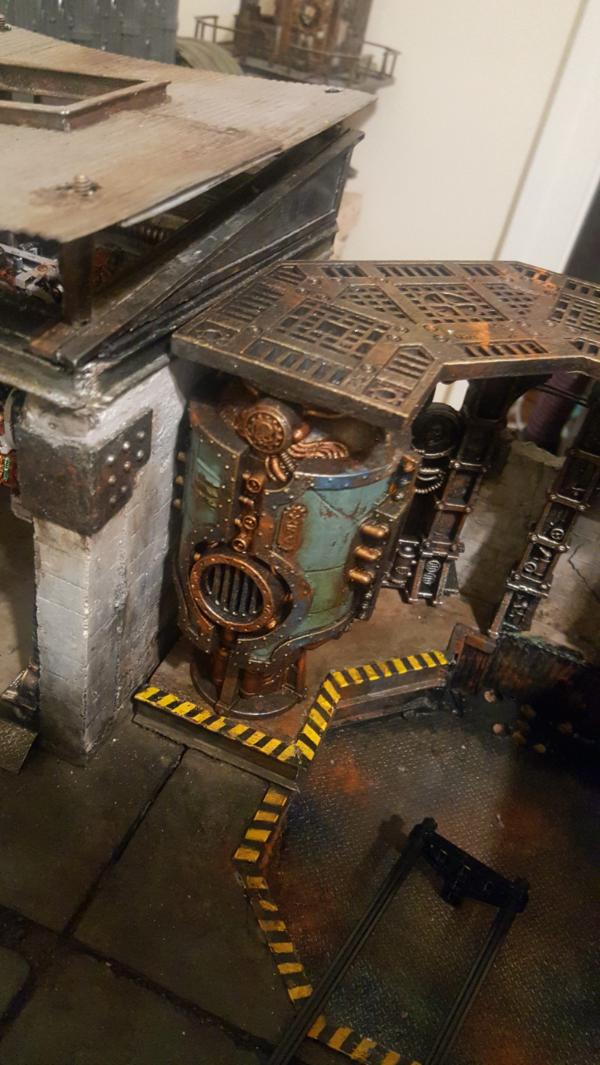
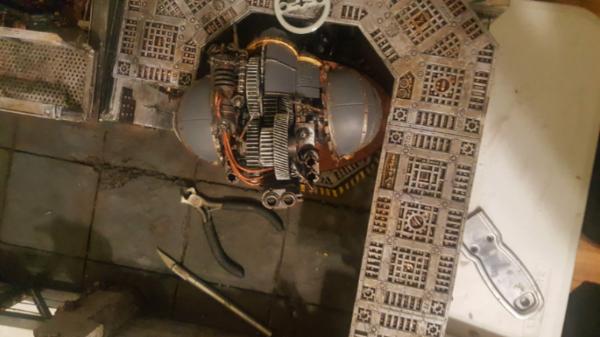
Took a bit of a break from the monotony of painting of all the mechanicus walkways to paint up my generator. Pretty happy with my industrial green.
|
|
|
|
|
|
2018/11/12 22:07:07
Subject: Re:Imperium vs Nids Diorama II: The Final Pieces (11/10: back to painting mechanicus walkways)
|
|
Dakka Veteran
|
|
|
|
|
|
|
2018/11/13 23:22:12
Subject: Re:Imperium vs Nids Diorama II: The Final Pieces (11/13: washing the walkways)
|
|
Dakka Veteran
|
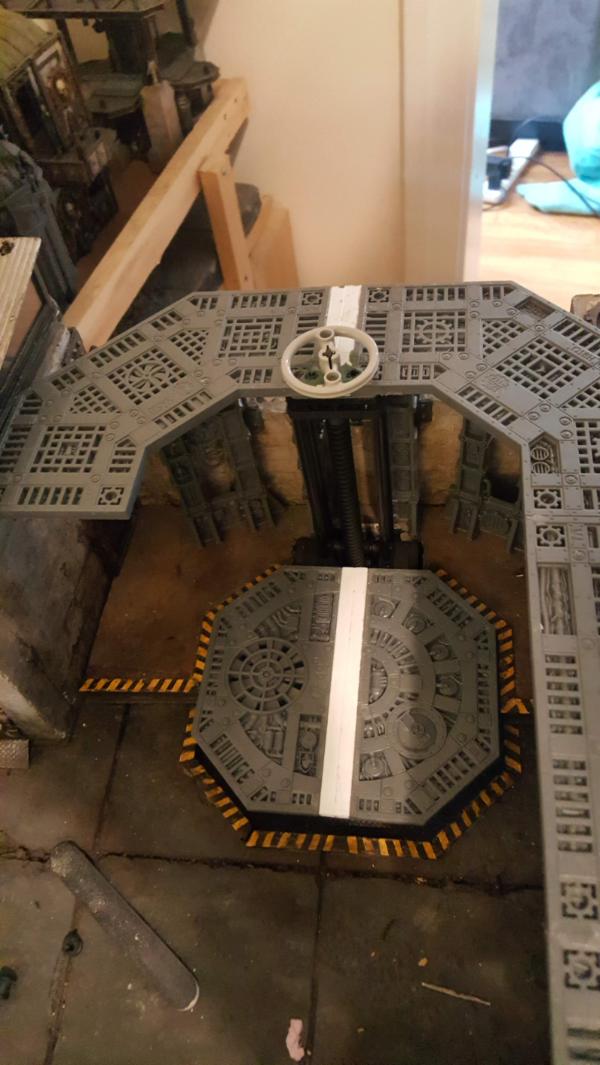
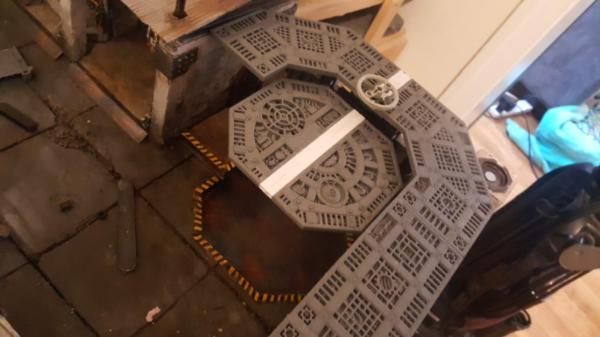
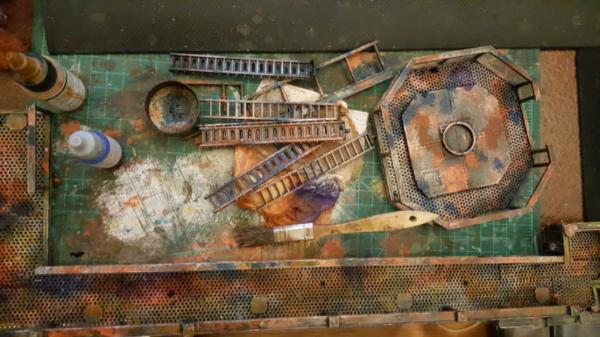
wash time!
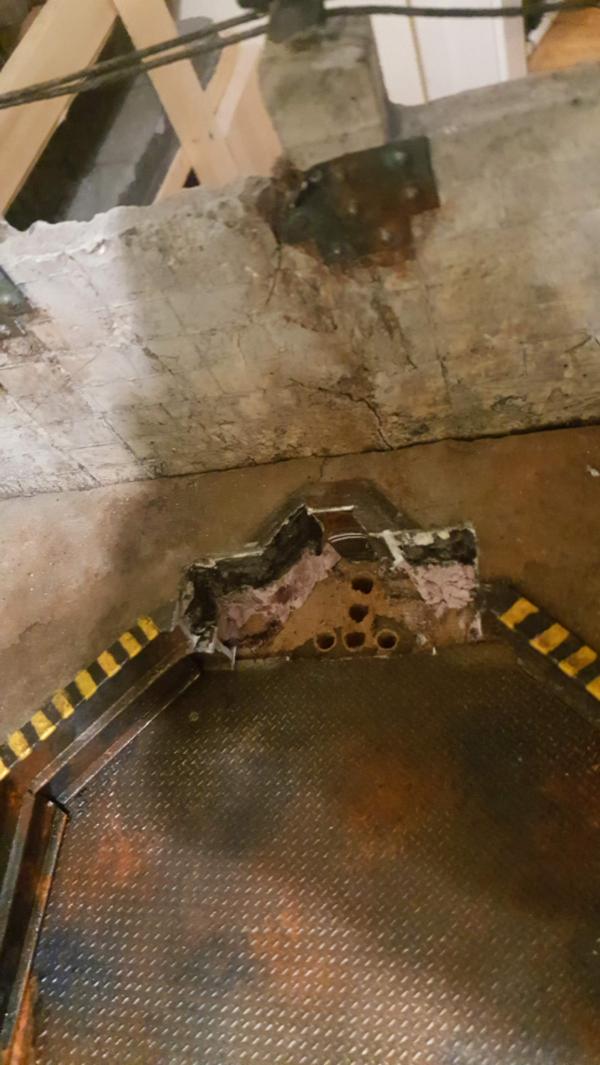
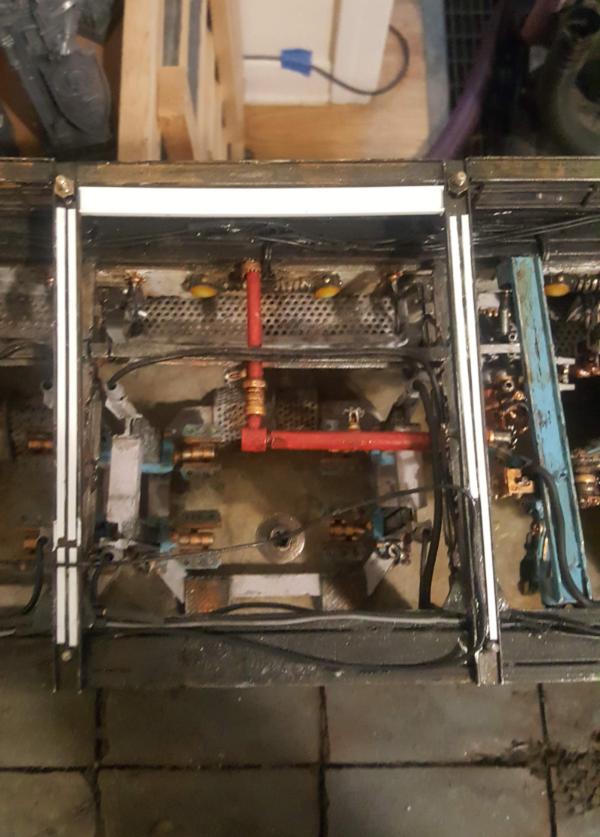
Also I cut out a bigger hole for the lift mechanism and finished it off.
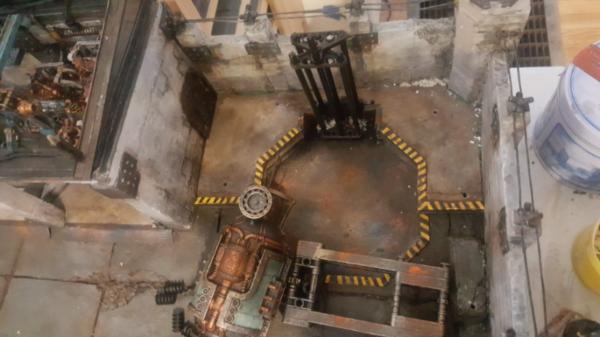
Leaving us with a full on test of everything in place! yay!

|
|
|
|
|
|
2018/11/14 22:02:54
Subject: Re:Imperium vs Nids Diorama II: The Final Pieces (11/14: knight lift installed, pondering my walkways)
|
|
Dakka Veteran
|
It's installed! Phew, this one was a big piece to get right. There are a lot of inbetween pictures you arnt seeing but the basic way it went was this:
first I glued down the lift to the bottom. Most of my axels went "into" the wood so that way when i got out my gorilla expanding glue it would have something to really bite into. Obviosuly I had to be careful not to glue down the axle that spins but everything else could get really firmly in there.
Next up was making a TON of pins, at least 1 per "leg" of the walkway to keep it sturdy. The holes I drilled into the board/foam I made a bit bigger so i had wiggle room since there were a LOT of things that had to line up (6 axles for the lift INTO the walkway and then 10 or so pins FROM the walkway into the ground)
I did a lot of tests to make sure it would work and then glued it down. One consequence of this was my walkway, in certain areas, ever so slightly floats off the ground. One thing I noticed was that the whole structure had a slight "curve" to it that would need to be smashed down. But since I made pins for everyhing that last "smash" at the end didnt quite reach so a few areas ever so slightly float. Fortunately i have a ton of green stuff so i can just fill in those gaps and move on, they are pretty tough to see.
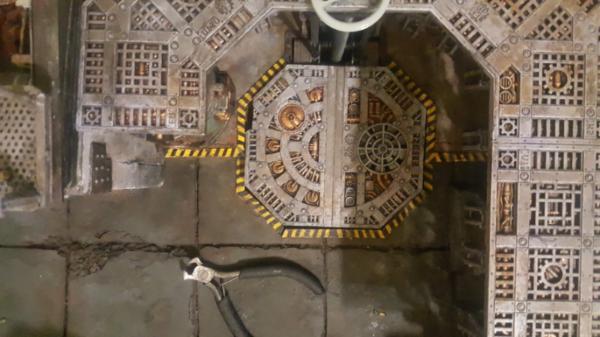
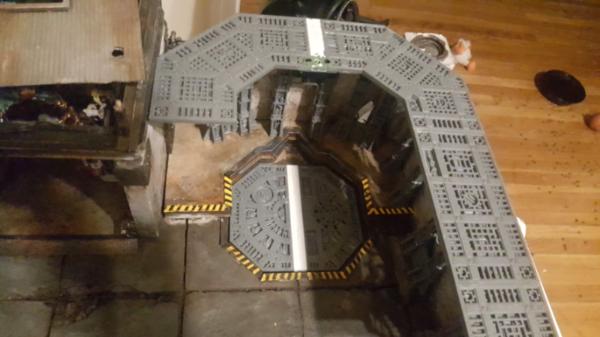
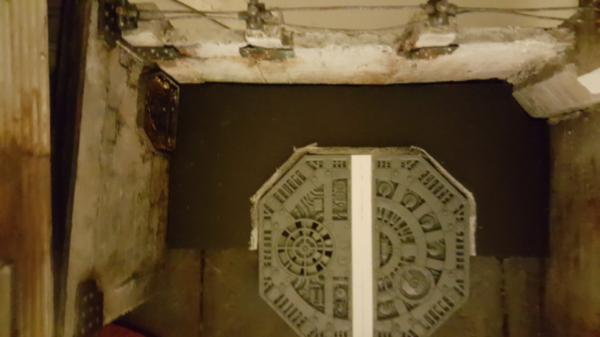
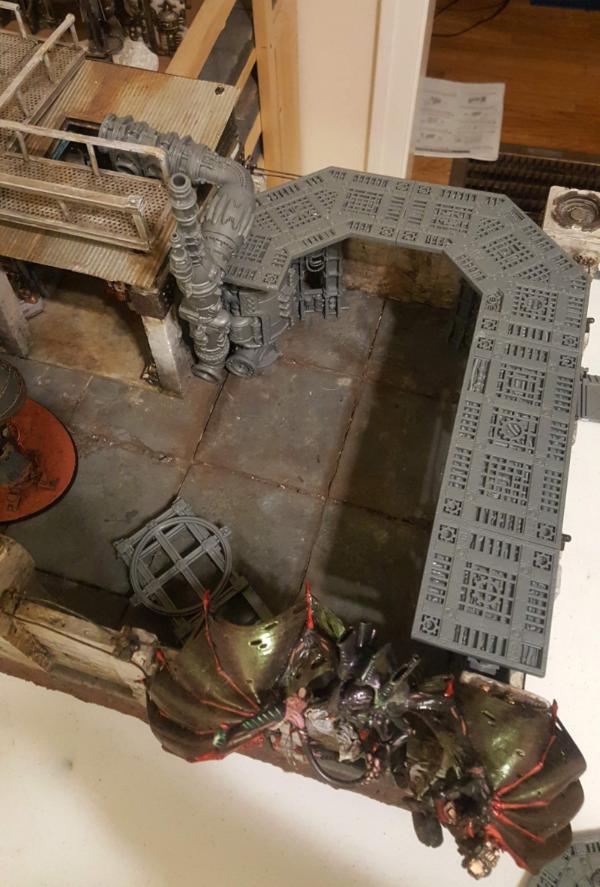
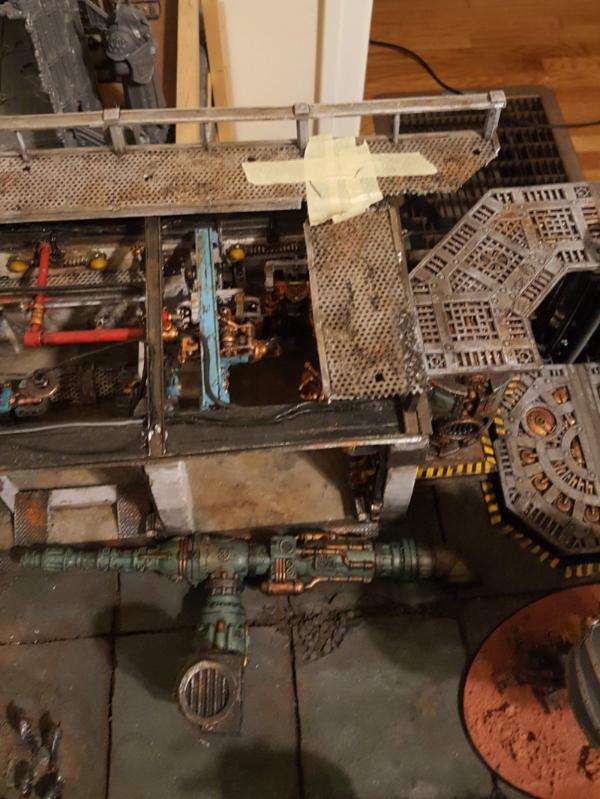
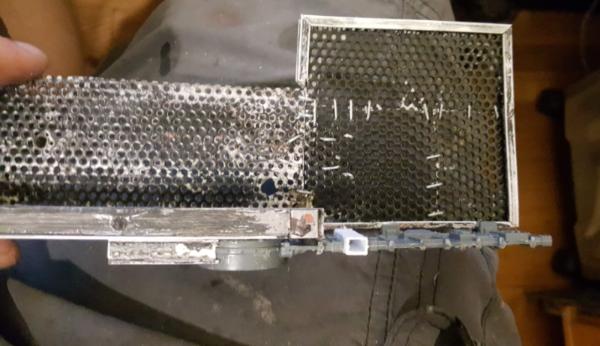
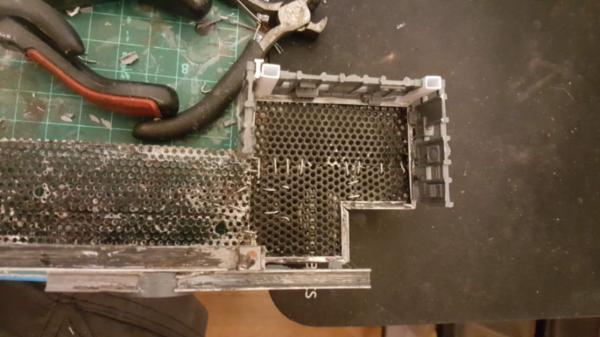
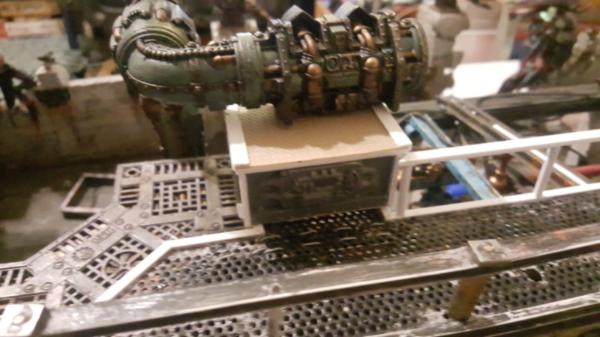
One thing you are going to notice is the slight "cut" i had to make in my octagon. Turns out the generator sticks out juuuusttt enough to necessitate that. Instead of slicing the generator down a bit i figured I would just cut the octagon. Not pictures is my putting another hazard cover over that cut to make it more "official"
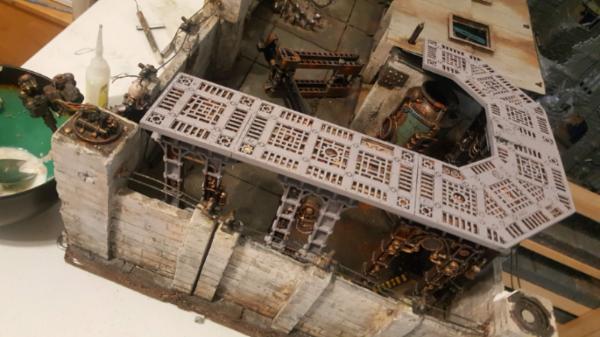
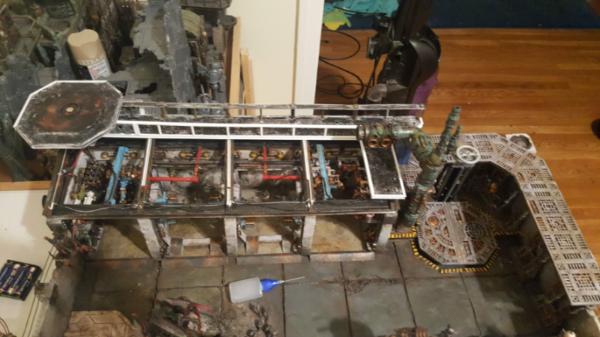
So finally we have a wide shot1
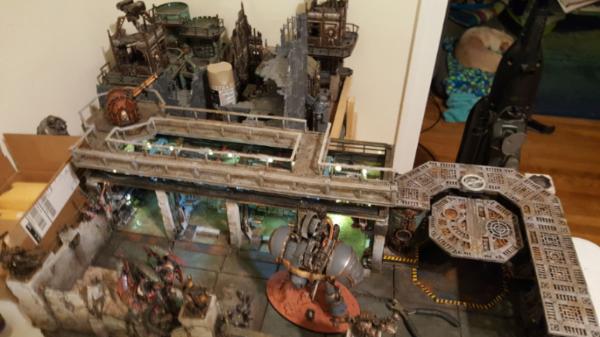
SO HAPPY. Well, mostly. See this is ALREADY with me just taking off the roof and.. you really still cant see inside the garage. Given that I'm about to add a ton MORE detail in there its just.. not gonna work. At a certain point form needs to win over function and here is that case. Since I have to modify the walkway anyways for my new exhaust pipes I think it's time to start over completely and re-do the whole thing. A bit extreme but ultimtely a good step to make. Remember my commentary about willingness to iterate and do it again? This is where that comes into play. It sucks, it will be a pain to strip it, but it will look better to just start over. Especially now that I know abotu the plastic glue and I can get some extra room to place marins for "free" by putting the railing directly on the plastic ibeam instead of wiring it into the metal.
|
|
|
|
|
|
2018/11/15 22:40:16
Subject: Re:Imperium vs Nids Diorama II: The Final Pieces (11/15: redesigning my metal walkways)
|
|
Dakka Veteran
|
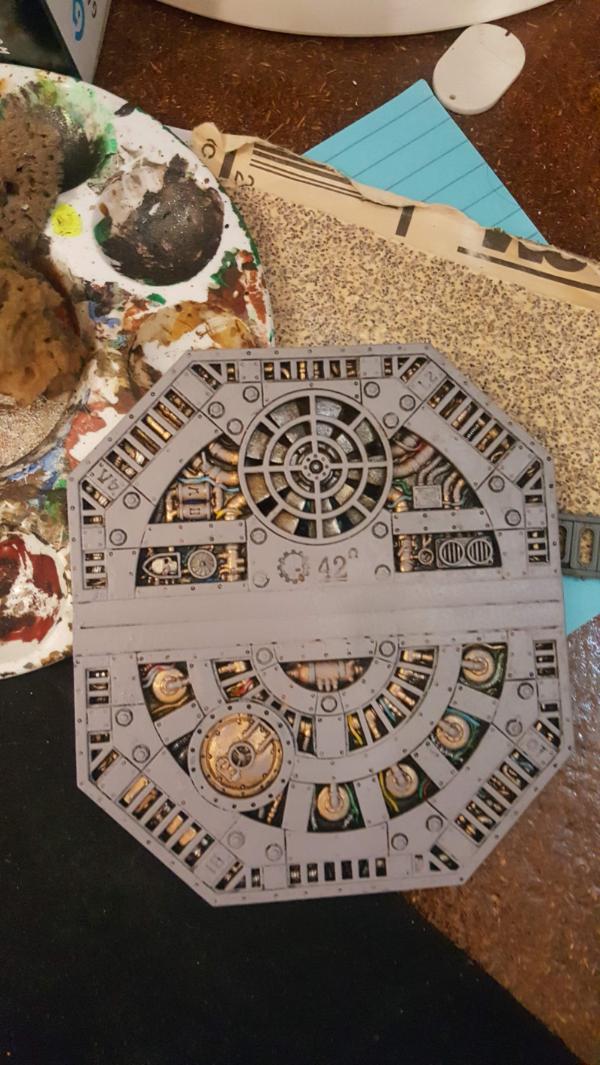
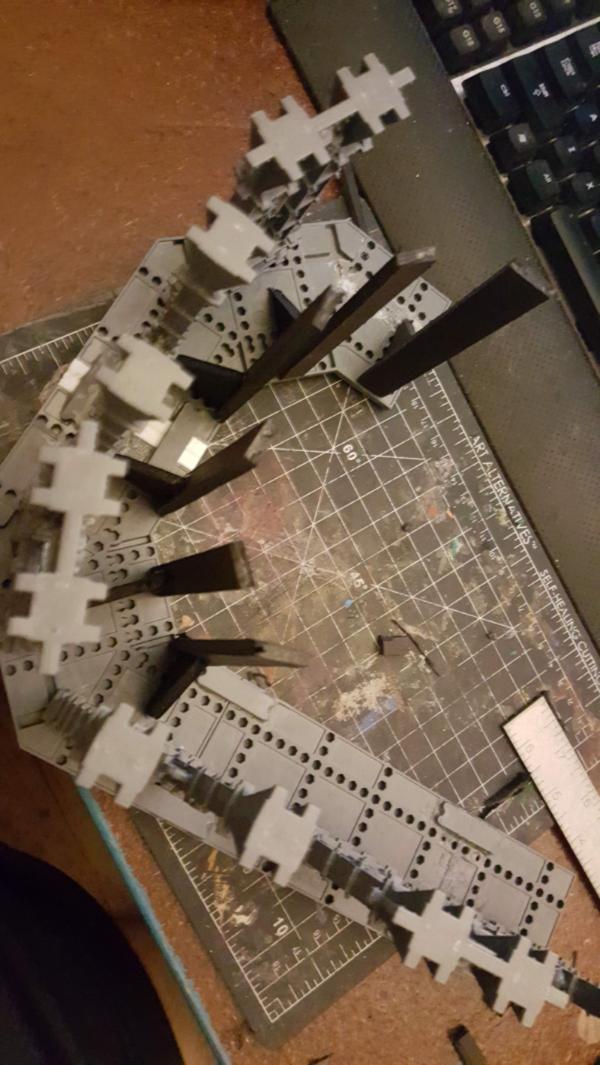
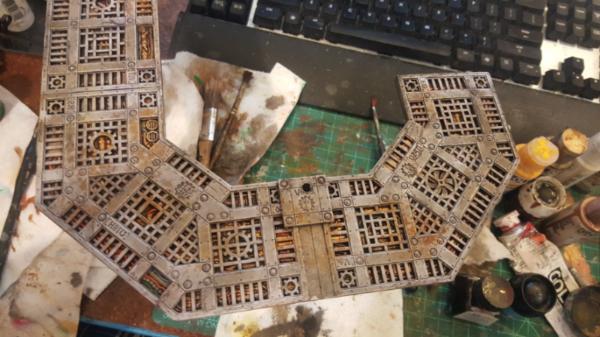
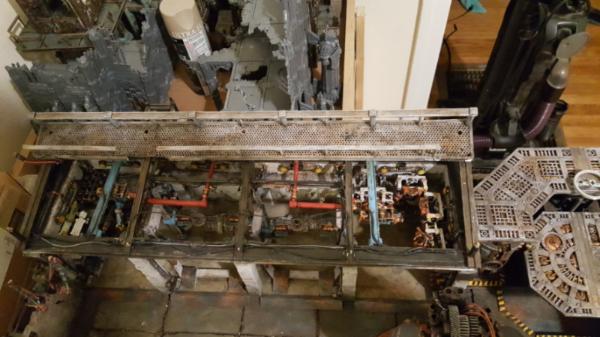
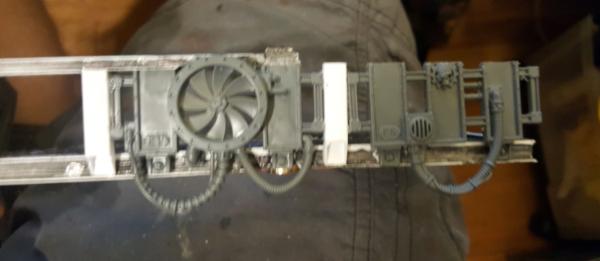
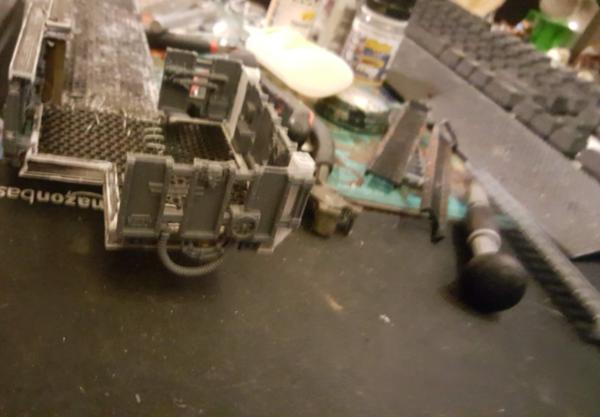
So, time to rethink the metal walkways. As previously mentioned we started here:
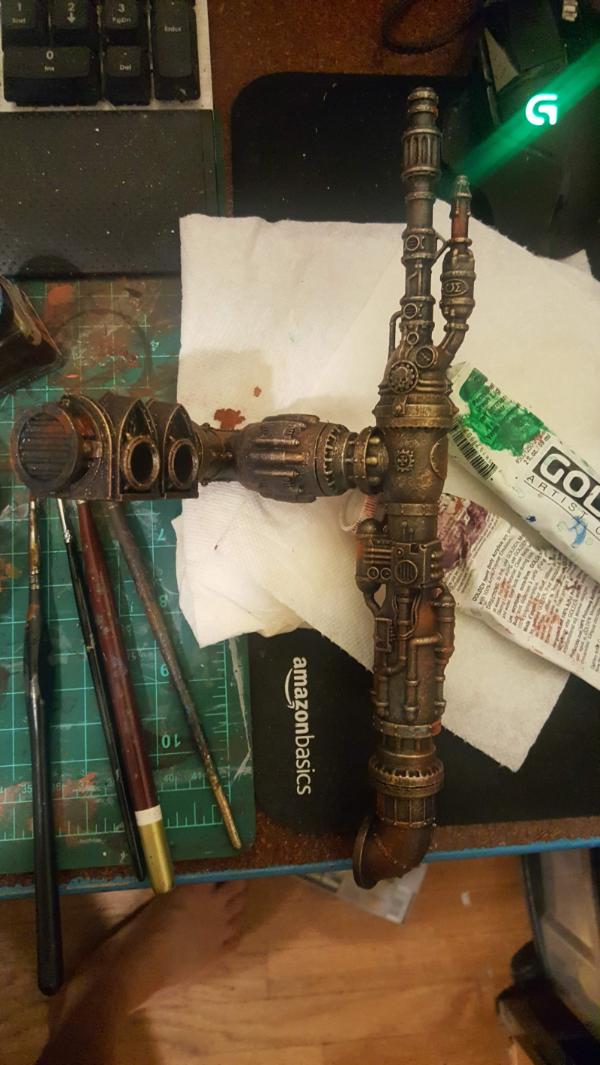
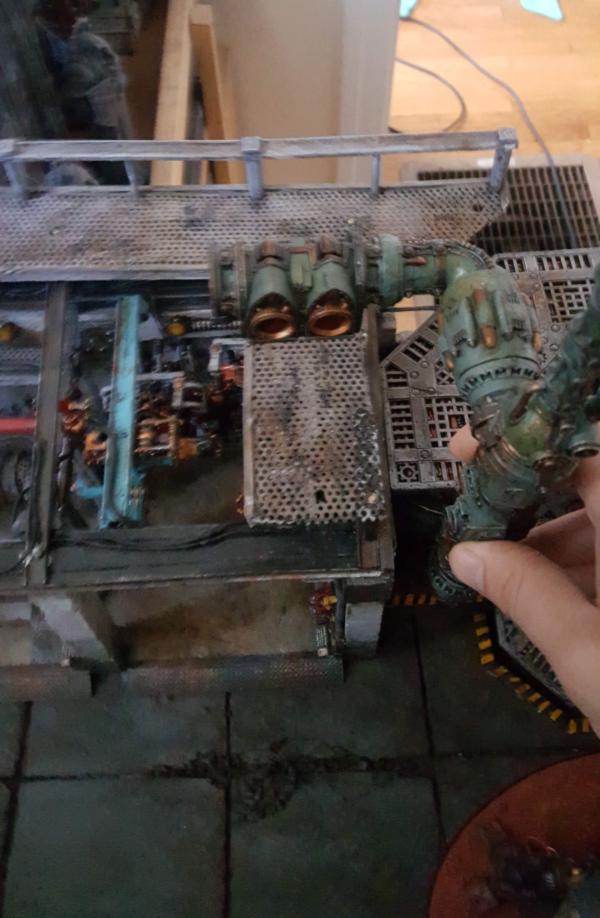
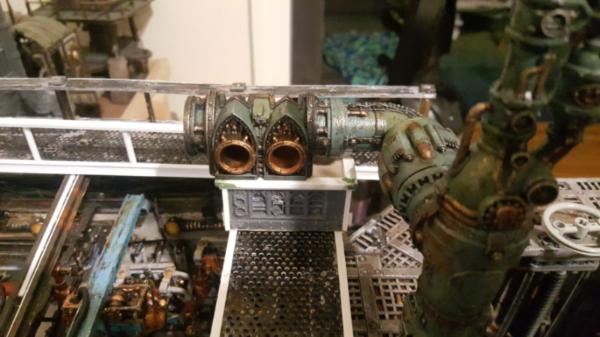
I also know that my exhaust pipes will look like this:
and finally that the main endpiece actually has detail on both "ends". So there are the plasma coil thingies on one end and a computer terminal on the other. So it would make sense for somehow both ends of that to be reachable. Now one trick is that i could potentially have 2 entry points onto the walkway from my mechanicus walkway, so i dont necessarily need to link both sides of the terminal via the metal walkway. This leads me to a design more like this:
where the terminal would go in the middle of the piece that sticks out. I also want the octagon to be raised up and detachable so i can hide my battery pack underneath it. (and also put this on my shelf easier)
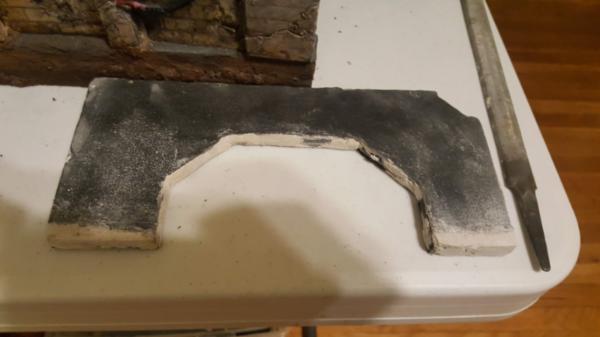
GIven that design its time to dissassemble! We're going for a full redo here so nothing is sacred!
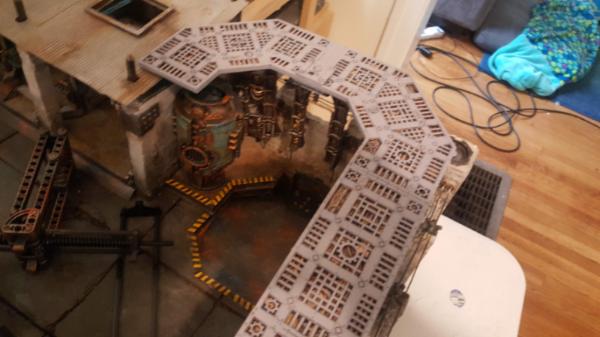
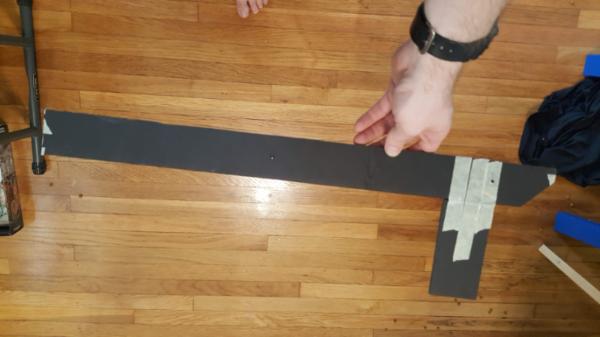
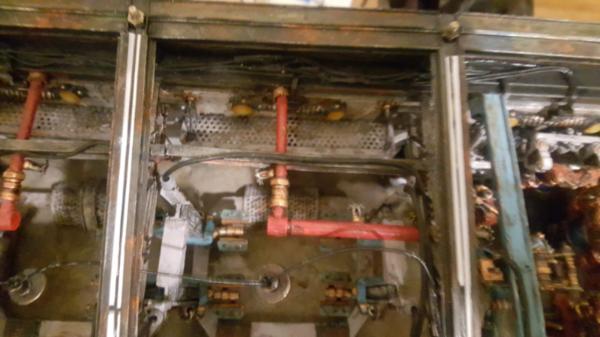
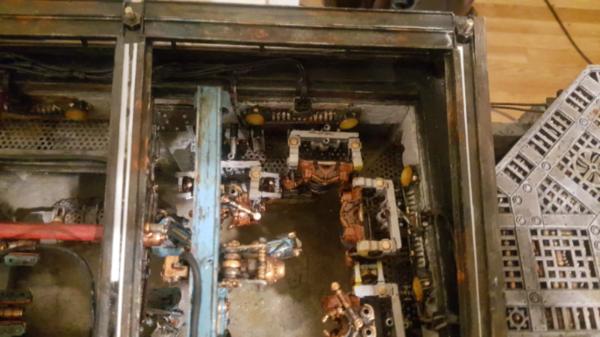
This left me with a straight piece. Look at how more visible the garage innards are now. I might even offset my walkway from the edge just to further help things.
|
|
|
|
|
|
2018/11/16 06:19:23
Subject: Imperium vs Nids Diorama II: The Final Pieces (11/15: redesigning my metal walkways)
|
|
Painlord Titan Princeps of Slaanesh
|
Yeah, that's so much clearer.
One step back, two steps forward.
|
|
|
|
|
|
2018/11/16 23:15:37
Subject: Re:Imperium vs Nids Diorama II: The Final Pieces (11/16: Paint stripping really long things)
|
|
Dakka Veteran
|
For sure. When you see it and you get mad at yourself because it's so obvious why didnt you do this before... yeah that's a good sign that you are on the right path lol. On the flip side, had I done before I would have also glued down my clear ceiling before and thus prevented the addition of all the new shiny bits I've gotten from the ork workshop sooo thre are plus sides.
Anyways im still working out and cutting to get the walkway that intersects the control panel:
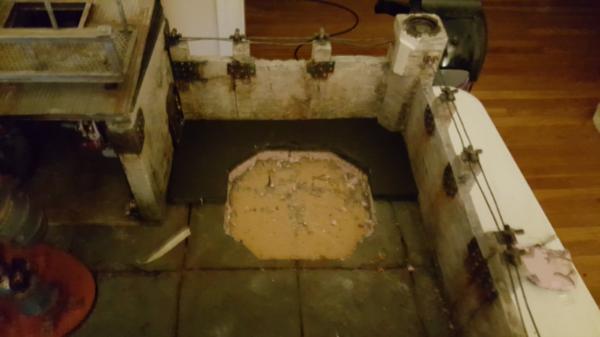
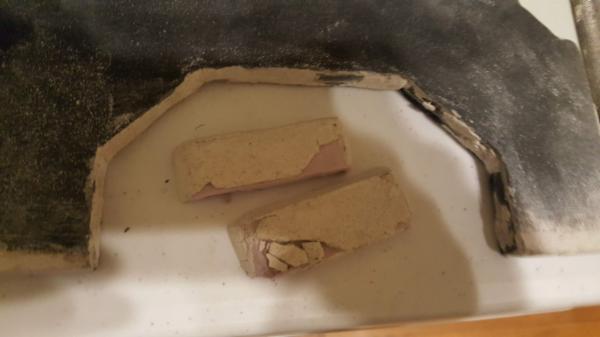
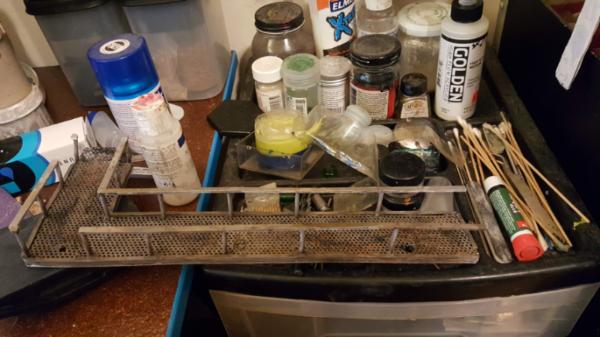
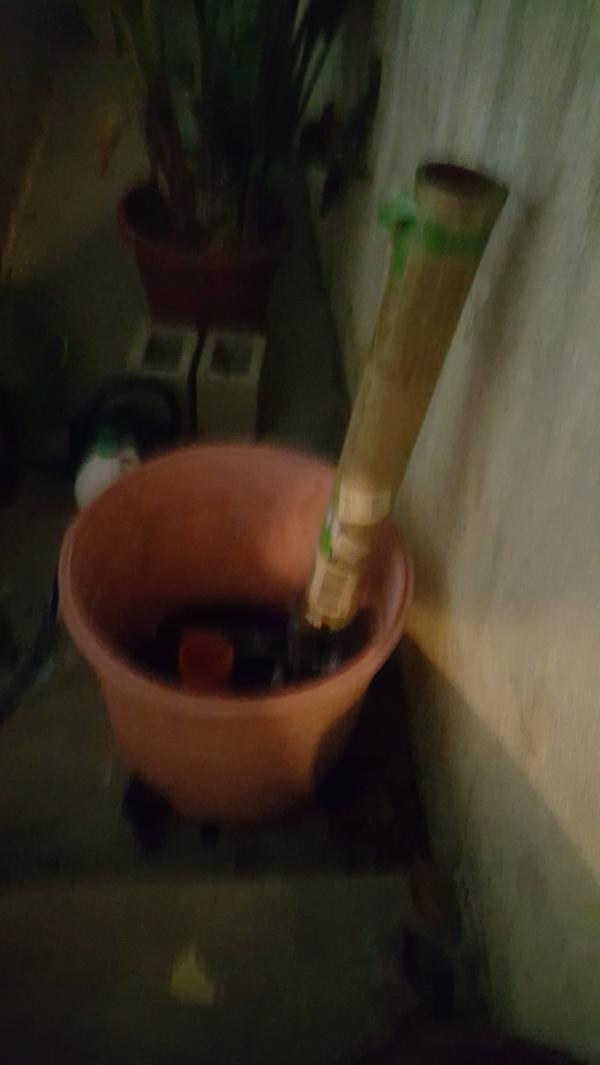
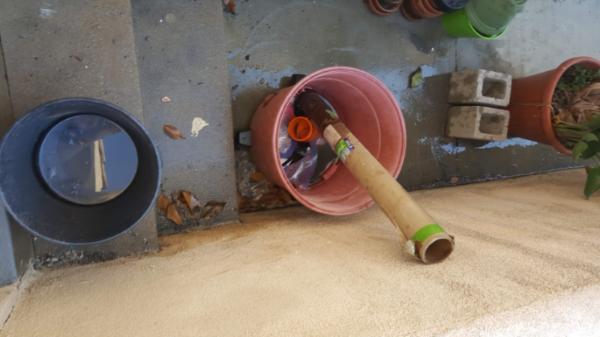
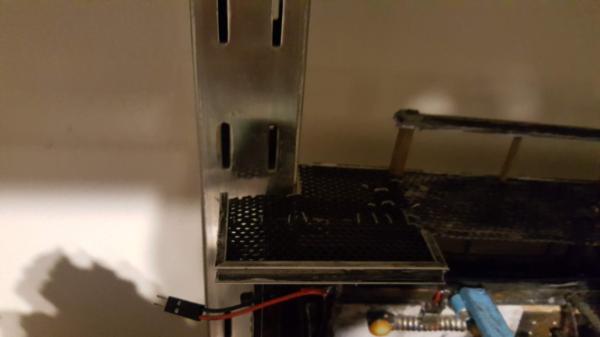
With that I have enough design done to need to strip everything so I can start gluing on the new finishing bits. This then becomes one of the harder problems I've faced on this project: how on earth do i strip this thing? The main "walkway" is about 22 inches long. I tried a trashbag but it IMMEDIATELY started leaking (lost... quite a bit of simple green too as a result)
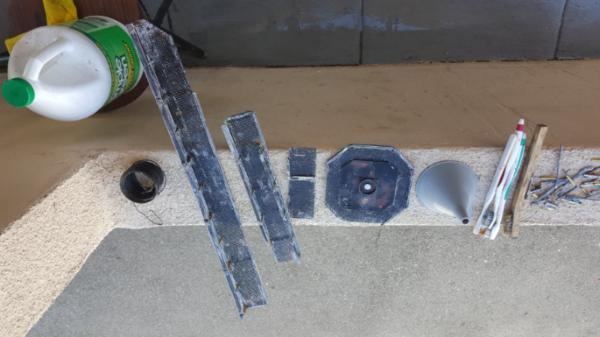
My biggest cooking tray lost as well..
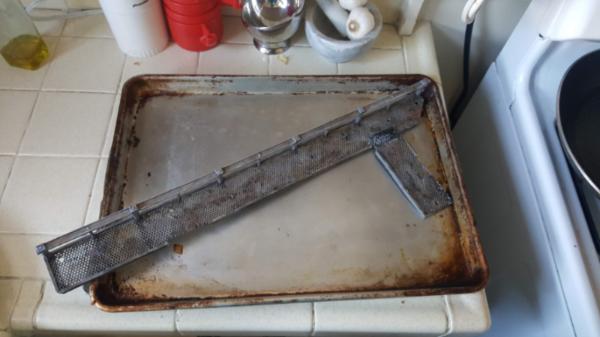
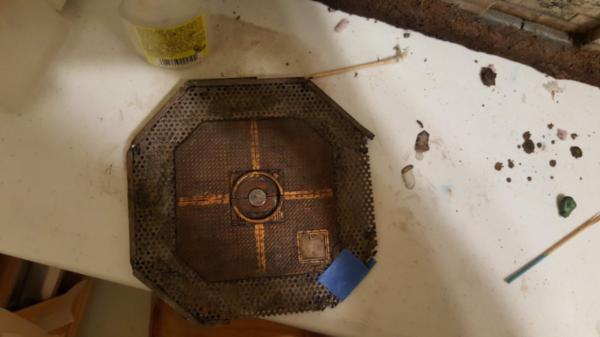
Finally I had an old poster tube and just.. kinda hoped the green stuff wouldnt eat through the cardboard too fast?
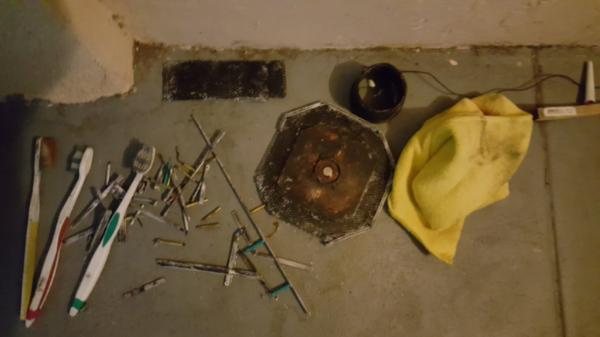
At least the smaller pieces stripped okay...
|
|
|
|
|
|
2018/11/17 23:02:25
Subject: Re:Imperium vs Nids Diorama II: The Final Pieces (11/17: painting a ton of industrial details I)
|
|
Dakka Veteran
|
|
|
|
|
|
|
2018/11/17 23:32:45
Subject: Imperium vs Nids Diorama II: The Final Pieces (11/17: painting a ton of industrial details I)
|
|
Painlord Titan Princeps of Slaanesh
|
If you know how big the bases are and you know how big the area you want to fit them in is, don't you just need to figure out spacing to be able to know how many you'll need?
What am I missing?
|
|
|
|
|
|
2018/11/18 03:34:59
Subject: Re:Imperium vs Nids Diorama II: The Final Pieces (11/17: painting a ton of industrial details I)
|
|
Dakka Veteran
|
You know me, I want them to exactly line up with the walkway underneath them 
|
|
|
|
|
|
2018/11/18 21:38:12
Subject: Re:Imperium vs Nids Diorama II: The Final Pieces (11/18: stripping done,time to rebuild my walkway)
|
|
Dakka Veteran
|
So with the stripping done I can move back to building the walkway. Although painting the fiddly bits is also important I really want to get all the big pieces in "place" before I start worrying abotu where that stuff will go and how it will look.
My hacky strip setup lol. I wasted so much simple green..
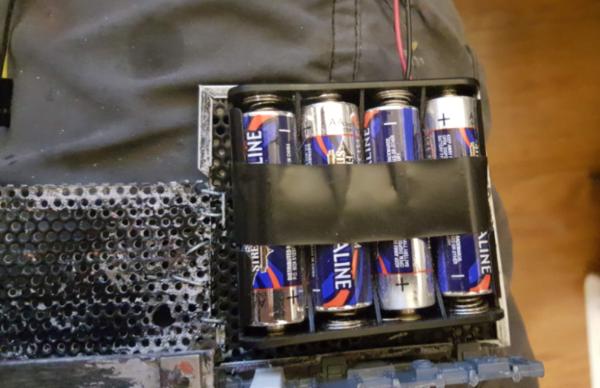
I started first with the battery area, since that would require the most "development". Since I had so many of those wlkway walls from my forge I figured I'd use those. I kind of hate the walls because of the pointy top but you cut that off and its not so bad. Its a bit wierd with the gear-skull there so high up but oh well, cant really be helped.
One realization is that, given the height, I could change the battery pack itself to be "double thick" instead of a single layer of batteries. However i wanted to make sure this at least configuration worked because I could instead just add more batteries (if i want any more LEDs) instead and thus have 2 rows of 4)
|
|
This message was edited 1 time. Last update was at 2018/11/18 21:38:34
|
|
|
|
|
2018/11/19 22:44:23
Subject: Re:Imperium vs Nids Diorama II: The Final Pieces (11/19: always measure twice)
|
|
Dakka Veteran
|
So, building for me is hard, especially mechanical building. Unlike pro greeblers/adam savage/etc, any time I try to just add "greebling" to something and move on it never looks right to me. I always need some kind of structure and physical basis for it to work for me. Having rules has helped me make stuff im happy with but it definitely takes longer than a pro. Every once in a while though I get into a groove where I just KNOW what goes where. I know in my head all my relevent available bits and their sizing and can thus imagine the final piece. Its a fun groove and ususally when I get the most done after a few hours of puttering trying to remember what I have bits wise.
The downside of grooves, however, is occasionally you forget the original design requirements.
In this instance, the entire reason why I'm making the octagon seperate in the first place is because I need the walkway to be A: permenent and B: avoid this beam on my shelf
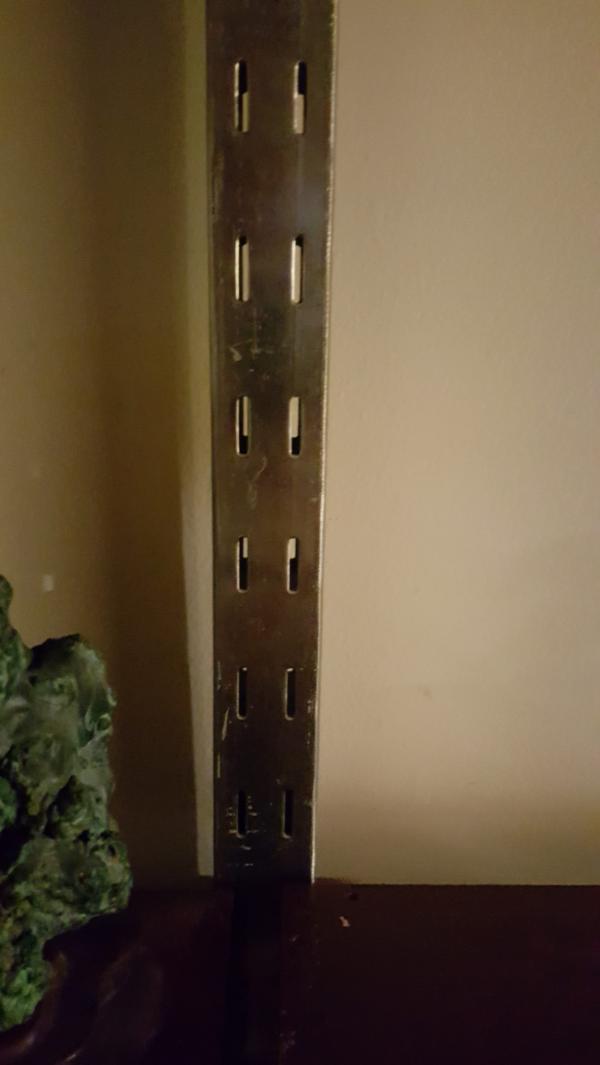
since it digs "into" the octagon at that point. Now, with the new walkway hanging over the side a bit doing something like this...
still wont work. Sigh. At least I caught it semi-early but still, DAMMIT. Time to start a-cutting
I guess my battery will have to hide somewhere else whilst its on the shelf. Bleh, still, this works at least.
So yes, grooves are fun, but still measure twice.
|
|
|
|
|
|
2018/11/20 23:07:11
Subject: Re:Imperium vs Nids Diorama II: The Final Pieces (11/20: walkways and window sills)
|
|
Dakka Veteran
|
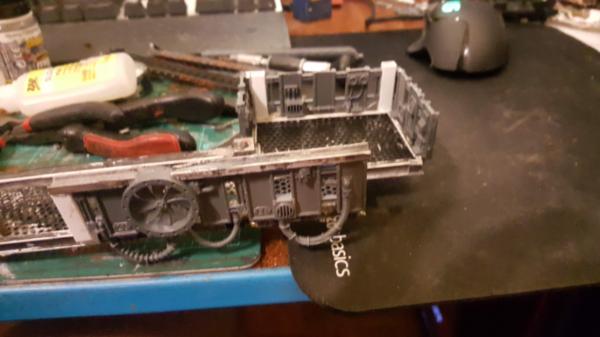
more progress on the walkways:
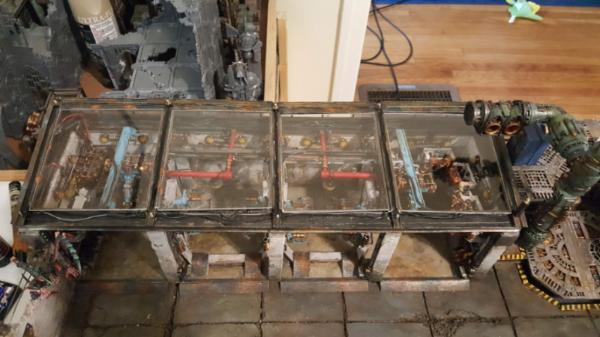
I also started on another key point, the actual window sills. The idea is basically just abig slab of acrylic over it, no frames no nothing. Nothing to block the view of the garage or get smudged/tarnished by glue. So I need some kind of "sill" to set them in. so they can more or less just plop down and be done (with some glue on the edge)
I started adding "S" shaped beams so i get an "edge" for each opening that the acrylic could rest on.
I also added some more ibeam thickness in the back because the walkway covers all that up anyways so might as well:
All together now the new design! It's so much better.
|
|
|
|
|
|
2018/11/24 06:39:14
Subject: Re:Imperium vs Nids Diorama II: The Final Pieces (11/23: happy black friday! Skulls and boxes)
|
|
Dakka Veteran
|
Ahh fake holidays. Perfect for.. more progress! yay!
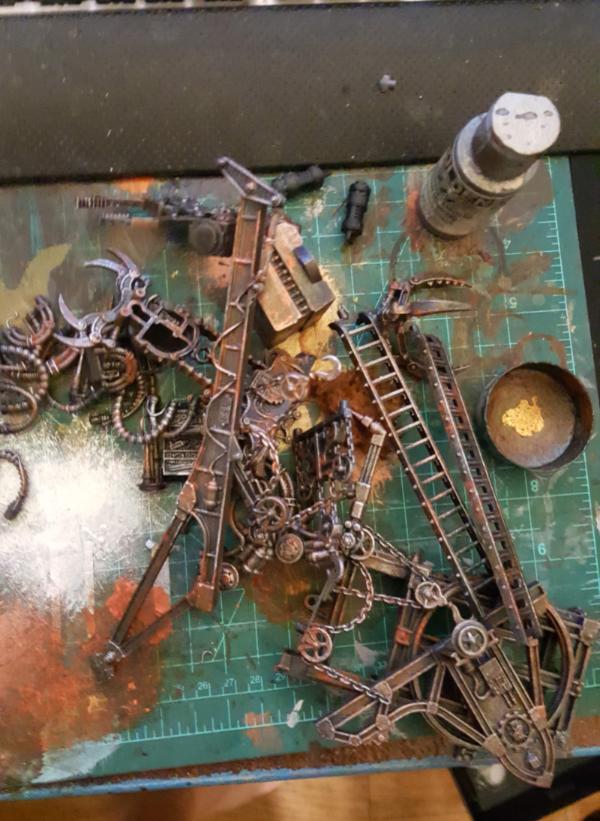
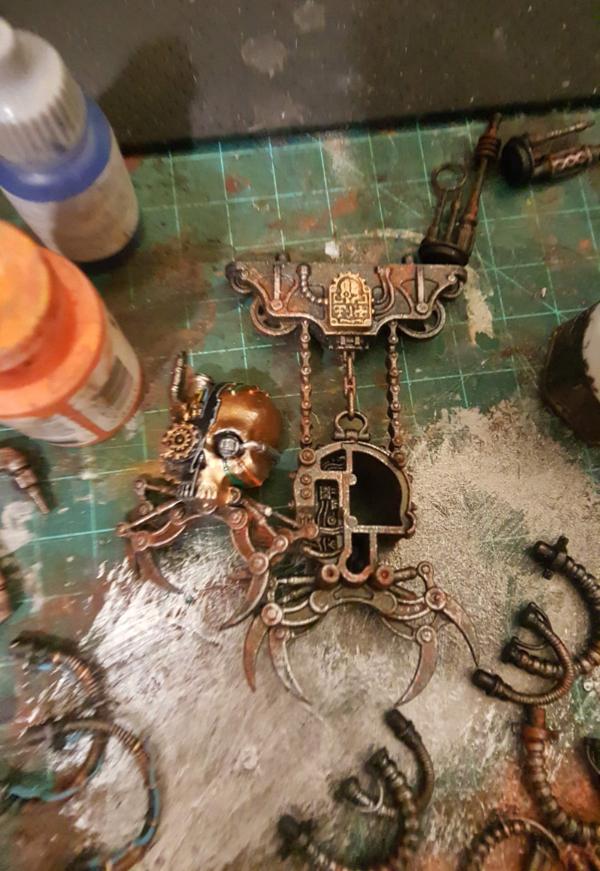
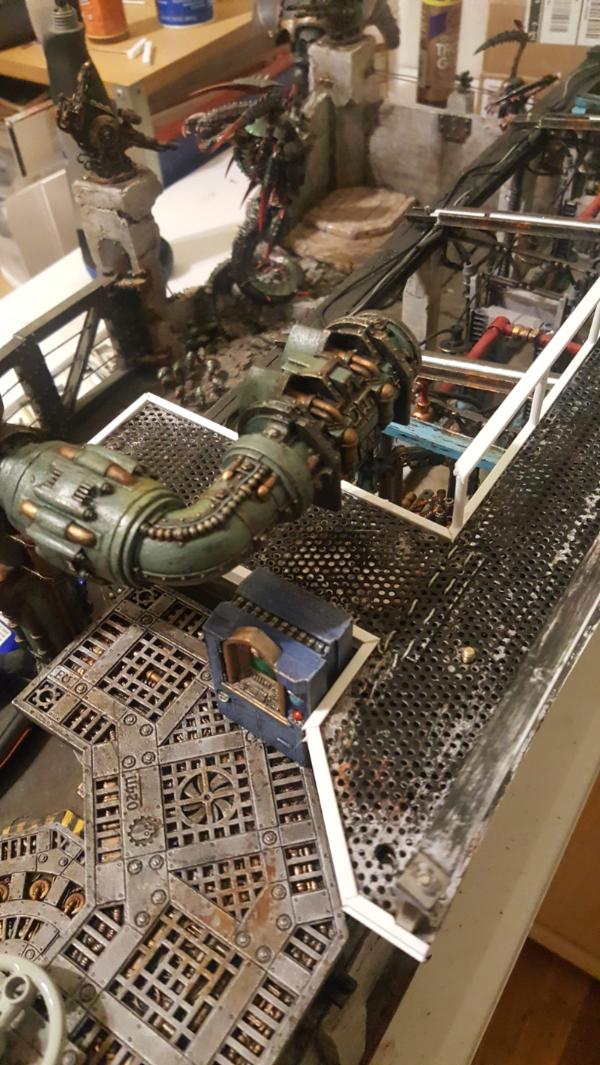
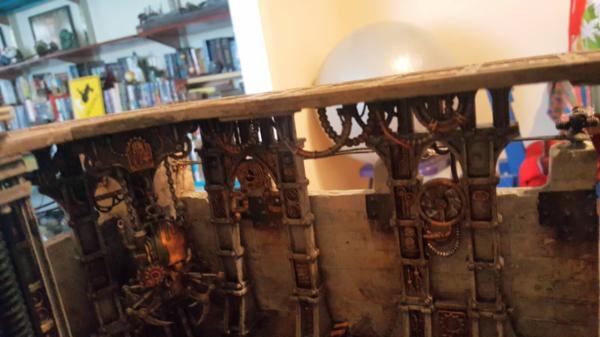
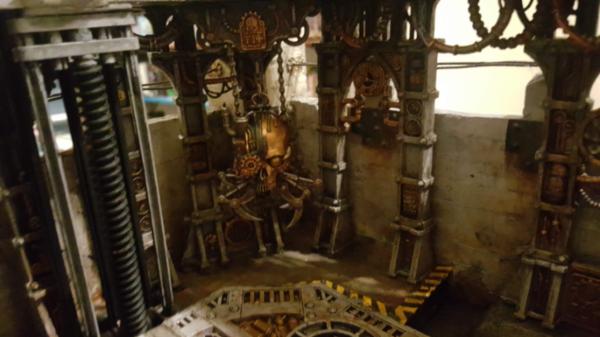
First up the giant skull crane of awesome doom is done and installed, along with some of the other detail cabling:
I also got a basic box down for the underside of the exhaust "system". I made it a bit bigger than necessary so you could conceivable have some place to sdtand and operate the console on the back. To construct it i just used bits from my grab bag of "what do i have left?". So some old mechanicus stuff from the original city terrain mixed in with the ubiquitous white plastic goodness and some flooring.
|
|
|
|
|
|
2018/11/25 09:19:07
Subject: Imperium vs Nids Diorama II: The Final Pieces (11/23: happy black friday! Skulls and boxes)
|
|
Stalwart Veteran Guard Sergeant
|
Enjoy the paint work on the pipeline.
Cant wait to see it finished.
|
|
|
|
|
2018/11/26 02:17:16
Subject: Re:Imperium vs Nids Diorama II: The Final Pieces (11/25: painting walkways part I)
|
|
Dakka Veteran
|
Thanks!
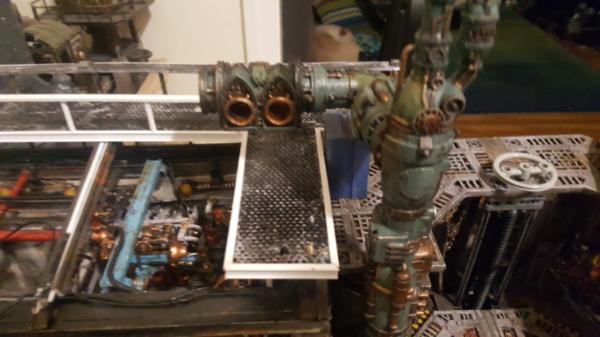
Work continues. First up I went ahead and cut-out my windows in thick acrylic so they would jsut allf it and I could figure out at what stag to put them on relative to the walkway. I realized I should probably permenenlty install at least the outer 2 windows since their interiors are already done and they overlap most with the walkway. So we'll go with that, still they look nice and should be a good anti-dust layer.
I also got some straight line plastic to "finish" the area on the bottom of the window and clean up seeing all the now visible cables hidden there before.
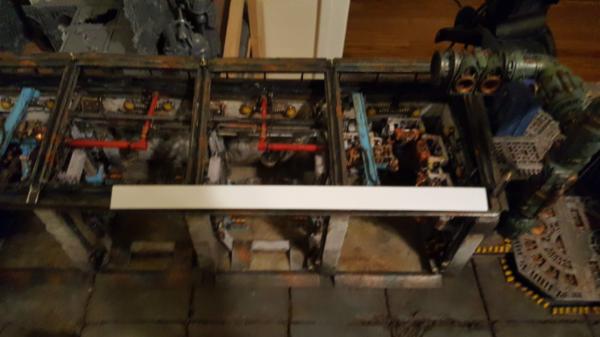
Next up is painting the walkway. One thing I forgot to mention is I covered up the previous holes with an octagonal "patch" of material so it looks semi-realistic.
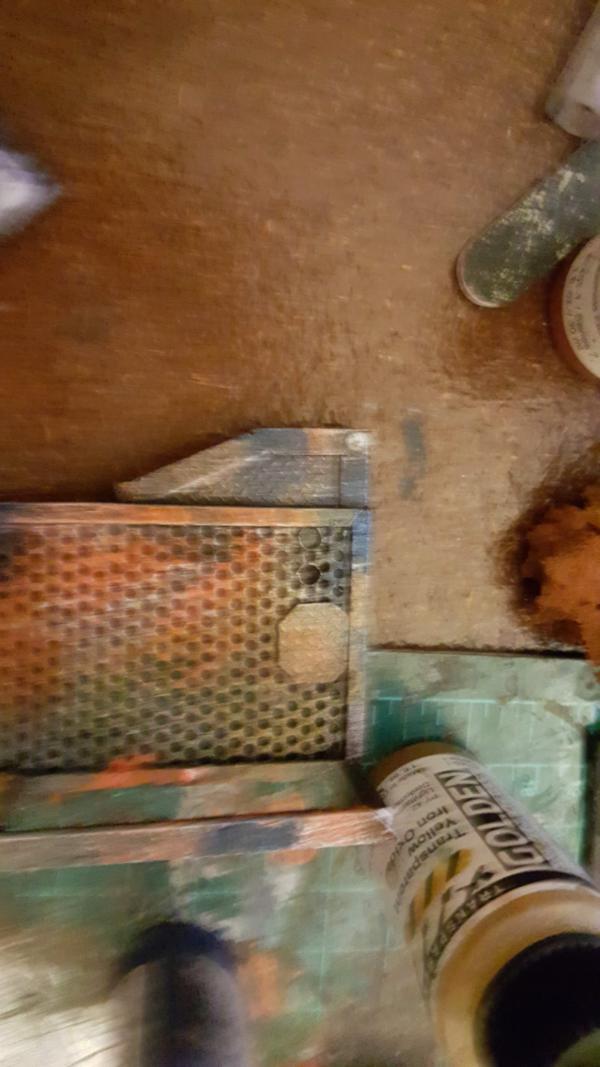
as always, dark metal base...
|
|
|
|
|
|
|
|