| Author |
Message |
 |
|
|
|
|
Advert
|
Forum adverts like this one are shown to any user who is not logged in. Join us by filling out a tiny 3 field form and you will get your own, free, dakka user account which gives a good range of benefits to you:
- No adverts like this in the forums anymore.
- Times and dates in your local timezone.
- Full tracking of what you have read so you can skip to your first unread post, easily see what has changed since you last logged in, and easily see what is new at a glance.
- Email notifications for threads you want to watch closely.
- Being a part of the oldest wargaming community on the net.
If you are already a member then feel free to login now. |
|
 |
2018/11/27 18:02:48
Subject: Re:Imperium vs Nids Diorama II: The Final Pieces (11/27: walkways painted)
|
|

Dakka Veteran
|
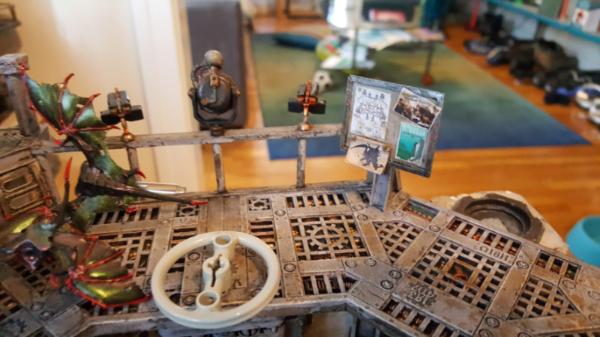
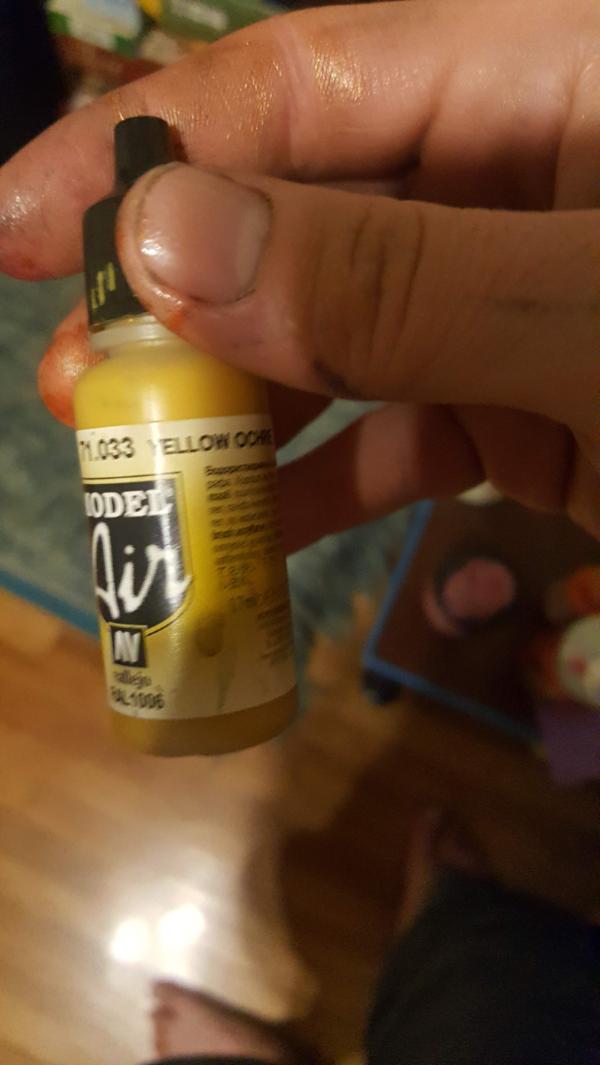
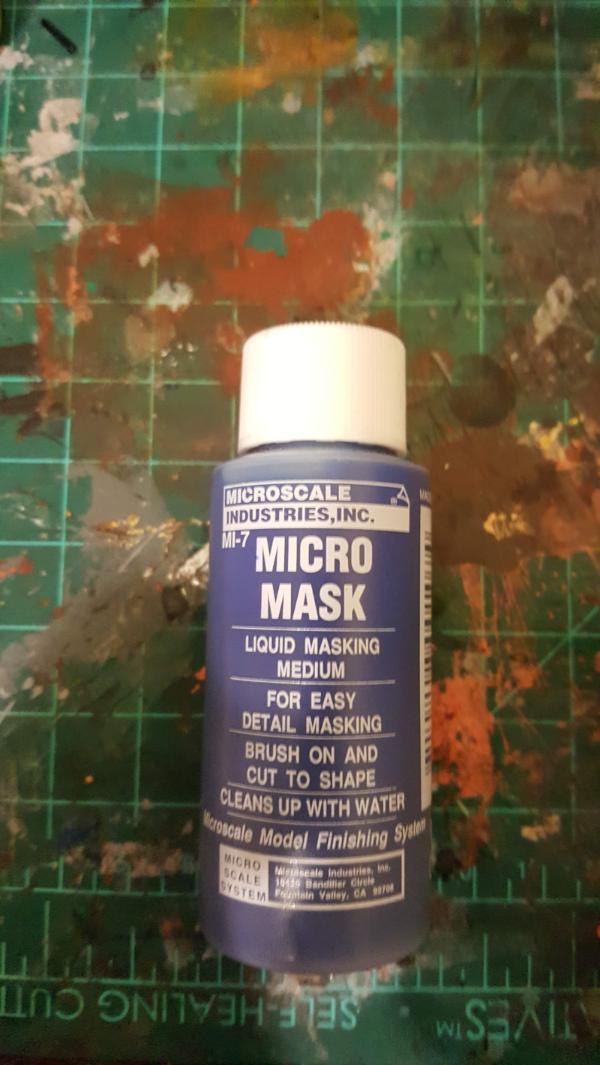
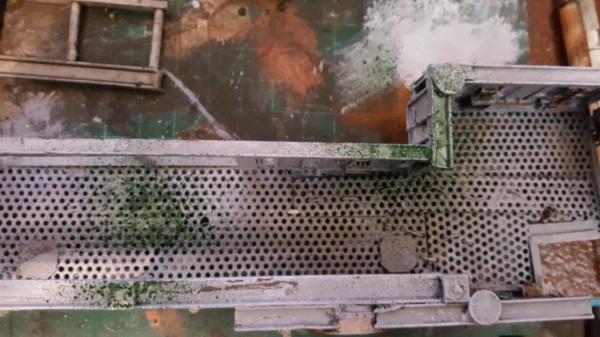
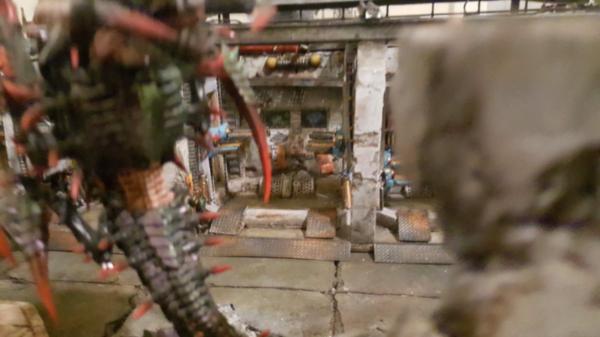
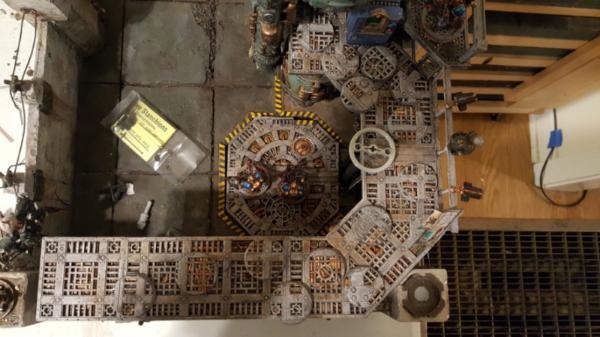
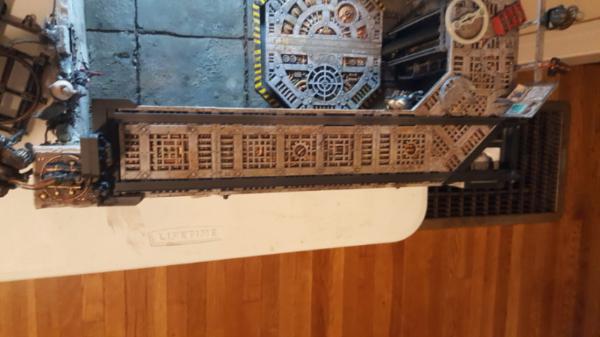
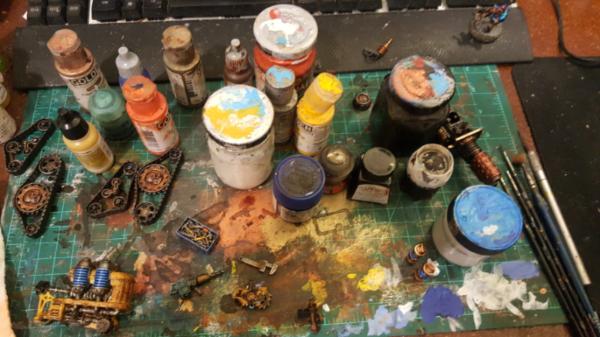
Walkways are done. I tried a new technique as part of my general wash regime, using these spray bottle washes:
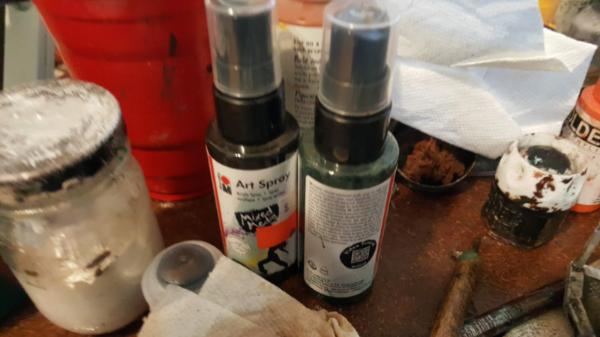
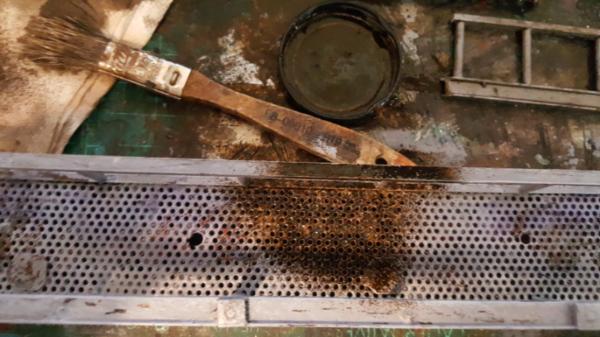
Turns out pretty cool! its a fun way to add color. Its VERY saturated so you have to sponge it back but still not a bad way to add random to something.
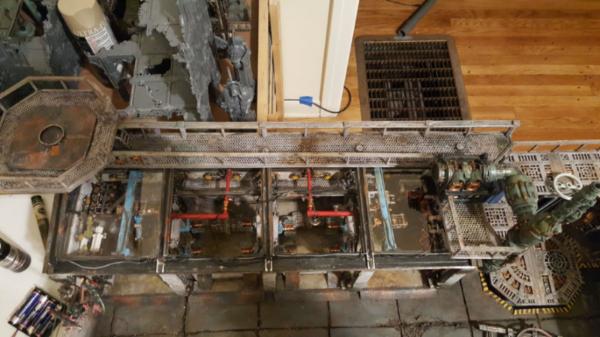
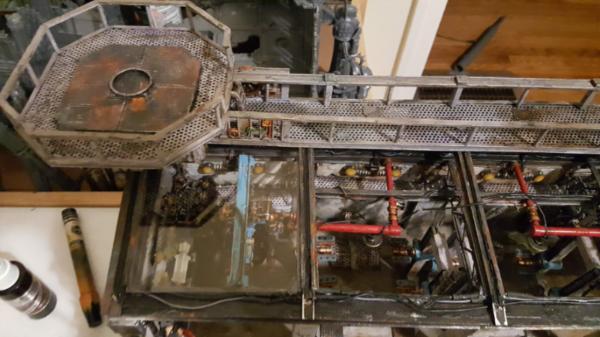
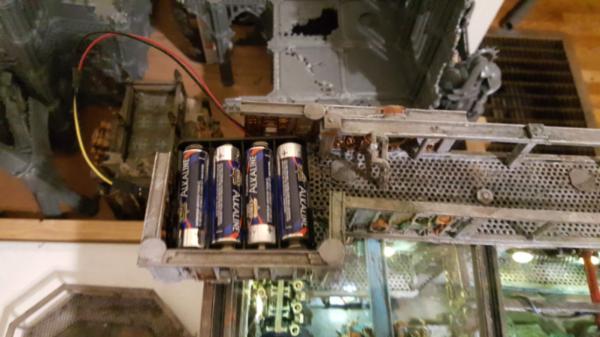
and the battery pack still works great too. It's all coming together:
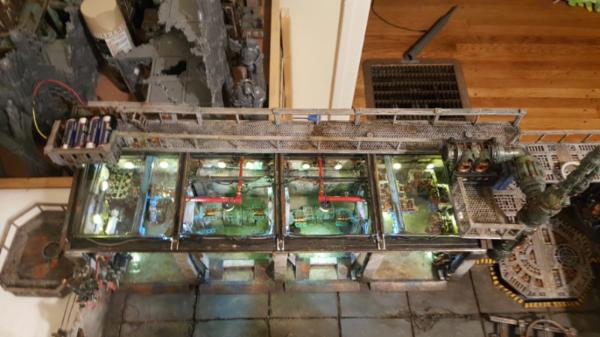
next up is adding the guns/spotlights and such details TO the walkway so i can begin to figure out where all the based marines/scouts will go and thus the nids attacking them.
|
|
This message was edited 1 time. Last update was at 2018/11/27 18:03:33
|
|
|
 |
|
2018/11/29 18:16:27
Subject: Re:Imperium vs Nids Diorama II: The Final Pieces (11/29: bolter turrets and workshop tables)
|
|
Dakka Veteran
|
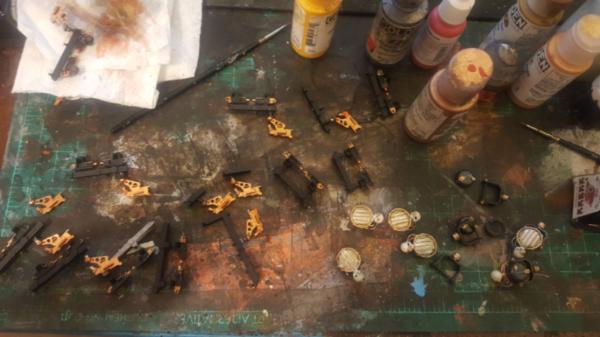
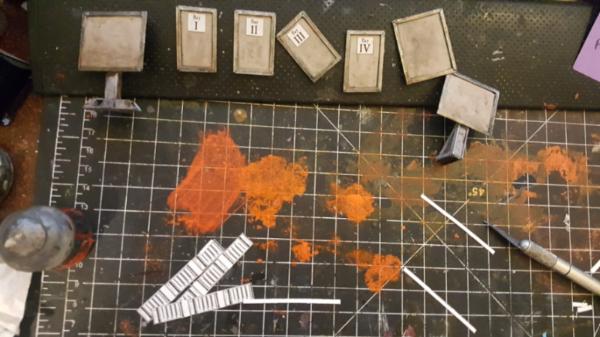
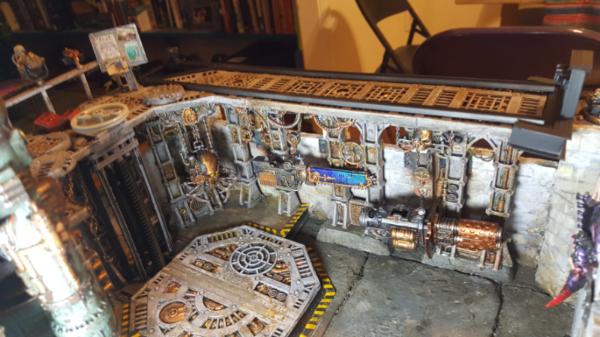
So, with all the big "pieces" now done and laid out. It's time to start all the detail bits. First up are some fairly straightforward ones: bolter turrets and spotlights!
I have like.. 8 of each so I figure i just liberally sprinkle them all over my walkways and they are fairly straightforward to paint too.
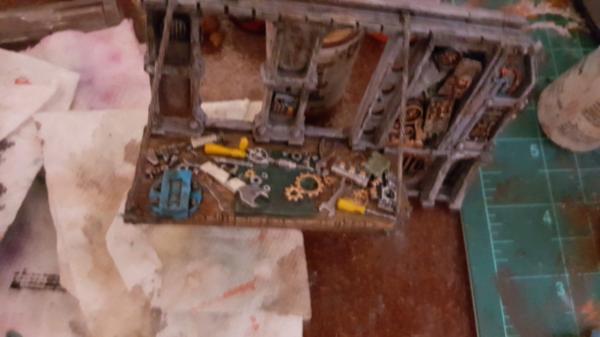
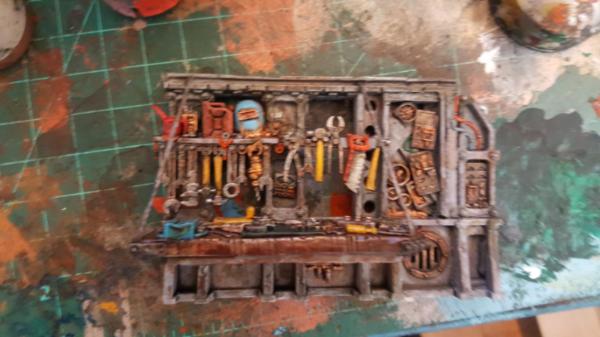
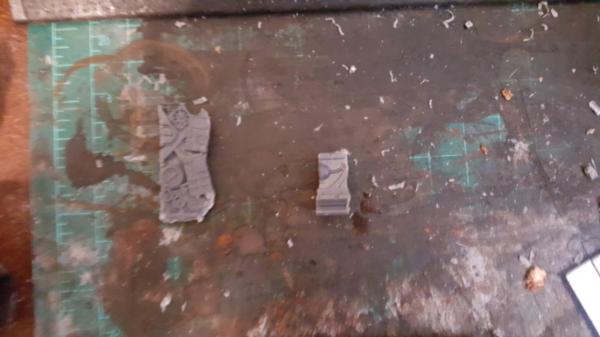
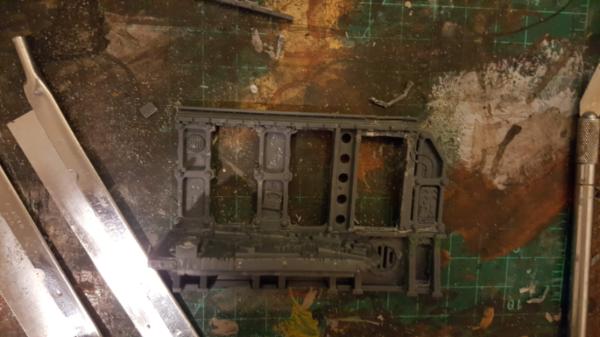
While I work on that it's also time to start working on the workshop table. Basically I'm using the one from the mekboy workshop almost intact. I just need to shave off a few of the more obvious orky bits in the middle of each i-beam (cloth and such)
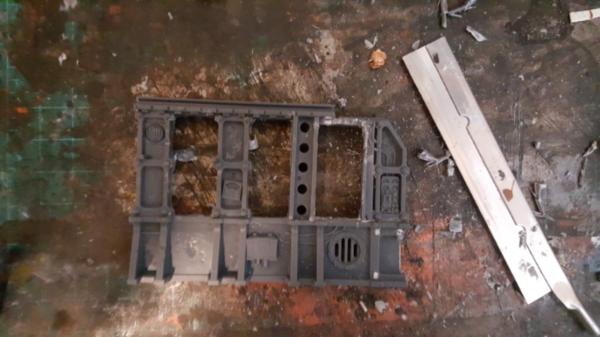
This took.. way too much time (several hours) to do because I wanted to preserve those details as much as possible. Some of them werent bad, just need to be moved a bit.
|
|
|
|
|
|
2018/11/30 19:53:22
Subject: Re:Imperium vs Nids Diorama II: The Final Pieces (11/29: lego turrets, soo many greeblies to paint)
|
|
Dakka Veteran
|
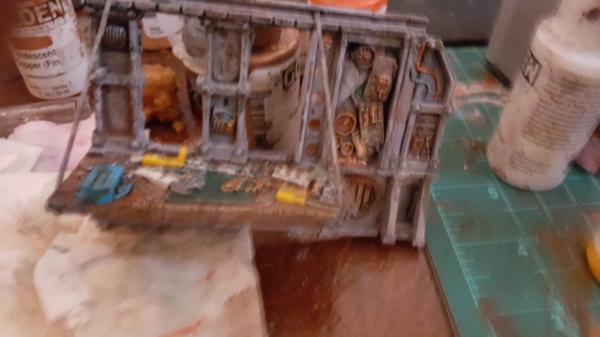
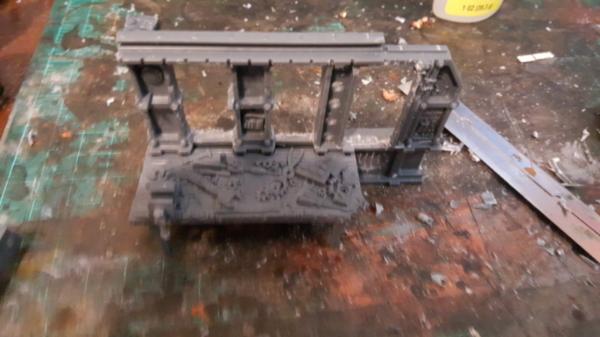
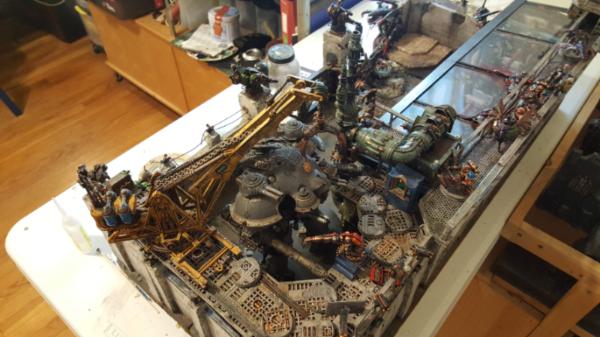
So first up I finished off modelling the table and.. a few other things:
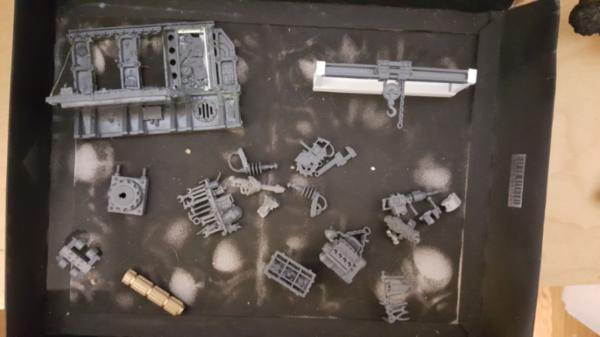
Boy thats.. a lot to paint. Sigh. Anyways I started with some of the easier stuff:
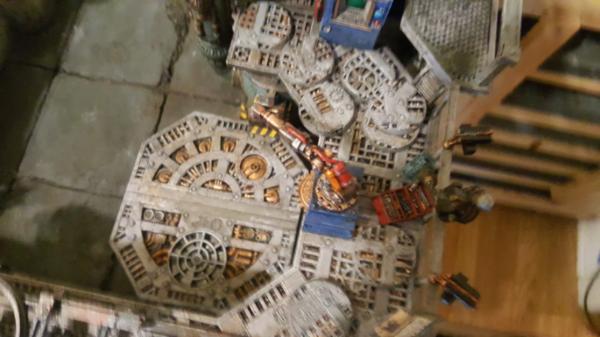
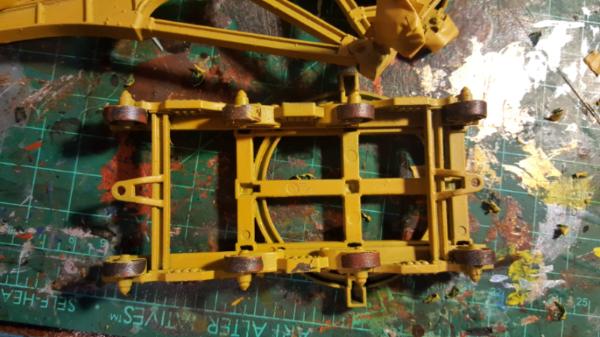
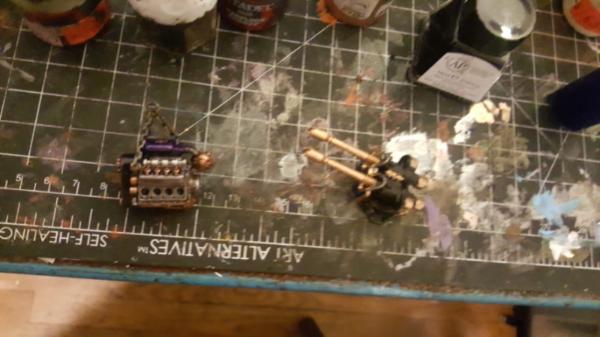
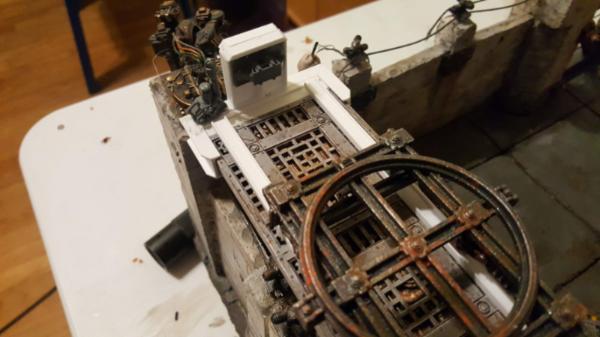
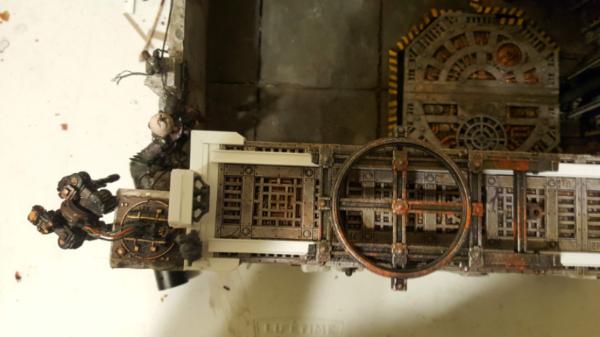
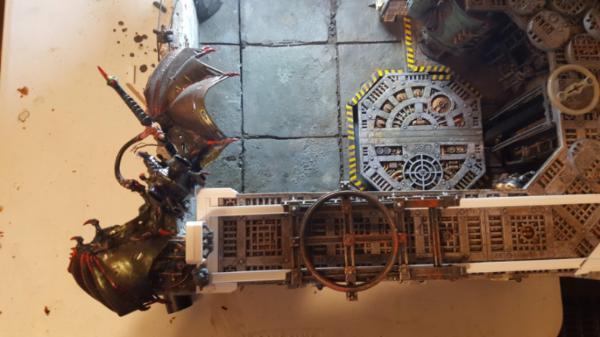
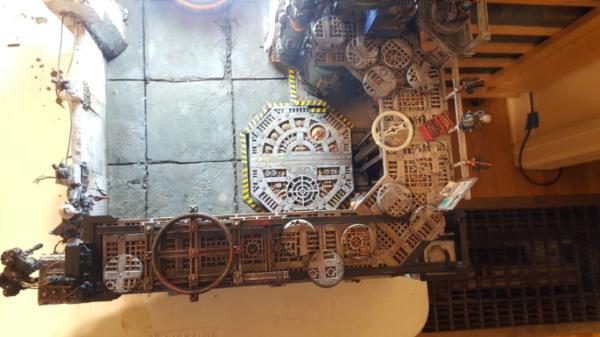
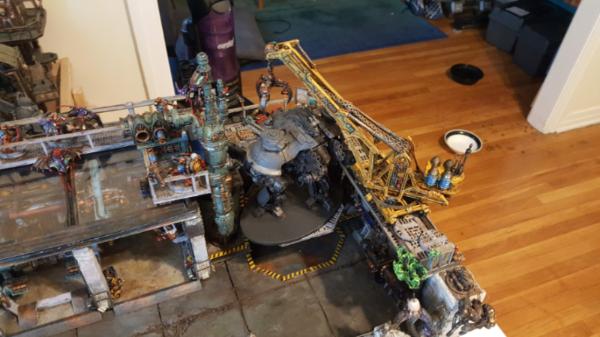
I should explain this too, this is the original mek crane which carries the engine block. However I wanted it to stick out a bit since there really isnt anything to "hang" it off of in the garage, so I figure I just make it an independent rail. However as I paint it I realize it would need some supports, you would never just have something that heavy cantilevered out without a little diagonal cross bracing.
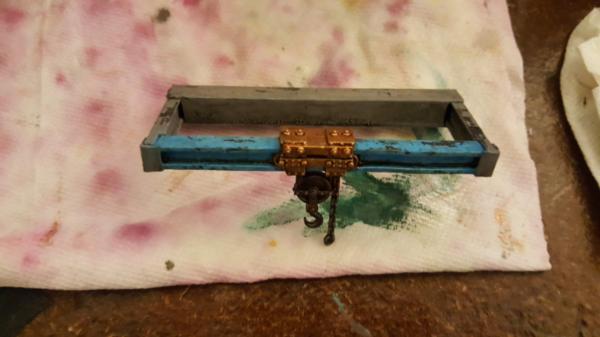
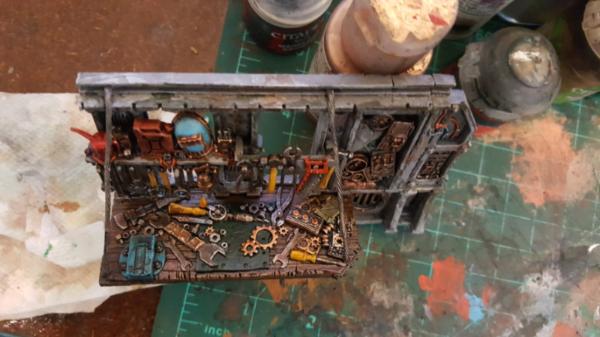
I also painted up my box:
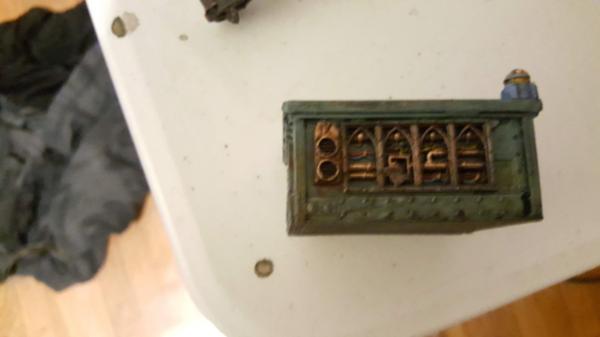
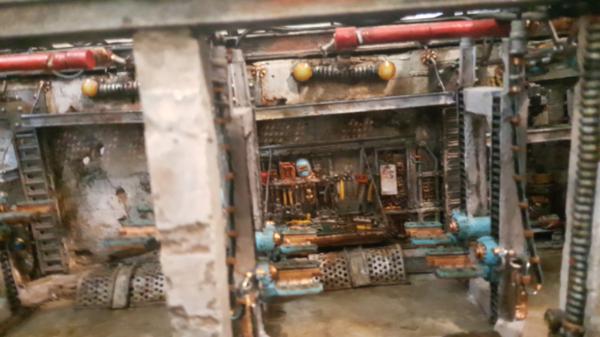
And installed it all, along with my bolter turrets and spotlights:
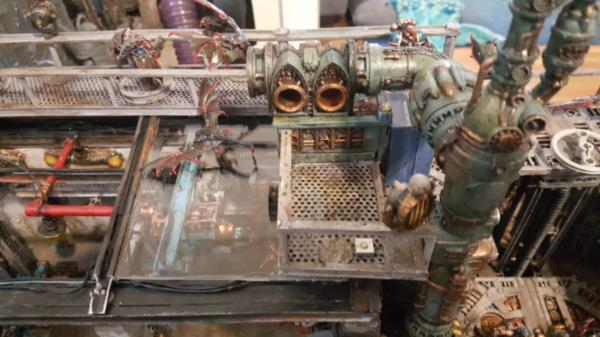
You can also see me start to think about where the gargoyles will go and how they will attack.
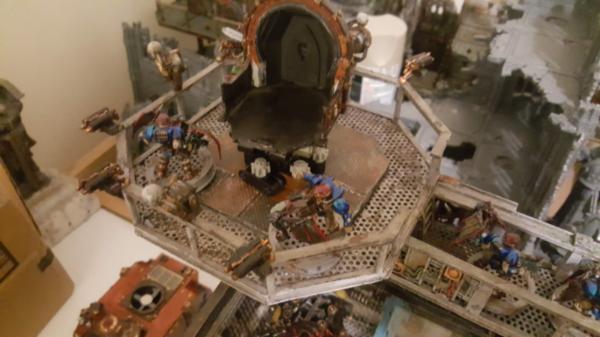
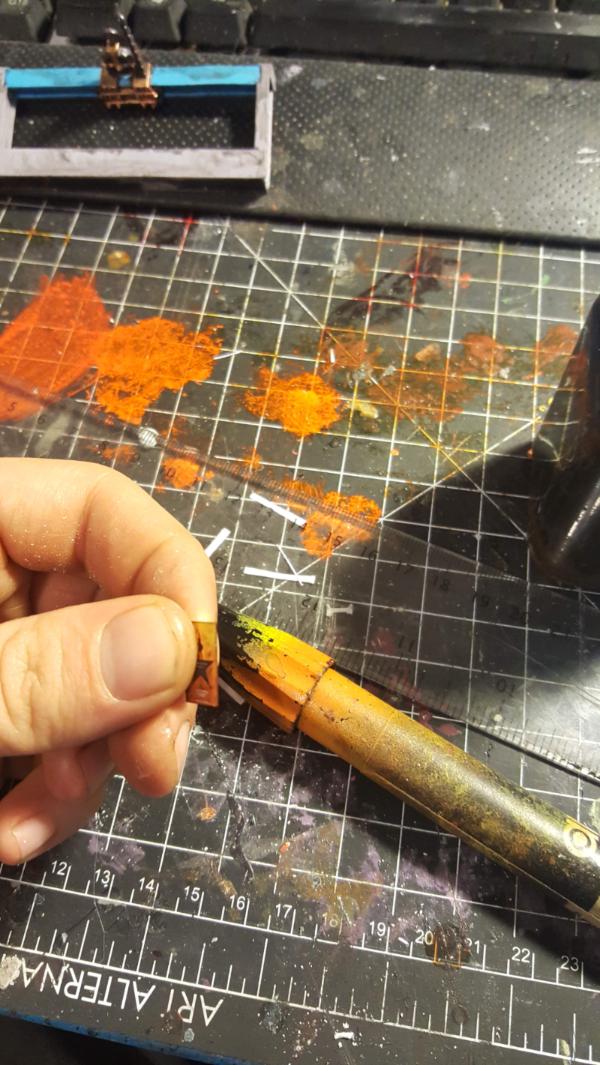
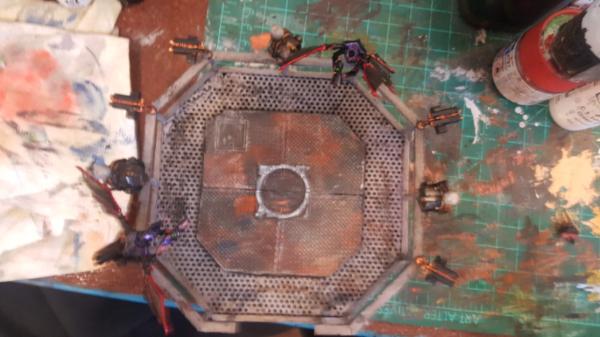
Finalyl we have another fun addition: lego turrets! So since i've been moving away from orange anyways I really wanted to repaint the big turret. It didnt really scale well so it would be nice to redo. However one thing I noticed was the gun was so low to the ground the barrel wouldnt A: reasonably actually clear the fence around my octagon and B: tended to prevent placement of any models there. Although I moved the fence out a bit which helped B some, it would still be nice to raise the whole thing up a bit so it looked more realistic. Enter lego turrets! Might as well have some cool gears right? I might try to print a 3d "edge" to wrap the lego beams but yeah its super fun now.
|
|
|
|
|
|
2018/12/01 01:32:23
Subject: Imperium vs Nids Diorama II: The Final Pieces (11/29: lego turrets, soo many greeblies to paint)
|
|
Stealthy Warhound Titan Princeps
|
Beautiful work as always - I particularly like your grey green pipes with the copper fittings.
Lego is always great!
|
|
|
|
|
2018/12/02 17:38:43
Subject: Re:Imperium vs Nids Diorama II: The Final Pieces (12/2: painting a workshop table)
|
|
Dakka Veteran
|
|
|
|
|
|
|
2018/12/03 22:00:40
Subject: Re:Imperium vs Nids Diorama II: The Final Pieces (12/3: the my little pony calendar and other posters)
|
|
Dakka Veteran
|
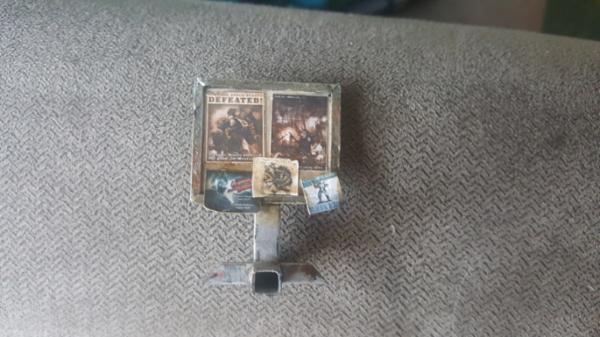
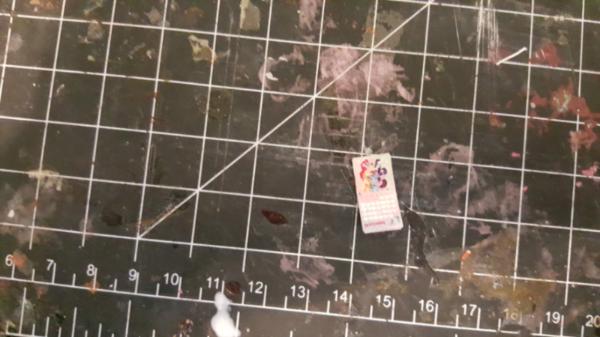
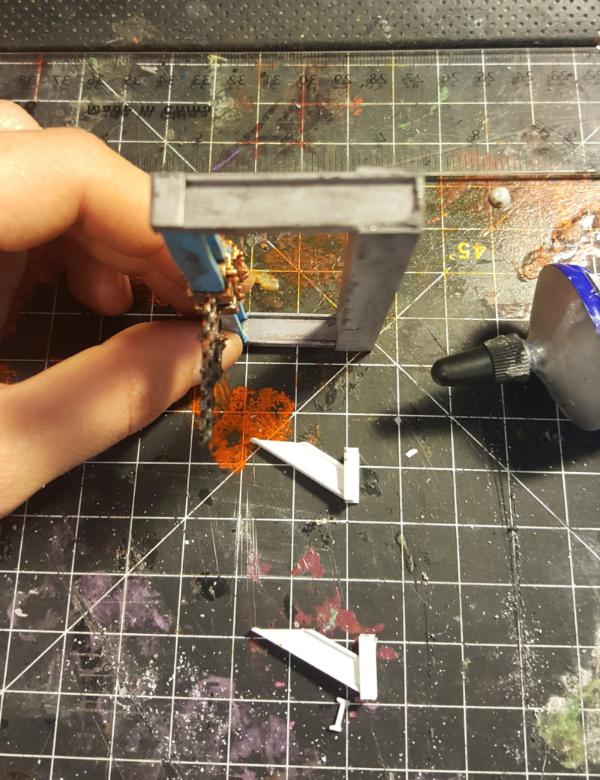
So with the workshop table done there was onnneee more thing I wanted to add: a poster!
Posters and other prints are one of the last sort of techniques I wanted to try. A while ago I had found this youtube video of a super realistic modeller and how he did posters where he use thicker paper to print it on and split the paper in half to "erode" the poster edge appropriately and.. it looked amazing but a lot of work so it was something I wanted to get to "later.
Well today is that later but of course, couldnt re-find the video. So instead I found a GW video where they did posters a bit more quickly: find it, scale it, print it out, and use PVA glue on the back of it to stick it on a wall and then another coat of PVA glue to seal it (and while its pva'd you can bend it around a bit without it tearing to add wrinkles and such) This seemed.. more my speed, especially since I could already tell I would want a lot of these everywhere (including on my city tiles).
First steps was to find images to make as posters and GW has that covered as well: the regimental standard website! https://regimental-standard.com/
Nearly every post has an image inside it and many of those look very poster-like, completed with fading and wrinkles and such in the image. It's perfect. So I did an initial scour of about half of it (its a lot of posts) to get an initial set of images. My other sources are those famous "how they work" posters of the imperial tanks and finally My Little Pony. MLP and 40k has a long amusing history so I figured i would continue it by giving the hard working marines, tech priests, and guardsman a lovely MLP calendar to keep time by.
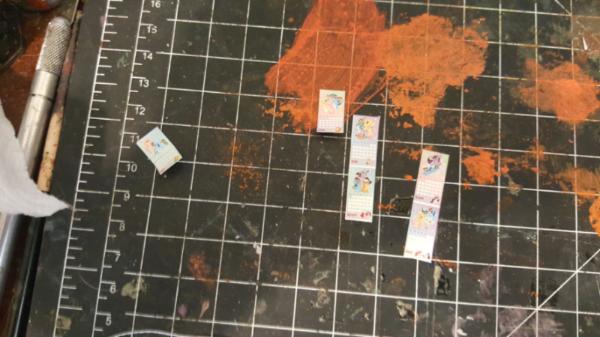
I took those images, scaled them down and voila! made stuff.
Now scale is an interesting question here. You want the images to be big enough so you have a chance at seeing/recognizing them from a distance, but they also have to.. you know.. work and not be comically large. I settled on about 1 CM wide for a "normal" sized poster (or like the calendar and such), since thats still something like 2 feet wide at scale. Still it works pretty well printed out.
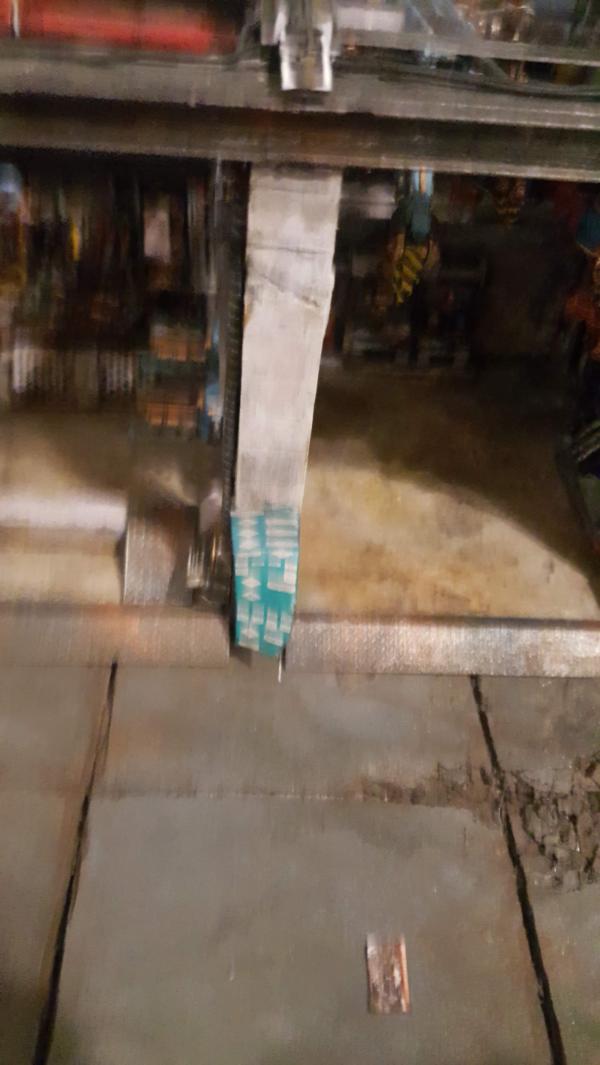
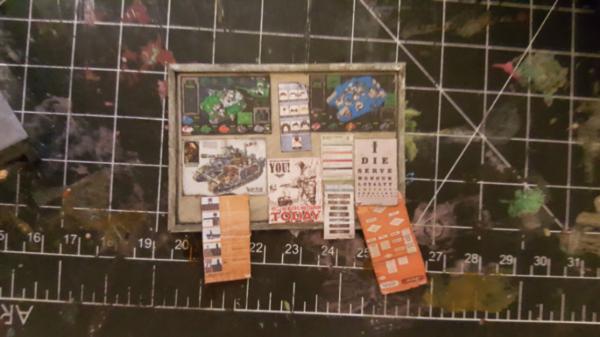
Next up was cutting them out. For the calender I wanted to acutally hasve it look like a real one with some thickness so I glued the months together so it felt a bit better and I could get that "spread" of sheets on the bottom:
and finally installed:
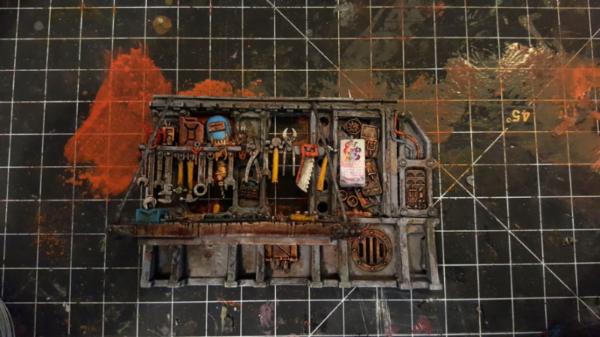
overall im super happy with it. The scale of the "hook" is huge but thats literally the smallest bit I have a driver for so thats that. Now to make a whole bunch more posters and put them places...
|
|
This message was edited 1 time. Last update was at 2018/12/03 22:01:38
|
|
|
|
|
2018/12/04 02:45:27
Subject: Imperium vs Nids Diorama II: The Final Pieces (12/3: the my little pony calendar and other posters)
|
|

Been Around the Block
|
Your attention to detail is amazing. Love what you are doing here!
|
|
|
|
|
2018/12/04 05:26:35
Subject: Imperium vs Nids Diorama II: The Final Pieces (12/3: the my little pony calendar and other posters)
|
|

[MOD]
Otiose in a Niche
|
Love the posters.
We also have a ton in the Dakka gallery both real and 40k search for poster sometime.
|
|
|
|
|
|
2018/12/04 19:55:51
Subject: Re:Imperium vs Nids Diorama II: The Final Pieces (12/3: the my little pony calendar and other posters)
|
|
Dakka Veteran
|
Wow, great call, didnt even think to search dakka. There are some great ones there. Automatically Appended Next Post: First up I installed the work-table. Yay!
It looks great, im super happy, and its a really nice amount of detail. Next up is finishing off the engine crane by adding some needed braces. It's awkward to add it to something already painted buuuttt meh:
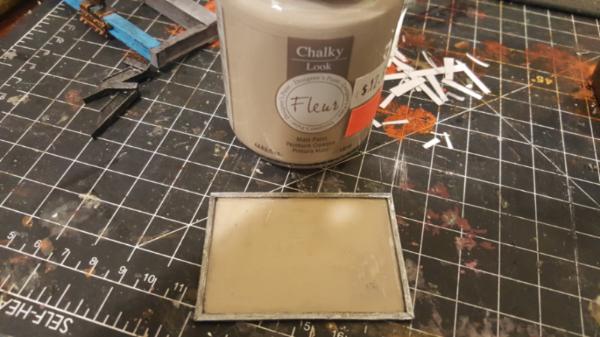
I also think I want something "behind" the crane. having details on all these walls is really helping fill out the garage and since I have all these cool posters maybe I make a big "cork board" that everyone would put them on.
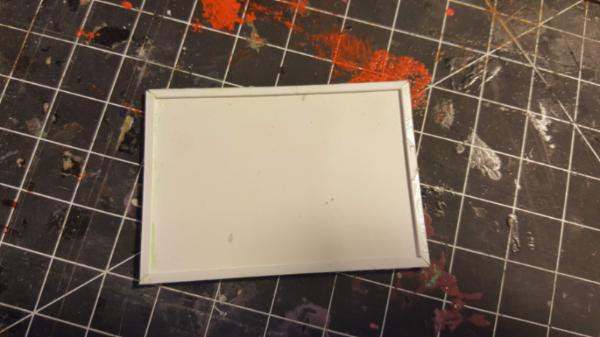
to paint the interior i want something netural so I thought I would try some new paint on it. My local art store was having this stuff on super discount (like 3 bucks for the whole bottle) and apparently its made from eggshells to be SUPER matte. So far so.. good really, its very matte. As a "city" color/base color/undercoat for stone or something it should work actually really well. I got another cream color for my marble basecoats too.
More cutting out of posters to start spattering on walls and such. Some little guardsman (or maybe secretly a marine?) really liked hamilton...
and finally we have an example of when scale.. well.. fails. This thing would be like 7 feet hi and 3 feet wide. Kinda odd.
Actually just putting posters on the pillar is a bit problematic, it looks a touch odd just slapped on there. Hopefully smaller ones work better.
|
|
This message was edited 1 time. Last update was at 2018/12/04 21:53:41
|
|
|
|
|
2018/12/05 22:27:55
Subject: Re:Imperium vs Nids Diorama II: The Final Pieces (12/5: finishing a big posterboard and installing it)
|
|
Dakka Veteran
|
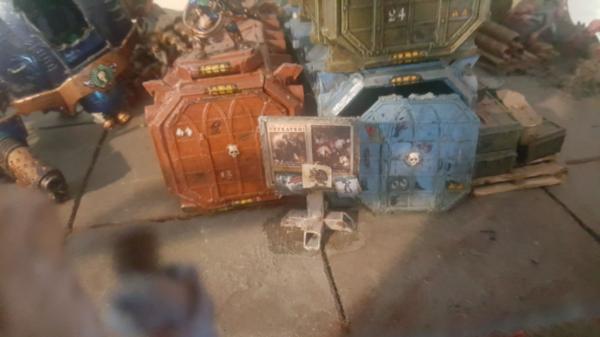
More poster work! lets fill up that corkboard I made.
overall its a really simple technique and it looks really nice tbh, even the "cruder" way of just cutting and gluing it on. One thing I was doing was painting or sharpie-ing the edges to remove the super white edge of the paper from the cutline. Just helps a bit on realism. A small wash also works which you'll hear about.. later 
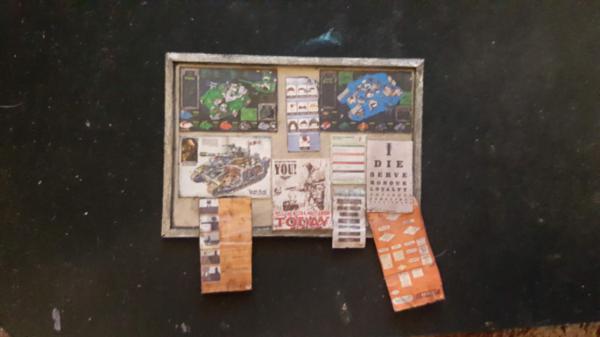
a slightly better picture on black:
I also finished adding in my supports
which means it's time to install! it pops pretty well and works even at a moderate distance so im super happy with it. Always good when the detail you add feels visible/something someone might notice instead of being the kind thats hidden away but you have to paint it anyways because you are OCD.

|
|
|
|
|
|
2018/12/06 19:47:52
Subject: Re:Imperium vs Nids Diorama II: The Final Pieces (12/6: poster intrigue)
|
|
Dakka Veteran
|
more views of my corkboard!
anyhoo so i wanted to add some more posters around the tile, to give it flavor. I figured first I would start with the columns since they are a natural area where you'd put stuff like that. Unfortunately that only.. kind of worked.
up close they dont look bad but far away you really cant tell whats going on. Having the "frame" of the corkboard really helps seperate it out from the wall. Otheriwise it either pops too much (the bright white over the darker bottom area of the column) or starts to blend in too much (the top)
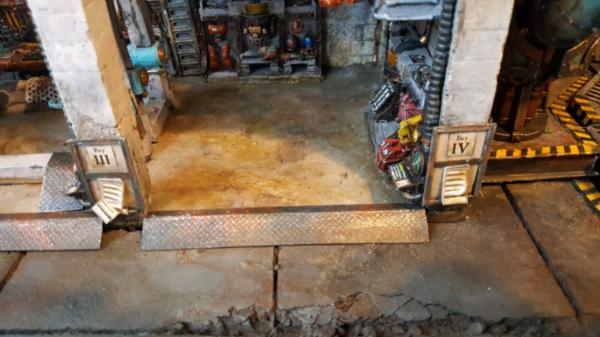
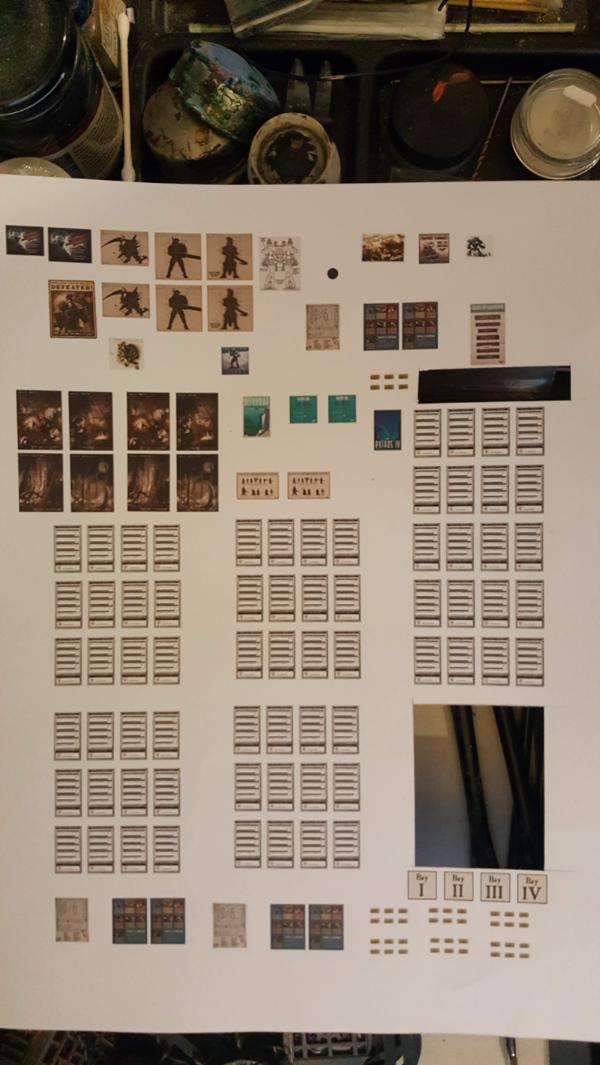
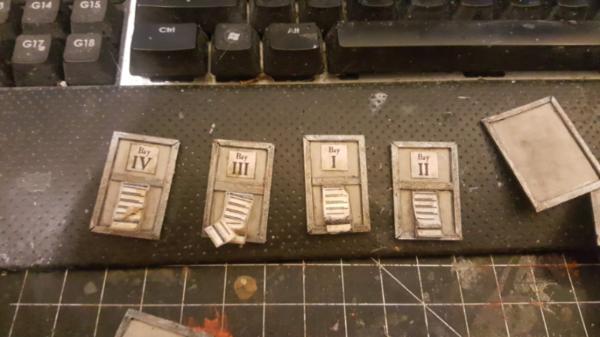
I also realized that I kind of wanted some sort of sign or thing for each garage bay. Finally if i made little corkboards for each bay then i could hide the joint between the computers and the columns and the fact that the computers stick out a bit.
So thats what is next:
I'm also thinking i might make like a "work order sheet" or somethign since the calendar turned out so well. Something based off of this guy:
|
|
|
|
|
|
2018/12/07 22:05:09
Subject: Re:Imperium vs Nids Diorama II: The Final Pieces (12/7: way more cork boards and posters)
|
|
Dakka Veteran
|
So to recap the poster drama:
- I liked my big posterboard a LOT
- I didn't like my posters raw on the pillars
- I wanted some kind of "I, II, III, IV" for each pillar, maybe with some kind of work order sheet.
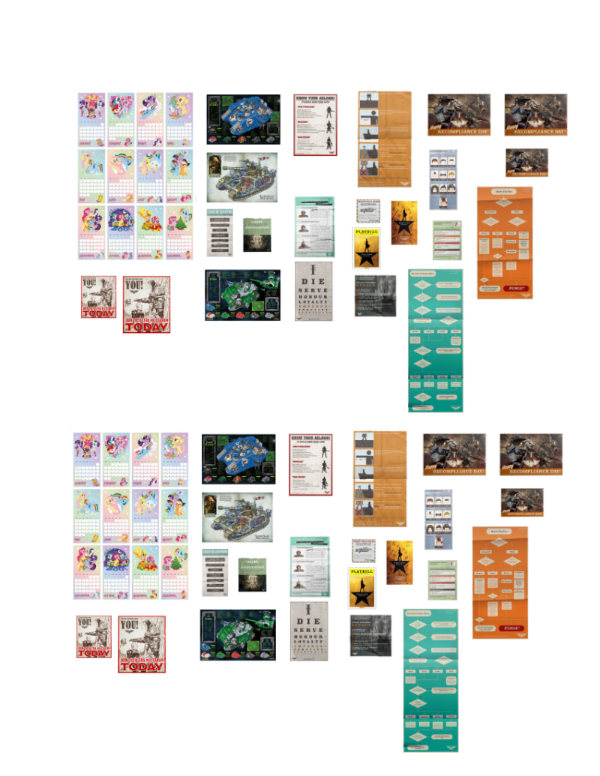
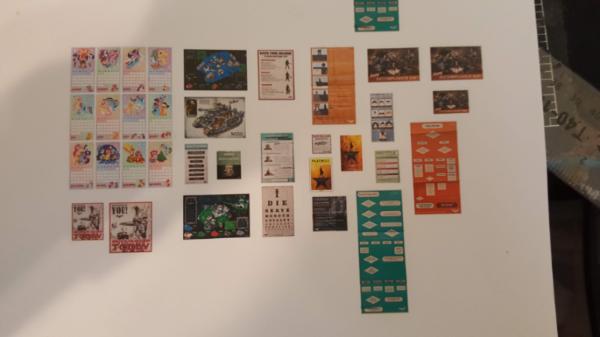
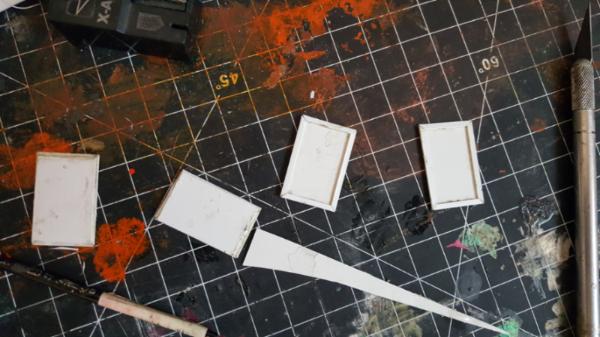
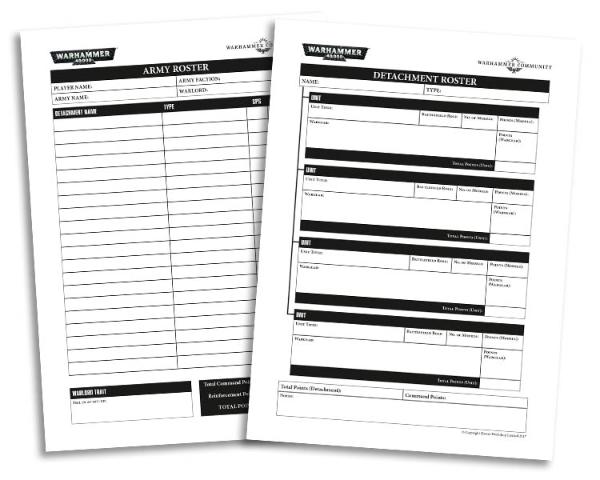
Given that first up i needed to go through the REST of that blog and get all the remaining images. After that I figured i would convert an existing 40k roster sheet into a work order type dealio (final worksheet not pictured cause I put some names on it for lawls but you get the idea)
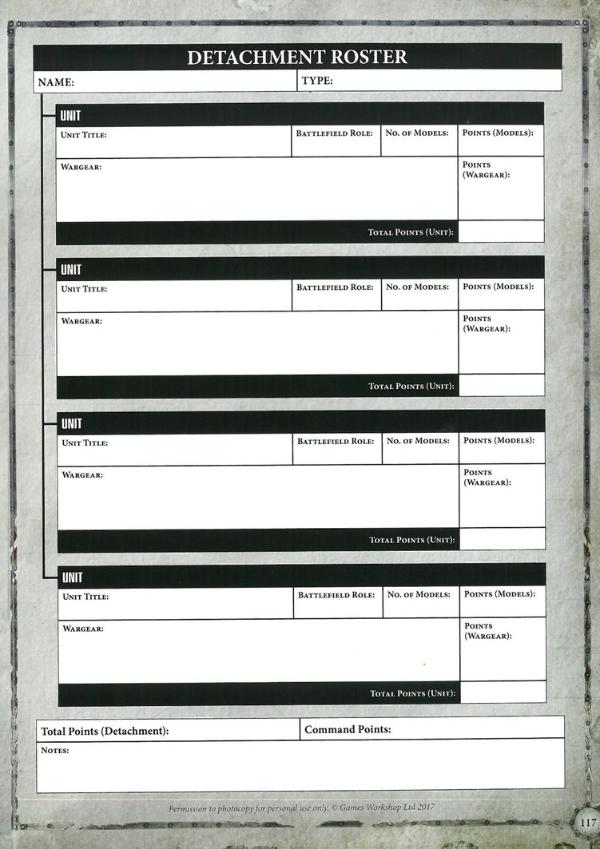
giving me this:
and then just start cutting and sticking them on. Whereas before I was using a sharpie/dark marker to darken my edges I found that for this it didn twork as well so I started using a darkish wash instead. It cut the whites nicely and gave me more of a stained look.
For the "torn" sheet I actually had to put superglue in there to really set it. PVA wasnt quite enough.
Then it was about the rest of the poster boards which i'll put up on both tiles:

|
|
|
|
|
|
2018/12/09 13:57:13
Subject: Imperium vs Nids Diorama II: The Final Pieces (12/7: way more cork boards and posters)
|
|

Blood-Drenched Death Company Marine
|
Just magnificent attention to detail and it's really well executed.
|
|
This message was edited 1 time. Last update was at 2018/12/09 13:57:35
|
|
|
|
|
2018/12/09 14:07:18
Subject: Imperium vs Nids Diorama II: The Final Pieces (12/7: way more cork boards and posters)
|
|
Painlord Titan Princeps of Slaanesh
|
Brilliant stuff.
Needs propaganda.
|
|
|
|
|
|
2018/12/09 23:52:12
Subject: Re:Imperium vs Nids Diorama II: The Final Pieces (12/9: cork boards/posters placed)
|
|
Dakka Veteran
|
|
|
|
|
|
|
2018/12/11 01:32:58
Subject: Re:Imperium vs Nids Diorama II: The Final Pieces (12/10: shelf bits and engine painted)
|
|
Dakka Veteran
|
Just keep painting.. just keep painting...
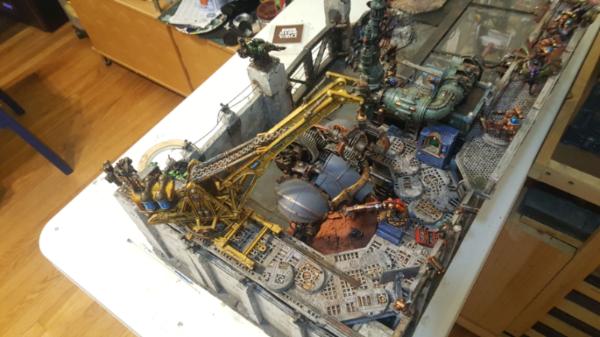
anyways, the "top" shelves int he middle, the ones I added my engine crane/poster/workbench underneath are a bit bare:
Sure there is the light there but it doesnt make sense to have a shelf that holds.. nothing. So I found a few more spare knight and other bits and just painted them up to throw up there. Adds a bit of "feel" detail without really blocking the light to anything important. I also finished painting the engine up too so I can hang it:
I also realized something else I could do: spare knight arms! I have a fair amount of room "underneath" my mechanicum area where the crane track will be as well as a few spare hooks from my mechanicus bits so it would be fun to hang some spare knight "arms" there.
|
|
|
|
|
|
2018/12/11 22:19:21
Subject: Re:Imperium vs Nids Diorama II: The Final Pieces (12/11: garage interior shelf bits/engine installed)
|
|
Dakka Veteran
|
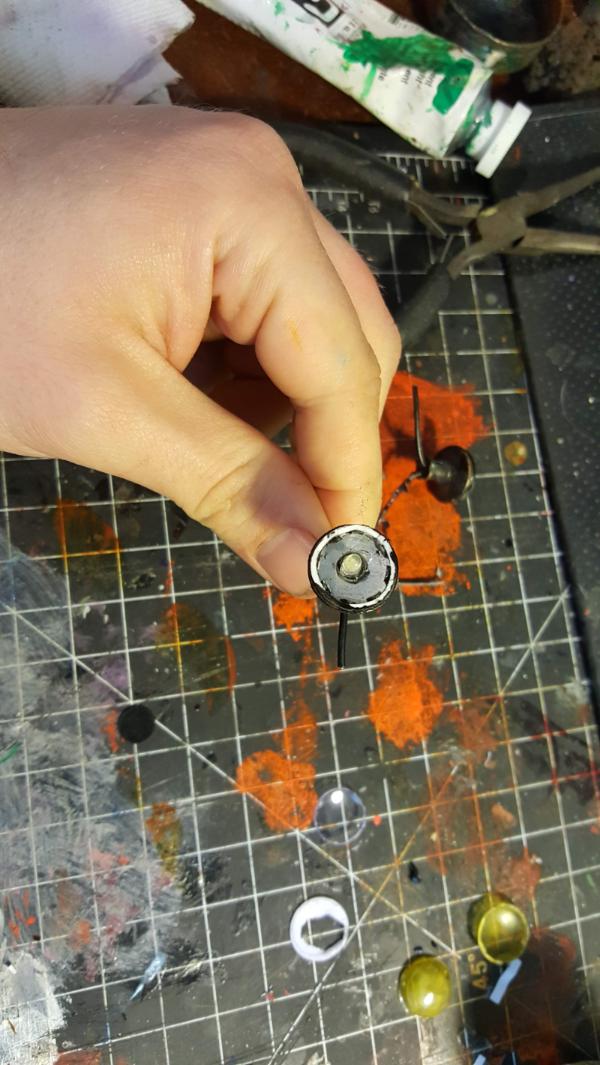
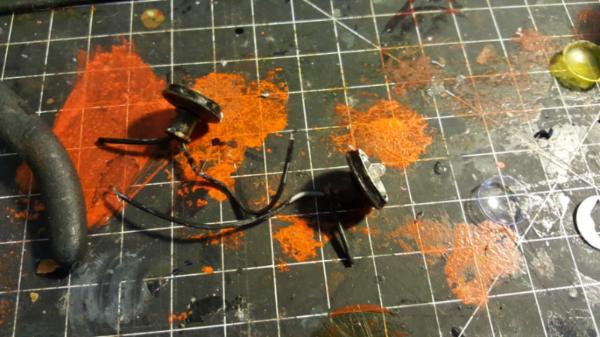
So before I glue down my last 2 roof panes I wanted to clean up my lanterns. I had kind of kludged them together before and there was a definite seam between the covering the the metal the attached too:
(holy crap old pictures!)
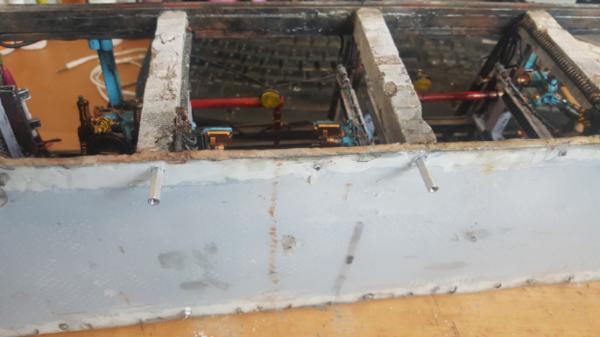
(back to now..)
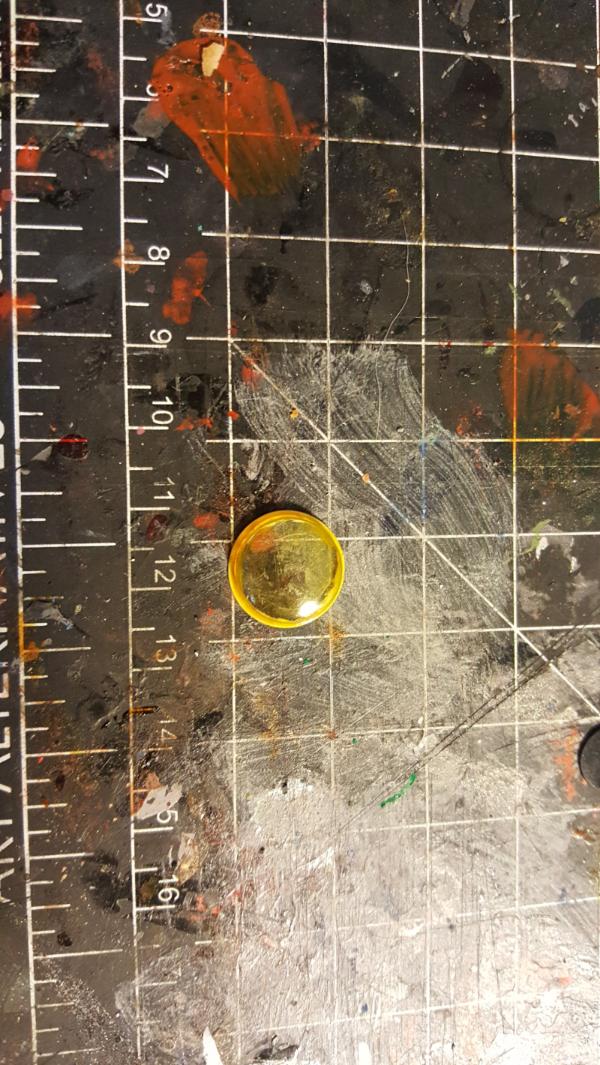
so I just added a ring of plastic and now everything holds together a lot better:
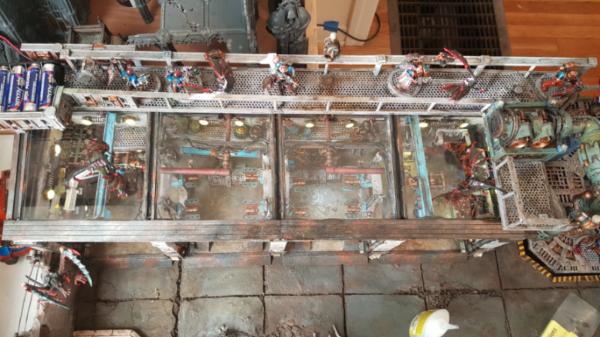
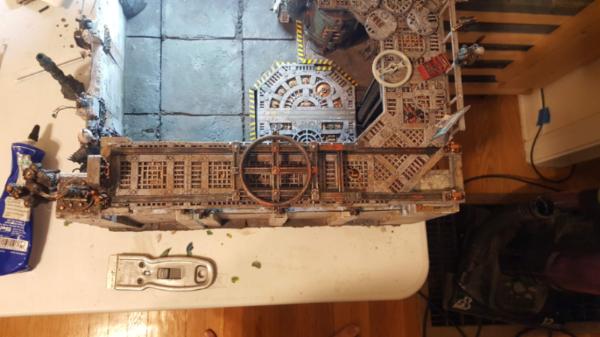
I also installed all my bits and filled in those shelves:
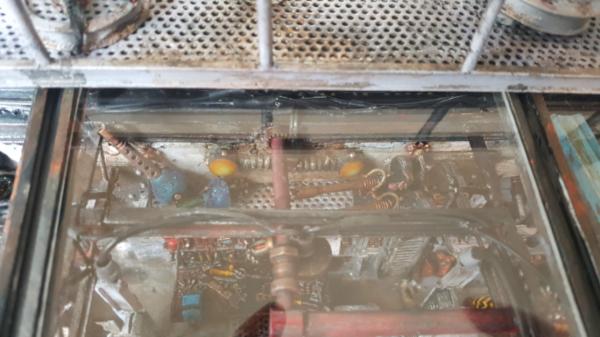
Huzzah roof glued down! With that the back walls of the garage are done.
|
|
This message was edited 1 time. Last update was at 2018/12/11 22:19:46
|
|
|
|
|
2018/12/14 17:57:50
Subject: Re:Imperium vs Nids Diorama II: The Final Pieces (12/14: bases painted, gargoyle attacks planned)
|
|
Dakka Veteran
|
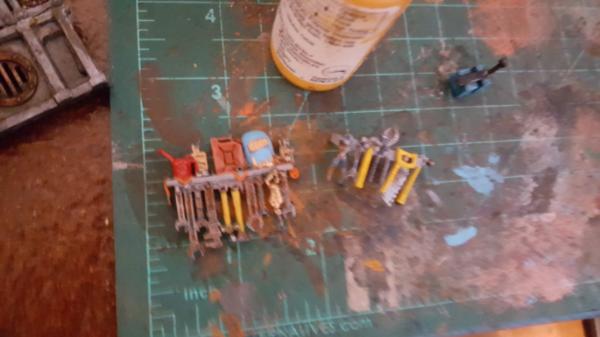
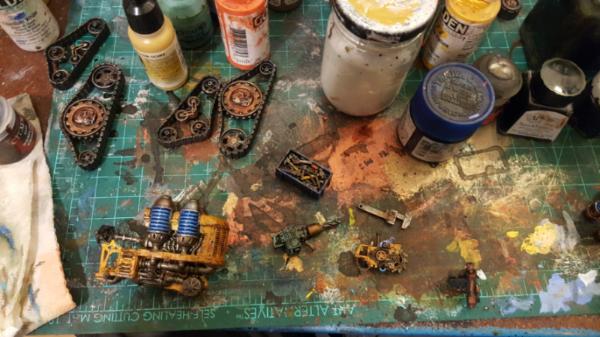
Do be do. Next up we have some greebling/tool boxes to place in various locations. I still need to paint them but its fun to have:
We also have planning for the gargoyles. Originally the idea was to have 2 on the octagon, 2ish attacking on the walkway, 1-2 corpses on the glass and then another one attacking the guys on the mech walkway. But then i realized i could use my tower to have one attack in a cool wayl...
so yeah we'll see. Maybe i attack the mech walkway with something else later.
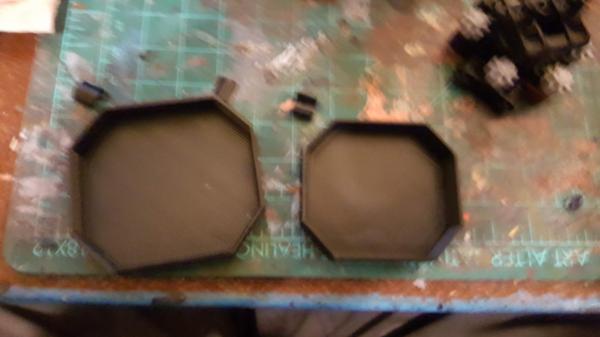
I also finished painting a set of 15 bases! I realized that the base kit is 2 sprues x 2. So I really only needed to paint 1 set of the 32 mm bases to figure out placement, which is a lot more reasonable and exactly what i did!
Looks like i will only end up getting at most 12-13 on there total with the crane but still, not bad and they line up pretty well.
this lets me start finaly working on the train tracks:L
|
|
|
|
|
|
2018/12/16 23:35:11
Subject: Re:Imperium vs Nids Diorama II: The Final Pieces (12/16: rail work)
|
|
Dakka Veteran
|
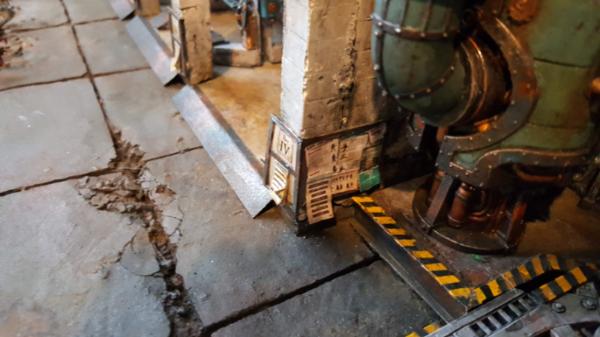
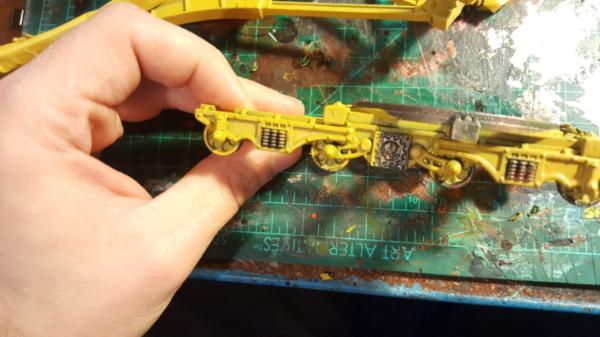
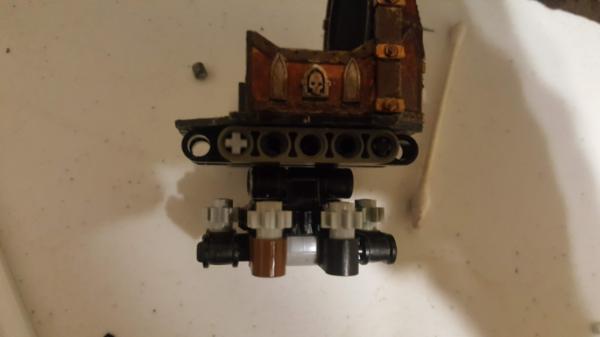
So with that end of the railway figured out it was time to work on the other end which buts up against the flyrant. I was out of those "stopper" bits as well so I would need to think of something new. Thankfully there was a natural piece on the train cart sled thing which was raised up so I could go a bit more vertical with it and better differentiate the two sides.
Its not symmetrical because i dont have 2 of the terminator locator beacons, also I knew that side would need to be acidified to slag anyways so I can potentailly get a second later and melt it and stick it on then.
A quick better lit view of the underisde:
and we're off to spraying:
Finally I re- did the base placement given the new track. I also realized i need to do it with the sled/crane in mind. Originally I hoped i could be flexible with where it went but realistically it needs to be locked down so all the marines/scouts/scions fit where they fit.
|
|
|
|
|
|
2018/12/17 22:19:45
Subject: Re:Imperium vs Nids Diorama II: The Final Pieces (12/17: arches and greebling)
|
|
Dakka Veteran
|
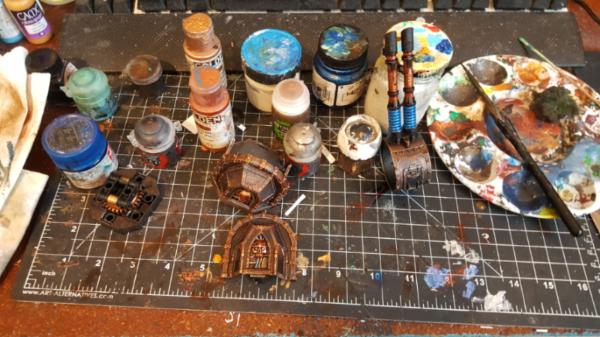
so, the rail is now primered its time to.. paint more greebling. First though building is fun so I started thinking about arches. I want to spruce up my marble area and make it more shrine-like so that it's something to look at and see tucked away in its little corner. The best way to do that is make a big shiny archway that stands out. Thankfully with the new kits I can do just that pretty well:
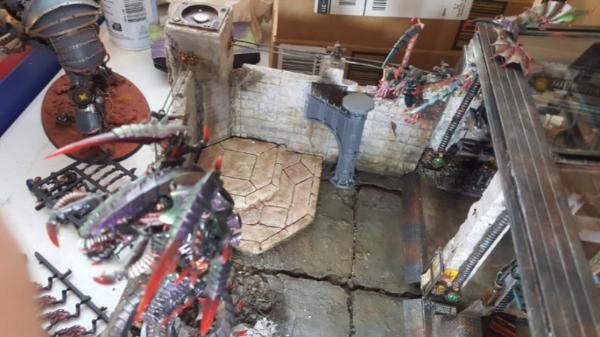
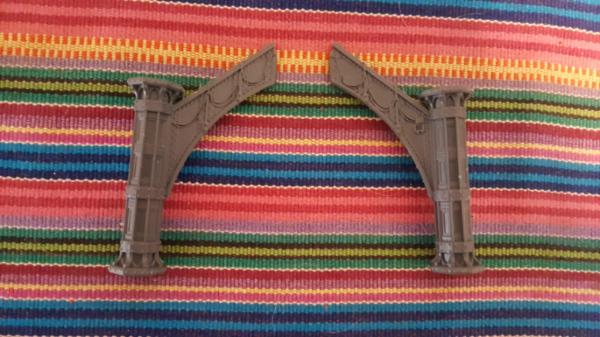
I just need to re-buy those arch bits again because i still want them in my terrain as well. I also started clearing away rubble from that area so i could actually PLACe the columns
Next up is back to painting. This time tool boxes, tools and starting the crane work:
Finally I started painting up the dark metal of the rail:
|
|
|
|
|
|
2018/12/18 19:38:24
Subject: Re:Imperium vs Nids Diorama II: The Final Pieces (12/18: tools painted and placed, robot arm thoughts)
|
|
Dakka Veteran
|
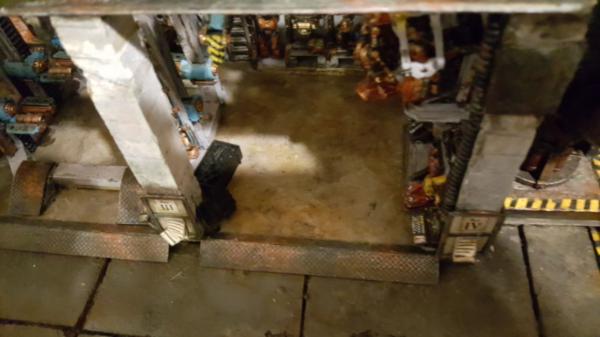
So first up I finished painting my tool boxes and went ahead and placed them:
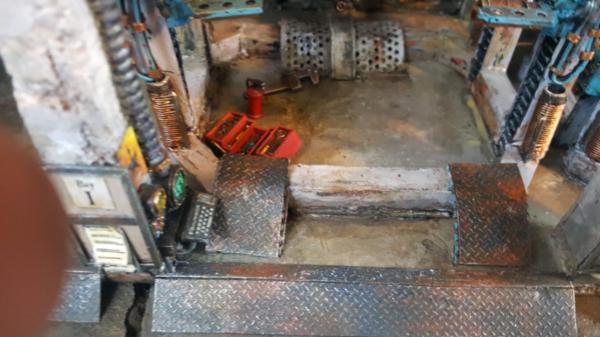
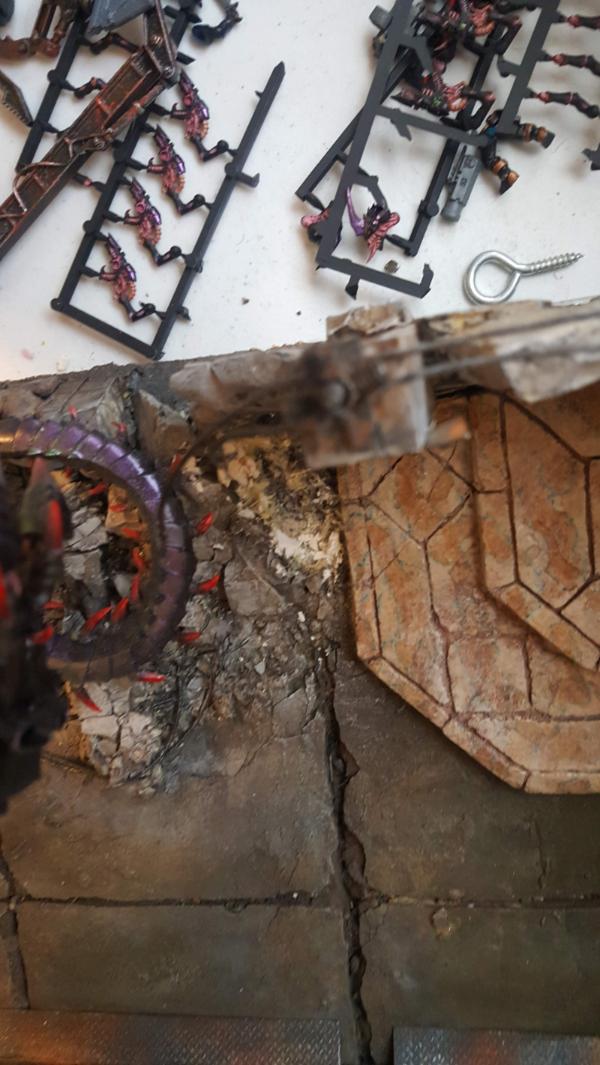
So thats done. Next up is melting and gooifying the platform nearest to the flyrant. I forgot to take a picture of the green but yeah I make it grteen after too (you'll see it eventually). Basically I just took my sacrifical soldering iron for this prupose and just shoved it in there and waited for it to goo up.
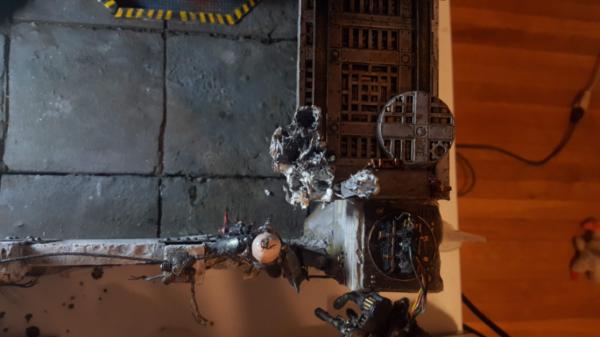
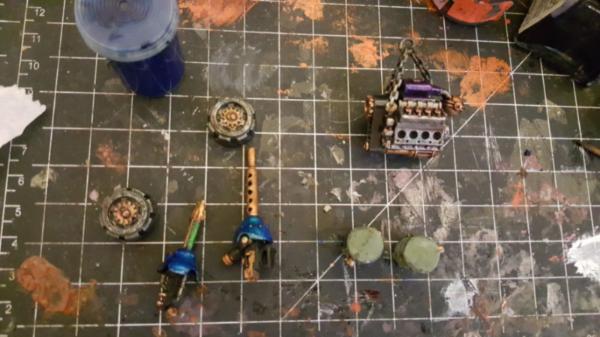
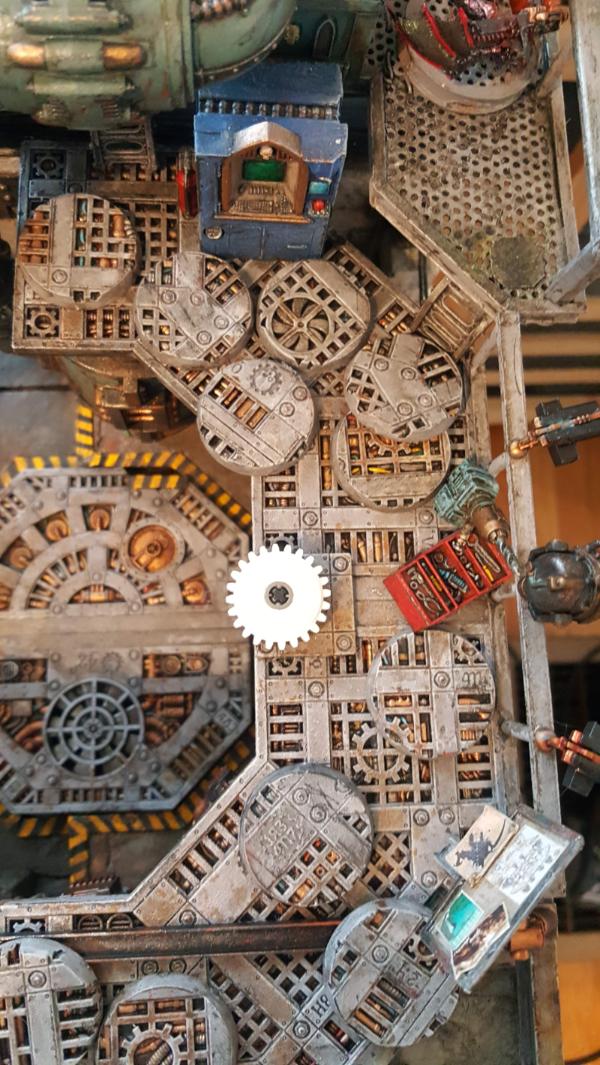
Finally I started trying to figure out what to replace my giant "wheel of death" with to raise the platform. I realized that lego has these slippable gears to prevent damage which is perfect to prevent overscrewing when you reach either the top of bottom, so that seemed ideal.
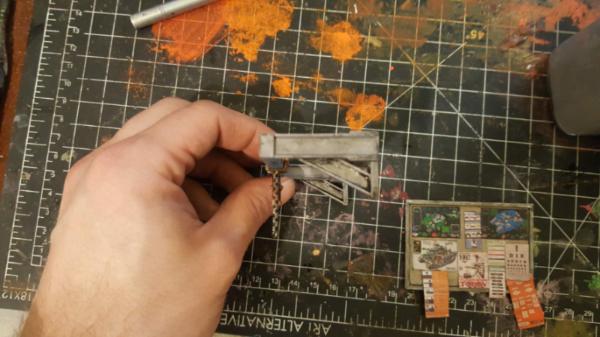
But I still had one other problem. if you look back at my original pile of stuff there are these 2 welding arms (on the left hand side) that are lovely from the mechanicus/crane boxes
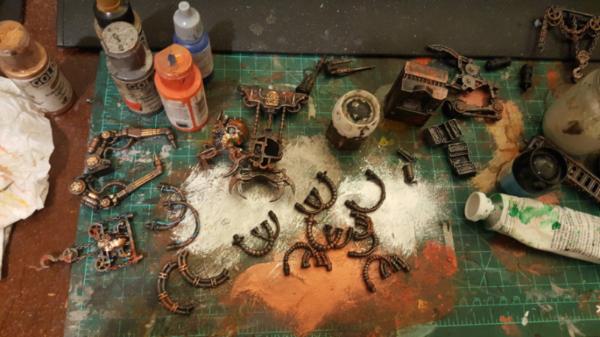
They are a great bit but suffer 2 flaws:
1. the tip of the welder is the same height as the base. In other words, if you just had this on the ground it would be welding the floor. (the idea I guess was that since it hangs over the knight bay you dont.. care that its like this? its really.. really annoying)
2. you cant really re-pose it. There are cables and such thit cross over the joints that would be a pain to remake and repose.
I really wanted to put one on my platform but couldnt figure out where. Anywhere I have it hanging over the edge could prevent knight placement, and i cant just have it weld the ground either. Then I had a brainwave that maybe i put it on TOP of this gear magnetized to swivel! It's a perfect solution but now I just need to make some kind of box for it...
|
|
This message was edited 1 time. Last update was at 2018/12/18 19:38:47
|
|
|
|
|
2018/12/19 10:04:16
Subject: Imperium vs Nids Diorama II: The Final Pieces (12/18: tools painted and placed, robot arm thoughts)
|
|

Cog in the Machine
|
Wow, such a gorgeus project! So many lovely details! Great job!
|
|
|
|
|
2018/12/19 20:27:07
Subject: Re:Imperium vs Nids Diorama II: The Final Pieces (12/19: crane box made, gargoyle on pipe thoughts)
|
|
Dakka Veteran
|
Thanks!
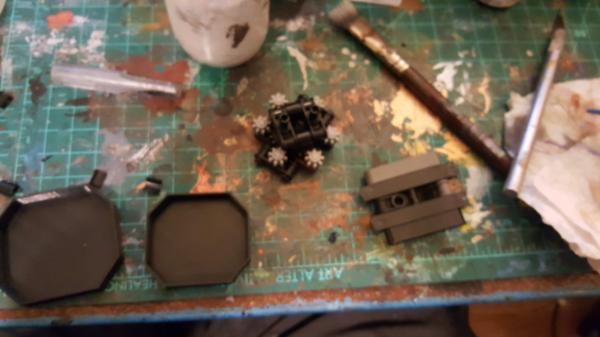
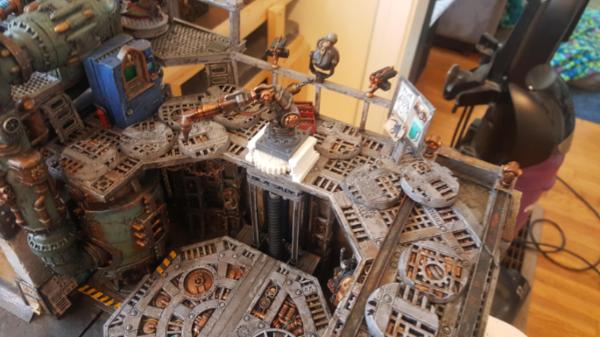
So i made the box! huzzah!

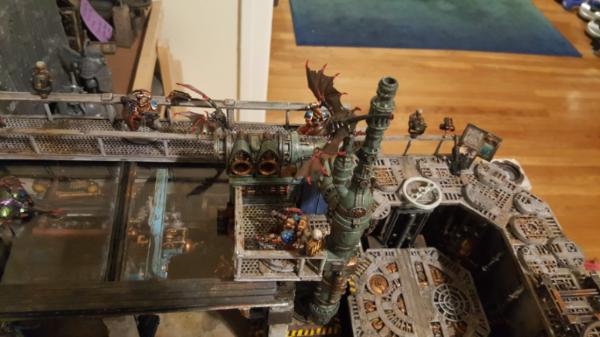
Really happy with this, solves a lot of problems and gives a good center point for the crane:
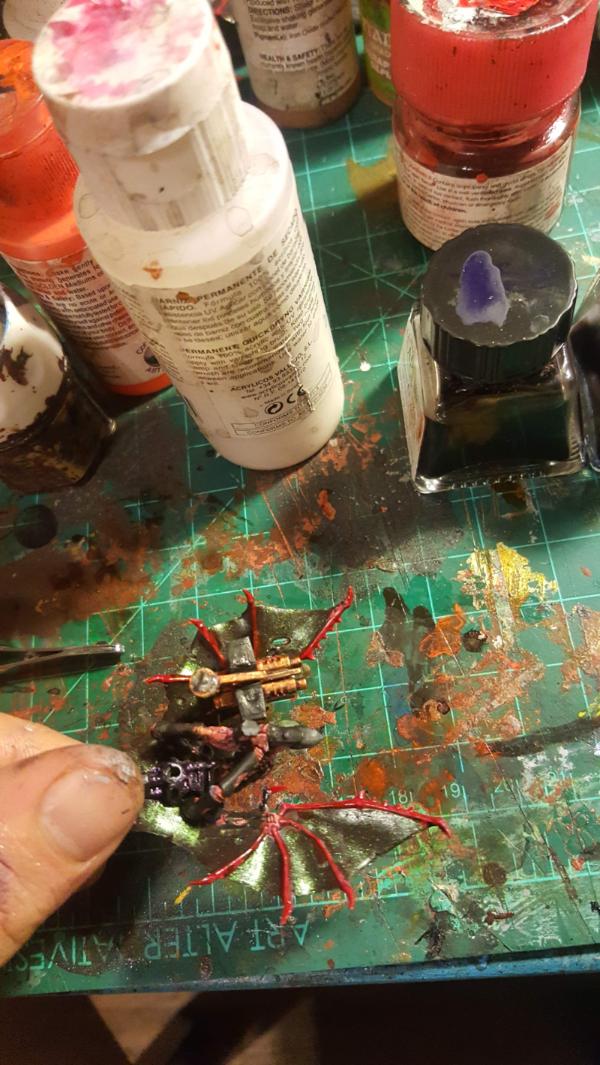
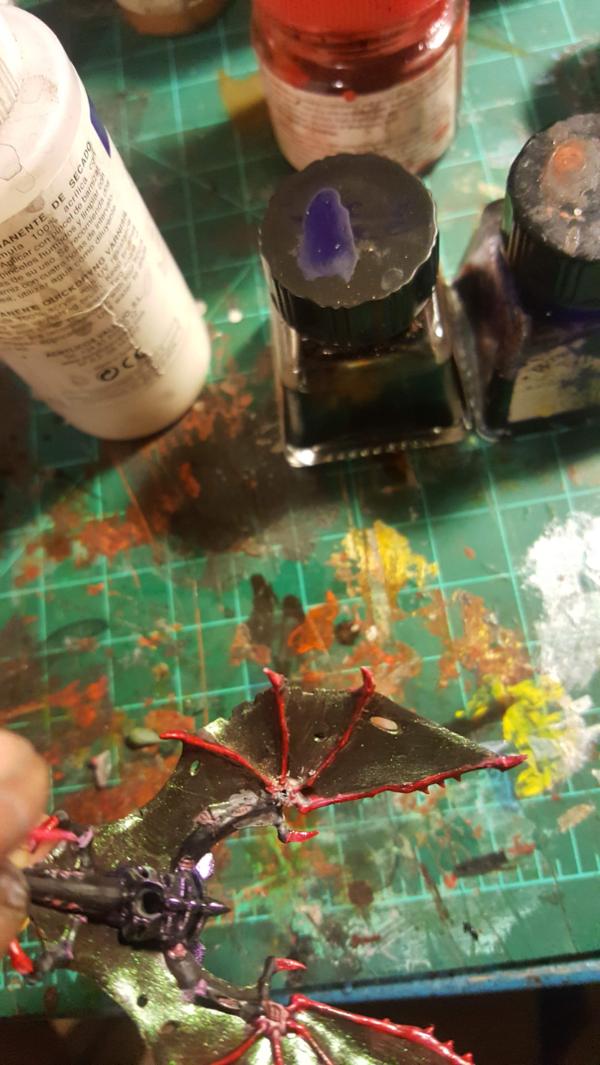
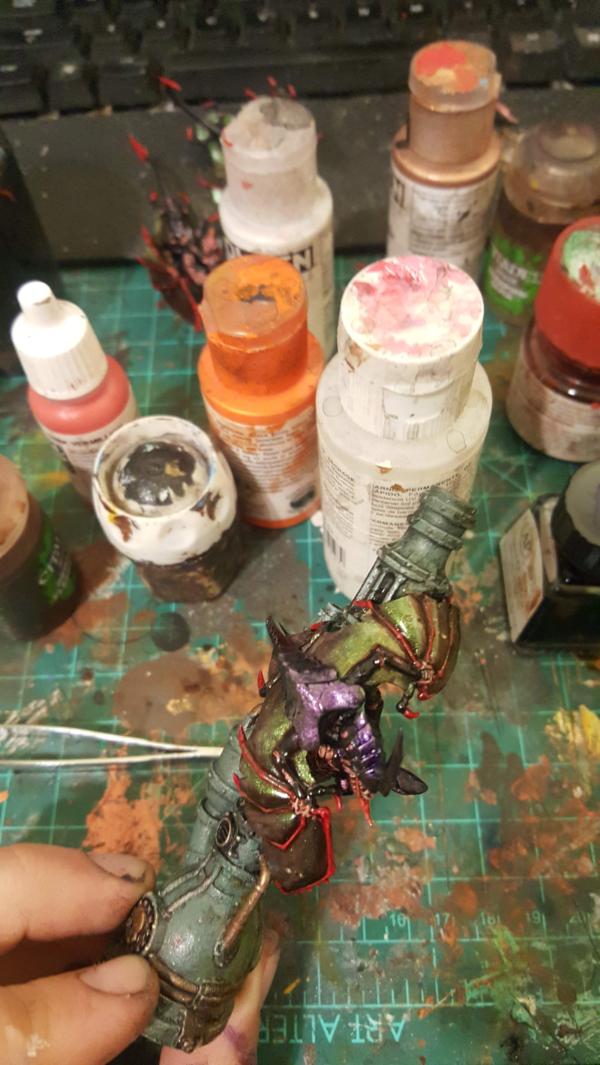
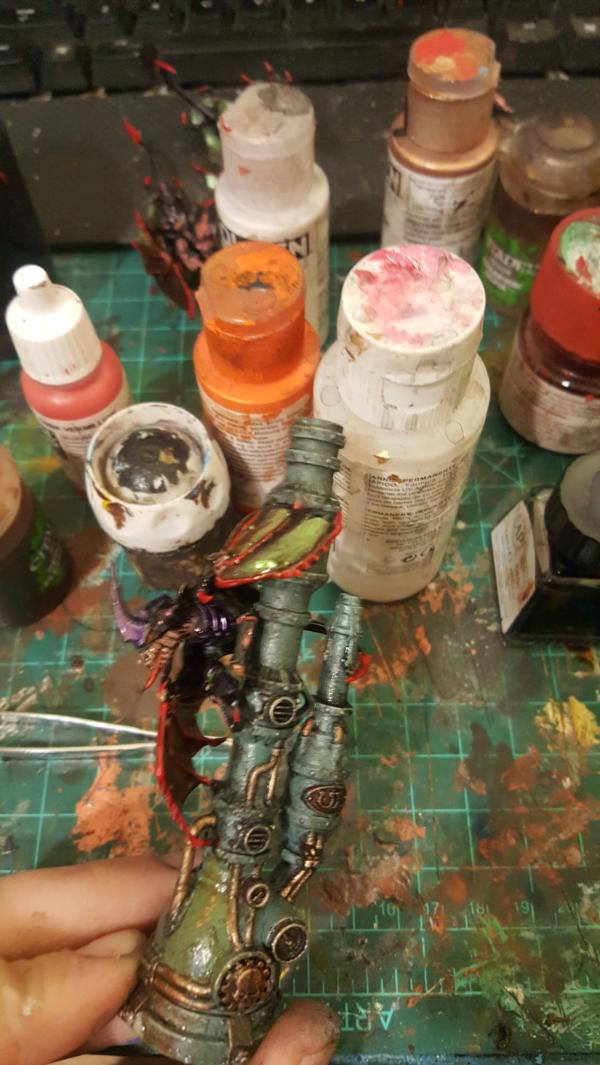
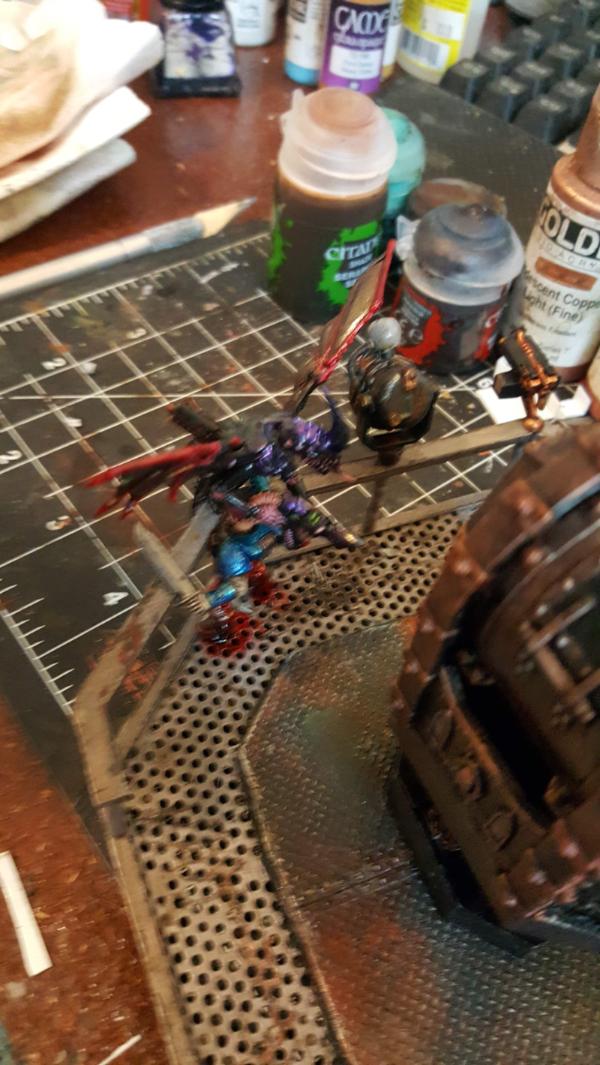
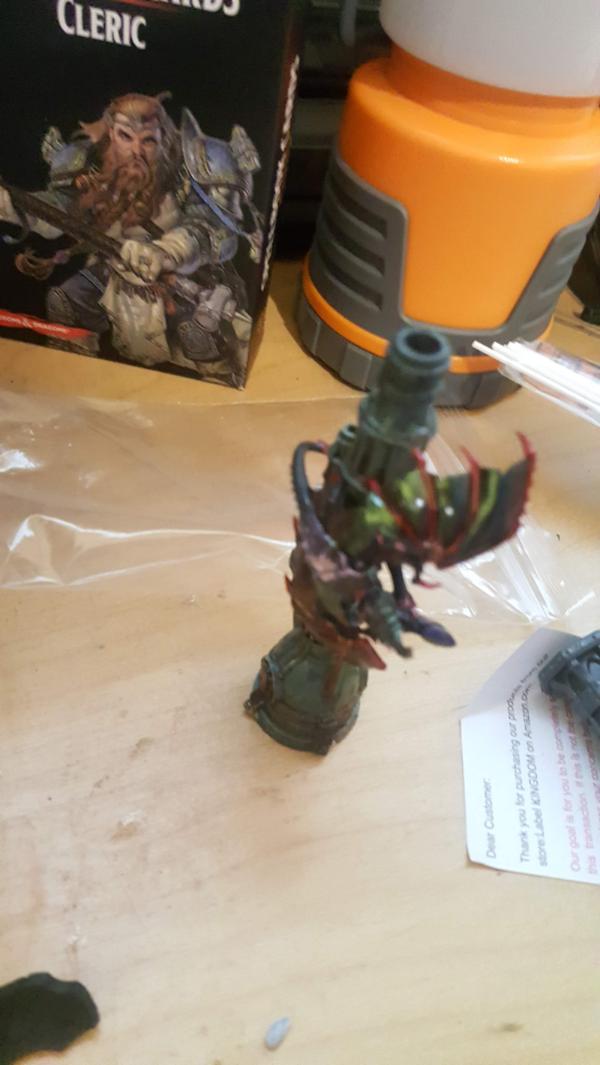
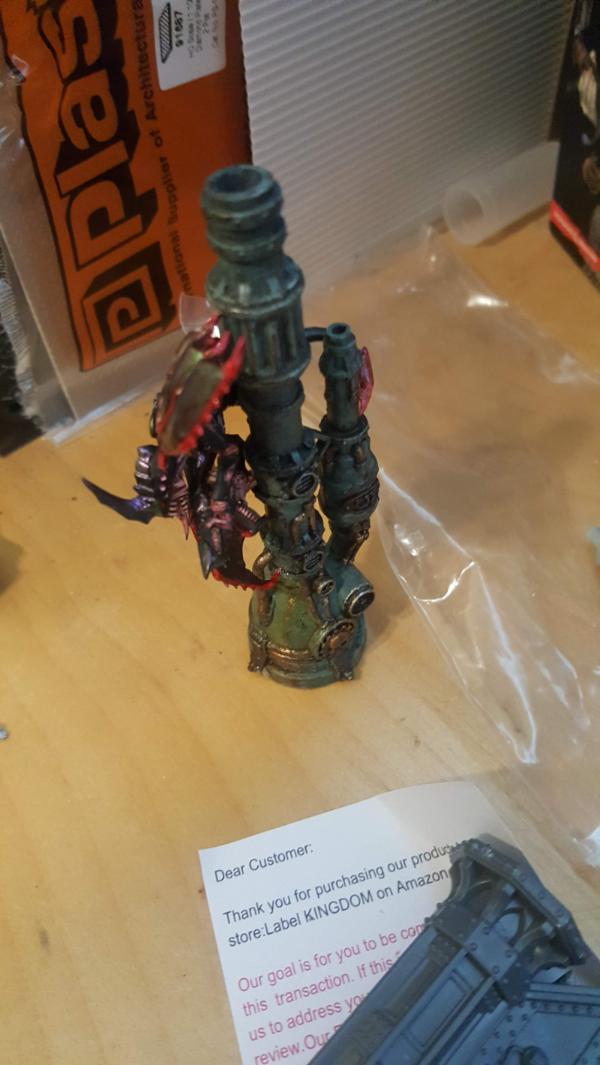
Next up I started to try and think about how to place the gargoyle ON the pipe and what all I might need to (carefully) bend to make it work:
|
|
|
|
|
|
2018/12/21 18:14:36
Subject: Re:Imperium vs Nids Diorama II: The Final Pieces (12/21: weld arm box installed, gargoyle pose work)
|
|
Dakka Veteran
|
|
|
|
|
|
|
2018/12/22 19:19:13
Subject: Re:Imperium vs Nids Diorama II: The Final Pieces (12/22: gun platform gargoyle work)
|
|
Dakka Veteran
|
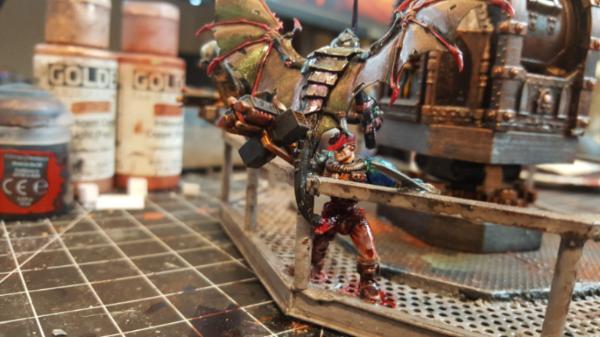
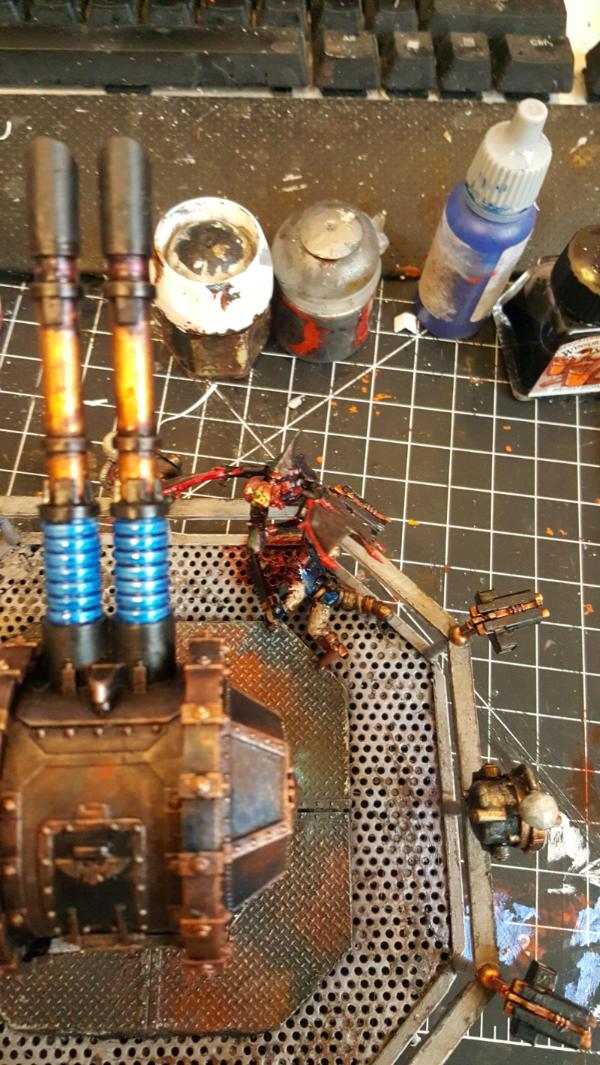
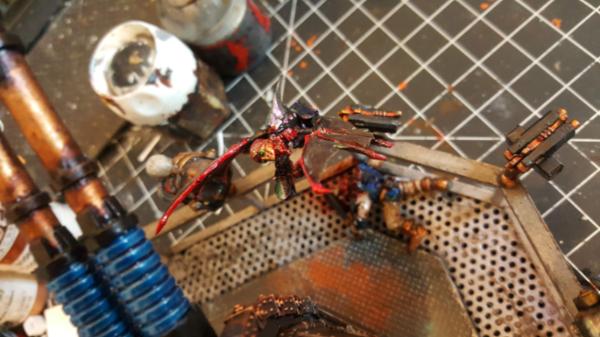
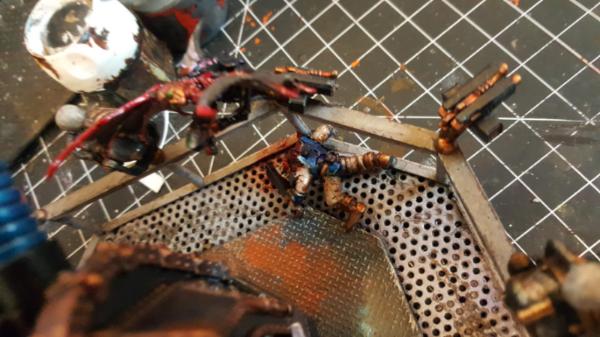
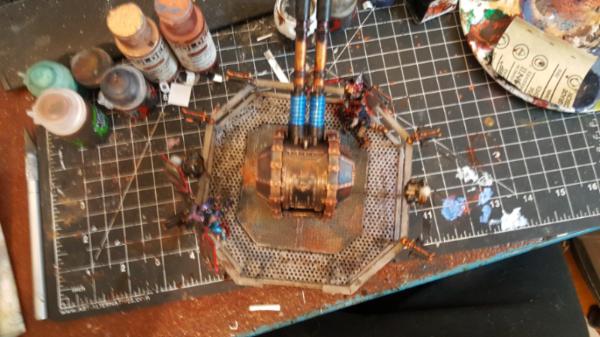
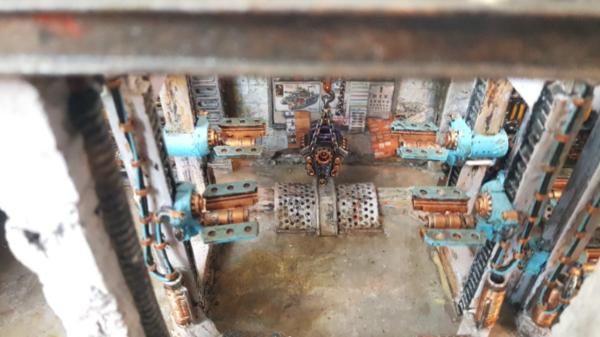
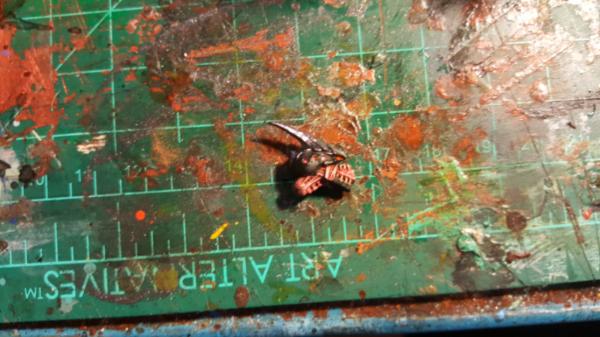
More gargoyle work, this time the 2 attacking the gun platform octagon directly. I figure in this case the nids are winning so they'll have killed 2 scouts. One ripped a scouts head off and the other stabbed him with his tail.
So first up I need to make room for a scout head in a gargoyle's mouth:
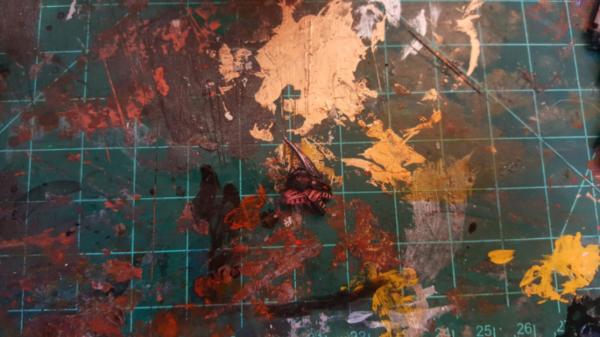
and then mount the two gargoyles:

|
|
|
|
|
|
2018/12/24 16:44:57
Subject: Re:Imperium vs Nids Diorama II: The Final Pieces (12/24: crane day)
|
|
Dakka Veteran
|
|
|
|
|
|
|
2018/12/26 08:28:45
Subject: Re:Imperium vs Nids Diorama II: The Final Pieces (12/25: crane finished)
|
|
Dakka Veteran
|
|
|
|
|
|
|
2019/01/03 19:24:53
Subject: Re:Imperium vs Nids Diorama II: The Final Pieces (1/3: happy new year! Castellan on lift with crane)
|
|
Dakka Veteran
|
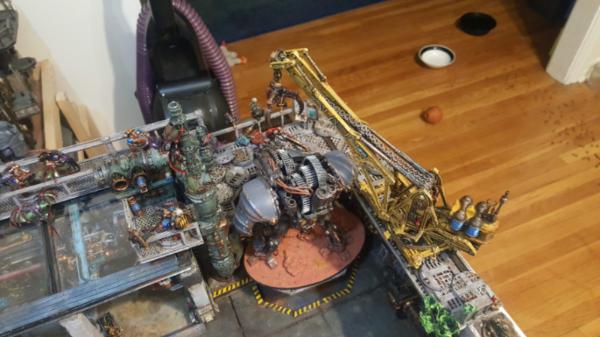
Hello again and happy new year! Took a bit of a break to do holiday family things but we're back to finish these dioramas off.
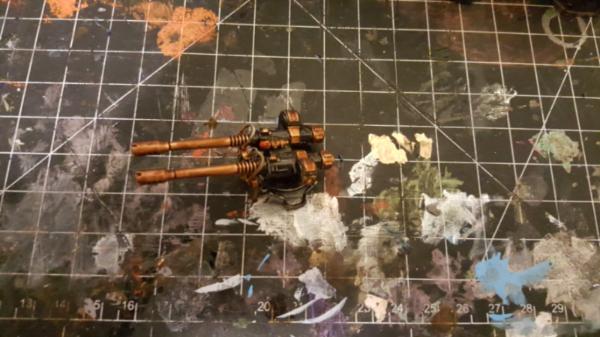
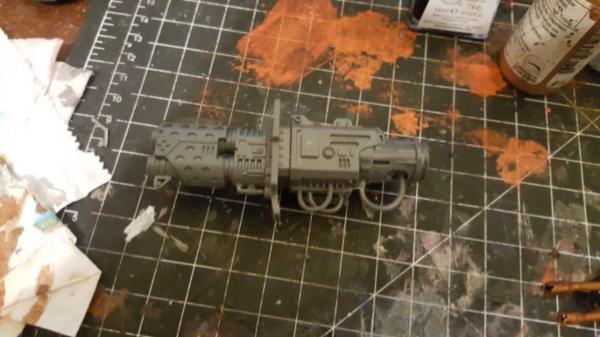
Out with the old (borrowed) knight and in with the new borrowed knight: a castellan.
This is m ore likely the knight I would actually build in the future, so I wanted to see how it (and it's guns) would work on the lift. As you'll see the answer is: yes but, as suspected, with a custom base.
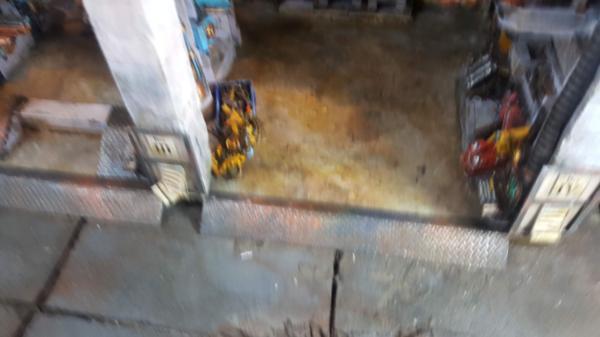
without the crane there are some positions that work fine with the crazy base:
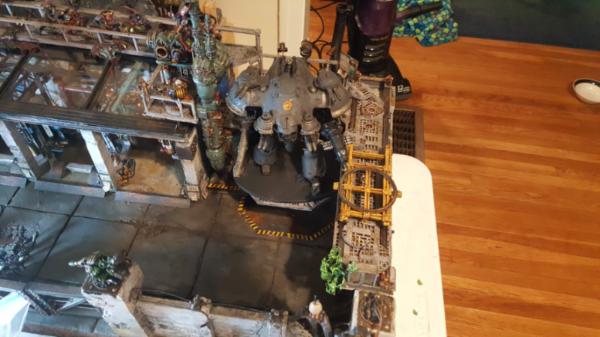
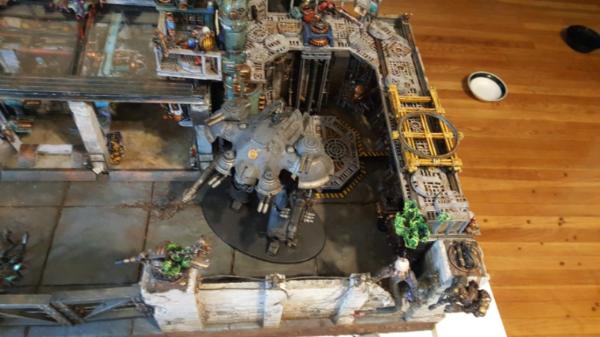
with the crane things get tighter as I cant go too high to run into the crane but cant go troo low to hit the base issues
you can see the base issue here:
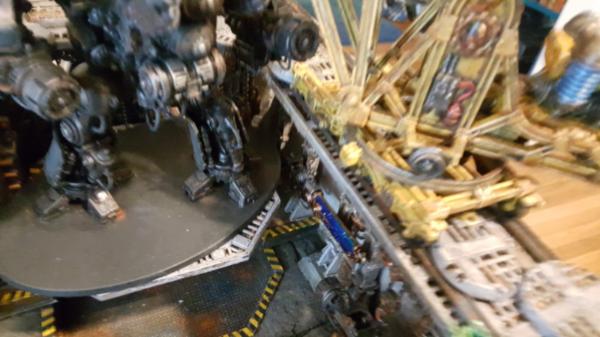
so yeah, just need a custom base and this will be gravy. Still, looks cool even when not in an ideal position.
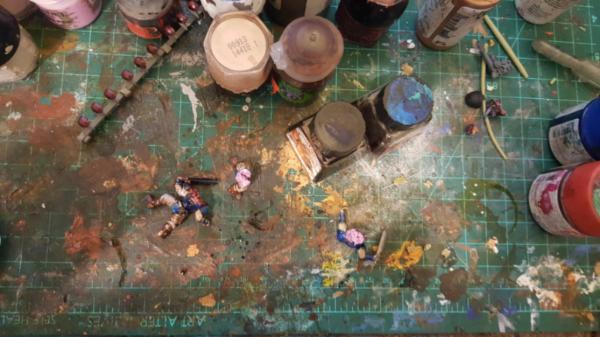
Also continued to work on my octagon setup by making some scout corpses:
|
|
|
|
|
|
2019/01/04 21:21:02
Subject: Re:Imperium vs Nids Diorama II: The Final Pieces (1/4: big gun platform done with scout corpses)
|
|
Dakka Veteran
|
|
|
|
|
|
|
2019/01/05 03:42:06
Subject: Imperium vs Nids Diorama II: The Final Pieces (1/4: big gun platform done with scout corpses)
|
|
Stealthy Warhound Titan Princeps
|
Off the charts! Making the gargoyle look like it was crawling around the smokestack by bending the wings was great. Where did you get all the tiny tools for the work bench?
|
|
|
|
|
|
|